
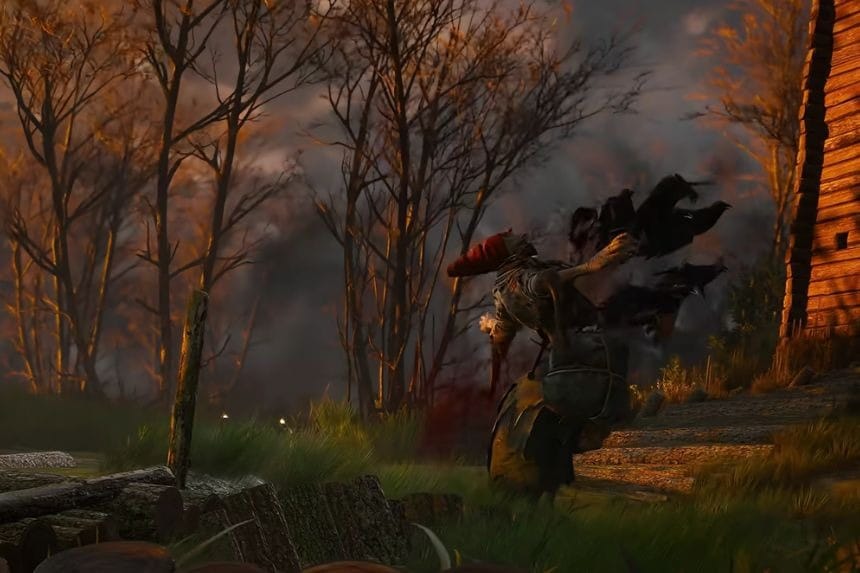
Ursine Witcher Armour Set is one of the finest armour sets designed for people preferring a defensive game style in The Witcher 3 Remastered. There are various types of armour, swords, and crossbows included in this set, whose designs are scattered all over Velen, Skellige, and Toussaint. There are many variants of this set in various levels of development. In this guide, we’ll tell you where to find all the Ursine Witcher Gear diagrams and how to reach each location.
Basic Ursine Witcher Armour Set Locations
The Ursine Armor set unlocks at level 20, and the set has four different components, namely a crossbow, silver sword, steel sword, and armor set blueprints. You can craft them at any blacksmith available across the map after obtaining the resources for each gear.
Basic Ursine Crossbow
| Ursine Crossbow | Stats |
| Damage | 10 – 12 |
| Attack Power | +210% |
| Adrenaline Gain | +1% |
| Critical Hit Chance | +5% |
| Critical Damage | +2% |
| XP from Monsters | +15% |
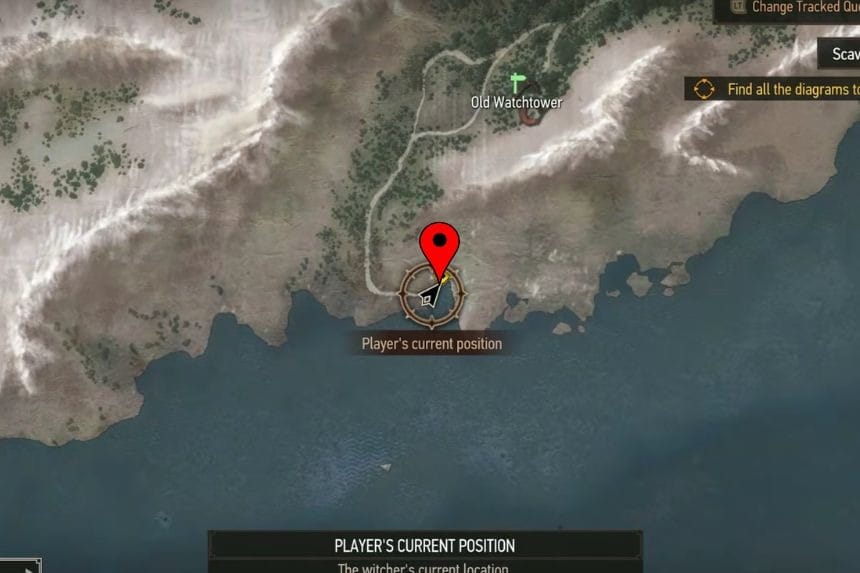
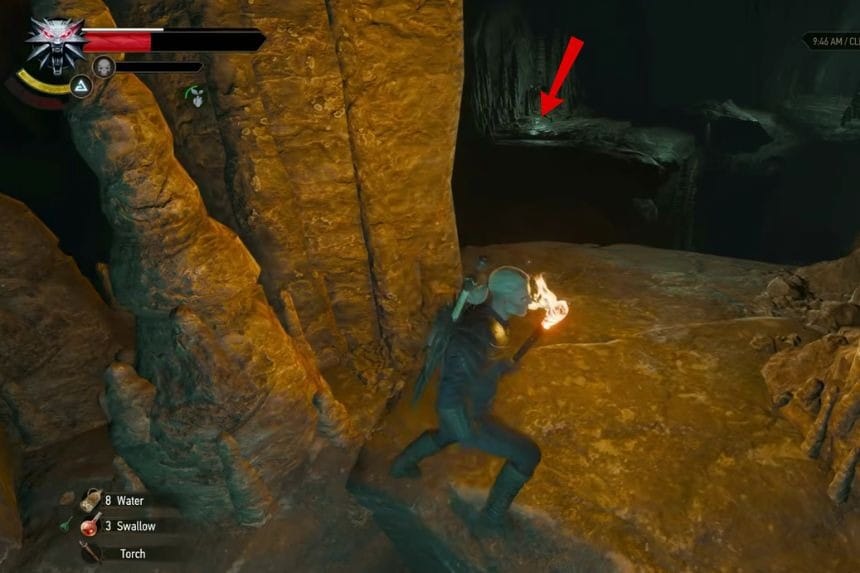
Travel to the southwest corner of the northwest island of Skellige, located below the Old Watchtower. You will come across a cave with a bunch of Level 15 Drowners. Head into the cave and stick to the right while you ascend the rocks.
At one point, you will come across an area that has a gap between two rock platforms. Jump over this gap to avoid fighting most of the monsters. Continue forward, and you’ll find a skeleton holding the Ursine Crossbow Diagram. To craft it, you will need:
- 2 Hardened Timber
- 2 Monster Hair
- 1 Dark Iron Ore
- 1 Monster Bone
- 1 Resin
Basic Ursine Silver Sword
| Ursine Silver Sword | Stats |
| Damage | 283 – 345 |
| Critical Hit Chance | +5% |
| Dismemberment | +10% |
| XP from Monsters | +20% |
| Adrenaline Gain | +5% |
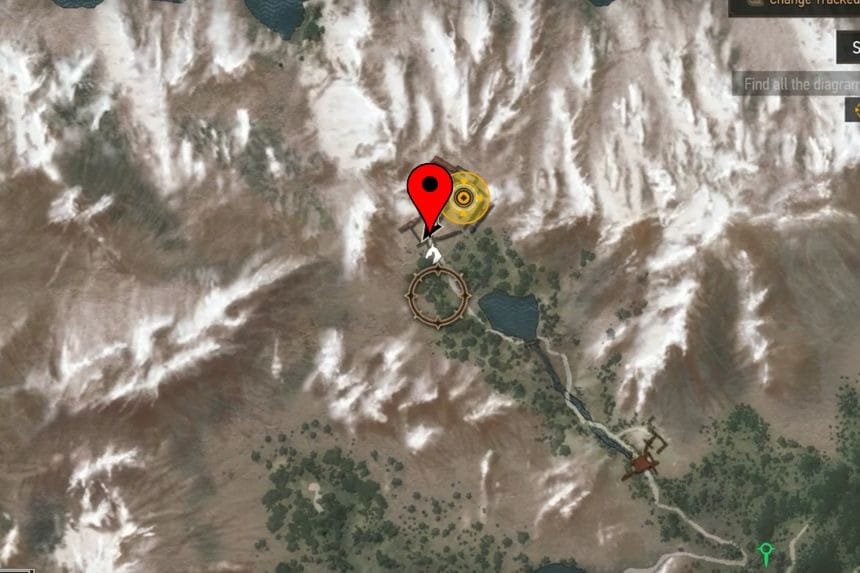
Head to the south of Ancient Crypt in Skellige, where there are some ruins guarded by level 13 Gargoyles. You need to kill the Gargoyles to enter the door that is far on the right side. There is a skeleton near the entrance with the Ursine Silver Sword Diagram. To craft it you will need:
- 1 Leather Straps
- 2 Silver Ingots
- 1 Monster Brain
- 1 Powdered Monster Tissue
Basic Ursine Steel Sword
| Ursine Steel Sword | Stats |
| Damage | 184 – 224 |
| Adrenaline Gain | +5% |
| Bonus XP | +5% |
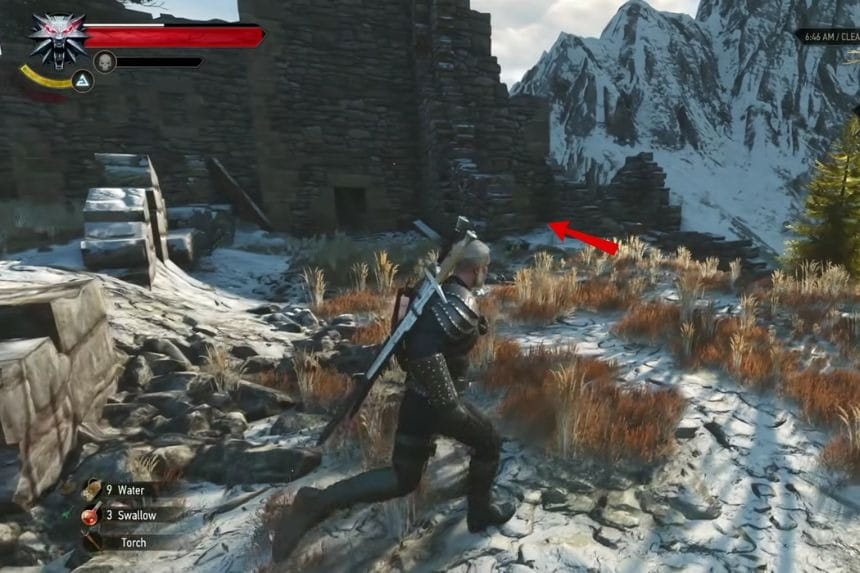
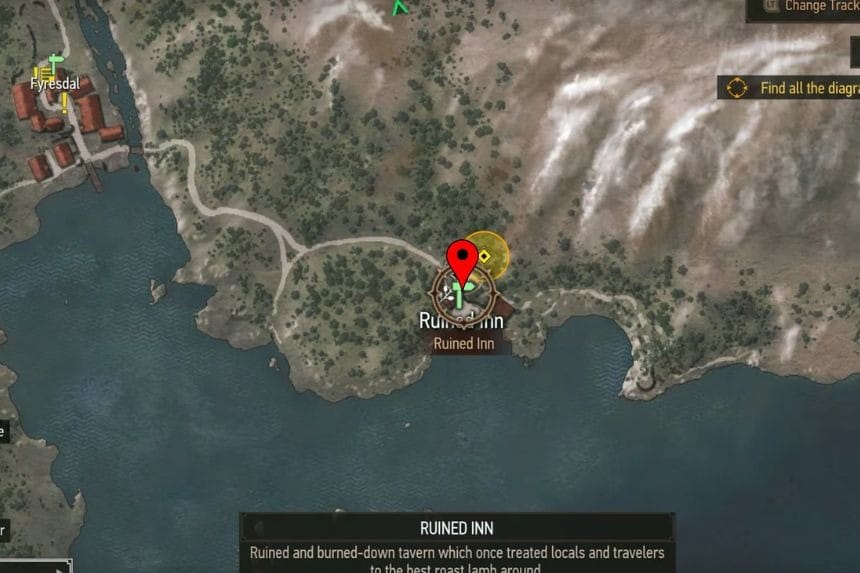
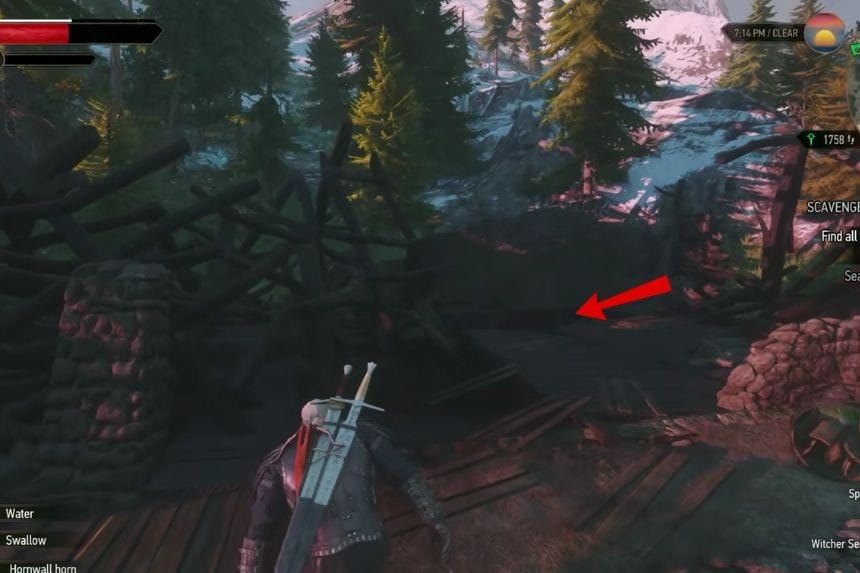
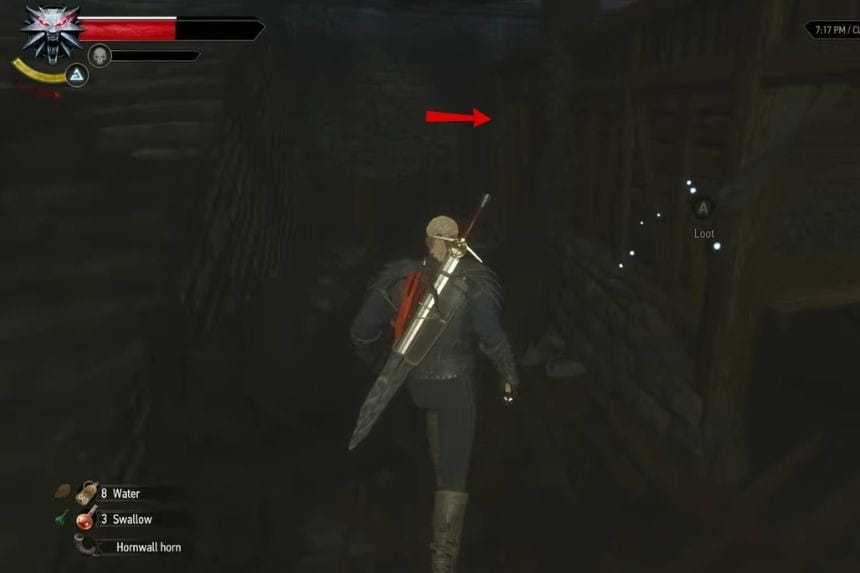
Head southeast of Fyresdal to find a ruined inn along the coast. This area has many enemies near level 20. Climb up the steps and go inside the ruined part of the building. Walk through the interior path and look for a room. Inside this room, you can find a chest with the Ursine Steel Sword Diagram. To craft it, you will need:
- 2 Leather Straps
- 2 Steel Ingot
- 1 Monster Essence
- 1 Monster Tongue
Basic Ursine Witcher Armour
| Ursine Armor | Stats |
| Armor | 135 |
| Adrenaline Gain | +5% |
| Piercing Resistance | +5% |
| Bludgeoning Resistance | +5% |
| Slashing Resistance | +15% |
| Monster Resistance | +20% |
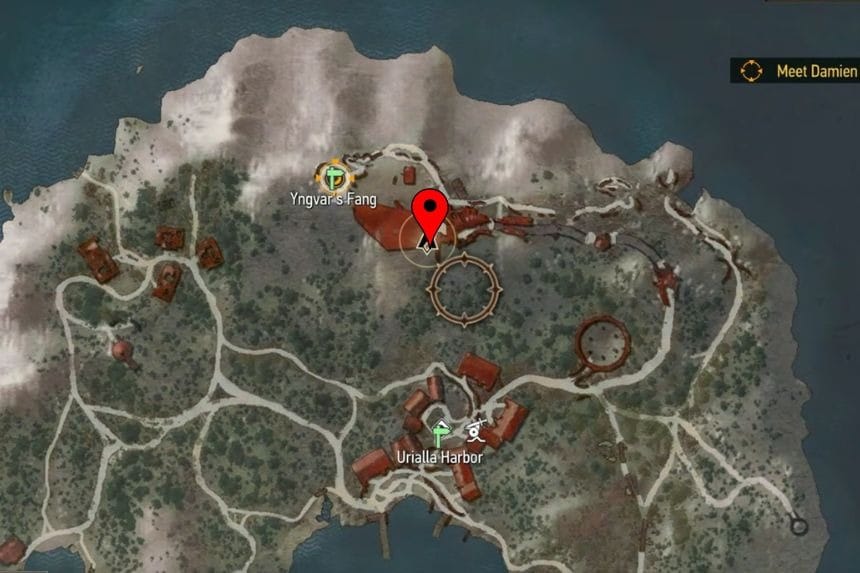
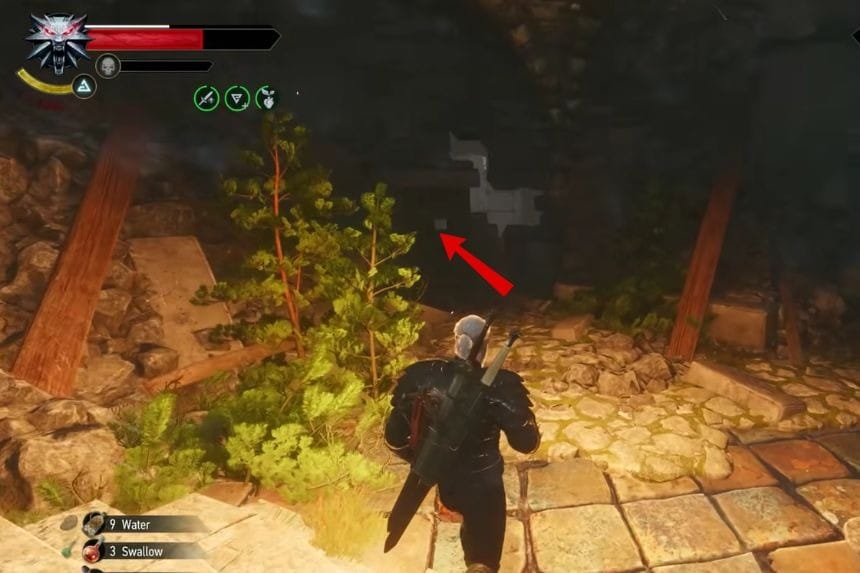
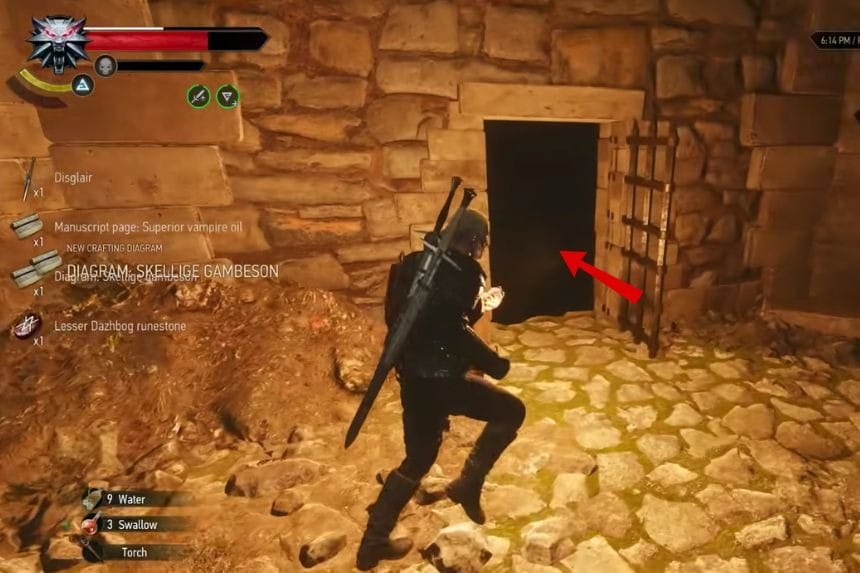
Visit the location between the markers Yngvar’s Fang and Trail to Yngvar’s Fang in the Skellige region. There is an abandoned building at this spot. Go inside the building and walk downstairs towards the opposite wall. Use the switch to unlock the door near you. You will be able to fight some Level 7 Wraiths in this location.
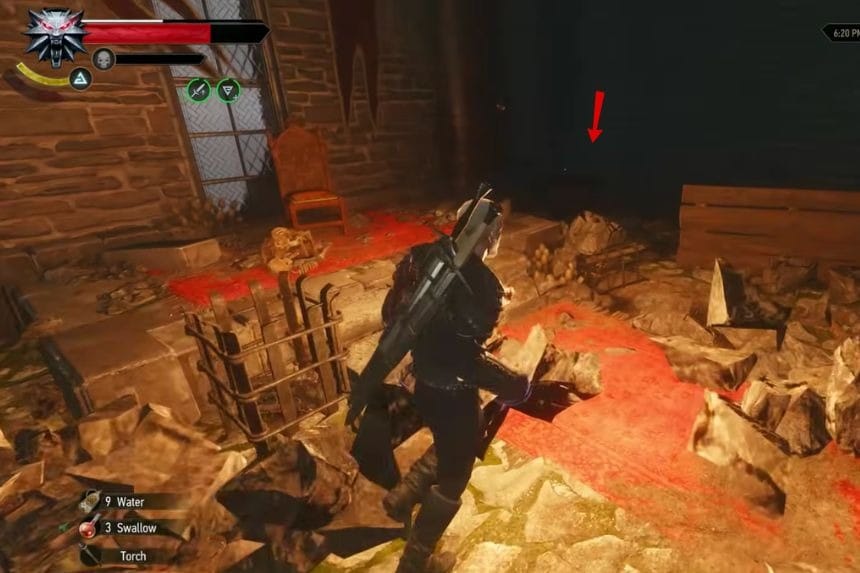
Go back and step inside the first door you see. Drop down below and keep going straight ahead. Go right and climb up through the debris to access the higher ground. You will now find yourself in a big chamber with a chair placed right in the middle of it. Move beyond it to retrieve the full set of Basic Ursine Witcher Armour.
Enhanced Ursine Witcher Armor Locations
The Enhanced Ursine armor is unlocked and equippable at level 25. Similar to the Basic Ursine armor, you can craft this armor set at any blacksmith. The set includes a steel and silver sword, along with the entire armor set that consists of boots, gauntlet, trousers, and armor.
Enhanced Ursine Steel Sword
| Enhanced Ursine Steel Sword | Stats |
| Damage | 220 – 268 |
| Adrenaline Gain | +10% |
| Critical Hit Damage Bonus | +25% |
| Bonus XP from Humans / Nonhumans | +5% |
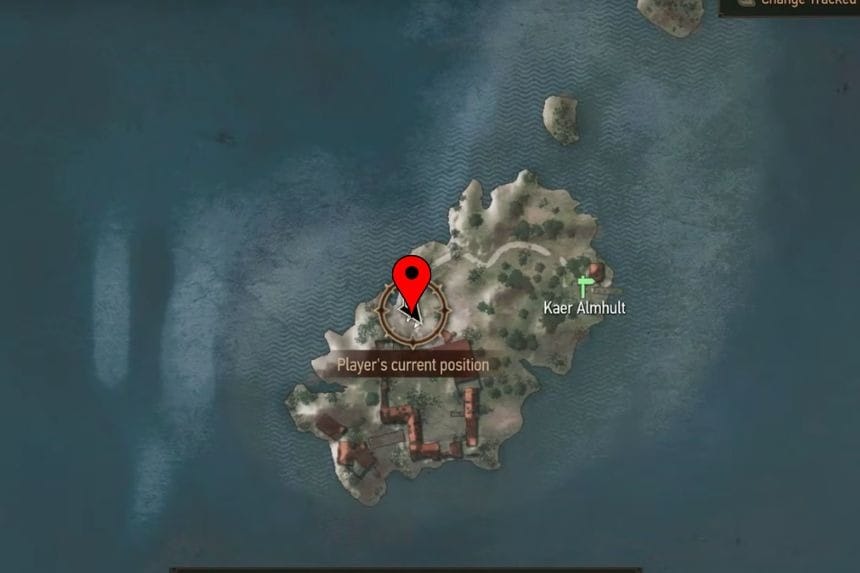
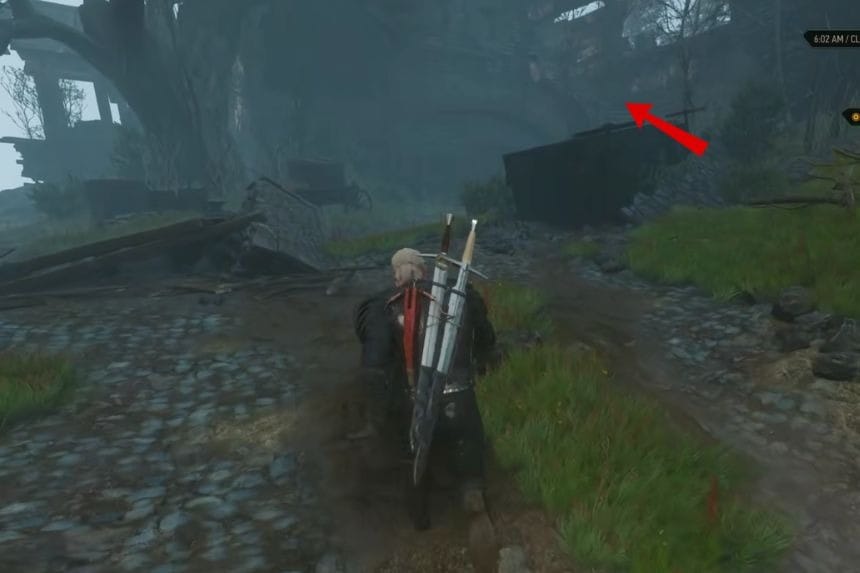
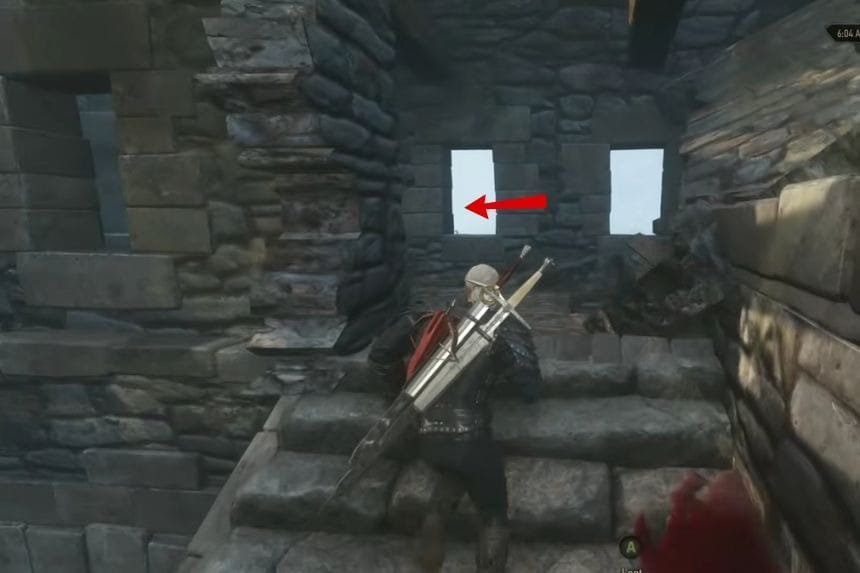
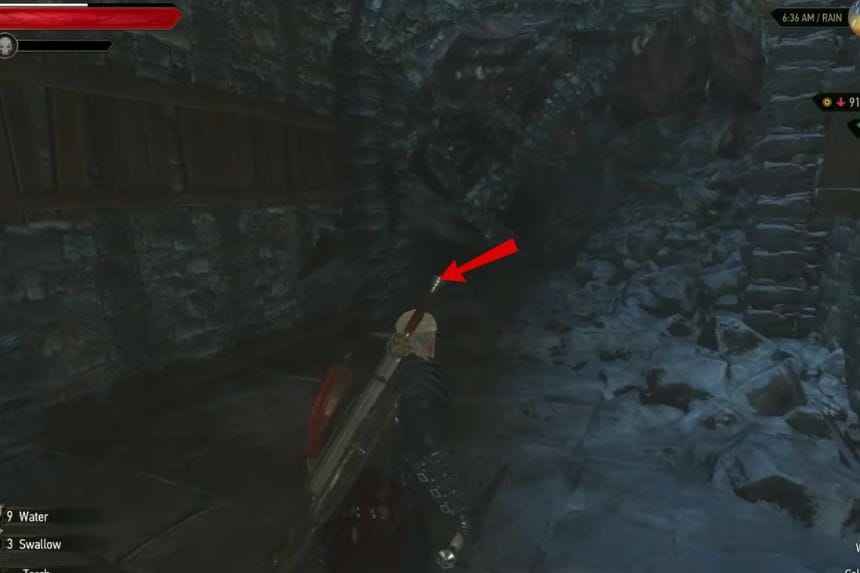
Travel to the big ruins located on the island to the west of the mainland, close to the sign marking Kaer Almhult. There are Level 12 Pirates in these ruins, and therefore, you have to clear out these pirates first. After exiting through the entrance near the road, take the stairs leading to the right and locate the chest in the left-hand corner. To craft it, you will need:
- 1 Ursine Steel Sword
- 2 Leather Scraps
- 2 Dark Steel Ingot
- 1 Monster Hair
- 1 Monster Bone
Enhanced Ursine Silver Sword
| Enhanced Ursine Silver Sword | Stats |
| Damage | 328 – 400 |
| Critical Hit Chance | +5% |
| Critical Hit Damage | +25% |
| Dismemberment | +12% |
| XP from Monsters | +20% |
| Adrenaline Gain | +10% |
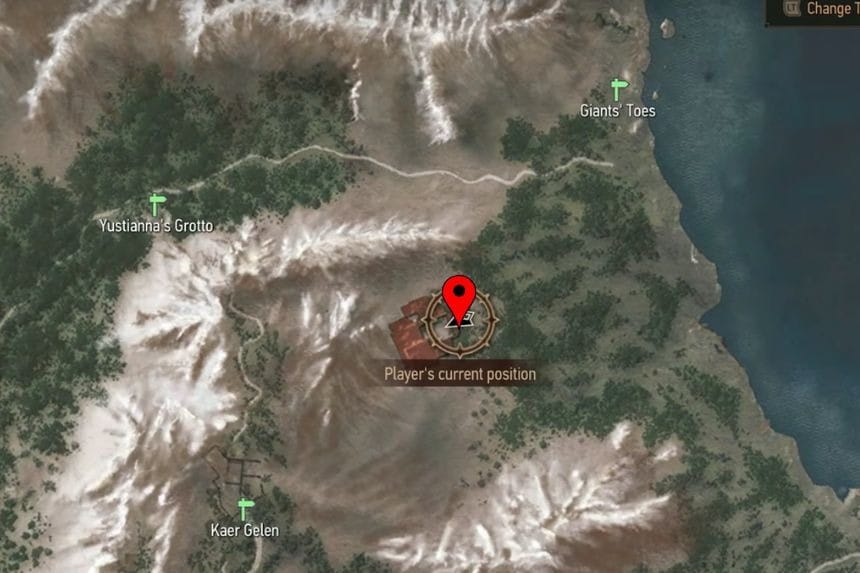
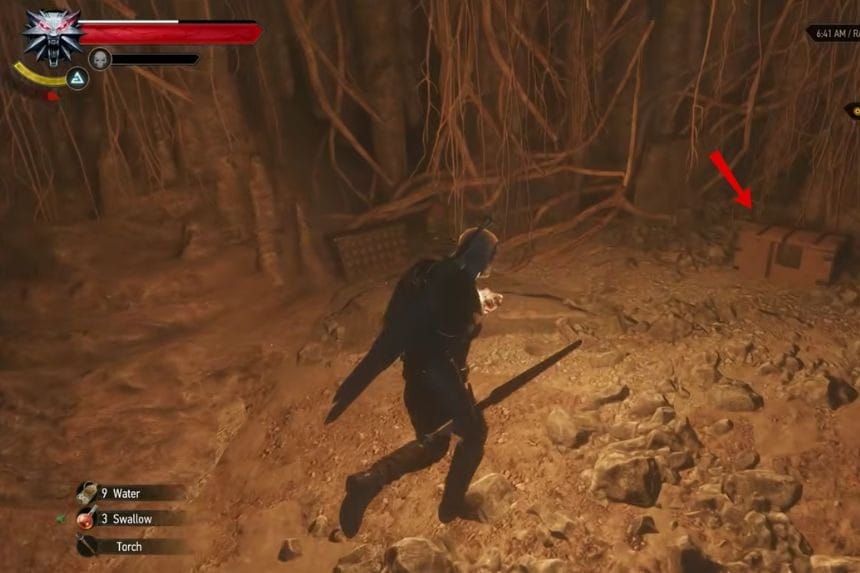
You will find yet another castle ruin between Giant’s Toes, Yustianna’s Grotto, and Kaer Gelen. Go in from the main arch and enter through the doorway. There are some Level 21 Alghouls present inside the area, and you must take care of them first.
Once that is done, you have to turn left and make your way down the hallway to an area where there will be some more Alghouls present. Head toward the back of the cavern to find a chest containing the Enhanced Ursine Silver Sword Diagram. To craft it, you will need:
- 1 Ursine Silver Sword
- 2 Leather Scraps
- 2 Meteorite Silver Ingot
- 1 Nigredo
- 1 Monster Saliva
Enhanced Ursine Armour
| Enhanced Ursine Armor | Stats |
| Armor | 160 |
| Adrenaline Gain | +10% |
| Piercing Resistance | +10% |
| Bludgeoning Resistance | +10% |
| Slashing Resistance | +20% |
| Monster Resistance | +30% |
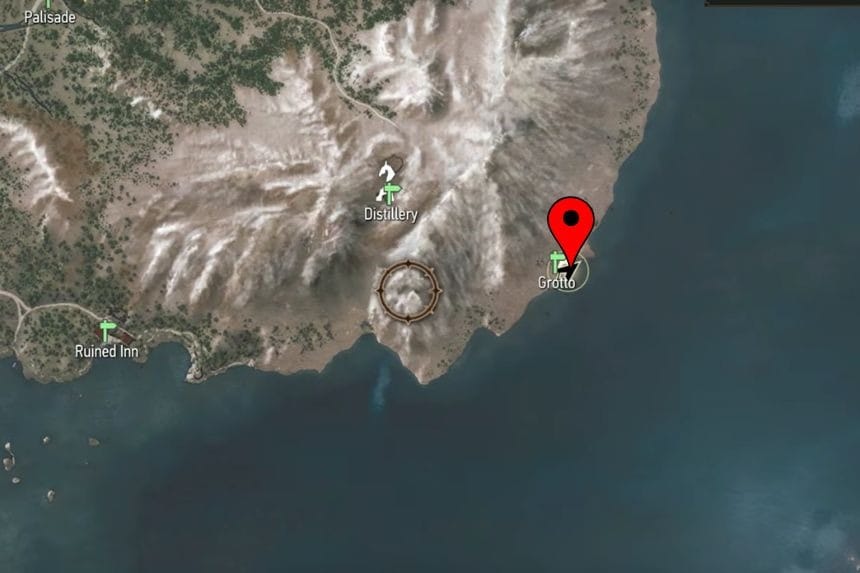
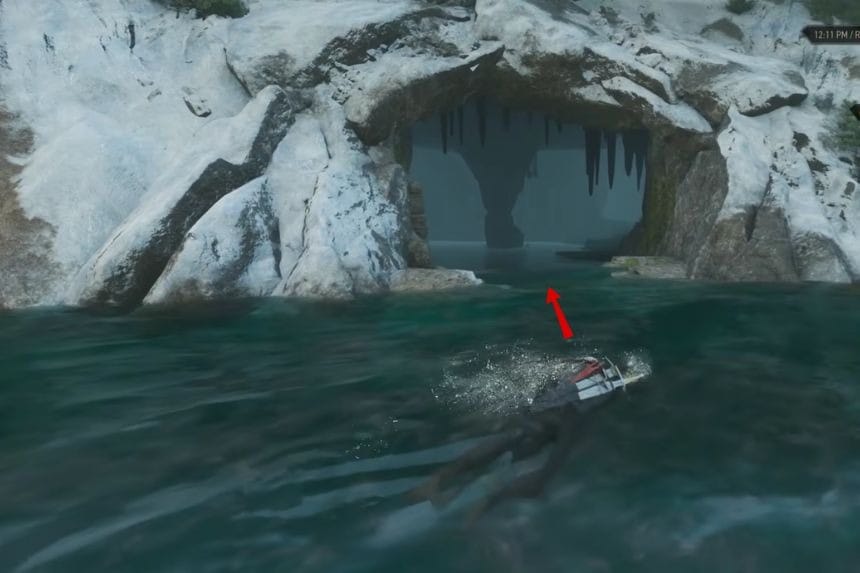
Head towards the Grotto waypoint in the southeastern part of the main island in Skellige. There is a cave close by where you will find the armour blueprint. The cave entrance faces the water, and you can either take a boat or swim here.
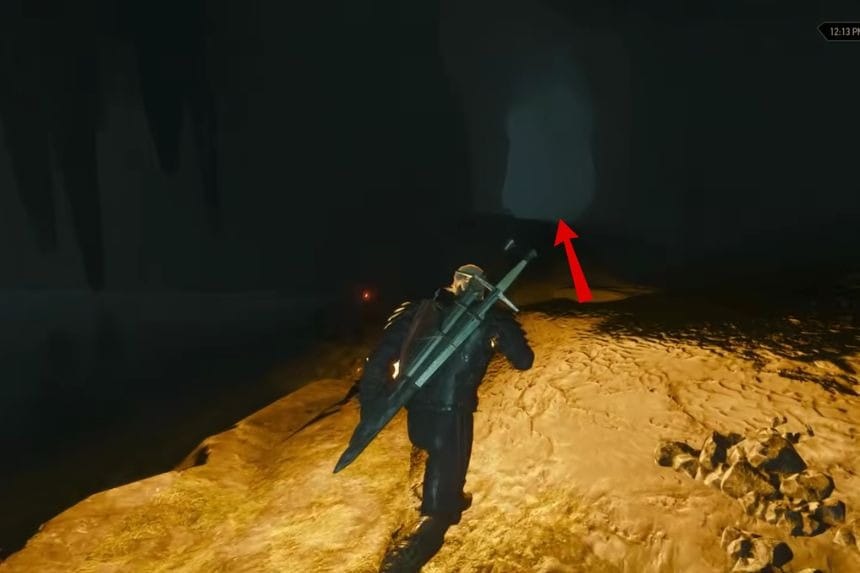
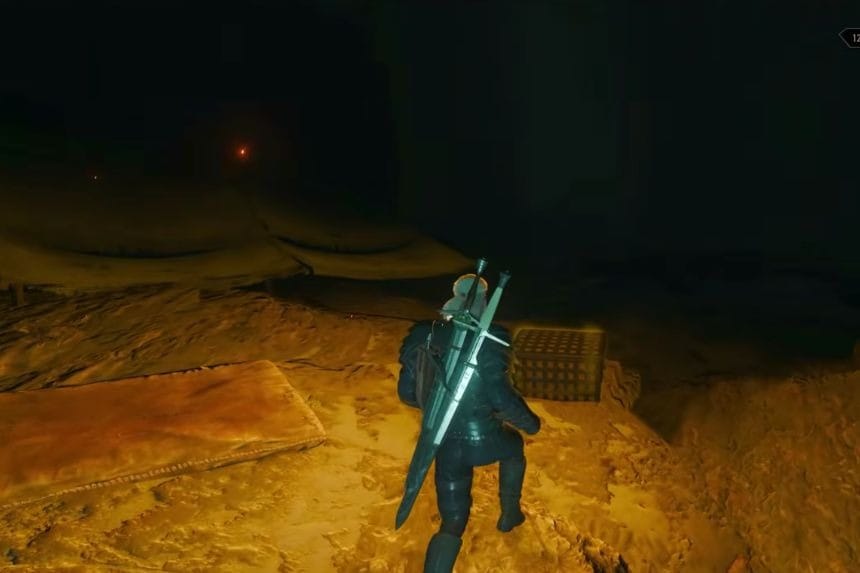
Go into the cave and follow the right wall in order to not have to swim. Go inside the hallway leading to a big cave where you need to take a left turn, and then take another right turn into the corridor. Kill the Level 26 monsters and locate a rock in the centre of the cave. The chest beside it contains the Enhanced Ursine Armour Diagram. To craft it, you will need:
- 1 Ursine Armor
- 1 Meteorite Silver Plate
- 5 String
- 1 Monster Hair
- 3 Hardened Leather
Enhanced Ursine Boots
| Enhanced Ursine Boots | Stats |
| Armor | 59 |
| Adrenaline Gain | +6% |
| Piercing Resistance | +3% |
| Bludgeoning Resistance | +3% |
| Slashing Resistance | +3% |
| Monster Resistance | +3% |
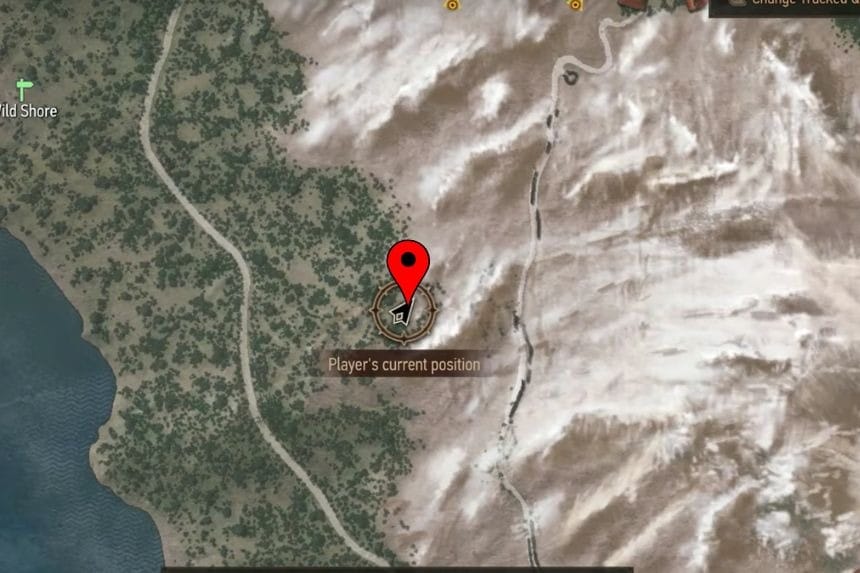
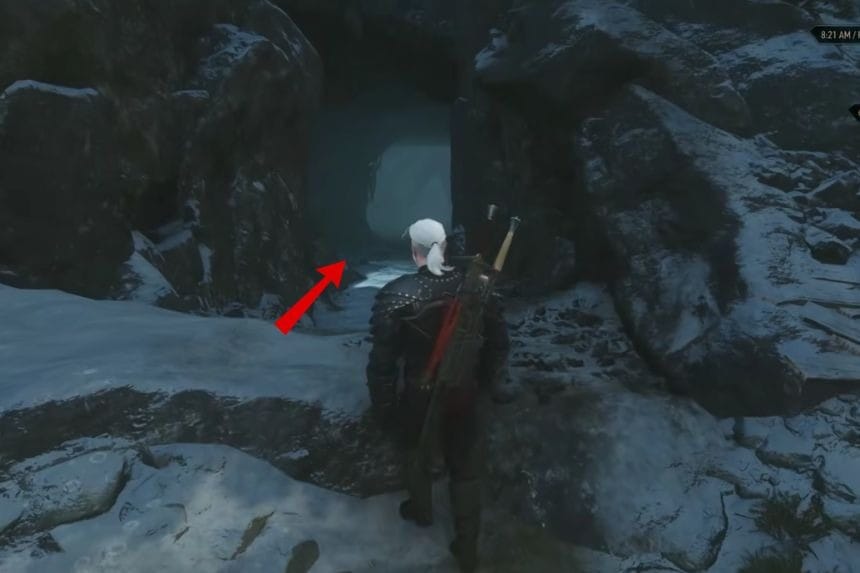
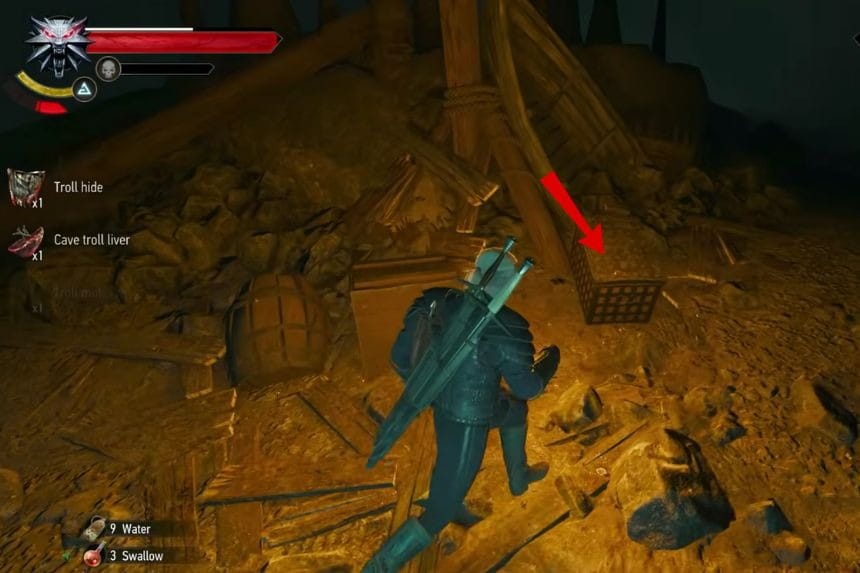
Take the road from the Wild Shore and travel eastwards towards the mountains. You will find the entrance to the cave on the mountain’s side. Once inside the cave, take the long tunnel until you reach the place where there are level 16 trolls. Kill the trolls, and beyond the campfire, you will see the pointed area of the cave where the chest is located. To craft it you will need:
- 1 Ursine Boots
- 1 Dark Iron Ore
- 2 String
- 1 Fur Scrap
- 1 Monster Blood
- 2 Hardened Leather
Enhanced Ursine Gauntlets
| Enhanced Ursine Gauntlets | Stats |
| Armor | 55 |
| Adrenaline Gain | +6% |
| Piercing Resistance | +3% |
| Slashing Resistance | +3% |
| Elemental Resistance | +3% |
| Monster Resistance | +3% |
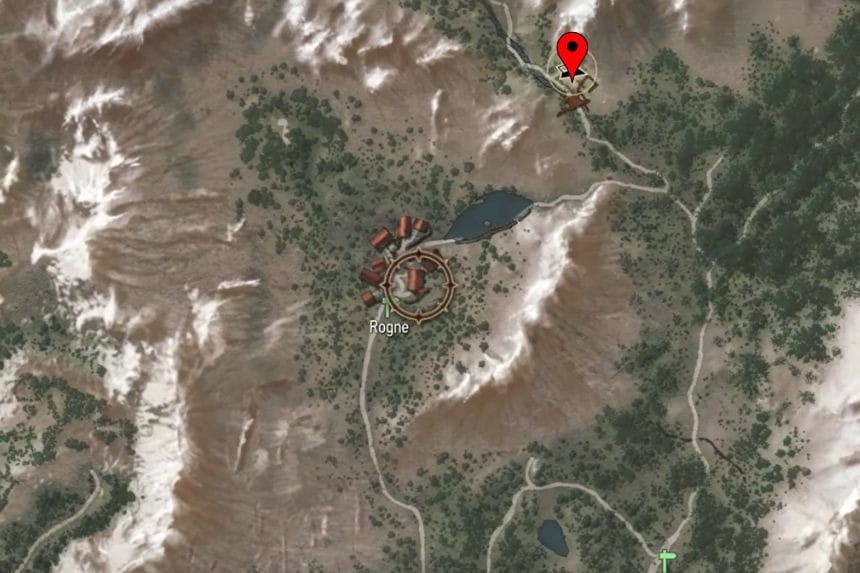
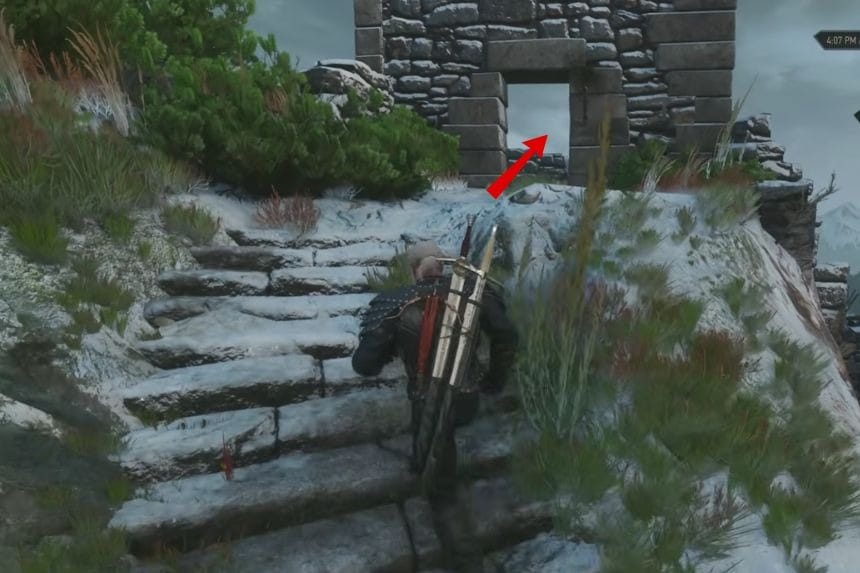
Start from Rogne and move northeastwards, following the roads towards Yustianna’s Grotto. You will finally reach an impressive stone arch with steps behind it. Move past the stone arch and climb up the steps. There you can find the chest which contains the Enhanced Ursine Gauntlets Diagram. To craft it you will need:
- 1 Ursine Gauntlets
- 3 Silver
- 1 Dark Iron Ore
- 2 Cured Leather
- 2 Monster Tongue
- 2 Leather Straps
Enhanced Ursine Trousers
| Enhanced Ursine Trousers | Stats |
| Armor | 59 |
| Adrenaline Gain | +6% |
| Piercing Resistance | +3% |
| Slashing Resistance | +8% |
| Elemental Resistance | +10% |
| Monster Resistance | +10% |
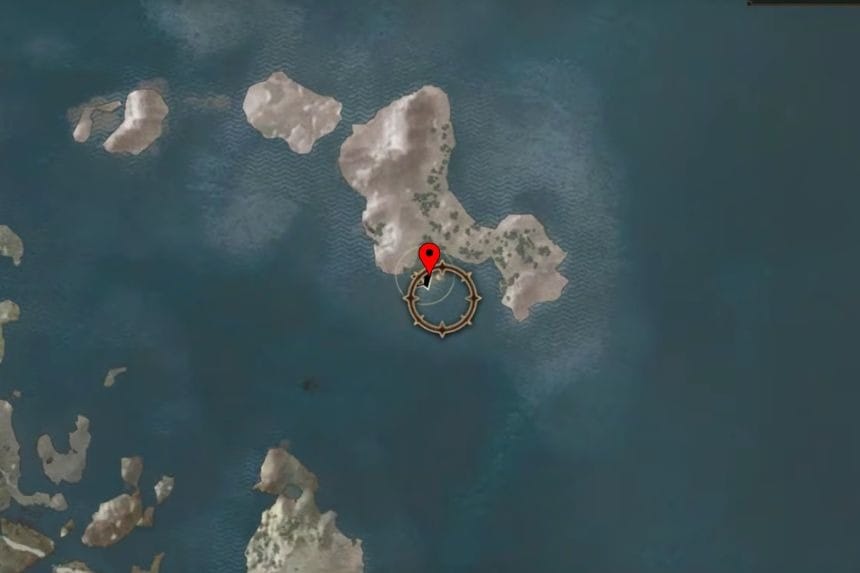
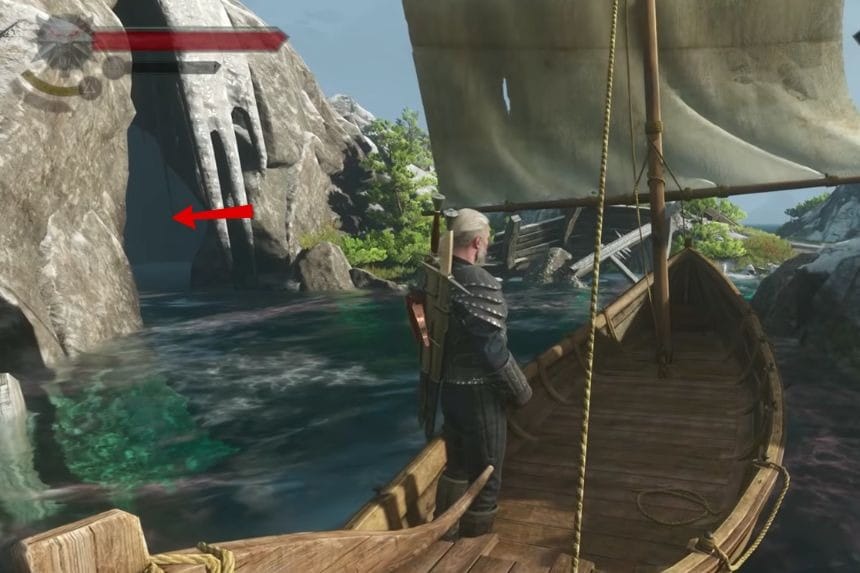
Leave on a ship from Marlin Coast and head to the adjacent island in a northern direction. Some Level 26 Foglets might be in the cave area, so get rid of them before entering the cave. Go into the cave and move towards the back, where you will find the chest with the Enhanced Ursine Trousers Diagram. To craft it you will need:
- 1 Ursine Trousers
- 5 Silver
- 2 Leather Scraps
- 1 Cured Leather
- 2 Silk
- 1 Monster Liver
Superior Ursine Armour Locations
Upon reaching level 30, you can craft and equip the Superior Ursine armor. Luckily, you don’t need to run around to find all the armor parts, as you can collect the trouser, gauntlet, armor, and boots from one location. The silver and steel swords are the only items you might need to hunt around for. Visit any blacksmith later on to craft the set.
Superior Ursine Armour Set Location
| Superior Ursine Armor | Stats |
| Armor | 185 |
| Adrenaline Gain | +15% |
| Piercing Resistance | +15% |
| Bludgeoning Resistance | +15% |
| Slashing Resistance | +25% |
| Monster Resistance | +35% |
| Superior Ursine Boots | Stats |
| Armor | 69 |
| Adrenaline Gain | +8% |
| Piercing Resistance | +4% |
| Bludgeoning Resistance | +4% |
| Slashing Resistance | +4% |
| Monster Resistance | +4% |
| Superior Ursine Gauntlets | Stats |
| Armor | 65 |
| Adrenaline Gain | +10% |
| Piercing Resistance | +4% |
| Slashing Resistance | +4% |
| Elemental Resistance | +4% |
| Monster Resistance | +4% |
| Superior Ursine Trousers | Stats |
| Armor | 69 |
| Adrenaline Gain | +10% |
| Piercing Resistance | +4% |
| Slashing Resistance | +9% |
| Elemental Resistance | +15% |
| Monster Resistance | +15% |
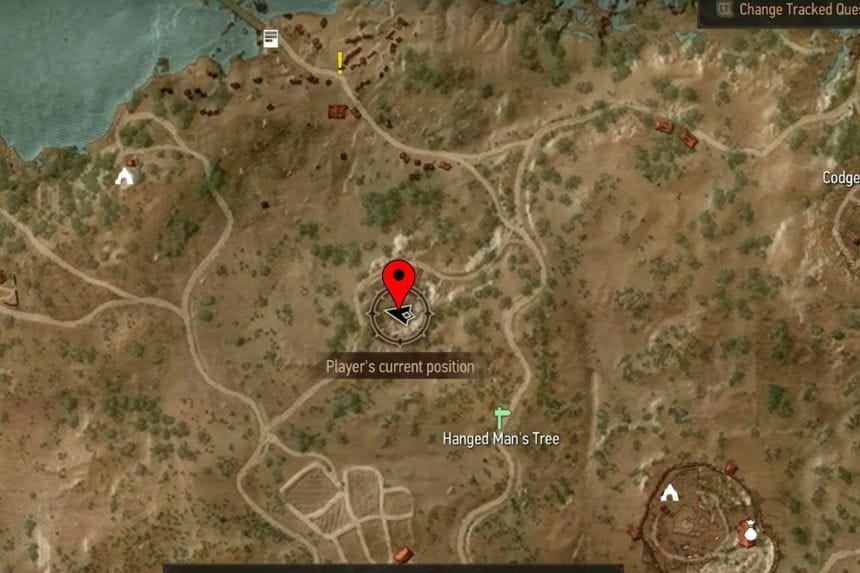
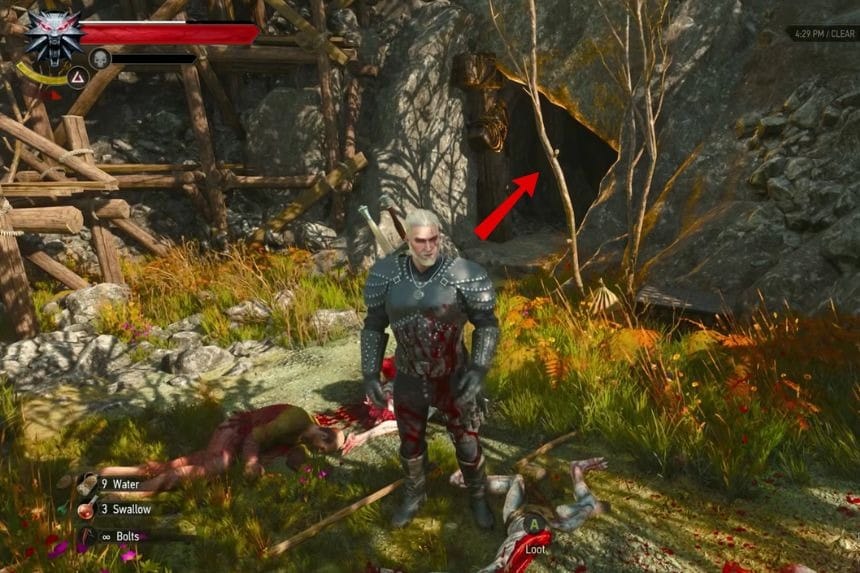
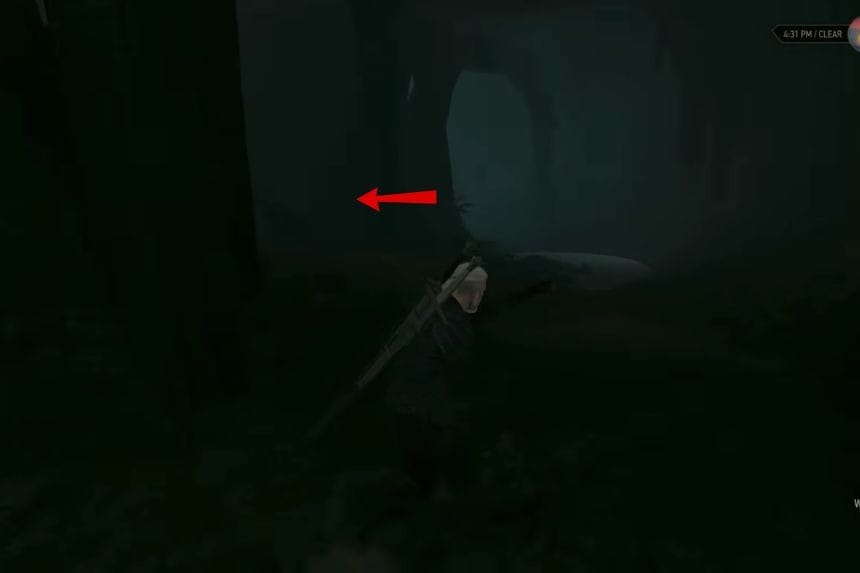
Walk north-west from Hanged Man’s Tree in Velen until you see a cave before coming to the next road. Go into the cave and follow the left wall all along the cave until you get to a point where it protrudes slightly. The chest inside the cave has the blueprints for all four pieces of Superior Ursine Armour:
- Superior Ursine Armour Diagram
- Superior Ursine Boots Diagram
- Superior Ursine Gauntlets Diagram
- Superior Ursine Trousers Diagram
| Superior Ursine Items | Materials Required |
| Superior Ursine Armour | Required Lvl: 301 Enhanced Ursine Armor2 Dimetrium Plate1 Monster Essence1 Monster Hide3 Cured Draconid Leather |
| Superior Ursine Boots | Required Lvl: 301 Enhanced Ursine Boots1 Dark Steel Plate2 Leather Scraps2 Monster Claw1 Hardened Leather |
| Superior Ursine Gauntlets | Required Lvl: 301 Enhanced Ursine Gauntlets1 Dark Steel Ignot1 Meteorite Ore4 Monster tooth6 Leather Scraps |
| Superior Ursine Trousers | Required Lvl: 301 Enhanced Ursine Trousers1 Dark Steel Ignot1 Hardened Leather2 Silk1 Monster Brain |
Superior Ursine Silver Sword
| Superior Ursine Silver Sword | Stats |
| Damage | 373 – 455 |
| Critical Hit Chance | +5% |
| Critical Hit Damage Bonus | +50% |
| Dismemberment | +13% |
| XP from Monsters | +20% |
| Adrenaline Gain | +15% |
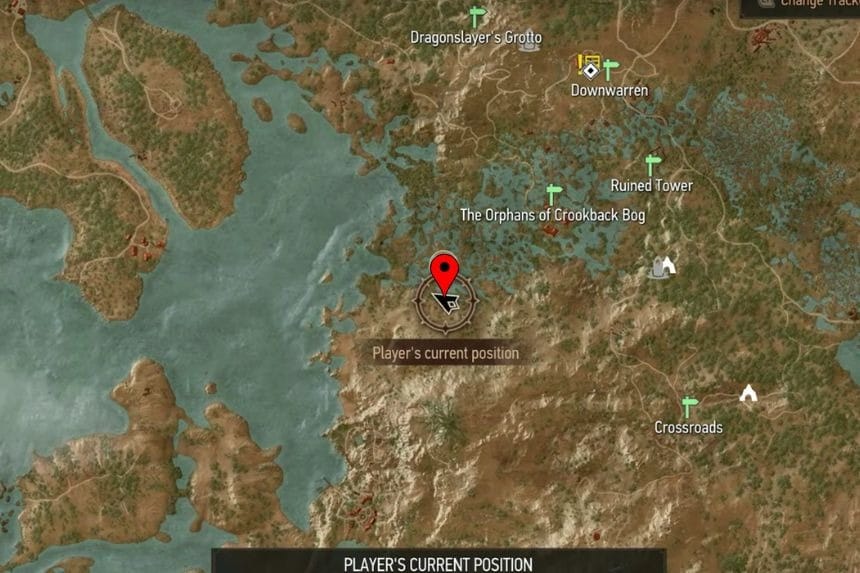
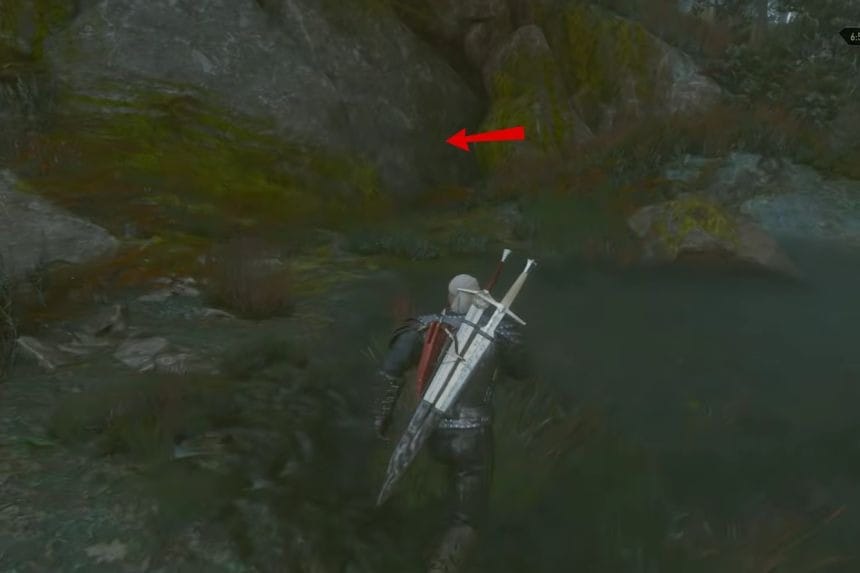
Start your journey south from The Orphans of Crookback Bog until you reach the boundary of the marshy region. There you will find a cave. You need to get rid of the illusionary wall blocking the cave entrance first. Go inside the cave and follow the left-side path until you find the chest which holds the map of the Superior Ursine Silver Sword. To craft it you will need:
- 1 Enhanced Ursine Silver Sword
- 2 Leather Scraps
- 1 Dimertrium Ingot
- 1 Albedo
- 1 Monster Hair
Superior Ursine Steel Sword
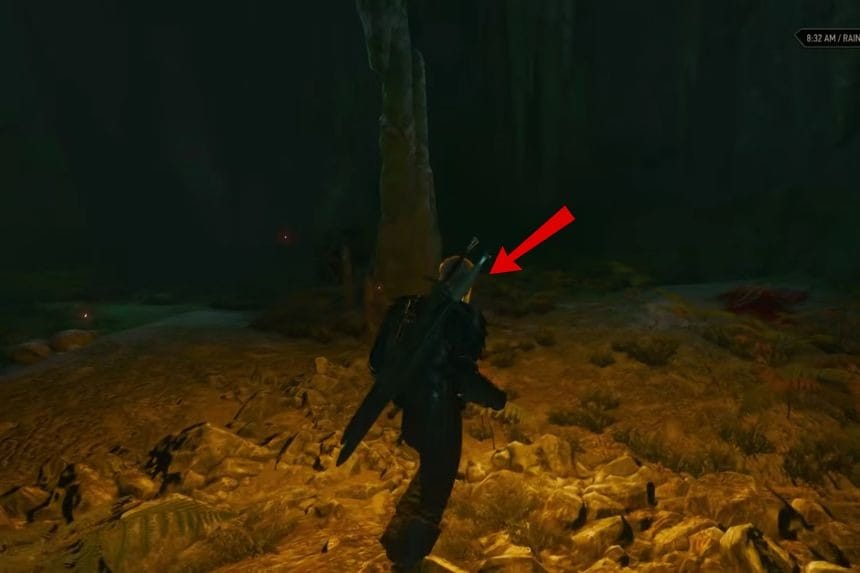
| Superior Ursine Steel Sword | Stats |
| Damage | 256 – 312 |
| Adrenaline Gain | +15% |
| Critical Hit Damage Bonus | +50% |
| Bonus XP from Humans / Nonhumans | +5% |
Head east from The Orphans of Crookback Bog until you reach the Ruined Tower signpost. You then have to follow the left side of the tower structure all the way up to the back area, which will allow you entry into the tower through a gap in the wall. You’ll find the diagram of the sword there. To craft it you will need:
- Required Lvl: 30
- 1 Enhanced Ursine Steel Sword
- 1 Leather Scraps
- 1 Dimetrium Ingot
- 1 Monster Blood
- 1 Monster Claw
Mastercrafted Ursine Armor Locations
At level 34, you can craft the Mastercraft version of the Ursine Armor. For this particular armor set, only the blacksmiths at Novigrad and Crows Perch can work on them. You will require all the previous versions of the Ursine Armor set to upgrade them to Mastercraft versions.
Mastercrafted Ursine Steel Sword
| Mastercrafted Ursine Steel Sword | Stats |
| Damage | 284 – 348 |
| Adrenaline Gain | +20% |
| Critical Hit Damage | +75% |
| Bonus Experience (Humans / Nonhumans) | +5% |
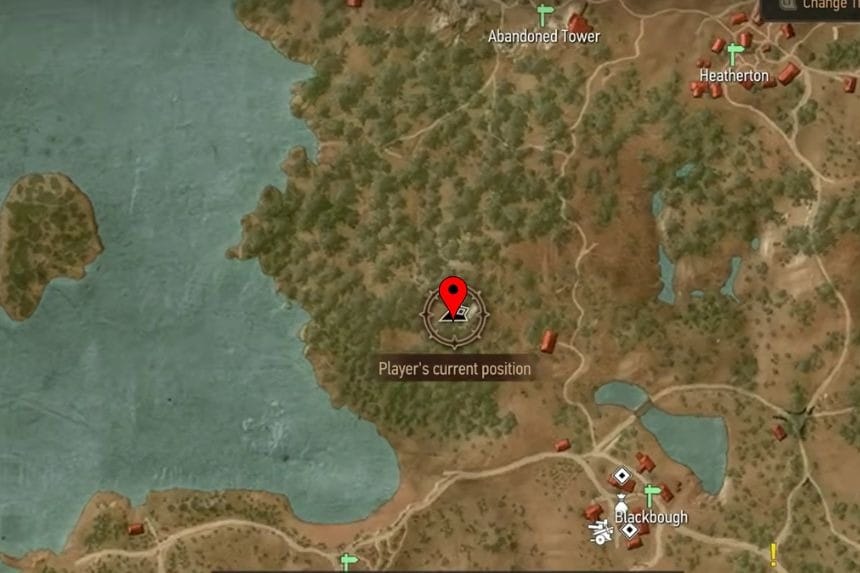
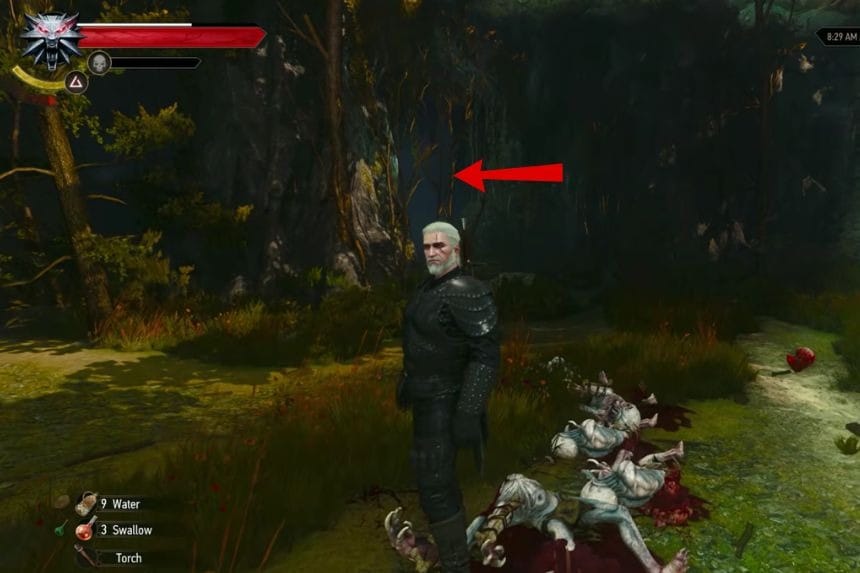
Head northwest of Blackbough into the forest. Look for a cave hidden in the rocky area. Search for a cave located among the rocks. Go into the cave and make your way towards the back. You will discover a chest between some stalagmites and the back wall. Open it to get the diagram. To craft it you will need:
- 1 Superior Ursine Steel Sword
- 2 Dimetrium Ingot
- 2 Leather Scraps
- 1 Monster Saliva
- 1 Monster Tooth
Mastercrafted Ursine Silver Sword
| Mastercrafted Ursine Silver Sword | Stats |
| Damage | 409 – 449 |
| Critical Hit Chance | +5% |
| Critical Hit Damage | +75% |
| Dismemberment | +14% |
| XP from Monsters | +20% |
| Adrenaline Gain | +20% |
Travel to the coast east of Olena’s Grove in Velen. You will come across a destroyed camp with a sign of a Witcher. Once you search around there, you will be pointed out to a small island north from that spot. Once you get there, you will see a Level 4 Drowner nest. The chest there holds the diagram for the Mastercrafted Ursine Silver Sword. To craft it you will need:
- 1 Superior Ursine Silver Sword
- 2 Dimertrium Ingot
- 2 Leather Scraps
- 1 Monster Essence
- 1 Rebis
Mastercrafted Ursine Armour
| Mastercrafted Ursine Armor | Stats |
| Armor | 205 |
| Adrenaline Gain | +20% |
| Piercing Resistance | +25% |
| Bludgeoning Resistance | +25% |
| Slashing Resistance | +30% |
| Monster Resistance | +45% |
| Mastercrafted Ursine Boots | Stats |
| Armor | 77 |
| Adrenaline Gain | +10% |
| Piercing Resistance | +5% |
| Bludgeoning Resistance | +5% |
| Slashing Resistance | +5% |
| Monster Resistance | +5% |
| Mastercrafted Ursine Gauntlets | Stats |
| Armor | 73 |
| Adrenaline Gain | +10% |
| Piercing Resistance | +5% |
| Slashing Resistance | +5% |
| Elemental Resistance | +5% |
| Monster Resistance | +5% |
| Mastercrafted Ursine Trousers | Stats |
| Armor | 77 |
| Adrenaline Gain | +10% |
| Piercing Resistance | +5% |
| Slashing Resistance | +10% |
| Elemental Resistance | +20% |
| Monster Resistance | +15% |
Go to the sign for the Destroyed Bastion located in the south of Velen. You will get to this point after defeating the cyclops boss. Go down the road towards the ruins and behind the collapsed stone wall on your right. There will be a chest with all four Mastercrafted Ursine Armour plans:
- Mastercrafted Ursine Armour Diagram
- Mastercrafted Ursine Boots Diagram
- Mastercrafted Ursine Gauntlets Diagram
- Mastercrafted Ursine Trousers Diagram
| Mastercrafted Ursine Item | Materials Required |
| Mastercrafted Ursine Armour | Required Lvl: 341 Superior Ursine Armor1 Cured Draconid Leather3 Dimetrium Plate1 Monster Carpace1 Optima Matter |
| Mastercrafted Ursine Boots | Required Lvl: 341 Superior Ursine Boots1 Dark Steel Plate1 Hardened Leather2 Leather Scraps2 Monster Claw |
| Mastercrafted Ursine Gauntlets | Required Lvl: 341 Superior Ursine Gauntlets1 Dark Steel Ingot6 Leather Scraps1 Meteorite Ore4 Monster tooth |
| Mastercrafted Ursine Trousers | Required Lvl: 341 Superior Ursine Trousers1 Dark Steel Ingot1 Hardened Leather1 Monster Brain2 Silk |
Grandmaster Ursine Armor Locations
The Grandmaster Ursine Armor is locked behind the Blood and Wine DLC. You also need to be level 40 and beyond to craft the armor set. Only one specialised blacksmith will work on this version of the armor, and you need to visit Beauclair for it.
Grandmaster Ursine Gear Location Part 1
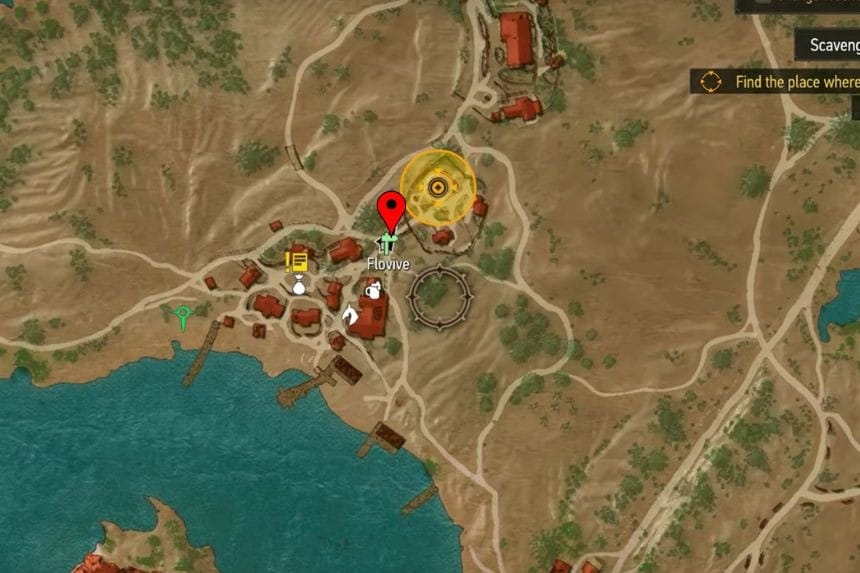
Go to the northern side of Flovive in Toussaint, and locate the dilapidated building there. Move around to the rear of the building and utilise Aard to remove the obstruction covering the entrance to the building. Move into the basement and turn right after moving a few meters into it.
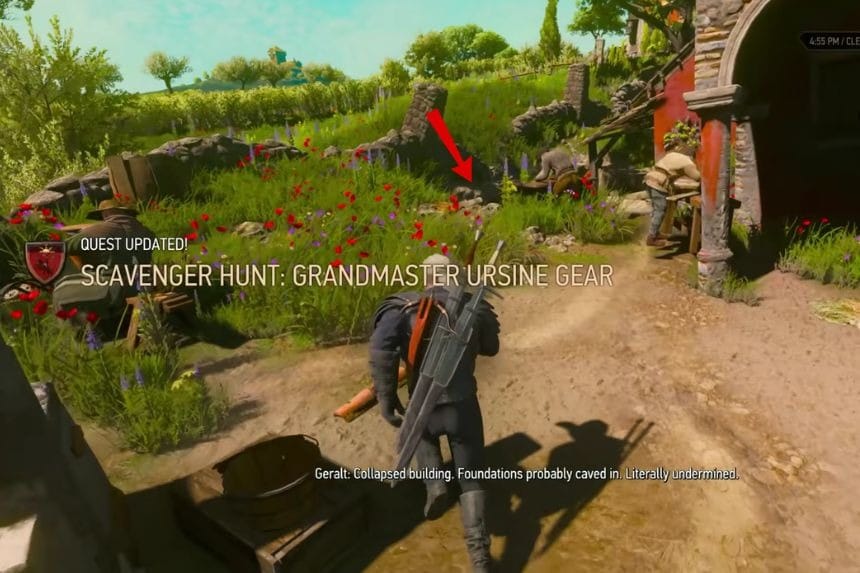
Locate the protruding section of the basement that contains a chest. Open it to obtain the Grandmaster Ursine diagram series one, along with a book. Read the book to discover the other locations of the diagrams.
Grandmaster Ursine Gear Location Part 2
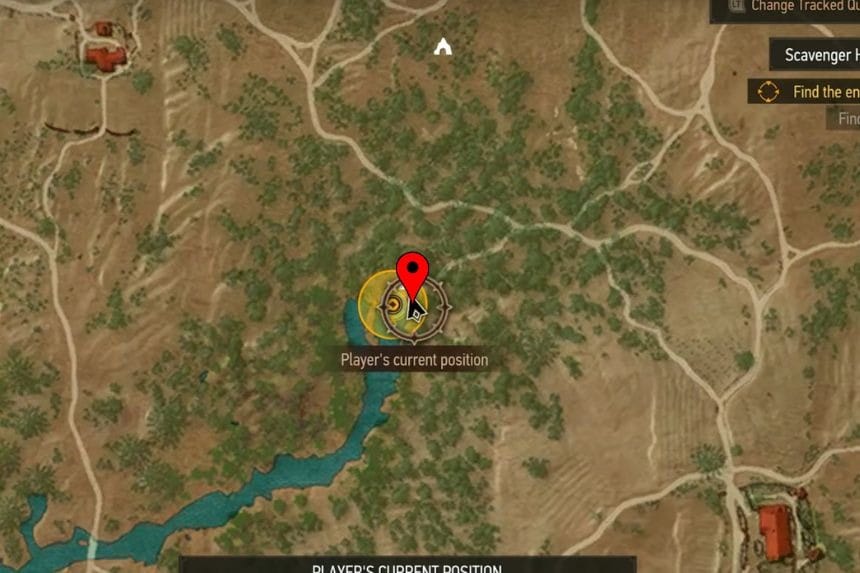
To go to the cave next to the lake, move from Flovive to the north. There live several Giant Centipedes. Enter the cave, fall down, then take the left tunnel into the small space. There is a sign there saying that you should be guided by the Witcher signs while going through the twists and turns of tunnels.
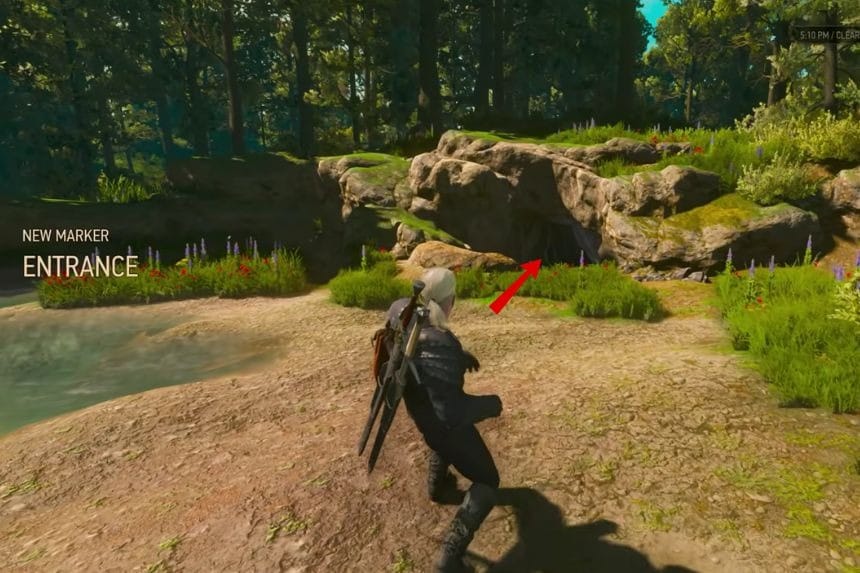
Move backwards and go along the left wall. Soon you will have to fight the Giant Centipede. You need to see the Witcher sign before entering the new corridor. Then take the right fork, go by signs, and turn after the next sign. Go down and turn left. Fight the second Giant Centipede, then go into the open space where you will see the bones with the last diagrams of the Grandmaster Ursine.
