
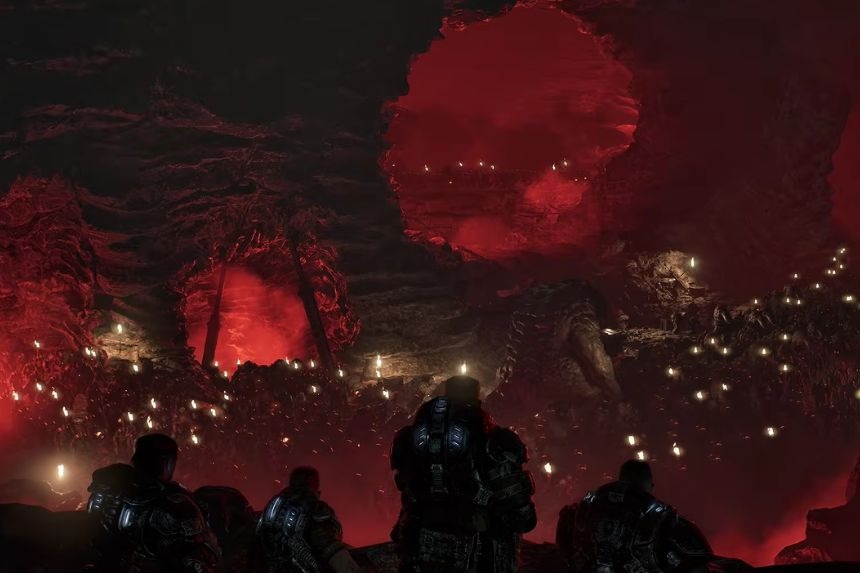
Act 3 of Gears of War: E-Day takes you through dangerous streets, underground tunnels, abandoned buildings, and areas filled with Locust. While on your journey, you can discover various Collectables, Hard Cases, and a few Secondary Objectives. Some of these are quite obvious, while some are hidden from the main path and difficult to locate. This guide covers all the Act 3 Collectables, Hard Cases, and Secondary Objectives and explains where to find each one.
Act 3, Chapter 1 – Stranded
Collectable – COG Army Knife
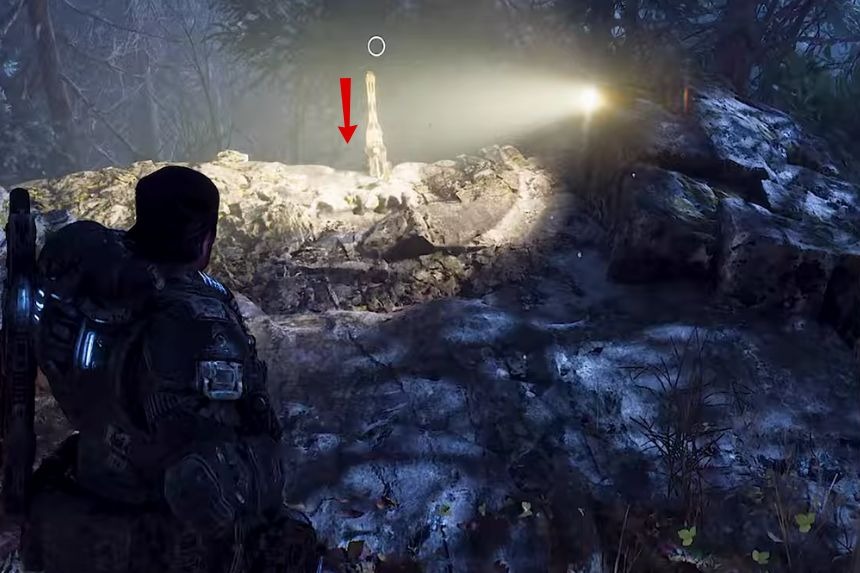
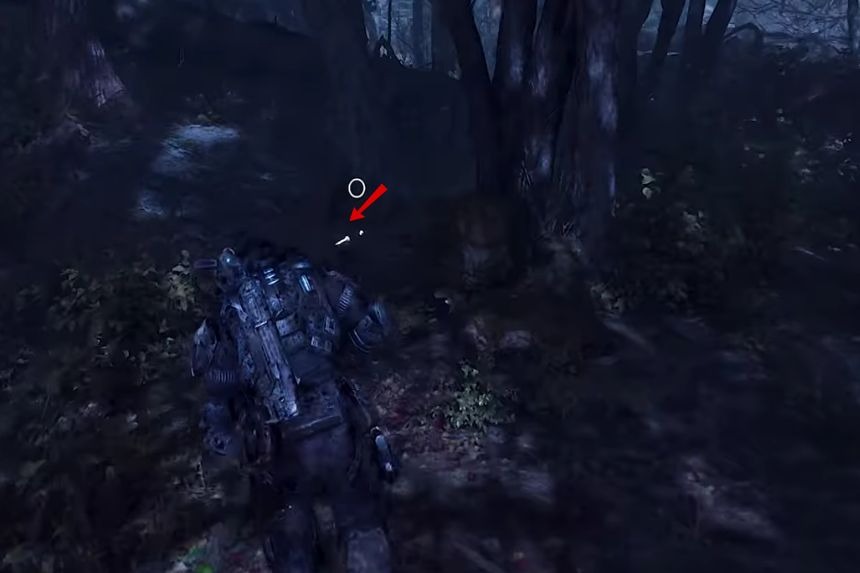
Make your way to the clearing towards Fairlight Outpost. As you come down via the rope, you will arrive at a fork with a dead body lying there. Take the path on your right, but make your way into the short left path to find the collectable.
Hard Case
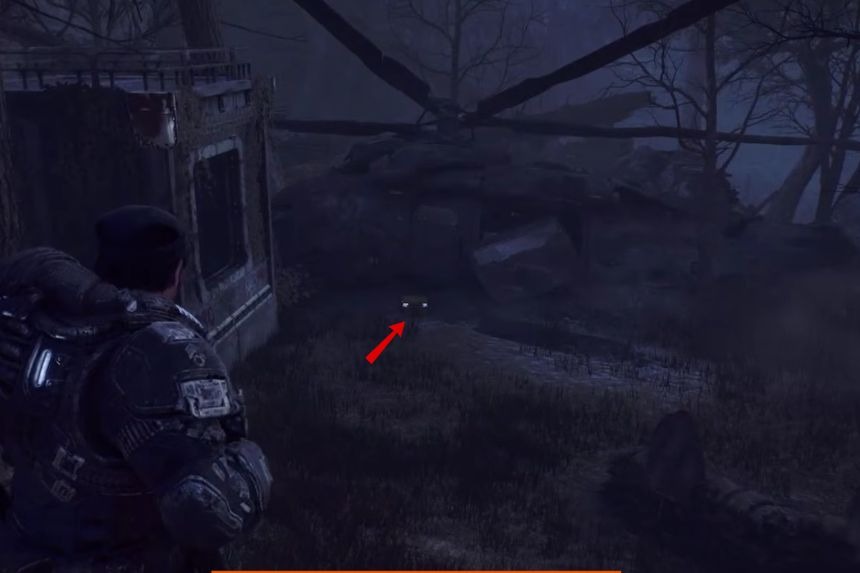
Go past the locked gate, then proceed until you see Fairlight Outpost in the far distance. After killing the Locust, stick to the left part of the map where the nearest enemies were located. Seek out the wrecked helicopter where the Hard Case is seated in front of it.
Collectable – Fairlight Rifle Range Sign
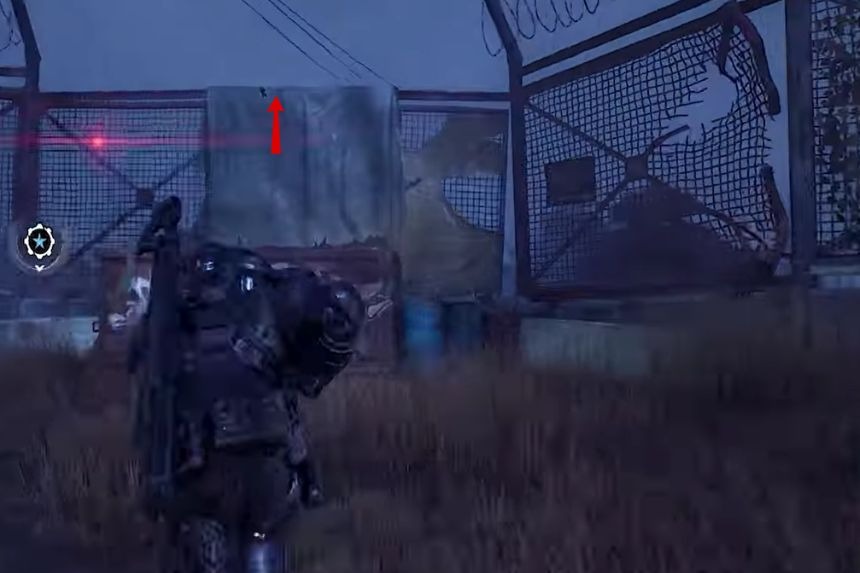
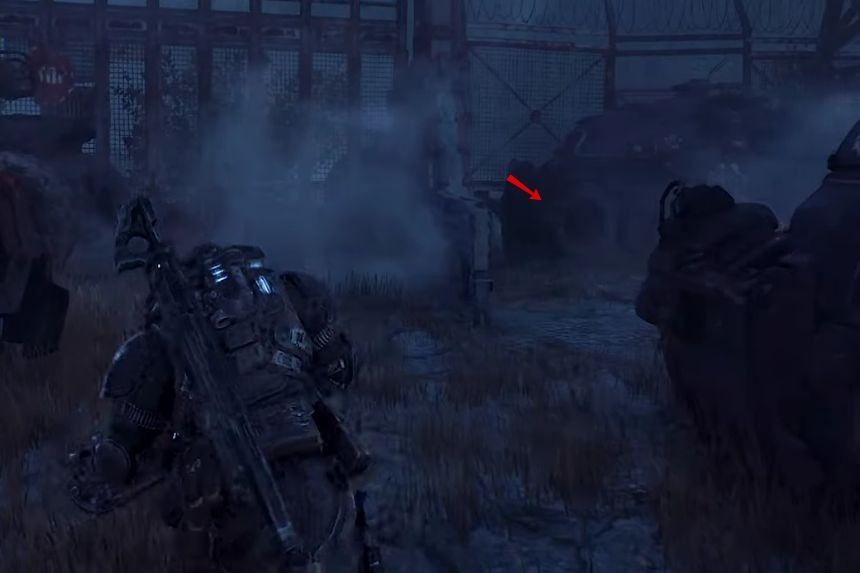
Climb the shipping container in order to climb the fence and reach Fairlight Outpost. After you get down on the other side, turn to your right and walk uphill. On the other side of the blocked fence gate, you will find the collectable sticking out of the wall.
Hard Case
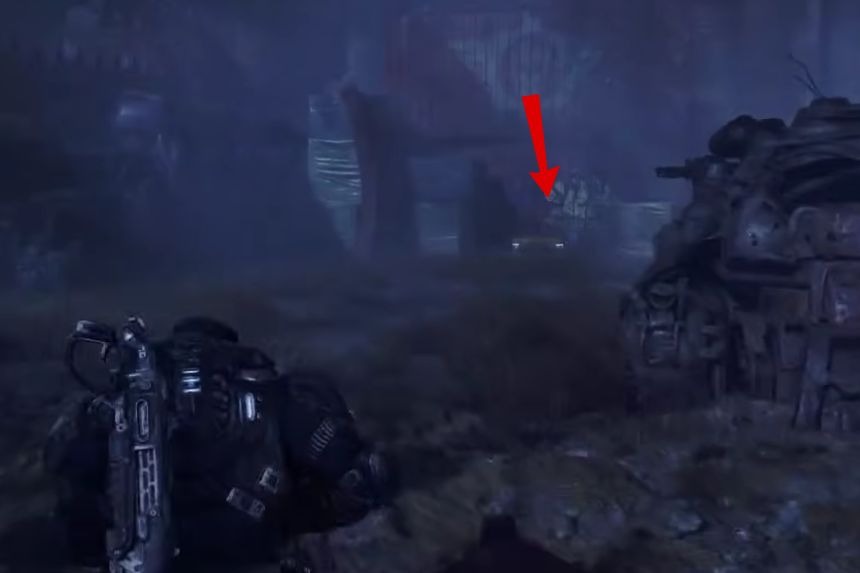
After crawling over the shipping container and going inside Fairlight Outpost, go left. There will be two red shipping containers, one above the other, and Hard Case will be in front of them.
Collectible – Gut-Puncher Grenade Rounds
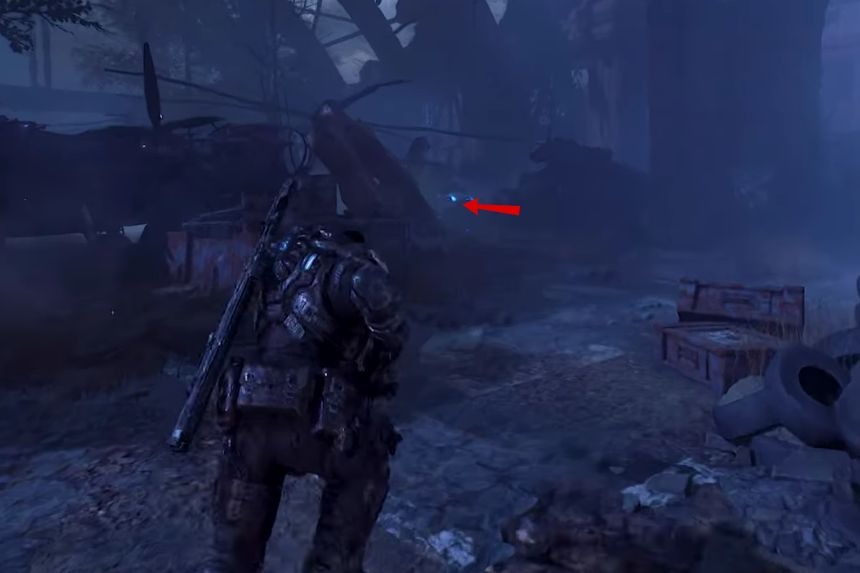
Move beyond the last Hard Case. You will find a warehouse building on your left, along with a Supply Cache. The item you are looking for is near some crates beside the supply cache.Collectablee – Prepper’s Scavenging Map
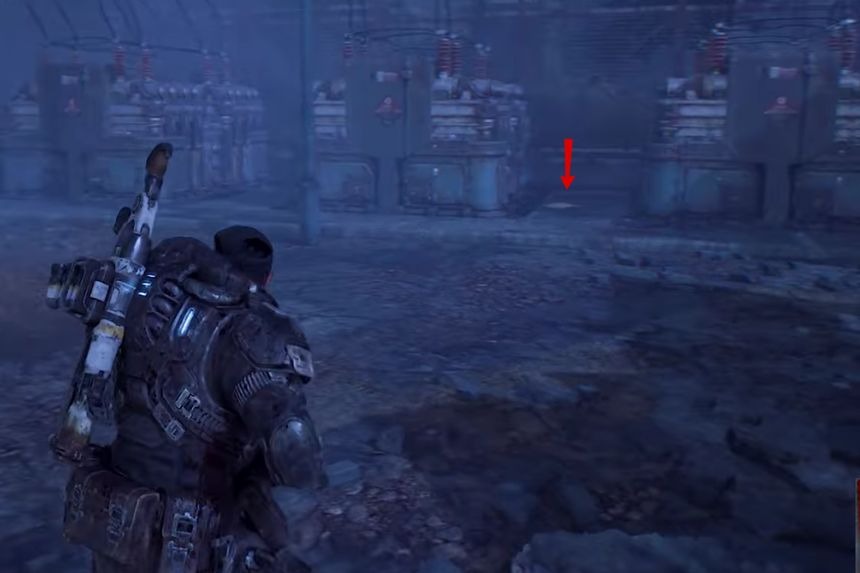
Your objective will take you to the substation to restore the power. Go through the doorway in the fence and look to your right for the generators. The collectable is between two of them.
Collectable – UIR Soldier Shooting Target
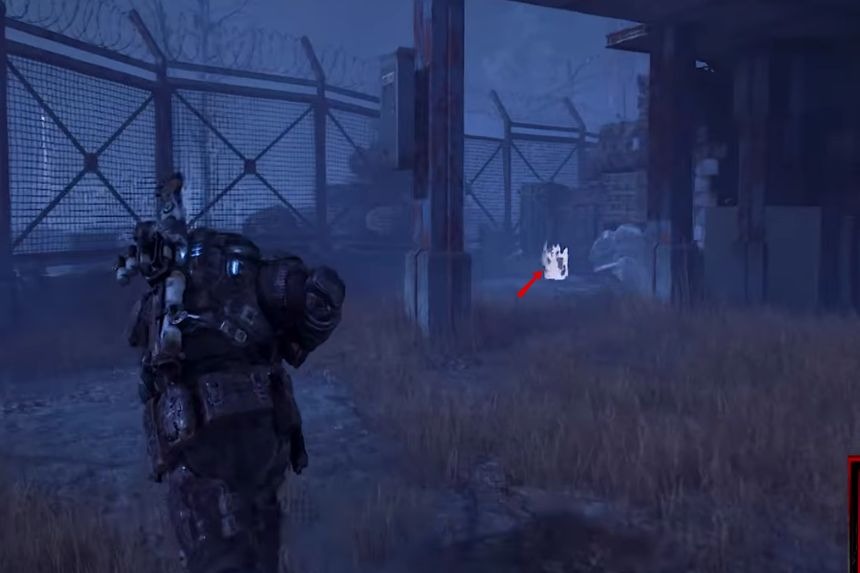
Before entering the substation, turn left from the entrance. Follow the side of the building to the back, where the collectable is leaning against a fence.
Hard Case
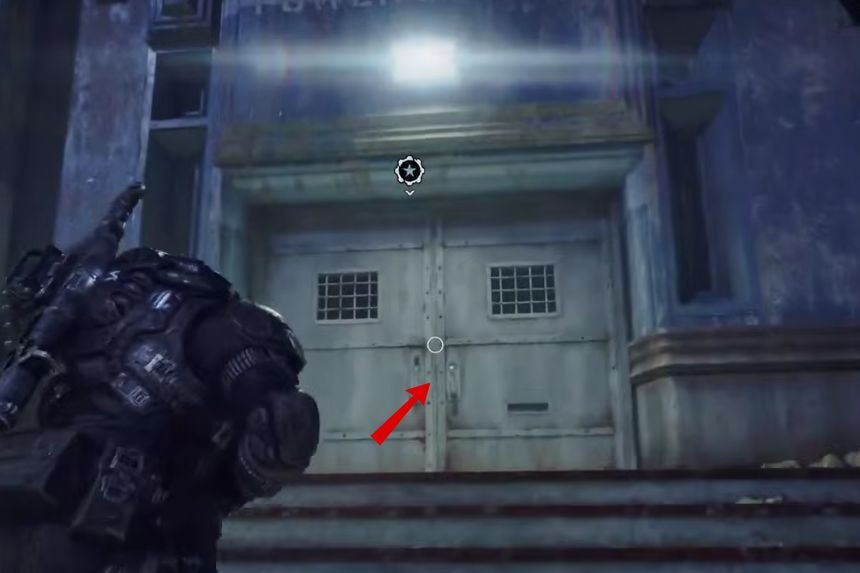
Enter the sub-station and immediately look left. The Hard Case is in the corner.
Act 3, Chapter 2 – Enemy Lines
Collectable – Damaged Gnasher Shotgun
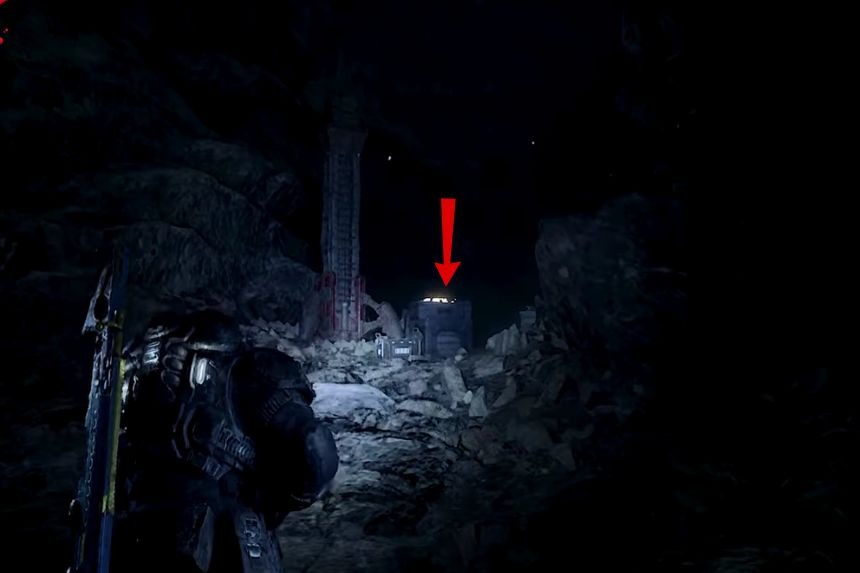
As you work your way through the tunnels, you’ll come to a large, red-lit room with tall metal poles. To the right, up a small slope, are some supplies and the collectable.
Hard Case
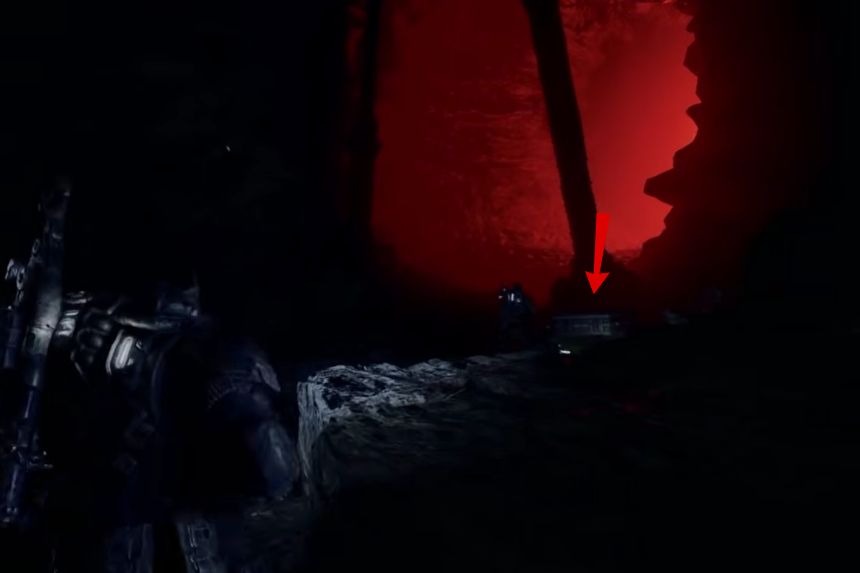
From the last collectable, stay on the main path and continue forward. The Hard Case is slightly right of centre and should be easy to spot.
Collectable – Parchment and Powder Pouch
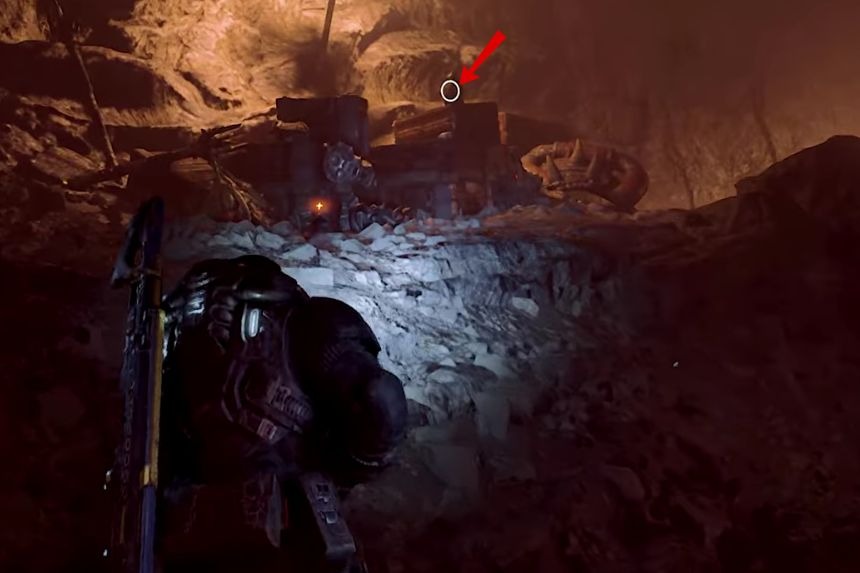
Next, you’ll enter a wide room filled with supplies. It is better lit than the previous rooms, and Dom will mention the ‘supply lines’. Go up the slope on the left to find the collectable on some crates.
Collectable – Parchment with Indecipherable Writing
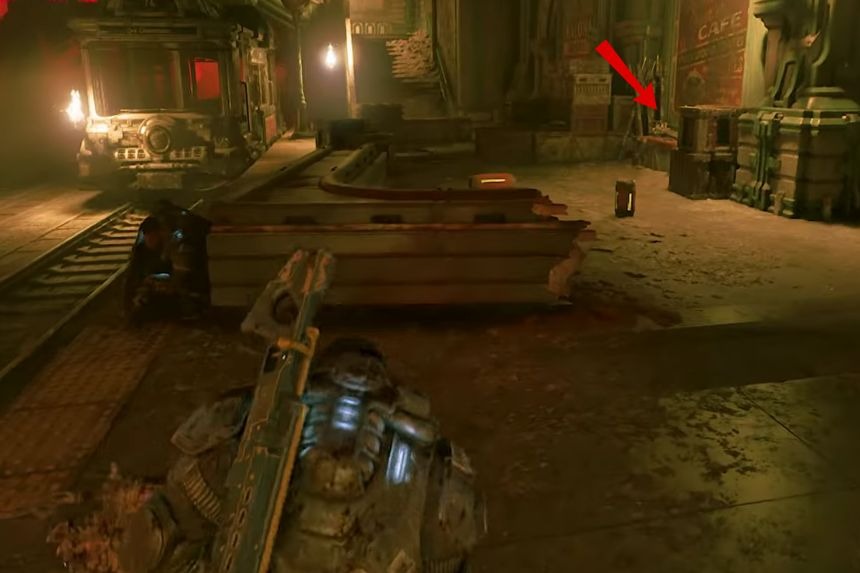
You’ll come to an underground subway station. Move to the right of the tracks and the subway car to find the collectable on some crates.
Hard Case
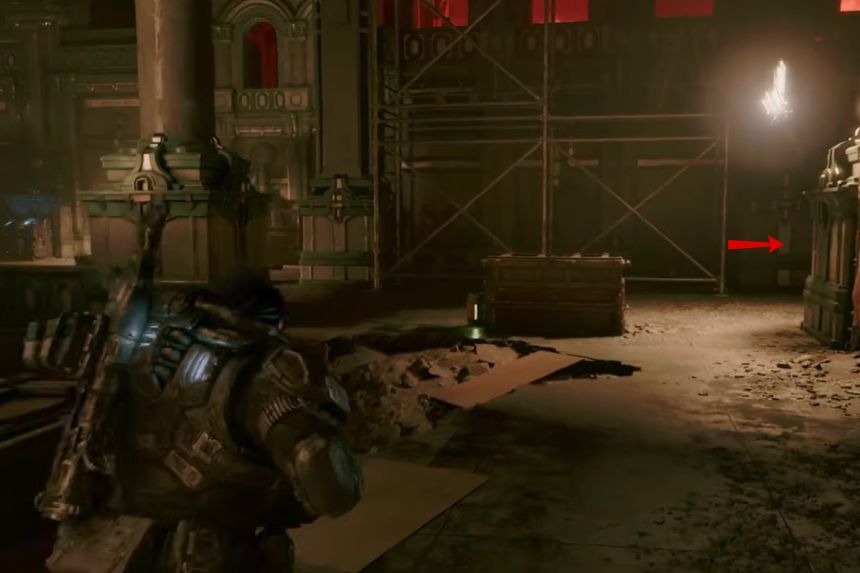
In the underground subway station, go up to the floor above. On the right side, look behind some planks near the construction materials to find the Hard Case.
Hard Case
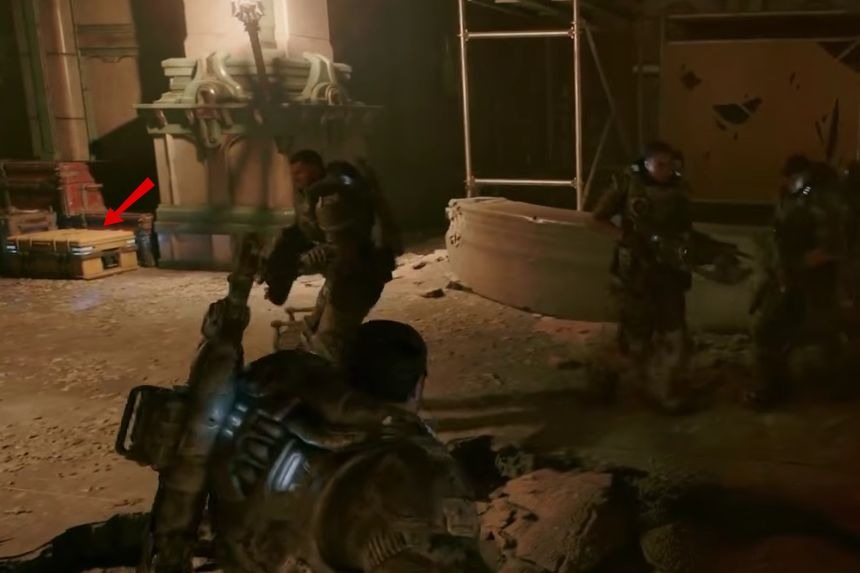
On the upper floor, look for the Supply Cache in the centre of the area. The Hard Case is just to its left.
Hard Case
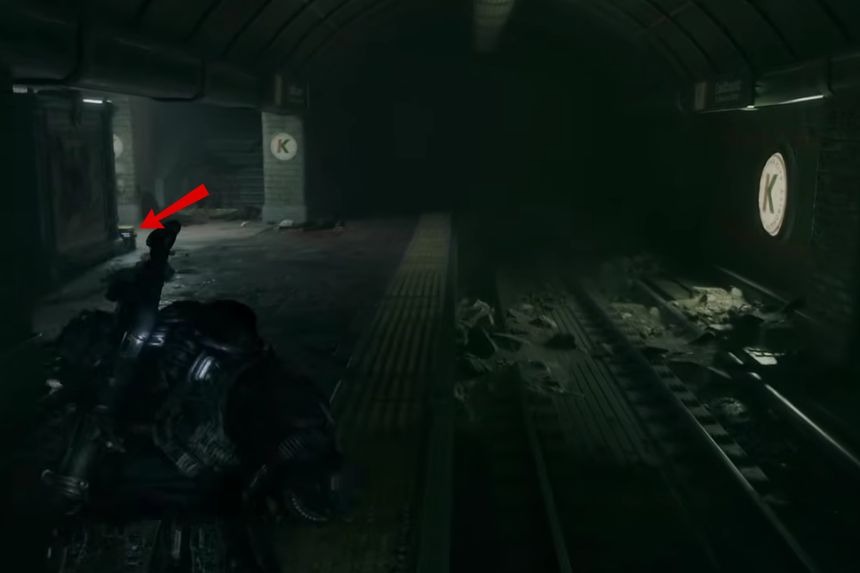
Later, you’ll need to climb over some crashed subway cars to continue. Before doing that, go left onto the subway platform. At the far end, look in the centre, in front of the divider, to find the Hard Case.
Collectable – Maintenance Worker’s Bloodied Flashlight
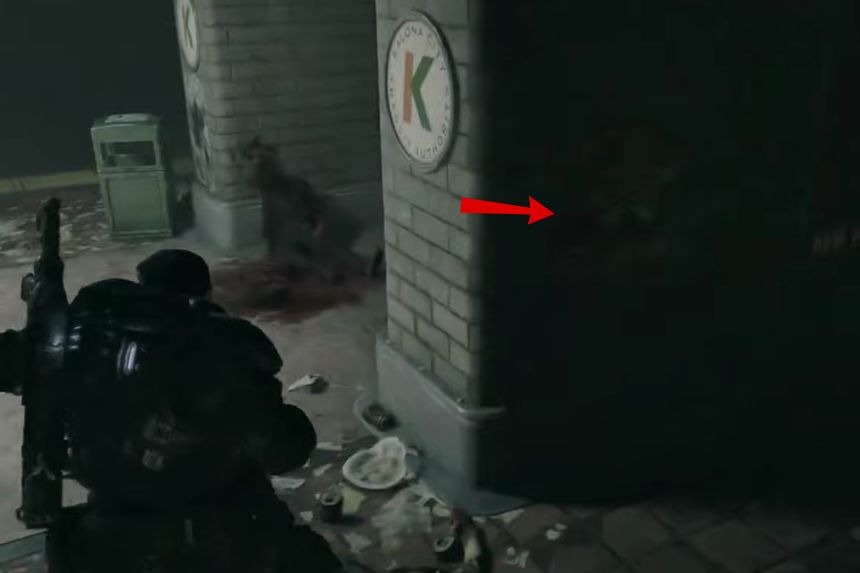
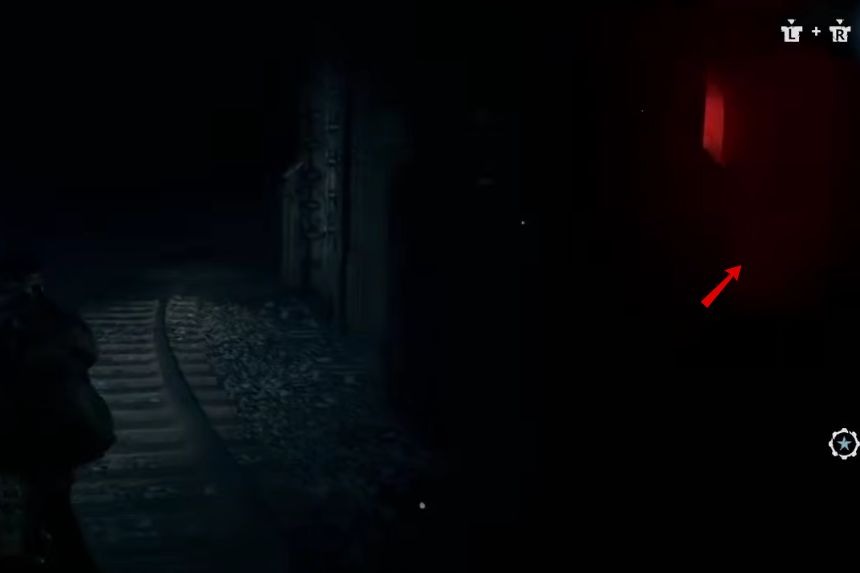
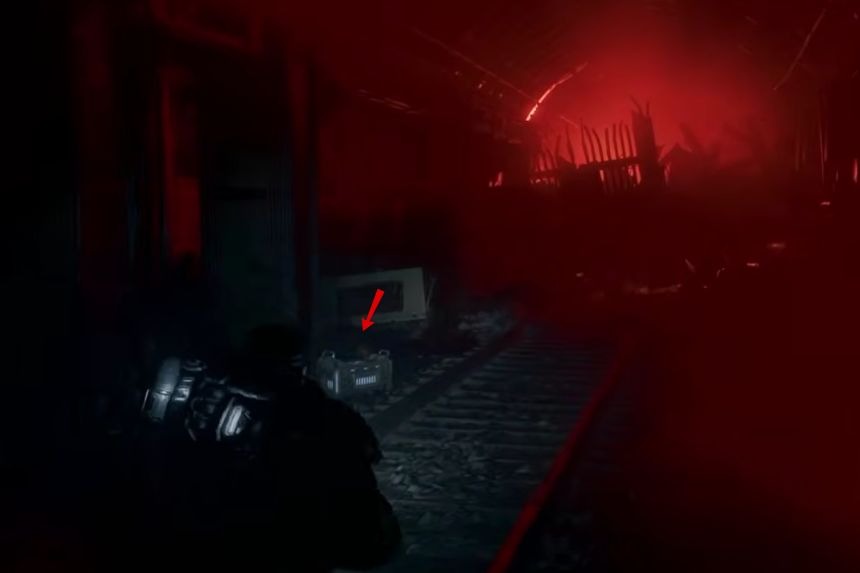
From the last Hard Case, continue away from your objective marker and head down the dark tunnel, following the train tracks. You’ll see a red light up ahead. Move toward it until you reach some wreckage and a dead end. The collectable is on the floor to the left.
Collectible – COG Tags of Private Beth Avila
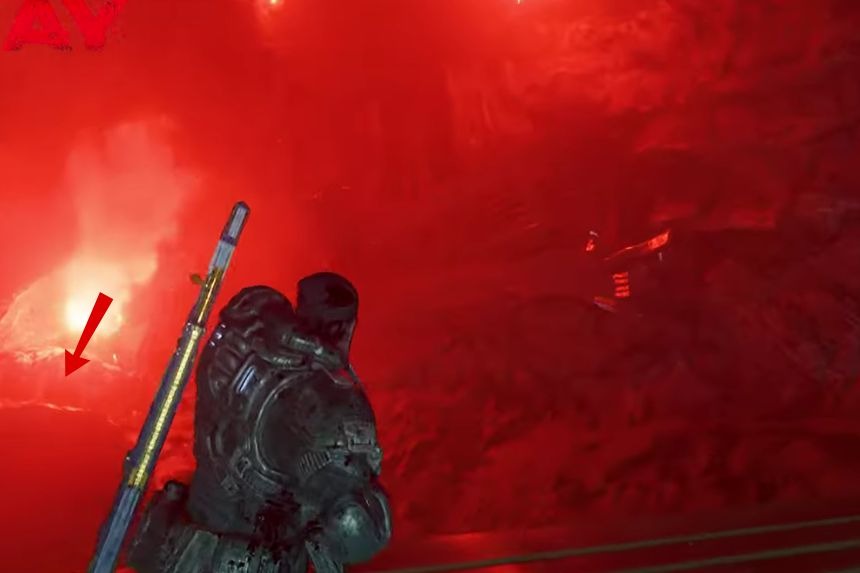
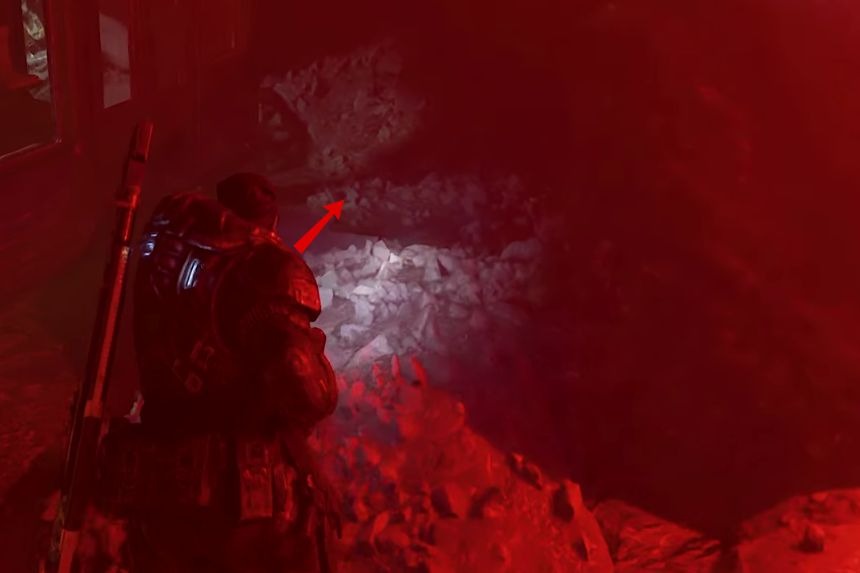
Turn back toward the train platform and the crashed subway cars you need to cross. Pass the previous Hard Case on your right, then look left for a doorway with stairs leading down. Go downstairs and enter the area below. The COG tags are on the floor to the right, beside a body.
Hard Case
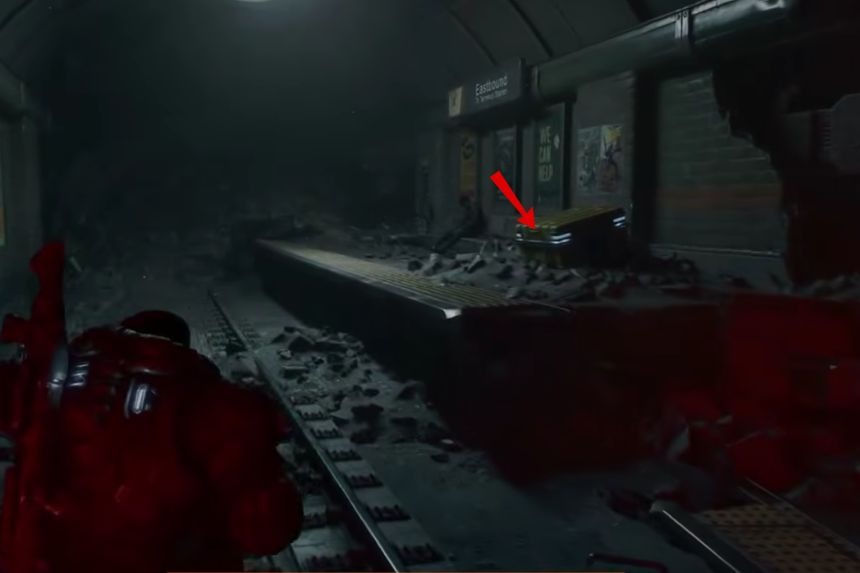
Cross the train cars and continue toward the main objective. Once you’re across, look to the right of the path for the Hard Case.
Hard Case
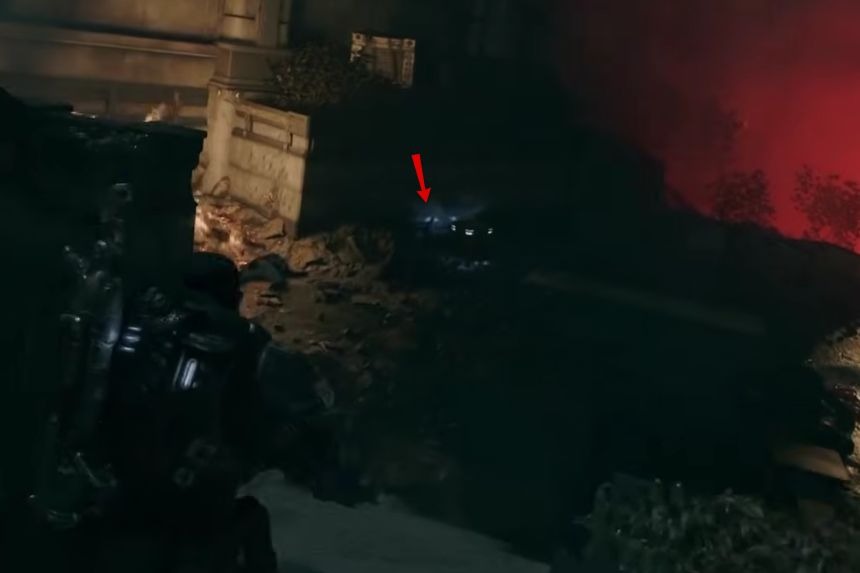
Later, you’ll emerge from the underground into an area filled with destruction. A collapsed golden Gear statue will be in front of you. Deal with the enemies, then go down to the left to find the Hard Case.
Hard Case
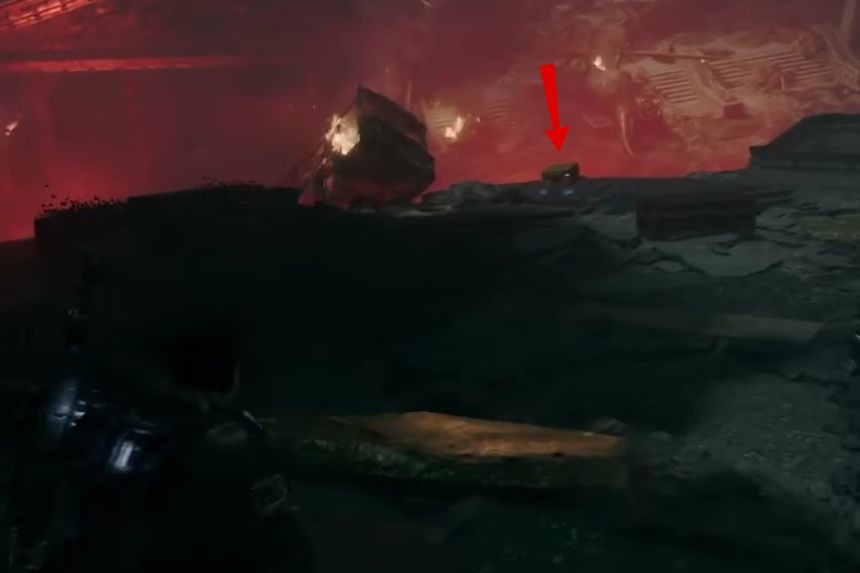
Continue toward the objective from the previous Hard Case. Before turning right onto the next path, look left near the edge of the cliff to find another Hard Case.
Hard Case
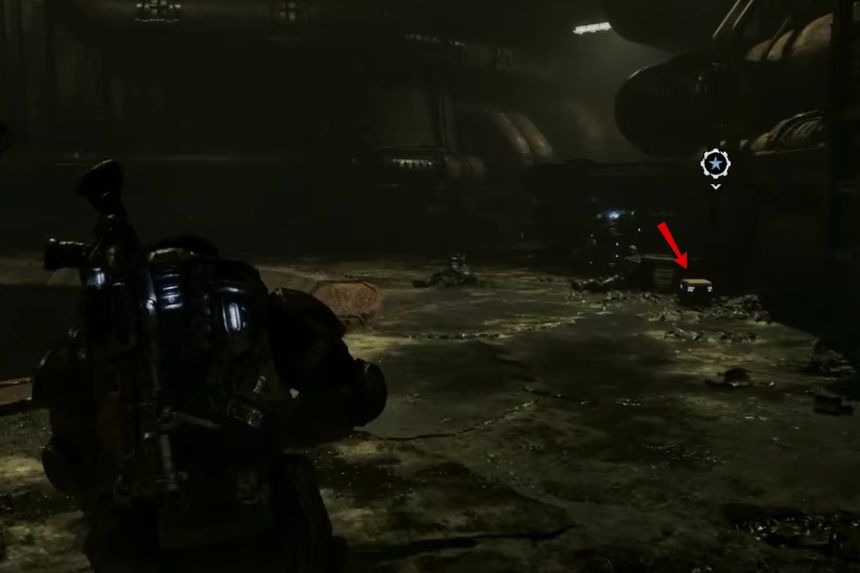
Later on, when you’re in the sewers, you’ll come to a Supply Cache with the Hard Case next to it.
Collectible – COG Tags of Private First Class Erick Davis
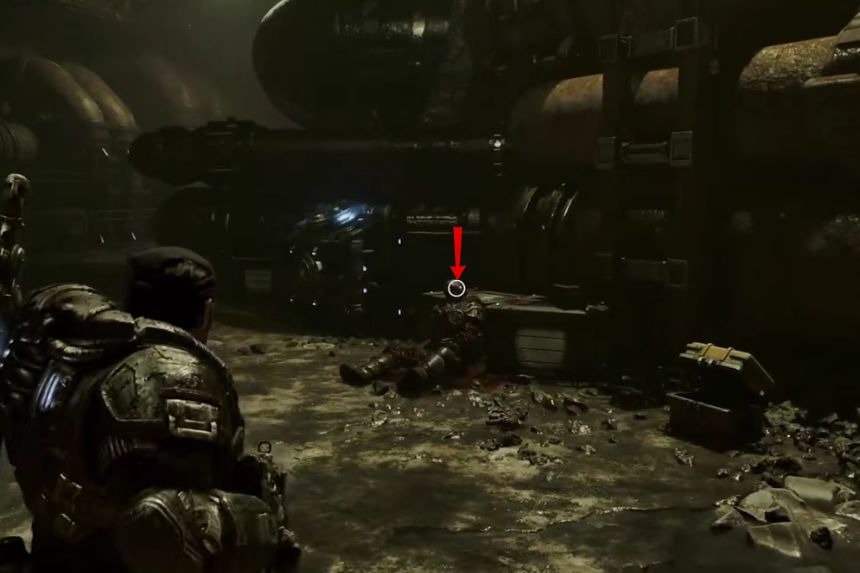
In the sewers, look immediately to the left of the previous Hard Case to find the COG tags.
Act 3, Chapter 3 – Last Foothold
Hard Case
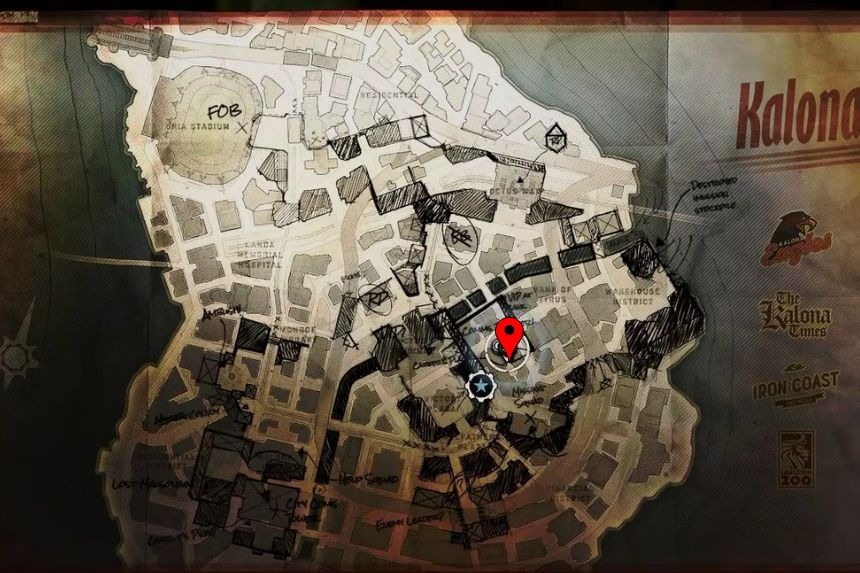
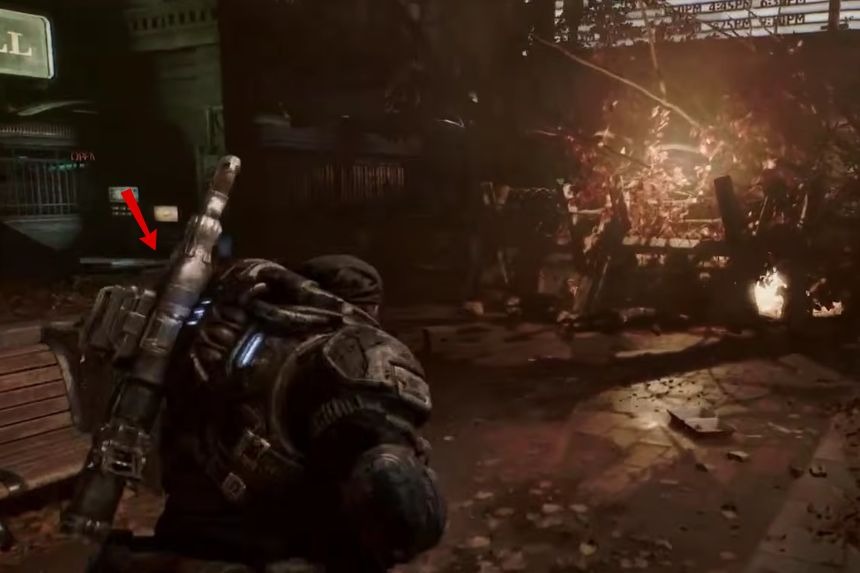
From the start of the chapter, facing the Kalona Theatre, turn around and head left down the side of the subway entrance. You’ll find the Hard Case in front of the pool hall.
Collectible – COG Tags of Sergeant First Class Robin Hamill
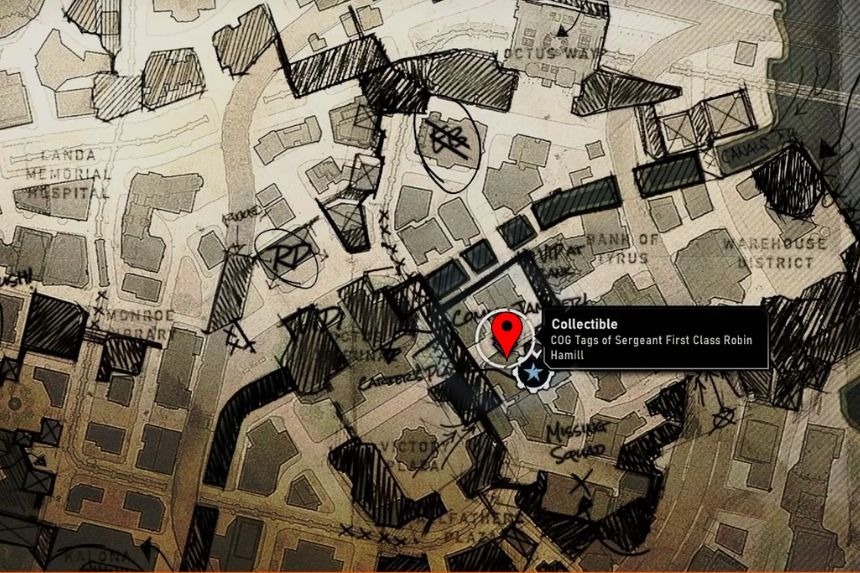
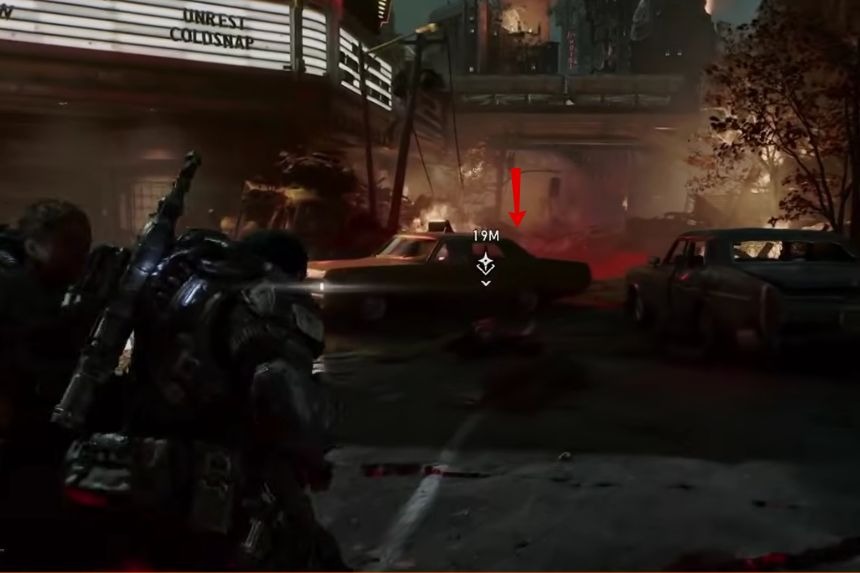
Go to the right of the Kalona Theatre and look behind a taxi. The COG tags are on the ground.
Collectible – COG Tags of Corporal Tracy Moore
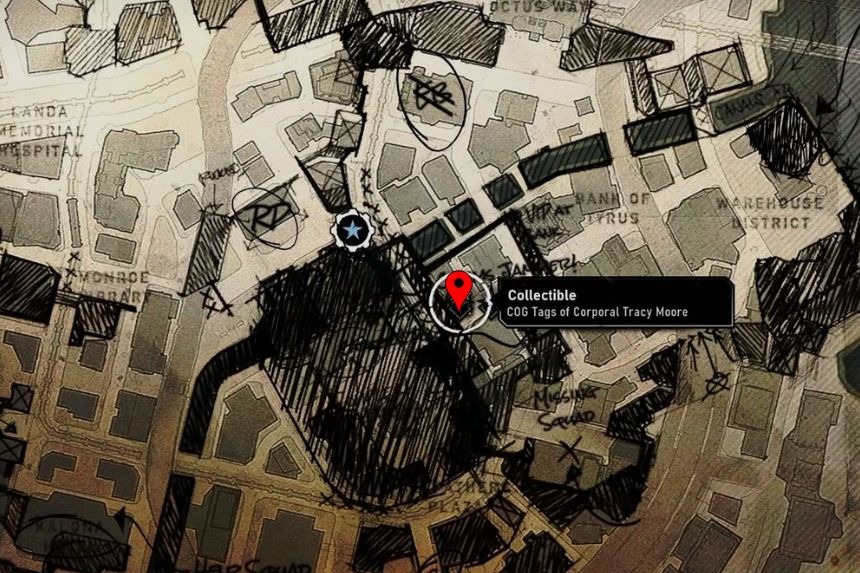
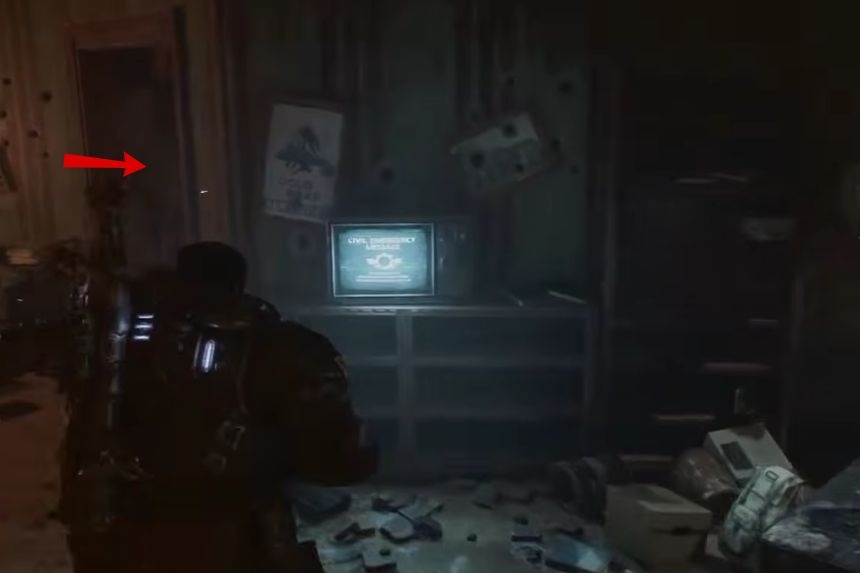
You’ll make your way through the collapsed streets underneath the sky train. You’ll come to a building on your right. Head inside and look in the back room to find the COG tags on the floor.
Hard Case
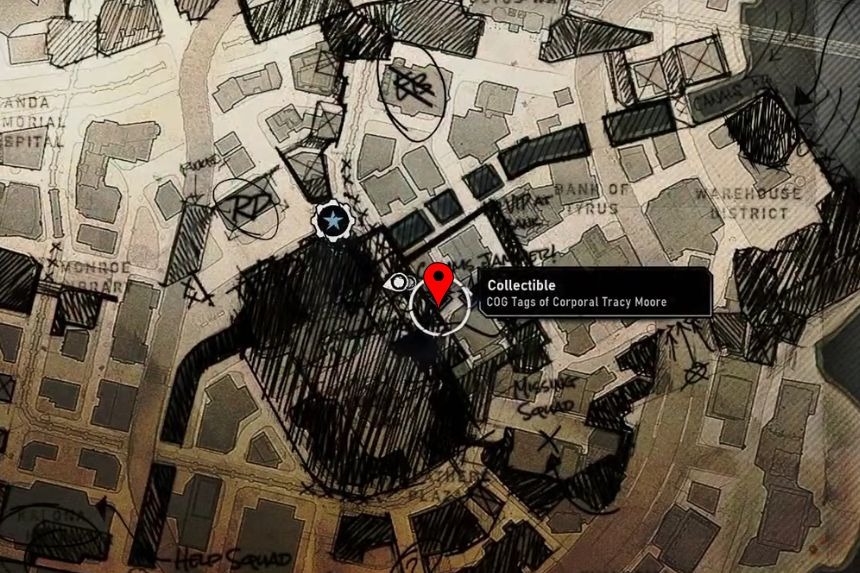
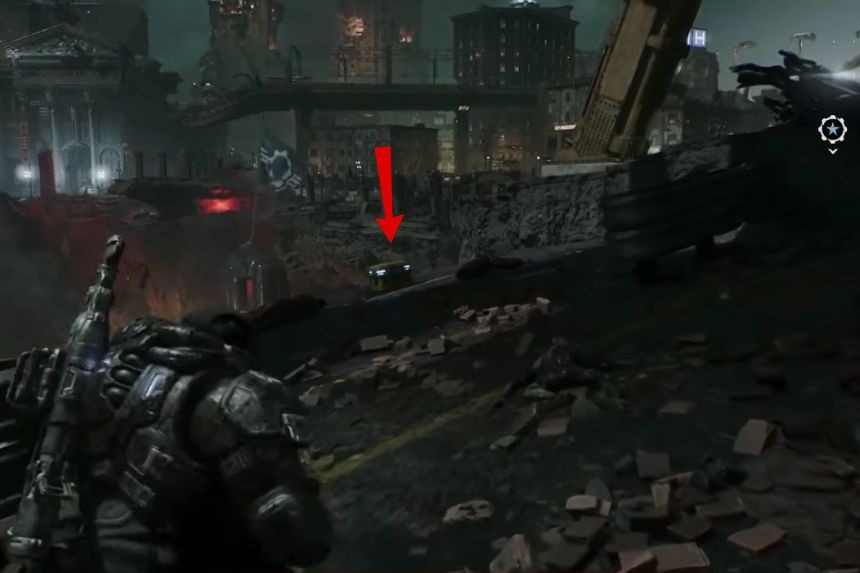
Leave the building and continue forward. The Hard Case is on the left side of the road, near the edge.
Collectible – Colonel Trench’s VIP List
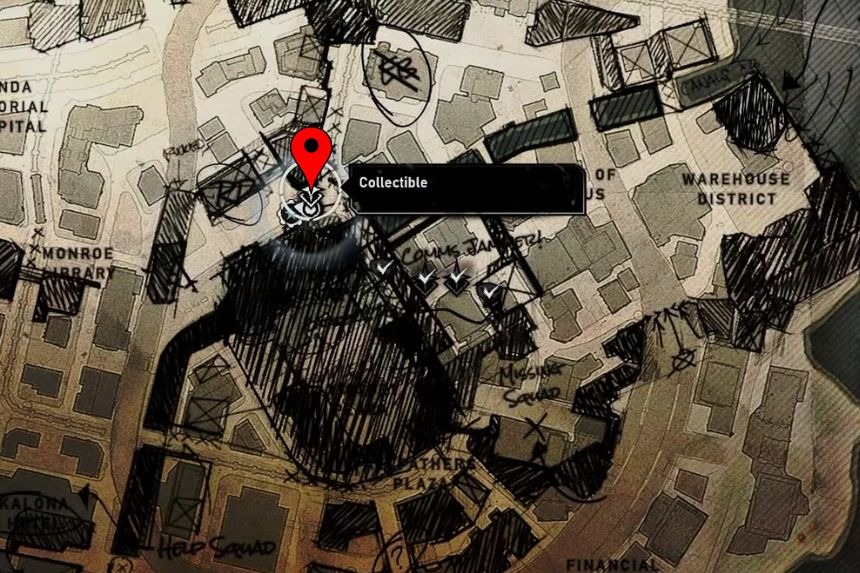
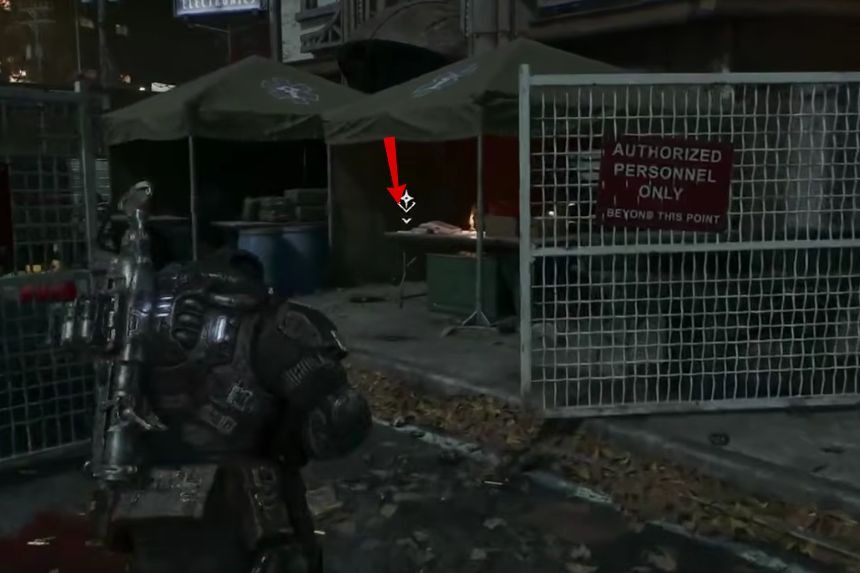
You’ll meet up with Tai at an abandoned COG checkpoint. You’ll need to follow him by climbing over a bus. Before you do, head to the right side of the checkpoint to find the collectible on a table under a gazebo or tent.
Hard Case
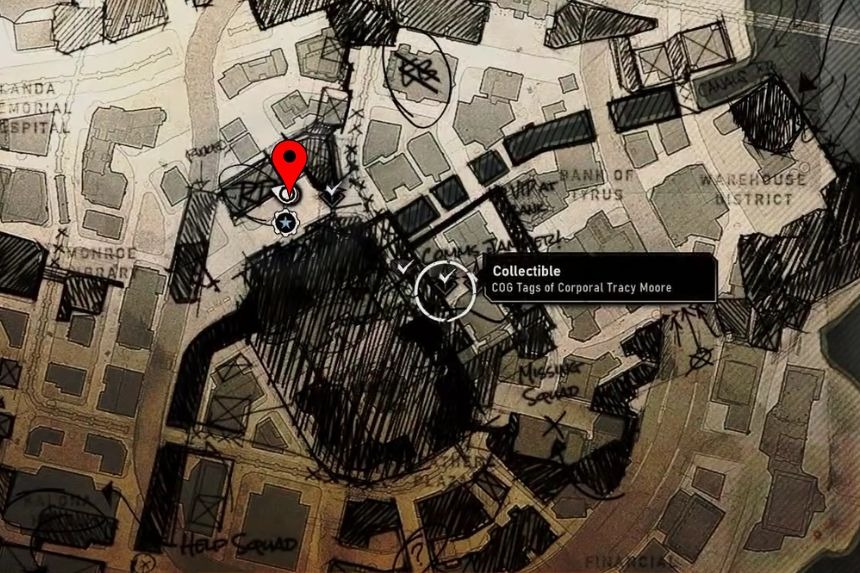
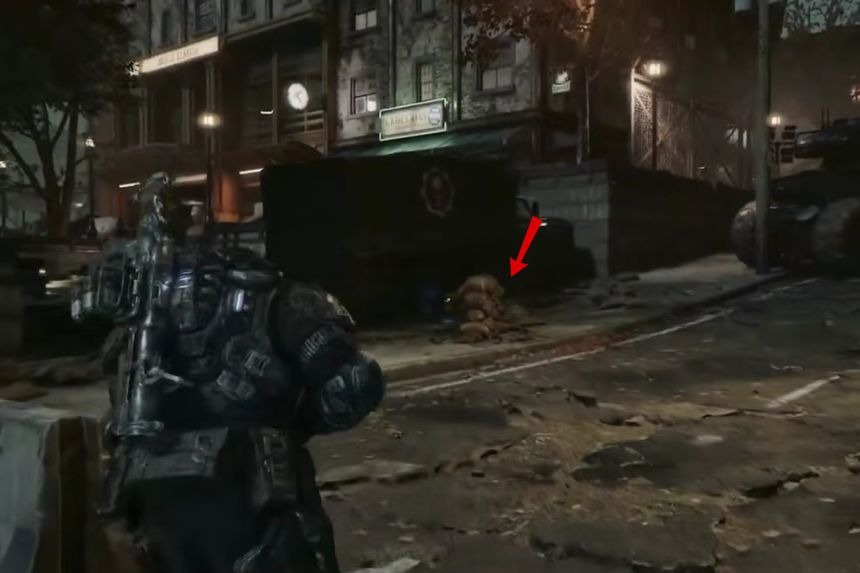
After climbing over the bus, turn right and continue up the street. The Hard Case is against a wall on the left.
Collectible – COG Tags of Private Luis Garcia
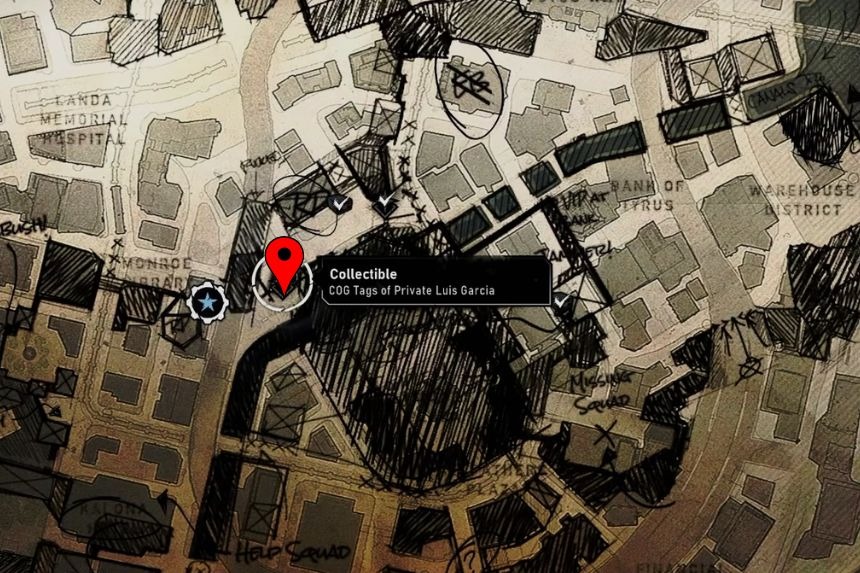
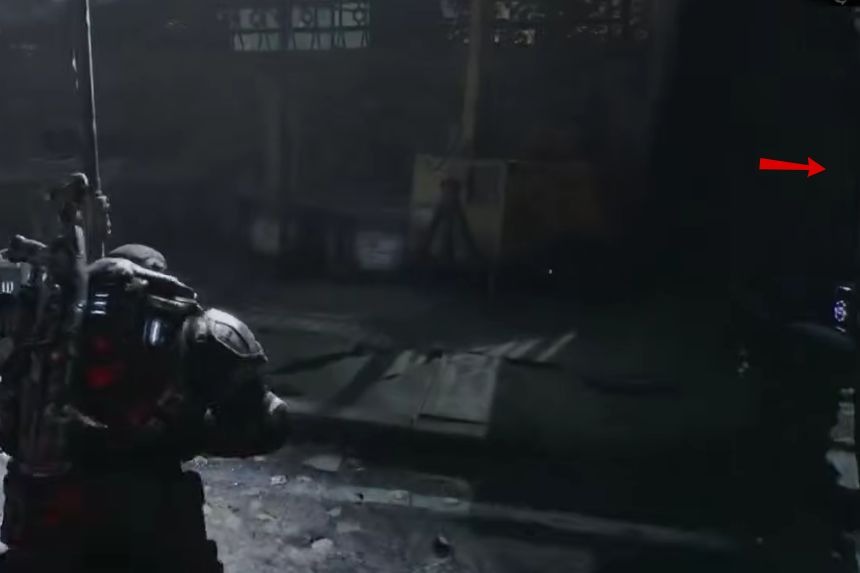
As you make your way to the library to meet Captain Grey, you’ll enter a fight with the Locust. Head to the right and climb up the ledges. At the top, turn around and head toward the edge. You’ll find a shipping container on your right with the COG tag inside.
Hard Case
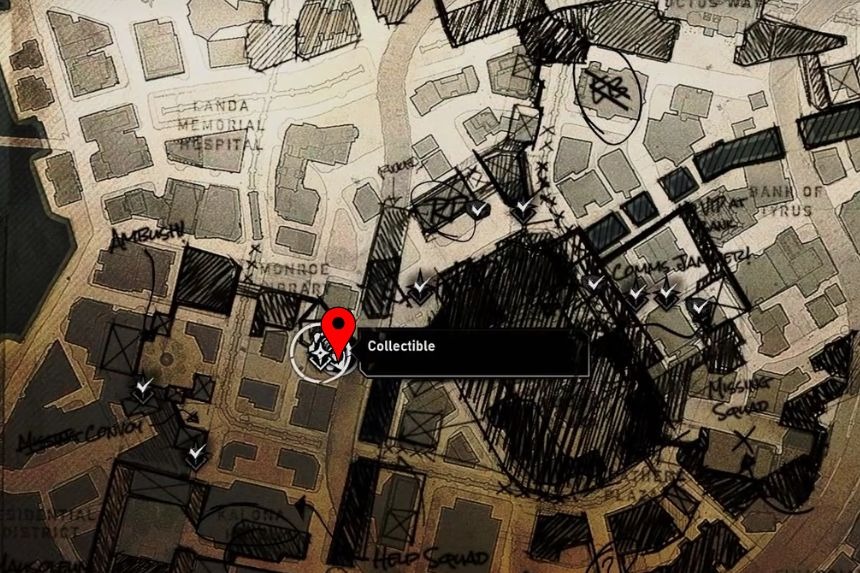
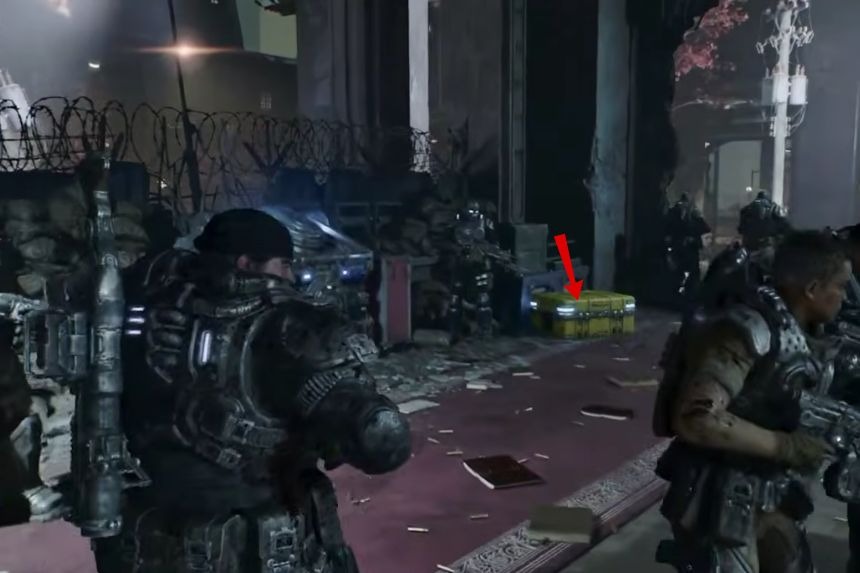
Meet Captain Grey and the surviving COGs in the library. During the briefing, you’ll find a tactical map table in the center of the room. The Hard Case is in the back-left corner.
Collectible – Captain Grey’s Field Journal
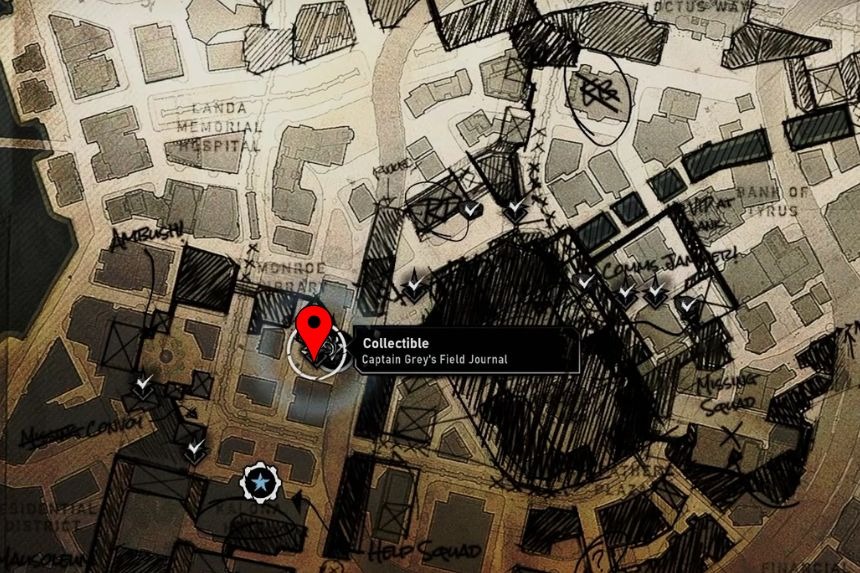
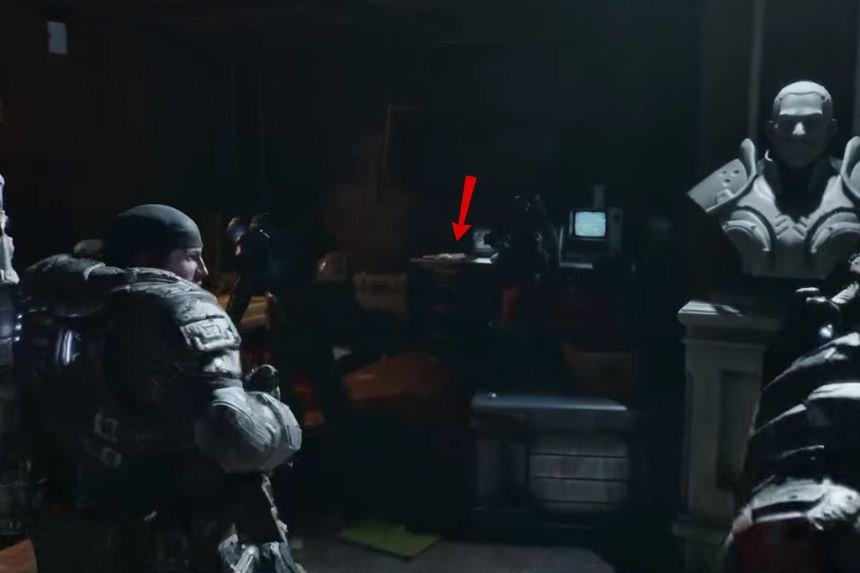
From the last Hard Case, turn right and enter the room at the back. The collectible is on a table.
Hard Case
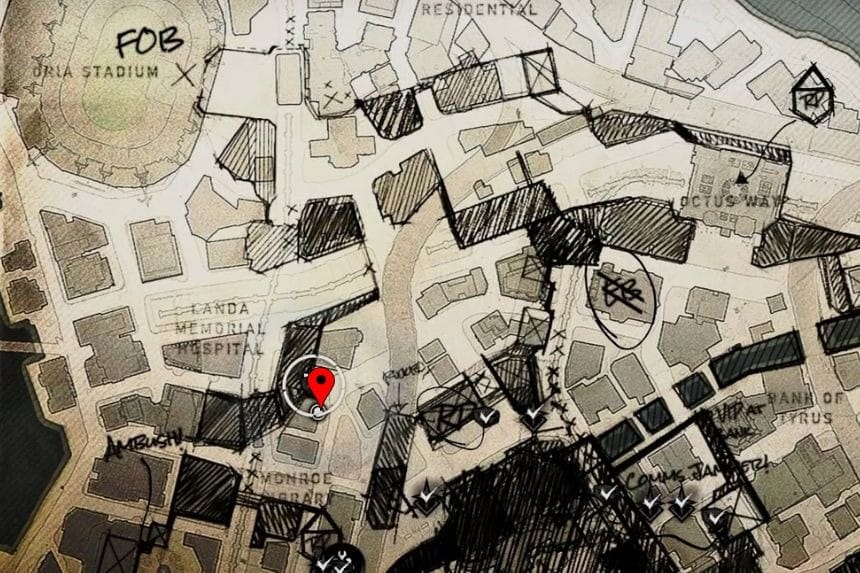
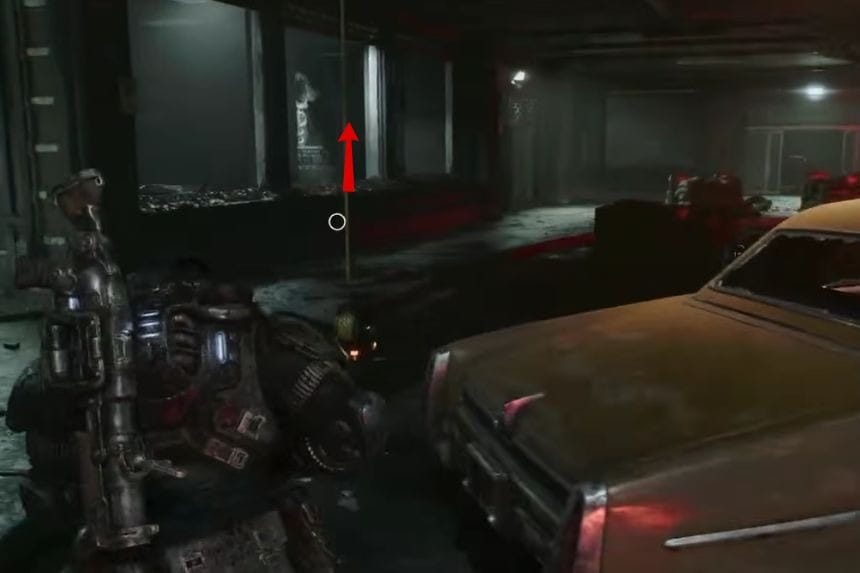
Go to Landa Memorial Hospital and deal with the Locust. Then check the roof above the entrance to find the Hard Case.
Collectible – Landa Memorial Hospital Evacuation Order
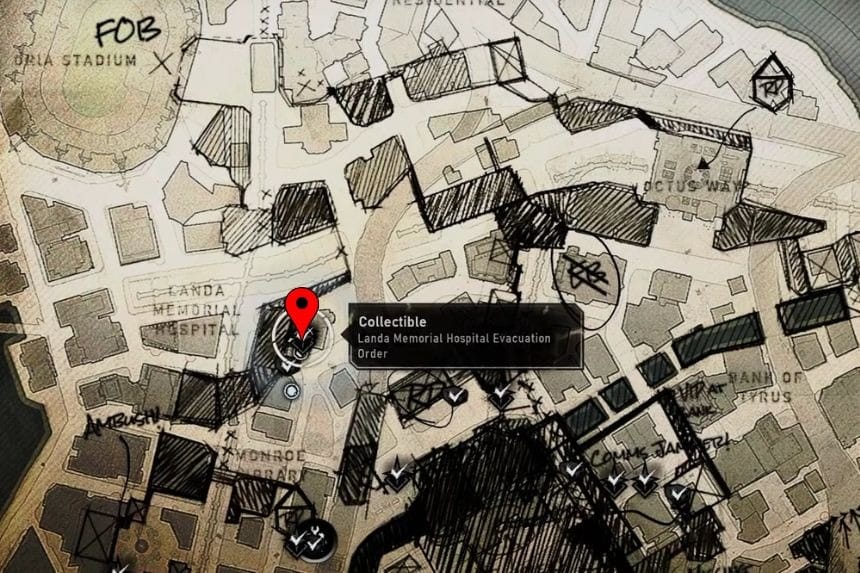
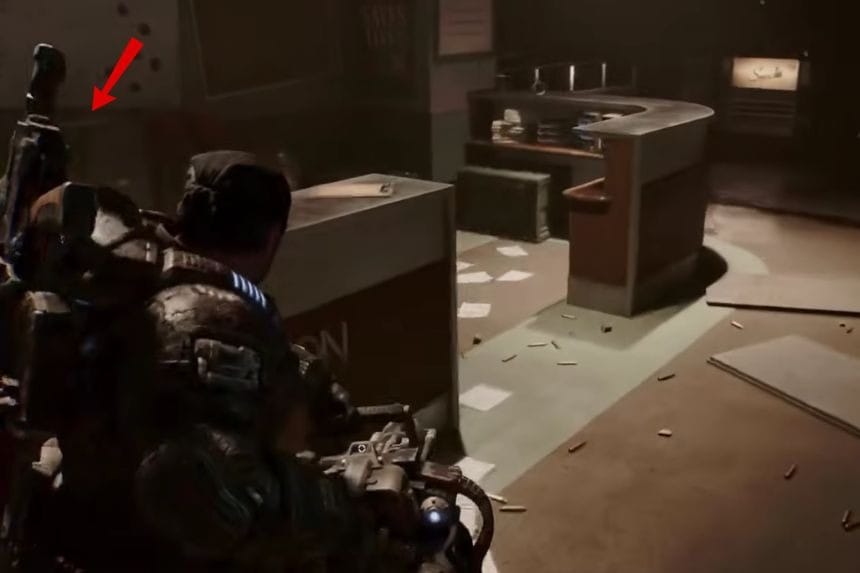
Enter the hospital through the ground-floor entrance and stay to the right. Behind the reception area, you’ll find the collectible on a filing cabinet.
Collectible – COG Tags of Specialist Radchel Carnahan
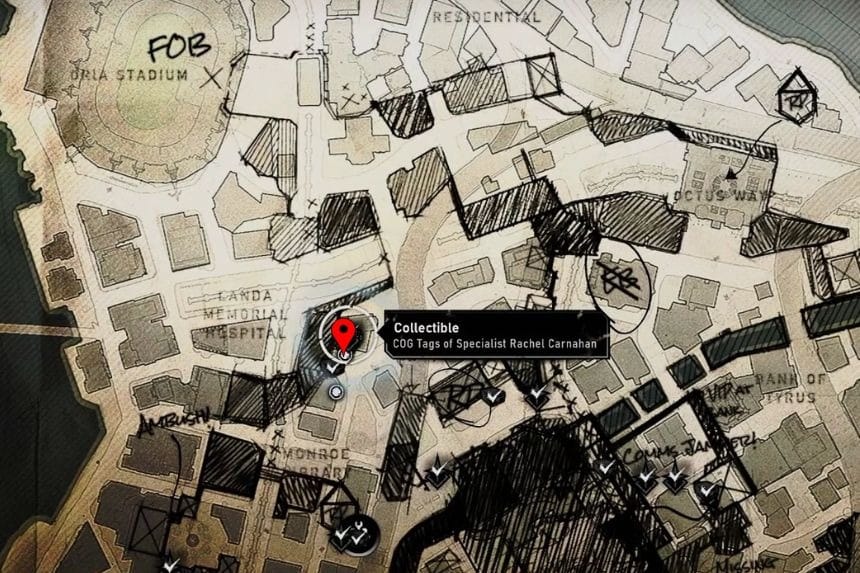
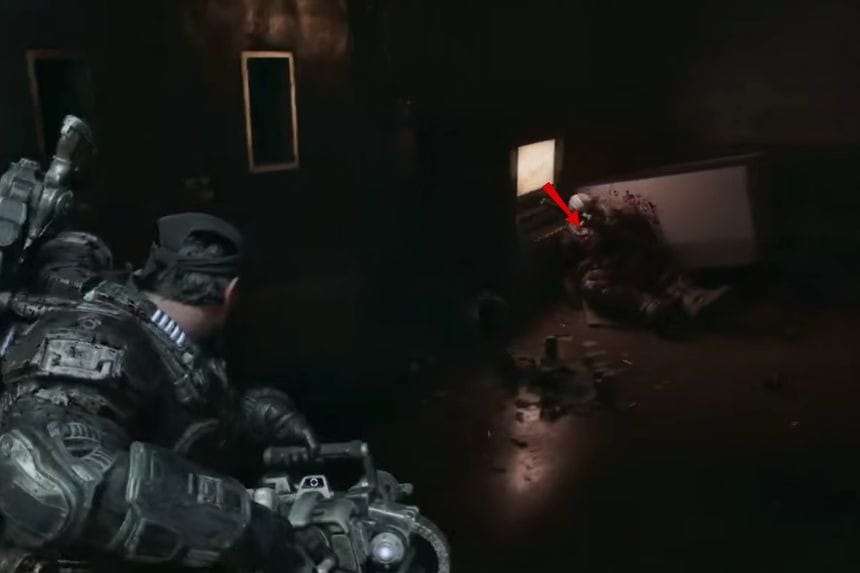
From the hospital entrance, turn left and head up the stairs. At the top, turn left to find a dead Gear soldier. Move over to the body and grab the collectible.
Hard Case
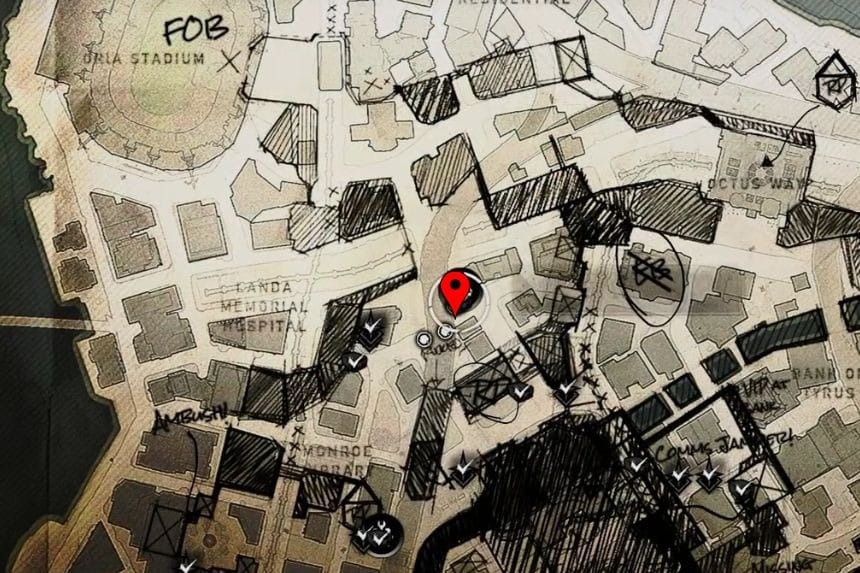
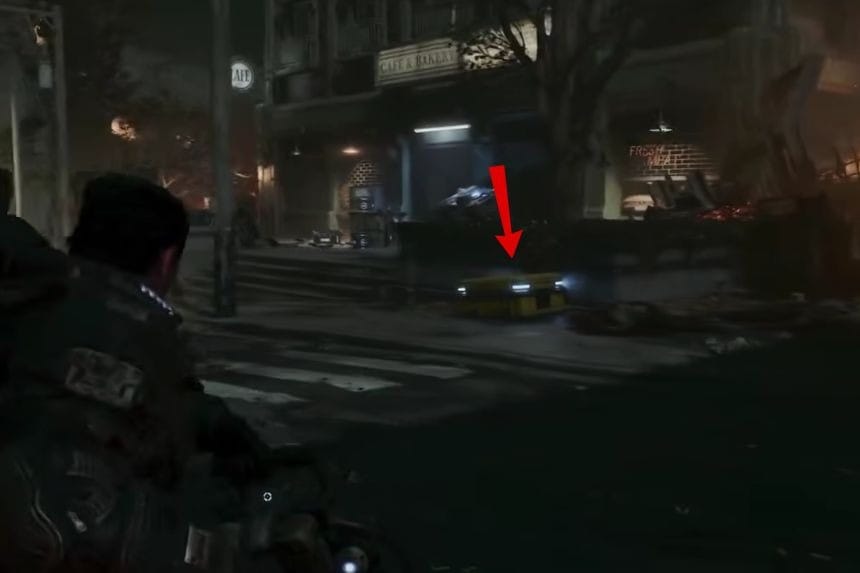
Go down the road to the right of the hospital. You’ll find a Supply Cache in front of some buildings on your left. In front of it, on the right side at the start of the road heading left, is the Hard Case.
Hard Case
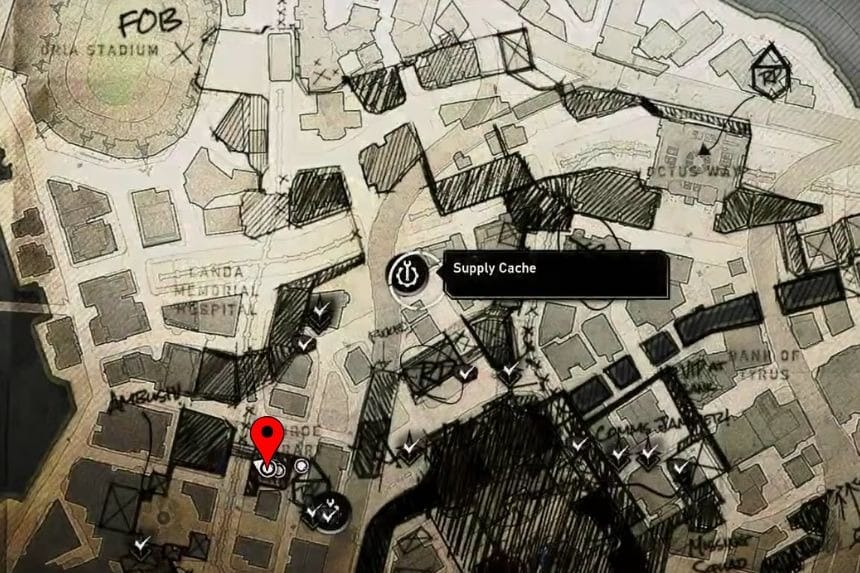
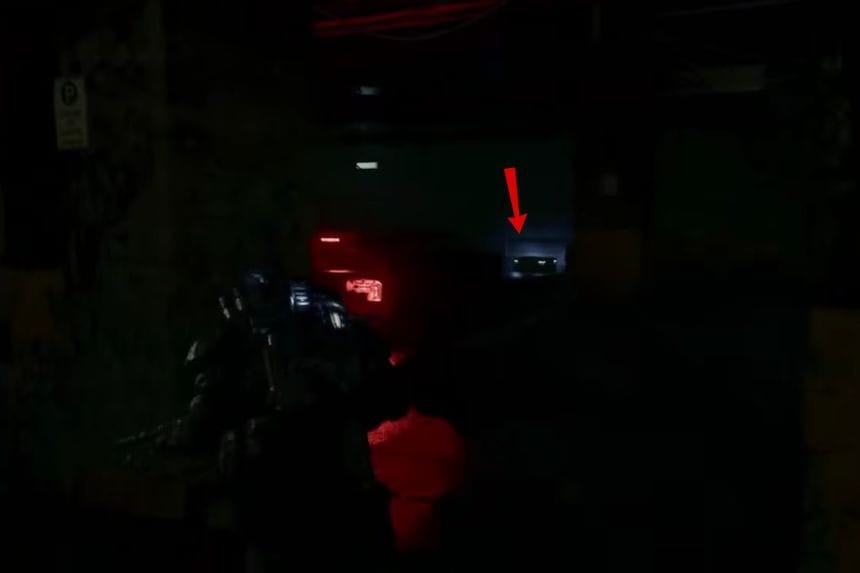
Head back toward the library. When you’re almost there, turn right to enter an underpass. On your left, you’ll see an entrance to an underground parking lot. Marcus will comment that there is something in the parking garage. Head inside to find the Hard Case against the back-left wall. Watch out for an ambush.
Hard Case
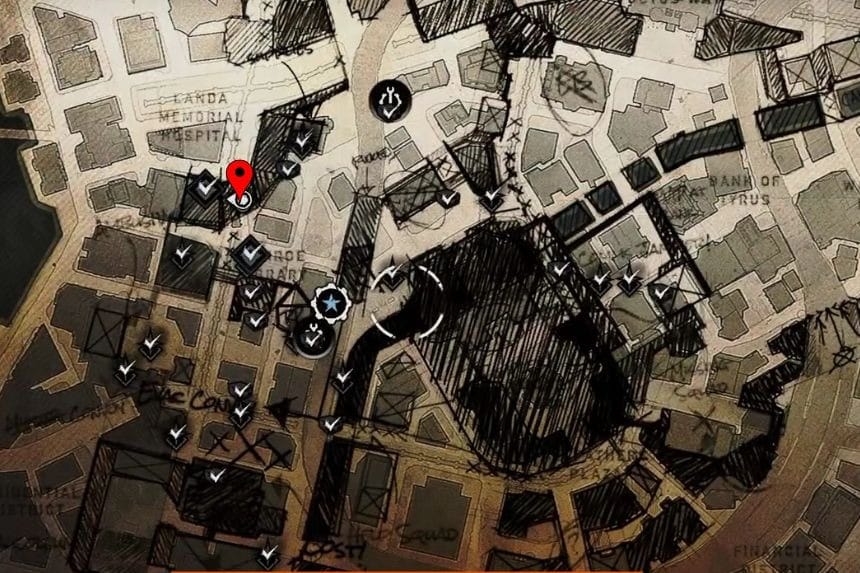
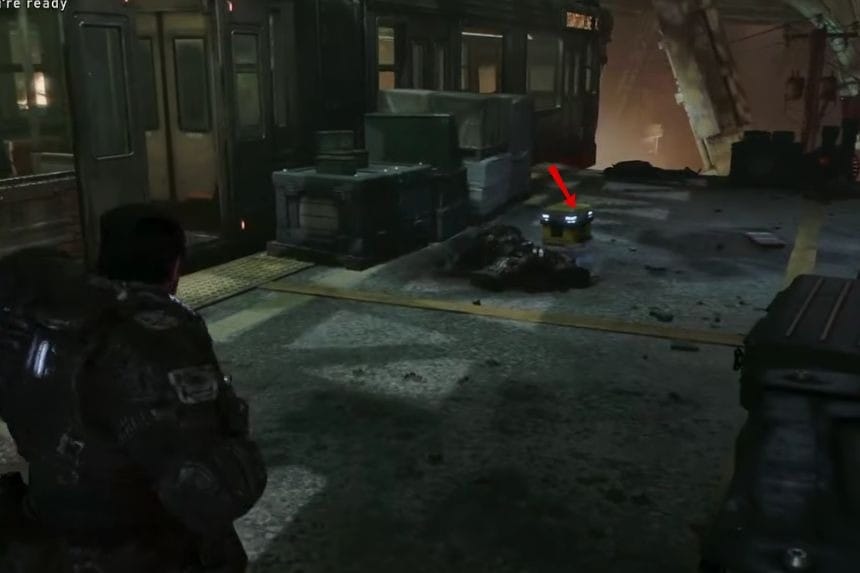
Go to the Kalona Police Department, which is to the right of the underground parking lot entrance. At the crossroads, look right for the stairs leading to a sky train platform. The Hard Case is on the platform.
Collectible – COG Tags of Private Terrance Sander
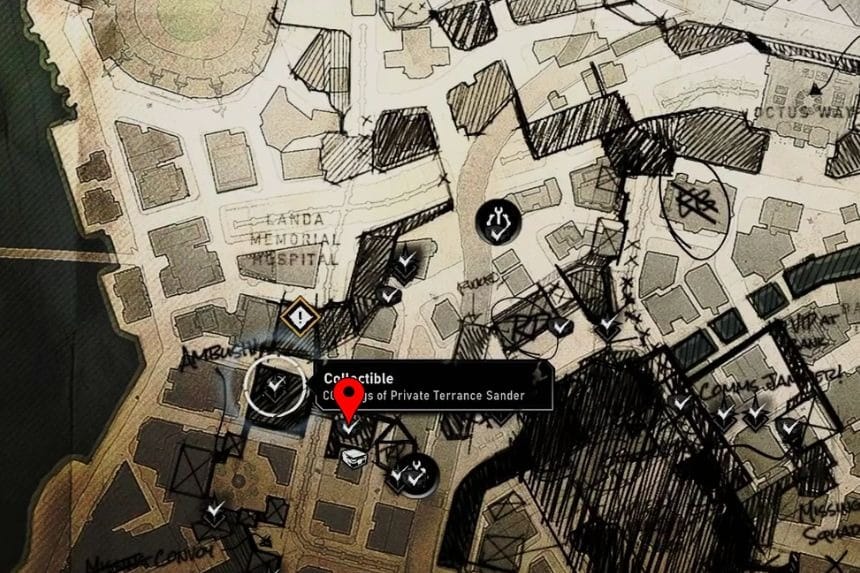
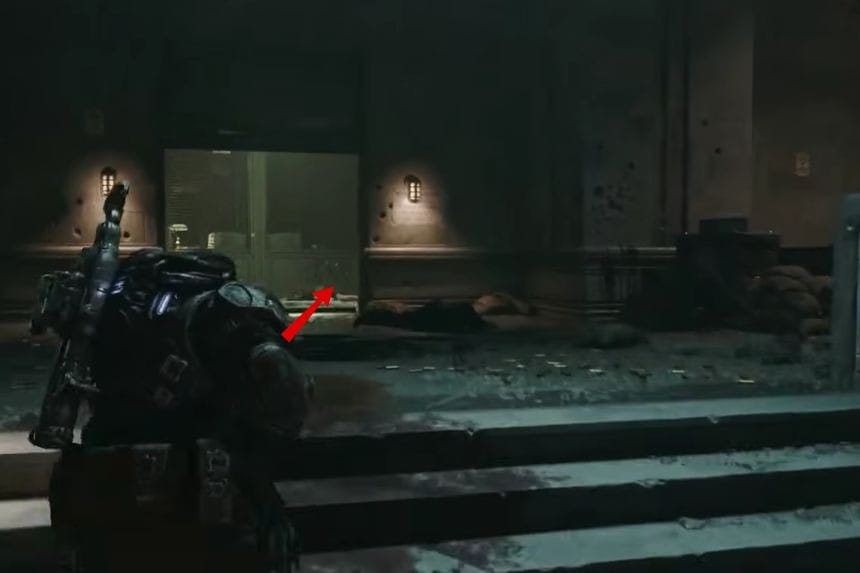
At the Kalona Police Department, go down the right side of the building. Enter the door on the left and look beside the body near the entrance. The collectible is on the floor.
Secondary Objective – Weak Signal
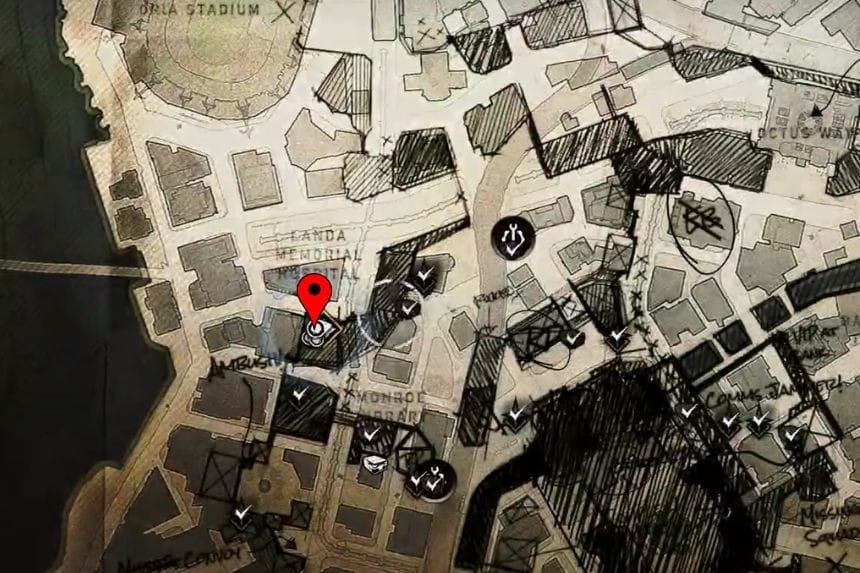
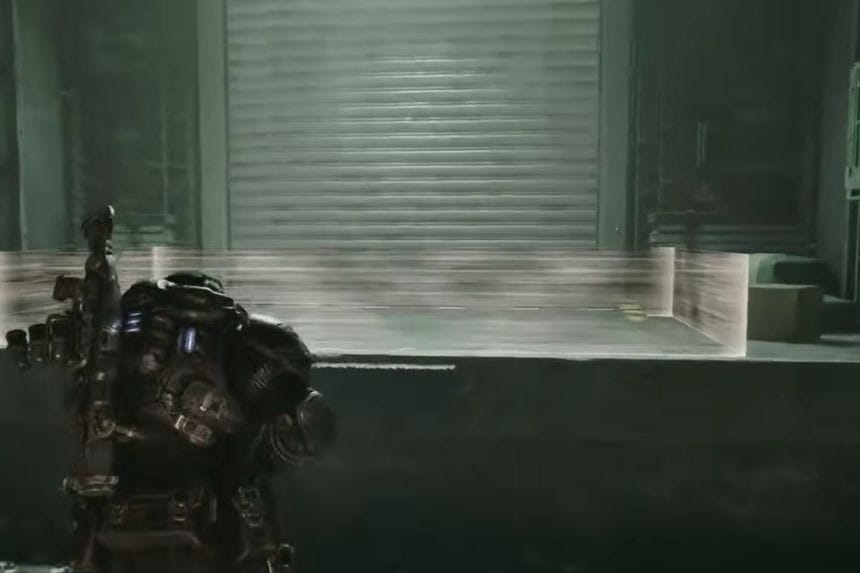
Across from the police station, on the other side of the road, look for a loading bay. Go to the back and check the right side to start the secondary objective. Defeat all the Locust that spawn to complete it.
Hard Case
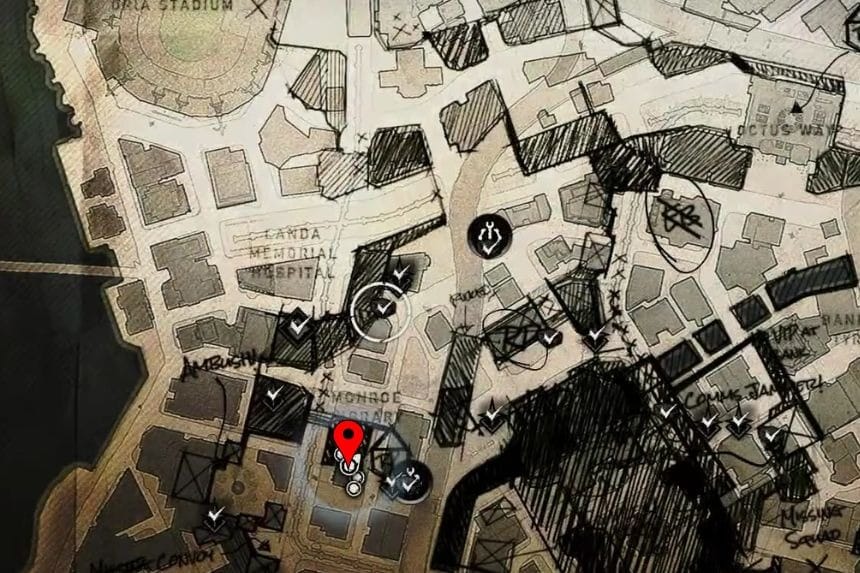
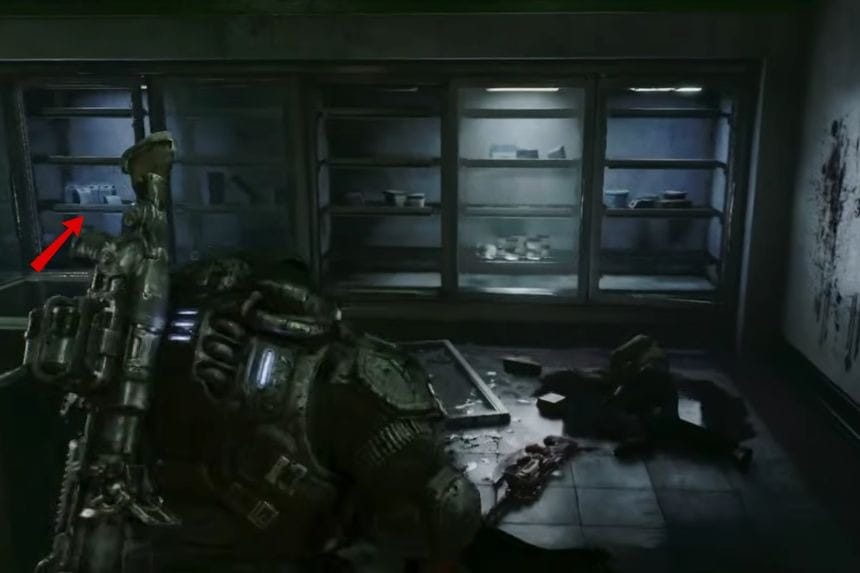
If you’re at the top of the library steps, enter the supermarket with the yellow sign and green lettering. In the back room, where you found a collectable in Act 2, you’ll find a Hard Case guarded by a Ticker.
Collectible – COG Tags of Private Oded Bay
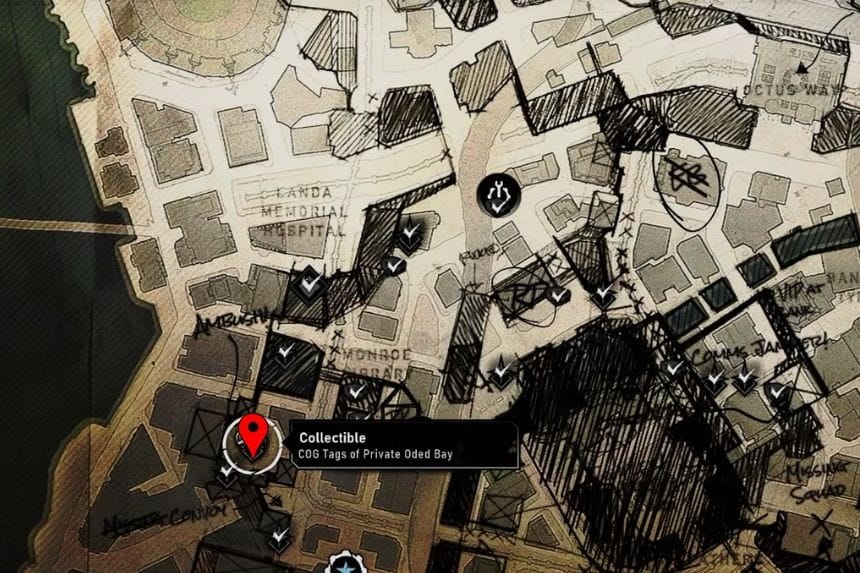
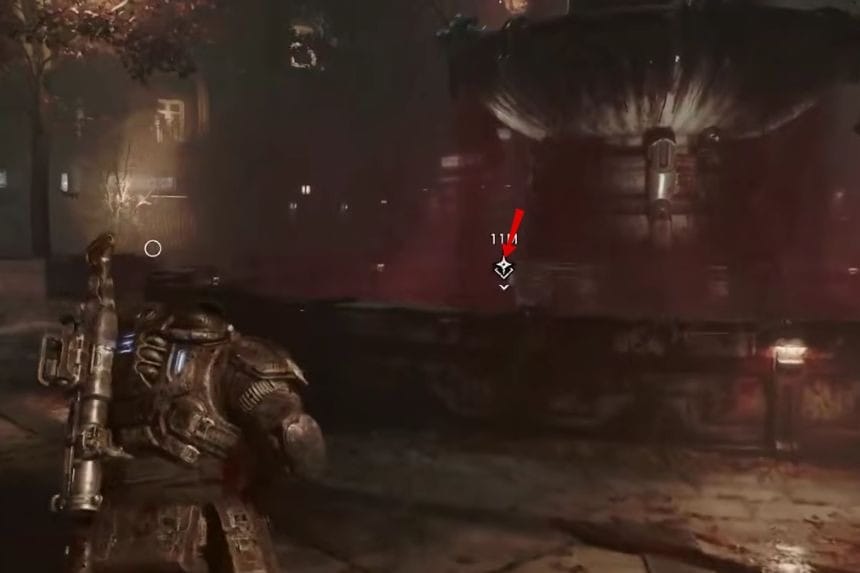
Return to the area with the bloody fountain behind the Kalona Police Department. Jump into the fountain to find the collectible.
Hard Case
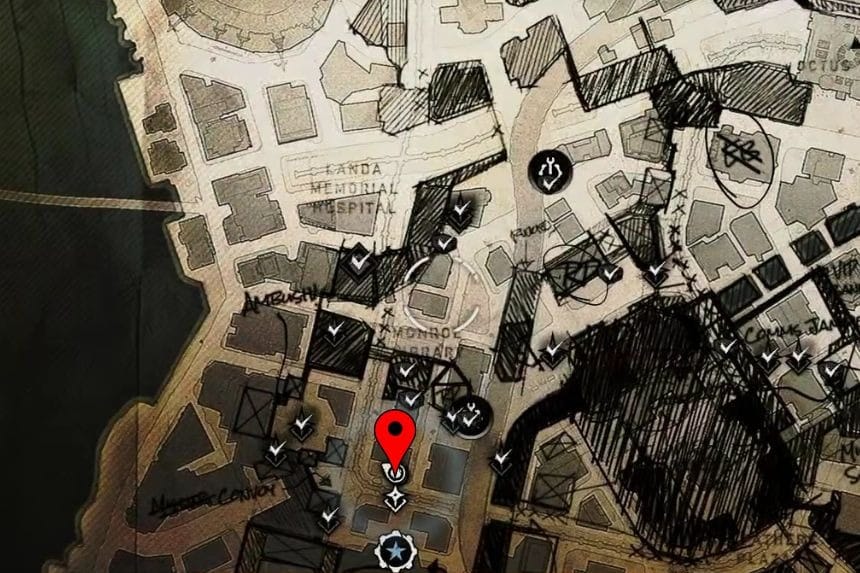
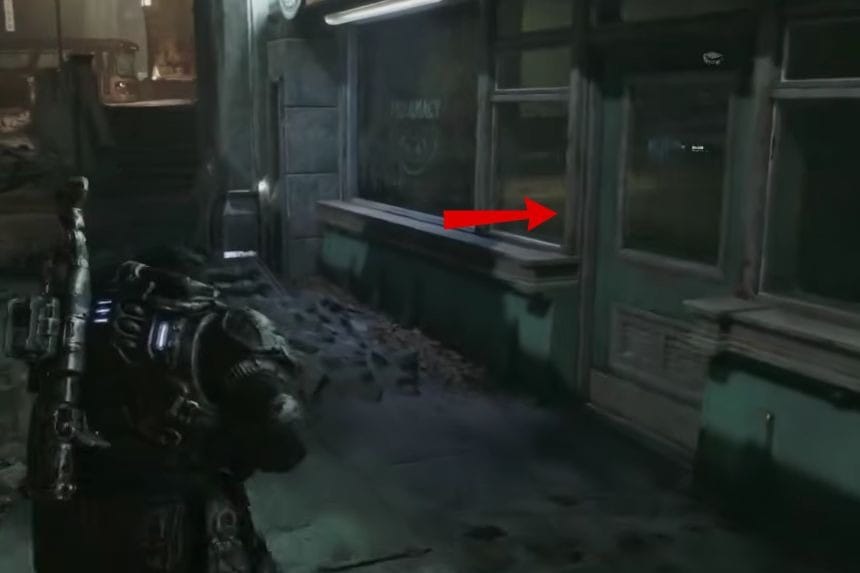
Enter the pharmacy building on the corner. You’ll have to shoot the windows to get inside. It is close to the front of the Kalona Hotel.
Collectible – COG Tags of Specialist Bernard Havelock
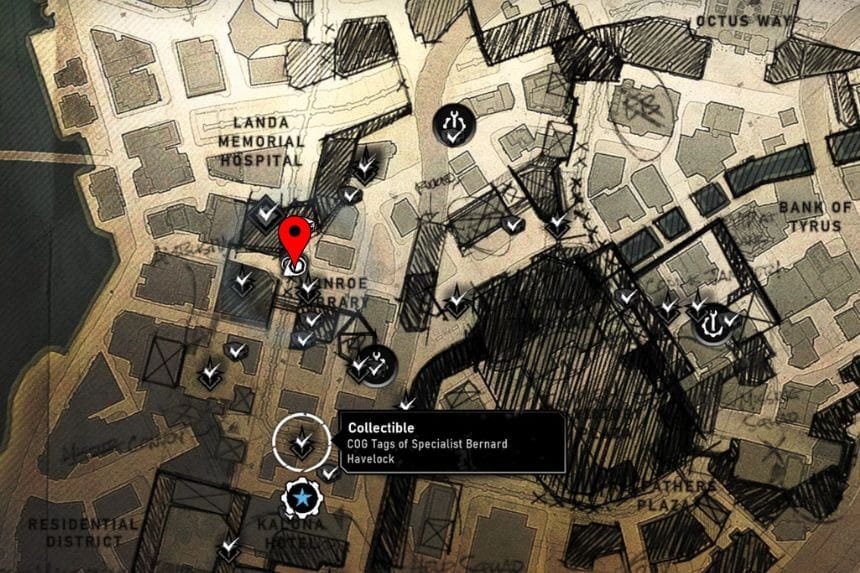
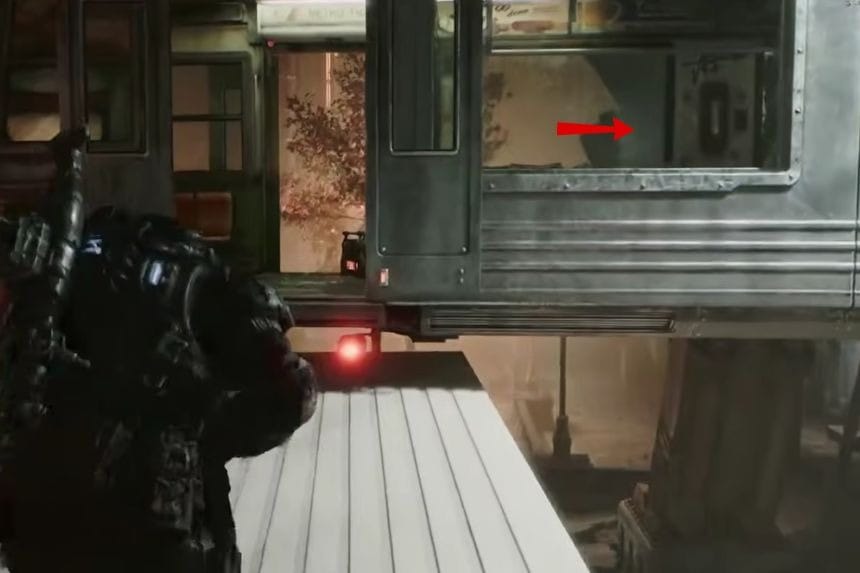
Go to the front of the Library area, toward the river. The collectible is in front of a set of four park benches.
Collectible – Locust Pistol Ammunition

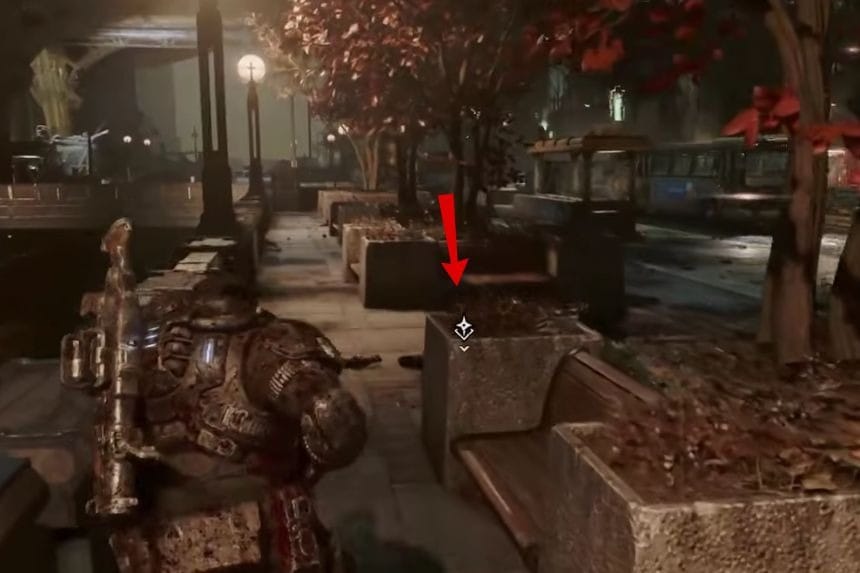
At the front of the Library and apartment building area, toward the river, look in front of the four park benches for the collectible.
Hard Case
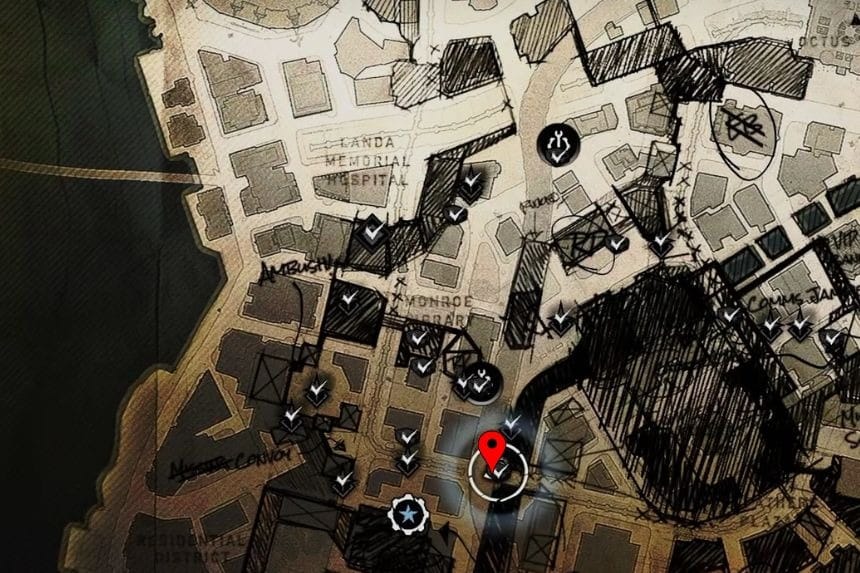
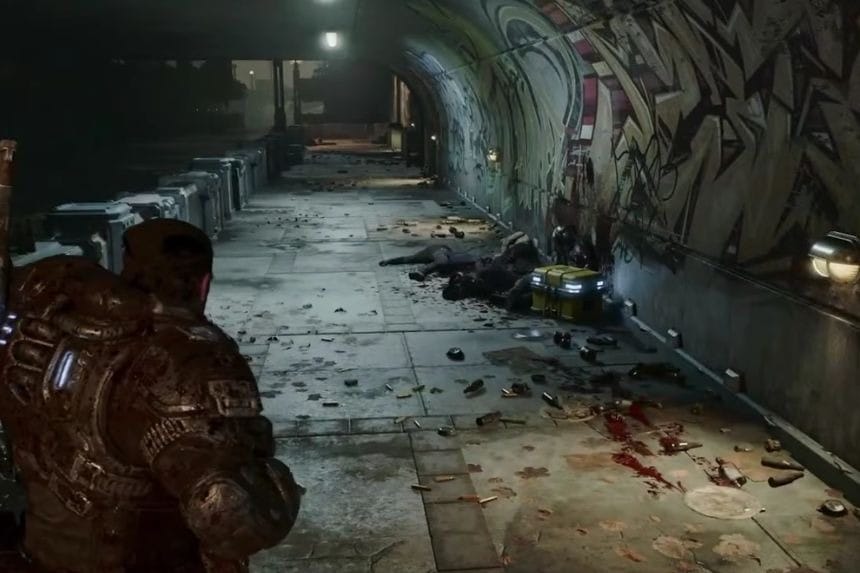
From the previous collectable, look for the Gears fighting Locust near the roadblock. Take the stairs down to the underpass on their left. The Hard Case is underneath the roadblock.
Collectible – COG Tags of Private First Class John Carnahan
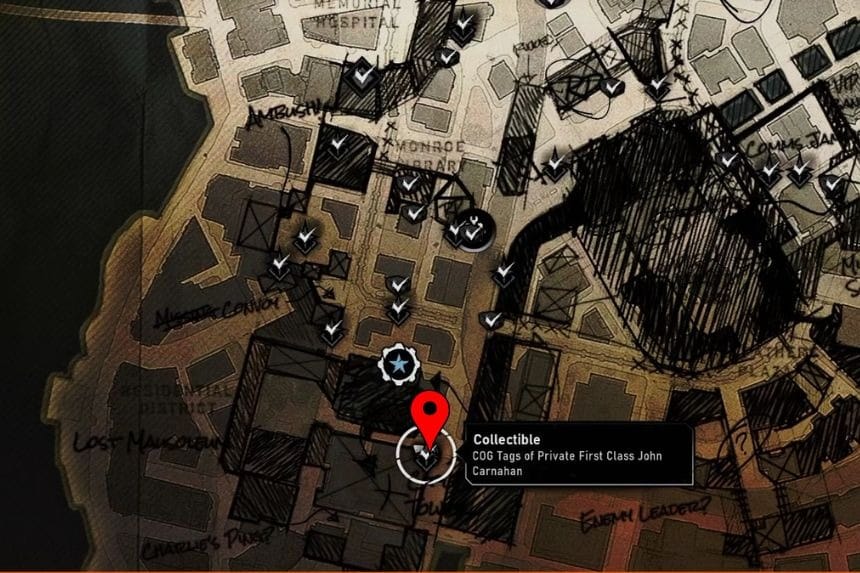
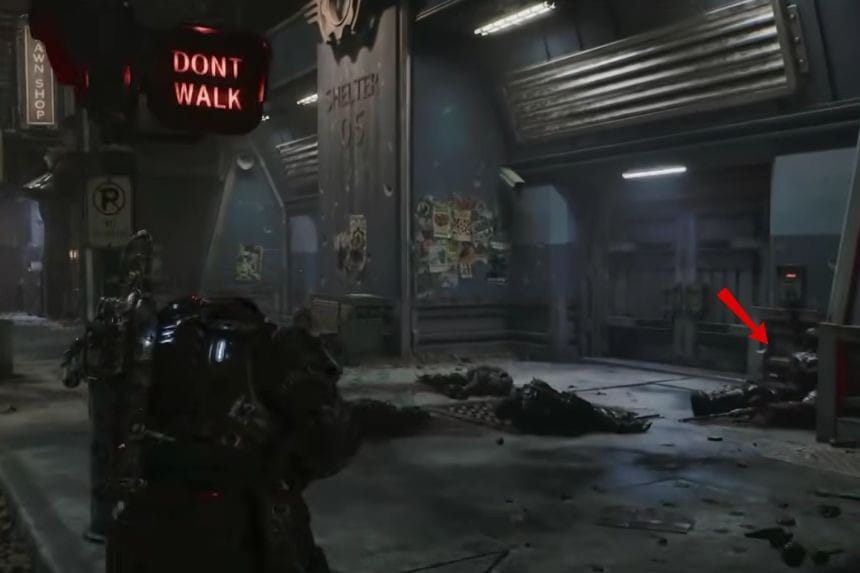
Stay on the same main road and continue all the way to the end. On the right is a closed-off shelter with a blue front and a COG emblem. A dead Gear soldier is beside the entrance. Grab his tags.
Hard Case
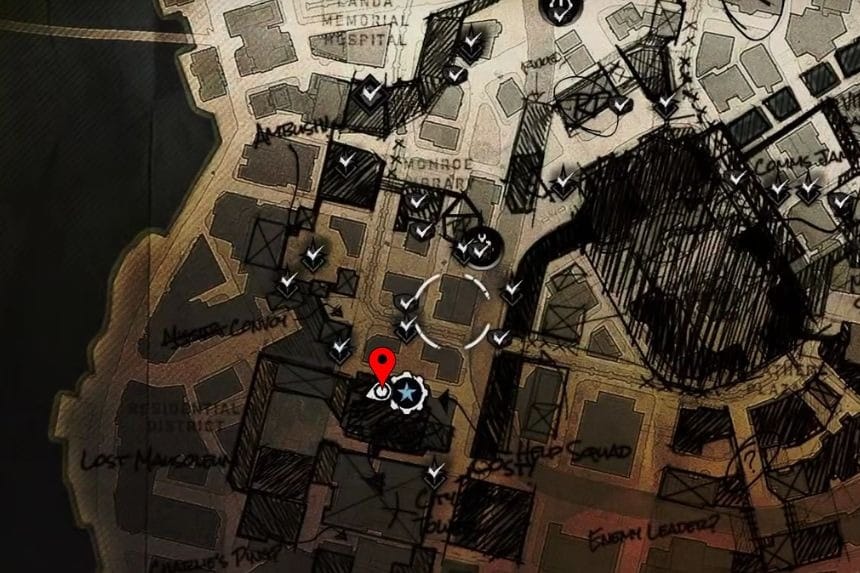
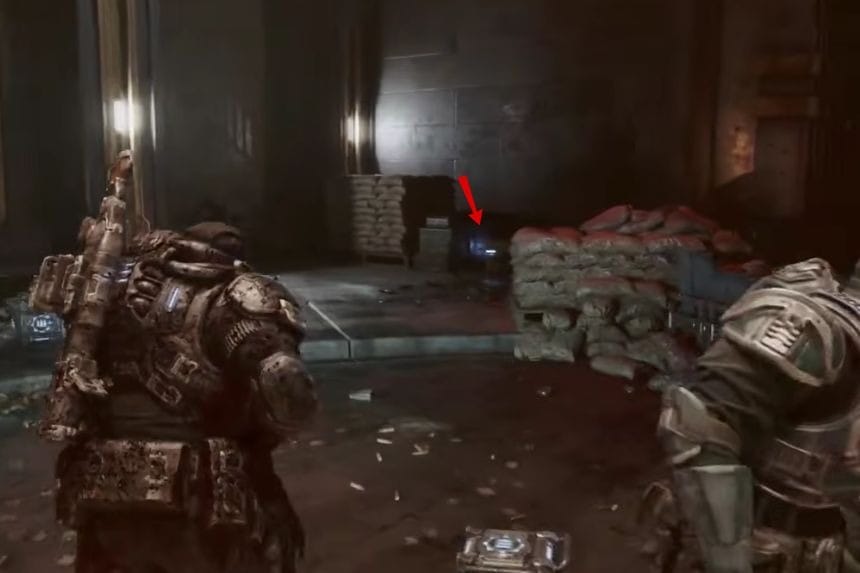
From the previous collectible, look for the Gears fighting Locust near the roadblock. Take the stairs down to the underpass on their left. The Hard Case is underneath the roadblock.
Secondary Objective – Lost in the Park
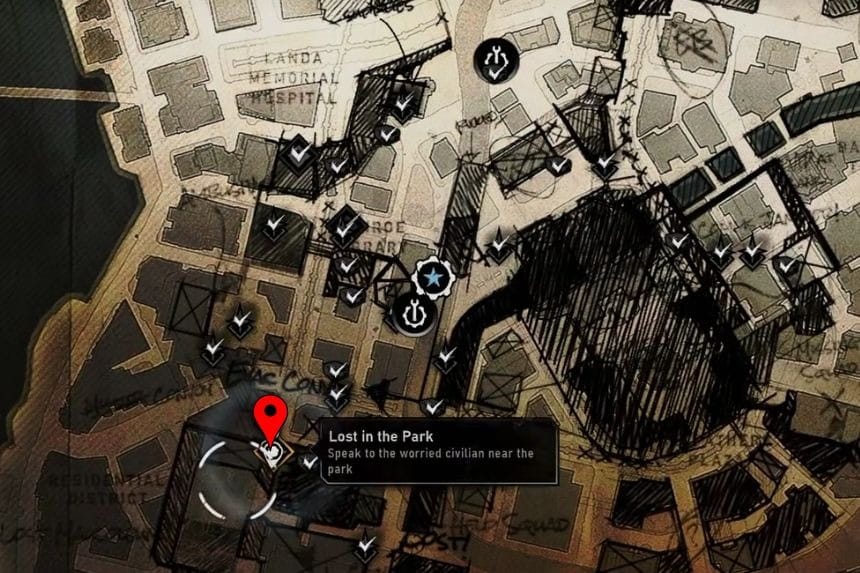
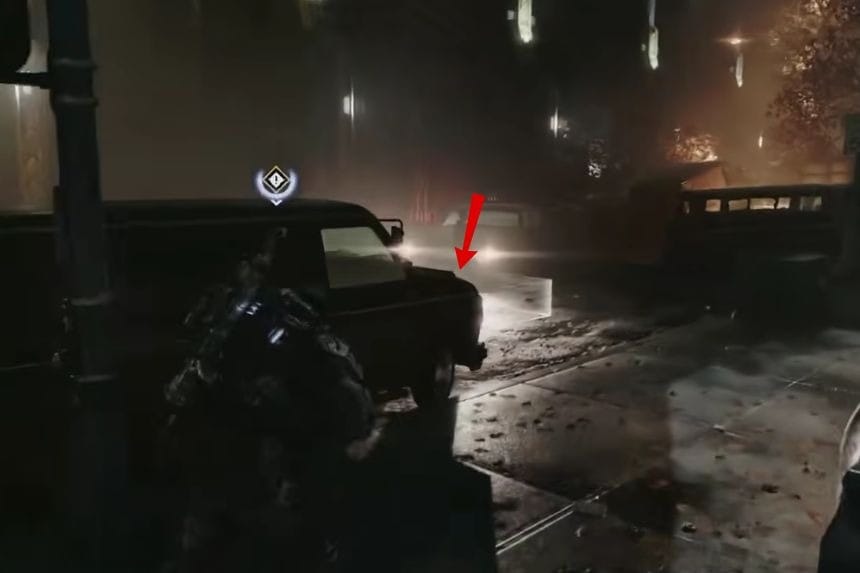
After helping the Gears load the convoy and fighting the Spore Matrons for the first time, look to the right of the Kalona Hotel. The secondary objective is in the corner on the left. Go through the doors on the right to enter the park and defeat the Locust. You’ll also need to find a civilian hiding under the steps near the park entrance.
Collectible – Heavy Locust Helmet
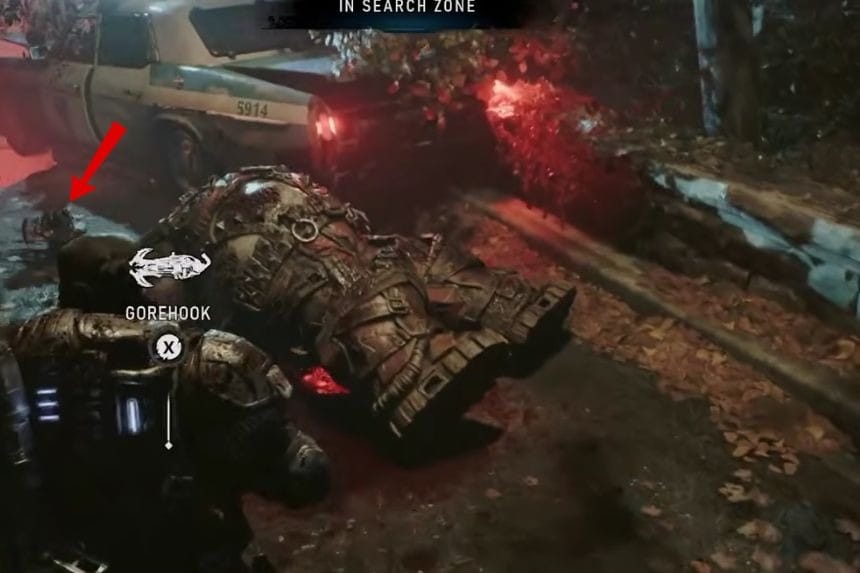
During the ‘Lost in the Park’ secondary objective, go through the gate on the left once the area is safe. Follow the road and turn right. Near a large sinkhole, beside a police car and a dead Boomer, you’ll find the collectible.
Secondary Objective – Rooftop Mayday
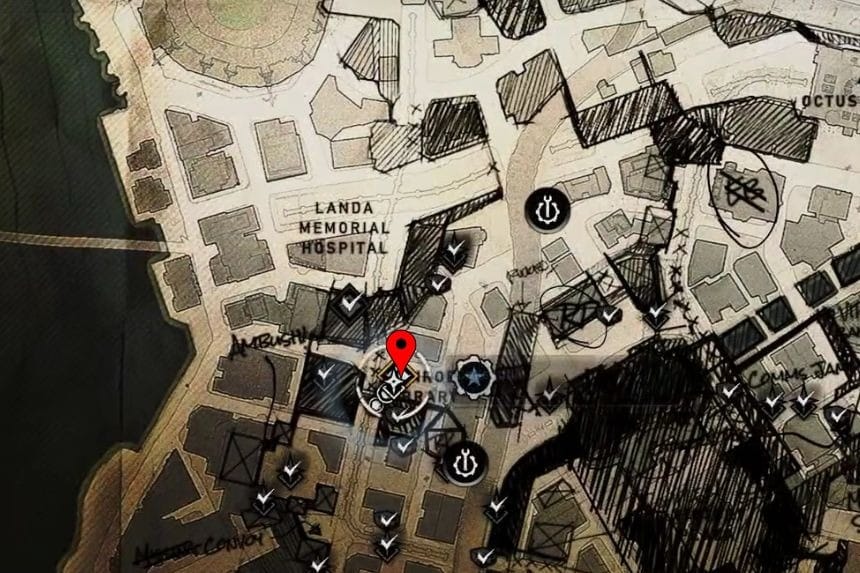
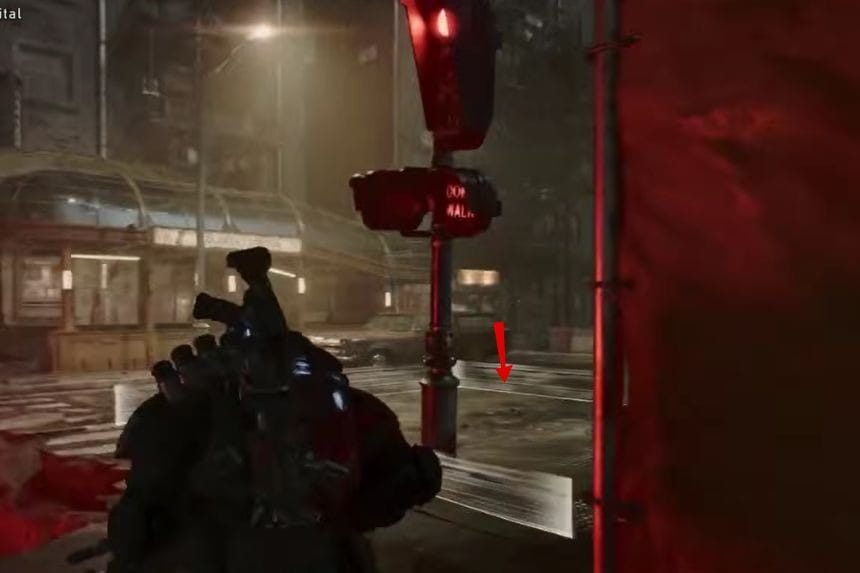
After helping the Gears load the convoy and fighting the Spore Matrons for the first time, look to the right of the Kalona Hotel. The secondary objective is in the corner on the left. Go through the doors on the right to enter the park and defeat the Locust. You’ll also need to find a civilian hiding under the steps near the park entrance.
Collectible – Blade-Like Projectile
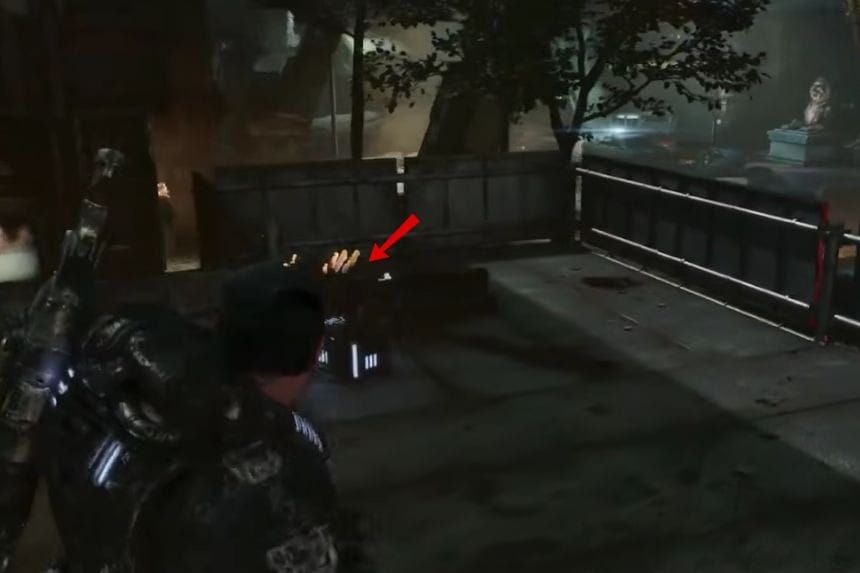
During the ‘Lost in the Park’ secondary objective, go through the gate on the left once the area is safe. Follow the road and turn right. Near a large sinkhole, beside a police car and a dead Boomer, you’ll find the collectible.
Act 3, Chapter 4 – The Convoy
Collectible – COG Tags of Private Rudy Bartholomew
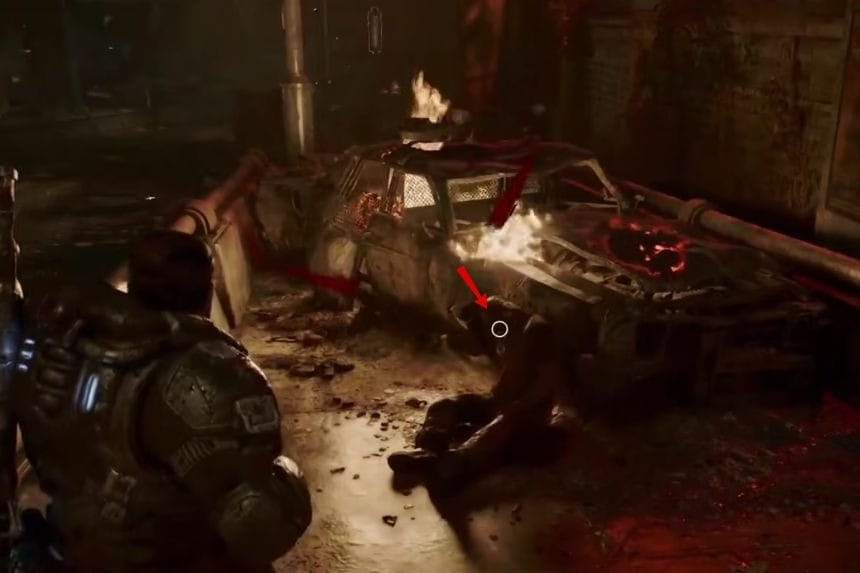
Near the start of this chapter, you’ll go up the road. On your left, you’ll see a burnt-out car that is still on fire, with a dead soldier against it over the barricade.
Hard Case
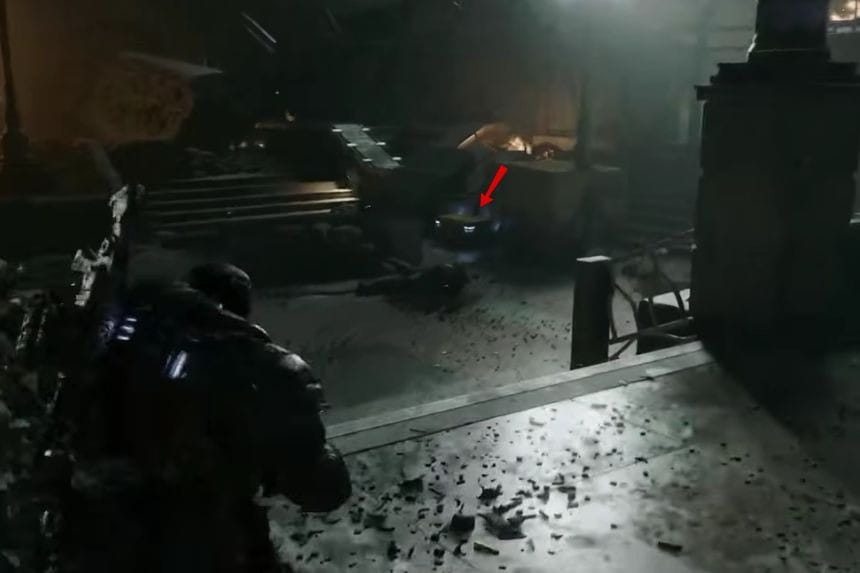
At the top of the road, after the last collectible, you’ll find a small courtyard on your left. Take out any Locust and go down the steps to the far-right corner at the back. The Hard Case is there.
Hard Case
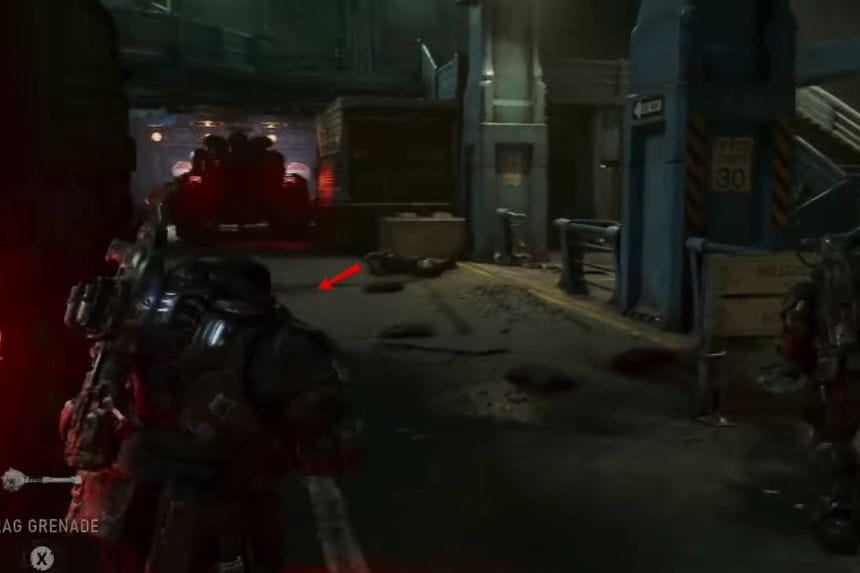
You’ll go up a floor on the bridge and make your way toward the control room. Near the control room, cross the bridge from left to right. The Hard Case is underneath a military truck.
Hard Case

When you leave the control room, you’ll fight some Locust on the bridge. You’ll then be told to drop through a hole in the floor to the lower level. Before doing that, head to the end of the bridge. The Hard Case is on the left, in front of a barricade.
Collectible – Locust Crest
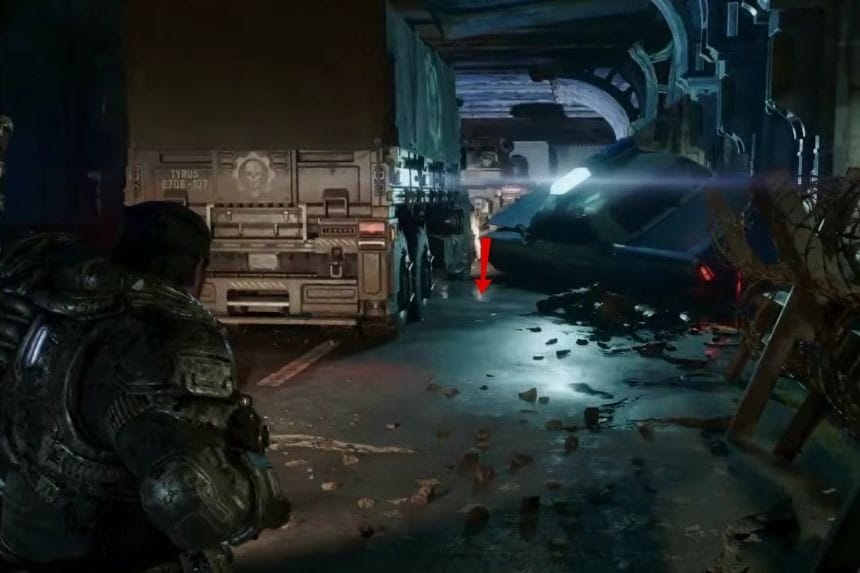
Once you’ve dropped down and dealt with the enemies, the convoy will start moving again. Stay on the right side and you’ll reach an overturned police car with the collectible in front of it.
Hard Case
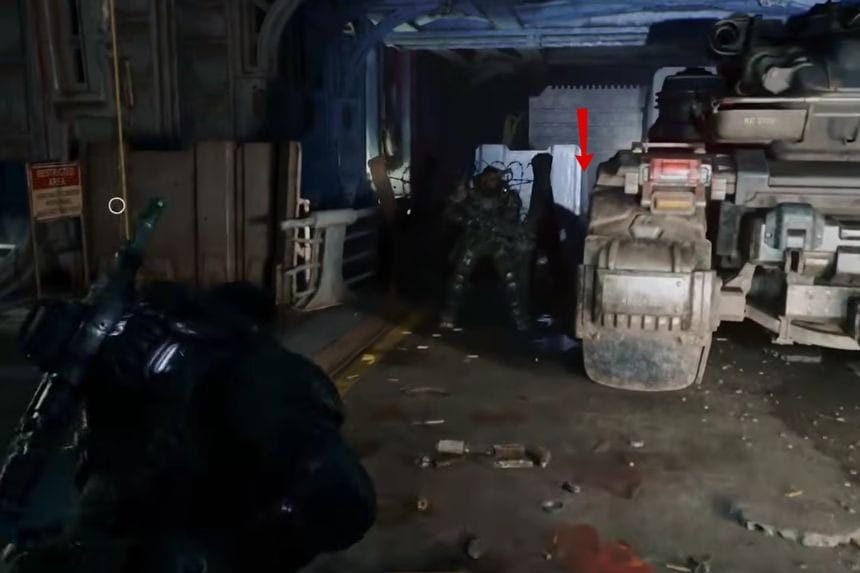
You’ll need to use a rope to climb up. Before doing that, head to the right of the ropes and move behind the vehicles. The Hard Case is on some crates on the left side of the road.
Hard Case
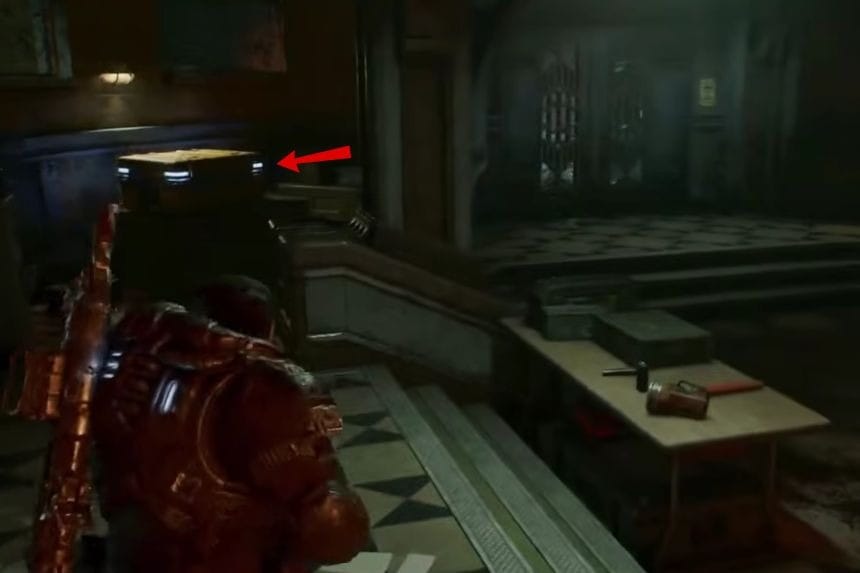
Once you return to the floor above, climb onto the crate and go through the window into the control room. As you enter, look to the left in the main area to find the Hard Case.
Collectible – COG Tags of Private Rudy Bartholomew
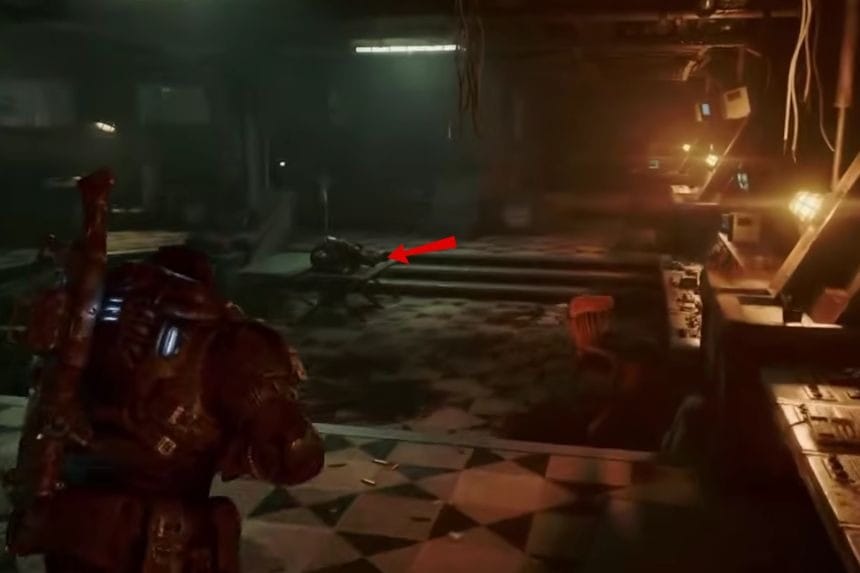
From the Hard Case, head to the right. In the center, in front of the console you need to use, you’ll find a dead COG soldier. Grab his tags.
Act 3, Chapter 5 – Desperate Times
Collectible – A Bottle of Iron Coast Beer
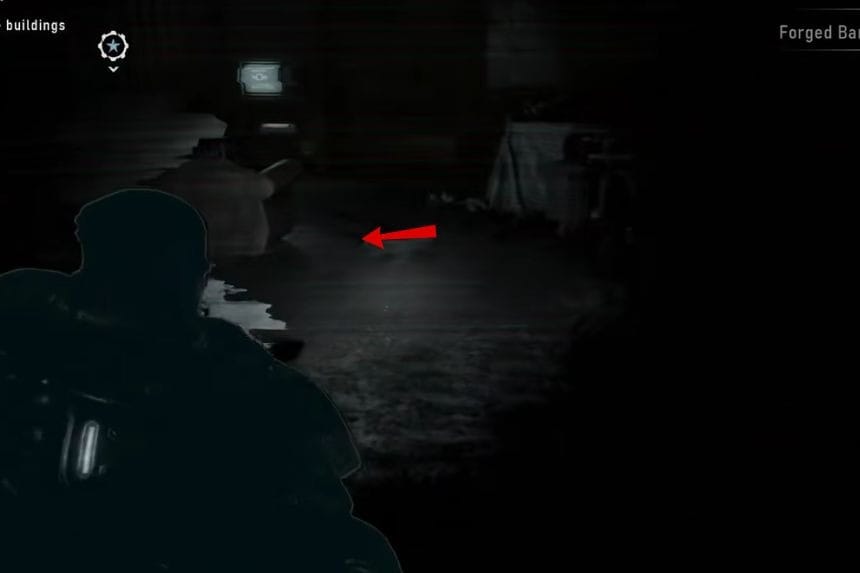
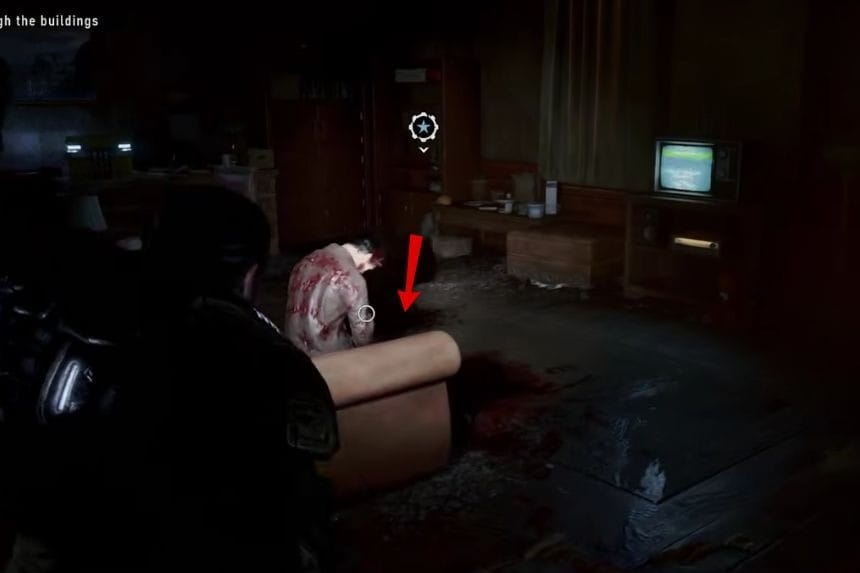
At the start of the chapter, you’ll be on the roof fighting Locust. Once they’re defeated, head inside. You’ll enter a room where Marcus tries to talk to someone sitting on a couch. Go over to him to find the collectible.
Hard Case
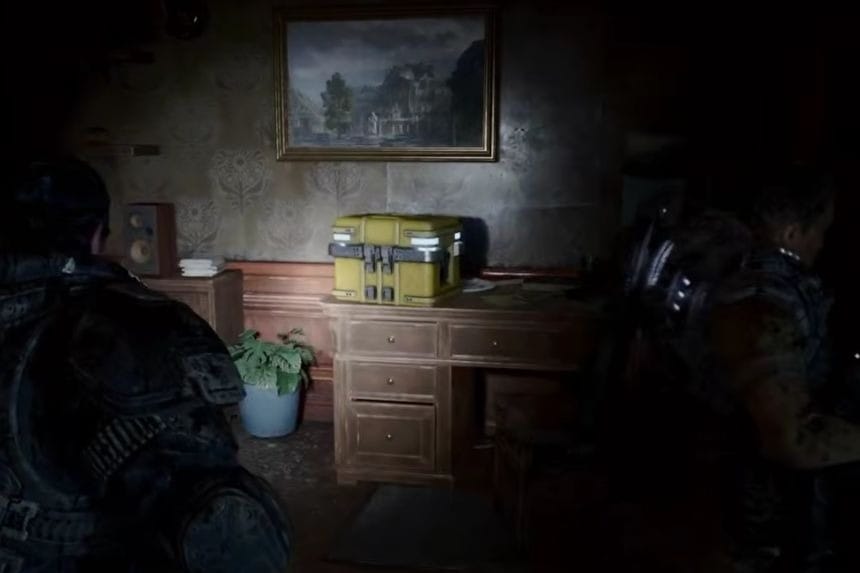
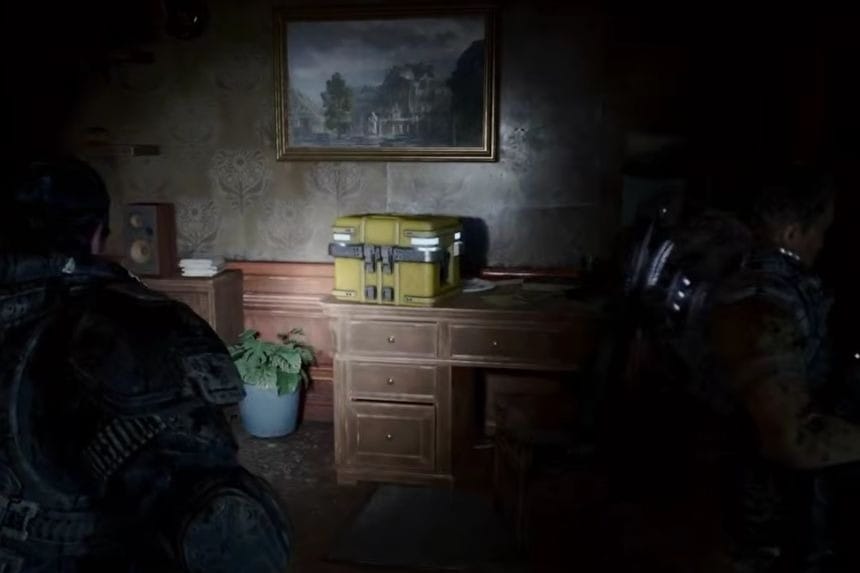
Immediately after the collectible, look to the right to find the Hard Case.
Hard Case
You’ll end up back outside and have more Locust to fight. Once they’re dealt with, you’ll be told to head back inside. Instead, look left and climb up the small ledge to the next level. The Hard Case is on the left against a chain-link fence.
Hard Case

Once you head back inside, you’ll deal with some Wretches. After they’re gone, look for a hole in the wall on the left and crawl through. The Hard Case is directly in front of you on a chest of drawers.
Collectible – Portrait of Jacob Monroe
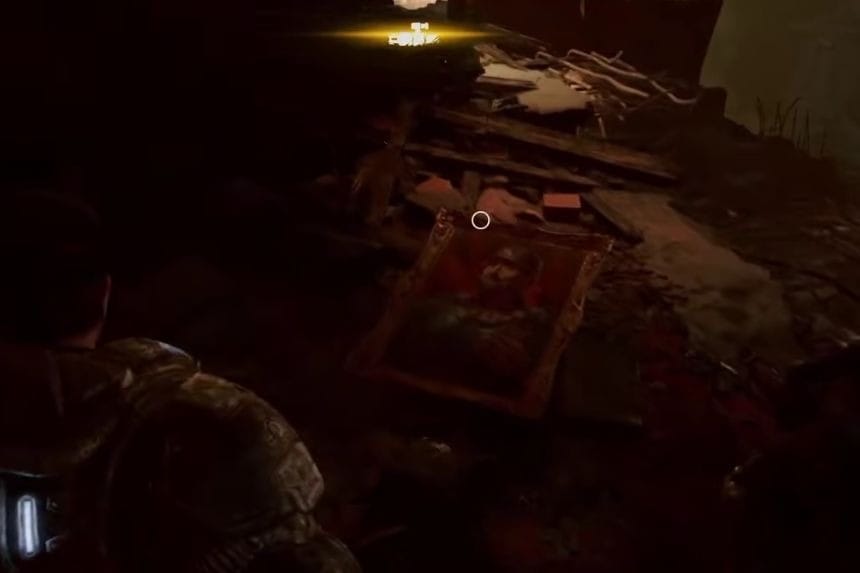
Immediately after the last Hard Case, look to your left to find the collectible on the ground.
Hard Case
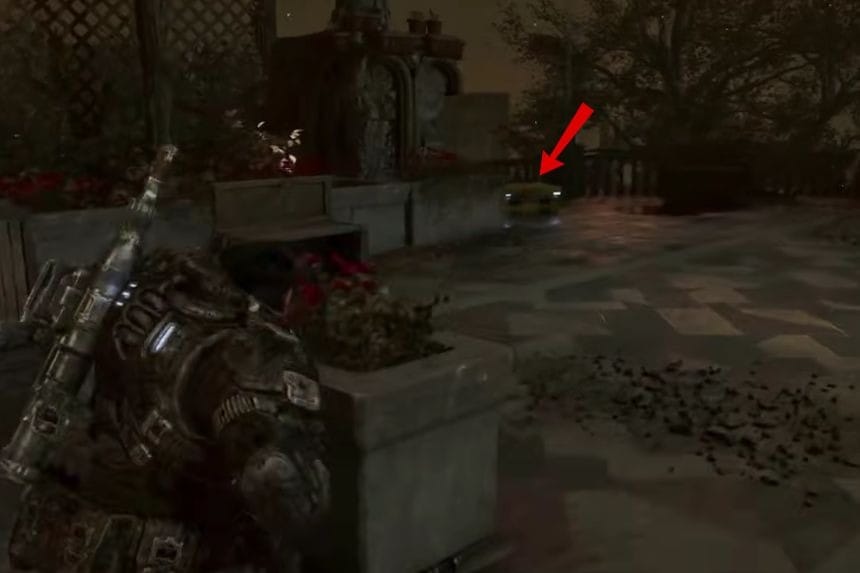
Continue until you reach a courtyard with a Reaver and several Locust. Once the area is clear, go around the left side of the courtyard. The Hard Case is beside a stone fence.
Collectible – Sanctum of the Fallen Memorial Ceremony Program
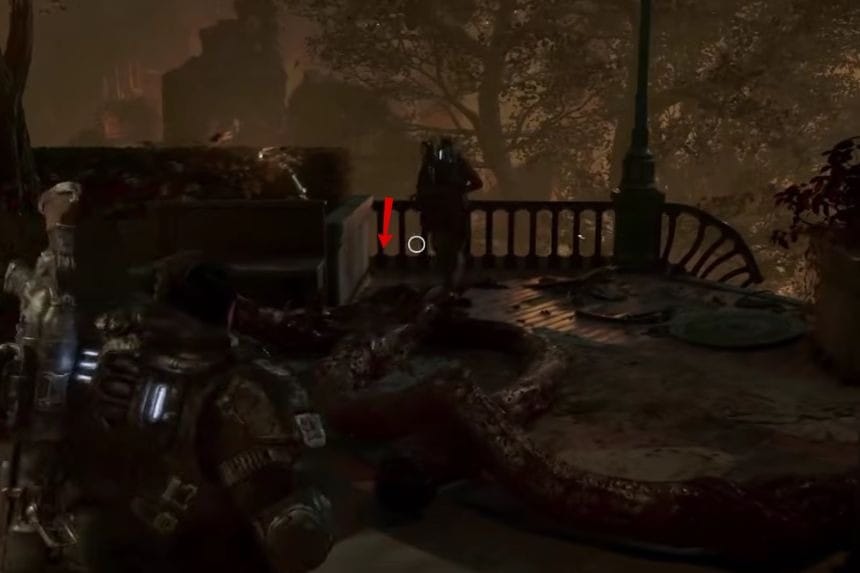
Return to where you entered the courtyard and stay to the right of the central stone barricade. Continue toward the edge of the courtyard to find the collectible on the floor next to a stone planter.
Hard Case

You’ll see a cutscene where the Locust with a Torque Bow appears. Continue forward and deal with the Tickers, then climb up the ledge. Before crossing the bridge on your left, look to the right to find the Hard Case.
Collectible – Locust Spiked Shoulder Pad
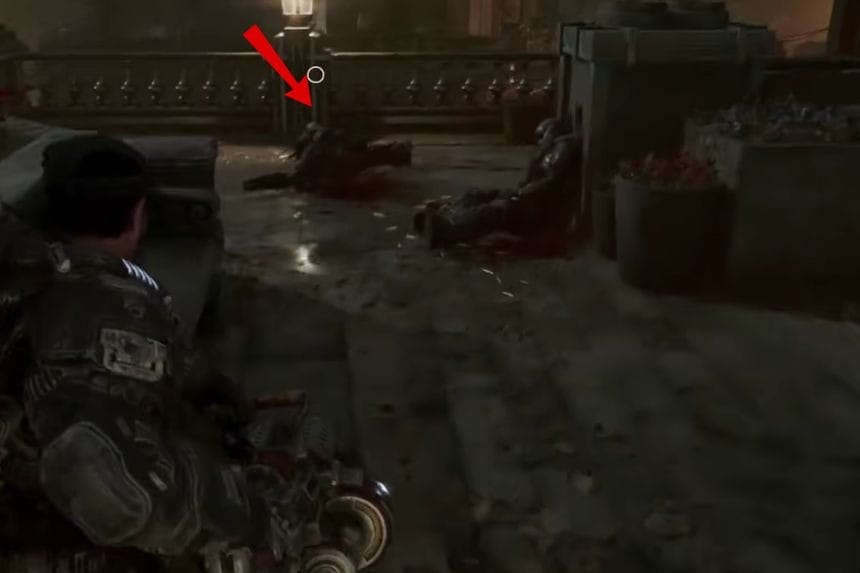
Cross the bridge and go to the right of the tree in the middle. The collectible is on the floor near the balcony.
Collectible – Explosive Bolt

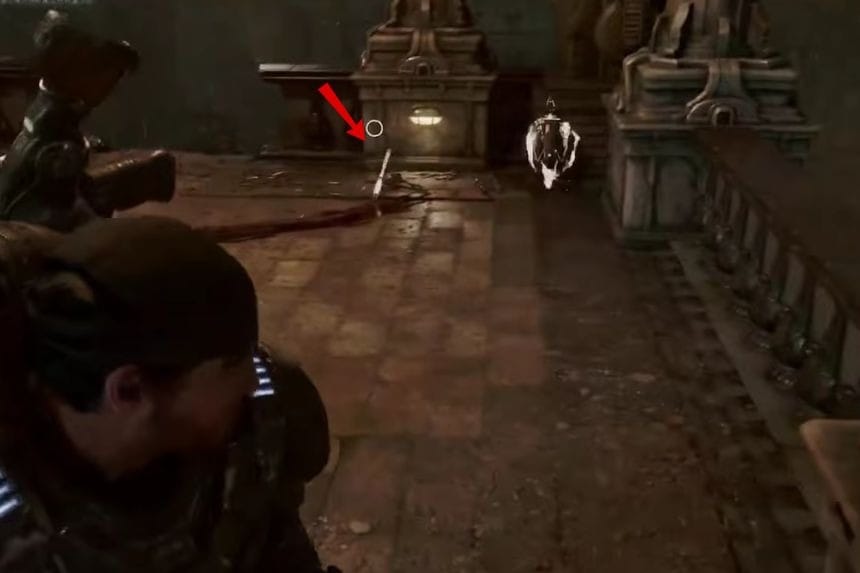
After clearing the enemies in the clock tower, you’ll need to enter it to reach street level. Instead, go to the top of the tower and pick up the collectible from the floor where the Torque Bows were.
Act 3, Chapter 6 – Desperate Measures
Hard Case
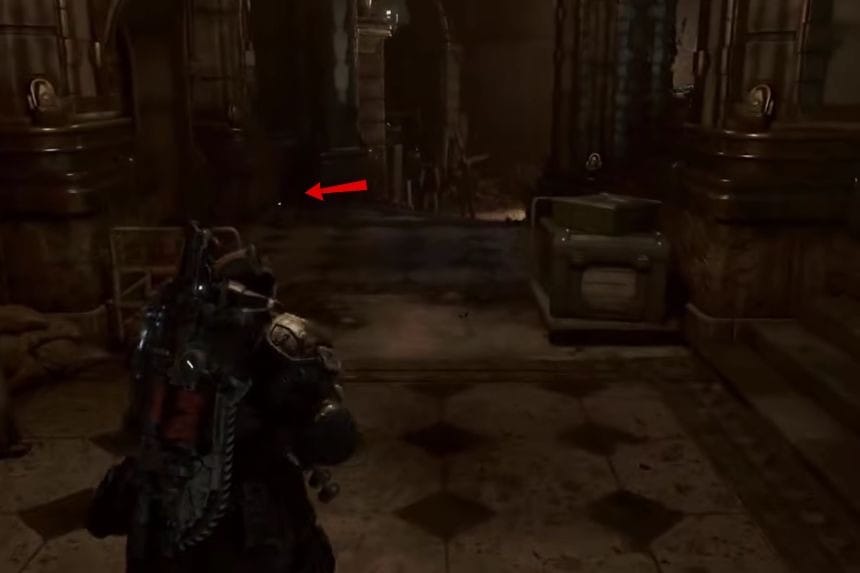
After fighting off the Locust at the beginning of the chapter, head down the left side of the fort. You’ll find a path up a few steps on your left. Go down there to find the Hard Case.
Collectible – Commander’s Letter Home
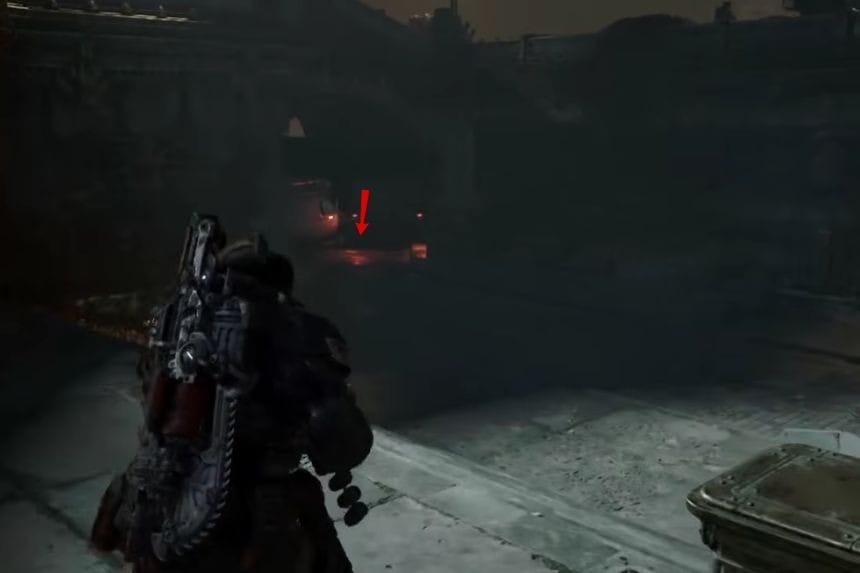
Go to the center of the fort and look back toward the entrance. You’ll see a statue in the middle. Go down the steps on the left and into the corner. The collectible is under a red light beside a truck.
Hard Case
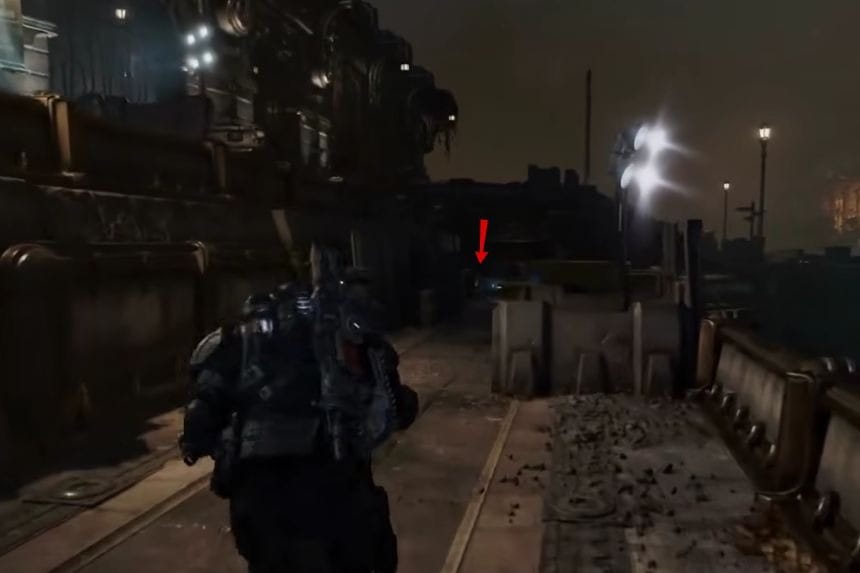
From the center, make sure you’re at the top of the steps and go to the left side. You’ll find a long walkway with a Hard Case at the end.
Hard Case
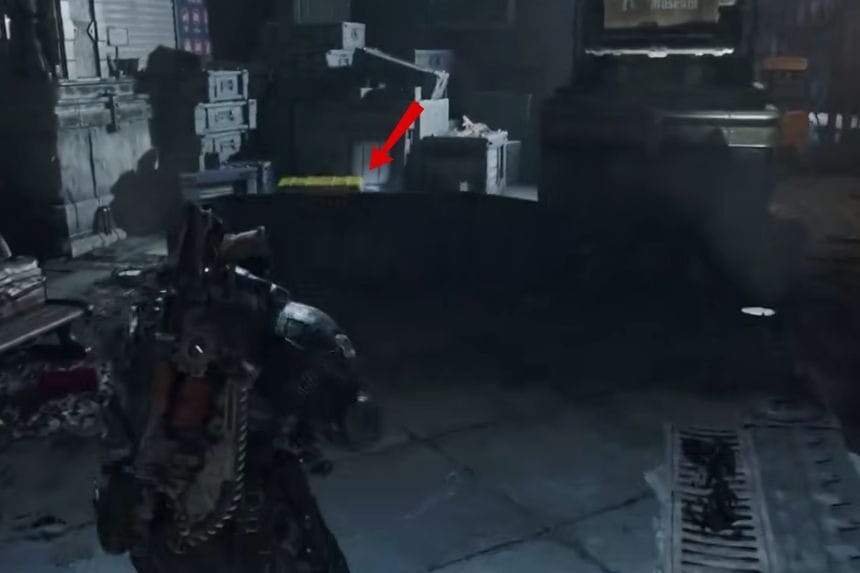
Face the main entrance with your back to the statue. Look to the left, behind the barrier, to find the Hard Case.
Collectible – Torn Flag of Tyrus

Go through the main entrance while chasing the Brumak and deal with the enemies. Once the area is clear, look left and back down the now-blocked path. The collectible is beside the wall on the right.
Hard Case
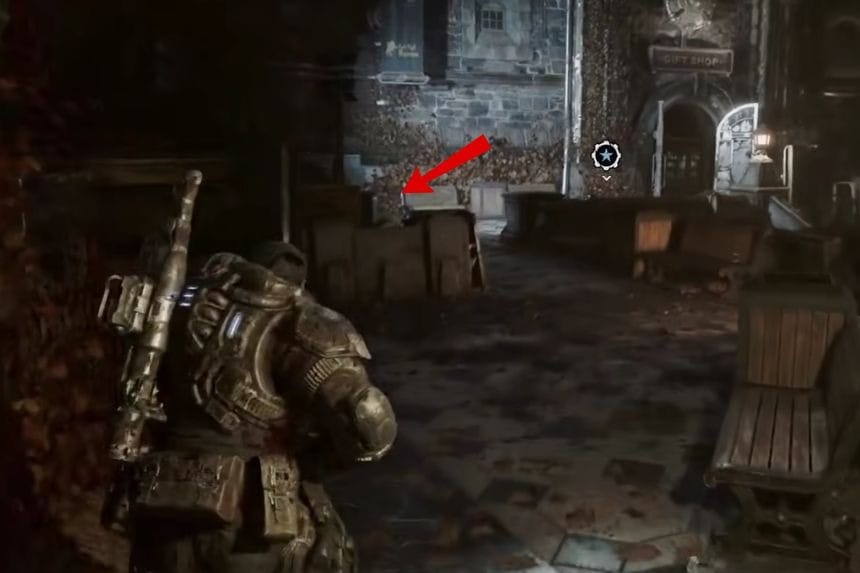
Turn around from the previous collectible and stay close to the wall on the left. Go up the ledge and continue forward to find the Hard Case on your left.
Collectible – Morith Harbor Snow Globe
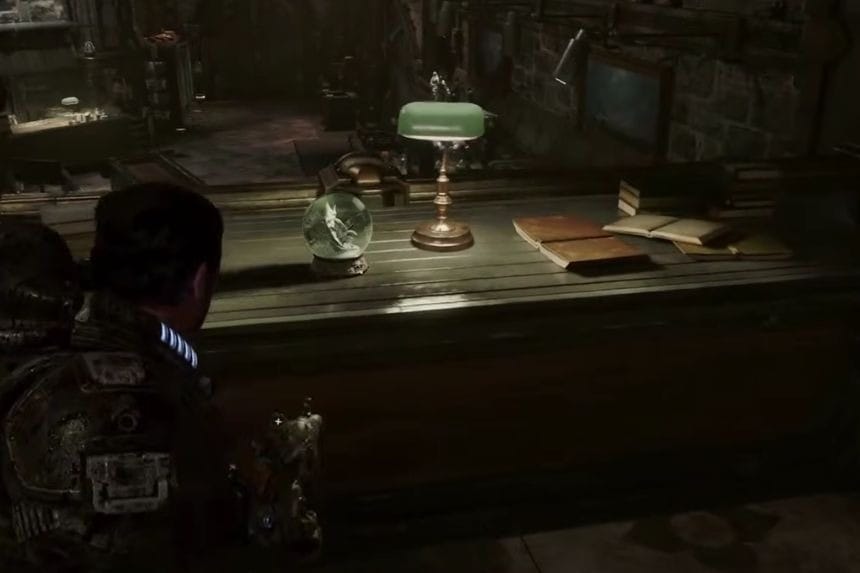
Go through the gift shop and head upstairs. You’ll see a display on the floor to the left. Move past it and pick up the snow globe from the counter.
Hard Case
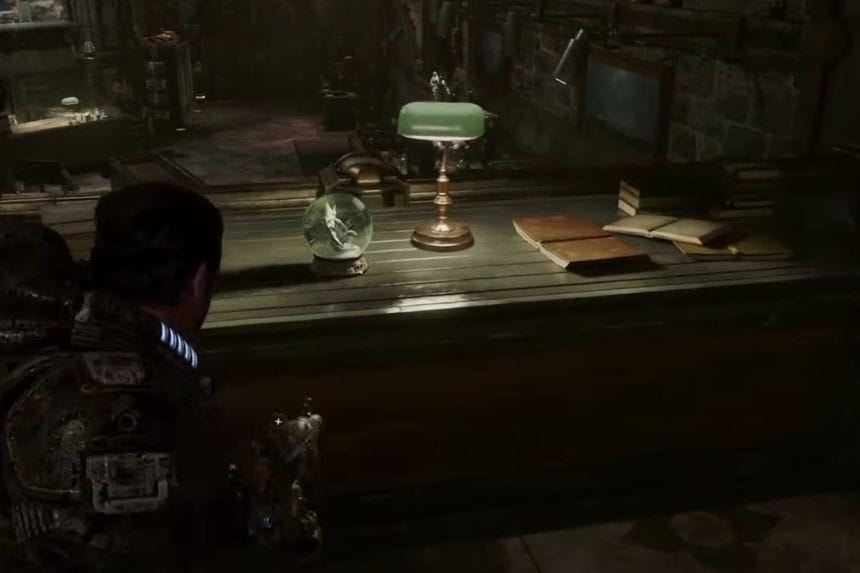
From the previous collectable, turn around and face the stairs you need to climb. Go left onto the balcony and walk to the far end to find the Hard Case. This one is easy to miss because the game does not give a “Hard Case nearby” warning, and the case does not glow.
