
Act 1 of Gears of War: E-Day has 13 collectables to find. Most of them are placed along the main story path, but a few can be easy to miss if you move ahead too quickly. Below, you’ll find the location of every collectable in each chapter.
Chapter 1: Emergence
Monster Jaw
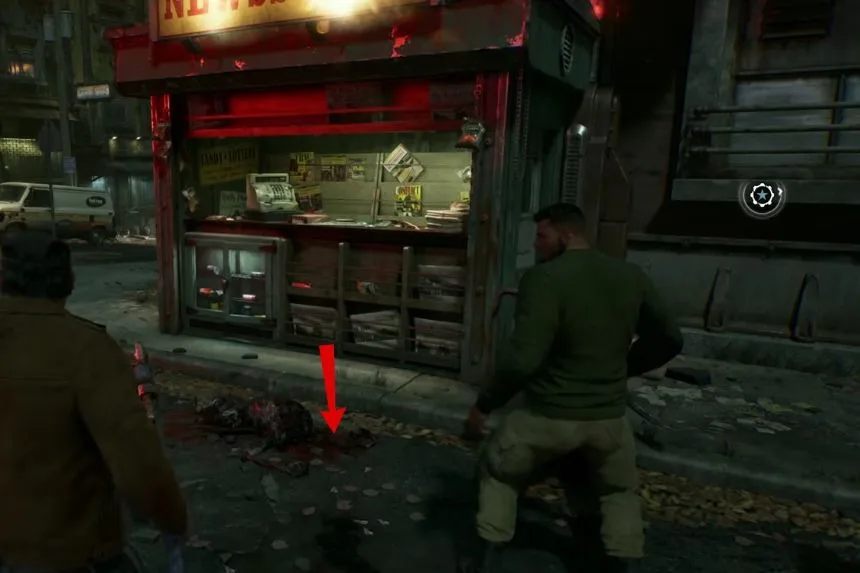
The Monster Jaw is immediately available after you have completed the cutscene that introduces you to the melee attack. Once you regain control of your character, look down at your feet for the item.
Worker’s Helmet
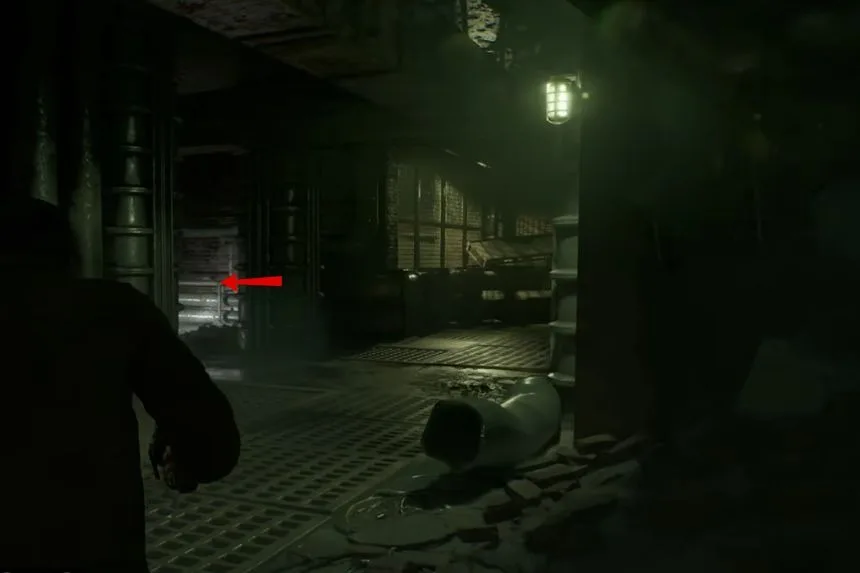
Keep going through the level until you see the pipe room indoors. Continue further ahead until you find a little room on your left. Go into the room and try to find the Worker’s Helmet there. You will be able to hear the sound effect of the collectable item too.
Newspaper
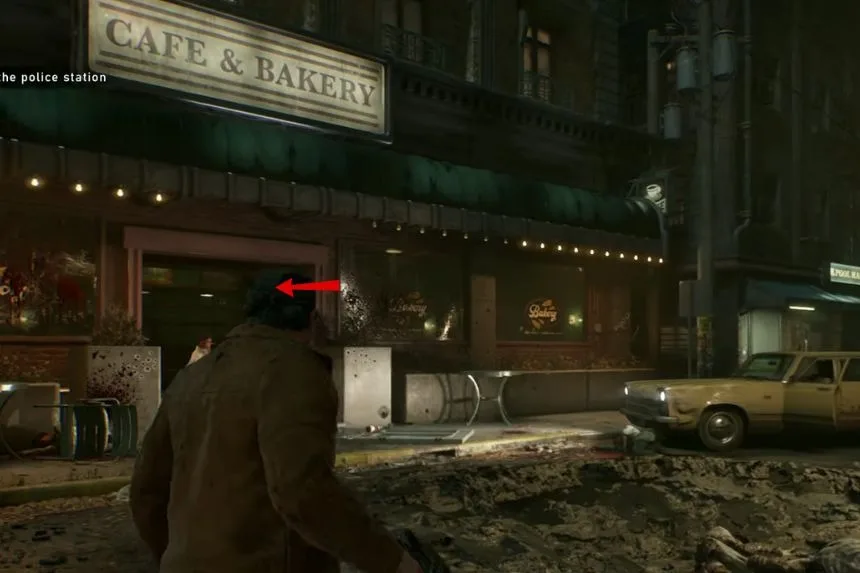
Further into the chapter, you will find yourself going to the police station. But before that, search for a little restaurant on the other side of the street. Enter the restaurant and move towards the back part where the kitchen is. There, you will see The Newspaper.
Chapter 2: Survival of the Fittest
Police Bulletin
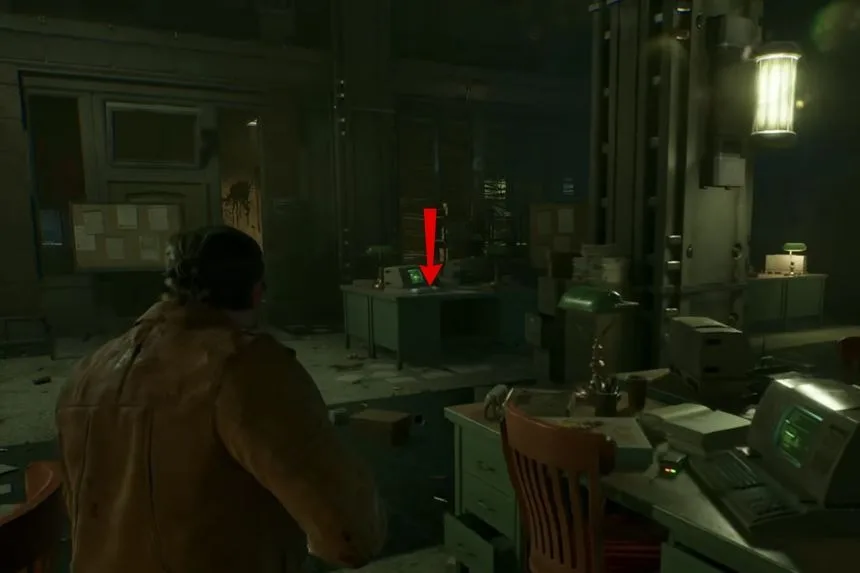
As you begin the chapter, you will be inside the police station. From where you begin, go into the room and look towards your left. You will find that the Police Bulletin is lying on the table.
Chief’s Badge
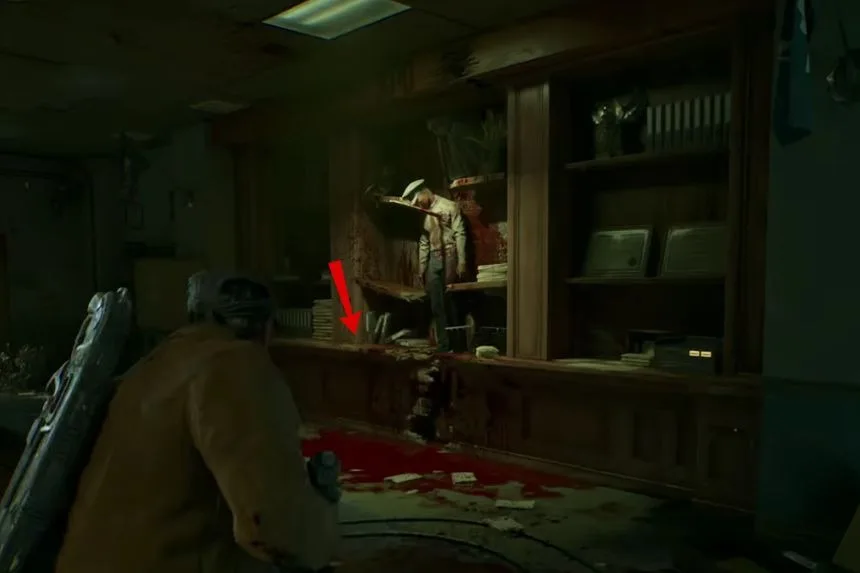
Go through the chapter further until you come across the Tactical Operations Room. This location is a part of the storyline, so you don’t need to make detours to get there. In the Tactical Operations Room, find a place on the wall near the policeman. There you will find the Chief’s Badge.
Recruitment Pamphlet
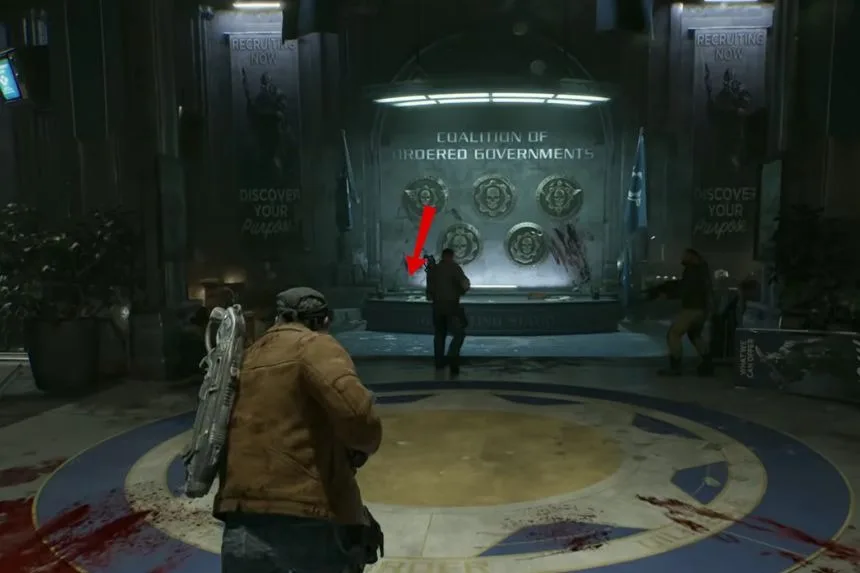
At the end of the chapter, you will come to the COG Armed Forces Recruiting Centre. You will go into this building as part of the narrative. Go to the back of the room and look at the table. There you will find the Recruitment Pamphlet.
Trion Pilot Helmet
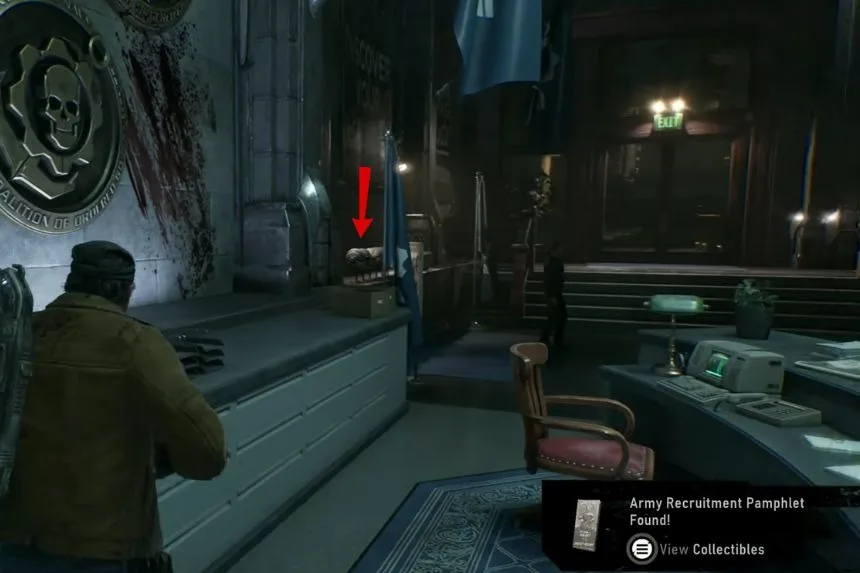
When you are within the COG Armed Forces Recruiting Center, you will find that there is a Trion Pilot Helmet next to the table from which you can retrieve the Recruitment Pamphlet. Be sure to take it along.
Chapter 3: A Gear in Need
Canned Tomatoes
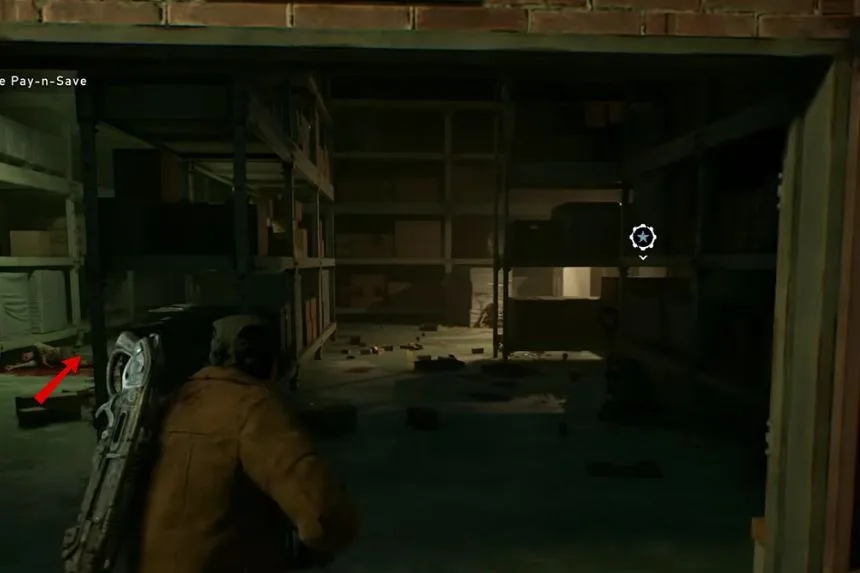
During this chapter, you will arrive at the loading bay area. Go inside the loading bay area and proceed to the next room while heading towards the Pay and Save area. Do not forget to look around the left side among the storage racks. The Canned Tomatoes are hiding there.
Broken Lancer Bayonet
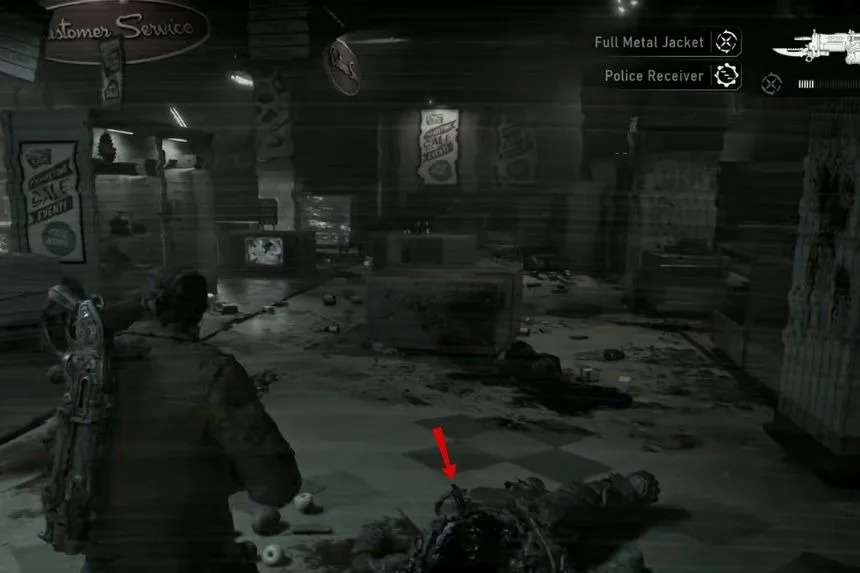
Keep going until you are at the department store. You will be attacked by a few enemies here as part of the mission’s plotline. After defeating them, a cinematic scene is triggered. The moment it is over, you get back control of yourself right next to the Broken Lancer Bayonet. Locate it and pick it up.
Chapter 4: Back in the Fold
Newspaper
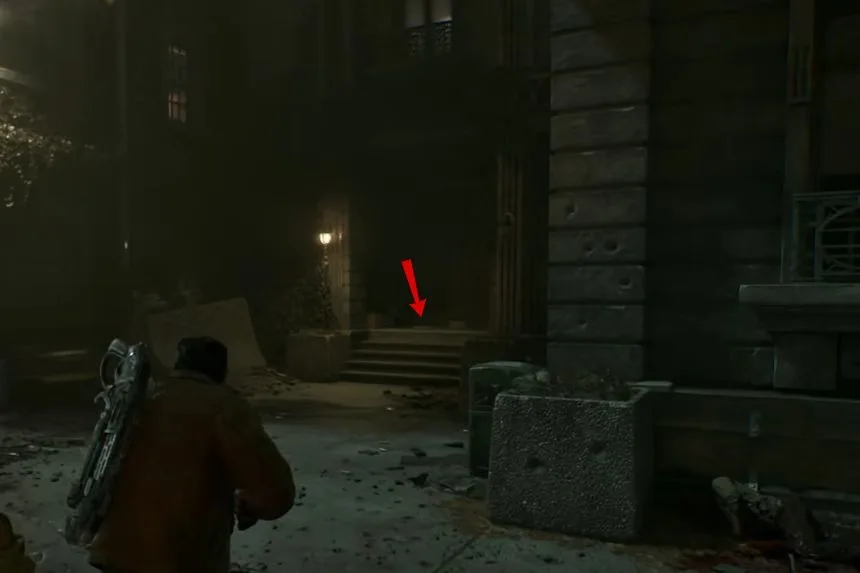
Early in the chapter, you will be leading Tai down the main road while delivering the mayor to City Hall. Look to your right along the street. There should be some steps by a building, and on top of those will be the Newspaper.
Propaganda Poster
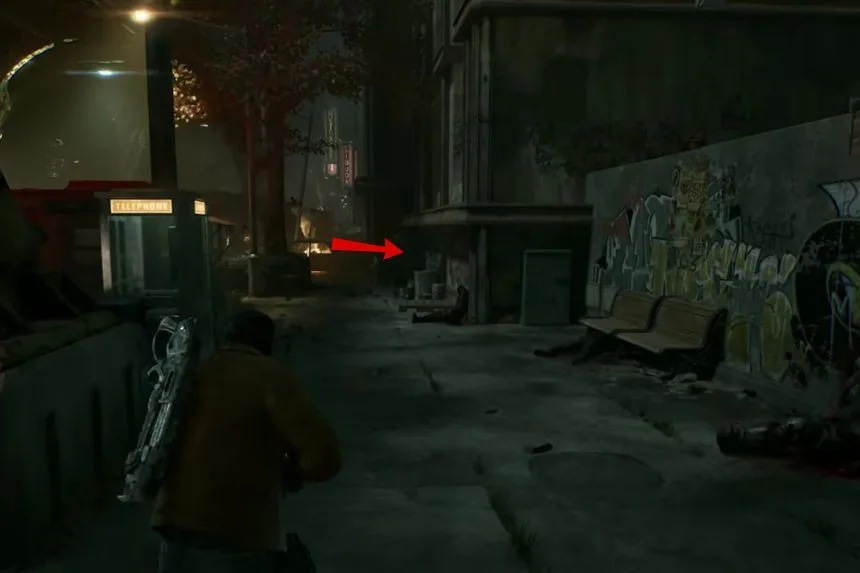
Keep going and break the gate. After handling the enemies in this region, you need to check on the other side of the road for the emergency facility. Then, you have to descend the stairs and take a right turn. There is a Propaganda Poster on the wall.
Memorial Medical Supplies Memo
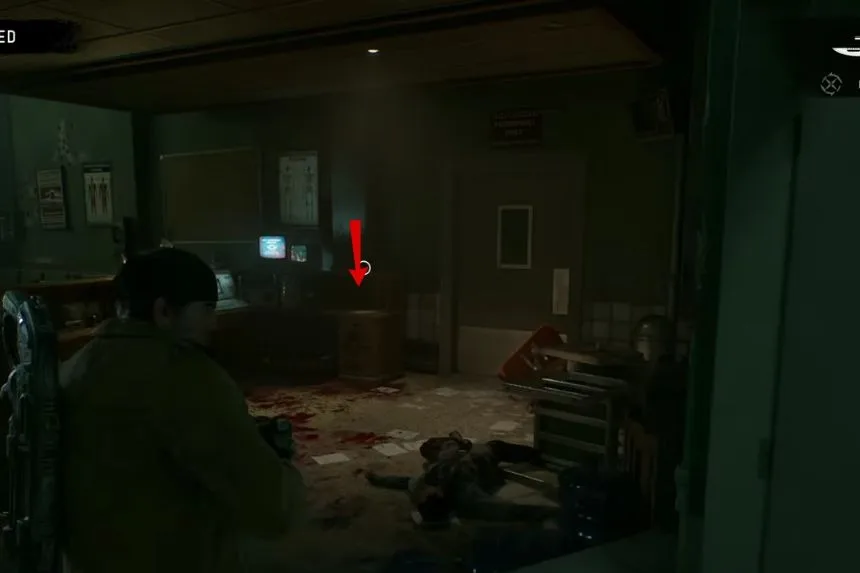
Proceed to the medical zone and continue on the main path until you get to the corridor. Once you have done the talk-and-walk phase, enter the room that leads to your destination. Before you leave this zone, take a look at the computer situated on the right-hand side.
COG Tag
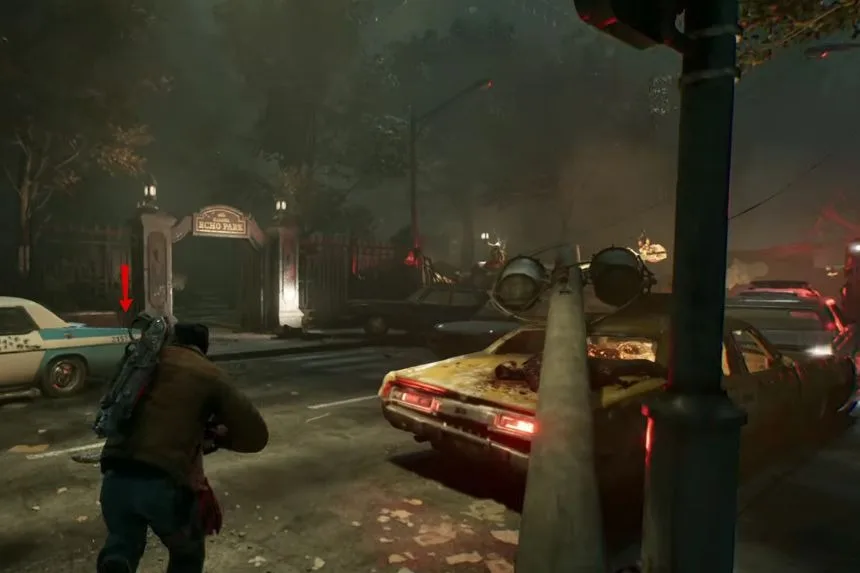
In the later part of this chapter, you will be taught to plug up emergency openings through the use of grenades. Following that part, you will be ready to cross the road to enter Echo Park. Prior to entering Echo Park, check out the area around the police vehicle where you will see a COG Tag on the ground.
