
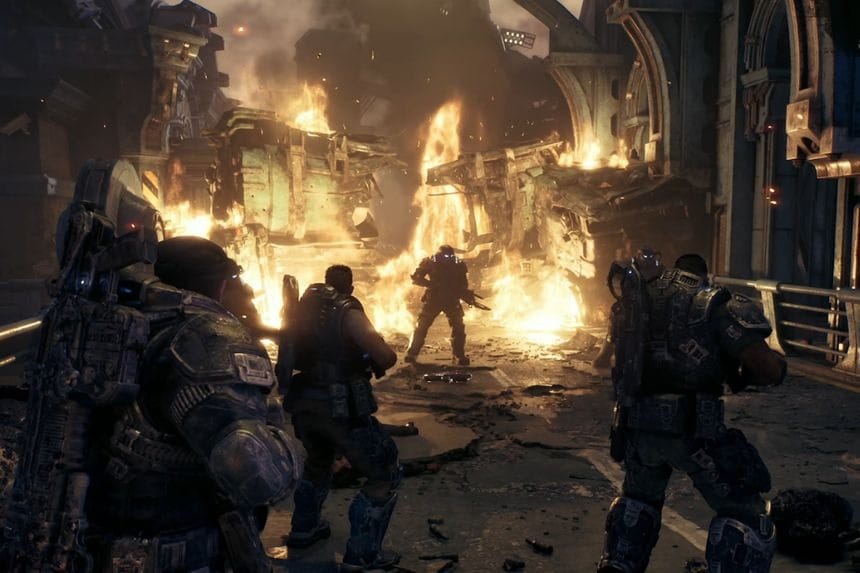
There are tons of items that you could pick up in Act 2 of Gears of War E-Day, ranging from Hardcases to Supply Caches to other collectables and extra missions. It’s not always easy to locate some of these items, as you can access some areas of the map only at certain stages of the game. This guide will help you find all of them. Follow each chapter section to collect everything before moving past any point of no return.
Act 2, Chapter 1
Helmet
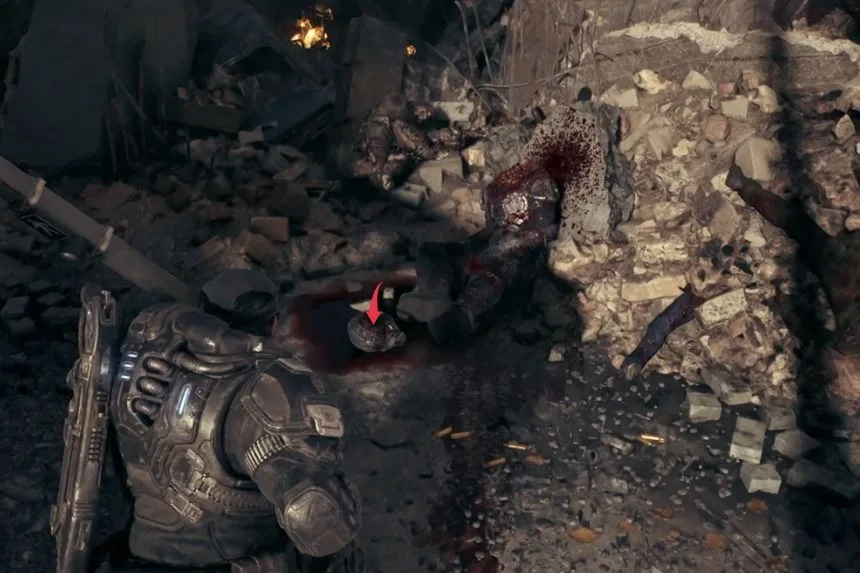
At the start of the chapter, proceed as Armadillo moves ahead and look at the left side of the trail. There you will find the Helmet.
Sniper Goggles
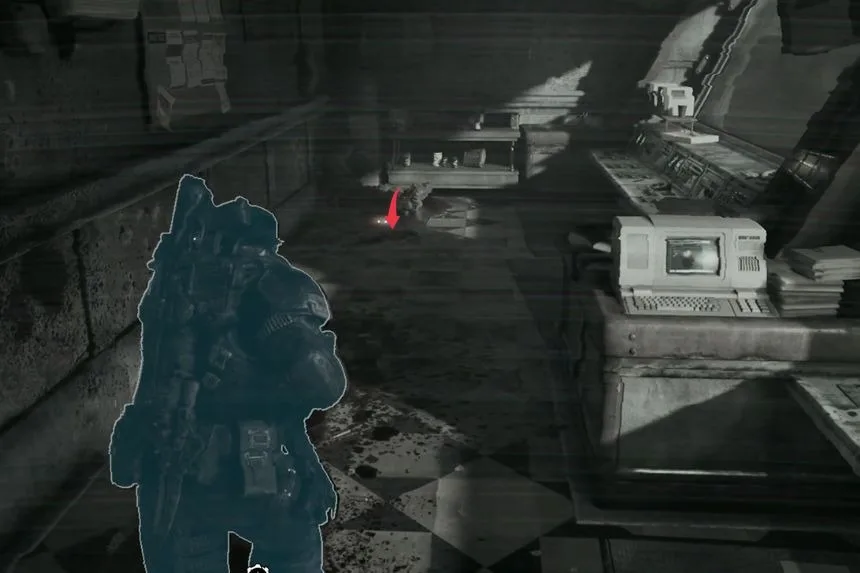
Proceed with the story until you find yourself at the location called the West Control Room. Upon entering, take a left and go down the corridor until you reach the end. You will find your Sniper Goggles there.
Bridge Worker’s Lunch Kit
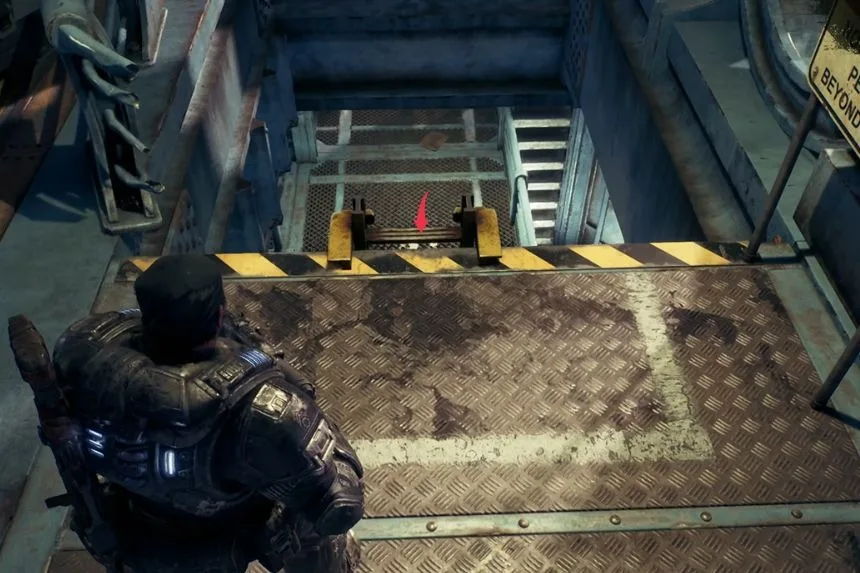
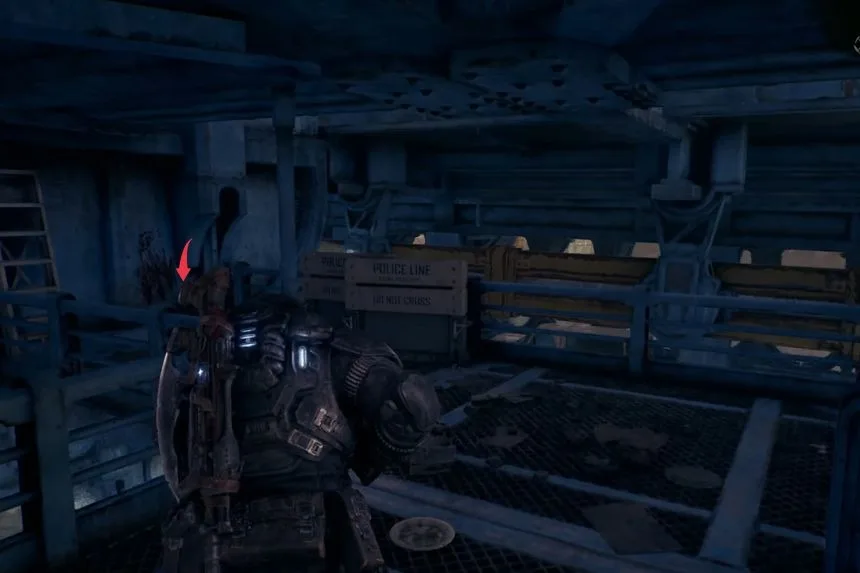
After that, you will have to make your way through the bridge and eventually fall off a cliff. You can use the ladder if you want to skip the fall damage. After falling off, don’t go forward; rather, turn left to find the Bridge Worker’s Lunch Kit.
Thrash Ball Rush Magazine
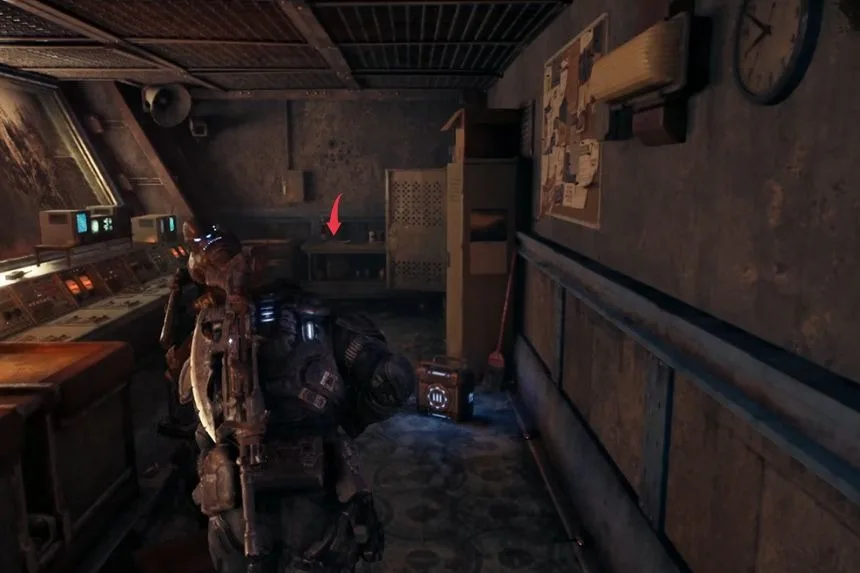
Walk further on to reach the East Control Room. There are many things to do here, but be sure to take a look at the corner near the console where there is a Thrash Ball Rush Magazine.
Medic’s First Aid Kit
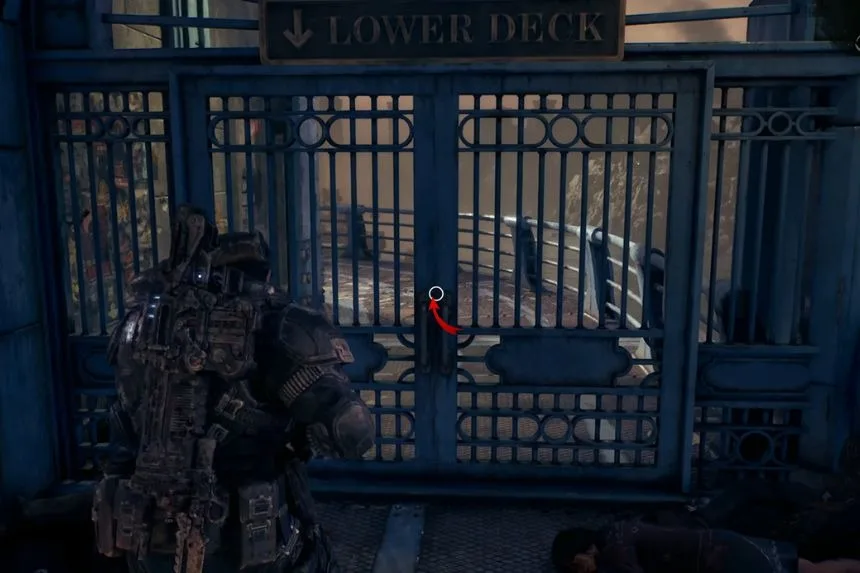
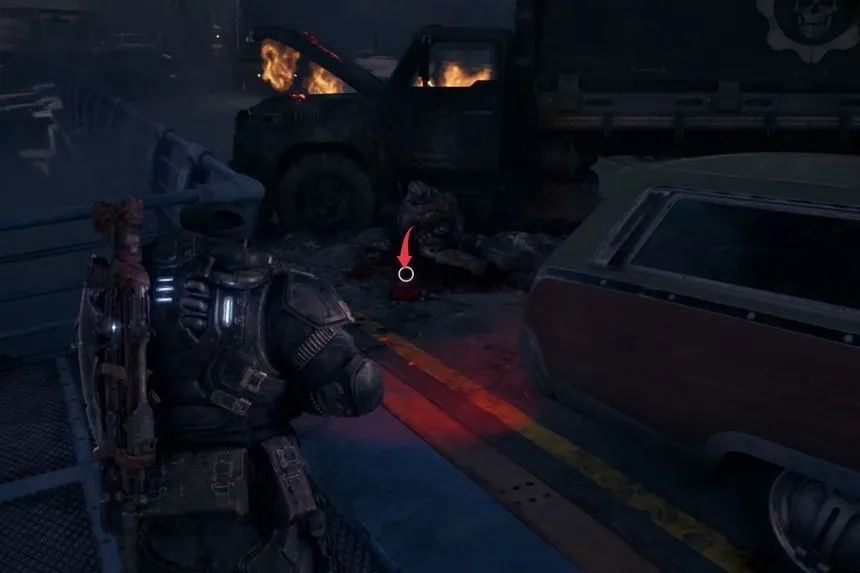
Towards the end of Chapter 1, you will have to face some Boomers and will then move past the metal gate. After going down the stairs, defeat your opponents there. Once you reach the lower part of the bridge, take the left path and make an immediate left turn. There you will come across the Medic’s First Aid Kit on a pile of bodies behind the car.
Act 2, Chapter 2
Most of the collectables and the optional activities in Act 2 can be found in Chapter 2; thus, this chapter will require the most exploration from you.
First Supply Cache
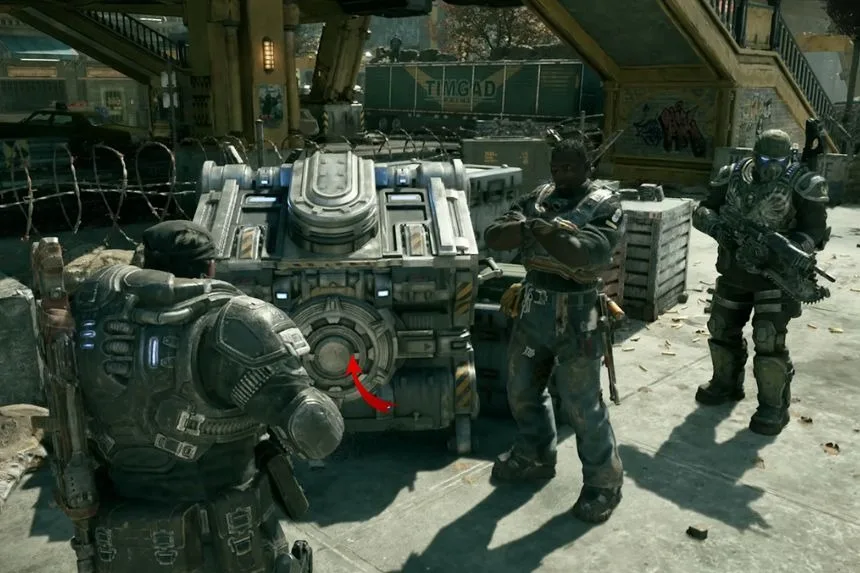
As you begin the chapter, your first Supply Cache is bound to be encountered by you. They function as weapon stations, wherein you have control of your weapons and upgrades.
Secondary Objective: The Vanguard
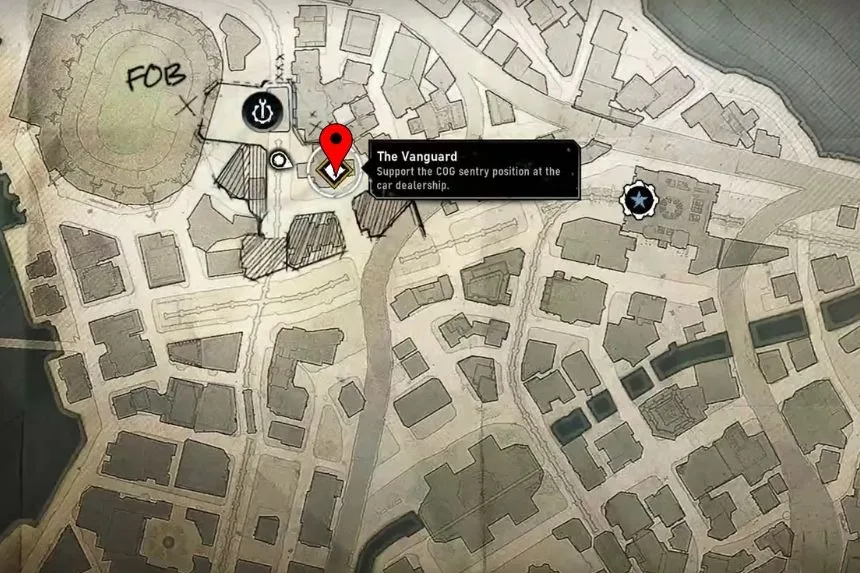
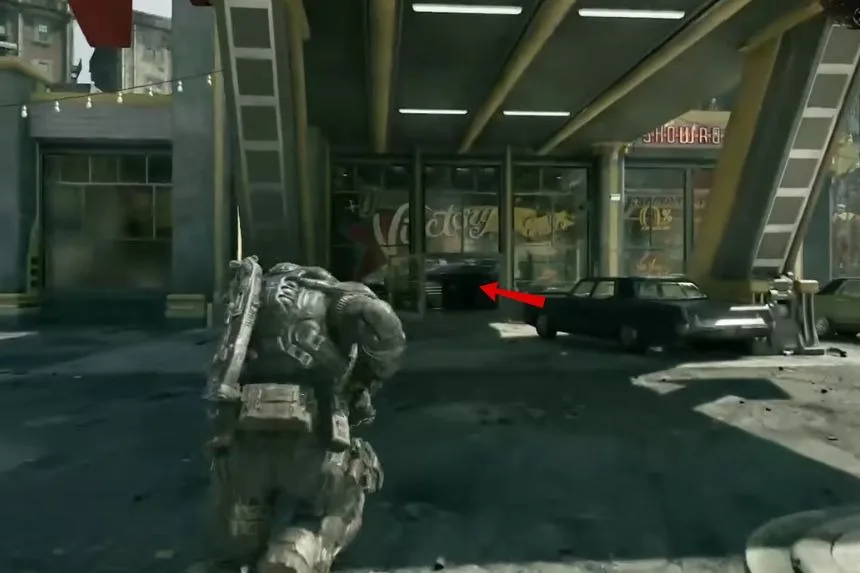
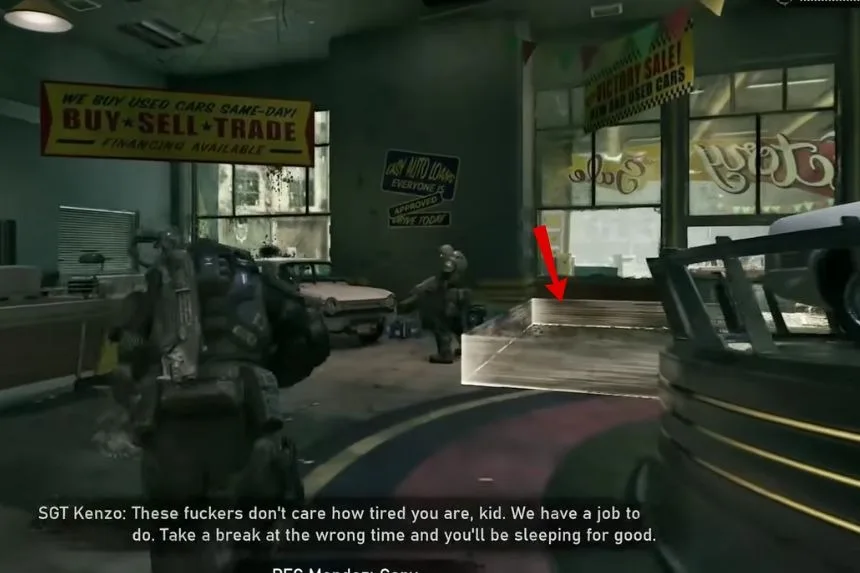
You can find The Vanguard in Chapter 2, east of Oria Stadium. Head over to the car dealership in this area and make your way inside to complete the side objective. You’ll also find two weapon upgrades here: the Bayonet for the Hammerburst and the Cover Brace for the Lancer Mk1.
Cinema Filmatica Magazine
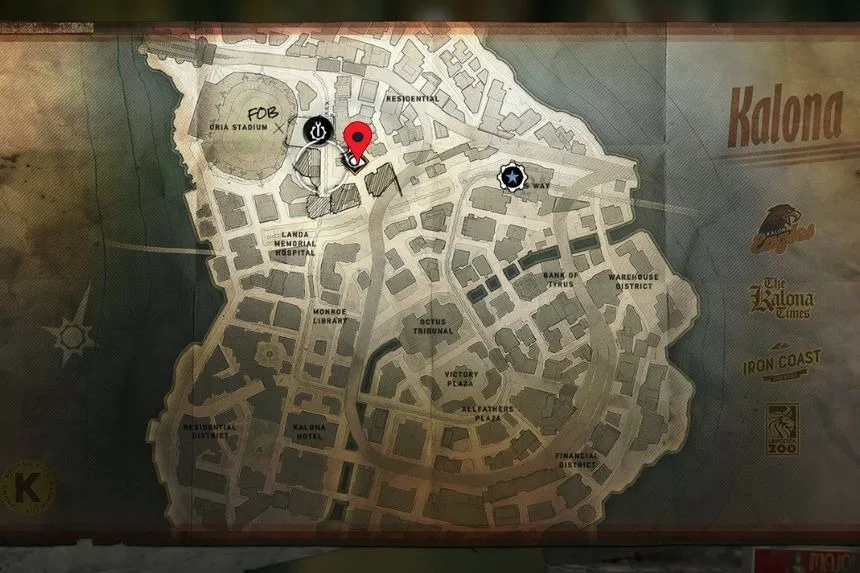
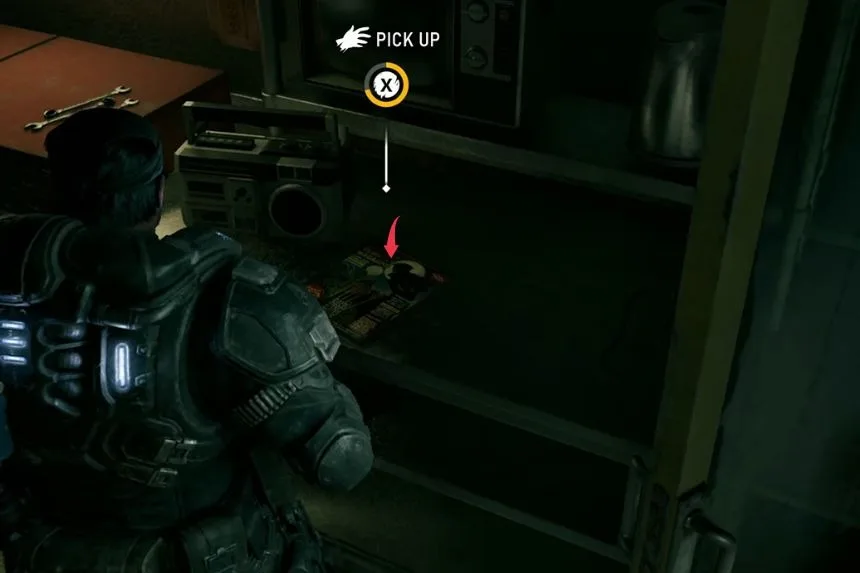
Once you pick up the map, wait for the truck to move from the gas station up ahead. After that, you will be assigned the Vanguard Secondary Objective. Go inside the gas station and click on the indicated section. There will be some enemies that you will need to hold off. At this particular gas station, look around for the Cinema Filmatica Magazine item.
Trapped Family Secondary Objective
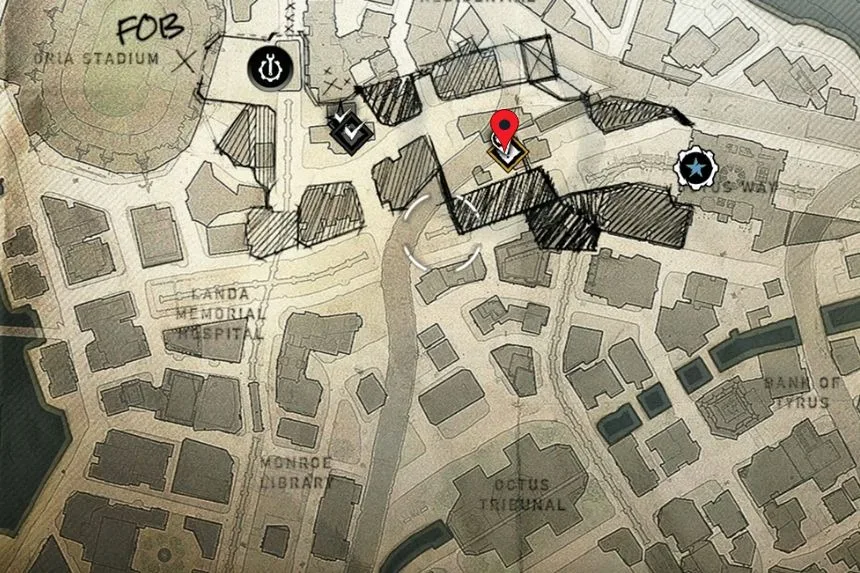
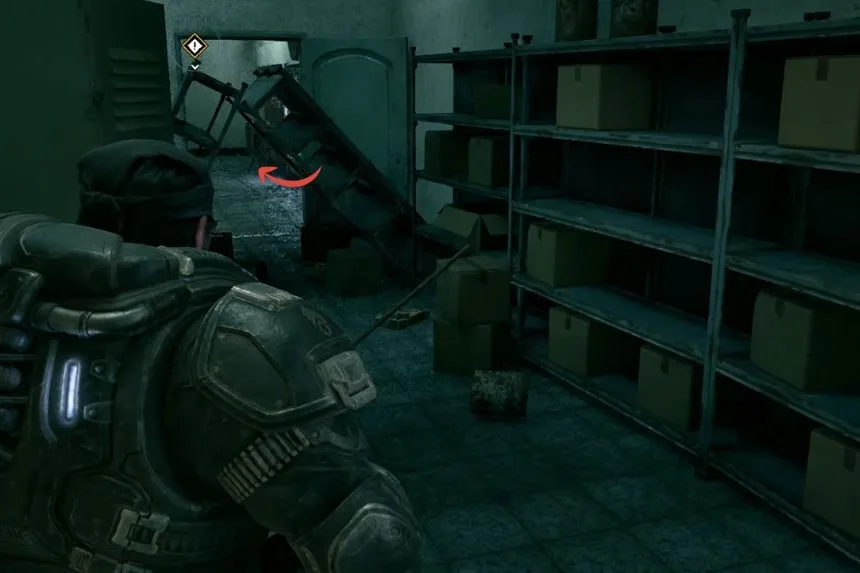
Proceed until you get to the area with the Last Dollar store. When you are near this point, you will get the Secondary Objective “Trapped Family”. Kill the enemies in the vicinity of the building and then open the door. Walk down the corridor, bypass the shelves and press the button to open the window. Remain with the family for some time, and you’ll complete the Secondary Objective.
Letter Home
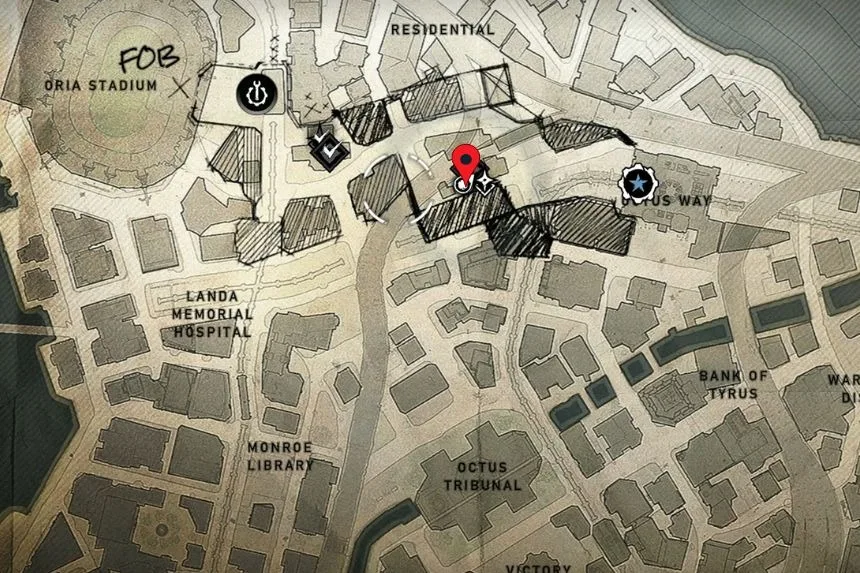
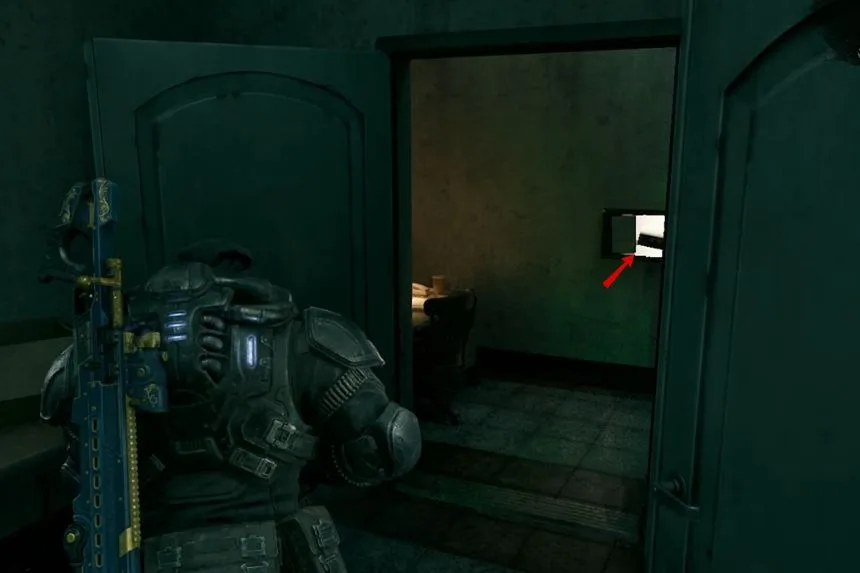
Having finished Trapped Family, backtrack using the door through which you entered before. To your right will be the Letter Home.
First Hardcase
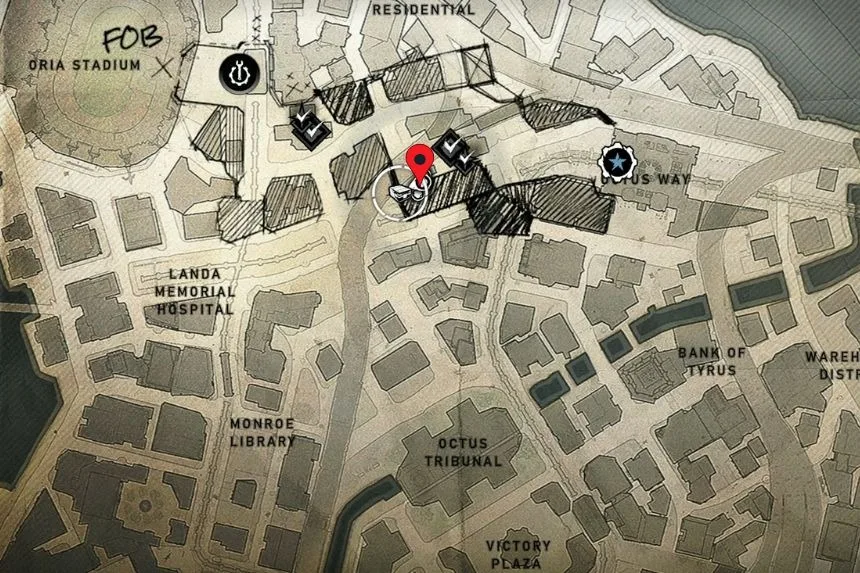
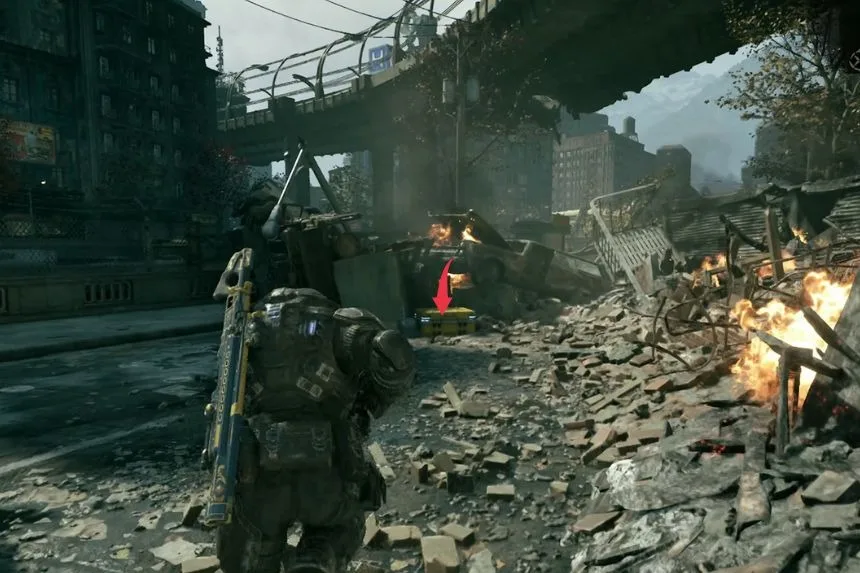
Near the Last Dollar, you’ll come across your first Hardcase. Some of the possible upgrades that can be found in a Hardcase are weapon upgrades, armor, and other ability enhancements. In the open world maps, Hardcases can appear on your map too.
Cereal Box
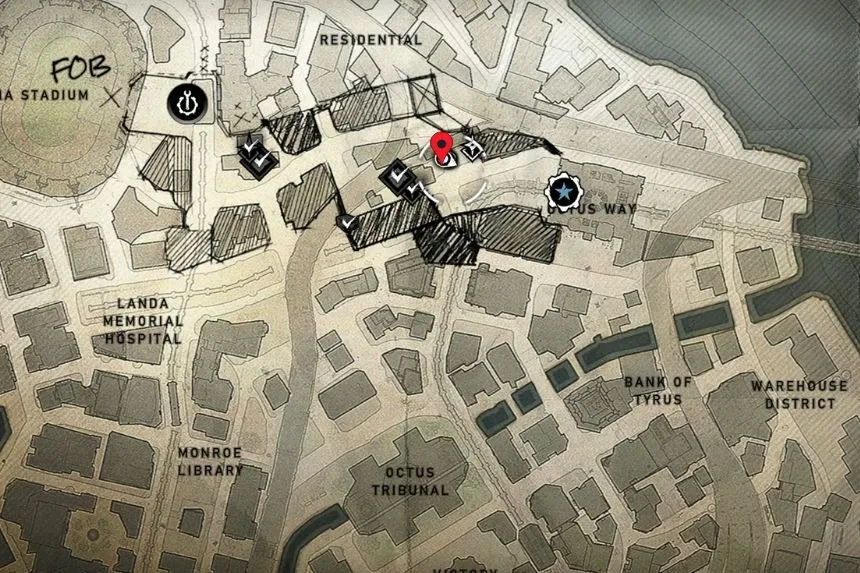
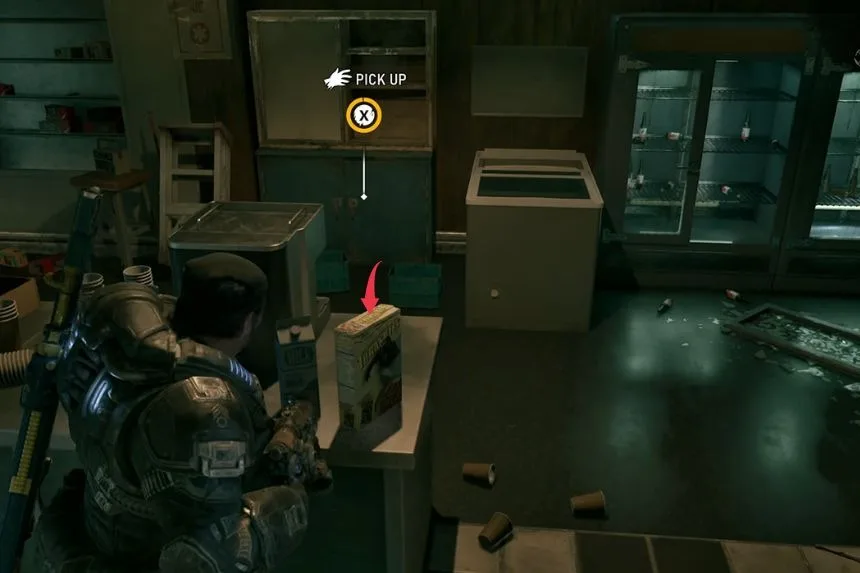
Continue until you see the fuel station. Enter the building and go to the counter to find the Cereal Box collectable.
Kalona Postcard
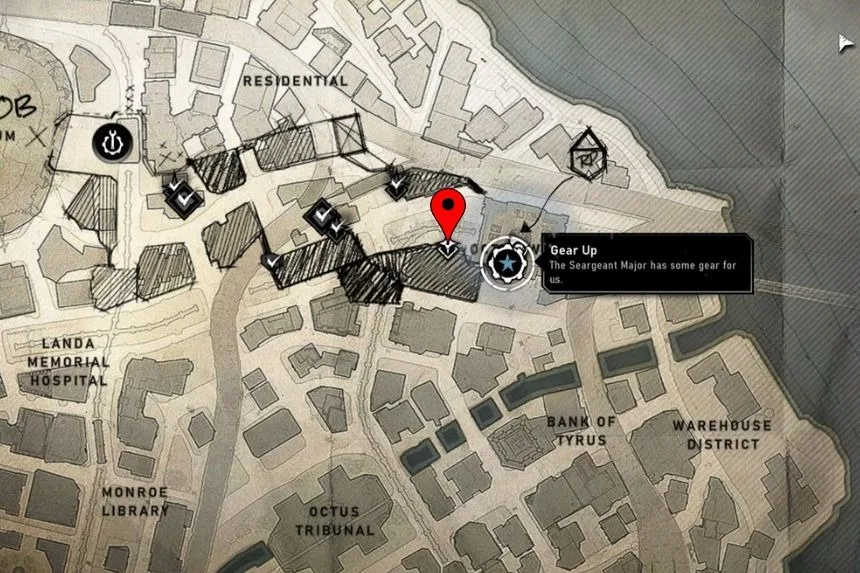
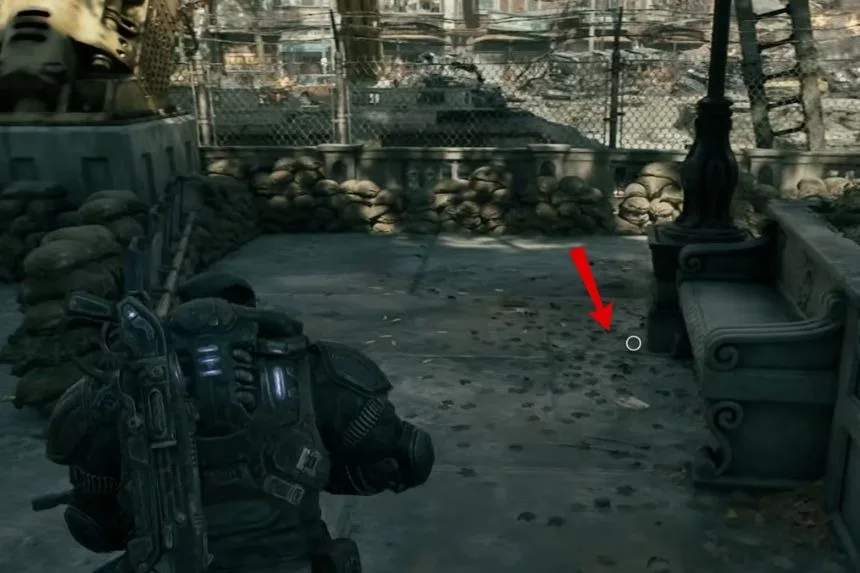
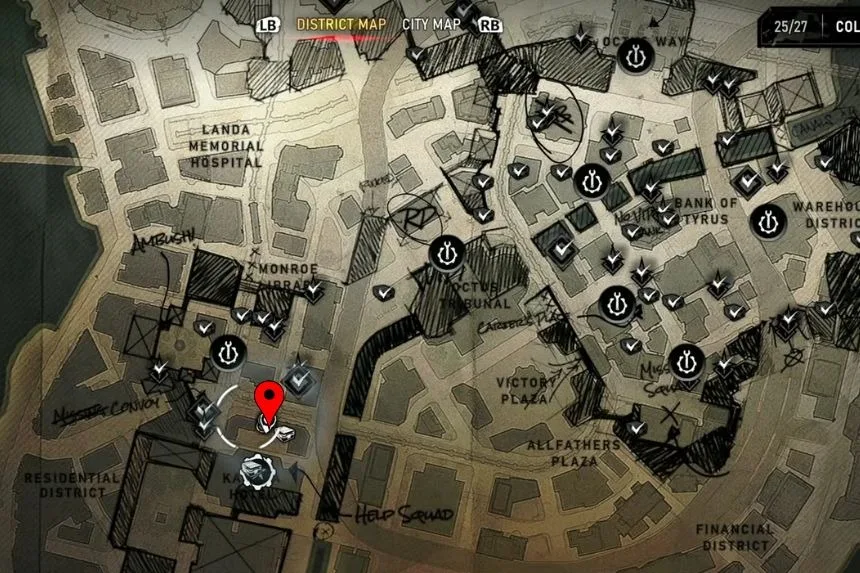
As you leave the station, turn right and go down the small set of stairs. Walk past the pawnbroker and head into the plaza, which is being barricaded. Keep moving through the plaza until you find a stone bench. The Kalona Postcard is on the ground on the far side of the bench.
Supply Cache Near the Subway
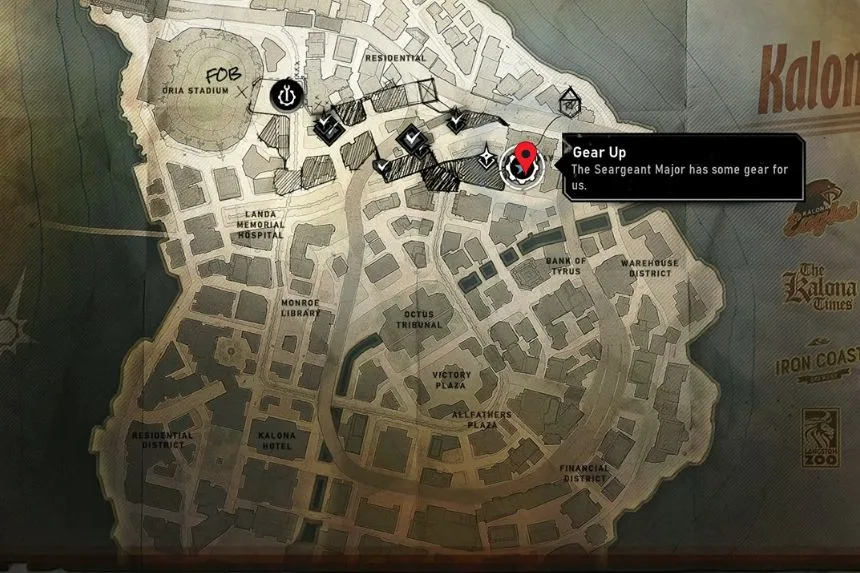
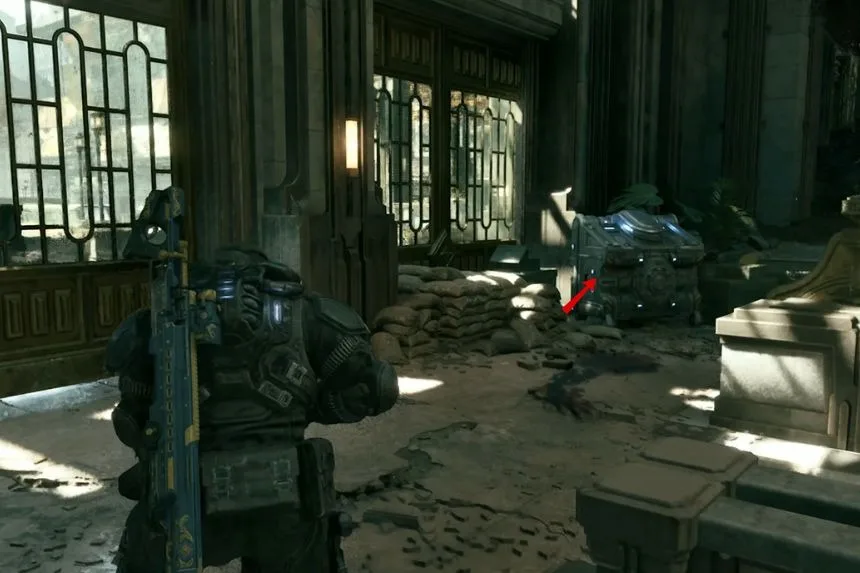
At some point, you are going to take an excursion through the subway station. Once you are at the end of the tunnel, you will need to utilise another Supply Cache to your right. You will find the huge metal doors to your right, which stay locked until the conversation ends.
Vandalized Salvaging Poster
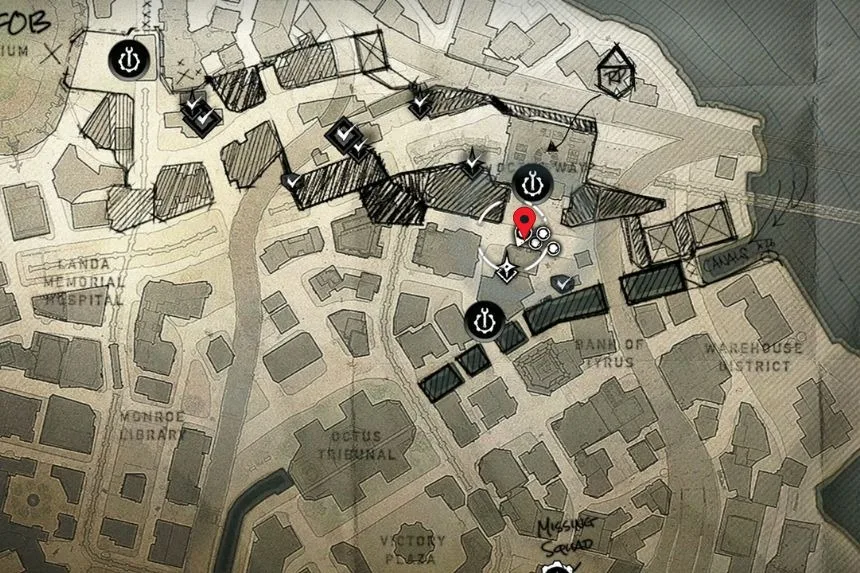
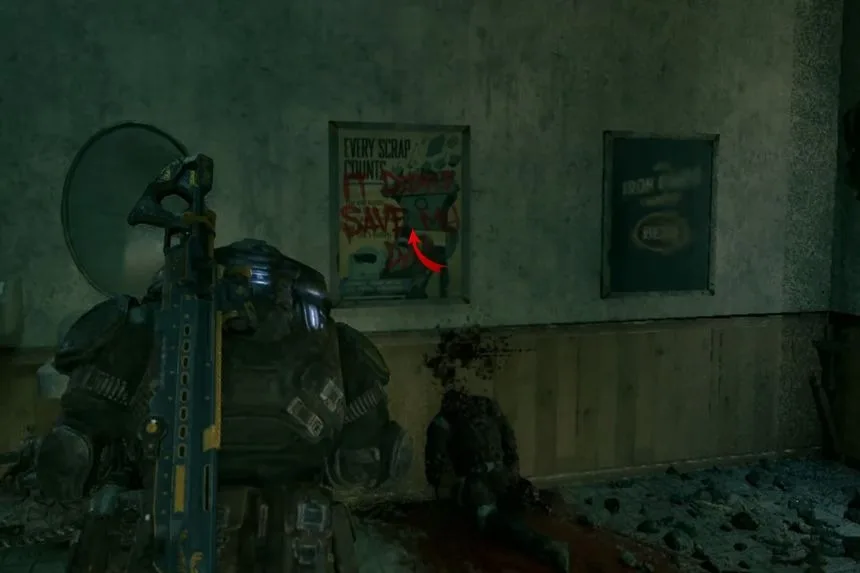
There are various ways one can get to this location, but the following way will keep the collectibles close by. Go straight into a side area by taking a sharp turn to the right. After that, walk towards the Major Burger restaurant located in front of you. Enter it and pick up the poster in the bathroom at the back of the restaurant.
Hardcase in the Parking Garage
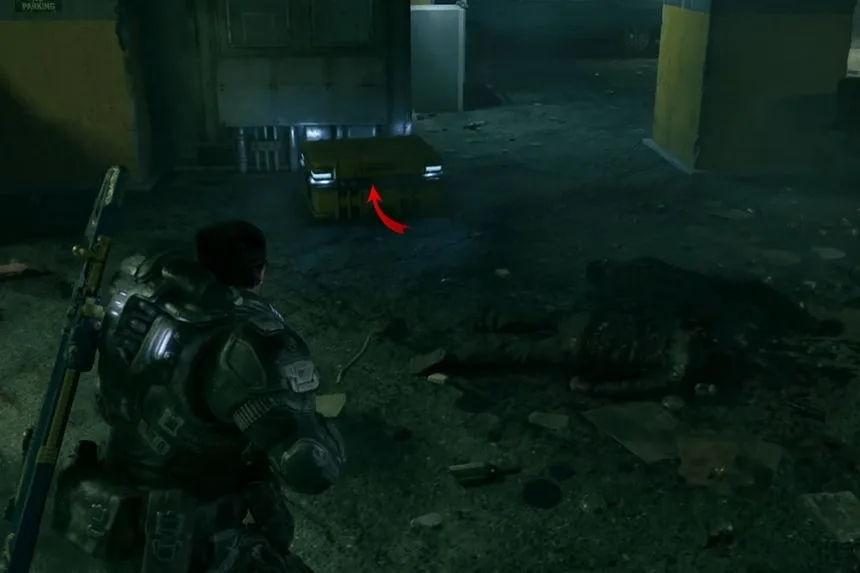
Exit the hamburger place and make a right turn. Walk past the ambulance, take the stairs down, and stick to the left wall to arrive at the parking garage. From there, descend into the garage and move to the lower level. There might be some enemies waiting for you; dispose of them and then continue. Look for the Hardcase on the left side.
Supply Cache Near the Canal
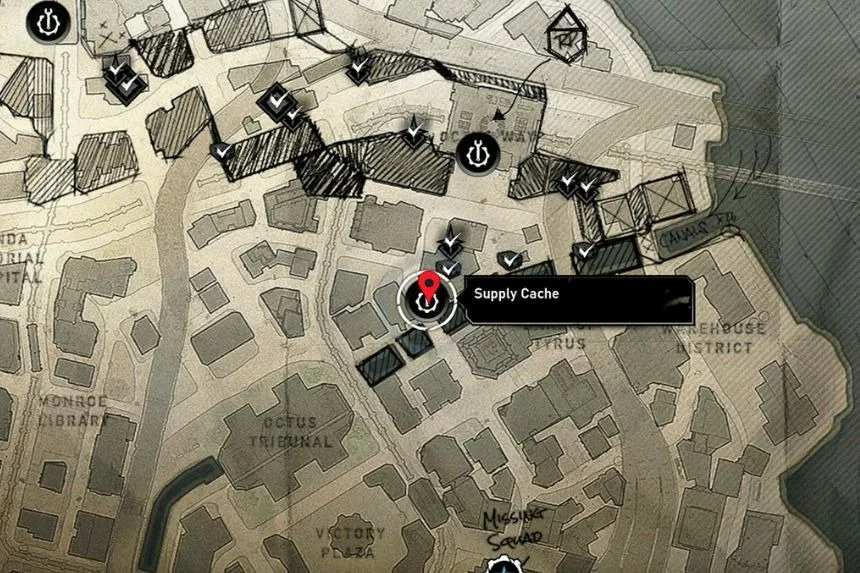
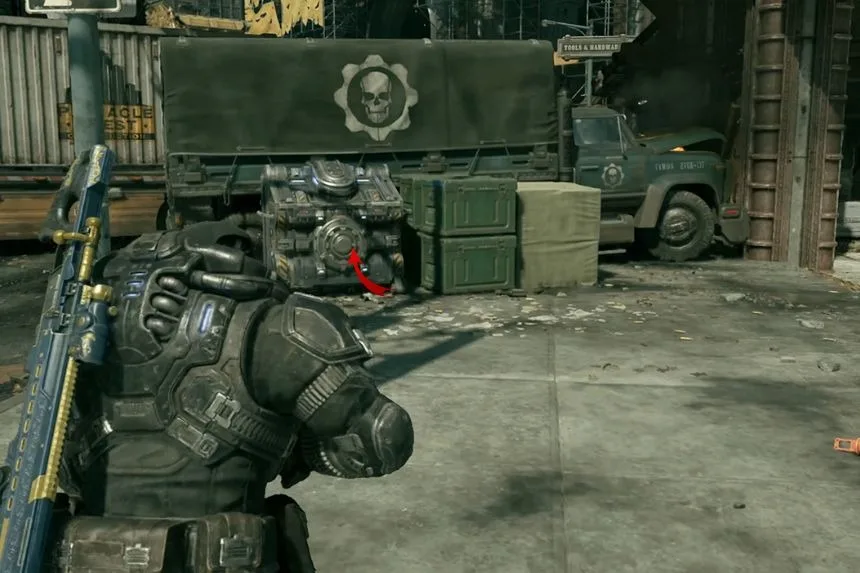
Keep moving through the garage and go out at the other end. You should find yourself close to a canal. Climb the stairs ahead to collect the other Supply Cache. You will have to come back to this location again in order to complete your objective.
Hardcase at the Top of the Parking Garage
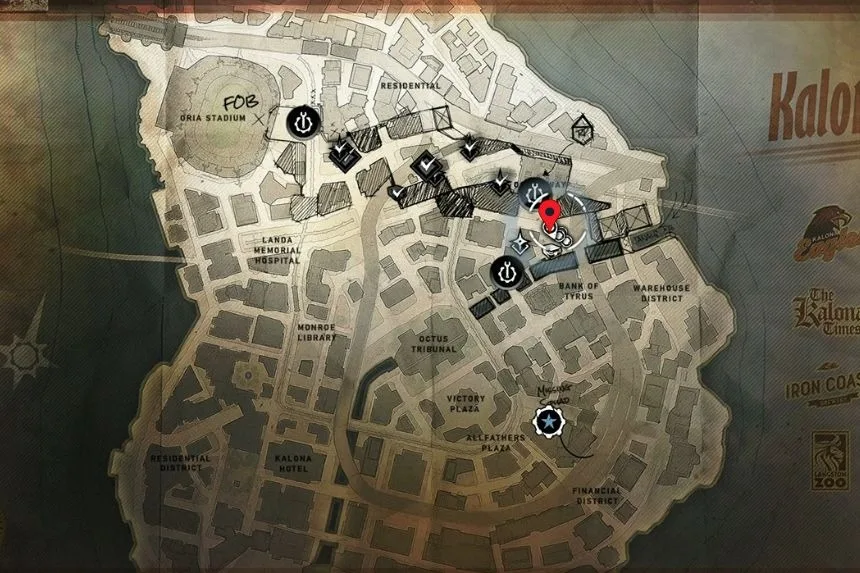
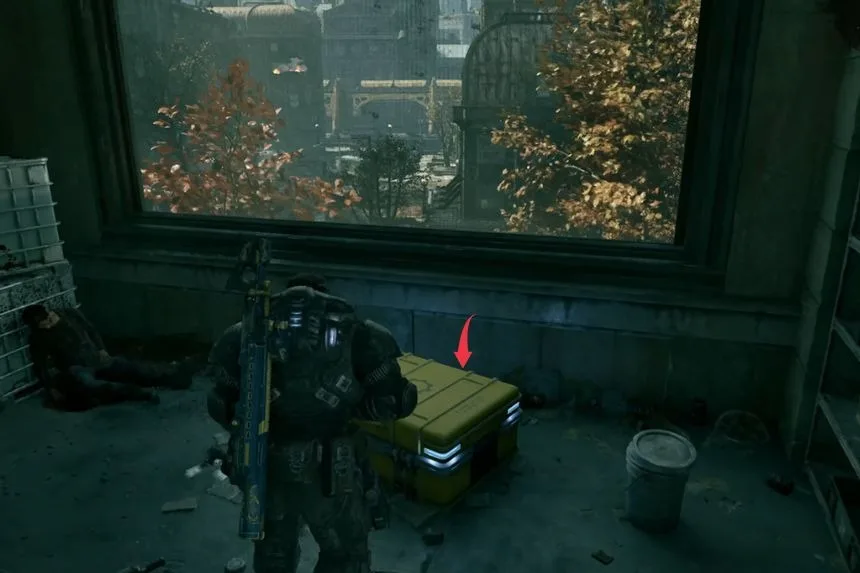
Starting from the canal zone, go back to the parking lot located on the left side of the hamburger joint. Make your way to the top and get into the secret room that is located at the very top.
Hardcase Near the Canal
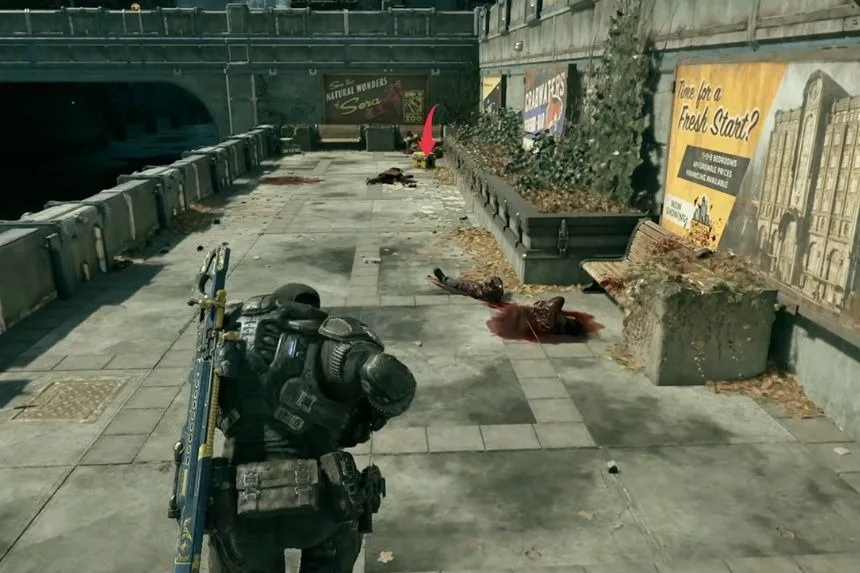
Exit the parking garage and head down towards the bridge. You might have to kick down the rope before you can access the lower part. Cross the little bridge and keep close to the canal. Just follow the path all the way until you reach the stairs. It is safe to jump down from the ledge, but taking the stairs prevents fall damage. At the end of this level, you will find another Hardcase.
Cog Tags of Liz Waxman
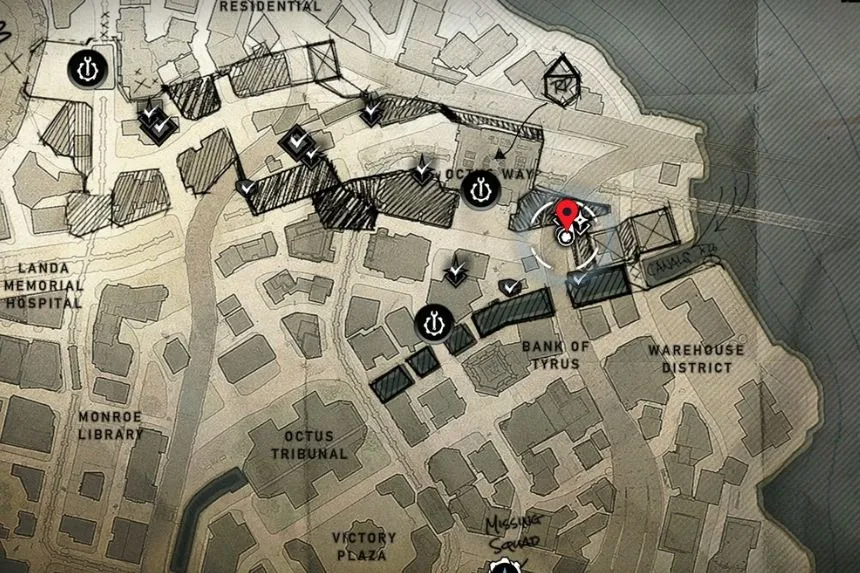
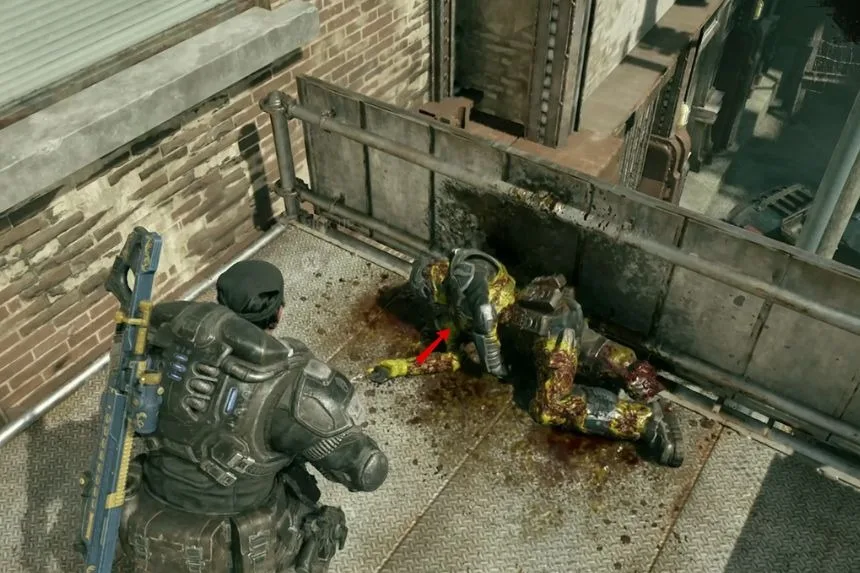
Just nearby, there is an array of apartments. Step into them, walk up the first floor, and jump out of the window to land on the scaffolding balcony in order to get the Cog Tags of Liz Waxman.
Emazi Blitz Display Case
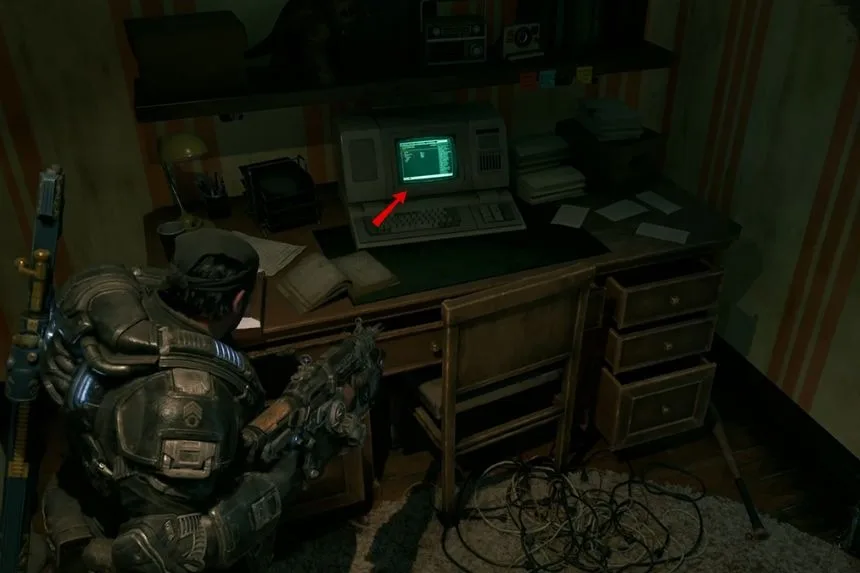
From the same apartments, take the elevator to the third floor. Here you will see the Emazi Blitz Display Case.
Tales from the Tyran Night Story Book
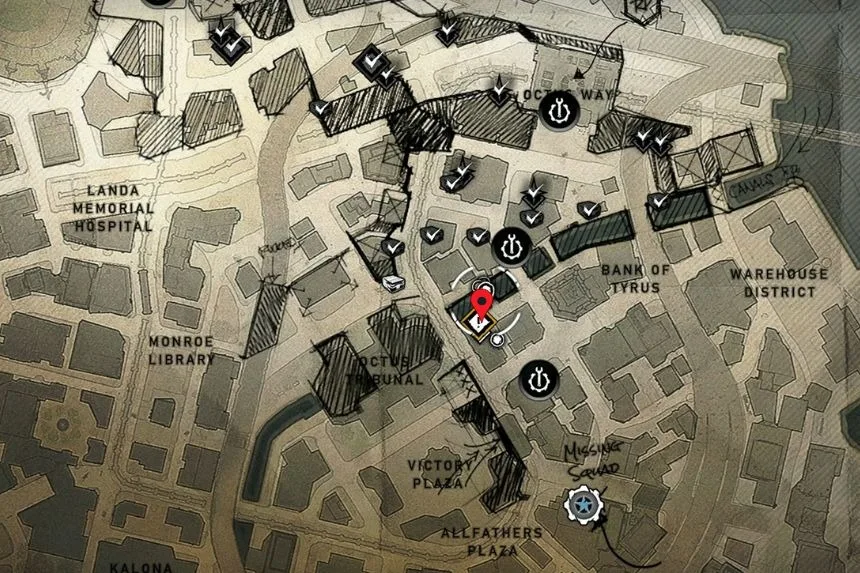
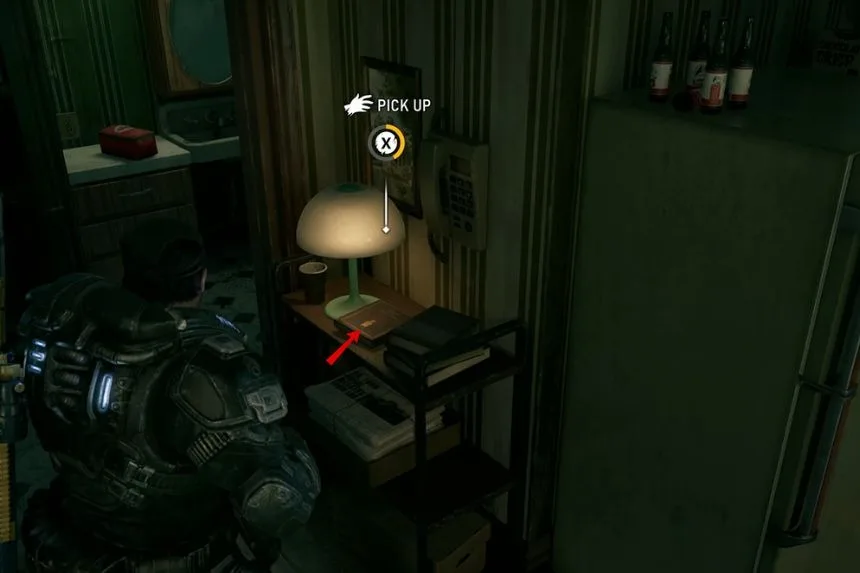
Now move towards the story path. At the point where you see the bridge with the window having the “Help” sign, take the stairs and go up to the scaffolding. Jump over to get to the top floor. After reaching the top, on entering the left side, you can get the Stories from the Tyran Night Story Book.
Apartment SOS Secondary Objective
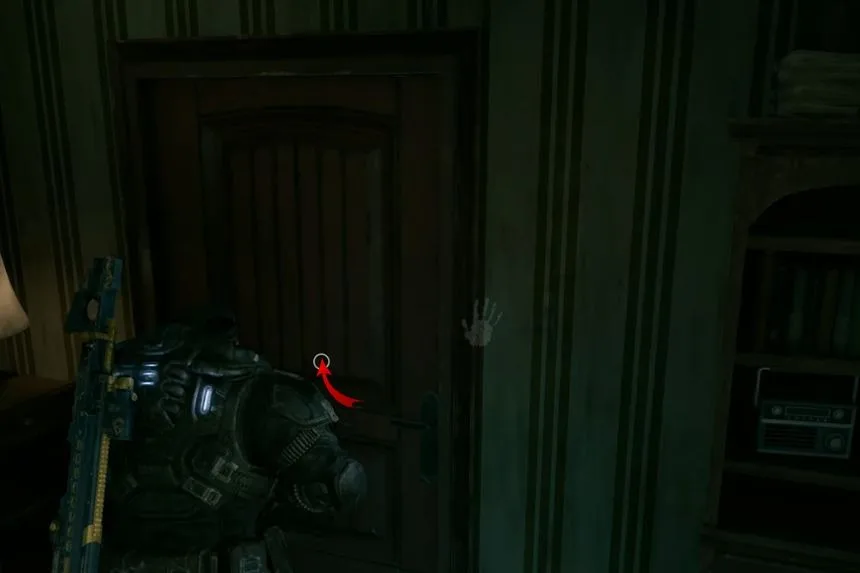
You may also achieve the objective Apartment SOS Secondary in this area. Go and talk to the two characters requesting assistance, kick the door down, and fight through the staircase. After killing off the enemies, you have achieved your objective.
Birthday Card with a Toy Lancer
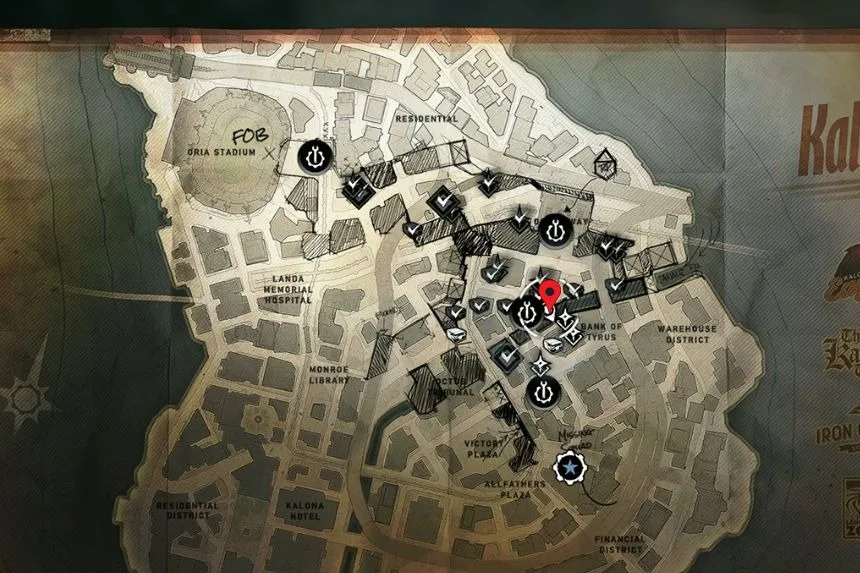
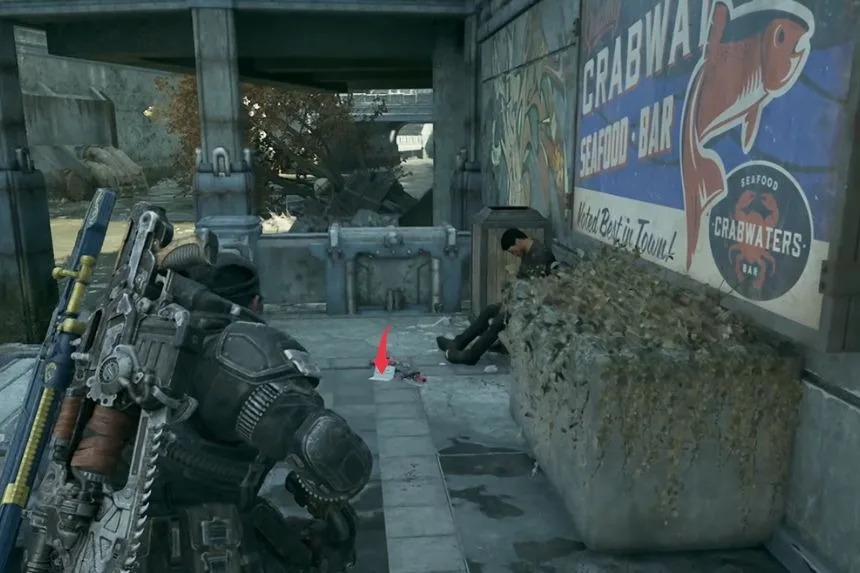
Head to the next bridge and find the alleyway which points towards the Bank of Tyrus. This bridge is destroyed and takes you underneath to a parking area. Make your way down the ramp and find the Birthday Card with a Toy Lancer on the left.
Hardcase in the Parking Garage
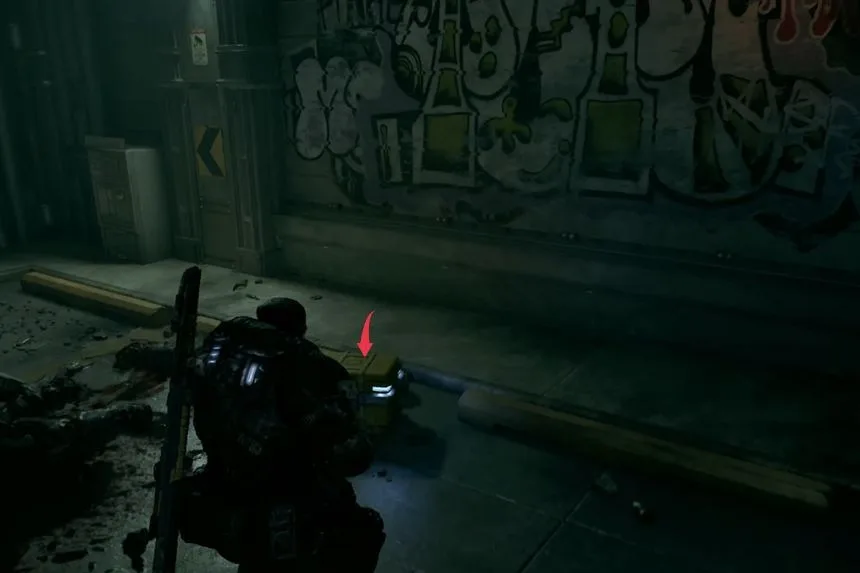
Move on to the parking garage. There are enemies here, but you’ll also find another Hardcase in here. Don’t be concerned about collecting items from within the bank just yet because you will get back here for the story mission.
Cog Tags of Specialist Jada Clemens
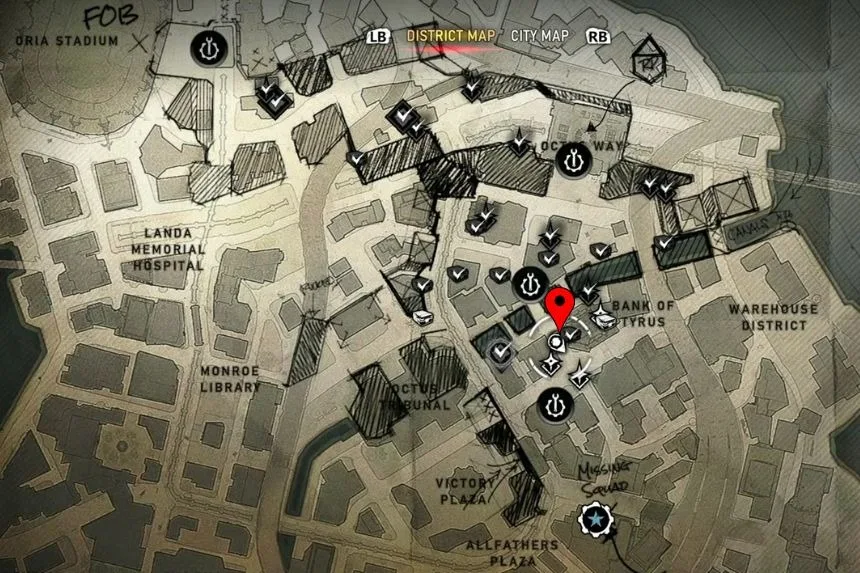
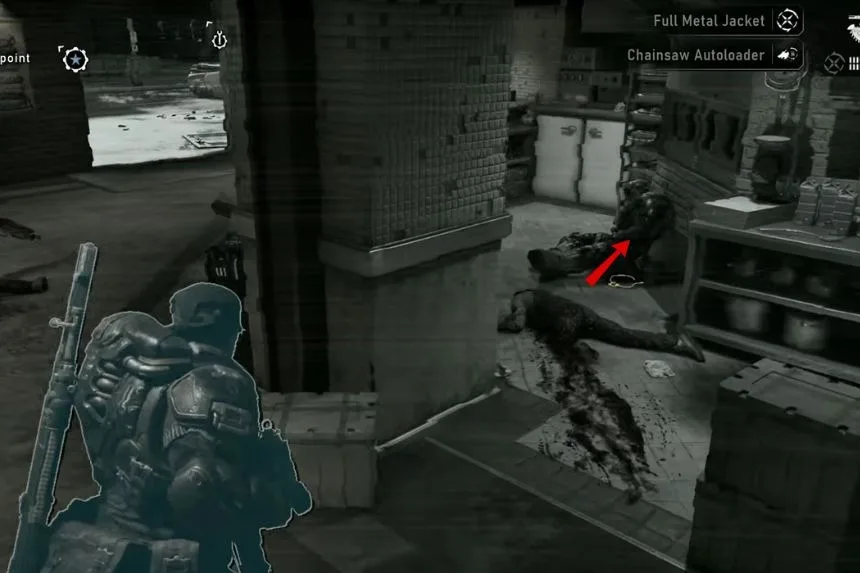
Head into the town square and into the coffee shop. Check the area behind the counter of the coffee shop to find the Cog Tags of Specialist Jada Clemens.
Metro Fare Notice
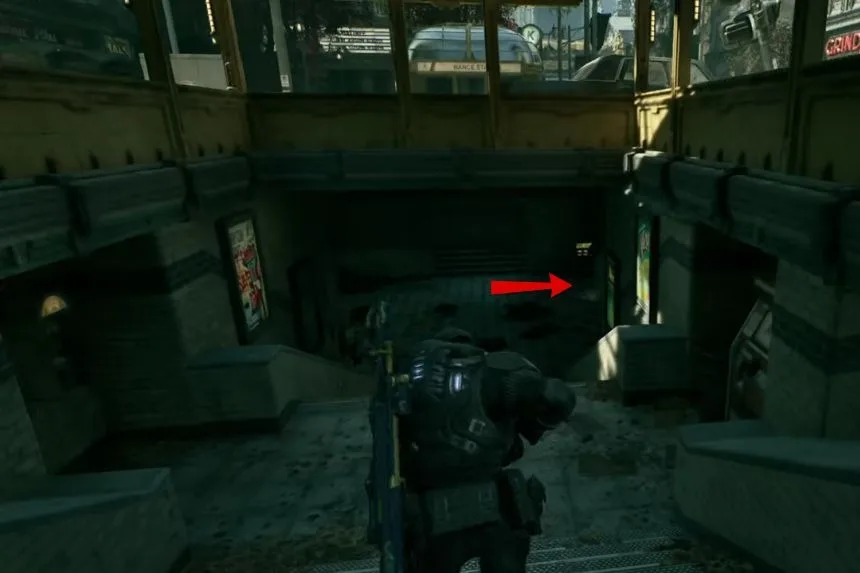
You can get the Metro Fare Notice from underground between the two metro exits close to the theatre. Go inside any one of the metro exits and check between them for the item.
Supply Cache Near the Theater
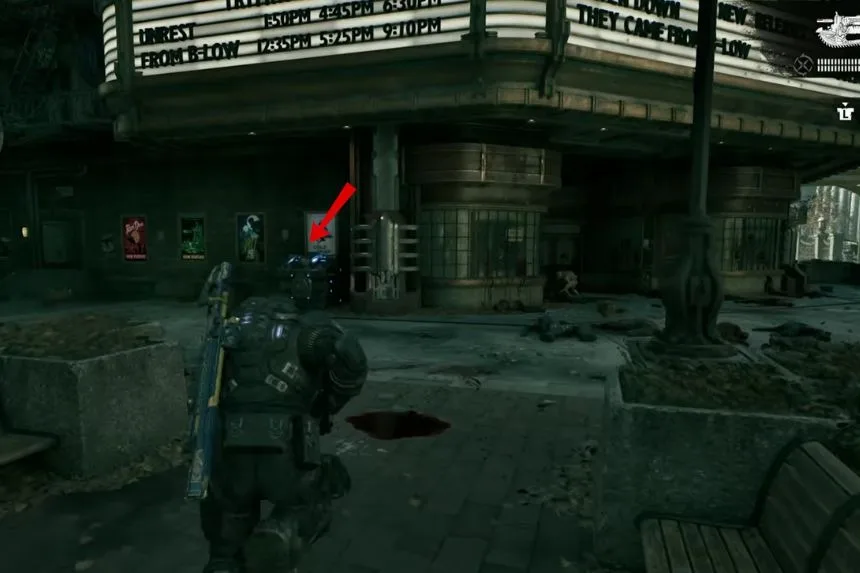
Exit toward the theatre and find another Supply Cache nearby.
Hardcase Near the Newspaper Stand
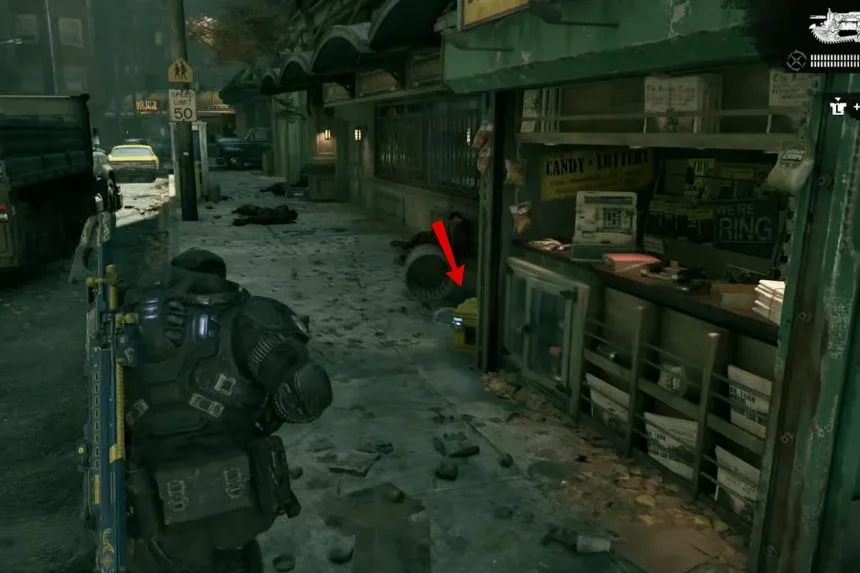
After exiting the Supply Cache, make your way back to the billiard room and the newspaper stand, where you will see a Hardcase near the newspaper stand.
Hardcase in the Newspaper Building
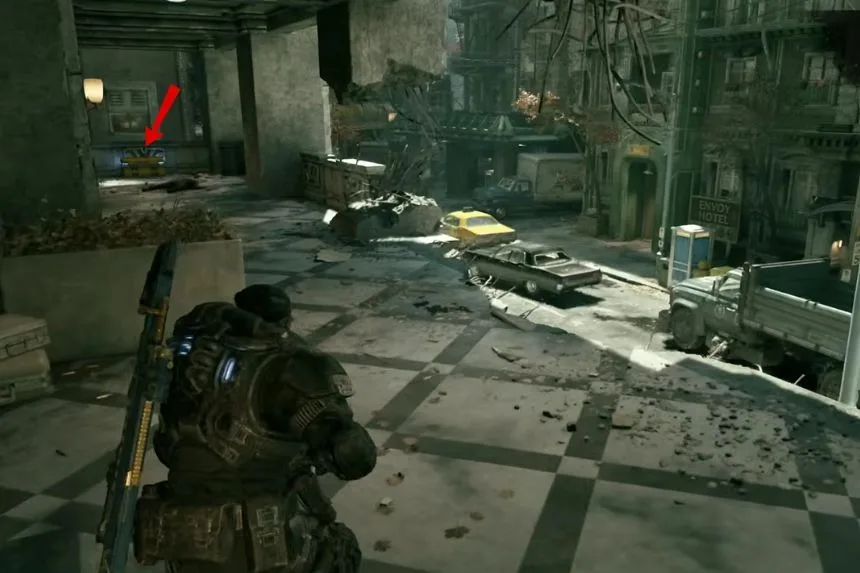
Head for the newspaper building close by. Climb the stairs to the second floor and take a left turn. Locate the big Hardcase along the passageway.
Hardcase at the Envoy Hotel Loading Dock
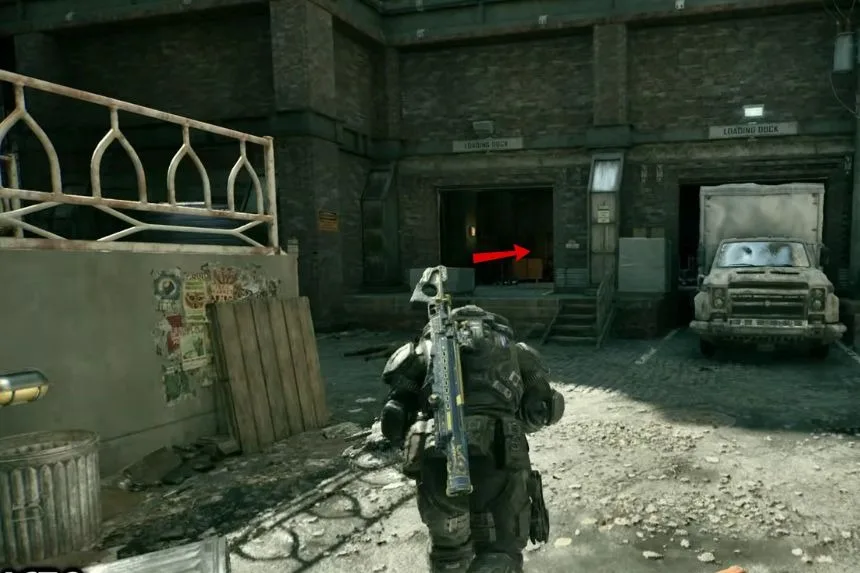
Make the leap off the ledge towards the Envoy Hotel. Take a left into the alley at the hotel and look for the loading dock where you’ll find another Hardcase.
Major Burger Box
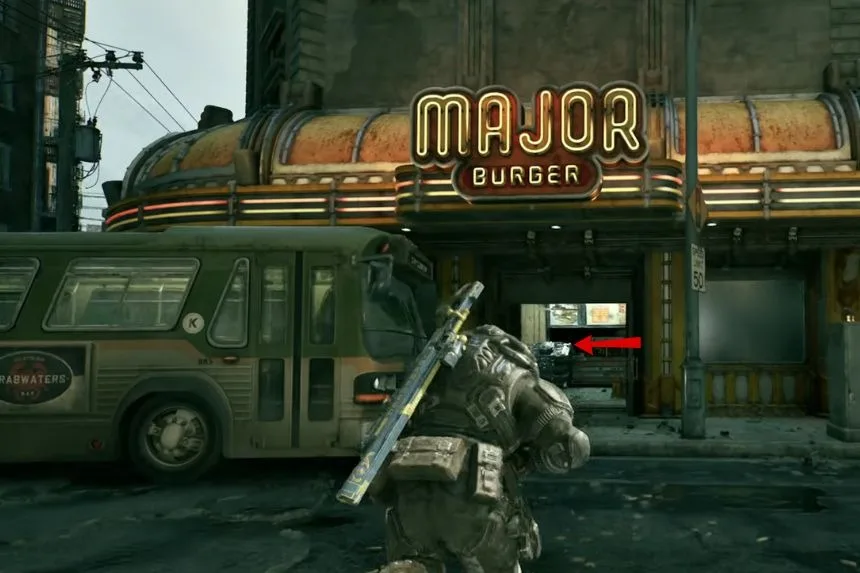
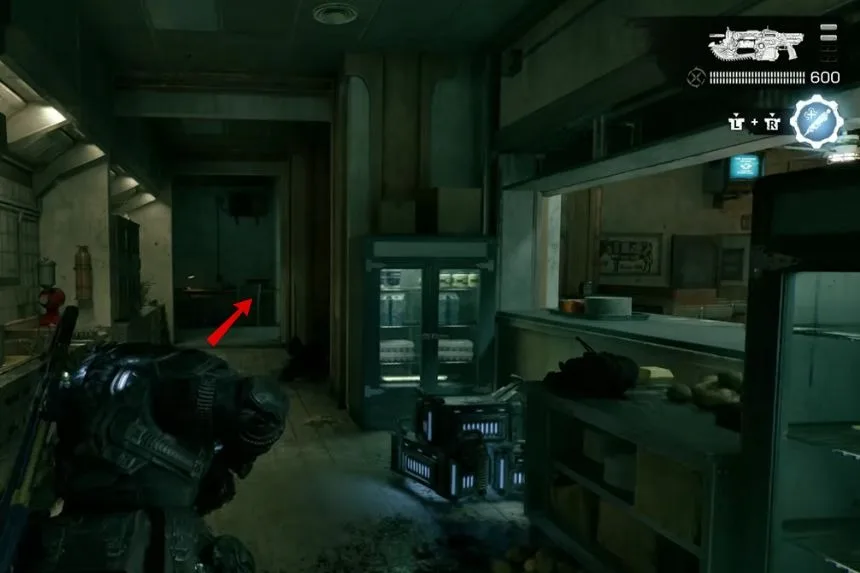
Walk out of the loading dock and take a right turn through the alley. You will come across another place that serves burgers. Go inside and look for a Supply Cache. There is also a Major Burger Box collectable here.
Cog Tags of Brendan O’Connell
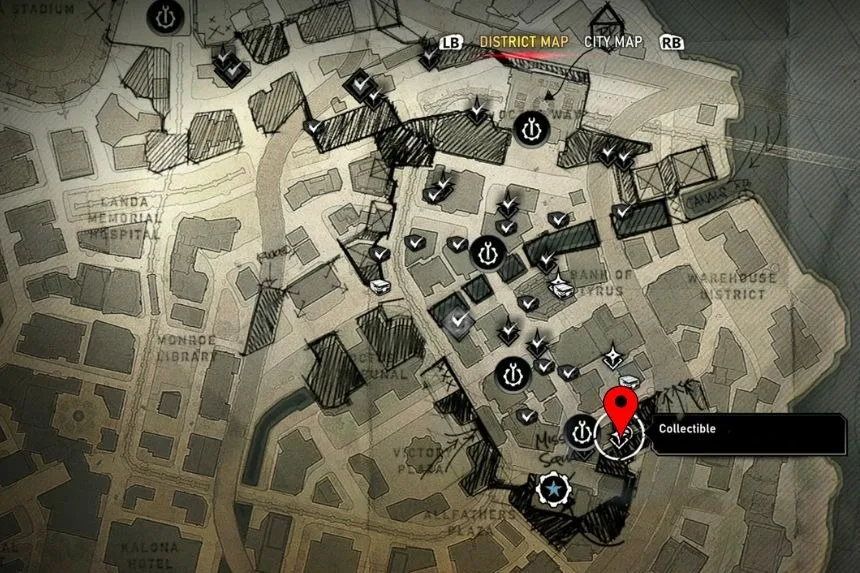
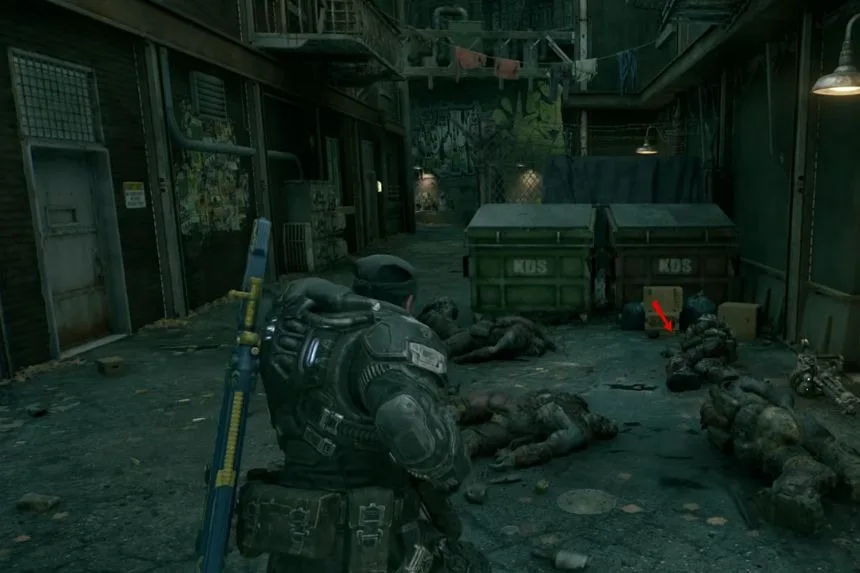
Exit the restaurant and walk along the right wall to the alley nearby. Look on the floor for the Cog Tags of Brendan O’Connell.
Hardcase in the Apartment
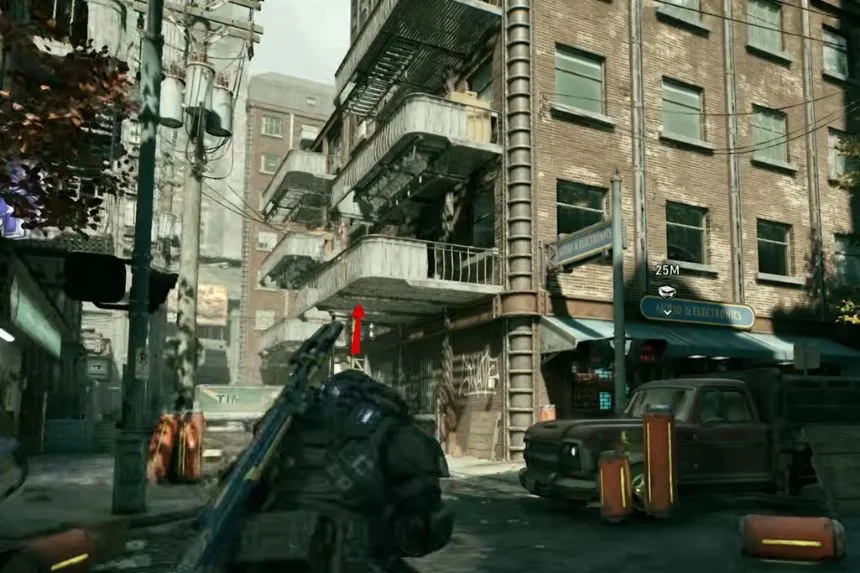
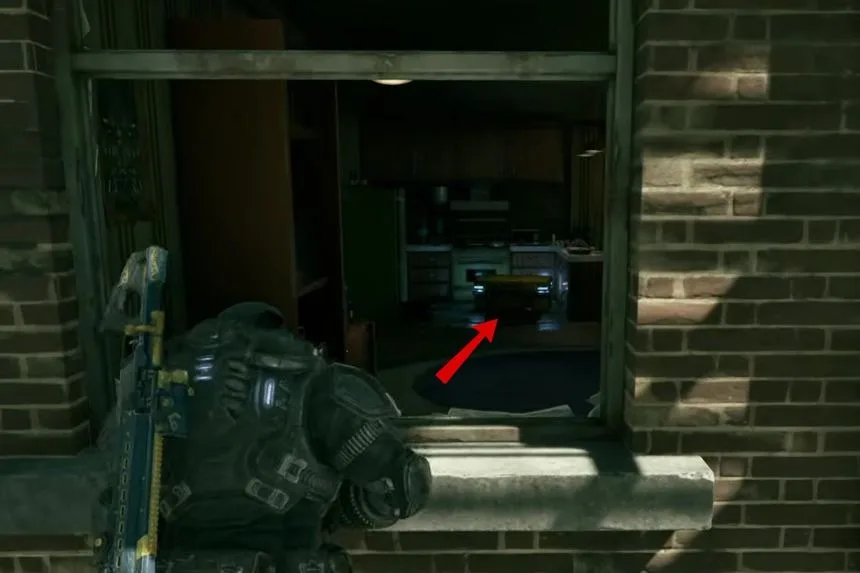
Go back to the last intersection and locate the second-floor metal balcony with a dumpster and ladder. Climb up the ladder and enter the apartment via the window in order to locate the Hardcase.
Cog Tags of Master Sergeant Mark Avamore
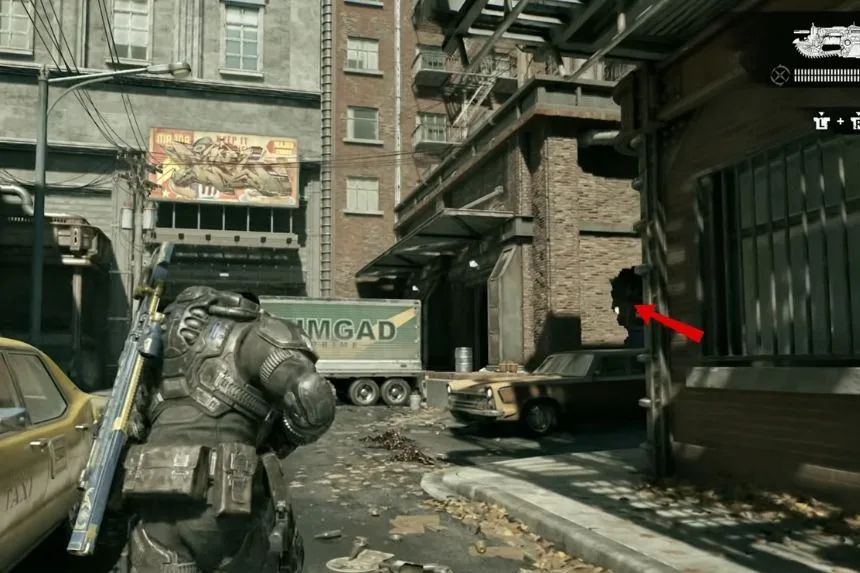
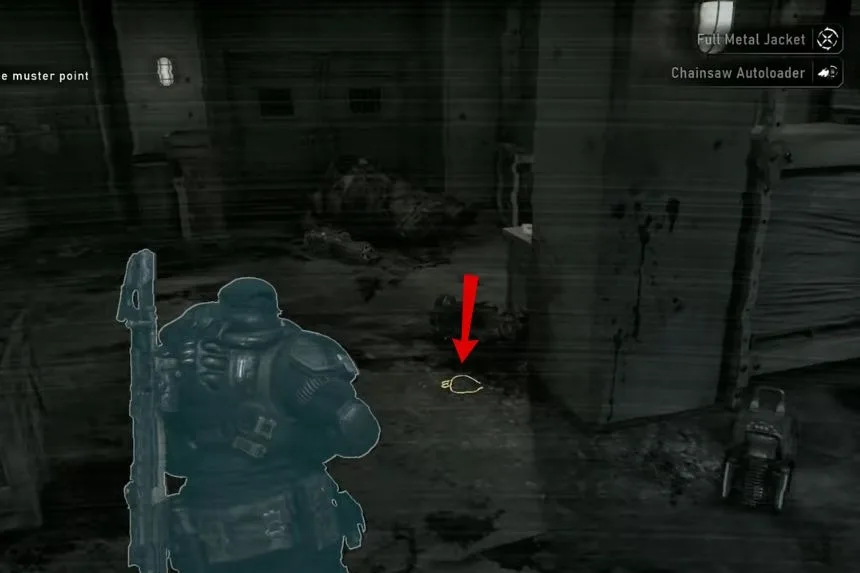
Exit the area using the same window and jump to the right side. Enter the shop that is located in the vicinity to locate the Cog Tags of Mark Avamore.
Caricature of Colonel Elias Trench
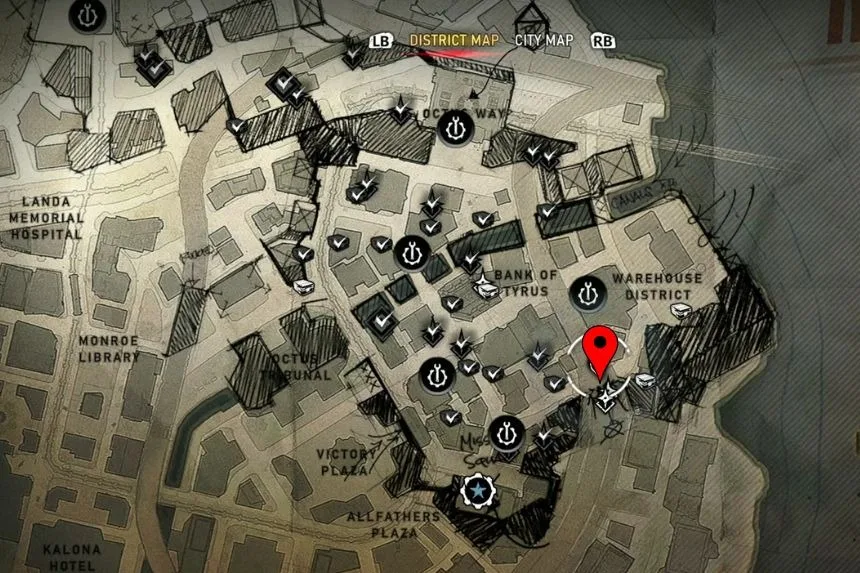
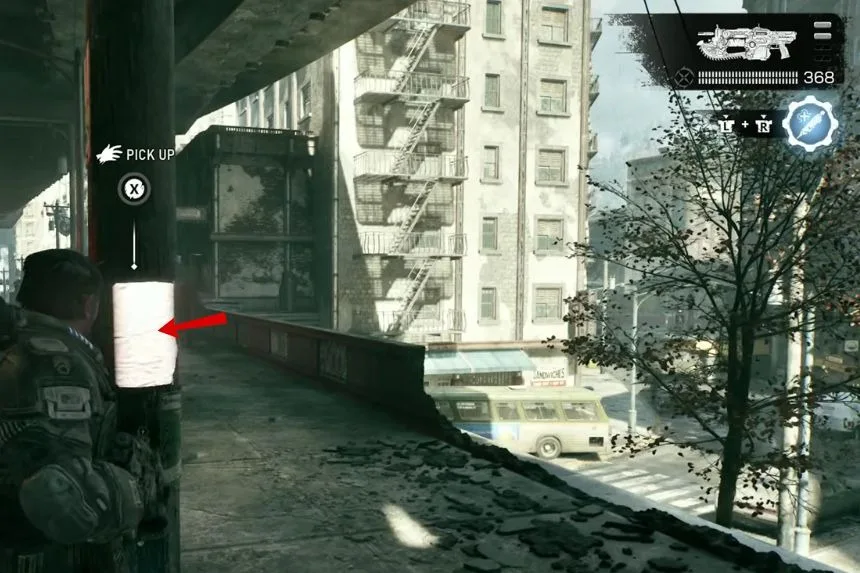
Then, go to the bridge section towards Timgad, where you will see the Caricature of Colonel Elash Trench located above the lower path.
Cog Tags of Specialist Arnold Imhatip
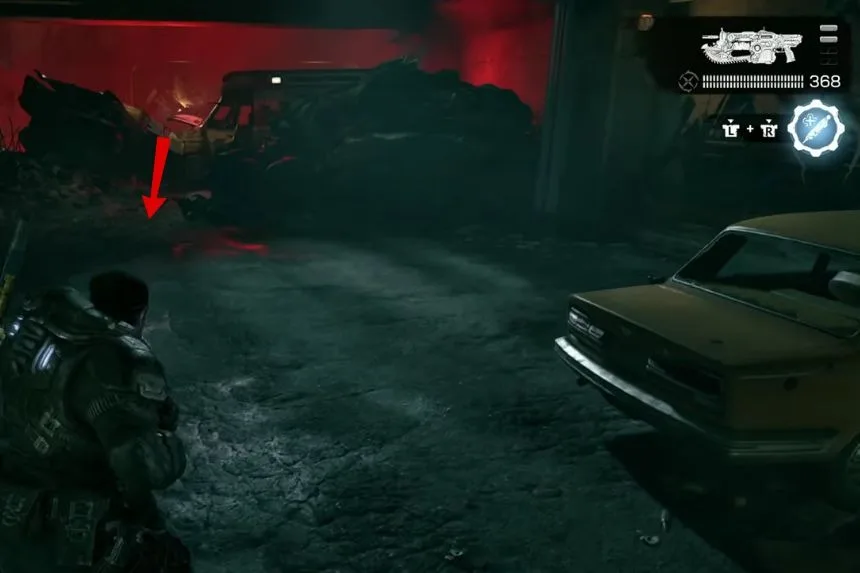
Below this section, there are the Cog Tags belonging to Specialist Arnold Im Hatip.
Hardcase Near the Blue Truck
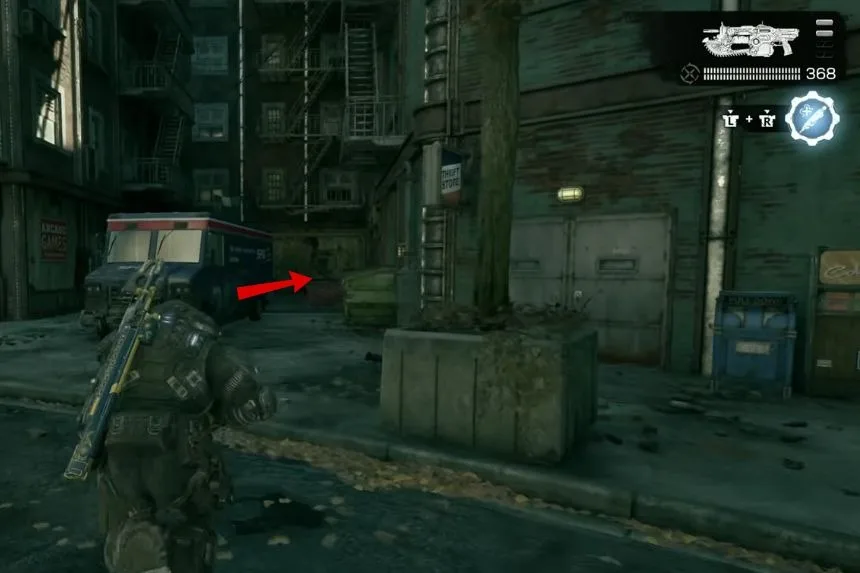
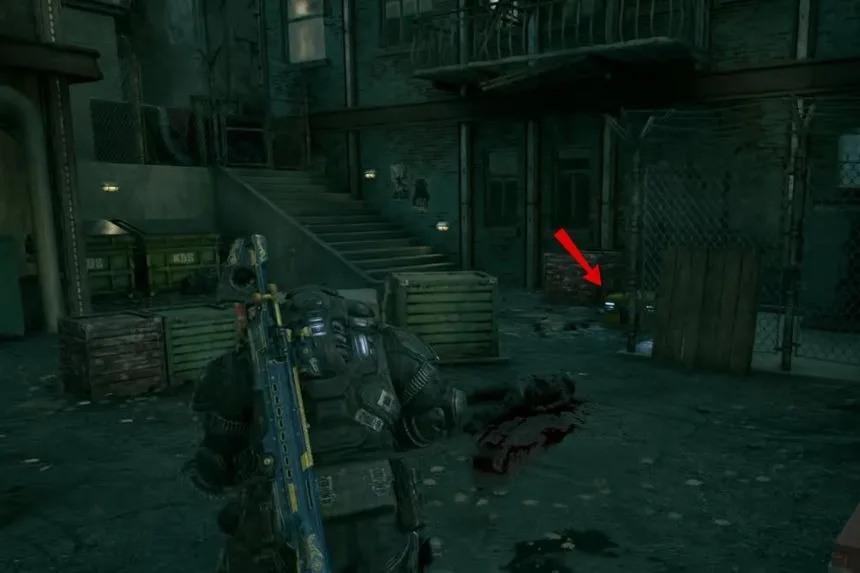
From here, turn around and follow the right wall. Pass the newsstand and enter the alley with the blue truck. A Hardcase can be found beside the chain-link fence.
Hardcase in the Lumber Truck Courtyard
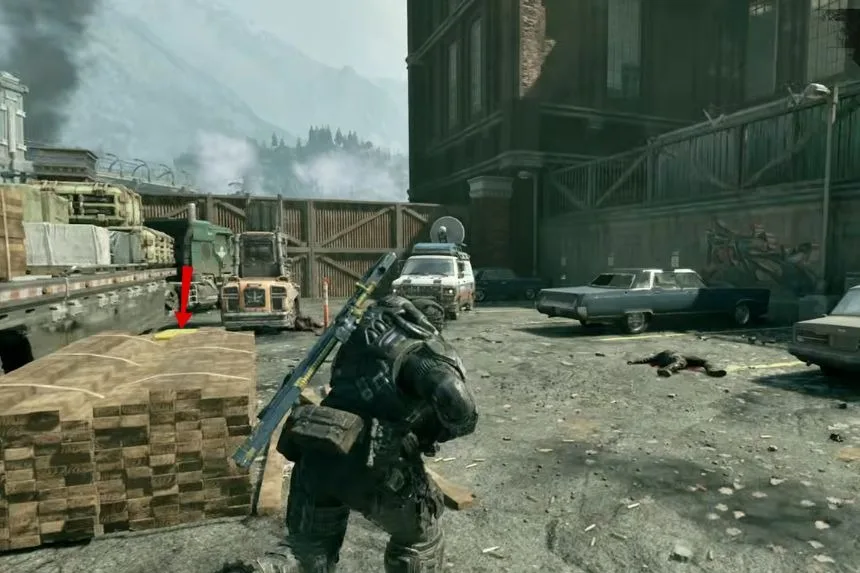
Leave the alley and continue along the right wall toward the large refinery building with the yellow writing. Cross the street near the newsstand and enter the courtyard with the lumber trucks. Another Hardcase is waiting here.
Vibration Complaints
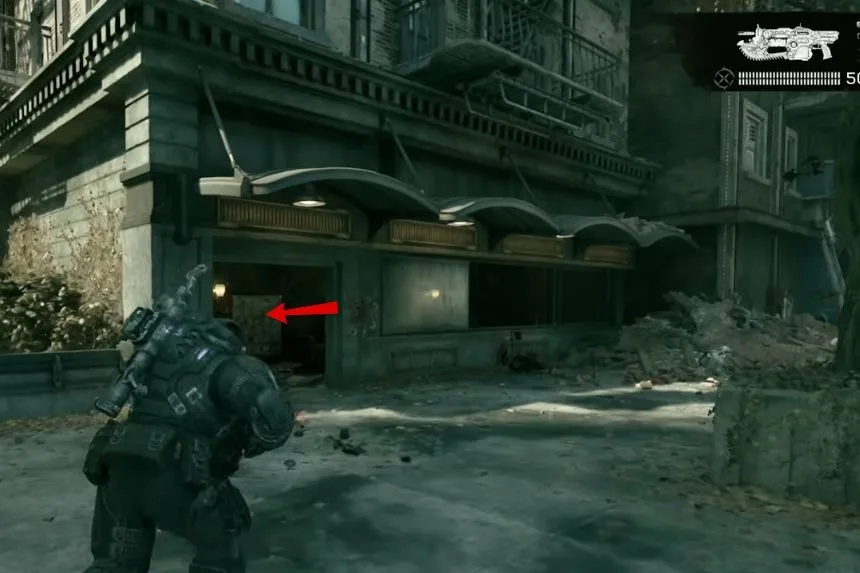
Cross the street diagonally toward the music store. Inside this area, you can find the Vibration Complaints collectable.
Muster Point
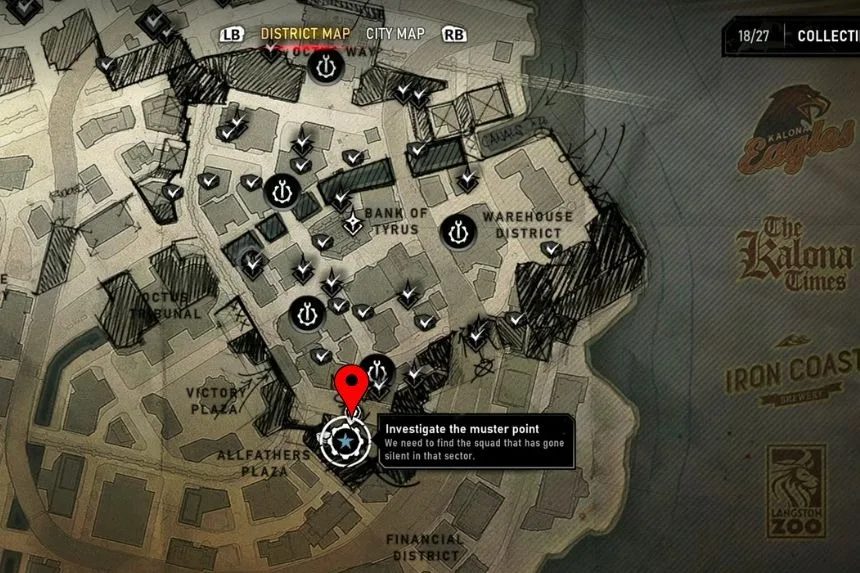
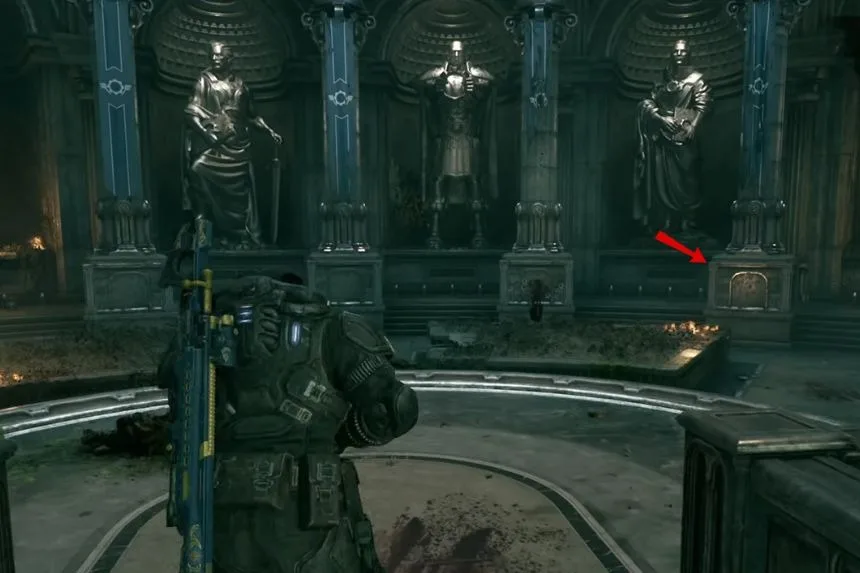
Before moving on, you need to investigate the Muster Point as part of the main objective. This is important because several later collectables will not become available until you complete this objective. Before starting the objective, make sure you grab the nearby Hardcase.
Hardcase at Amberstone Storage Facility
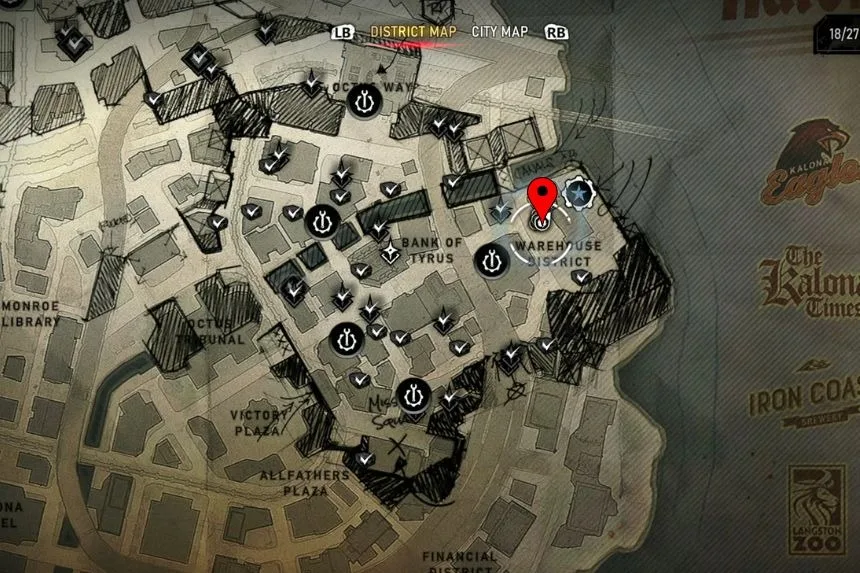
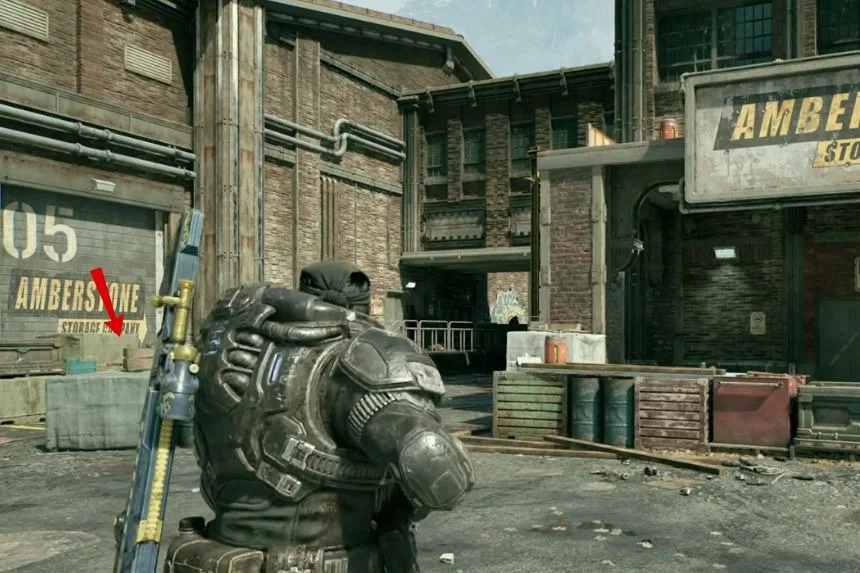
Once the Muster Point objective is complete, head toward the Amberstone Storage Facility. The gates will now be open. As you enter, look to the left for another Hardcase. Complete the objective at the storage facility and leave once the explosion occurs.
Recruitment Poster
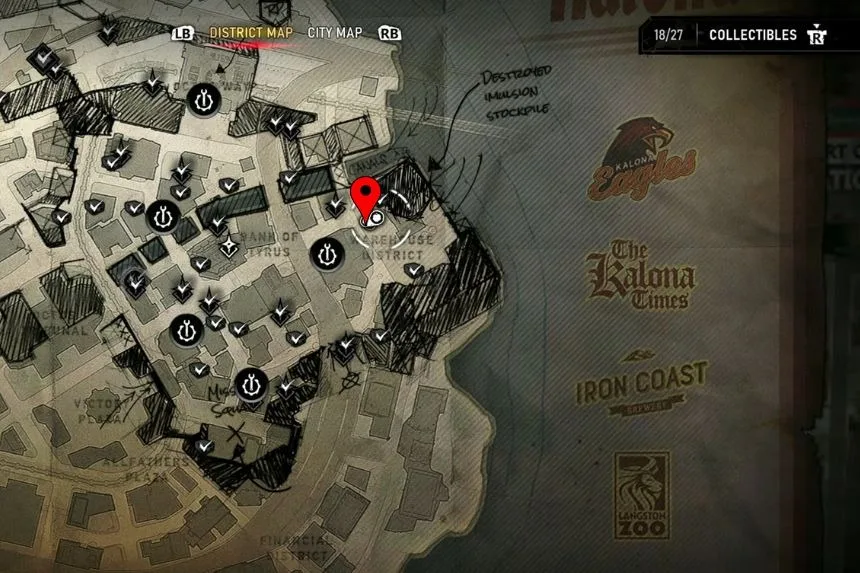
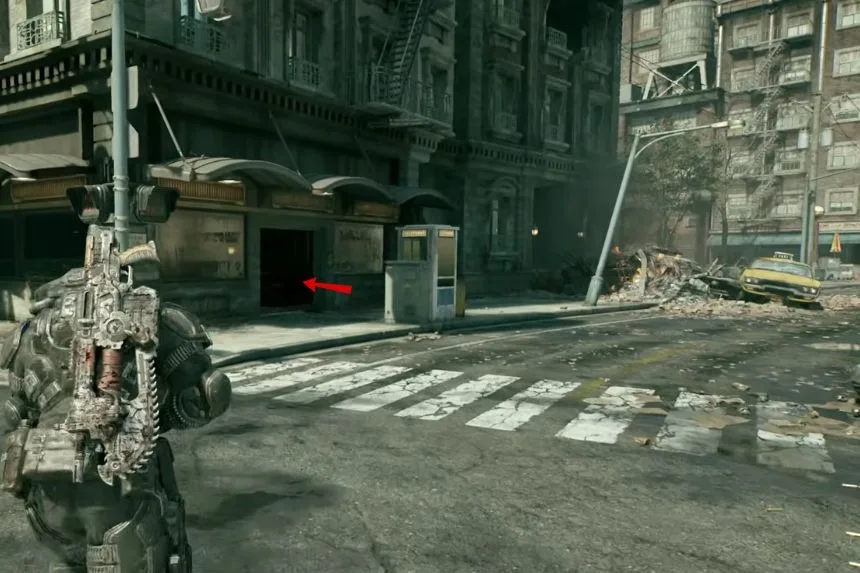
Cross the street toward the hotel and enter the lobby. Look to the right to find the Recruitment Poster: Sick on Leave for Much collectable.
Lost in Translation Secondary Objective
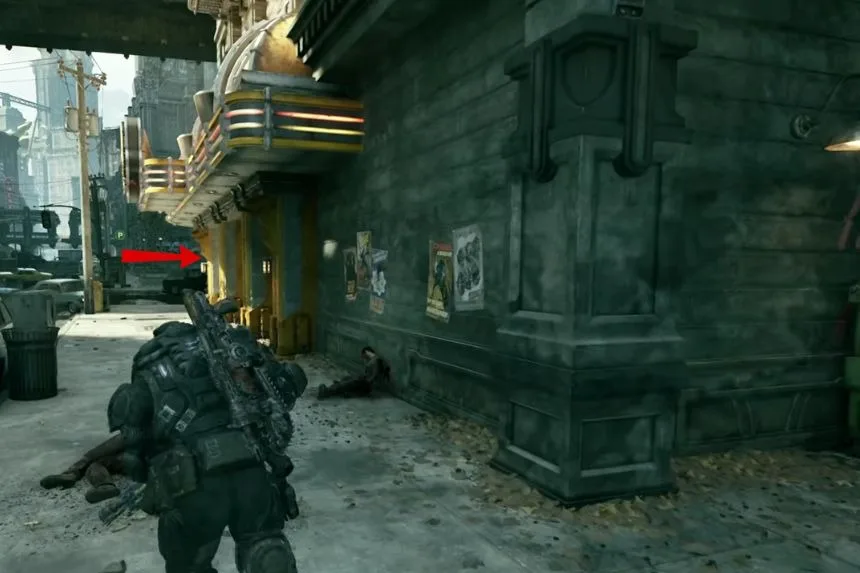
This also leads into the Lost in Translation Secondary Objective. Leave the hotel and keep the police station on your left as you move toward the burger restaurant. Inside the restaurant, you will find two employees who need help. Speak to them and escort them to the required location. Once you finish the escort, the Secondary Objective will be complete.
Police Department Supply Cache
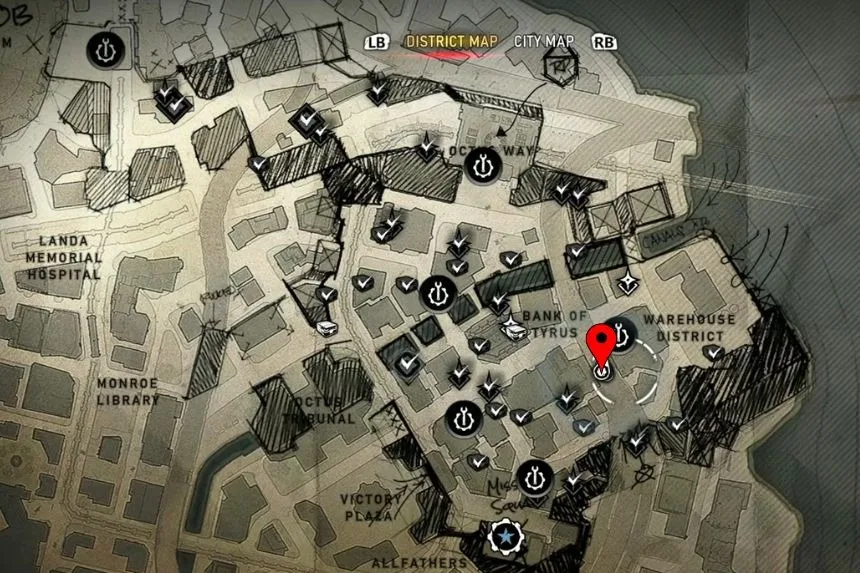
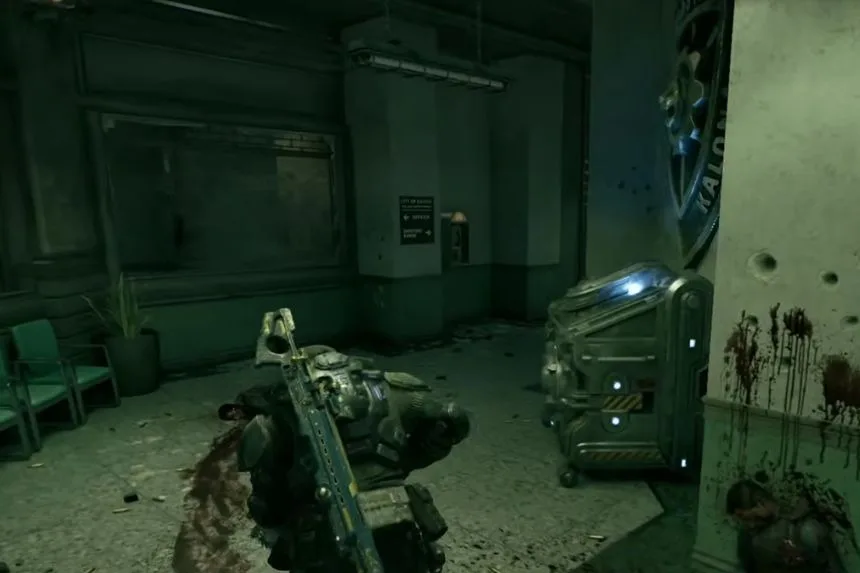
Return toward the burger restaurant area and cross the street to the Police Department. You can use the Supply Cache inside to restock and equip your upgrades.
Photograph and Harmonica from Mags’s Apartment
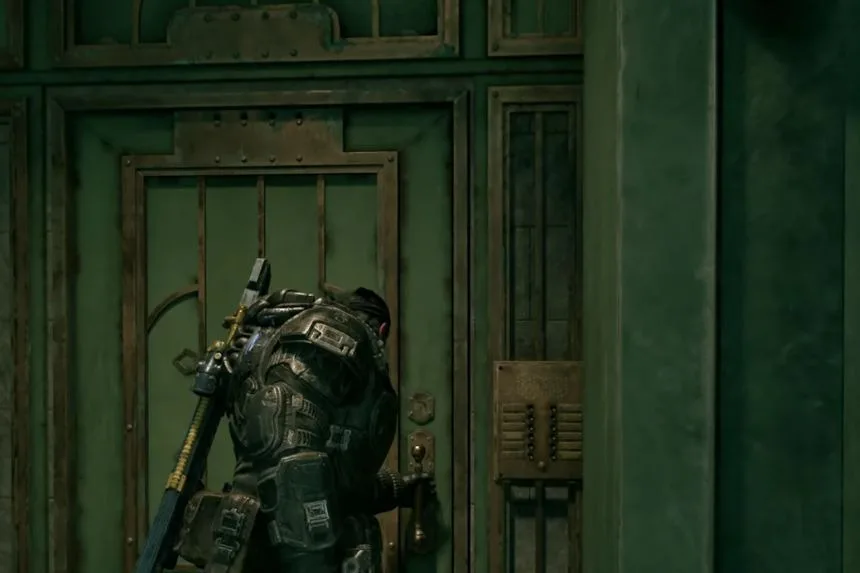
The story eventually takes you to the Envoy Hotel. Enter the hotel to trigger a cutscene. Afterwards, you will automatically receive the Photograph and Harmonica from Mags’s Apartment collectable. This one cannot be missed because it is tied to story progression.
War Savings Bond and Hardcase
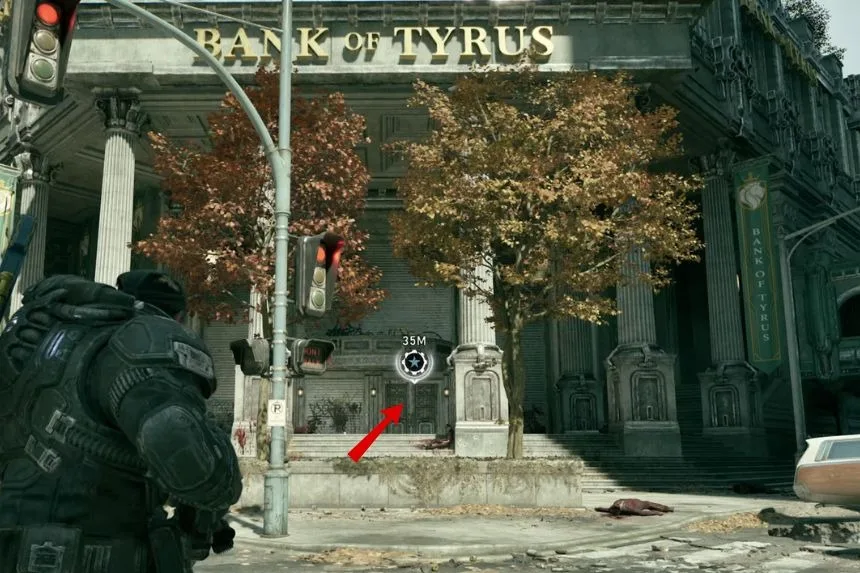
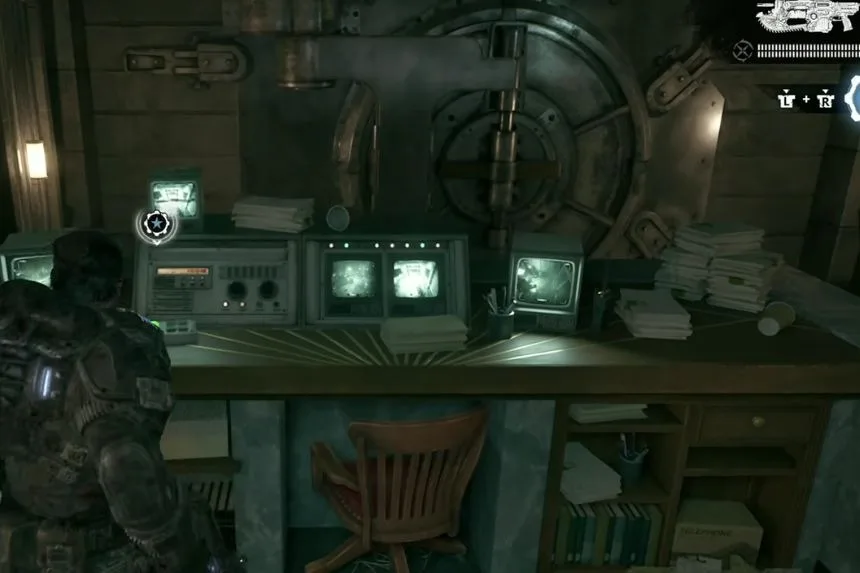
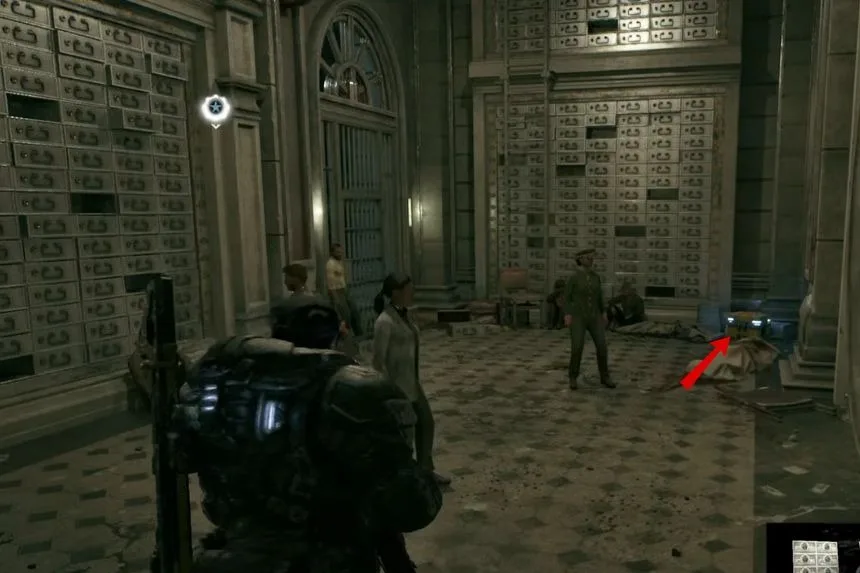
Your main objective will later take you to the Bank of Tyrus. You can only enter the bank once it becomes part of the main objective. Inside, meet the manager, collect the key fob, and deal with the enemies. Eventually, you will reach the vault. Inside the vault, look to the left for the War Savings Bond collectable. There is also a Hardcase on the right. Make sure you collect both before leaving.
Hardcase at the Apartment
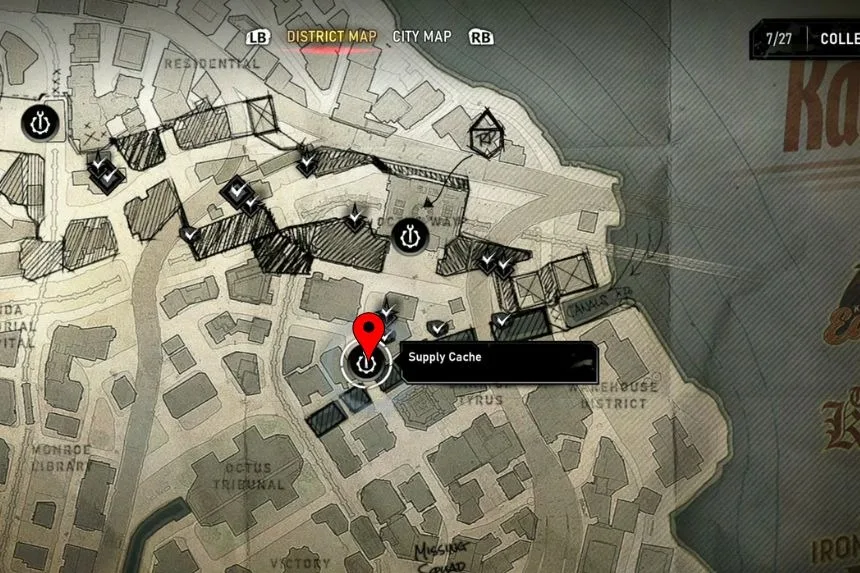
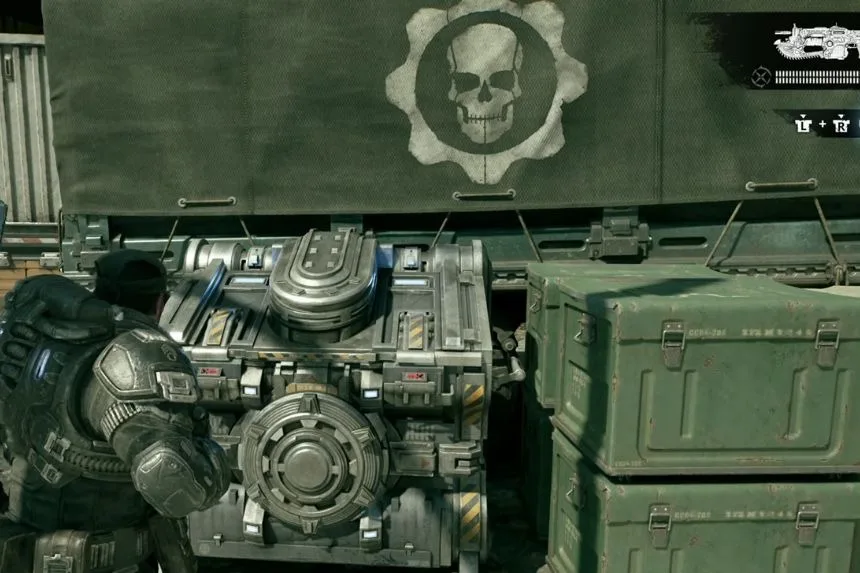
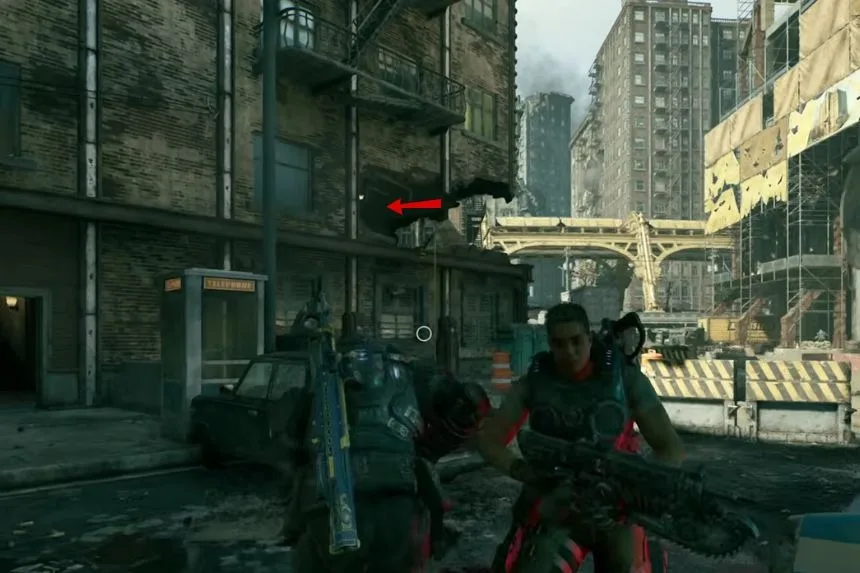
After finishing the bank section, return toward the construction site. Use the Supply Cache you unlocked earlier as a landmark. You will have to fight several enemies in this area. Enter the apartment building on the left and go upstairs to find another Hardcase.
Data Pad
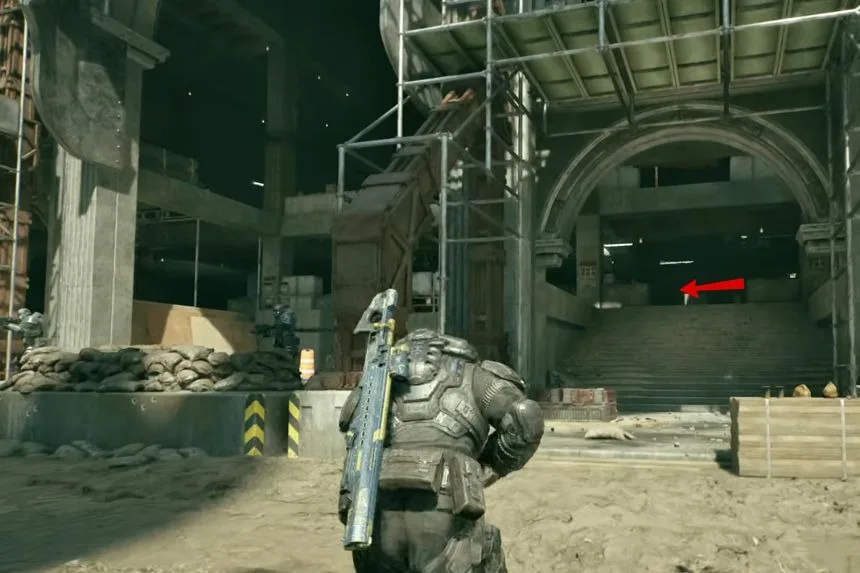
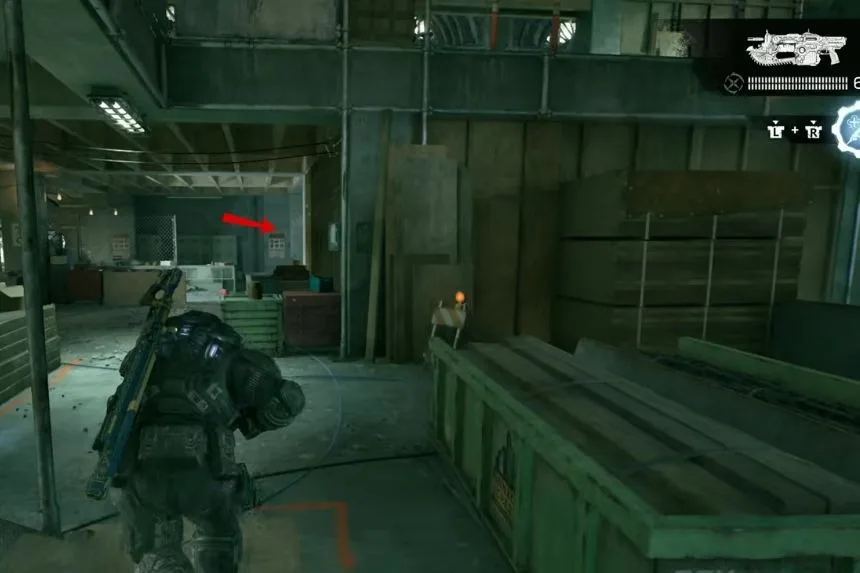
Head toward the construction site. You can only reach the third floor when the construction site becomes part of your main objective. Once you reach the first floor, go to the far left and around the corner. Turn right to find the Data Pad.
Hardcase Above the Data Pad
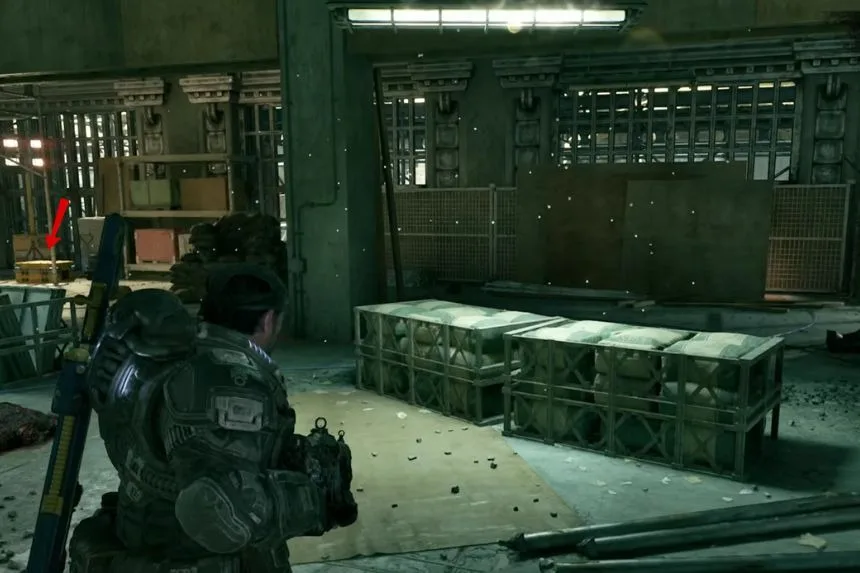
Head upstairs from the Data Pad to find another Hardcase directly above it.
Family Reunion Secondary Objective
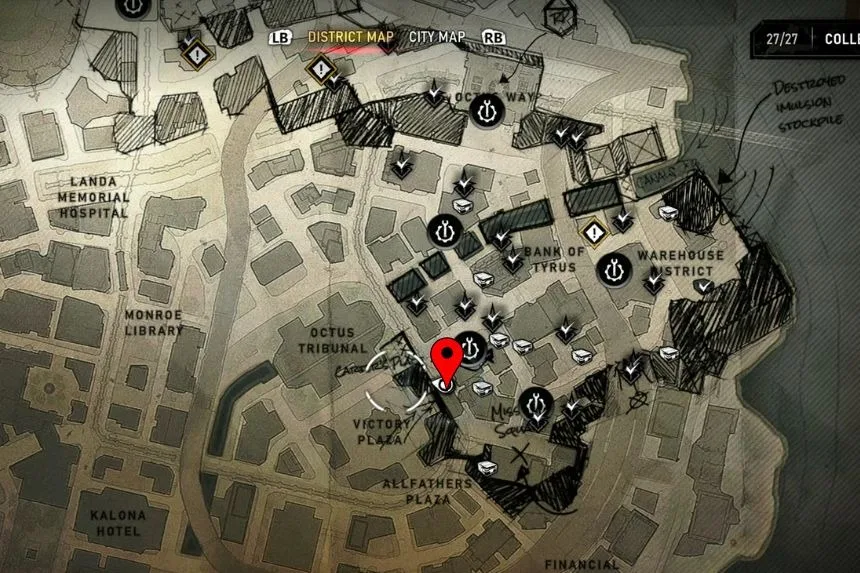
Continue through the construction site and reach the third floor. Use the repel line to descend onto the bridge. There are several collectables around this area, but you should complete the Family Reunion Secondary Objective before linking up with Charlie Squad.
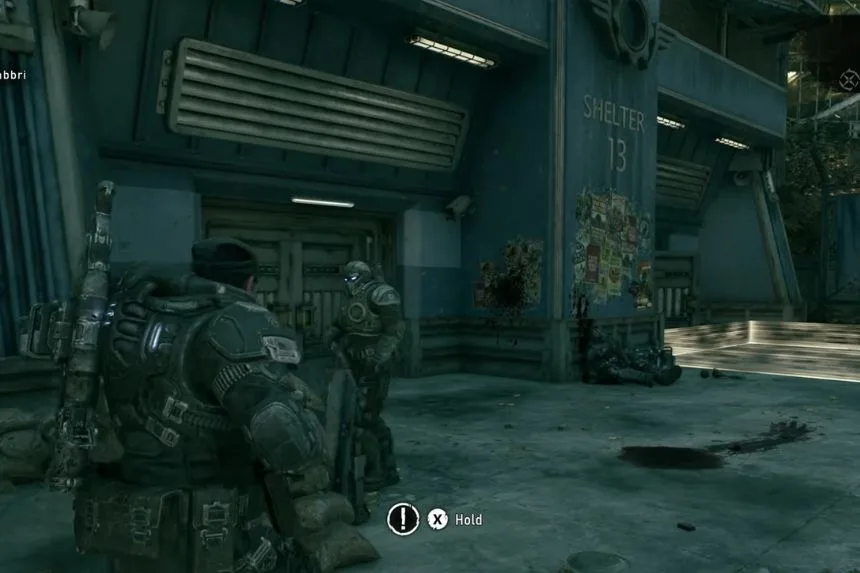
Head farther south and look for the building with Shelter 13 tucked underneath it. Start the objective and defend the area against the enemies. Wait for the dialogue to finish, and Family Reunion will be completed.
Hardcase Before the Point of No Return
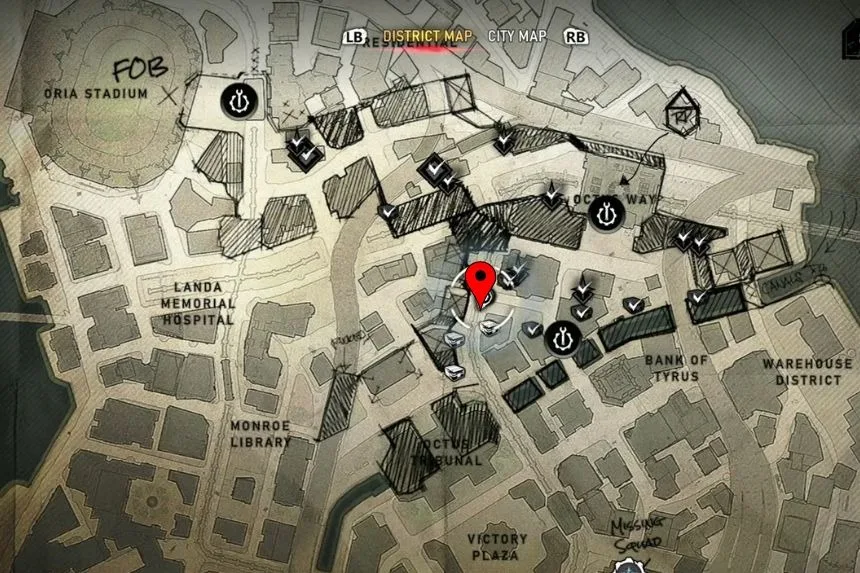
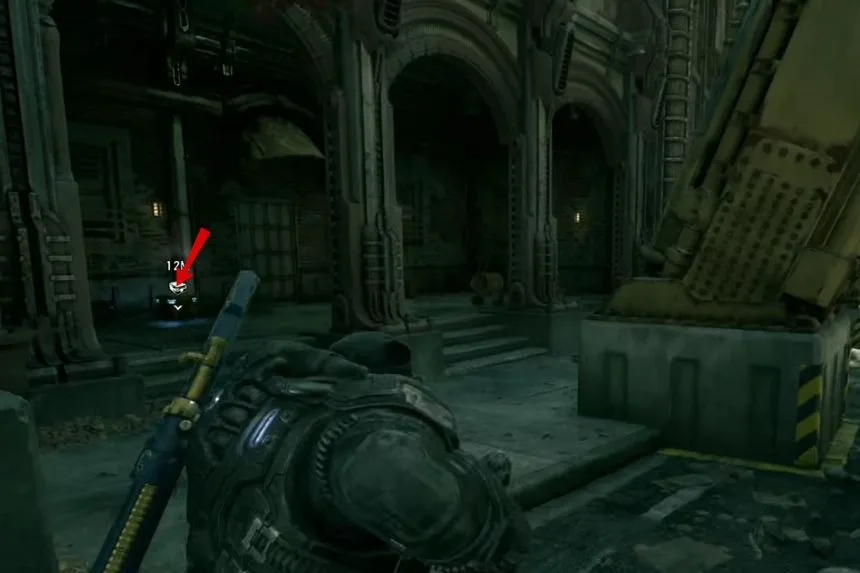
Going through the gate to Charlie Squad acts as a point of no return. Before you continue, grab the Hardcase directly on your right after linking up with Charlie Squad. If you go left too soon, you will pass the point of no return and may have to replay a large section of the chapter to collect anything you missed.
Courthouse Supply Cache
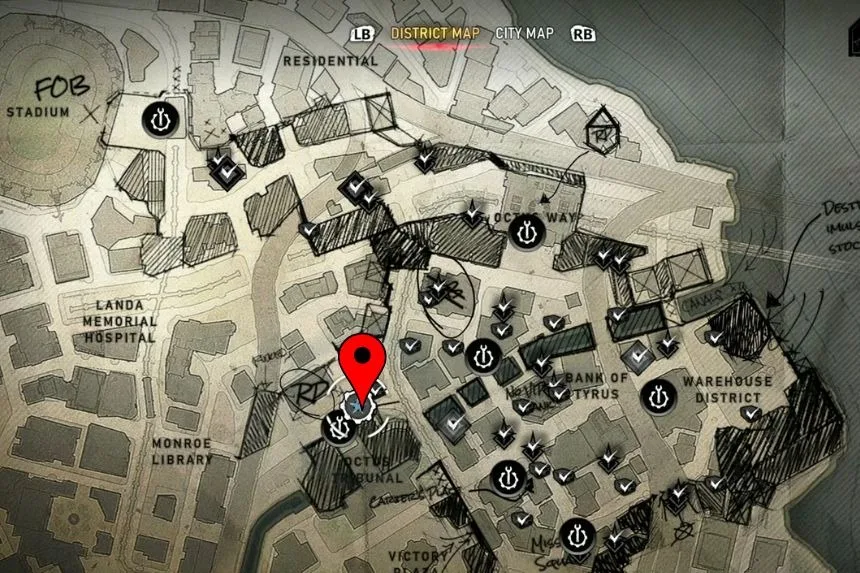
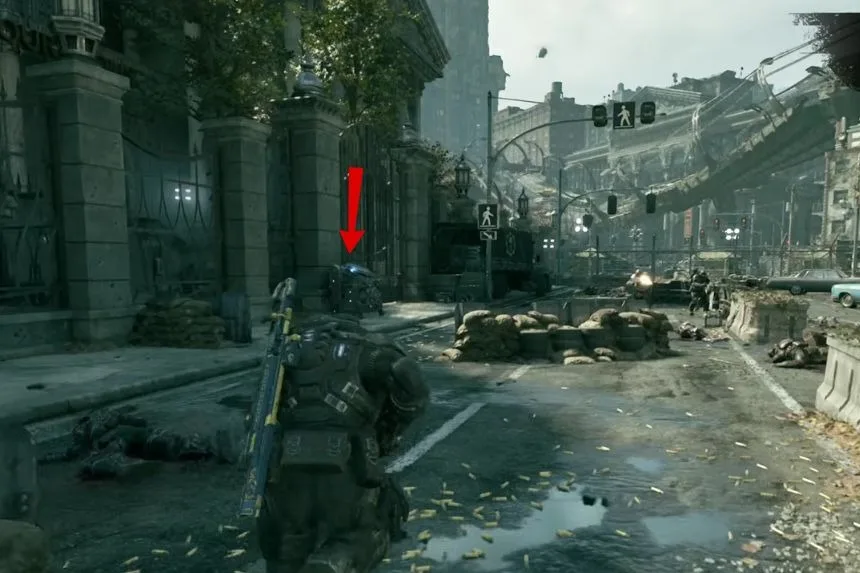
After joining Charlie Squad, you will have to defend the courthouse. Immediately after the cutscene, drop down to the left to find a Supply Cache. Defend the area for several minutes, then continue once the VIP has been taken to the Raven.
Hardcase in the White Storage Unit
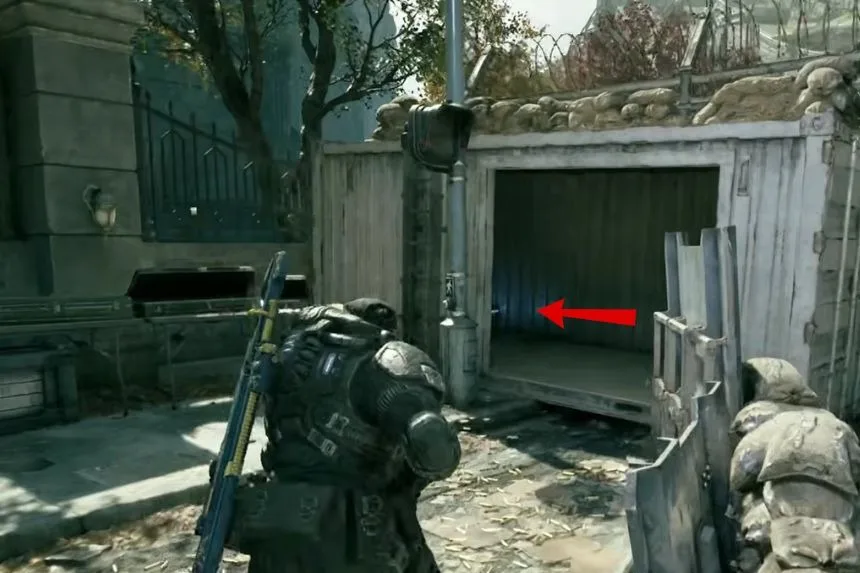
You will then pass through a quarantine fence section. Stay toward the far left and check the back-left corner for a small white storage unit. There is a Hardcase inside.
Hardcase in the Park
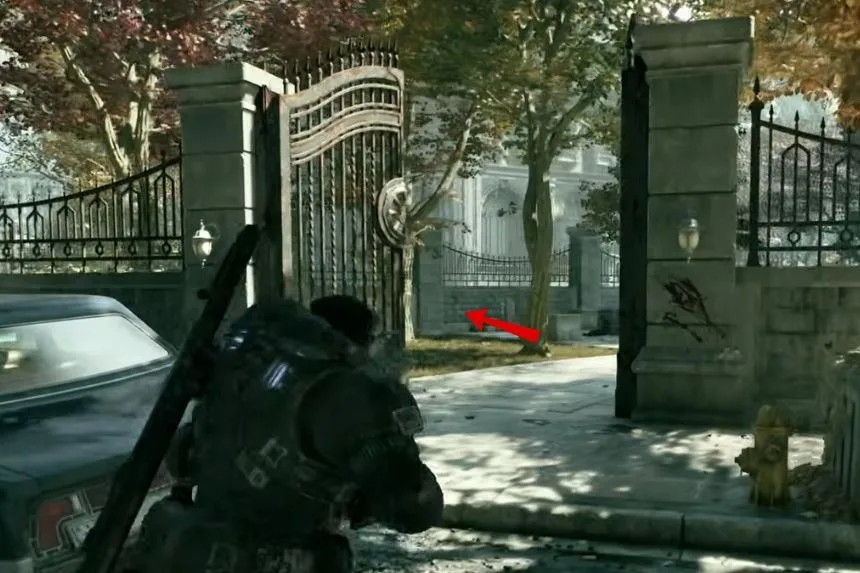
Continue from the checkpoint and look for the large building on the right. Instead of immediately fighting the enemies, stay along the left wall until you find the gate leading into a park. Enter the park to trigger another Hardcase on your map.
Victory Flag
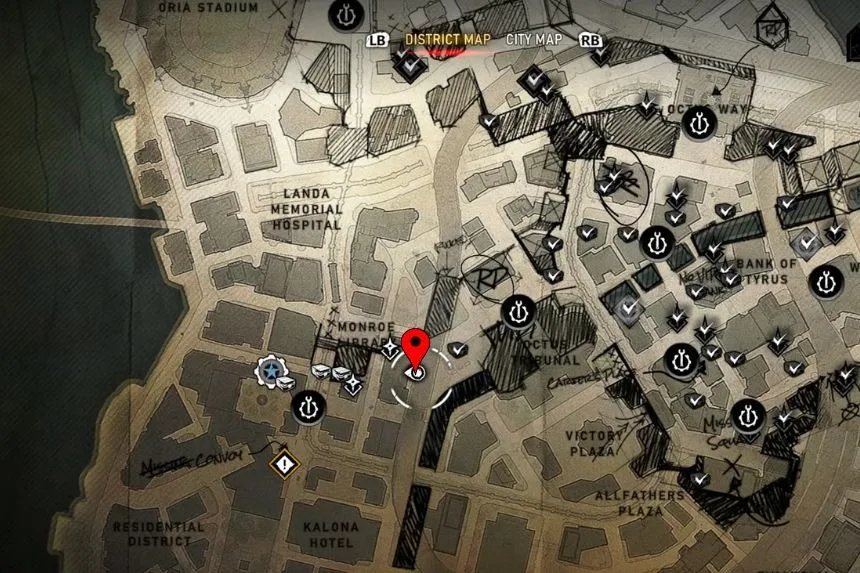
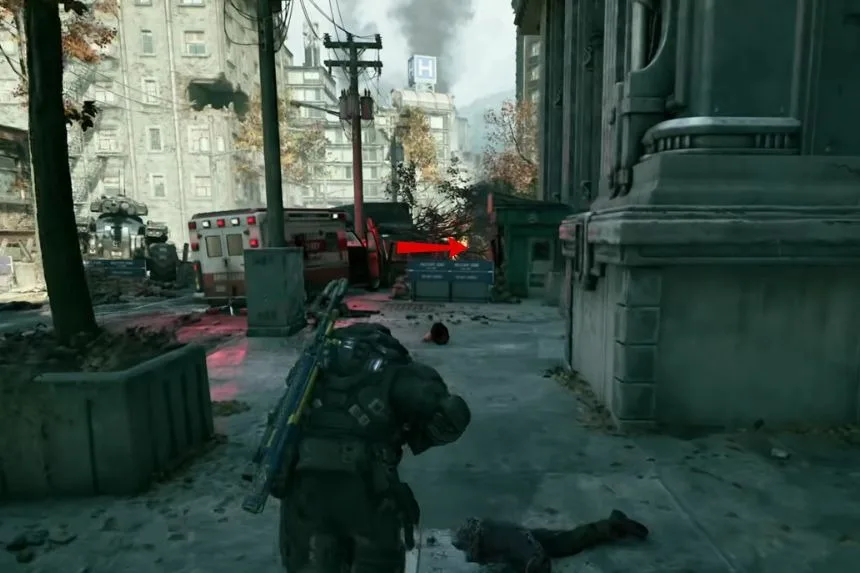
From the park, use the large building ahead as your landmark. Go up the stairs and look to the right for the newspaper stand. You will find the Victory Flag collectible there.
Child’s Monster Drawings
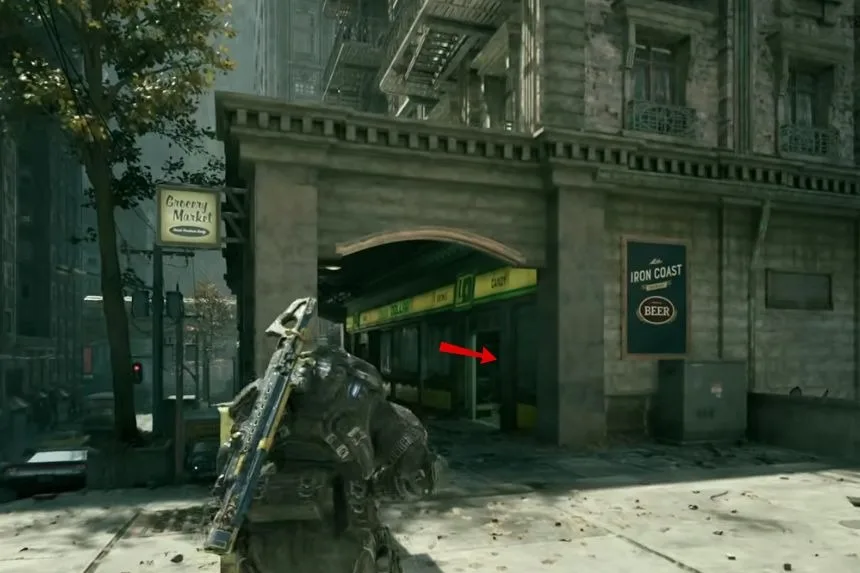
Turn around and head down the street toward the nearby convenience store. Enter the store and check the back for the Child’s Monster Drawings.
Supply Cache Under the Train Line
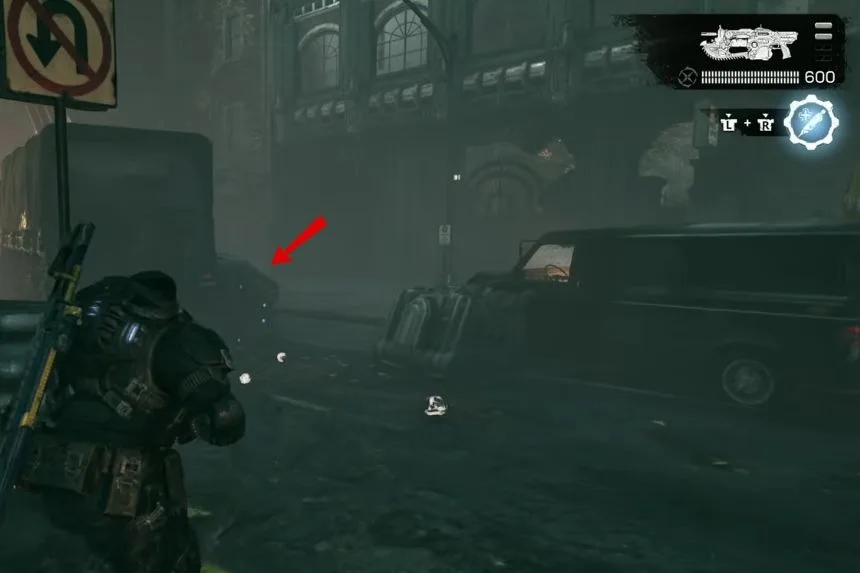
Leave through the nearby doorway and turn right twice. Go down the steps to reach the area underneath the train line. You will find a Supply Cache here.
Hardcase at the Police Car
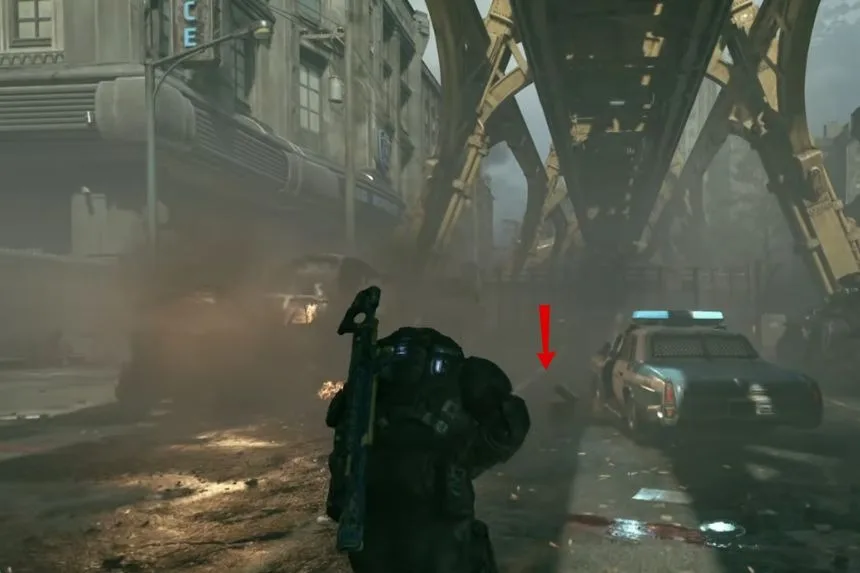
Follow the path underneath the train line. At the end, you will find a police car with another Hardcase nearby.
Second Hardcase in the Alley
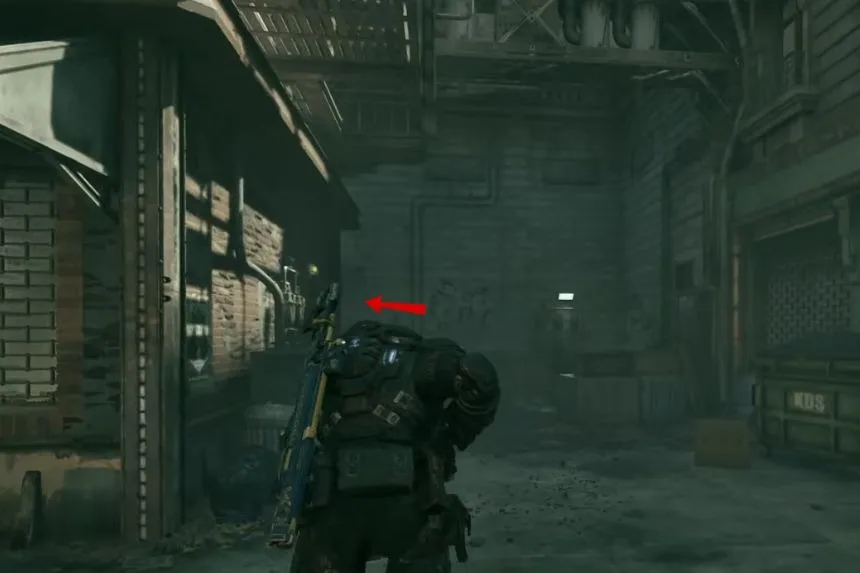
From the Hardcase, continue into the alley and around the corner to find another Hardcase. You can cut the nearby fence to create a shortcut back around the area.
Hardcase in the Courtyard
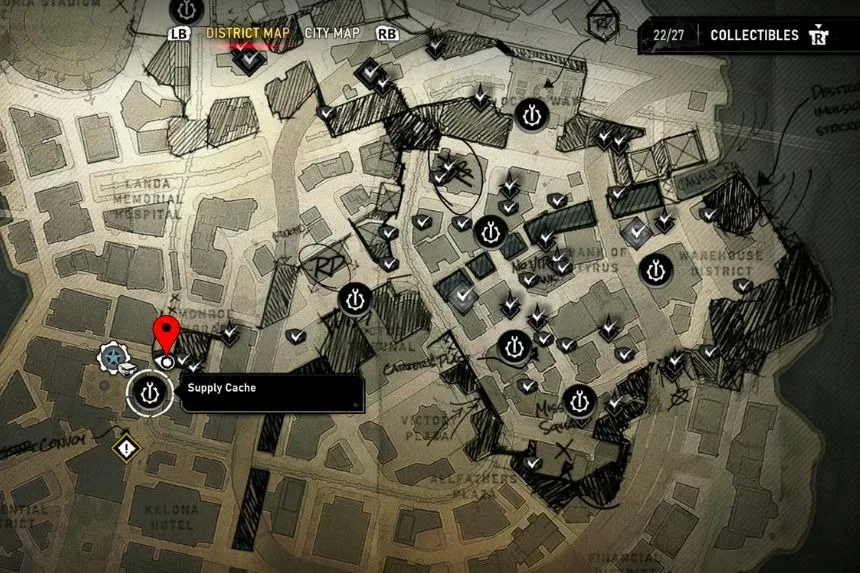
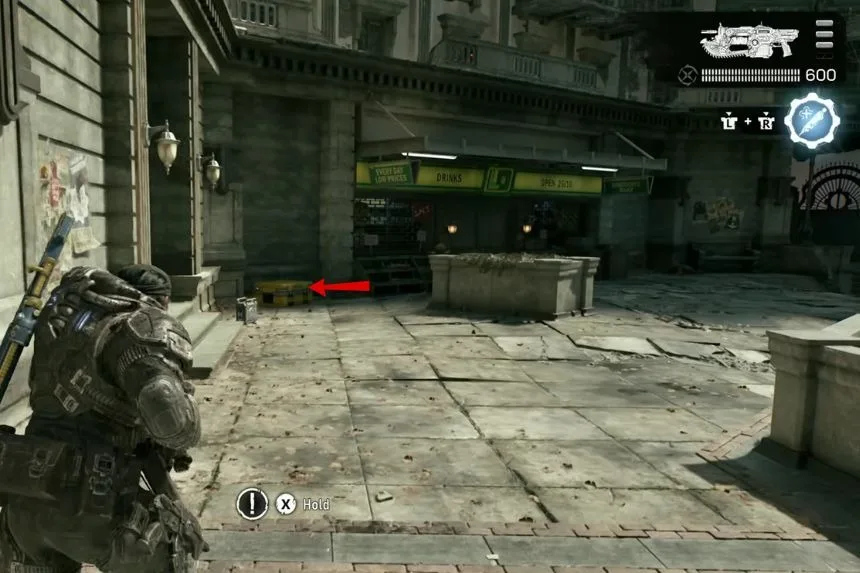
Continue toward the main objective and enter the courtyard through the side entrance. After opening the gate, deal with the enemies. There is a Hardcase immediately to the left after entering.
Muster Point Instructions
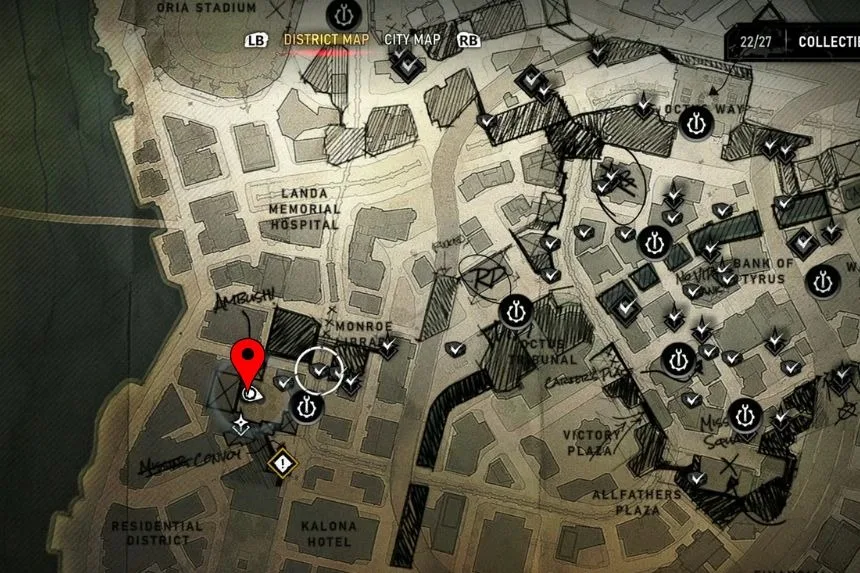
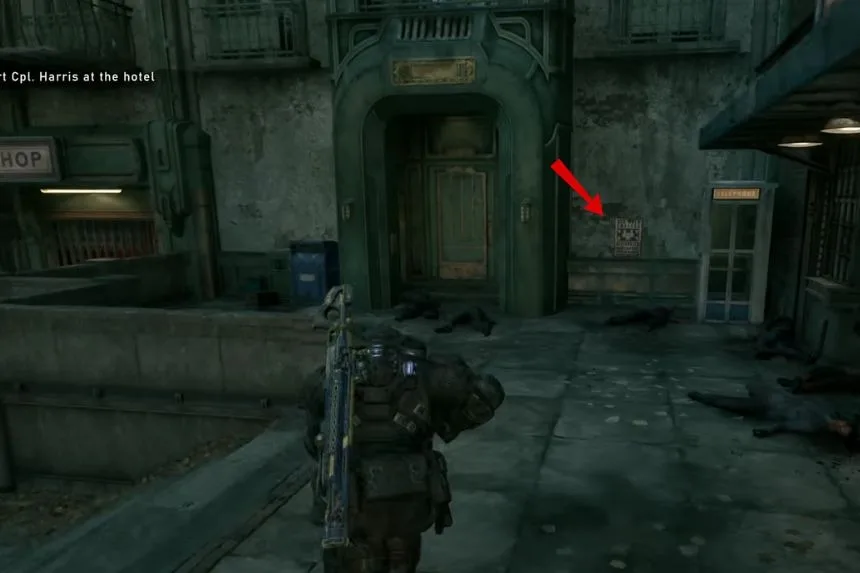
Once the courtyard is clear, stand at the back opposite the Supply Cache and face the fountain. Turn right to find the Muster Point Instructions hanging on the wall.
Black Raven Down Secondary Objective
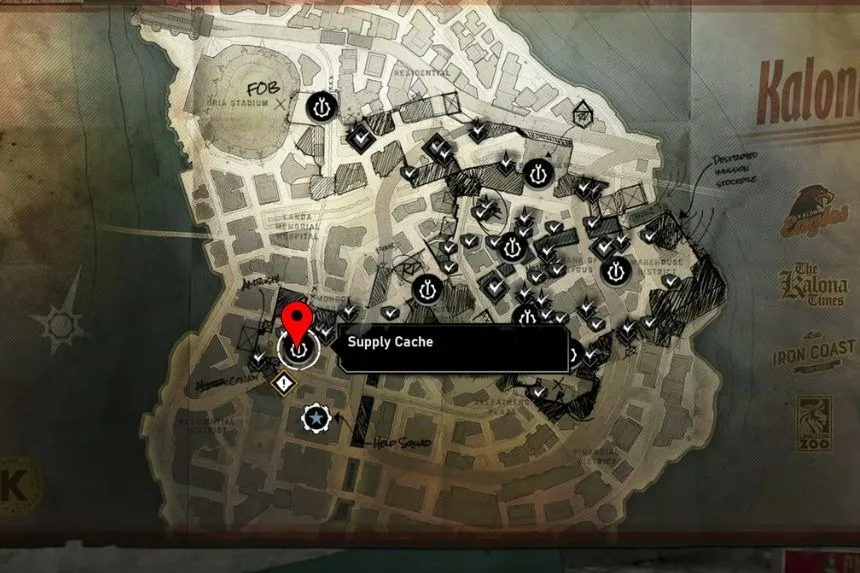
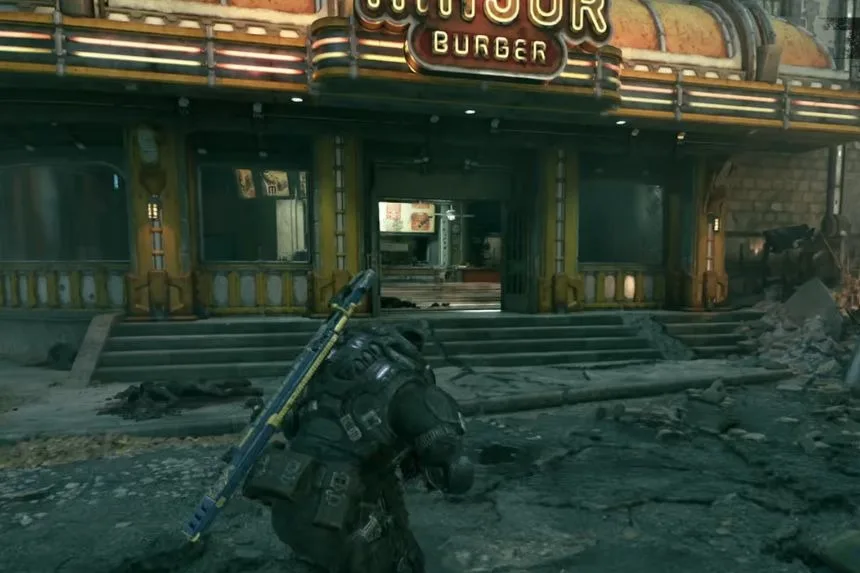
Leave the courtyard and return toward the Supply Cache. You can now start the Black Raven Down Secondary Objective. Follow the Montreal overhead toward the burger restaurant. Enter the restaurant and help the friendly NPC dealing with their fallen comrade. Start the objective and defend the area until all the enemies are defeated.
Holiday Photos
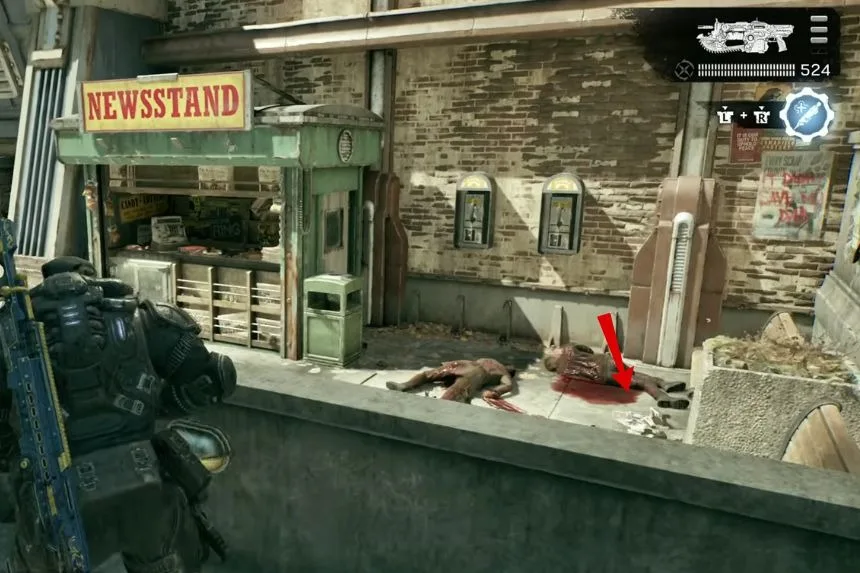
After completing Black Raven Down, look for the small downhill path leading toward a news stand. You will find the Holiday Photos collectible there.
Lone Wolf Secondary Objective
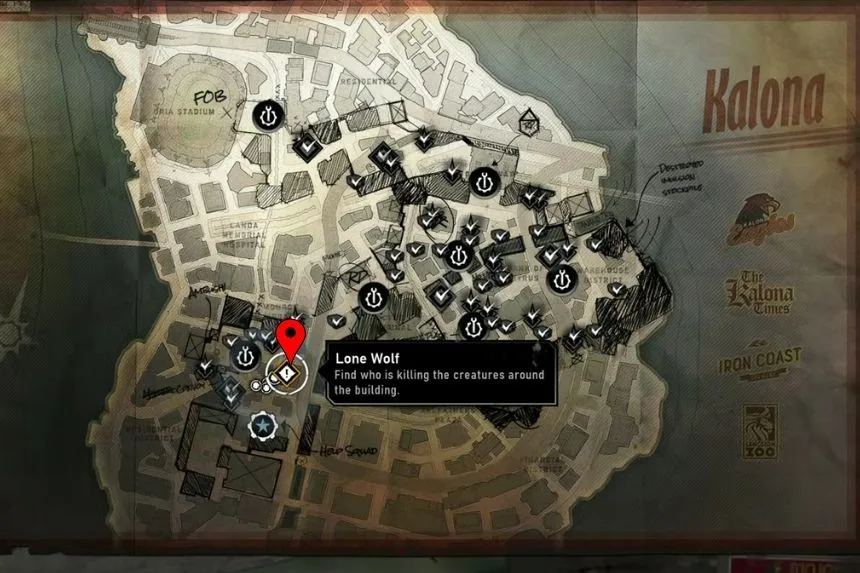
Next, head toward the Lone Wolf Secondary Objective. Look for the apartment building with open windows above it. You should hear people calling for help when you get close.
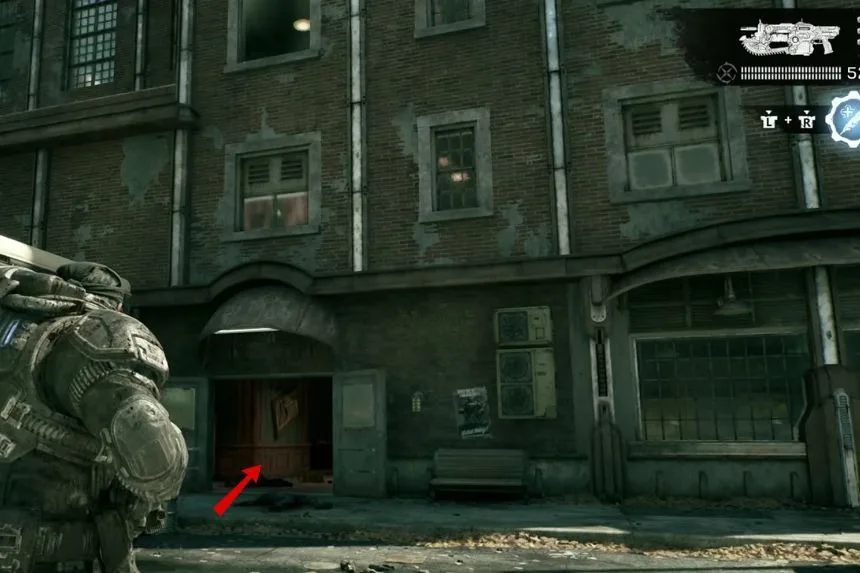
Go downstairs near the elevator shaft to start Lone Wolf. Use the rope line to reach the sniper who has been shot. Rescue them, then defend the area against several waves of enemies. Once the enemies are defeated, Lone Wolf will be completed.
Cog Tags of Sergeant Elijah Adams
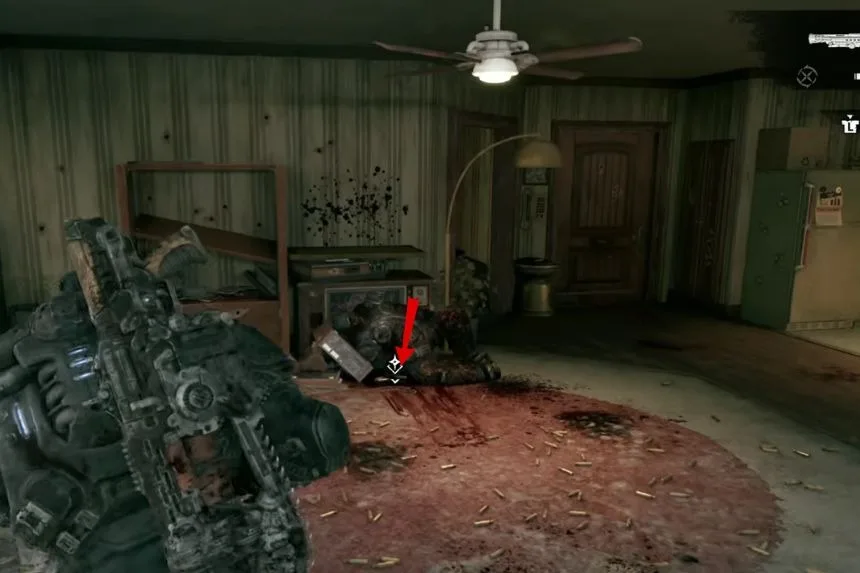
Immediately after completing Lone Wolf, turn around and collect the Cog Tags of Sergeant Elijah Adams. They can be found behind you near where the Secondary Objective took place.
Hardcases Before Entering the Hotel
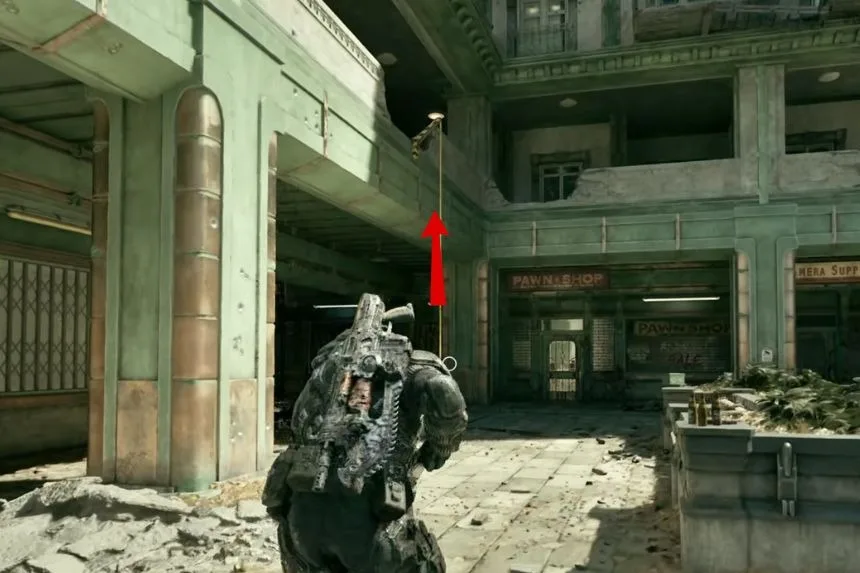
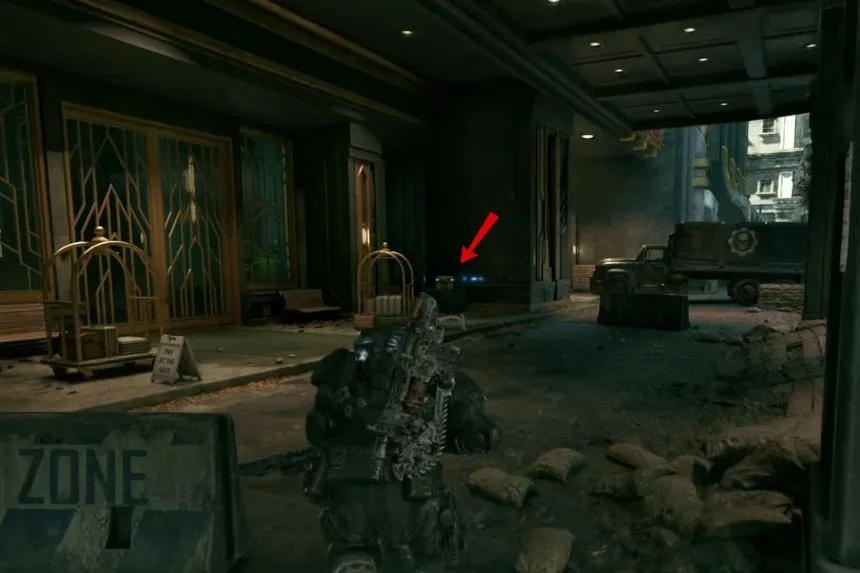
Before entering the hotel at the end of the chapter, make sure you collect everything nearby. Entering the hotel is another point of no return. As you approach the hotel, look to the left for a small zip line. Use it to reach the upper area and collect a Hardcase. Then approach the hotel entrance, but do not enter yet. There is another Hardcase near the front door.
Portrait of Chairman Thomas
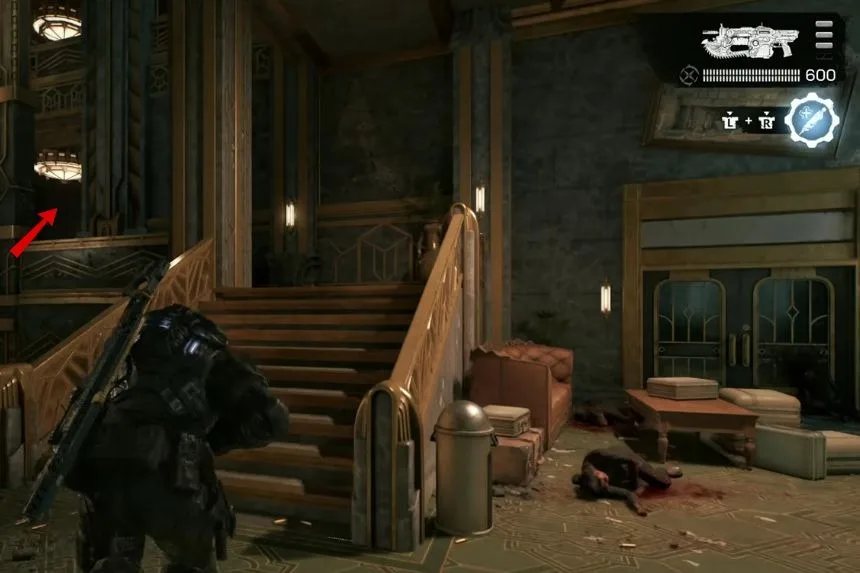
Once you enter the hotel lobby, deal with the enemies. Before interacting with anything else, go upstairs and to the right to find the Portrait of Chairman Thomas. Only after collecting the portrait should you return downstairs and speak with the unit. You can also use the Supply Cache in this area.
Hardcase Near the Fire Truck
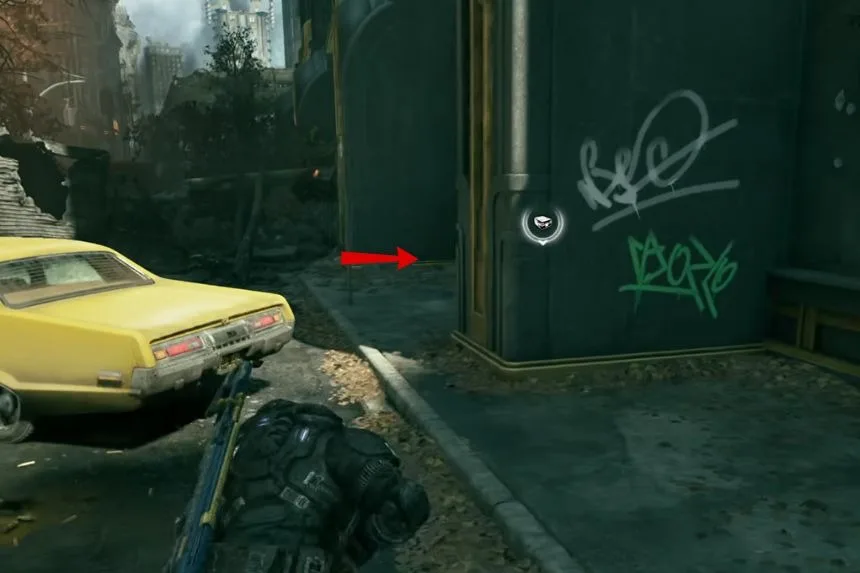
Afterward, continue through the story and exit the hotel. A cutscene will play, and you will regain control near a fire truck. Drop down onto the fire truck and look to the right around the corner to find another Hardcase.
Act 2, Chapter 3
Hardcase in the Tunnel
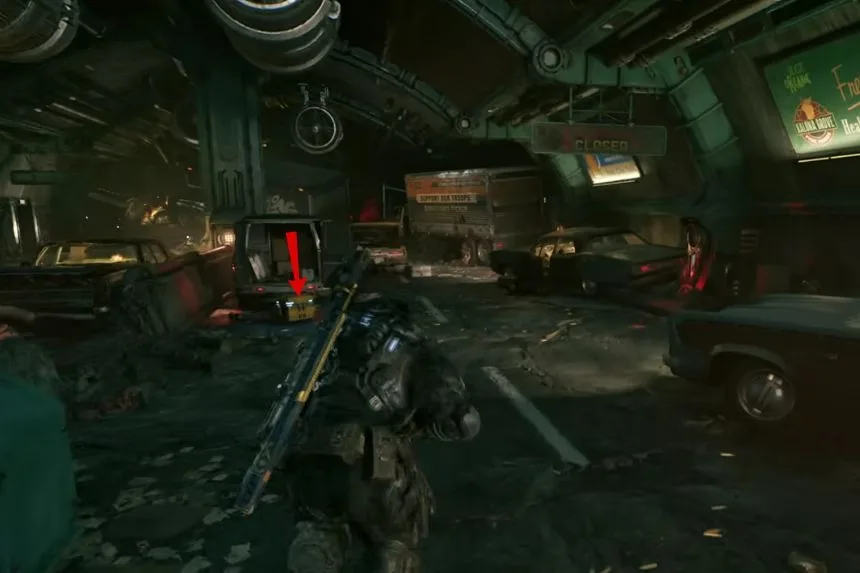
Chapter 4 becomes much more linear, making the collectables easier to follow. Near the beginning, enter the tunnel directly ahead. A Hardcase is located around the middle of the tunnel, so collect it before continuing.
Cog Tags in the Statue Area
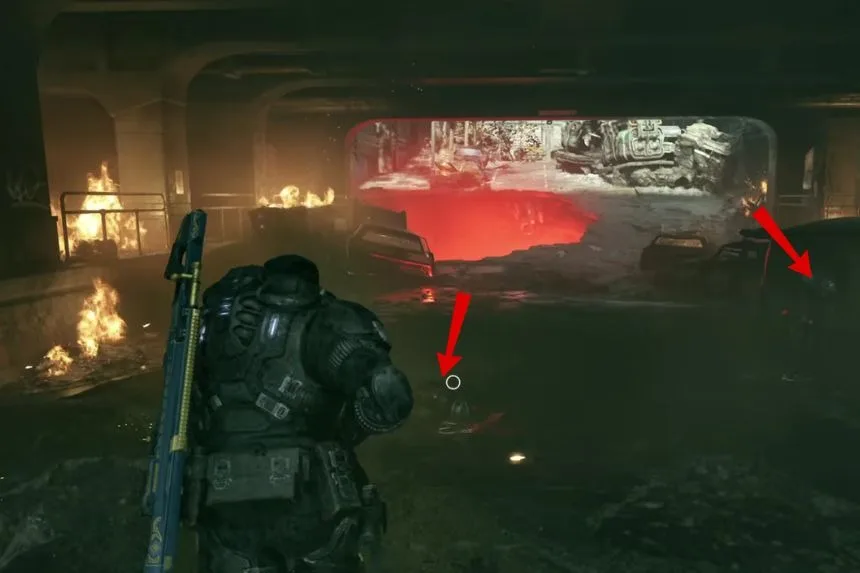
You will eventually reach an area where a short cutscene plays. In the centre of this area, you can find two sets of Cog Tags. One is near the middle, while the other is beside the truck on the right.
Hardcase Near the Debris
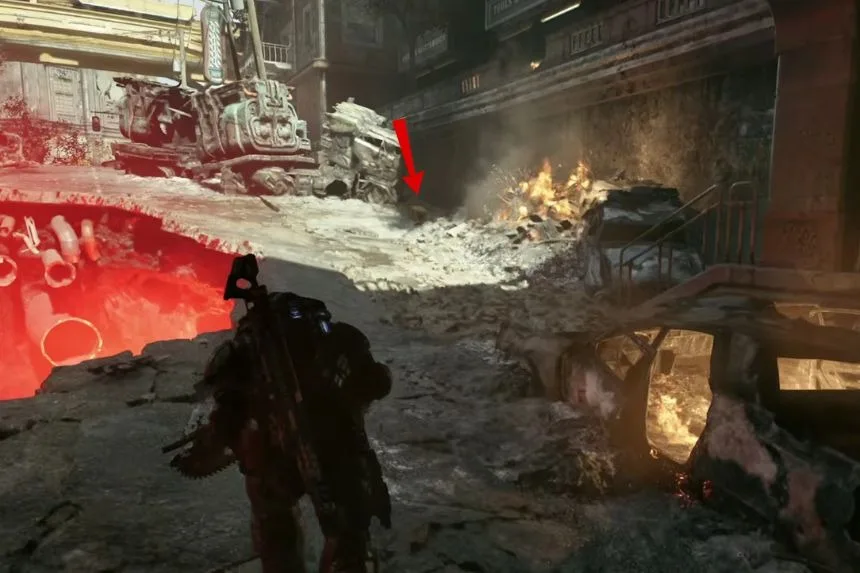
Continue up the hill and check the right side near the debris to find another Hardcase.
Spike
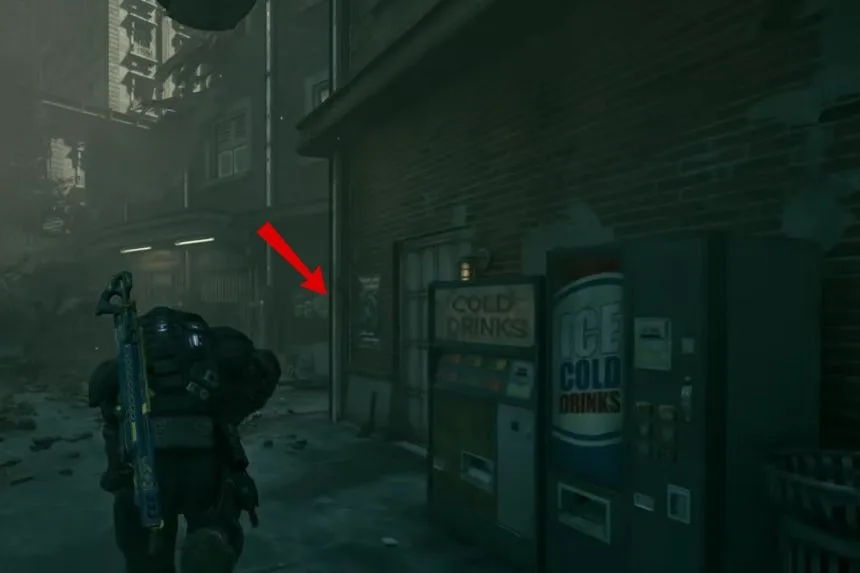
Keep moving uphill and deal with any enemies in your way. At the top, take a sharp right and stay close to the wall. Look for the beer and wine sign overhead. Underneath the sign, you will find the Spike collectable.
Ink-Covered Wrench
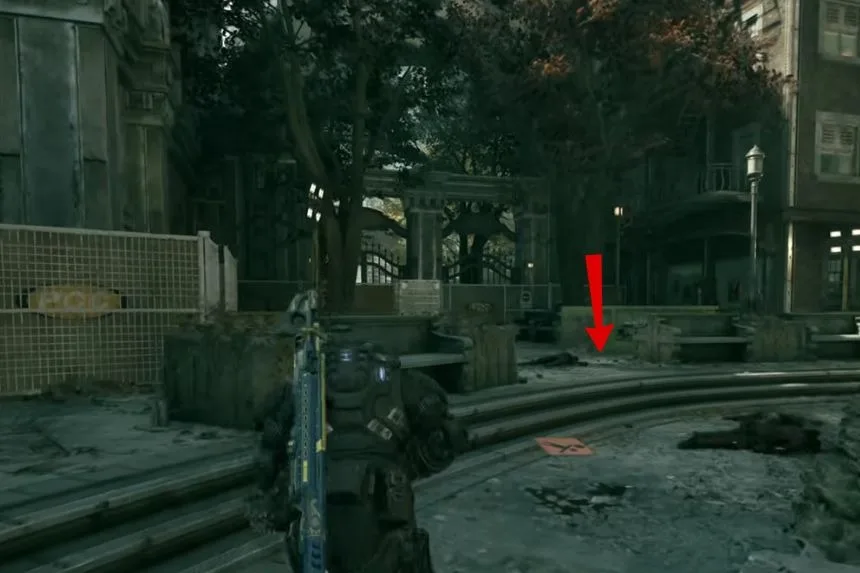
Continue through the narrow area until you reach the section with mortars and large statues. You will need to explore both sides of the statues for collectables and Hardcases. Start by going left to find the Ink-Covered Wrench.
Hardcases Around the Statues
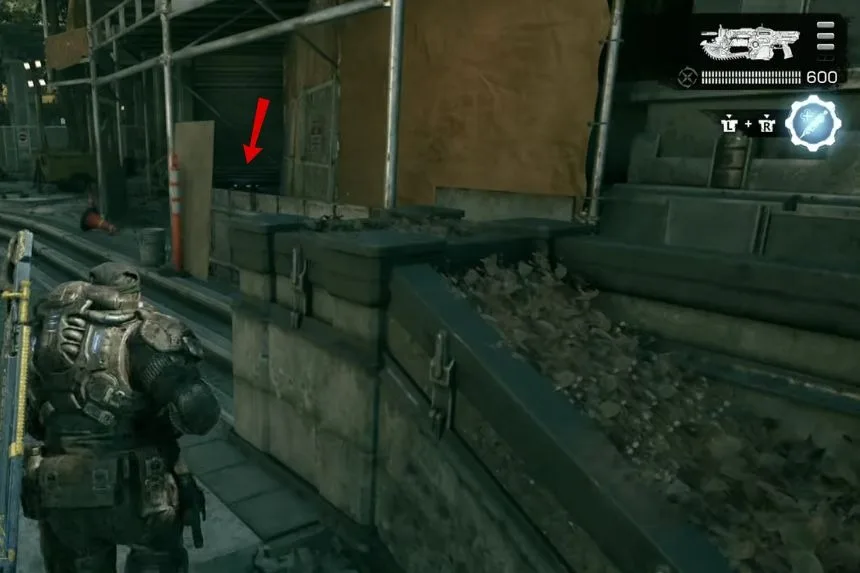
Move to the right side of the statues to find a Hardcase. Continue exploring this area before moving forward because some of these locations cannot be revisited easily. There is another Hardcase underneath the scaffolding on the right. Continue toward the second-story scaffolding to find another Hardcase that should become marked on your map.
Hardcase in the Central Container
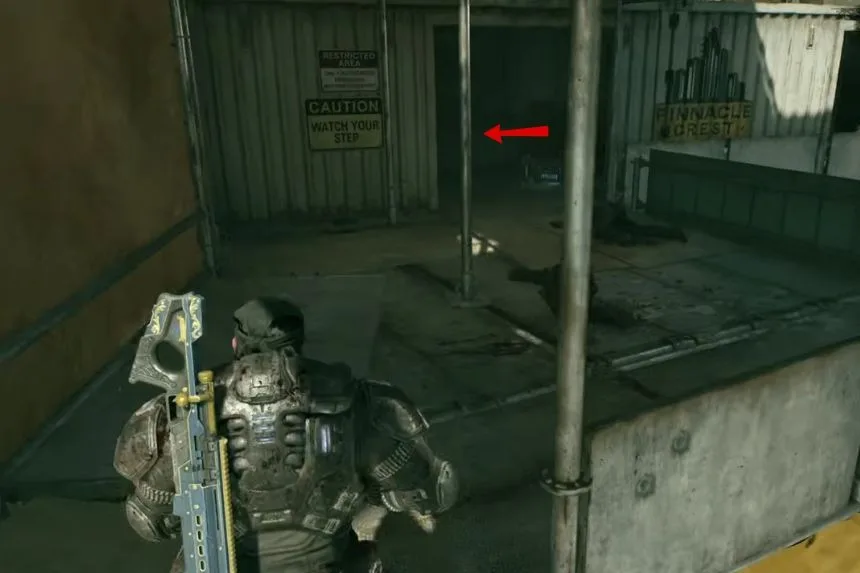
Near the central structure, look for a container with windows cut into it. Another Hardcase is inside.
Hardcase Near the Gold Statues
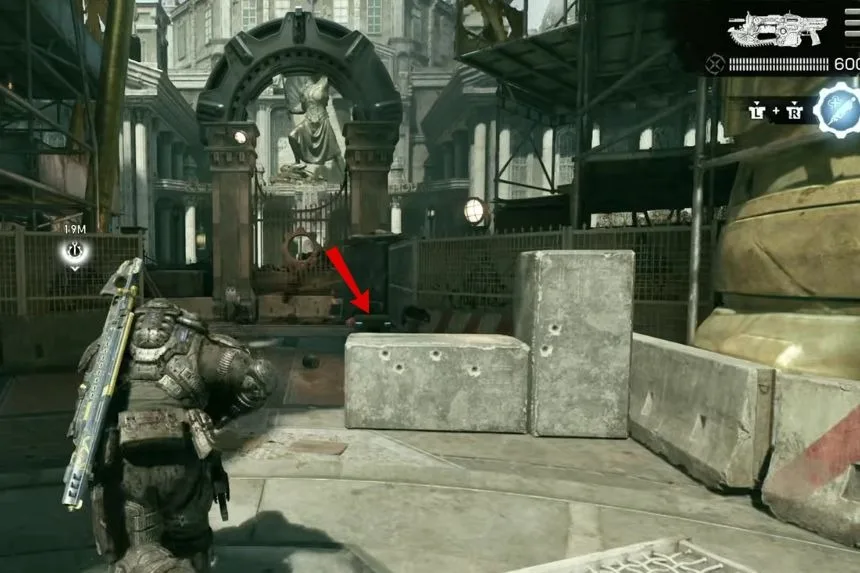
Move toward the center of the area and pass between the two large gold statues. Continue forward to find another Hardcase on the right.
Supply Cache
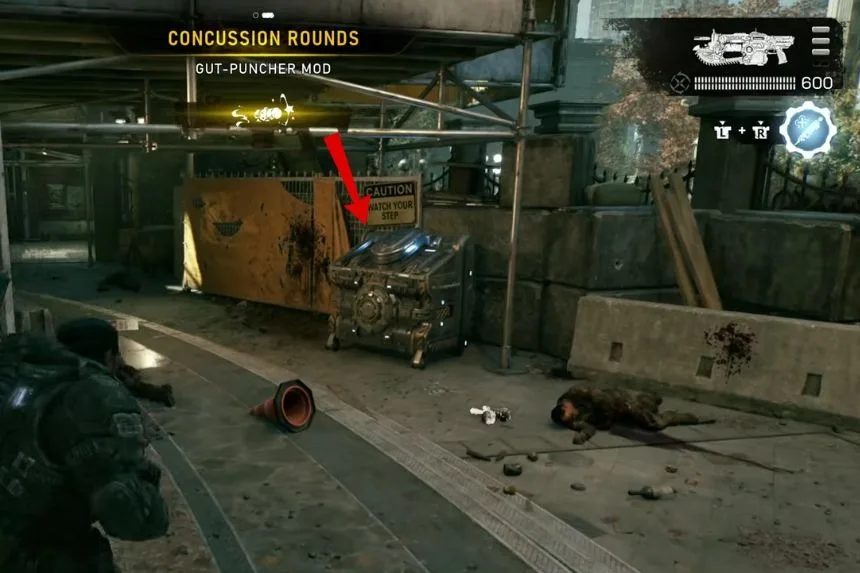
A Supply Cache is also located ahead as you leave this area.
Hardcase in the Hallway
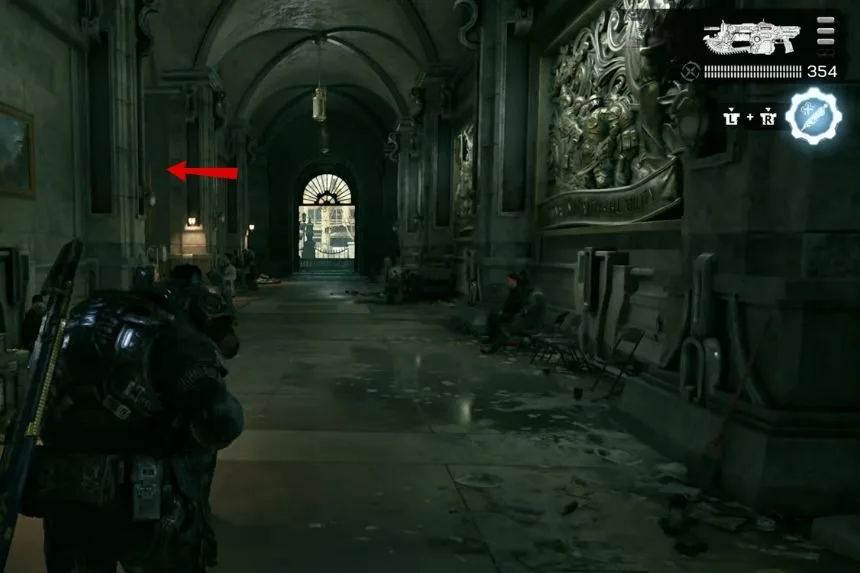
Continue into the street and fight through the enemies. The door ahead will eventually open, allowing you to proceed. As you walk through the hallway, check the left side for another Hardcase. This is easy to overlook because the section is mostly a linear walk-and-talk sequence.
Cog Tags of Lieutenant Jane Hawkins
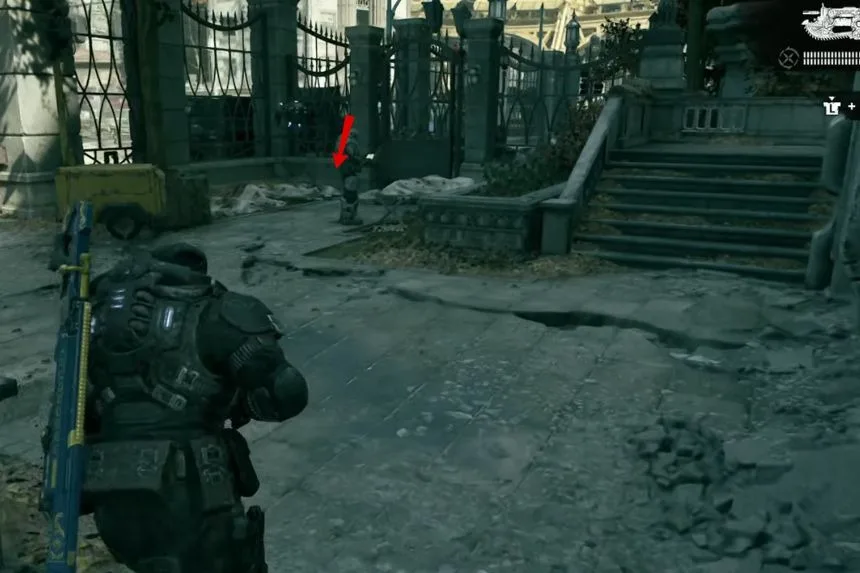
Continue down the hallway and pass the Supply Cache you previously visited. When you reach the next courtyard, check the right side before leaving through the gates. You will find the Cog Tags of Lieutenant Jane Hawkins there.
Act 2, Chapter 5
No Collectibles in Chapter 4
Chapter 4 is a chopper gunner mission, so there are no collectibles to collect here.
Hardcase in the Hangar
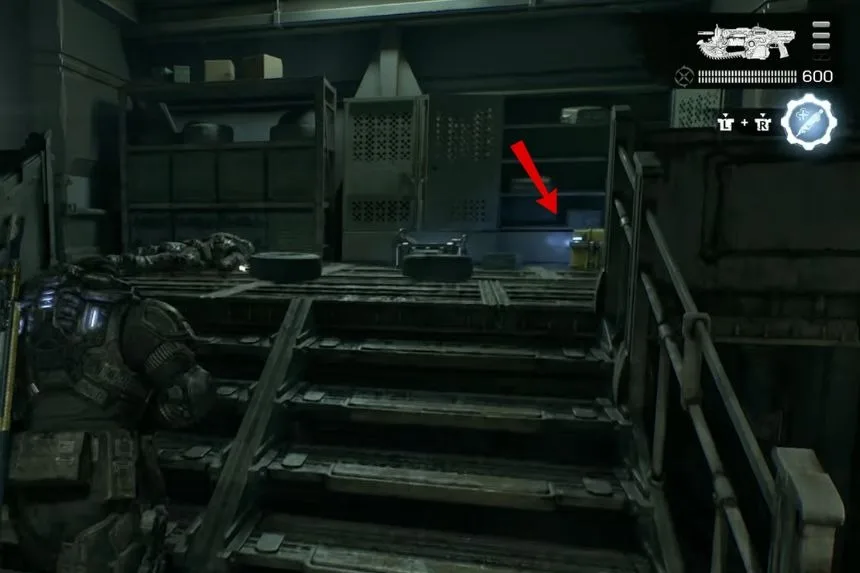
Chapter 5 is an Overrun mission. You will eventually reach a hangar and fight through the area. Once the exit opens at the far end, do not leave immediately. Look to the right of the exit for an unmarked Hardcase. Make sure you collect it before leaving the hangar.
Hardcase in the Red Tunnel
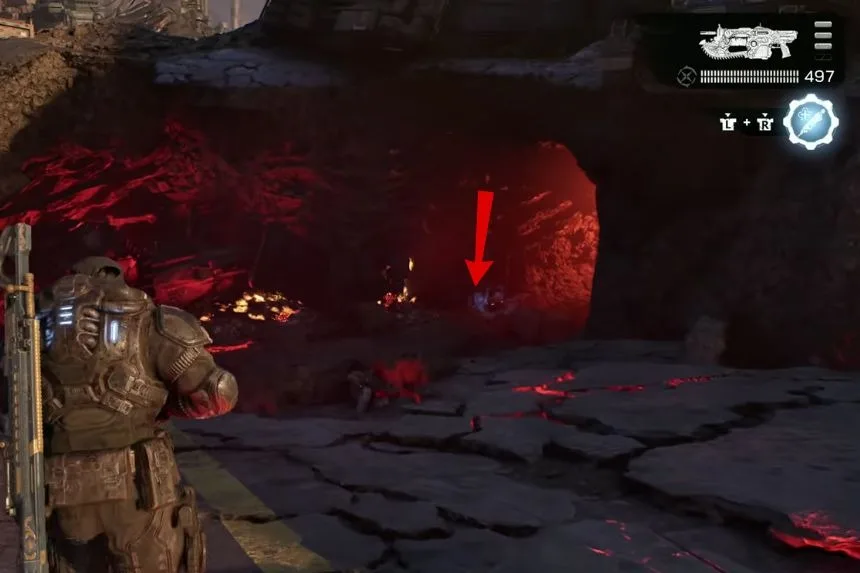
Continue through the chapter until you reach the downhill section with the red lighting. Follow the narrow tunnel and watch for the flare in the middle. Before moving forward, check the left side for another Hardcase. This is important because the area ahead acts as a point of no return.
Hangar Data Pad, Supply Cache, and Hardcase
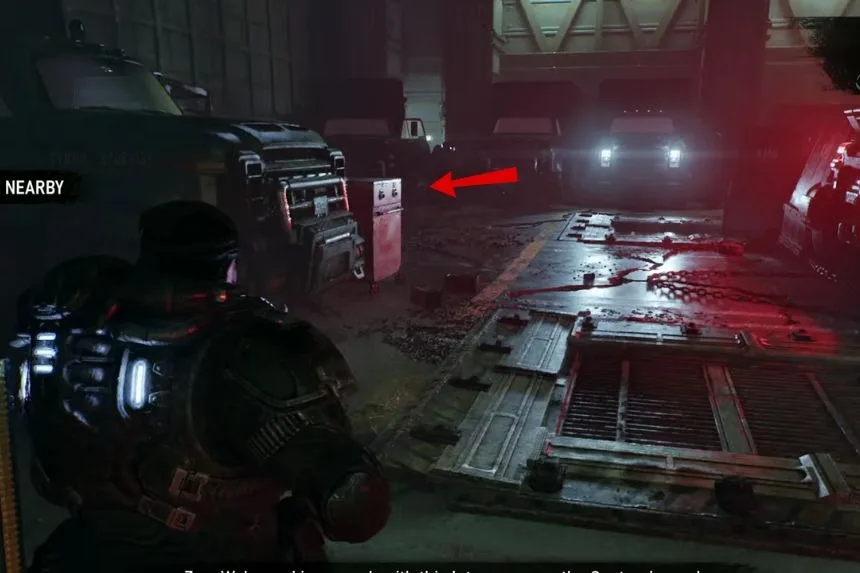
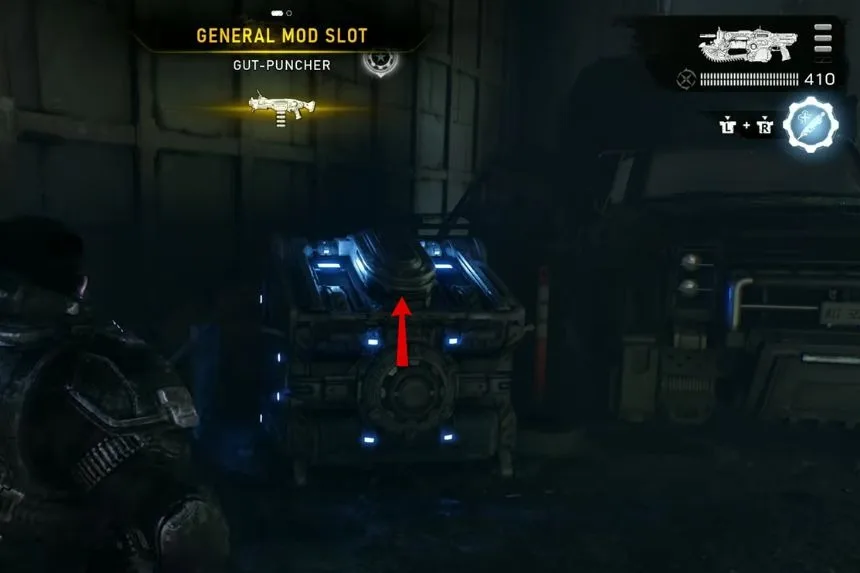
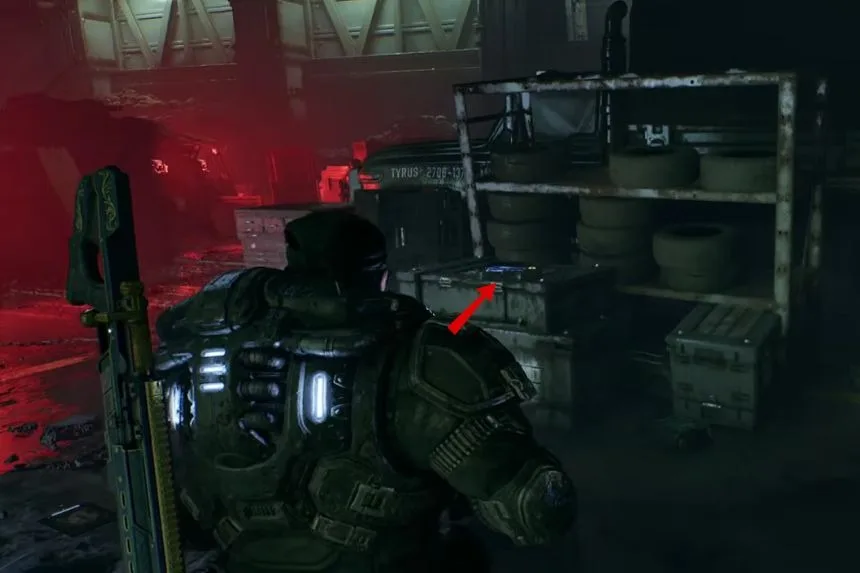
After entering the next building, there are three things to collect. They are all on the left side of the room. First, grab the Hardcase. Next, collect the nearby Supply Cache. Finally, make sure you pick up the Hangar Data Pad, which is next to the Hardcase. Once you have all three, you can continue and finish Act 2.
