
In Crimson Desert, treasure maps will lead you to hidden rewards scattered across different parts of the world. The drawings on the map give you a clue, and the treasure can sometimes be very far from where you first found the map. The game also doesn’t show any message when you reach the correct location, so you need to search carefully to get the treasure. In this guide, we will show you all the treasure map locations in Crimson Desert.
All Treasure Map Locations
The game doesn’t give you any confirmation when you are in the correct place. You need to trust your locations and search the area carefully to get the treasure. There is also no completion message that you have found the correct treasure. Here are all the treasure map locations found in Crimson Desert. These are the treasure maps that we have found till now, and we will update this article as we get to know more about them.
Hidden Treasure Map Piece 1
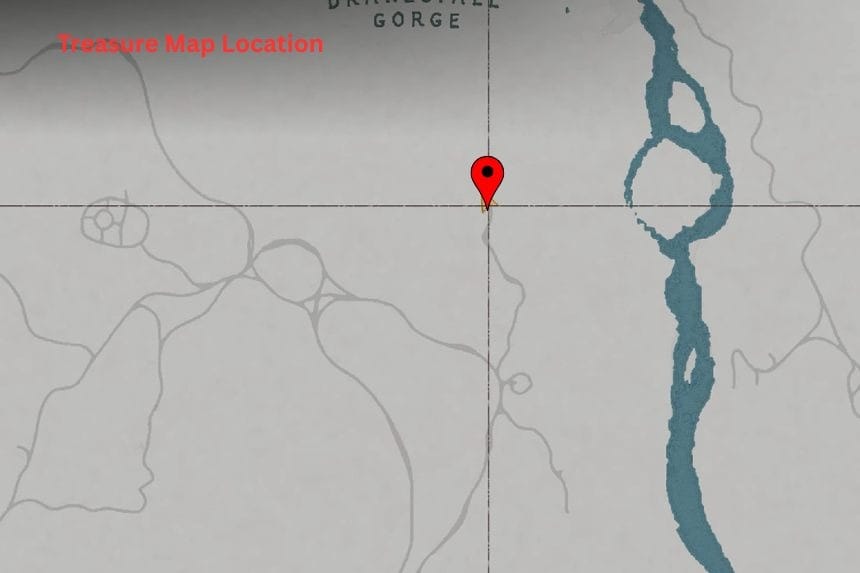
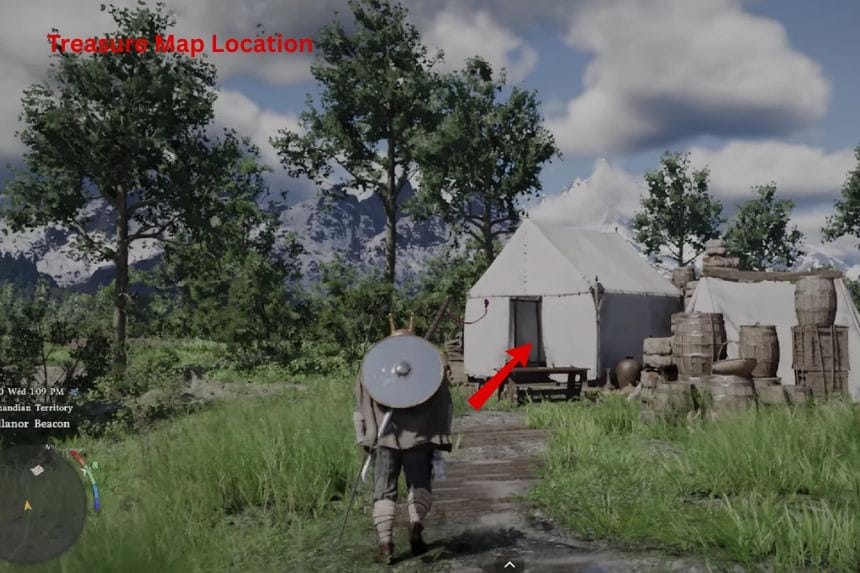
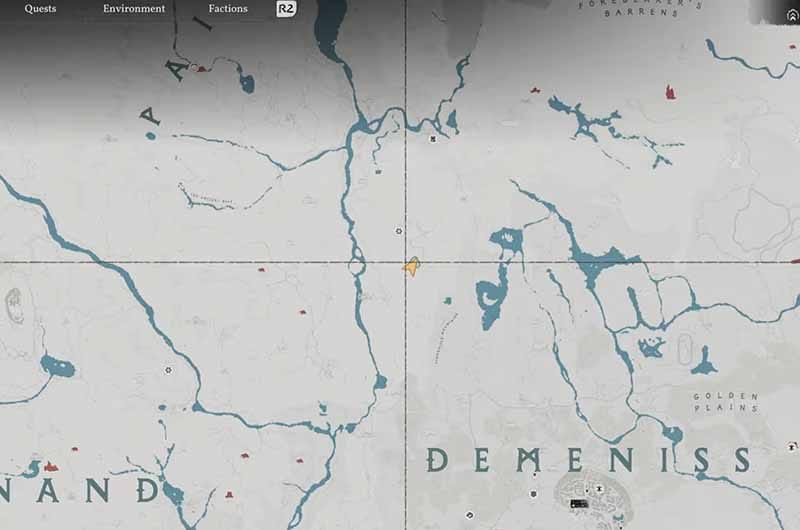
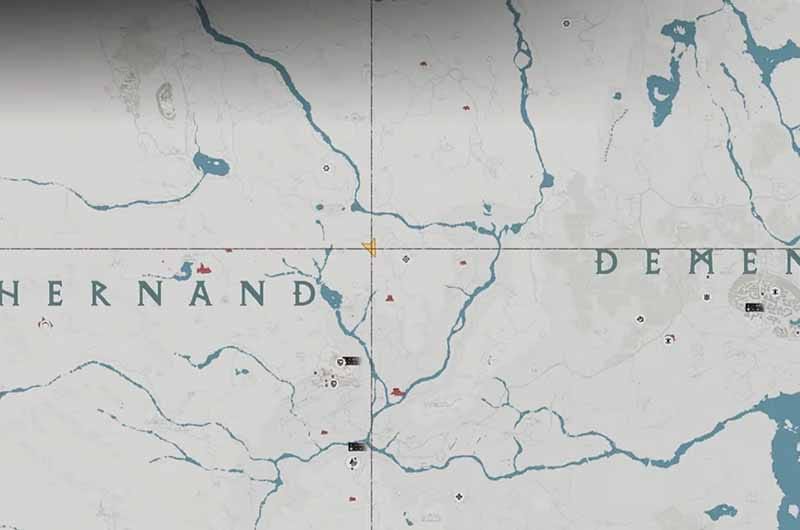
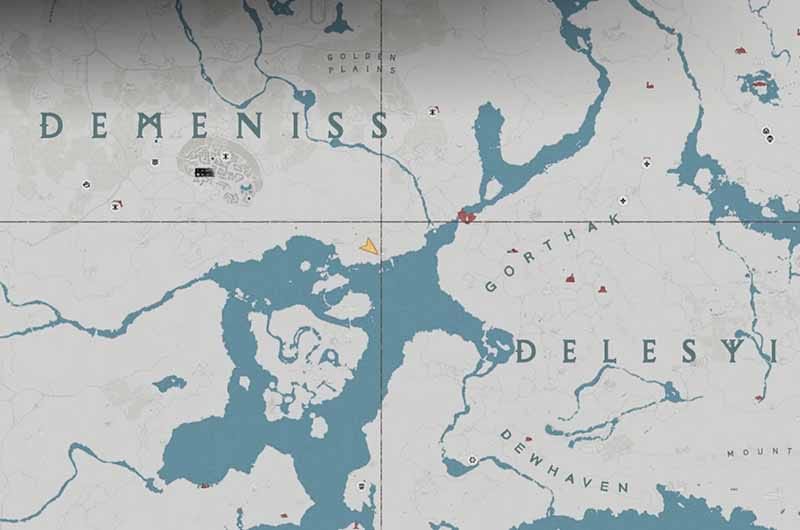
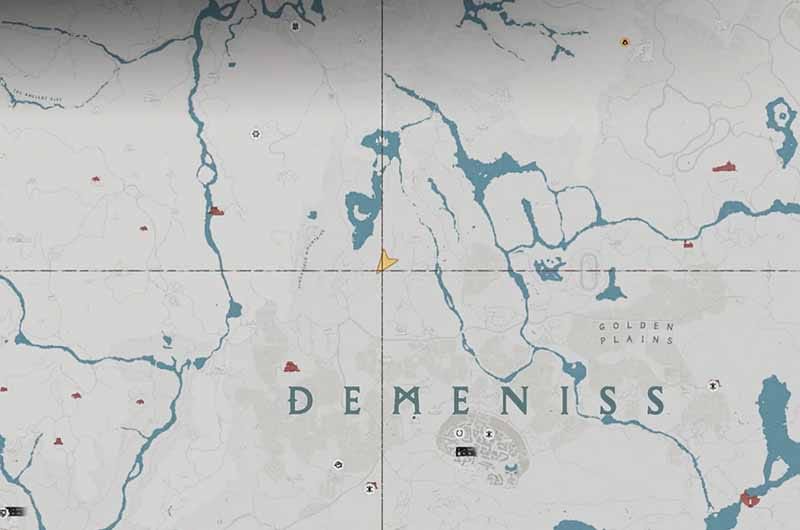
The hidden treasure map 1 is found on the north side of Demenis, south of Drakesfall Gorge, inside a white tent. The map will show a location near a waterfall.
Solution
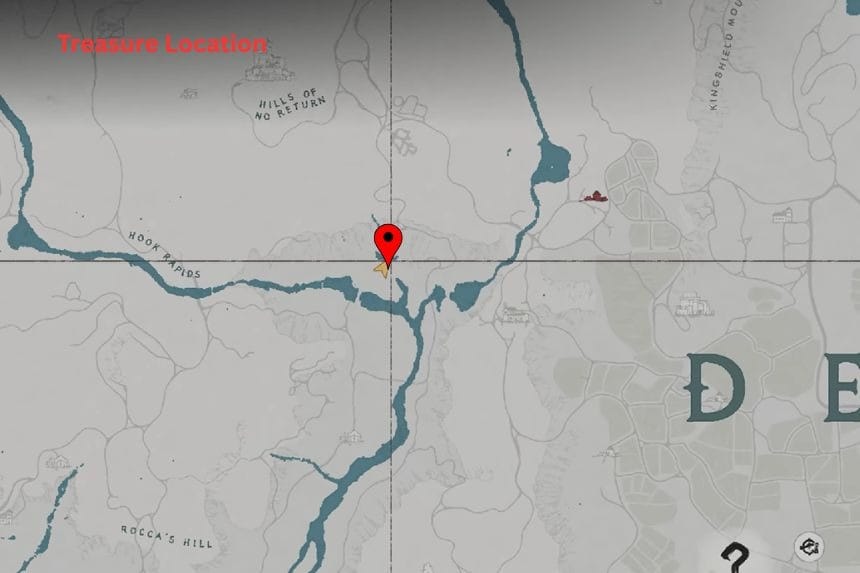
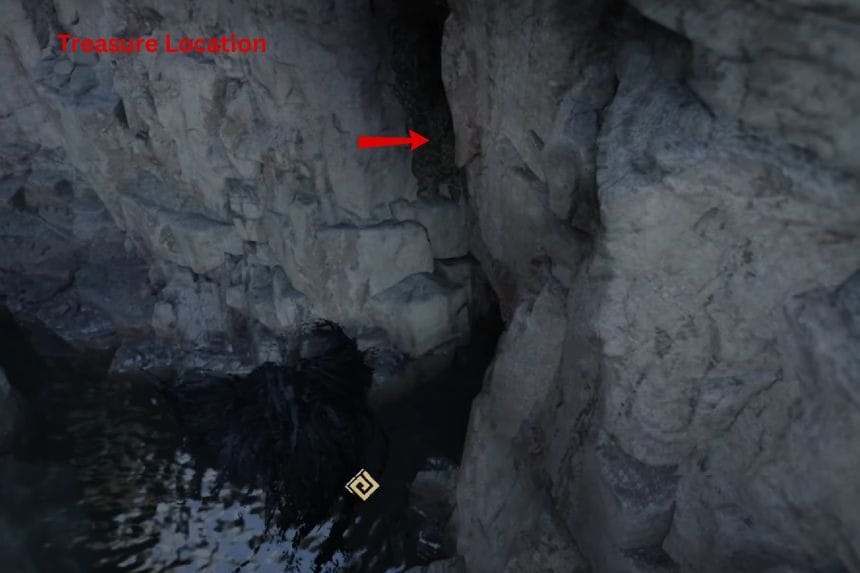
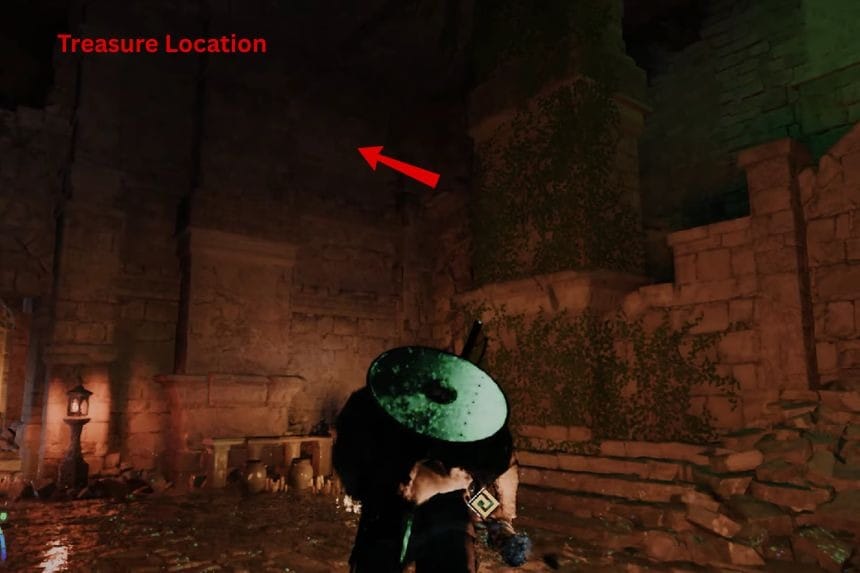
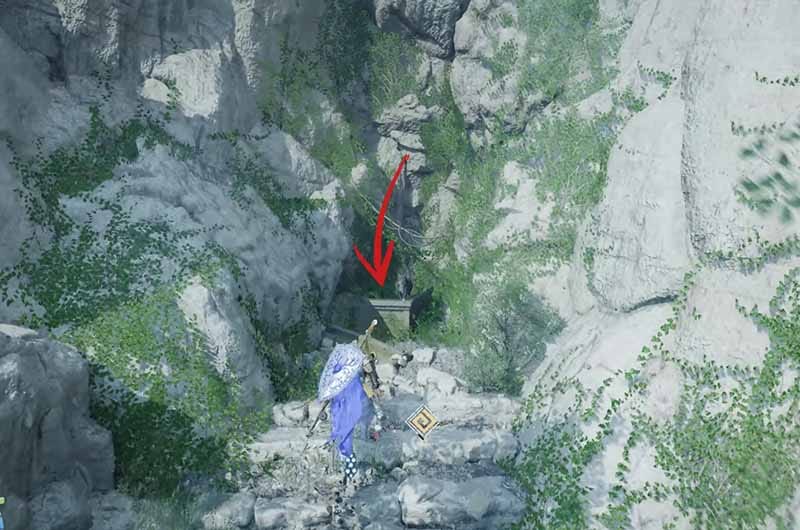
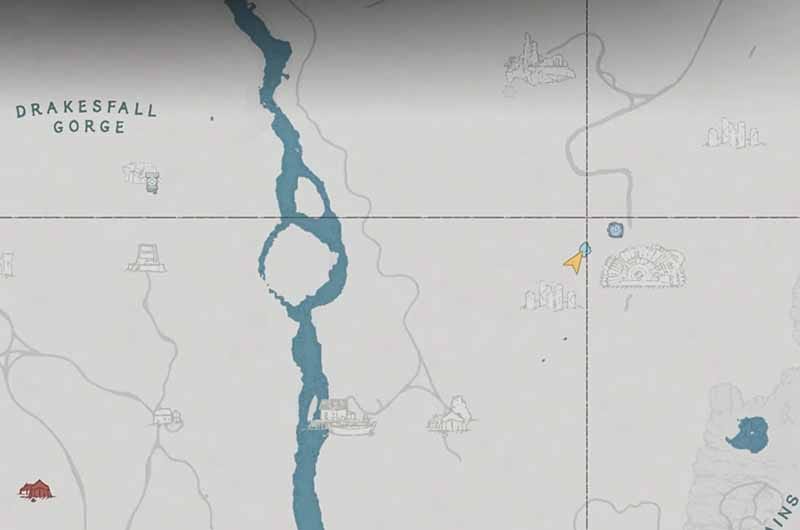
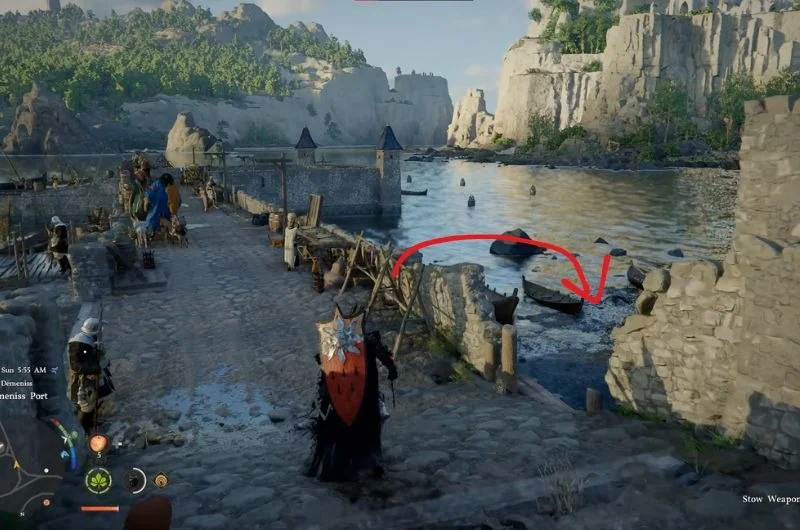
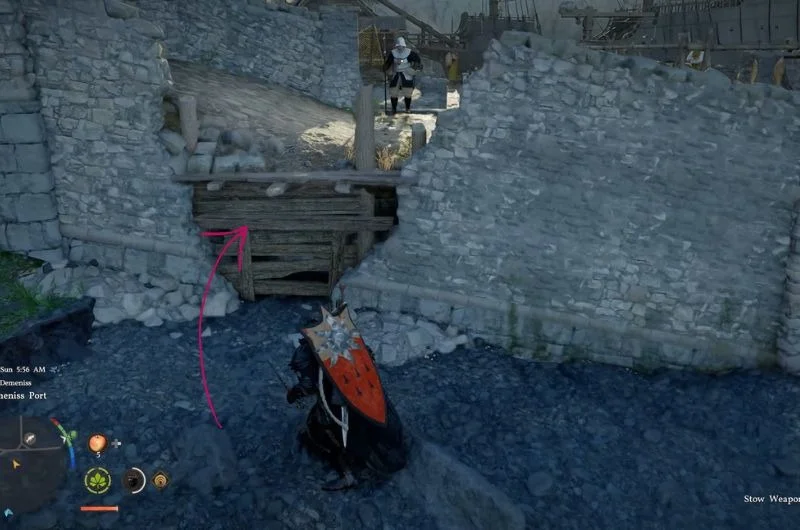
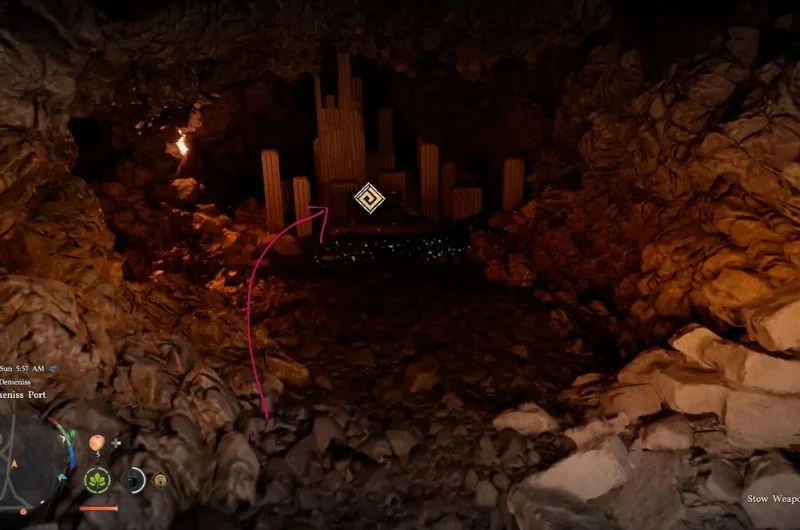
To find the treasure, you need to find the intersection of two rivers, where there is a waterfall. Go towards the waterfall and jump down to find a cave on the right side. Enter the cave and fight the Grave Walker. Defeat it and enter the dungeon to find a wall on the right side. Punch the wall to find a hidden room. Inside the room, you will find the treasure.
Hidden Treasure Map Piece 2
To get the Hidden Treasure map Piece 2, you ned to go North of D in Demeniss, next ot eh Drakefall Gorge. Check the map for the eact lcoation. Go and pick up the map and read below for the solution.
Solution
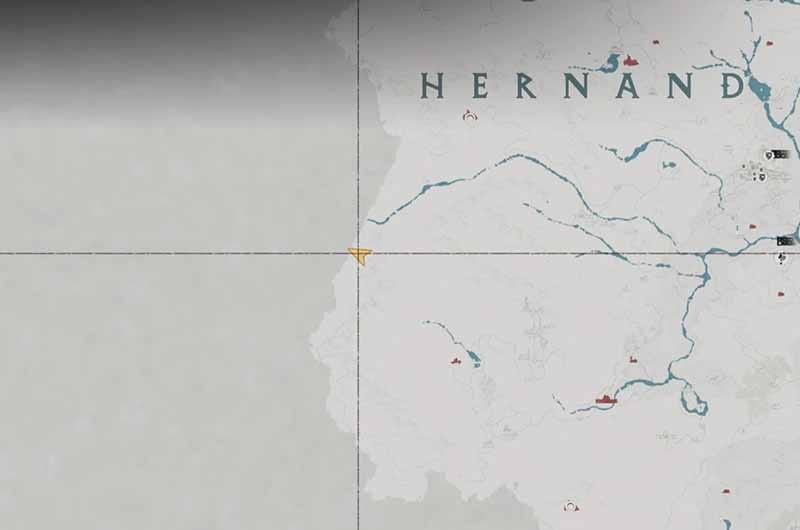
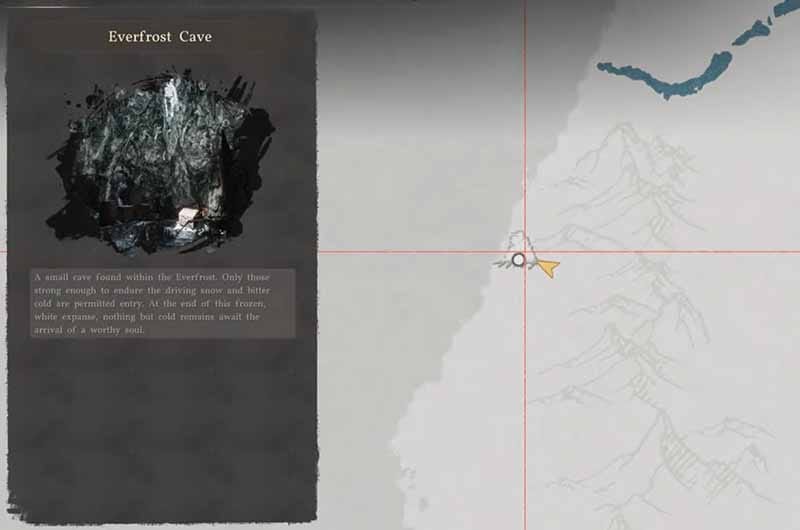

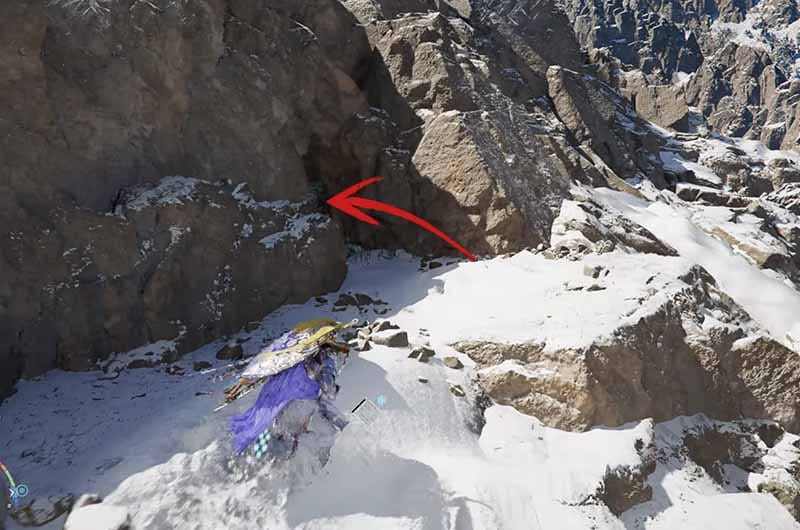
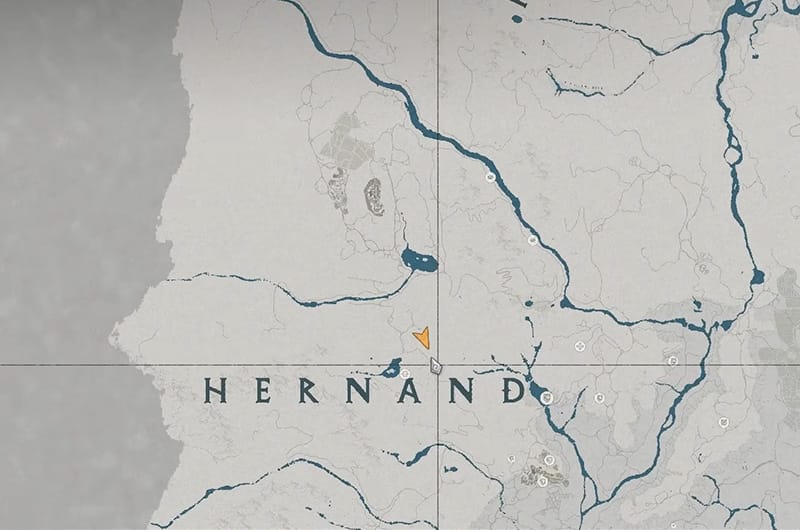
The trasure map points to the Everfrost Cave Southwest of H in Hernand. Once at the location, go into the cave and open the treasure chest to get the Plate Gloves of the Shadows.
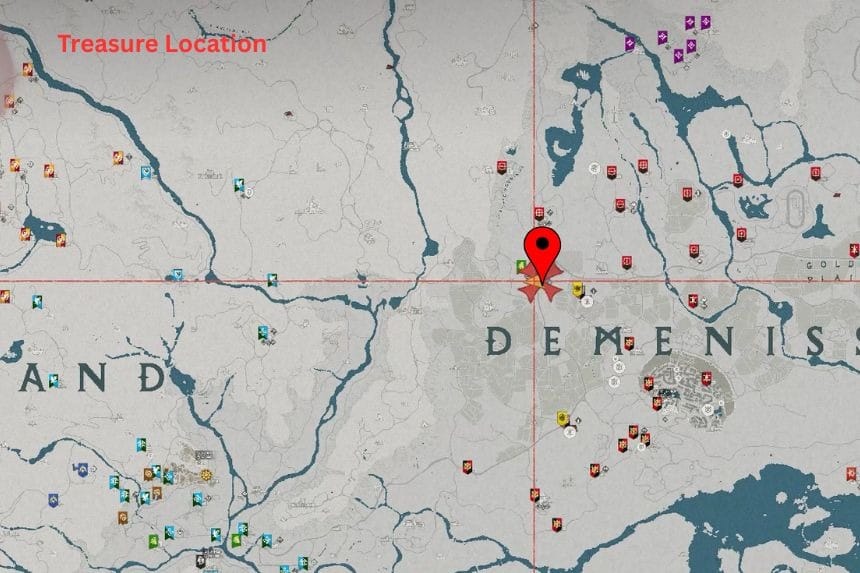
Hidden Treasure Map Piece 3

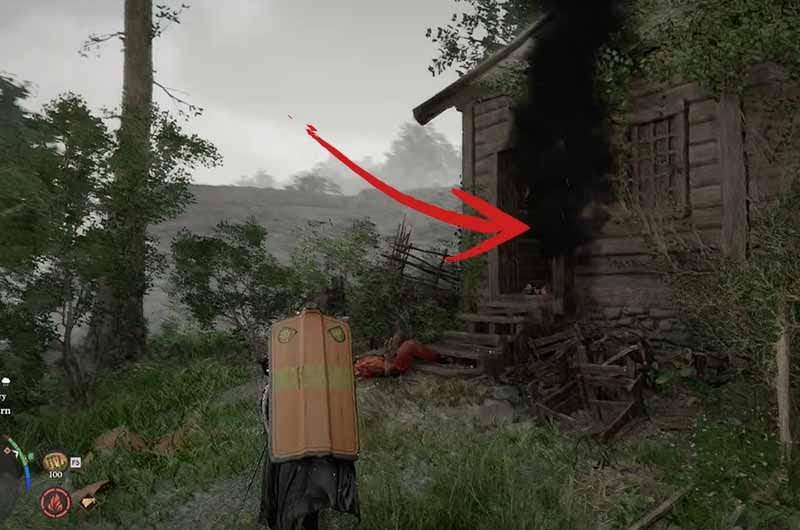
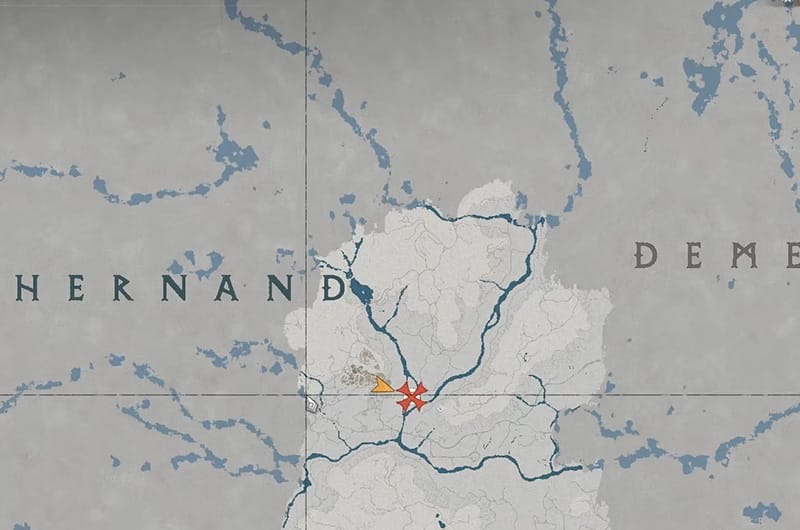
To get the Hidden Treasure Map Piece 3, go a little Northwest from the D in Demeniss. Use the maps above for guidance. At the lcoation, you will find a house on fire and some soldiers dead outside and inside. On the table in the house, you will find the map peice.
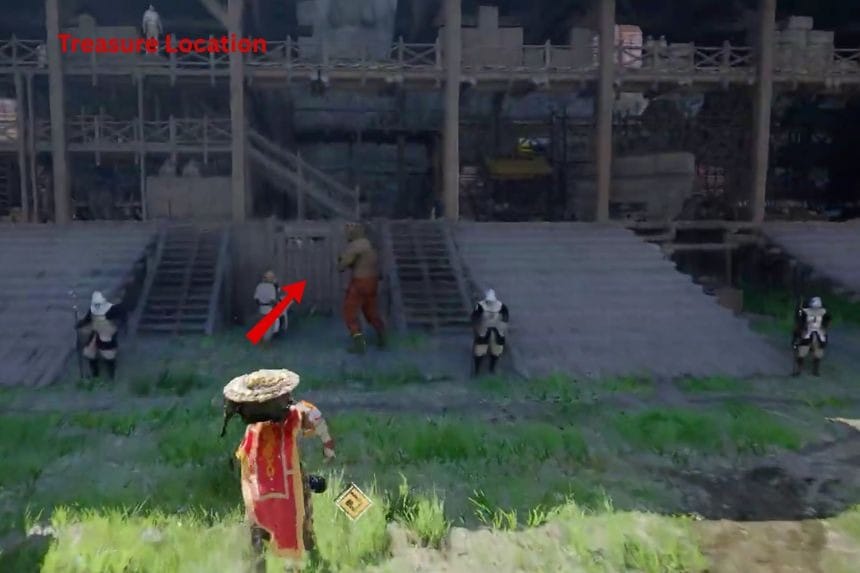
Solution
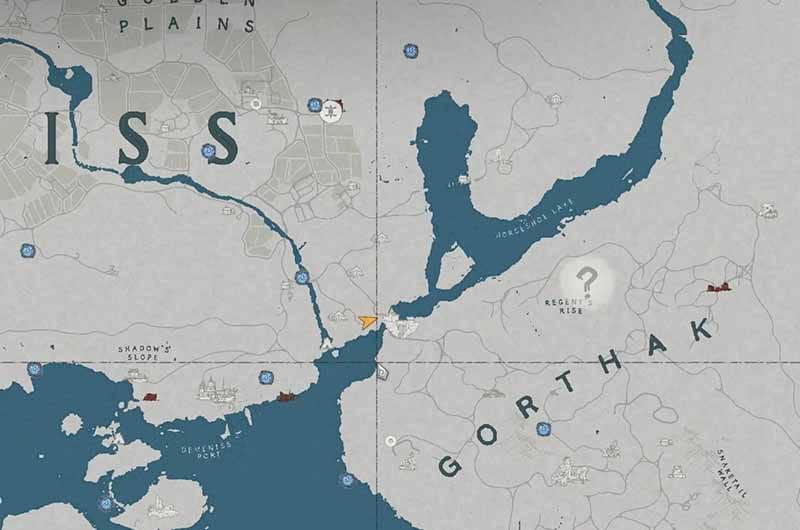
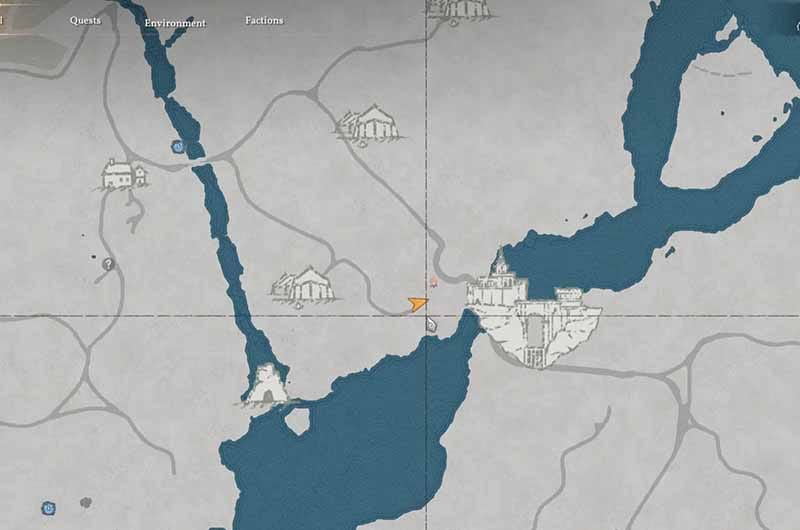
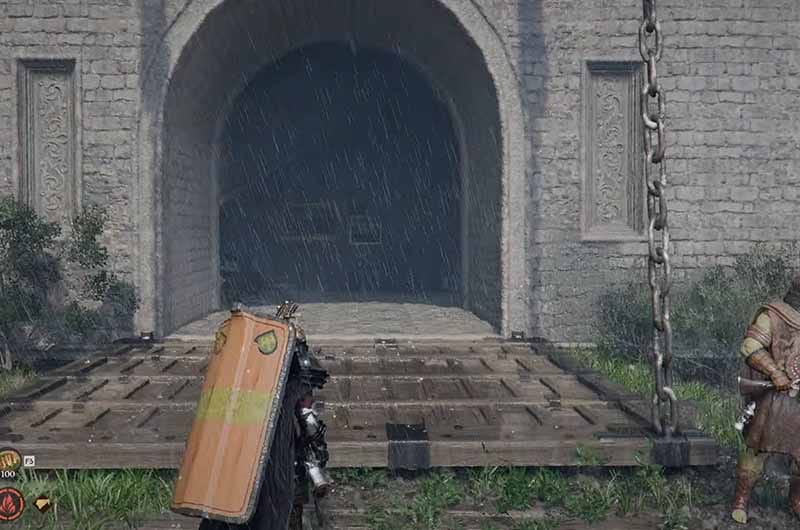
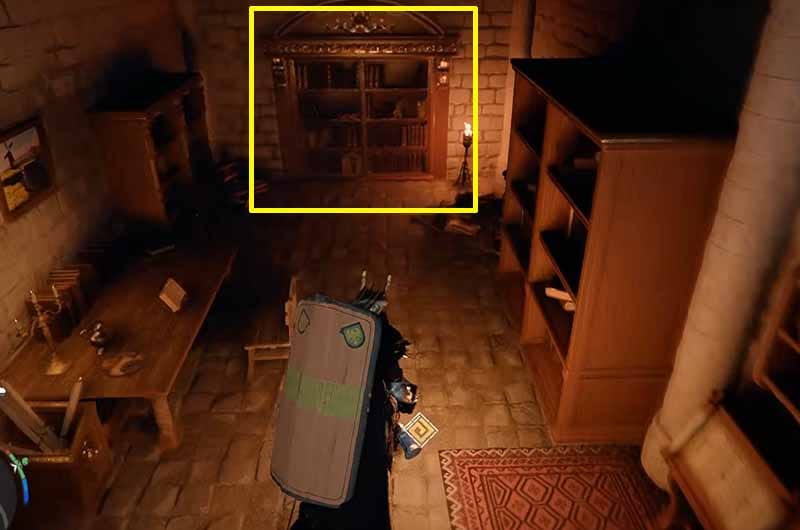
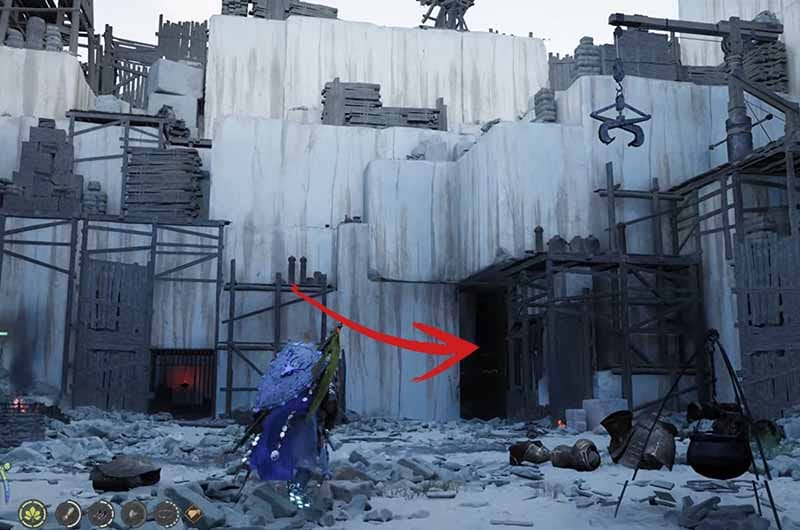
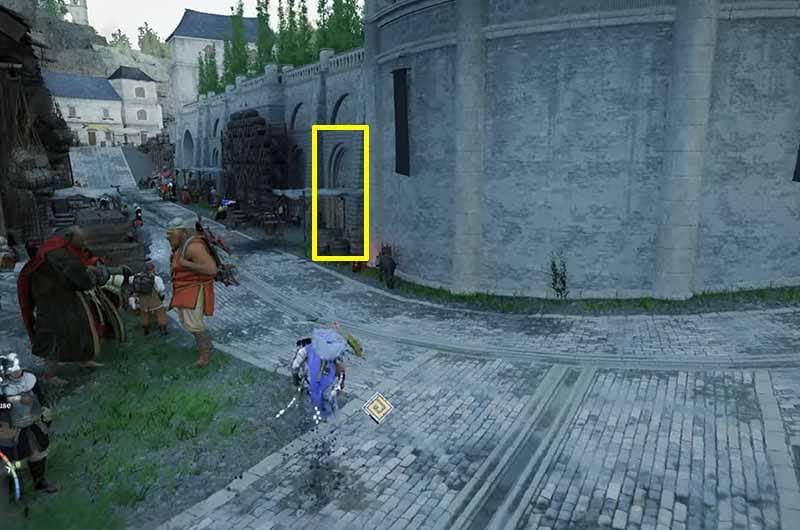
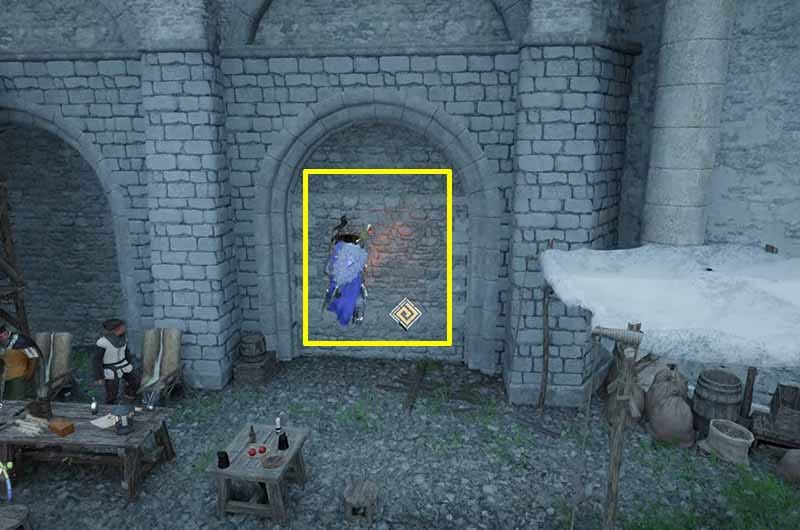
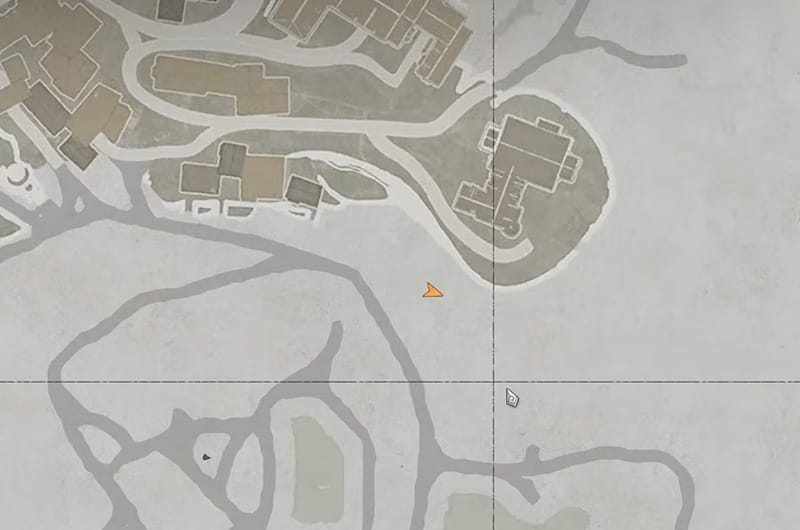
The trasure map points to the gate of Peace in Gorthak. Once you arrive at the lcoation, go in through the main gate, and follow the flight of stairs all the way down, until you come upon a room with a book shelf at the far end. Push the book shelf and it will reveal a hidden room. Open the chest in the room and claim your reward.
Hidden Treasure Map Piece 4
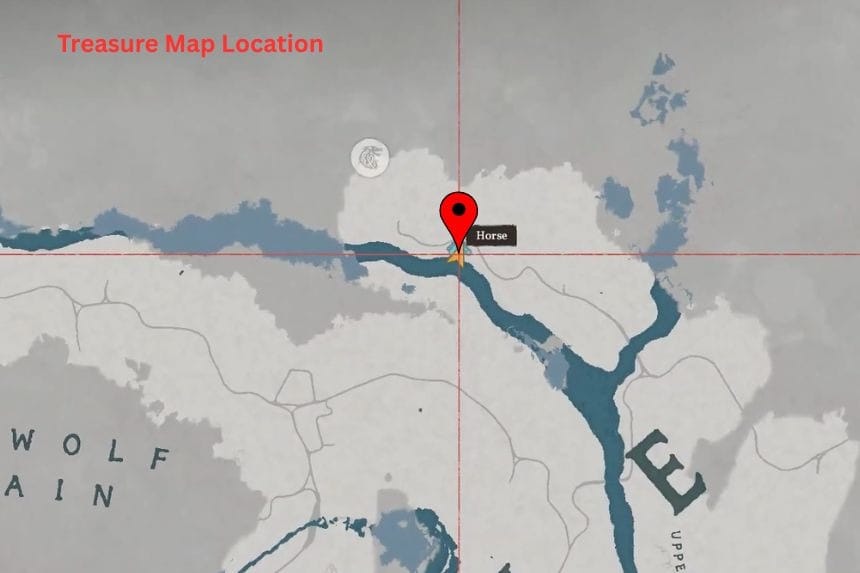
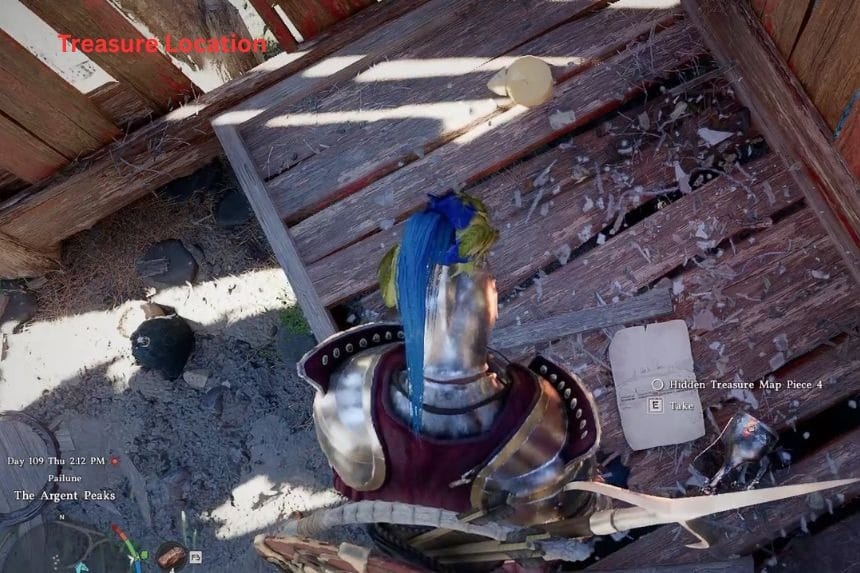
The hidden treasure map 4 is found inside a small hut located in the northern part of Paloon. The map is lying on the floor, and it shows a tower in the background.
Solution
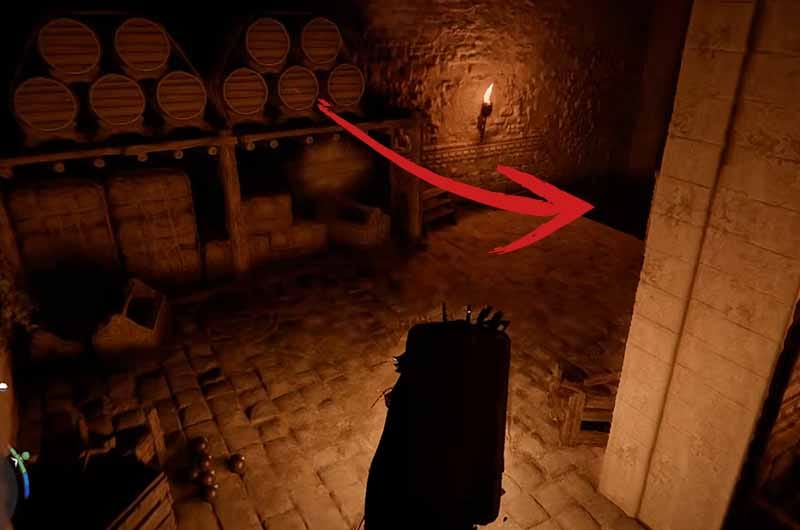
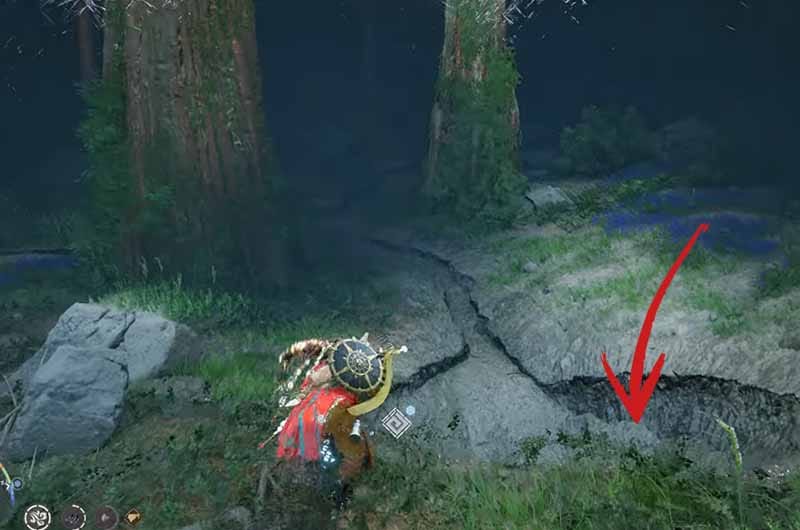
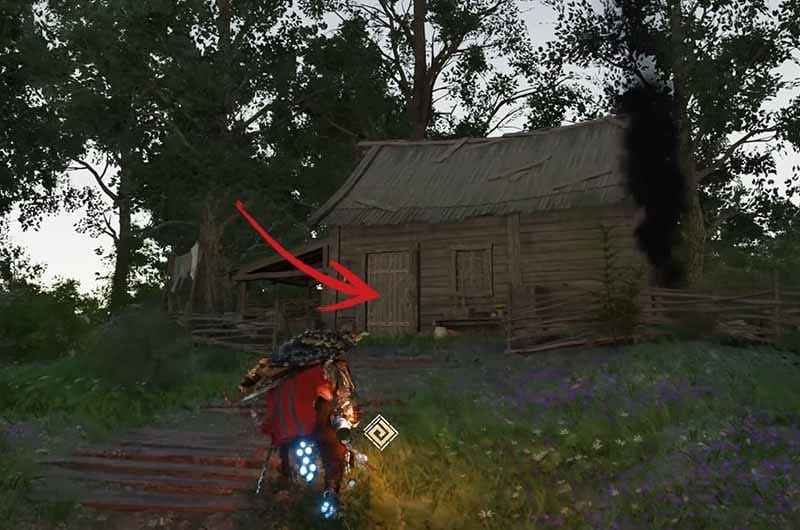
The treasure is found by going towards the area above Deminis. When you arrive there, look for a small wooden board or plank near the ground. You can slide underneath it or push through the gap behind it. The treasure is hidden behind the wooden fence.
Hidden Treasure Map Piece 5

Go to the the town of Hernand as marked on the above map and find Wandering Sellswords. Gain 100 trust level with him to get the Hiden Treasure Map Piece 5.
Solution
Go to the location on the above map and follow to image clues to get to the treasure. Inside the chest, you will find Wanderer of Faith’s Plate Helm.
Hidden Treasure Map Piece 6
After defeating the Marnie’s Excavatron, look to the right from where he came and there is an entrance with wooden panels. Break the wood and enter the space. There is a chest there with the Hidden Treasure Map Piece 6.
Solution
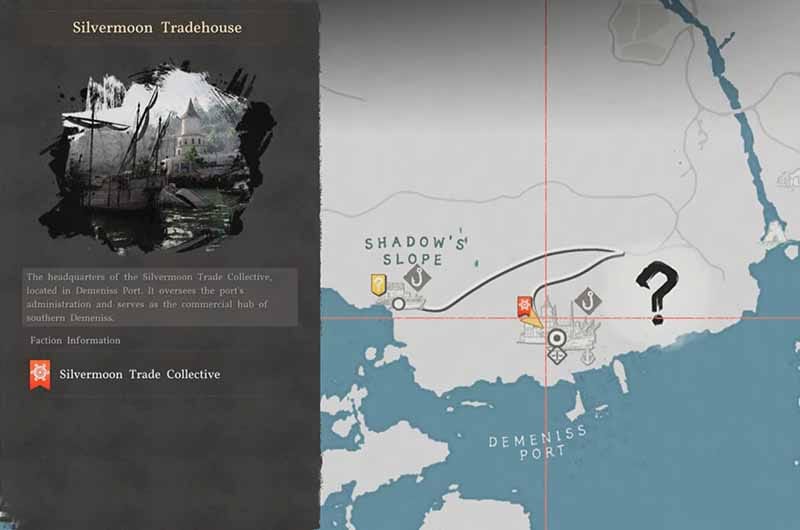
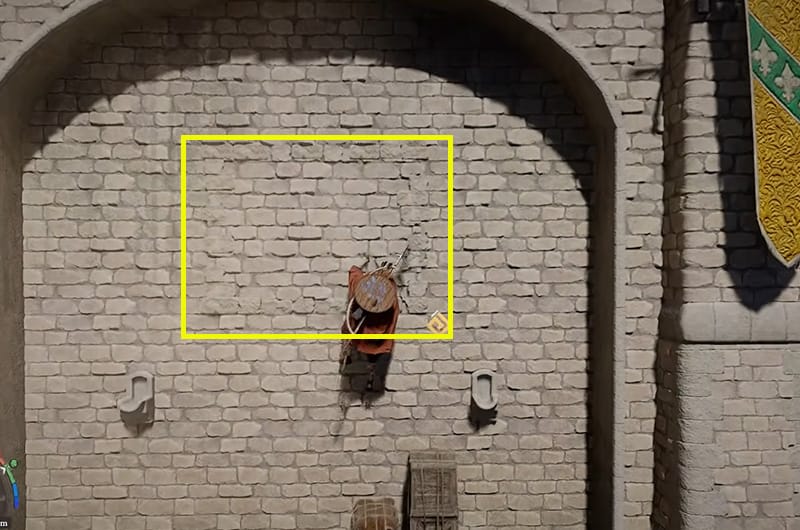
If you look closely, the map points to the Silvermoon Tradehouse. Go to the location as shown on the map and use force palm to flip the wall. Inside, you wil find a chest with the treasure.
Hidden Treasure Map Piece 7
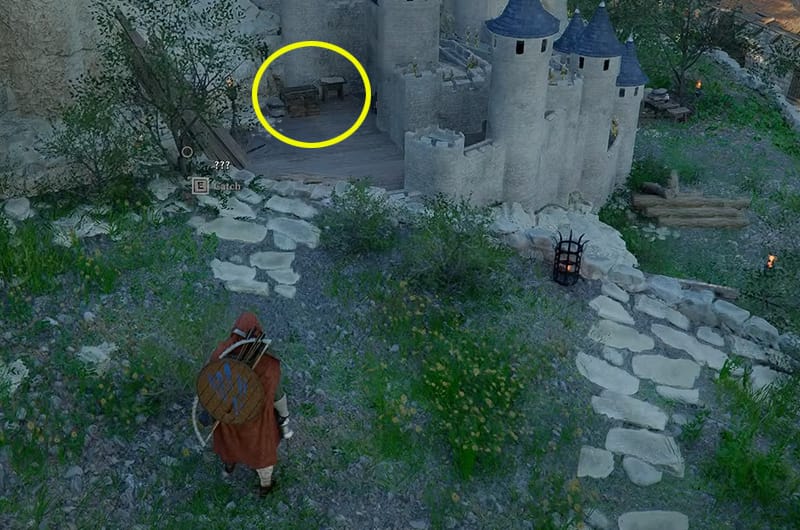
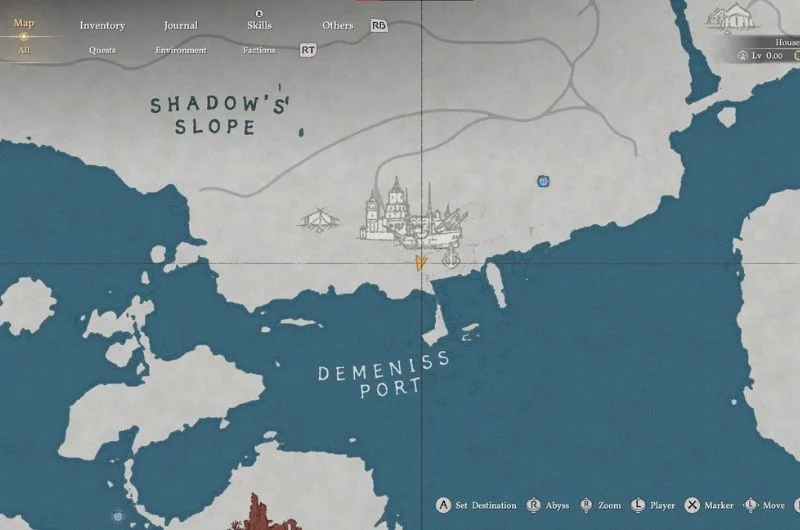
To get the Treasure Map Piece 7, go to the marked location on the map and you will notice a miniature castle here. The map can be found there.
Solution
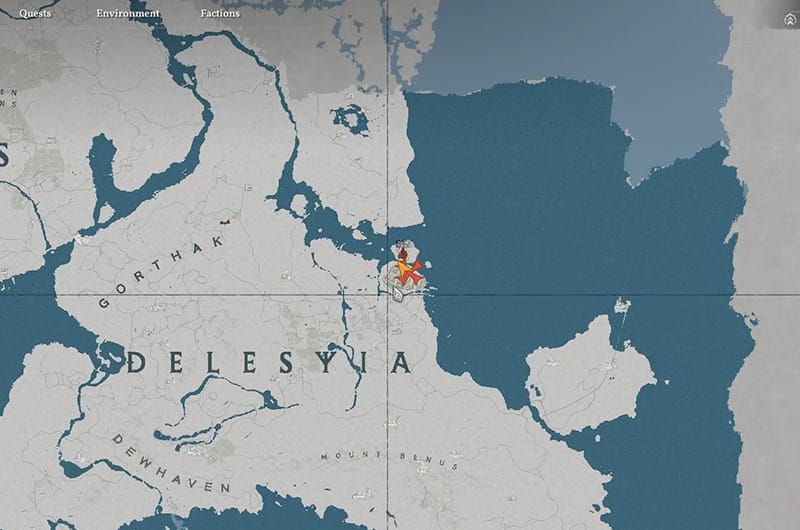

To get the treasure, travel to the coastal city of Delesyia and from there, head east towards the Delesyia Castle. You need the Visione Helmet, which becomes available near the beginning of Chapter 2, to enter the castle. Once inside the castle, cross the bridge into the castle grounds and turn left.
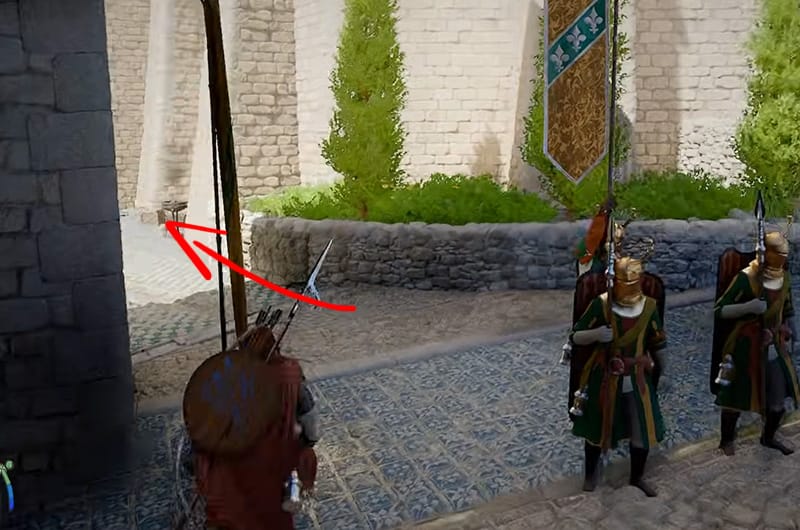
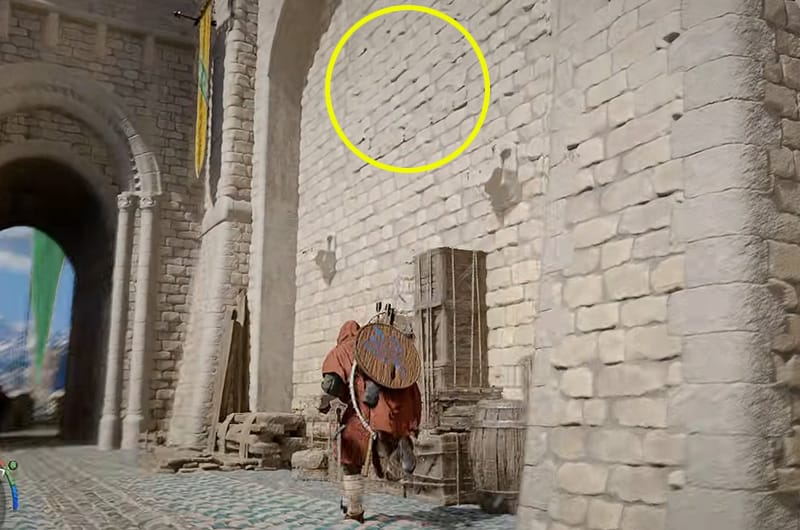
Walk forward for a short distance and then check the walls on your right. Hold up your lantern and look carefully to find a leaf symbol. To reach it, climb up the wall and use your dragger with Resist to stay attached, and then use Force Palm on the marked section so that it rotates and opens a secret chamber. Inside the hidden room, open the chest to get the Frozen Heart Plate.
Hidden Treasure Map Piece 8
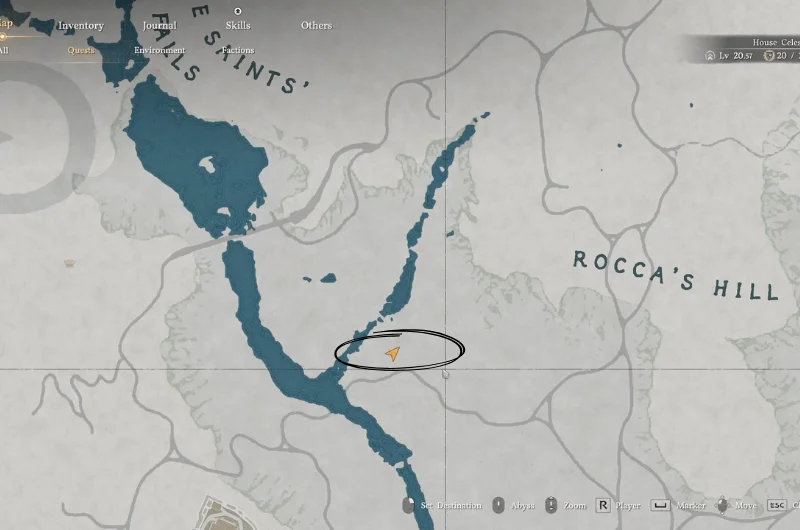
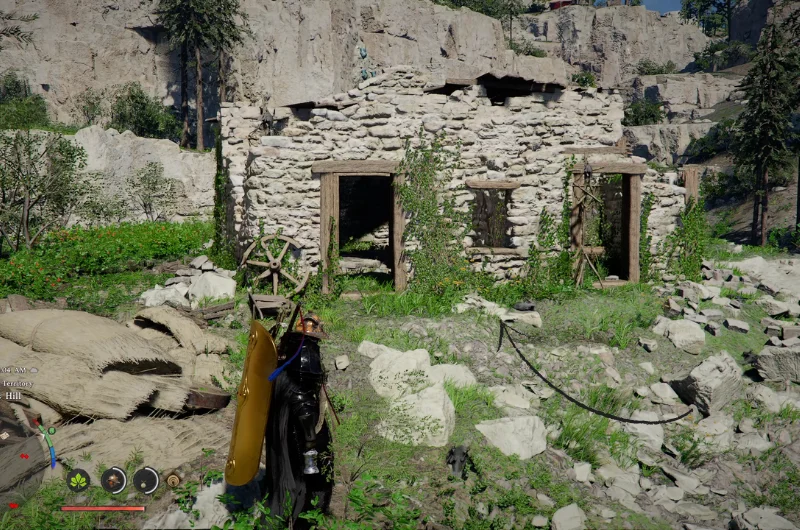
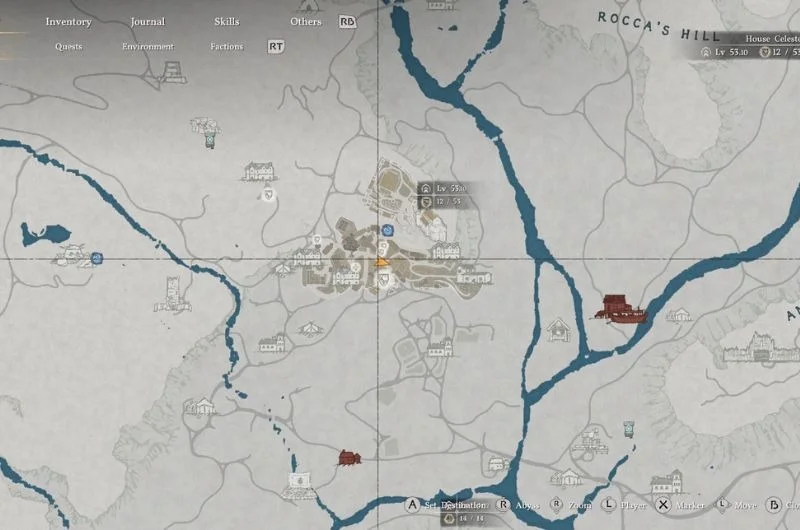
To find the hidden treasure map piece 8, you need to go to the east of Hernand, a little to the Southwest of Rocca’s Hill. The map is inside a small dilapidated house.
Solution
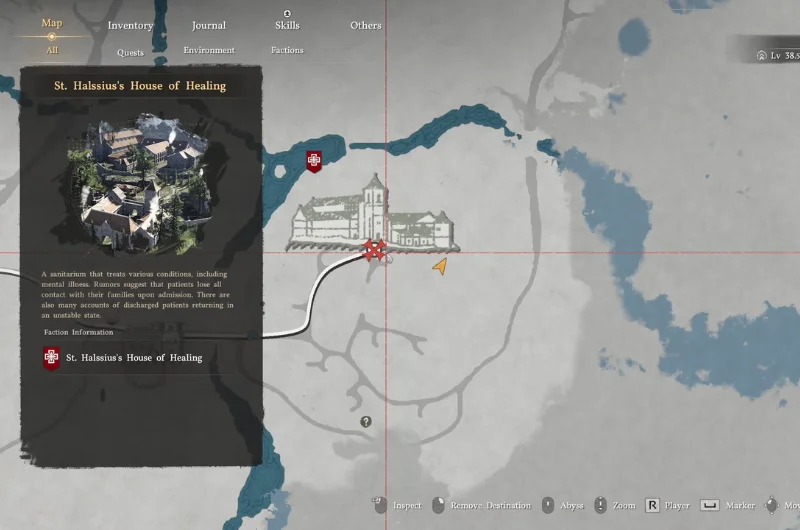
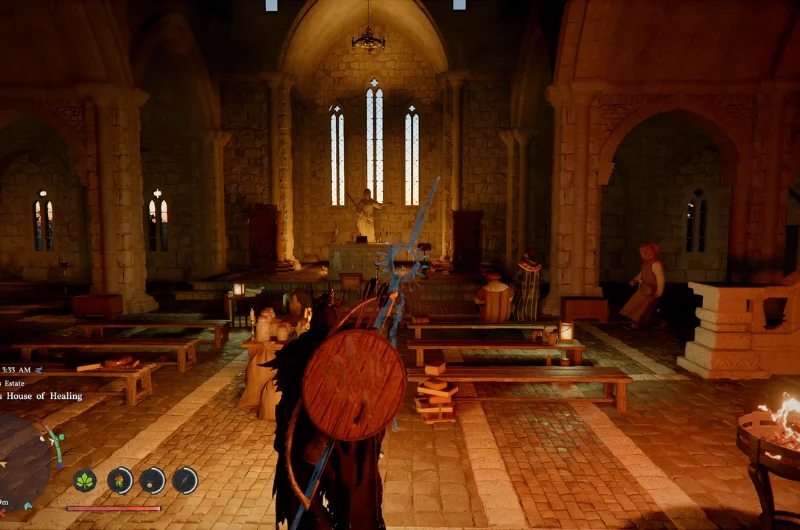
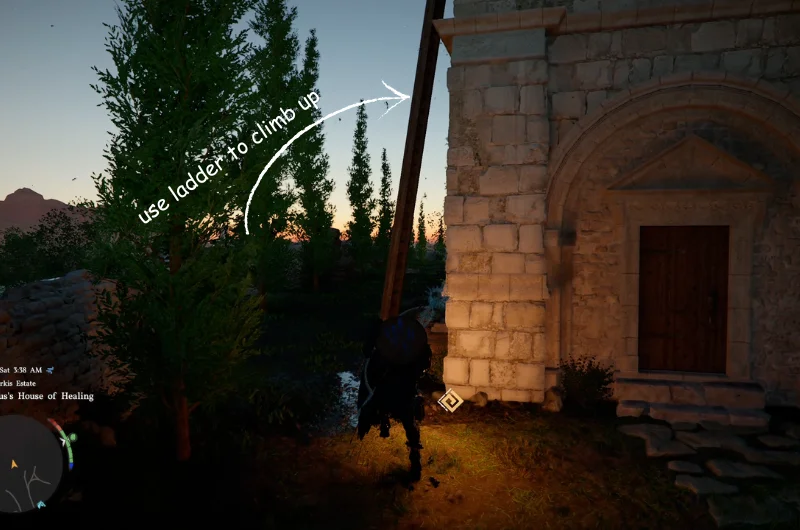
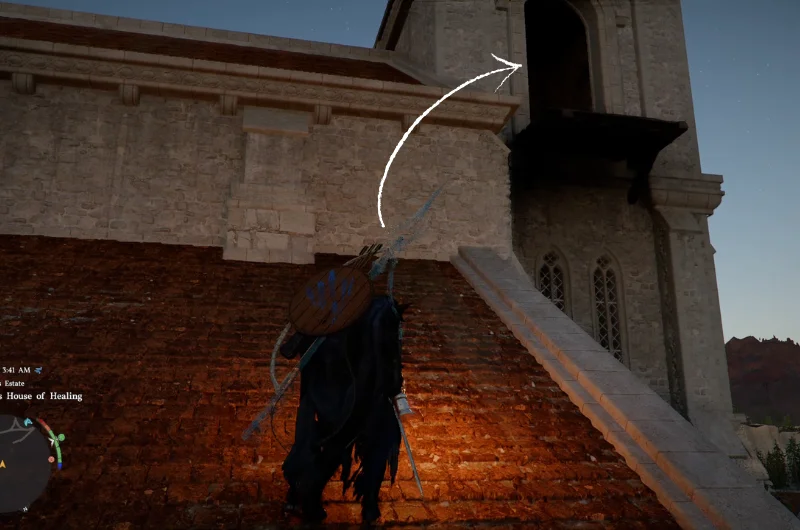
The map shows an alter which can be found at the St. Halssius’s House of Healing, east of Rocca’s Hill. When you reach St. Halssius’s House of Healing, you will notice an ladder on the left side of he entrace, climb the ladder up and go to the what looks like a bell room.
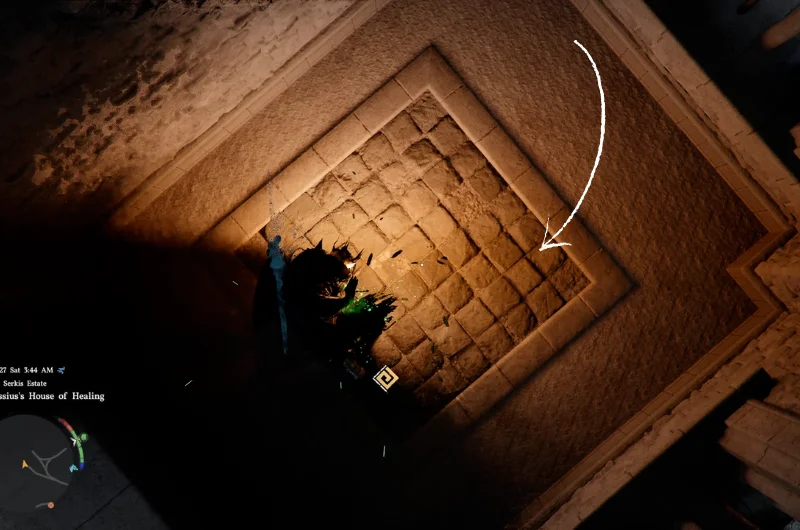
Once there, aim down and use the forced palm on the weird patter on the floor, this will flip the floor and you will fall inside the room with the treasure chest, claim the Blackwing Leather Boots armor piece.
Hidden Treasure Map Piece 9
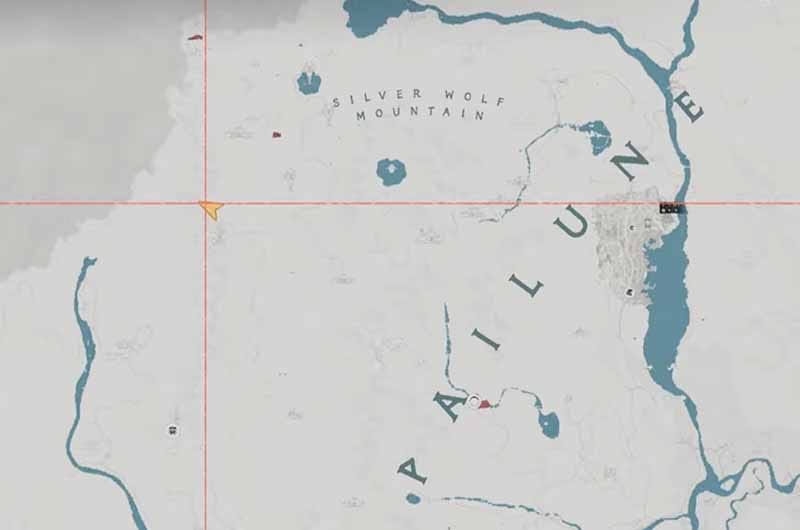
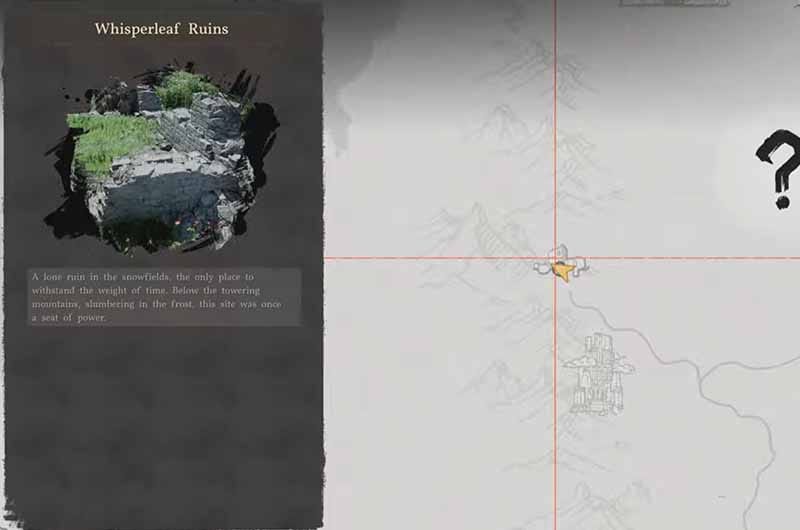
To find the Hidden Treasure Map Piece 9, go to the Whisperleaf Ruins, which is next to the Silver Wolf Mountains in Pailune. At the location on the map, you will find a pathway like a cave on the right, take the pathway and on the left you will see the first coffin with a skeleton, pick the map piece.
Solution
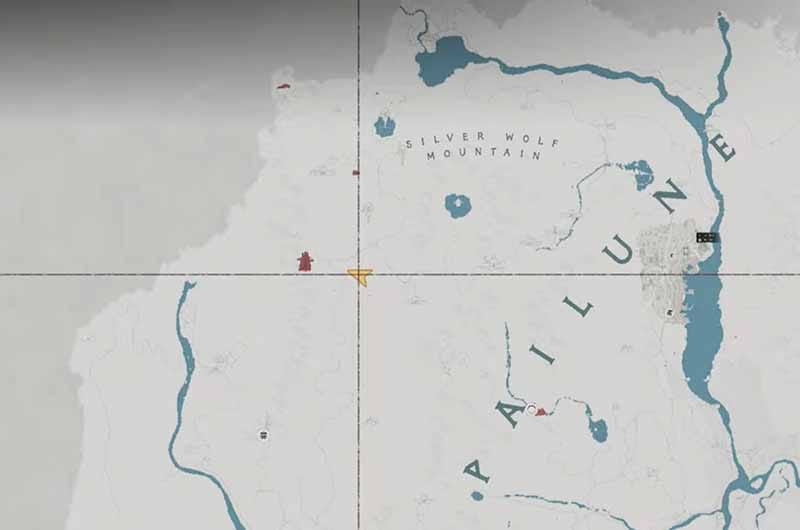
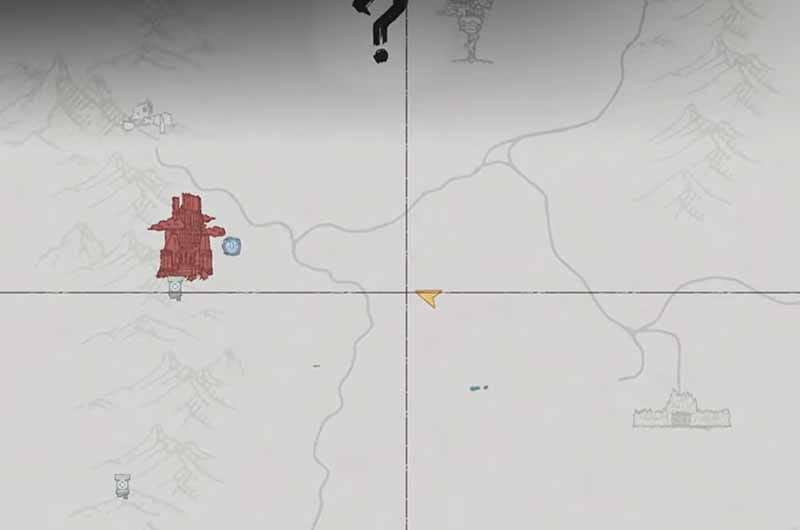
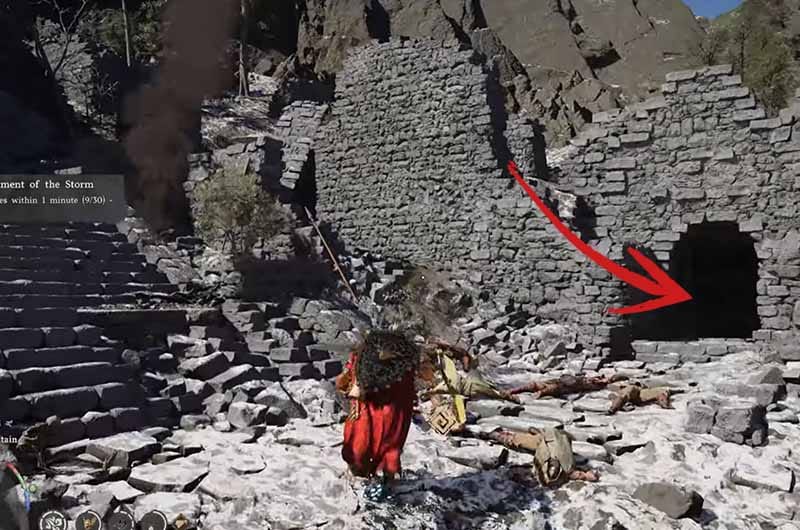
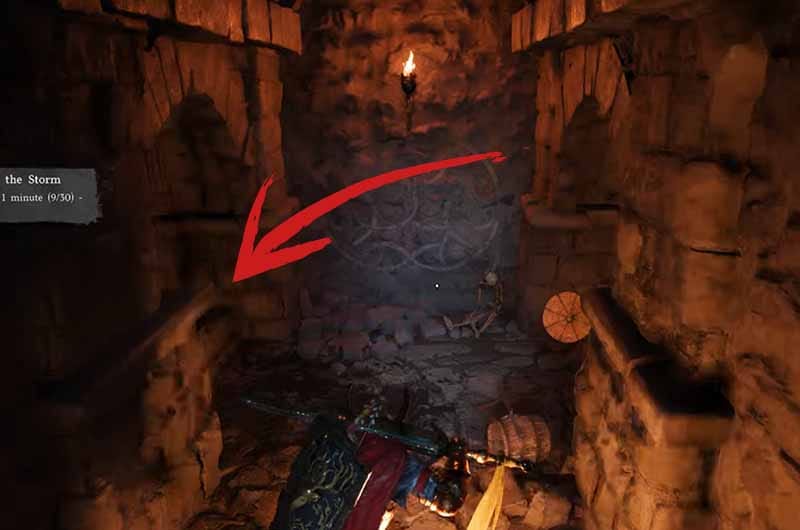
The treasure map points to a little south of the Silver Wolf Mountains. Once you arrive at the location, you will notice a crater at the bottom with a boulder. Use forced palm to break it, which it open a cave. Go in and claim your reward.
Hidden Treasure Map Piece 10
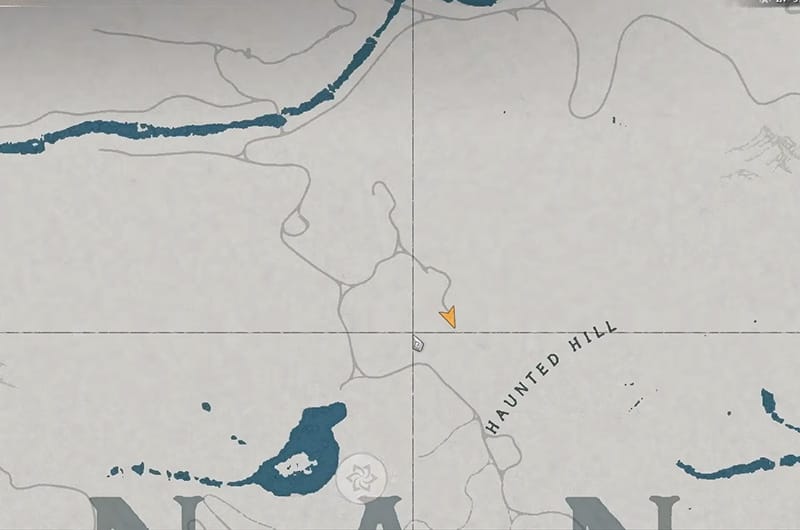

To find the Hidden Treasure Map Piece 8, you need to go to Hernand, a little North from the A and N of Hernand, next to the Haunted Hills.
Solution


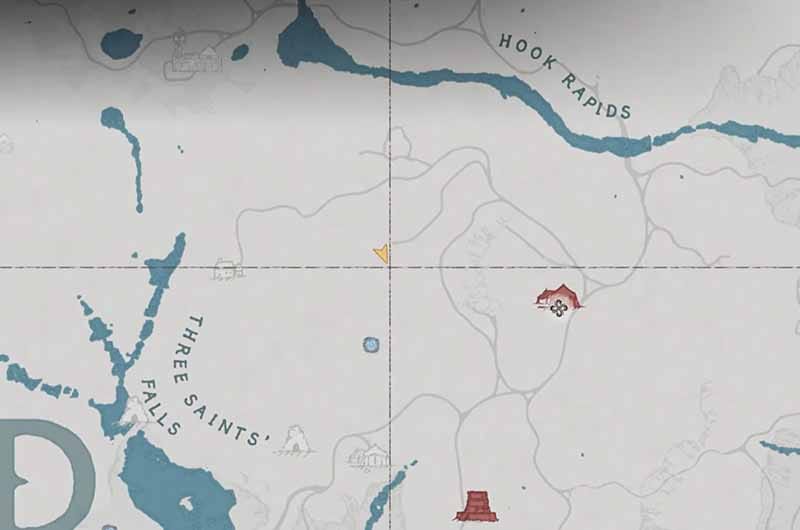
Once decoded, the treasure map points to the Bursada Castle Ruins. It’s by the Red River as shown in the above map. Go to the ruins, and make your way to a hallway with the wall puzzle that requires you to use a forced palm to flip.
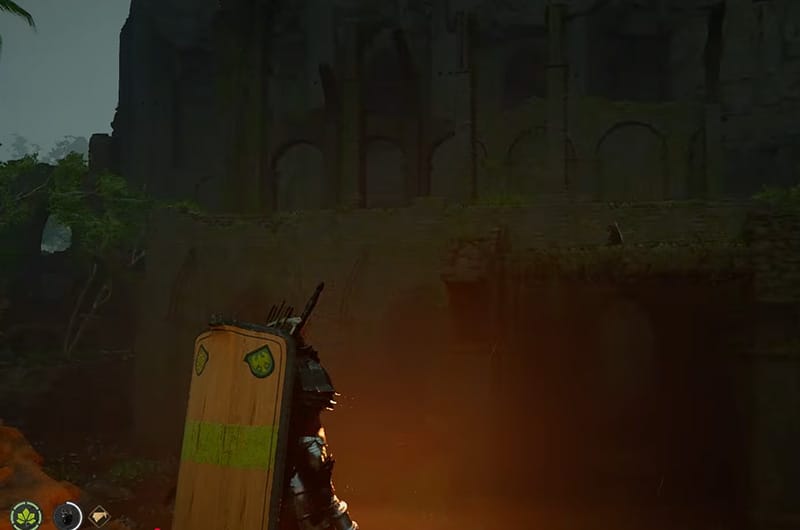
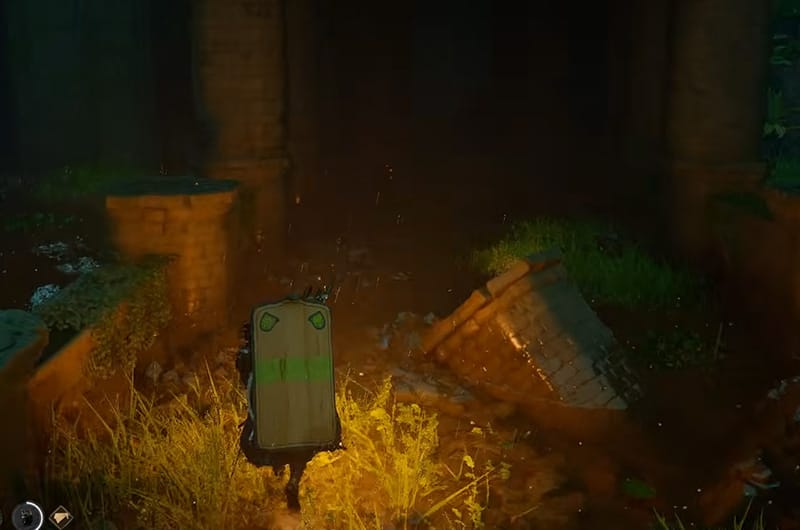
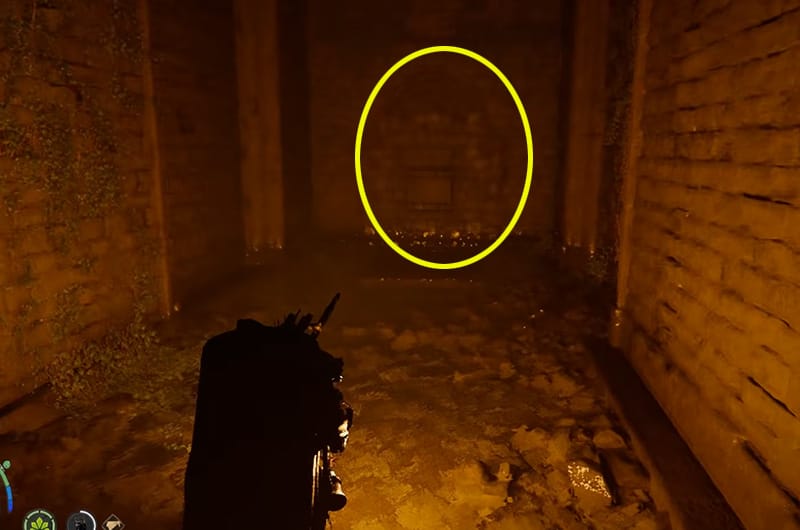
If you follow the same path as the image above, you will pass through some stairs going up, go through the door straight ahead and you will see the puzzle. Use forced pal and in the other room, the best contains the Golden Greed Plate Armor.
Hidden Treasure Map Piece 11
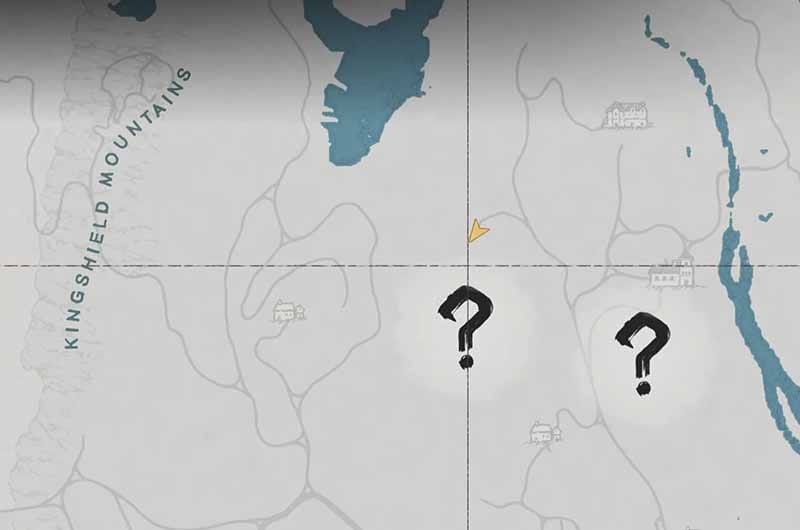
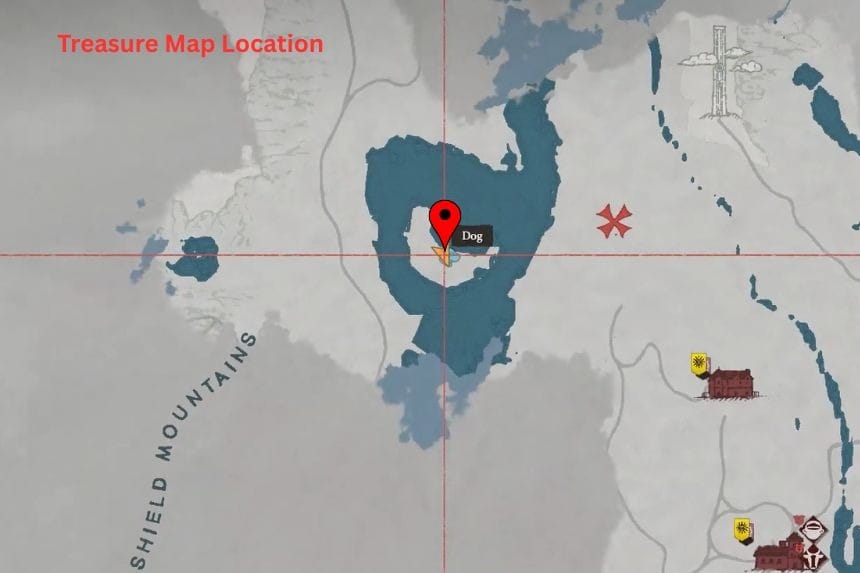
To get the Hidden Treasure Map Piece 11, go straight North between E and M of Demeniss, east from the Kingshield Mountains. You will find a house there that has the map on the table.
Solution
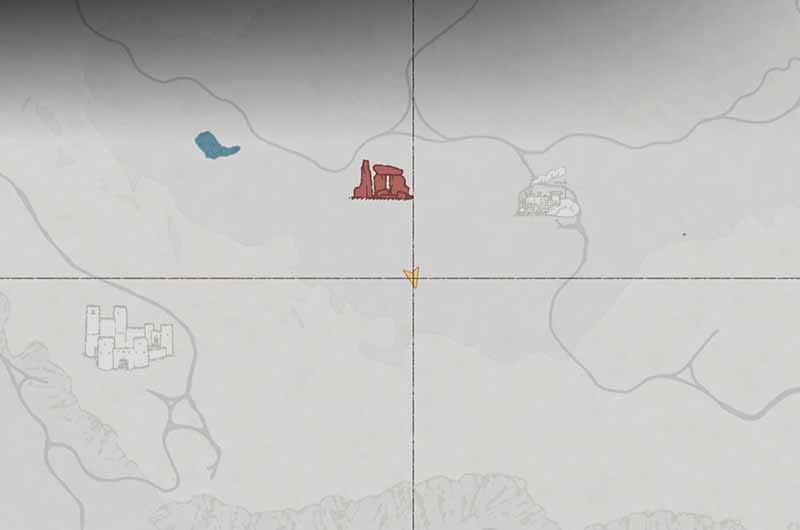
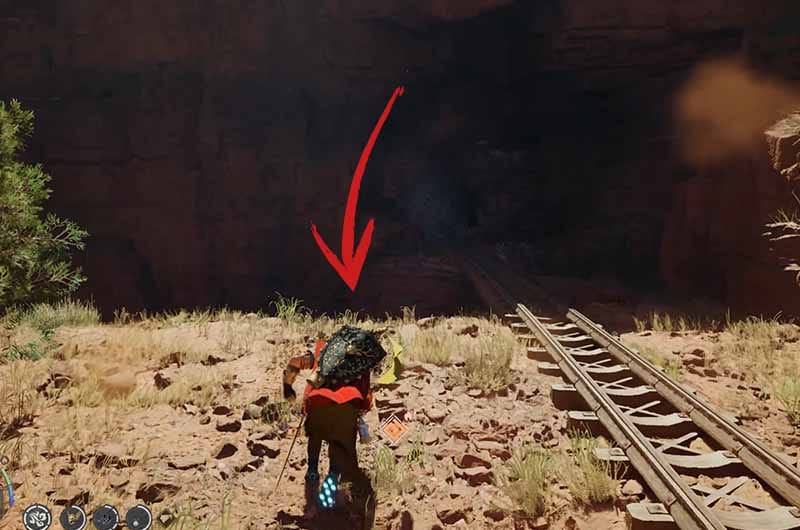
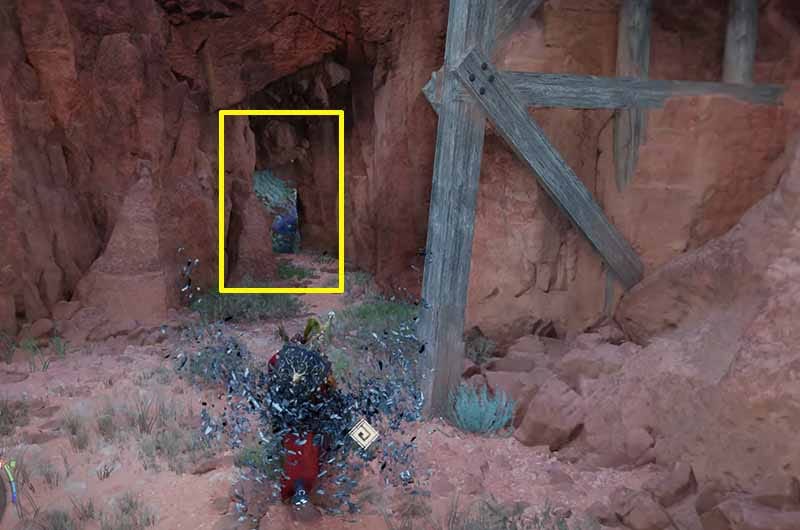
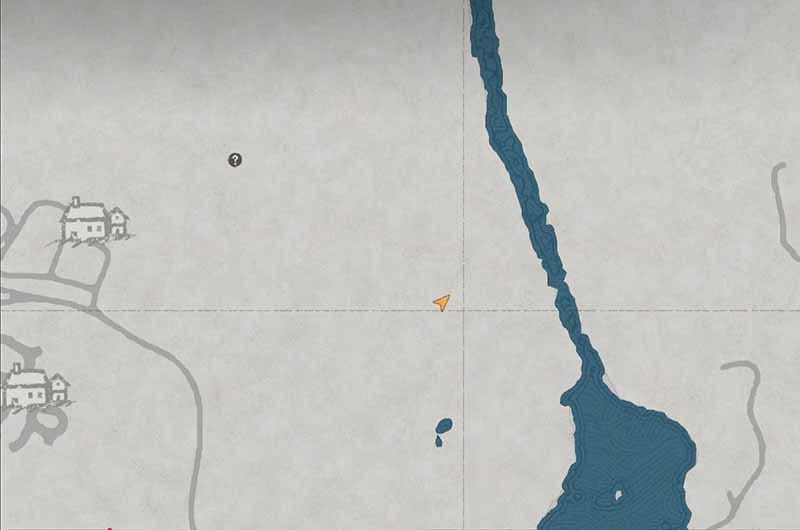
The map suggst the above location on the map and a hidden cave. Go to the lcoation, and jump down the cliff. You will notice a cave with the path blocked. Use forced palm and at the end of the cave, you will find the chest.
Hidden Treasure Map Piece 12
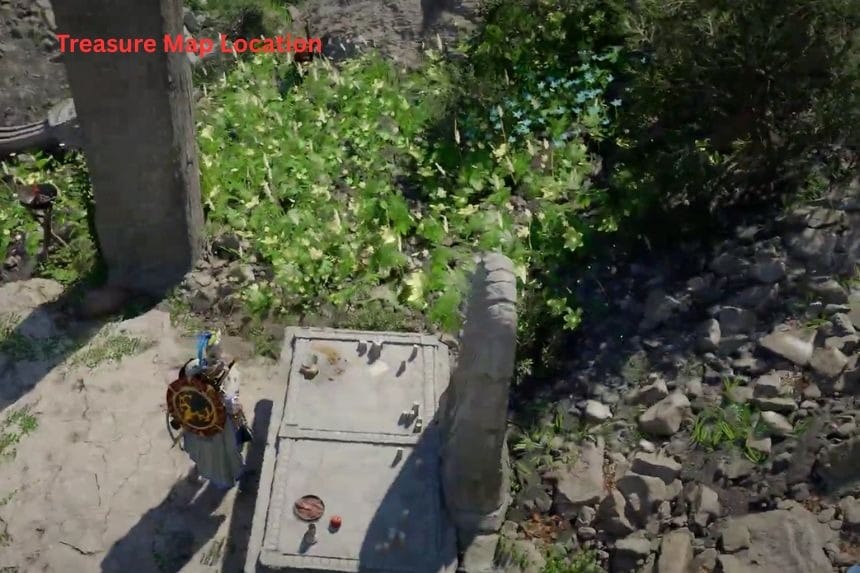
You can find the hidden treasure map 12 on top of a small shrine in the northern part of Deinis. After picking up the map, you need to reach the area near a waterfall.
Solutions
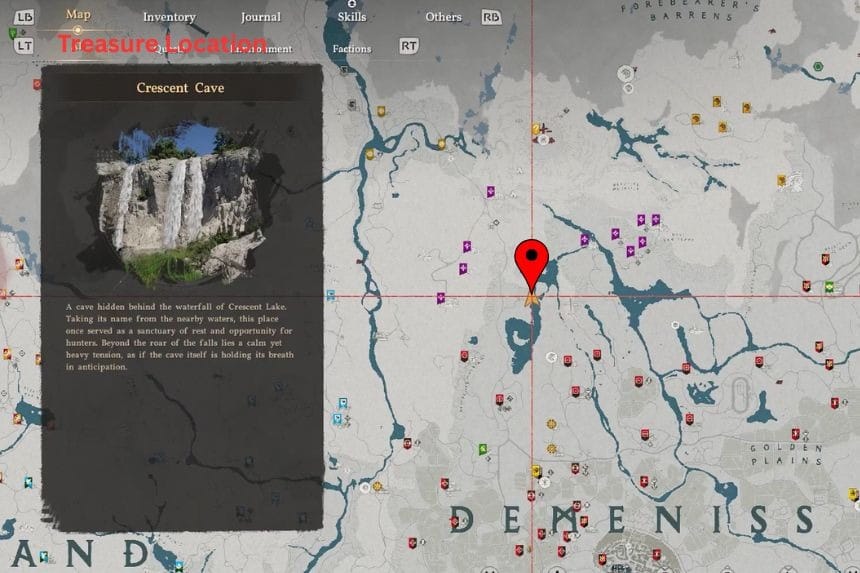
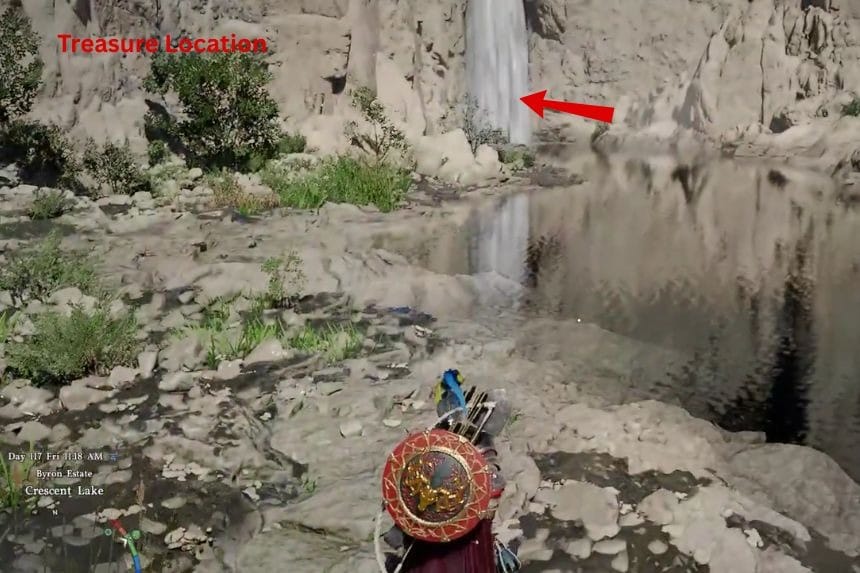
There is a cave hidden behind the waterfall. You need to get through the waters by using your Pierce attack. Once inside the cave, you will find the loot in front of you.
1 Comment
Good work so far. There is another way to get at least map piece 4 and maybe others (unconfirmed) and all it costs is food.
There is a gift system for npcs that seems to give random collectibles. I stumbled across one gift called a cylindrical box which came from a wandering swordsman near a house on a hill above vellua fishing village. Inside was treasure map piece 4. It was my first ever attempt at bribing npcs with food, so i dont know if it is 100% rng or if random npcs are carrying map pieces with them as fixed drops, but building trust with random can win excellent prizes if you are lucky.