 – Stalker 2")
Artifacts in Stalker 2: Heart of Chornobyl are both captivating and perilous. These enigmatic objects provide valuable benefits, such as enhanced carry capacity and greater resistance to bleeding, among other effects. However, most Artifacts emit radiation, posing a serious risk to players who equip them without proper precautions. Fortunately, managing Artifact radiation is entirely possible, and this guide will explain how to do so effectively.
Note: Players are unlikely to be prepared to handle radiation when acquiring an Artifact and may need to leave it unequipped until they have advanced further in the game.
Artifact Radiation Explained

Artifacts often emit radiation, and equipping them without the right precautions can result in deadly radiation poisoning. While their benefits are enticing, players focused on survival must prioritize developing countermeasures. Early in the game, you may not have the resources to manage Artifact radiation safely, making patience and preparation essential.
Dealing with Artifact Radiation
Although players can mitigate the radiation from equipped Artifacts by repeatedly using Vodka and Anti-Radiation Drugs, these are not sustainable long-term solutions. Instead, fans of Stalker 2 should focus on acquiring and equipping Artifacts that reduce radiation and gear that offers radiation protection.
Short-Term Radiation Remedies
During the early stages of your journey, temporary solutions like Vodka and Anti-Radiation Drugs can help counter radiation poisoning:
- Vodka: It’s not just for celebrations—consuming Vodka lowers radiation levels but temporarily hinders your character’s abilities.
- Anti-Radiation Drugs: A more dependable option than Vodka, these drugs directly counter radiation effects. However, both methods are short-term solutions and can quickly deplete your resources.
Tip: Save these temporary solutions for emergencies and prioritize finding long-term remedies.
Long-Term Radiation Remedies

Long-term radiation remedies work best and are the better option to opt for when dealing with the dangers of the Zone.
Radiation-Reducing Artifacts
Among the many options available, radiation-reducing Artifacts provide the most straightforward solution to Artifact radiation. An Artifact with “radiation protection” can offset the harmful effects of another Artifact with a similar radiation level.
- How they work: Equip an Artifact with “radiation protection” to offset the effects of another Artifact that emits radiation. For instance, an Artifact like Slug, which offers mild radiation protection, can neutralize the negative effects of an Artifact with low radiation.
- How to find anti-radiation Artifacts: While exploring, use an Artifact Detector like the Echo or Bear Detector. These detectors will notify you of nearby Artifacts, which are normally located near acid anomalies.
List of Artifacts that Negate Radiation and Their Location
Here’s a list of anti-radiation Artifacts you can look for:
1. Mica & Slug
Click on the image to enlarge
- Description(Mica): When exposed to ultraviolet or infrared light, mica loses its transparency and turns completely black.
- Description(Slug): Upon impact with a heavy object or when dropped onto a hard surface, the Slug rapidly hardens for 0.1 seconds.
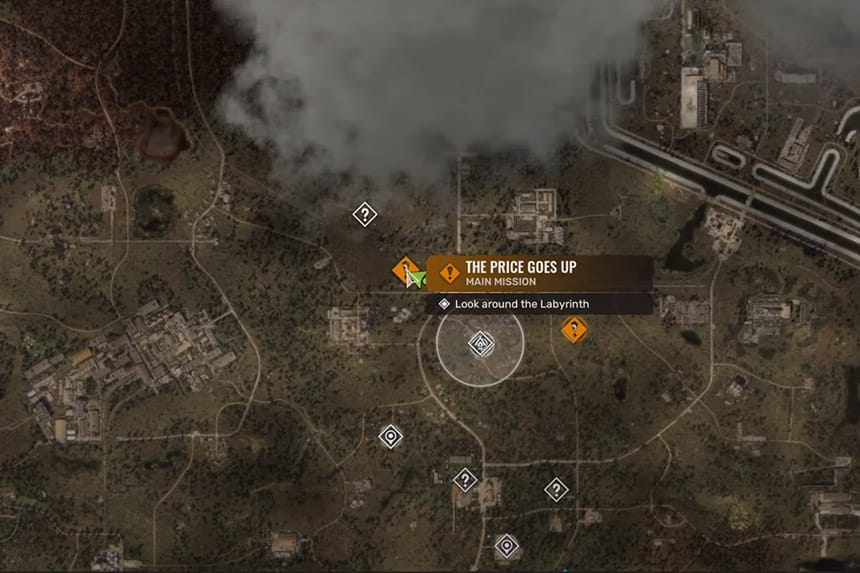
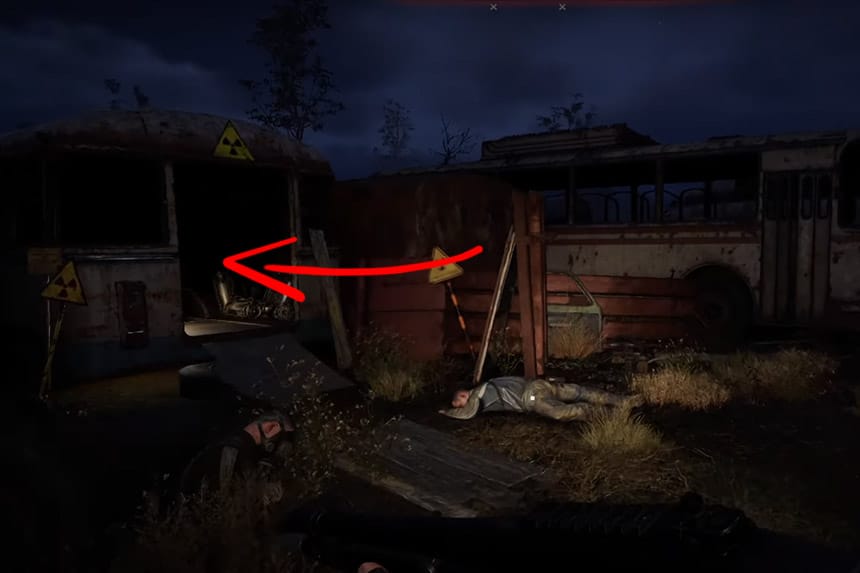
- Location: A common Artifact discovered in acid anomalies. To obtain it you’ll have to head towards the Garbage region, there, you’ll have to fight off a bunch of rats before going inside a downtrodden vehicle in the junkyard which has the Artifacts Mica and Slug in it. “The price Goes Up” main mission will take you to the area.
- Radiation protection: Both Mica and Slug have weak radiation protection.
2. Slime
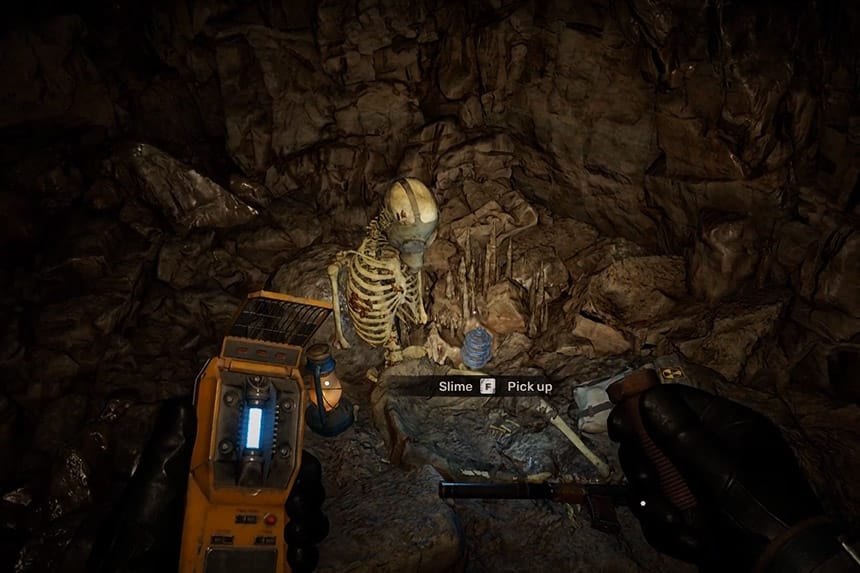
- Description: When exposed to extreme temperature fluctuations, the Slime melts and solidifies into a unique spiral form.
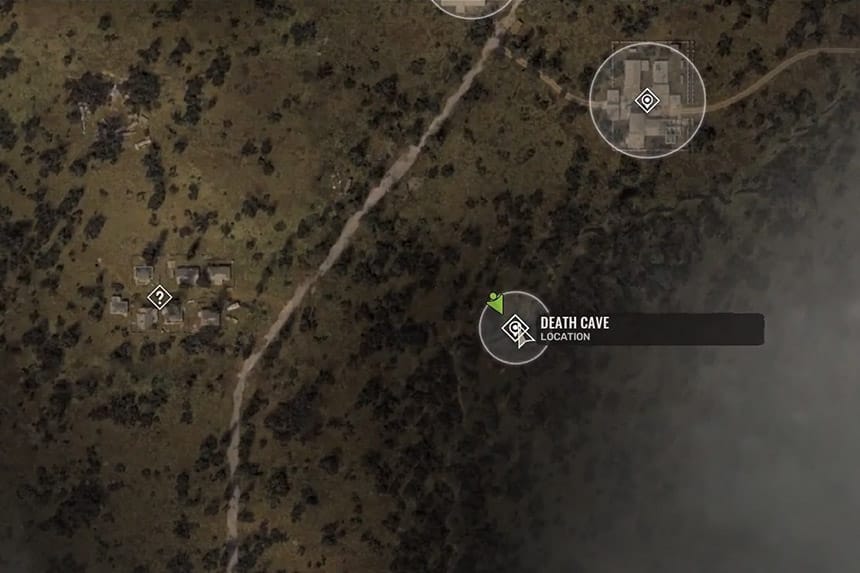
- Location: A common Artifact discovered in acid anomalies. You’ll have to head towards the Death Cave in the Cordon region to obtain it. You’ll find a cave, go inside it and using your Echo Detector get hold of the Slime Artifact.
- Radiation protection: Slime has weak radiation protection.
Radiation Protection Gear

In addition to Artifacts, gear such as helmets and suits can enhance one’s resistance to radiation. By combining this gear with anti-radiation Artifacts, one creates a multi-layered defense.
Helmets and Suits offer different degrees of radiation protection. Higher-tier gear provides more robust defense but can be difficult to obtain. The SEVA-I suit is easily obtainable armor with one of the highest radiation protection stats.
Where to find them:
- Stashes: Watch your map for stash locations. These concealed caches frequently hold valuable equipment.
- Mission Rewards: Finishing quests can provide radiation-resistant gear, although it is usually lower quality than the loot found in stashes.
- Combining Gear and Artifacts: Combining weak radiation protection gear with a matching Artifact can provide moderate radiation resistance, allowing you to endure more hazardous environments.
Why Artifact Detectors Are Your Best Friend
Artifact hunting is essential for surviving in the Zone. To succeed, you’ll require an Artifact Detector:
- How to Use Detectors: Equip your detector when you’re not engaged in combat. Follow the signals to find hidden Artifacts.
- Target Areas: Acid anomalies are key spots for radiation-reducing Artifacts. Be sure to check these areas whenever you come across them.
The Importance of Stashes
In Stalker 2, stashes are hidden caches filled with valuable items, including radiation-resistant equipment and other essential supplies needed for survival. Keep these tips in mind:
- Keep an Eye on Map Updates: Stashes appear at intervals, so be sure to check your map frequently.
- Weigh Risk and Reward: Certain stashes may be well-guarded or located in dangerous areas, but the potential rewards usually make it worthwhile.
Developing Your Radiation Strategy

Handling Artifact radiation in Stalker 2 demands a comprehensive approach:
- Explore Early Missions: Finish story missions in areas like Garbage to acquire initial anti-radiation artifacts.
- Loot Wisely: Focus on stashes with top-tier gear and always carry your Artifact Detector while exploring.
- Stack Defenses: Use a combination of radiation-resistant artifacts and protective gear for optimal protection.
Conclusion: Effectively managing Artifact radiation in Stalker 2 requires combining radiation-reducing Artifacts and protective gear. Use temporary solutions when necessary, but focus on exploration, looting, and stacking defenses for long-term survival in the Zone.