
This walkthrough covers the “Dawntreader” side quest in Avowed, guiding you step-by-step from picking up the quest in the Southern Paradis Administration District to confronting the Oracle and finding the missing Aedyran expedition. Whether you’re looking for the Splinter of Eothas, trying to figure out what happened to Caedmon’s team, or just want to explore the Eothasian Temple, this guide will help you navigate the quest’s challenges and optional objectives.
How to Start the Dawntreader
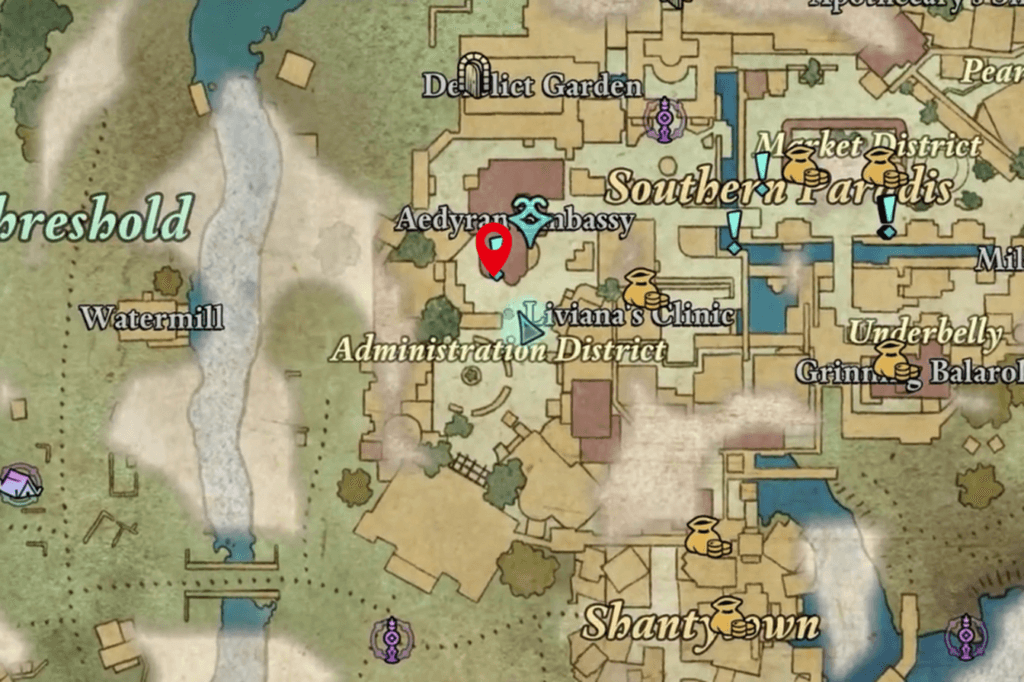
You’ll find it in the Southern Paradis Administration District. Since you’ll be talking to the Ambassador there as part of the main story, it’s a good idea to grab this quest while you’re in the area.
Just outside the Ambassador’s office, you’ll see a badly hurt guy named Ofryc. Chat with him, and he’ll tell you about an expedition he was on with the Free Expedition Corps, including his brother Caedmon. He’ll ask you to find the expedition and his brother to make sure they get out safely. If you agree, you’re on the hunt!
Eothasian Temple Location
Okay, so you’re trying to find that Aedyran Expedition Team. They’re hanging out north of Paradis in the Northern Farms area. Hopefully, you’ve already unlocked the Northern Farms Beacon – it’s super close to Pilgrim’s Path. Go past Secgwin and head inside. Follow the path behind her, and you’ll run into the Eothasian Temple. Go on in!
The first room you enter has some essence generators on the left. Zap the inactive one on the right with some shock damage. You can use a spell or even one of those electric lily seeds you might have found lying around. That should open the door.
Once you’re through, take care of the skeletons, grab any loot, and check out the Book of Verses. Then, head back out and keep going left.
In the next room, go up the stairs on the left and stick to the right wall. Take the tunnel on your right, and you’ll get a nice view of the Oracle’s temple. Turn right again and deal with the xaurips you encounter. Just keep following the marker on your HUD, grabbing loot as you go. You’ll eventually bump into Caedmon. Have a chat with him, and he’ll fill you in on the Oracle and the temple, plus give you a new, optional objective.
Speak to the Oracle
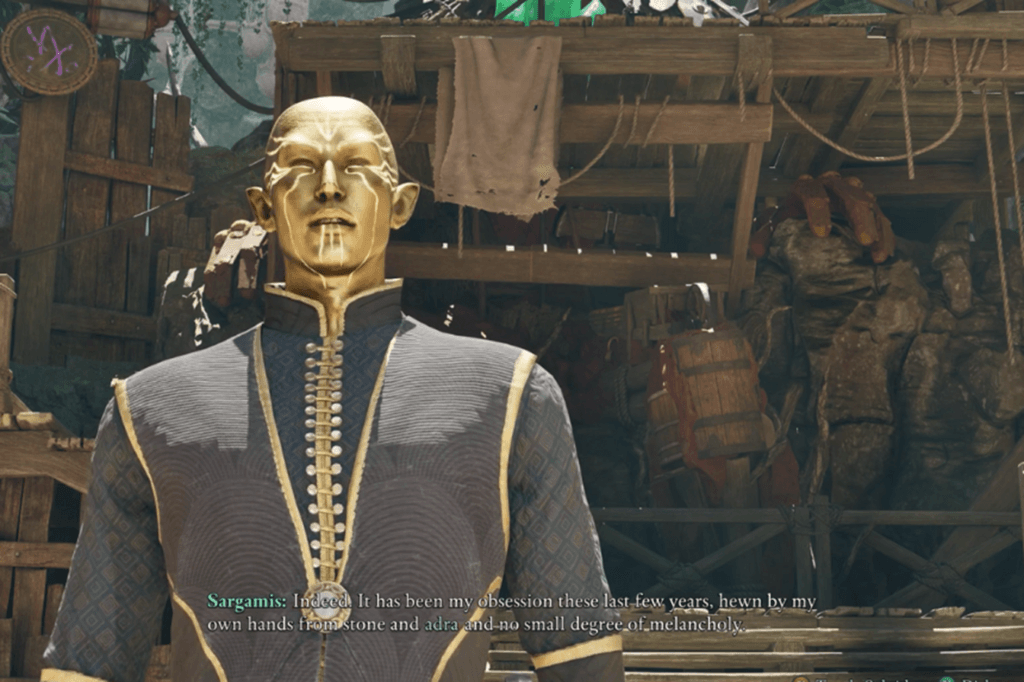
On your way to Sargamis, the Oracle, you’ll run into a few xaurips – take care of them. Once you cross the last wooden bridge, you’ll find Sargamis waiting in a clearing near that weird statue. Talk to him to get some answers and figure out what’s going on. He’ll tell you about the Splinter of Eothas, a relic that’s kept in this temple.
Splinter of Eothas relic Location
Okay, so you’re going after the Splinter of Eothas. Go through the main door behind Sargamis and follow your HUD marker. You’ll hit a flooded tunnel – time for a swim! When you surface, go up the ramp. You’ll see a cracked wall with an essence generator on the other side. Toss an electric lily seed through (or zap it with magic) to open the door below. Drop down and swim through again.
Underwater, there’s a chest to loot. Surface and follow the ledges to a breakable wall (or just swim the rest of the way). In the next room, there are a bunch of books – read them! Then, take care of the spiders to your right. Look around for more books, and then check out the Statue Schematic on the wall.
From the schematic, burn away the webs on your left to find a tunnel. It leads to some small dwellings. Deal with the beetles and xaurip, and grab all the loot. Use the ramp and broken stairs on the right wall to climb to the next hallway and grab the Consecration Prayer.
Go through the main door. The Splinter is right there, but hold on. Turn left and hit that essence generator. Now, right in front of the altar with the splinter, look on the ground to the right. Smash those vases to get into another room. Keep smashing vases as you go through the coffins. Grab the History of the Living Lands IV book.
At the end, look down and to the right again. More vases to smash! Take out the skeleton monk and loot the lockbox. Turn right and go into the hall. Loot the body on your way out, and then unbar the door to get back to the main entrance.
Now, go under the platform on the left side of the main entrance. Inside, look left for a cracked wall. Shoot the essence generator on the other side to open the door above. Go back out and through the door you just opened. To your left, open the sarcophagus for some goodies.
Finally, go back out and through the main door to grab the Splinter! When you head back to the main courtyard, get ready to fight some skeletons and a boss called the Godless Executioner.
Aedyran Expedition
You’ve got the Splinter, and you could finish the side quest right there. But let’s wrap up those optional objectives, too.
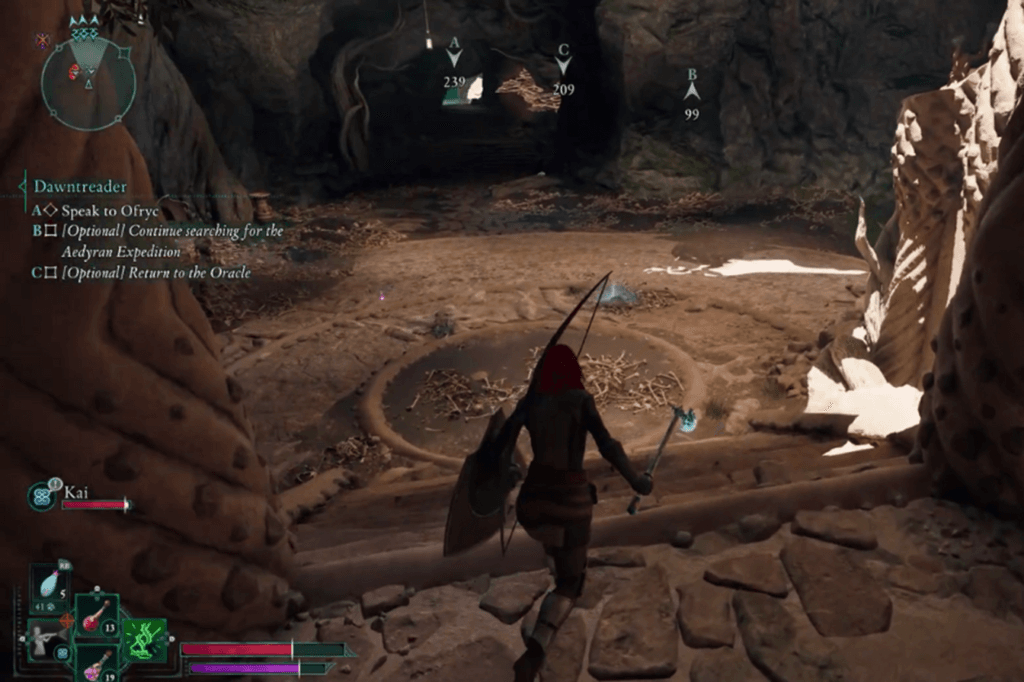
Head back the way you came. The temple will be a bit flooded now. Cross the tree root, jump the gap, and climb up the ledges on your right. At the top, duck through the low tunnel ahead and slightly to the right. Follow the cave, drop through the hole in the floor, and go around the curtain. You’ll find the missing expedition! Talk to Kai to figure out what happened. There’s also a book in the room, “On the Binding of Souls,” if you want some extra background. If you’re not interested in hearing what the Oracle has to say, you can just leave and go talk to Ofryc.
Should you attack or help the Oracle
Once you’re done in that curtained-off area, flip the switch on the wall to open the door. Head up the ramps and unlock the door at the top to get back to the Oracle’s courtyard.
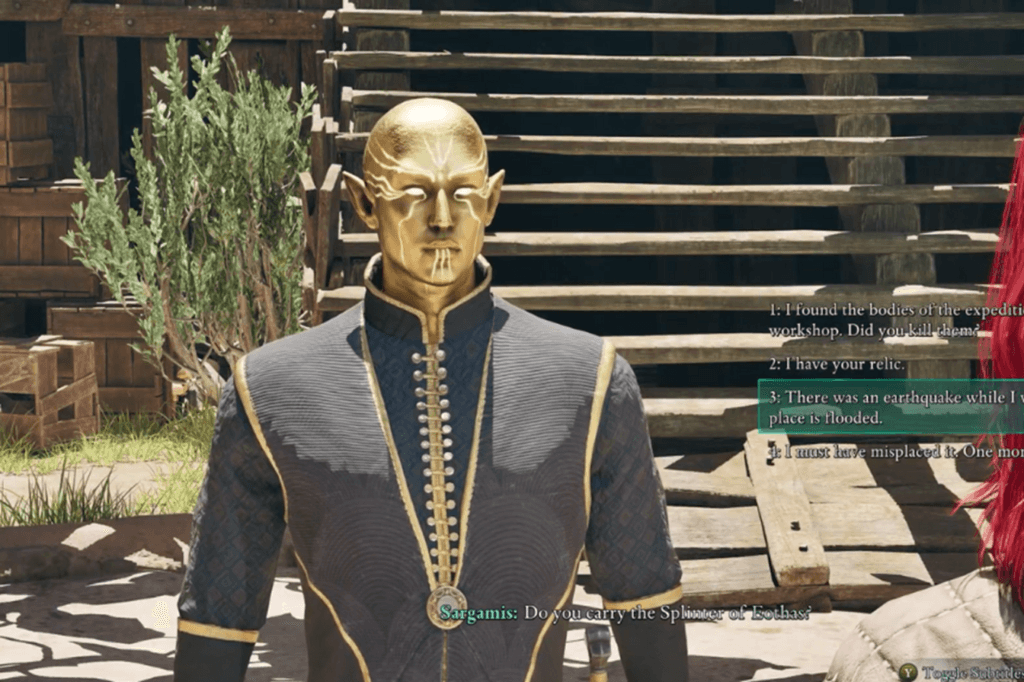
When you talk to Sargamis again, you’ve got some choices. You can pretend you don’t have the relic, you can attack him, or you can “help” him. But honestly, no matter what you pick, things pretty much play out the same way in the end.
To wrap things up, head to the west side of the Oracle’s temple. There’s an elevator there that goes to Dawnshore. From Dawnshore, you can easily get back to Paradis. Either the Paradis Main Gate Beacon or the Administration District Beacon will get you close to Ofryc. You’ll find Ofryc and Caedmon waiting outside the Aedyran Embassy. Chat with them to receive your reward: the Delver’s Caution ring.