
In Liberty Falls Black Ops 6 Zombies, players can uncover a variety of secret Easter eggs, each offering unique rewards, challenges, and fun surprises. From crafting powerful weapons to unlocking mini-games and transforming into powerful forms, there’s a lot to discover. This guide walks through the steps to capturing High-Value Targets, assembling the mighty Jet Gun, and engaging in intense boss fights. You’ll also find ways to unlock transformations like Aetherella and explore hidden areas like the bank vault or the bowling alley. This guide will walk you through 22 Side or Missable Easter Eggs in Liberty Falls – Black Ops 6 Zombies.
1. Bye-Bye Dark Aether Easter Eggs

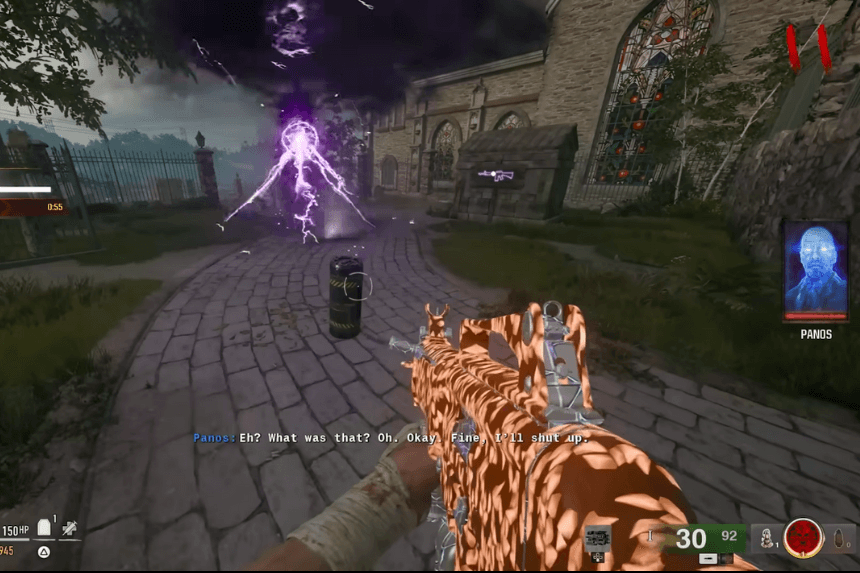
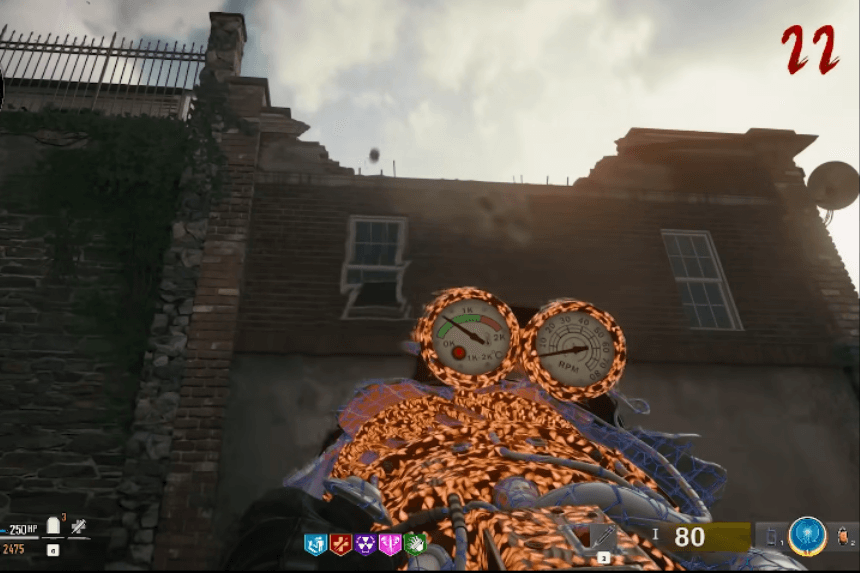
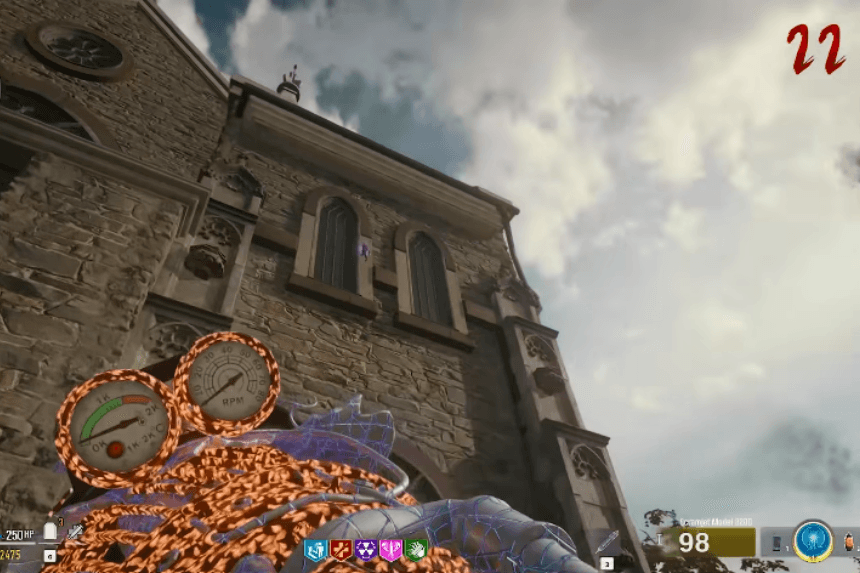
To begin the Easter egg, head to the Dark Aether Church at the back of the map, where you’ll find the Pack-a-Punch machine. Use essence to unlock access, then interact with the SDG Generator on the right wall inside. This will trigger a whiteout effect on your screen and reveal Dr. Pericles Panos, who can be seen standing on the church’s balcony. Then, you’ll need to craft the Jet Gun wonder weapon and put together the LTG. After that, fill two canisters with Aether Essence and bring them back to the church. To craft the Thrustodyne M23 Jet Gun and the LTG Device, refer to the mentioned links.
How to capture the Riverside HVT in an Aether Canister
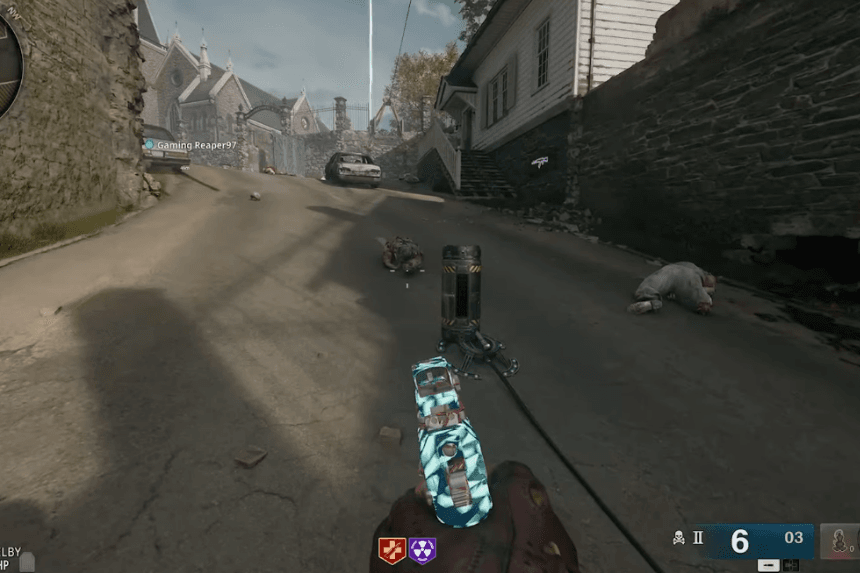
Once you have crafted the LTG device, head back to the starting area of Liberty Falls, and you’ll spot a Dark Aether Field Generator in the centre. Follow the cables from the generator to a “trap” spot near the gas tank, where Aether will start to flow once you activate the generator. This is where you need to place your Aether Canister, just drop it on the trap spot and leave it there.
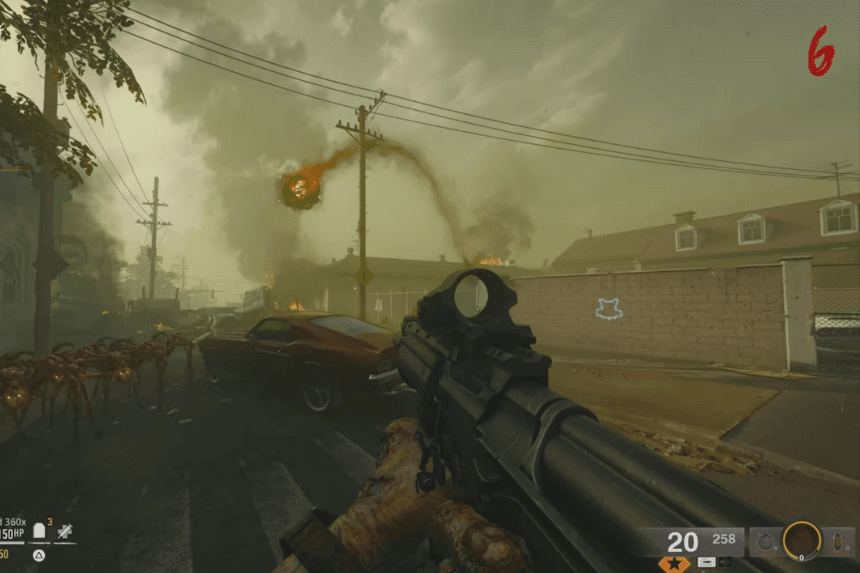
Next, head down the road toward Olly’s Comics. About halfway there, you’ll encounter a dangerous Aether Storm. Right under the storm’s eye is a small platform where you can place the LTG Device by holding the interact button. This will create a portal, but be ready for a zombie wave defence challenge. Zombies will start running toward the portal, and if they get inside, they’ll damage it. Defend the portal, and a special red version of either a Mangler or Abomination will spawn. This is your High-Value Target (HVT).
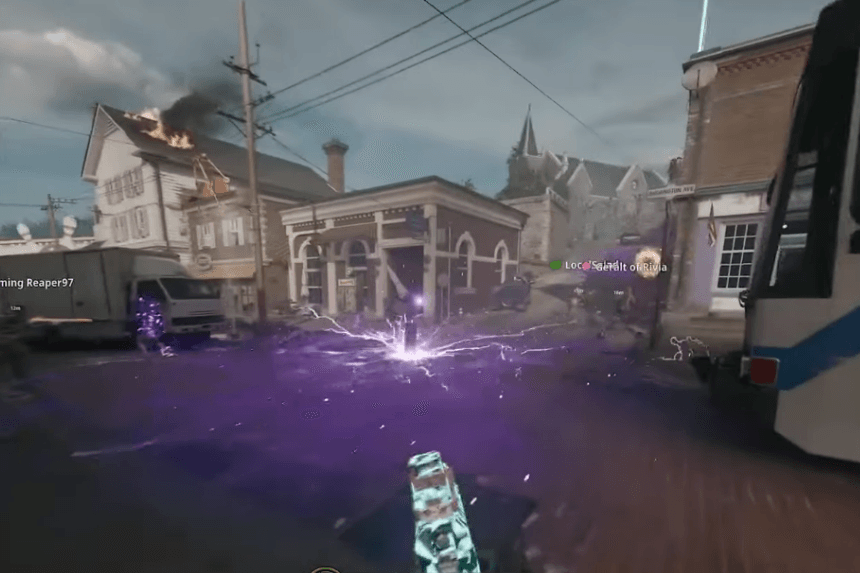
Your goal is to guide it to the spot where you placed your Aether Canister. Once you’re in the right area, start weakening the HVT until it’s left with just a tiny bit of health. The idea is to use the Dark Aether Field Generator to finish off the HVT, trapping its essence inside the Aether Canister you set on the trap.
Once the monster is weakened, activate the trap for 1000 essence. Make sure the HVT is close to the Aether Canister and within the range of the Dark Aether Field. Then, finish it off with your weapons, which will capture its essence in the canister. This step can be tricky, and if you mess it up, you’ll have to start over with the LTG portal defence in the next round.
Now, grab the canister and head back to the church, but you only have 90 seconds to make it there, so hurry up. Race to the church, and while holding the canister, interact with the SDG Generator inside to move on to the next part of the quest.
How to Align the Strauss Counter Projectors

After you deposit the first Aether Canister, the SDG Generator will give you a Strauss Counter, which will be added to your tactical slot. With the counter in hand, your next task is to find three projectors scattered around the map and calibrate them based on the colour the Strauss Counter displays when you’re near each one.
Each configuration will be different, you’ll need to interact with each projector until it shows the opposite colour of what the Strauss Counter is displaying. So, if the counter shows red, make the projector light up green, and if it’s green on the counter, set the projector to red. If the counter is yellow, just leave the projector yellow as well.
Strauss Counter Projector 1 Location

The first Strauss Counter can be found on a grassy hill to the right of the Hilltop Stairs, which lead down from the Dark Aether Church.
Strauss Counter Projector 2 Location

For the second Strauss Counter, go back to the Handbrake Toolshed we visited earlier and take a right, as if you’re heading down the stairs to Washington Avenue. You’ll see a small patch of ground on your right with a projector in the center.
Strauss Counter Projector 3 Location
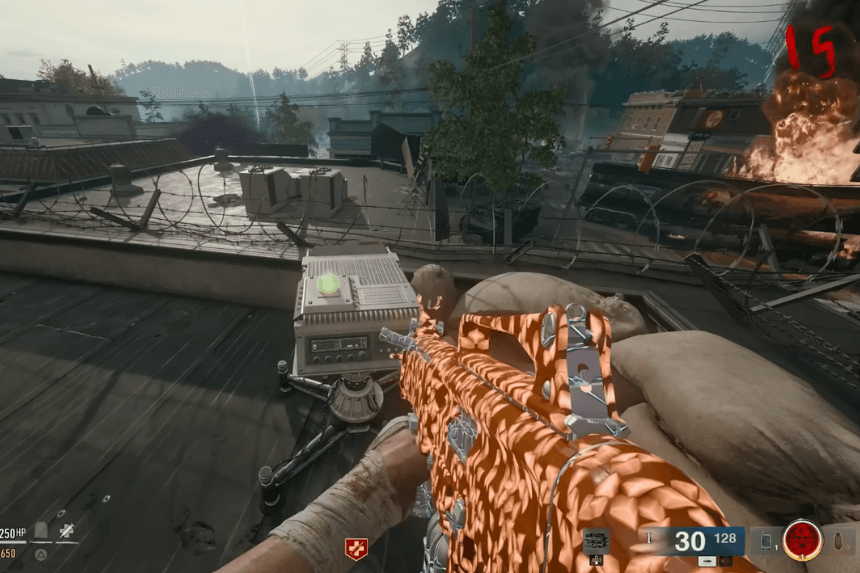
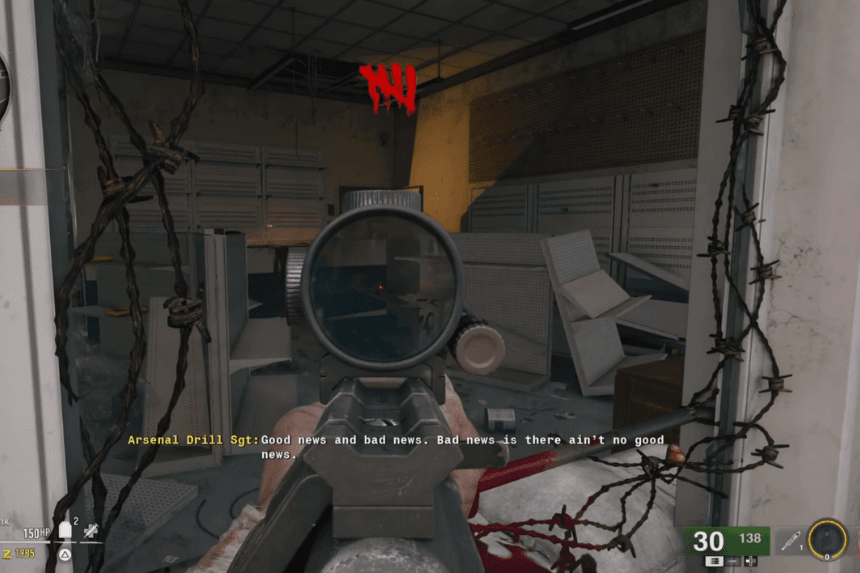
From the rooftop where you built the LTG Device, scan the area until you spot a wooden board with a red cross on it. Pay 750 essence to blow it up, then drop down into the newly unlocked area to find the final projector. Once the projectors are calibrated, Dr. Panos will deliver some bad news. You’ll need to fill another Aether Canister, which has just appeared near where you captured your first HVT. Head back to the gas station spawn point to grab the second canister, then go pick up the LTG Device from where you left it under the Aether Storm in Riverside.
How to capture the Cemetery HVT
With the LTG Device and second Aether Canister in hand, head to the road that connects Washington Avenue to the Dark Aether Church. About halfway up, you’ll find another Dark Aether Field Generator. Follow the cables and drop your Aether Canister on the trap spot once again. Then, head up to the Cemetery where you’ll encounter the second Aether Storm, which looks just like the one you dealt with in Riverside. Place your LTG under the storm to activate it, and defend the portal by shooting any zombies that try to get through.

If you’re successful, another HVT will spawn. Lead the special Mangler or Abomination down to the trap spot where you placed your second canister, and weaken it until it has just a sliver of health left.
Once again, activate the generator and finish off the HVT to trap its essence in the canister. Then, pick up the canister and interact with the SDG Generator in the church. This will trigger the final stage of the Easter egg, a boss fight in three waves. The Liberty Falls Easter egg boss fight is tough, especially if you’re going it solo.
Once you activate the generator, you’ll get trapped in the church with limited space to kite enemies. Before long, you’ll be swarmed by hordes of zombies, along with Manglers, Abominations, and eventually HVT Manglers and Abominations. It’s a brutal grind to the finish, and you’ll need every advantage you can get to make it through.
2. Aetherella Easter Eggs
To transform into Aetherella you need to collect all nine Aetherella figurines. Once you’ve gathered them, you’ll transform into a giant Aetherella statue and gain the ability to shoot laser beams from her eyes, which can take out zombies. The effect doesn’t last long, but it’s a lot of fun and an awesome way to clear out a zombie wave. In this article, we’ll walk you through the steps to become Aetherella in BO6 Zombies Easter Egg.
Locations of all the Aetherella Figurines:
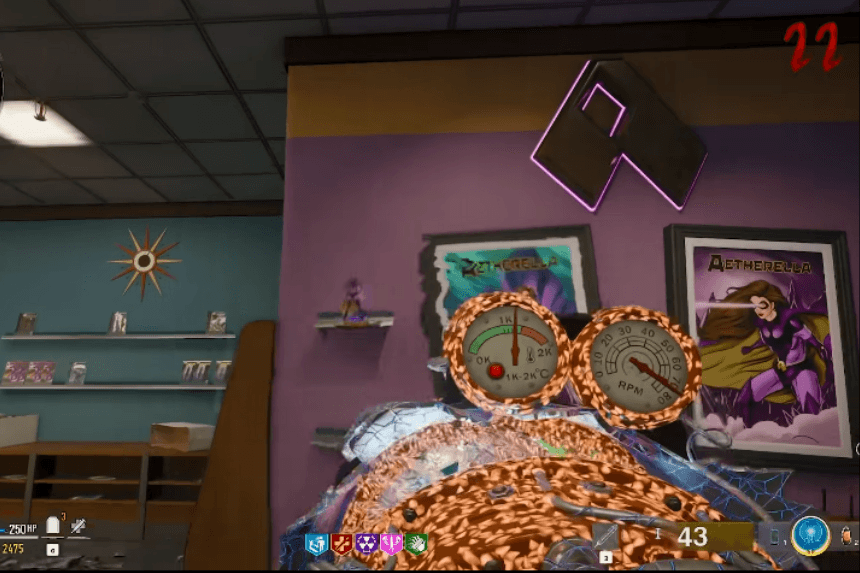
- First figurine: Inside Olly’s Comics, on a shelf next to the Aetherella standee.
- Second figurine: In the shop window, next to the radio.
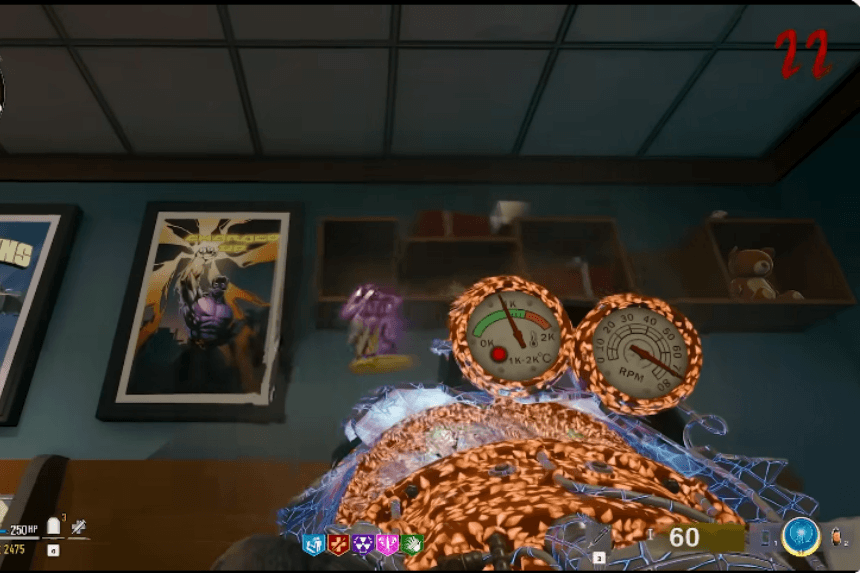
- Third figurine: On a shelf above the Quick Revive perk machine.

- Fourth figurine: On a unit to the right of the blue double doors that lead to the parking lot.

- Fifth figurine: On the sign for the motel where you crafted the Jet Gun. Stand on the car near the sign to reach it.
- Sixth figurine: On the rooftops along Washington Ave. Walk halfway up the hill toward the church, then turn left onto a grassy area and climb onto the roof. Look to your left across the hill, and you’ll spot Aetherella in a window.

- Seventh figurine: On a ledge beneath the bowling alley sign. Go up the stairs to the church, then head toward the grassy mound between the stairs and the bus. Jump onto the bus roof, and you’ll see the figurine face down on the ledge beneath the sign.
- Eighth figurine: Near the seventh, on the ledge of a window at the front of the church. Go up the stairs into the church’s forecourt and look up at the two windows to the right of the main entrance. Aetherella is on the ledge of one of them.
- Ninth figurine: This one’s tricky. It’s hidden between some vents on a rooftop that’s hard to reach. Head back to the rooftops on Washington Ave, where you found the sixth figurine. Use essence to take the zipline to the bank’s rooftop. Once you’re on the roof, jump down to a lower section. Look straight ahead at the rooftop with two vents, and the figurine is behind the rightmost vent. You’ll need to position yourself just right to spot and collect it.
Once you’ve gathered all nine figurines, you’ll complete the Domination Side Easter Egg and transform into Aetherella for 90 seconds. Just be sure to grab the final figurine when you’re ready to use Aetherella’s powers, as the transformation only lasts for a short time.
3. Bowling Easter Egg
In Liberty Falls, there’s a secret Easter Egg that lets you unlock a bowling mini-game at Fuller’s Liberty Lanes. However, before you can start, you’ll need to track down five pairs of hidden bowling shoes scattered across the map.
Bowling Shoe Location 1
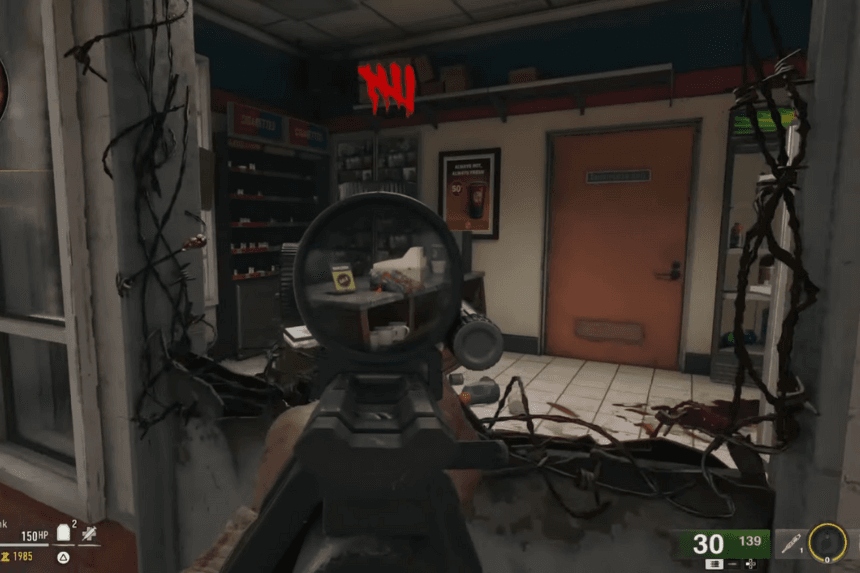
Inside the Zombie spawn area at the Pump and Pay Gas Station, you’ll find a pair of bowling shoes on the counter next to the register.
Bowling Shoe Location 2
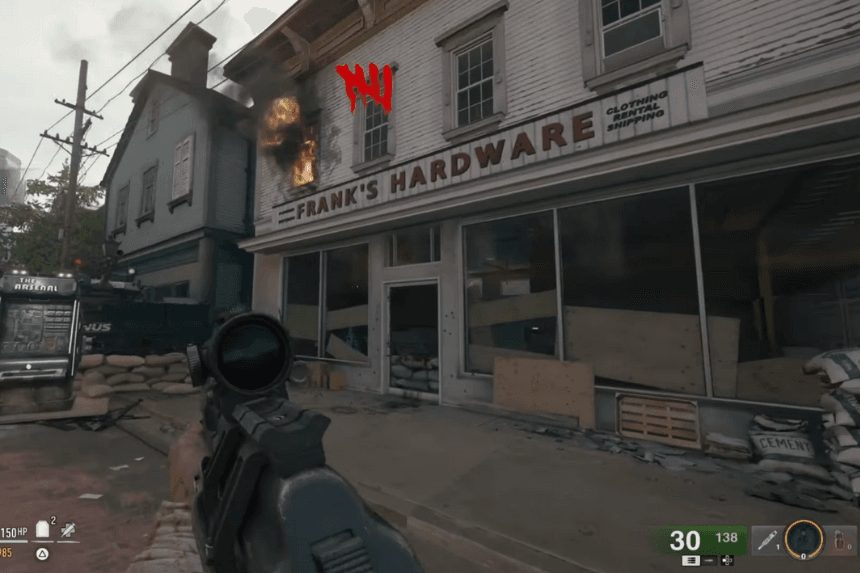
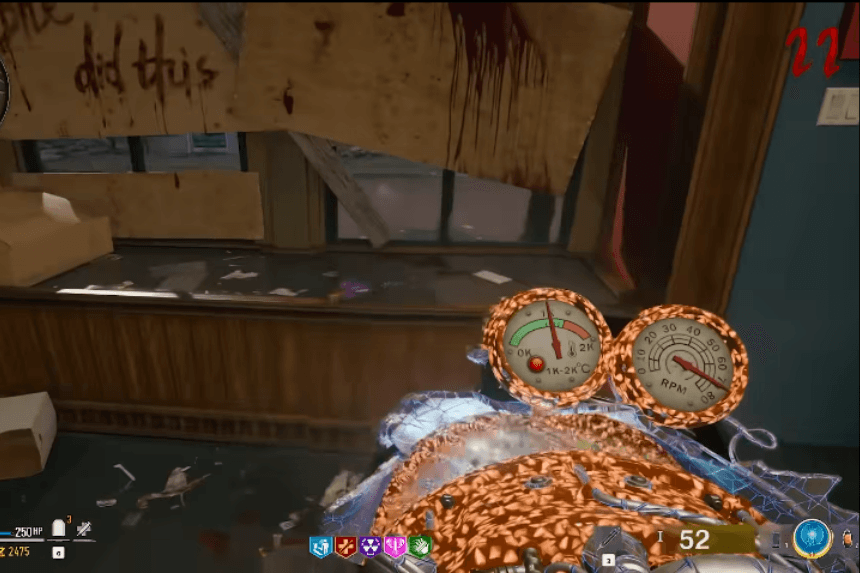
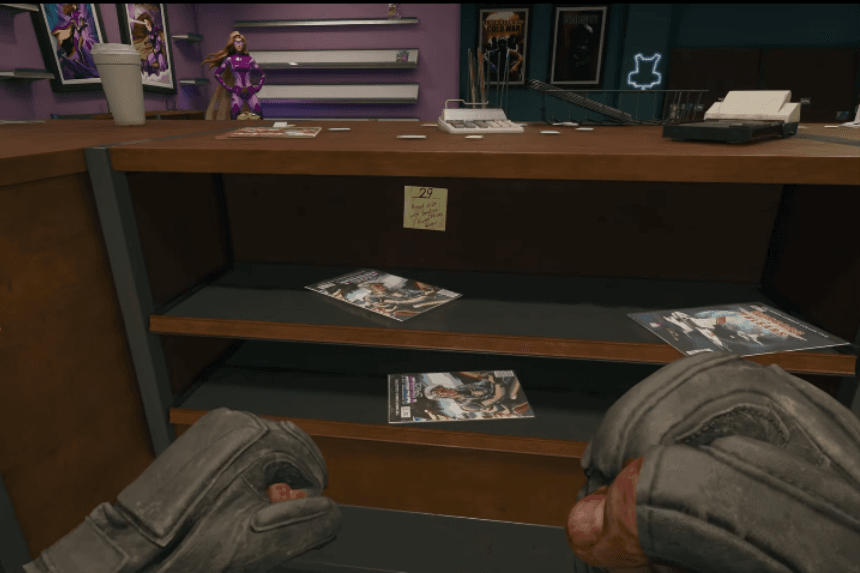
In Riverside, head to Frank’s Hardware across from Olly’s Comics. Look through the doorway, and you’ll spot a pair of bowling shoes on the second row of white shelves to your right. A light will shine on them, making them easy to see.
Bowling Shoe Location 3
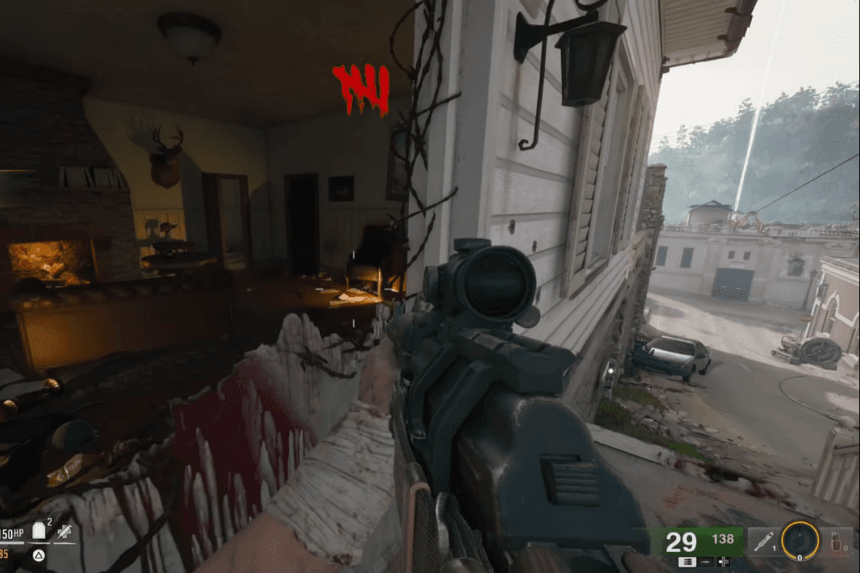
Next, make your way to the Groundskeeper’s house on Hill Street. Go up the stairs and peek through the door. You’ll find a pair of bowling shoes tucked under a chair along the right wall, with a fallen lamp nearby that lights them up.
Bowling Shoe Location 4

Next, head to the back wall of the Cemetery. Near the small mausoleum, you’ll see a gap in the fence where zombies can climb through. Look through the gap, and you’ll spot a pair of bowling shoes hanging from a tree just ahead.
Bowling Shoe Location 5

Finally, head to West Main Street and find the Funeral Home across from Fuller’s Liberty Lanes. Look through the front door, and you’ll see a pair of bowling shoes resting on top of a casket, on the left side of the room.
Bowling Shoe Location 6

You can also retry the bowling activity by shooting the pair of bowling shoes that will appear on top of the toilet inside Fuller’s Liberty Lanes building. Once you shoot them, you’ll be teleported back into the mini-game. If you’ve just tried the activity, the shoes might not be available yet, so you’ll need to wait for a few rounds before they show up again.

Once you’ve found and shot all five bowling shoes, a short cutscene will trigger, transporting you into the bowling area. There, you’ll see Zombies dancing and wandering around the lanes, but don’t worry, this area is completely safe. After a brief moment, a green bowling ball will appear in the rack to your right, and a two-minute countdown will start.
Your task is to pick up the ball, which is only accessible from the left side of the rack, and bowl it down the lane. Unlike regular bowling, your goal here is to knock down the Zombies roaming across the lanes. You’ll earn 10 points for every Zombie you eliminate. While you can bowl the ball without charging it, it will only knock down a single Zombie before exploding.
Charging the ball, however, makes it move faster and lets you take out multiple Zombies at once, making it the best strategy for this challenge. As you’d expect, the higher your score, the better your rewards will be. Once the game ends, Mister Peek will hand you your prize, which could include weapons, tactical or lethal items, salvage, armor plates, and more.
4. Dig Up Graves Easter Egg

Head to the Washington Avenue Rooftops, just above the Speed Cola Perk Machine. Look up at the wall near the Mystery Box, and you’ll spot a barrel sitting in the grass. To access the shovel and start digging around the Cemetery, you’ll need to destroy this barrel. To do so, you’ll have to get the Chopper Gunner Scorestreak. You can obtain it randomly from S.A.M. Trials or the Vault, or find it as loot after defeating an Elite Zombie. Alternatively, you can craft it at a Crafting Table for 2,500 Salvage.

Once you have the Chopper Gunner, use it near the wall and fire at the barrel until it’s destroyed. After the barrel is gone, exit the Chopper Gunner and look in the grass, there you’ll find the shovel.
You won’t see a prompt to pick it up, but just hold the interact button to grab it. Now that you have the shovel, make your way to the Cemetery, located to the right of the Dark Aether church. You’ll find several tombstones scattered around the graveyard.
If you hold the interact button near the dirt in front of these headstones, you’ll dig up the grave and uncover random items like Salvage, Equipment, or even weapons. Just be cautious, Zombies can rise up from the ground as well, so be ready to fight whatever comes out. You can now use the shovel to dig through the graveyard in Liberty Falls.
5. Deadshot Daiquiri Easter Egg


Deadshot Daiquiri is a helpful perk in Call of Duty: Black Ops 6’s Zombies mode. It makes aiming at zombies much easier. When you zoom in with weapons like sniper rifles or marksman rifles, the perk automatically targets the best spot to hit the zombie. This is especially useful when you’re up against tough enemies. By targeting weak points with Deadshot Daiquiri, you can deal extra damage. So, when you encounter those tougher zombies, use this perk with a powerful weapon like a sniper rifle to take them down more quickly.

Visit the shooting range at Liberty Falls Cemetery to practice by shooting tin cans. To find it, head to the Cemetery and go to the top-right corner, just past the Armor Wall-Buy. There, you’ll spot an open window.
If you aim a sniper rifle through the window and look toward the wooden bridge, you’ll see five cans lined up, perfect for target practice. To earn the Deadshot Daiquiri perk, you need to hit all five cans with your sniper rifle in quick succession within 15 seconds. If you succeed, you’ll get the perk for free.
However, if you miss any shots, you won’t receive the perk, and you won’t be able to try again. Make sure to grab Jugger-Nog and Armor for added protection. These perks help reduce flinch when a zombie hits you, making it easier to stay steady while using your sniper rifle. Also, pick up Speed Cola to reload faster if you miss a shot, giving you more chances to hit the cans before the timer runs out.
6. Bank Vault Easter Egg
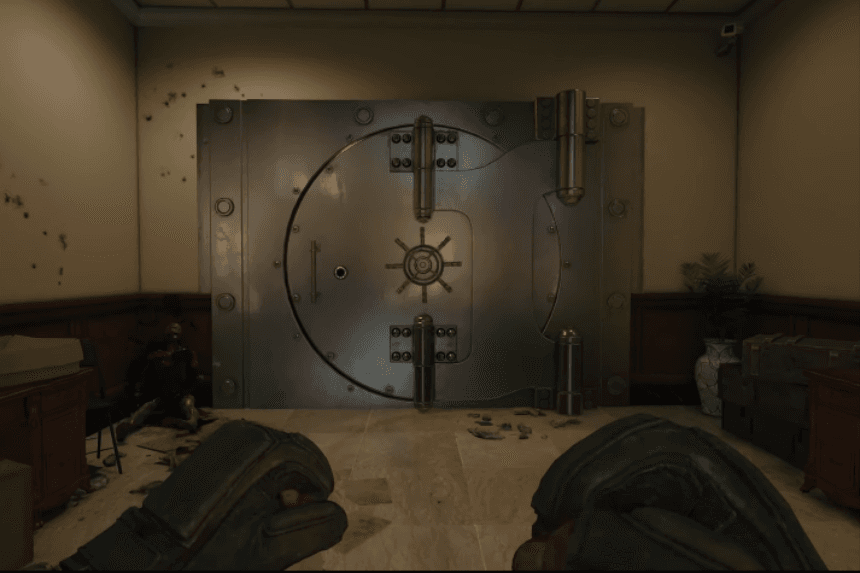
The bank vault is located inside the Savings & Loans bank on West Main Street in Liberty Falls. You can reach it from either the left or right side of the map. Once inside, you’ll find a locked vault door.
To open the vault, you’ll need to find three sticky notes scattered around. Each note has two numbers on it. There are three different codes to locate, and you must enter them into the vault in the correct order. While the locations of the codes remain the same each time, the actual numbers will be different in every game.
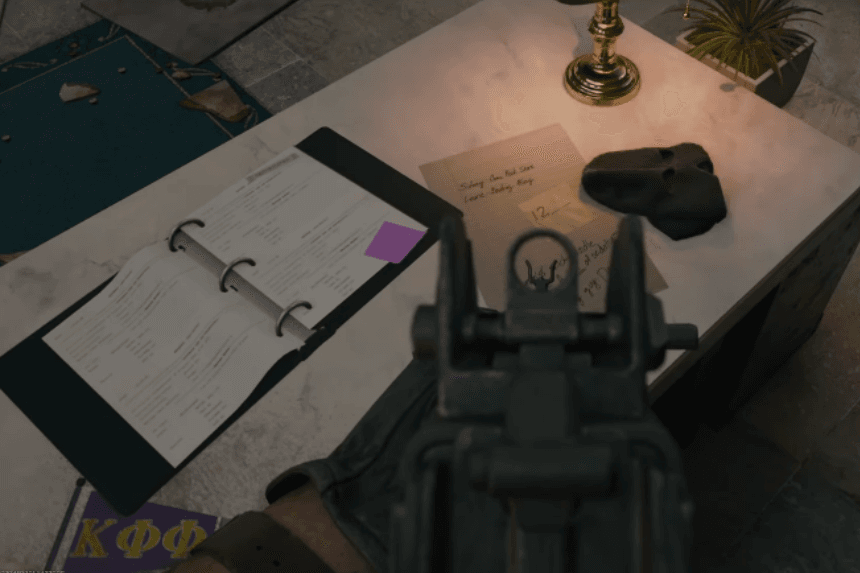
1st Sticky Note: When you enter the bank in Liberty Falls, you’ll find a piece of paper on the reception desk with a yellow sticky note on it. This note has two numbers, which are the first part of the code to unlock the vault.
2nd Sticky Note: Next, head past the Pay & Pump and go east toward the river area of the map. Look for a building called Olly’s Comics. Once inside, go behind the counter and face the superhero statue. If you crouch down or look closely at the floor, you’ll find a hidden note stuck inside a shelf.

3rd Sticky Note: For the final set of numbers, head over to Fuller’s Liberty Lanes, the bowling alley. Near the exit, across from the Stamin-Up machine, you’ll see a desk with a bucket of beer on it. Shoot or move the bucket, and the numbers will be revealed underneath.

Now that you have all 6 numbers, head back to the bank. In the back room with the vault, you can enter the numbers using the up and down arrows on your keyboard or the D-pad. Enter the numbers in the same order you found them. Once you’ve input the correct code, the vault door will open.
Inside the vault, you’ll find a small room filled with safe deposit boxes. Zombies can’t reach you here, so you’ll have 40 seconds to grab as much loot as you can. After 40 seconds, you’ll be forced out. The first time you enter the vault, you’ll earn some essence points. To get even more rewards, look for keys dropped by Manglers and Abominations. These keys can unlock the security boxes inside the vault, each containing different rewards.
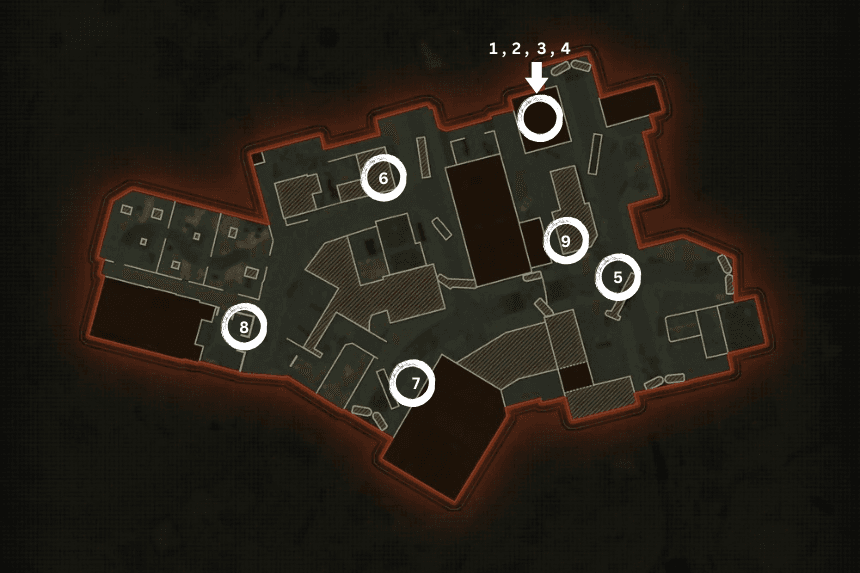
7. Easter Egg Song

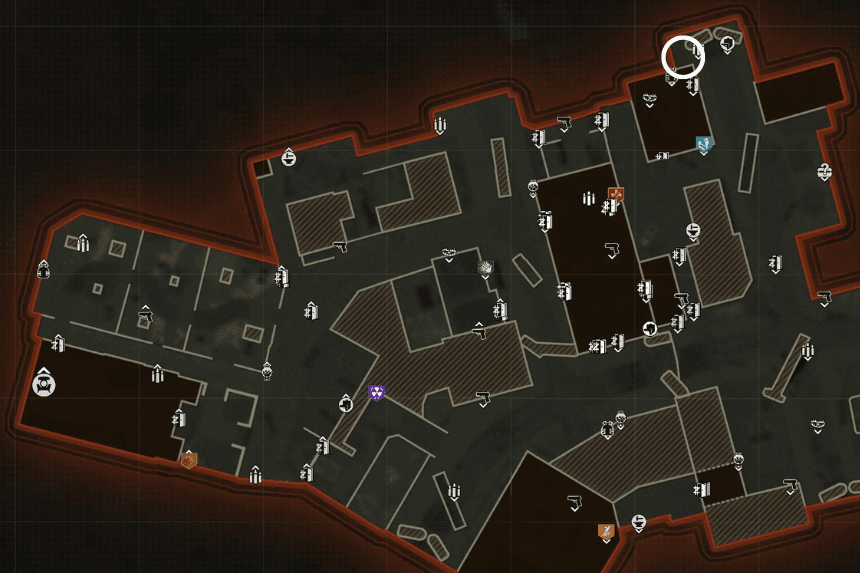
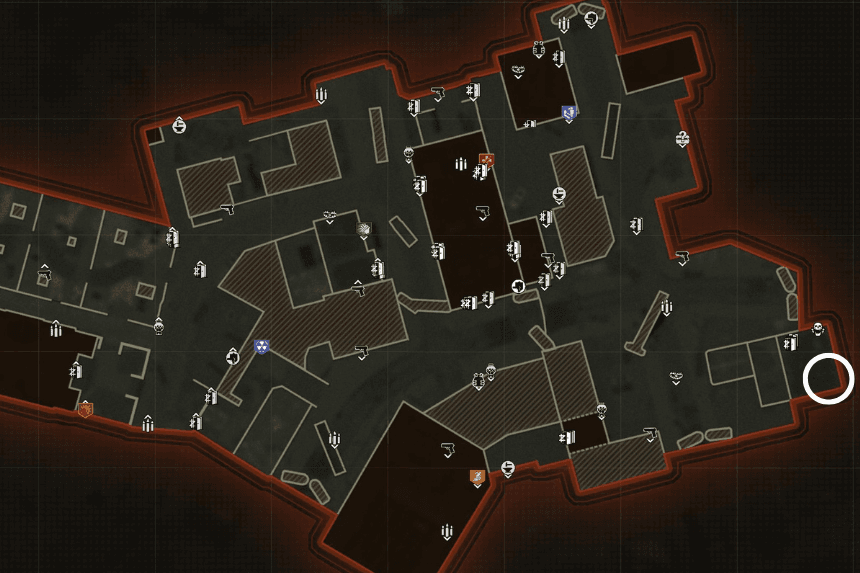
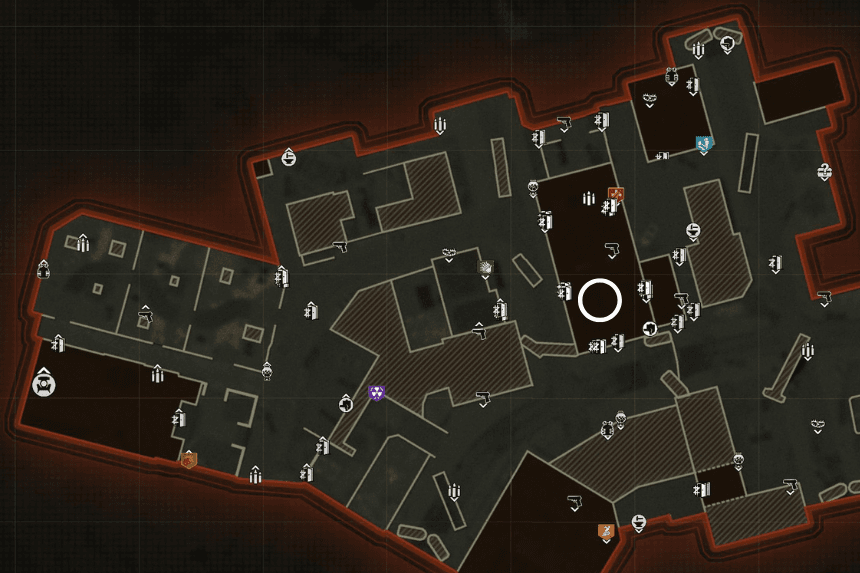
To find the hidden headphones and unlock the secret song in Liberty Falls visit the following location marked above. After interacting with all three headsets, the secret song “Destroy Something Beautiful” will start playing.
1st Headset: Head to the back of the Savings & Loan bank. Look for the benches near the staircase that leads to the comic book shop. The headset will be on the ground underneath one of the benches.

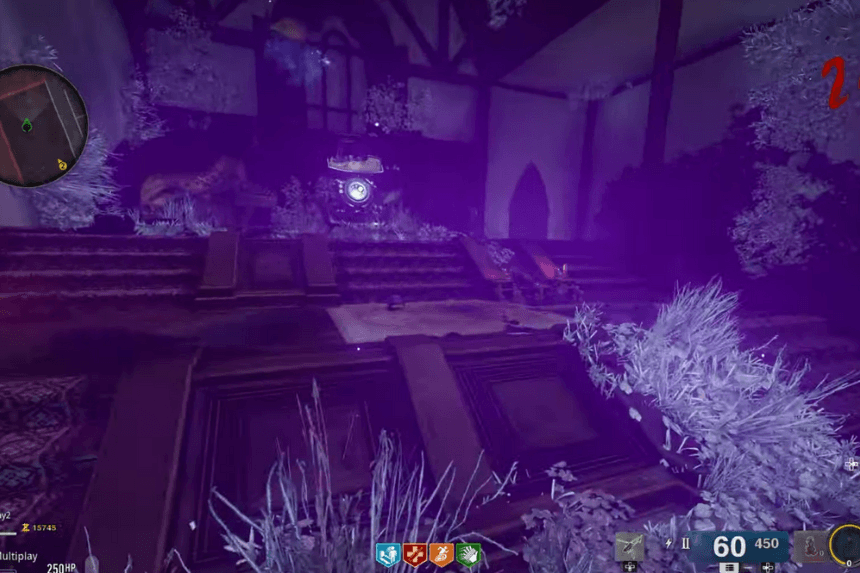
2nd Headset: Head to the church where the Pack-a-Punch machine is located. Inside, you’ll find the headset on a church pew. Once you’ve interacted with all three headsets, the secret song “Destroy Something Beautiful” will start playing. You can only do this once per match.

3rd Headset: Head to the left side of the map, past the motel. Climb the staircase and then turn right. You’ll find the headset on the ground near the railing.
8. Bloody Pool Easter Egg


To trigger the Bloody Pool Easter egg, all players need are 3 Semtex grenades, which you can craft at the Crafting Table for 250 Salvage each. Once you have them, wait for a Vermin round, which is marked by a gas-filled sky. When the round begins, head to “The Alamo” – the rooftop of the Savings & Loan Bank. Once you’re on the roof, face south, toward West Main Street and the Bloody Pool. Then, toss all 3 Semtex grenades into the pool to trigger the Easter egg.
When each Semtex explodes in the pool, a red blast will burst from the water, along with a few Vermin. Players will also receive some free Salvage and pieces of Lethal Equipment. While it won’t give you a Wonder Weapon or anything super rare, it’s still a fun Easter egg to do each game – especially if there’s a spare Semtex lying around. It’s a great way to earn free loot, and Salvage is always useful early on for upgrading weapon rarity.
9. Vending Machine Easter Egg

The Vending Machine can be found in the Liberty Falls starting area. After you begin the game, jump down from the Abandoned Roof and head to street level. Then, make your way to the Motor Lodge motel to the west. Look for the electric barricade that leads to the alley connecting the motel to Liberty Lanes Bowling Alley. When you face the barricade, turn right, and you’ll spot the vending machine.
 You can melee the vending machine’s item box once per round, and an item will pop out. These items can range from things like chips (which you can’t use) to useful equipment and even weapons, including powerful ones like the Ray Gun.
You can do this every round to get new rewards, but be careful if you’ve bought the Melee Macchiato Perk. The powerful punch from this Perk will destroy the vending machine, giving you some great loot but permanently disabling the Easter egg. It’s up to you whether you want to risk a big payout all at once or keep getting smaller rewards each round.
10. Dancing Zombies Easter Egg

When players enter the picturesque, abandoned Riverside street, they’ll notice two tower viewers or tourist telescopes by the water, facing East. Interacting with each telescope costs 50 Essence. Doing this causes all the zombies to ignore you, so it’s a safe move to make at the start of a round.
To activate the Easter egg, adjust each tower viewer so that it’s facing all the way to the right and up. This will reveal a dancing zombie on the cliffside. Once both telescopes are aimed at the zombie, two beams of light will appear beside it. After exiting the viewers, all the zombies on the map will stop hunting you and instead start dancing. While there are no tangible rewards for this Easter egg, it’s amusing to watch the zombies, including Manglers, get into party mode, swarming the Liberty Falls Transit bus. The dance party lasts for about two minutes.
11. Mister Peeks Mystery Box Easter Egg

Around Liberty Falls, you’ll find three identical black and gold vehicles parked at Backstreet Parking, Groundskeeper’s Yard, and Hill Street. Inside one of these vehicles, you’ll spot Mister Peeks sitting in the back seat. Once you’ve located the right vehicle, you’ll need a Mangler Cannon to open the mystery box in the trunk.
You can craft a Mangler Cannon at a Workbench for 1,250 Salvage, once you’ve reached Player Level 20. Alternatively, you can try to get one by shooting off a Mangler’s cannon, though this method relies a bit on luck, as the cannon isn’t always guaranteed to drop. Once you’ve got the Mangler Cannon, head to the back of the vehicle with Mister Peeks.
Use the cannon to destroy the vehicle’s trunk, but be careful, the explosion has a large radius, so make sure to stand back. The vehicle will be destroyed, and the trunk will briefly glow yellow before spitting out a free weapon reward, which, if you’re lucky, could be a Ray Gun.
Mister Peeks Vehicle Location

1. In the Backstreet Parking area, you’ll find the black and gold Mister Peeks vehicle parked next to the back door of Olly’s Comics.
2. In the Groundskeeper’s Yard, the black and gold Mister Peeks vehicle is parked next to the toolshed in the backyard.
3. On Hill Street, the third and final black and gold Mister Peeks vehicle is parked along the stone wall, across from the tank in front of the Cemetery.
12. Pool Table Easter Egg

To complete the Pool Table Easter Egg, head to Liberty Lanes, the large building at the southern end of the map. Your goal is to pot all the pool balls into the table’s pockets, but first, you’ll need the Melee Macchiato Perk, which boosts your melee attacks.
To get this perk, find the Melee Macchiato Perk-a-Cola machine on the southwest side of Liberty Falls, or you can get it through a Free Perk Power-Up or by using the Perkaholic GobbleGum. Once you have the perk, head back to the pool table and knock all the balls into the pockets. Just keep in mind, this only works if you’re holding a weapon, not when using a knife melee.
13. Raining Zombies Easter Egg

The Raining Zombie Easter Egg can be completed in every game on Liberty Falls and is a great way to earn points and other items early on. To start, head to the Forecourt in front of the Dark Aether church and look up at the highest spire to the left of the front entrance. You’ll spot a Mangler head on one of the spikes, which can be destroyed using an explosive. You can use any rocket launcher, grenade launcher, equipment like Frags and Semtex, or even the Ray Gun to take it out.

When you hit the Mangler’s head with an explosive, zombies will start falling from the sky and splatter when they hit the ground. When they land, they’ll drop rewards like Essence Vials, Salvage Armor, and Scorestreaks. You might even get Aether Tools, which will upgrade your weapon’s rarity based on the tool’s colour. This Easter egg can only be done once per game, but it’s a great way to get an early advantage in every round of Liberty Falls.
14. Church Fire Easter Egg

Head to the Dark Aether church at the west end of Liberty Falls, where you’ll also find the Pack-a-Punch machine. Follow the objective markers on your screen to guide you to this location. Once inside, you’ll notice several candle vigil stands, two of which are unlit. One is directly to the left of the Pack-a-Punch machine, and the other is to the right, near the back entrance to the church by the Cemetery.

To light these candles, you’ll need a weapon with the Napalm Burst Ammo Mod. You can get this mod by spending Salvage at any Arsenal machine around the map. There’s one right outside the church and another on the roof of the bank, known as “The Alamo.” Once you have the Napalm Burst mod, shoot at the candles to set them on fire.
When both sets of candles are lit, the floor of the church will catch fire, creating a trap that deals heavy damage to any zombies that walk through it. Be cautious, though, as you can also take damage from the flames. After a short time, the fire will burn out, but after a few rounds, you can shoot the candles again to reactivate the trap.
15. Nuke Power-Up Easter Egg Location
The Nuke Power-Up can be found at the Savings and Loans building in Liberty Falls. To get there, head to East Main Street and unlock the barricade to Riverside for 1,500 Essence. Then, pass the bus in the area and unlock the next barricade to Washington Avenue for 1,750 Essence. After that, take the first left after the stairs at Grease Trap Patio and unlock the door to the Savings and Loans building on Washington Avenue for 750 Essence.
Once inside, head toward the Liberty Falls vault, and you’ll find the main lobby with a chandelier hanging from the ceiling. To trigger the Nuke Power-Up, either throw a Semtex or shoot the chandelier with an explosive weapon. This will cause the Nuke to spawn at your feet, ready for collection.
Alternatively, you can use one of the ziplines to reach the top of the Savings and Loans building. From there, shoot through the skylight directly above the chandelier to make the Nuke Power-Up appear.
16. Double Points Power-Up Easter Egg Location

The Double Points Power-Up can be found beneath a water tower visible from the Groundskeeper’s Yard, which players can reach by heading to the right side of Hill Street before moving toward the church. Unlike other Power-Ups in Liberty Falls, this one isn’t visible at first.
To activate it, players need to cook a grenade and throw it toward the water tower. Luckily, there’s a Crafting Table nearby where players can easily craft Frag Grenades and other lethal equipment, so if you miss the first throw, you can quickly try again.
17. Full Power Power-Up Easter Egg Location

The Full Power Power-Up is located on West Main Street. To get there, players can either unlock the Hilltop barricade near the church for 2,000 Essence or make their way through Fuller’s Liberty Lanes from the starting area. Once on West Main Street, head south toward the burning vehicles in the area to find the Power-Up.
18. Max Ammo Power-Up Easter Egg Location

The Max Ammo Power-Up can appear as early as Round one. To find it, head towards the bridge on the northeast side of the starting area. The Power-Up is located just behind the railing on the right side of the bridge. Simply shoot the item to make the Max Ammo Power-Up spawn, and it will be ready for you to collect.
19. Insta Kill Power-Up Easter Egg Location

The Insta-Kill Power-Up is one of the most coveted, as it can help players get out of tough situations. To find it, you’ll need to access the cemetery by unlocking the Hill Street Barricade for 2,000 Essence.
Once that’s done, take the first right to enter the cemetery. Head to the far end of the cemetery and look towards the church, where the Liberty Falls Pack-a-Punch is located. On the roof, you’ll see a golden skull. Shoot it, and the Insta-Kill Power-Up will spawn for you to collect.
20. Bonus Point Power-Up Easter Egg Location
The Bonus Points Power-Up can be found at the comic book store in Riverside. To get there, unlock the barricade at East Main Street as if you’re heading toward Washington Avenue. Instead of turning left by the bus, continue past the comic book store towards the far end of Riverside. On the side of the comic book store, you’ll see an open window with a golden Bonus Points item inside. Shoot it, and the Bonus Points Power-Up will spawn, ready for you to collect.
21. Max Armor Power-Up Easter Egg Location

The free Max Armor Power-Up is located near the Nuke Power-Up, inside one of the Zombie barricades on the northeast side of Washington Avenue. To reach it, approach the barricade and look for a golden armour vest sitting on a trolley in the far right corner of the room, visible from the outside. Shoot the vest, and the Max Armor Power-Up will spawn at your feet, ready to be collected.
22. Fire Sale Power-Up Easter Egg Location

Head to the barricaded Bloddy swimming pool next to the bowling alley. Throw 3 Semtex Grenades into the pool, and a large red orb will pop out and land on the ground. Do this for two more rounds, and in the third round, you will get the Fire Sale Power-Up instead of the red orb.