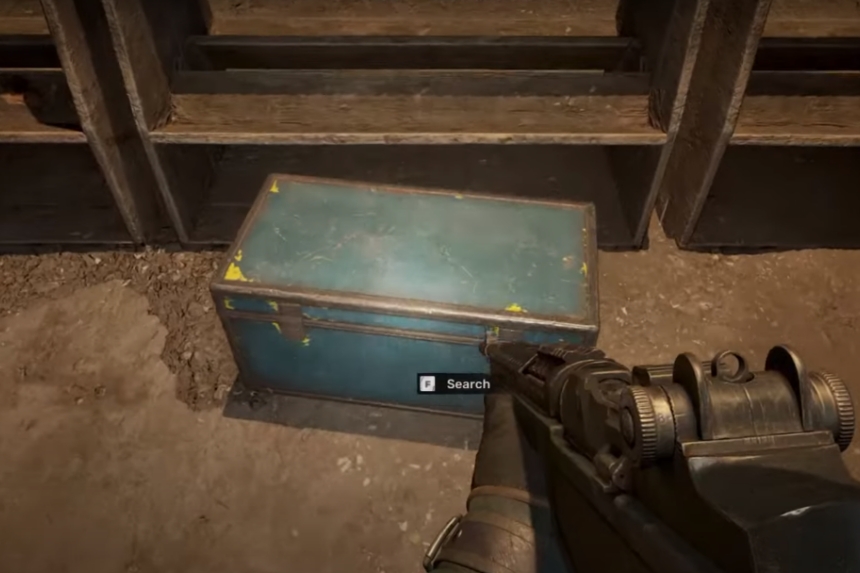
Like its predecessor, Stalker 2: Heart of Chornobyl delivers a gripping story of humanity and survival. While the game emphasizes immersive, moment-to-moment gameplay, it doesn’t compromise its narrative depth. As in the original Stalker, the sequel allows players to equip various armor pieces while advancing through the game.
The SEVA-I is among the best armors in the game and among the few that provide PSI Protection. Fortunately, there are more than one ways to get the SEVA-I and we will go through each location. This guide will explain why suit armor is important and help you locate the SEVA-I and SEVA-D suit armor in Stalker 2.
Suit Armors in Stalker 2: Their Importance
Suit armor is essential for protection against the Zone’s many dangers, and selecting the right suit is critical. Each suit provides varying degrees of protection against radiation, anomalies, and other hazards.
The type of armor you choose determines your ability to endure threats from mutants and the environment. Players can purchase armor from select traders, often at a high price. However, a free suit is available in the starting area to help prevent bleeding. You can go to the Old Mill just east of Zalissya for the free Debut Suit.
1. SEVA-I Suit Location in Stalker 2 Duga
To acquire the SEVA-I Armor Suit in Stalker 2, you must first go to the Journalist Stash in Duga, which might be tricky since the Duga region is heavily fortified.
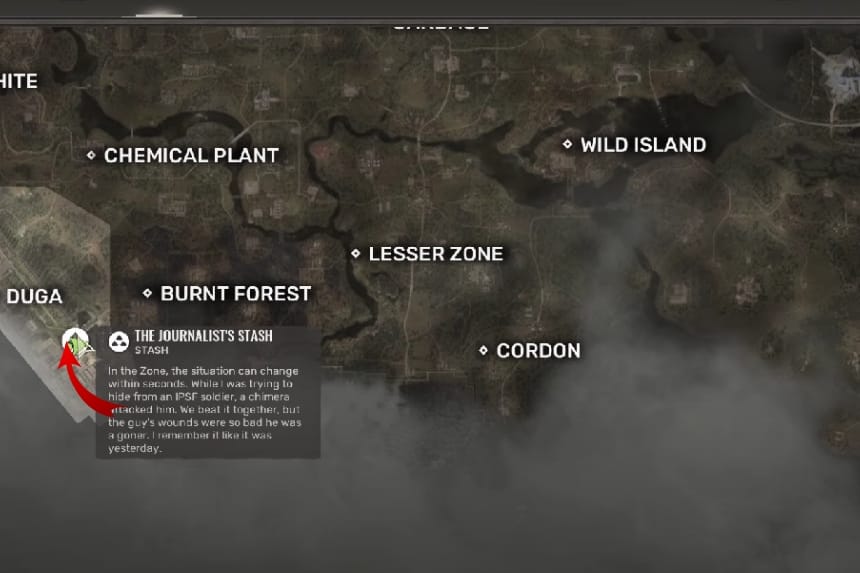

Click on the images to enlarge
Entering the Base
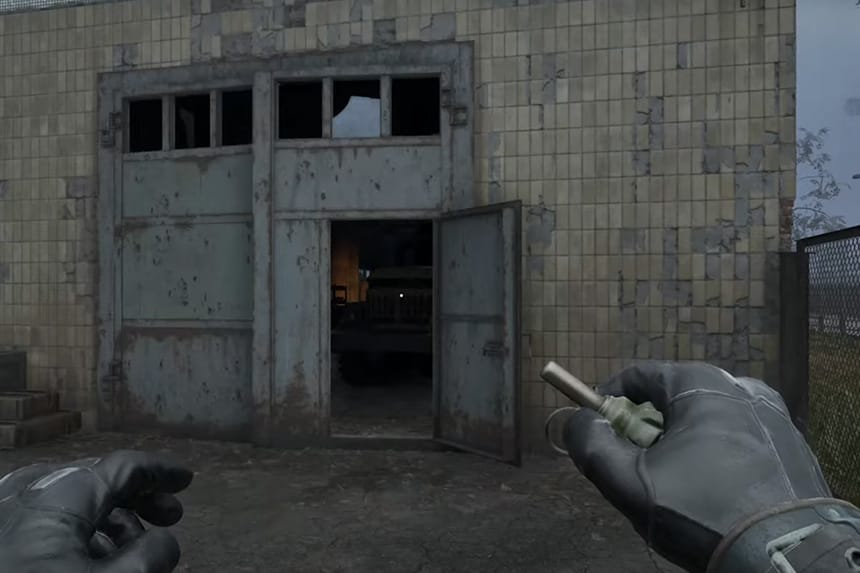
Snipers guard the base’s main gate and walled-off area. Even if you eliminate them, “invisible snipers” can still instantly kill your character. However, a path along the southeastern side of the base leads to an interior area with a yard and apartment buildings. This route is farther from the fortified section, keeping you out of the snipers’ immediate kill zone.
Note: We accessed this area while working on the main quest Happiness for Everyone. It’s unclear whether it’s possible to safely enter the southeastern part of the base earlier in the campaign.
Duga – Container Location, Burer Encounter, and Acquiring SEVA-I
When you reach the armory marked on your map, prepare for a tough fight. Inside, you’ll encounter a Burer—a mutant capable of psionically controlling and using weapons against you. Being in an armory, you’ll face nearly a dozen assault rifles firing from all directions. To make matters worse, the Burer can also snatch your own weapon.
Tips to Beat the Burer Mutant
The Burer Mutant is not a formidable enemy to beat, but the guns he’s controlling make it challenging to get a shot in while being safe. Try to take cover in nearby objects and use grenades. When a blue aura or anomaly surrounds the mutant, it cannot be damaged. Wait for the anomaly around it to dissipate and then target it again. You cannot do much about the guns firing at you, so try to take out the mutant as soon as possible. Grenades are your best friend.
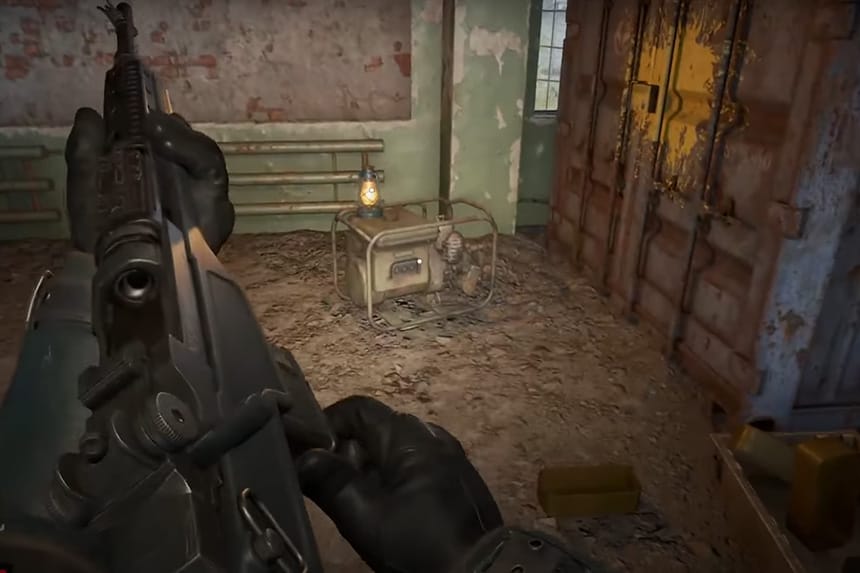
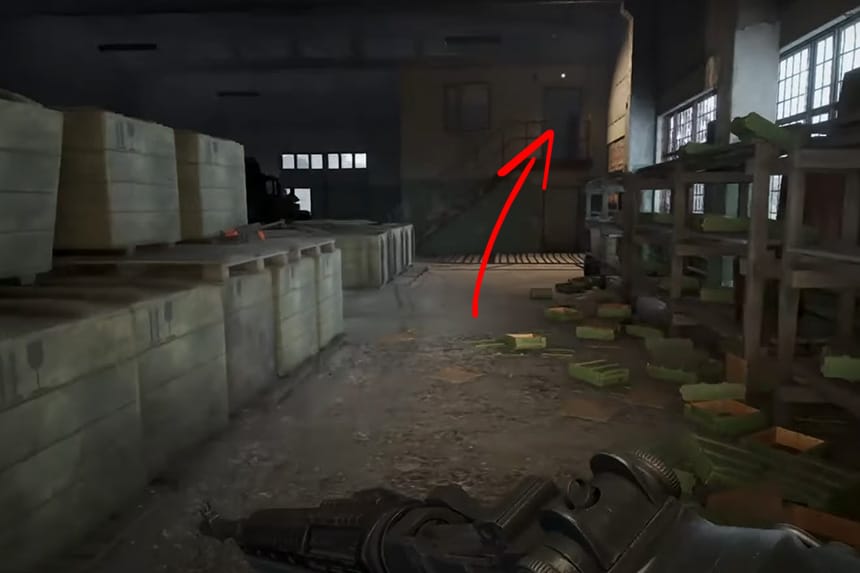
After defeating the Burer, head to the left side of the building’s interior to locate a generator. Activate it, then climb the steps to the control room and press the red switch. This will unlock the gate, giving you access to the loot in the locker area.
The Rewards You Will Find in the Locker Area
- SEVA-I Suit (from the nearby locker)
- SA-U Gabon (assault rifle)
SEVA-I Suit Armor: Details
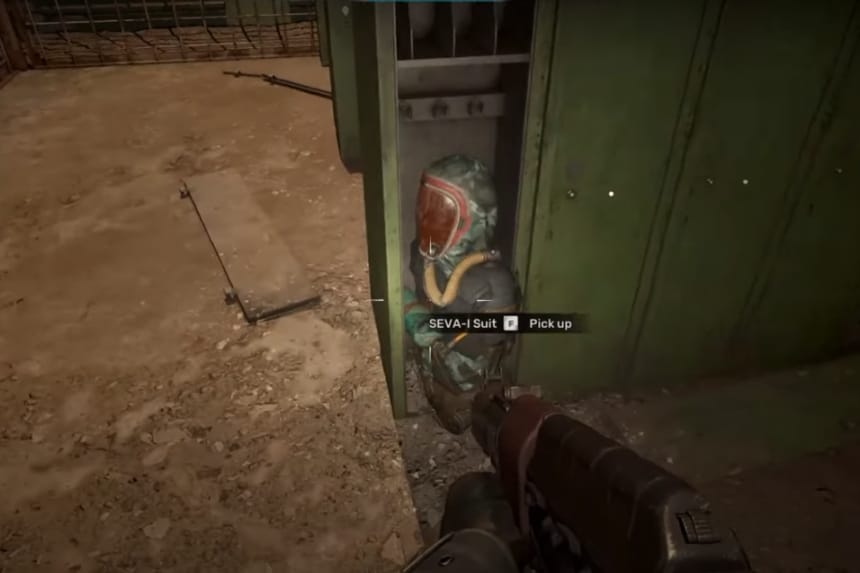
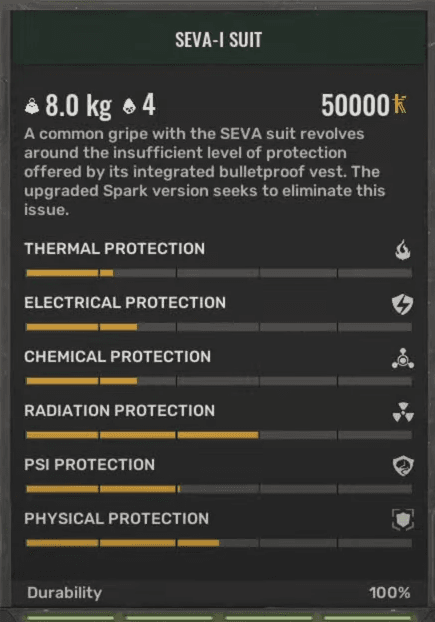
- Description: A frequent criticism of the SEVA suit is the inadequate protection provided by its built-in bulletproof vest. The upgraded Spark version aims to address this shortcoming.
- Weight: 2.00kg
- Artifact Slots: 4
- Cost: 50,000 coupons
- Durability: 910
2. SEVA-I Suit Location in Stalker 2 Yantar
The SEVA-I suit is in a very tough location with snipers and mutants in the Duga region; however, if you want to get the suit without any effort and have unlocked the Yantar region, you can also get it here.
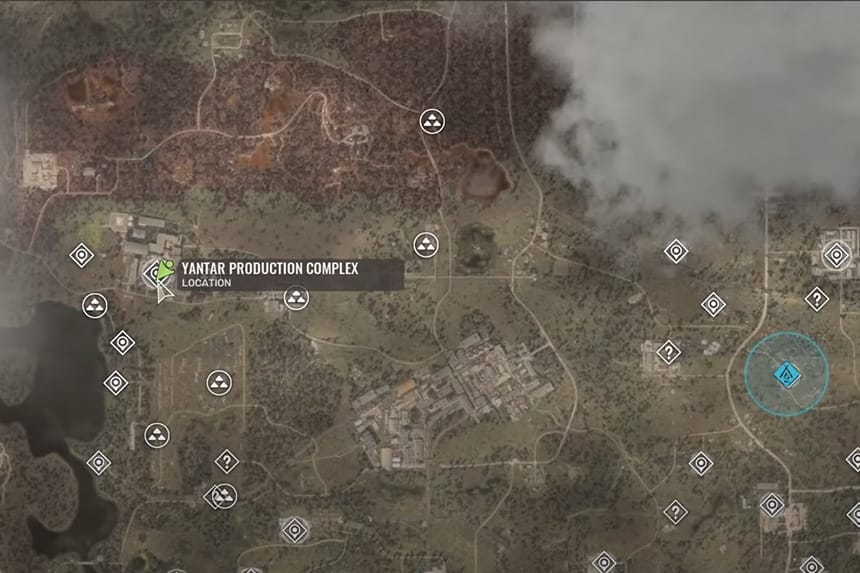
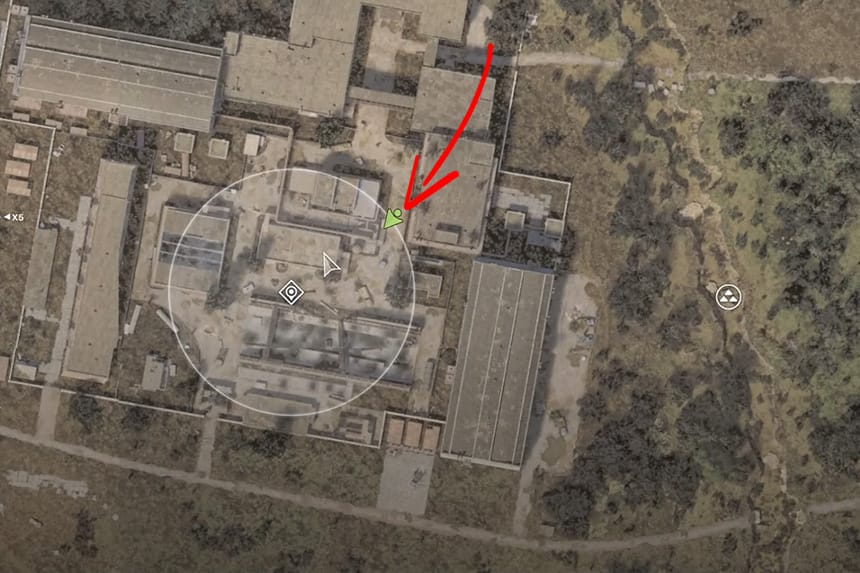
Click on the images to enlarge
Go to the Yantar Production Complex, the location on the above map. You will notice huge metallic pipes and stairs leading up to them.
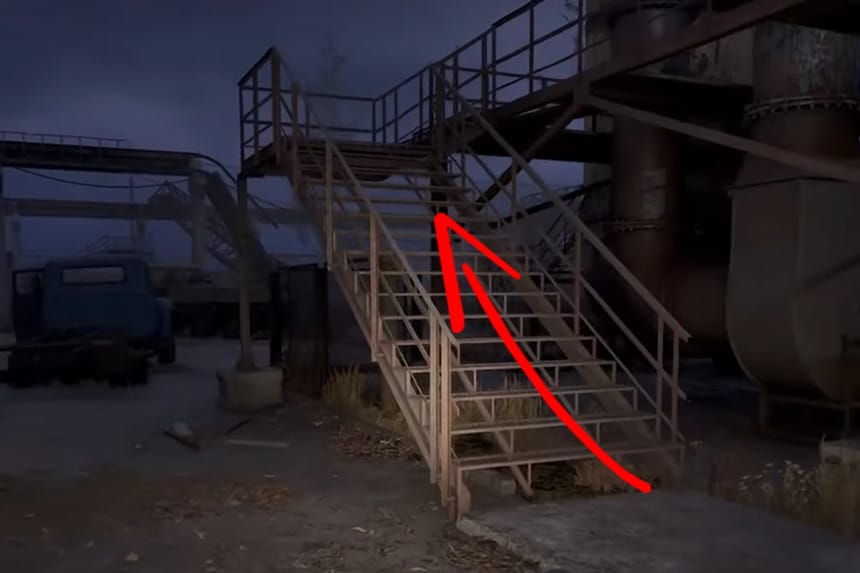
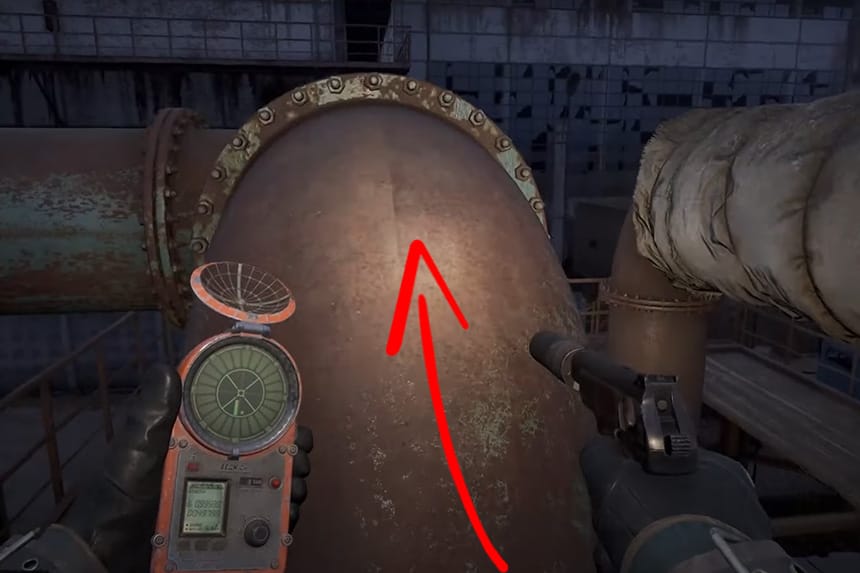
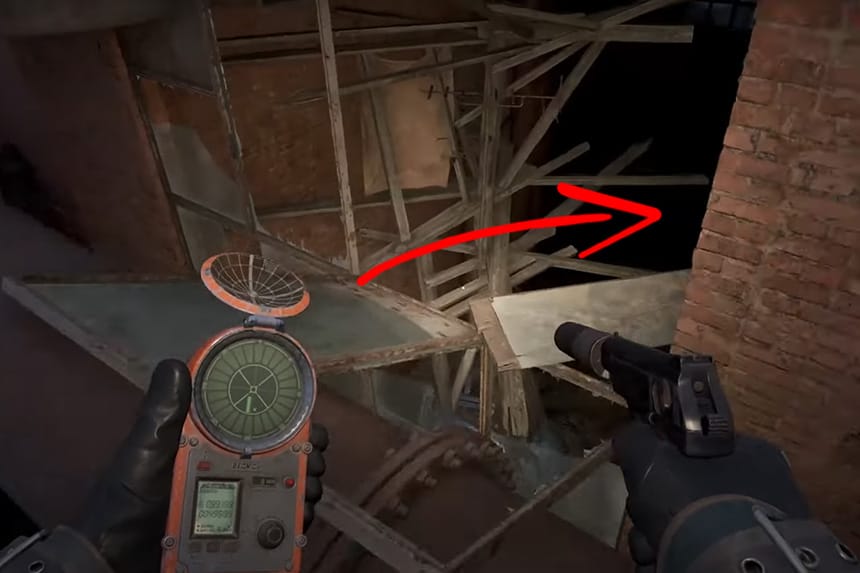
Take the stairs up to the railing. Jump to mount yourself on the railing and get on the pipe that leads into the nearby building. Follow the path and enter the building. The SEVA-I suit and a stash will be by the door.
Seva-I Lead Container Blueprint Location
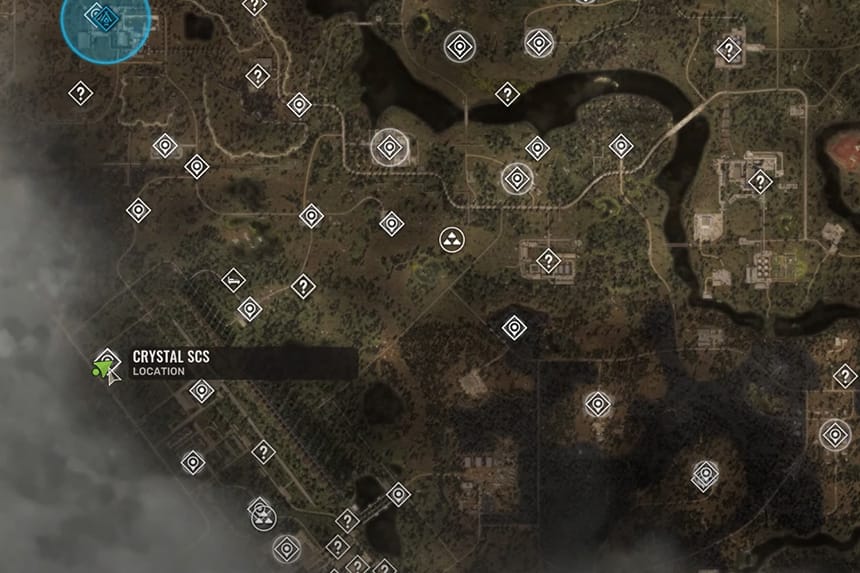
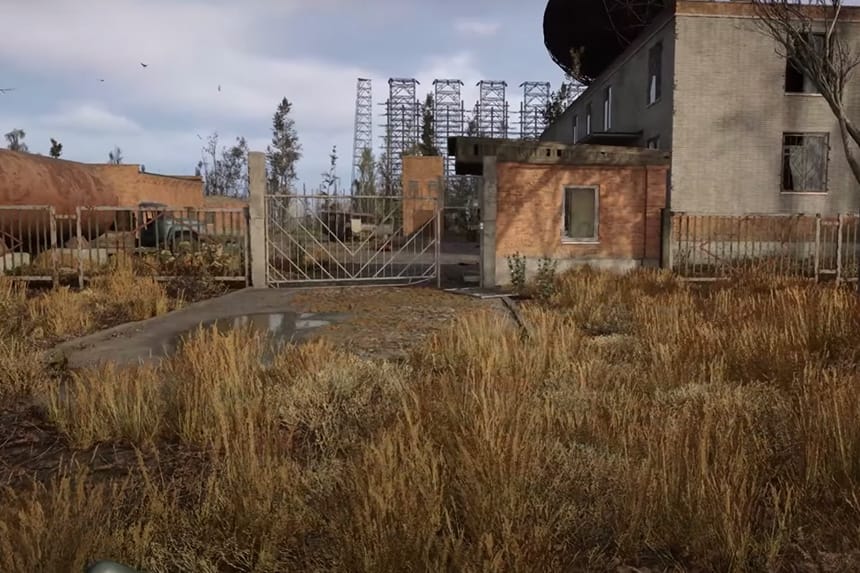
Go to Crystal SCS, northwest of the Duga map. There, you will find a building with a large antenna on the terrace.
- Enter the complex and go towards the right of the building. You will notice a ladder going to the top.
- On the terrace, you will find a stash that contains the Seva-I Lead Container Blueprint.
Tip: Be careful as you climb and explore the terrace. A poltergeist is levitating objects and throwing them at you. Be equipped to heal a few times and dodge the flying cylinders.
SEVA-I Sewn-On Pockets Blueprint
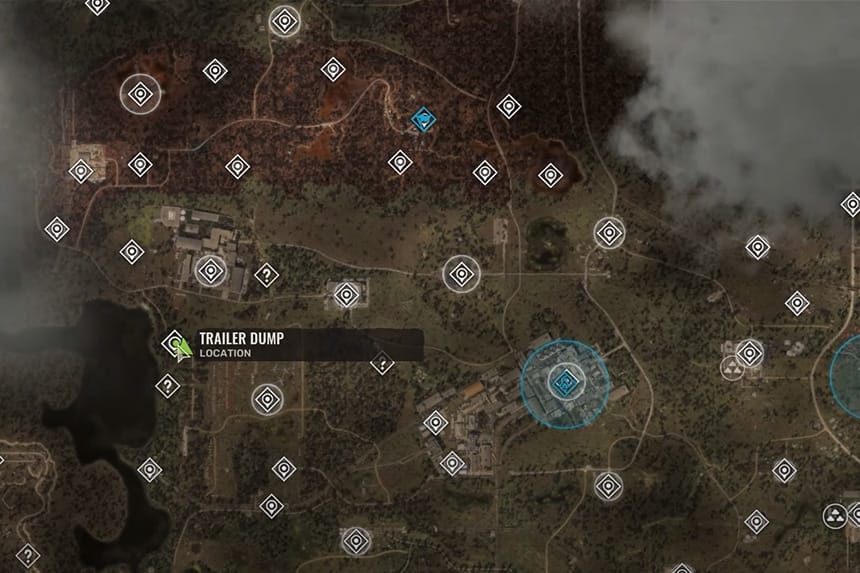
To get the Sewn-On Pocket blueprint for the SEVA-I, go to the Trailer Dump on the Western edges of Yantra. As the name suggests, several trailers are dumped and stacked on top of one another. One of the trailers has a ladder that you use to climb. Use the ladder to get to the top and into the trailer on your left. You will find the Sewn-On Pockets Blueprint in a crate.
SEVA-D Suit Armor Location in Stalker 2
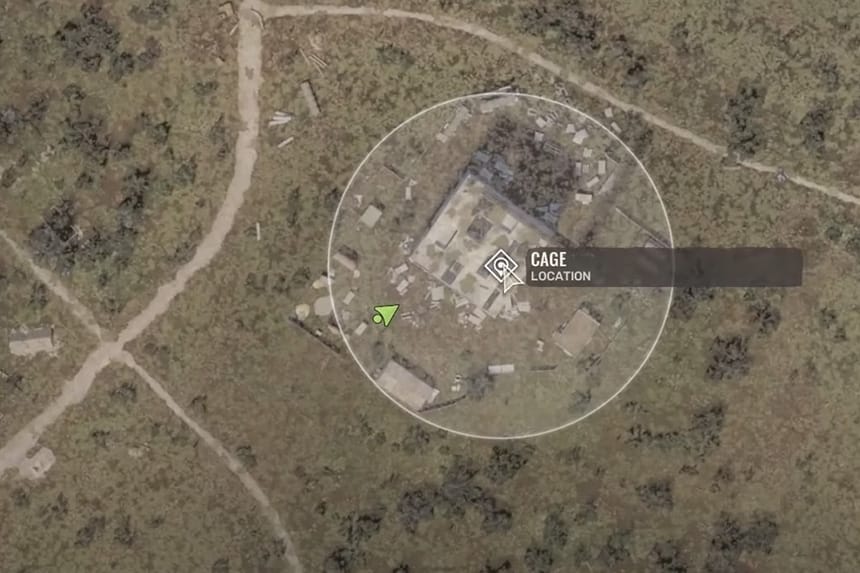
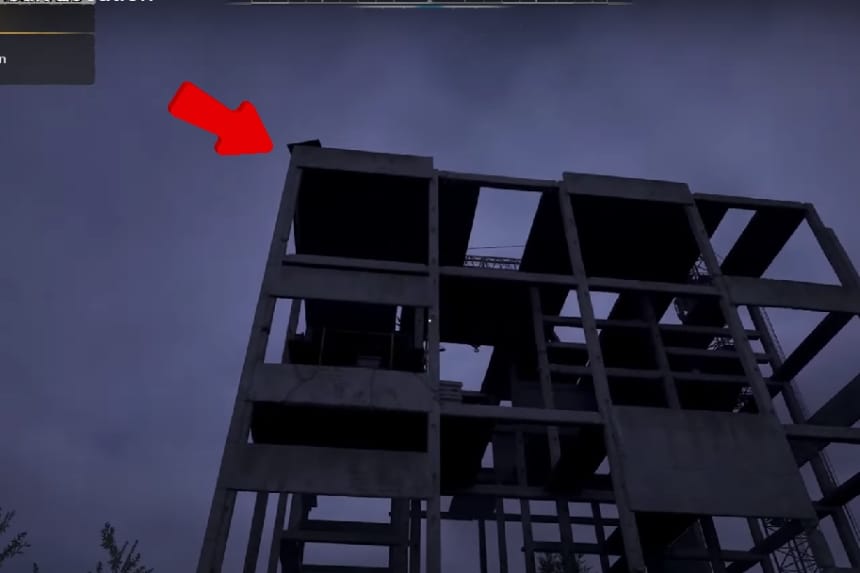
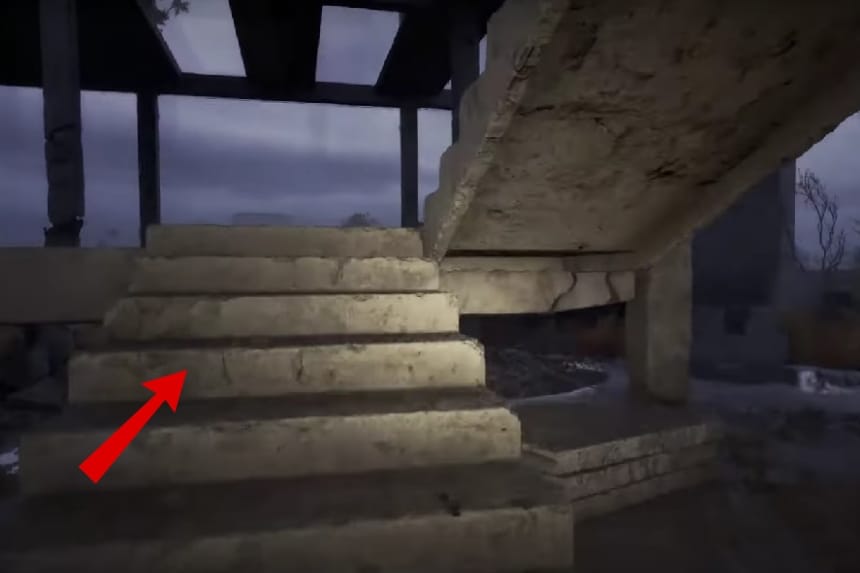
Click on the images to enlarge
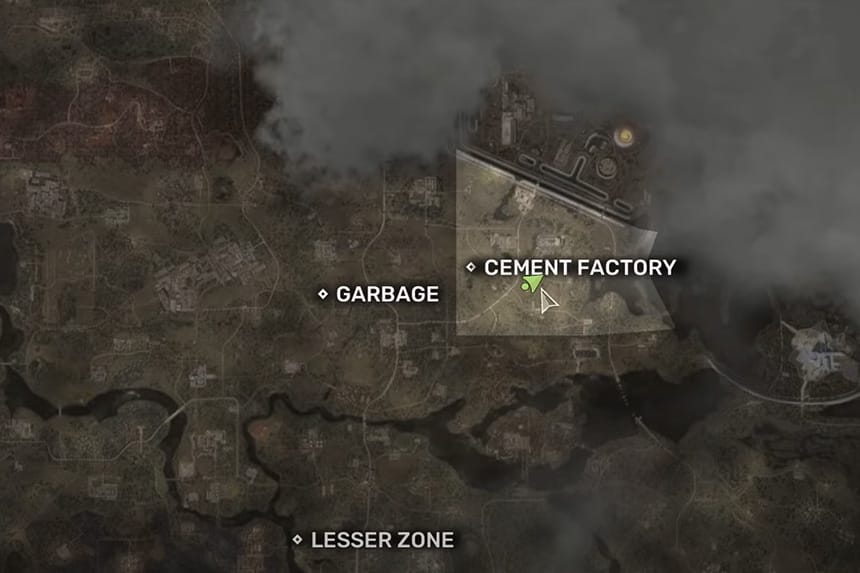
The Seva-D suit can be found on top of the unfinished building in the northeastern section of the cement factory. Be cautious, as there’s an anomaly that causes dizziness and gradually drains your health. Make sure to save your progress before attempting the climb.
Navigating your way through the Stairs
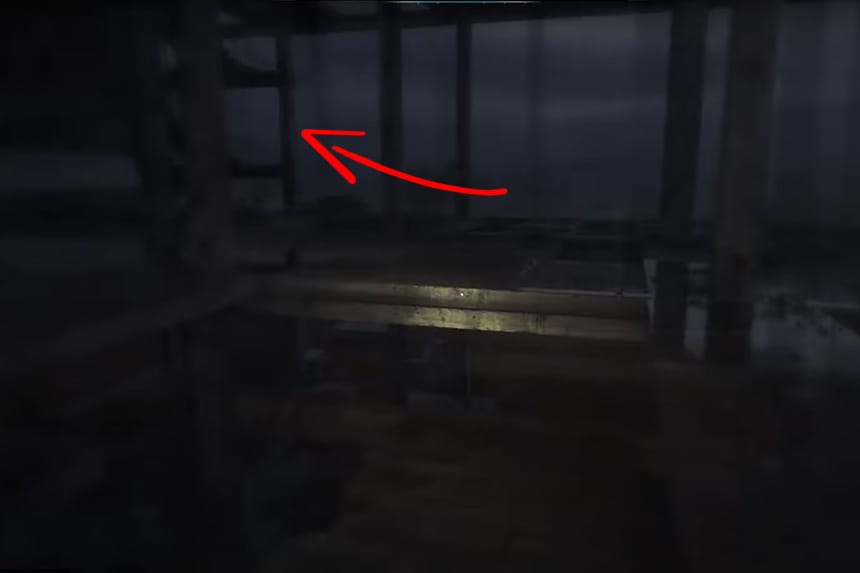
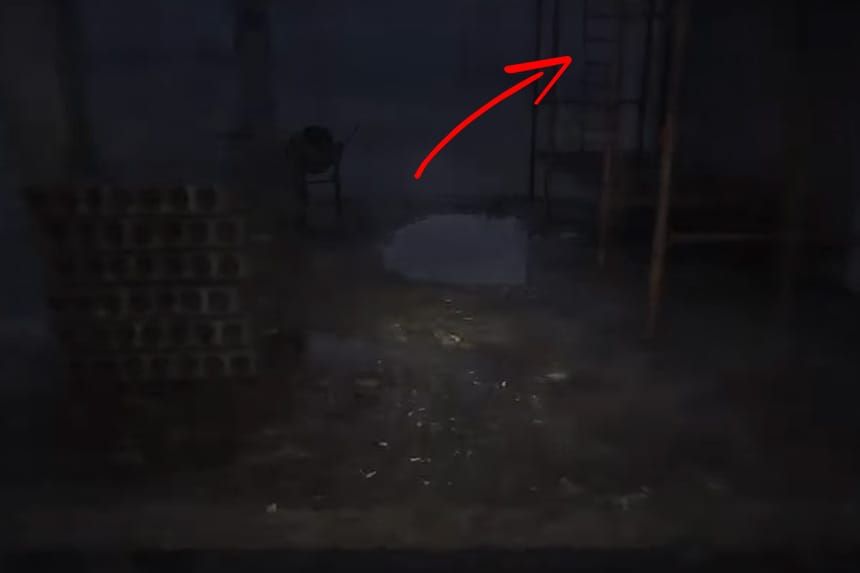
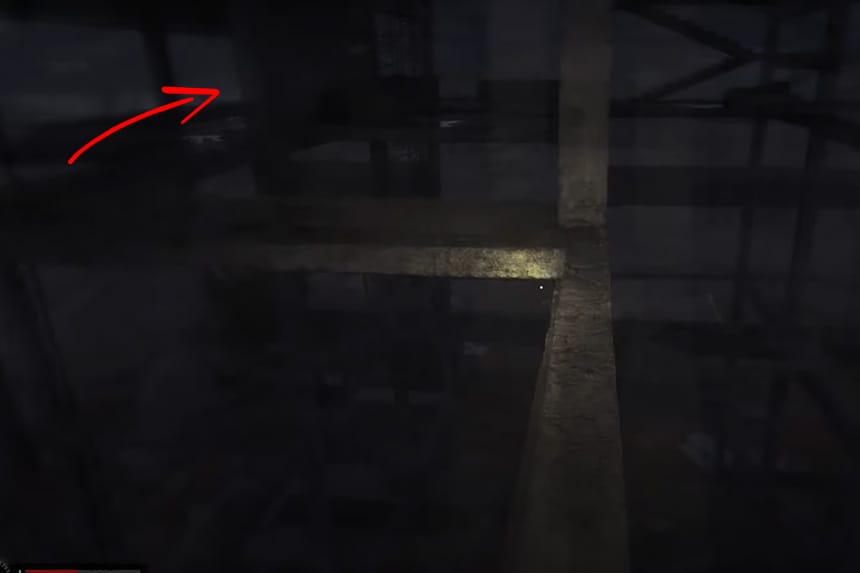
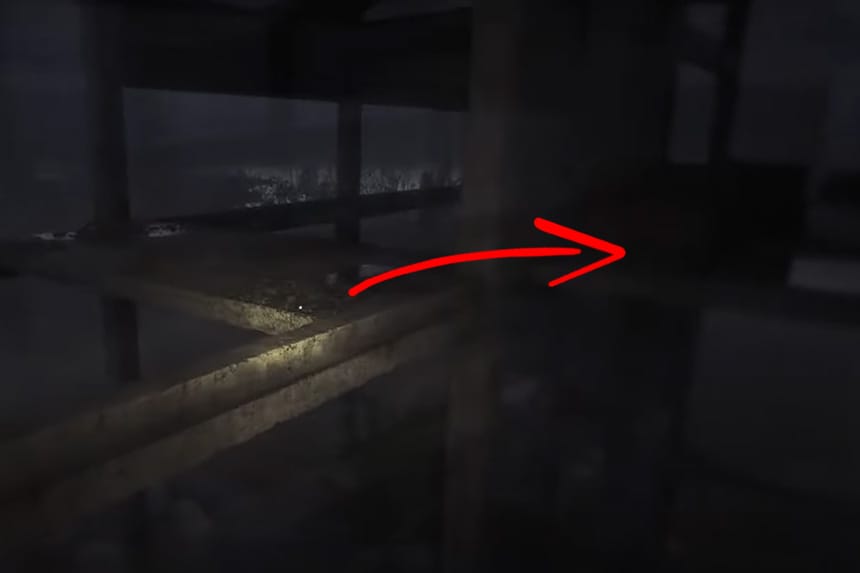
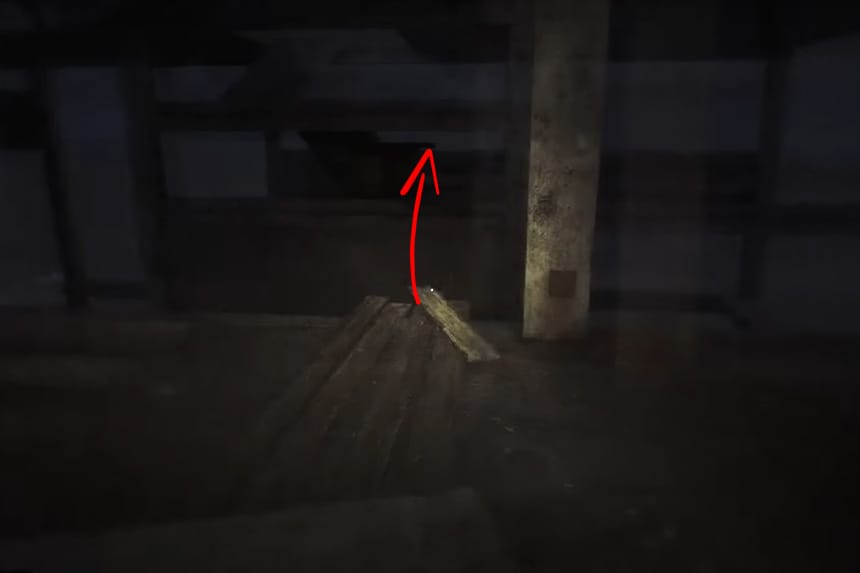
Click on the images to enlarge
Finding your way to the SEVA-D Suit Armor can be confusing due to the surrounding environment; these pointers will help you navigate your way:
- Upon entering the building, you’ll encounter a flight of stairs. Climb it, as you’ll have to repeat the process of climbing and jumping a few times before reaching the location of the ladder.
- Next, you’ll have to climb two ladders and navigate to the second set of stairs.
- After you find these stairs, start climbing them.
- You again have to locate the third set of flights of stairs. The above image guide will help you find your way
- Eventually, you’ll reach an open space: the terrace.
- Look around the terrace, pay attention, and find a corner where the rewards await you.
SEVA-D Suit Armor: Details
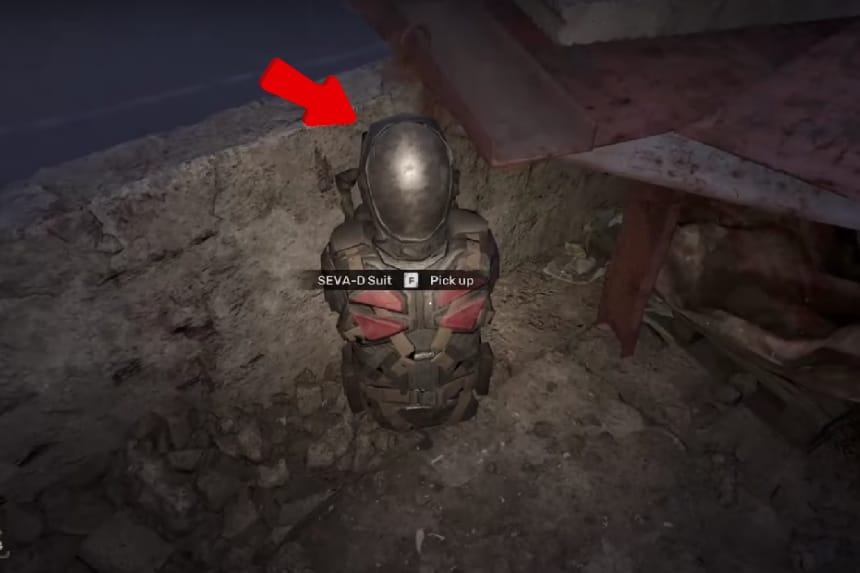
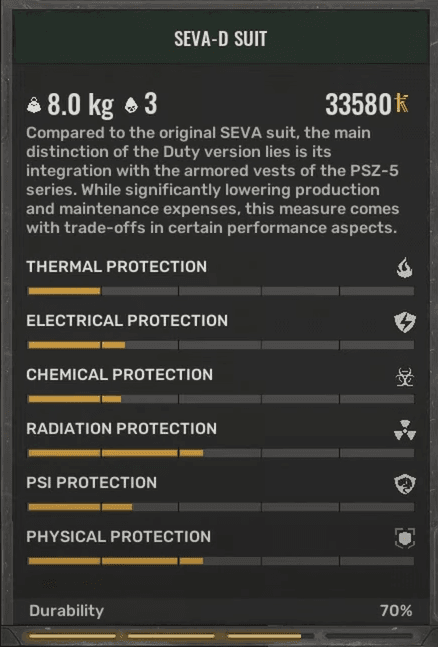
- Description: The primary difference between the original SEVA suit and the Duty variant is its integration with the armored vests from the PSZ-5 series. While this design choice significantly reduces production and maintenance costs, it also compromises some performance areas.
- Weight: 2.00kg
- Artifact Slots: 3
- Cost: 46,000 coupons
- Durability: 910
Concluding Thoughts
The Zone is a perilous area, teeming with enemies and an unforgiving environment that can threaten your health. You need to stay safe by wearing suit armors like SEVA-I and SEVA-D which are specifically designed to shield you from environmental hazards and combat damages.

