
From the moment you start playing Avowed, you’ll encounter a constant stream of choices at every turn. While these decisions may not always have drastic consequences, they can still influence the overall outcome of a quest and the rewards you receive.
This is particularly true for side quests like “Precious Light”, where you have multiple options for where to take the Luminous Adra. This guide will help you make the best choices to maximize your rewards in this side quest.
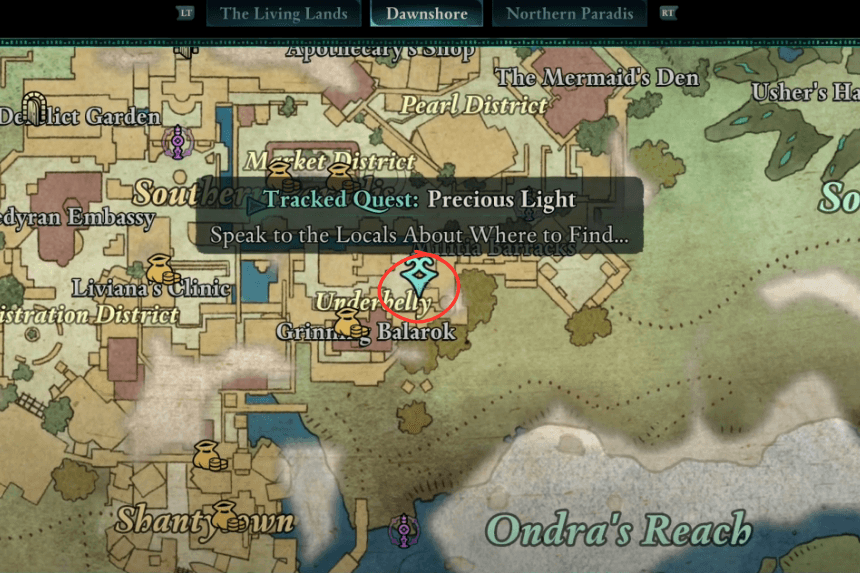
How to Initiate the Precious Light Side Quest

You can find it by making your way to Paradis City. On the city map, you’ll notice a side quest marker right where “Southern Paradis” is written. Head to this location and speak with Sapiento de Falva to start the quest, which involves hunting for Luminous Adra for the NPC.
Locate the Luminous Adra
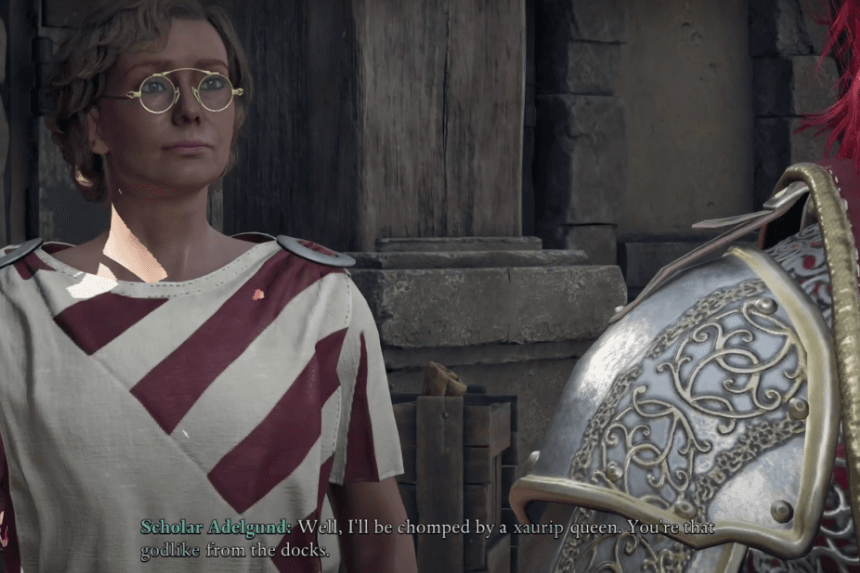
Once you begin the Precious Light side quest, your first objective is to gather information about luminous adra. While speaking to various locals is an option, you only need to talk to Scholar Adelgund in the Administration District to progress. Head to the district and initiate a conversation with Adelgund.
Introduce yourself, then mention that it seems she has had other visitors recently. She will reveal that a dwarf and his crew stopped by, appearing fearful of someone. At this point, you will have several dialogue choices:
- [Perception] It seems odd that they would come to a scholar for help.
- Do you know what they were looking for?
- I can think of many reasons for sailors to seem agitated.
- Sapiento de Falva doesn’t seem that scary to me.
Choosing the Perception option prompts Adelgund to reveal that the crew was asking about luminous adra. She directed them to Castol’s Folly, where animancers have conducted experiments on the substance. However, she warns that the area can be dangerous.
Reaching Castol’s Folly
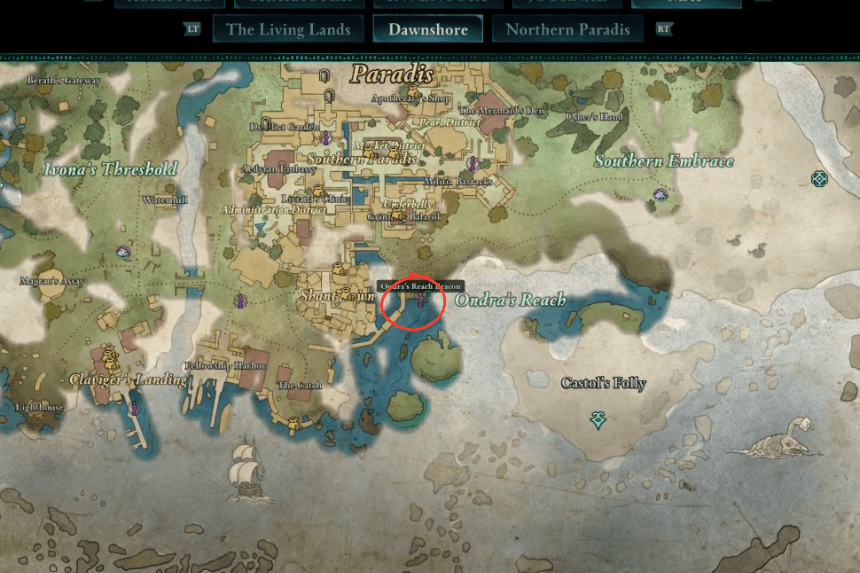

Castol’s Folly is located southeast of Castol’s Folly in Ondra’s Reach. You can get there by setting off from The Catch and travelling between islands. Upon reaching the northwestern side of Castol’s Folly, look for a shipwreck—climb onto it and then ascend the rocky terrain.
Following the rocky path will eventually lead you to the entrance of a smuggler’s camp. This area is heavily guarded by hostile Smugglers, so take them on in smaller groups to avoid being overwhelmed. Expect to encounter:
- Smuggler Apprentices
- Smuggler Lackeys
- Smuggler Duelists
Inside the camp, you will find a locked chest enclosed in a wooden cage. You can enter through an opening near the top of the platform. A Lockpick (1) is required to open it, and it contains:
- Copper Skeyt (34)
- Agate
- Paradisan Ladder
- Iron Chunk (4)
- Softwood Branch
- Common Great Hammer
Once you’ve gathered the loot, proceed to the eastern section of the island. Here, you will encounter another group of smugglers, including a Smuggler Arquebusier, Smuggler Apprentice, and Smuggler Lackey.
Note: A piece of the Totem of Rightful Rulership, the Golden Flames, can be found on a cliffside in the northern part of Castol’s Folly.
Confronting Captain Trevik

After clearing the area, head to the southern part of Castol’s Folly, where you’ll find Captain Trevik and his smuggler crew. This is where the quest becomes challenging. Captain Trevik reveals that they stole Captain Bardatto’s Luminous Adra for Sapiento but lost it. Now, Bardatto is demanding its return, and you must decide how to retrieve it and what to do with it.
If you agree to return the Adra to Bardatto or at least handle the situation on Trevik’s behalf, he will willingly hand it over. Alternatively, you can choose to fight him for it, but be prepared—this battle is significantly harder than the previous ones. Winning without fine-tier gear is nearly impossible unless you lower the difficulty.
Defeating Trevik and his crew not only secures the Adra but also provides additional loot. You can then deliver the Adra to Sapiento, earning 300 currency and The Fantastic Alembic trinket. However, if you peacefully obtain the Adra, you can either return it to Bardatto or give it to Sapiento for the same rewards.
If you choose Bardatto, she offers two options:
- She will take the Adra and spare Trevik and his crew.
- She will pay you 500 currency for the Adra but will likely execute Trevik.
Additionally, you have the option to fight Bardatto to protect Trevik without surrendering the Adra. However, this choice yields few rewards aside from a Bloodstone gem.
For maximum loot, the best path is to defeat Trevik and give the Adra to Sapiento.
Completing the Quest
Once you have the Luminous Adra Crate, return to Sapiento in Paradis to deliver it. As a reward, you will receive:
- The Fantastic Alembic
- 300 Gold
This concludes the Precious Light side quest.
