
The Barrow-Dyad Exotic SMG is a highly sought-after weapon in Destiny 2, but getting your hands on it isn’t straightforward. You’ll need to complete a secret questline called “The Taken Path.” This guide will walk you through every step—from discovering the first Taken Blight to tackling the final “Derealize” mission—so you can claim this powerful weapon for yourself. Get ready for Lost Sector grinds, tracking down Hive statues, and a tough but totally doable Exotic mission!
How to Start the Barrow Dyad Quest

Want to start the Barrow-Dyad quest in Destiny 2? It’s a bit of a hidden process. First, you need to find a special Taken Blight during a Nether mission. This Blight isn’t always there, so you might have to try a few times. It can appear in one of three places:
- The Mausoleum: When you start, turn around and jump up. It’ll be near the wall.
- Hall of Souls: Look for it on one of the support pillars in the room where you fight the Tormentor (it’s the same room where King’s Fall begins).
- Trenchway: This one’s easy to spot! It’s near the Wizard trio on the edge of the Dreadnought, and you can actually see it from where you spawn.
Once you find the Blight, jump in! You’ll be taken to a different area. There’s a plate on the floor – stand on it. A message will appear telling you which direction to go (left, right, forward, or behind). Follow the instructions. If you do it right, you’ll be teleported to another room with a Taken Osseous Fragment. Grab it! Now, head back to Eris’s place in the Last City and interact with the slab there. This will give you The Taken Path quest, which is how you get Barrow-Dyad.
How to Complete the Taken Path Quest
Okay, so you’ve got the Taken Osseous Fragment. Great! Now, warp to the Last City and go see Eris in her apartment. Once you’re there, interact with the Shaping Slab (that’s the seasonal vendor). This will kick off “The Taken Path” exotic quest.
Your first job is to buy and equip the Scotopic Rune upgrade from the Shaping Slab. This costs 150 Sigil Shards. If you’re running low, don’t worry, they’re easy to get. Just head into The Nether and loot some chests – you’ll have enough in no time.
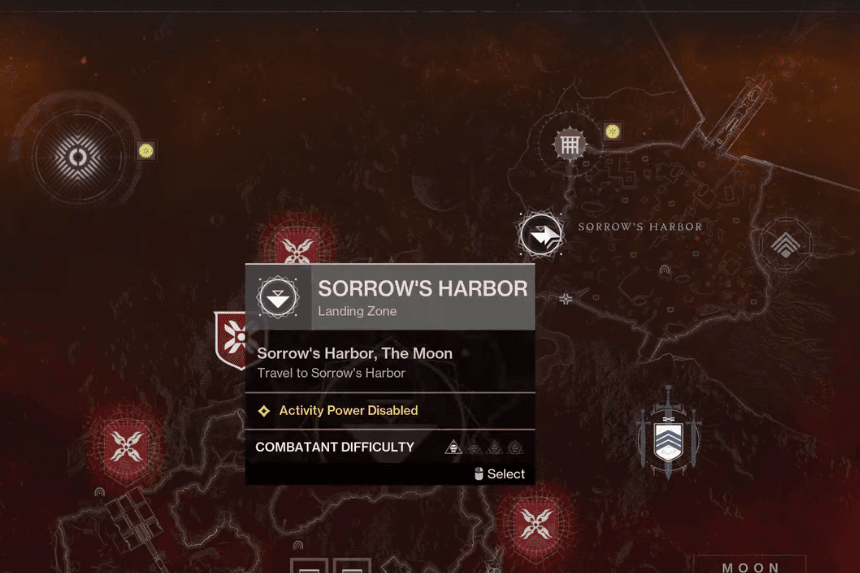
Okay, you’ve got the Scotopic Rune equipped, now it’s Lost Sector time! First, head to the Moon and find the K1 Revelation Lost Sector in Sorrow’s Harbor. Go through it until you find another one of those pressure plates, just like the one you saw before. Stand on it and follow the direction the Hive Rune tells you to go. A bunch of Taken enemies will appear – take them out! The boss will drop a second fragment, so grab it.
Next up, do the exact same thing in the Veles Labyrinth Lost Sector on the Cosmodrome (it’s in the Forgotten Shore area). The pressure plate in this one is hidden in the first maze section, so you might have to hunt around a bit to find it. Once you clear Veles Labyrinth and beat the boss there, you’ll get your third fragment. Then, it’s time to head back to the Shaping Slab in the Last City.
Curse quests
Alright, back at the Shaping Slab! You’ll get three new quests: Curse of Endurance, Curse of Revenge, and Curse of Urgency. For each one, you’ll go to the activity listed on the Moon, grab the Taken relic, use it to defeat some enemies, and then dunk it in the nearby deposit to destroy it. Pretty straightforward, just follow the quest markers.
After finishing all three of those, you’re almost there. Now, head back into The Nether and search for three Hive statues. There’s one in each of the Dreadnaught patrol areas. Find them, interact with them, and a boss will appear. Defeat the boss. You should see a message pop up saying “To the victor, an offering.” This means you can interact with the statue again to give it an offering and get another Taken Osseous Fragment.
You have to do this for all three statues, which means you’ll need to move around The Nether to get to them all. Once you’ve done that, boom! You’ll unlock the “Derealize” Exotic mission – the last step to getting your hands on the Barrow-Dyad Exotic SMG.
Derealize Quest
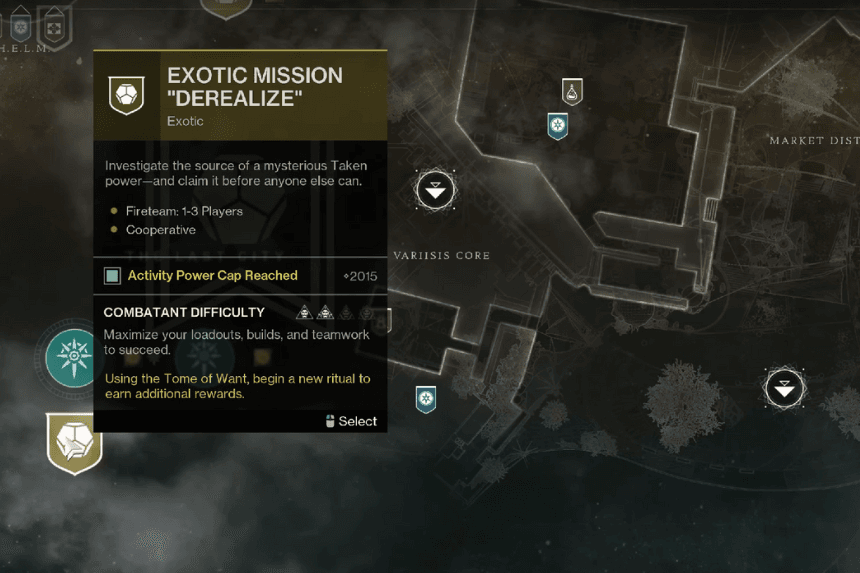
“Derealize,” the final Exotic mission, is now unlocked and you can start it from the Last City. Don’t let the name scare you – it’s actually one of the easiest Exotic missions Bungie has ever made. Seriously, you’ll be fine.
The mission is basically a boss gauntlet. You’ll work your way through the Dreadnaught, fighting Tormentors and Subjugators that get tougher as you go. There will be a lot of other enemies around too, so make sure your gear is good for both taking out groups of enemies and dealing damage to bosses.
Your first real challenge is Vrhiisk, Seeker of Power. To defeat him, you’ll need to damage him until he changes phase, then defeat six Blight Sentinels, take out the Taken Conduits, grab the curse they drop, charge it up by getting kills, and then dunk it in the nearby deposit. Do that twice, and you’ll move on.
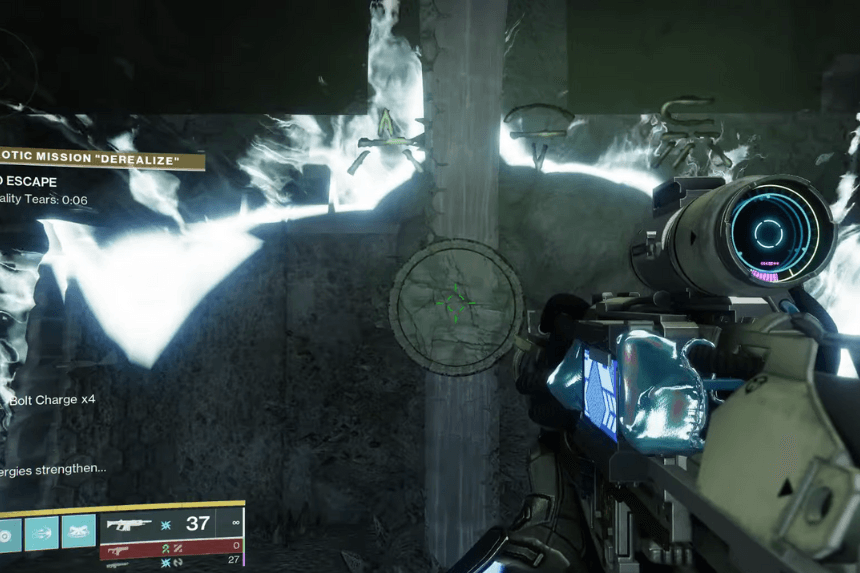
Eventually, Vrhiisk will teleport you to a small room where you can finish him off. Afterward, a Hive Rune with symbols above it will appear. This is like before – move in the direction the game tells you, but only if the Hive Rune matches one of the symbols above. If it doesn’t match, just stay put and let the ‘No Escape’ timer run out. Keep doing this until all four symbols are gone.
If you do it right, you’ll be teleported to a platforming section. Use the central platforms and holes in the walls to get around. If you get stuck, look up! There’s a lot of vertical platforming that’s easy to miss.
In the first part of this section, you just platform. In the second part, you have to destroy three crystals to open the path. Otherwise, it’s pretty straightforward parkour.
After the platforming, you’ll find a Rally Banner – use it! You’re on the last step. Just walk forward and interact with the Exotic SMG on the table. Boom! You’ve got it, and you’ll also get the pattern to craft it.
Completing the Quest
Don’t forget to take down the final boss, Xir-Kuur, while you’re at it! It’ll save you time later. This last fight has two mirror bosses that swap places between phases. Just defeat them both without dying.
There aren’t a lot of complicated mechanics here. But at the very end, you’ll need to leave the room and capture the Hive Plate where the Rally Banner was. This closes the door and traps the Taken beast. Once that’s done, the mission is complete! Loot the chest, and you’re all set.