
In Avowed, the “Penitent” achievement is unlocked by completing all 42 side quests scattered across the Living Lands. These quests not only offer valuable rewards but also deepen your understanding of the game’s rich lore and character dynamics. Be cautious, as some side quests can be missed if you advance the main storyline too quickly. To ensure you don’t overlook any, it’s advisable to thoroughly explore each region—Dawnshore, Emerald Stair, Shatterscarp, and Galawain’s Tusk—and complete all available side quests before progressing further. This guide provides detailed locations and tips for each side quest, assisting you in achieving 100% completion and unlocking the “Penitent” achievement.
All Dawnshore Side Quests’ Locations
Listed below are all the side quests found in the Dawnshore region:
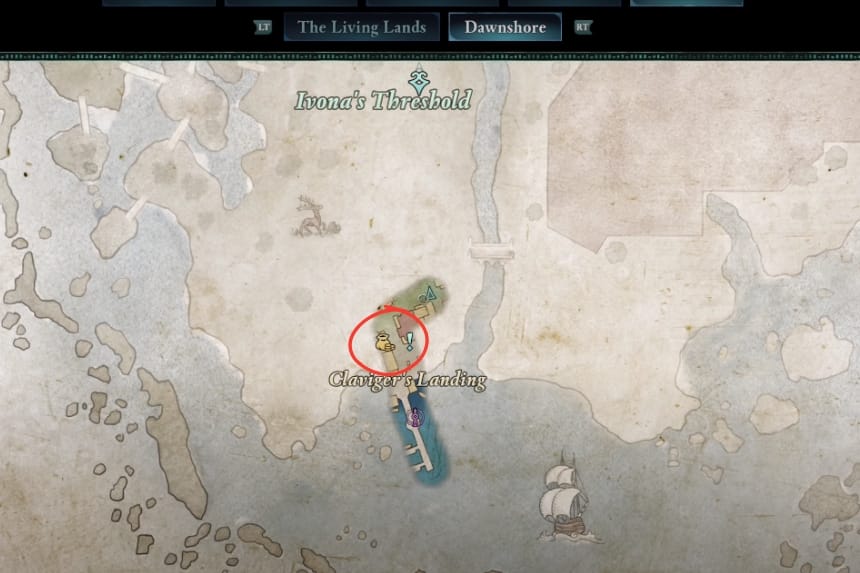
Armor Fit for the Wilds
Quest Type: Side Quest
Starting Location: Claviger’s Landing, Dawnshore
Quest Description: Surviving in the Living Lands requires scavenging for supplies to enhance your gear.
Rewards: Upon completing the quest, you’ll receive upgraded armour to aid you in battle. Additionally, you can acquire various common weapons, items, and XP as you progress.
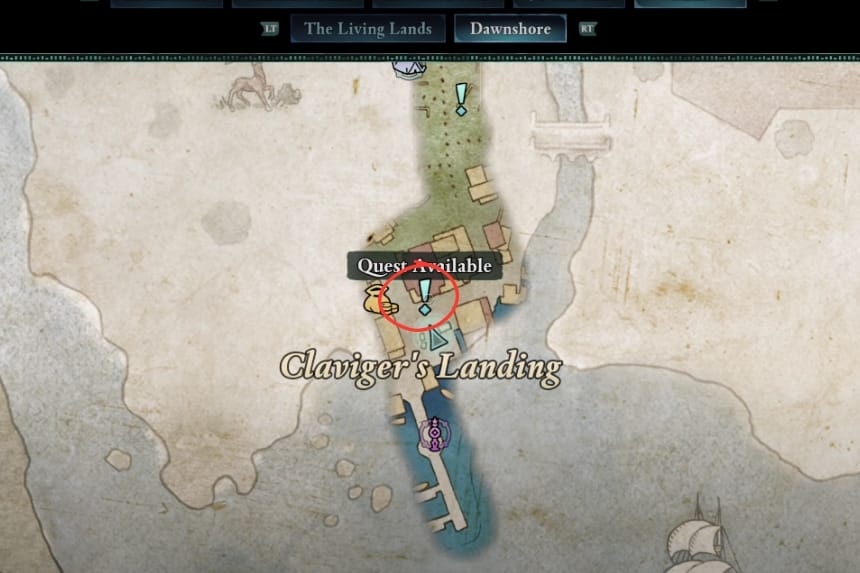
Cabin Fever
Quest Type: Side Quest
Starting Location: Claviger’s Landing, Dawnshore
Quest Giver: Dehengen
Quest Description: Dehengen, a local settler, was forced to flee her home after being pursued by a band of xaurips. She has asked for your help in driving them away so she can return. Interestingly, she also wishes to consult a Watcher, hinting at a possible supernatural aspect to the situation.
Rewards: Upon completing Cabin Fever, Dehengen will reward you with the Vindictive Band, a unique accessory that causes Critical Hits to inflict Poison damage on enemies!
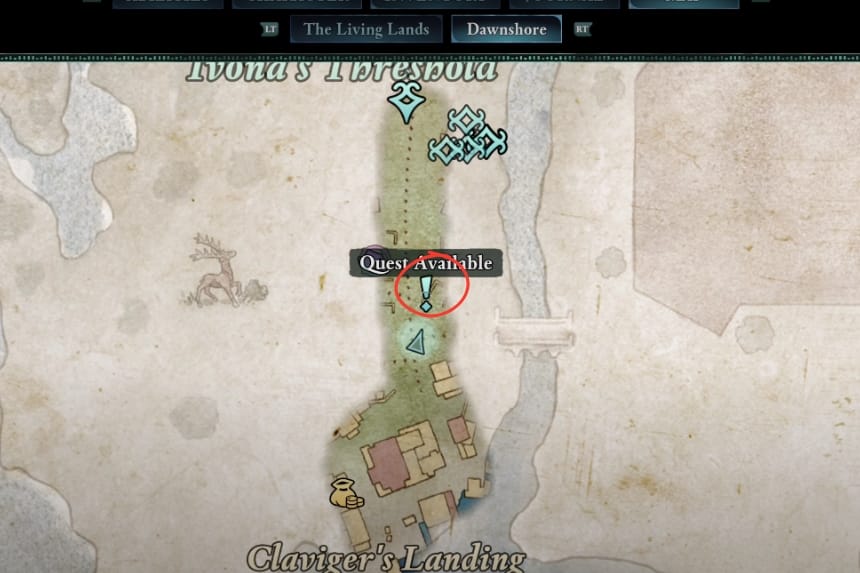
Mapping the Living Lands: Dawnshore
Quest Type: Side Quest
Starting Location: Dawnshore
Quest Description: Mapping the Living Lands is a series of side quests in Avowed that require you to locate cartographers in each region.
Rewards: Upon completing Mapping the Living Lands: Dawnshore, Sanza will reward you with the Fragment of the Scales, which will be added to your journal. This can also initiate the Totem of Rightful Rulership side quest.
Dawntreader
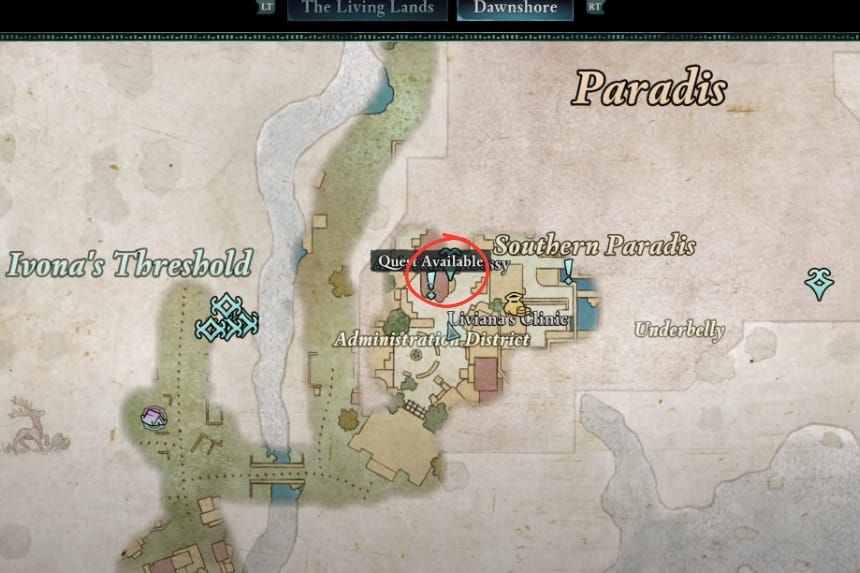
Quest Type: Side Quest
Starting Location: Southern Paradis, Dawnshore
Quest Giver: Ofrye
Quest Description: The “Dawntreader” side quest involves finding a missing expedition team. Players explore an Eothasian Temple, make moral choices involving relics and an oracle, and face consequences that impact the story and rewards.
Rewards: Upon completing this side quest, players receive the “Last Light of Day +2” sword, which can be obtained by either confronting or assisting Sargamis. Additionally, after returning to Ofryc and Caedmon, players are rewarded with the “Delver’s Caution” ring.
Escape Plan
Quest Type: Side Quest
Starting Location: Southern Paradis, Dawnshore
Quest Description: A young couple with a troubled past seeks to escape the Aedyran authorities in Paradis and start a new life in Thirdborn. Their friend, Remei, has requested your help in gathering the necessary supplies for their survival.
Rewards: Upon completing Escape Plan, Leoflaed will reward you for assisting with gathering supplies and handling the smugglers. Your inventory will be updated with the following items: 10x Softwood Branch, 10x Pelt, 2x Paradisan Ladder, and 10x Iron Chunk.
Precious Light

Quest Type: Side Quest
Starting Location: Southern Paradis, Dawnshore
Quest Giver: Sapiento de Falva
Quest Description: Sapiento de Falva, an animancer in Paradis, is developing a potion to protect travelers from the plague sweeping through the Living Lands. He believes luminous adra is the key ingredient. After a shipment he purchased never reached shore, he has turned to you for help in sourcing the luminous adra.
Rewards: Upon completing Precious Light, Sapiento will reward you with The Fantastic Alembic, which will be added to your inventory, along with 977 XP.
Note: If you decide to confront and defeat Captain Bardatto in battle, you will acquire a Bloodstone Gem.
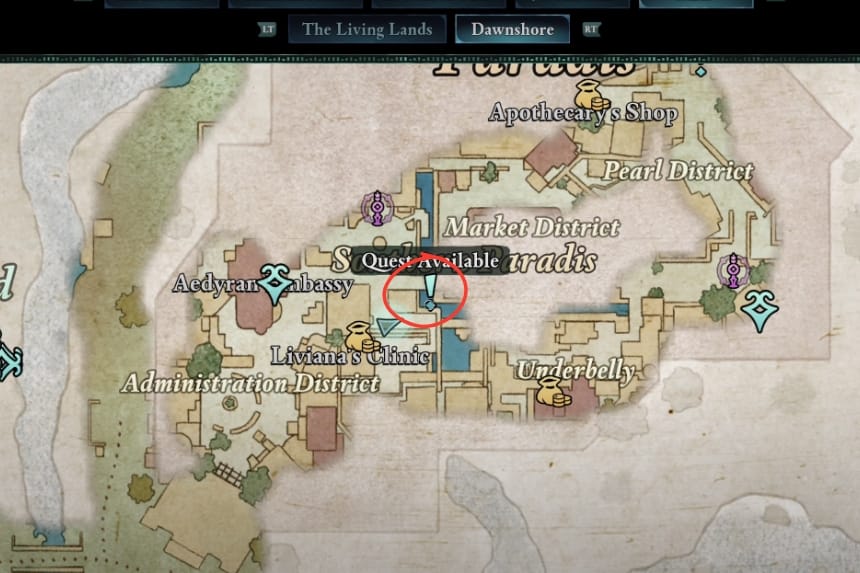
A Lady Never Tells
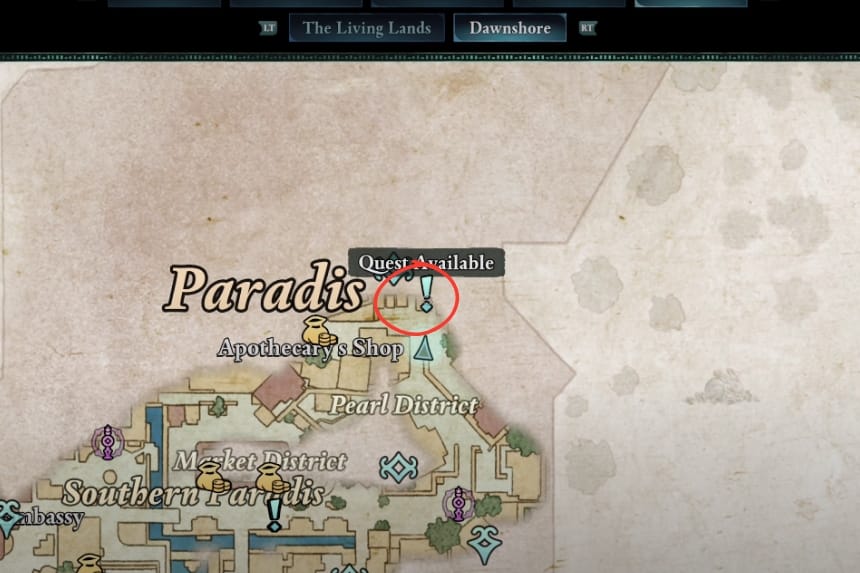
Quest Type: Side Quest
Starting Location: Pearl District, Dawnshore
Quest Giver: Concerned Courtesan
Quest Description: Giuliana, the proprietress of The Mermaid’s Den, suspects that a local gang—the Sparrowhawks—has stolen her shipment. Lacking the authority to confront them herself, she has asked for your help in recovering it. In return, she has promised a generous reward for your efforts.
Rewards: Upon completing A Lady Never Tells, you will receive the Night-Mistress’ Favor accessory and 300 Coins as a reward.
The Call of the Past
Quest Type: Side Quest
Starting Location: Dawnshore
Quest Giver: The Voice
Quest Description: The voice in your head insists that a fragment of their memory is lost somewhere in Dawnshore. As peculiar as it sounds, recovering it may offer valuable insight into their mysterious nature.
Rewards: Upon completing The Call of the Past, you will receive Drawn in Winter, a unique axe, along with the Remembrance of Kishamal Godlike Ability.
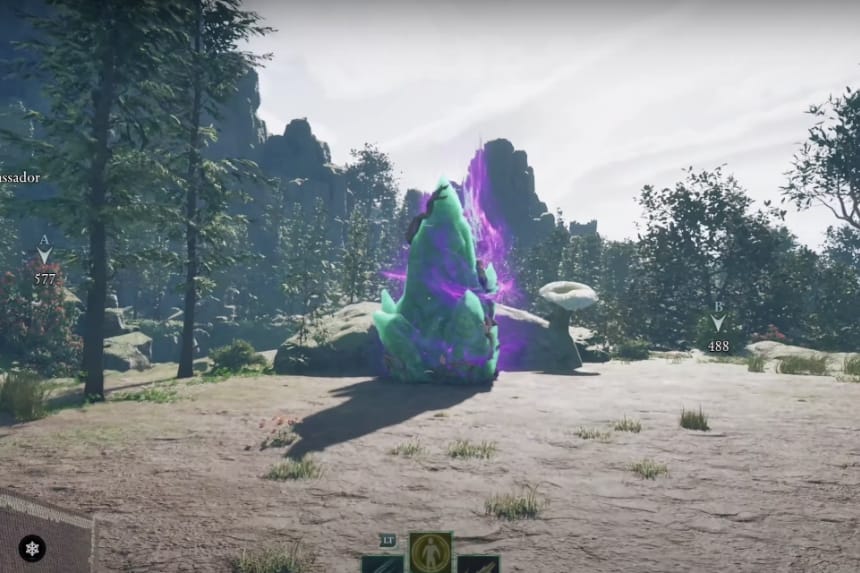
Totem of Rightful Rulership
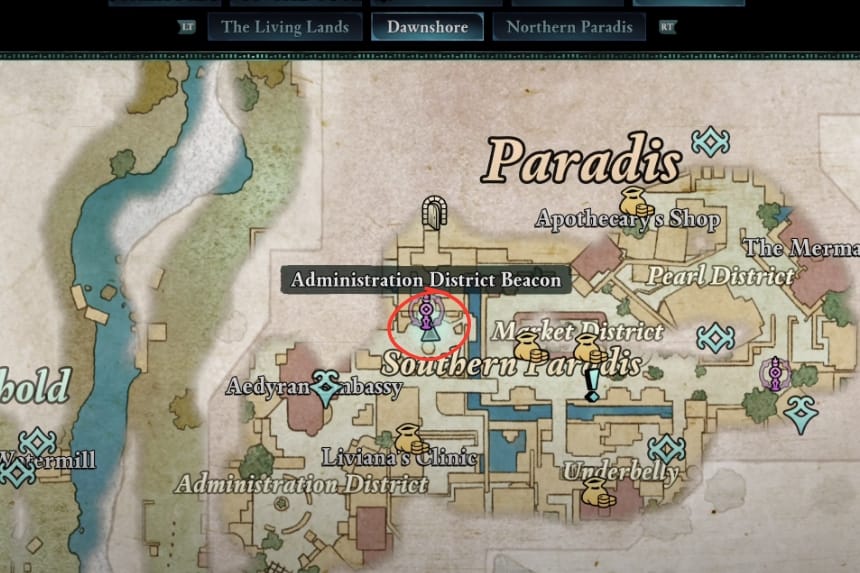
Quest Type: Side Quest
Starting Location: Paradis, Dawnshore
Quest Description: You have discovered a fragment of the Scales of the Oathbinder, a powerful artifact and sacred totem of Woedica. Additional pieces are scattered throughout Dawnshore, and the more you collect and assemble, the stronger the totem will become.
Rewards: Upon completing Totem of Rightful Rulership, you will obtain the fully restored Scales of the Oathbinder totem. Placing it in your party camp will grant your party the benefits of the following ability buffs: Swift Orders, The Power of Command, Sympathy for the Damned, The Queen’s Burden, Noblesse Oblige, and Flames of Resurrection.
Forged of Star-Stuff
Quest Type: Side Quest
Starting Location: Dawnshore
Quest Description: You have discovered a rare piece of starmetal. With the aid of a skilled smith, it might be forged into something valuable.
Rewards: Upon completing Forged of Star-Stuff, you will receive two refined starmetal weapons: Ondra’s Offense and Heavenstrike. Both feature enhanced stats and unique abilities, making them among the most powerful weapons in the game.
Lost Suoles
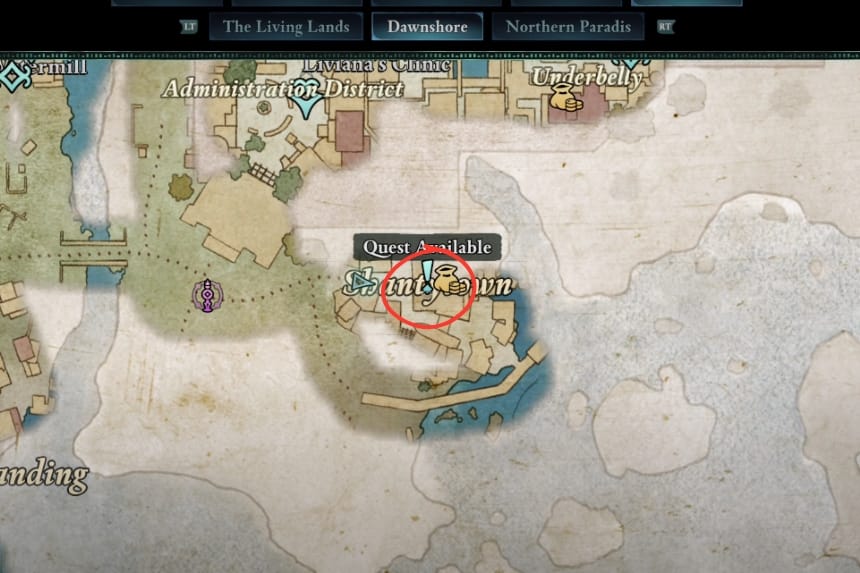
Quest Type: Side Quest
Starting Location: Shantytown, Dawnshore
Quest Giver: Miteno
Quest Description: Miteno, a former sailor, angered Hylea in a tragic accident. Now, birds have taken the soulnets of his fallen crew. He longs to recover these sentimental treasures.
Rewards: Upon completing Lost Souls, Miteno will reward you for returning the soulnets with either his Enchanted Soulnet or the Celestial Loop, depending on your choice.
- The Enchanted Soulnet is an accessory that increases the amount of coins you earn.
- The Celestial Loop grants a 15% resistance to Fire and Frost accumulation.
The Finer Things in Battle
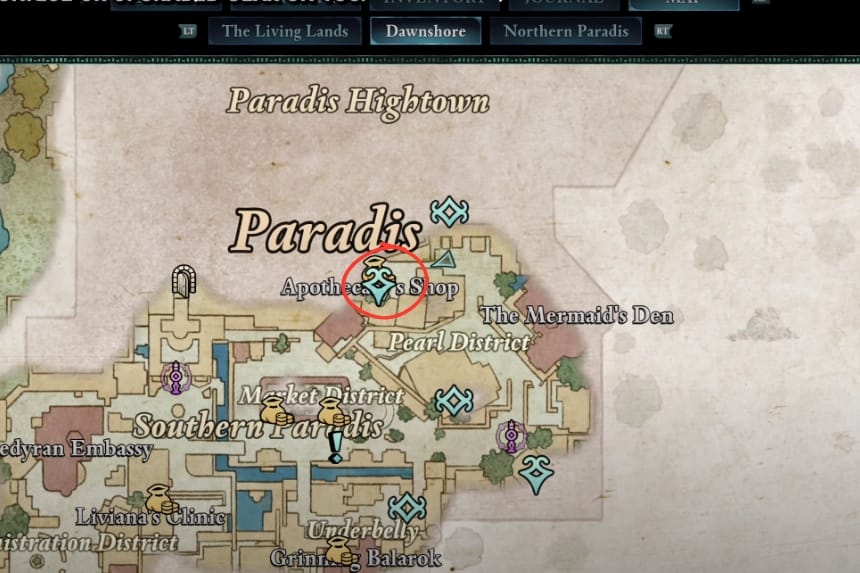
Location and Description: The Finer Things in Battle becomes available in the Dawnshore region after speaking with the Apothecarist during the An Untimely End main quest.
Rewards: Completing the quest will ensure you have Fine-quality or better equipment, preparing you for the challenges ahead. Additionally, you can acquire various common weapons, items, and XP as you progress.
All Emerald Stairs Side Quests’ Locations
Listed below are all the side quests found in the Emerald Stairs region:
Scofflaw’s Vase
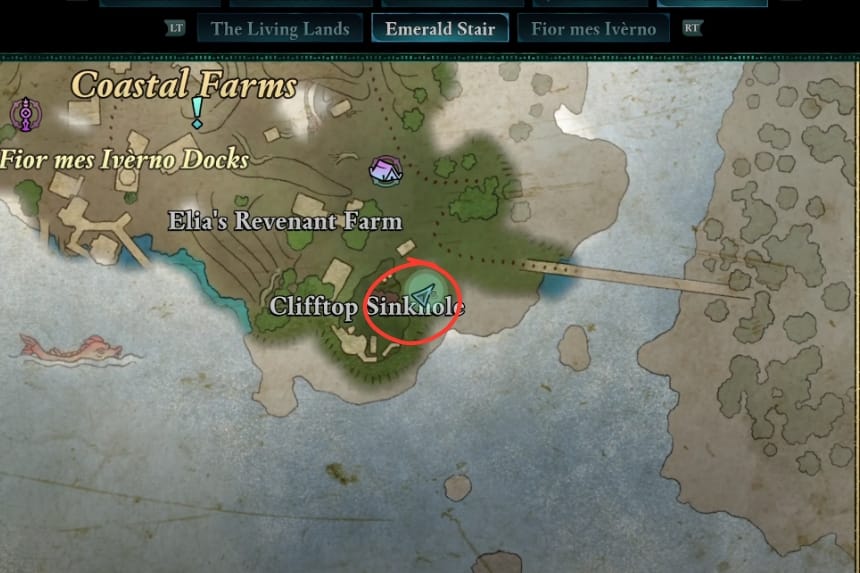
Quest Type: Side Quest
Starting Location: Cliffton Sinkhole, Emerald Stair
Quest Giver: Yatzli
Quest Description: In the Emerald Stair region, you encounter Yatzli, an eccentric wizard besieged by Sporelings. After assisting her, she requests your help in retrieving an ancient artifact known as the Godless Vase from a nearby tower, which she cannot access herself. She provides directions to the tower, where the vase is located at the top. Climbing the structure involves navigating wooden platforms and scaffolding, as well as confronting additional Sporelings. Once you secure the vase, return it to Yatzli to complete the quest.
Rewards: Completing Scofflaw’s Vase grants you 192 XP. Yatzli will express her gratitude for retrieving the Godless Vase, but no additional tangible rewards are provided.
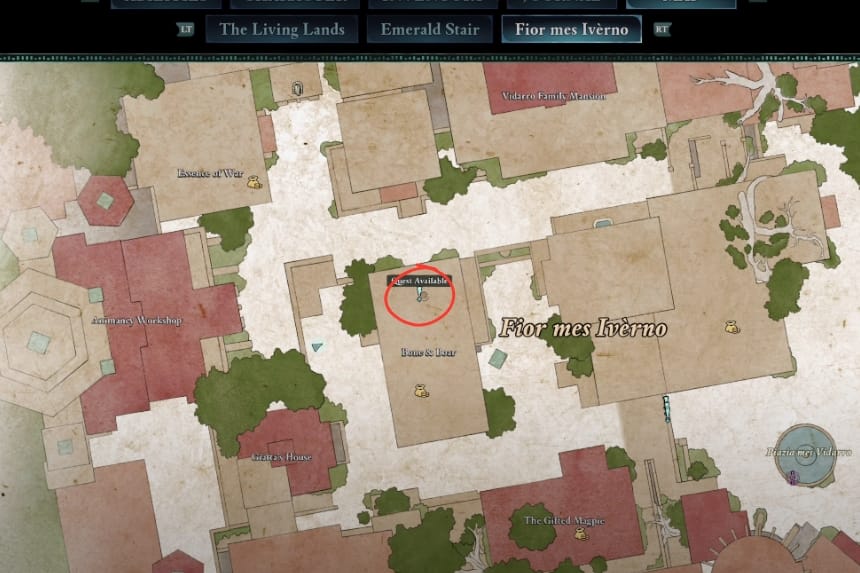
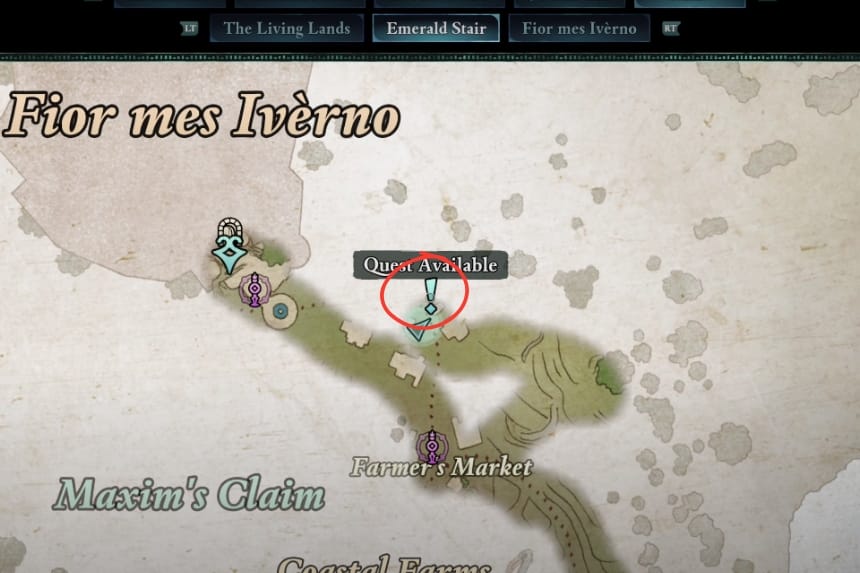
Elder Offerings
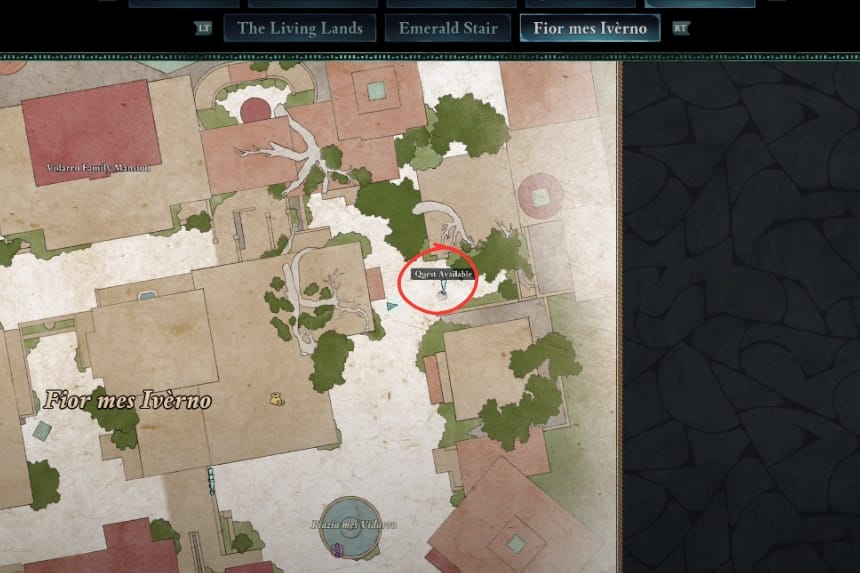
Quest Type: Side Quest
Starting Location: Fior mes Iverno, Emerald Stair
Quest Giver: Rossana Fallo
Quest Description: In the Emerald Stair region, you encounter Rossana Fallo outside Quilicci’s House in Fior mes Iverno. She requests your assistance in honoring the deceased by placing food offerings at three specific gravesites throughout the area. Be prepared to face angered spirits guarding these sites.
Rewards: Berath’s Blessed Ward: A unique item bestowed upon you by Rossana for your efforts and Experience Points (XP).
Missing Rangers
Quest Type: Side Quest
Starting Location: Emerald Stair
Quest Giver: Lieutenant Fidelio
Quest Description: Lieutenant Fidelio is growing concerned after two of Fior’s rangers, Belenna and Adelarro, failed to report back for three days. He has asked for your help in locating them.
Rewards: Upon completing Missing Rangers, Lieutenant Fidelio will reward you with the Ring of the Peerless Marksman for returning the badges. This item will be added to your inventory.
Totem of Defiance
Quest Type: Side Quest
Starting Location: Shrine to Skaen, Emerald Stair
Quest Description: You have discovered a fragment of the Schemer’s Offering, a powerful artifact and sacred totem of Skaen. Additional pieces are scattered throughout Emerald Stair, and the more you collect and reassemble, the stronger the totem will become.
Rewards: Upon completing Totem of Defiance and fully restoring The Schemer’s Offering with all the totems, you will be rewarded with the following ability buffs for your party: Furious Frenzy, The Slave’s Patience, Hidden Hatred, Kill the Master, Bitter Thoughts, and A Vengeful Victim.
Mapping the Living Lands: Emerald Stairs
Quest Type: Side Quest
Starting Location: Emerald Stairs
Quest Description: Mapping the Living Lands is a series of side quests in Avowed that require you to locate cartographers in each region.
Rewards: Upon completing Mapping the Living Lands: Emerald Stair, Sanza will reward you with the Awakened Adra, which will be added to your journal.
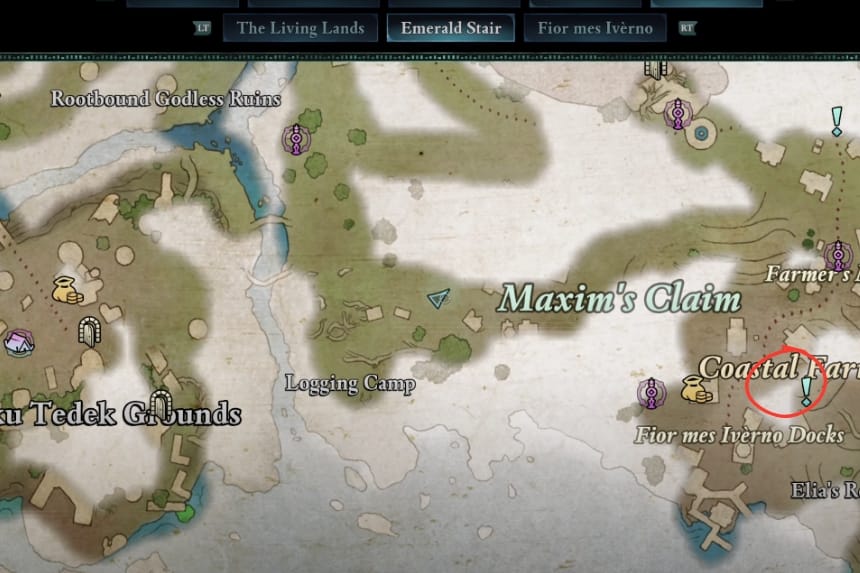
Memory of the Deep
Quest Type: Side Quest
Starting Location: Coastal Farms, Emerald Stair
Quest Giver: Josep Abbacio
Quest Description: Josep, a rival of Elia in the revenant farming business, has noticed his revenants straying from the farms, seemingly drawn to a nearby lake. Convinced that something unusual is happening, he has asked you to investigate.
Rewards: Upon completing Memory of the Deep, you will receive 550 gold as a reward, either from the Giftbearer or Josep. However, if you choose to return to Josep and give him the meteorite, you will also receive the Chanter’s Panpipes, an accessory that allows you to summon a Phantom. While useful in the early game, stronger summons can be found later.
Nature vs. Nurture

Quest Type: Side Quest
Starting Location: Emerald Stair
Quest Giver: Dolina
Quest Description: Xaurips are sabotaging vital animancy equipment essential for the survival of Emerald Stair’s farms.
Rewards: If you choose to fight the hermit Amadio to complete Nature vs. Nurture, Dolina will reward you with the Ring of Pain Amplification, an accessory that increases critical damage. Additionally, you will earn 254 XP for completing the quest.
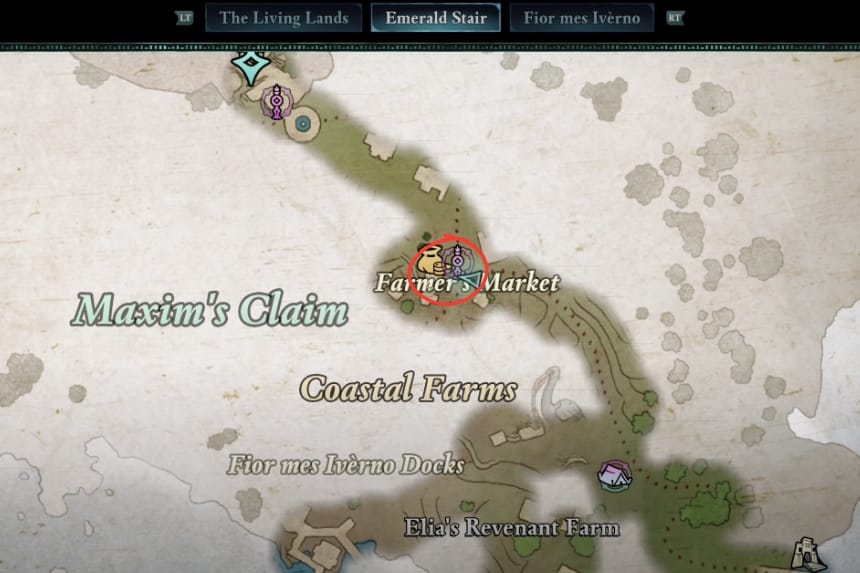
Food Theft
Quest Type: Side Quest
Starting Location: Maxim’s Claim, Emerald Stair
Quest Giver: Sielo Piannini
Quest Description: Sielo, a struggling farmer in Fior, has had his last harvest stolen. He suspects “bandits” are responsible and has asked you to track them down and recover the stolen crops.
Rewards: If you allow the Paradisian Rebels to keep the stolen crops, you will receive 350 Coins. However, if you recover the food or medicine and return it to Sielo, you can choose between 350 Coins or the Forager’s Friend, a unique ring.
To maximize your rewards, let the Paradisian Rebels keep the food in exchange for Medical Supplies, earning 350 Coins. Then, when you return to Sielo, you can claim an additional 350 Coins or select the Forager’s Friend.
Note: If your goal is to farm Coins, opting for the 350 Coins reward may be the better choice. While Forager’s Friend is a unique accessory, it isn’t particularly valuable, as there are stronger rings available in the game. Consider choosing Forager’s Friend only if you’re looking to collect all unique items.
Debt of Blood
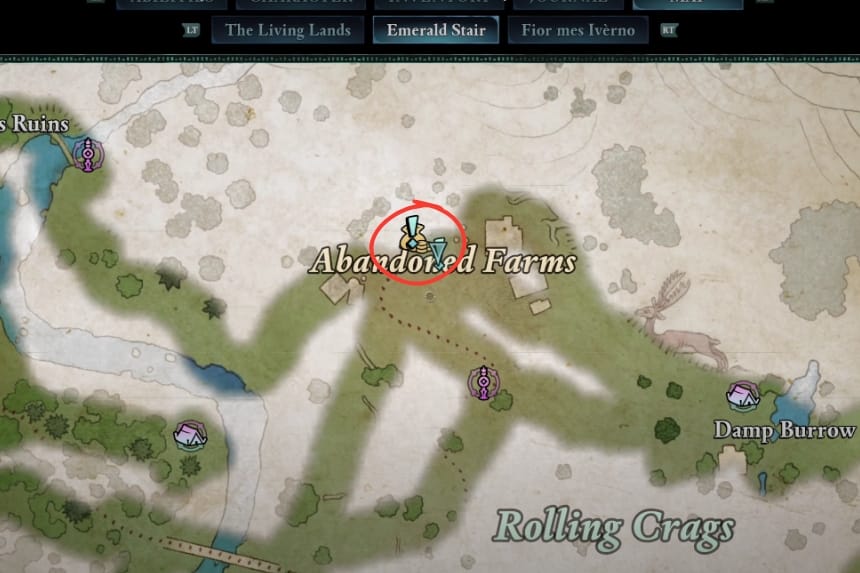
Quest Type: Side Quest
Starting Location: Abandoned Farms, Emerald Stair
Quest Giver: Vemas Rogera
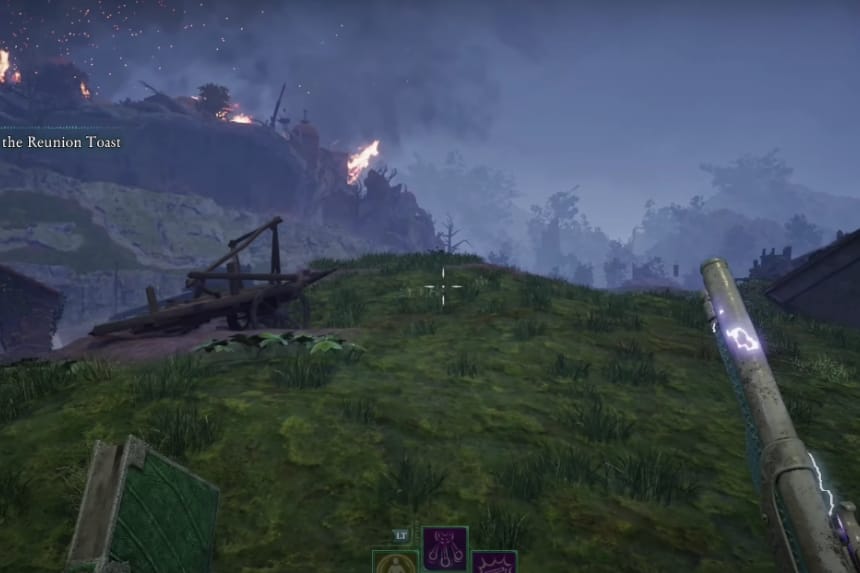
Prerequisite: Fior mes Iverno must be burned down
Quest Description: During the destruction of Fior, the Steel Garrote killed a young sentry and took a ring from his body. His uncle, Vemas, is determined to avenge him and has asked you to eliminate the Steel Garrote captain responsible and retrieve the stolen ring.
Rewards: If you defeat Captain Carnet and return the Rogera Family Ring, Vemas will reward you with 750 Coins if you choose to demand payment.
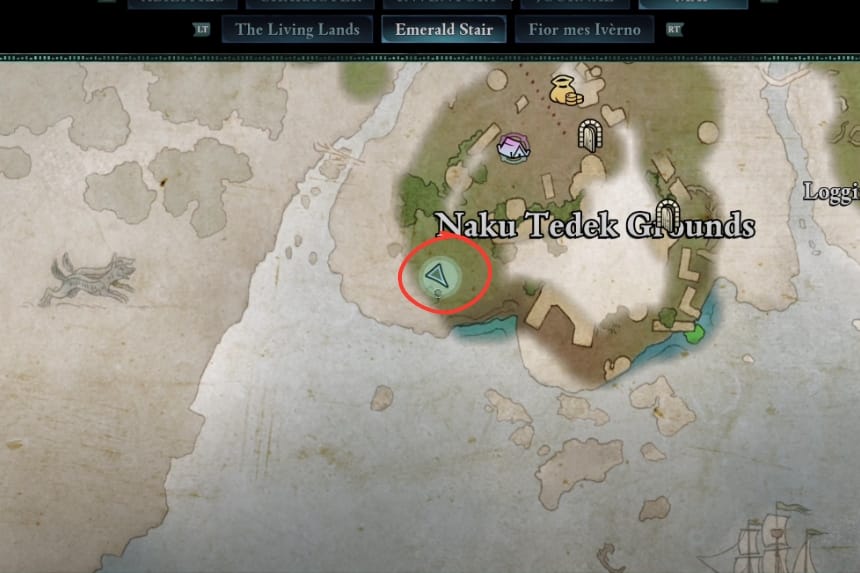
A Relic From the Ashes

Quest Type: Side Quest
Starting Location: Naku Tedek Grounds, Emerald Stair
Quest Giver: Luminous Alfons
Quest Description: The reliquary of Saint Waidwen has been stolen from its shrine in Naku Tedek. Luminous Alfons wishes for its safe return but does not seek retribution against the thief.
Rewards: Upon completing A Relic from the Ashes, Luminous Alfons will express his gratitude for recovering the Reliquary of Saint Waidwen. This side quest rewards you with 210 XP.
Steel Resolve
Quest Type: Side Quest
Starting Location: Ranger Headquarters, Emerald Stair
Quest Description: Ranger Verano of Fior mes Iverno has been captured by bandits and is being held for ransom. However, he suspects that something unusual is happening within the ranks of his fellow rangers.
Rewards: Upon completing Steel Resolve, Ranger Captain Acierno will reward you with One Last Trick, which will be added to your inventory.
Note: You can acquire the Exceptional Dagger by choosing to attack Ranger Dorso. This weapon is only obtainable by looting her corpse after the battle.
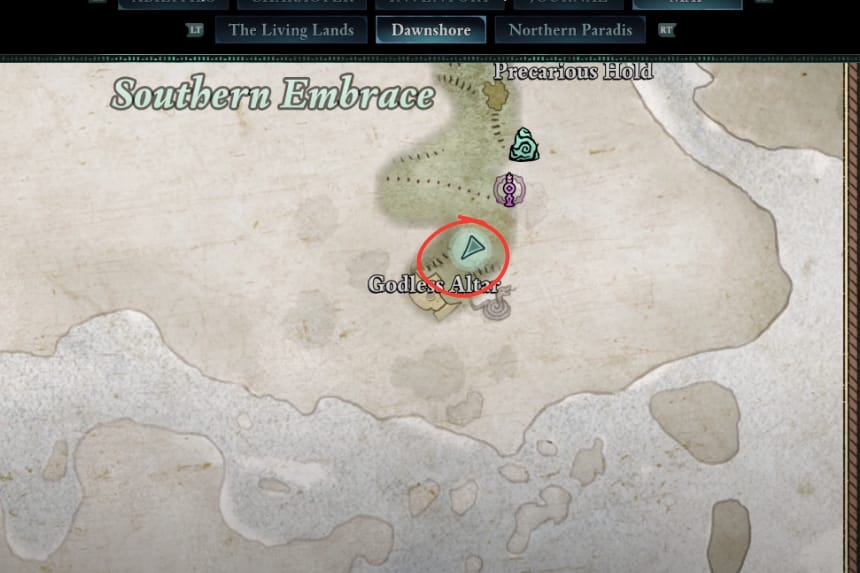
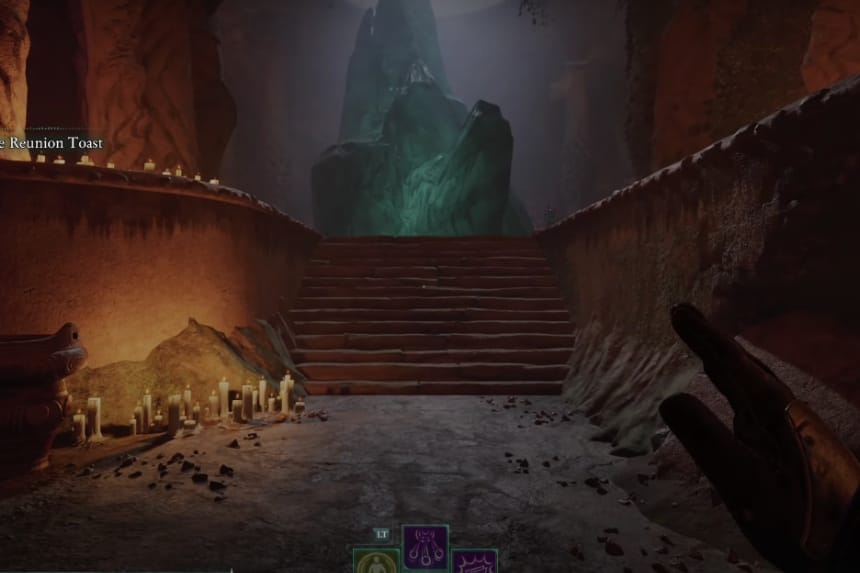
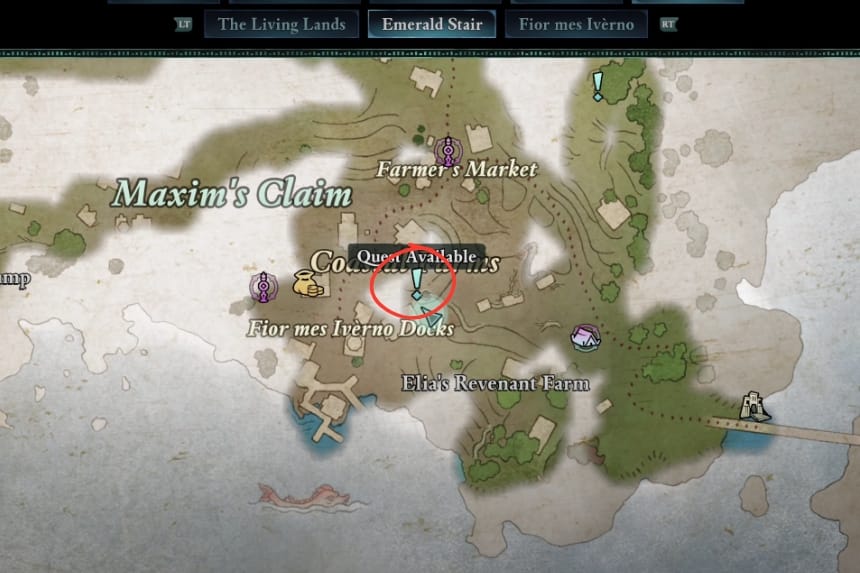
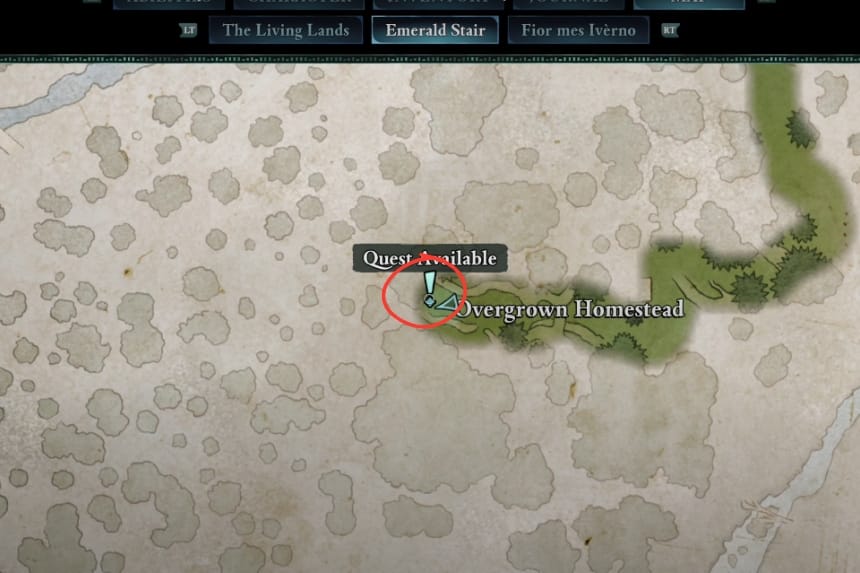
The Sinkhole Stroll
Quest Type: Side Quest
Starting Location: Felipe’s Depression, Emerald Stair
Quest Giver: Old Felipe
Quest Description: An animancer’s workshop has collapsed into a massive sinkhole, revealing a Godless ruin beneath. Investigate the sinkhole and uncover its secrets.
All Shatterscarp Side Quests’ Locations
Listed below are all the side quests found in the Shatterscarp region:
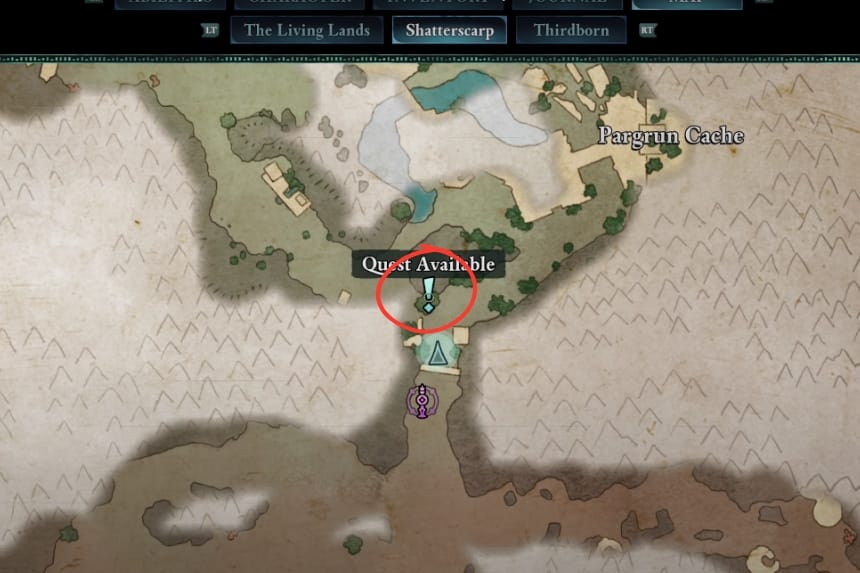
Mapping of the Living Lands: Shatterscarp

Quest Type: Side Quest
Starting Location: Shatterscarp
Quest Description: Mapping the Living Lands is a series of side quests in Avowed that require you to locate cartographers in each region.
Rewards: Upon completing Mapping the Living Lands: Shatterscarp, return to Sanza at his emporium in Paradis. Handing over Wilfrith’s Map will conclude the quest and reward you with 650 Coins.
That Which Remains
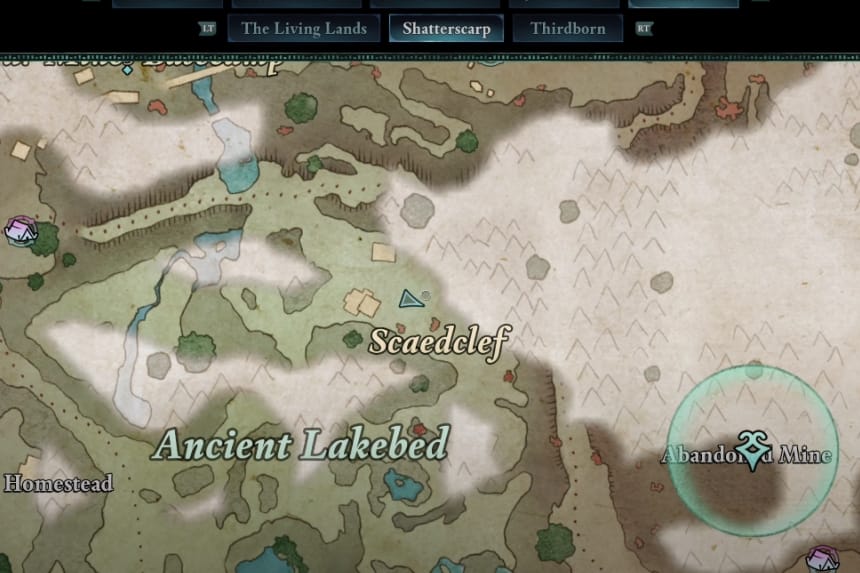
Quest Type: Side Quest
Starting Location: Scaedclef, Shatterscarp
Quest Description: The Aedyran settlement of Scaedclef, once located in the Ancient Lakebed, has been reduced to ashes. Explore the ruins and uncover the truth behind its destruction.
Rewards: Speaking to Captain Wymgar at the end of That Which Remains will reward you with 900 Coins. However, if you chose to kill Fewen, you will receive only XP for completing the quest.
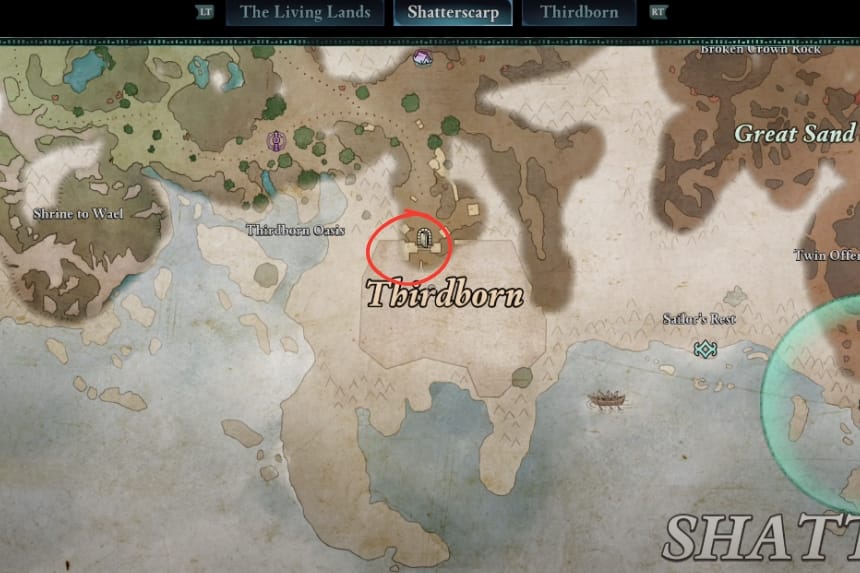
Totem of Revelations
Quest Type: Side Quest
Starting Location: Shrine to Wael, Shatterscarp
Quest Description: You’ve discovered a fragment of the Eyes of the Obscured, a potent artifact and sacred totem of Wael. Additional pieces are scattered throughout Shatterscarp—collecting and assembling them will enhance the totem’s power.
Rewards: Upon completing Totem of Revelations and fully restoring the Eyes of the Obscured with all the totems, you will receive Fickle Winds, Disappearing Trick, Magic in the Blood, Sight Beyond Eyes, Enigmatic Shield, and The Obscured’s Vantage—powerful ability buffs for your party.
Don’t Look Down
Quest Type: Side Quest
Starting Location: Tago’s Tower, Shatterscarp
Quest Giver: Wounded Aedyran
Quest Description: A wounded Aedyran soldier has warned you that the old Pargrun tower in the Shark’s Teeth has been fortified. Aedyr needs it as an outpost to defend against Dreamthralls, but the tower is riddled with traps. Ascend the tower and uncover who is occupying it.
Rewards: Completing this side quest rewards you with 3,330 XP. If you finish Don’t Look Down without engaging in combat with Katoa and Haiako, they will choose to trust you and let you go.
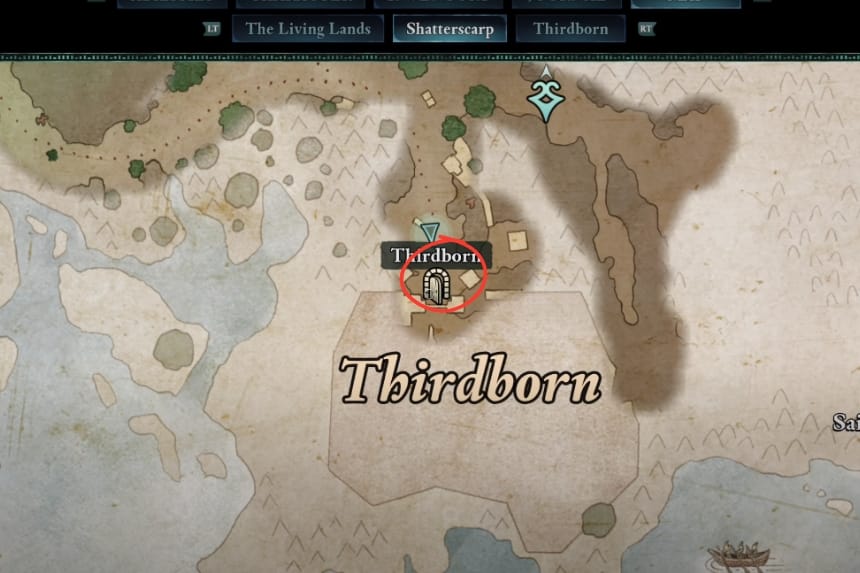
Heart of Valor
Quest Type: Side Quest
Starting Location: Thirdborn, Shatterscarp
Quest Giver: Chiko
Quest Description: Chiko has asked you to visit their elderly uncle, Keipo—a legendary figure in Shatterscarp known for slaying a fearsome leviathan. Chiko suspects Keipo has been feeling the weight of his years, and a conversation with a fellow adventurer might lift his spirits.
Rewards: From Chiko: If you choose not to give the heart to Keipo and instead inform him about the Dreamscourge, Chiko will reward you with Stormdancer’s Scale, Stormdancer Gloves, Stormdancer Boots, and Stormdancer Ring, which will be added to your inventory.
Umpara’s Spear from Keipo: If you give the heart to Keipo, he will exchange it for Umpara’s Spear as a reward.
Keeping the Heart of the Leviathan: If you refuse to give it to either Keipo or Chiko, the Heart of the Leviathan will remain in your inventory as a trinket. It provides increased attack damage but gradually drains your health over time.
First Contact With the Enemy
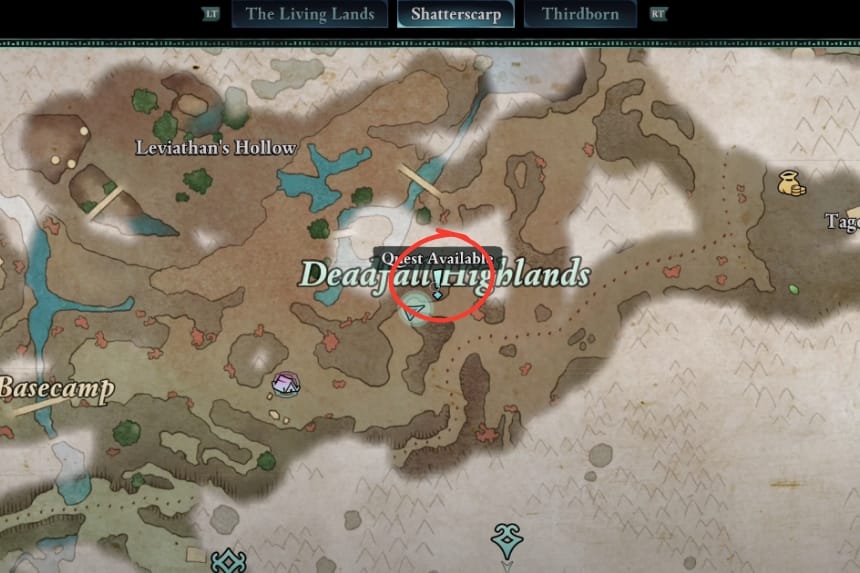
Quest Type: Side Quest
Starting Location: Deadfall Highlands, Shatterscarp
Quest Giver: Nauki
Quest Description: Nauki, a Thirdborner soldier, has asked you to retrieve the badges of his four fallen comrades. He last saw them near a xaurip lair within Leviathan’s Hollow.
Rewards: If you return the badges to Nauki, he will reward you with 900 Coins. However, if you kill Nauki and give the badges to Temertri instead, you will receive XP but no monetary reward.
One Last Drink
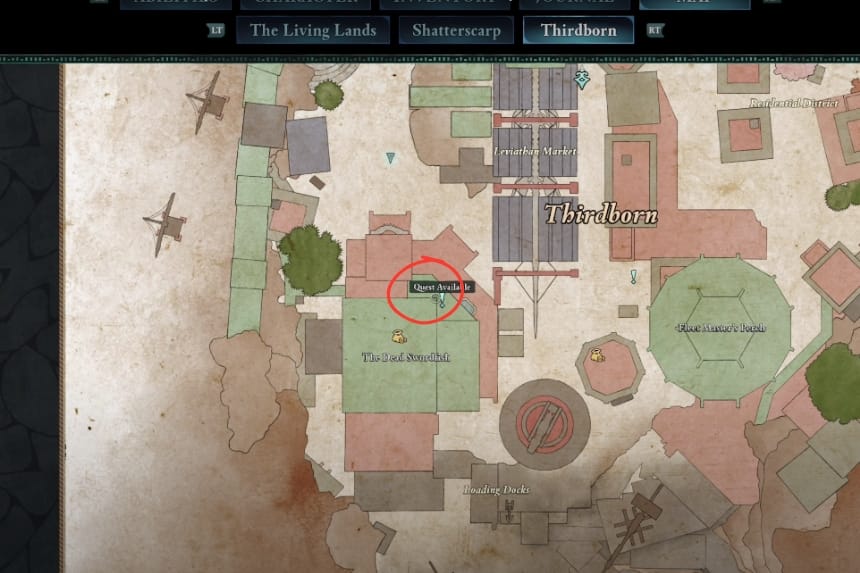
Quest Type: Side Quest
Starting Location: Thirdborn, Shatterscarp
Quest Giver: Captain Ngunu
Quest Description: Captain Ngunu longs to reunite with his old crew. Track them down across Shatterscarp and invite them for drinks.
Rewards: Ring of Prosperity’s Fortune: Completing One Last Drink grants you this unique ring, which boosts Critical Hit Chance based on your total wealth. You will receive this reward regardless of who succumbs to the poison.
Note: Reverse Card Achievement–If you kill Captain Ngunu using his own poison, you will unlock the Reverse Card achievement.
Fire in the Mines
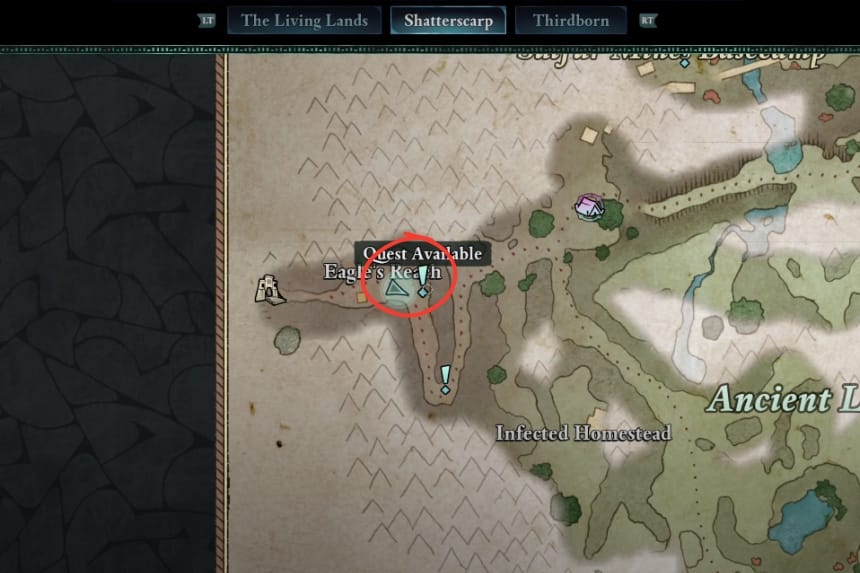
Quest Type: Side Quest
Starting Location: Eagle’s Reach, Shatterscarp
Quest Giver: Aedyran Soldier
Quest Description: An abandoned sulfur mine in the Deadfall Highlands remains closed due to a Dreamthrall spider infestation. Thirdborn and Aedyr seek to reopen it, but the situation is more complicated than it seems. Head to the mine and deal with the threat.
Rewards: 900 Coins upon successful completion. Quest outcome may vary depending on your choices regarding Darle.
Home Sweet Home

Quest Type: Side Quest
Starting Location: Eagle’s Reach, Shatterscarp
Quest Giver: Nameho
Quest Description: Having lost their family to the Dreamscourge, Nameho and Tamamu now only have each other to rely on.
Rewards: Completing Home Sweet Home does not grant any specific rewards. However, you can acquire various common weapons and items, along with XP as you progress through the quest.
The Wasteland Courier
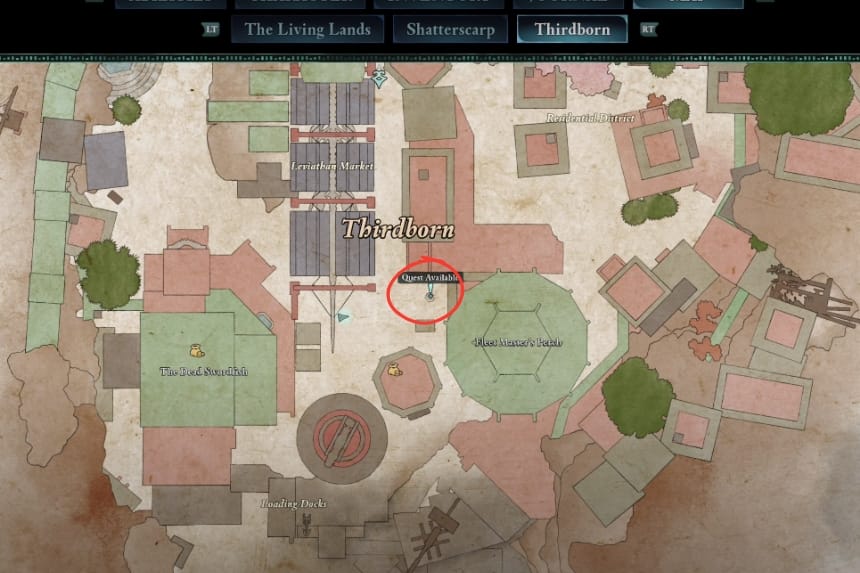
Quest Type: Side Quest
Starting Location: Thirdborn, Shatterscarp
Quest Giver: Daiko
Quest Description: A Thirdborn merchant has lost contact with his supplier and seeks your help in finding him.
Rewards: Once you obtain the Suspicious Package, you must choose who to give it to, which will determine your reward:
- Giving it to Daiko grants you the Poisoner’s Kit, a unique trinket that boosts Poison Damage by +5% on your weapons.
- Handing it over to the Tira Nui rewards you with the Thirdborn Tira Nui Badge, a unique trinket that provides +2 Might.
Both options offer valuable benefits, so your decision should align with your preferred playstyle.
Note: If you pay Aiko 500 Coins after receiving the Suspicious Package, you can loot his body when he collapses, recovering 1,000 Coins—netting a 500 Coin profit.
All Galawain’s Tusks Side Quests’ Locations
Listed below are all the side quests found in the Galawain’s Tusks region:
Totem of Perseverance
Quest Type: Side Quest
Starting Location: Shrine to Galawain, Galawain’s Tusks
Quest Description: You’ve discovered a document with clues leading to fragments of the Huntmaster’s Spoils, a powerful artifact and sacred totem of Galawain. These pieces are scattered throughout Galawain’s Tusks—the more you collect and assemble, the stronger the totem will become.
Rewards: Upon completing Totem of Perseverance and fully restoring The Huntmaster’s Spoils with all the totems, you will receive Quarry to Slaughter, Bloodied Hands, Hunting Howl, In Victory’s Raiment, The Changeling’s Power, and On Victory’s Heels—granting additional ability buffs for your party.
Mapping the Living Lands: Galawain’s Tusks
Quest Type: Side Quest
Starting Location: Galawain’s Tusks
Quest Description: Mapping the Living Lands is a series of side quests in Avowed that require you to locate cartographers in each region.
Rewards: Upon successfully finding the cartographer and returning their notes to Sanza at his emporium in Paradis Hightown, you will be rewarded with the Ring of Many Stars. This unique ring enhances your character’s abilities, though its specific effects are not detailed in the available sources.
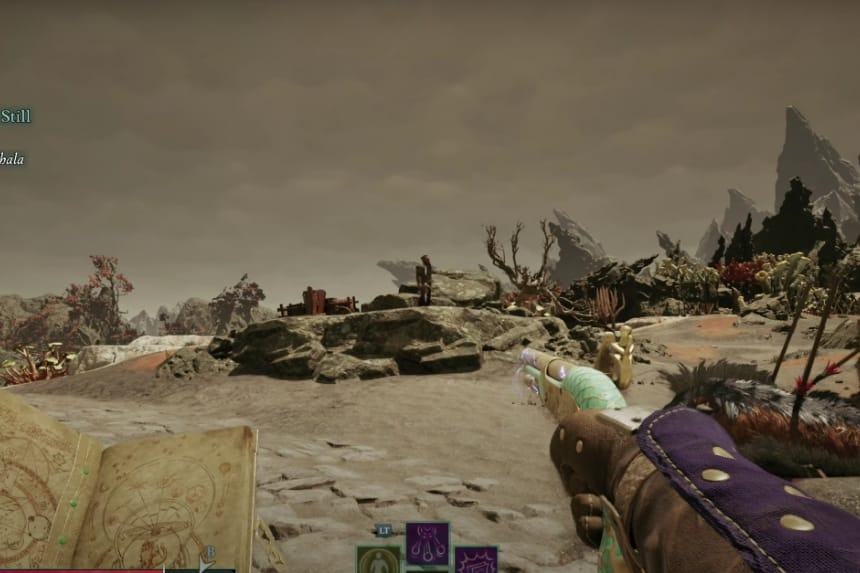
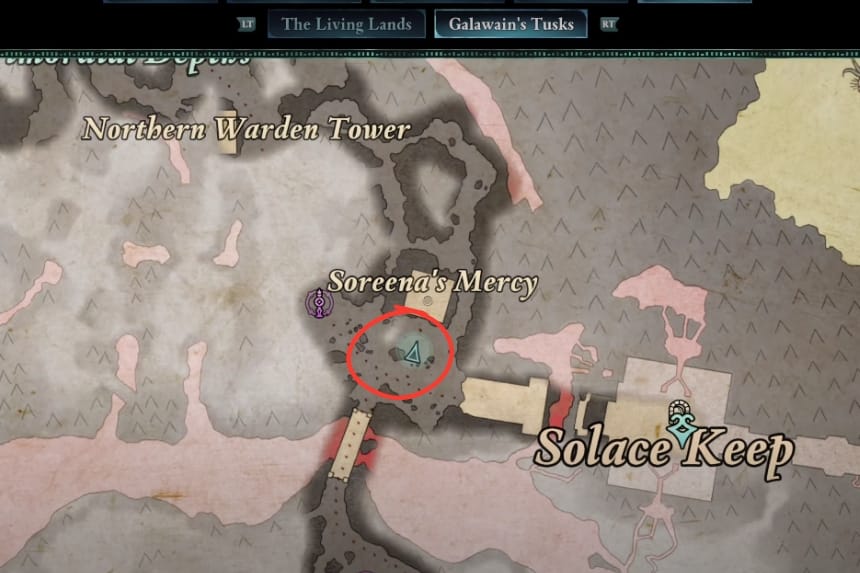
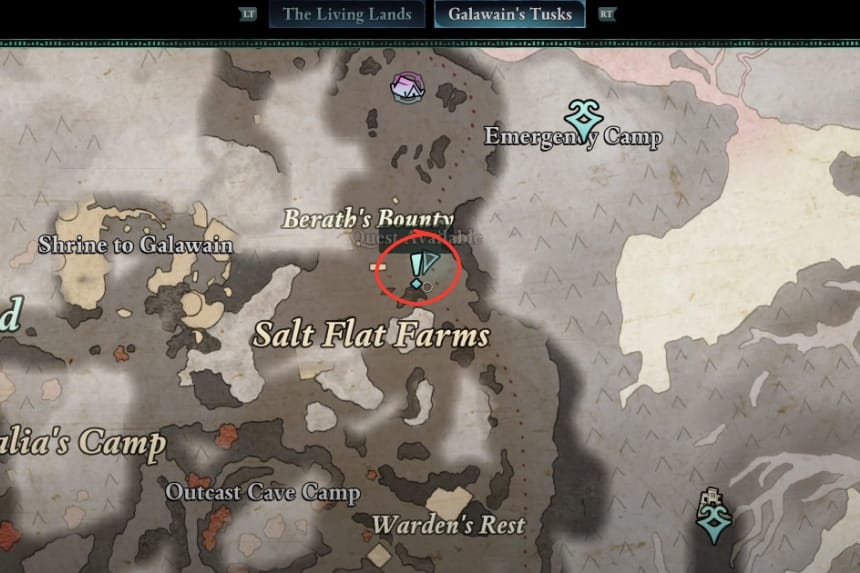
Keep History Alive
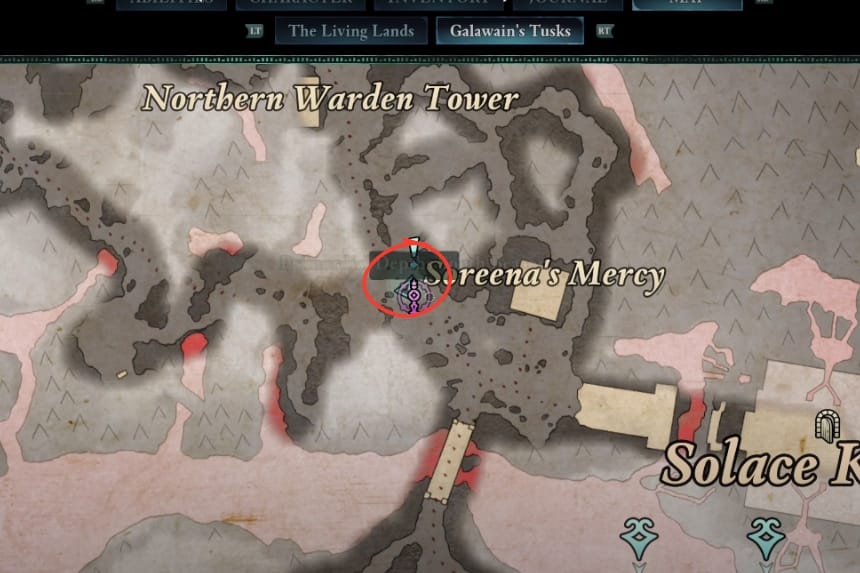
Quest Type: Side Quest
Starting Location: Near Soreena’s Mercy, northwest of Solace Keep, Galawain’s Tusks
Quest Giver: Novice Bojan
Quest Description: Novice Bojan seeks assistance in preserving ancient texts critical to the region’s history. He has lost contact with his fellow archivist, Novice Dolna, who was last seen near an old library in the area. Bojan requests that you locate Dolna and ensure the safety of these invaluable manuscripts.
Rewards: Upon completing this quest you’ll receive the following rewards.
- Experience Points (XP): Completing the quest grants a significant amount of XP, aiding in character progression.
- Historical Insight: Gaining access to the preserved texts may unlock additional lore and background information about Galawain’s Tusks, enriching your understanding of the game’s world.
Note: Your choices during this quest may influence future interactions with the archivists and affect the availability of certain lore-related content.
A Home for Outcasts
Quest Type: Side Quest
Starting Location: Small hill near wooden barrels and a cart, Galawain’s Tusks
Quest Giver: Pargrun Outcast
Quest Description: A Pargrun outcast seeks help in finding a new home after being exiled from their community. They’ve heard of a secluded area within Galawain’s Tusks that might serve as a safe haven but need assistance reaching it.
Rewards: Completing the quest grants a significant amount of XP, aiding in character progression. The outcast will reward you with a special trinket that enhances stealth abilities. Additionally, your reputation with the Pargrun community will improve, potentially unlocking new interactions or quests.
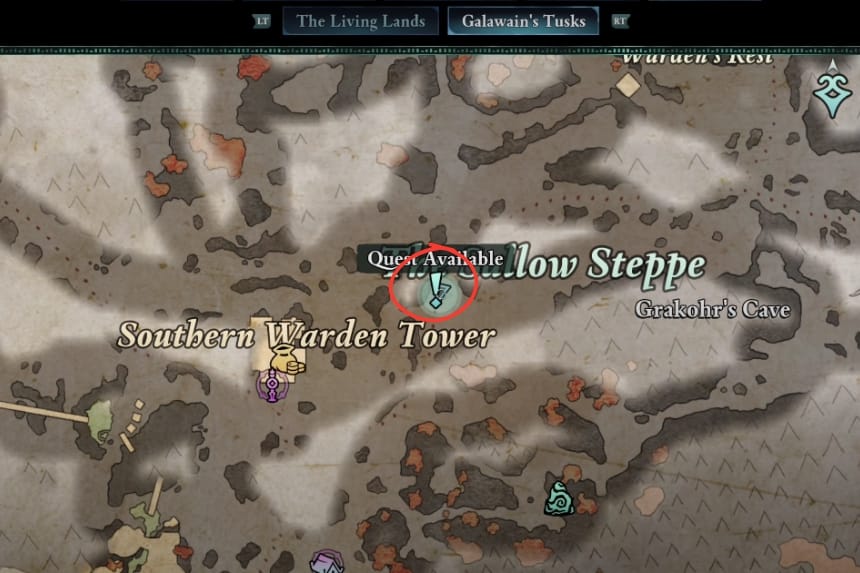
Wardens Warding

Quest Type: Side Quest
Starting Location: Southern Warden Tower, Galawain’s Tusks
Quest Giver: Warden Radut
Quest Description: Warden Radut requests your assistance in resolving a conflict with Amalia, a leader of a faction of outcasts. He believes that a peaceful resolution is possible and seeks your help in negotiating with Amalia.
Rewards: Experience Points (XP)–Completing the quest grants a significant amount of XP, aiding in character progression and Ashfall’s Legacy.
A Cure for Rage
Quest Type: Side Quest
Starting Location: Galawain’s Tusks
Quest Giver: Warden Lerae
Quest Description: Warden Lerae seeks help in locating a missing Aedyran trade caravan that has failed to return from Solace. She is especially concerned about a dwarf named Gilyn, who was part of the caravan.
Rewards: Completing the quest grants a significant amount of experience points, aiding in character progression. Depending on your choice, you will receive either the unique weapon “Limb-Taker” or the amulet “Stoneheart,” which allows you to summon a Ruinous Blight to fight alongside you.
Boundaries of Antiquity
Quest Type: Side Quest
Starting Location: Slumbering Fields, Galawain’s Tusks
Quest Giver: Delemgan
Quest Description: Delemgan, a scholar, requests help in repairing the Godless Aqueducts, ancient structures that once supplied water to the region. She believes that restoring these aqueducts will not only provide water but also uncover valuable artifacts from the past.
Rewards: Completing the quest grants a significant amount of experience points, aiding in character progression. You will also receive Ancient Memory, a unique item that grants a special ability to your character.
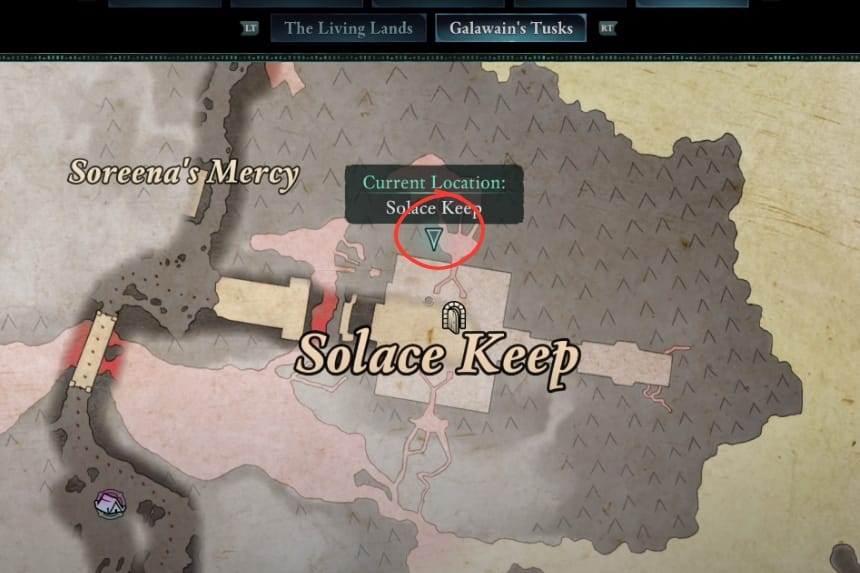
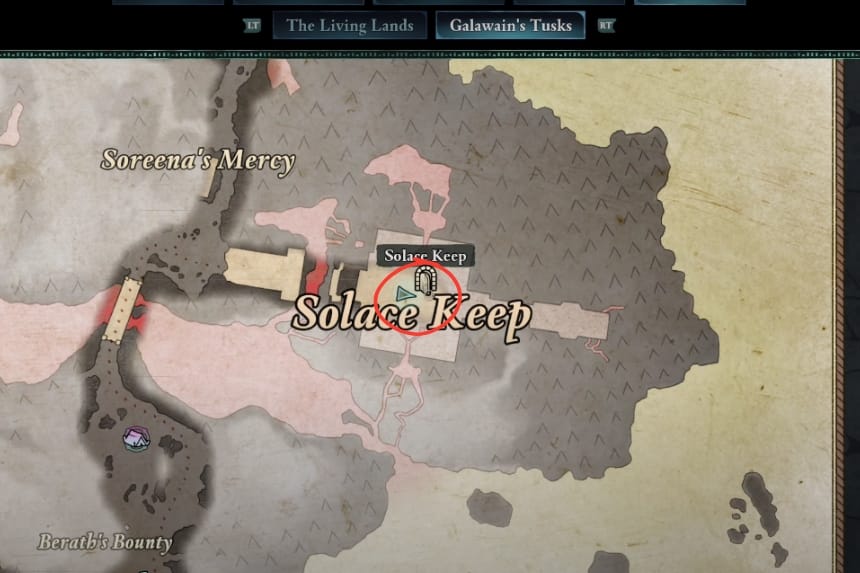
Homecoming
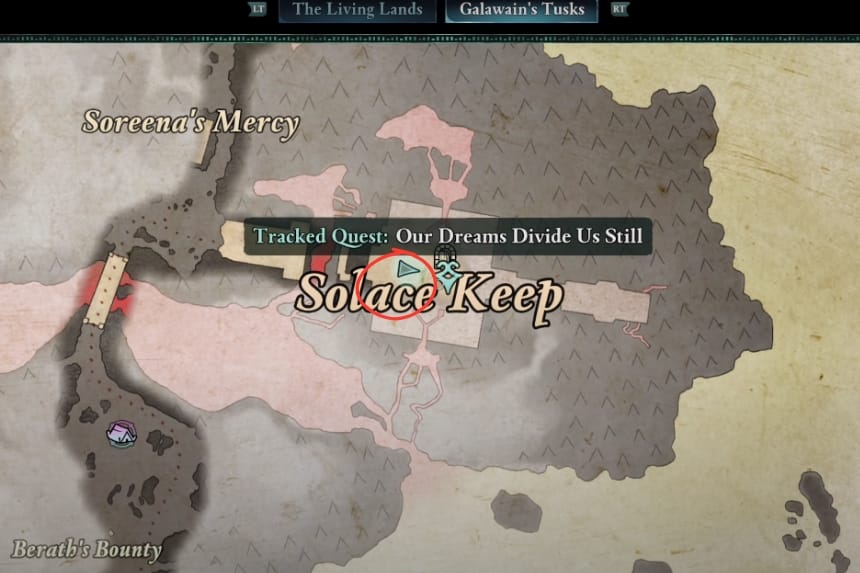
Quest Type: Side Quest
Starting Location: Solace Keep
Quest Giver: Captain Geofri
Quest Description: Captain Geofri requests assistance in locating a missing Aedyran trade caravan that has failed to return from Solace. He is especially concerned about a dwarf named Gilyn, who was part of the caravan.
Rewards: Completing the quest grants a significant amount of experience points (XP), aiding in character progression. If you choose to help Grakohr, you will receive the “Stoneheart” amulet, which allows you to summon a Ruinous Blight to fight alongside you. Alternatively, if you choose to defeat Grakohr, you will receive “Limb-Taker,” a unique weapon.