
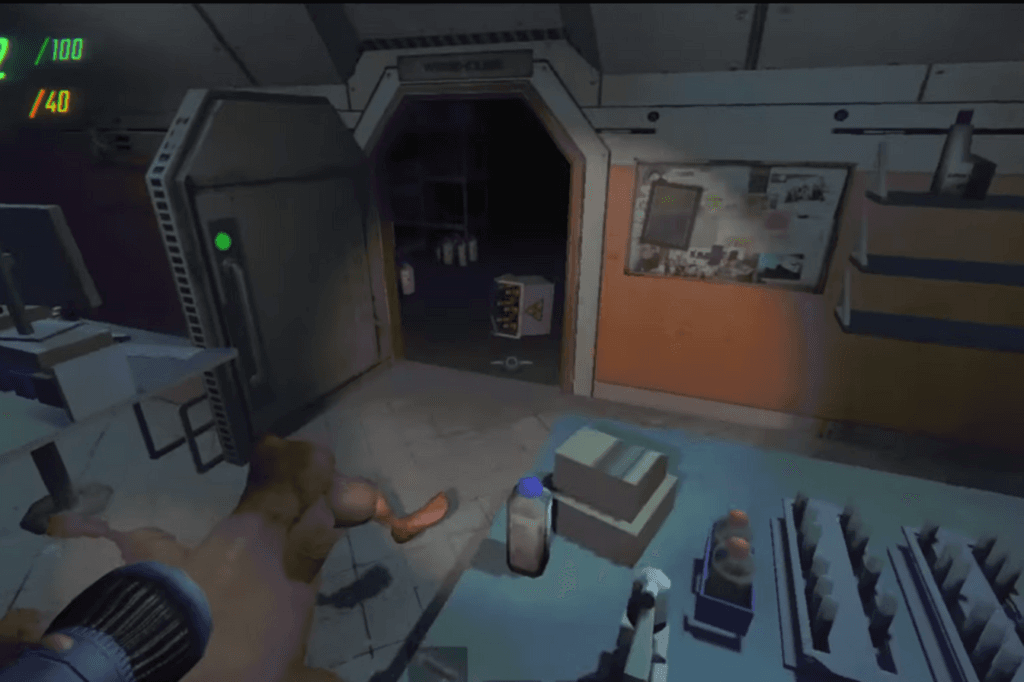
REPO is a survival horror game that drops players into frightening environments containing a varied collection of monster creatures. Learning about these creatures and their specific behaviors is central to surviving. Some monsters pose a weak threat, serving as little more than a nuisance, while others can terminate your run in an instant. This guide explains each monster that the player will meet in REPO, including their attack patterns, vulnerabilities, and the best approach to defeating them. From the seemingly innocuous Apex Predator to the deadly Robe, proficiency in these battles is the only way to emerge with your prized loot intact.
All Monsters and How to Beat Them in REPO
At first, players might assume that every creature in REPO can kill them instantly, much like in Lethal Company. However, most monsters can’t take you out in one hit, which makes surviving a bit more manageable. To stand a real chance, it helps to understand each enemy in REPO. While they all look absolutely terrifying, some are definitely more dangerous than others.
Animal and How to Beat it
These strange creatures, which one is likely to find in such locations as Headman Manor and Swiftbroom Academy, are a striking resemblance to crudely built, humanoid constructs. Their motion is akin to that of a spider, jerky and spasmodic. Though their attacks deal but a moderate four points of damage, their rather slow speed denies them the ability to overwhelm their victims with sheer speed. Nonetheless, confronting more than one of these creatures at a time can very quickly turn into a risky endeavor.
When they see a human, these animals have a frenzied response, causing them to move in a haphazard, uncontrolled manner. This randomness causes the surrounding objects, such as anything inside the C.A.R.T., to be destroyed. Additionally, anyone in the way of these animals will be toppled over, losing anything being held.
In order to survive attacks from these animals, there are a number of strategies one can use. Using cover at hand to disrupt their line of sight is effective. Fighting the Apex Predator, if present, provides a method of killing them outright. Standing on furniture is a safe refuge from their wild attacks. Waiting for them to pass on is wise before trying to move the C.A.R.T. or other valuable resources. Their low intelligence and poor eyesight make them easily eluded, as long as one stays quiet and is not directly in front of them.
Apex Predator and How to Beat it

The Apex Predator, a harmless-looking duck, is a surprisingly potent threat. Common to all locations, the beast first appears in an innocent disguise, waddling and dancing in a mesmerizing way, nearly lulling onlookers into complacency. It trails people relentlessly, apparently inviting attention. But yielding to this allure is deadly.
Any touching of the duck causes a horrific metamorphosis. Its beak opens wide, showing rows of teeth, and it flies after its victim relentlessly for about ten seconds.
The duck uses several methods to attract attention. It follows the crosshair of the player, jumps into the C.A.R.T. when items are being deposited, and otherwise acts in a manner that simulates companionship. The best survival tactic is to ignore the duck entirely. Acting as if it doesn’t exist, even though it keeps trying to get noticed, is important. In addition, any injury done to the duck, irrespective of the causative agent, will instantly provoke its aggressive transformation.
Banger and How to Beat it
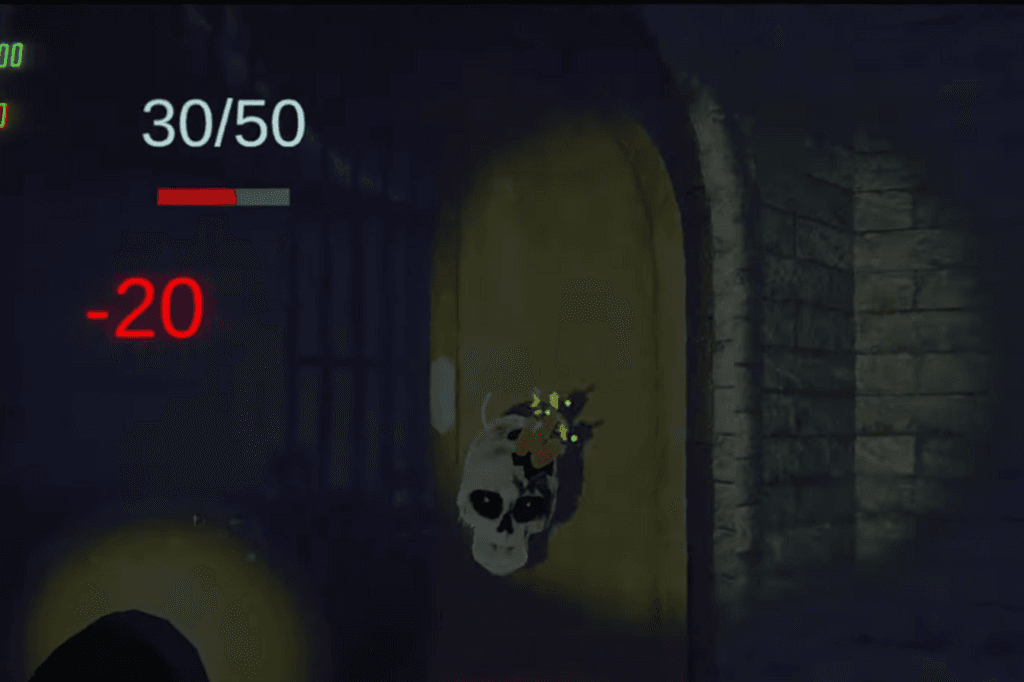
The Banger, a small skull with bony legs extending from its mouth, offers a distinct, but low-level, threat only found primarily at McJannek Station. Its threat comes from the stick of dynamite stuck in its eye socket or resting on top of its head. As the fuse burns at a slow pace, the Banger incessantly stalks its victims, set on blowing up and destroying them in the explosion. The beasts always show up in multiples.
In order to survive battles with Bangers, keeping at a safe distance is essential.
Their jumping ability and small size make them easy to find hidden people or pursue onto raised platforms. Dodging them by running off, scooping them up, and using the mouse wheel to push them away forcibly is effective. Really, playing “hot potato” with the Bangers, throwing them off before they detonate, is imperative. Their comparative slowness also enables escape by simply exiting the room and closing the door behind oneself if one happens to be discovered.
Bowtie and How to Beat it

The Bowtie, an odd, marshmallow creature that is primarily at Swiftbroom Academy, is a medium-level threat. It reflects the Trudge and the Clown in its slowness of movement and perpetually crouched head. When it spots a human, the Bowtie transforms into a terror. Its cloud body contorts into a massive mouth, and its head collapses within itself. It then releases a screaming yell, shoving its target back hard. This attack can be particularly lethal in confined spaces, entrapping and immobilizing victims. The attack of the Bowtie lasts five seconds and inflicts serious damage, up to 55 points. When attacking, the Bowtie will withdraw.
Survival depends on keeping distance, just like tactics used against the Trudge. Crouch-walking and using furniture to remain hidden is the key. Avoiding the Bowtie is quite simple if stealth is used and it is seen before it sees the person. If noticed, escape from the room is necessary immediately in order to limit damage.
Chef and How to Beat it
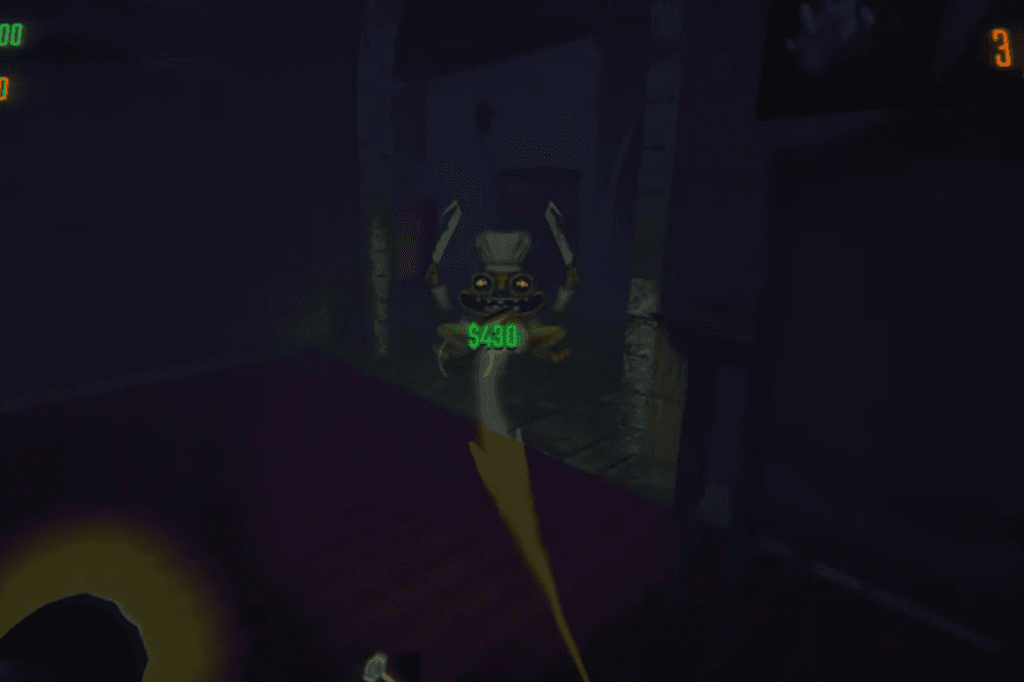
The Chef, a strange green frog with a mustache, wanders Swiftbroom Academy in search of its prey. It seems peaceful at first but then immediately becomes hostile with two bloodied cleavers. Its only attack is rolling straight at its target, dealing damage upon collision.
While one Chef is not very threatening, danger arises when there are several Chefs that approach together, each after their missing ingredient: the player. The perception of the Chef is relatively slow, so it is possible to move freely until it reaches close. When the Chef notices the player, immediate room exit, if there is a door close by, or climbing up onto furniture is the best. The most important tactic is avoiding its straight rolling course. Surprisingly, the Chef is eliminated by a Spewer parasite as well as other Chefs. They can be baited to run into one another as a useful strategy.
Clown and How to Beat it

The Clown is a powerful and extremely dangerous sight, and especially so when it is found in tight spaces like spawn points at Swiftbroom Academy and Headman Manor. Its characteristic spots are big, bulging eyes and a centrally placed mouth on its body. Its main danger is really its red nose at the top of its head, with which it can project a killing laser beam. When it senses a target, the Clown charges this beam, leading to a single, horizontal blast that can destroy anything in its path. It also has close-range attacks, such as a strong stomping attack.
Survival against the Clown requires constant mobility and vigilance. Although its speed is not high, staying inside the extraction point or remaining unaware of its arrival can be deadly. The Clown’s slow beam-charging time offers time to leave the room and step away from the door since the beam cannot pierce walls. Using cover by crouching and staying under furniture when in the same room as the Clown is also able to hide oneself from its view.
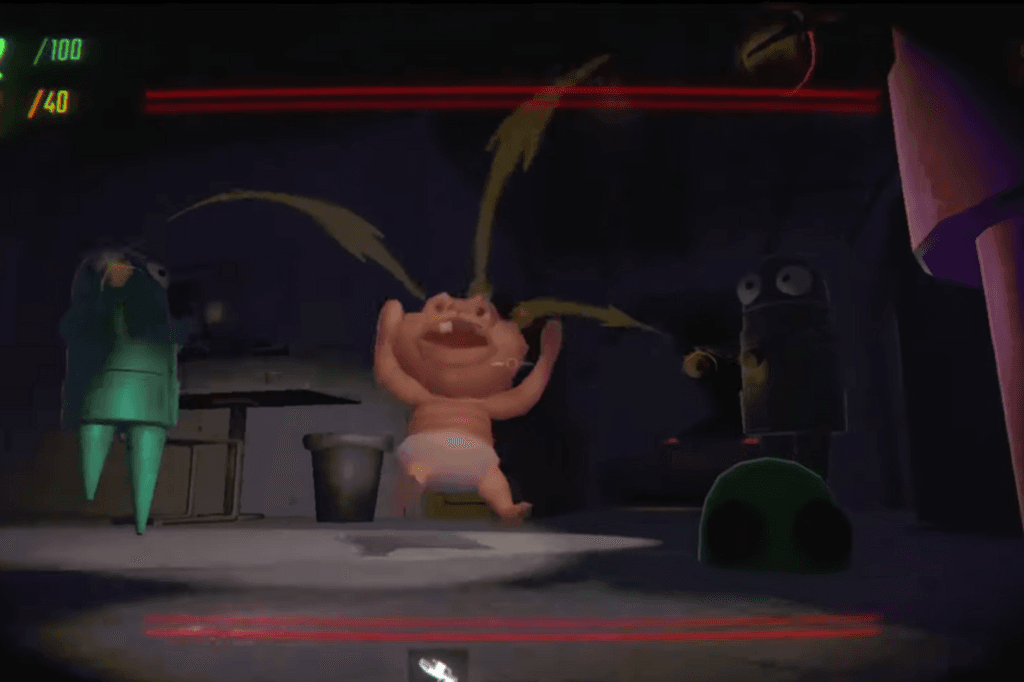
Gnome and How to Beat it
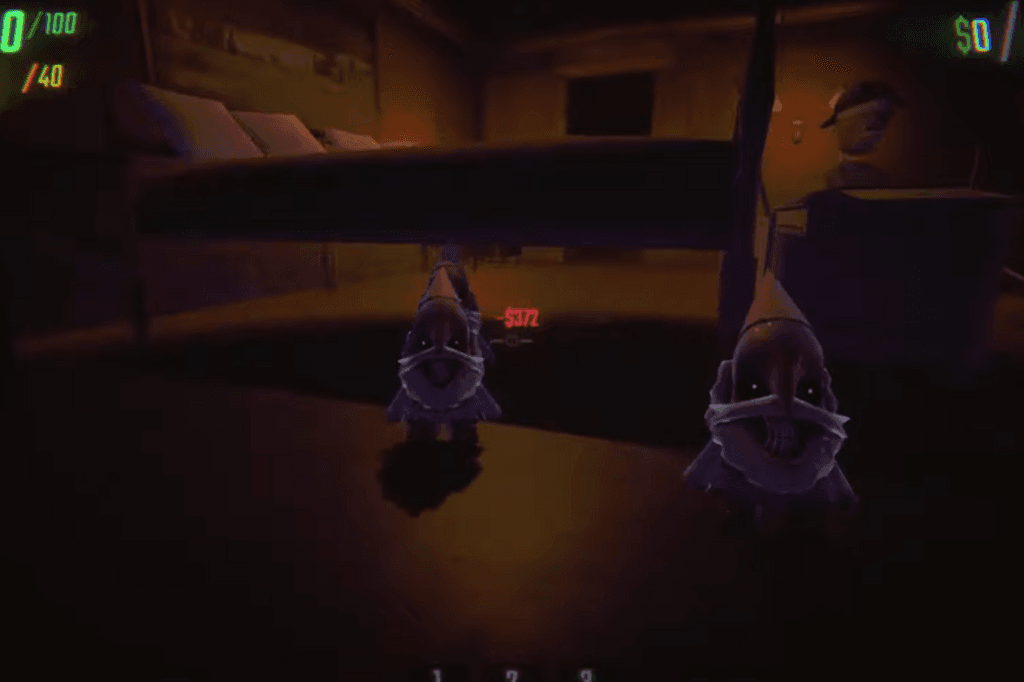
The Gnome is a small, incessant animal that resides mainly at Headman Manor and McJannek Station, which shows similar behavior to the Apex Predator in incessantly pursuing people. It is a great inconvenience, attacking as it is getting close. The difficulty is in keeping the Gnome attack in check while at the same time facing larger and more dangerous threats. Its attacks, though equally causing little damage, are relentless and can leave people exposed. Gnomes tend to be seen in large numbers and have the power to grab and throw fireable items. They also actively attempt to destroy any valuable items being carried.
Healthy survival methods involve picking up and throwing the Gnomes, which instantly kills them. Even faced with multiple Gnomes, picking up one Gnome and throwing it over another from a height will instantly kill both of them. A Gnome may also be employed as an edged melee weapon, bashing it into other Gnomes to instantly kill both of them.
Headman and How to Beat it
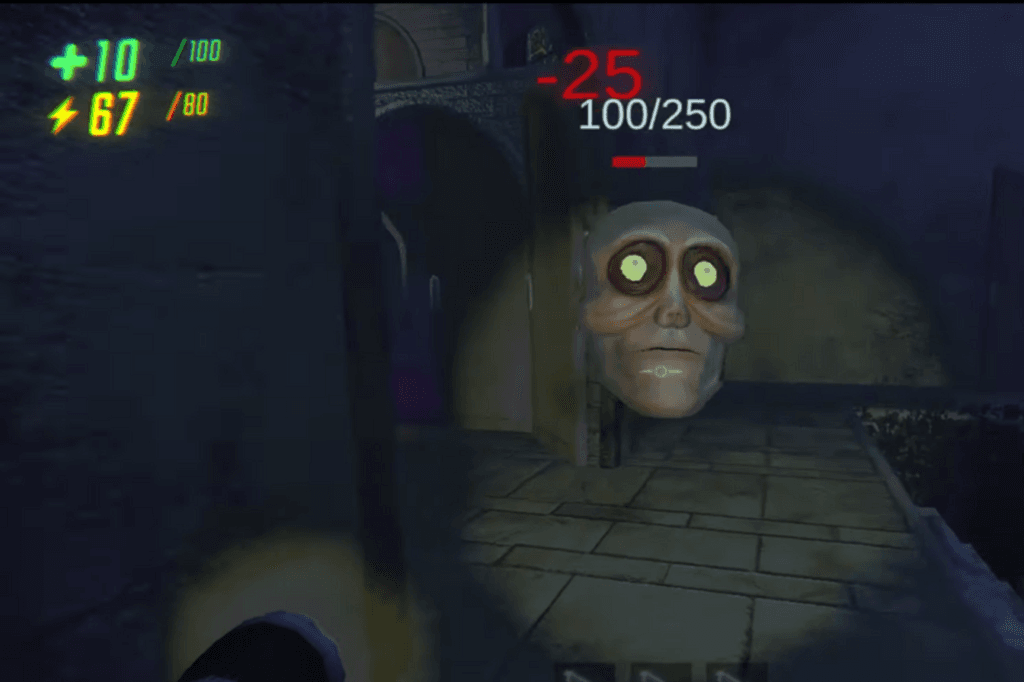
Headman, a formidable floating giant head, is a serious threat, particularly around Headman Manor and McJannek Station. Because it relentlessly chases its target, it is one of the most difficult creatures to evade. The attack of the Headman is preceded by its spreading eyes and open mouth, out of which it charges to bite its victim, inflicting crushing 50 points of damage on each bite.
Survival against the Headman involves tactical movement and use of the environment. Remaining behind the Headman as much as possible is important. Utilizing furniture as cover to disrupt line of sight is also useful. When seen, retreat into a corridor with an alcove or side room, quickly closing the door. Although the Headman can open doors, it can become disoriented with its target if they move rapidly enough. Most importantly, never try to run away in a direct line since this gives the Headman a better chance to intercept.
Hidden and How to Beat it
The Hidden, a supernatural being that exists mostly on Headman Manor and Swiftbroom Academy, is a low-level, but extremely disturbing, threat. It glides freely across the terrain, attempting to take over unsuspecting players. It can be stagnant, clearly breathing heavily, with only its breath having a visual indication of its existence, or it can chase players in person. Its purpose is possession, which causes the victim to shrink, be suspended in mid-air, and produce audible wheezing and laughter. Although it doesn’t cause immediate harm, the Hidden’s aim is to move its victims to inconvenient or perilous places, like far-away extraction points or the dens of more dangerous monsters.
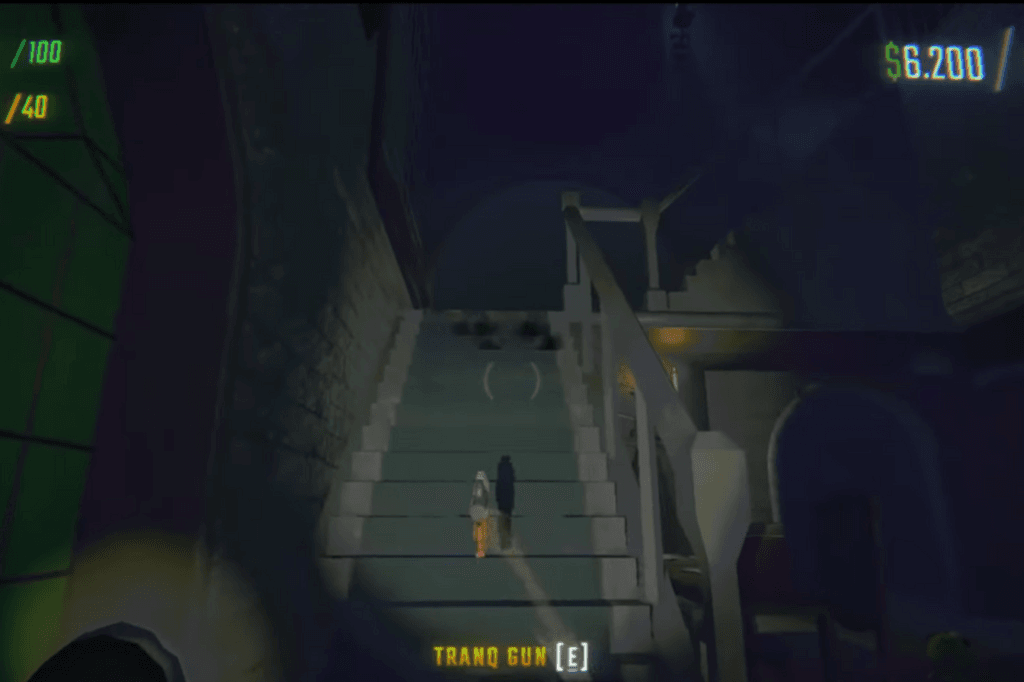
Survival is dependent on sharp eyes and awareness. Hearing its unusual breathing is very important, as is seeing its visible breath and tracks, which are always discernible irrespective of its movement. Steer clear of its route and stay keenly alert all the time. Even though the Hidden is physically present, it is usually not visible. Still, it may be stunned and killed with a Tranq Gun, Stun Mine/Grenade, or close-range attacks. Monitoring its tracks and respiration yields accurate location data to enable countermeasures.
Huntsman and How to Beat it
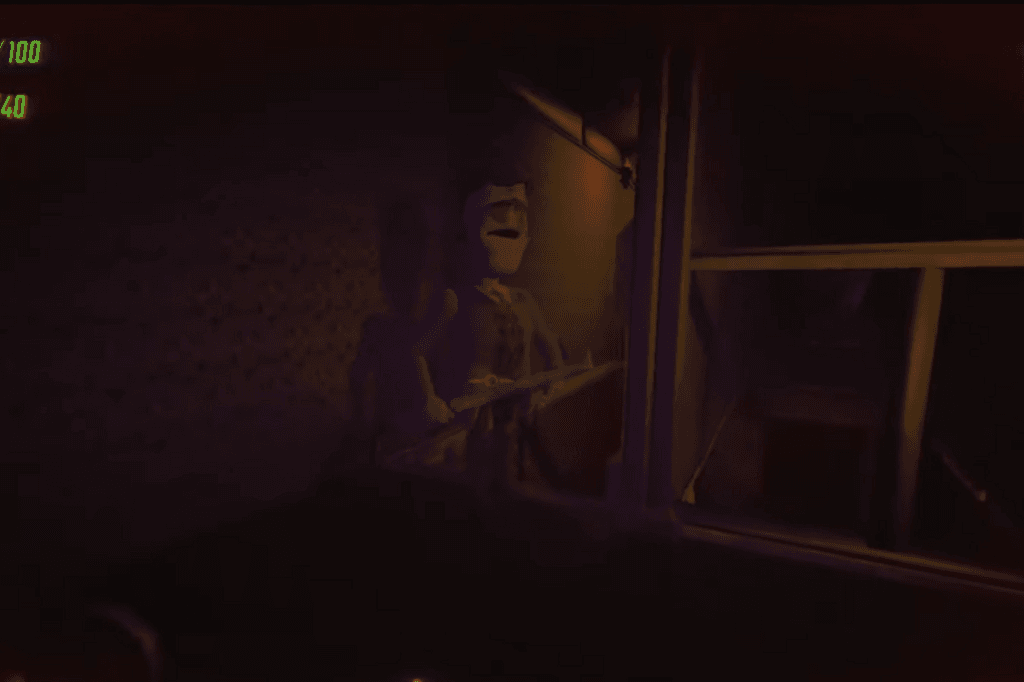
The Huntsman, shotgun-carrying foe who bears a resemblance to the Nutcracker from Lethal Company, roams Swiftbroom Academy and McJannek Station and is a medium-level threat. He uses his shotgun as a walking stick and follows a particular patrol path, making him more likely to encounter when carrying valuables to the extraction point. He can also patrol the extraction point, restricting escape.
The Huntsman is blind, so one can come near him unnoticed by crouch-walking. His sense of hearing, on the other hand, is extremely acute, and noise becomes a decisive element. Normal conversation, normal walking, or running will make him aware of someone’s presence. His shotgun carries lethal force, so escape must be done immediately if he spots movement. Staying at a safe distance and not following straight-line patterns of running reduces the chance of getting hit by the spread of the shotgun. Health upgrades are strongly advised to survive likely shotgun shots.
Mentalist and How to Beat it
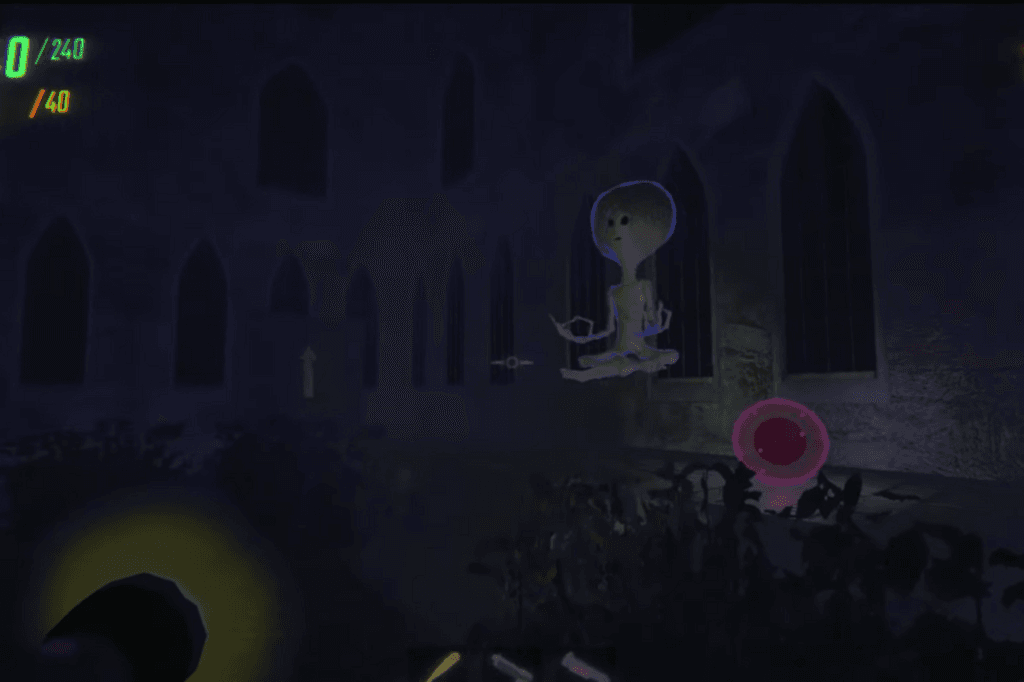
The Mentalist, a floating alien with the ability to control gravity, is of medium threat, mostly at Headman Manor and Swiftbroom Academy. The psychic alien raises both people and objects around it up into the air and smashes them downward with great force, breaking fragile objects and halving or negating their worth. Every slam deals a serious 50 points of damage and could cut in half a person’s health. If they survive, the player will need to find and recover undamaged valuables for transport to the extraction site. Although there is a possibility that some items will survive the crash, they will have to be recovered and re-secured.
To enhance survival prospects against the Mentalist, buying health upgrades is strongly advised. Teamplay is a major advantage: a team member who is not under the Mentalist’s control can disrupt its attack by hitting it with a weapon, releasing their partner. The Mentalist can also be stunned with the Tranq Gun, creating a temporary opportunity for escape or counterattack.
Peeper and How to Beat it
Peeper, a minimal-threat creature occurring at Headman Manor and Swiftbroom Academy, deals less than a couple of points of damage, reducing two health points every few seconds, but not unless it can see its victim. It is capable of luring people close to it so that they would stare at it. Although little damage is being done, it can be considerable distraction, something that could drive people into a more threatening entity. The Peeper will eventually leave, but will return to the same position if the player stays in the level for too long. It also appears close to the extraction site, which could be a possible hindrance during the late part of the round. The Peeper is able to focus on just one player at a time.
Survival tactics depend on evading its stare. Leaving the room as soon as one sees the Peeper works best. Anything and everything to obstruct its vision works. It may try and pull the player with its look, but should an exit remain close by, one can break free. Peeper’s glance only reaches to the room of its spawn. If its eyelids are seen before it sees the player, avoiding and crouch-walking by it will allow one to escape detection, but this is only consistent for short periods in a room. If a player has been seen by the Peeper, a team member can “tumble launch” them, lifting them and carrying them off to another room, thus destroying the Peeper’s line of sight.
Reaper and How to Beat it
The Reaper is a powerful, dual-bladed scarecrow encountered only at McJannek Station and poses a high-level threat. It does a sort of waddle through the terrain and, as with most other R.E.P.O. mobs, has the capability to open doors, thus being nearly invisible because it is stealthy and quiet. It slowly approaches the target until it senses something, then it waves its blades about and swings them harshly, relentlessly chasing down its prey.
Survival is all about stealth and evasion. Crawling under pieces of furniture and staying crouched, with staying to the side when a Reaper is near, is vital. Its active phase is short, just like the Apex Predator. The Reaper has a poor record with sustained chases, mainly punishing unaware people it catches off guard. Closing doors on oneself when escaping can successfully re-initiate the Reaper’s chase, leaving it lost as to where the target is. Stamina and speed are essential to survival, as trying to flee down a long corridor without proper preparation will surely be fatal.
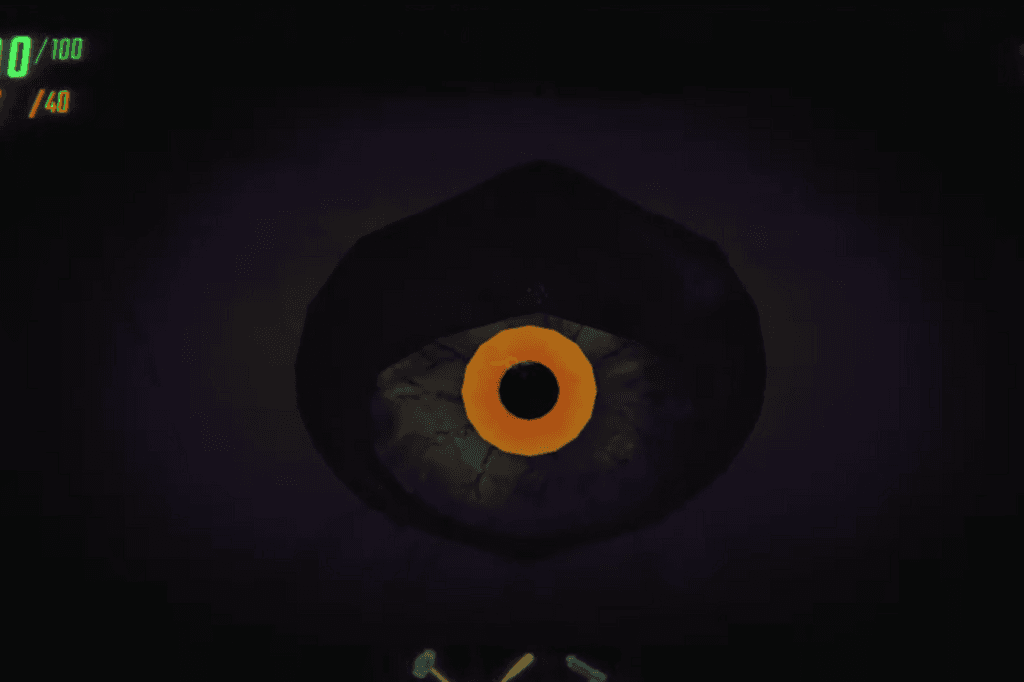
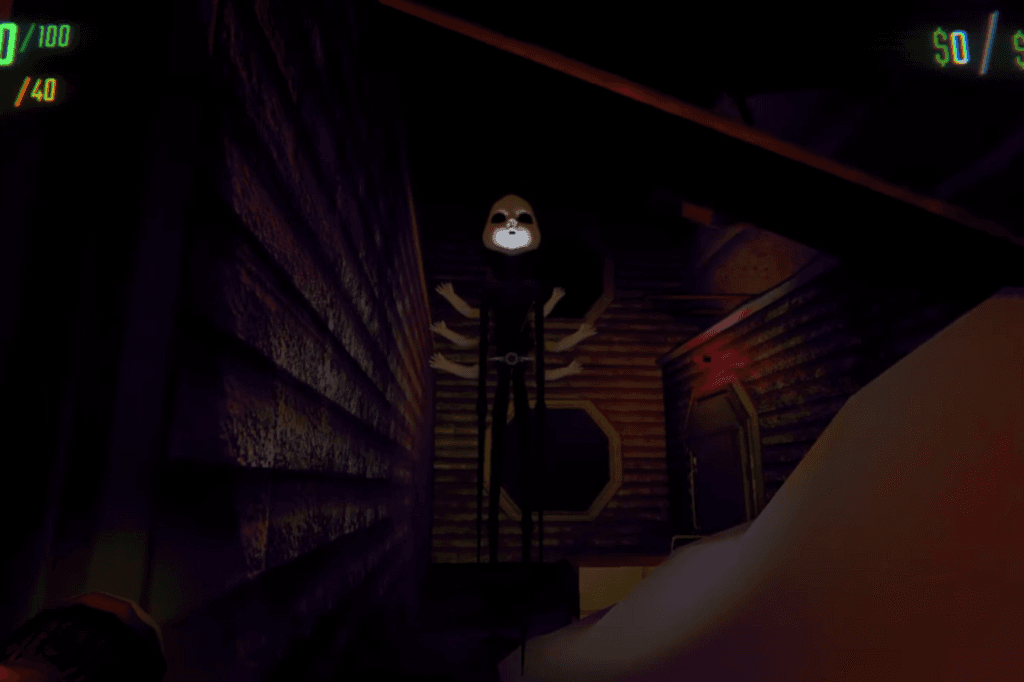
Robe and How to Beat it
The Robe, a fearsome being that can be found mainly at Headman Manor and McJannek Station, is a high-level threat. It is not a major threat if seen from behind, but a frontal view is always lethal. It looks like No-Face from Spirited Away with its black cloak, white skull-shaped head, and skeleton-like hands. When it sees a target, it charges with reckless abandon, able to kill its victim instantly if it is in an open area.
Survival requires greater awareness and purposeful avoidance. The Robe makes an occasional crying baby noise, which is an aural signal of its presence.
Without this, it is always perfectly silent, so visual caution becomes necessary. The Robe attacks only when the victim looks directly at it. As such, survival hinges on not staring at its face under any circumstances. While staying behind it is the safest approach, if confronted directly, the player must avert their gaze. It is possible to maneuver around the Robe while maintaining visual contact, provided its face is avoided. However, physical contact will also provoke an attack. Extreme caution is advised when encountering this deadly creature.
Rugrat and How to Beat it
The Rugrat, a troublesome creature mostly encountered at McJannek Station and Headman Manor, is a medium-level threat. This creature enjoys running around and throwing things at its victims. Though these projectiles cause little direct damage to health, they are extremely destructive to prized items. Its actions are similar to those of the Gnomes, but with an emphasis on interfering and destroying the player’s gathered loot. If not stopped, the Rugrat will methodically destroy all the valuables headed for the extraction point. It attacks the nearest items, shooting them with enough force to give them a knockback effect upon hitting the ground. When it senses that it has caused enough damage to impede the progress of the player, it will retreat.
Good survival tactics include preemptive measures. If the Rugrat is seen before it has seen the player, get out of the C.A.R.T. immediately and kill the creature as fast as possible. Any weapon will work, but a gun will kill it with one shot.
Shadow Child and How to Beat it
The Shadow Child, a tall, gaunt humanoid figure, is a low-level threat only at McJannek Station and Swiftbroom Academy. It tends to stay in one place, having the power of teleportation only when not seen directly. This teleportation in itself is not a direct threat. The Shadow Child’s threat lies in sustained visual contact, as prolonged exposure will eventually result in death. It can also temporarily blind by darkening the surroundings.
Survival against the Shadow Child is dependent on not making direct eye contact. Like the Enderman in Minecraft, it is necessary to keep one’s eyes away. Harkening to its characteristic laughter and noticing sudden dimming in the room are most important signs of detection. Walking by it backwards or getting a glance occasionally at its feet, but never on its upper body, are successful tactics. Although fleeting looks do not directly lead to death, continued exposure must be avoided. In the event of doubt, one should just ignore the existence of the Shadow Child.
Spewer and How to Beat it
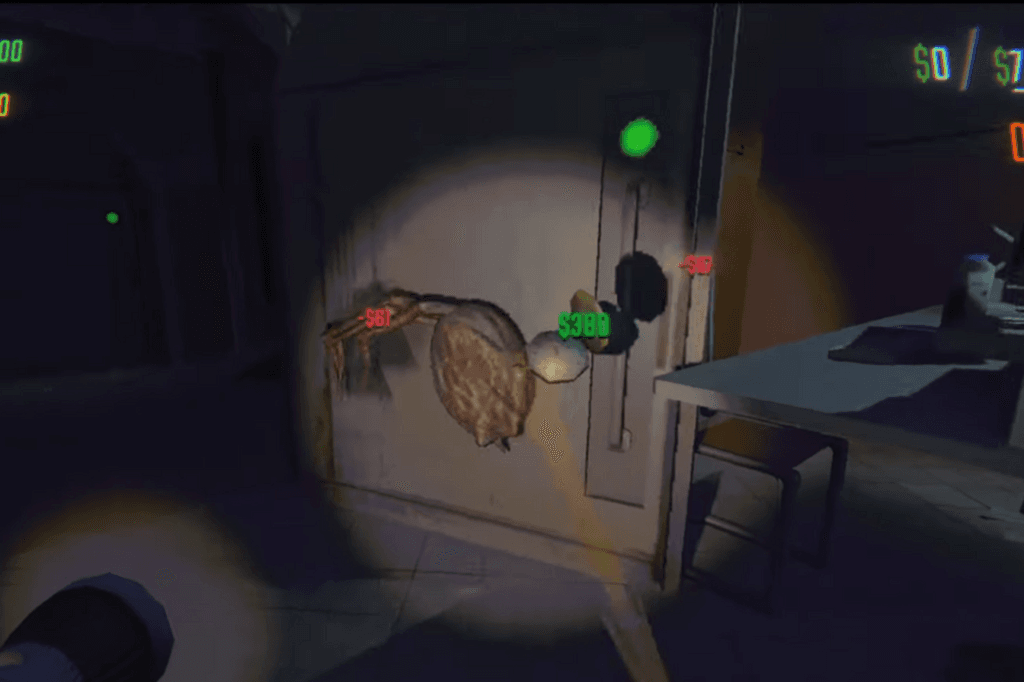
The Spewer, a tadpole-like being located mainly in Swiftbroom Academy and Headman Manor, is a low-level, though potentially problematic, threat. It flits through the terrain, able to spit acid or grab onto its victim. Its two main functions are to spit acid and attach itself to someone’s neck. If it attaches, its tail wraps around the neck, and it spits bile continuously. Although this move does not harm the possessed player directly, it poses a serious threat to surrounding teammates.
Survival tactics center on evading its acid projectiles. Distance is essential. The Spewer flies at a relatively slow speed and has a poor vision, which makes it simple to escape its detection by crouching or hiding behind furniture. In case it clings to a player, colleagues should avoid trying to pull it off since doing so will subject them to the bile of the Spewer. The creature will detach naturally, and the player possessed will not take any damage. Surprisingly, the Spewer can be utilized as a weapon against other creatures when attached to a player’s face.
Trudge and How to Beat it
The Trudge, with all its massive bulk, is actually a fairly reasonable, high-threat challenge inasmuch as it is encountered most notably at Swiftbroom Academy and McJannek Station. It has a very slow gait and patiently waits for the chance to deliver a hammer blow from its crouched neck. The Trudge can deliver a lethal strike with one swing of its hammer-like club, as the weapon has a magnetic pull effect which draws victims into its deadly trajectory, having an estimated two to three meters of effective range.
Survival from the Trudge depends on avoidance and situational awareness. Evading is simple: just move into another room and proceed with exploration, being mindful of the last known location of the Trudge. It is recommended to use the in-game map to avoid getting lost. Crouch-walking by approaching the Trudge from its blind side, where its canted neck is not directed, permits safe travel. Furniture can be used to move around it, and crouching is important in order not to be seen. Vigilance is needed, though, since the Trudge has an eye on its belly that can see hidden people. Repositioning is needed to evade its sight.
Upscream and How to Beat it
The Upscream, a perturbing being located mainly at McJannek Station, is a threat of medium severity because of its insatiable chasing. Its only attack is to send its victim flying into the air and thrust them against the walls, dealing 10 damage points per hit. The creatures are fast and quite merciless for those with low stamina.
Survival against the Upscream involves tactical movement and, if necessary, killing. Though hard to avoid completely, they can be temporarily knocked out with a Tranq Gun. They come in pairs and have excellent eyesight, so staying stealthy is important. Using cover and staying crouched are effective means of avoiding being seen. Covering behind furniture provides little protection, as they do not drop their line of sight. Scaling up to high areas is no less ineffective, as they can jump up and latch on to their prey. Thus, taking out the Upscream tends to be the best option.
