
Dying Light: The Beast has a lot of hidden items you can collect while exploring the world. These collectibles include newspapers, beaver statues, recipes, secret recordings, murals, and more. Some of them help tell the story of the game, while others are just for fun or trophies. In this guide, you will find all the locations for every collectible in the game, explained in simple steps. This guide will help you find everything you need to complete your collection easily.
All Castor Woods Newspapers
In Dying light: The Beast, you will encounter many newspapers that tell the past stories of the area. These newspapers are only for collectable purposes. Below, we have listed all the newspapers that are found in the game.
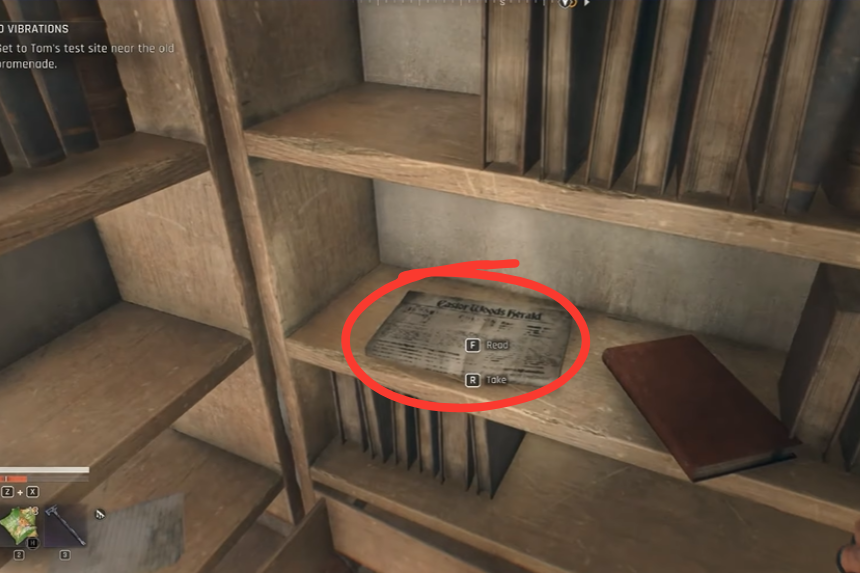
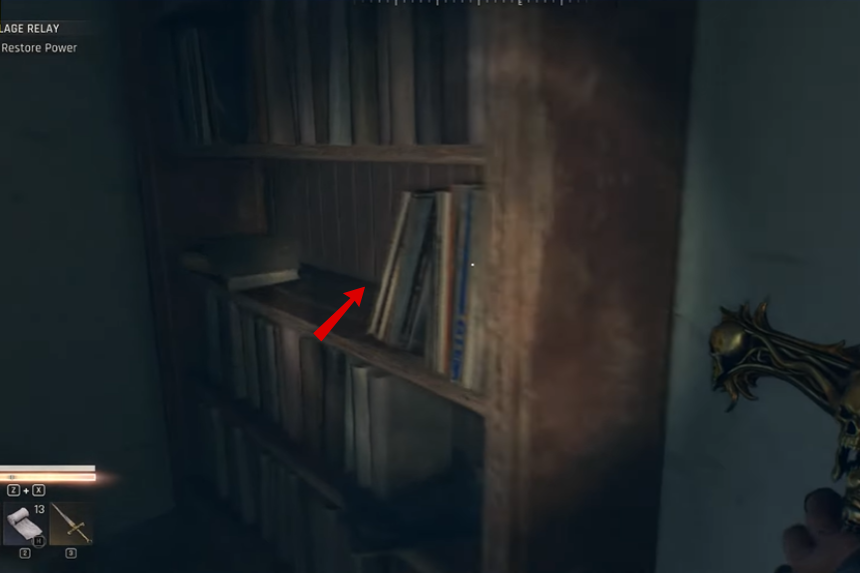
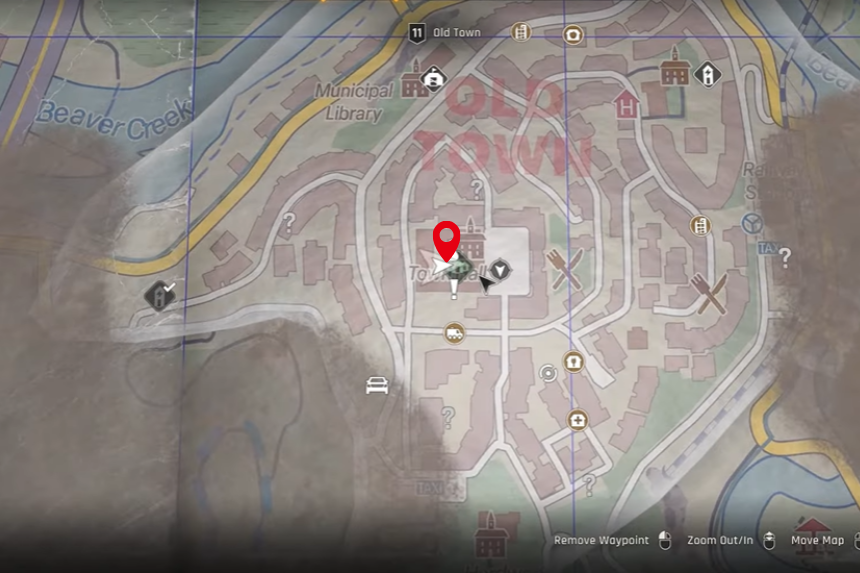
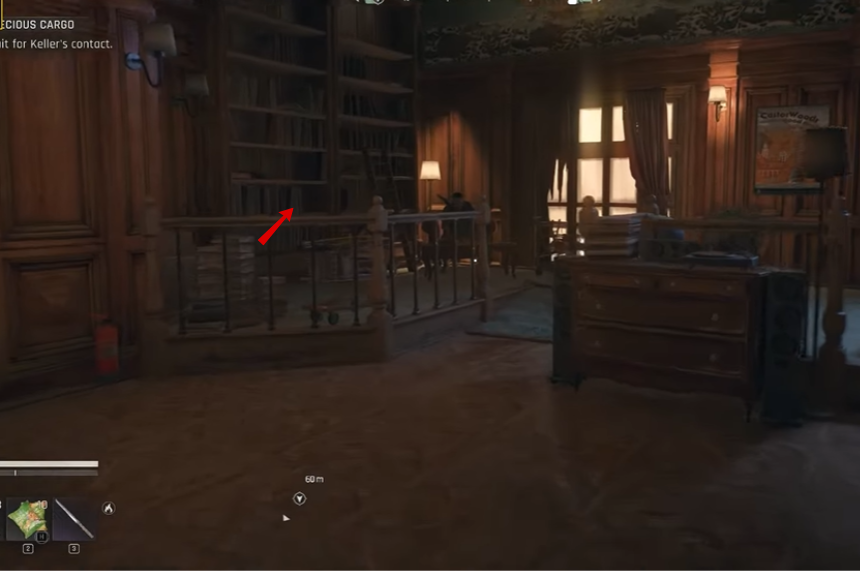
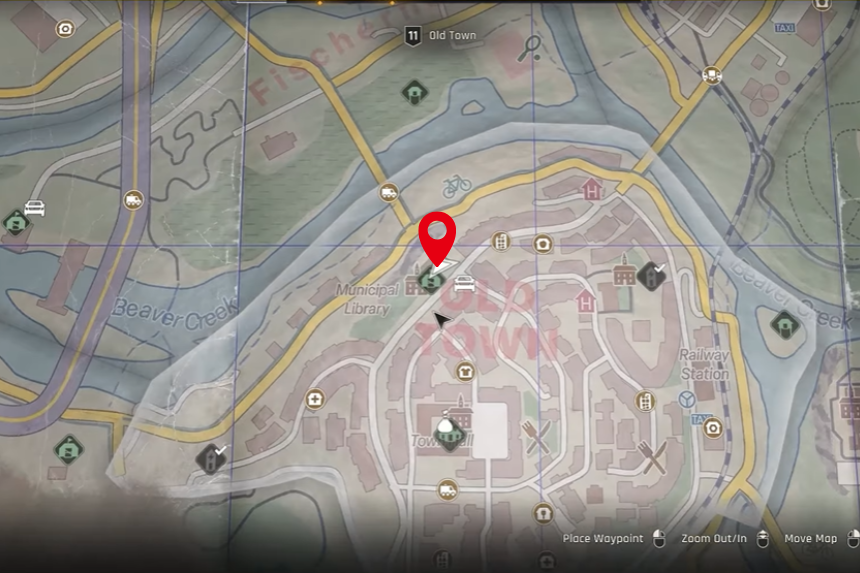
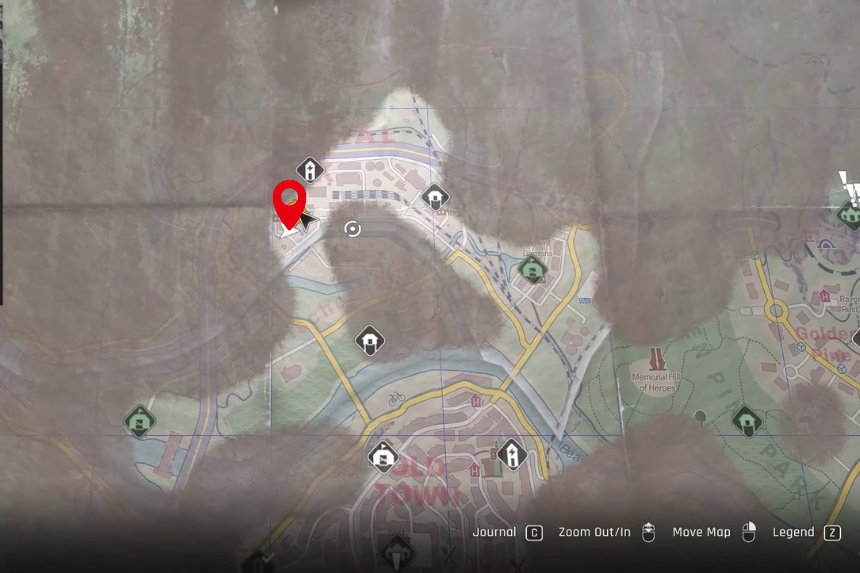
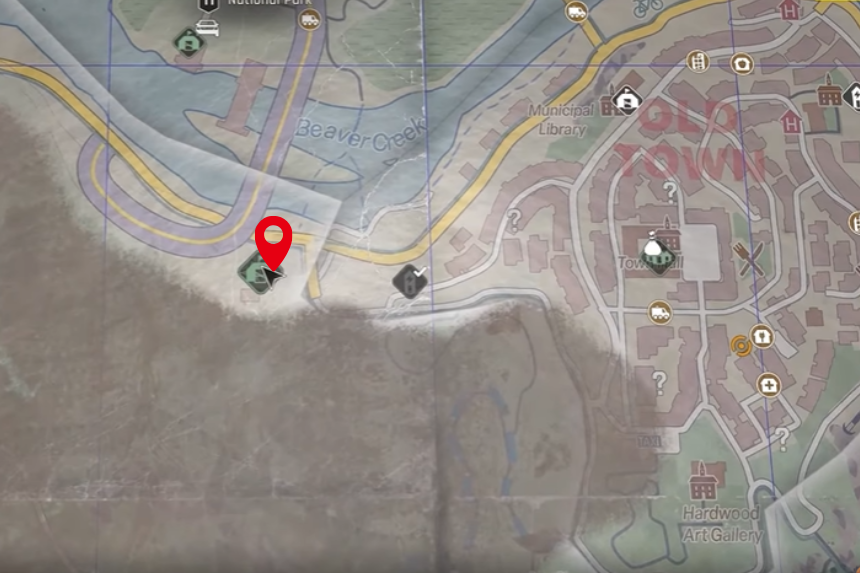
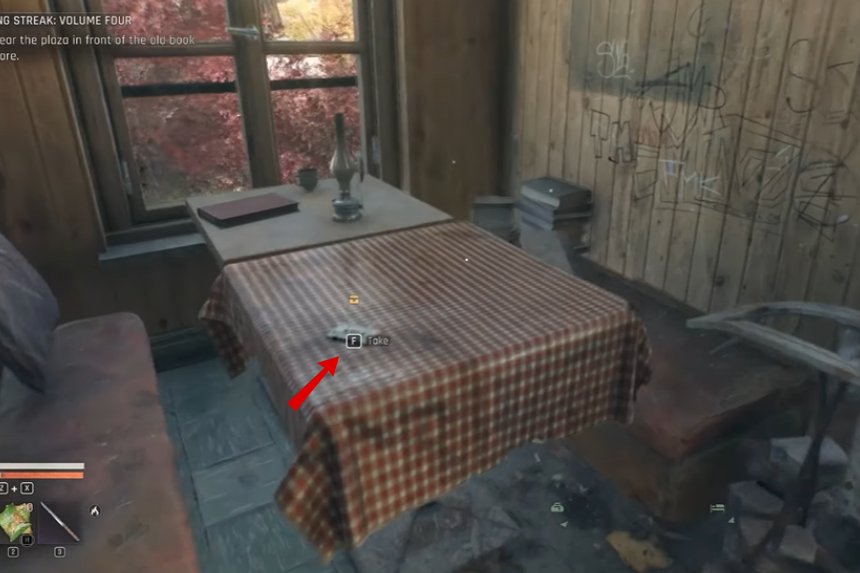
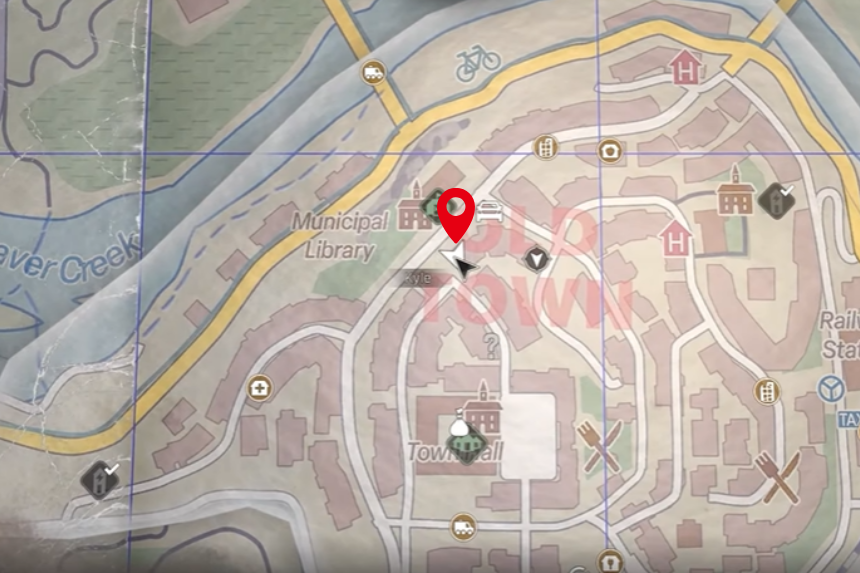
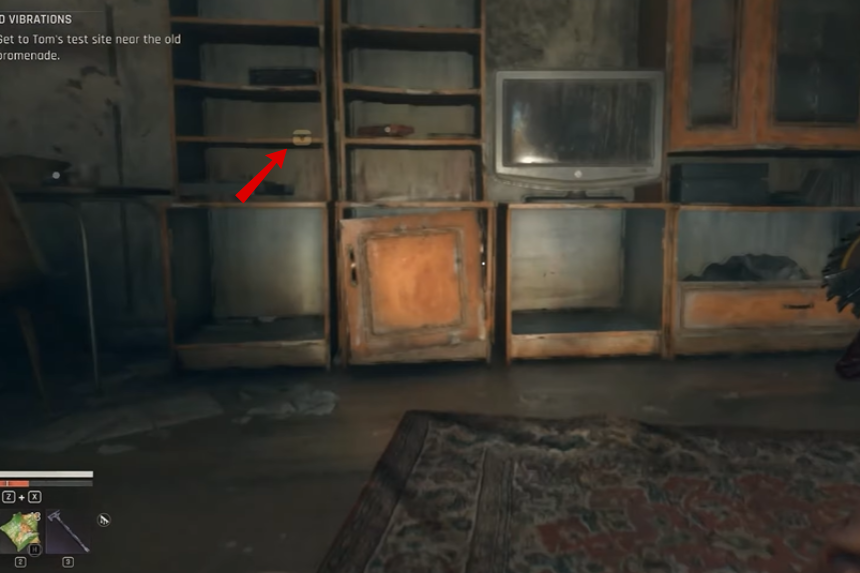
Newspaper 1693
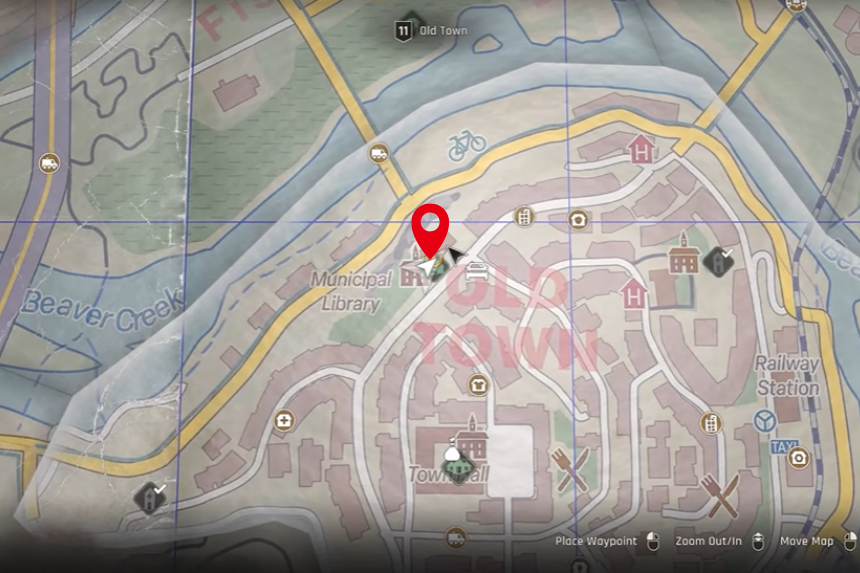
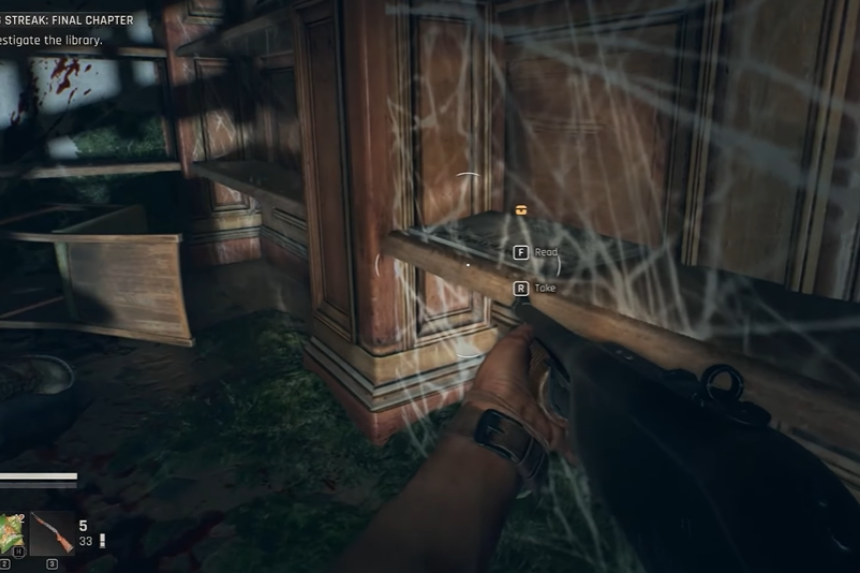
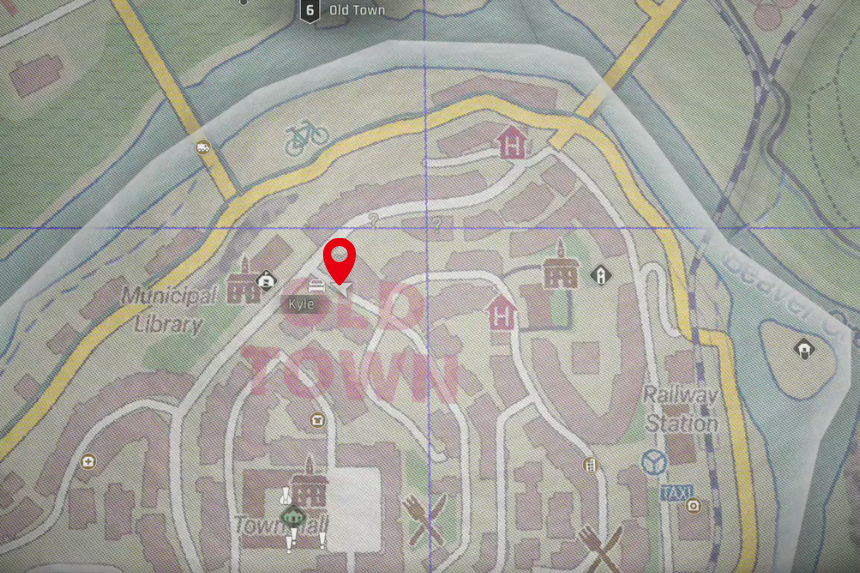
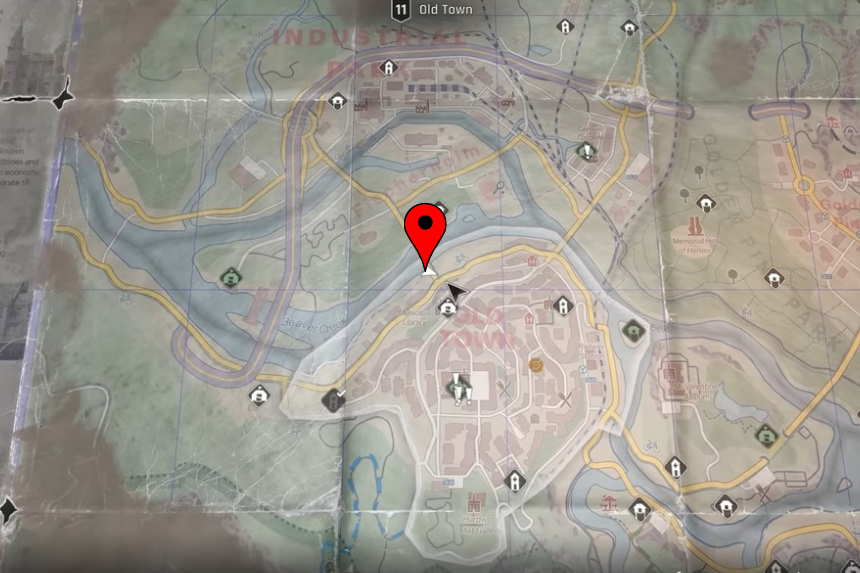
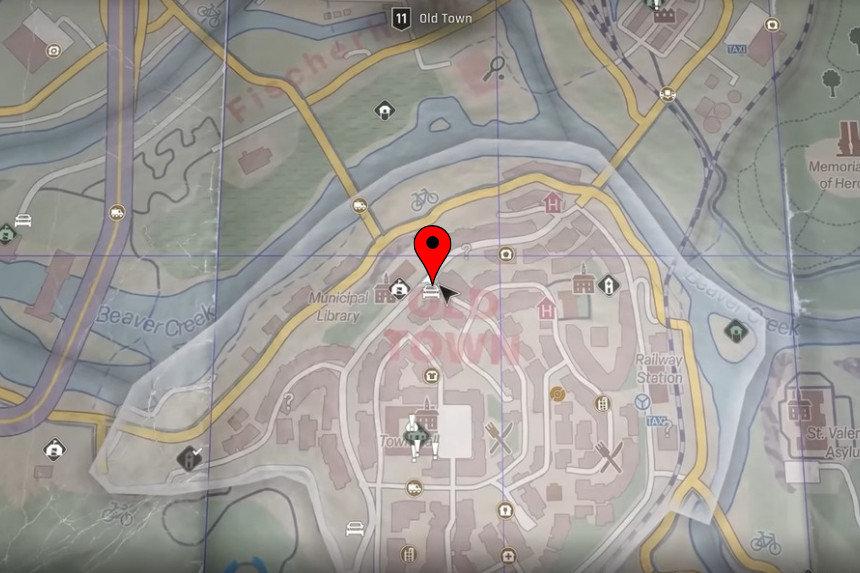
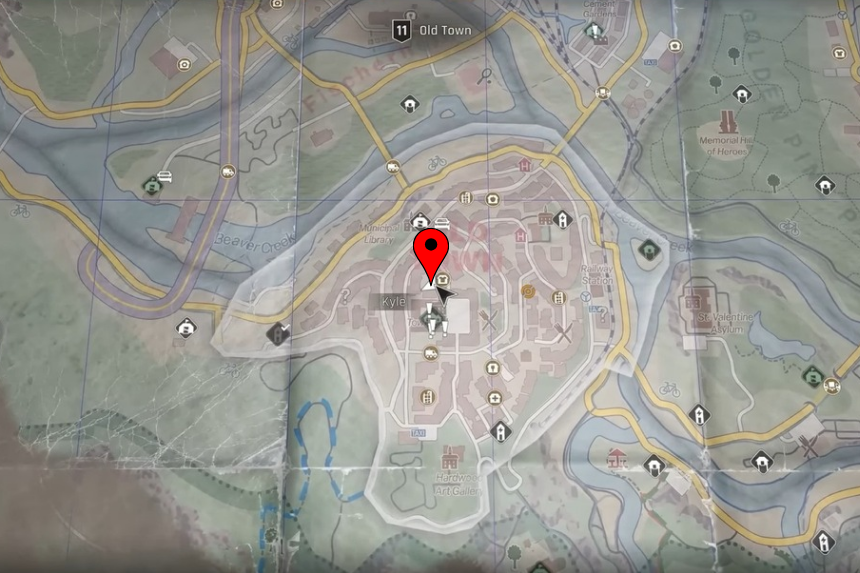
Go inside the Municipal Library, in the old town area. During the Killing Streak; Final Chapter quest, you will find the newspaper on a shelf.
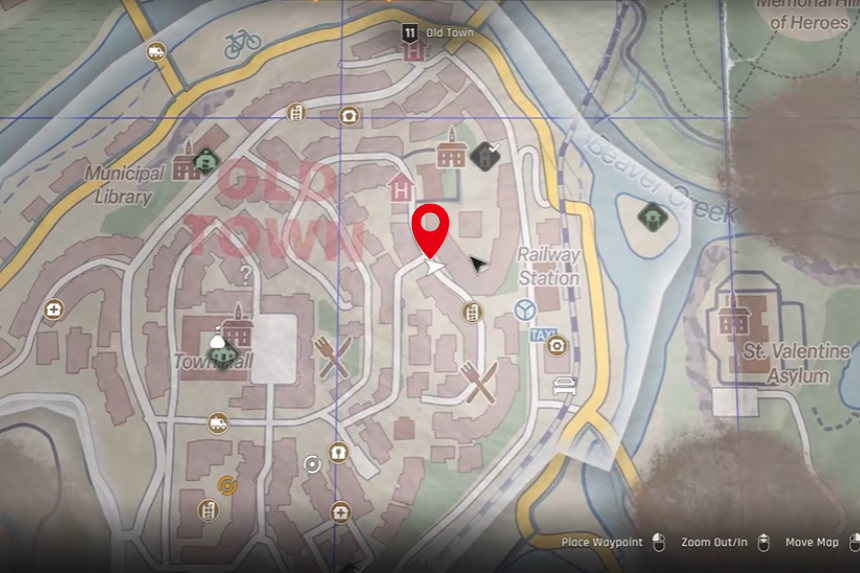
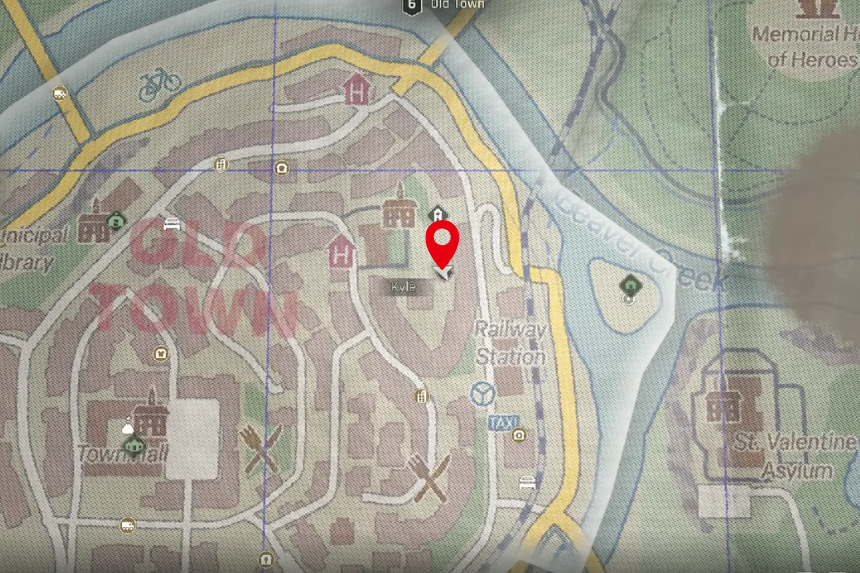
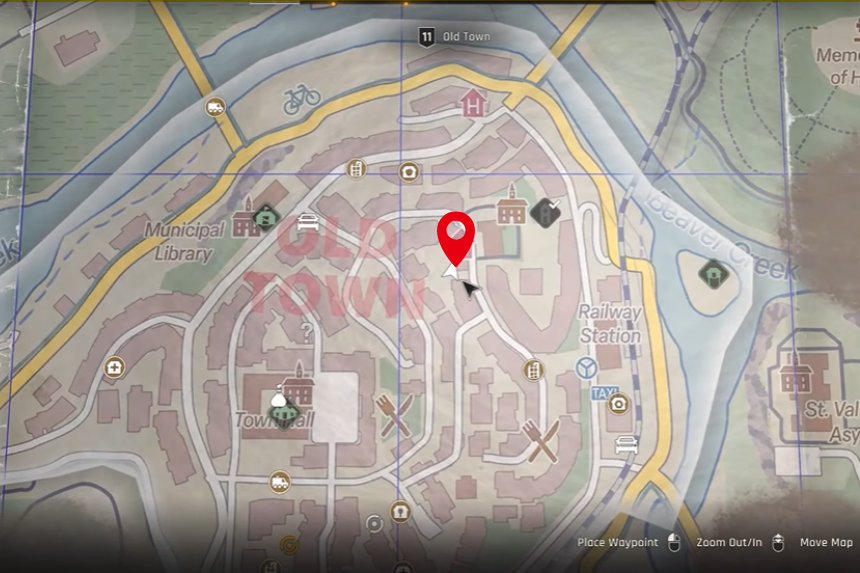
Newspaper 1913
In the old town area, near the railway station, you will find the newspaper inside a building, behind the counter on a shelf.
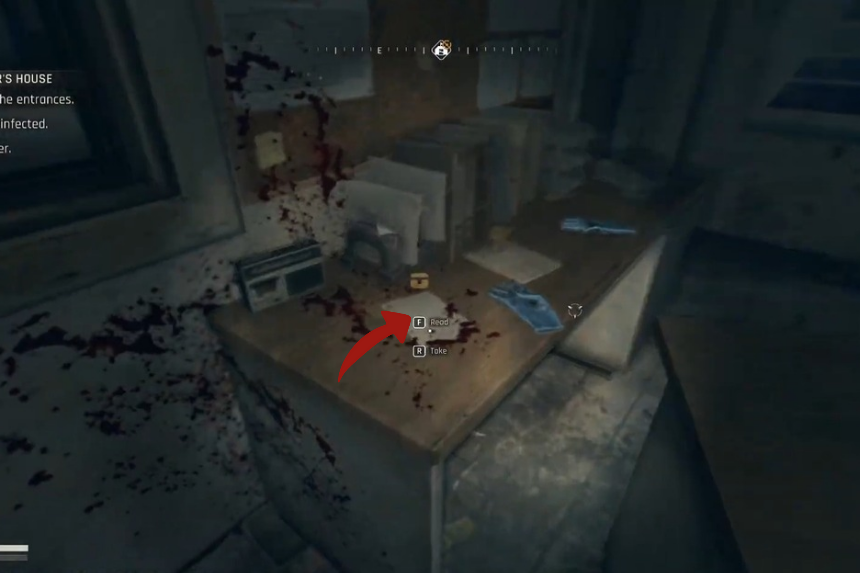
Newspapers 1938 + 1942
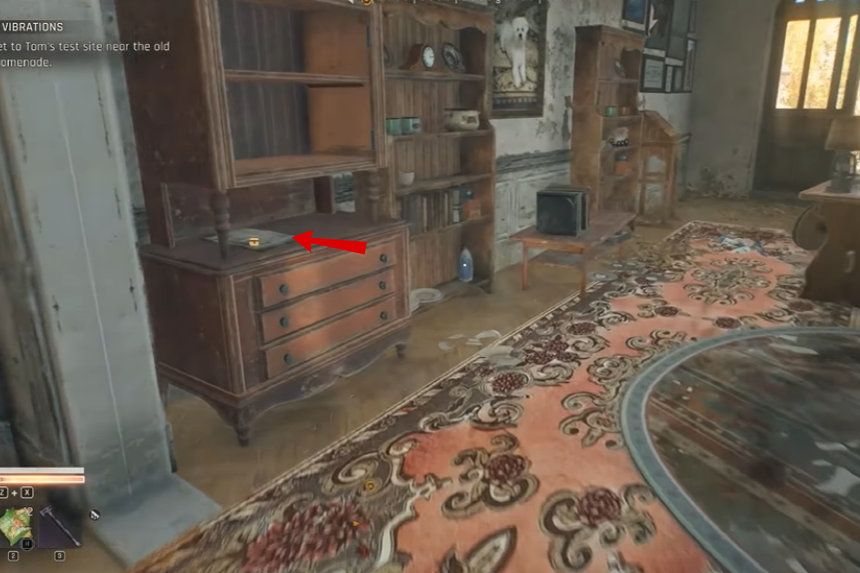
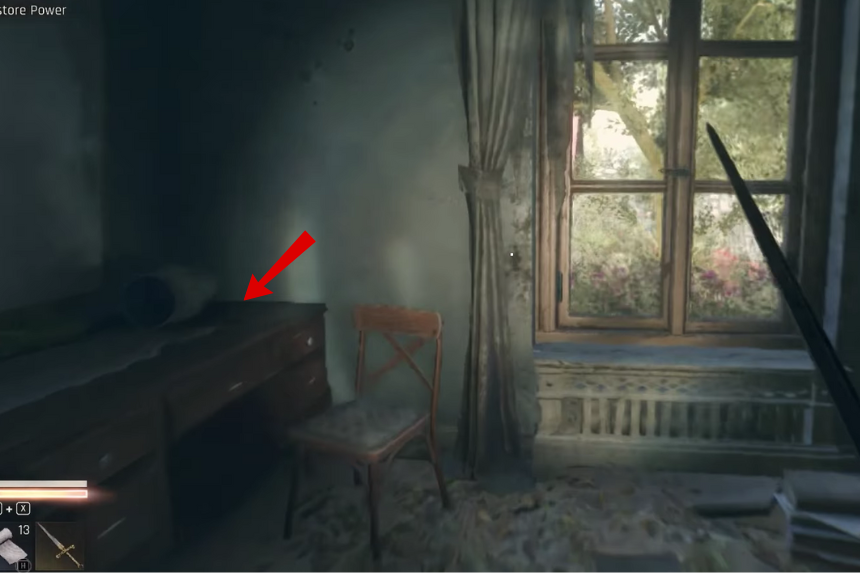
In the old town region, go inside an abandoned building. You will find the 1942 newspaper on the dressing table.
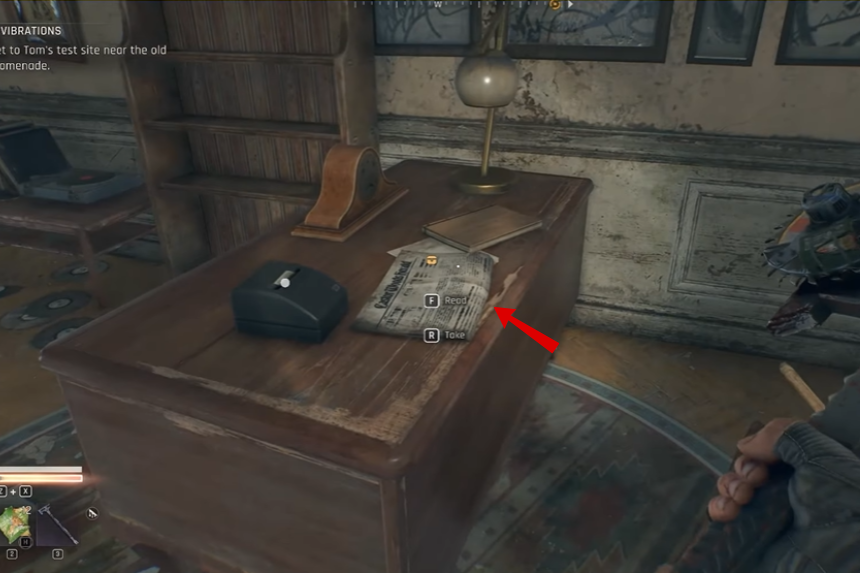
In the same room, you will find the 1938 newspaper on the table.
Newspaper 1950

In the old town region, near the museum library, go inside the red brick shop. On the shelf, you will find the 1950 newspaper on a shelf, near the books.
Newspaper 1952

You will find the 1952 newspaper on the kitchen shelf, in the abandoned building.
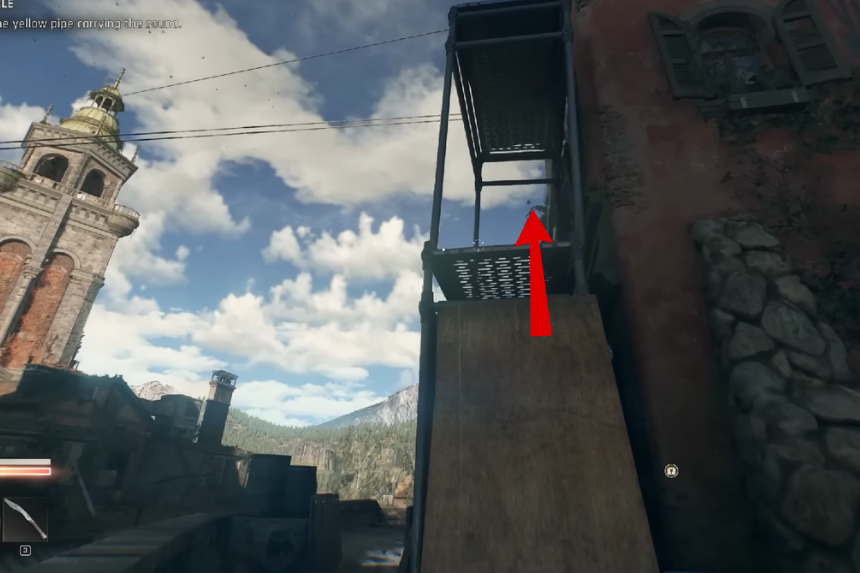
Newspaper 1975
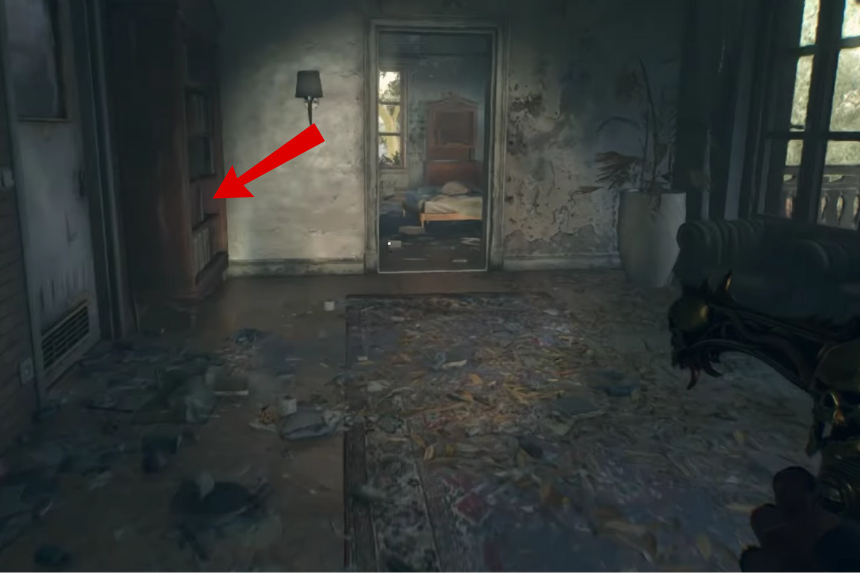
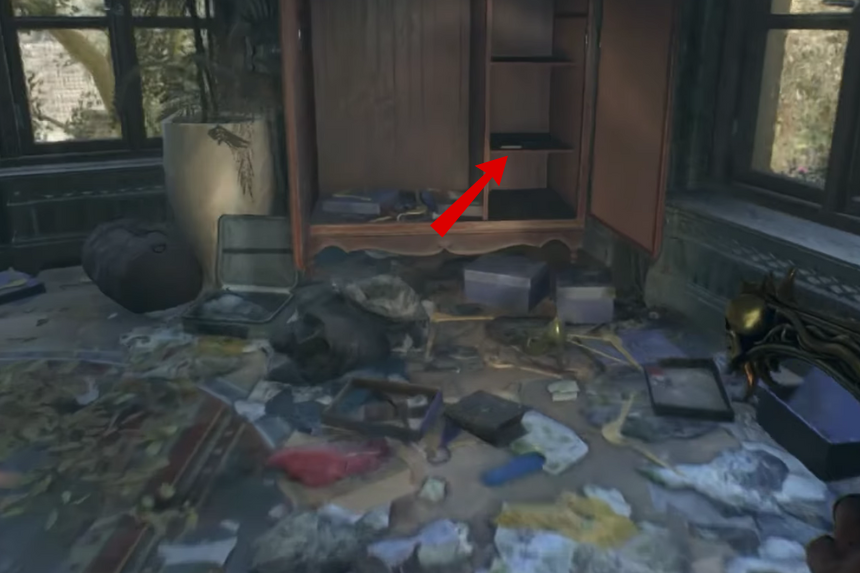
During the A Sign of Love sidequest, go inside the big bungalow in front of you by climbing through the pipe and reaching the balcony. You need to pick the lock of the door to get inside the building. In the bedroom, on the right side, you will find the 1975 newspaper in a cupboard.
Newspaper 2015

In the Palm Lands area, go inside a big green building. You will find the newspaper in a cupboard in the kitchen area.
All Castor Woods Beavers
Know What ‘Castor’ Means? (Silvertrophy): To unlock this trophy, you will need to find all the hidden Castor Beaver statues scattered around the map. Below, we have listed all the Castor Woods Beavers locations.
1. Beaver the Monk
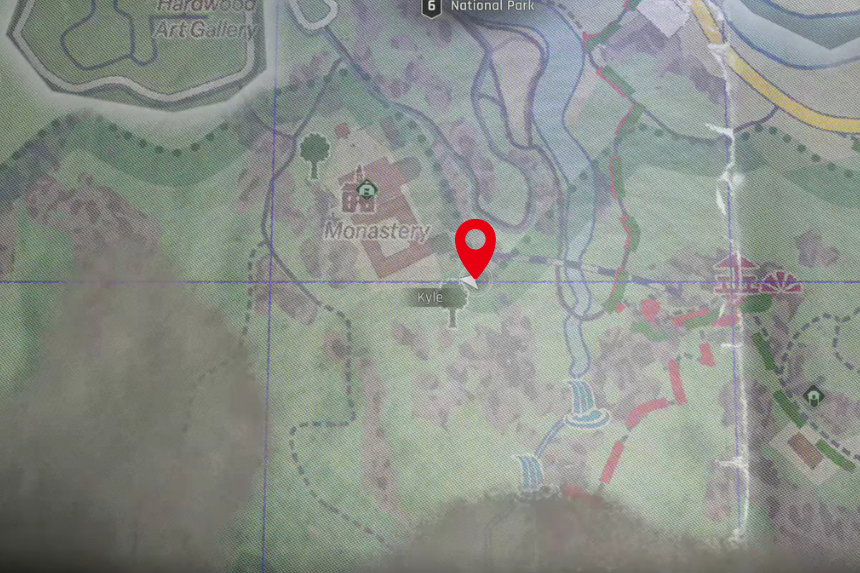
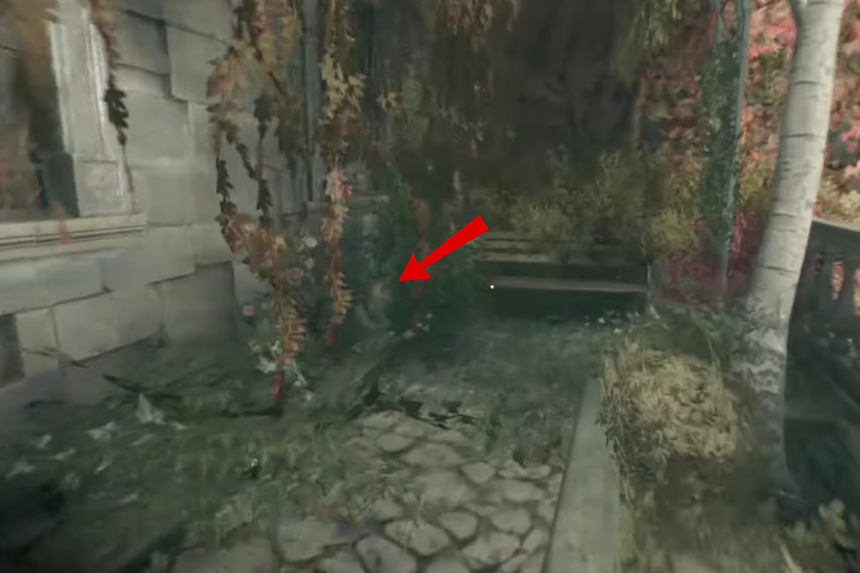
You will spot this one on the left side of The Monastery garden. You can grab it right after the prologue, just before entering The Monastery.
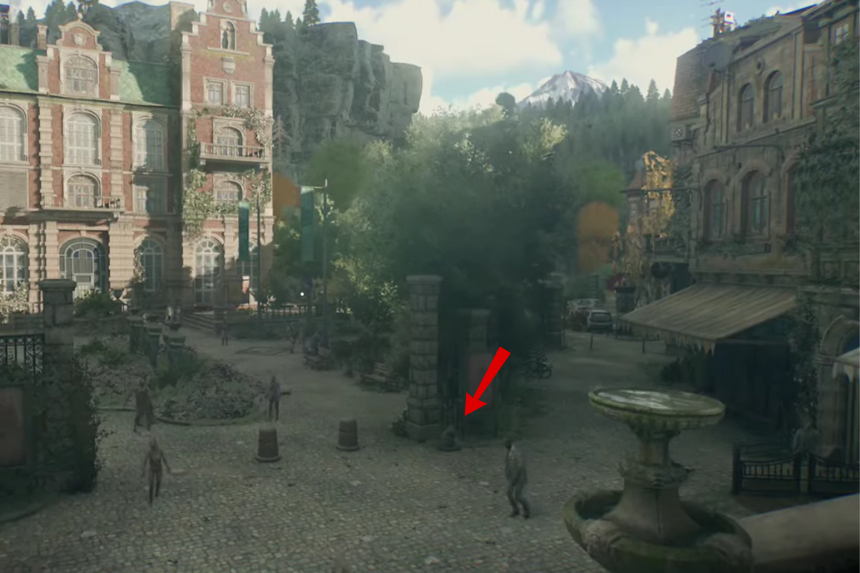
2. Town Hall Beaver
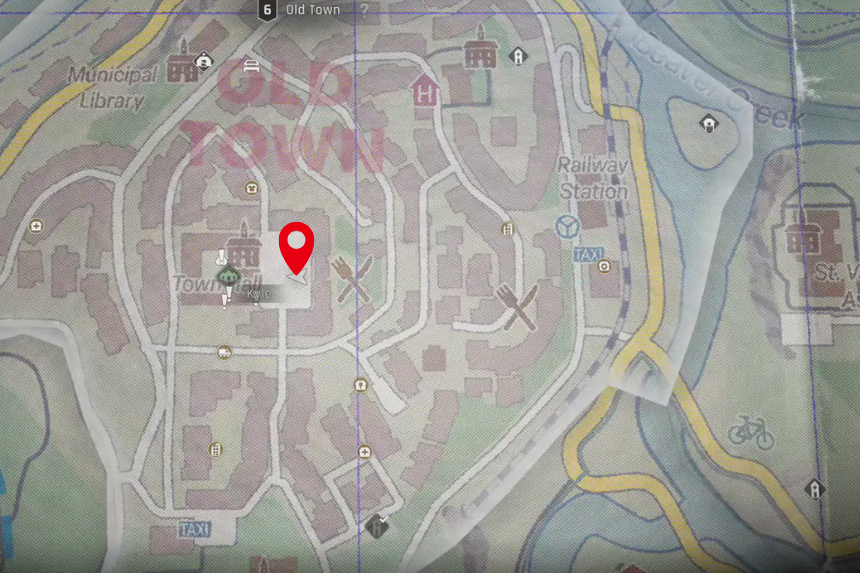
It’s standing right in front of the Town Hall in Old Town.
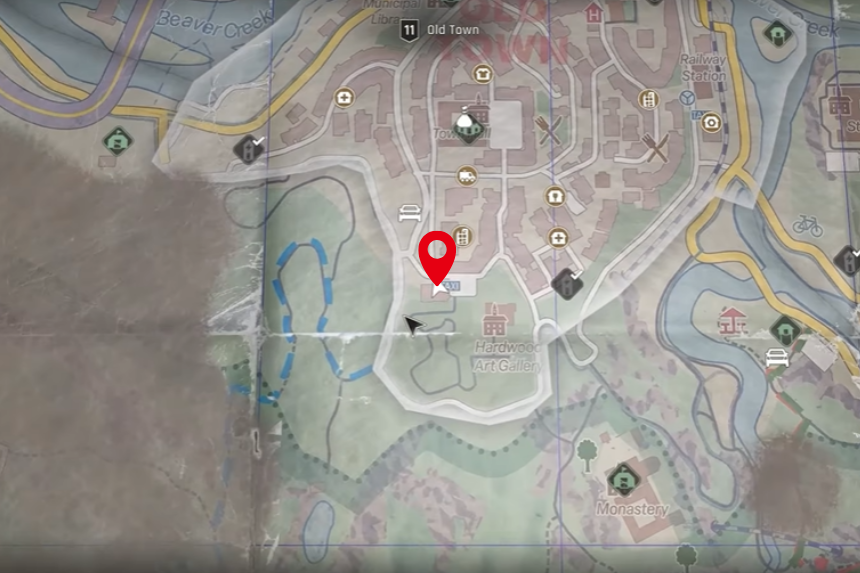
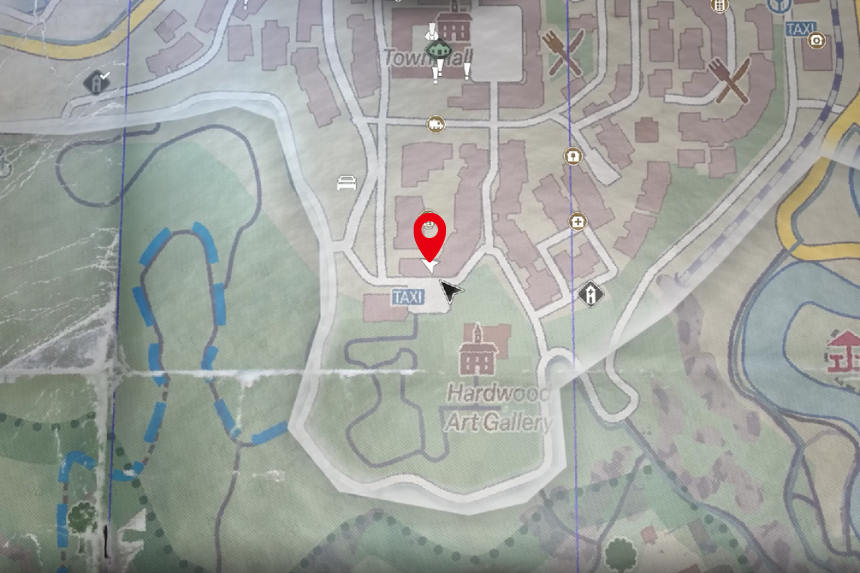
3. Beaver the Artist
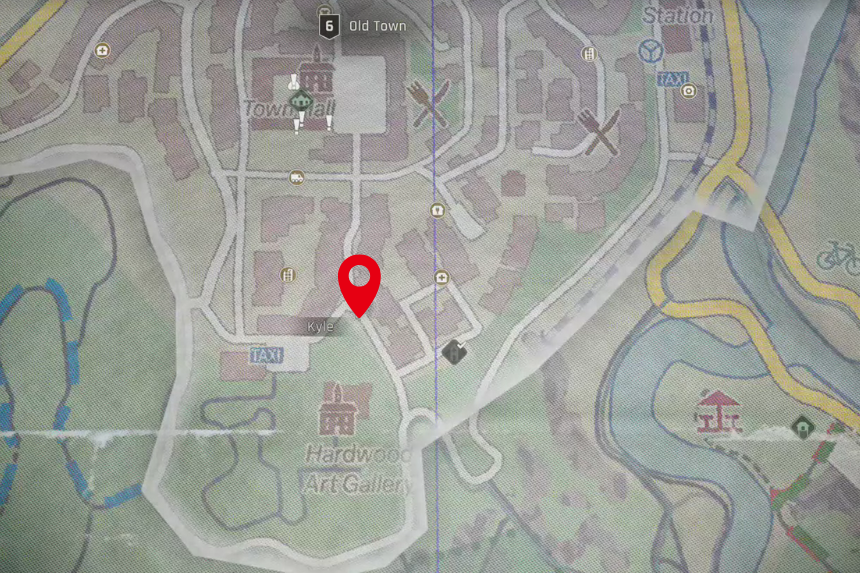
Head to Old Town, near the Hardwood Art Gallery. Before you step into the gallery courtyard, look to the right you will see this Beaver waiting there.
4. Beaver the Librarian
Still in Old Town, this one is next to a bench near the scaffolding leading to the Municipal Library. Keep your eyes open around the entrance area.
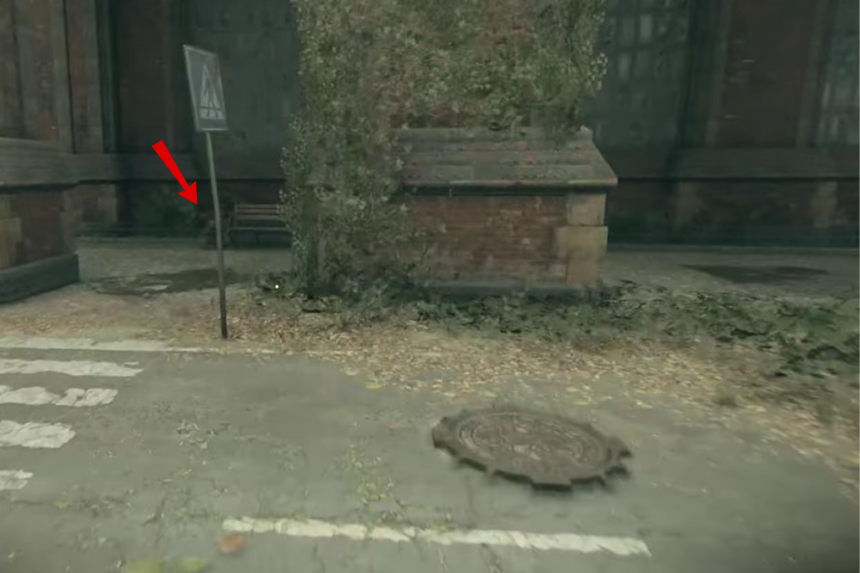
5. Dam Builder Beaver
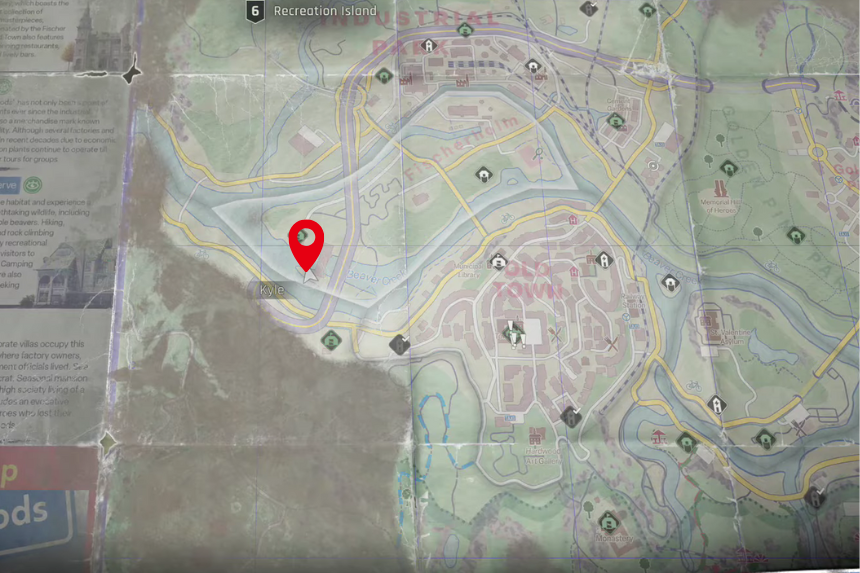
On Recreation Island, go all the way to the left side. You will pass some huge metal structures near the hydroelectric power plant. This area is also part of the Power Hambit main mission, so you will naturally come across it.
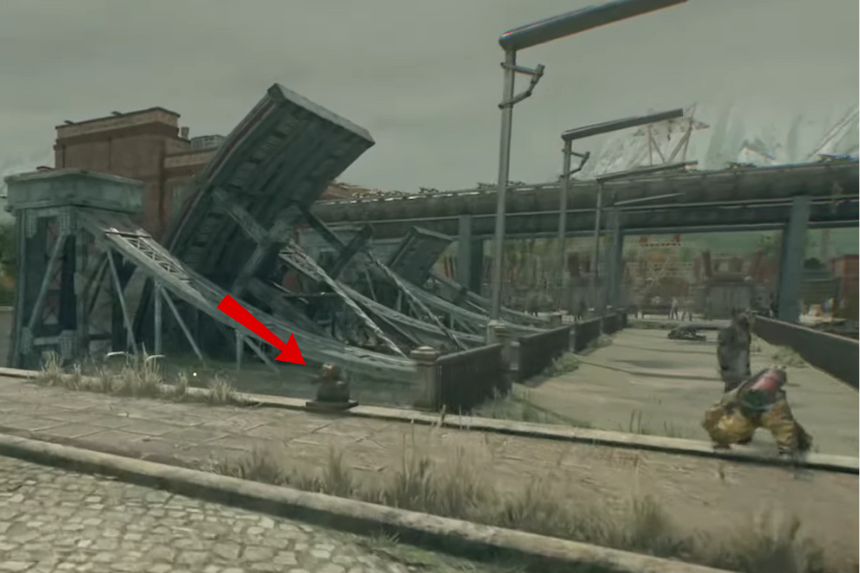
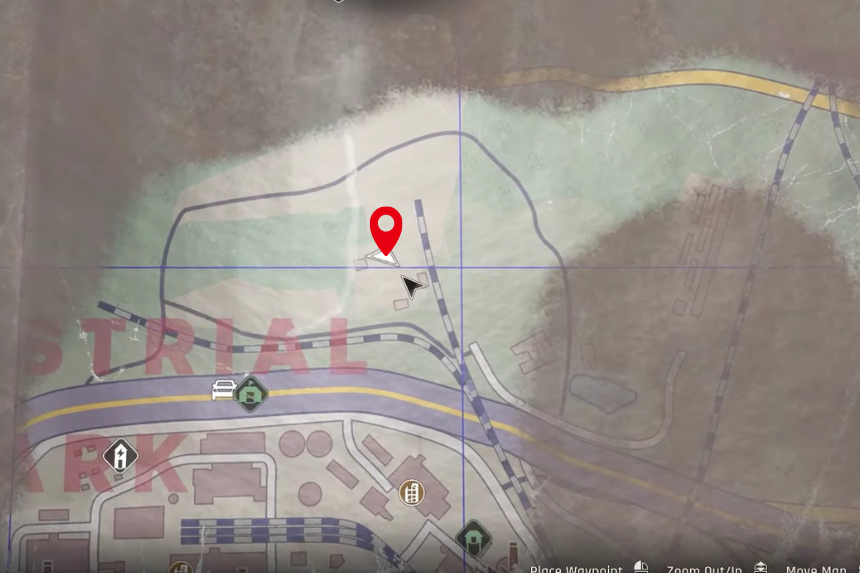
6. Engineer Beaver
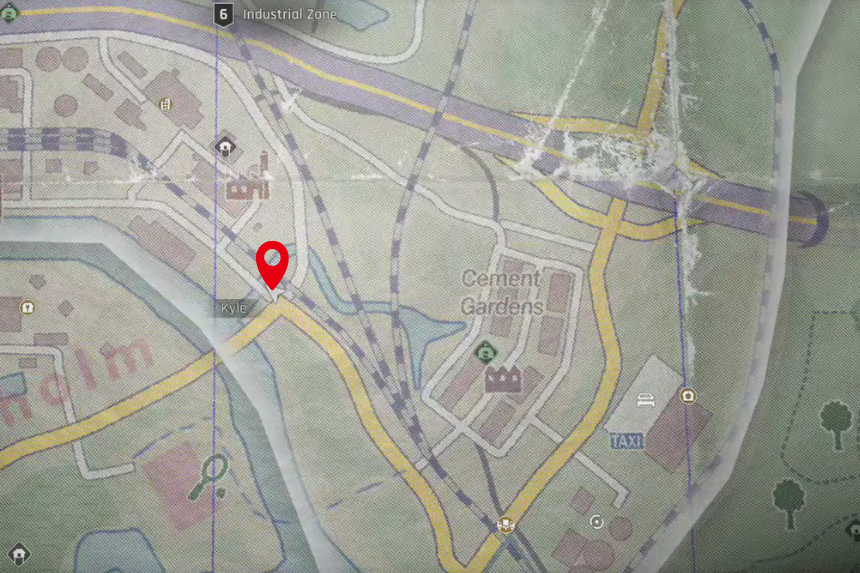
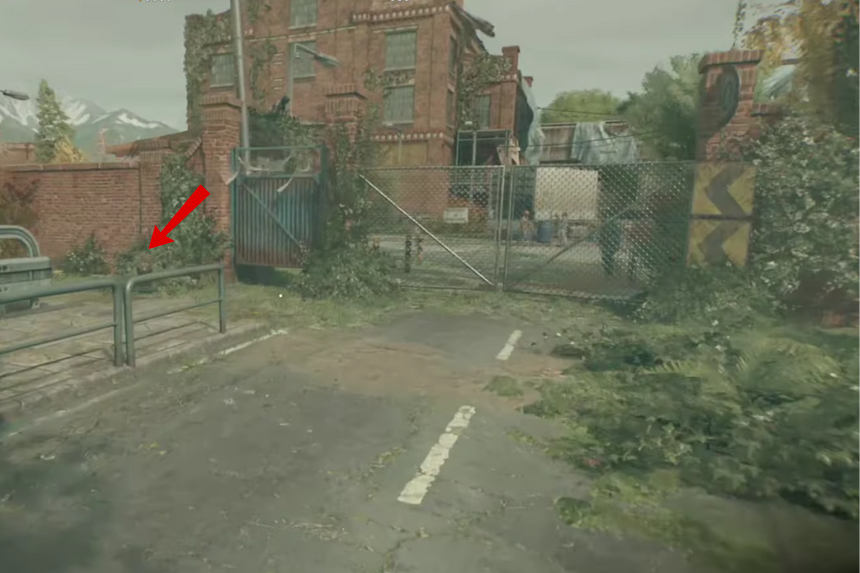
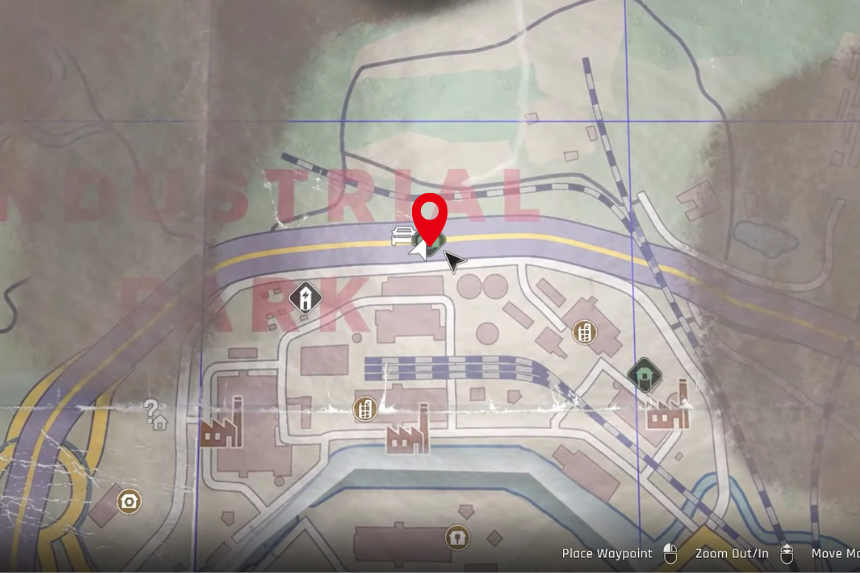
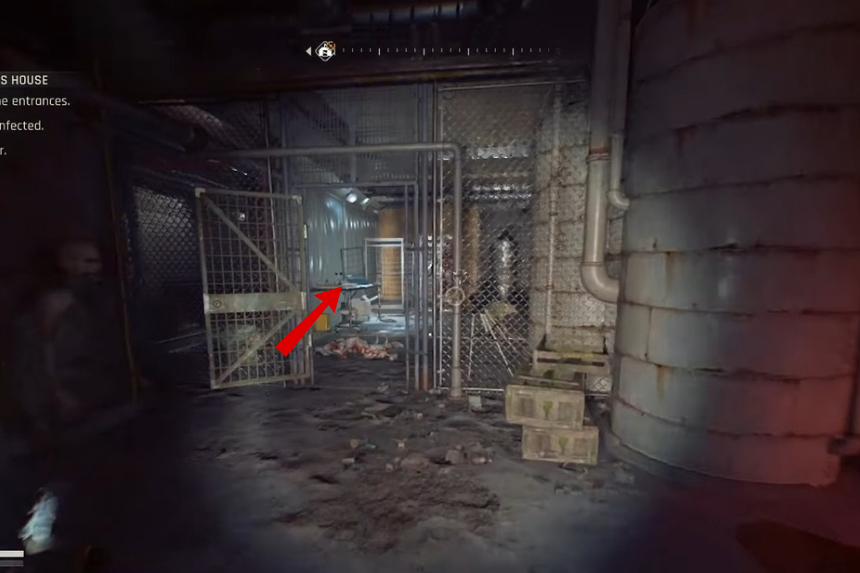
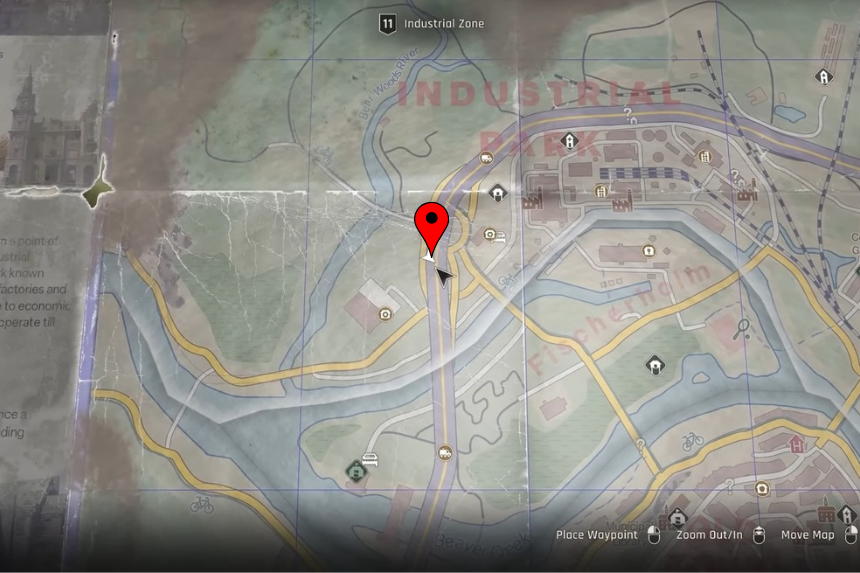
In the Industrial Zone, check right in front of the gate of CWIP Industrial Park. The Engineer Beaver is stationed there.
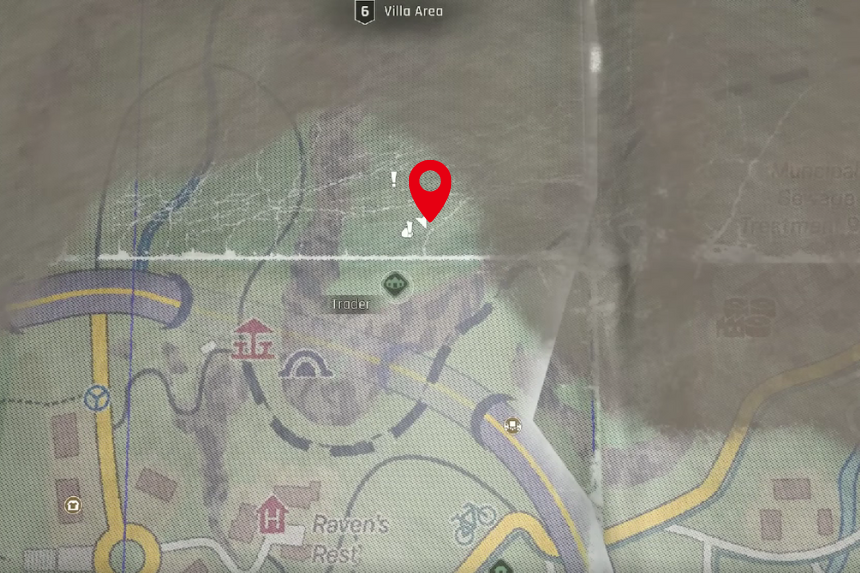
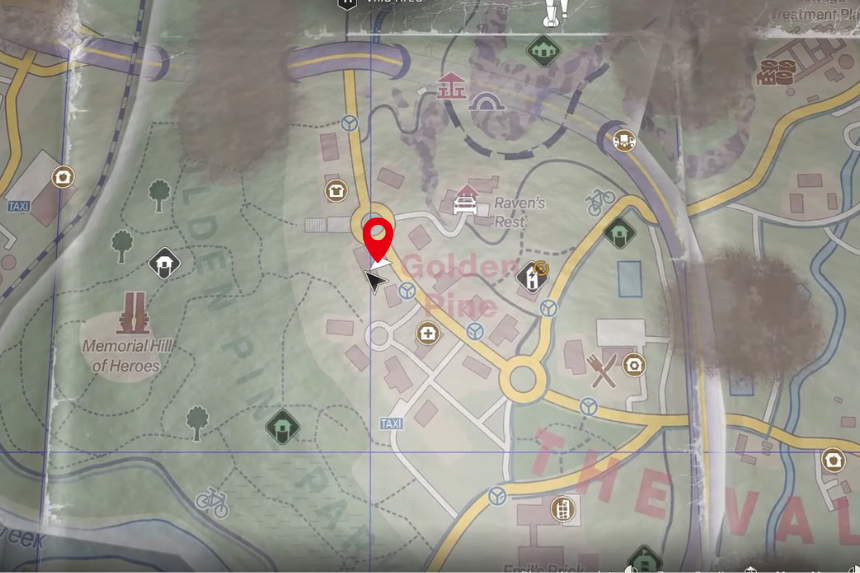
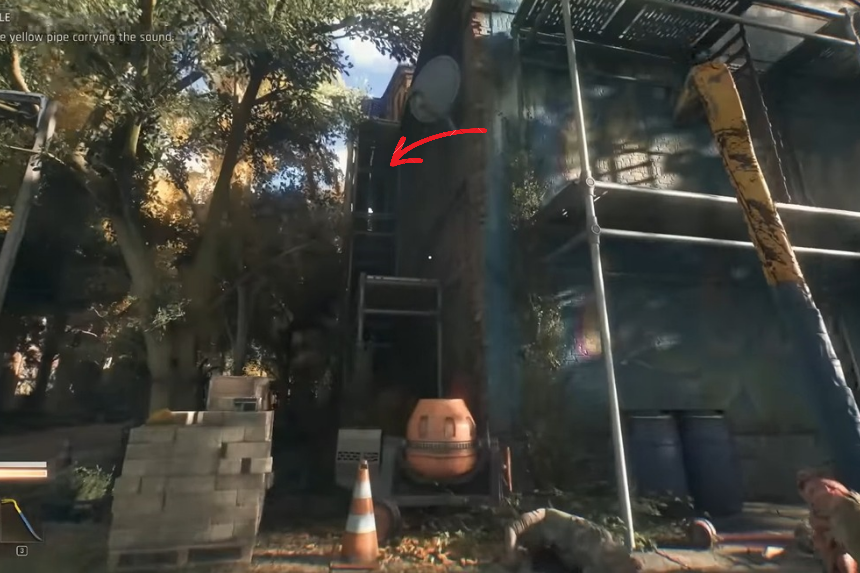
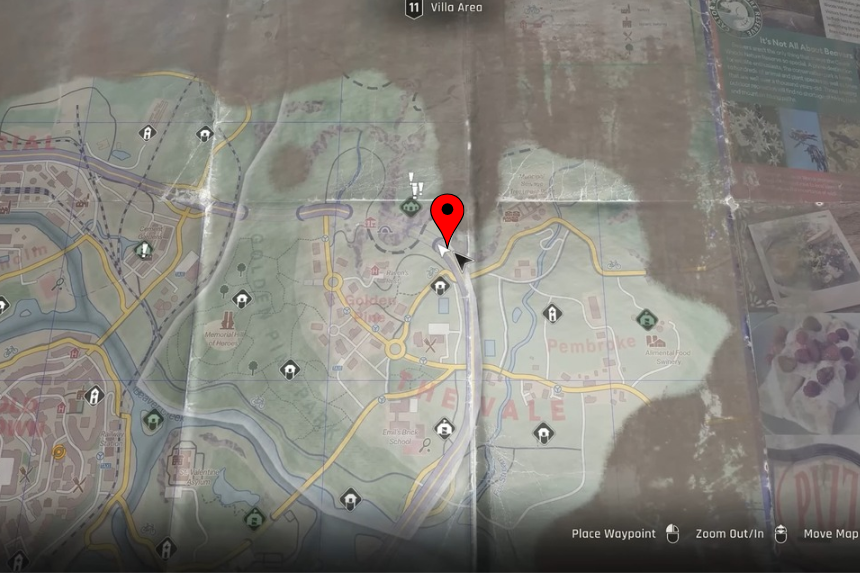
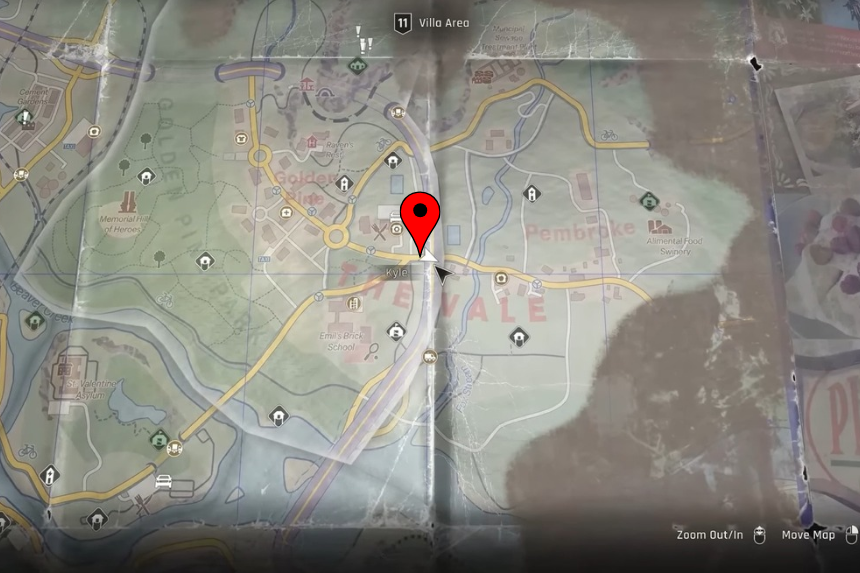
7. Pharmacist Beaver
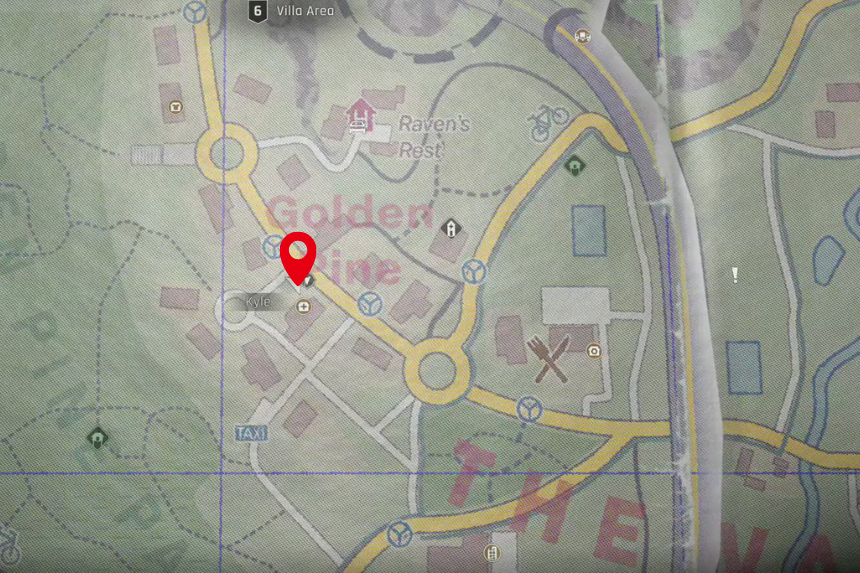
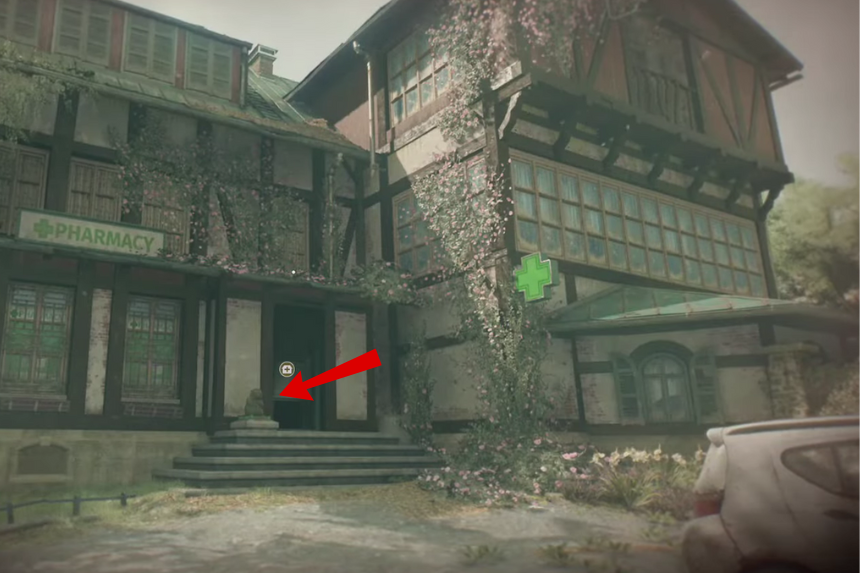
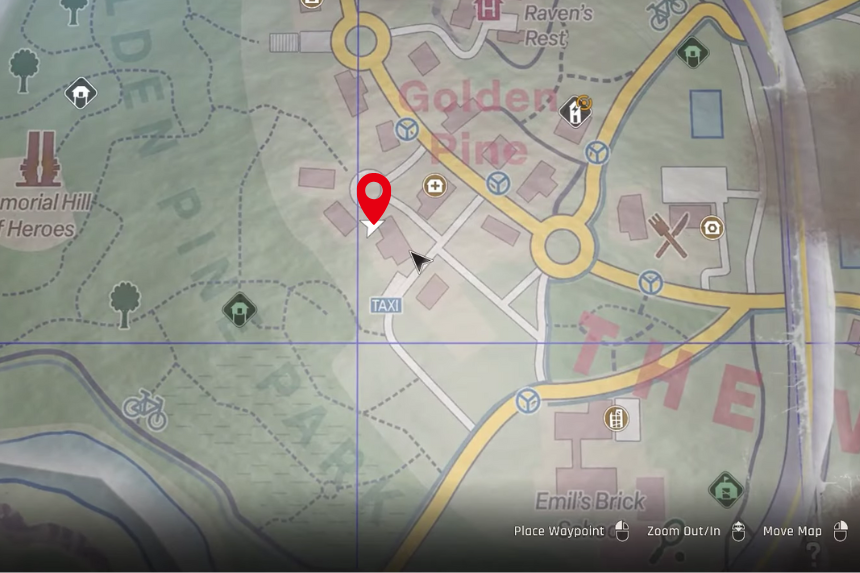
Go to the Villa Area, Golden Pine. Look in front of the Pharmacy Night Zone you will see the Pharmacist Beaver hanging out there.
8. Beaver the Farmer

You will find this Beaver under the bridge near the Auto Repair shop.
9. Soldier Beaver
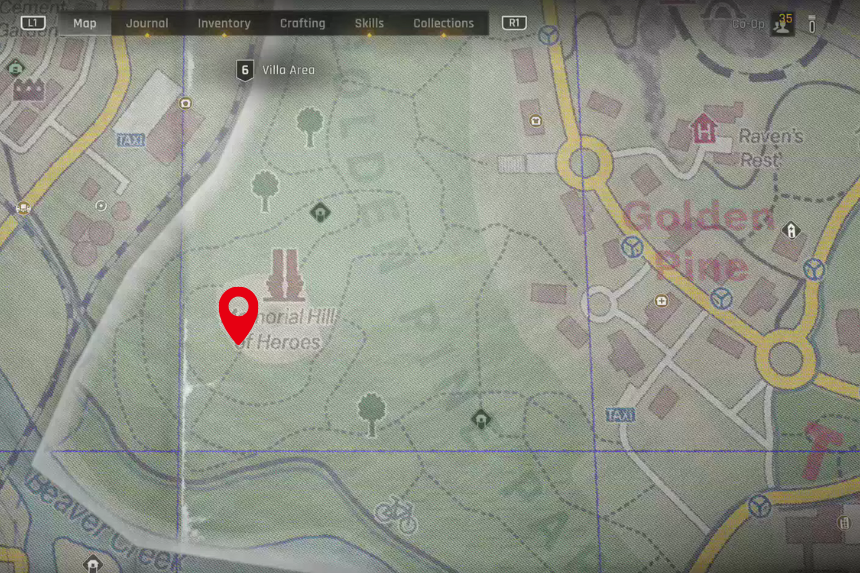
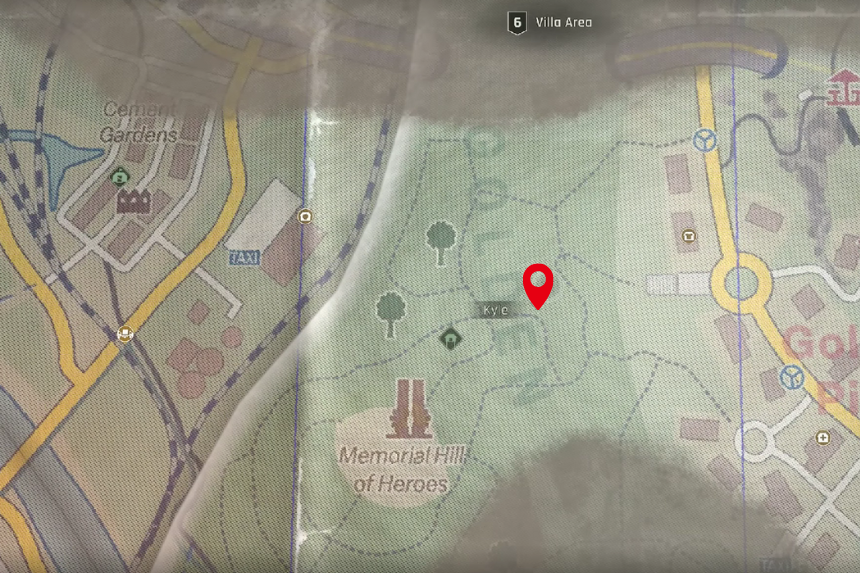
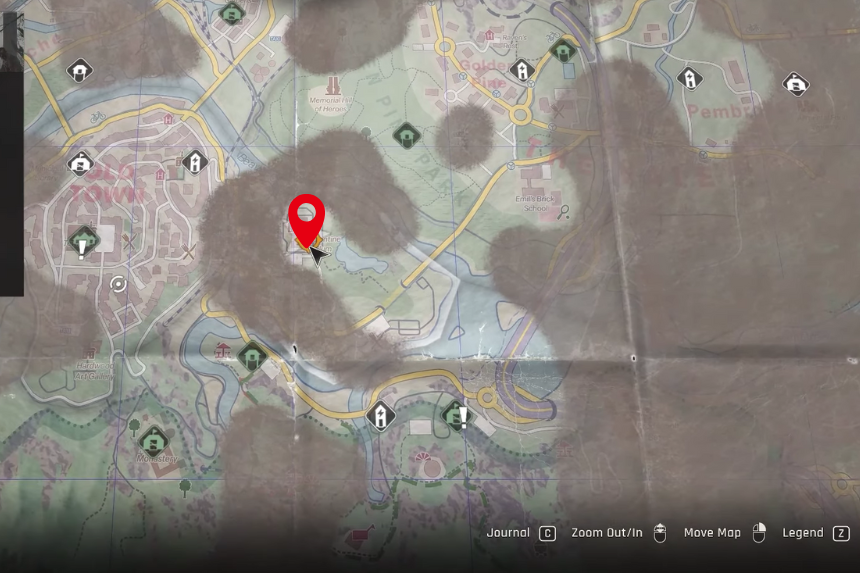
Check the Memorial Hill of Heroes monument square in the Villa Area. If you approach from the southwest, you will find the Soldier Beaver nearby.
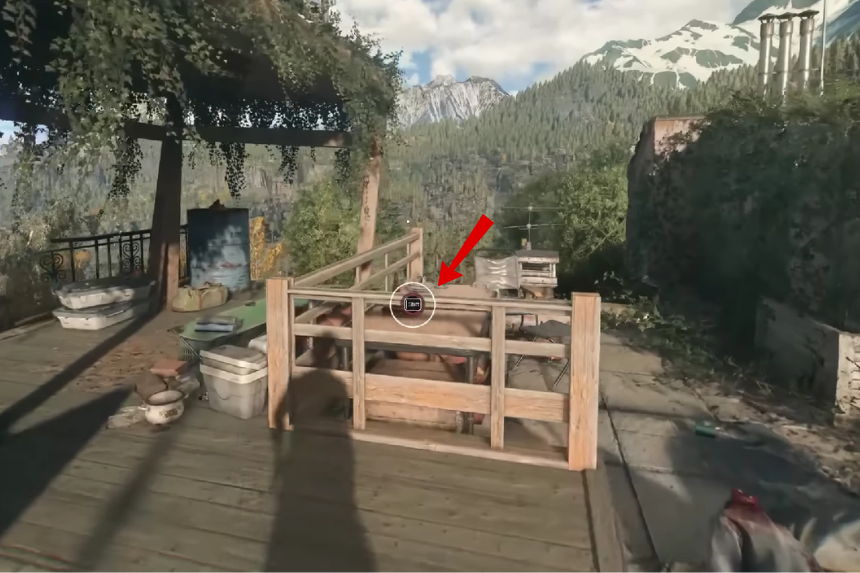
10. Backpacker Beaver
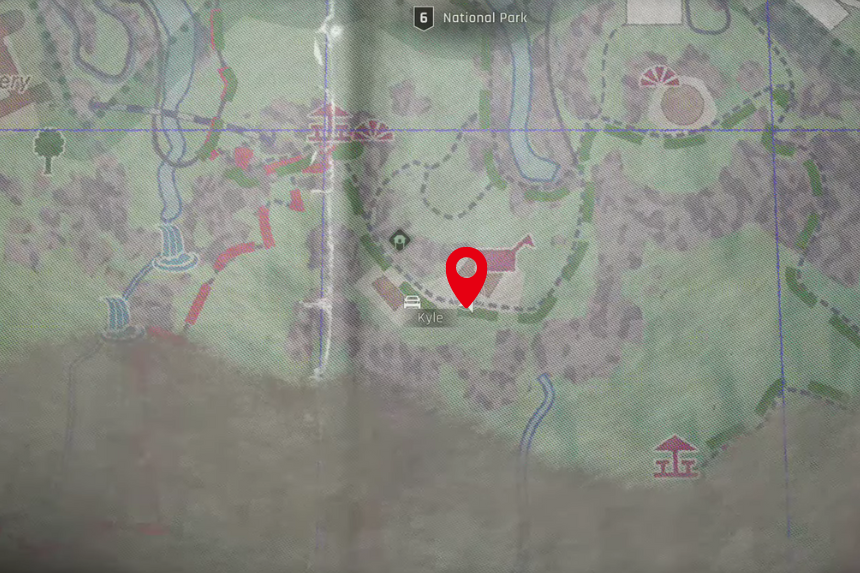
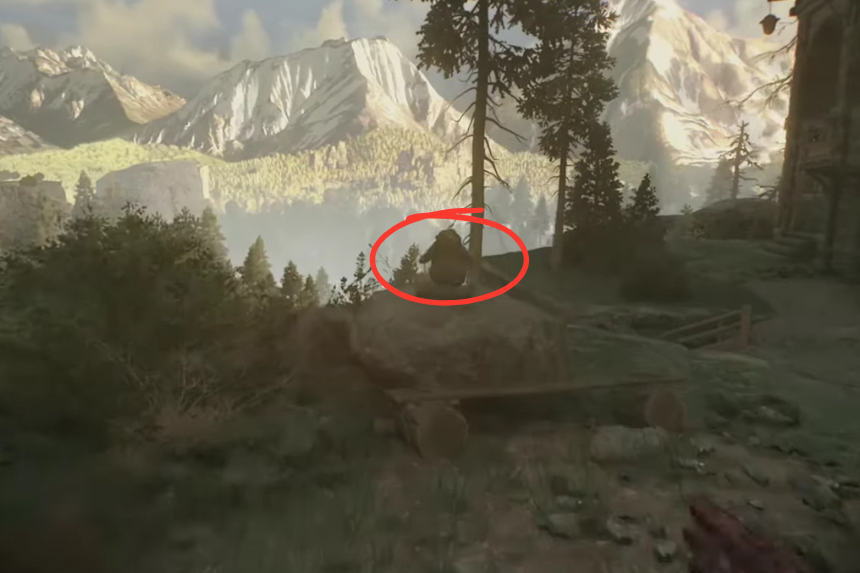
Head to the National Park. Near the mountain shelter look to the left you will spot this Beaver sitting on top of a table.
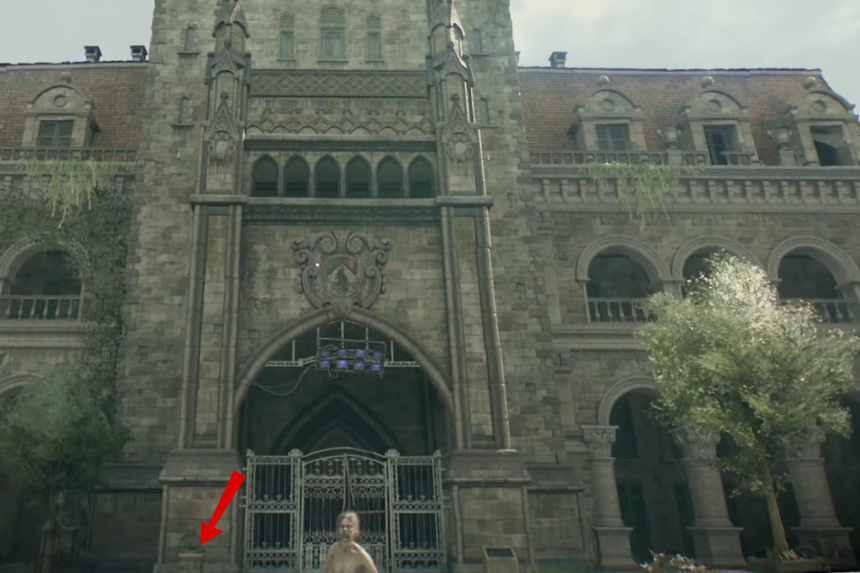
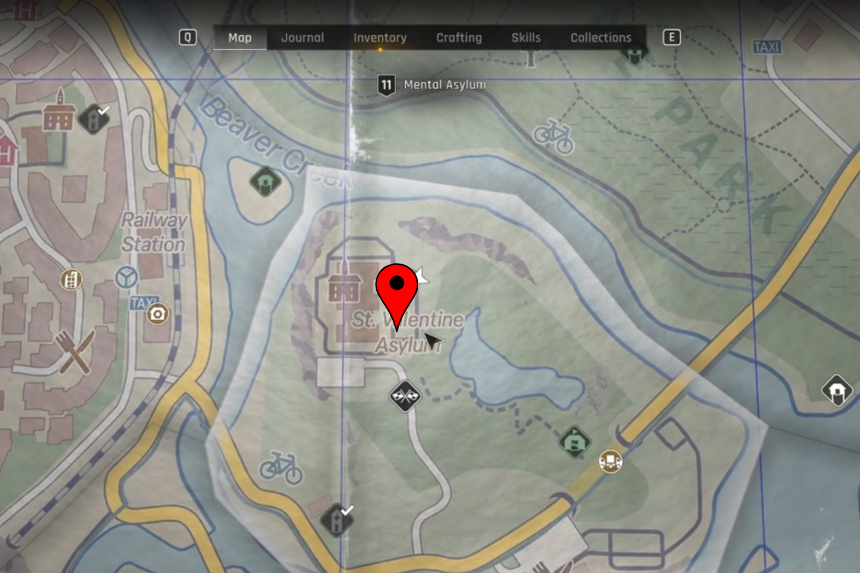
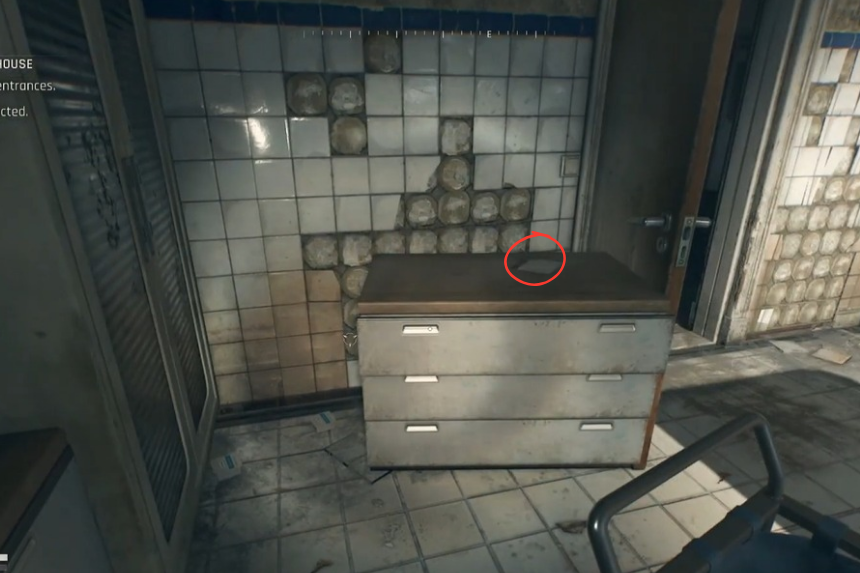
11. Doctor Beaver
The last one is at St. Valentine Asylum. Go up the stairs to the main building, and check the right side you will see Doctor Beaver waiting there.
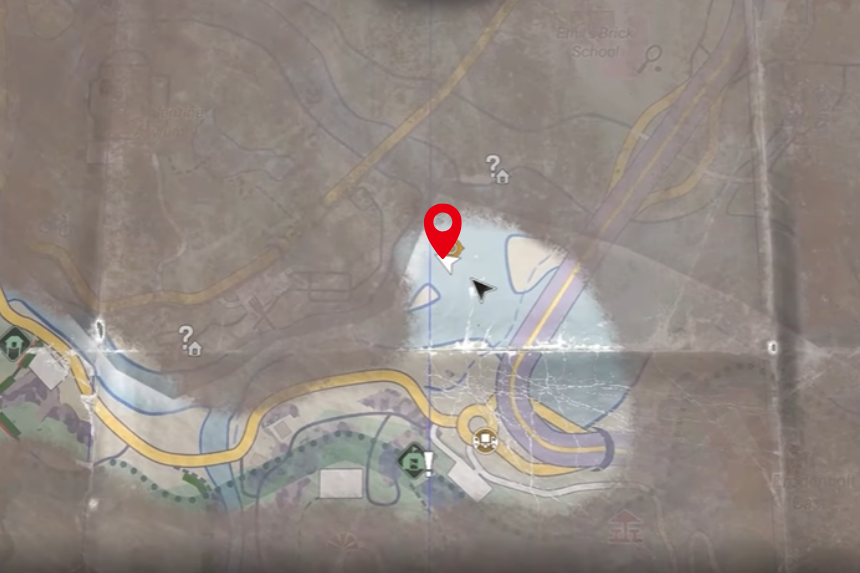
All Sigils
Dying Light: The Beast is filled with collectibles, but one set actually plays an important role the Sigils. There are eight of them, and each one is a stone with a symbol carved into it, hidden across Castor Woods. Collecting all of these Sigils is how you unlock EXPcalibur
Stone Sigil: Sacrifice
Go to the National Park area. From there, head toward the cliff, and look for a structure hidden beneath it. Once inside, turn around and check the pillar behind you, the Sigil is right there.
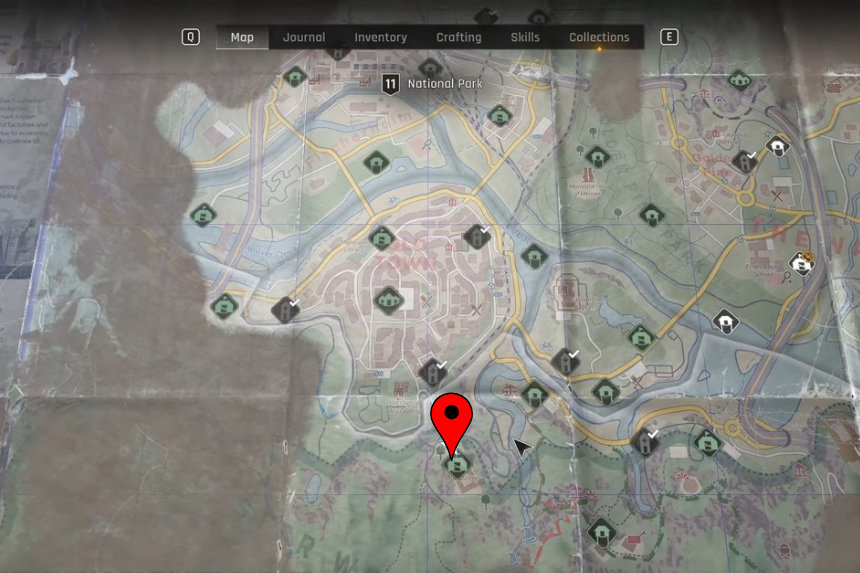
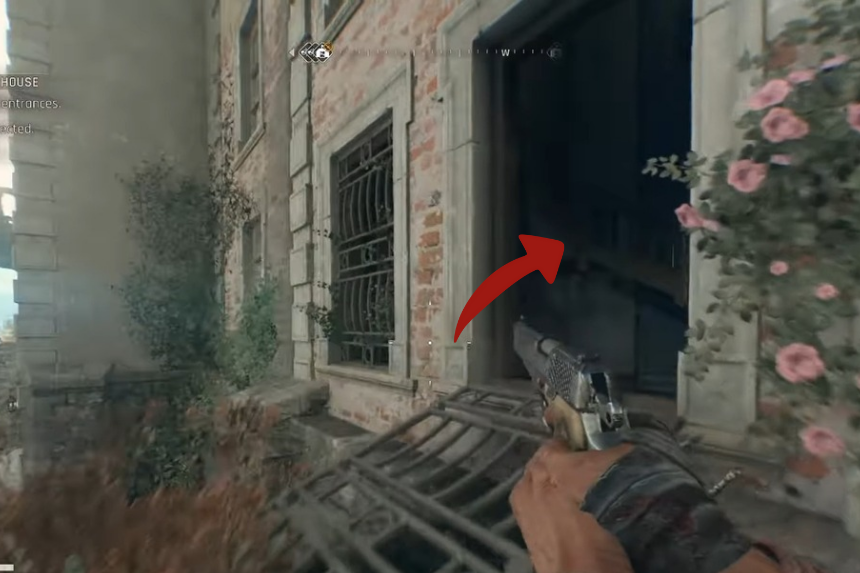
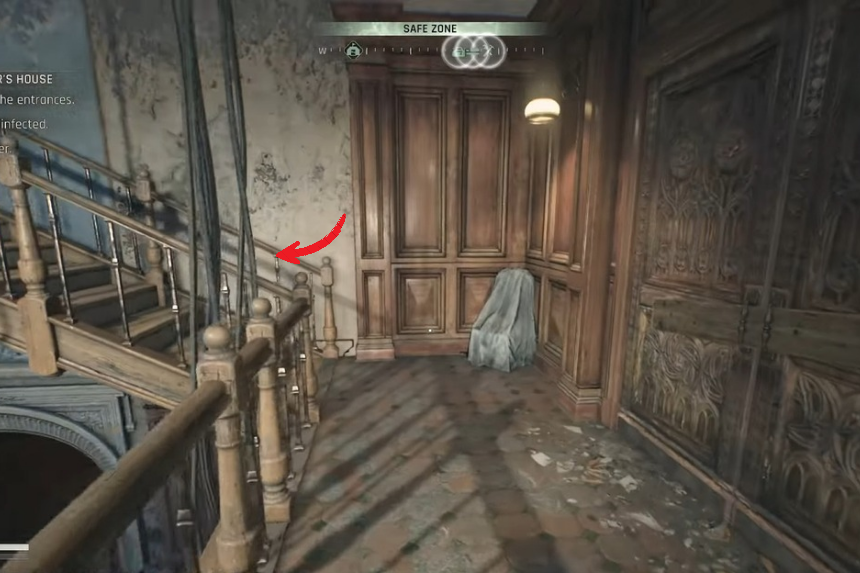
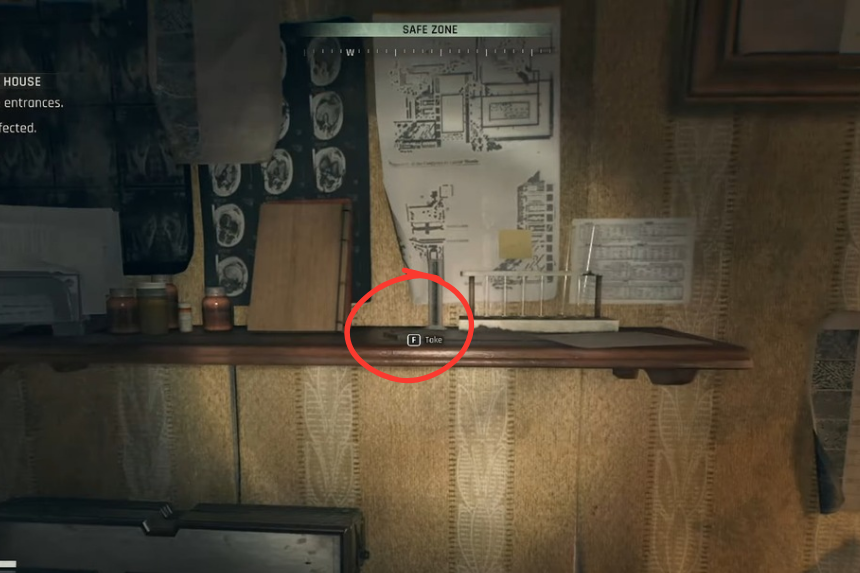
Stone Sigil: Witch’s Mark
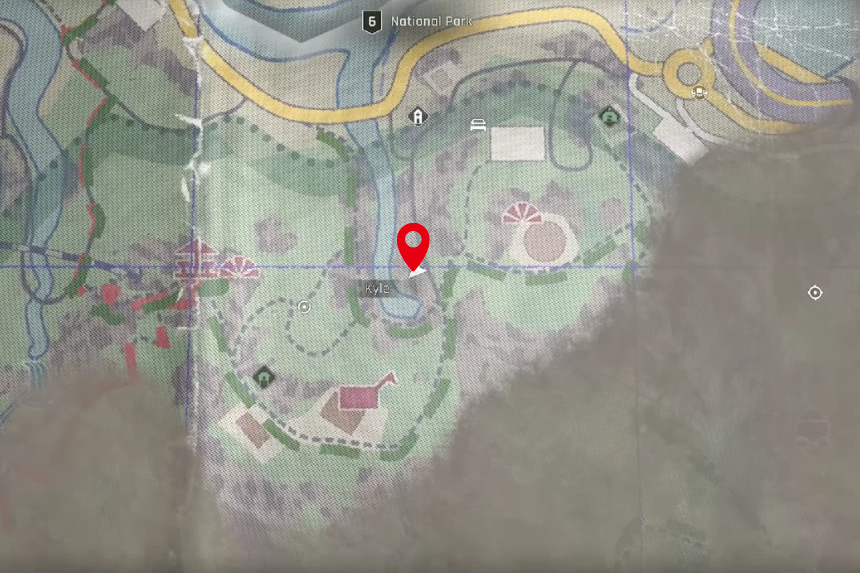
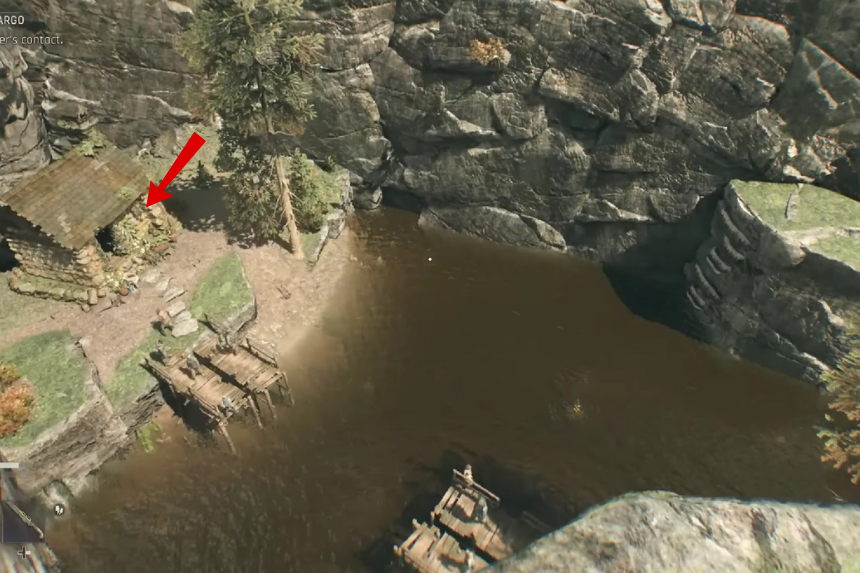
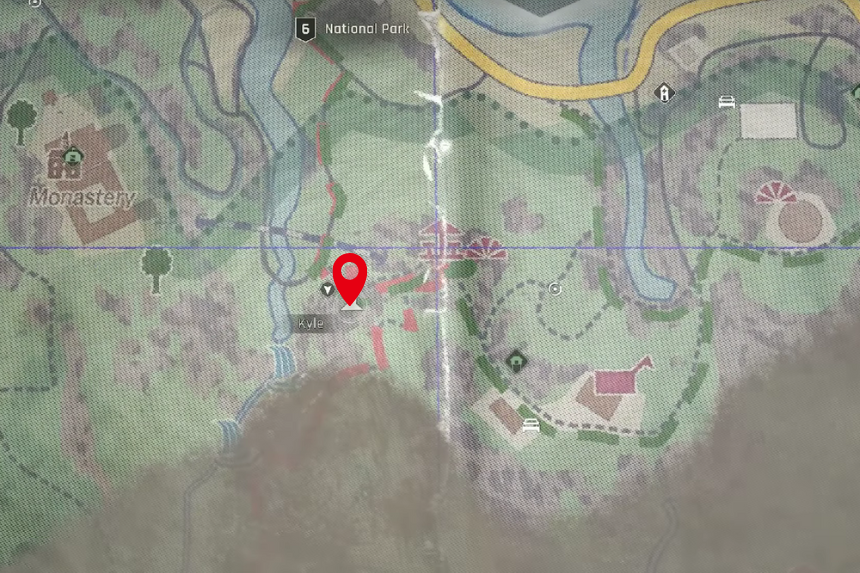
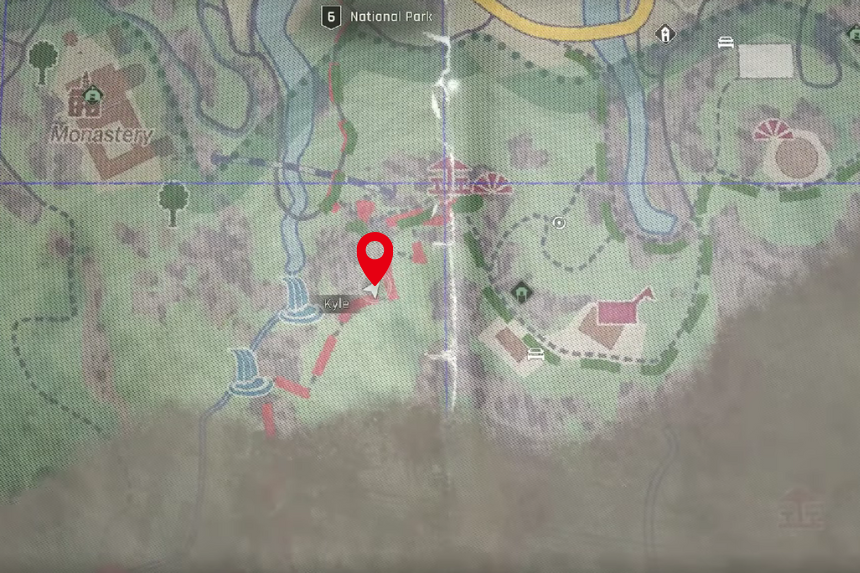
The last Sigil is also in the southern National Park, but a bit eastward, close to a Safe Zone. Head to the location marked on the map, and you will see a small cabin. Go inside, and you will find the Witch’s Mark Sigil stuck to the wall.
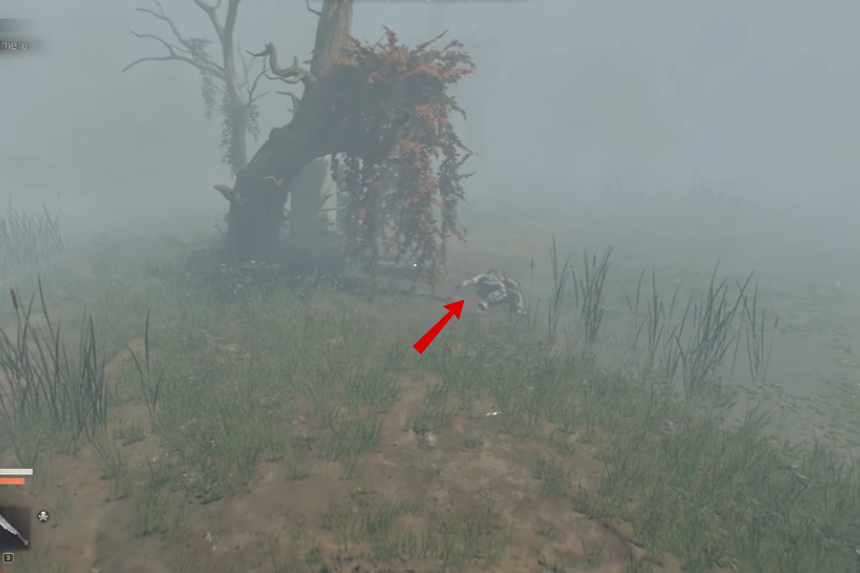
Stone Sigil: The Void

The Void Sigil is also in the southern part of the National Park. Look for a big waterfall, and go behind it; you will find a hidden cave. Follow the path through until you reach a body of water. The Void Sigil is floating at the bottom of it.
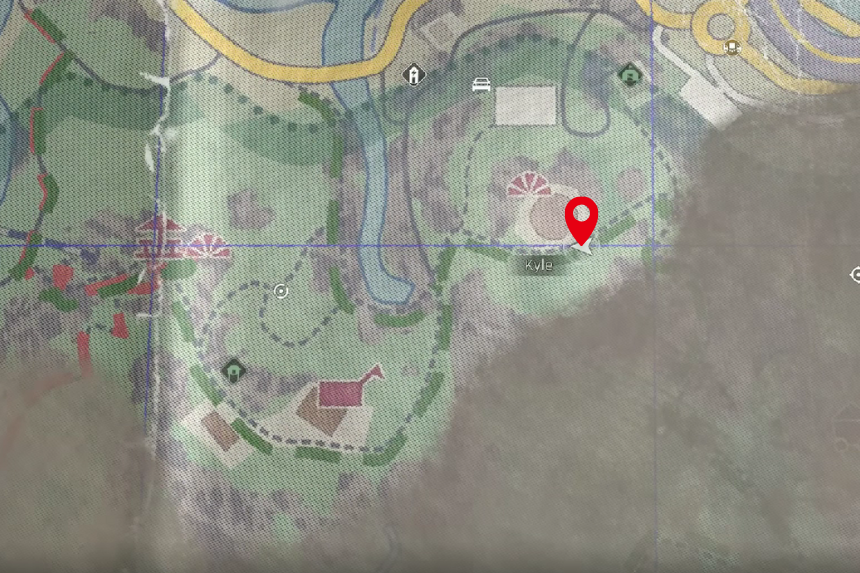
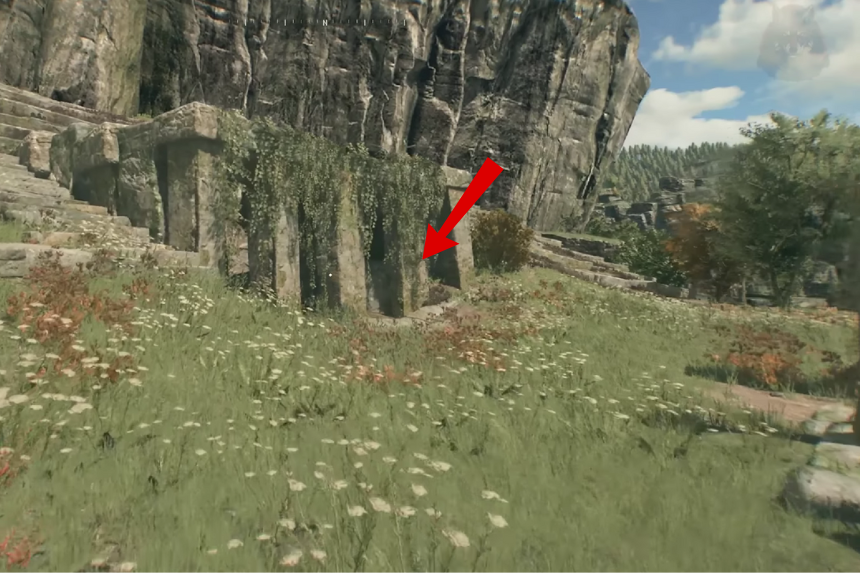
Stone Sigil: The Moon

This one is deep in the southern part of the National Park, close to a waterfall. Follow the path up the forested hill until you reach the top, then go through a crack in the rocks. On your right, there’s a stone on the ground near some trees, the Moon Sigil is sitting on it.
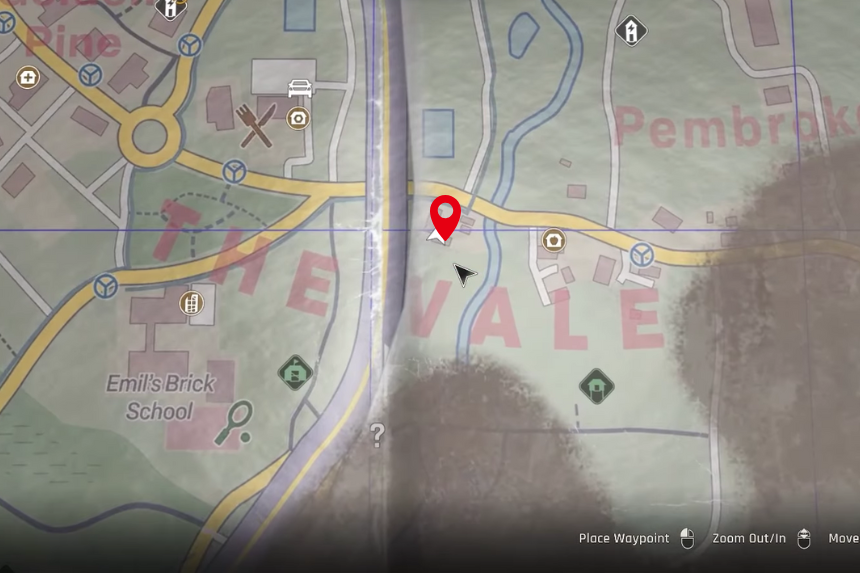
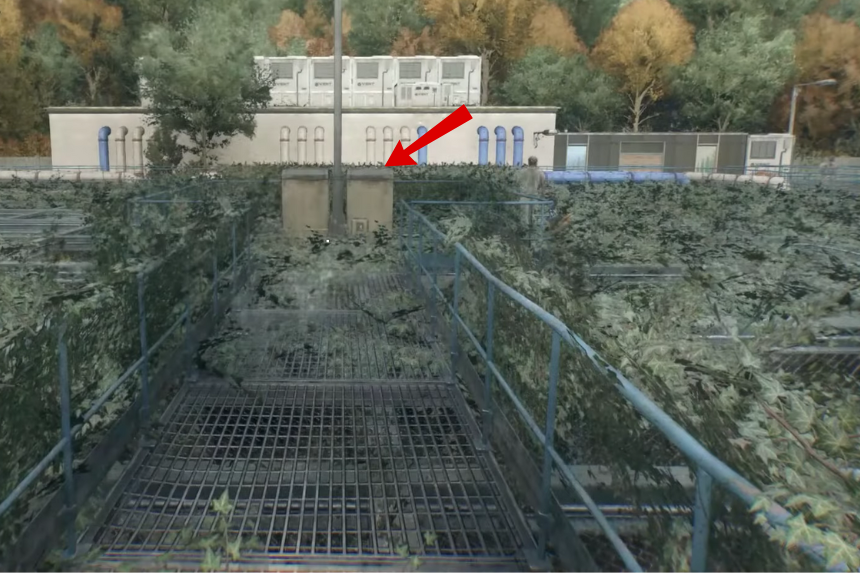
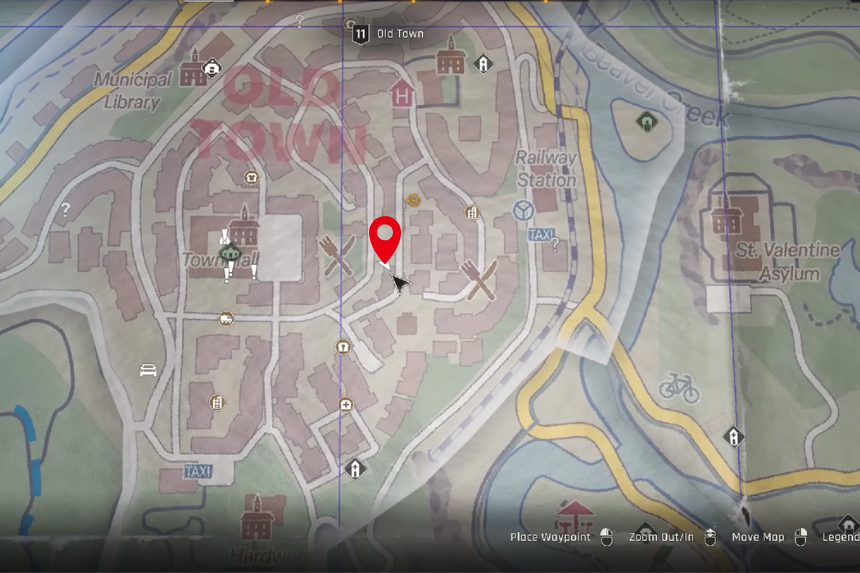
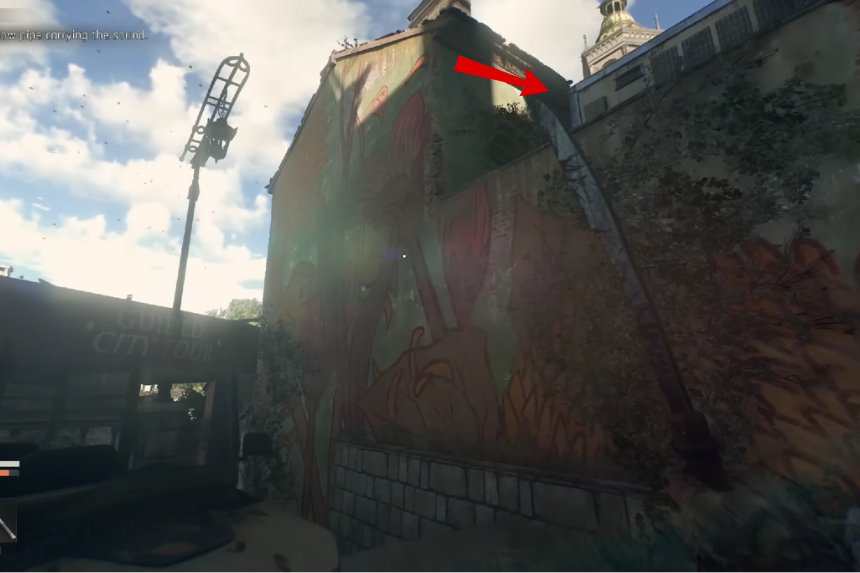
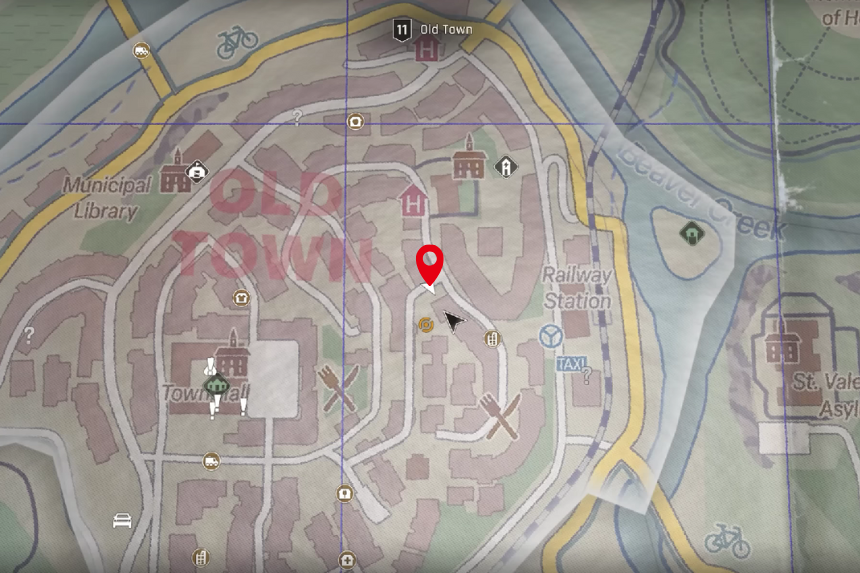
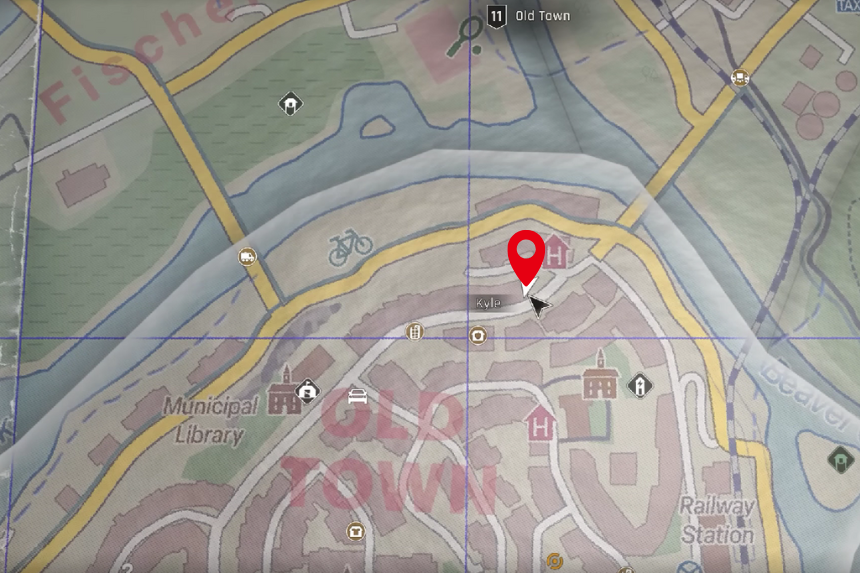
Stone Sigil: Death

Head to Old Town, just above the Railway Station. You will find a church there, it’s actually part of a story mission. Go inside, then through a hole on the right. Keep moving until you reach a room with a large statue, that’s where the Death Sigil is placed.
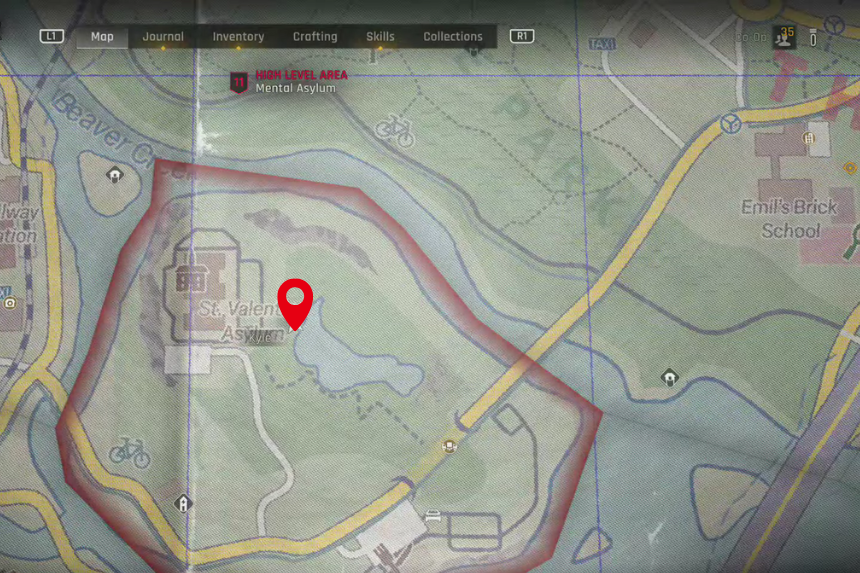
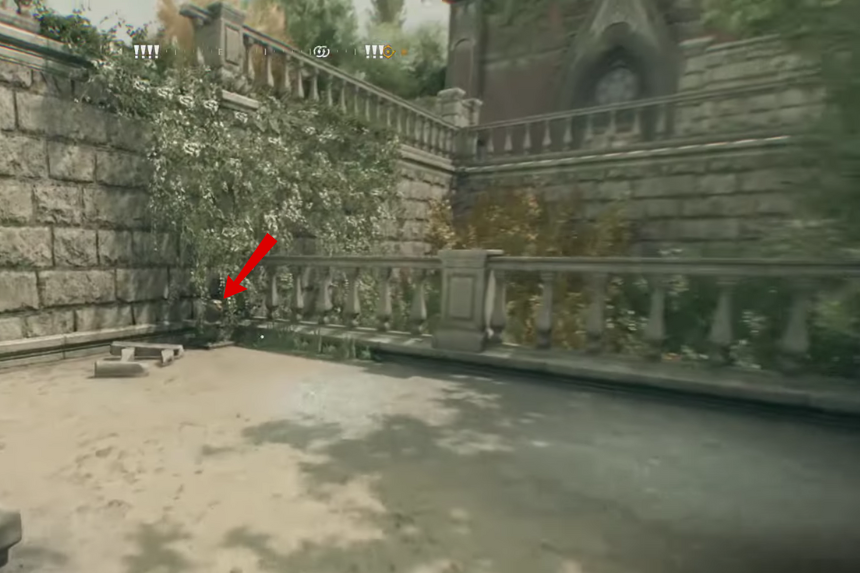
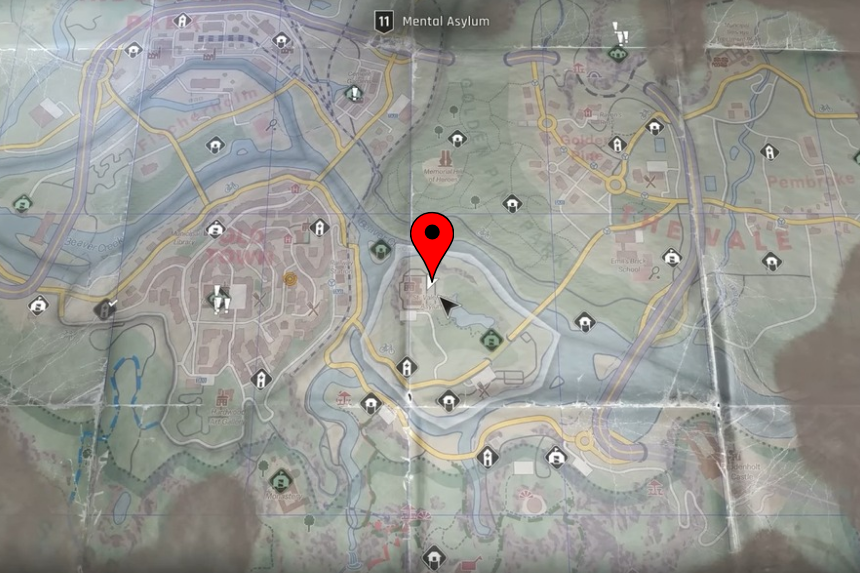
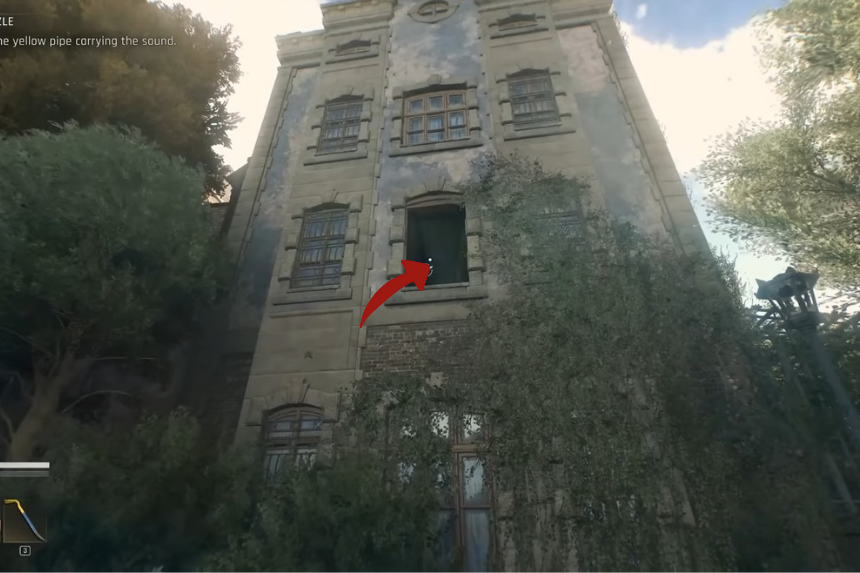
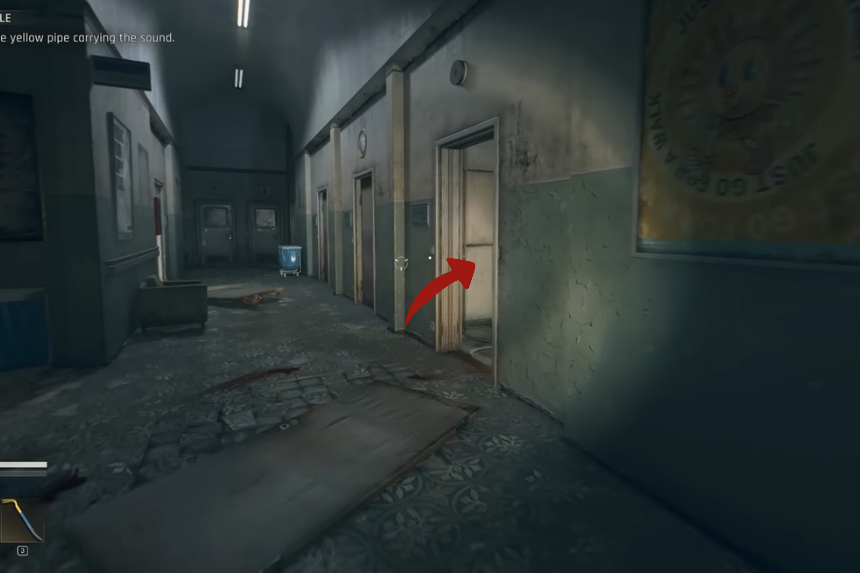
Stone Sigil: Blood
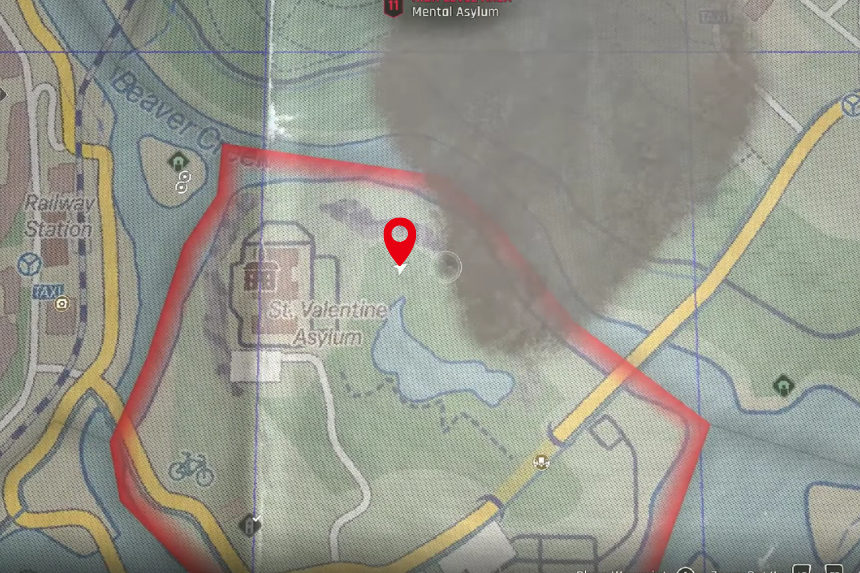
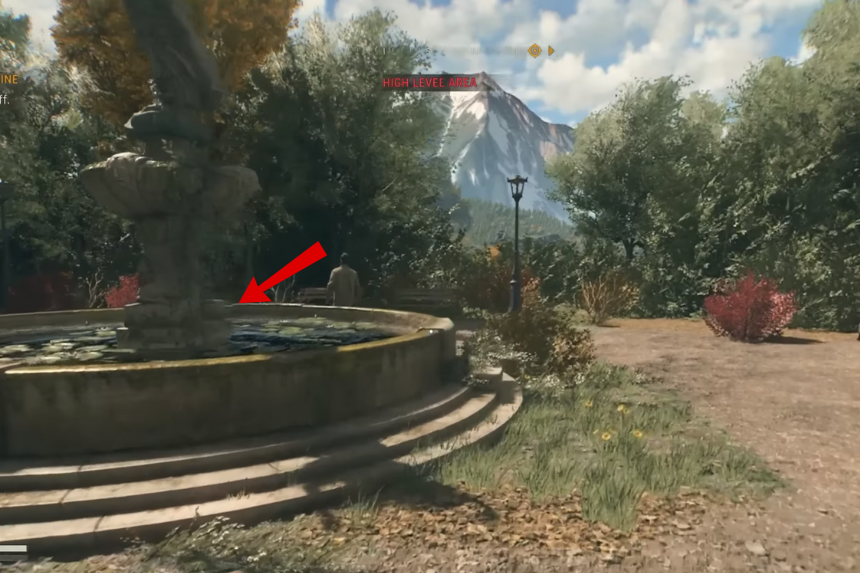
You will find this one in the Mental Asylum area of Castor Woods. It’s a high-level zone, so be careful if you’re not at least Level 11. The Sigil is sitting right in the middle of a fountain in the garden, look at the base of the fountain to spot it.
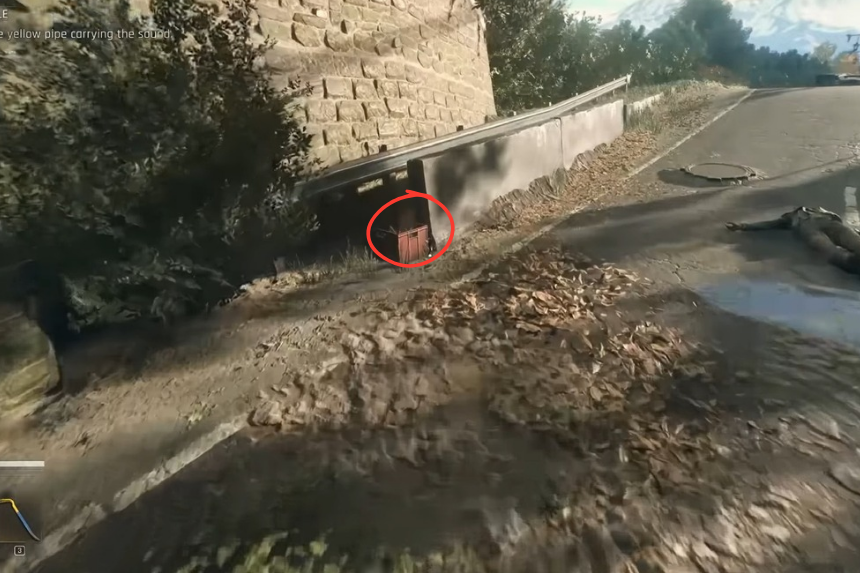
Stone Sigil: Curse
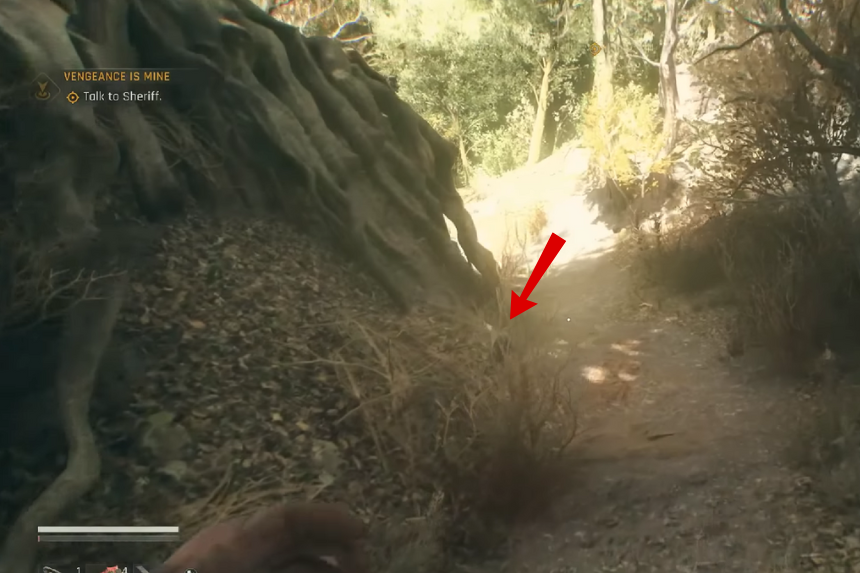
This one is in the Villa Area, not far from the Village Voltage Pole Safe Spot. Just beside it, there’s a skeleton with the Sigil in its mouth. Hard to miss once you spot the tree.
Stone Sigil: Shadow
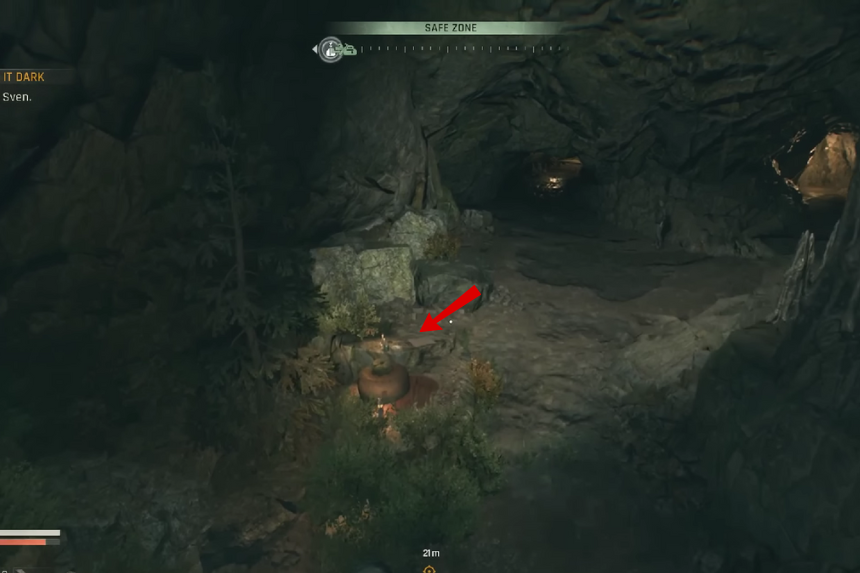
It’s inside Exile’s Cave, which is in the Villa Area. Once you’re in the cave, go to the NPC standing by a candle, and look down, the Sigil is on the ground near him. If you can’t see it, just use Survivor Sense and it will light up.
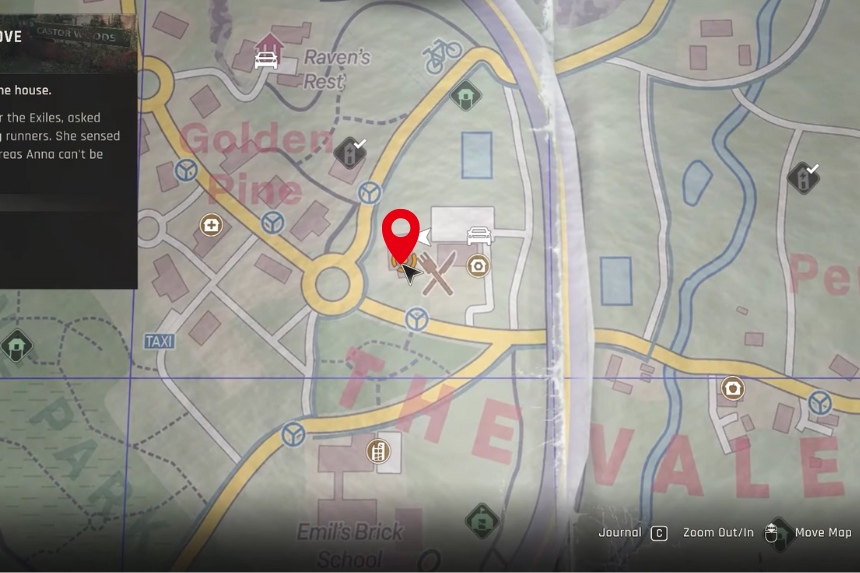
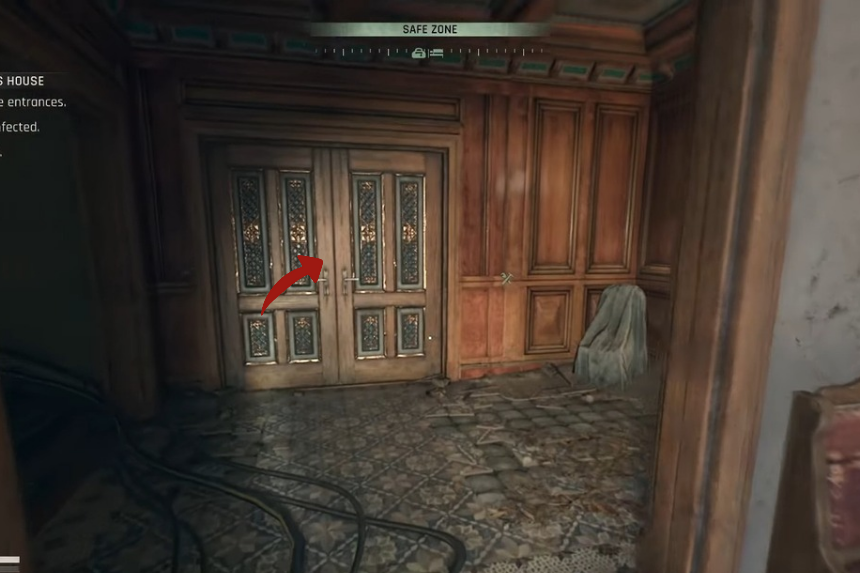
All Dr. Paulaner Diaries
Go to the villa area. Here, you will find a big bungalow guarded by lion statues. Inside the bungalow, you will find the three diaries.
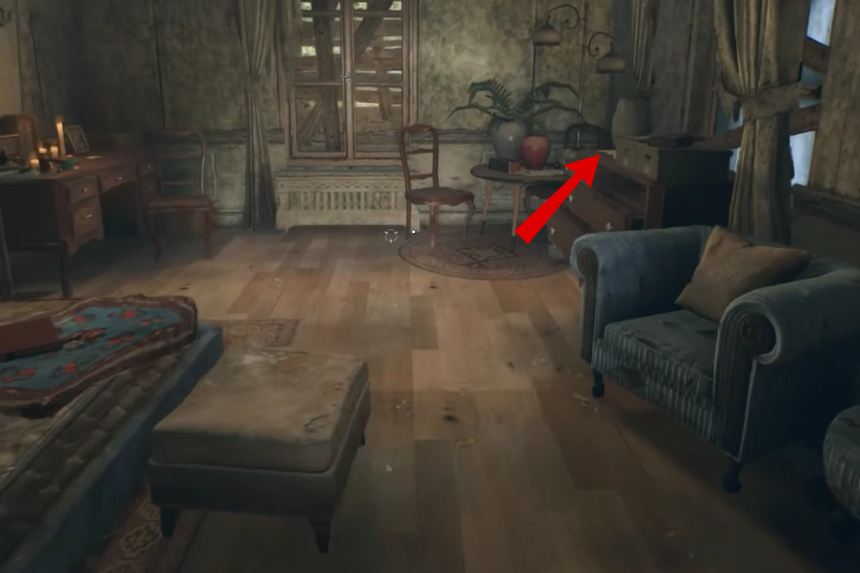
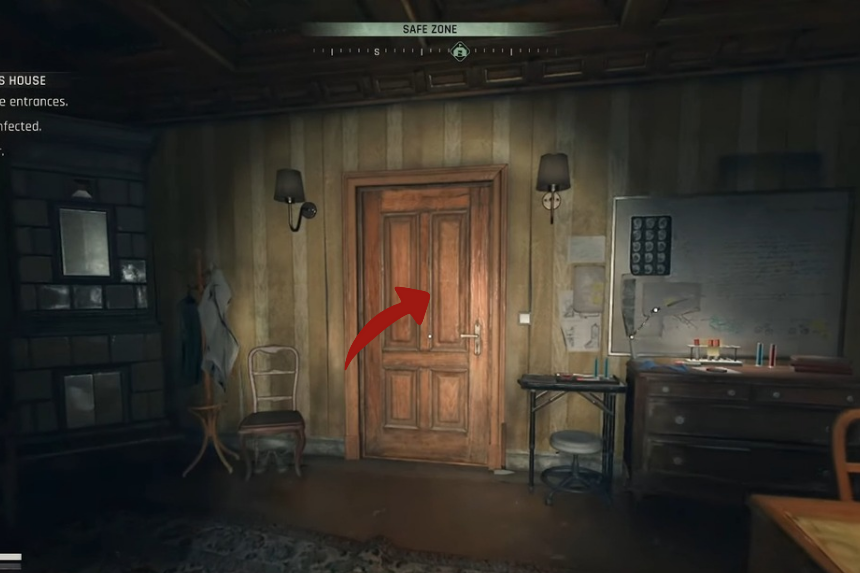
Dr. Peter Paulaner Diary: Diary No.1
Head inside the bungalow. In the drawing room, you will find Dr. Peter Paulaner Diary on a book shelf.
Dr. Peter Paulaner Diary: Diary No.2
In the same house, go to the first floor. You will find the second diary on a bookshelf outside the bedroom.
Dr. Peter Paulaner Diary: Diary No.3
In the bedroom, you will find the third diary, inside a cupboard.
All Fisher Family Documents
Eleanor Fischer, was a woman whom people used to call a witch during the old Wiesensteig trials in 1562. But according to her family, she wasn’t a witch, she was someone who discovered a strange kind of science that let her live longer and heal in ways no one understood.
The two main documents, The Story of Eleanor Fischer and Heinrich Fischer’s Last Will and Testament, tell the story of a powerful legacy built on forbidden knowledge, passed down through the Fischer bloodline.
The Story of Eleanor Fishcer Location

Head towards the Saint Valentine’s Asylum. In the clothes washing area, you will find a ventilation shaft. Crawl through the ventilation shaft to move to the next room. On the shelf, you will find the Story of Eleanor Fishcer.
Heinroch Fischer’s Last Will and Testament Location
Go inside the town hall. On the first floor, you will find a reading area. On the bookshelf, in the left side, you will find Heinroch Fischer’s Last Will and Testament.
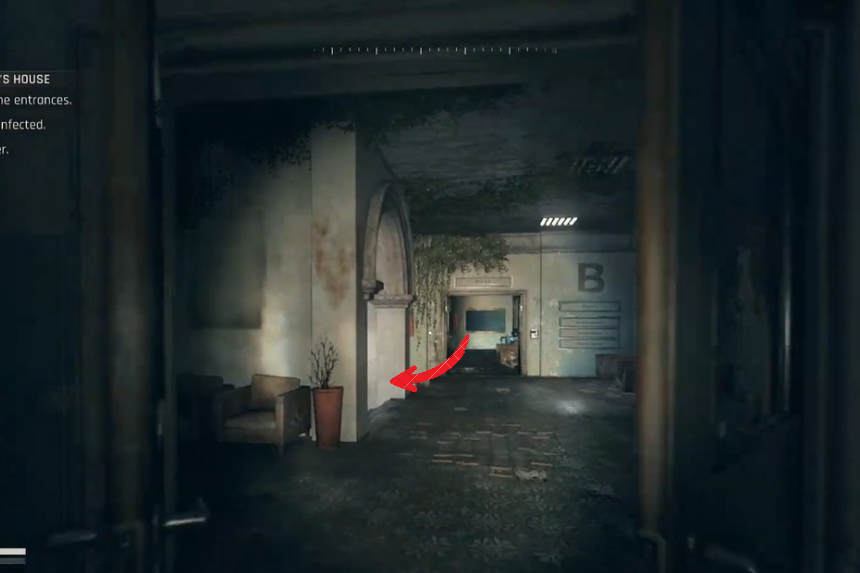
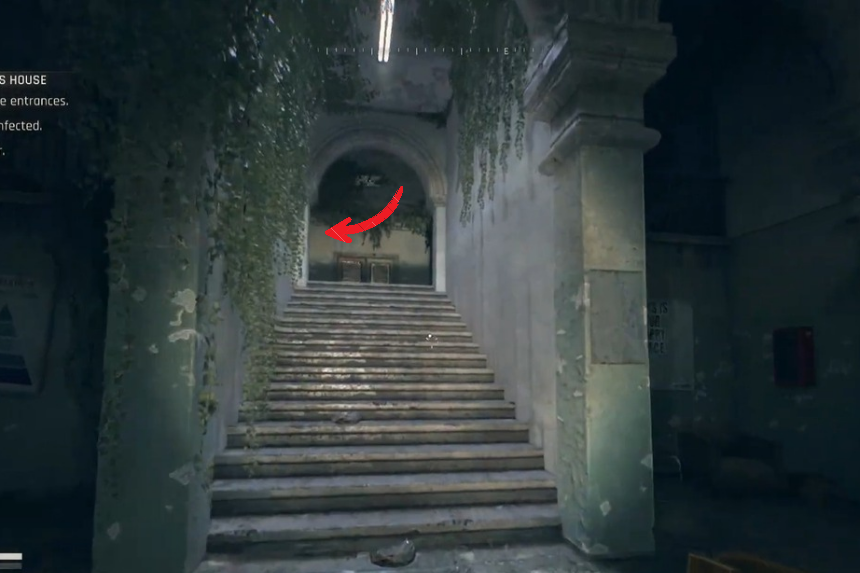
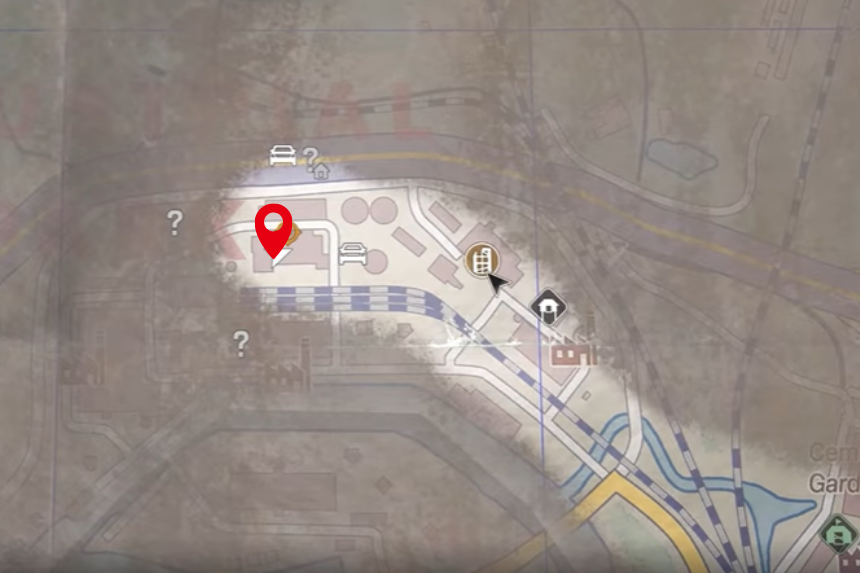
All Asylum Patient Records
Lydia, found outside, gives you the quest. After speaking with her, regular zombies won’t attack for a short time, but infected can still detect you. Head inside and track down the files as you progress through the mission.
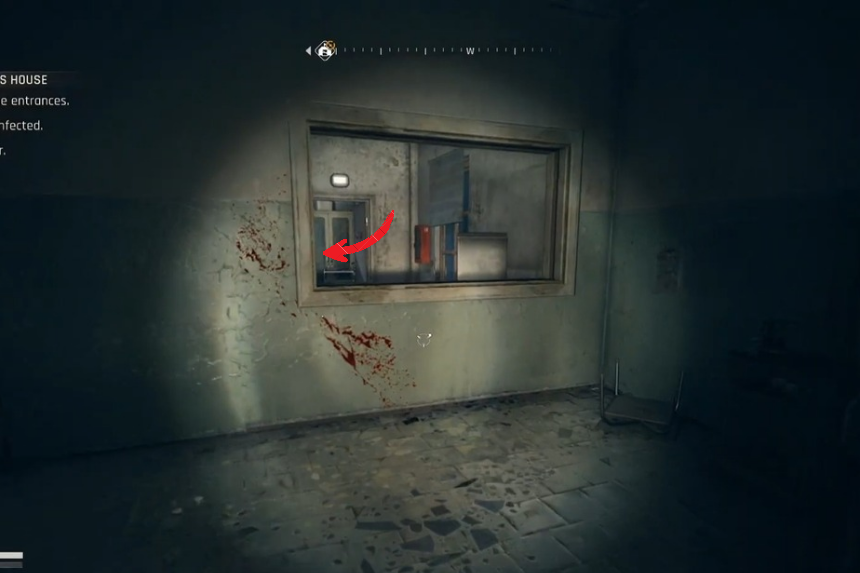
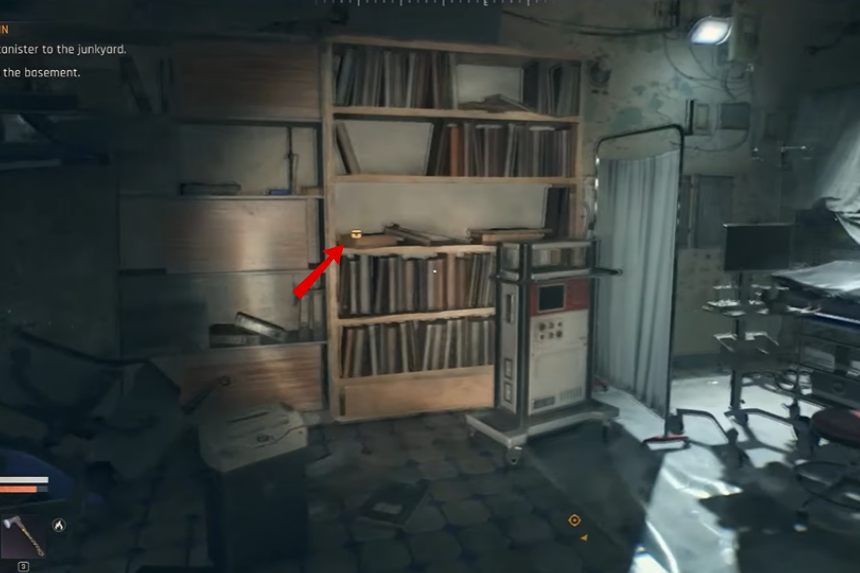
Project 1913: Subject Otto
On the first floor, go past the elevator into the room ahead. Use the air vent inside, crawl left until the end, and drop into a room with a corpse. Otto’s file is beside the body.
Project 1913: Subject Hans

Return to the hallway and check the room to the left. You’ll see another corpse inside. Hans’ records are sitting on the table.
Project 1913: Subject Helga
Still in the same room as Hans’ file, turn right once you step in. Helga’s record is lying on the table near the door.
Project 1913: Subject Kurt

Go back to the asylum’s entrance. Take a left to find a small office with shelves. Search them to pick up Kurt’s file.
Project 1913: Subject Ingrid
From the office, head upstairs into Block B. Turn left and follow the hallway to the end where there’s an opening in the wall. Jump through, then drop into the next room through another gap. Ingrid’s record is in there.
Project 1913: Subject Maria
While looking for the drug Neuroraze, Lydia begins losing control of the zombies. In that section, Maria’s file will be waiting on the table right in front of you. Remember, all six records can be collected during this single mission, so make sure to grab them before moving on.
All Castor Woods Recipes
Below, we have listed all the Castor Woods Recipes that are found throughout the game which tells the stories of all the residents in Castor Woods.
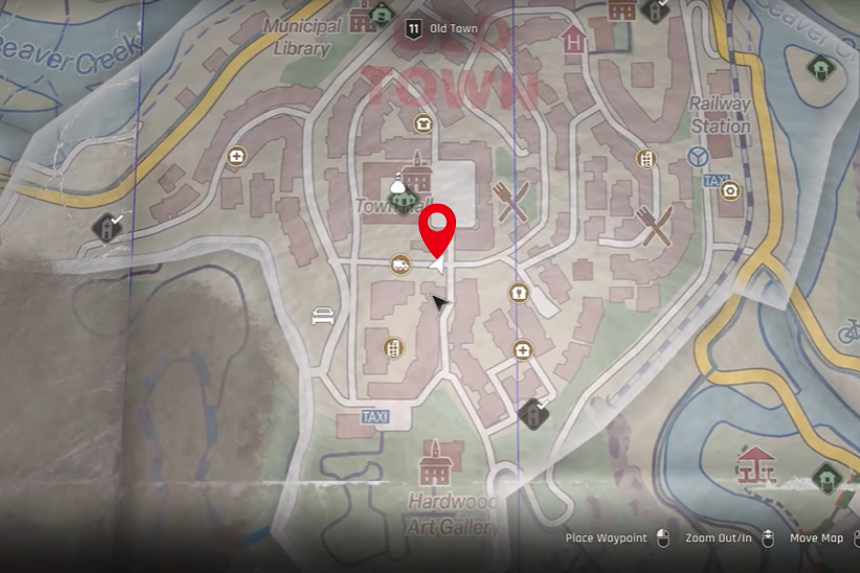
Recipe 1: Beaver Tail
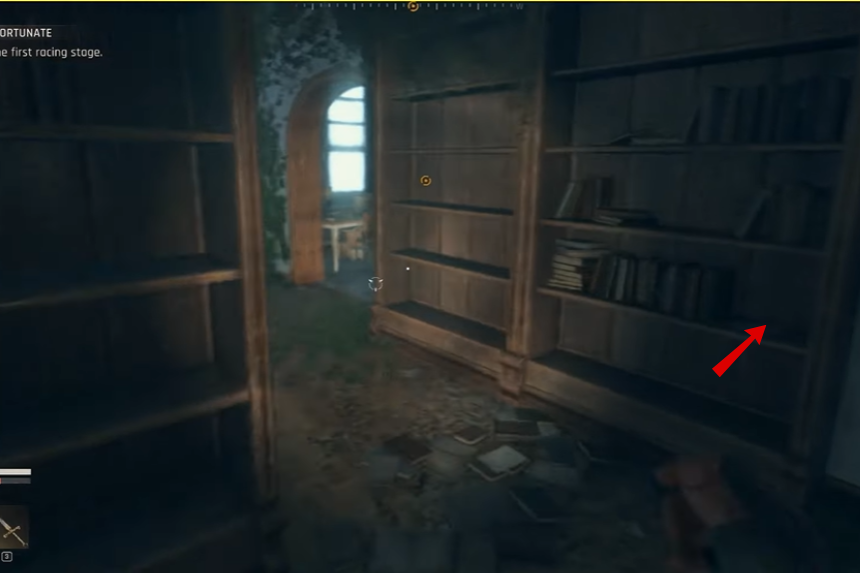
In the Old Town, you need to go inside the Municipal Library. On the upper floor, you will find the Beaver Tail recipe on the bookshelf.
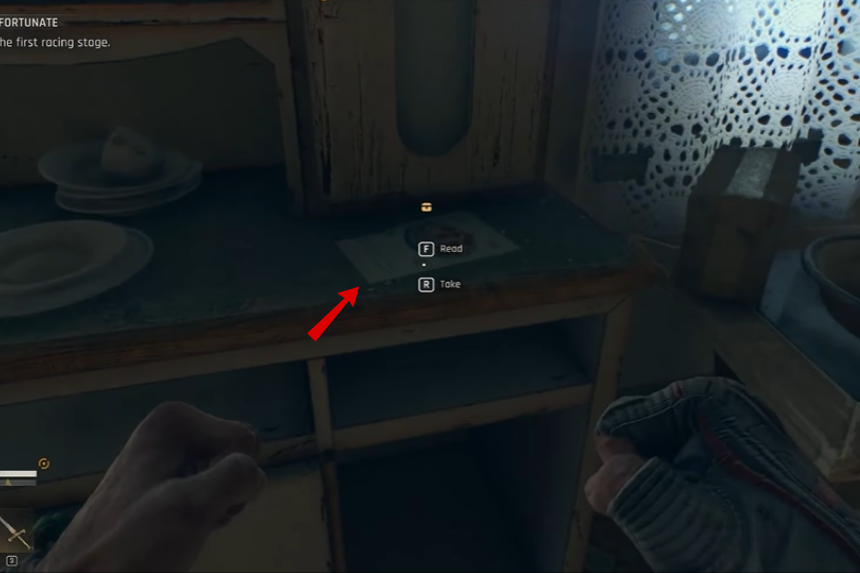
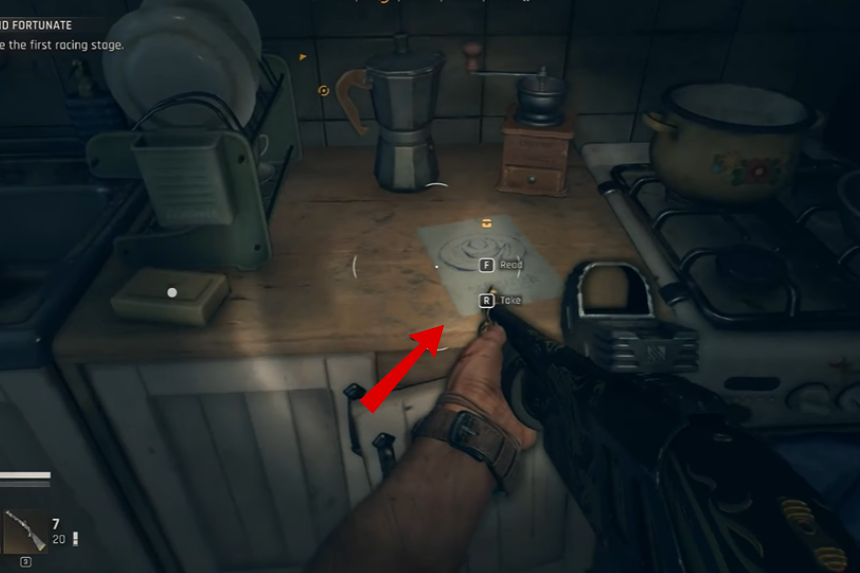
Recipe 2: Carrot Cake
In the old town area, go inside the big green building. You will find the carrot cake recipe on a table in the kitchen area.
Recipe 3: Iris’s Quince Liqueur
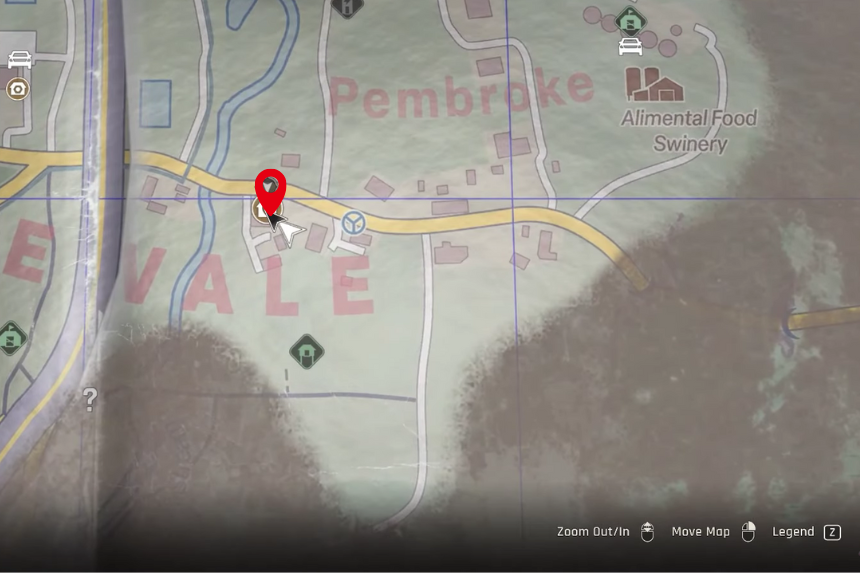
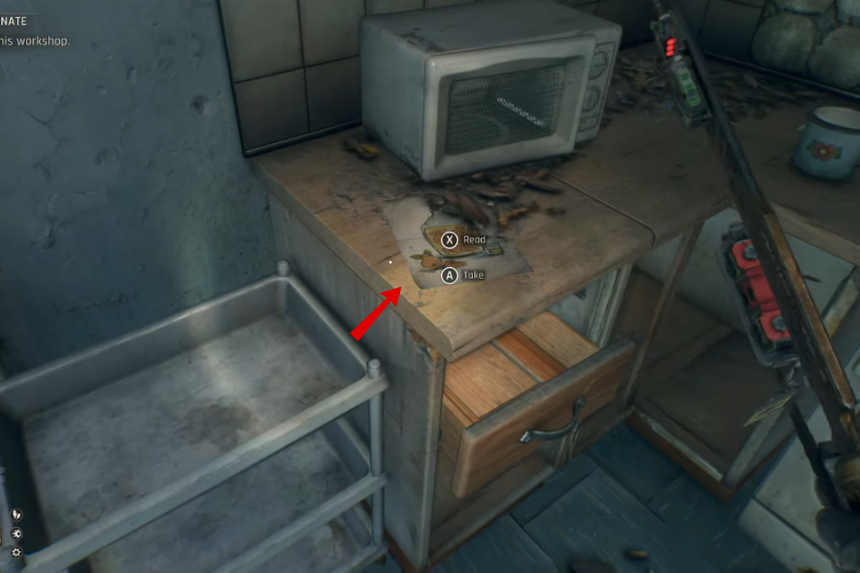
In the Palm Lands, you will find Nate Market. Inside the house, you will find the Iris’s Quince Liqueur recipe on the countertop, near the microwave, in the kitchen area.
Recipe 4: Strawberry Pasta
In the Old Town, go near the taxi stand. In a big abandoned building, you will find the Strawberry Pasta recipe on a table in the kitchen of the apartment.
Recipe 5: Blood Sausage
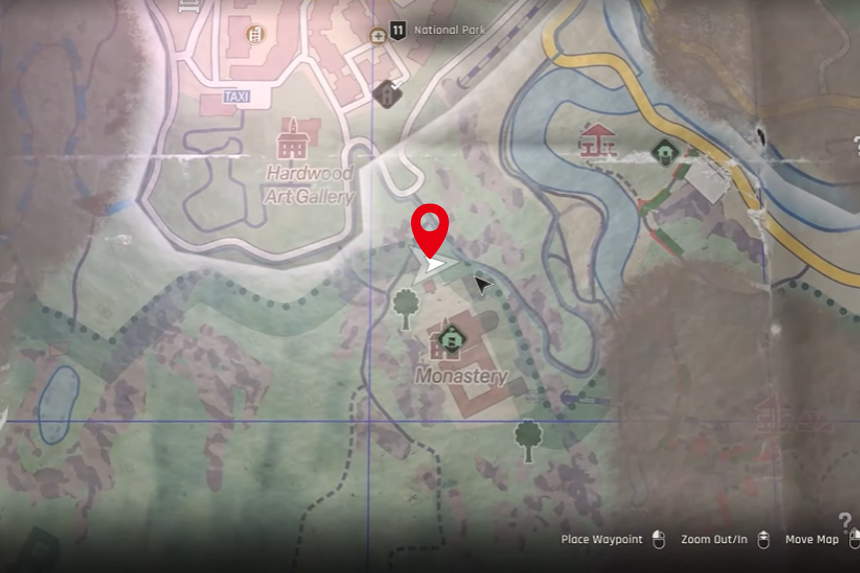
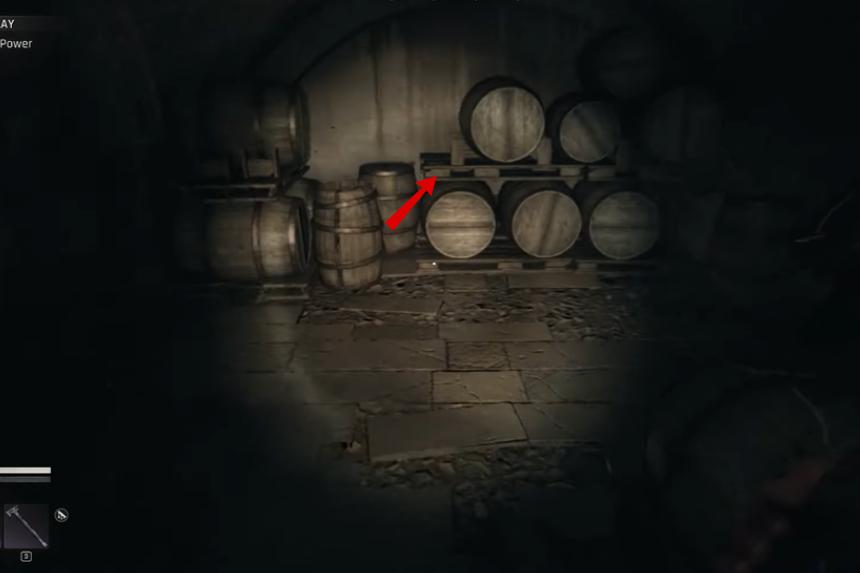
Go to the national area, near the monastery. Just outside the ‘cafe and bistro’, you will find an underground place. Pick the lock to enter. Inside, you will find the Blood Sausage recipe near the barrels.
Recipe 6: Bread Roll with Banana
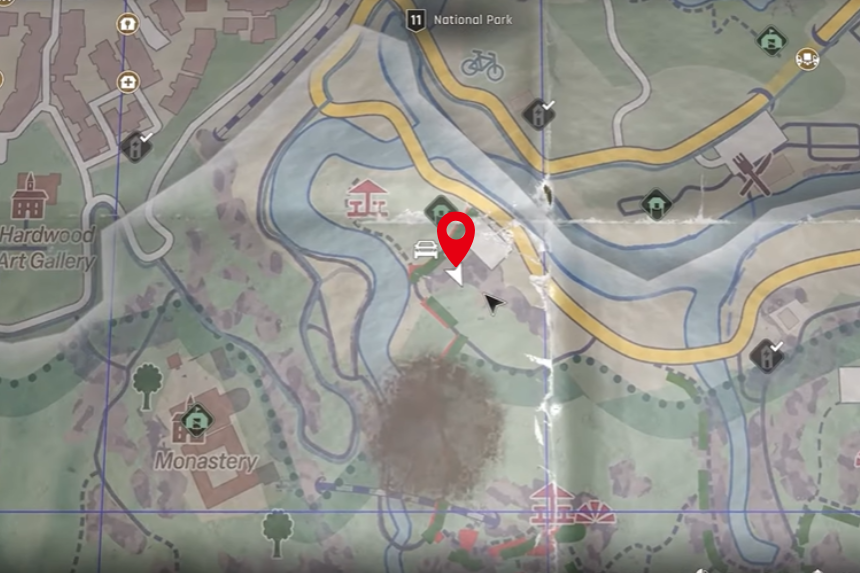
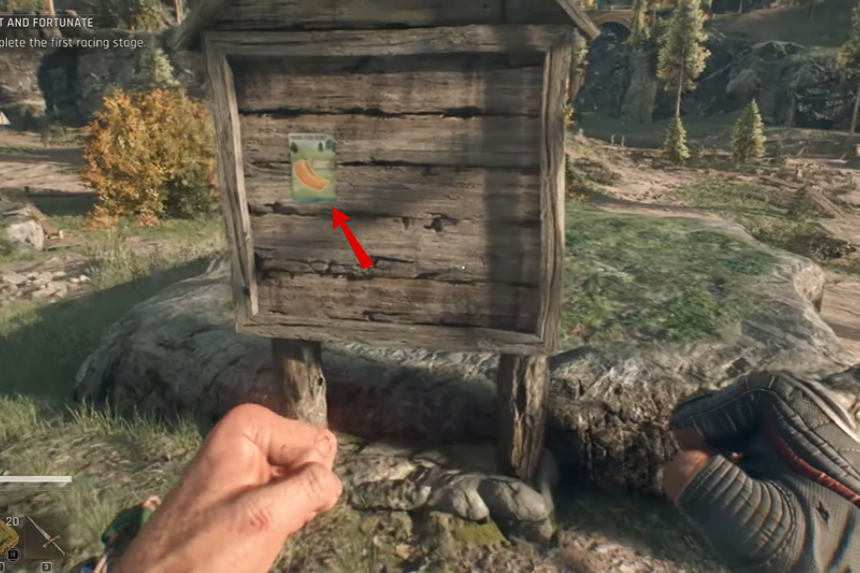
In the National Park area, you will find the bread roll with banana recipe attached to a wooden board.
Recipe 7: Steak Tartare
In the old town area, go inside an apartment, and you will find the stake tartare on a kitchen countertop.
Recipe 8: Fruit Dumplings
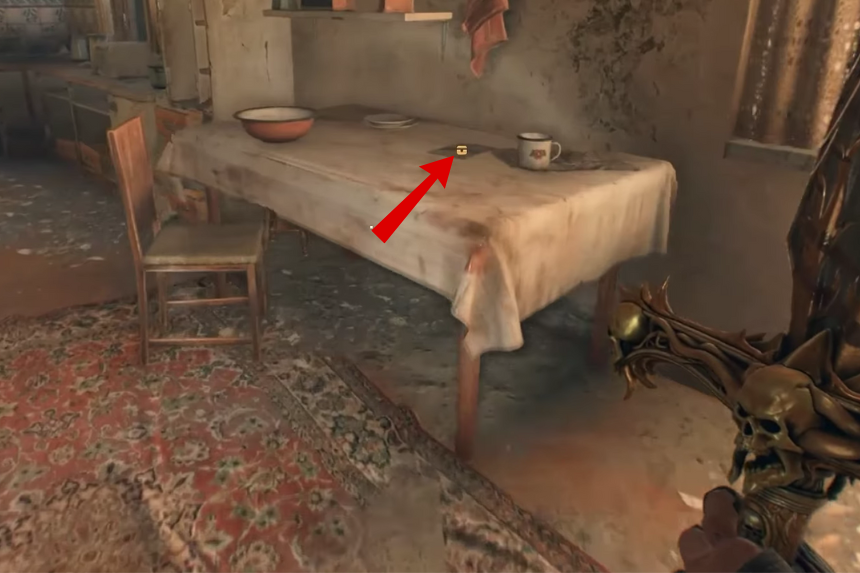
In the farm lands, you will find an abandoned house. The fruit dumpling recipe can be found on the table, in the dining area.
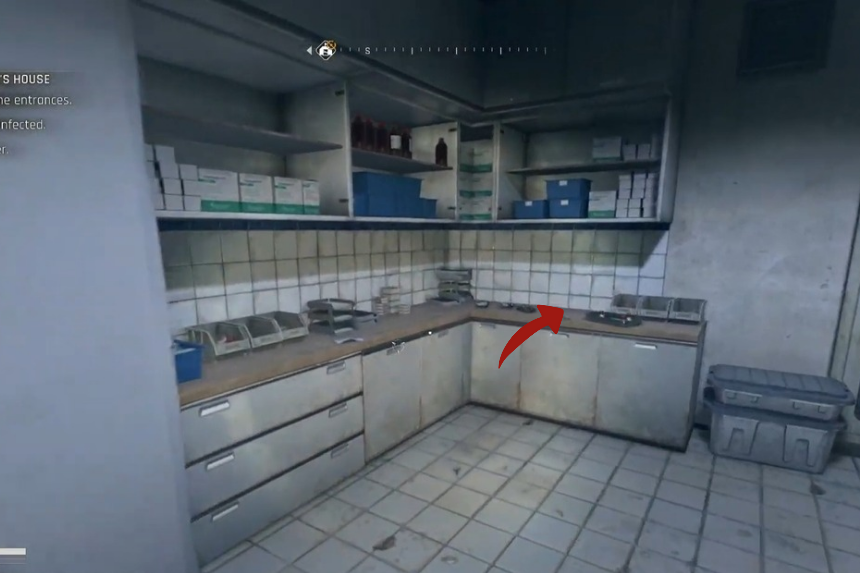
Recipe 9: Flemish Carbonade

In the mental asylum kitchen area, you will find the Flemish Carbonade behind the countertop.
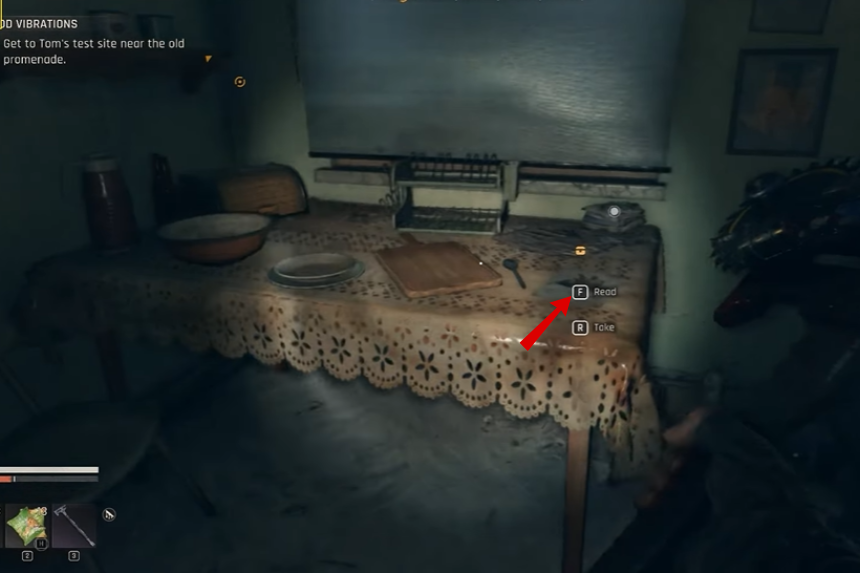
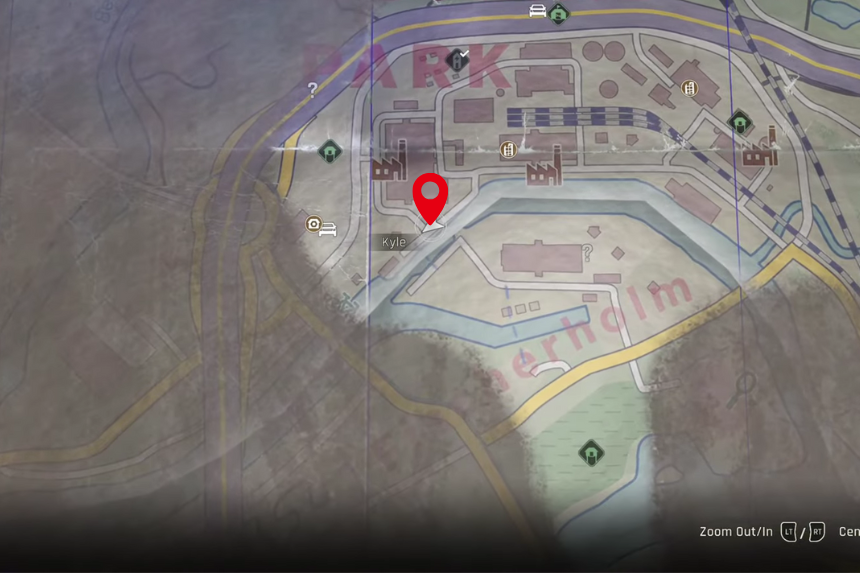
All Baron’s Research Memos
Below, we have listed all the Baron’s Research Memos that we have found in the game. These memos tell the stories of all the research conducted by Baron.
Memo 01
Go to the national park area, and you will find the first memo lying on the ground near a dead body.
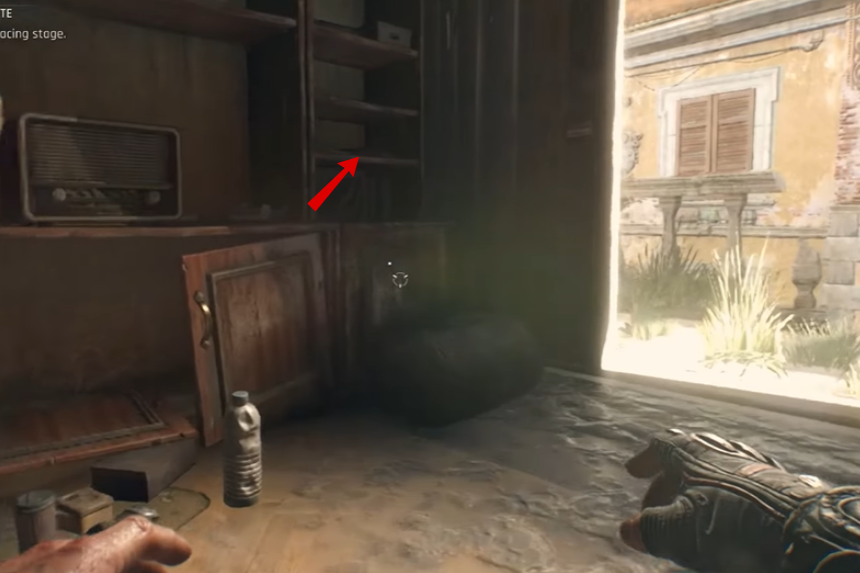
Memo 02
In the industrial zone, you will find a test site. Inside the test site building, on the first floor, you will find the memo on the bookshelf in the operating room.
Memo 03
In the industrial zone, you will find the memo lying on a table in the car dumpyard.
Memo 04
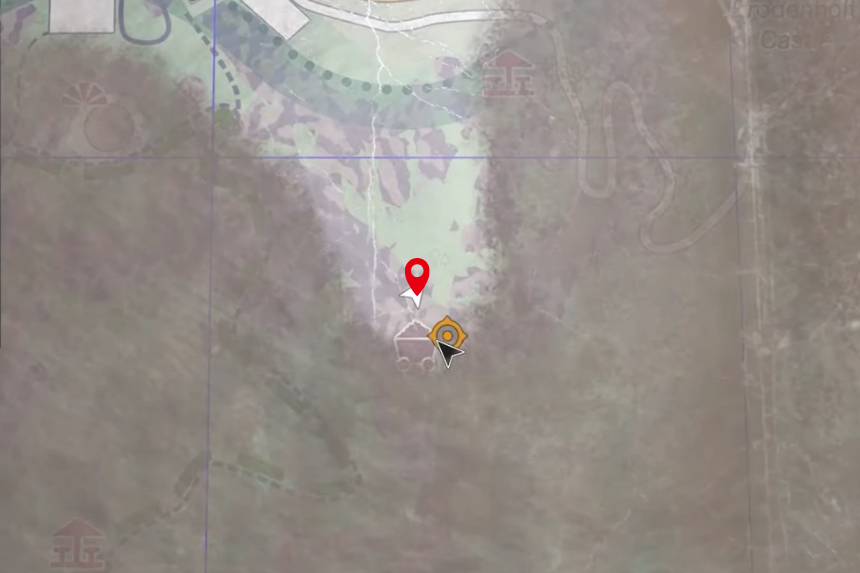
In the National Park area, you will find the memo on a crate near the mines.
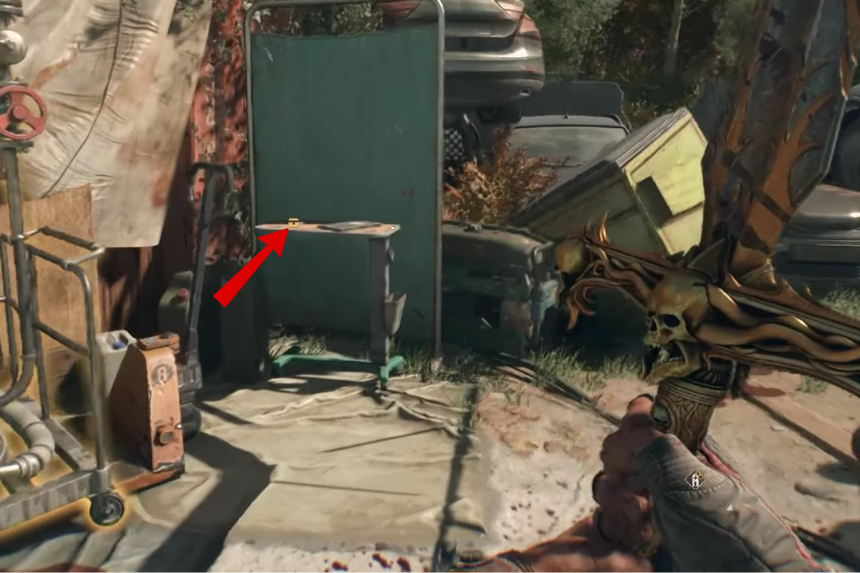
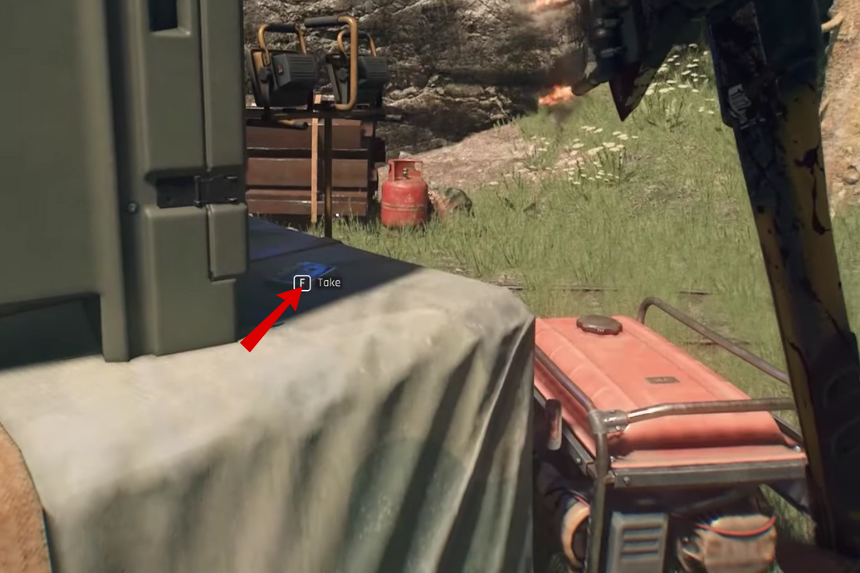
Memo 05
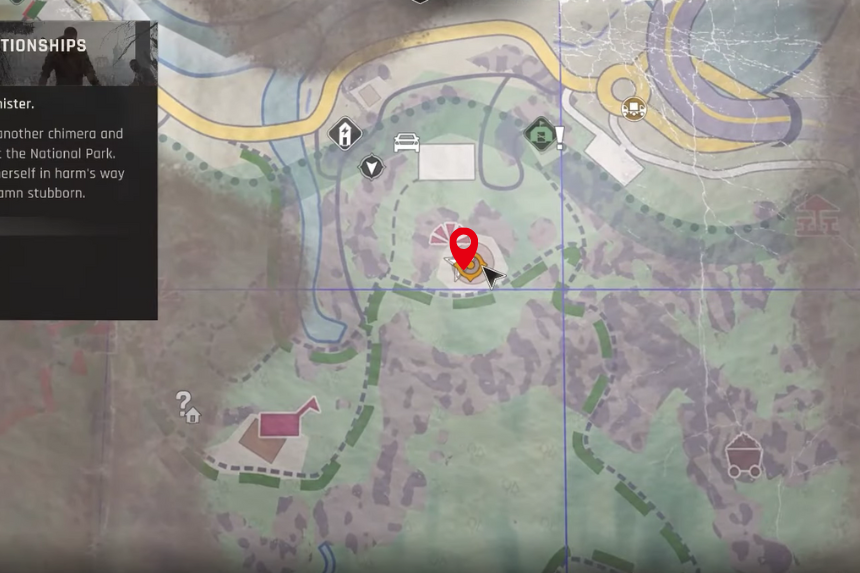
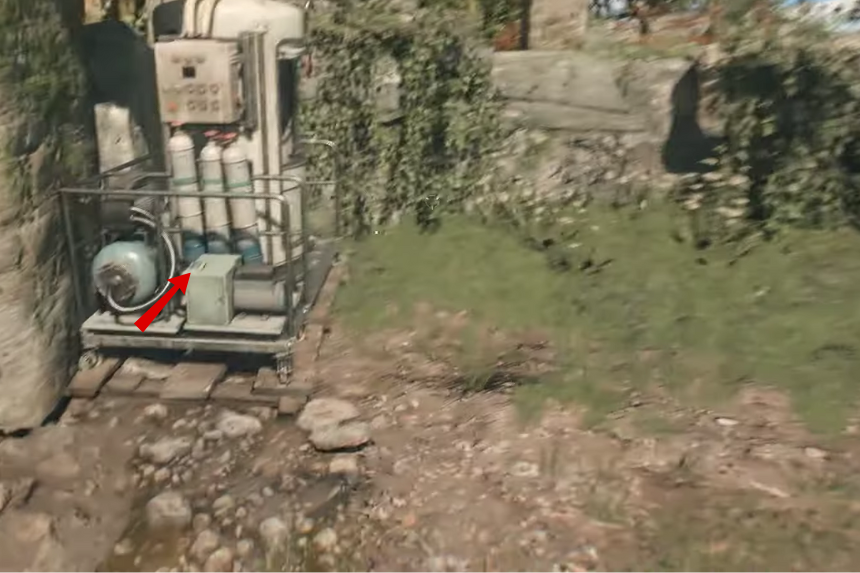
In the National Park area, you will find the memo near some gas canisters.
Memo 06
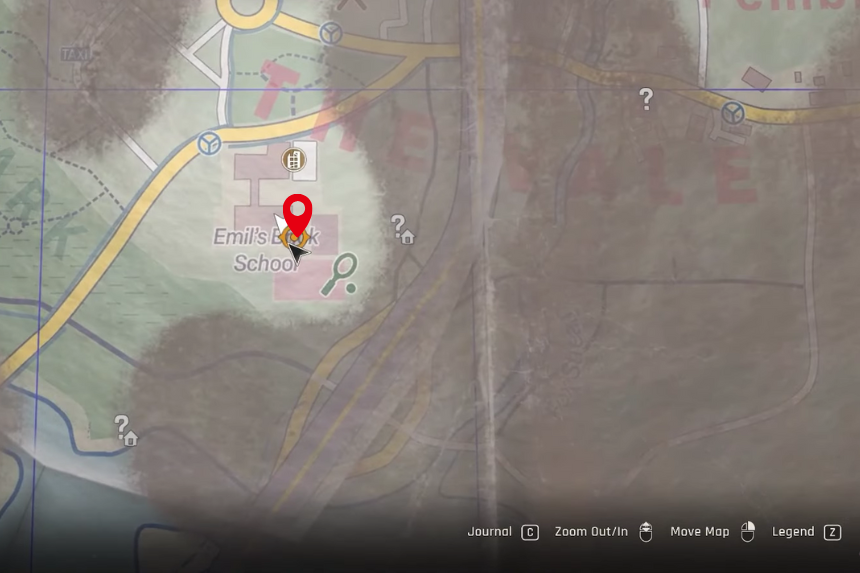
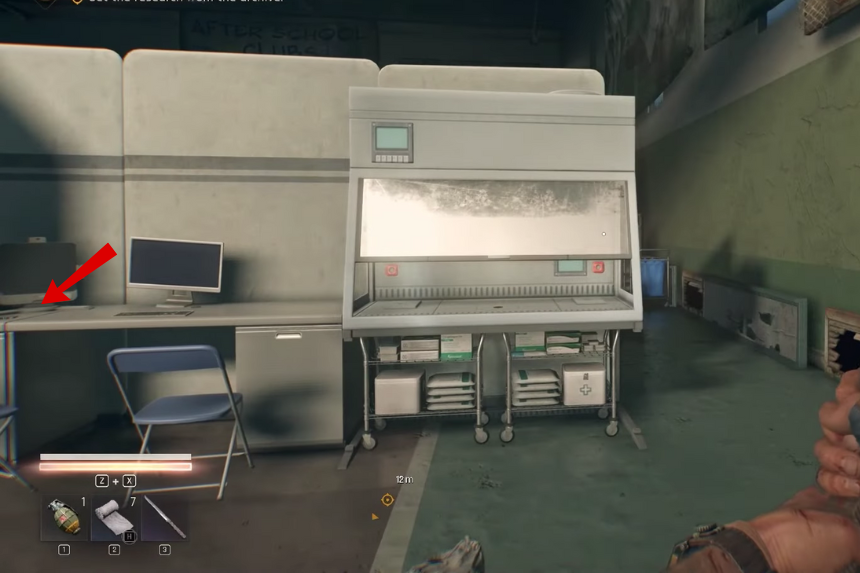
In the Villa area, go inside Emil’s school. You will find the memo on a table, near the computer desk.
Memo 07

In the industrial zone, you will find the memo on a table in the command centre of the building.
Memo 08
You will find the memo inside the factory. You will find it on a table near the computer, inside the control unit of the factory.
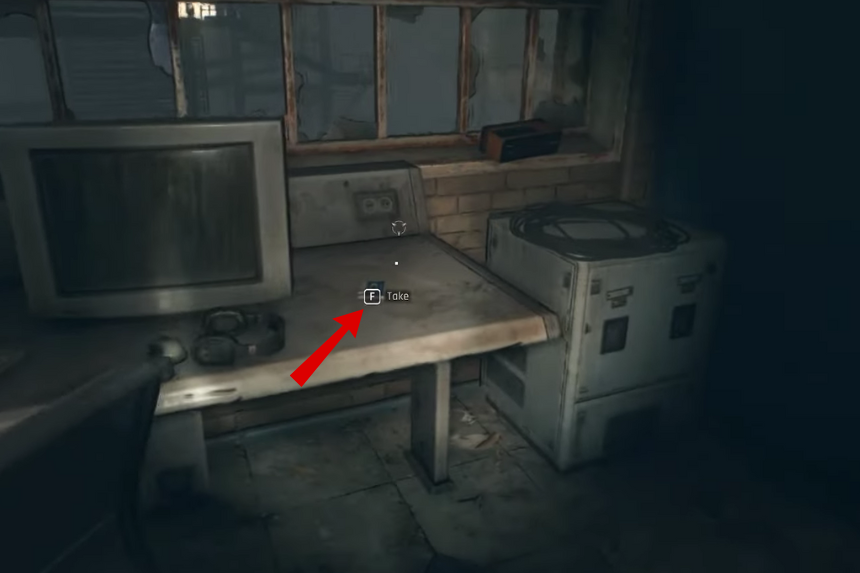
Memo 09
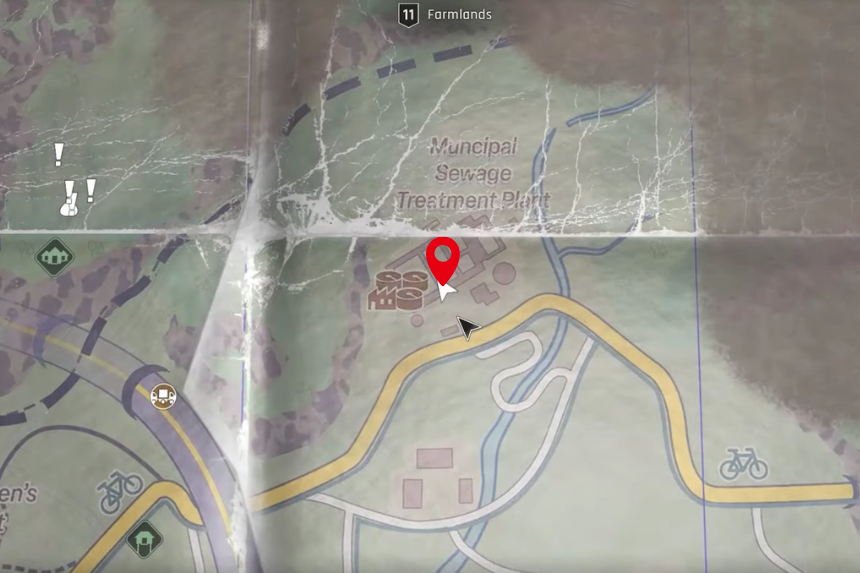
In the Municipal Sewage Treatment plant, you will find the memo lying on the machine, in the middle of the sewage.
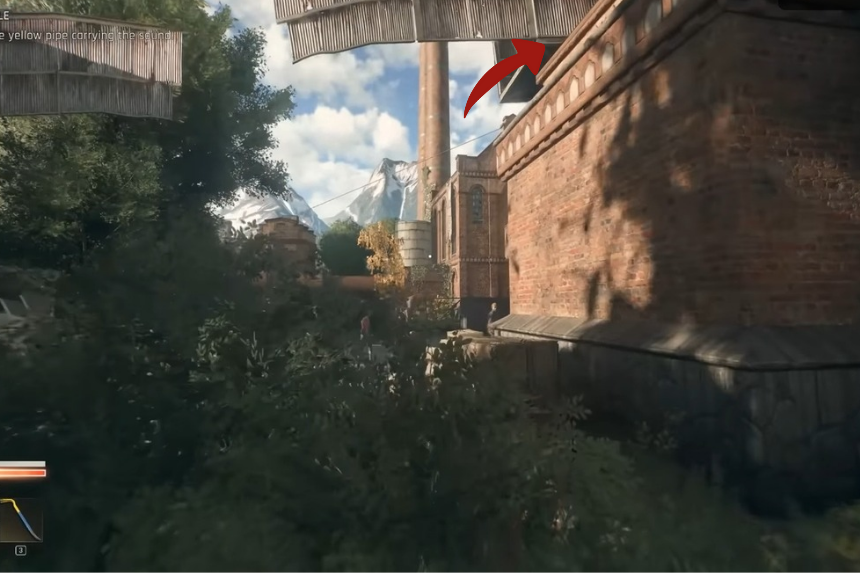
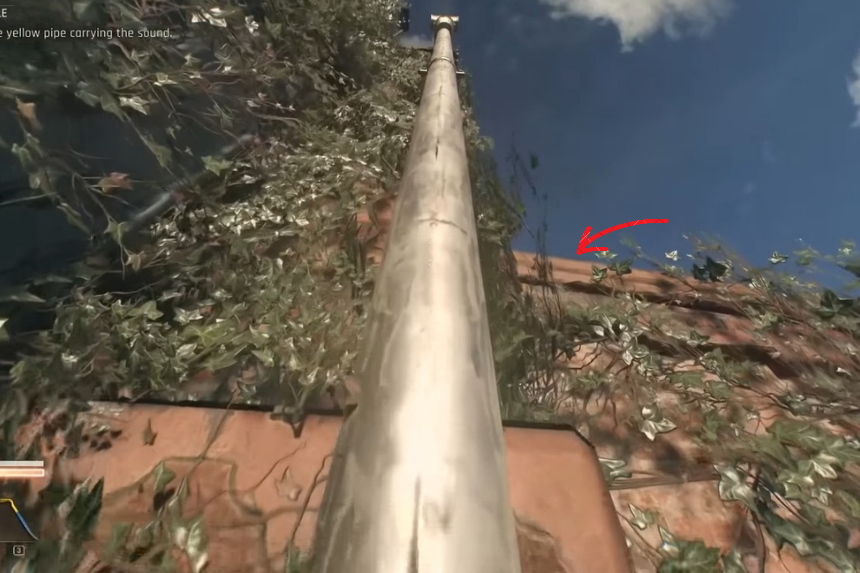
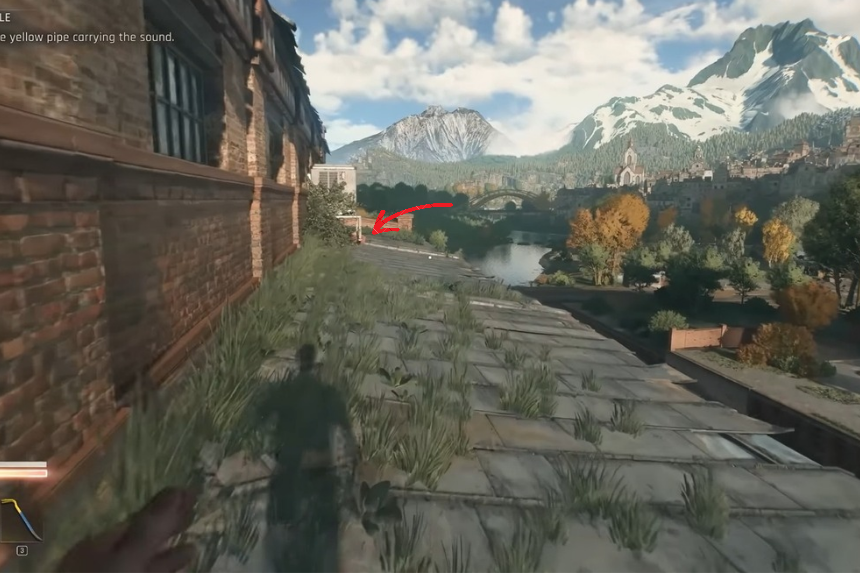
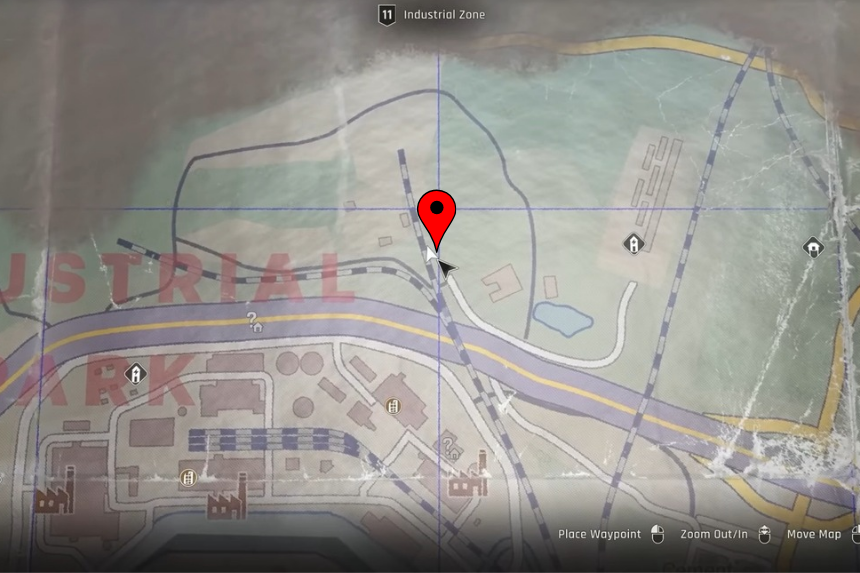
All Hidden Truths with Spark
You can find the hidden truths with Spark all through the map.
EP01: “The Valley’s Veil”
Head west from Old Town along the main road until you reach the Inn, a safe zone before the bridge to Recreational Island. If the Baron’s men are still around, clear them out first. Once it’s safe, go inside the diner, and you will find the recording sitting on a table.
EP02: “Bloodlines and Betrayals”
Go to the Library area in Old Town. Across the street, you will see some newspaper shops and small markets. The recording is on a shelf inside one of these buildings, next to a record player.
EP03: “Nature’s Wrath”

Make your way to the Railway Station in Old Town. West of the station, there’s a U-shaped cluster of buildings. Find the apartments in the central-left part of that U, enter through a window, and look on a shelf inside the large apartment for the recording.
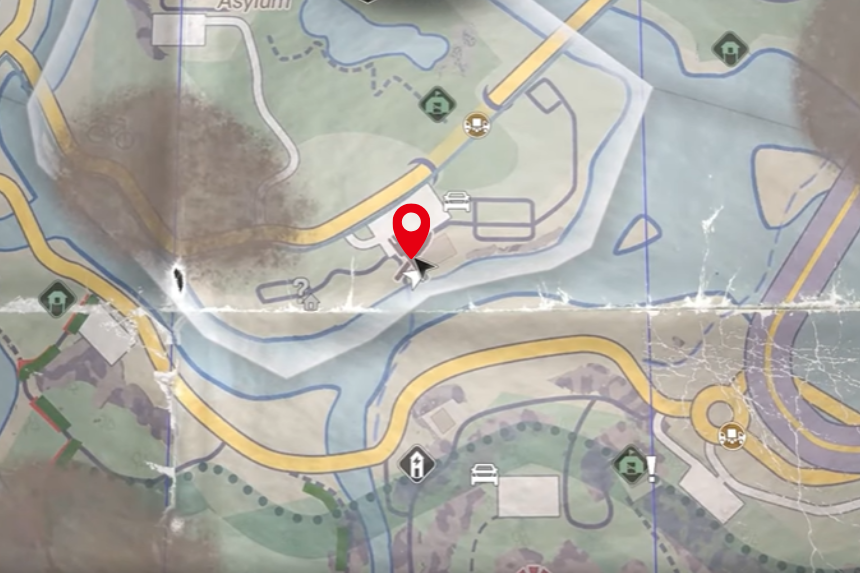
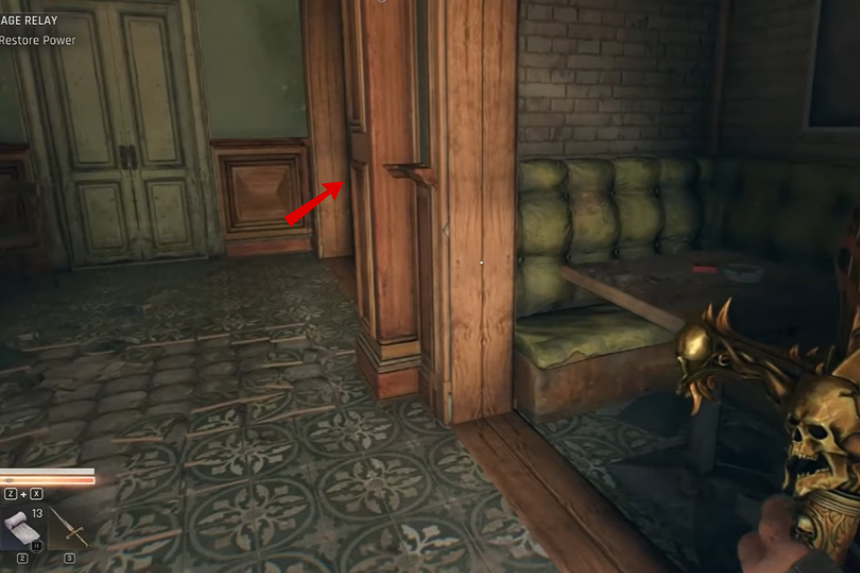
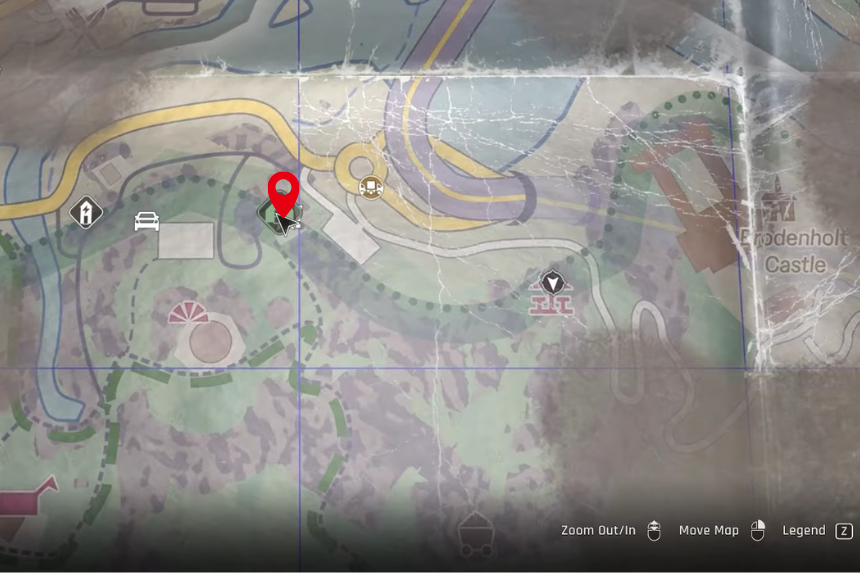
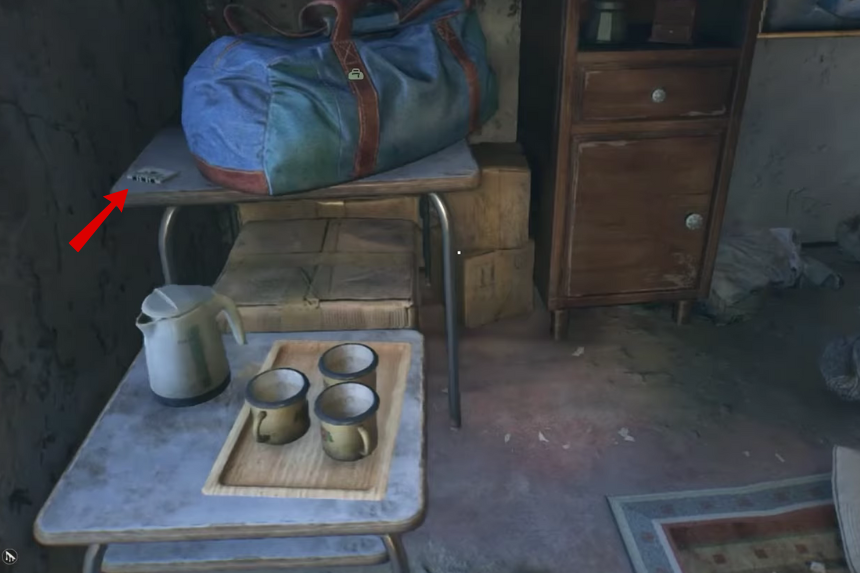
EP04: “Whispers in the Woods”
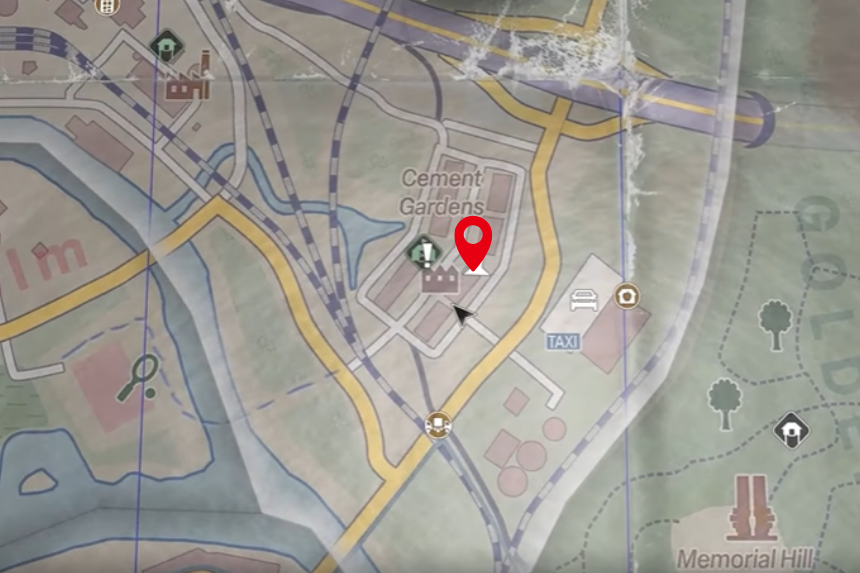
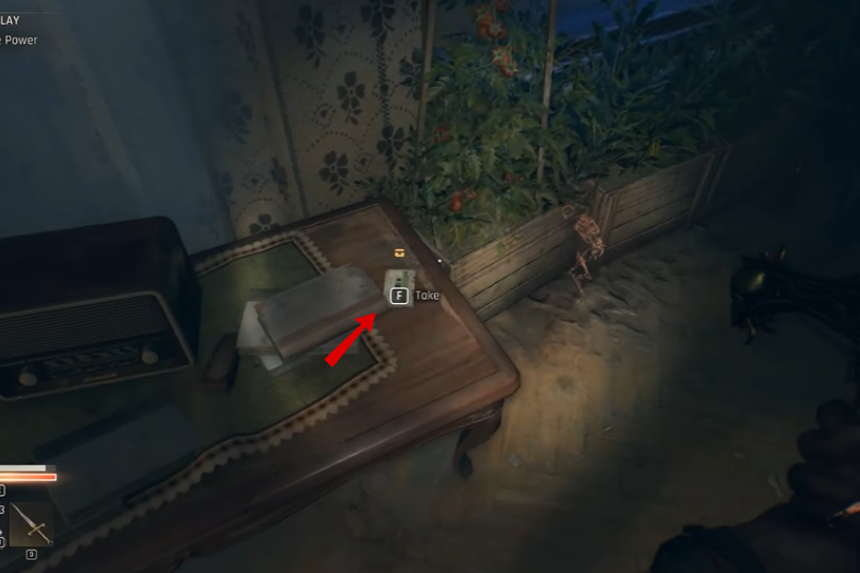
Head to the Cement Gardens area east of the Industrial Hub. Look for the cluster of three buildings on your map. In the southern-facing house, there’s a vent you can use to get inside. Restore the power in the house, then go through the door to find the recording sitting on a table.
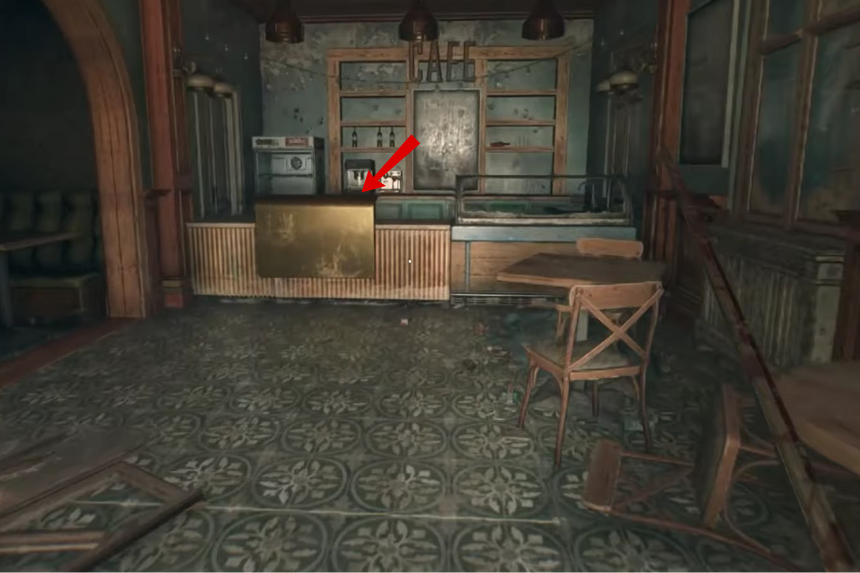
EP05: “The Silent Circle”
Go to the Mental Asylum island and visit the restaurant marked with a knife and fork on the map. The recording is on a table inside. You can also pick up a recipe collectible here.
EP06: “The Huntsman’s Shadow”
Visit the Abandoned House Safe Zone in the National Park region, just above the large convoy from the early game. Inside the house, check the garage near the fuse box the recording is on a table by the door.
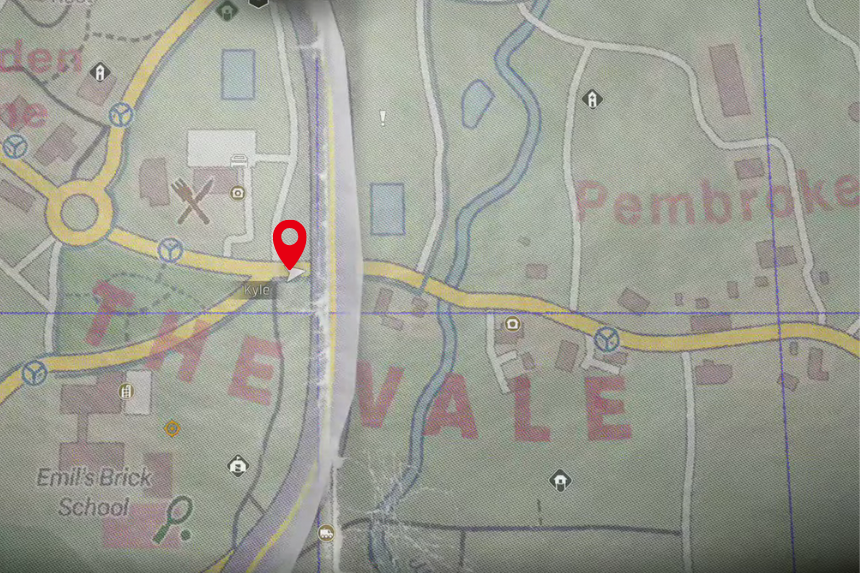
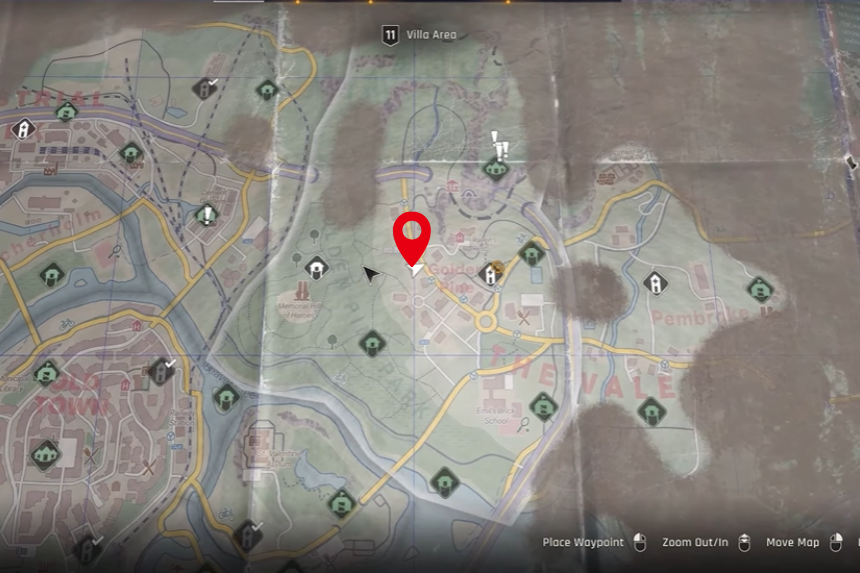
EP07: “The Fischer Enigma”
Go to the Golden Pine suburb in the Farmlands. Look for the roundabout in the residential area, then find the southeastern house with a yellow car outside. Lock-pick the door, go inside, and the recording will be on a table.
EP08: “Threads of Truth”

Head to the Highway Bus Refuge safe spot, which is across from the industrial site you visit during the Behemoth escape mission. The recording is inside the bus, where you can rest.
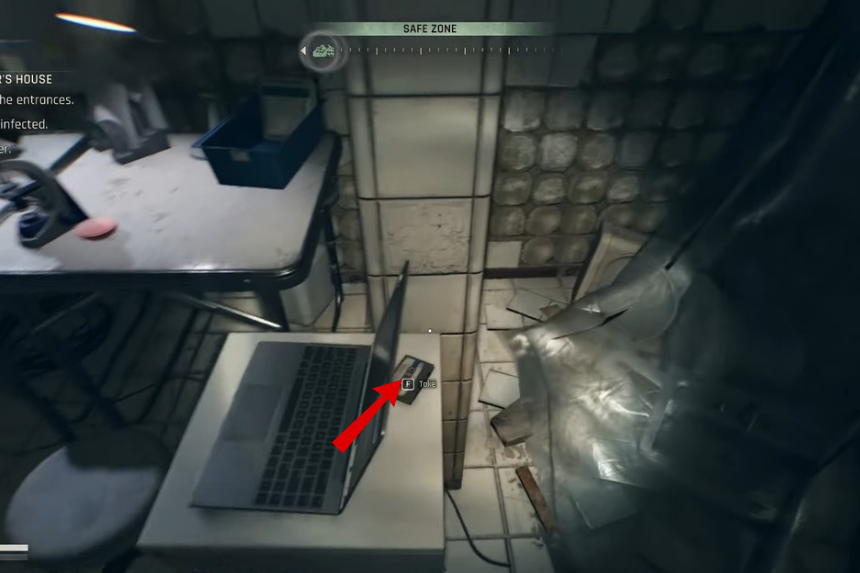
All Dr. Tal Cubero Recordings
Dr. Tal Cubero Recordings can be found all over the map. These recordings are all about the life about Dr. Tal.
Dr. Tal Cubero Recordings: Voice Memo 1 + Voice Memo 3
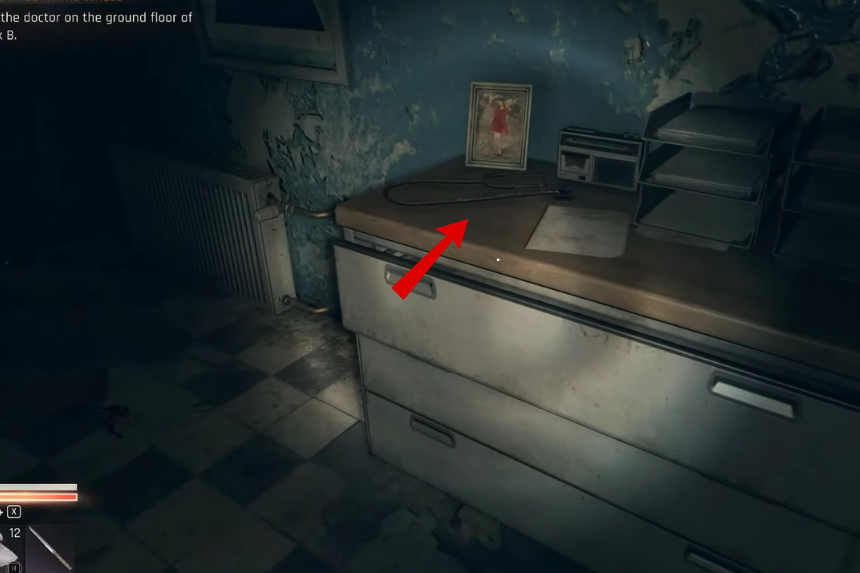
Head towards the Valentine Asylum. Inside the doctor’s room, you will find the first memo on a table beside a picture frame.
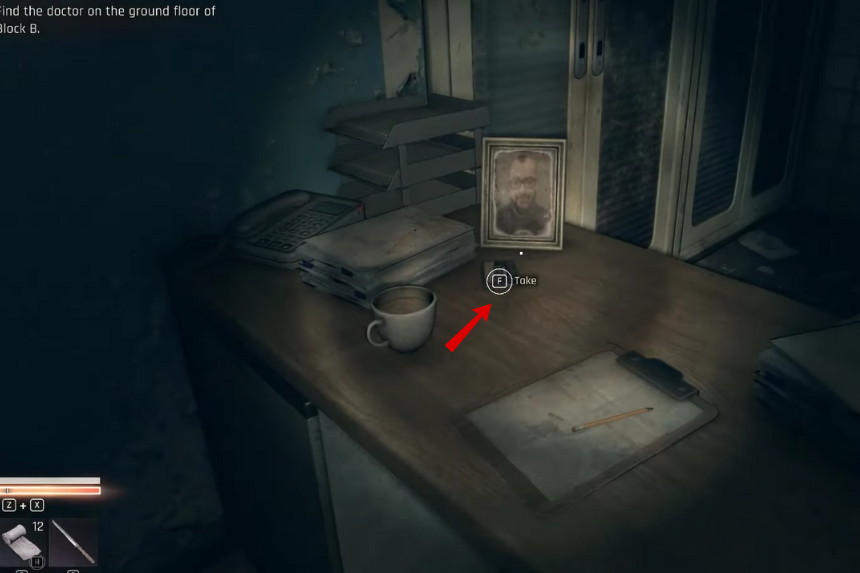
In the same room, you will find the voice memo 3 on the doctor’s table.
Dr. Tal Cubero Recordings: Voice Memo 5
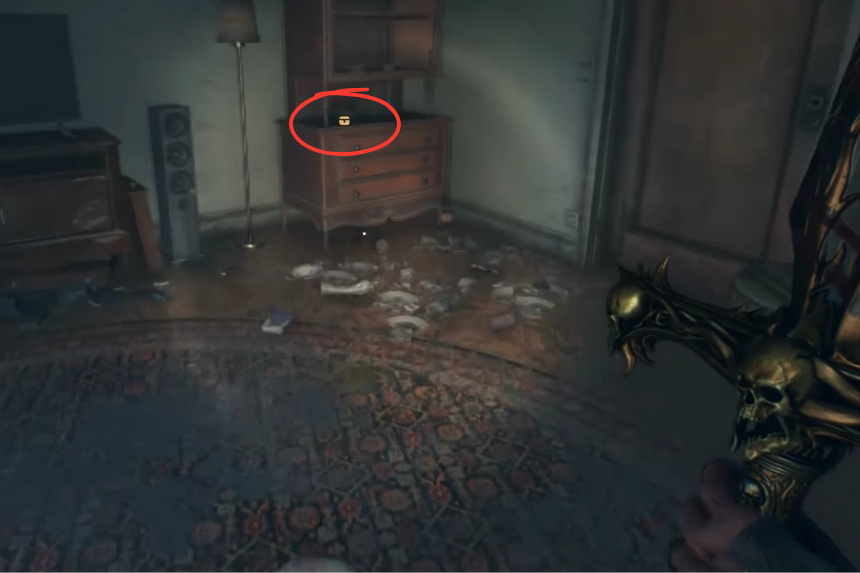
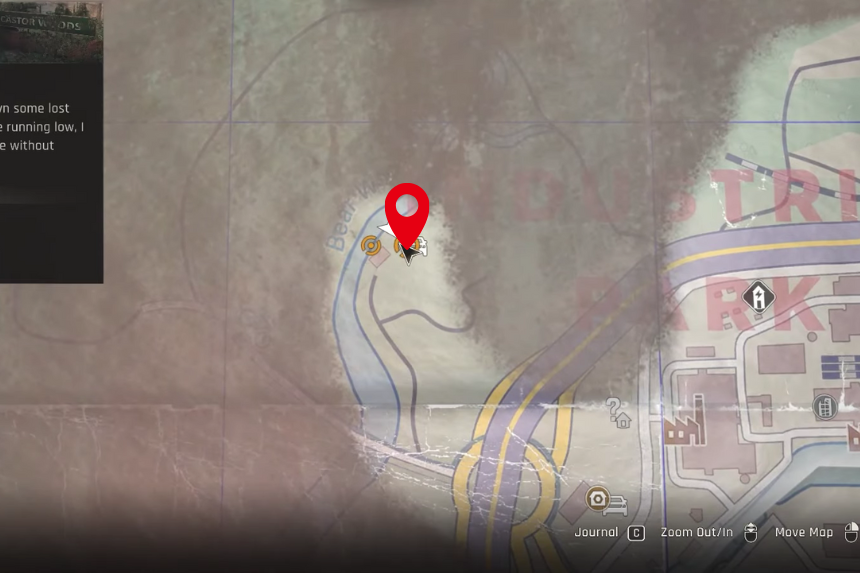
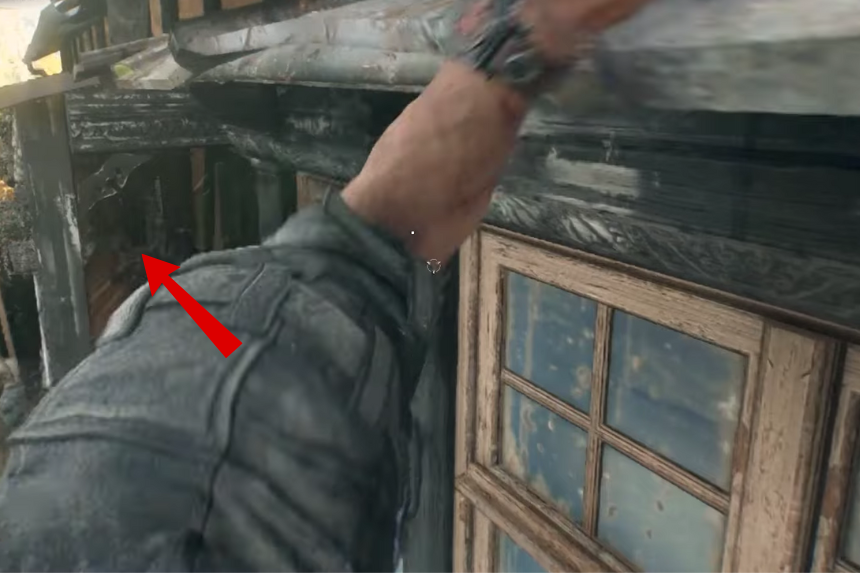
In the Villa area, you will find a bungalow guarded by two lion statues. You will find the memo in a cupboard in the drawing room area.
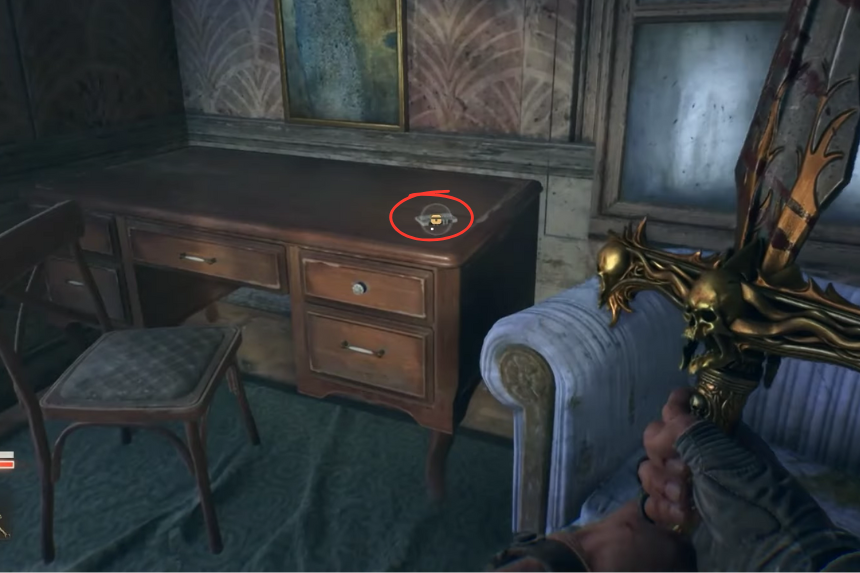
Dr. Tal Cubero Recordings: Voice Memo 4
In the same bungalow, move to the first floor. You will find the memo on a table in the bedroom.
Dr. Tal Cubero Recordings: Voice Memo 2

In the same bungalow you will find the voice memo 2 on a table near some blue boxes.
All Olivia’s Recordings
There are four of Olivia’s audio logs within the game that address some lingering story questions. Here’s the location for all four of them.
Recording #1 – “Mission brief for Major Jablonksi”

The first recording is located on the roof of the building. Follow the side of the building, using the air conditioning unit and window ledges to climb, and once you’re at the top, take left, jump down, and go inside the building. In the long corridor, there’s a room towards the left, you will find the recording on top of a table inside the room.
Recording #2 – “Message from Olivia to Her Father”
This one is located inside a Safe Zone at the Monastery. You will have to enter via a broken window that leads down to the stairs. Climb up to the office and the tape lies on a wooden shelf behind the desk.
Recording #3 – “Message from Dr. Bennet to His Daughter”
Available only after the main story is finished. It’s in the same Monastery office as #2 — check the attached bathroom and look behind the laptop.
Recording #4 – “Dr. Bennet’s Resignation”

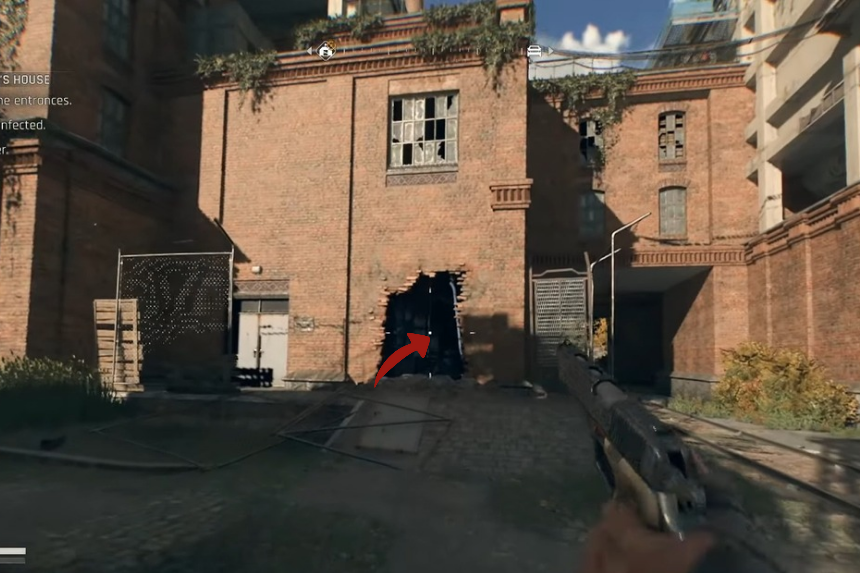
This one is situated in a rundown building in the Industrial Park. Access the building through the ruined wall, and descend the stairs to the basement level, looking for a small room where the recording is — it’s pretty close to a Volatile, so don’t waste much time there if you aren’t prepared to fight.
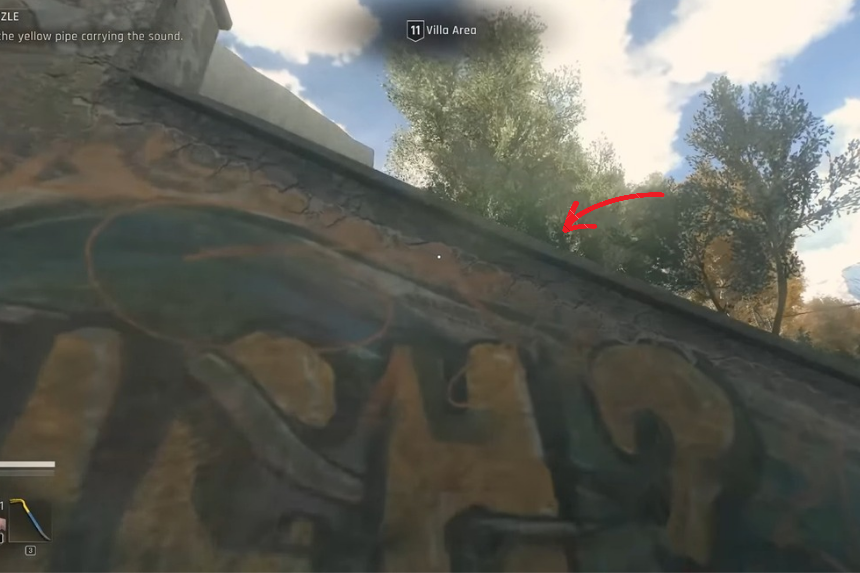
All Murals
Murals are graffiti that were made by the past citizens. You can collect these collectibles for 100% completion.
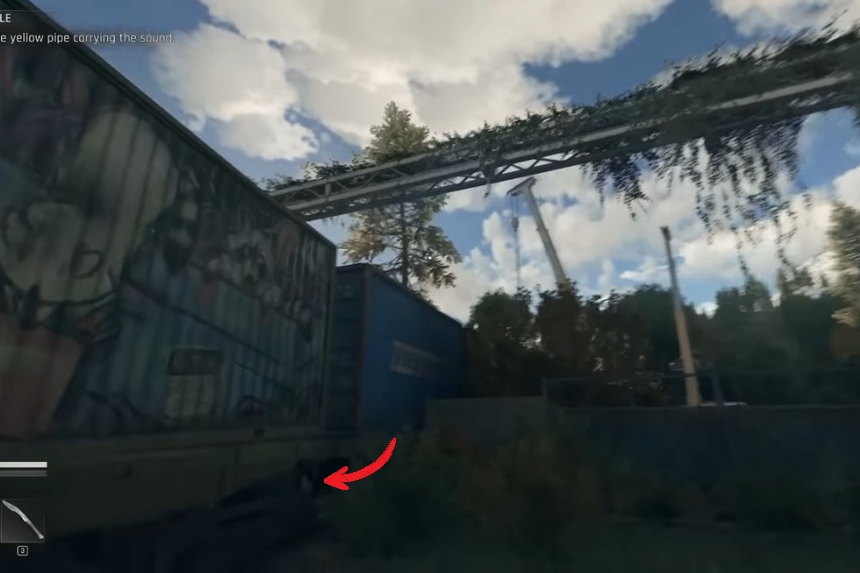
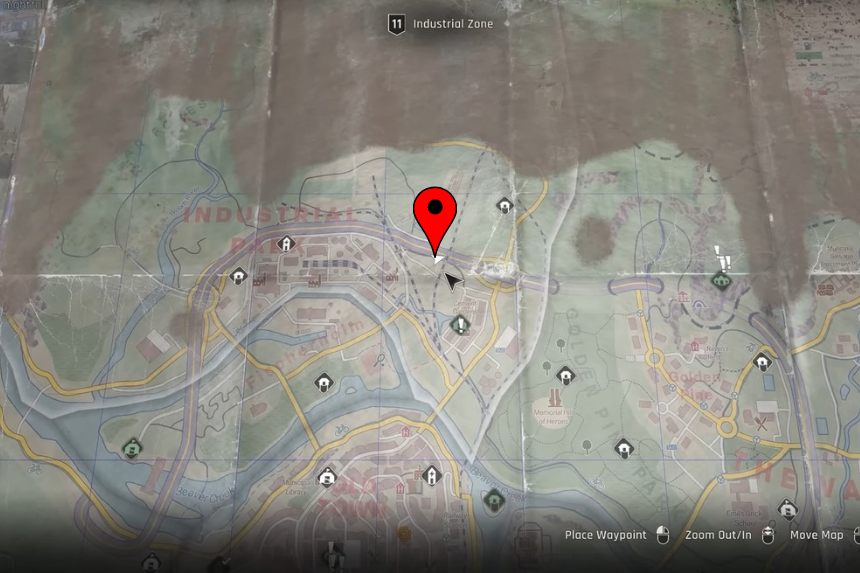
Give Me Your Best Shot
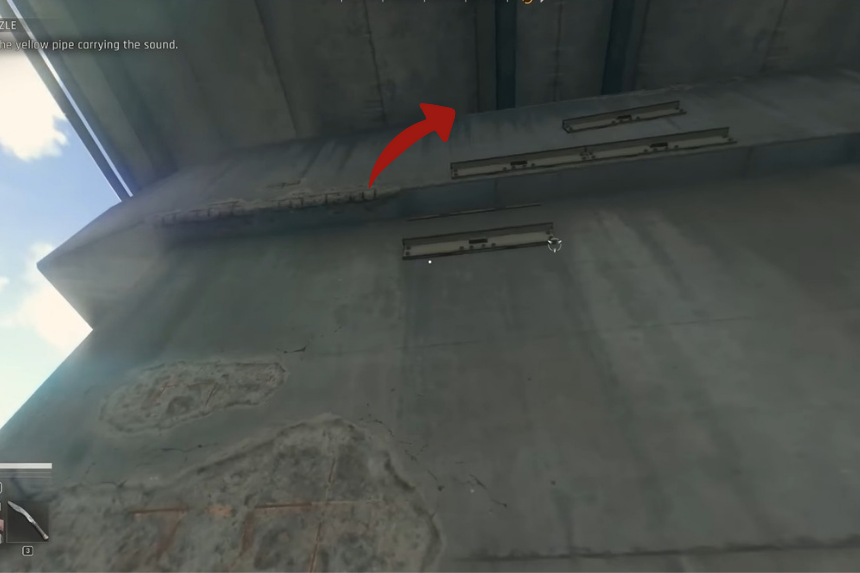
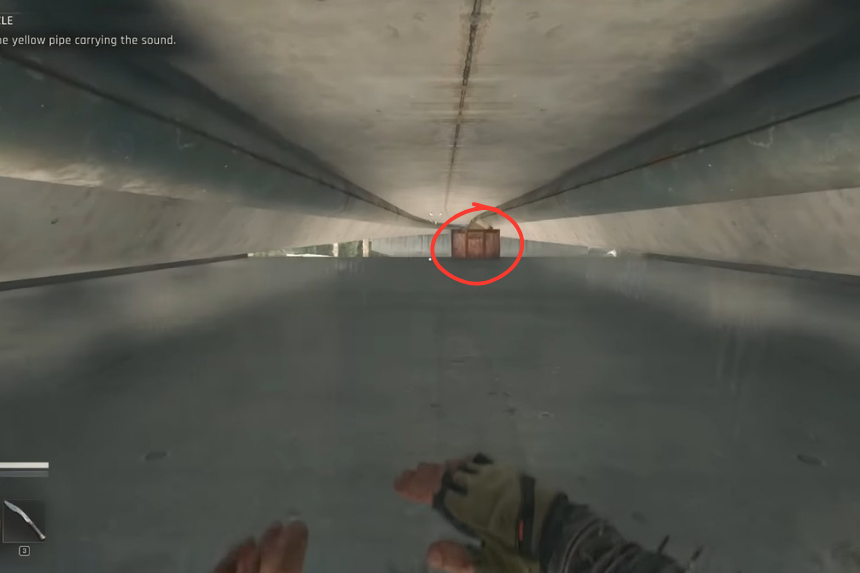
In the Industrial zone, you will find a bridge. Under the bridge, you will find the Give Me Your Best Shot collectible by climbing up the pillar and crawling through it to reach the edge.
Hop or Die

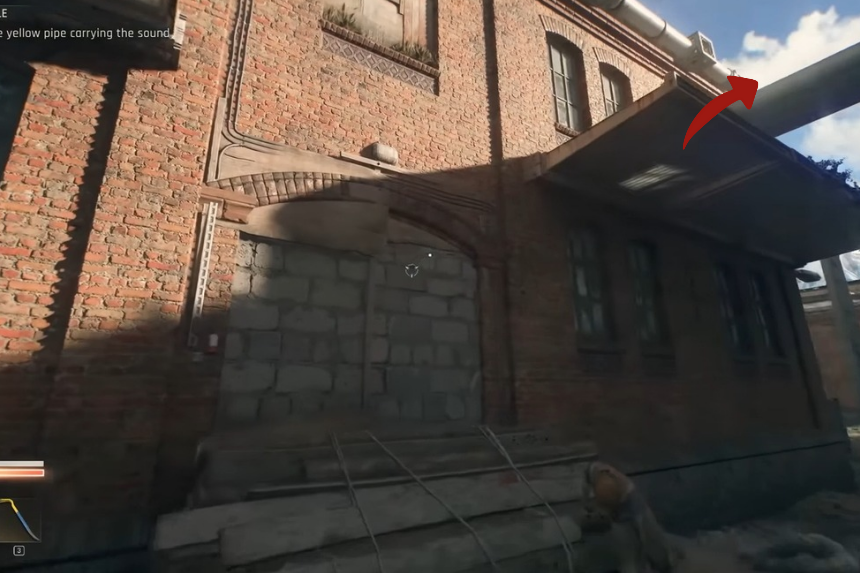
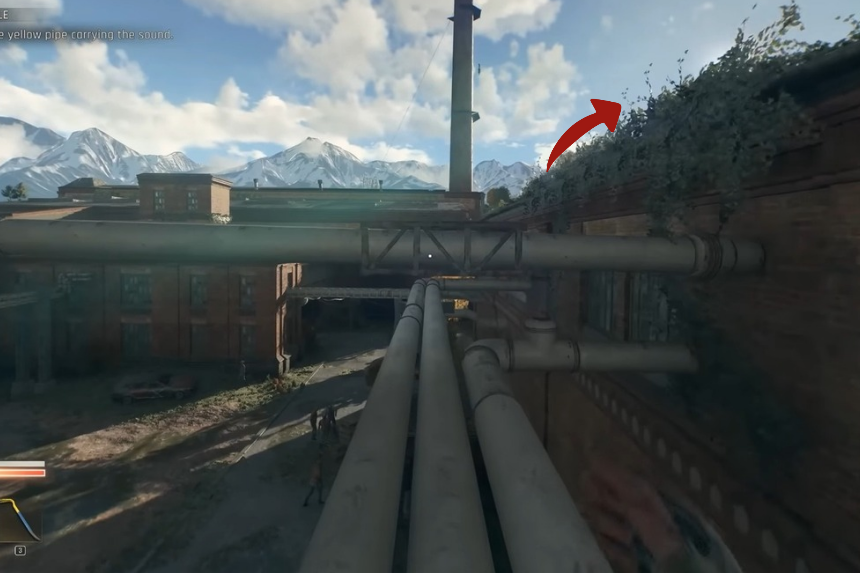
In the Industrial zone, you will find a big red building. Climb onto the roof of the building through the steel pipes. You will find the Hop or Die collectible on the roof near the generator.
Danse Des Bizarres
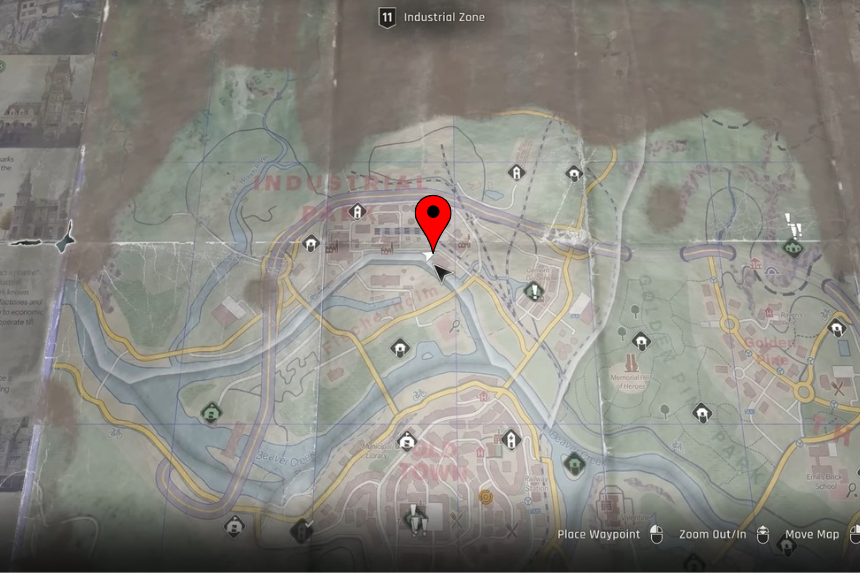
In the Industrial zone, climb up the roof through the steel pipes. Move forward, and you will find an outdoor AC unit. Under it, you will find the Danse Des Bizarres collectible.
Mealz on Wheelz
In the Industrial zone, go towards the train yard. Under the blue container train, you will find Mealz on Wheelz collectible.
Bloodsucking Bunnies
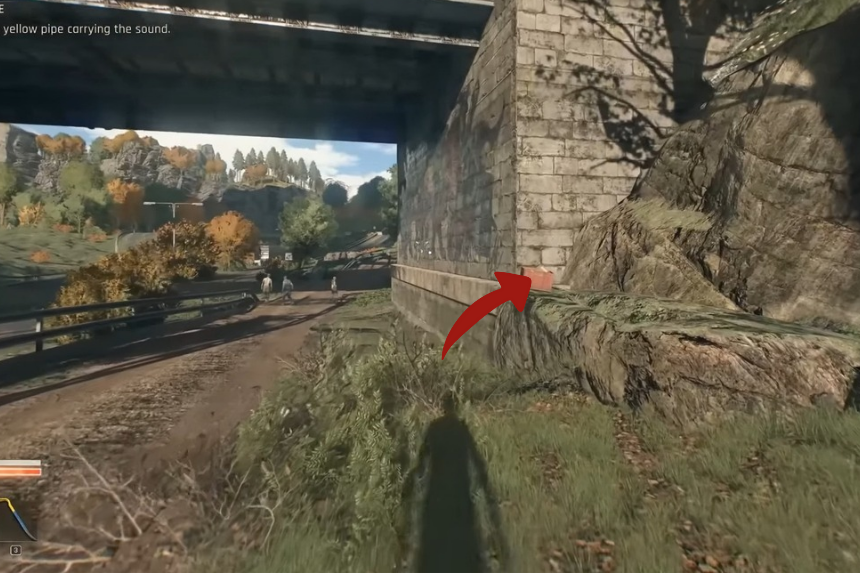
In the Industrial zone, under the bridge, you will find the Bloodsucking Bunnies collectible.
The Future is Bright
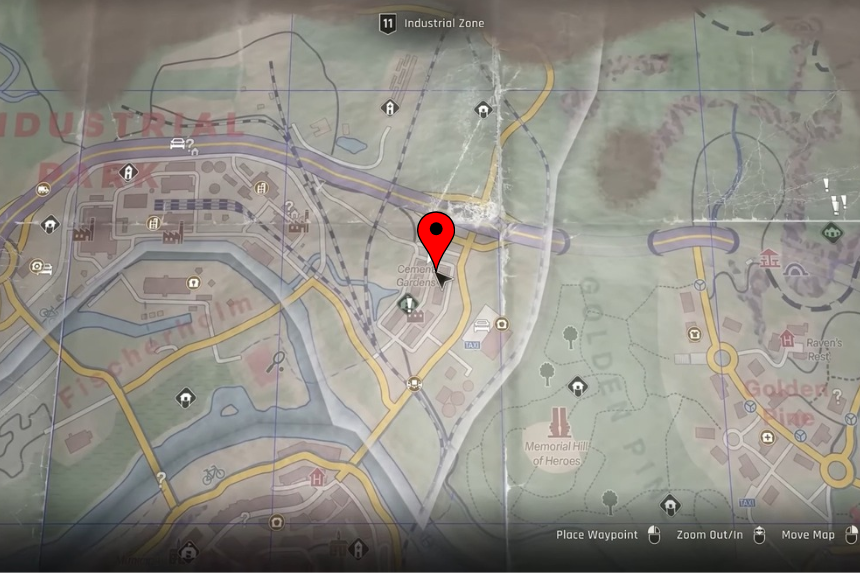
In the Cement Gardens, climb up the scaffolding. At the end of the scaffolding The Future is Bright collectible.
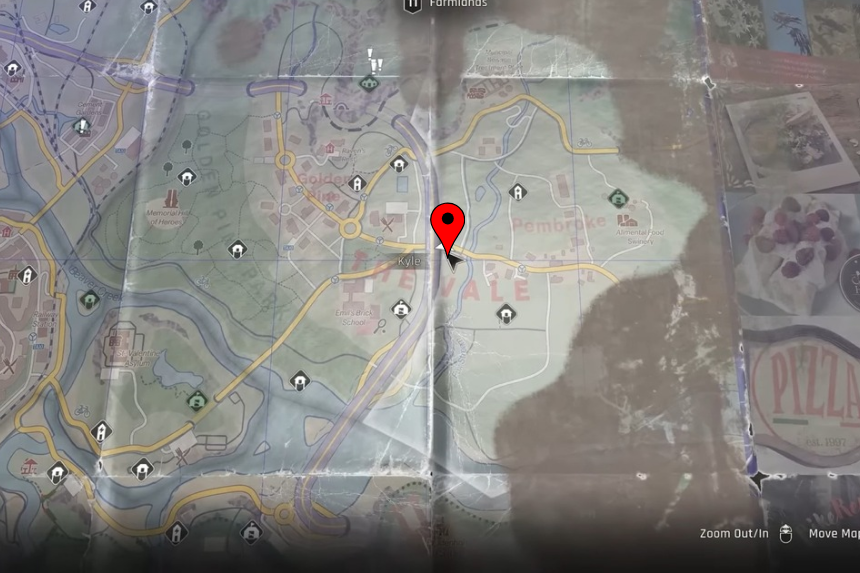
Races
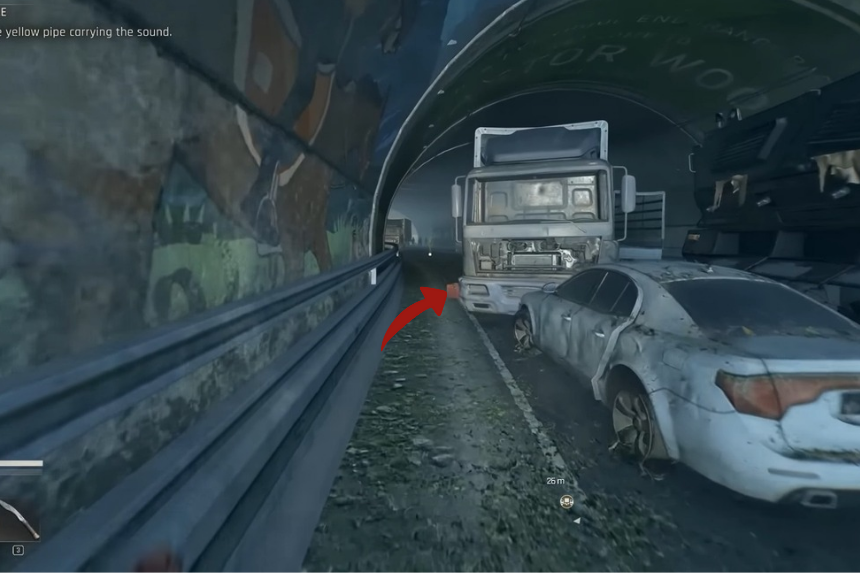
Near the mountain tunnel convoy, you will find the Races collectible inside the tunnel, near a truck.
Catfish
In the Palm Lands, you will find the catfish collectible on the bridge.
Fish
In the Palm Lands, at the end of the tunnel, you will find the fish collectible.
St. Valentine’s Apocalypse
Go inside the St. Valentine’s Asylum. Head inside the patient room. On the right side, you will find the St. Valentine’s Apocalypse collectible, near the skeleton.
Neighbors
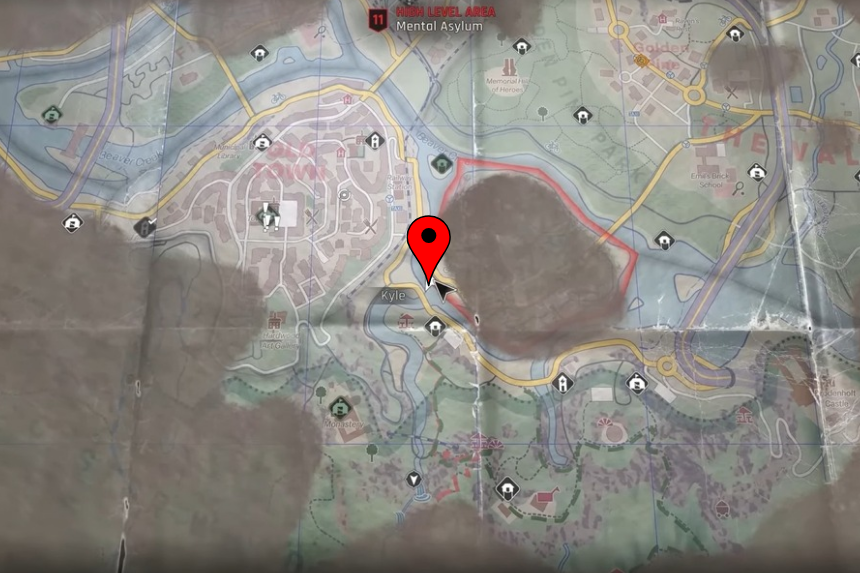
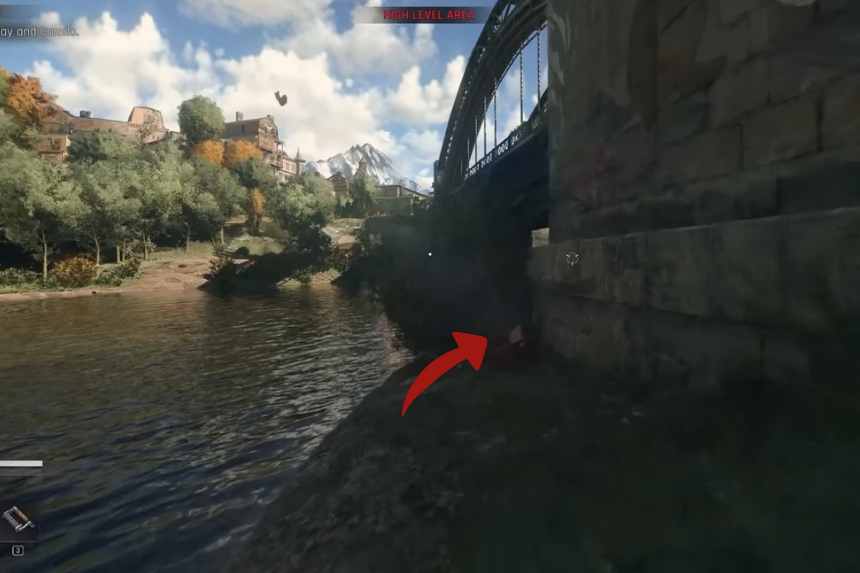
Near the Mental Asylum, you will find the neighbors collectible at the end of a bridge, near the river.
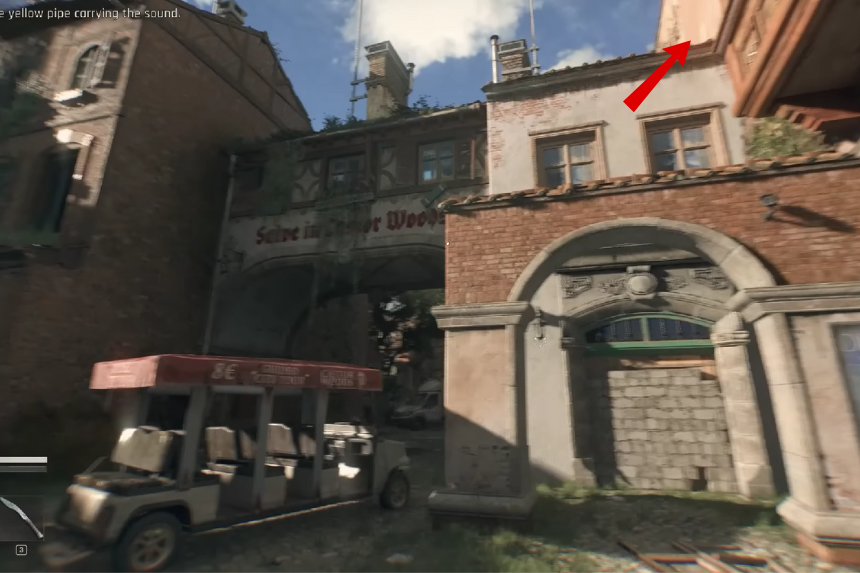
The Hunt
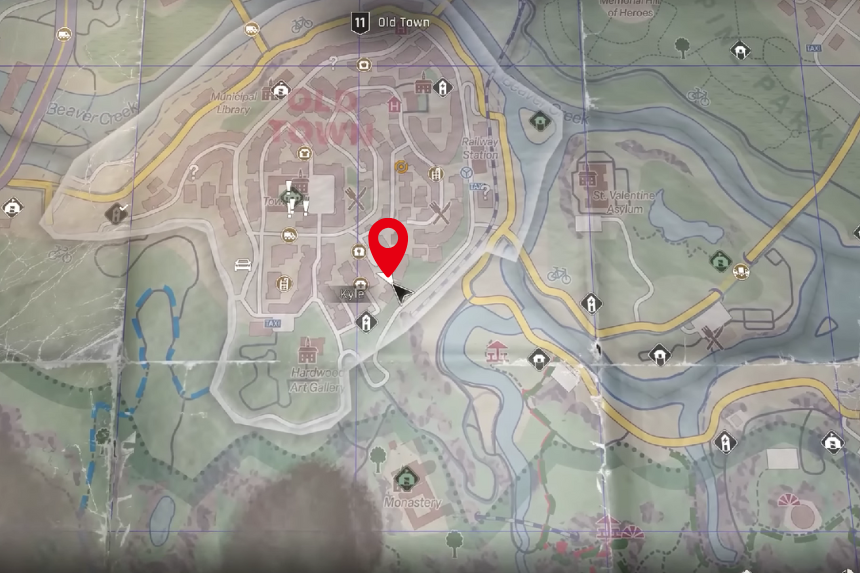
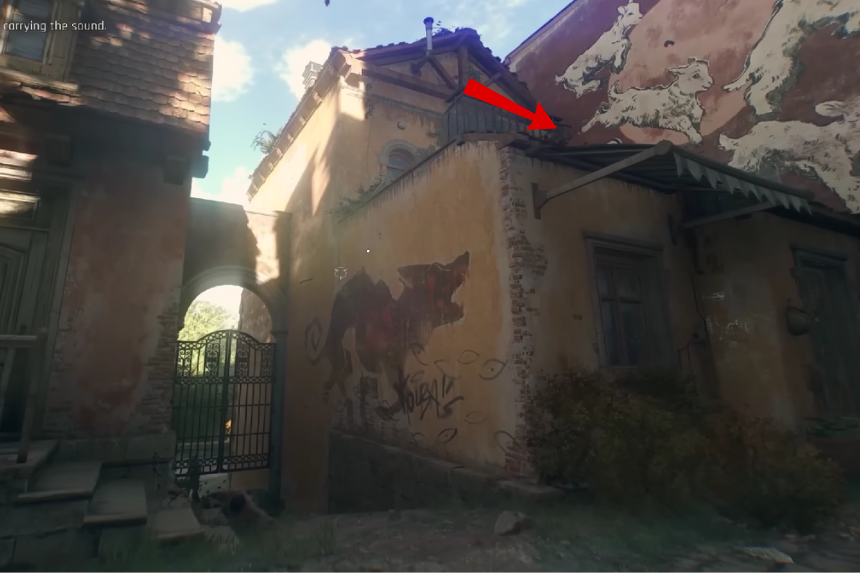
In the Old Town area, climb the roof of a building having the fox graffiti. You will find the hunt on a crate.
Infinite
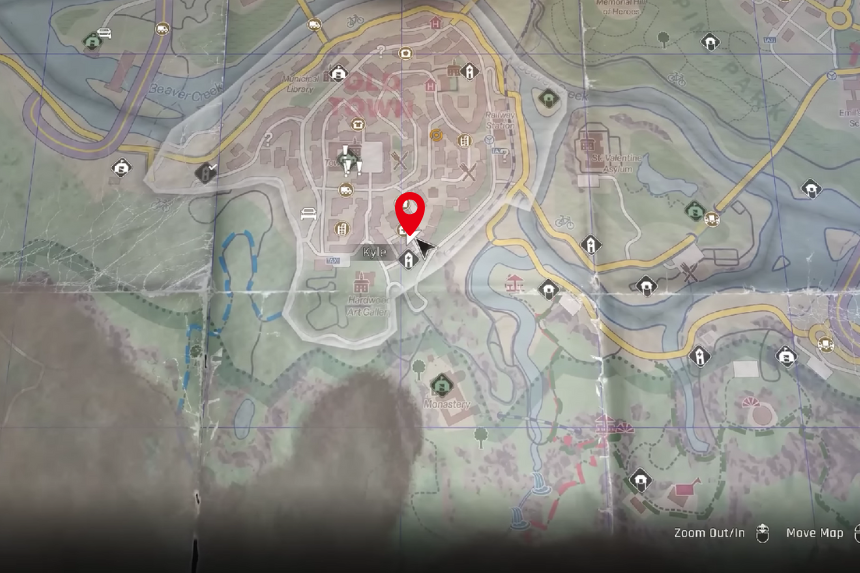
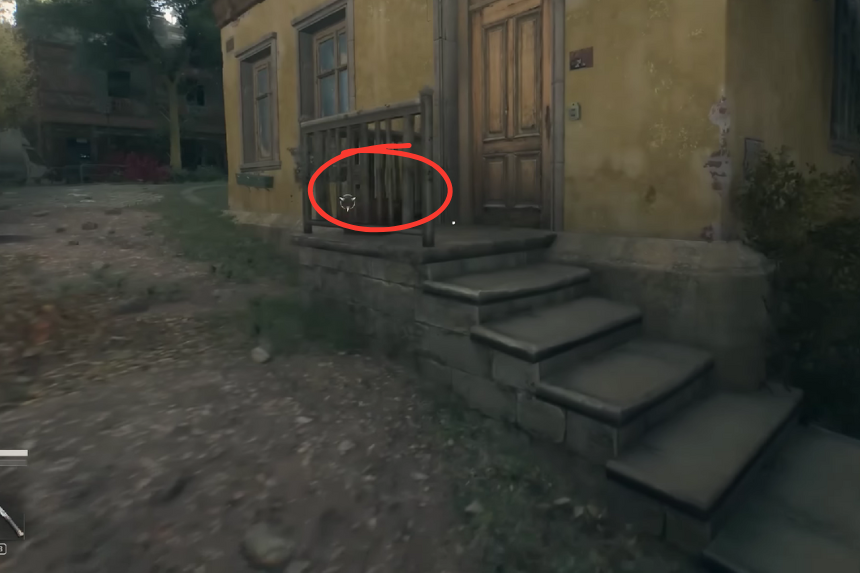
In the Old Town area, you will find the infinite on the doorstep of a yellow house.
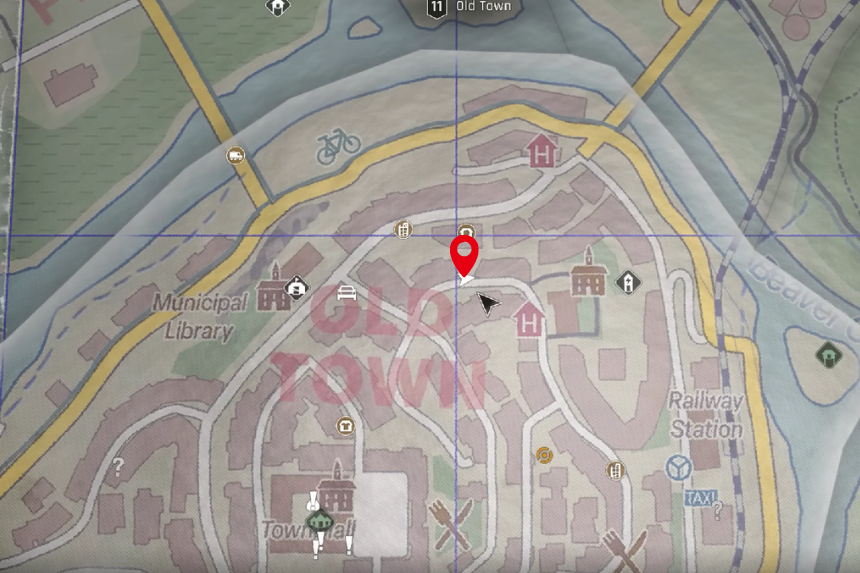
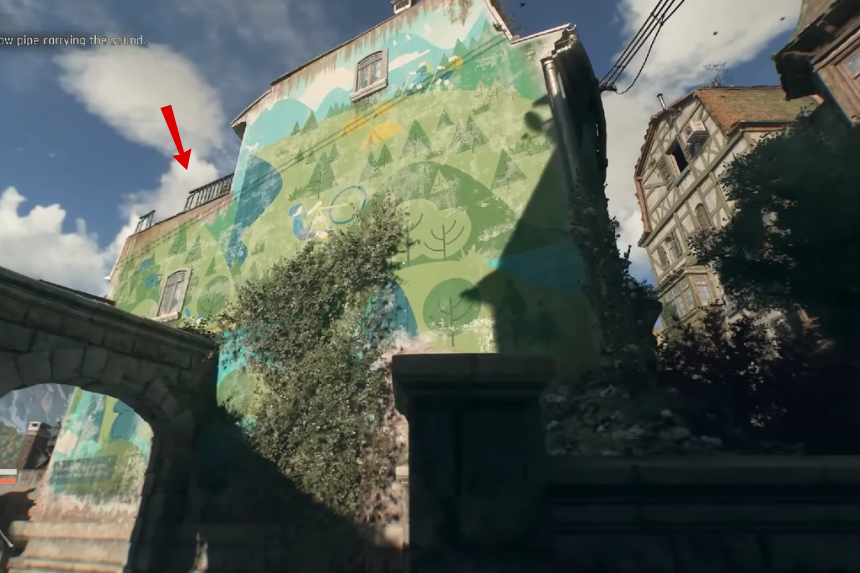
Puppet Master
In the Old Town, go towards the Castor woods building. Then climb up to reach the roof. You will find the puppet master under a table, in the sitting area.
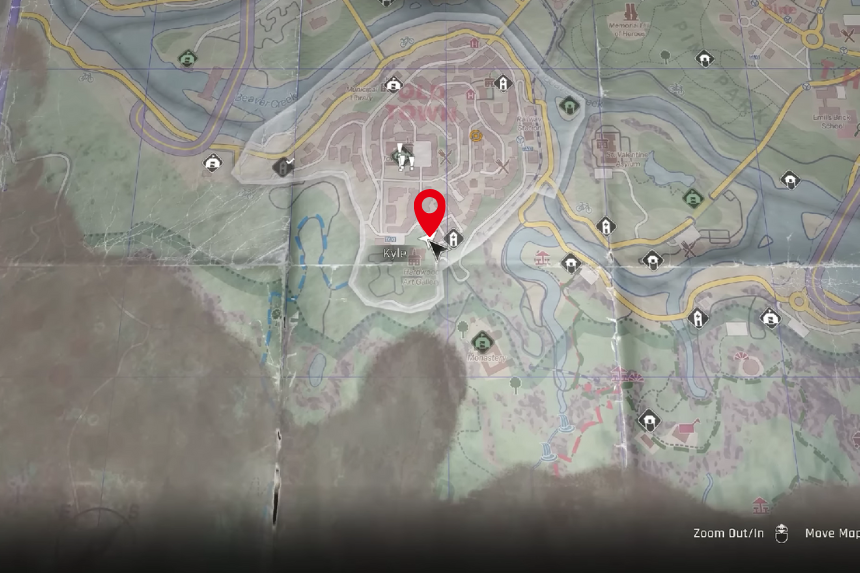
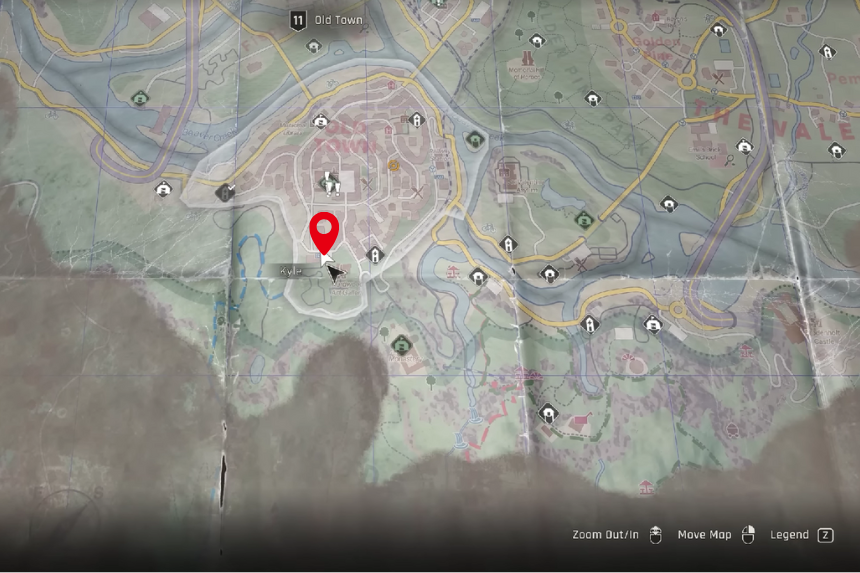
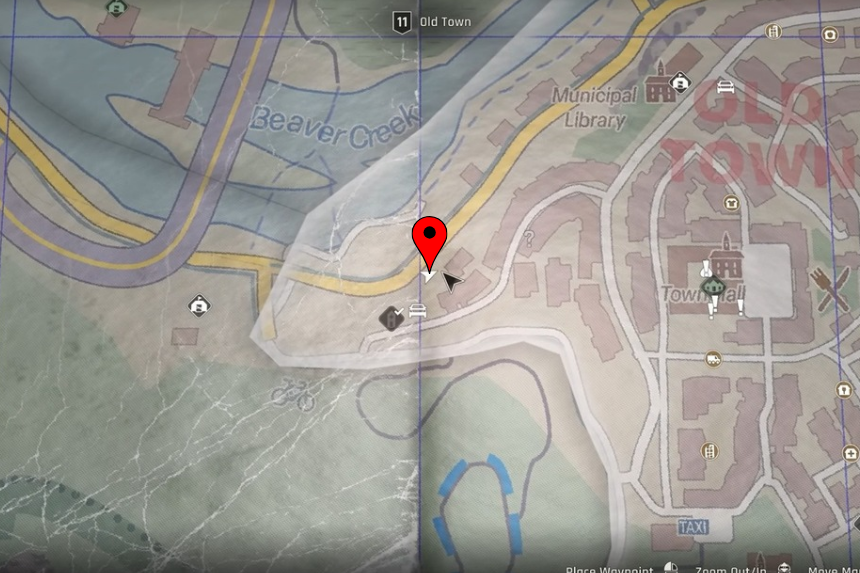
A Nymph Dances to a Playing Satyr
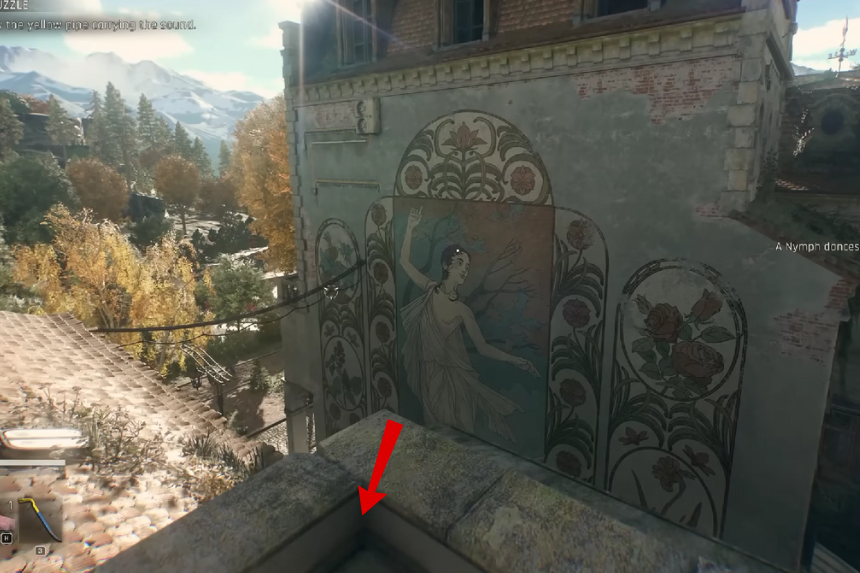
In the old town, go near the taxi stand and climb up the building. You will find the collectible on a roof in the corner.
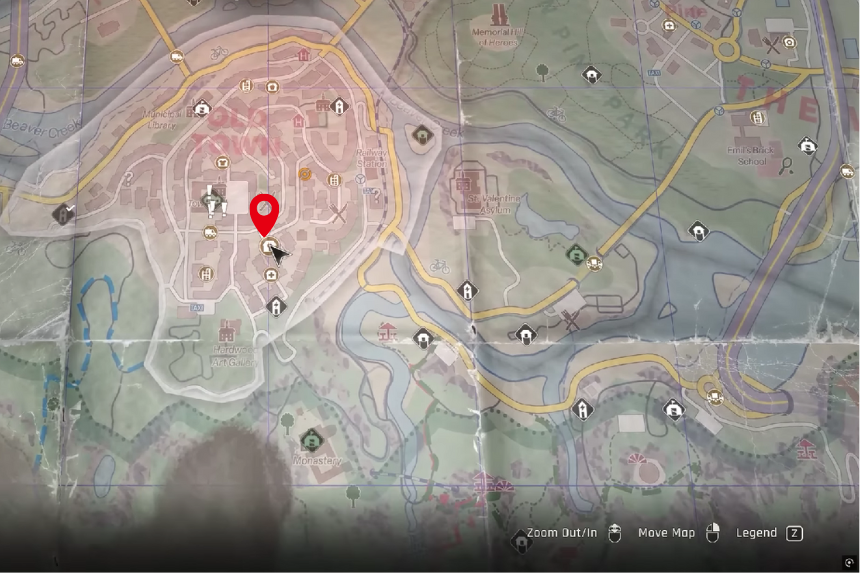
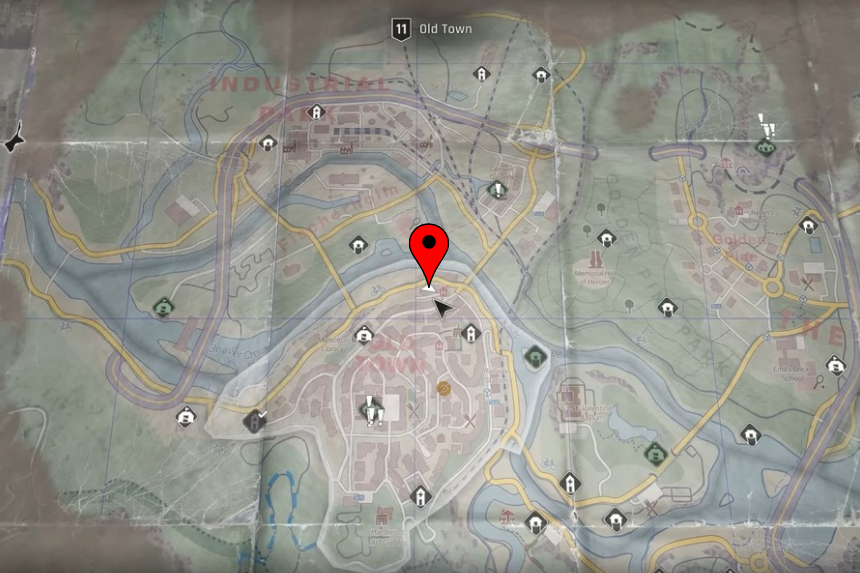
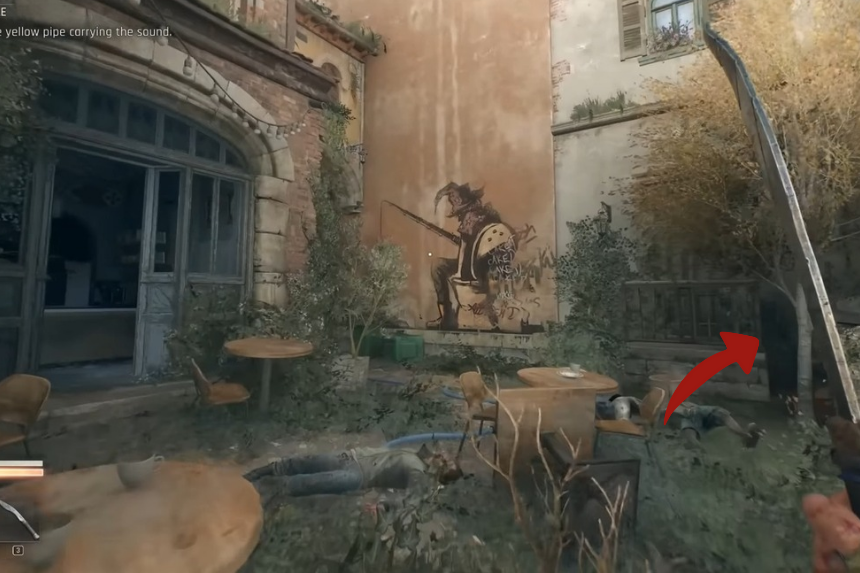
A Satyr for a Nymph
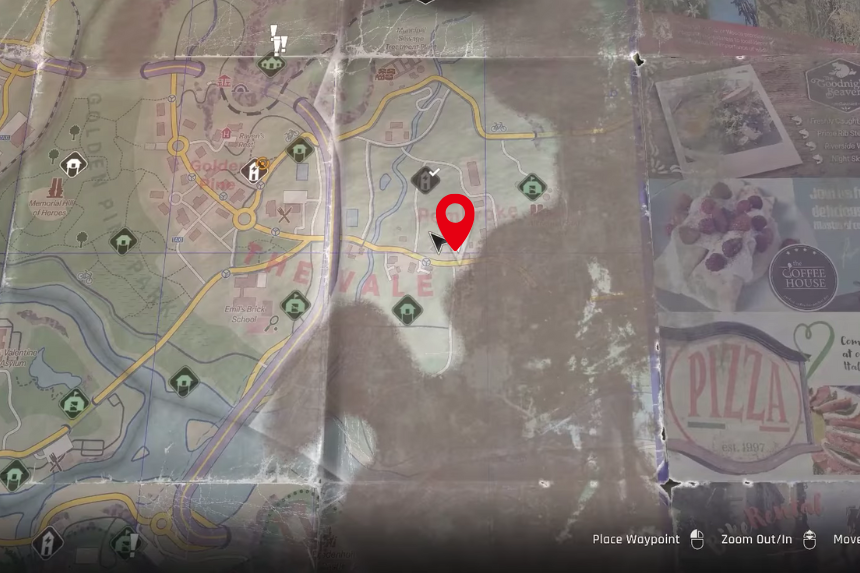
Go to the location provided on the map above. Climb up the roof. You will find A Satyr for a Nymph at the corner.
Daydreamer
In the Old Town area, move towards the mega store America. Climb up the scaffolding. At the top, you will find the daydreamer.
Nature
In the Old Town area, you will find a city tour bus. Climb up the building. Adjacent to it, you will find nature beside a chair.
Castor Woods – Yesterday and Today

In the Old Town area, go to the top floor of the restaurant. You will find the collectible under a cupboard.
Where are the Birds?
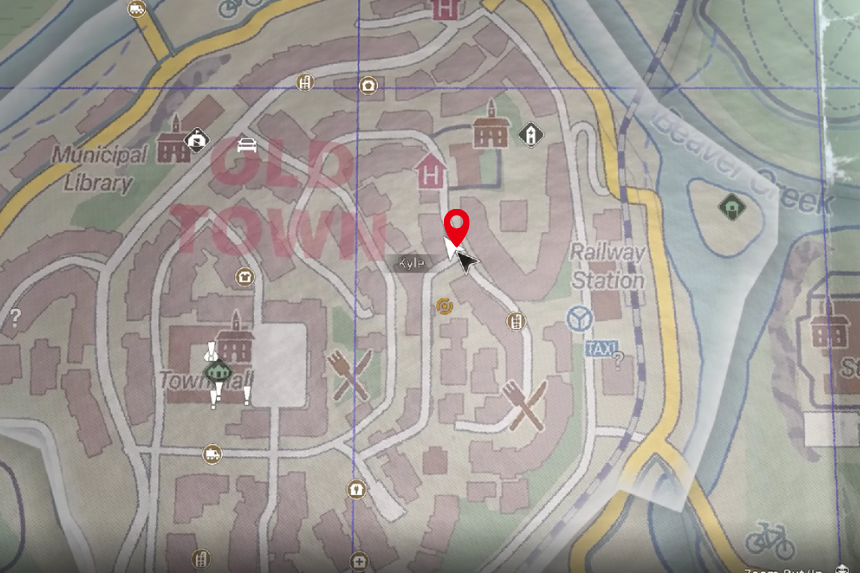
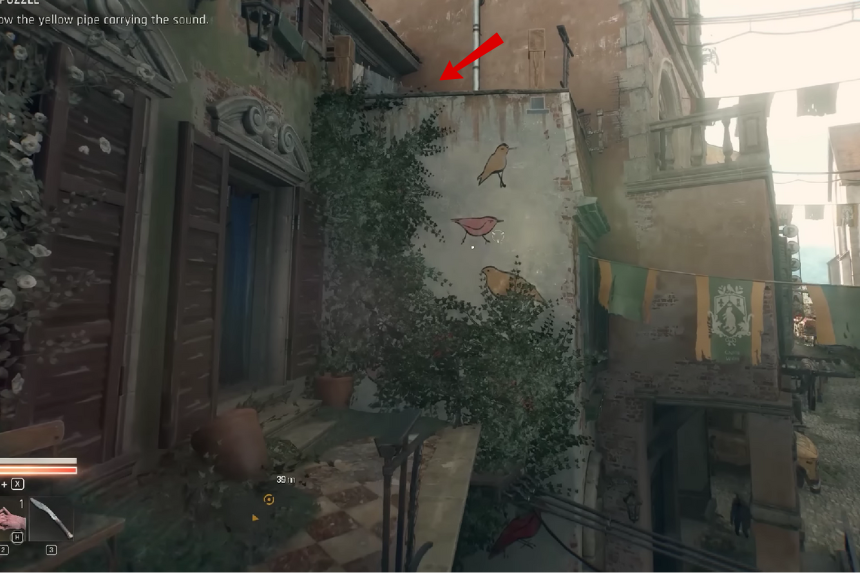
In the Old Town area, climb up the building having bird graffiti. You will find Where are the Birds? Collectible near some plants.
Holidays in Castor Woods
In the Old Town area, perform some parkour to climb up a big building. On the roof of the building Holidays in Castor Woods Collectible near some pillows.
Monkeys
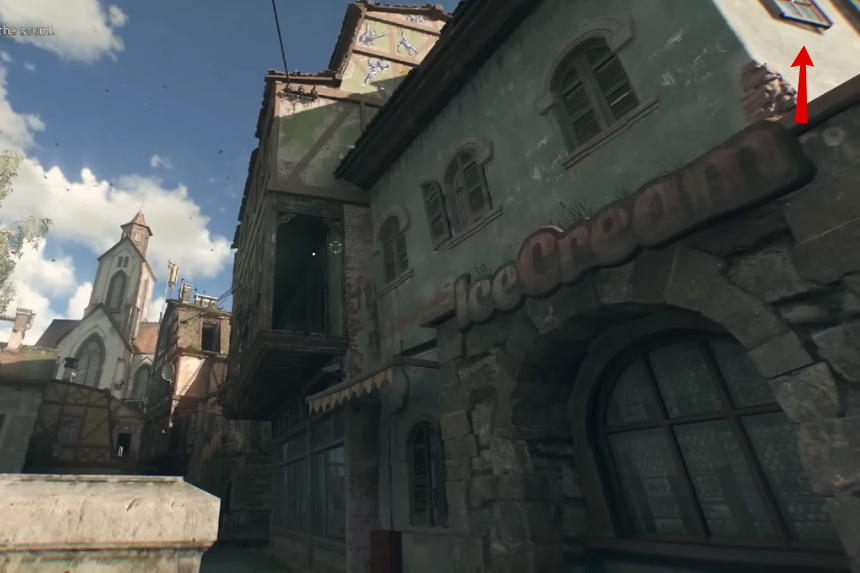
In the Old Town area, climb up the ice cream building to enter the attic. Here, you will find the monkeys collectible.
The Beast
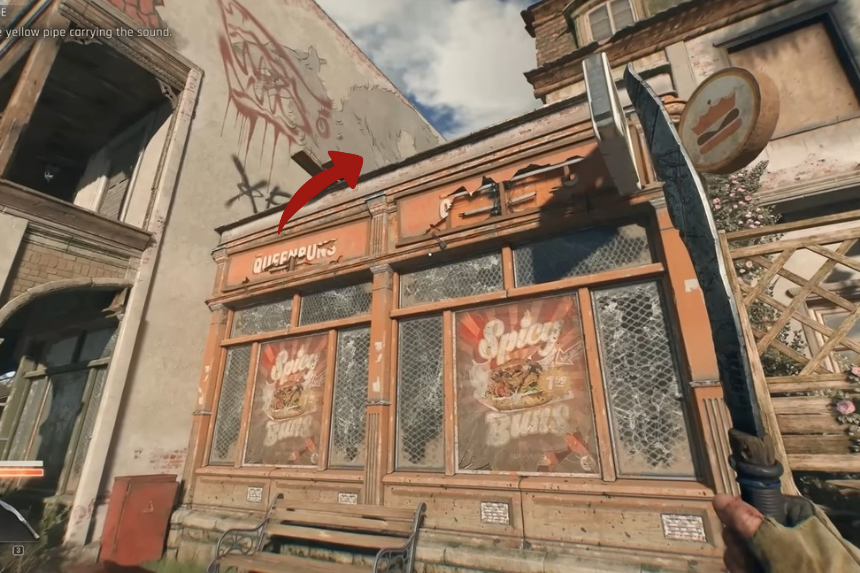
Climb up the Queenbuns restaurant. On the roof, you will find the beast collectible.
Atlas Resting

You will find Atlas Resting under a bridge having a big graffiti on it.
Tales ‘N’ Trials
Climb up the yellow building in front of you. At a corner, on the roof, you will find the Tales ‘N’ Trials collectible.
Second Thoughts
Go to the location provided on the map above. You will find the Second Thoughts collectible lying on the ground beside a tree.
Cute Monster
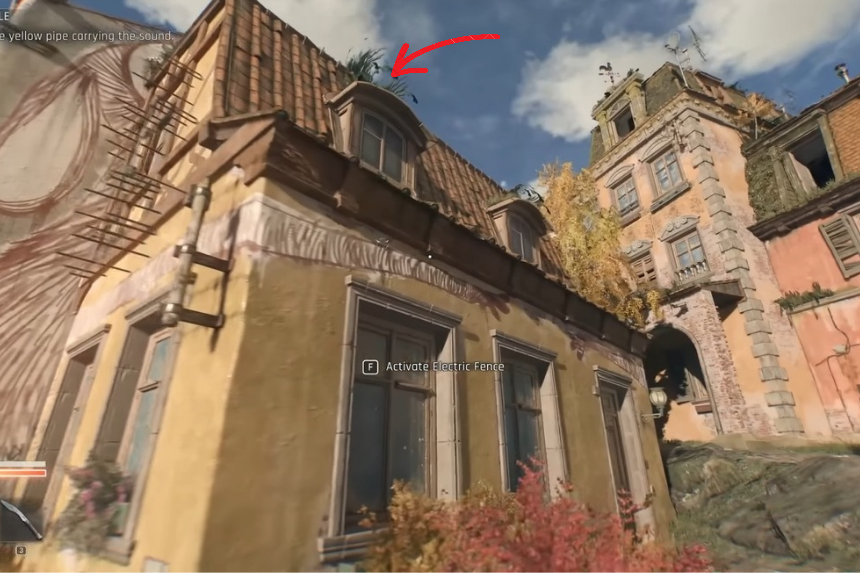
Climb up the yellow house in front of you. At the top roof, you will find the cute monster collectible near the chimney.