 – Code Violet")
There are a lot of collectables in Code Violet, which you can find while playing the main story. Since you will be in a very dangerous area, it is advised to carry a lot of weapons and medkits. Be aware of your surroundings, as dinosaurs can come from any direction to kill you. In this guide, we will show you how to find all collectables in Code Violet.
All Collectable Locations (Outfits, Cameos, Ducks, Eggs, and More)
Code Violet is an action-adventure survival game where you play as Violet Sinclair from the past, who has awakened in the Aion Bio Engineering Complex. It has many prehistoric animals. You will need to find the mysteries of why you came here and what you need to do. During the journey, you will find many collectables. Below is the list of all the collectables that we have found in the game.
Tech Queen Outfit
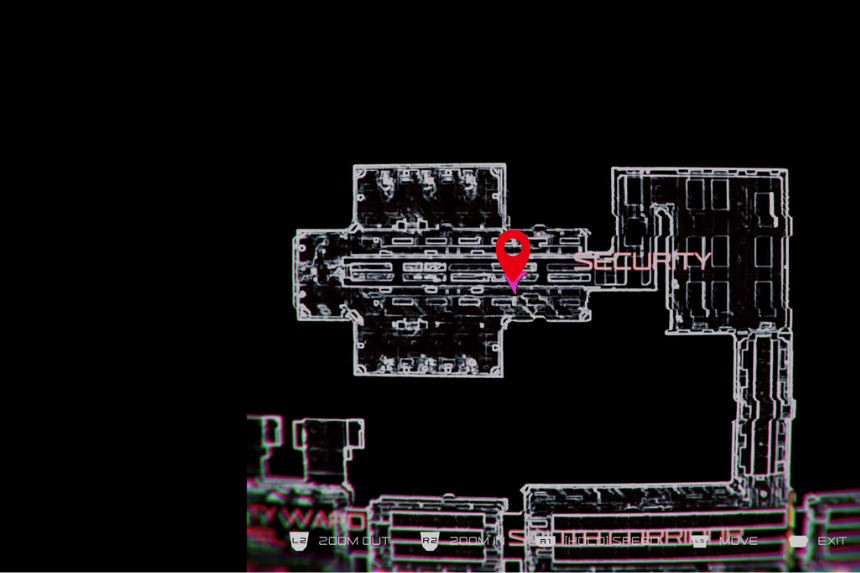

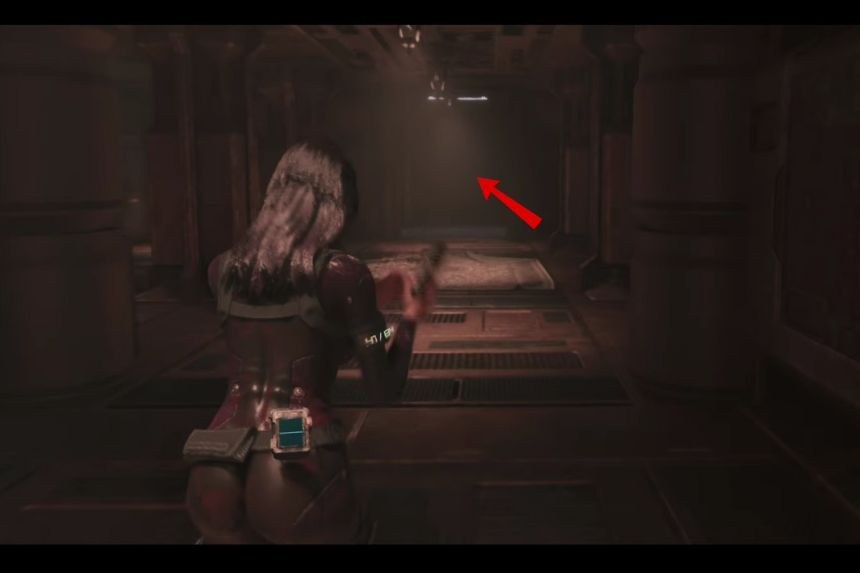
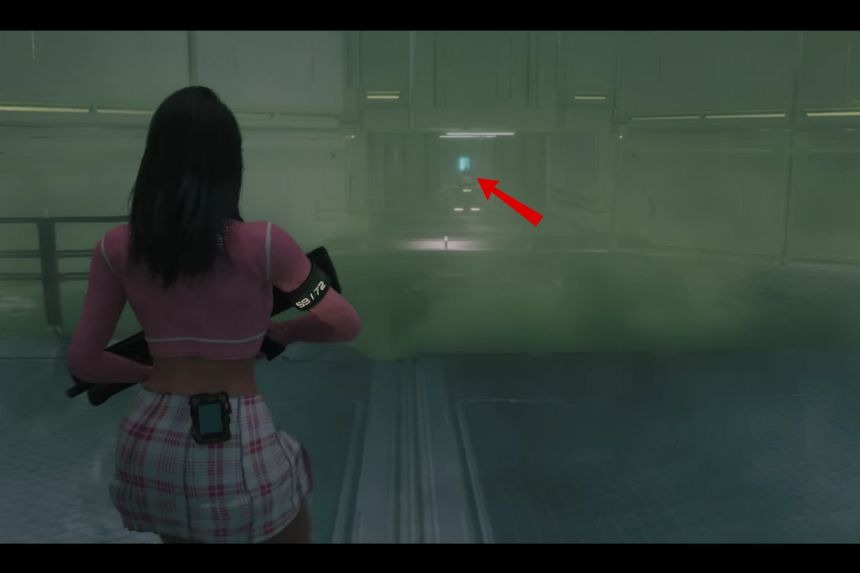
Go to the Testing Facility, inside the Security room. Head towards the right side and open the door. On top of the door, you will find a bright white bulb. Shoot the bulb and get outside the room. Then turn left and move forward, avoiding the cameras.
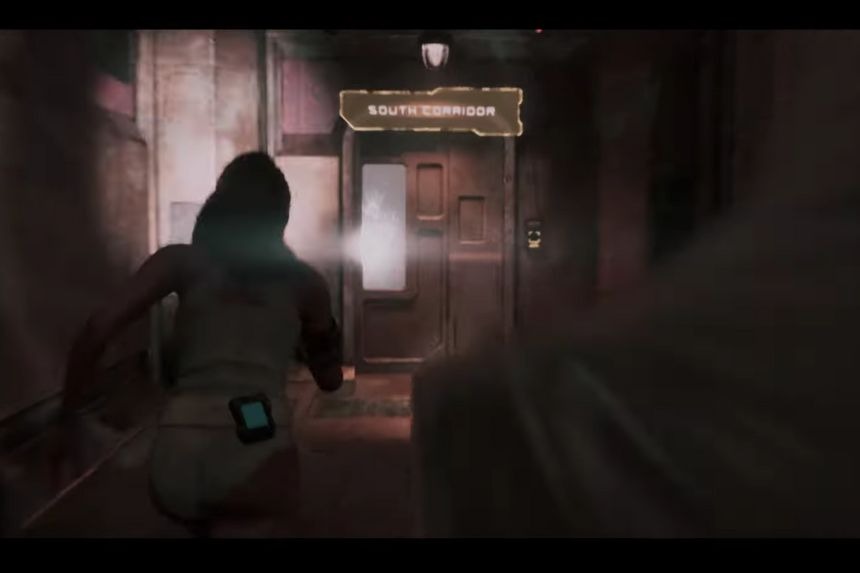
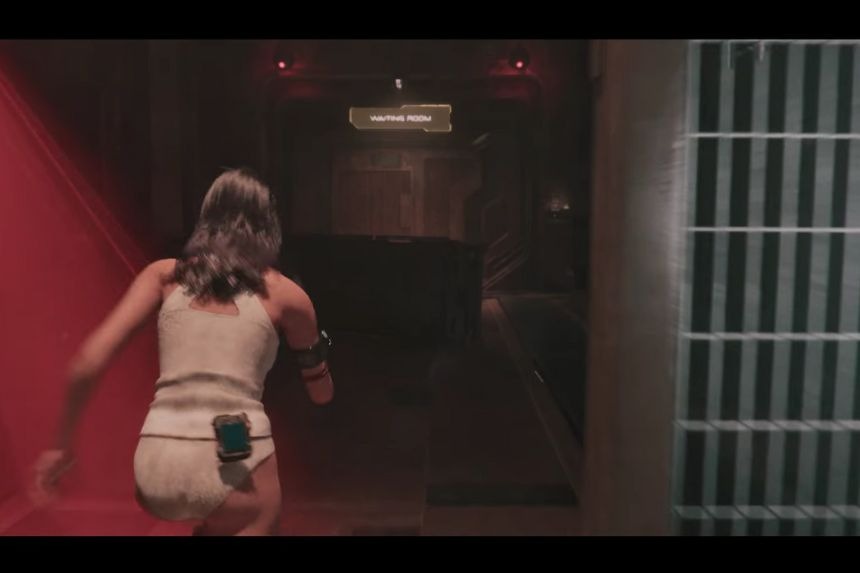
Now, enter the South Corridor room. Move through the hallways and turn right. On the left side, you will find the waiting room. Open the waiting room and turn right. At the end of the pathway, you will find the Tech Queen Outfit.
Stamina Earring
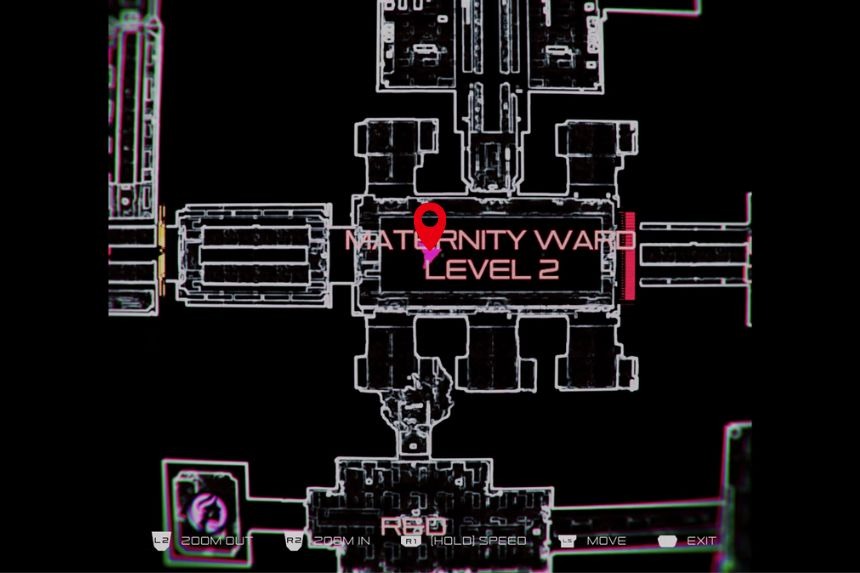
Go inside the Maternity Ward, Level 2, in the Testing Facility. On the left side, you will find the kitchen. To open the kitchen door, you will need to solve a mini puzzle. On the panel, the computer will show different symbols in an order. You need to press the symbols in that order three times to open the kitchen door. Move through the kitchen, and on the right side, you will find a door under a camera. Open the door to reach the storage area. Take the left, and on the shelf, you will find the Stamina Earring.
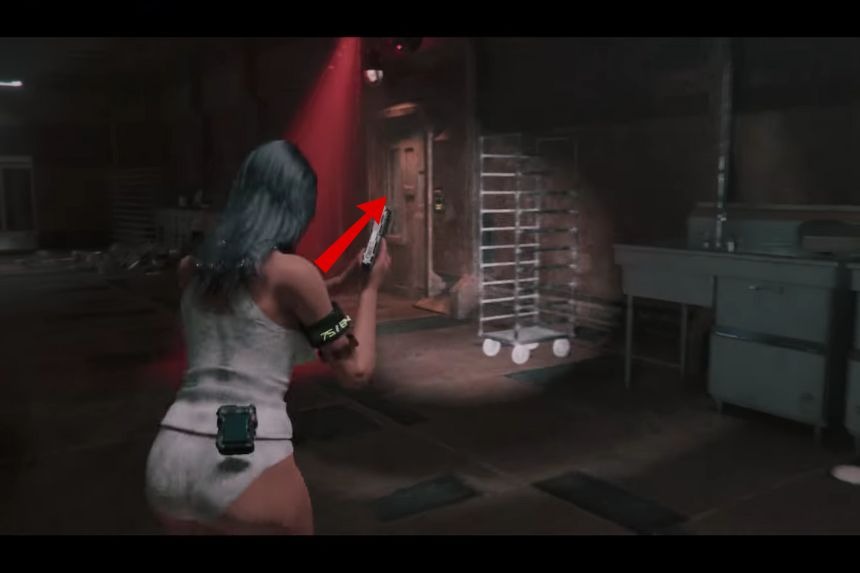
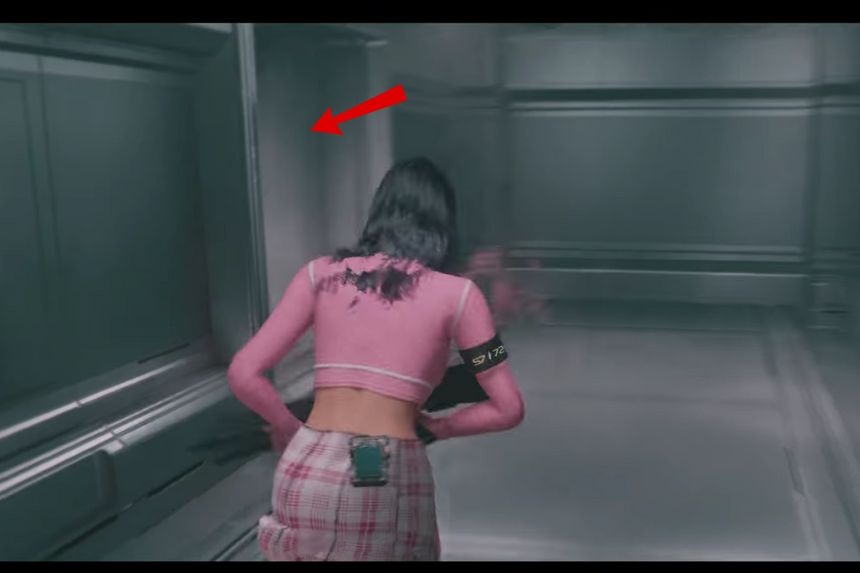
Gear Pouch #1
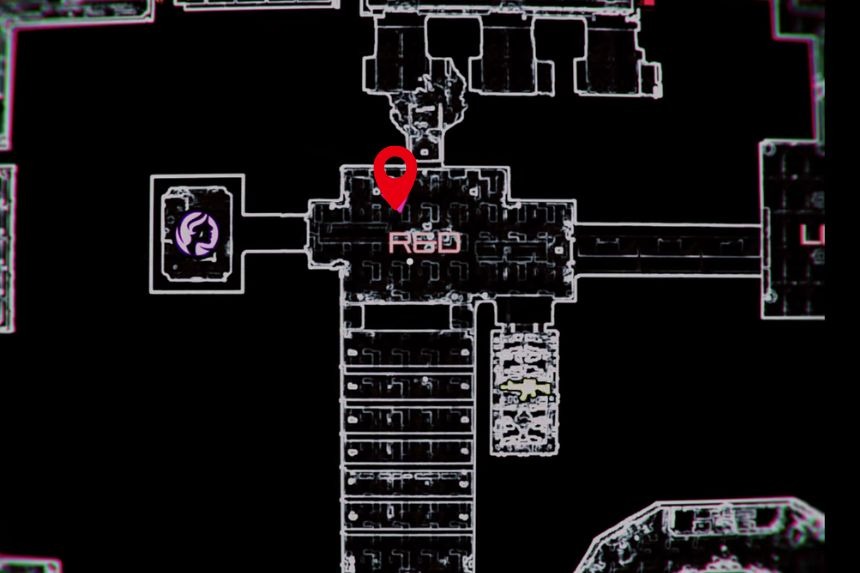
In the Testing Facility, you need to go towards the RBD room. On the table, you will find the Gear Pouch #1. You will UV Power Cell on the table.
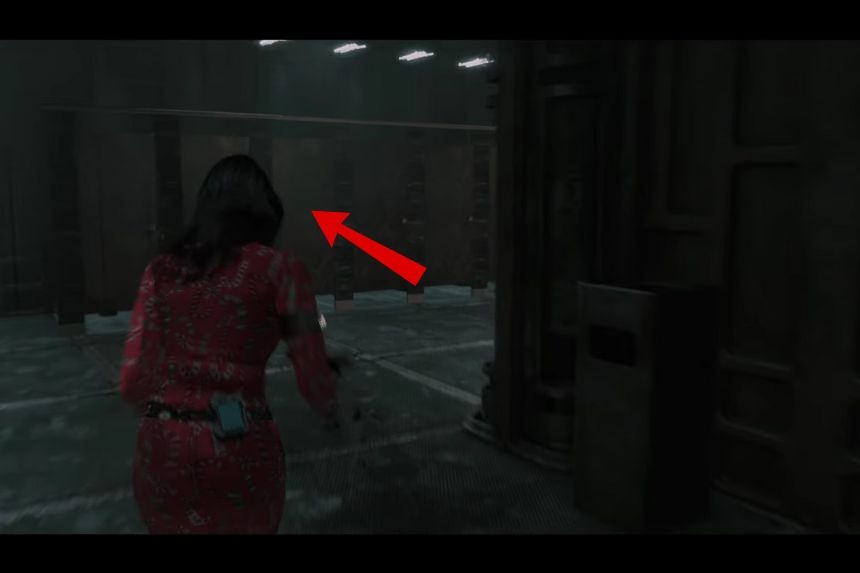
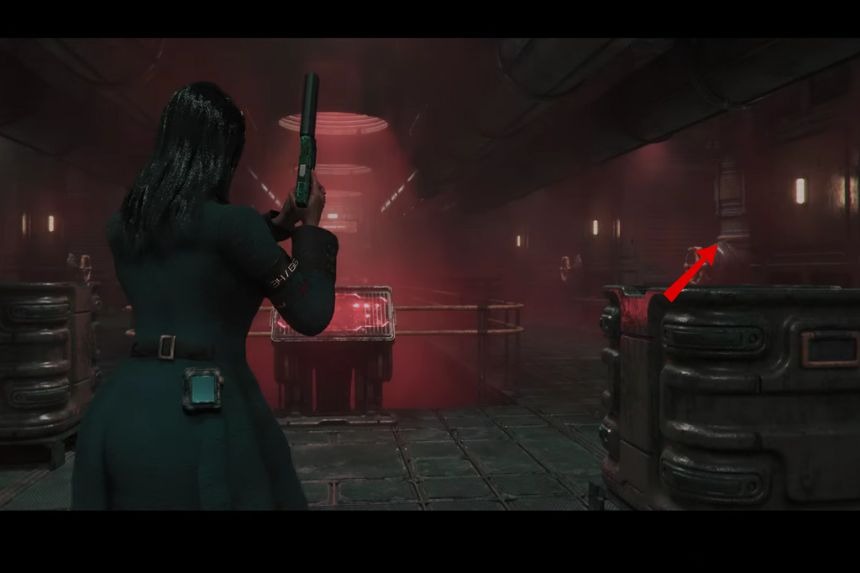
Smart Suit Outfit
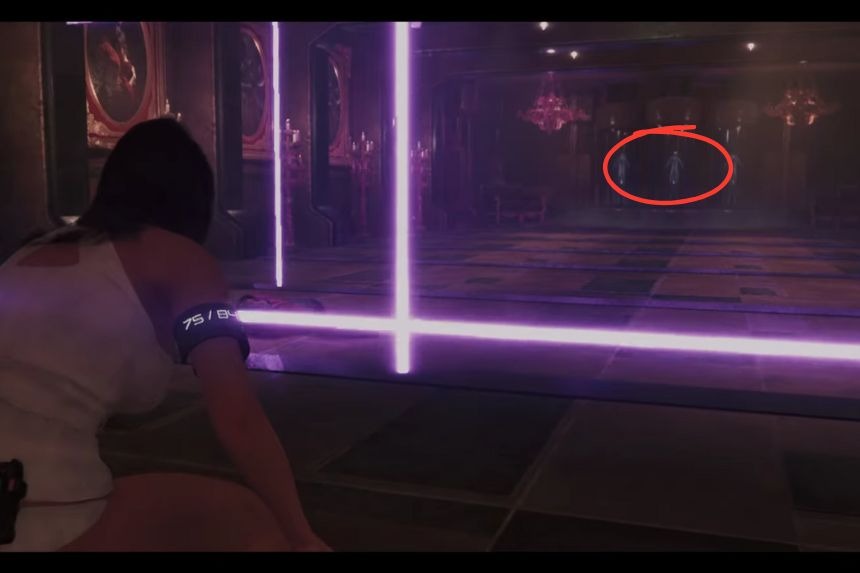
From the above location, move forward. You will get the Smart Suit Outfit during the main story. There will be a laser grid in front of you, which you need to avoid to reach the other end of the room. Be careful, as this laser can cause damage to you. When you reach the last laser grid, you need to shoot at the green, bright bulb above you to disable the last laser grid. At the end of the room, you will find the smart shoot outfit.
Duck #1
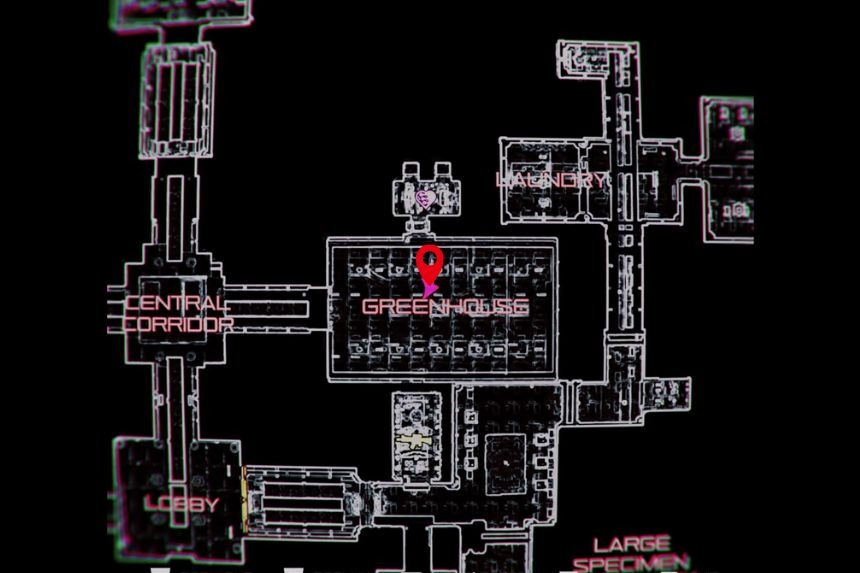

Inside the greenhouse, in the Testing Facility, you will find the Duck #1 at the far end of the fruit plant, just on the left side.
Breathless Beauty Outfit
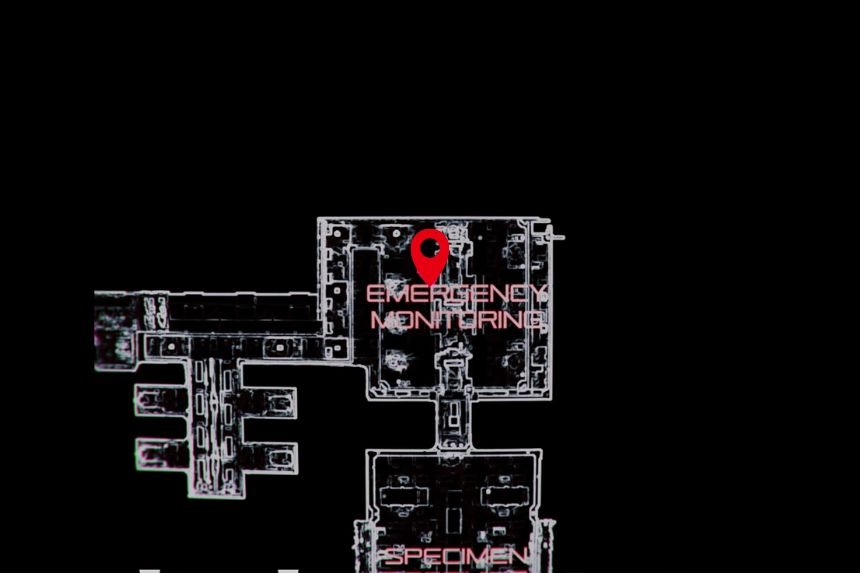
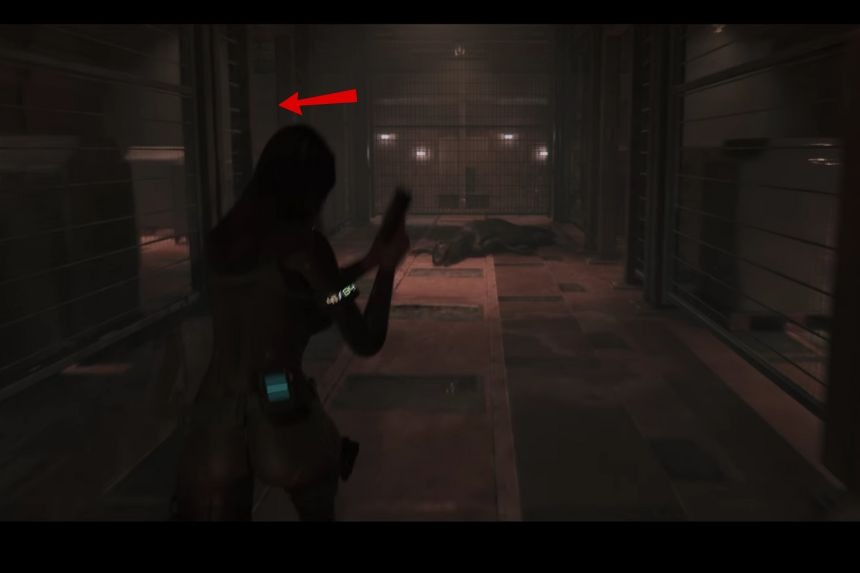
Inside the Emergency Monitoring room in the Testing Facility. You will find a bright white bulb on the right side. Shoot it and move forward by interaction at the door panel of the Specimen Receiving Bay. Move forward towards the central chamber and reach towards the lobby. Run straight towards the pathway. At the end, you will find the Breathless Beauty Outfit.
Decorative Egg #1


Head towards the left of the Emergency Monitoring room in the Testing Facility. You will find four rooms with valves. Turn on the valves of each room such that the pointer will be on the green side of the gauge in each room.

Then exit the room and turn left. Climb down the stairs and enter the first room. Here, you will find a dinosaur and then turn left to reach a room full of boxes. Push the boxes in front of you and turn right to find three boxes at the end of the room. Behind the boxes, you will find the Decorative Egg #1.
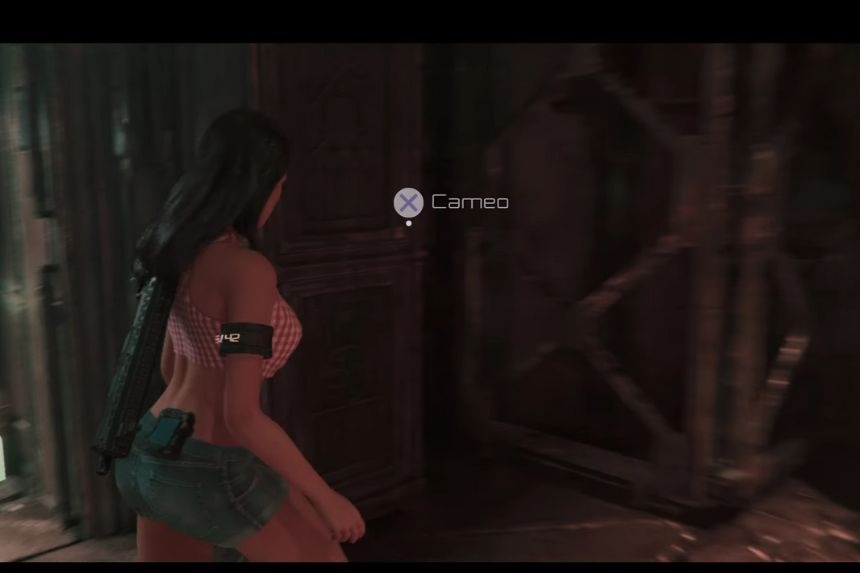
Cameo #1


Inside the laundry room, in the Testing Facility, you will find the Cameo. Go to the far end of the room, and you will find the washing machines. Just above the machines, you will get the Cameo #1.
Dino Hunter Outfit


Inside the laundry room, you will find a bright white bulb. Shoot it and open the door. On the right side, you will find another door; you need to interact with it. Once the door is open, move forward to find another door. Open the door and turn left. At the end of the pathway, you will find the Dino Hunter Outfit.
Decorative Egg #2

Outside the Testing Facility, you will find the Decorative Egg #2 near the front wheel of the broken truck.
Duck #2
Outside the Testing Facility, turn right and move forward till you reach the end. You will find Duck #2 on a crate box. Be careful, as there will be a dinosaur that you need to kill to move forward.
Silencer For a Pistol


Inside the Security room, in the Preservation Facility. On the left side, you will find a locked shelf. To open the lock, you need to turn the dials. The password of the lock is DUCK. Inside, you will find the Silencer for Pistol.
Cameo #2


Inside the Plasma Heating Control Room in the Preservation Facility, you will find bug tubes. Crouch down in the tube and reach the other side. You will find the Cameo #2 on a wall.
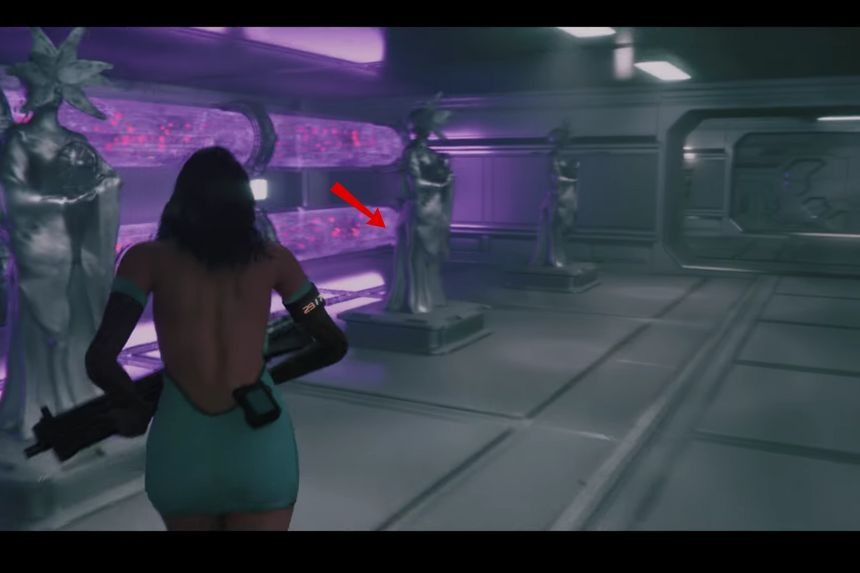
Lady In Red Dress Outfit


Inside the Plasma Heating Control Room in the Preservation Facility, move towards the Raptor Exhibit Room. Shoot at the white bulb at the top of it. Move forward towards the lobby area.
Open the lobby room and turn left, and move forward to reach the Incubation Room. Turn left to find a dinosaur in front. Kill it and move forward. Turn left, and at the end of the path, you will find the Lady in Red Dress Outfit.
Duck #3
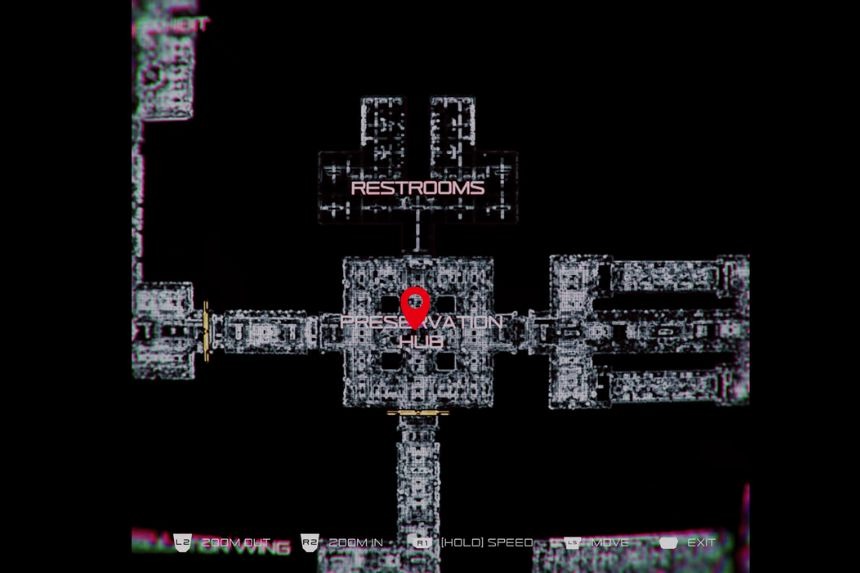
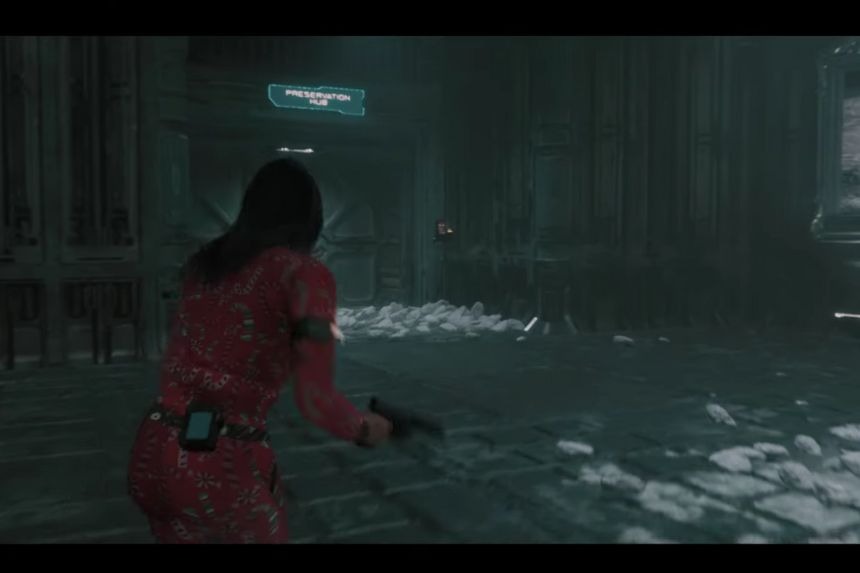
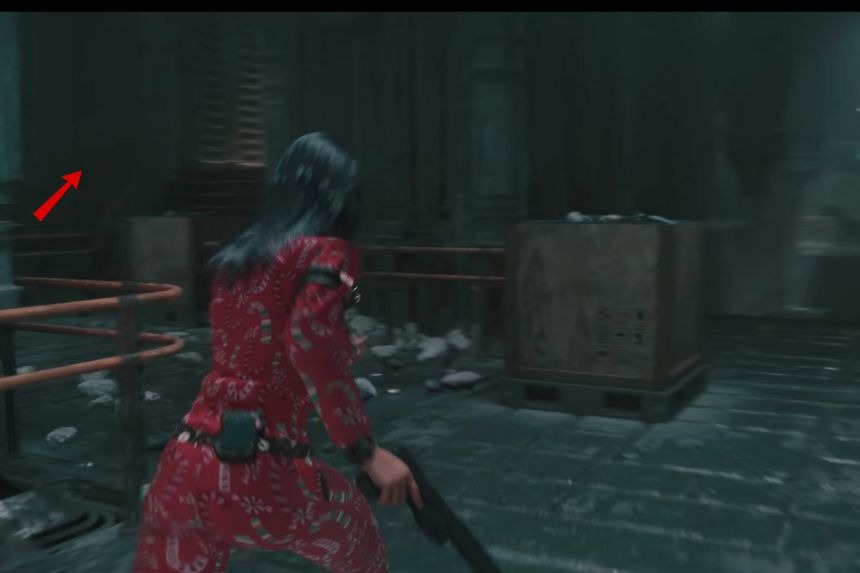
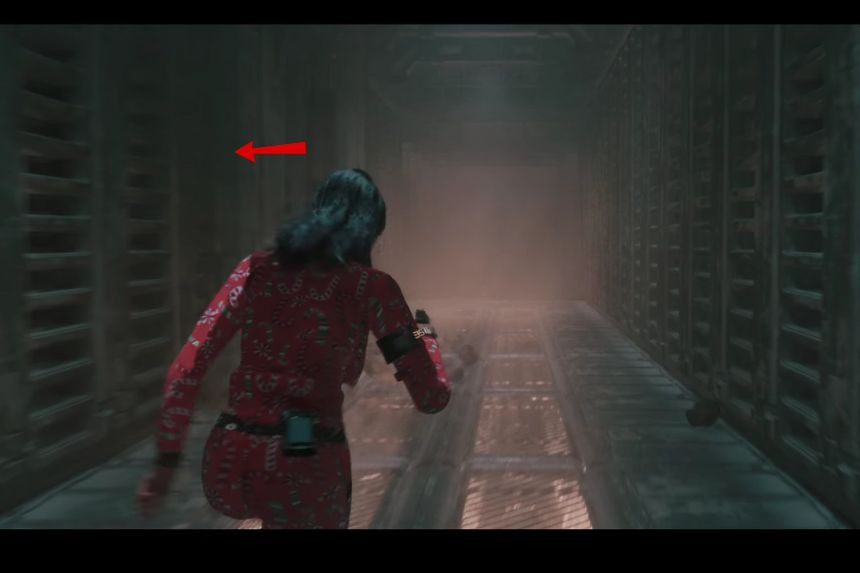
Inside the Preservation Hub, in the Preservation Facility, go to the restroom. In the third cubicle, you will find the Duck #3.
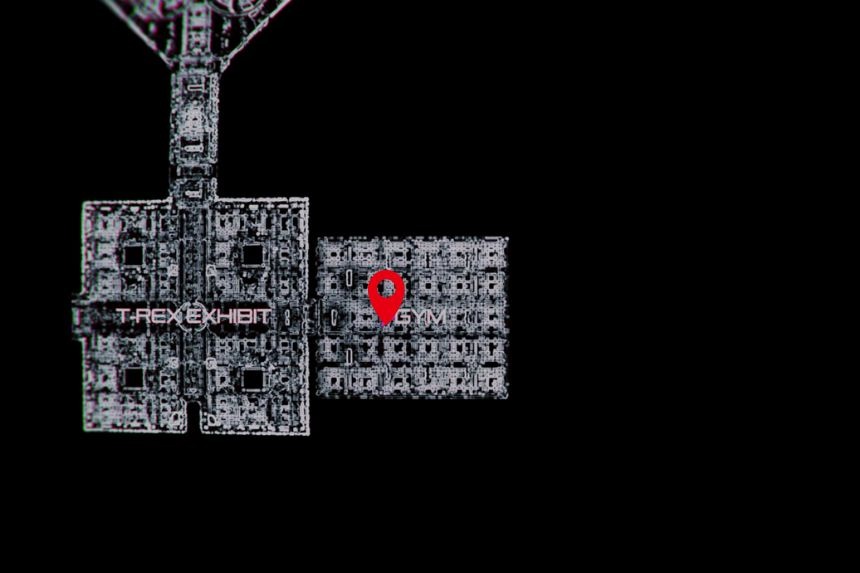
Decorative Egg #3


Go inside the gym in the Preservation Facility. In front of you, you will find a gaming machine. At the back of the gaming machine, you will find the Decorative Egg #3.
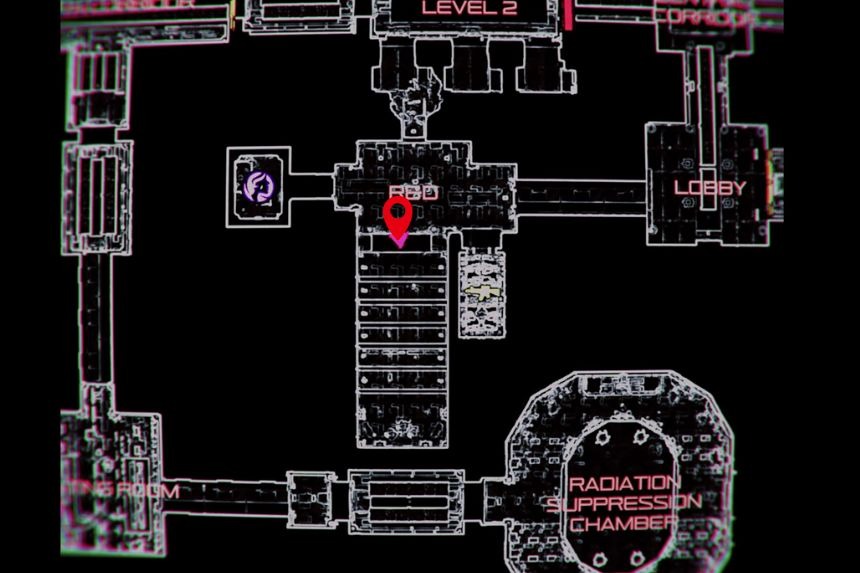
Gear Pouch #2 (Part 1)
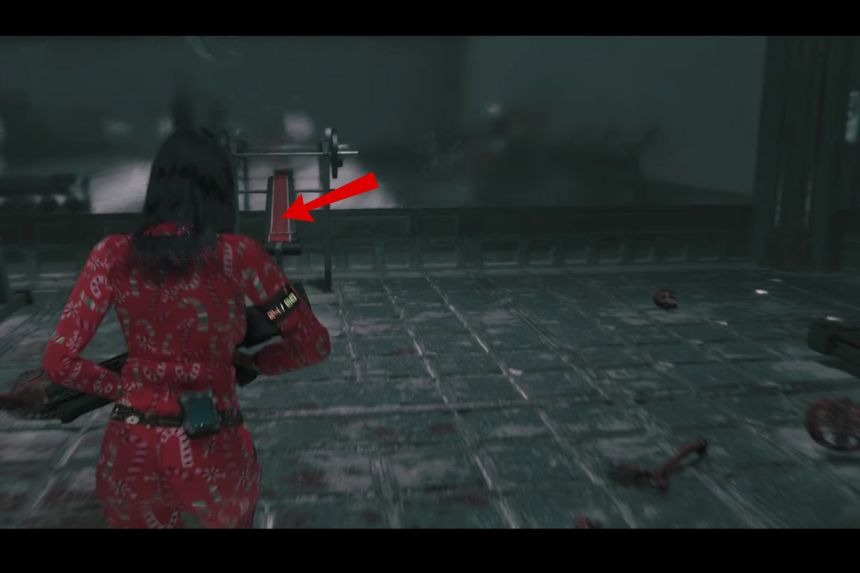
Inside the gym, in the Preservation Facility, turn left. Here, you will find a lifting bench. On the lifting bench, there is a key which you will need later to open the Gear Pouch #2.
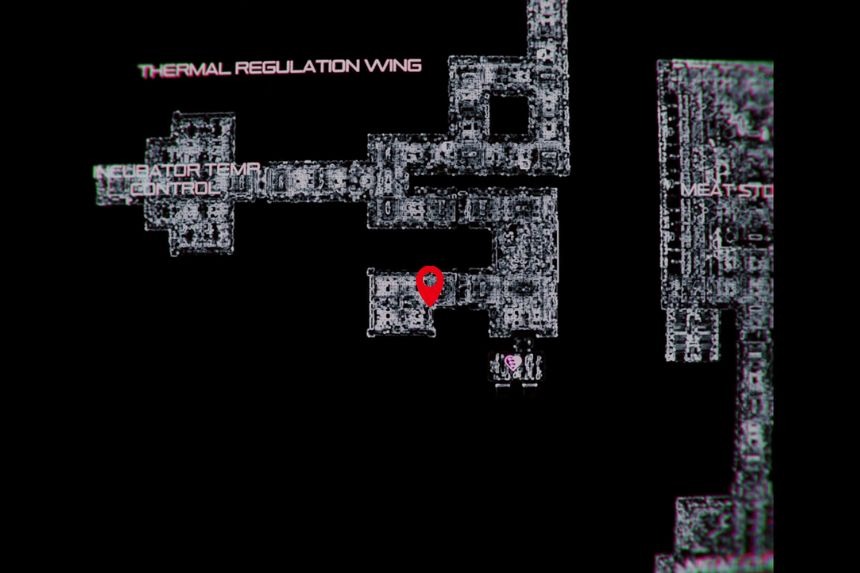
Lucky Drop Earring
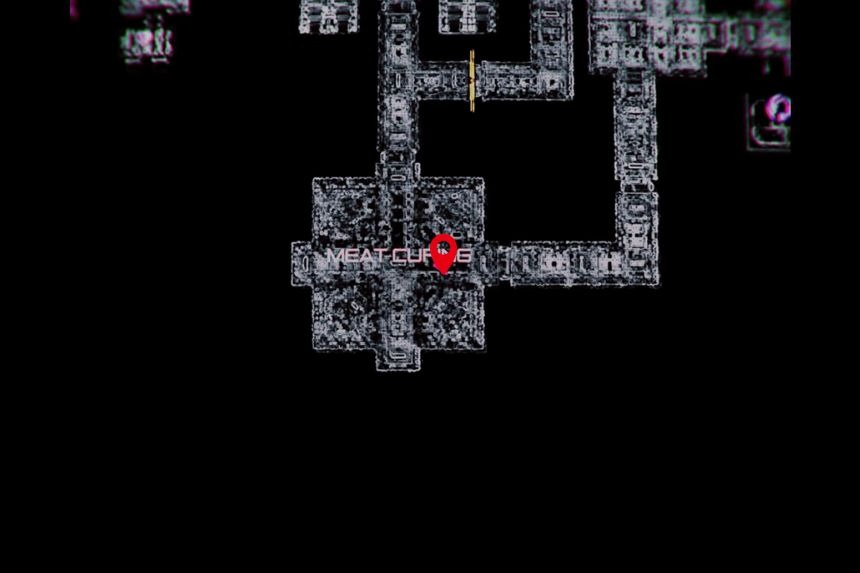

In the Meat Curing, inside the Preservation Facility, go towards the control panel. Behind it, you will get the Lucky Drop Earring.
Vintage Sweater Girl Outfit


Inside the Meat Storage in the Preservation Facility, you will find a white bulb on the left side. Shoot at it and exit the room. Now, go towards the Meat Curing room and turn left. Move forward and take the right to find the Vintage Sweater Girl Outfit.
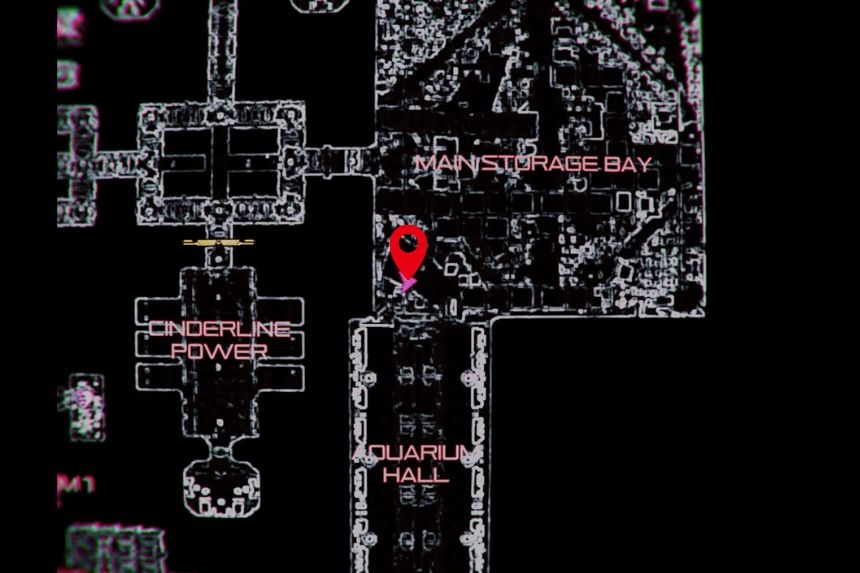
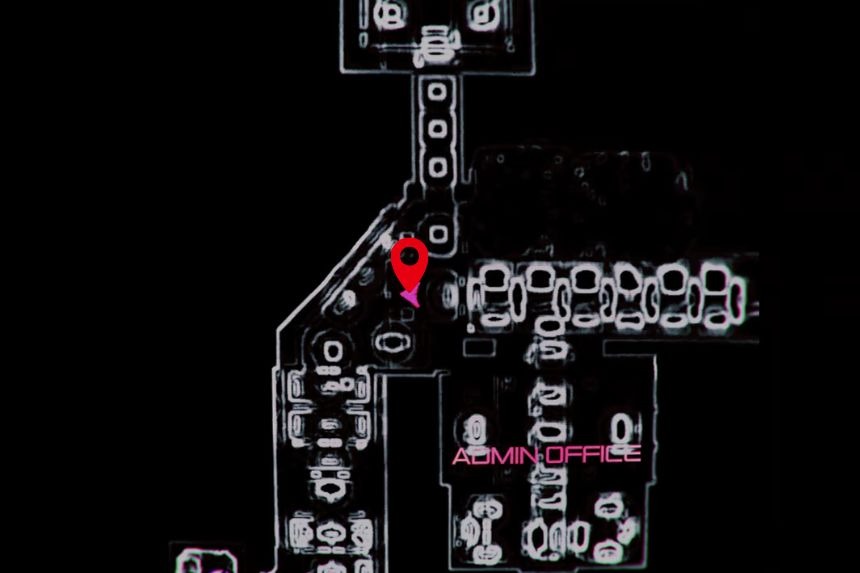
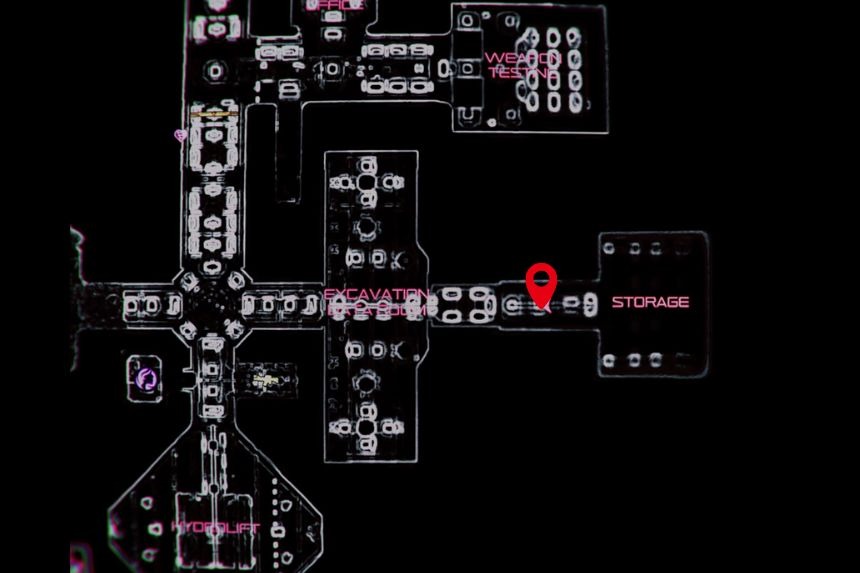
Gear Pouch #2 (Part 2)

Go to the location marked on the map above in the Preservation Facility. You will find a locked shelf in front of you. Use the key that you found in the gym to open the door. You will find the Gear Pouch #2 inside.
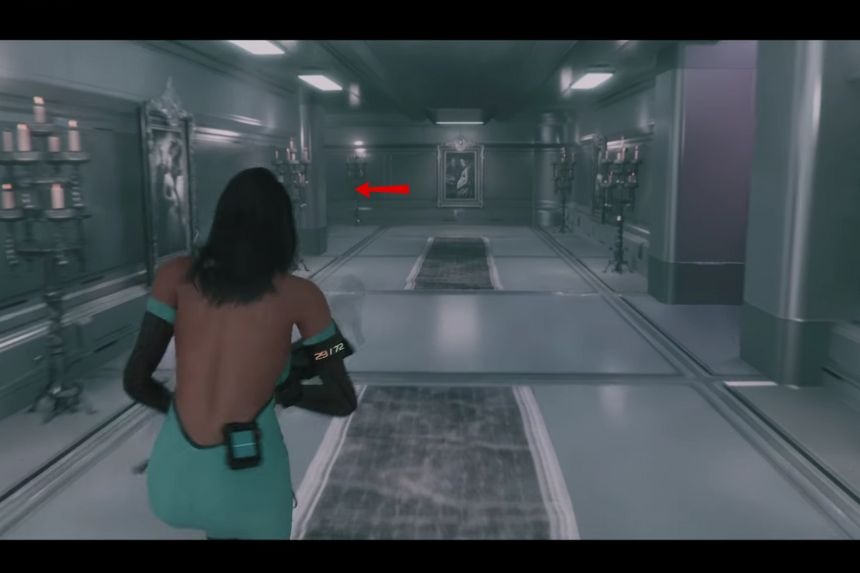
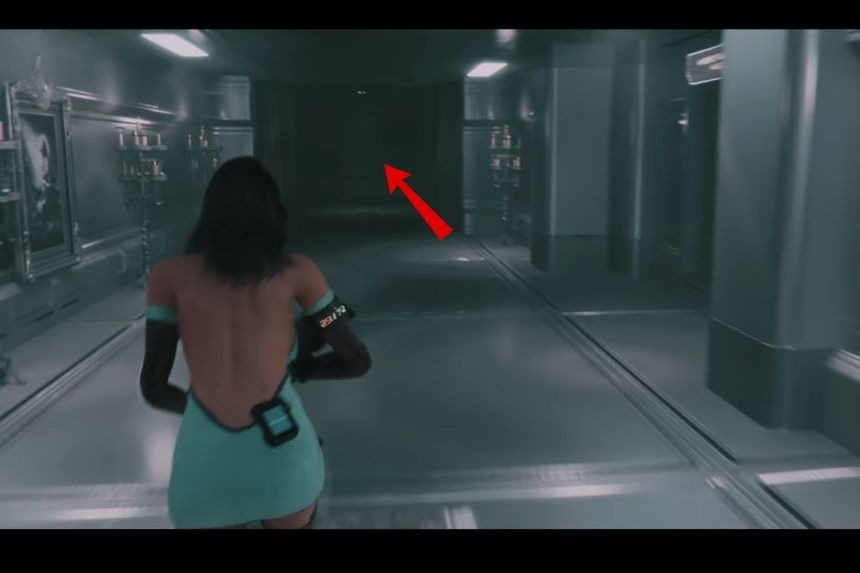
Ba Donka Donk Outfit


Head to the location marked on the map above in the Preservation Facility. Shoot at the white bulb above you. Next, move forward and turn right to reach an area with pictures. Take the first left and then again take a left. At the end of the path, you will get the Ba Donka Donk Outfit.
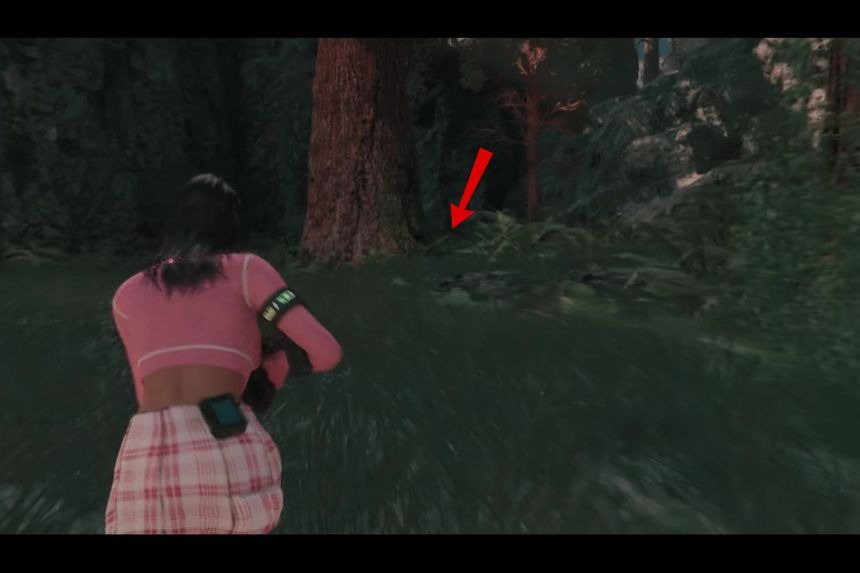
Decorative Egg #4

You will find the Decorative Egg #4 on a fallen tree trunk. You need to climb the trunk from the right side and jump towards it. You will find it at the far end of the tree trunk.
Duck #4


Outside the Preservation Facility, you will find an abandoned barn. Enter the barn and take a left. On the crates, you will find Duck #4.
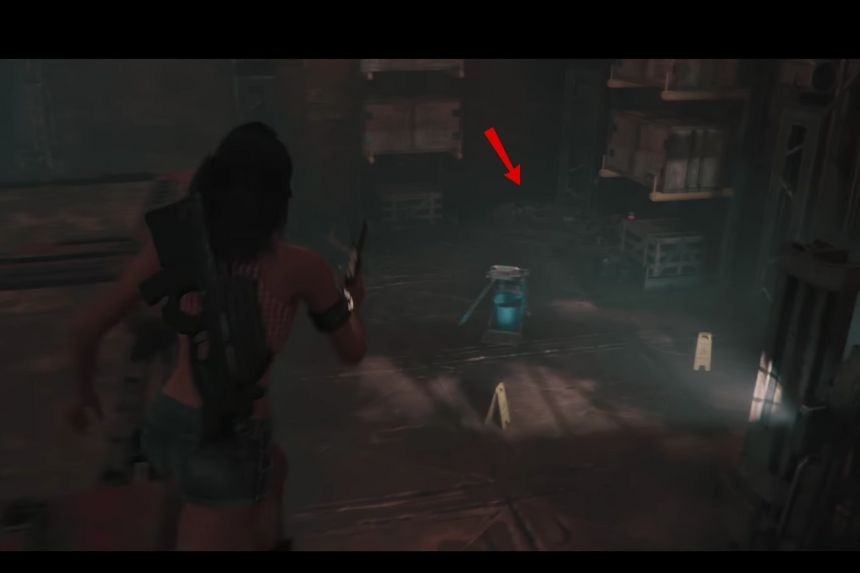
Decorative Egg #5

Inside the main Main Storage Bay, in the communication facility, go forward, and you will find a set of boxes. Behind the boxes, you will need to crouch and move forward. There will be a dinosaur in this area. You need to kill him to move forward. Near the Forklift, you will find the Decorative Egg #5.
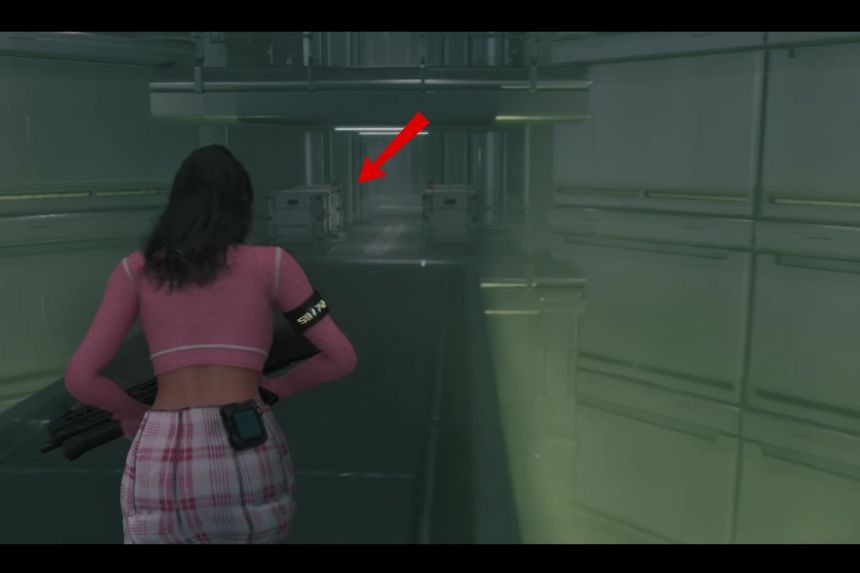
Gear Pouch #3 (Part 1)


Inside the main Storage Bay, in the communication facility, you will find a lift in front of you. Take the lift to reach the upper area. Move forward and right end of the area, drop down to find the key. After that, go towards the purple glowing containers and slide between the big boxes.
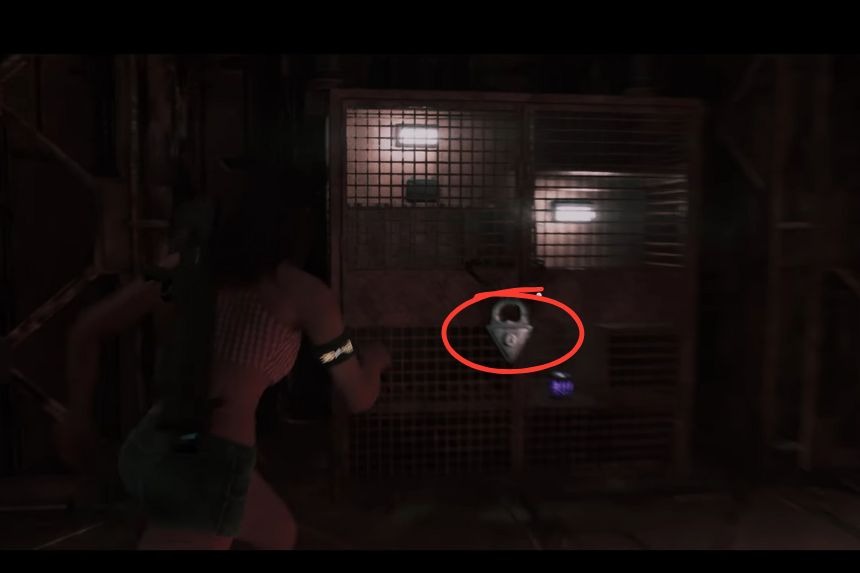
Move forward and open the doors in front and take the right. Wherever you see a laser grid obstacle, turn towards a different direction. At the far end of the path, you will see a lock shelf. To open the lock, use the key you found earlier. Inside, you will find the Gear Pouch #3.
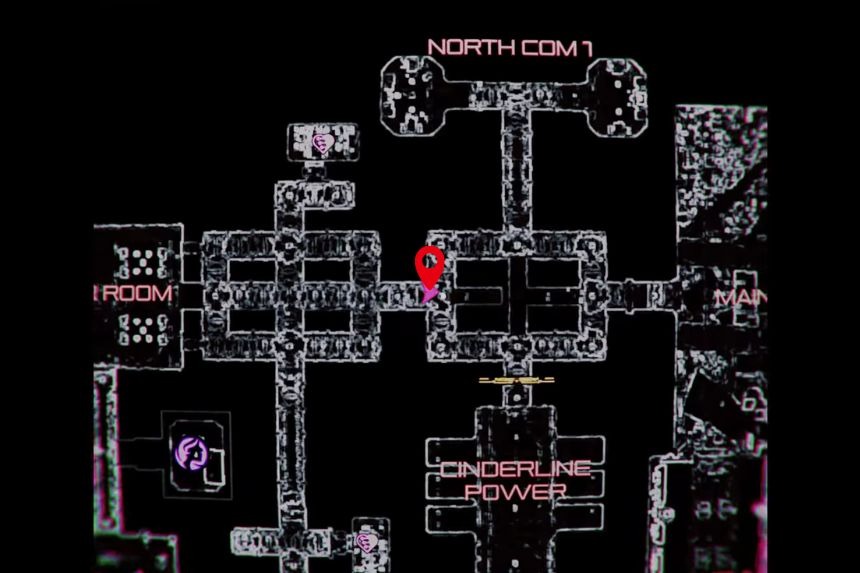
Cameo #3
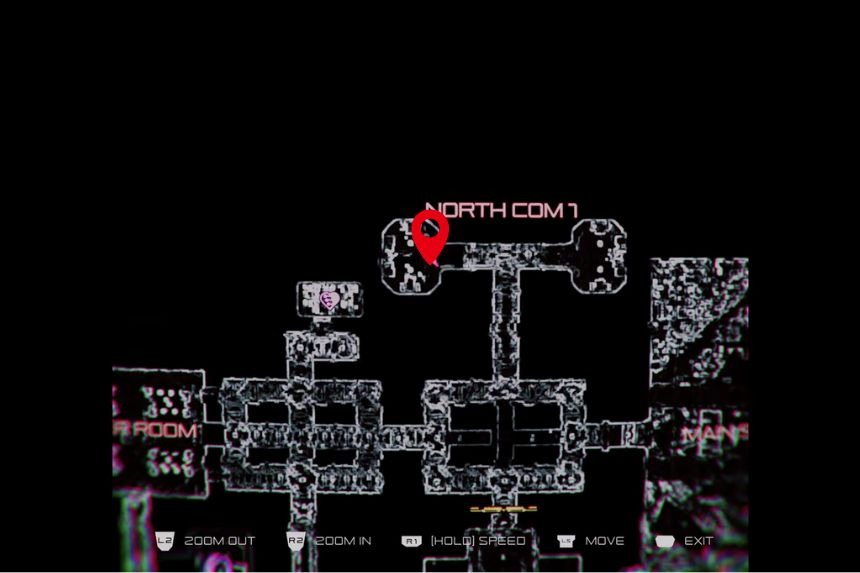


Inside the North Com 1, in the Communication Facility. In front, you will find a dead body. Take the eye of the dead body for the scanner. Then move forward and take the first ride. After that, interact with the doors to open them.

Crouch down and open another small door. Move forward, and you will reach a chamber. To open the door of the chamber, you will need to flip the switch in the nearby rooms. When you see the Chamber door light turning green, you will be able to open it. On the back of the door, you will find the Cameo #3.
Life Of The Party Outfit
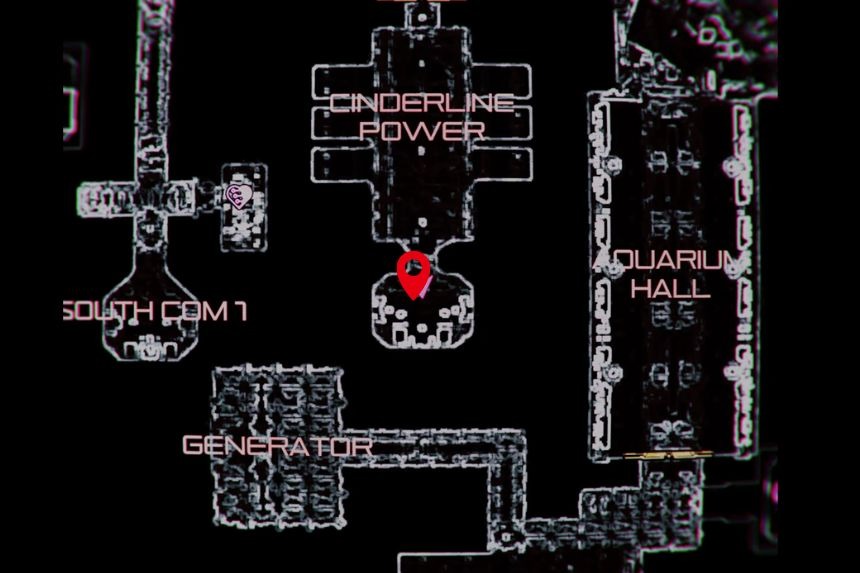

At the far end of Cinderline Power, in the Communication Facility, you will see a white bulb above you. Shoot it and move forward. Then you can exit the chamber and pass through the air ducts. Continue to move forward, and at the far end of the path, you will find the Life Of The Party Outfit.
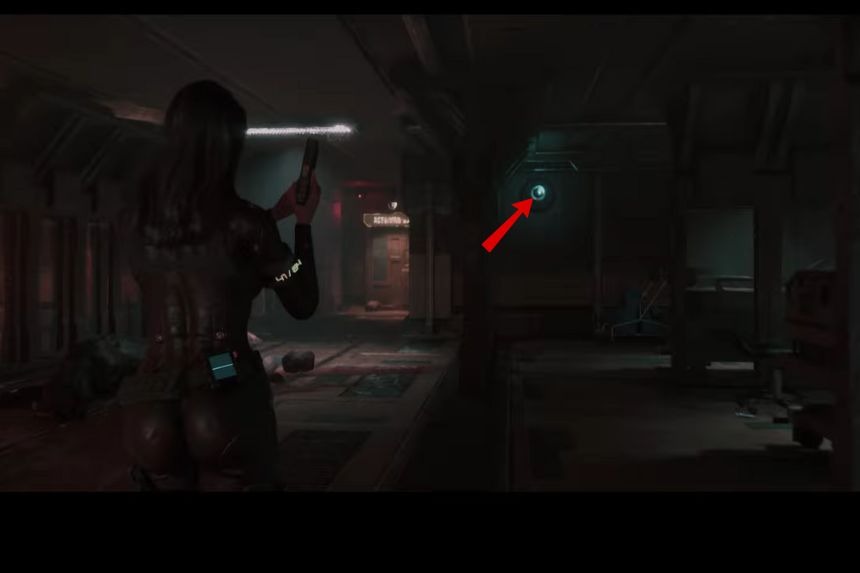
Vitality Earrings

Go to the location marked on the map above in the Communication Facility. Interact with the small door in front of you. Crouch down to move forward. At the end of the passage, you will find the Vitality Earrings with a UV Power Cell.
Not Fast, But Furious Outfit


Head to the location marked on the map above, on the Communication Facility. You will find a white bulb. Shoot it and interact with the door in front of you to move forward. Run straight till you find a dinosaur attacking you. Kill it and at the far end of the room, take a right turn. At the end of the path, you will find the Not Fast, But Furious Outfit.
Duck #5

Inside the Server room, in the communication Facility, between the server boxes, you will find the duck #5.
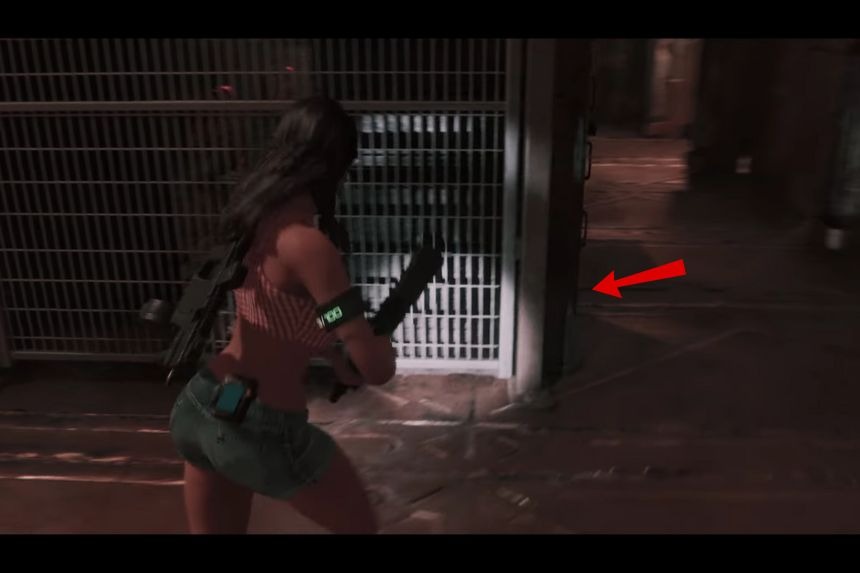
Silencer For Assault Rifle


Inside the Server room, in the communication Facility, you will find a locked shelf behind the Servers. To open the lock, you need to rotate the dials. The password is FISH. Inside it, you will find the Silencer for the Assault Rifle.
Girl, Holo My Poodle Outfit


Inside the Server room, in the communication Facility, shoot the white bulb on the ceiling. Then turn left to open the door. Run straight to find another door, and interact with it to open. You will find a dinosaur in front; kill it to move forward. After that, turn right and at the end of the path, you will find the Girl, Holo My Poodle Outfit.
Decorative Egg #6
Outside the Communication Facility, go towards the Giant red tree. On the right side, the Decorative Egg #6 will be present in a crate box.
Decorative Egg #7

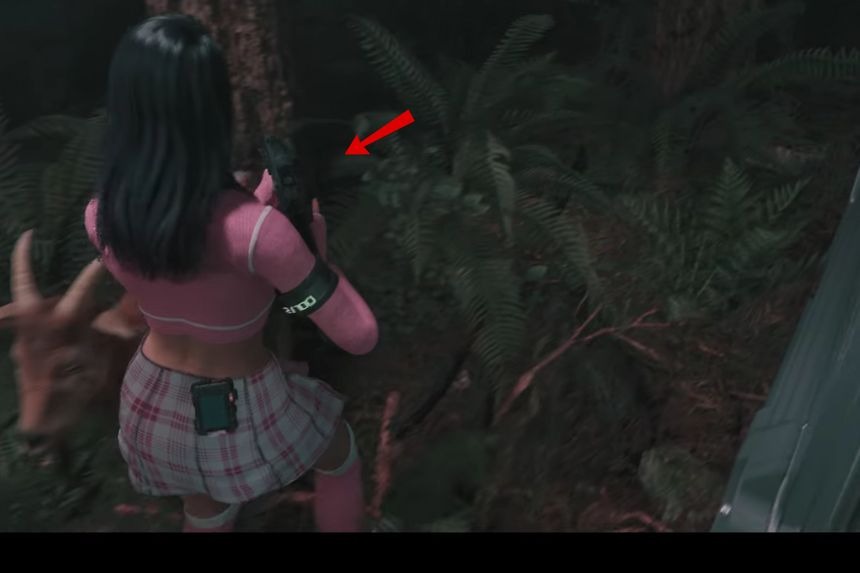
Go towards the location marked on the map above, inside the Bio Engineering lab. On the right side, you will find a display of a goat. Break the glass with your gun and enter the display box. Behind the tree, you will find the Decorative Egg #7.
Prototype Weapon (Step 1)
Head to the location marked on the map above in the Bioengineering lab. You will find an aquarium in front of you. Break the glass so that the main building falls down, and you will get the key for Prototype Weapon.
Silencer For Submachine Gun


Go inside the Lornianstratum Site, in the Bio Engineering lab. There will be eggs in front of you. Go towards a broken egg at the far end. Inside it is the Excavation Data Key.
Then return and exit the area. Pass through the laser grid and open the door in front of you. After that, turn left and move towards the lobby. Move forward to reach a bigger room on the right side.

Enter the room having blood on the floor. Avoid getting detected by the cameras. Turn right and go straight to find small dinosaurs. Near the computer, the Silencer for Submachine Gun will be lying on the table.
Wild Thing Outfit

Go outside the storage area in the Bioengineering lab. Shoot at the white bulb in front of you. Interact with the door to open it. Pass through the laser gate and avoid being detected by the cameras.


Use your purple light to see the grid. Move forward till you reach the lobby area. Now take a right turn. At the end of the path, you will find the Wild Thing Outfit.
Duck #6
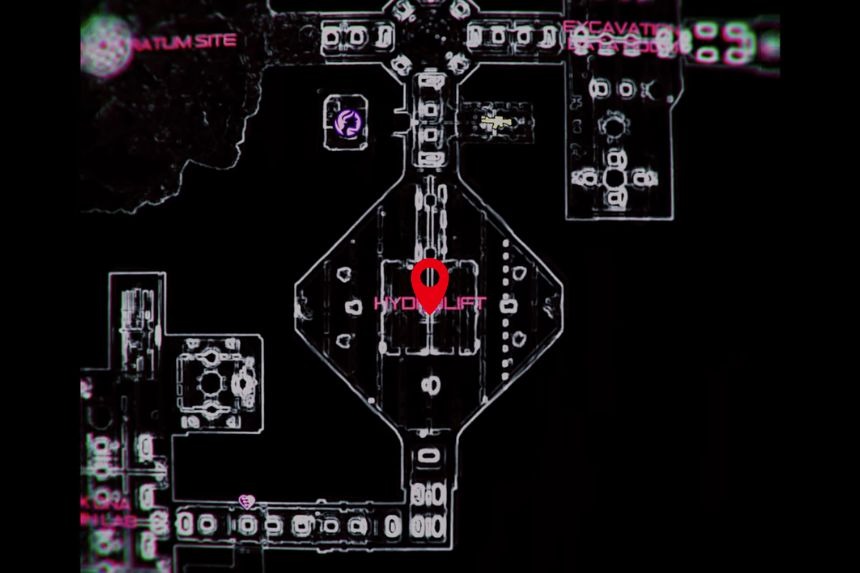

Inside the Hydrolift room, in the Bio Engineering lab, press the retract bridge button. After that, press the change floor button. You will reach the ground area. Now, turn the platform and extend the bridge. Move forward to find the duck #6 behind the containers.
Sugarplum Outfit


Inside the Hydrolift room, in the Bio Engineering lab, go to the bottom floor and shoot at the white bulb in front of you. Then move to the upper floors and turn the platform. Extend the bridge and move forward. Turn left, and at the end of the path, you will find the Sugarplum Outfit.
Strength Earrings


Inside the T. rex DNA fusion lab, in the Bio Engineering lab, turn left, and on the container, there will be Strength Earrings.
Cameo #4

Go outside the Clone Monitoring room in the Bioengineering lab. Move forward, and on the left side behind the status, there will be the Cameo #4.
Argh, Black Tides Outfit


Inside the Hydrolift room, in the Bio Engineering lab, shoot at the white bulb on the left side. Move forward and turn left. At the end of the path, there will be Argh, Black Tides Outfit.
Stealth Earrings


Inside the West Processing room in the Disposal Facility, go under the big pipes. Move forward and turn right to find the Stealth Earrings behind the dustbin.
Great Jeans Outfit


Inside the waste processing room in the Disposal Facility, turn left and crouch under the pipes. After that, move forward and turn right. Then push the dustbin in front of you and interact with the door to open it. Inside, you need to activate the drain system.

On the right side, you will find a white bulb. Shoot it and exit the room. Now, drop down in the sewage system drops. There will be a crocodile swimming in the area, so be careful. On the right side, you will find a dead body.


Take the finger of the bear’s body for the scanner. Turn left and climb up the sewage system. Interact with the door in front of you and turn right. Now take another right and go to the Waste Flow room. Turn right, and at the end of the path, there will be the Great Jeans Outfit. However, be careful, there will be a dinosaur nearby in the area.
Duck #7


In the trash processing room, in the Disposal Facility, turn left to find a dustbin. On the dustbin is a Duck #7.
Cameo #5
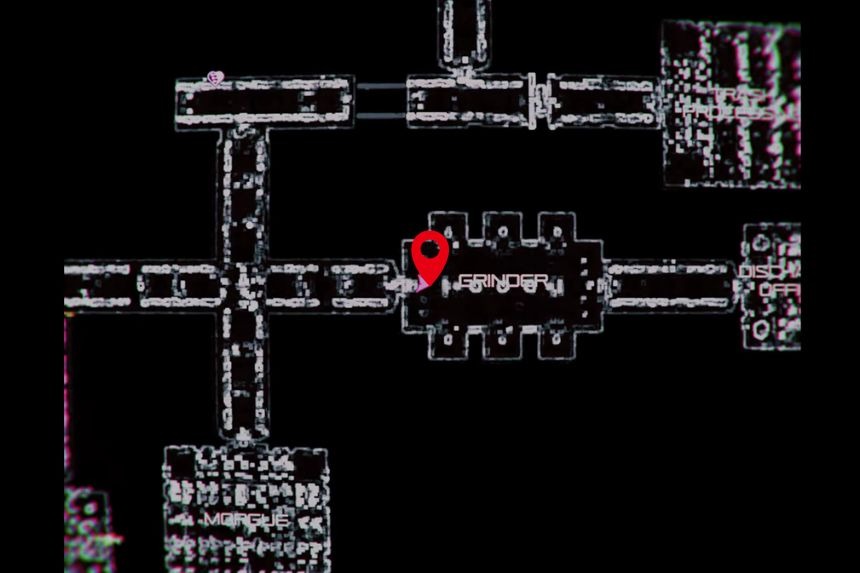
Inside the grinder room, in the Disposal Facility, turn right and behind the pipe, you will find the Cameo #5.
Decorative Egg #8
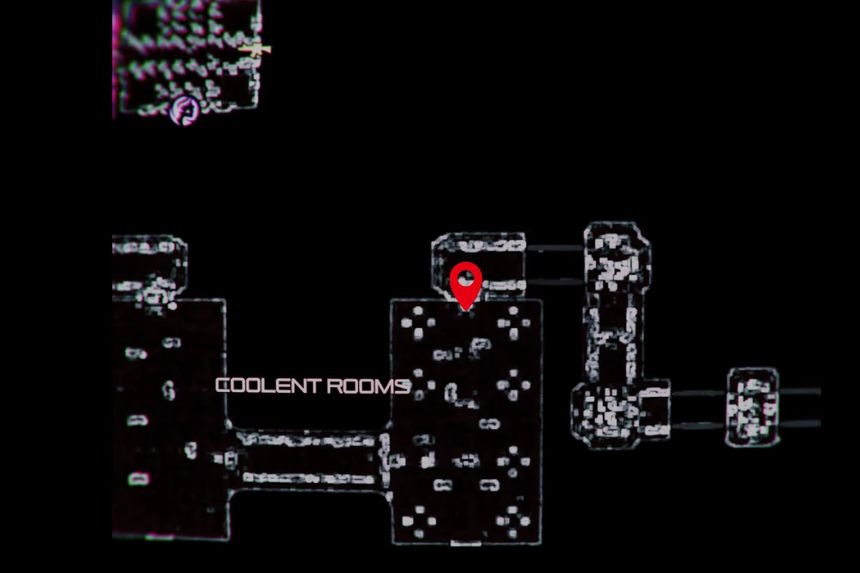

At the far end of the Coolent rooms, in the Disposal Facility, you will find the Decorative Egg #8 under the pumps, on the right. Be careful, as there will be a lot of enemies inside the area.
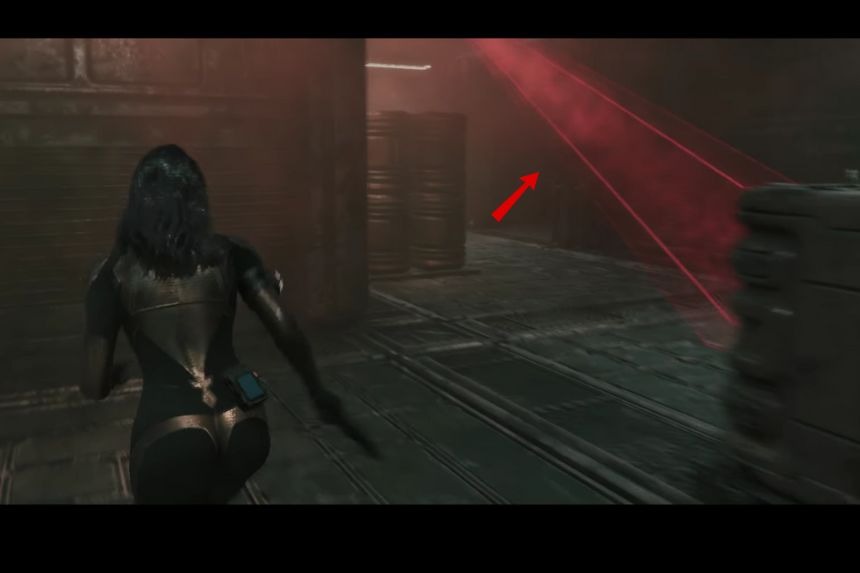
Huntress Outfit


At the far end of the Coolent rooms, in the Disposal Facility, go towards the big fan in front of you. On the left side, you will see a white bulb. Shoot it and open the door in front of you.

Climb the stairs and take a left turn. The huntress outfit will be present at the end of the path.
Be A Legend Outfit


Inside the Storage area, in the Disposal Facility, shoot at the white bulb on the wall. After that, move forward and take a right turn.

There will be a lot of dinosaurs in this area. Kill all of them and take another right to find the Be A Legend Outfit at the end of the path.
Cameo #6


Inside the Sewage Overflow room in the Disposal Facility, go forward and take a left to find the Cameo #6 behind the steel pipes.
Prototype Weapon (Step 2)

Inside the Start Bridge, climb the stairs and open the secret door with the key that you got from the Bio Engineering lab. In front of you, there will be the Prototype Weapon and its ammo.
Purrfectly Cat’s Meow
Inside the Star Bridge, climb the stairs in front of you and open the secret door. On the right side, you will find the Purrfectly Cat’s Meow outfit.
Biker Chick Outfit

After you get the Purrfectly Cat’s Meow outfit in the Star Bridge. You will get the Biker Chick Outfit kept just near the Purrfectly Cat’s Meow outfit.