

For those looking to get a full experience from 007 First Light, this guide can help you in finding all the collectibles that exist within the game. The majority of these collectibles are found in special chambers, locked rooms, or hidden places. Collecting everything will also unlock several trophies and achievements, making this guide useful for both completionists and trophy hunters.
All Cards Location in 007 First Light
In all there are 36 collectible Playing Cards found in 007 First Light. By collecting all the cards, you get to win the Casino Royale trophy/achievement. It’s not necessary for you to have all cards on your first run-through as you can always go back to collect all cards using the Chapter Select function.
7 of Acorns
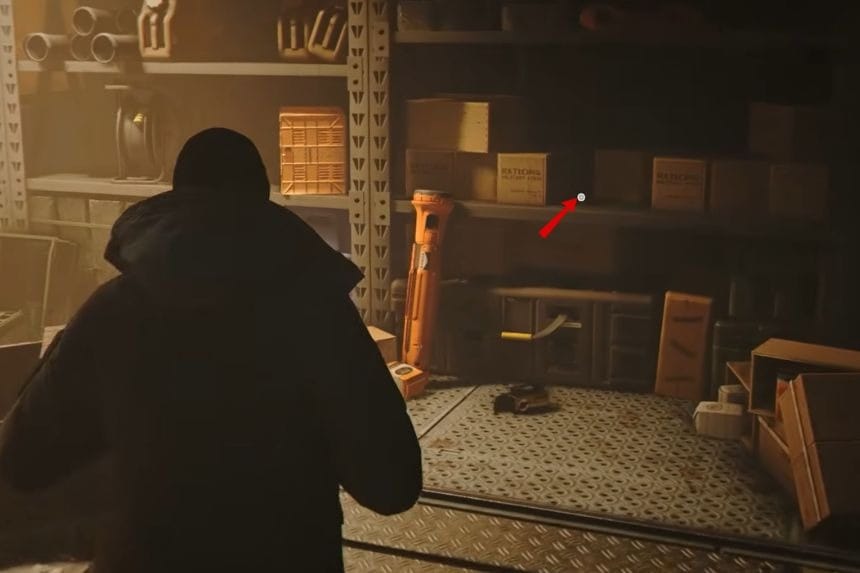
You can find the 7 of Acorns during the “Move the BT-65” objective in the Deployment Camp checkpoint. After the cutscene where two men crash a car and ask you to move it, head over to the remote control area. Look at the shelves on the right side of the control panel, and you’ll spot the card sitting there waiting to be picked up.
7 Roses
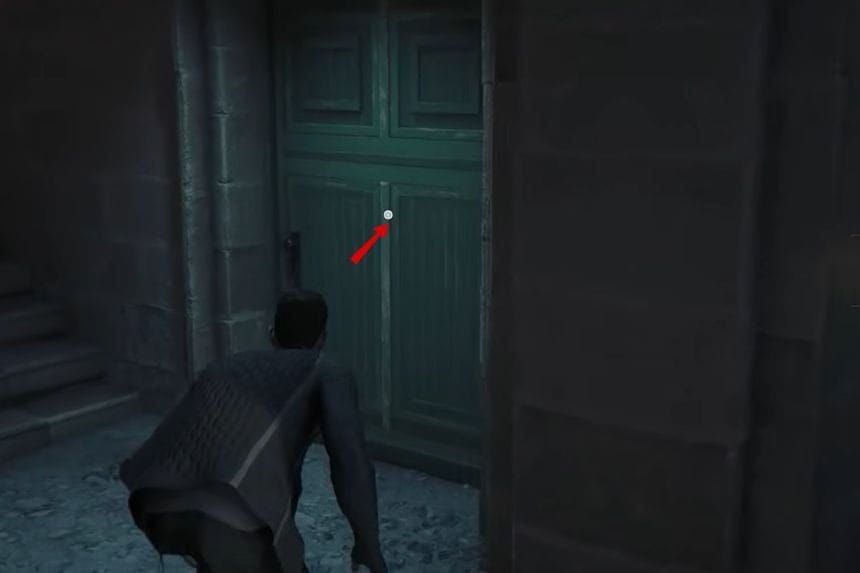
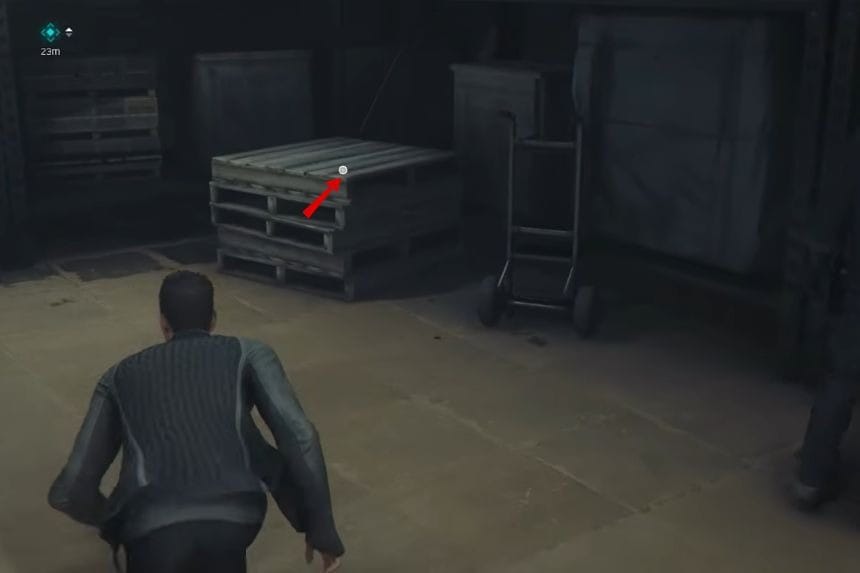
The 7 of Roses is located during the “Steal the Flag” objective in the “Search the Compound” checkpoint. Make your way down to the pier area where you’ll see a large double door beside a staircase. You can either break the door open, which will alert nearby enemies, or quietly grab the key from the guard standing near the stairs. Once inside, clear out the three enemies in the room and check the wooden pallets to find the card.
Ober of Bells
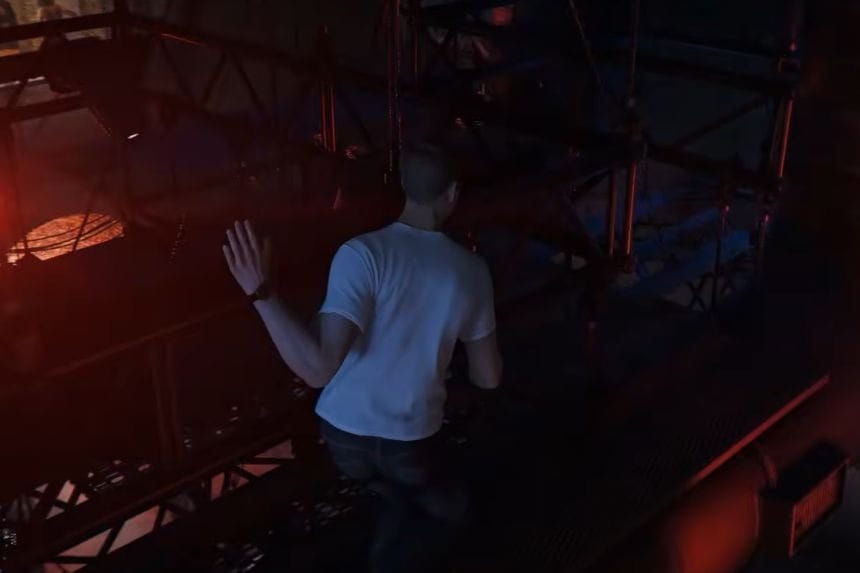
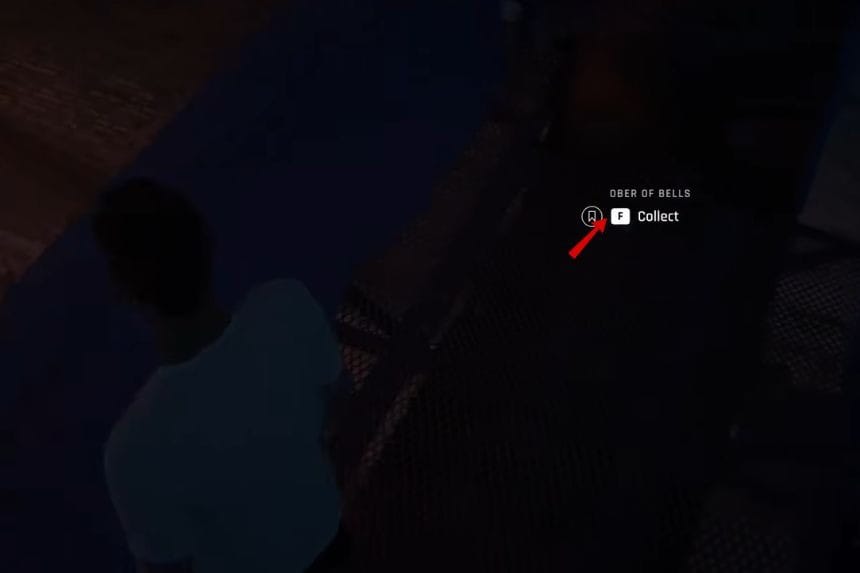
The Ober of Bells card can be collected during the “Get Upstairs” objective. When you reach the disco hall, go behind the stage and climb the scaffolding backstage. From there, carefully move across the pipes above the area. Just before you make the jump to the second floor, look down at the floor and you’ll see the card there. You can also continue and complete the “Above and Beyond” side quest while you are in this section.
Ace of Acorns
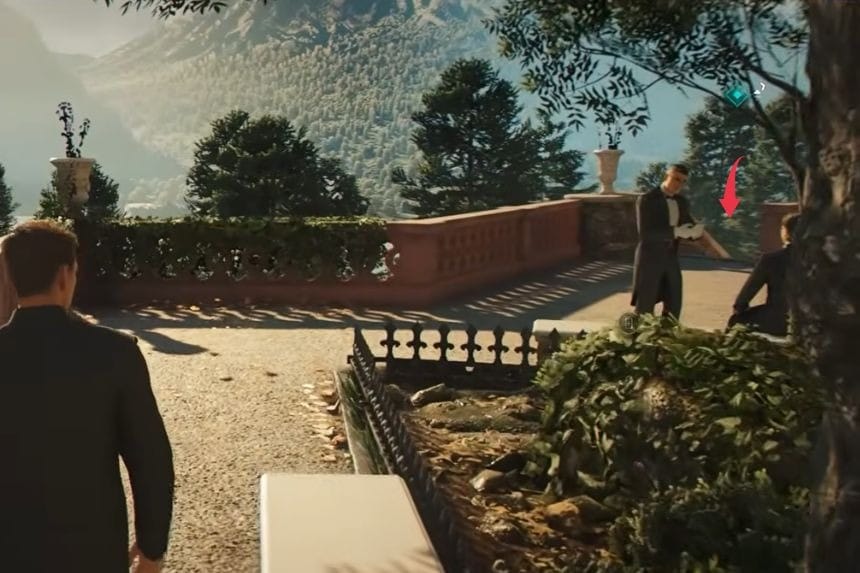
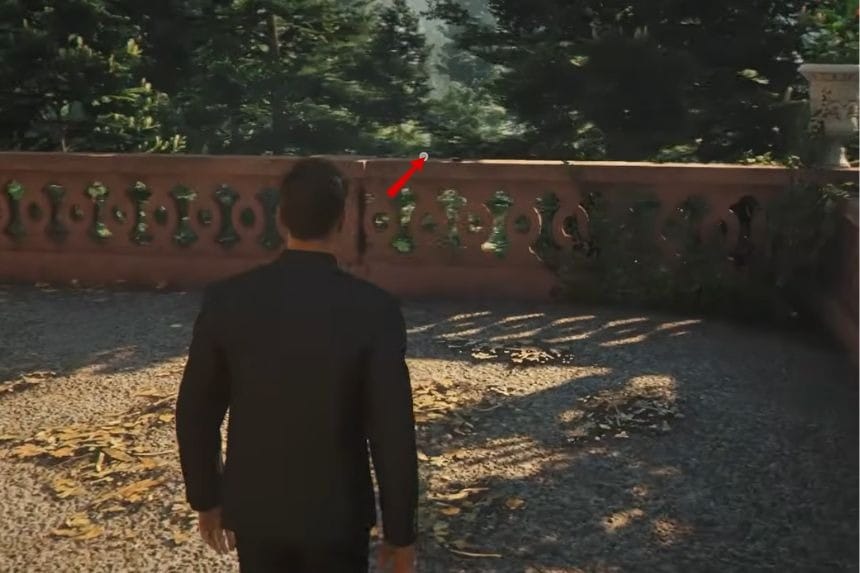
You can collect the Ace of Acorns during the “Investigate the Blond Man” objective in the “In Position” checkpoint. After parking your car, continue forward on foot and head up the stairs. Once you reach the top, take the next staircase going down on the left side. As you move down, check the railing carefully because the card is sitting right there and can be easy to overlook if you rush past it.
Ober of Shields
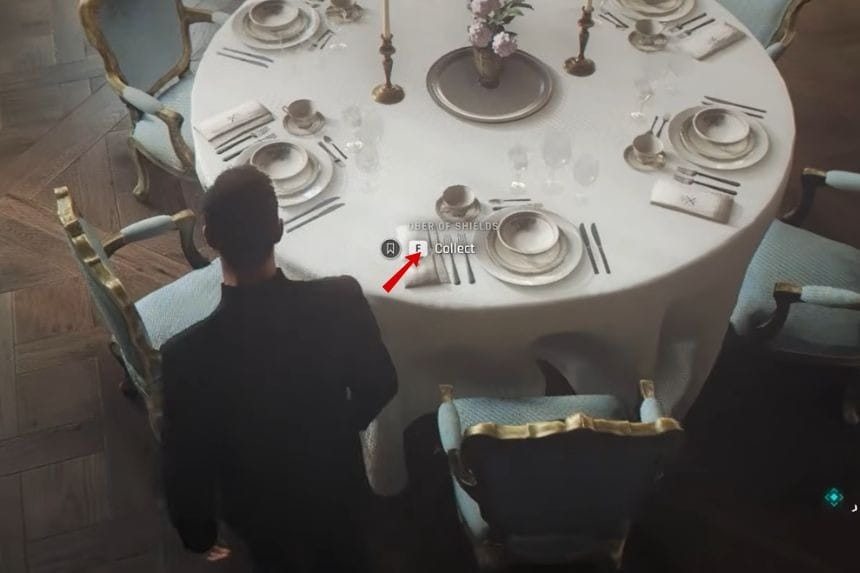
The Ober of Shields card is found while searching the hotel during “The Game is On” checkpoint. When you enter the large guest hall, turn left and head down the stairs. After coming out of the stairway, turn left once more and follow the corridor until you reach the Dining Room. Look at the far-left dining table covered with a white tablecloth. The card is resting there, but since it blends in with the cloth, it is very easy to miss at first glance.
6 Roses
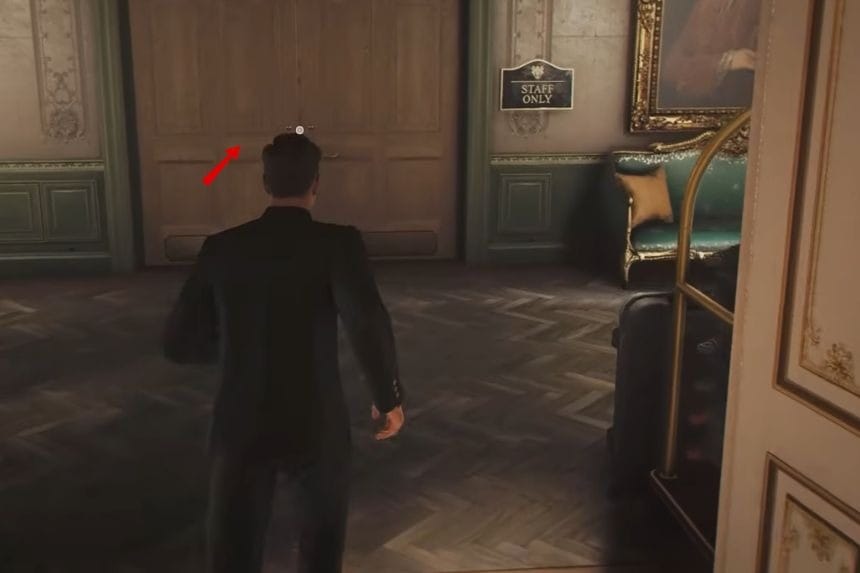
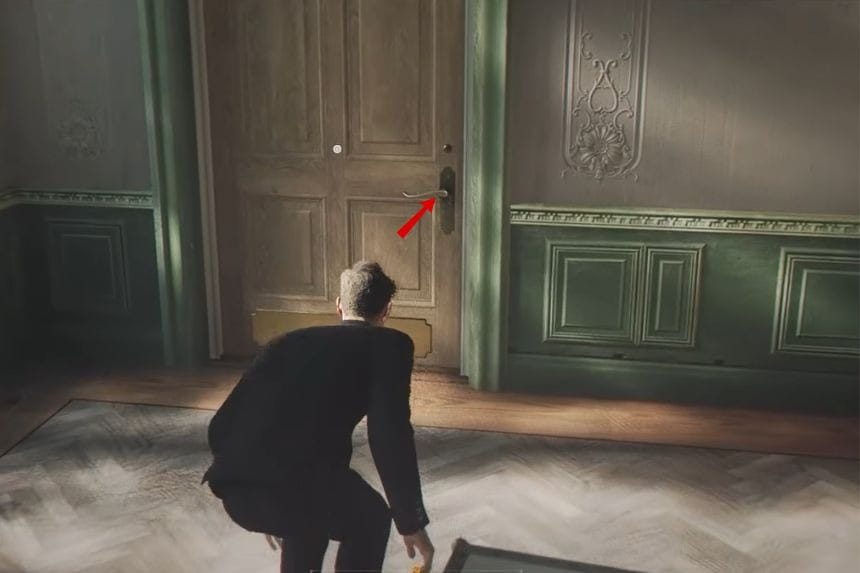
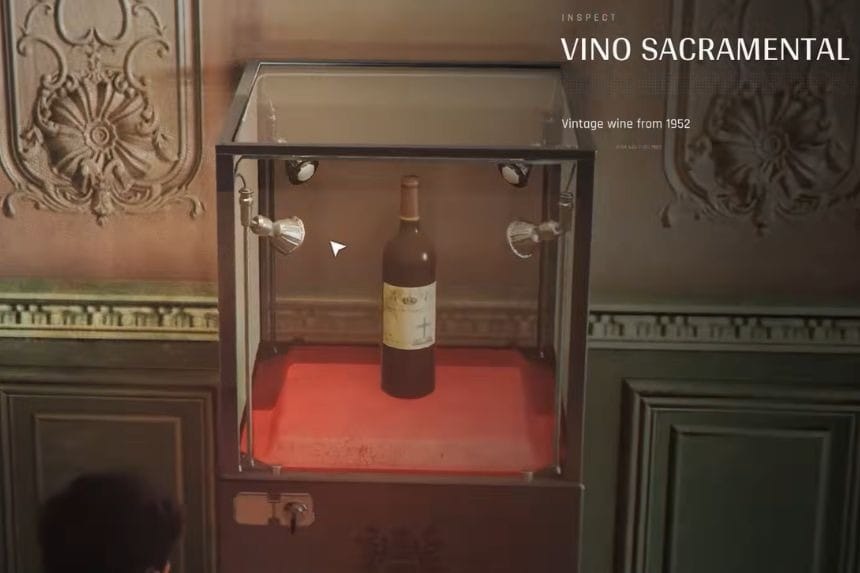
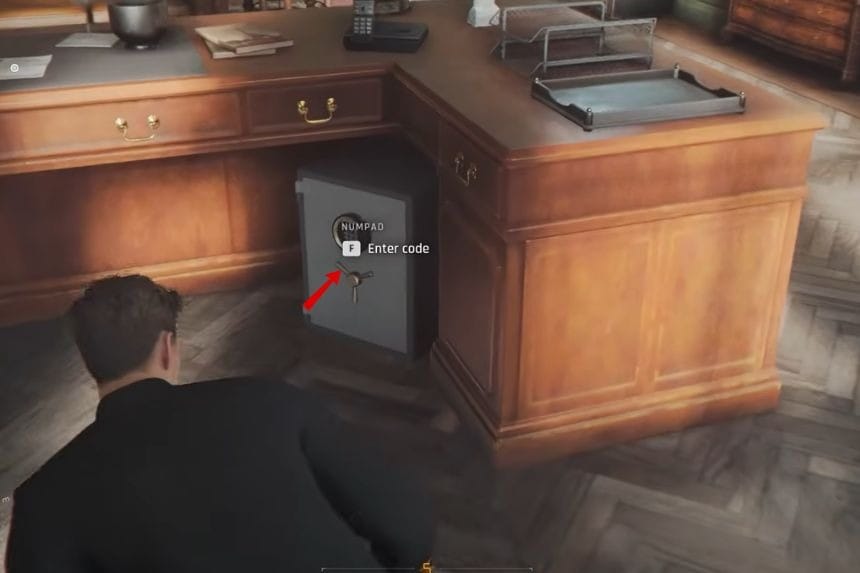
The 6 of Roses is also located during “The Game is On” while searching the hotel. Head down to the reception desk and go through the white door behind it to enter the restricted staff area. From there, make your way to the manager’s office. You can either distract the guard nearby or sneak through the Staff Only room where the two maids are working. Inside the office, look for the safe under the desk and open it using the code 1952. The card is hidden inside the safe, and the code itself comes from the year written on the central wine bottle in the room.
6 of Acorns
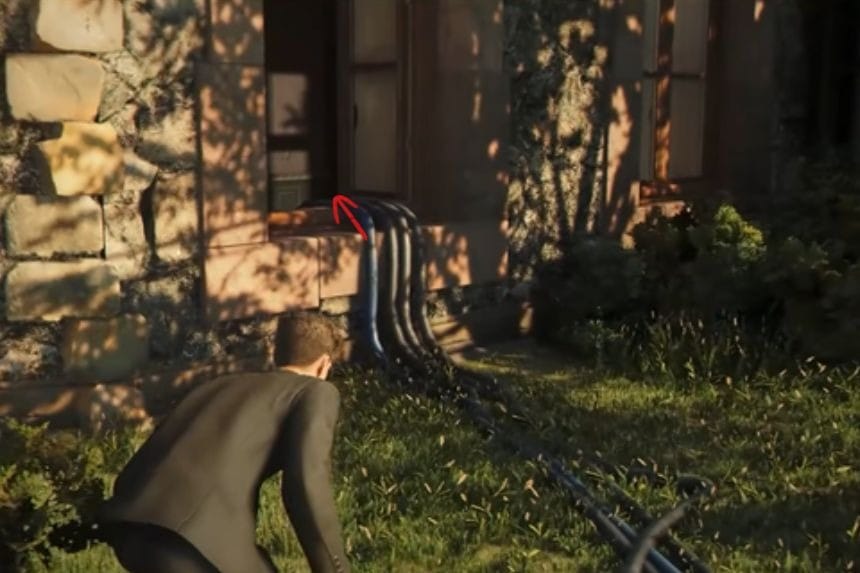
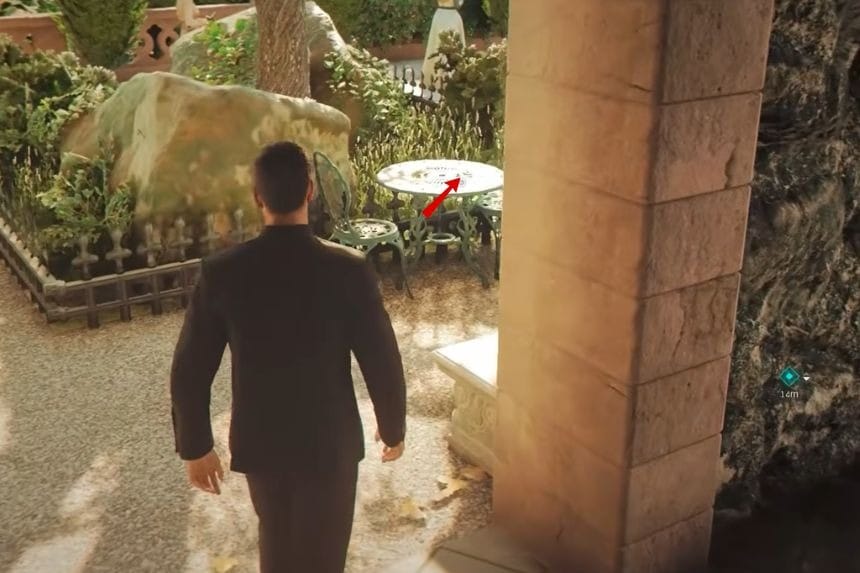
You can find the 6 of Acorns during the “Pursue the Blond Man” objective in the “Delivery Area” checkpoint. As the story continues, you will eventually pass through room 206 and enter a utility corridor with a large blue cable running through it. Follow the corridor all the way to the end, then go through the door and turn left onto the terrace outside. The card will be sitting on a table there, so make sure to check the area before moving on.
7 of Bells
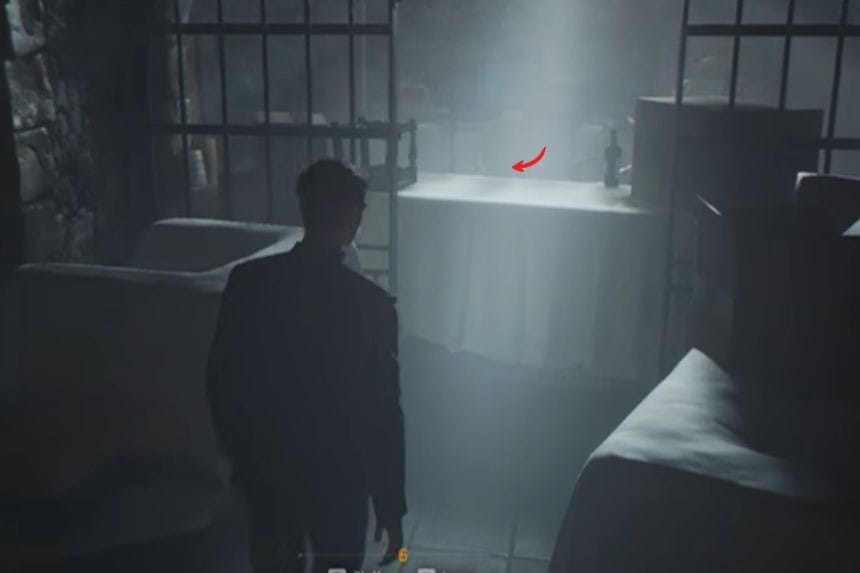
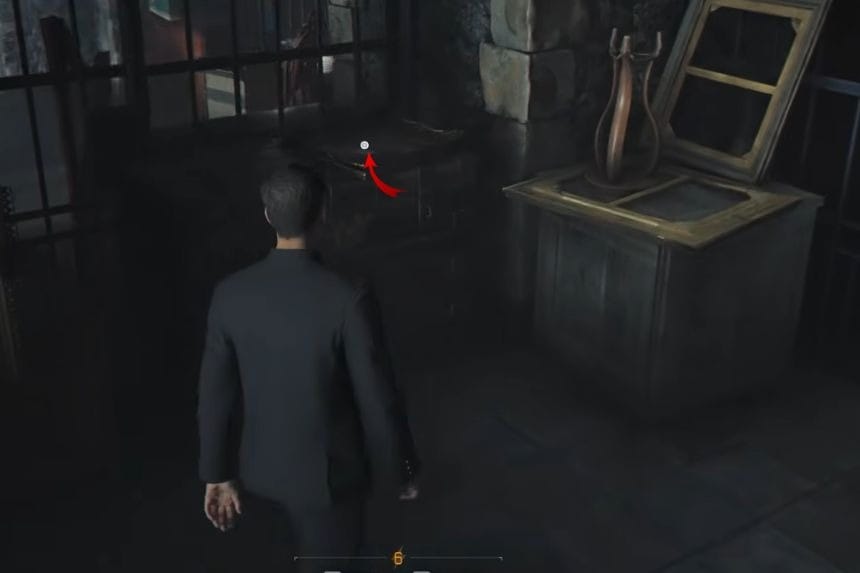
The 7 of Bells is collected later during “The Vanishing” checkpoint while still pursuing the blond man. After solving the dining room puzzle using the sequence Lion → Snake → Goat, you will end up in a dark basement area. Jump over the first table you see and immediately turn left. In the next room with prison bars, look for a box placed in front of a narrow passage. The card is resting right on top of that box.
6 of Bells
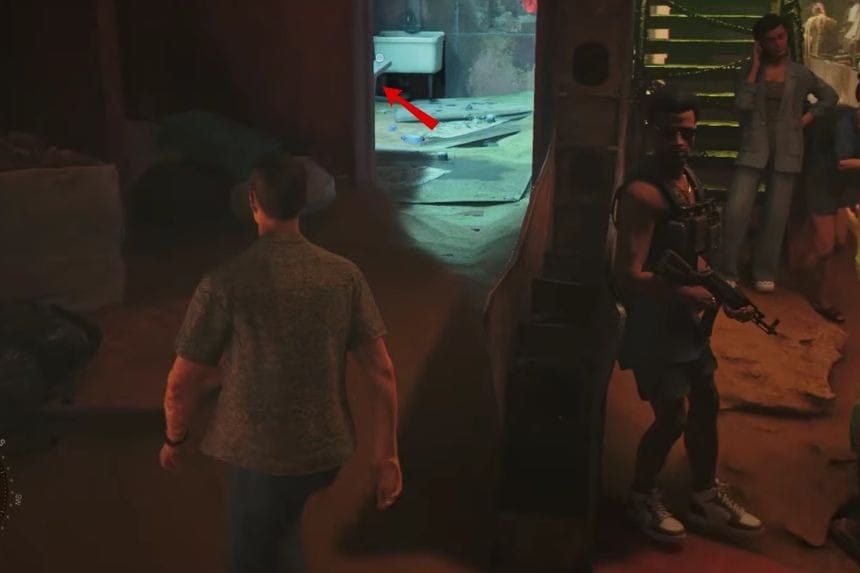
You can collect the 6 of Bells during the “Arriving at Aleph” checkpoint while following Greenway. After getting out of the car, you will enter a shipwreck that has been turned into a market area. Take the path on the left side and head into the bathroom nearby. The card can be found inside there.
9 of Acorns
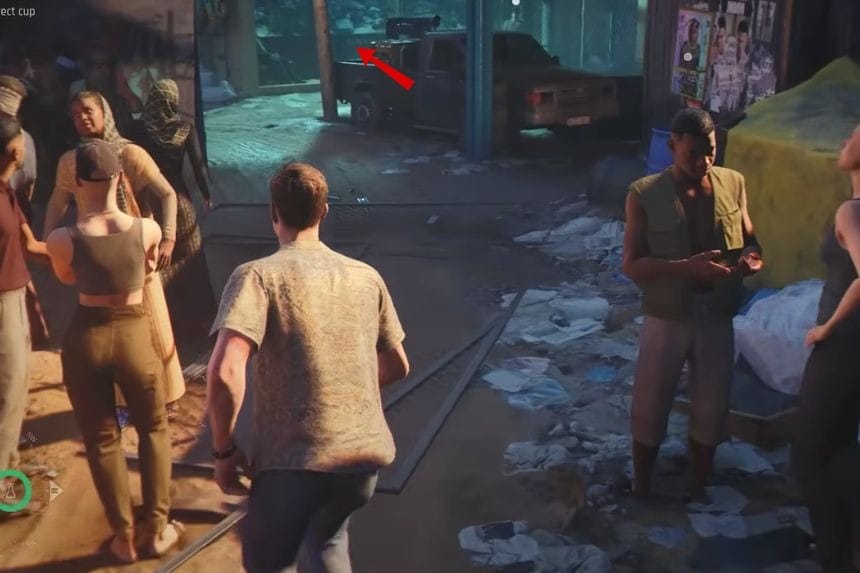
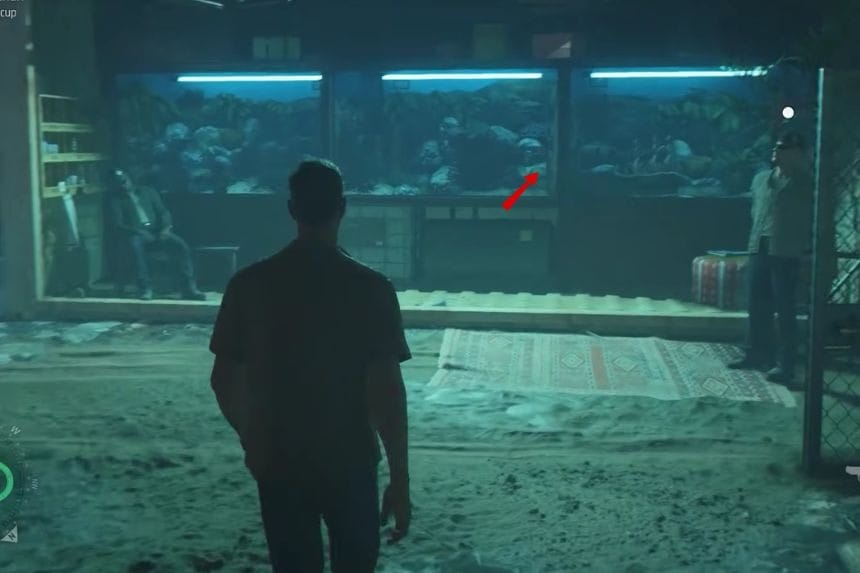
The 9 of Acorns is found during the “Obtain Auction Fee” objective in the Black Market checkpoint. Once you receive the task, head down into the market and turn right until you reach two guards having a conversation that you can eavesdrop on. Next to them is an aquarium with the card inside. Use the Q-Watch laser gadget to break the glass and grab it. Just remember that the laser gadget must already be equipped in Chapter 9, otherwise you will not be able to collect the card.
Ober of Acorns
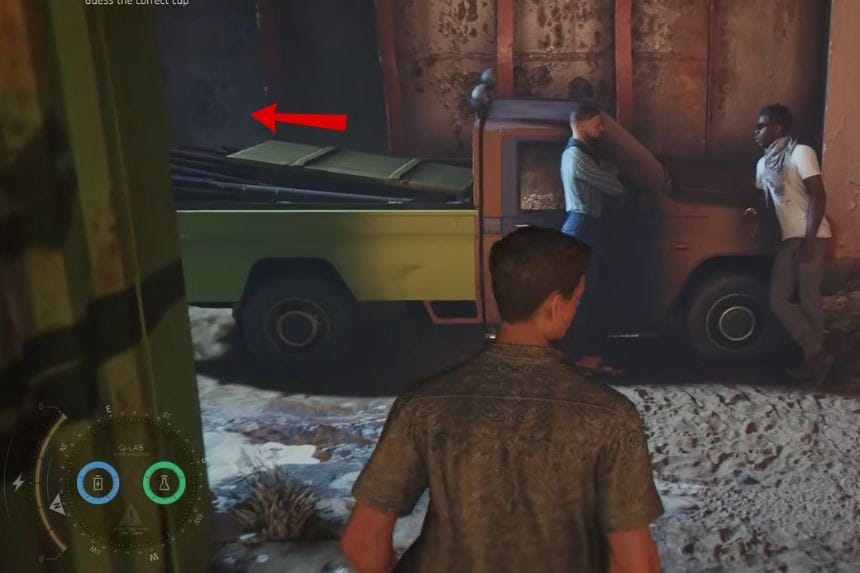
You can also find the Ober of Acorns during the same “Obtain Auction Fee” mission. Go back to the ramp where you first entered the market and head toward the area with the large red anchor. Behind the parked truck, there is a wall panel that can be cut open using the laser gadget. Inside that hidden spot, you will find the card waiting for you.
Ace of Roses
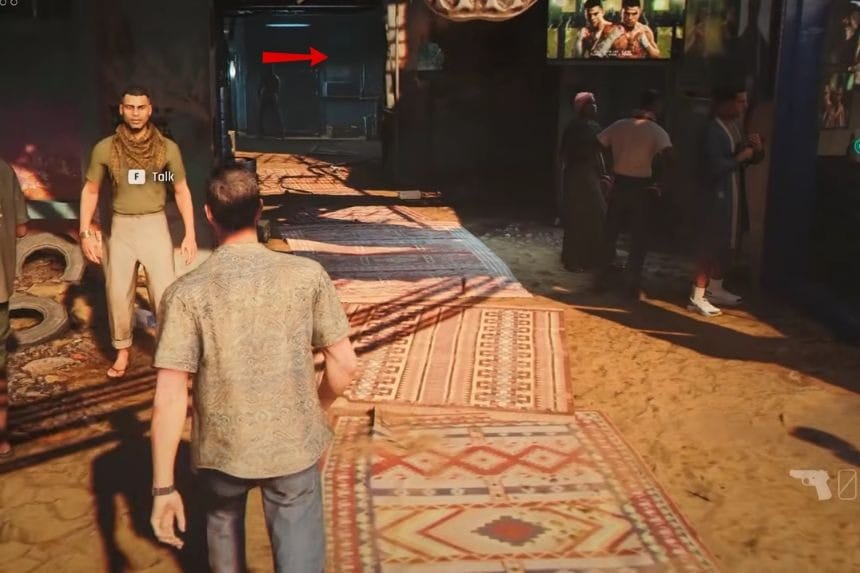
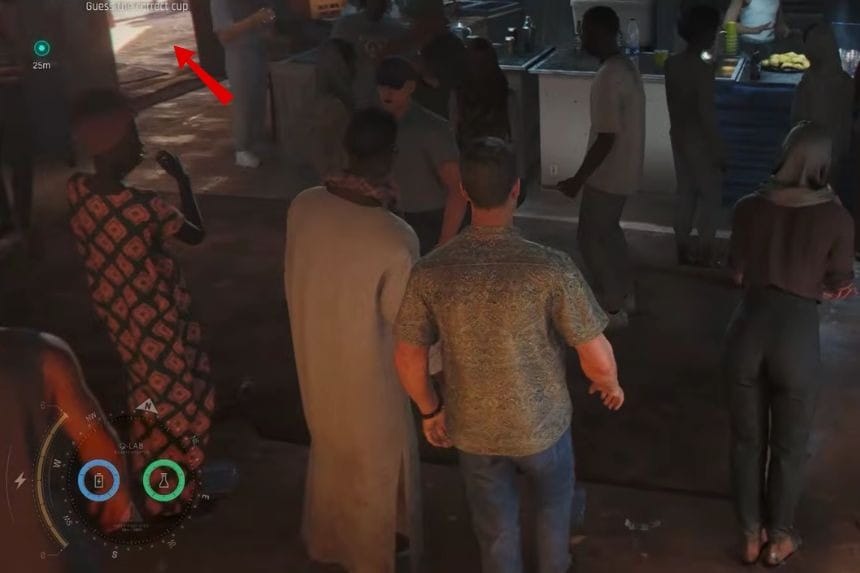
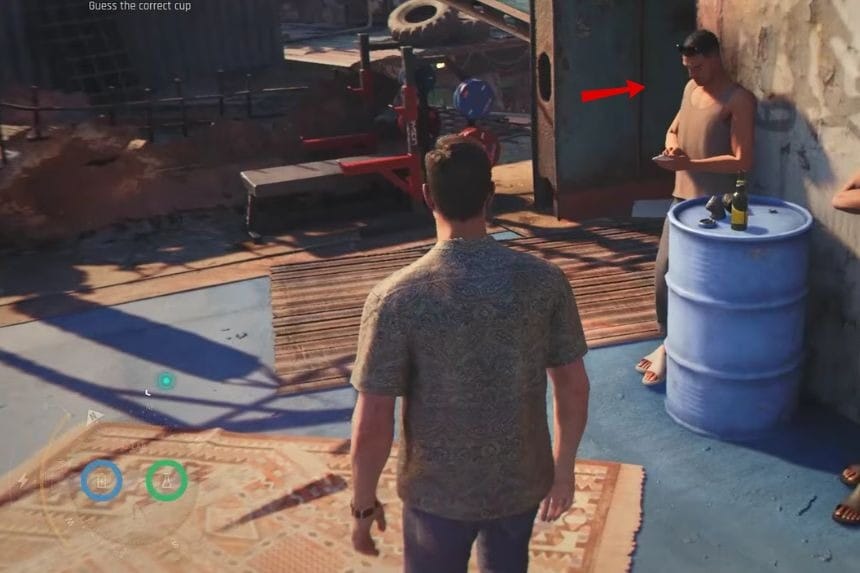
The Ace of Roses is another collectible in the Black Market section. Return to the entrance ramp of the market and continue straight through the tunnel leading to the Fight Club. Once inside, make your way up to the top floor. Near the bar, go through the door on the left side to reach the rooftop training area. In the corner, there is a small room with some boxes inside, and the card is sitting on one of those boxes.
Banner of Shields
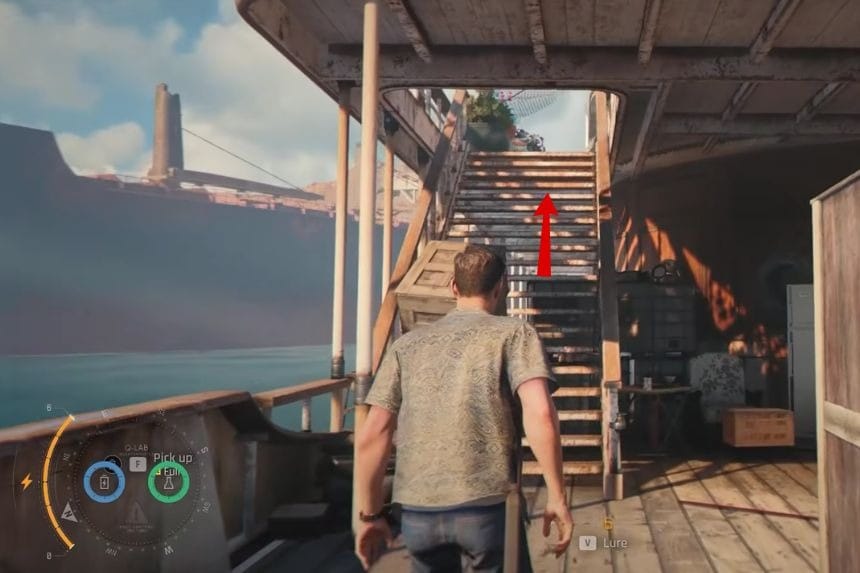
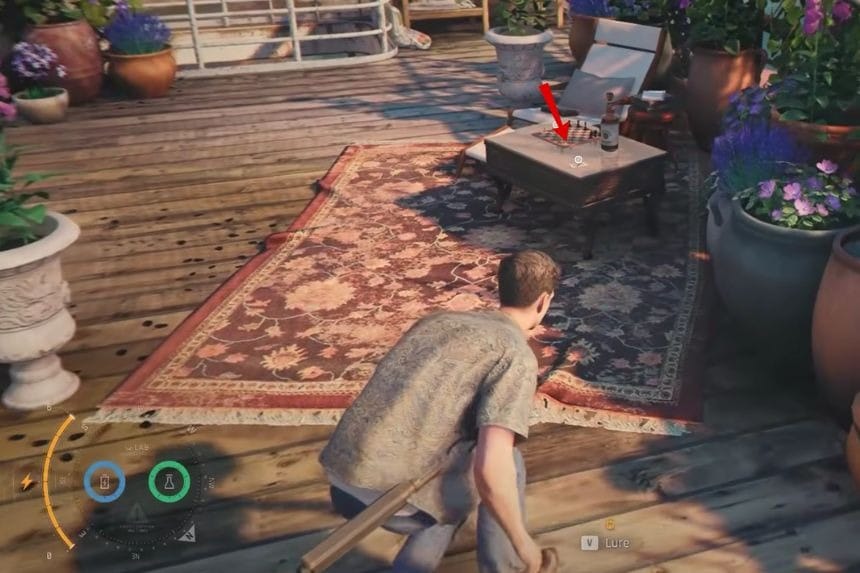
The Banner of Shields appears during the “Find Agent 009” objective. At one point, the story will ask you to disarm tripwires on the ship. Climb the ladder on the right side and then immediately turn around once you reach the top. The card is located near the front section of the upper deck, so it is very easy to spot if you look behind you first.
6 of Shields
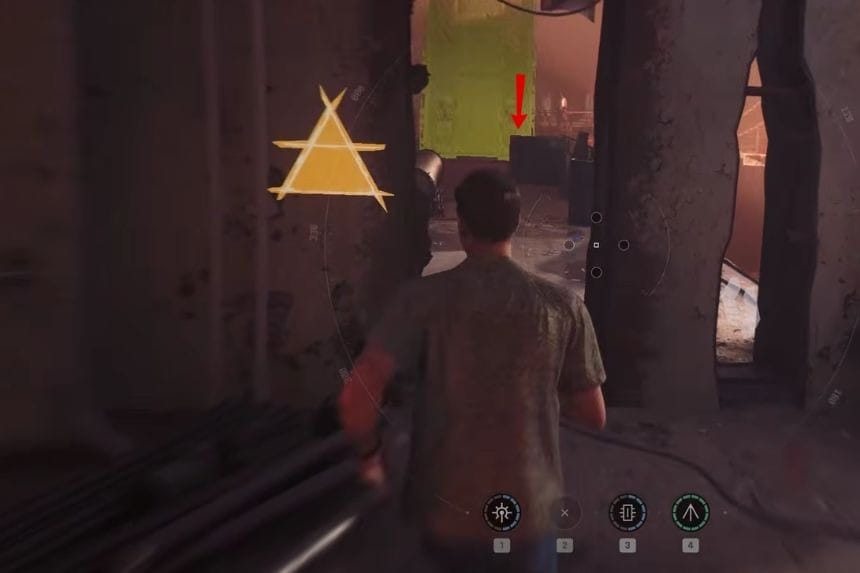
Finally, the 6 of Shields can be collected during the “Find a Way Inside the Shipwreck” checkpoint while following the clues. Inside the shipwreck, climb up the chain and use the rope to cross over to the next area. Continue moving forward and look for a barrel beside a blue pipe. The card is resting on top of the barrel, right near the pipe that you will later climb to lower the bridge.
8 of Acorns
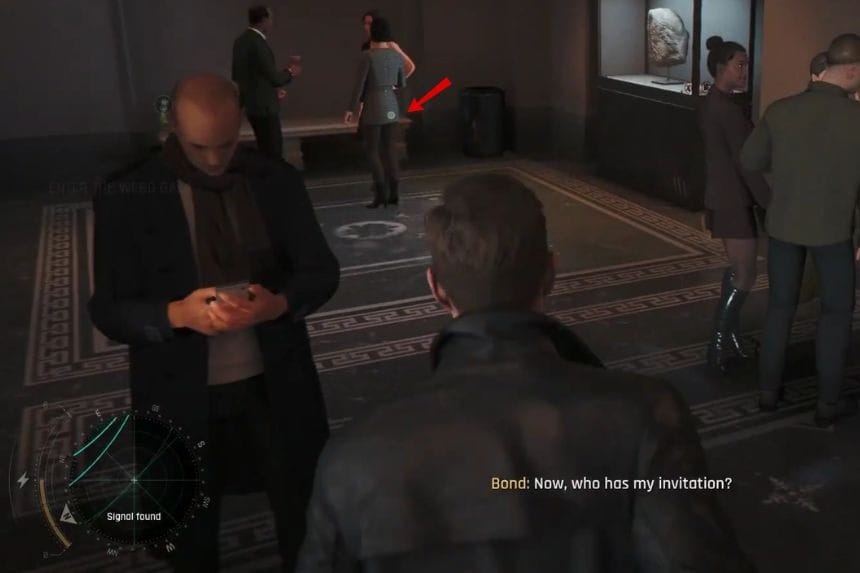
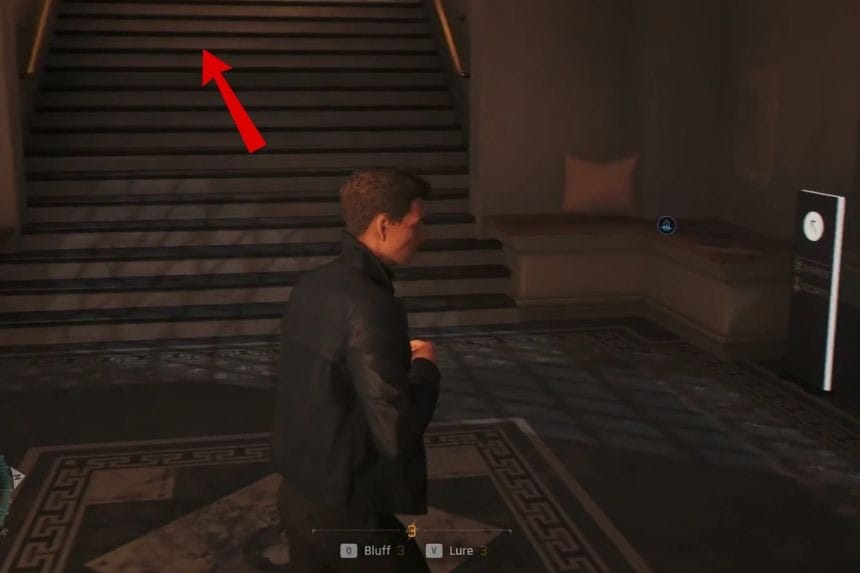
You can find the 8 of Acorns during the “Enter the Webb Gala” objective at the Gala Entrance checkpoint. As soon as you enter the first hall of the gala, head toward the back-right corner of the room. Near the reception desk, you’ll see a stone bench, and the card is sitting right there on top of it.
Ober of Roses
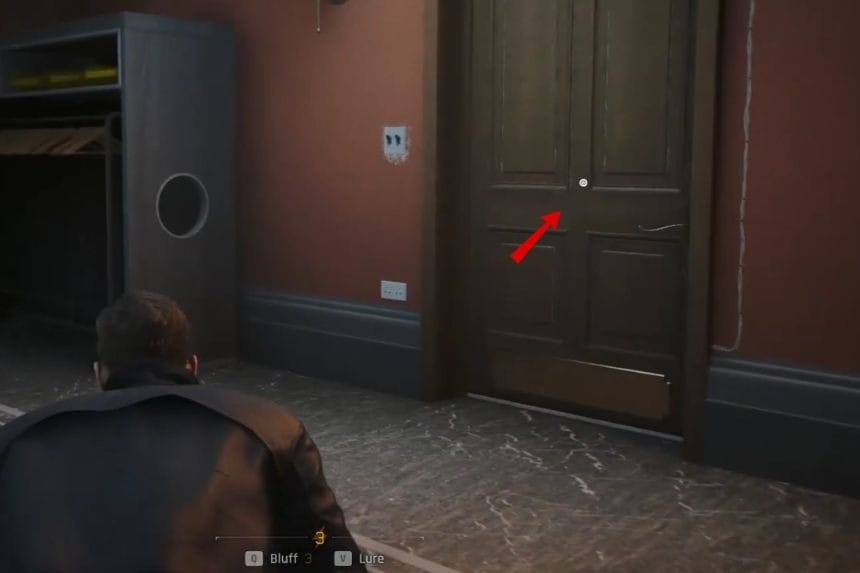
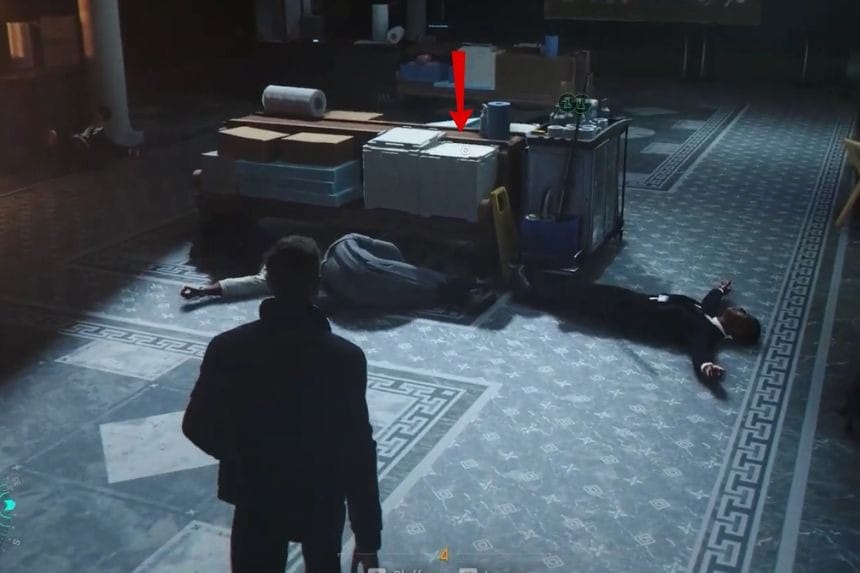
The Ober of Roses is collected during the “Find the Assassin” objective. After using your invitation to enter the gala room, immediately turn left and go into the side hallway. Turn left again in the hallway and continue until you spot a single guard wearing a white shirt near the restricted Cloakroom area. Use a gadget like the Dartphone or Laser to distract him, then sneak past into the Cloakroom. Once inside, turn right, squeeze through the gap, and kick down the nearby door. Head upstairs into the next room filled with enemies. After dealing with them, check the middle of the room and you’ll find the card resting on a white box.
King of Shields
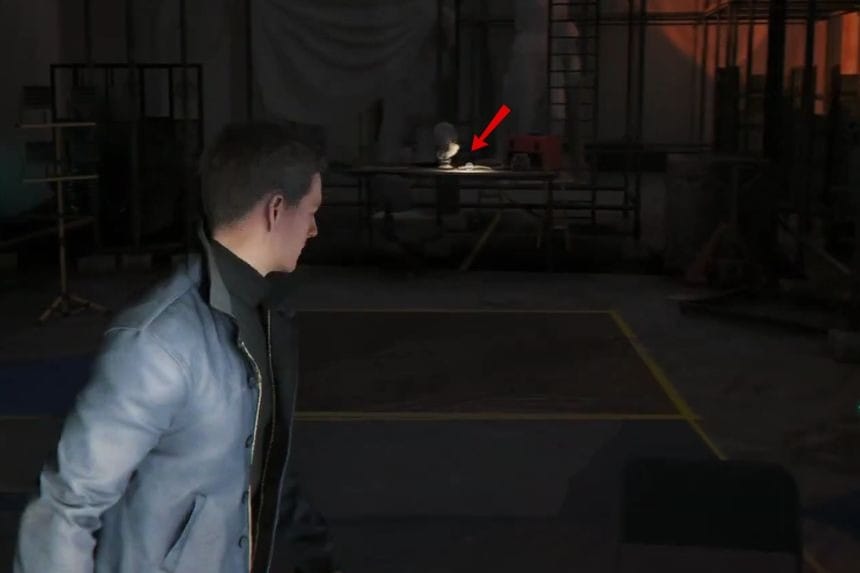
The King of Shields appears during the “Escape with Isola” objective in the Storage Room checkpoint. After you are freed from the chair, simply turn around and look at the table behind you. The collectible is sitting right on top, making this one very hard to miss.
8 of Roses
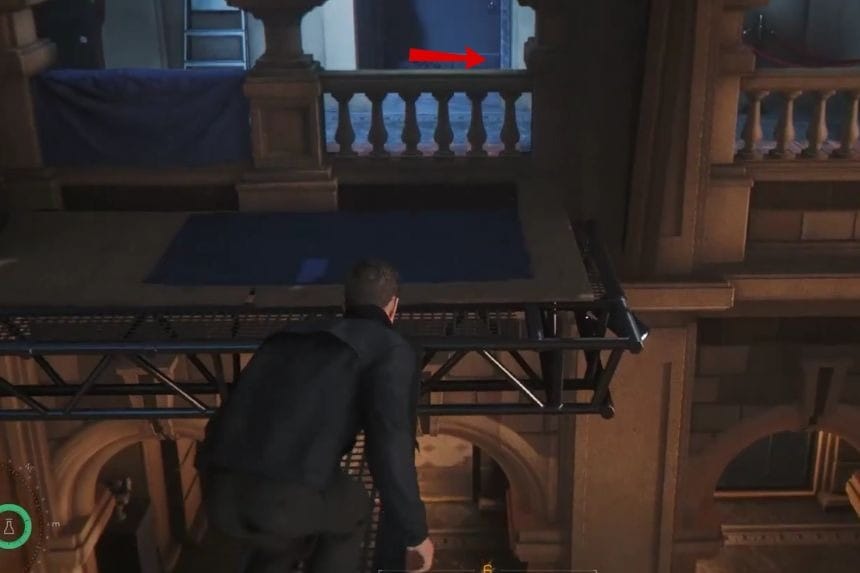
You can collect the 8 of Roses during the “Reach the Adjacent Balcony” objective. After jumping across the light rig to the next balcony, head to the right side of the area. You’ll spot the card placed on a table nearby.
9 of Shields
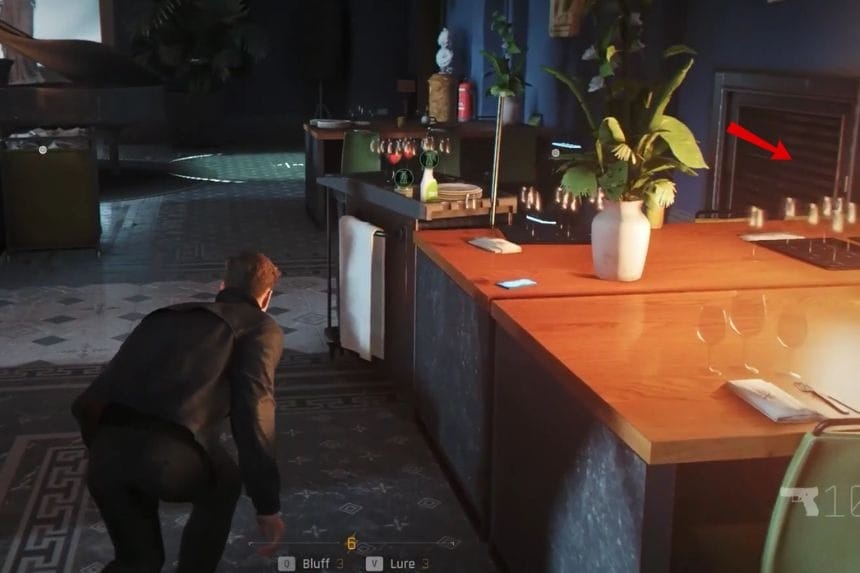
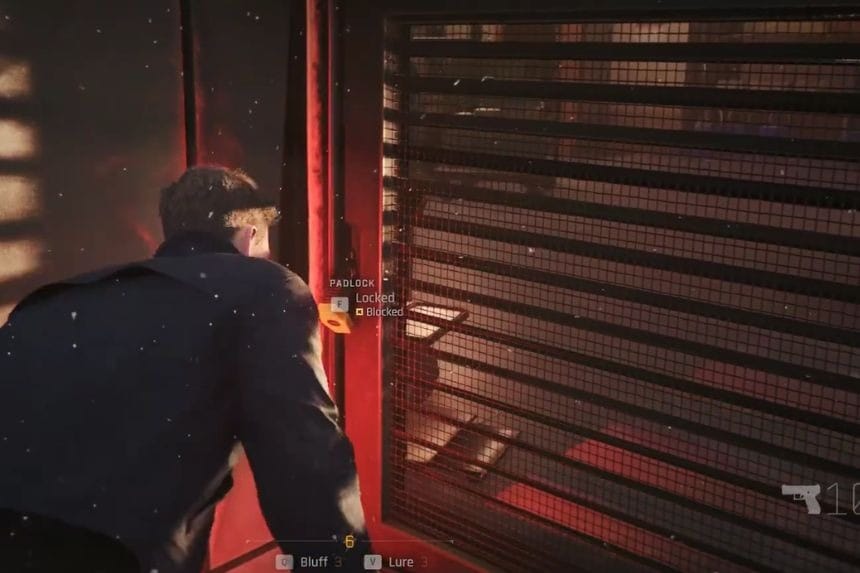
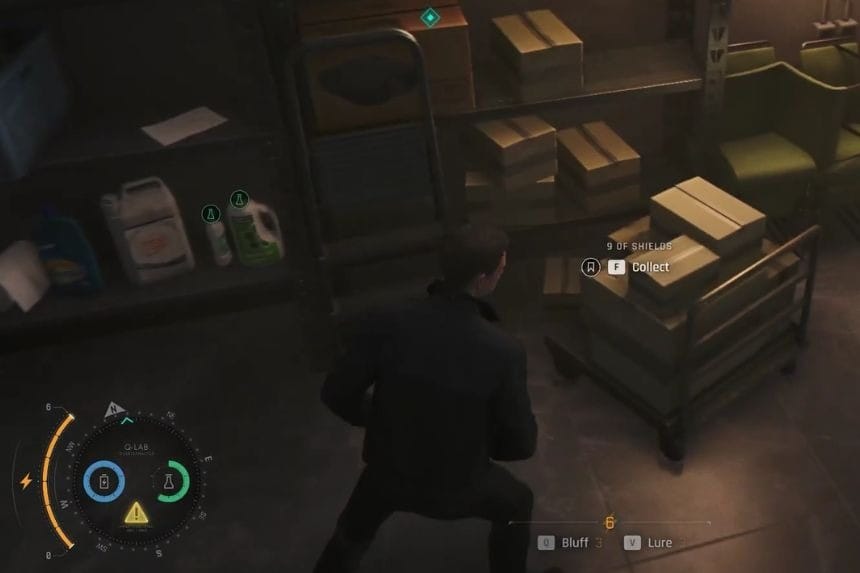
The 9 of Shields is found during the “Escape the Courtyard” objective. After dropping down into the large courtyard filled with enemies, make your way to the ground floor dining hall located in the back-right corner of the area. Near the piano, there is a vent you can crawl into. Follow the vent until you reach a maintenance room door with a padlock. You can either use the laser gadget to break the lock or enter the code 3256 to open the door. The code can be discovered earlier on a laptop in the library. Once inside the maintenance room, the card will be sitting on top of a box.
Banner of Roses
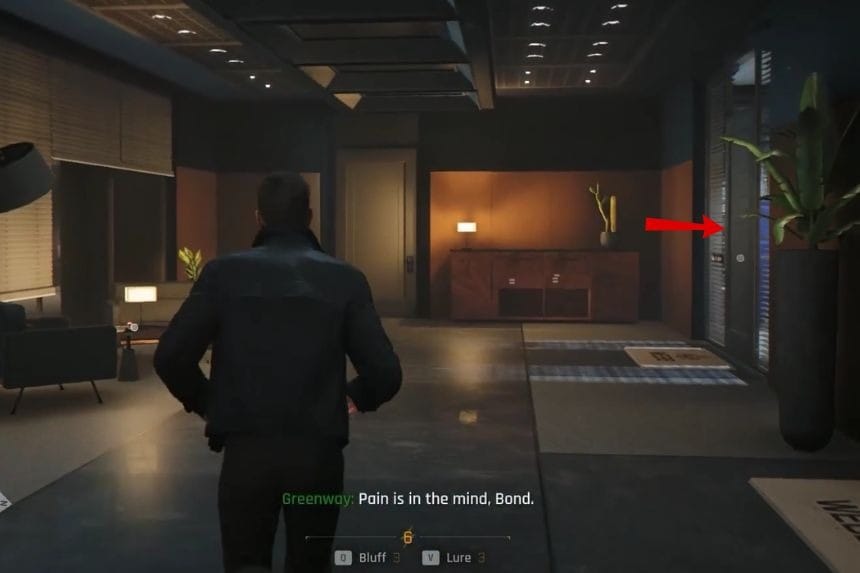
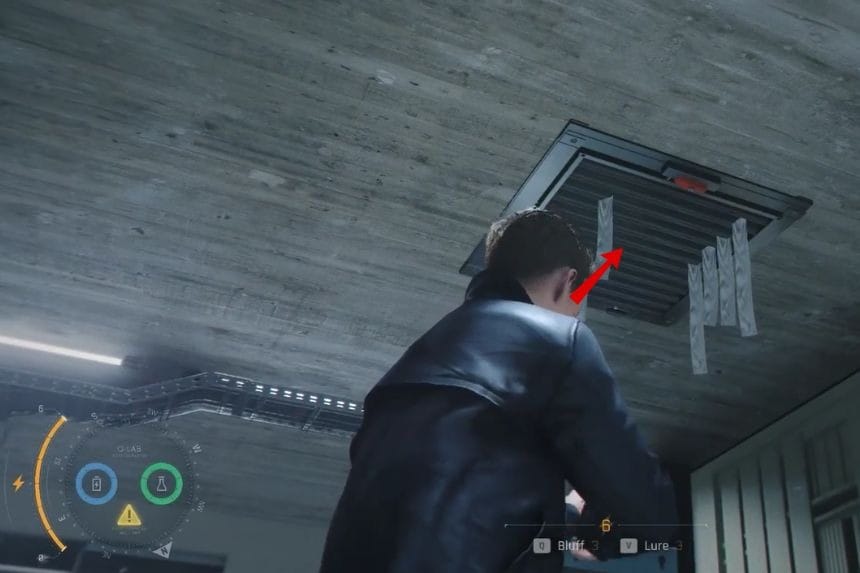
You can collect the Banner of Roses during the “Reach the Perch / Find a Way Inside” objective on the Executive 1st Floor checkpoint. After reaching Level 2, you’ll enter a hallway area. Go to the end of the hallway and enter the Maintenance room on the right side. Inside, look up at the ceiling and use the Laser Strap to open the vent. Climb into the vent and you’ll find the collectible lying on the ground inside.
Banner of Bells
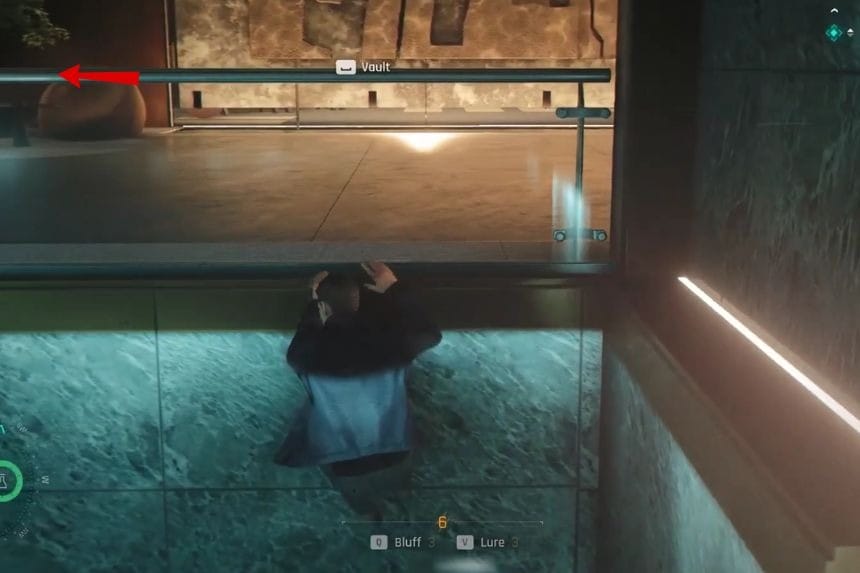
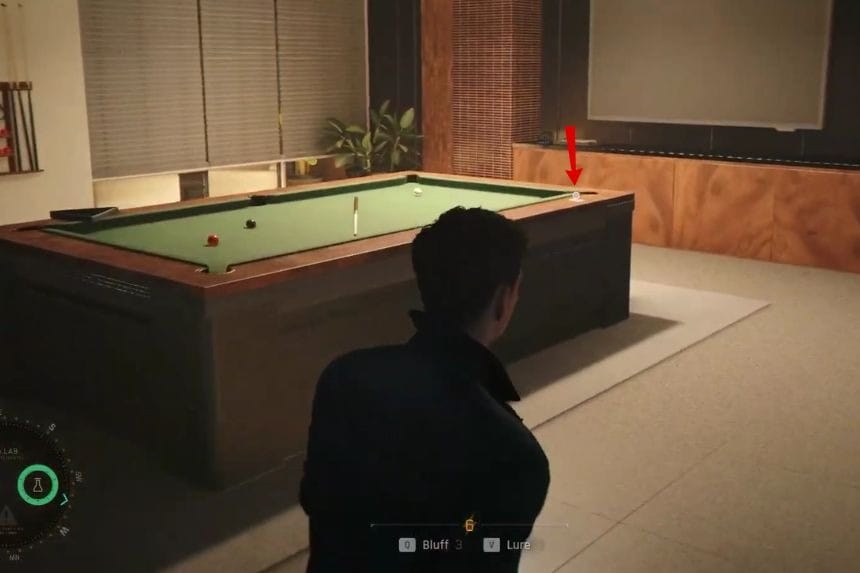
The Banner of Bells is found during the “Reach the East Wing” objective. After speaking with Greenway near the railing in front of the two waterfalls, climb over the railing and carefully shimmy across the ledge between the waterfalls to the opposite side. As soon as you climb up, turn left and hack the door sensor of the locked room nearby. Wait for Greenway to open the door from the other side, then head inside. The card will be sitting on the billiard table.
7 of Shields
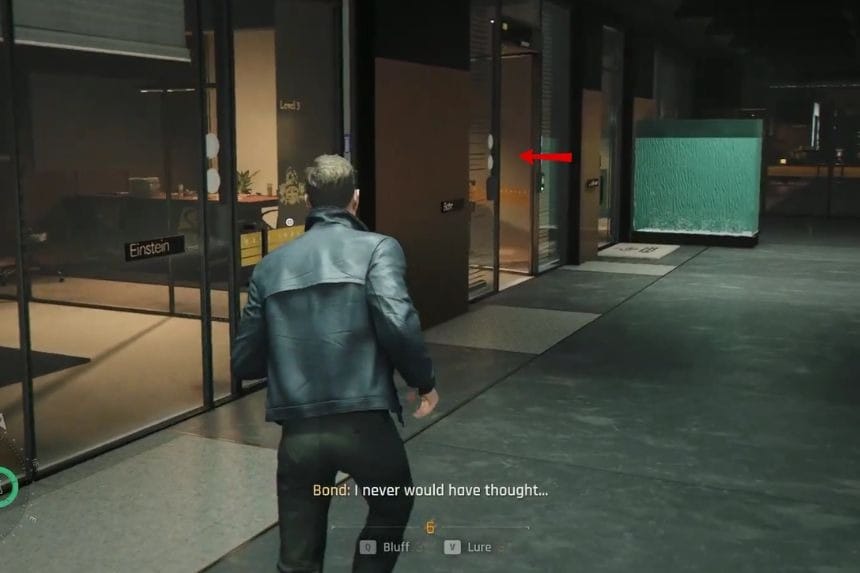
You can find the 7 of Shields during the “Get to the Penthouse” objective. After moving up to Level 3 with Greenway, continue down the hallway until you spot the office labeled “Bohr” on the left side. Go inside and then turn left to hack the door for the office marked “Einstein.” Once the door opens, head inside the Einstein office and check the desk to collect the card.
King of Acorns
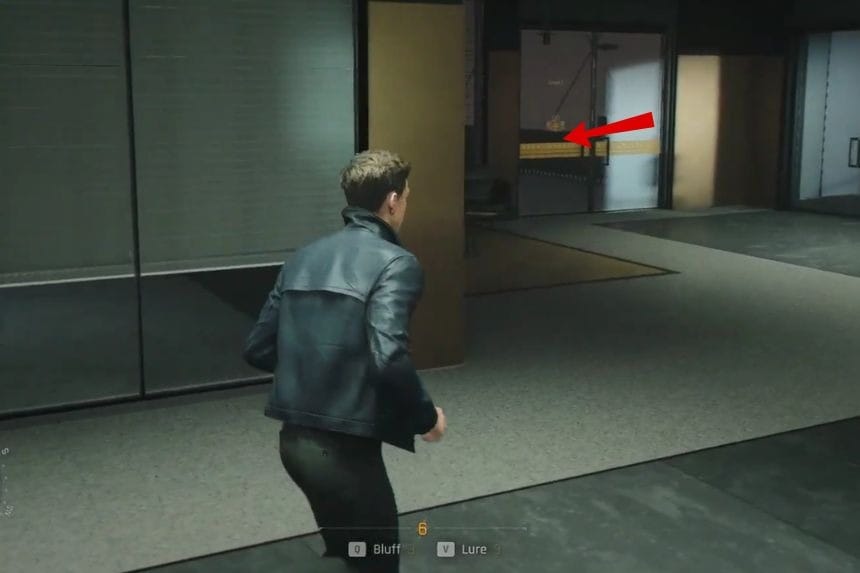
The King of Acorns is also found during the “Get to the Penthouse” mission. After obtaining the Security Access Key as part of the main objective, return to the area near Einstein’s office where you picked up the previous collectible. Instead of entering the office again, backtrack toward the beginning of the hallway where you first arrived on Level 3. You can now unlock the side doors leading to the balcony using the Security Access Key. Out on the balcony, the card will be resting on a table.
Under of Shields
Finally, the Under of Shields appears during the “Locate the Helicopter” objective on the Cargo Floor checkpoint. When you reach the stairs that lead up toward the flight deck, don’t go upstairs right away. Instead, head down the stairs and you’ll spot the collectible sitting on top of a crate nearby.
Banner of Acorns
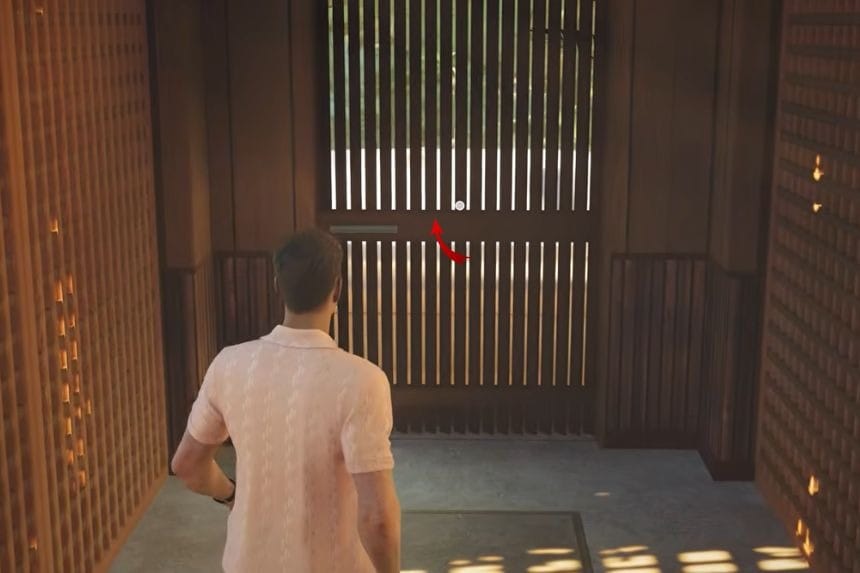
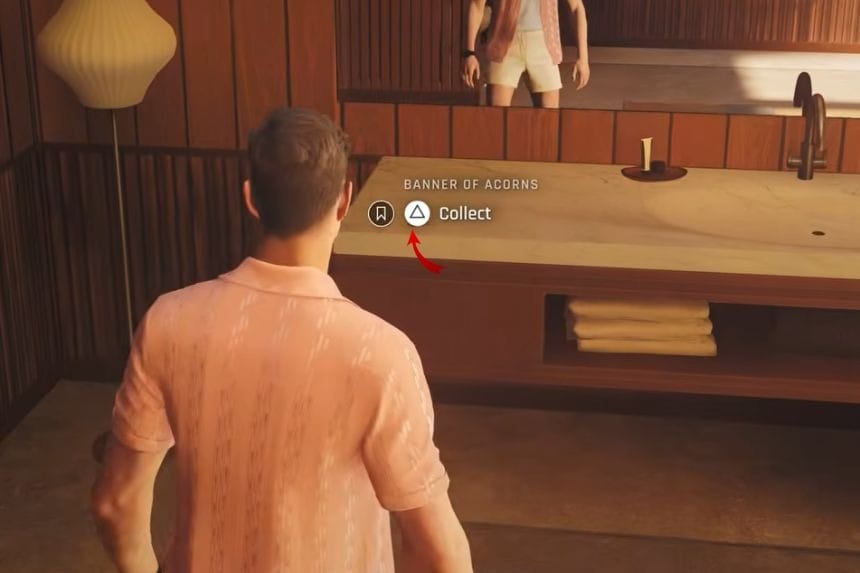
You can find the Banner of Acorns during the “Open Package from Q” objective. After entering the villa, head upstairs and take the hallway on the right side until you reach the bathroom. Inside, check the sink counter and you’ll find the collectible sitting there.
8 of Shields
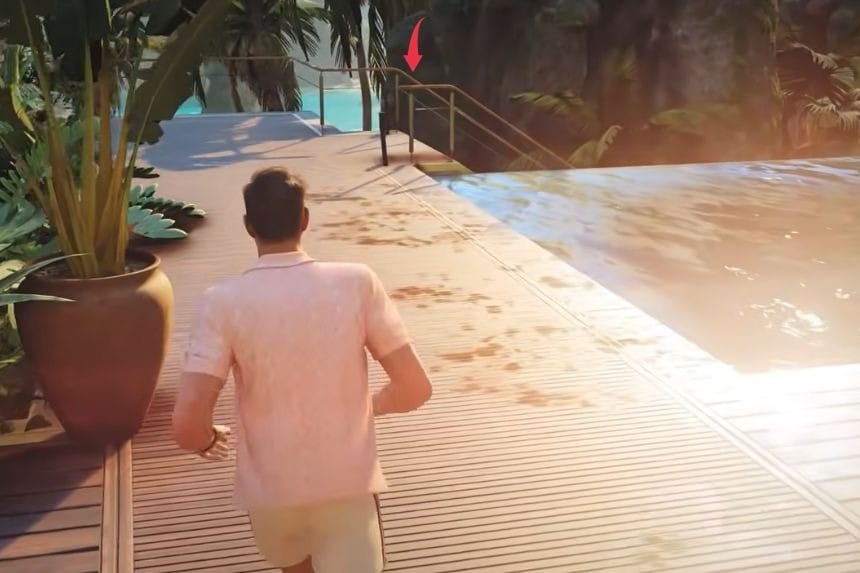
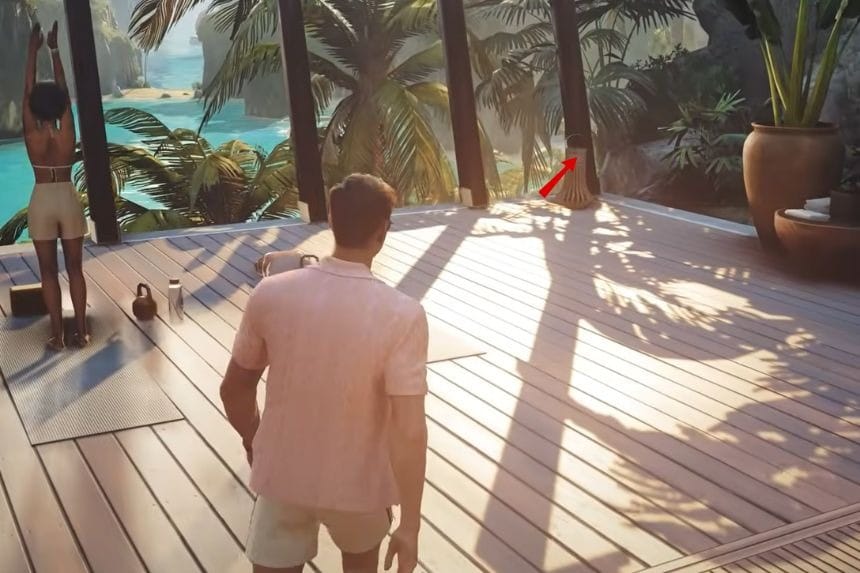
The 8 of Shields is collected during the “Plant Q-Traks” objective. After visiting the reception area, follow the signs leading toward the Tranquility platform near the Ocean View Bar. Once you arrive, look near the edge of the platform for a lantern. The collectible is resting on top of it, so it is fairly easy to spot as you explore the area.
9 of Roses
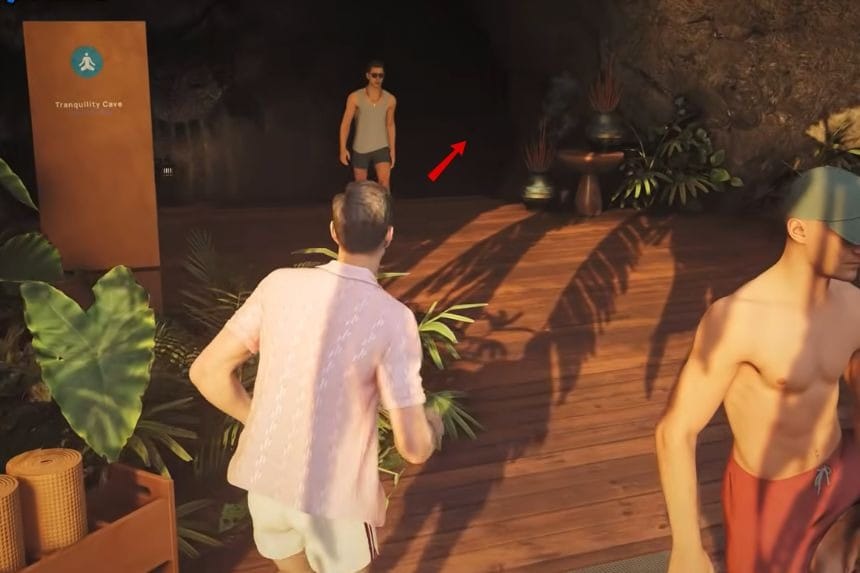
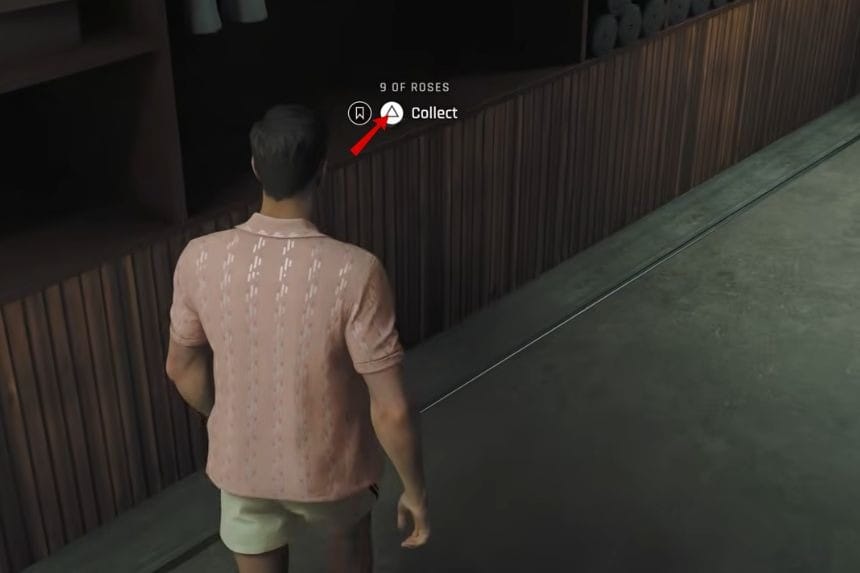
You can pick up the 9 of Roses shortly after finding the previous card. Head down the stairs into the Tranquility Cave and continue toward the far end where you’ll notice a man talking on the phone. Listen to his conversation first, then use the Dart Phone gadget on him to steal the Storage Key. Use that key to unlock the nearby storage room door. Once inside, look at the shelf on the left side to find the collectible.
Under of Bells
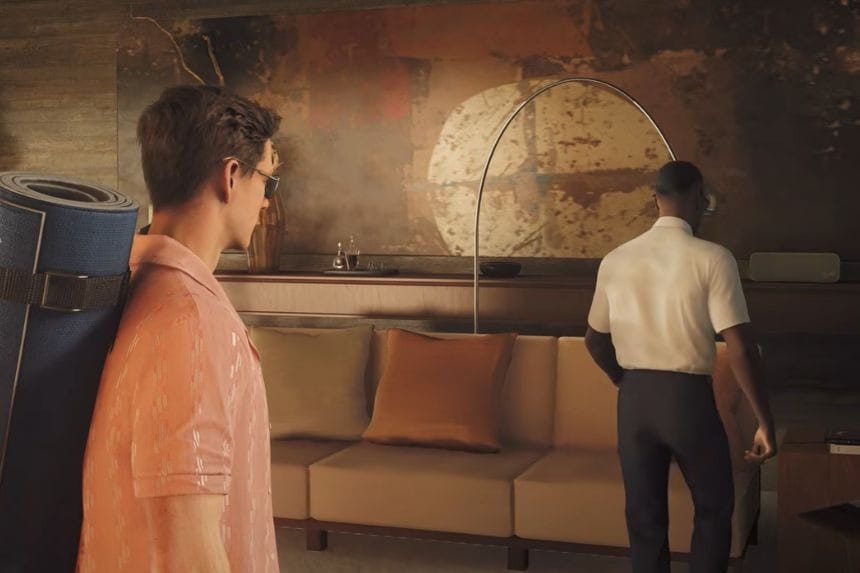
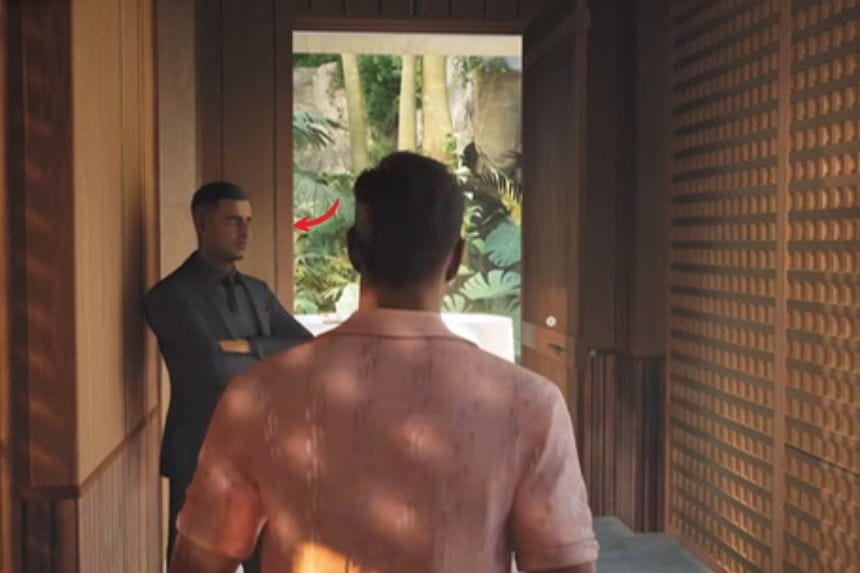
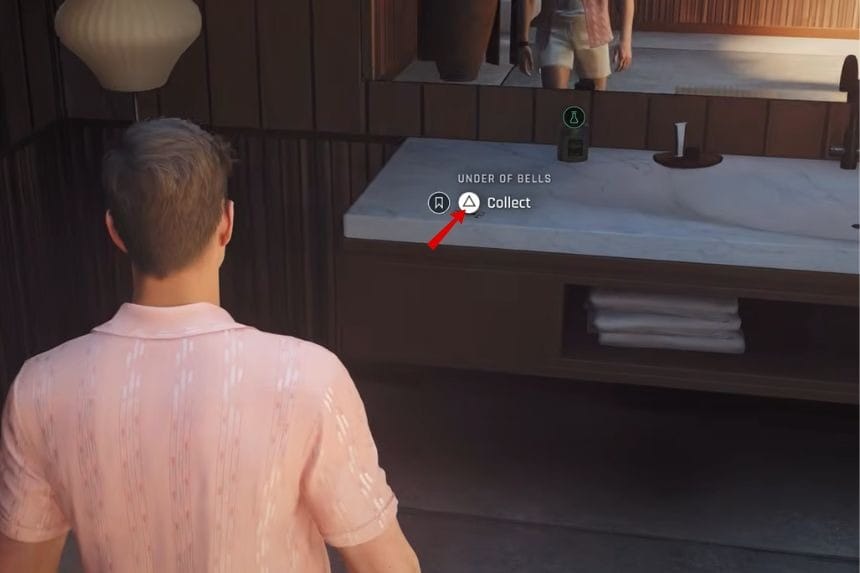
The Under of Bells is found during the “Reach Ramon Hernandez” objective. After entering Hung Villa, go upstairs to meet Ramon Hernandez as part of the story. Once the conversation is finished, head into the bathroom and check the sink counter for the collectible. It’s highly recommended to use the Yoga disguise here because it lets you move around the villa much more freely. You can get the disguise in the same area as the previous collectible by reading the wall note and picking up the yoga mat.
King of Roses
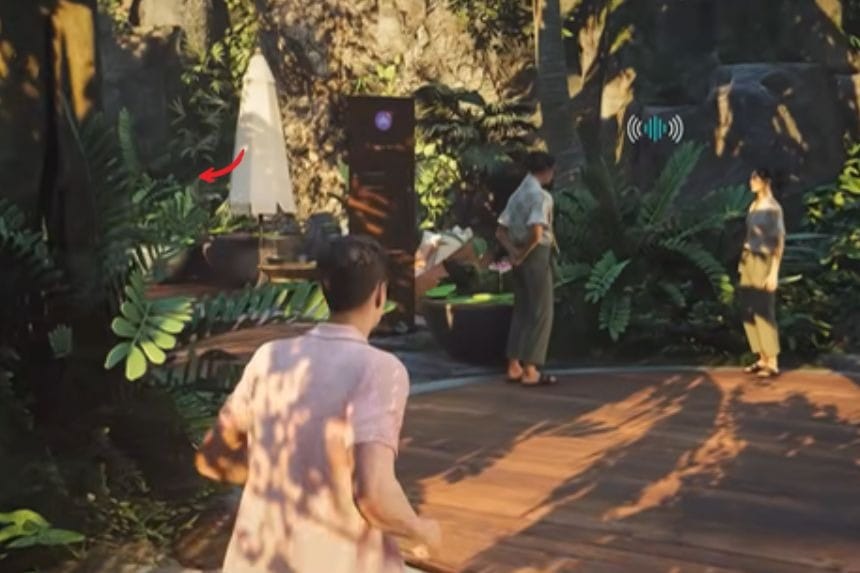
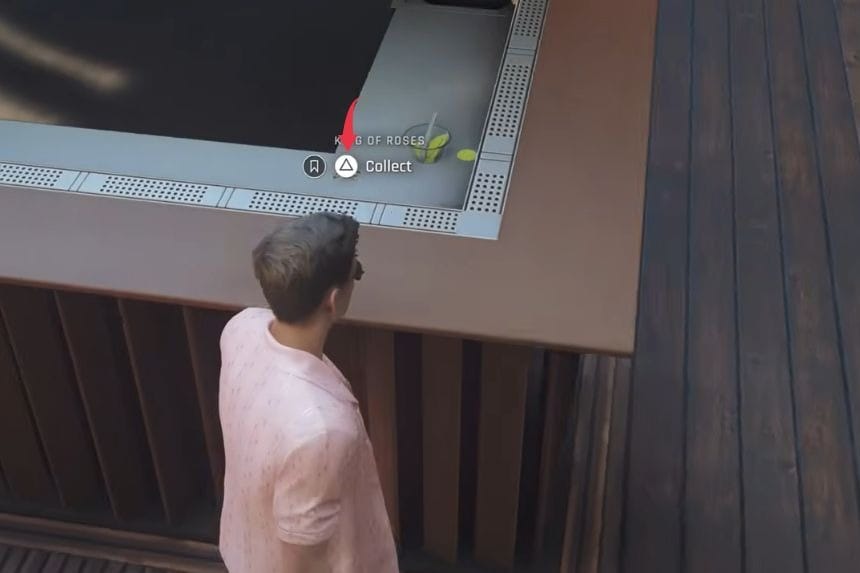
The King of Roses is another collectible tied to the “Plant Q-Traks” mission. Follow the signs leading to the Lotus Bar. When you leave Ramon’s villa, go straight ahead and then take the next left turn. Inside the Lotus Bar, head toward the back counter where you’ll find the collectible waiting there.
Under of Roses
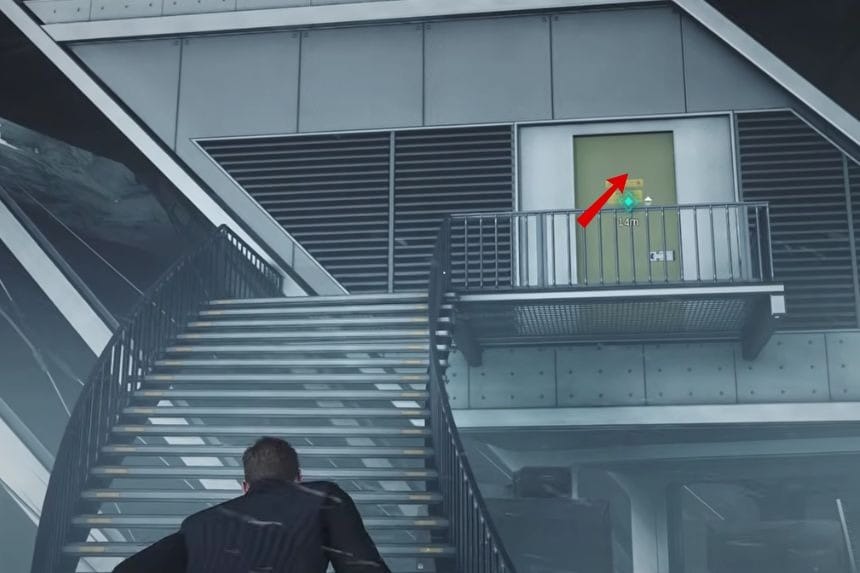
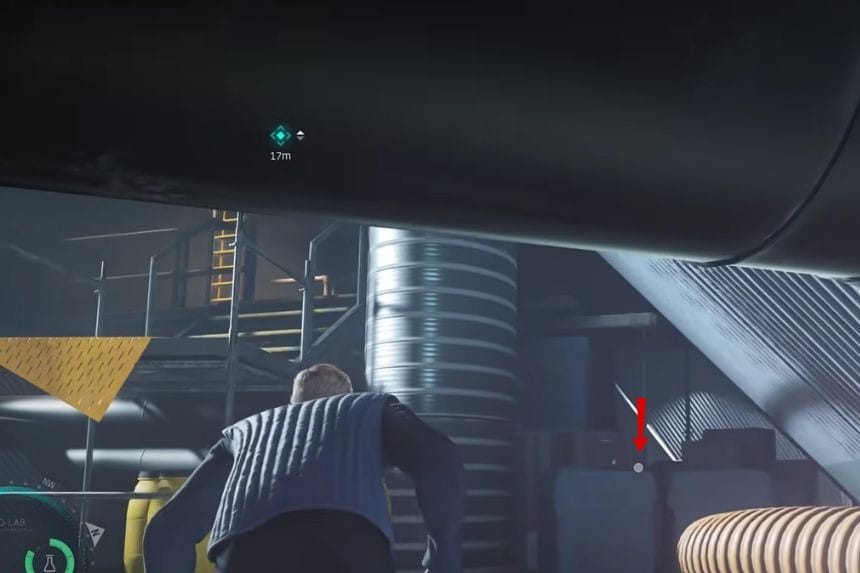
You can collect the Under of Roses during the “Reach the Gate House” objective in the Gantries checkpoint. After fighting your way past the first group of enemies and entering the building, continue down the hallway until you reach the very end. Before climbing up the yellow scaffolding, look around carefully because the collectible is located right there at the end of the corridor.
Ace of Bells
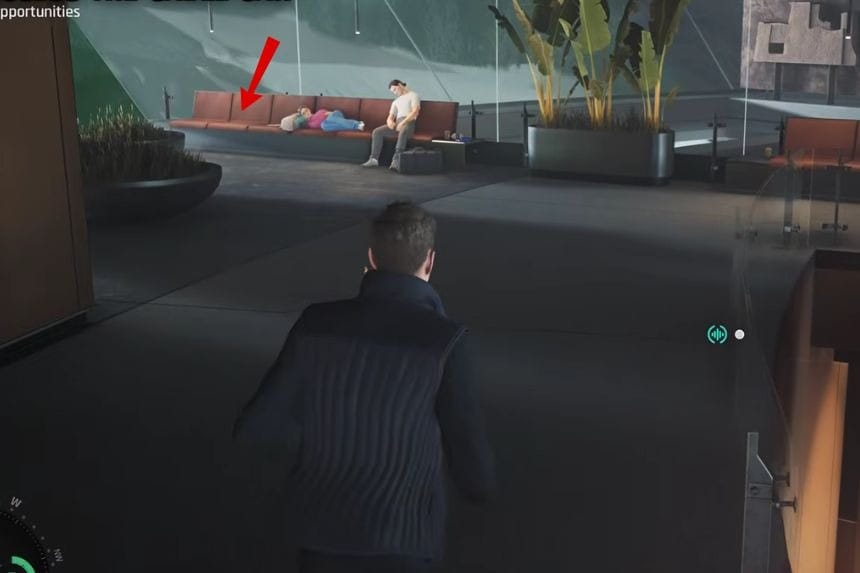
The Ace of Bells is found during the “Access the Cable Car” objective in the Gate House checkpoint. Once you arrive at the cable car area, head up the stairs on the right side. When you reach the top, turn around and look toward the couches on the left side. The collectible will be sitting on one of them.
9 of Bells
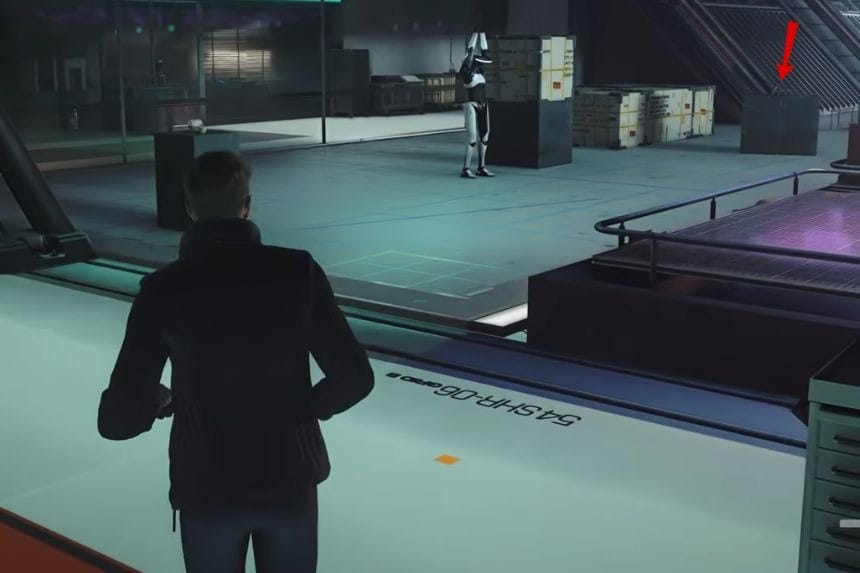
You can find the 9 of Bells during the “Get into Utility” objective in the Robotics Department. From the Robotics entrance, move straight toward the Utility door and then head to the right side of the area. Look for a nearby box, as the collectible is resting right on top of it.
King of Bells
You can find the King of Bells during the “Reach the Red Phone” objective in the Null Space checkpoint. After speaking with the wounded woman, go through the nearby door into the next area. Enter the room directly in front of you, and you’ll see the collectible sitting on the table inside.
Ace of Shields
The Ace of Shields is collected during the “Locate Moneypenny” objective at Moneypenny’s Pod. Once you arrive near Moneypenny’s office, look for the office door on the left side and kick it down. Inside the room, the card will be waiting on the table.
8 of Bells
The 8 of Bells appears during the “Get to THEIA” objective. After falling through the elevator and defeating the three enemies in the area, check the desk on the right side of the room. The collectible will be sitting there before you continue forward.
All MI6 Location in 007 First Light
There are 23 Intel collectibles, also known as MI6 Files, scattered throughout 007 First Light. If you manage to collect all of them, you’ll unlock the “For Your Eyes Only” trophy and achievement. Don’t worry about missing anything during your first playthrough, because all cards can still be collected later by using Chapter Select.
Selina Tan
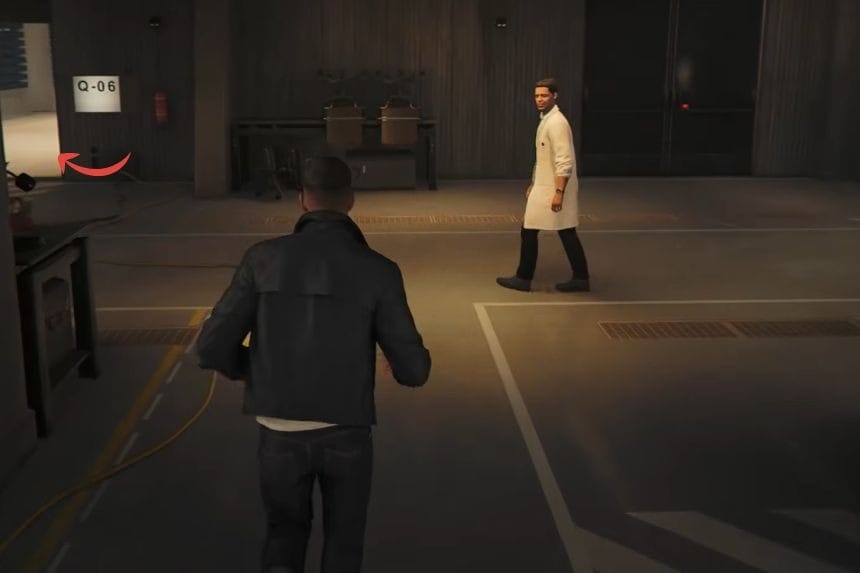
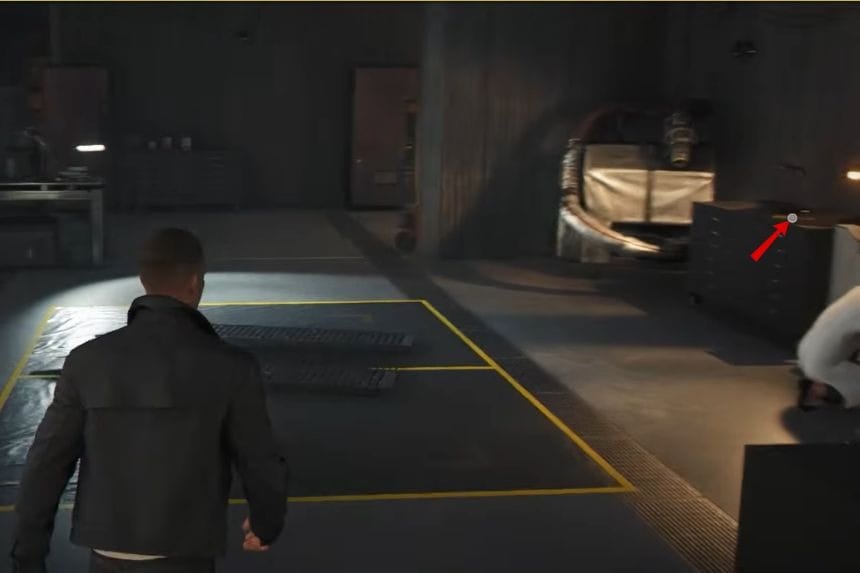
You can find the Selina Tan intel during Chapter Four in the room where you meet Q. Look around the back-right corner of the room and you’ll spot a table with the intel resting on top of it.
00 Recruits
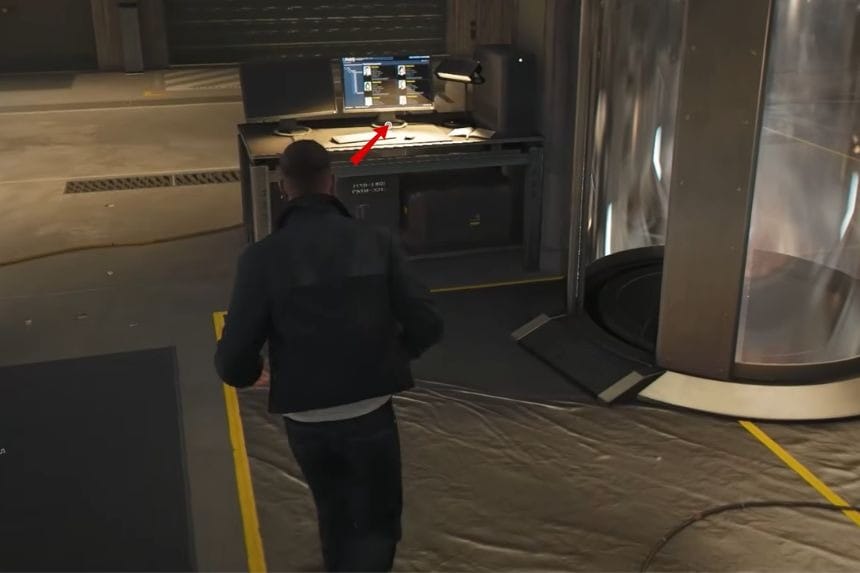
The 00 Recruits intel is also found in Chapter Four. Keep progressing until you gain access to the Q-Branch. After speaking with Q, look to the left side of the SUV where you’ll see a computer terminal. Interact with the screen to collect the intel.
Lennox Monroe
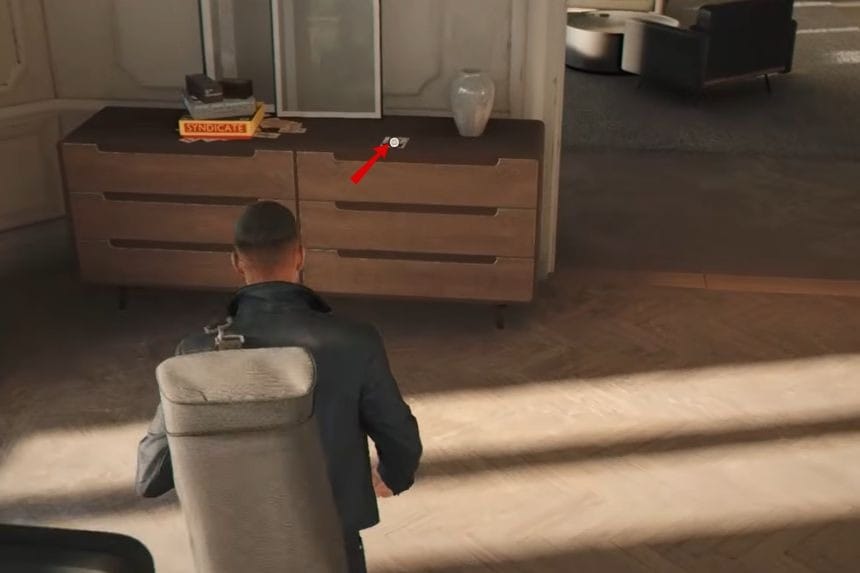
In Chapter Five, the Lennox Monroe intel can be found inside the house. Head into the living room and look for a dresser with two mirrors of different sizes. The photo you need is sitting on that dresser.
Cressida Bright
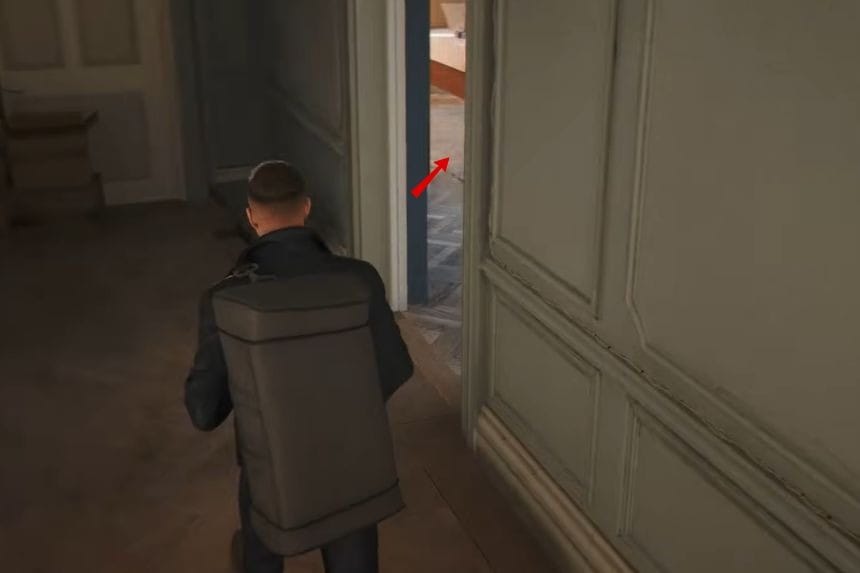
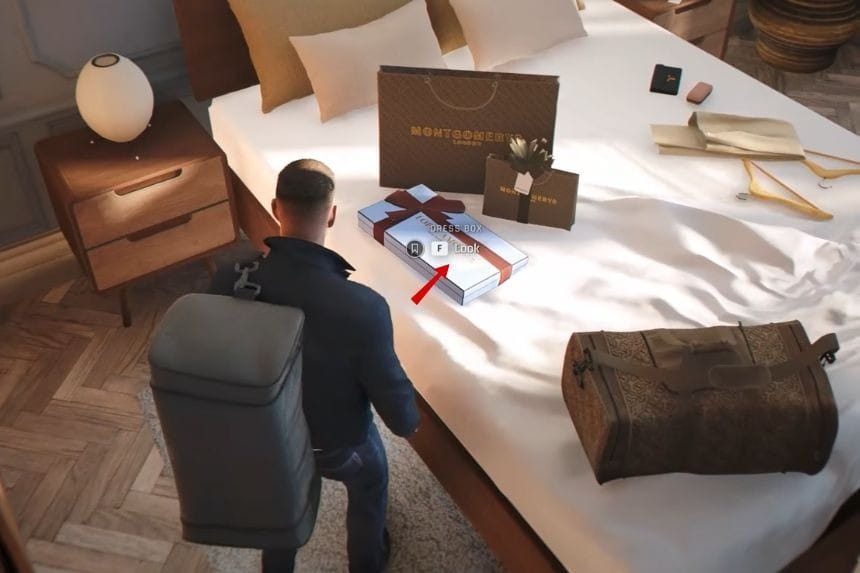
The Cressida Bright intel is also in Chapter Five. Enter Cressida’s room and check the bed. Interact with the present box there to obtain the intel.
Arrowhead
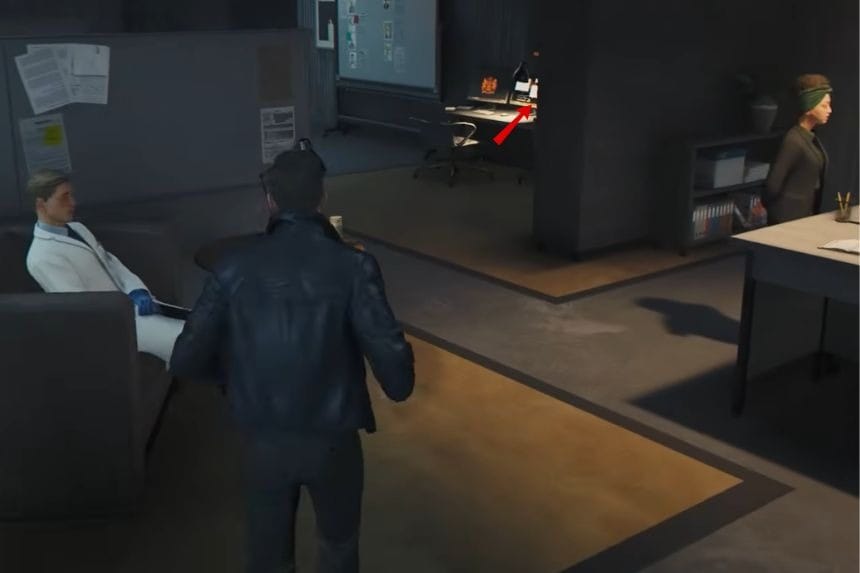
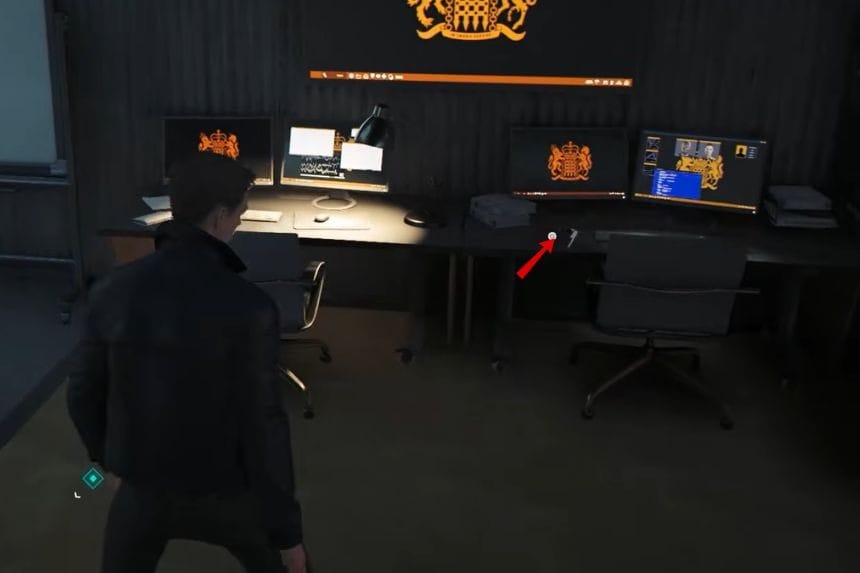
You can collect the Arrowhead intel in Chapter Seven when you return to the Q-Branch. Instead of going directly to Moneypenny, head toward the other side of the room. At the back, you’ll find a computer station with a red file that contains the intel.
009 Profile
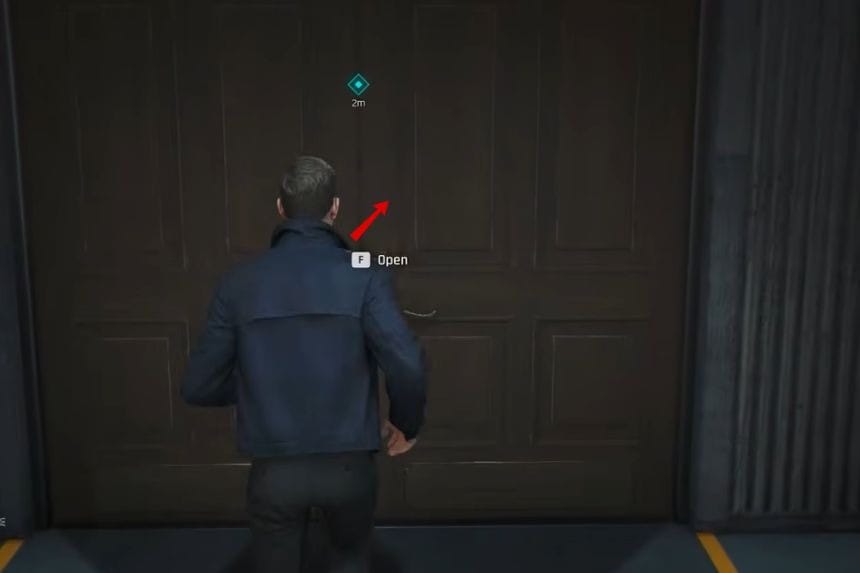
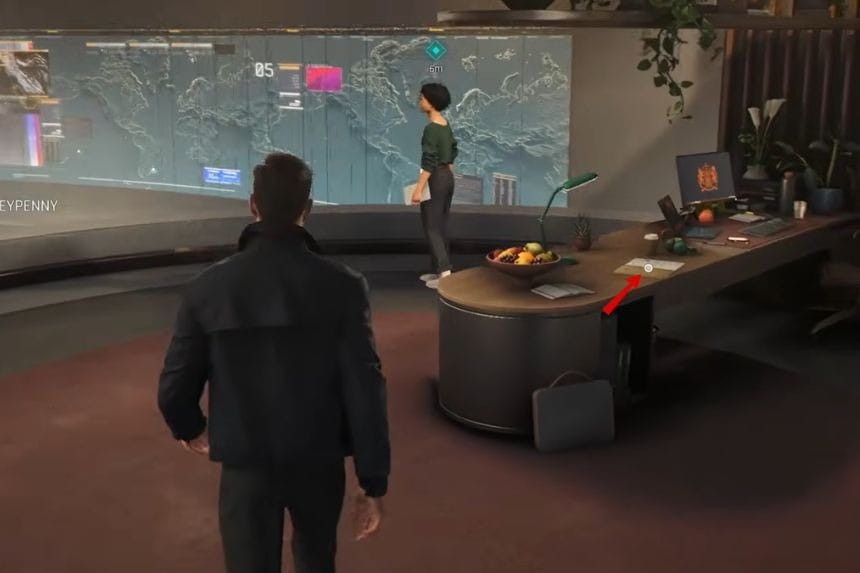
The 009 Profile intel is also found in Chapter Seven. After visiting Moneypenny on the Operations floor and watching the cutscene, look at the folder sitting on her desk to pick it up.
Niko and Tero Murto
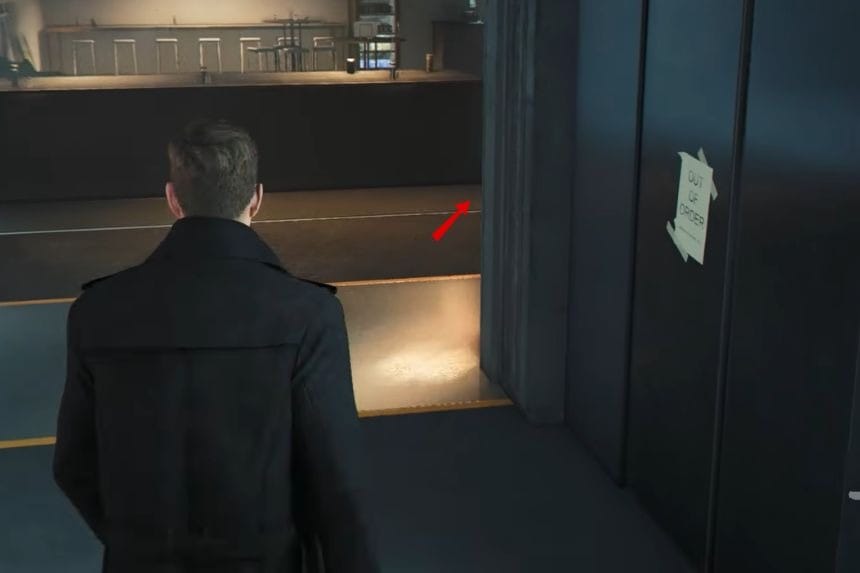
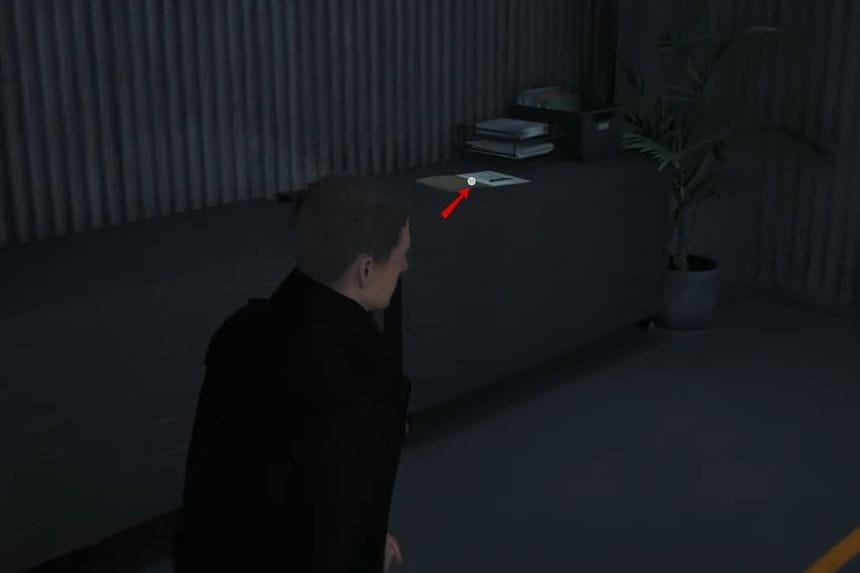
During Chapter Nine, you can find the Niko and Tero Murto intel after visiting the Q-Branch for the third time. Once you finish speaking with Q, head to the Operations area and look toward the back of the room. The intel file will be sitting on a desk there.
Bawma
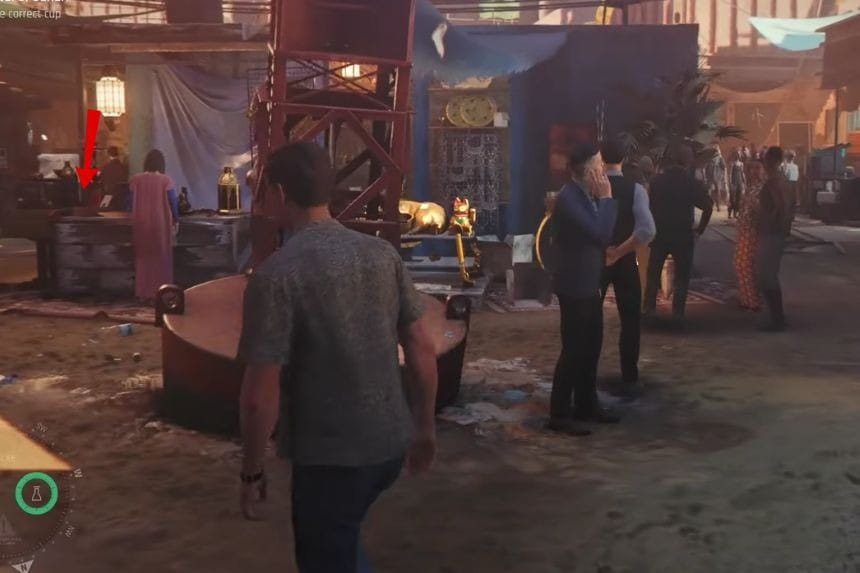
The Bawma intel is located in Chapter Ten inside the Black Market. Head to the left corner of the market where a vendor is selling statues and vases. On the table, you’ll see a small box that you can interact with to collect the intel.
John Greenway
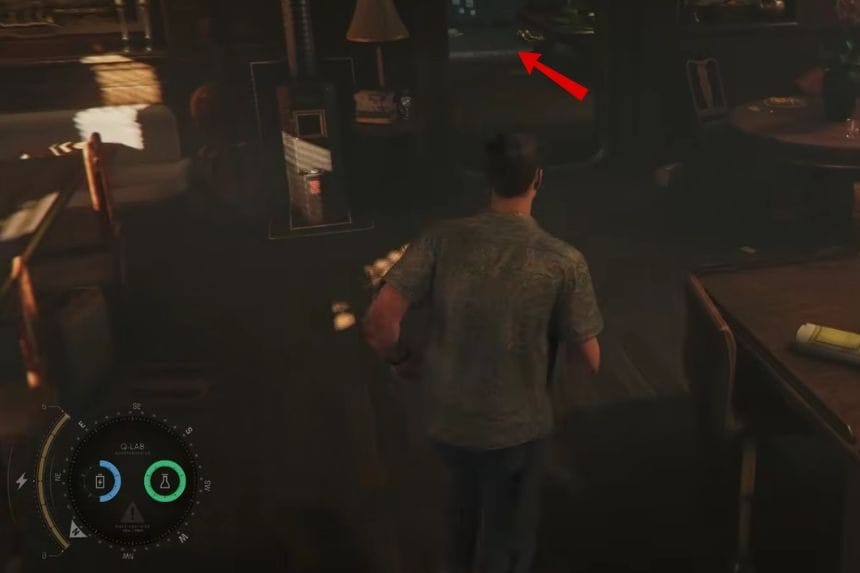
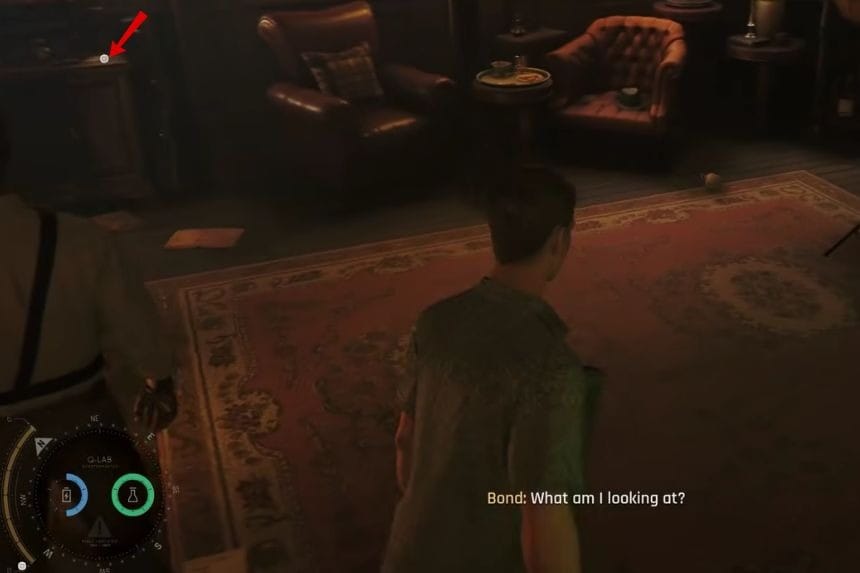
The John Greenway intel is also in Chapter Ten. After the cutscene aboard 009’s boat ends, head into the room at the back and turn left as soon as you enter. You’ll find the photo sitting on a table.
James Bond
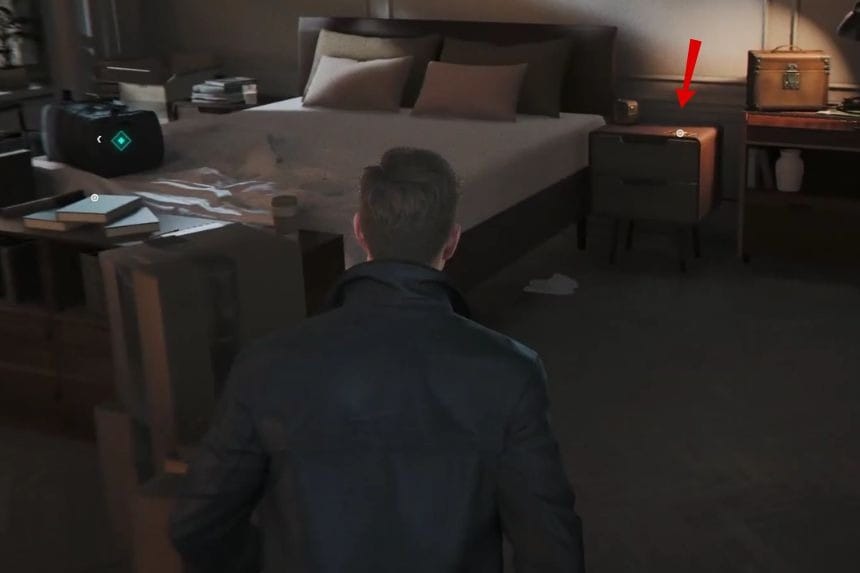
You can collect the James Bond intel during Chapter Eleven after returning to your penthouse. Go into the bedroom and check the nightstand beside the bed to find it.
Webb Industries
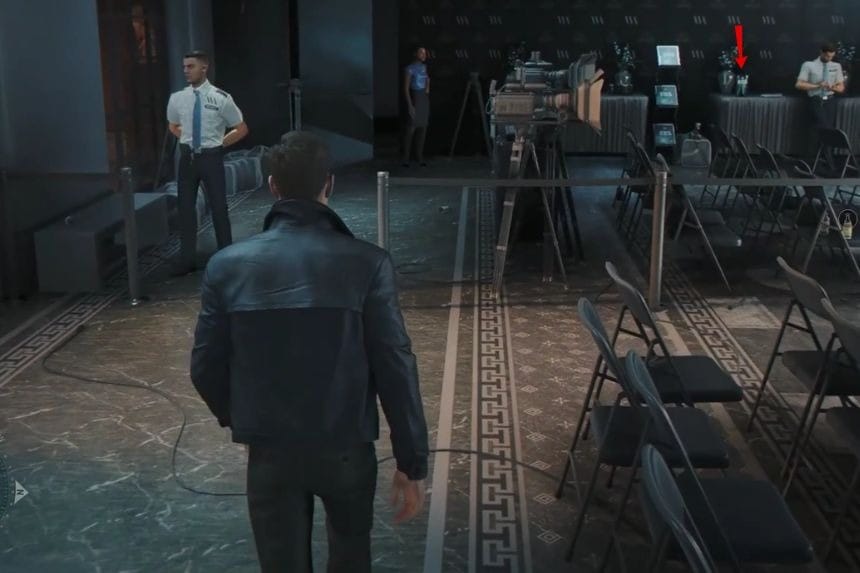
The Webb Industries intel is also in Chapter Eleven. Enter the Gala room and make your way to the Press room. Distract the guard first, then bluff the remaining people in the area. After that, use the narrow window to grab the flier, which counts as the intel.
Stephen Bright
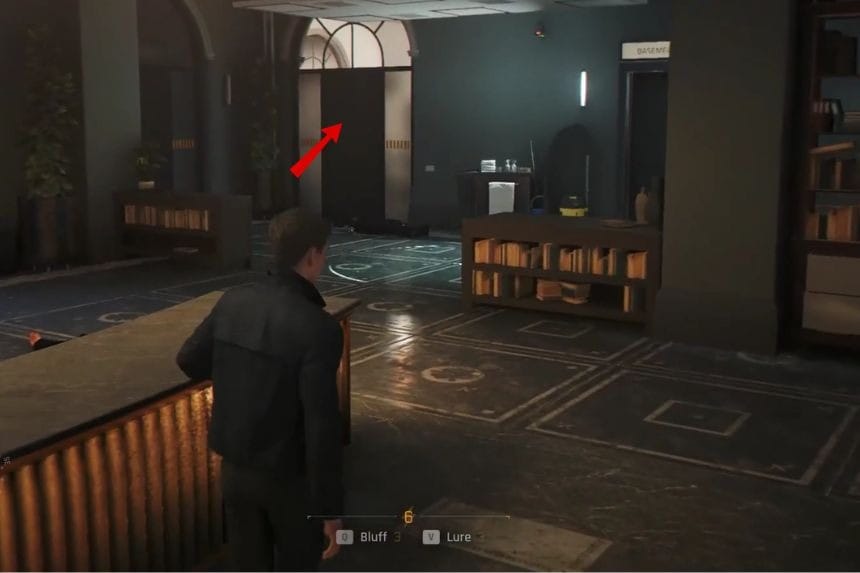
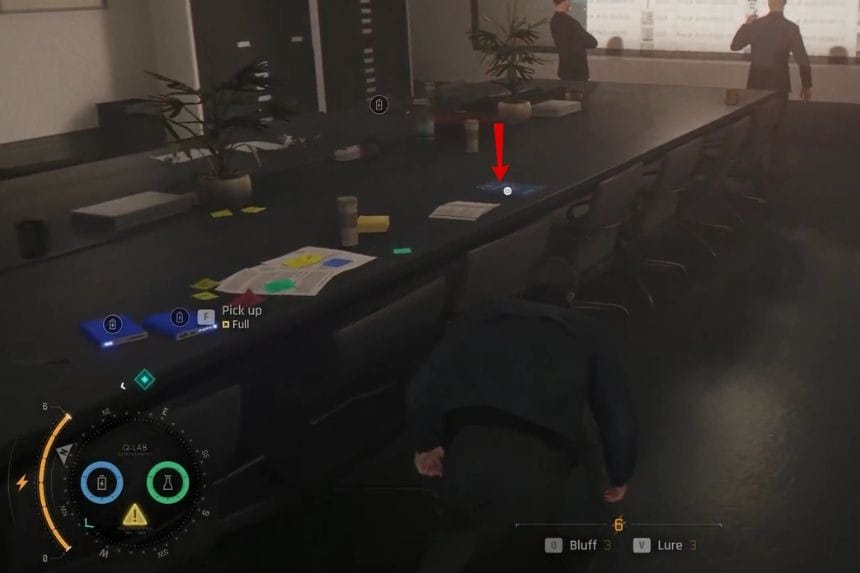
The Stephen Bright intel is found later in Chapter Eleven while entering the security hub during the mission. Take the second door on the right to reach a conference room. Make your way to the center table, where the intel file is waiting.
Isola Vale
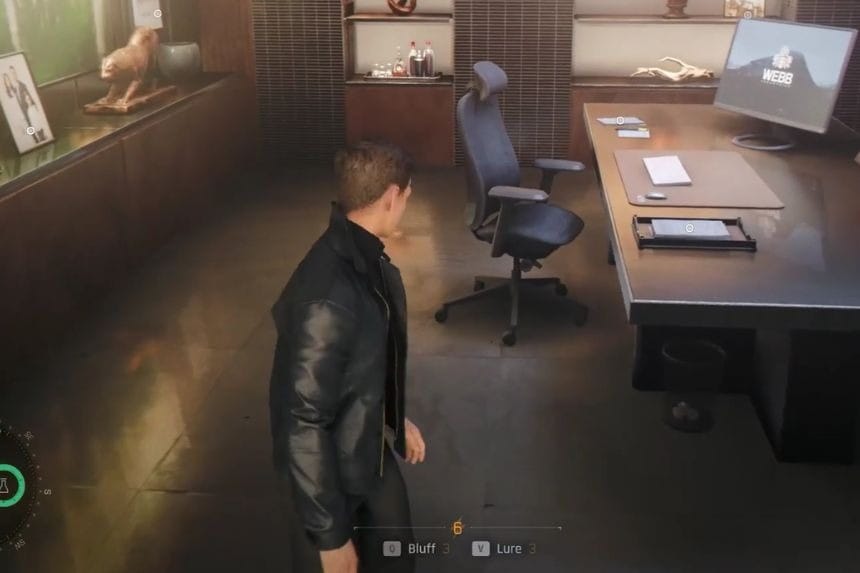
In Chapter Twelve, the Isola Vale intel can be found inside Damian’s office after crawling through the vent. Once you reach the office, don’t leave immediately. Instead, continue forward toward the computer to find the intel nearby.
Damian Webb
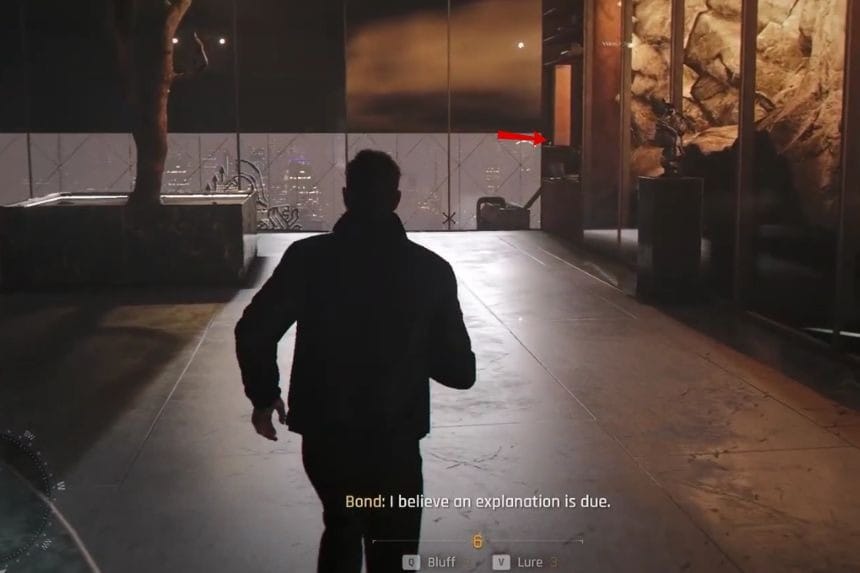
The Damian Webb intel is also located in Chapter Twelve. Head toward the back area of Webb’s penthouse and look underneath the statues. The file is resting on a shelf there.
Roger Finch
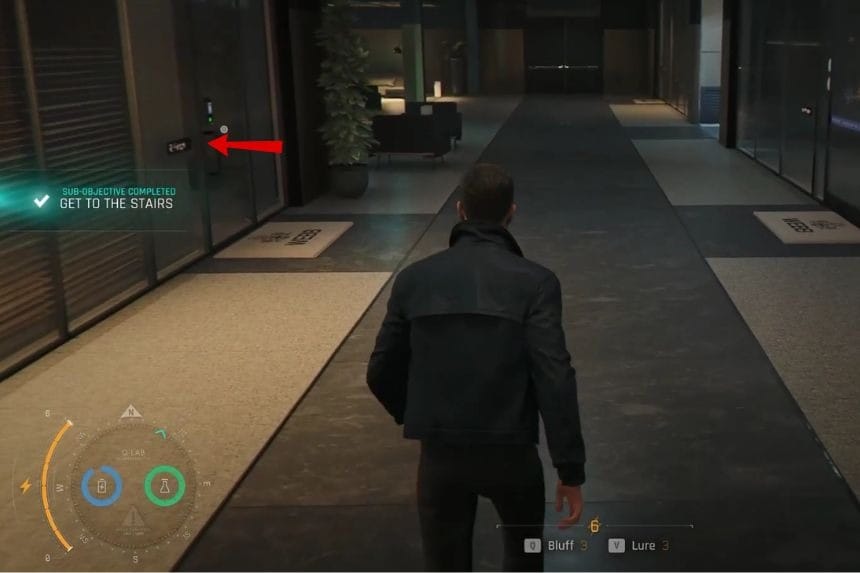
You can collect the Roger Finch intel in Chapter Twelve as well. After obtaining the mission keycard that unlocks the hallway, go through the first door on the left to enter an office. Interact with the wooden spoon hanging on the wall to get the intel.
Q
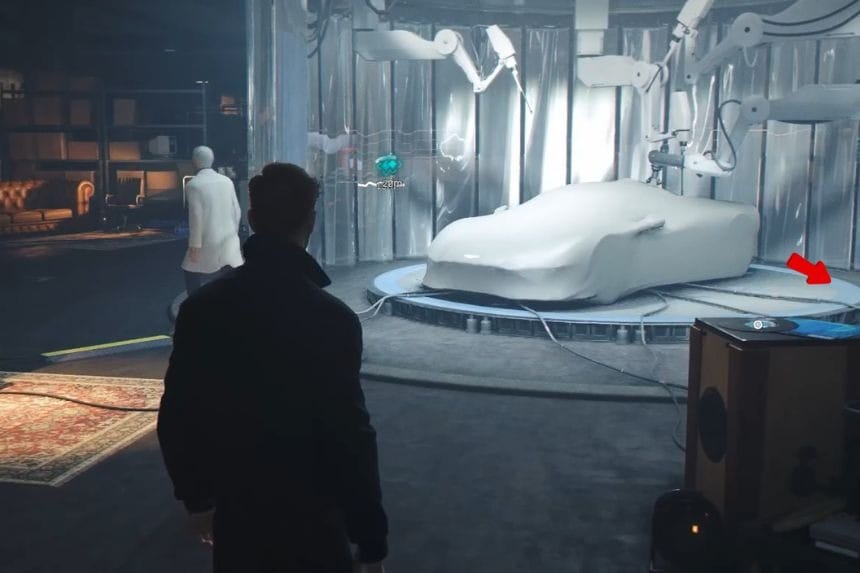
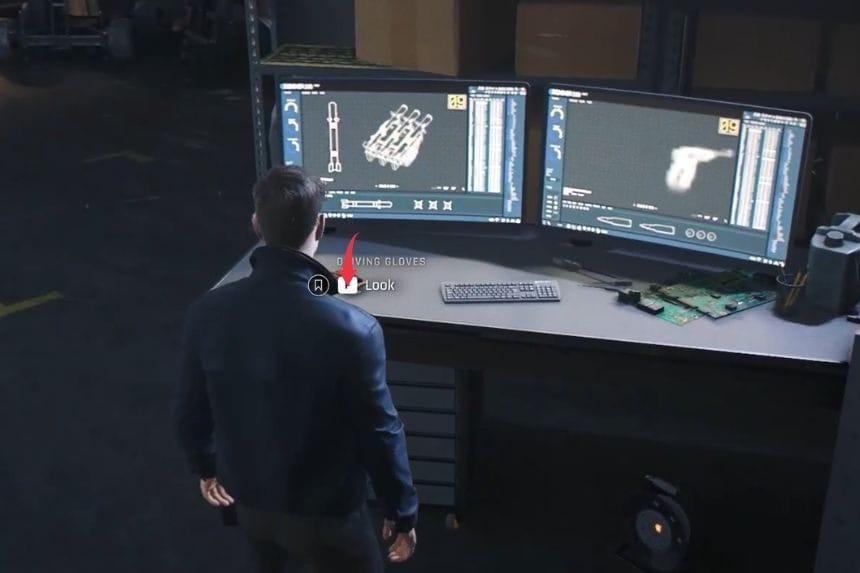
The Q intel appears in Chapter Thirteen when you arrive back at Q-Branch. Meet with Q, then look near the car for a pair of driving gloves. Interacting with them will unlock the intel.
Theresa Lorca
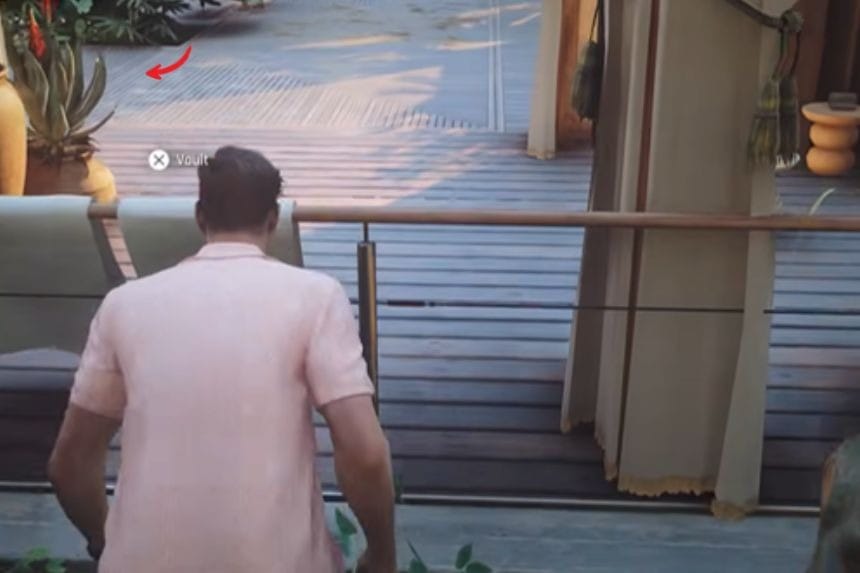
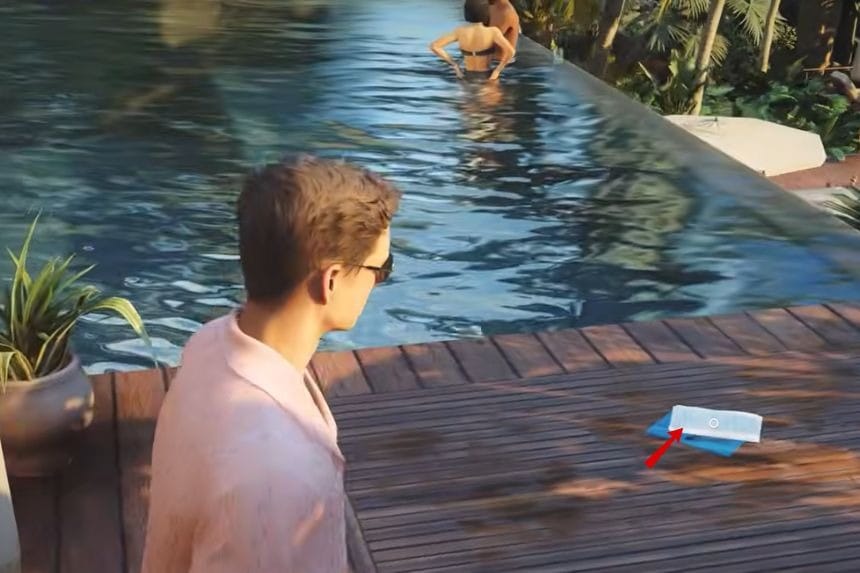
In Chapter Fourteen, the Theresa Lorca intel is found after speaking with Lorca. Once the conversation ends, look toward the front of the pool area to spot the intel.
Caliban
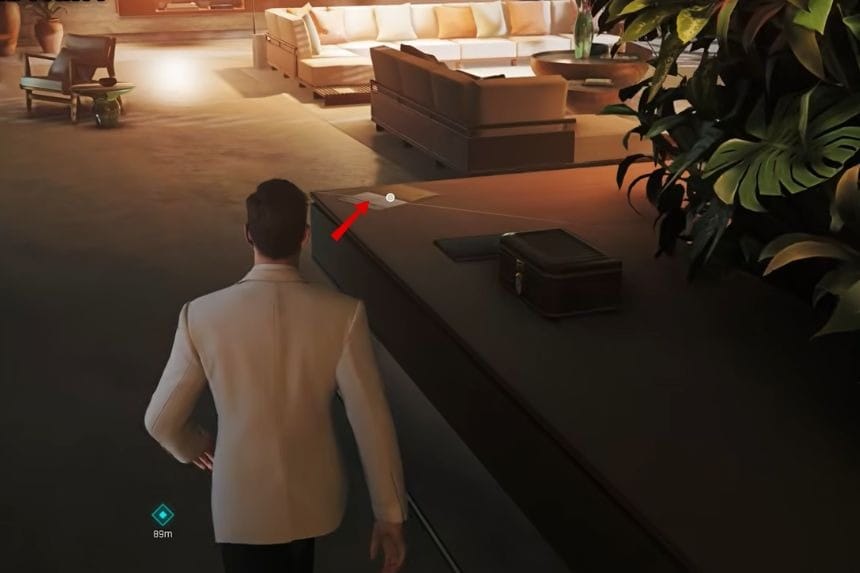
The Caliban intel is also in Chapter Fourteen. After Bond puts away his suit, head into the living room and check the desk to find the file.
Riptide
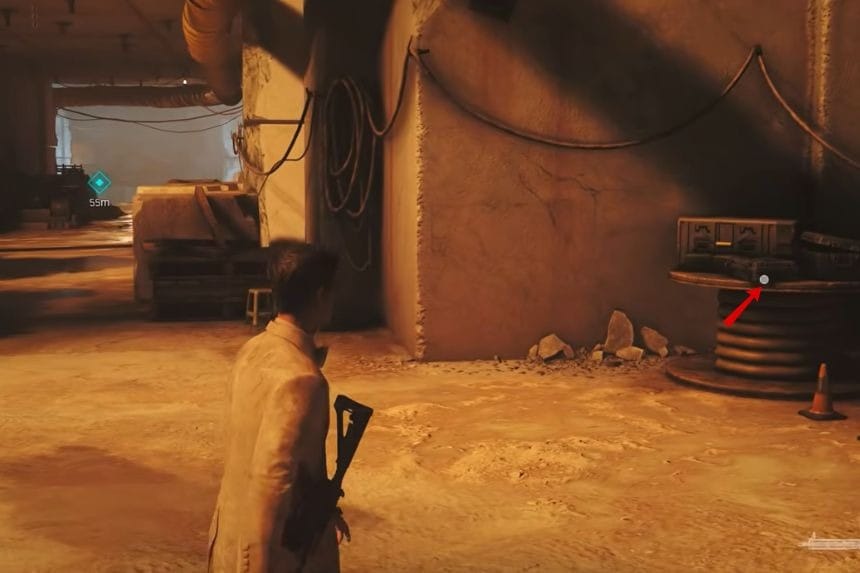
The Riptide intel is collected during the “Time to Die” section in Chapter Fourteen. After meeting Greenway, look for a black case resting on top of some bundled cables. The intel is inside that case.
Rhys Beckett
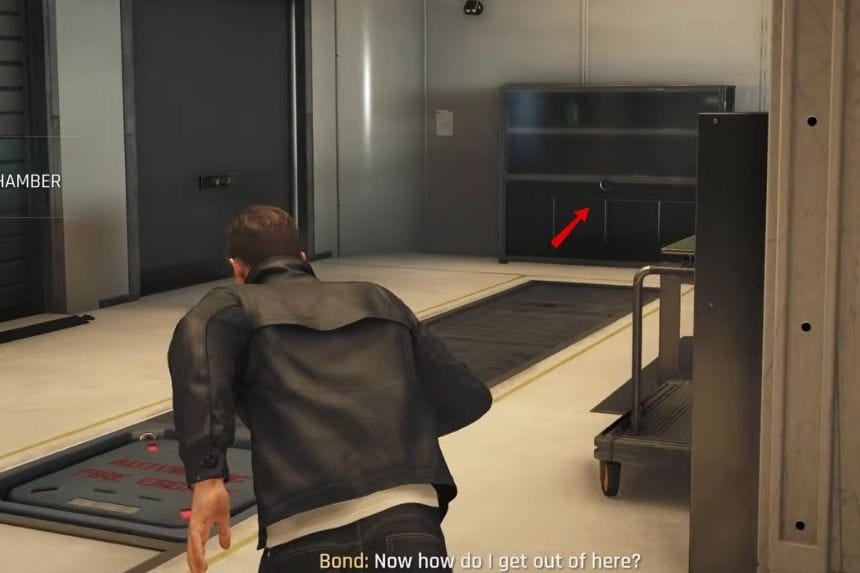
The Rhys Beckett intel can be found in Chapter Fifteen. Enter the Q-03 Stress Testing area and locate the cabinet inside. Open it using the code 4397, and you’ll find the intel stored within.
M
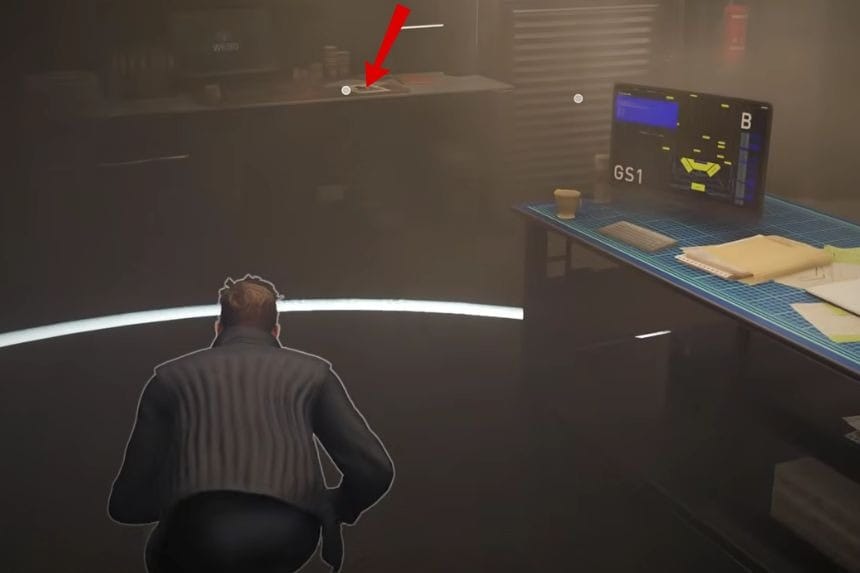
In Chapter Sixteen, the M intel is located inside the security room. Simply check the desk there and you’ll spot the intel resting on top.
Sir Nicholas Webb
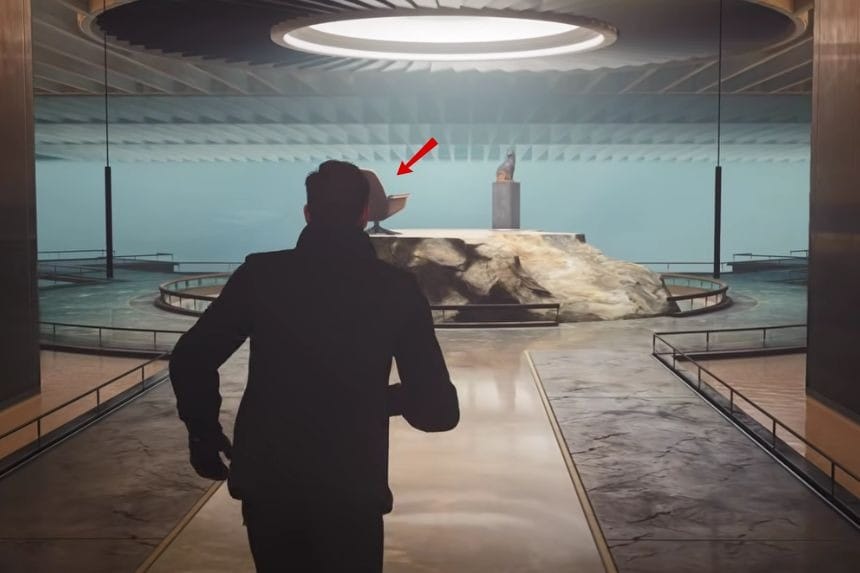
The Sir Nicholas Webb intel is also found in Chapter Sixteen. During the mission, you’ll come across a statue that needs to be moved. Near the same statue, there is a chair with the intel sitting on it.
Eve Moneypenny
Finally, the Eve Moneypenny intel appears in Chapter Seventeen. You’ll eventually enter a tunnel with a large fan inside. Continue straight through the tunnel and switch off the fuse box. Remove the vent cover nearby to enter a hidden room where you’ll find Moneypenny’s wallet, which counts as the intel collectible.
All Mementos Location in 007 First Light
There are 14 Memento collectibles hidden throughout 007 First Light. Collecting all of them will reward you with the “Recovered Assets” trophy and achievement. Don’t worry about missing anything during your first playthrough, because all cards can still be collected later by using Chapter Select.
Satellite Part
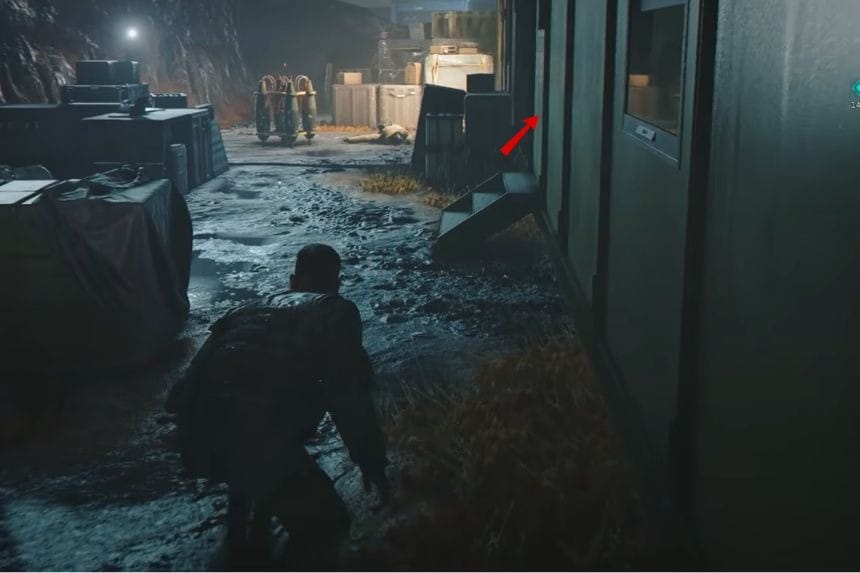
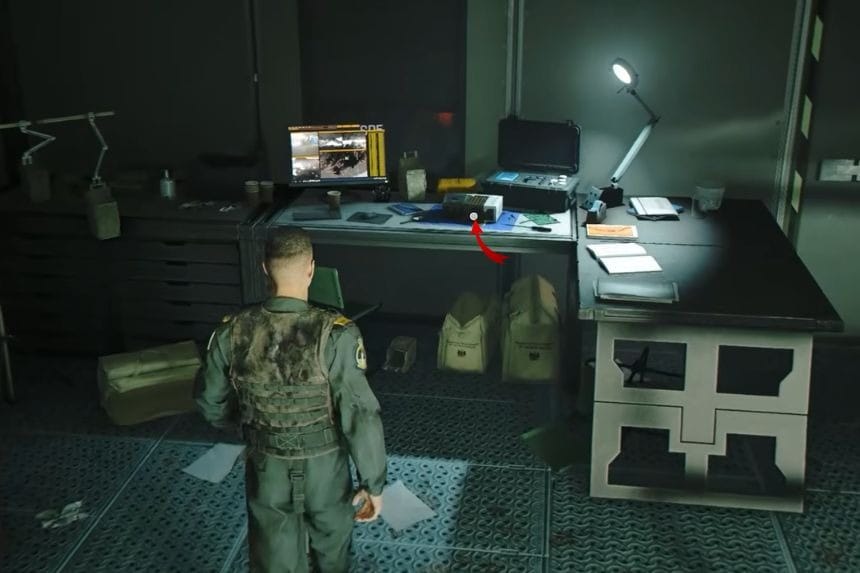
You can find the Satellite Part collectible during the opening mission, “Against the Odds.” While making your way to rescue the hostages in container G9, take a quick detour to a nearby workspace area. On one of the desks, you’ll spot the Satellite Part waiting to be picked up.
Pillow Mint
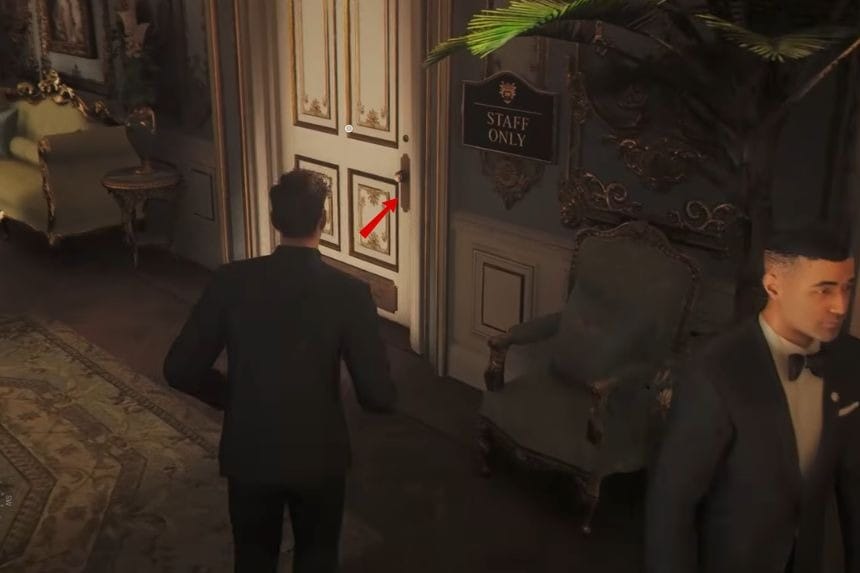
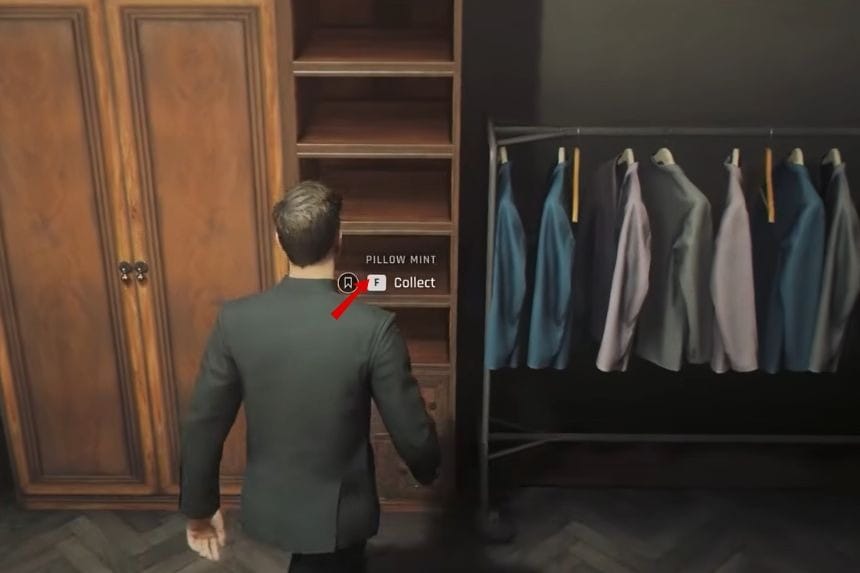
The Pillow Mint collectible appears in “All the Time in the World.” While searching for the blond man, enter the staff-only area on the first floor by stealing a key from a nearby guard. Inside, look through the menswear section and you’ll find the Pillow Mint near a chair that is blocking a door.
Anniversary Pin
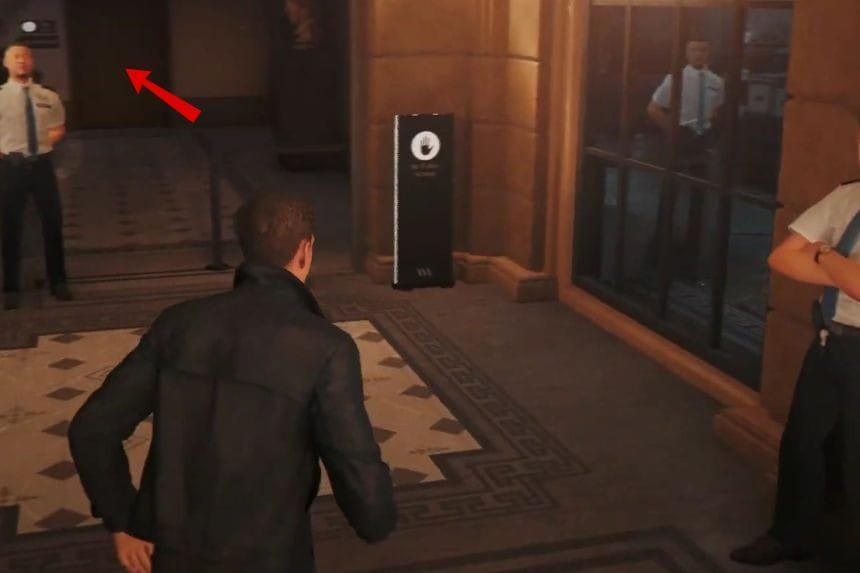
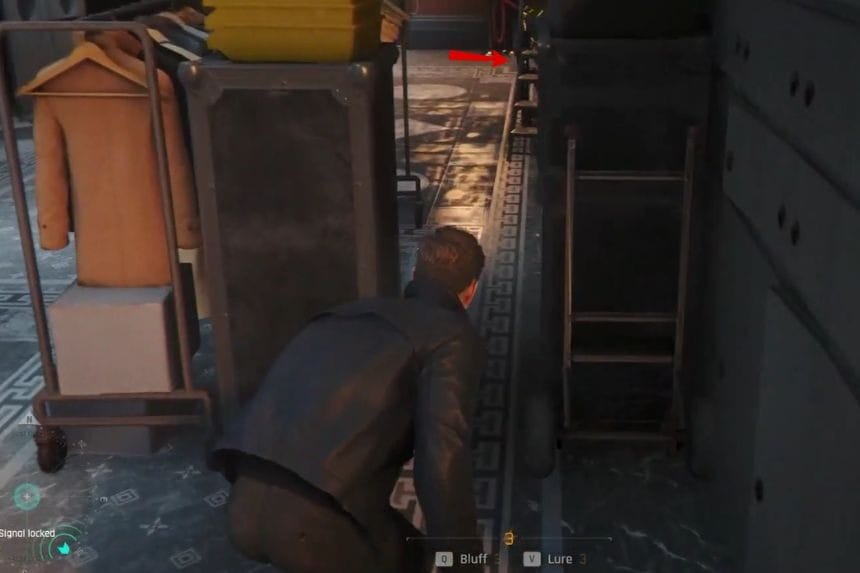
The Anniversary Pin is also found during “All the Time in the World.” Near the press room, enter the cloakroom and squeeze through the narrow gap inside. Once through, check the nearby shelf to collect the pin.
Office Toy
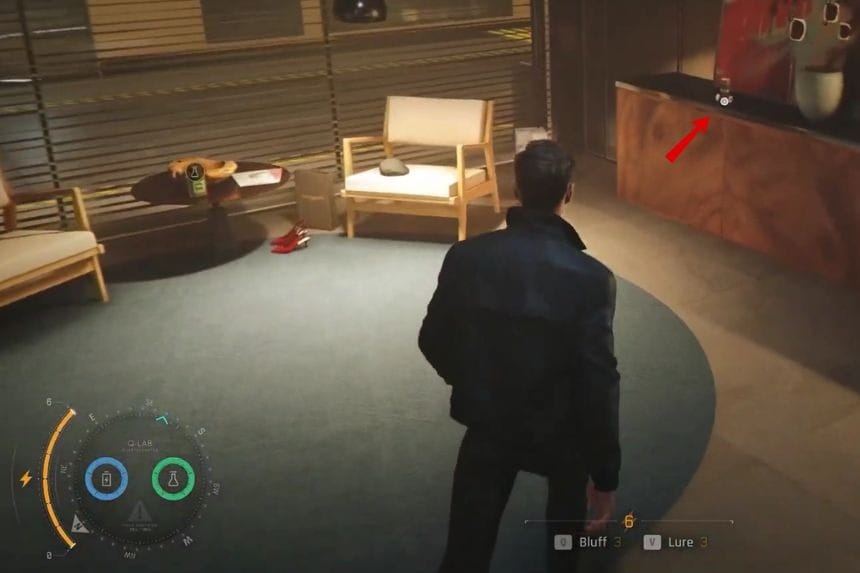
You can collect the Office Toy during the infiltration of the Webb building. While working on the “Bypass the Sensors” objective, search one of the offices carefully. Near a piece of abstract artwork, you’ll find the Office Toy sitting nearby.
Diving Watch
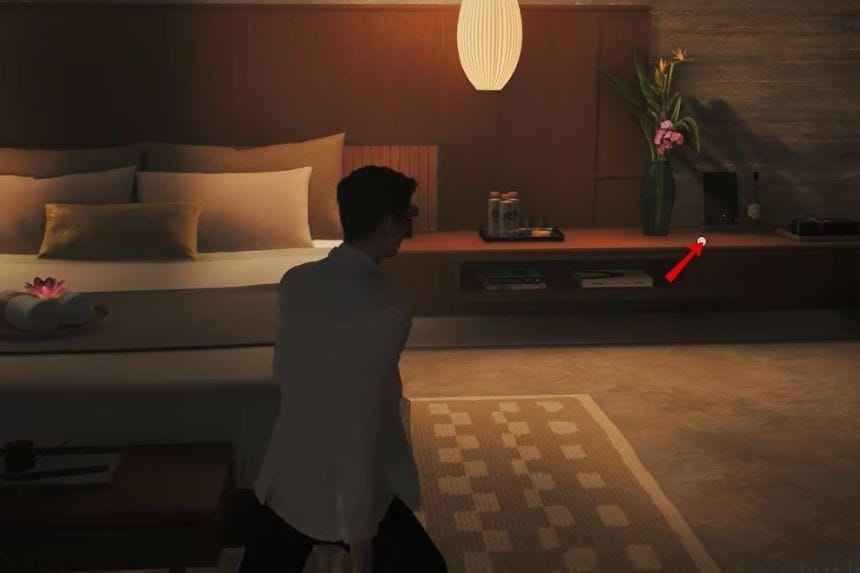
The Diving Watch can be picked up before Bond heads out to the party in Vietnam. After getting ready, look at the nightstand beside the bed in the room. The watch will be resting there and can be collected before leaving.
Niko Murto Locket
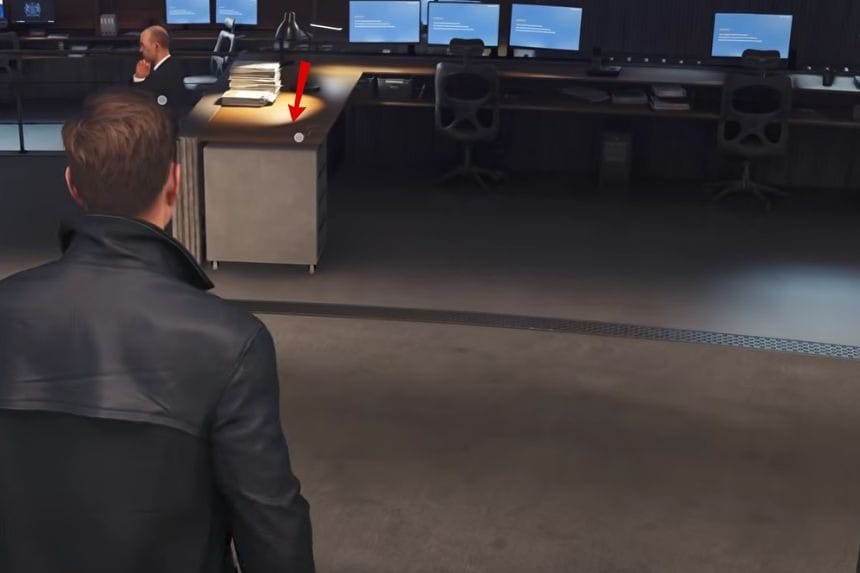
The Niko Murto Locket is found after the Vietnam mission when Bond returns to MI6 for a briefing from M. Once the briefing is over, walk around the desks located beneath the large THEIA OFFLINE screens. Near a man leaning against one of the desks, you’ll find the locket waiting there.
Snow Globe
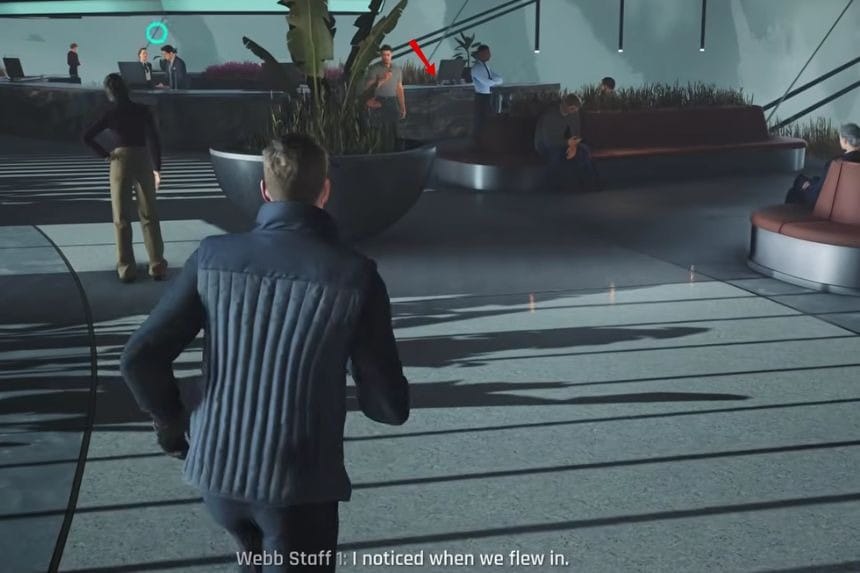
You can grab the Snow Globe while trying to obtain an ID bracelet in 007 First Light. Sneak behind the restricted desk area by using the tall grass for cover. Before moving on, quickly check near the computer desk to find the Snow Globe sitting there.
Robot Keychain
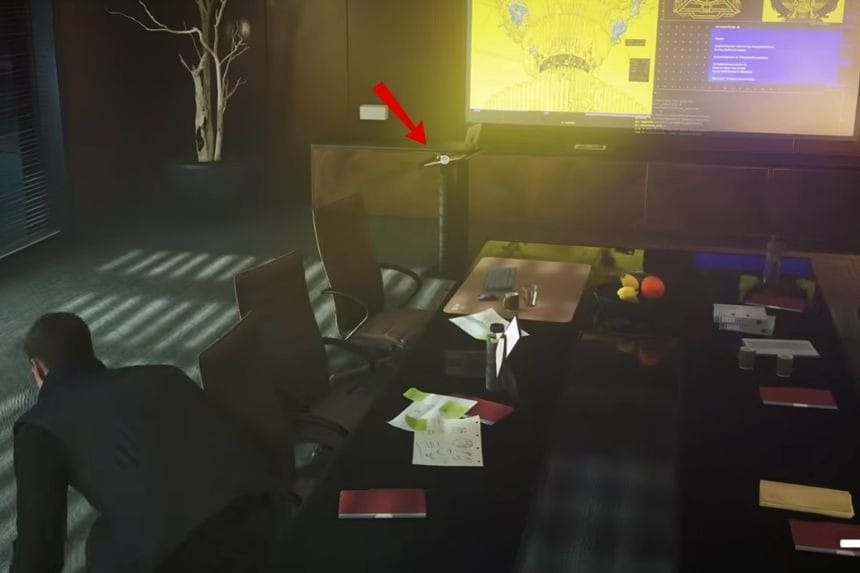
The Robot Keychain is located later in the R&D facility section. After escaping from the robots and crashing the lift down to the bottom, stop near the projector displaying the bright yellow Hyperion computer image. Beside a laptop in that area, you’ll find the Robot Keychain.
Dashboard Toy
Finally, the Dashboard Toy can be collected once Bond returns to Q’s lab with Q’s master watch. Head toward the double doors leading into the lounge area with the outfit selection. Near the kettle on the table, you’ll find both the Valhalla Keys and the Dashboard Toy waiting to be picked up.
Cocktail Napkin
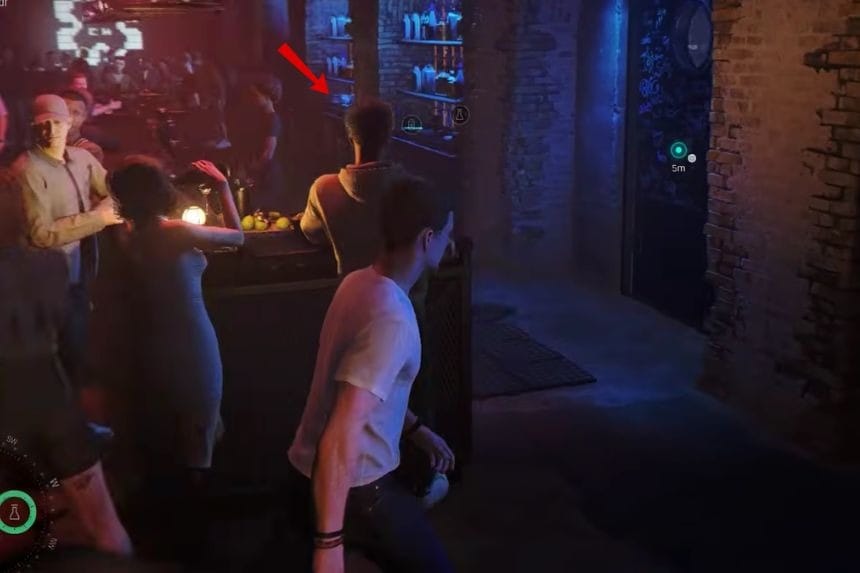
You can find the Cocktail Napkin collectible during the nightclub mission in “A Night Out.” Head over to the bar where you are supposed to meet your contact and speak with them first. After the cutscene ends and you are told to head to the bathroom, quickly move behind the bar counter. Before the employees notice you, grab the napkin sitting on the back counter.
Championship Badge
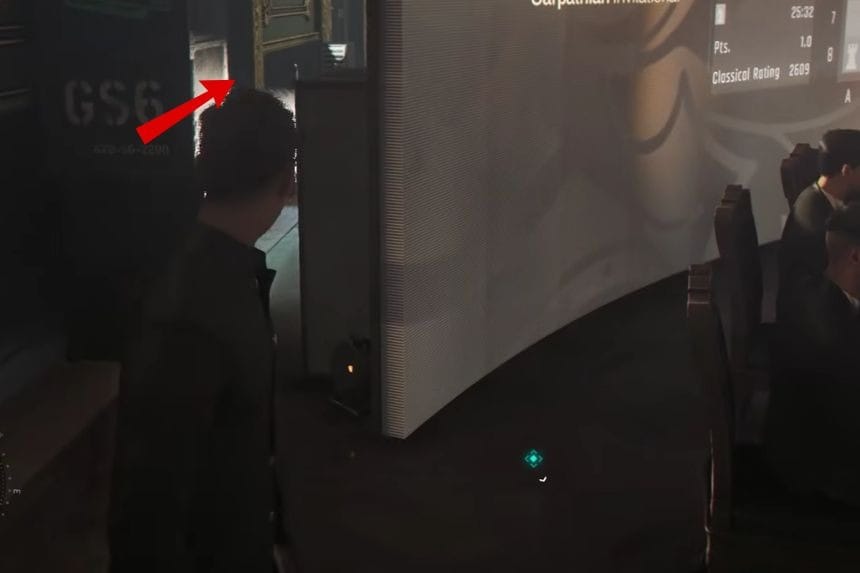
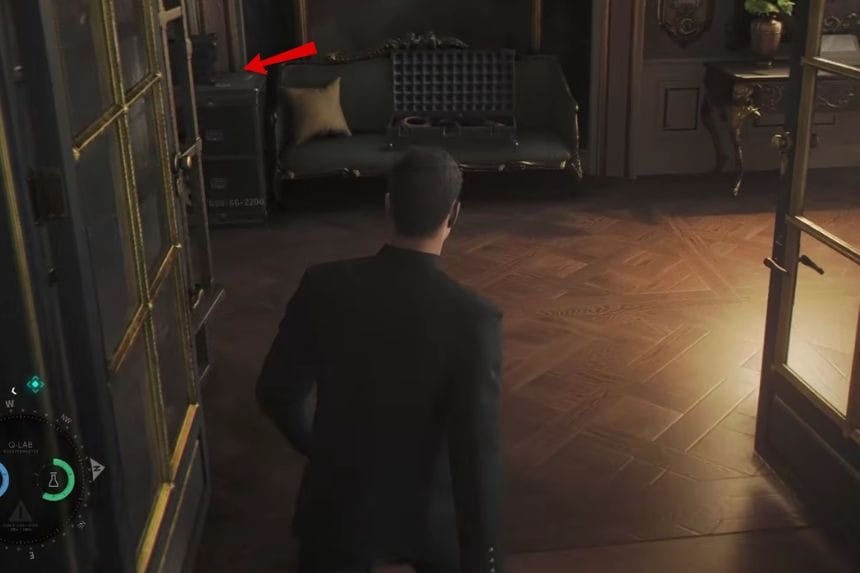
The Championship Badge is found during “All the Time in the World.” Once the game lets you freely explore the hotel while searching for the bellhop, head down to the first floor. Go behind the referee’s station near the ancient book where the bellhop tore out a page earlier. In the side hallway on the right, you’ll spot a black crate sitting beside a locked door. The Championship Badge is resting on top of the crate.
Pirate Grillz
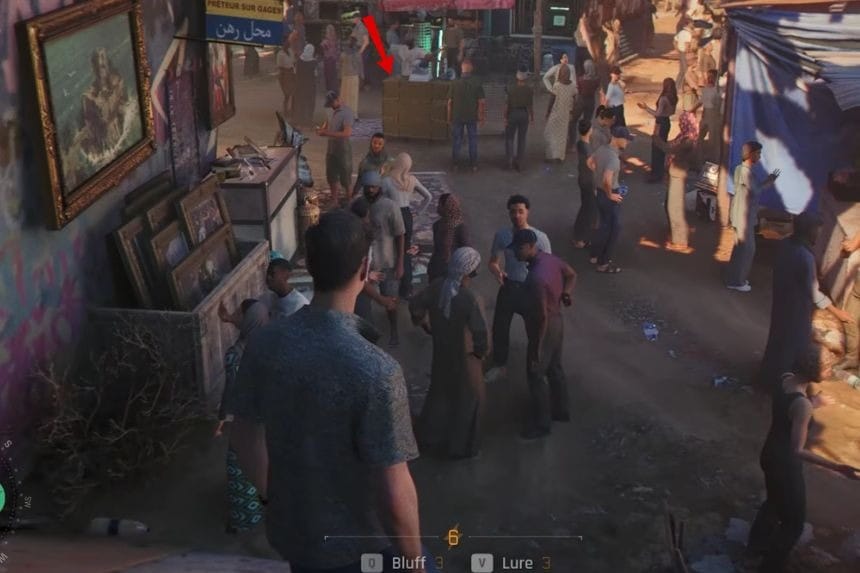
You can collect the Pirate Grillz during “The Past Never Dies” mission while trying to earn $100,000 in the Black Market. Head down the stairs and look directly ahead to find a vendor selling the Pirate Grillz at a small stall. The item costs $1,000, so you’ll need to earn some money first before returning to buy it.
Crocodile Tooth
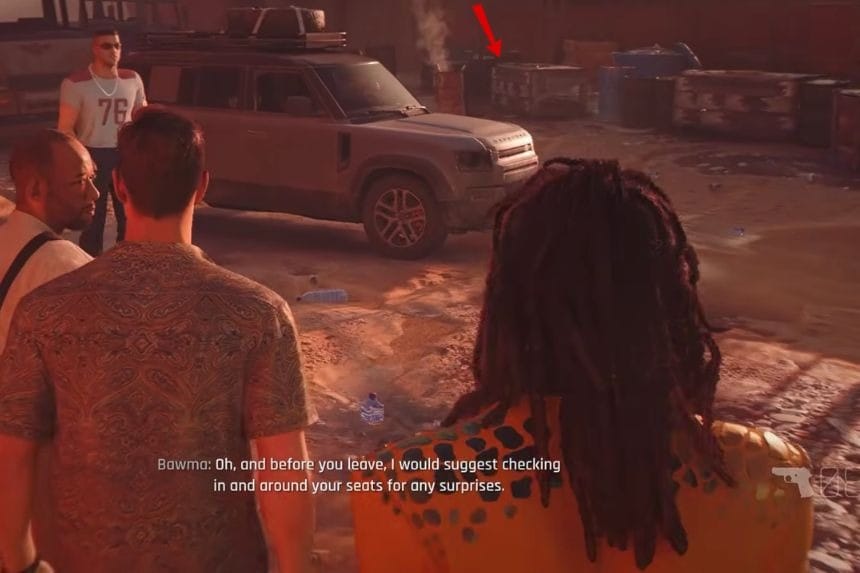
The Crocodile Tooth collectible is also found during “The Past Never Dies.” After you and Greenway escape from the crocodile pit, Bawma will guide you back toward your Land Rover. Before getting into the vehicle, check the table behind it on the right side. The Crocodile Tooth memento will be sitting there waiting to be picked up.
Tero Murto Locket
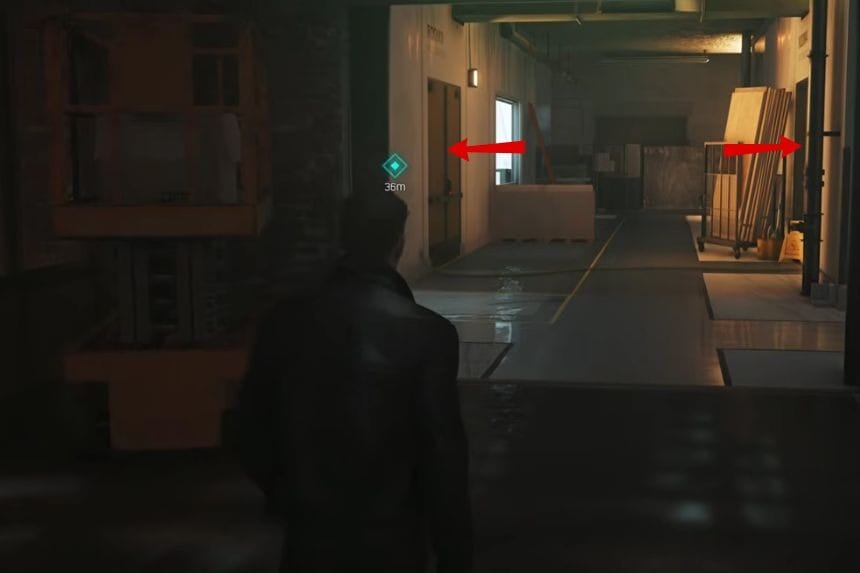
You can find the Tero Murto Locket during the “Confront Sir Nicholas Webb” objective in the Basement checkpoint. After defeating Murto in the boss fight, leave the arena and continue into the next corridor. Enter the first room on the right, which is labeled “Room 4 Restoration.” Inside, open the metal box to pick up the Restoration Room Keycard. Then head directly across the corridor to “Room 3 Restoration” and use the keycard to unlock it. Once inside, check the table on the right side of the room to find the Tero Murto Locket.
All Postcards Location in 007 First Light
There are 10 Postcard collectibles hidden across 007 First Light. Finding every postcard will unlock “The World Is Not Enough” trophy and achievement. Don’t worry about missing anything during your first playthrough, because all cards can still be collected later by using Chapter Select.
Iceland Postcard
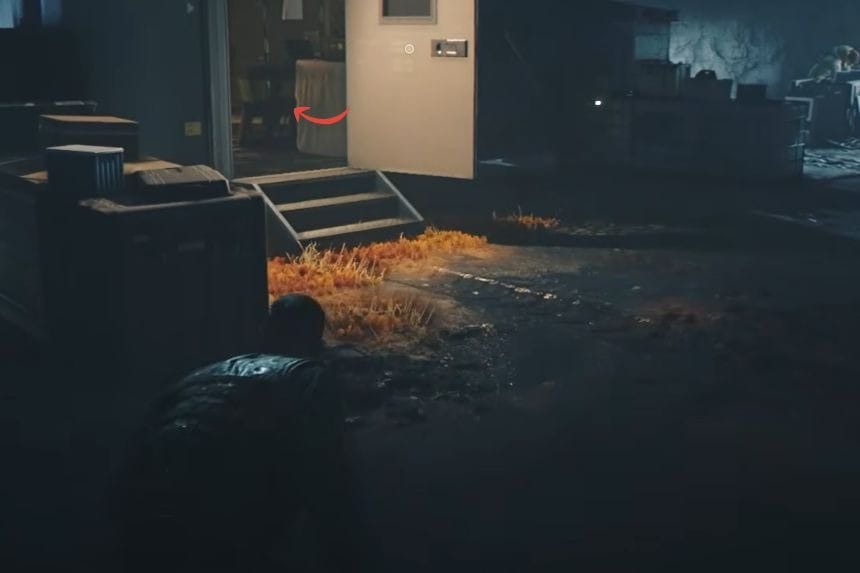
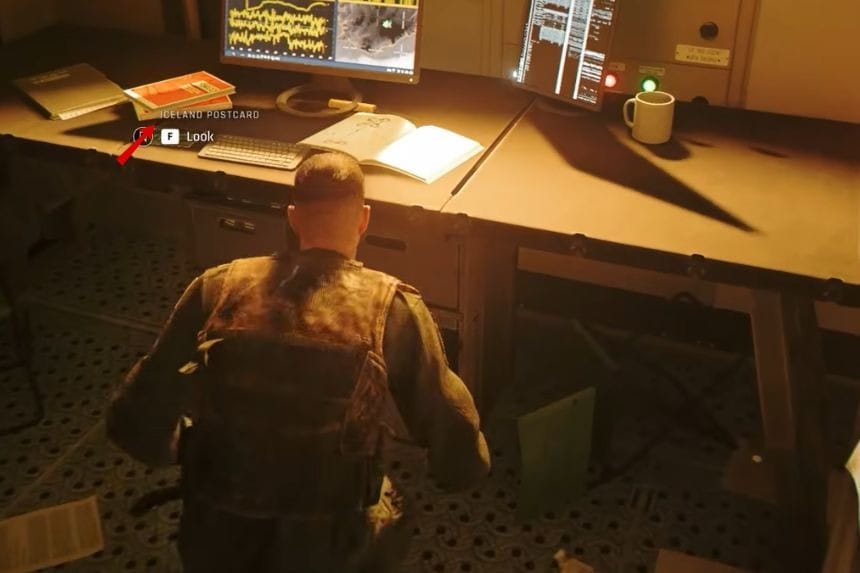
You can find the Iceland Postcard during Chapter 1, “Against the Odds,” while completing the “Save the Captives” objective. Once you reach the enemy camp, head over to the B2 shipping container. Make sure to take out the guard protecting the area first. Inside the container, you’ll see the postcard sitting on top of a table.
Malta Postcard
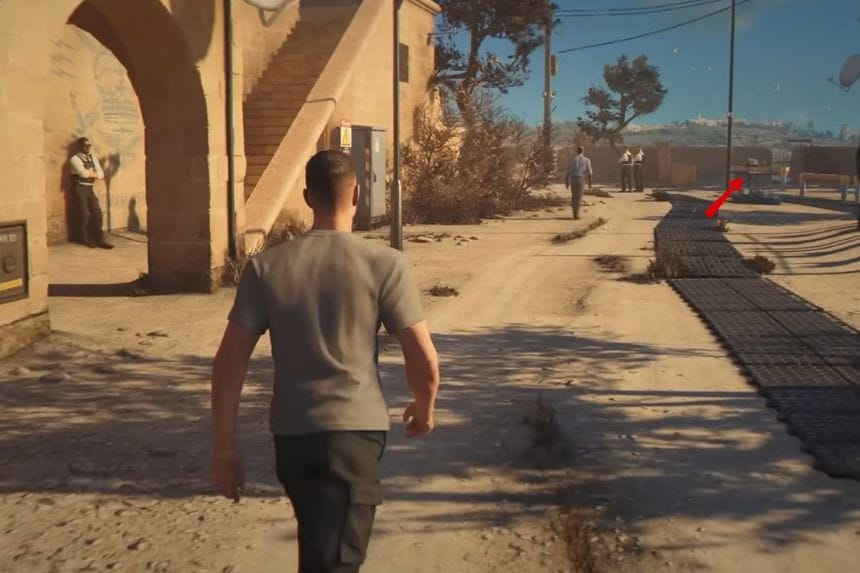
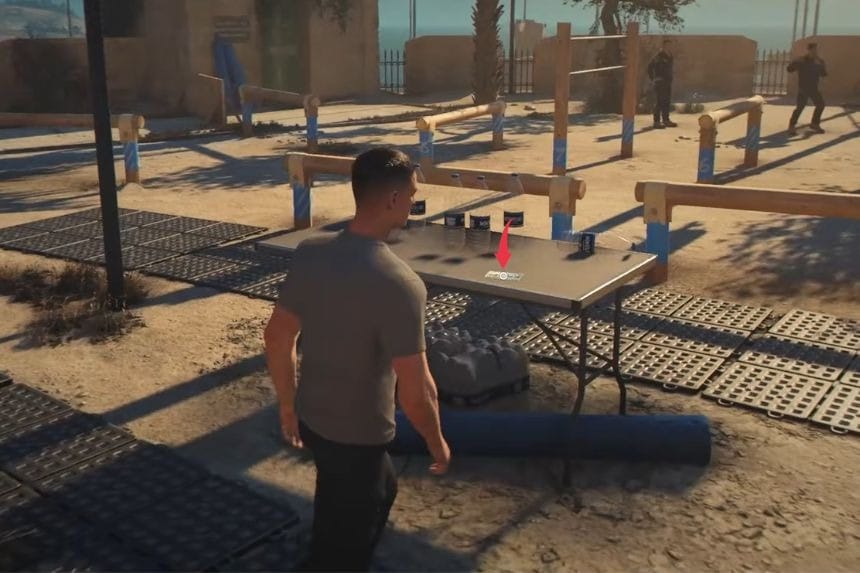
The Malta Postcard is found very early in Chapter 3, “The Needle’s Eye.” After the car ride ends and you regain control of Bond, head to the right side of the training grounds. On a foldable table surrounded by water bottles, you’ll spot the postcard waiting there.
Slovakia Postcard
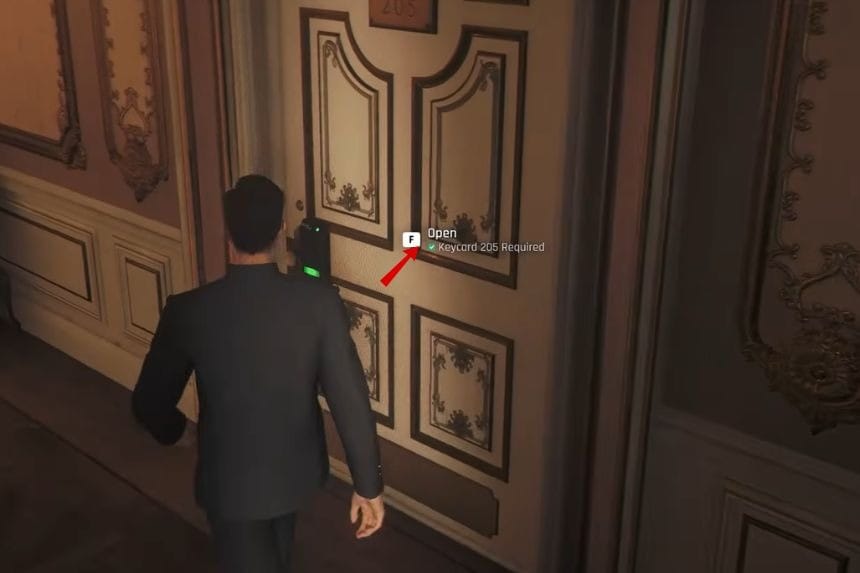
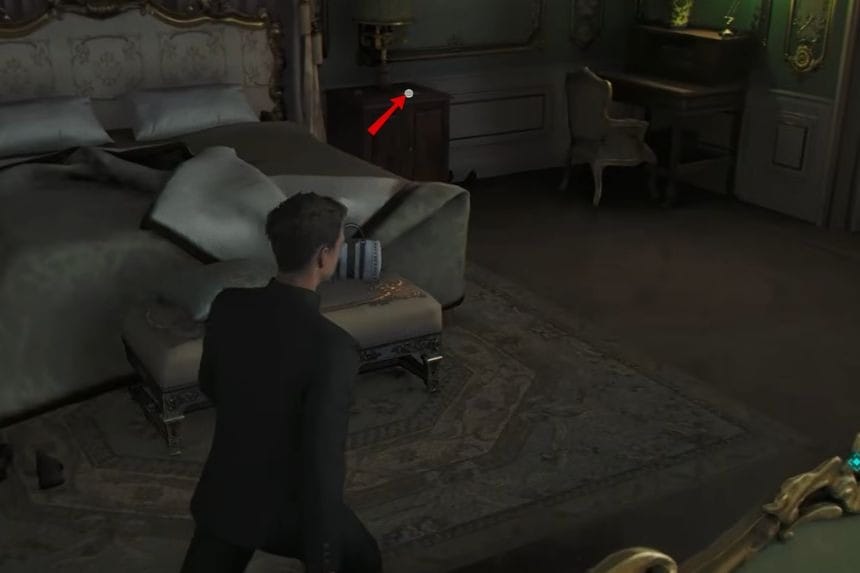
You can collect the Slovakia Postcard during Chapter 8, “All the Time in the World,” while trying to access Room 206. Before entering Room 206 on the second-floor hallway, you’ll notice a maid walking around near Room 205. Listen to her conversation, distract her, and then pickpocket the keycard from her. Once you unlock Room 205, head inside and check the nightstand beside the bed to find the postcard.
Mauritania Postcard
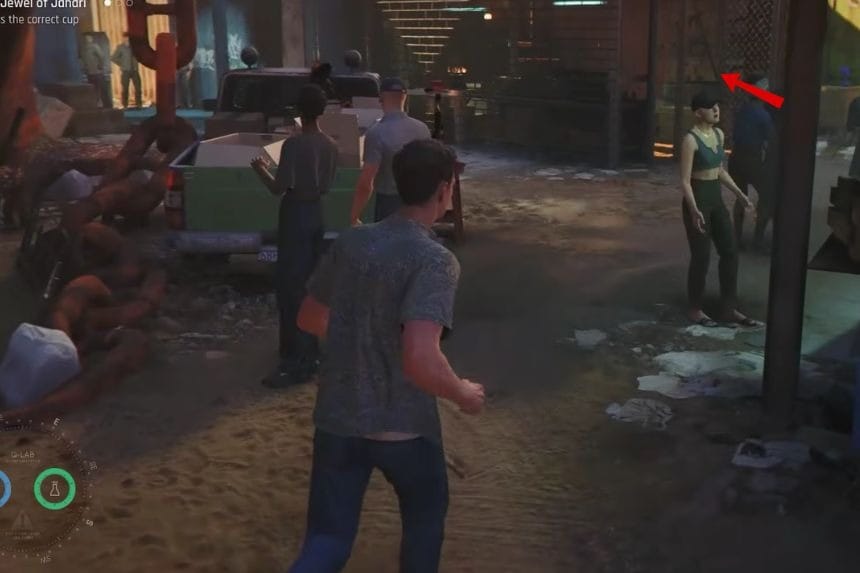
The Mauritania Postcard appears during Chapter 10, “The Past Never Dies,” while working on the “Obtain Auction Fee” objective. From the market entrance, head left until you spot a large red anchor on the ground. Nearby, there’s a fenced-off area secured with a padlock. Use the laser gadget to destroy the lock and head inside to collect the postcard.
Kensington Postcard
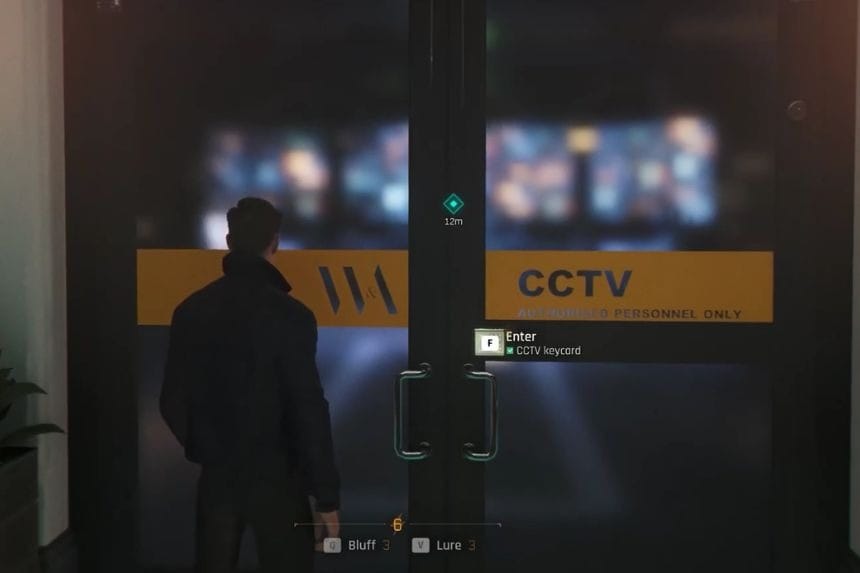
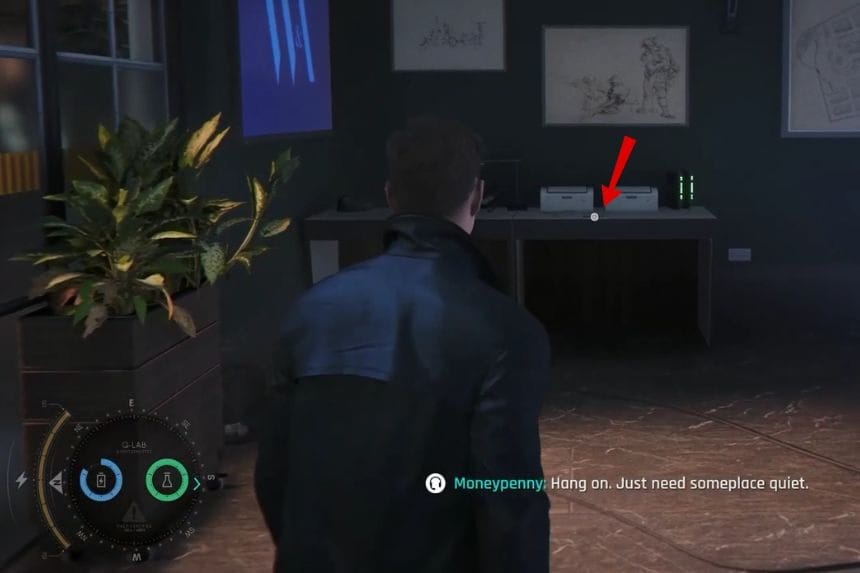
You can find the Kensington Postcard during Chapter 11, “Uninvited,” while completing the “Use the CCTV System” objective. Once you enter the CCTV room, simply look at the table on the left side and you’ll see the postcard sitting there.
City of London Postcard
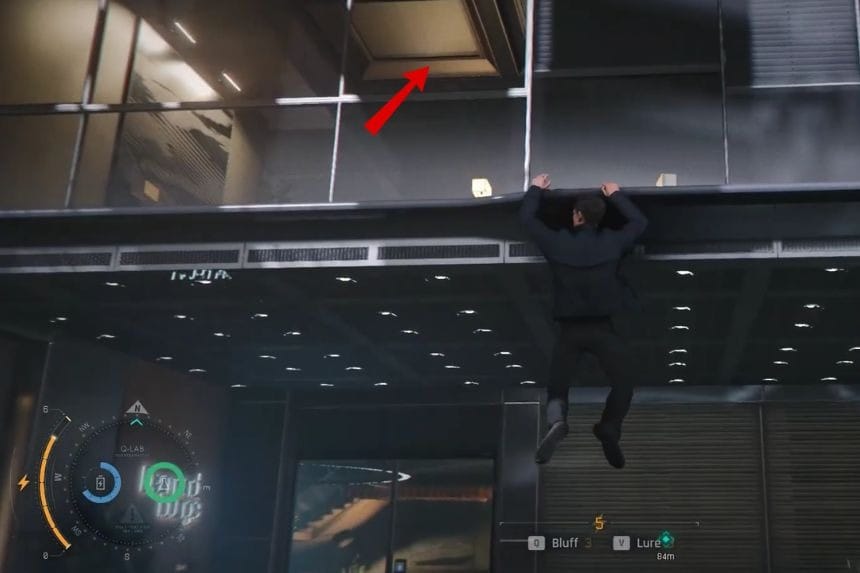
The City of London Postcard is found in Chapter 12, “Knightfall.” Climb onto the statue, jump across to the next balcony, and shimmy along the ledge until you can hop over the railing. Keep moving along the ledge until you reach an open window you can climb through. Inside the room, the postcard will be resting on the counter to the left.
Vietnam Postcard
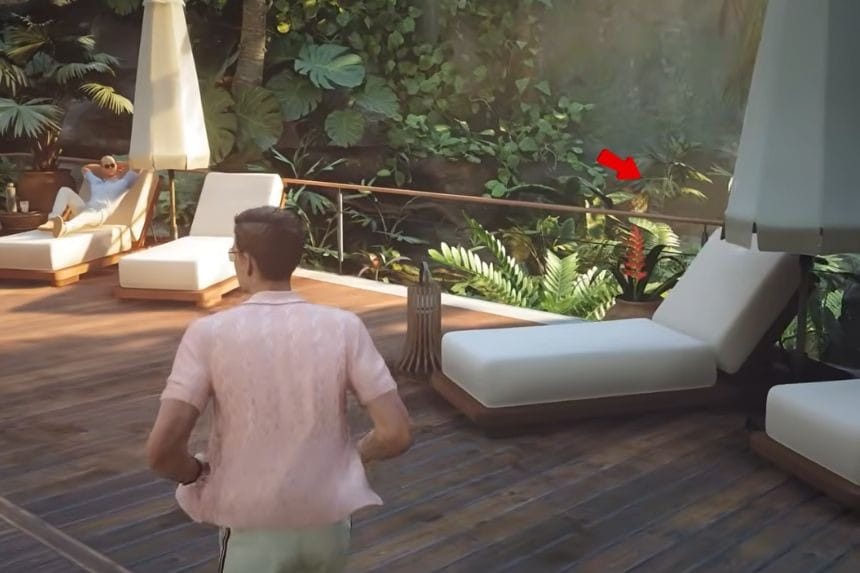
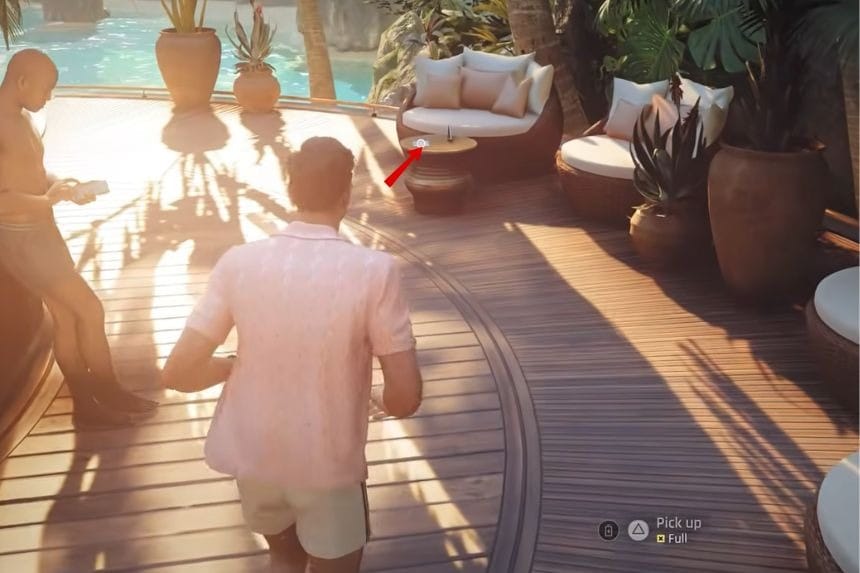
The Vietnam Postcard can be picked up during Chapter 14, “Time to Die,” while approaching Ellis White. Once you arrive at the Ocean Vie
Q-Lab Postcard
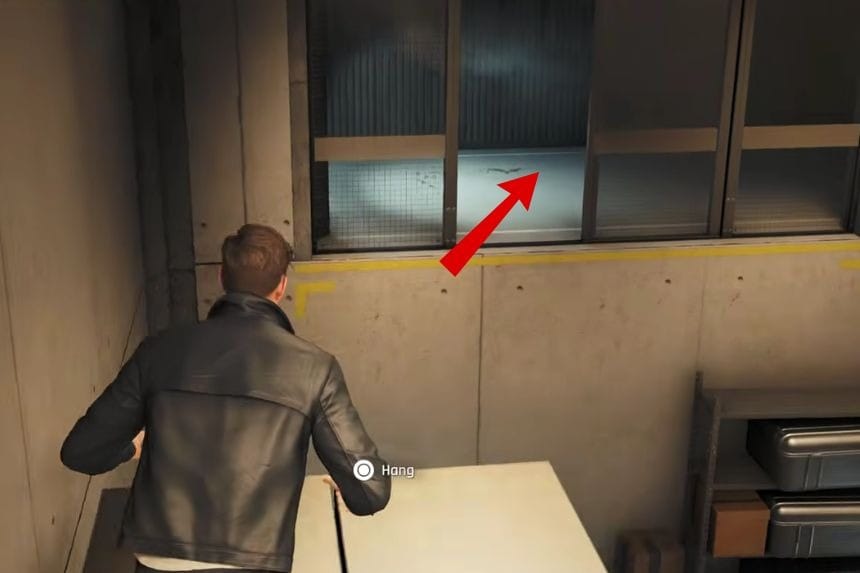
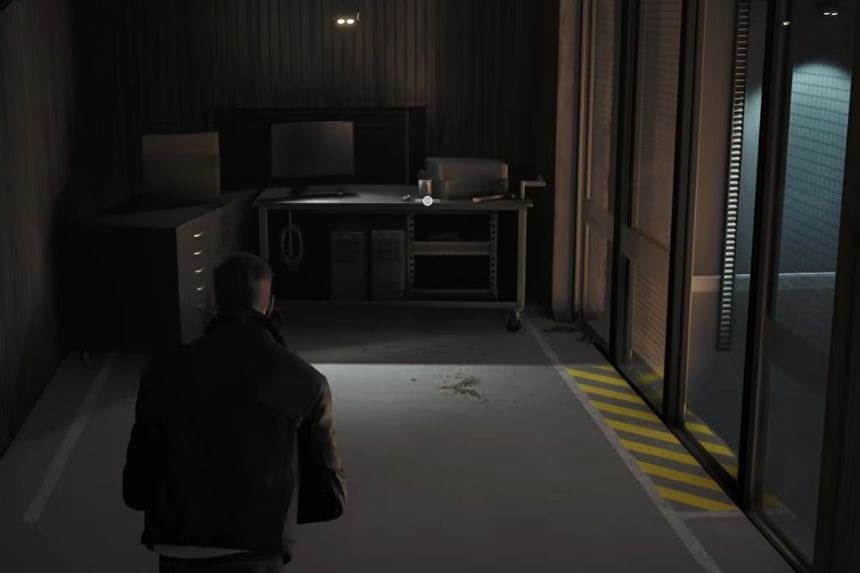
You can collect the Q-Lab Postcard during Chapter 15, “Man of the Hour,” while completing the “Steal Field Equipment” objective. Enter the Q-01 gym and climb on top of the lockers. Jump across to the opposite ledge and enter the hallway ahead. The postcard can be found on a table in that hallway.
Antarctica Postcard
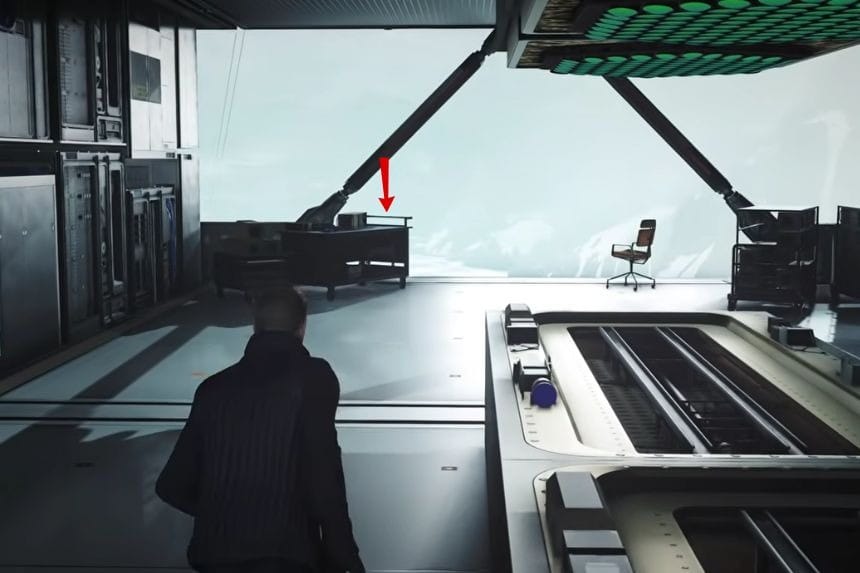
The Antarctica Postcard is located in Chapter 16, “Wave of the Future.” After reaching the bottom of the lift, remove the Override Key and defeat the android enemy. Insert the key into the next door as required by the mission, then head inside and walk across the metal beam. Near the window, you’ll find the postcard sitting on top of a trolley.
MI6 Postcard
Finally, the MI6 Postcard is the last postcard collectible in the game and can be found during Chapter 17, “For England.” After answering the red phone and defeating the enemy, pick up the earpiece and go through the next door. Move past the shelves and squeeze through the narrow section ahead. Once you come out on the other side, look down on the ground to find the final postcard waiting there.
All Legacy items Location in 007 First Light
There are 9 Legacy Item collectibles hidden throughout 007 First Light. Collecting all of them will unlock the “A Legacy of Spycraft” trophy and achievement. Don’t worry about missing anything during your first playthrough, because all cards can still be collected later by using Chapter Select.
Cruciform Key
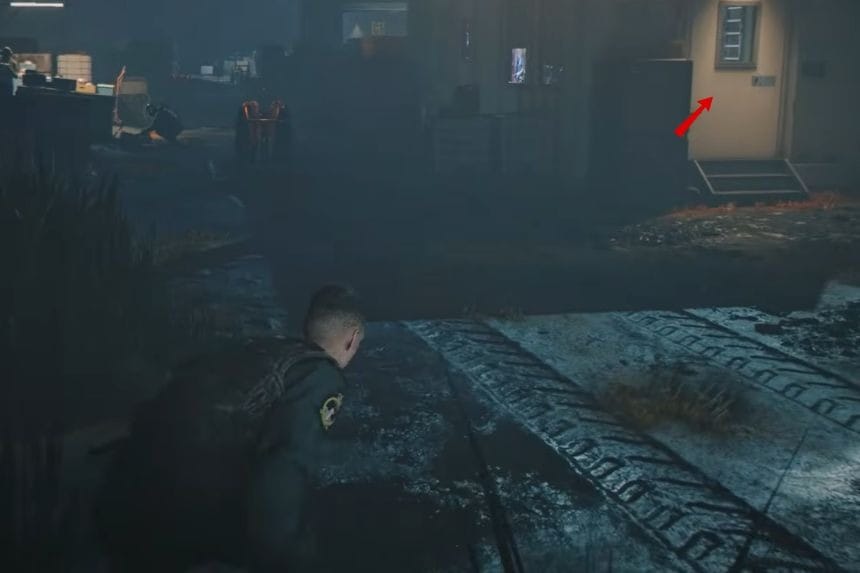
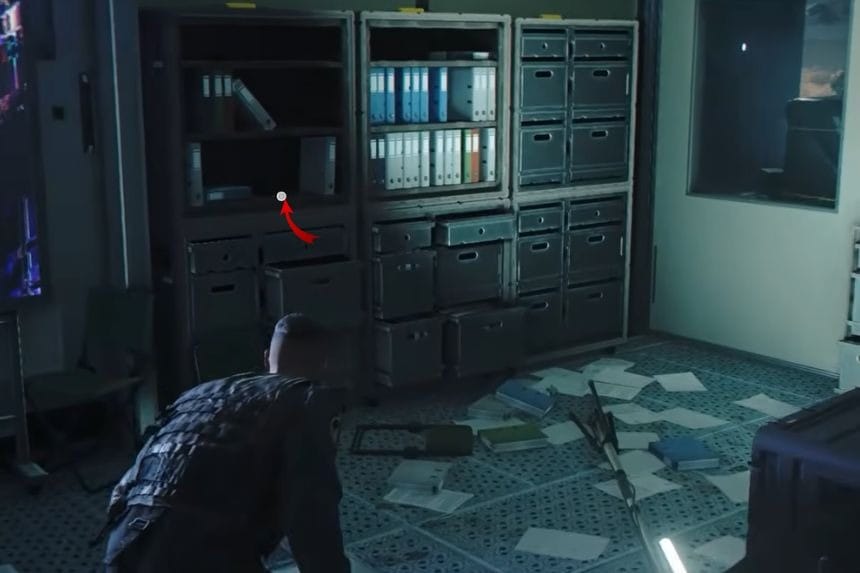
You can find the Cruciform Key during the “Against the Odds” mission while clearing the camp and rescuing the hostages. Head toward the middle of the camp where the large white container is located. Climb inside through the open window, and once you are inside, look to the right of the destroyed television screen. The Cruciform Key will be sitting there.
Dagger Shoes
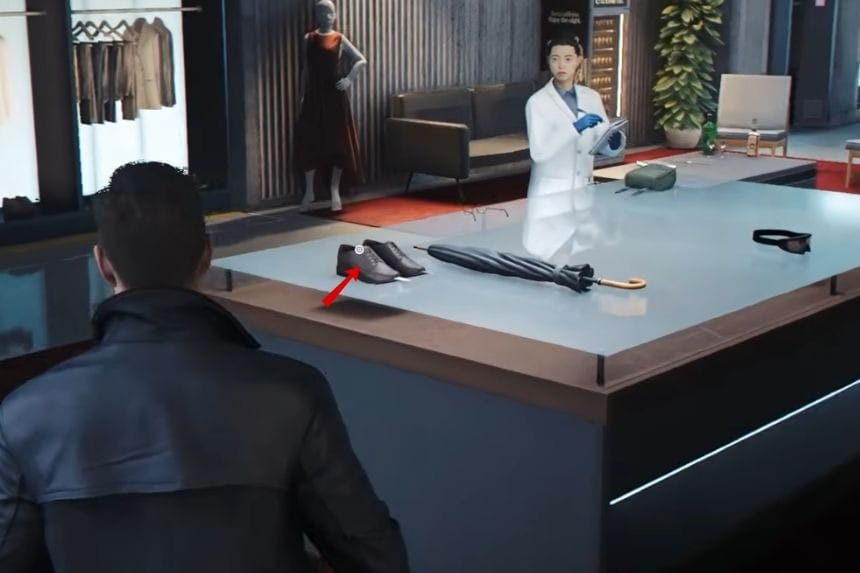
The Dagger Shoes collectible is found during your second visit to Q-Branch in “A Matter of Considerable Delicacy.” Go and speak with Q in the wearables department. After the cutscene finishes, walk over to the table in the center of the room and inspect the brown shoes with blades sticking out from the front. Doing this will unlock the Dagger Shoes collectible in your Legacy tab.
Chess Biography
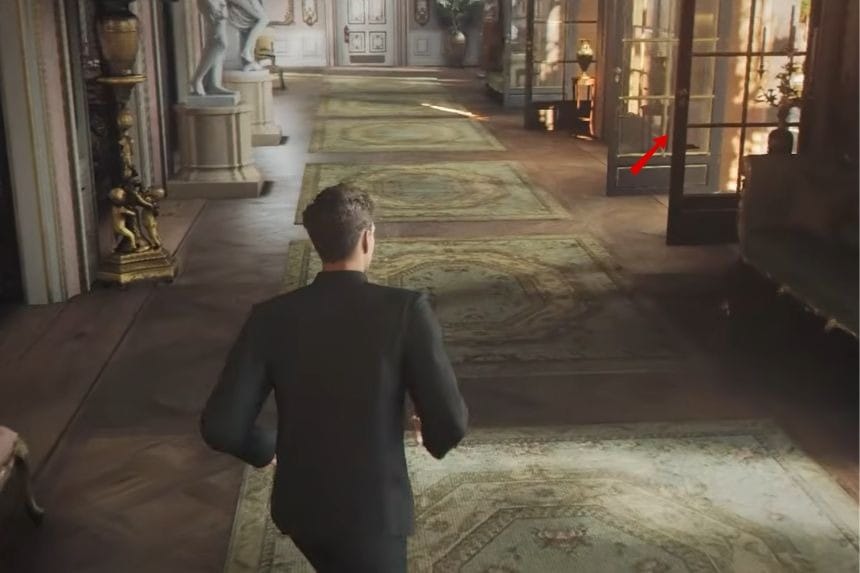
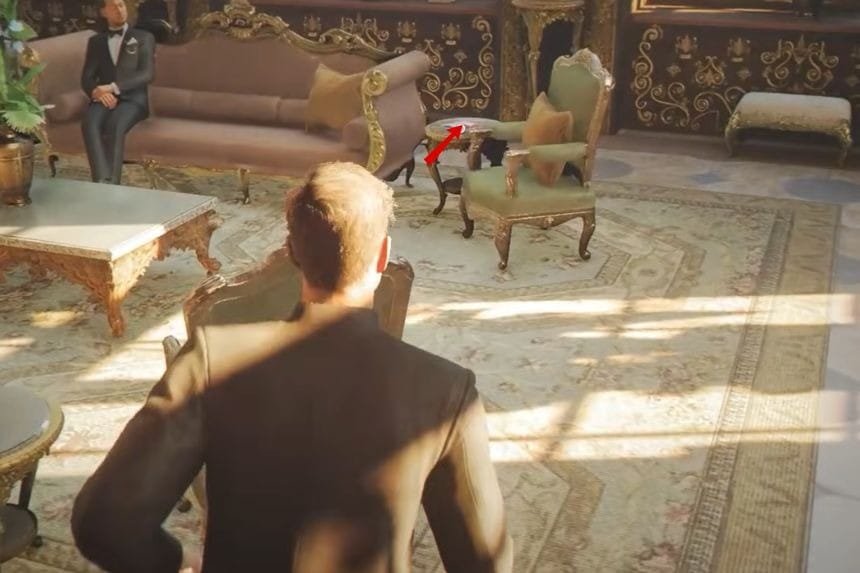
You can collect the Chess Biography during “All the Time in the World” once the game lets you freely explore the hotel during the chess tournament. Head down two floors and move to the opposite side of the building. Above the main front entrance, you’ll notice a small lounge area with a few people inside. Enter the lounge and look at the small table beside the couch to find the Chess Biography book.
ATAC Device
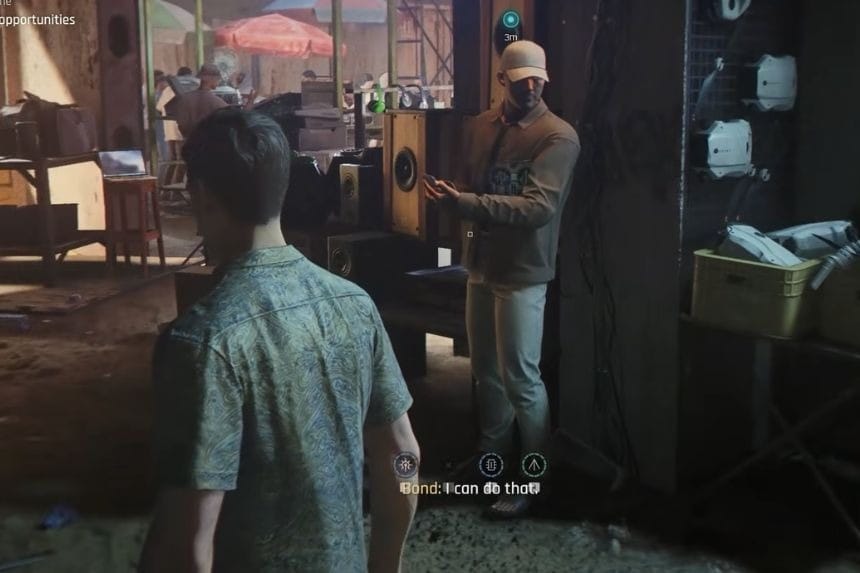
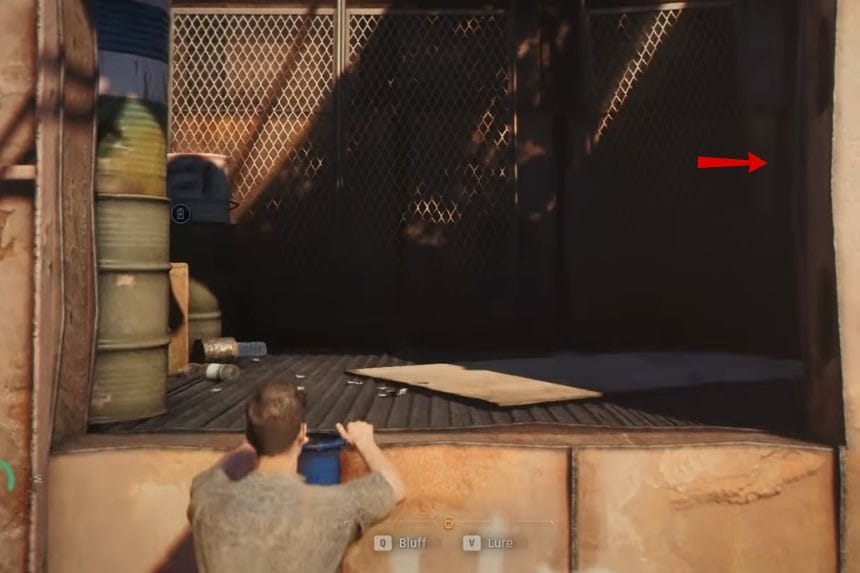
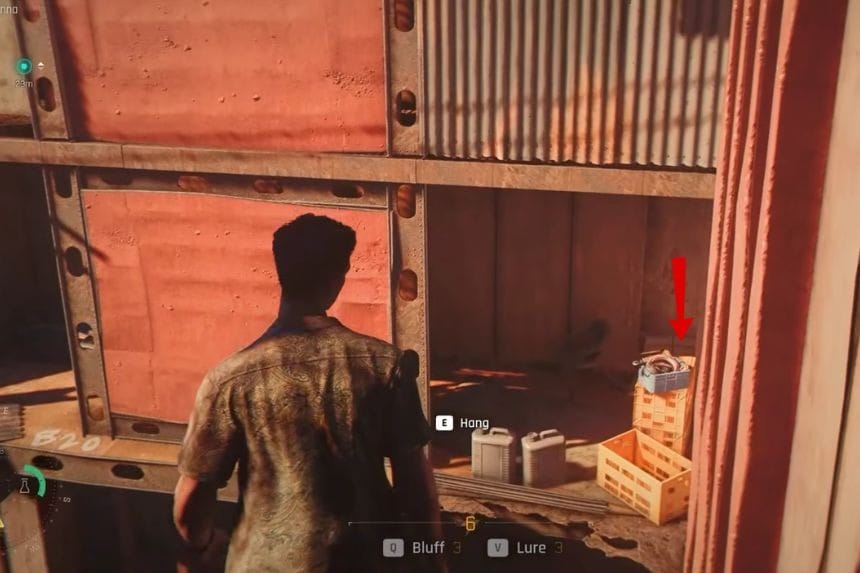
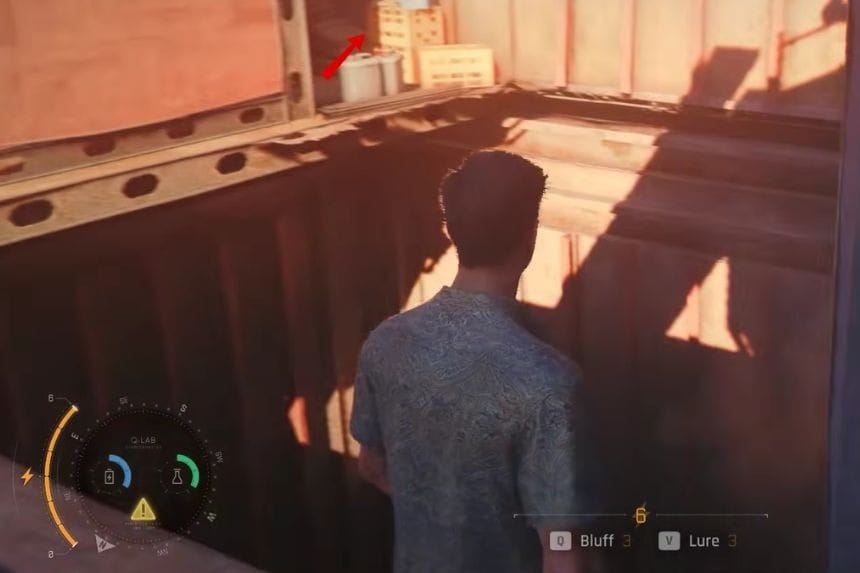
You can find the ATAC Device during “The Past Never Dies” mission while working on the objective to earn $100,000 for the auction. Head down the stairs and take the left path toward the large boat anchor. From there, turn right underneath the overhang where you’ll find a man talking on the phone. Listen to his conversation to unlock “The Crypto Wallet” side quest. Continue through the entire side quest until you reach the tower where the wallet needs to be synced. Near the tower, shimmy across the beam covered with the blue tarp. Instead of climbing up toward the tower, drop down onto the smaller beam below and carefully walk across to the small platform at the end. The ATAC Device collectible will be waiting there.
Uninvited
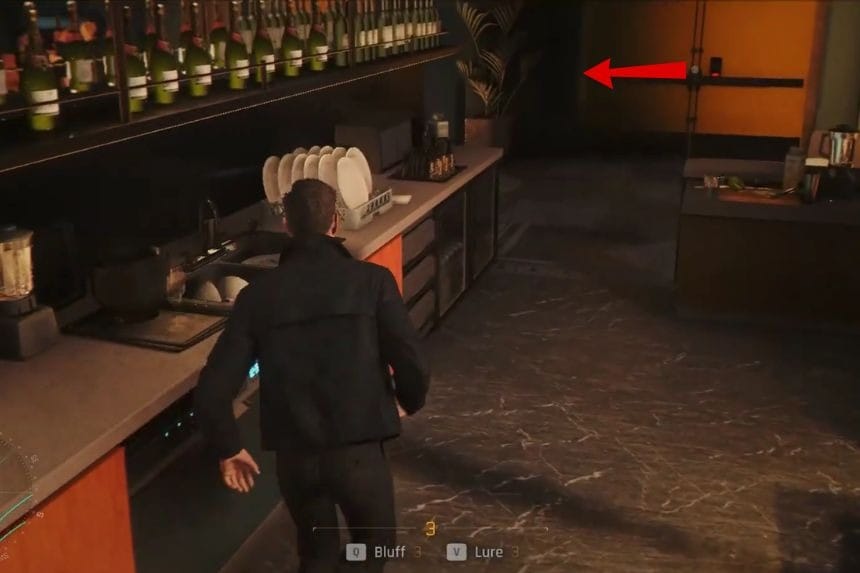
The Concert Poster can be collected during the “Uninvited” mission. Progress through the level until you successfully sneak into the gala by stealing someone’s invitation. Once inside, you’ll eventually enter a café area with a large bar in the middle. Head toward the back-right corner where you’ll find a smaller restaurant section. Inside that room, check the table in the back-left corner to find the Concert Poster collectible.
Blades Club Badge
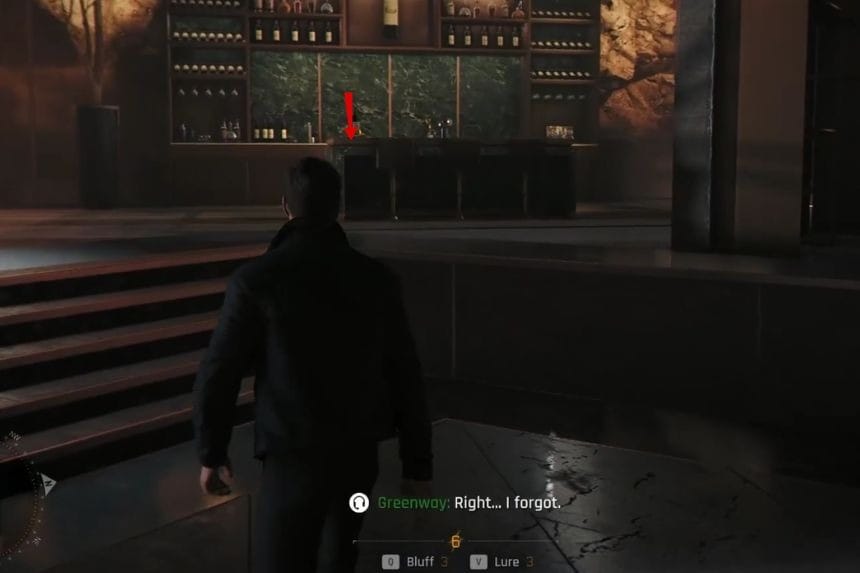
You can find the Blades Club Badge during the “Knightfall” mission. Keep progressing through the level until you finally reach Webb’s penthouse. As soon as you enter the penthouse, look toward the bar on the right side of the room. The collectible will be sitting there and is very easy to spot if you check the area carefully.
Tarot Deck
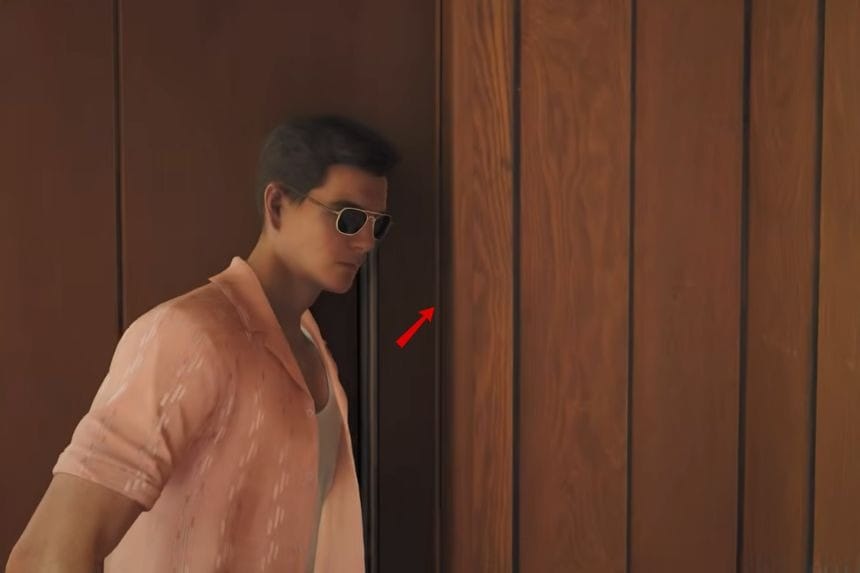
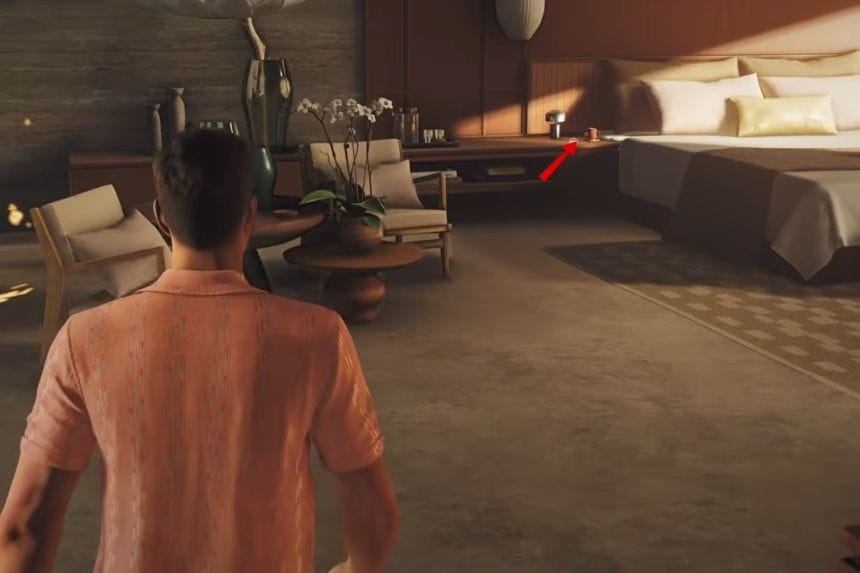
The Tarot Deck is collected during the “Time to Die” mission while exploring the resort. At some point, you’ll need to infiltrate Ramon’s villa. One of the easiest ways to do this is by stealing the yoga mat disguise from the Tranquility Cave area and pretending to be Ramon’s instructor. After getting inside and speaking with Ramon, you’ll be free to explore the villa. Head into the bedroom and look at the nightstand beside the bed to find the Tarot Deck.
Trilby Hat
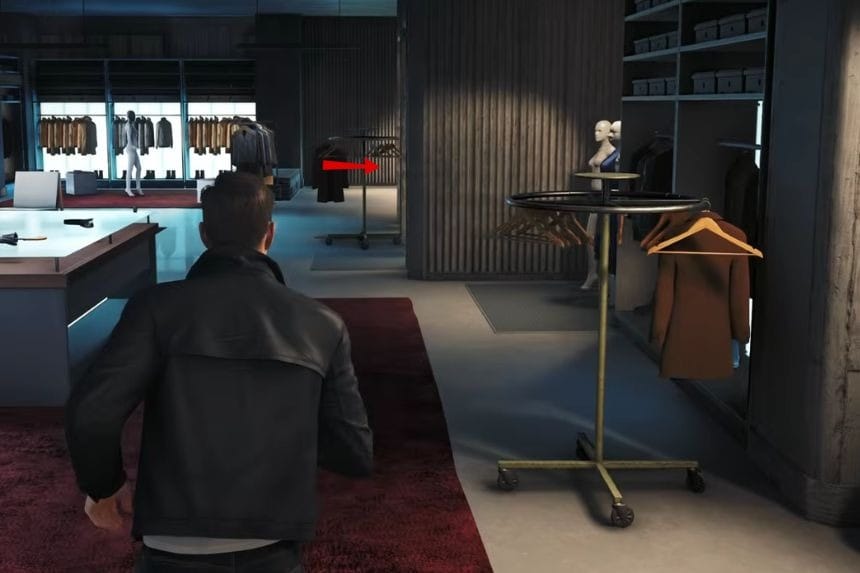
You can collect the Trilby Hat during “Man of the Hour.” After finishing your conversation with Q and receiving the objective to steal your supplies, head toward the wardrobe room near the elevators. Inside one of the dressing rooms, you’ll spot the Trilby Hat that can be interacted with to unlock the collectible.
Jaws Design Spec
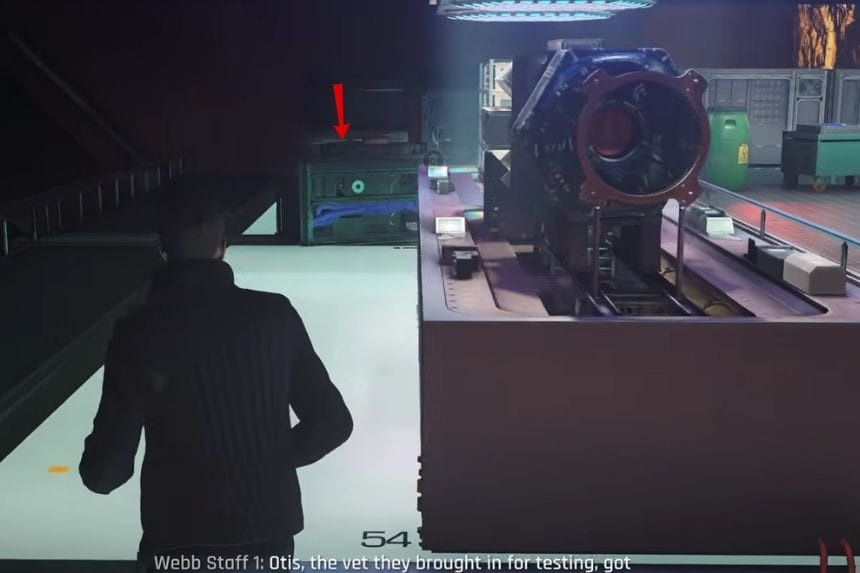
The Jaws Design Spec is the final Legacy collectible you can find in the game, and it appears during the “Wave of the Future” mission. Once you arrive in the Robotics Department, continue through the demonstration sequence with your boss. After the game lets you move around freely again, head to the left side of the area. In the far-left corner, you’ll spot a black container with the Jaws Design Spec resting on top of it.
