
The Lion’s Crest is a DLC quest in Kingdom Come: Deliverance 2 where you embark on a journey to track down and unlock the Brunswick Armor. However, finding the quest is just the beginning—your next challenge is to uncover the locations of all the various pieces of this coveted armor. The armor pieces are spread out across the game, making them difficult to locate. To access this DLC, you’ll need to ensure you have it, as it’s not available to all players. The Brunswick Armor set is exclusive to those who pre-ordered the game, meaning if you didn’t pre-order, the quest won’t be available to you.
This mission presents a series of challenges, including solving a riddle and finding hidden armor. We’ll guide you through completing the quest, which rewards you with the legendary Lion’s Crest.
How to Begin The Lion’s Crest Quest in Kingdom Come Deliverance 2
You can begin the quest soon after unlocking the main world, which is when you arrive in Troskowitz and part ways with Hans. Head to the building west of the tavern, marked with a Scribe quill and ink symbol, and speak with Scribe Gaibl. This knowledgeable scholar will present you with The Lion’s Crest riddle, which will guide you to Brunswick’s Armor through treasure maps. Gaibl will also provide the crafting diagram for Brunswick’s Poleaxe, which you can forge if you assist blacksmith Radovan in the Wedding Crasher’s quest. If you’re looking for some Frankfurt Steel, you can find it in the Cave in Apollonia by solving the first treasure map.
Before diving into The Lion’s Crest, be sure to gather a shovel and a weapon to dig up treasures and fend off bandits and wolves. It’s also wise to bring along some food and Saviour Schnapps, as you’ll be exploring the wilderness for a while.
Solving The Lion’s Crest Riddle in Kingdom Come Deliverance 2
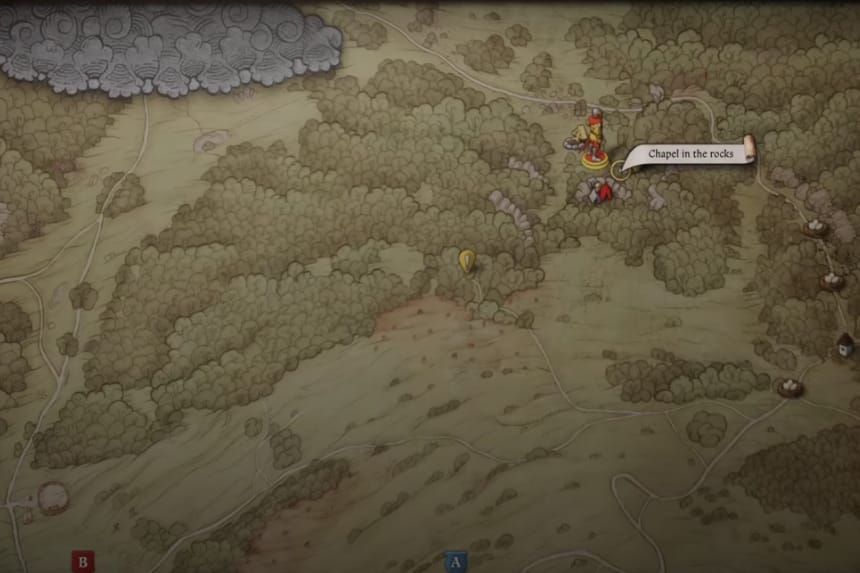
The solution to the initial riddle in Kingdom Come: Deliverance 2 (KCD2) points to the Chapel in the Rocks, located in the forest to the north of Trosky Castle. The riddle itself is quite challenging, relying on both in-game knowledge and some flexible logic. The line “Take your leave of Crone and Maiden, standing tall behind the gates” is relatively straightforward. Upon reaching Trosky Castle, you learn that the two main towers are named Crone and Maiden, so it’s clear that you need to start there.
The next part of the riddle becomes more challenging: “Boldly go towards true midnight, in caverns cold your prize awaits.” This is difficult because midnight doesn’t have a clear direction. However, it involves some indirect logic, suggesting you head north (likely because it aligns with the direction of twelve o’clock). To solve it, leave Trosky Castle through the North gate and continue until you reach the forest directly to the north. The “hall of forest kings” refers to a stag hunting ground marked on your map.
From there, head into a canyon flanked by rocks on both sides, with one rock directly ahead, creating a Y-shaped path. Carefully circle around the rock in front of you until you reach its northern side, where you’ll discover a small crevice containing a shrine: the Chapel in the Rocks. Interact with the shrine to open it, then use your shovel to dig and uncover the following:
- Brunswick’s Dagger
- Brunswick’s Map I
- Brunswick’s Map II
- Brunswick’s Gauntlet
- 17 Groschen
- Fine Wine
- Bible Fragments (Skill Book)
- 2 Candles
The Dagger allows you to perform a stealth kill on unaware enemies, and the Gauntlet is the first piece of the Brunswick armor set. With the two maps in hand, you’re ready to begin your search for the remaining pieces.
All Brunswick Map Solutions in Kingdom Come Deliverance 2
Map l
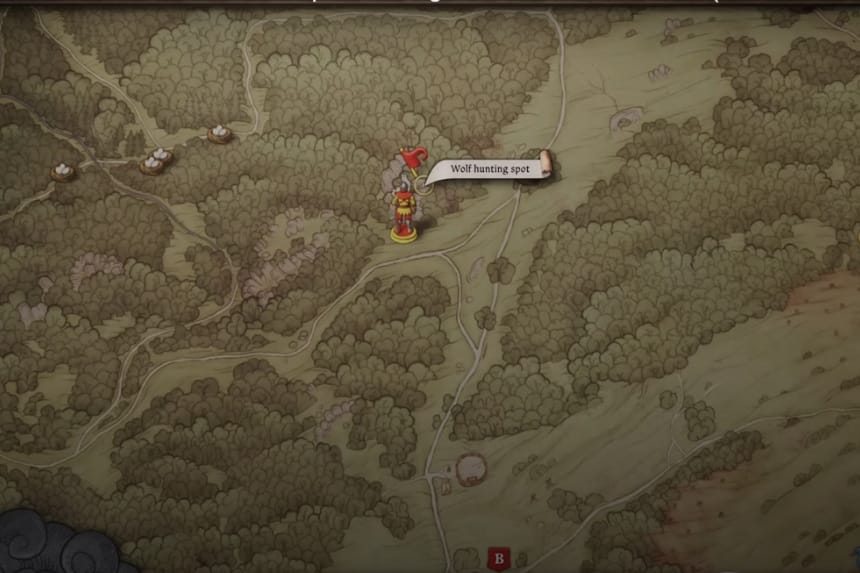
The first Brunswick map leads to the Wolf Hunting Spot, located to the west of the Chapel in the Rocks, directly north of Tachov. It’s advisable to be well-armed, as you’ll need to fight off a pack of around five wolves. You might want to recruit Mutt for some backup beforehand. Additionally, keep in mind that you can still parry the wolves by pressing the right mouse button when the green shield appears.
Once you’ve taken care of the wolves—killing a few will cause the rest to flee—examine the caves in the rocks where they were making their lair. Just beside them, you’ll find two trees with a sack positioned between them. Open the sack to find:
- Brunswick’s caparison
- Brunswick’s plate leg armour
- Brunswick’s chainmail coif
You’ll also receive Brunswick’s Map III upon opening it.
Map ll
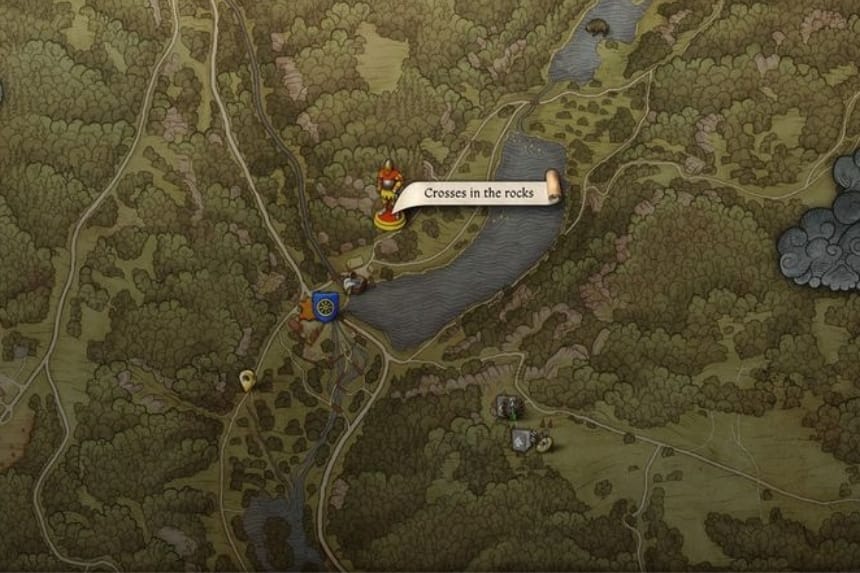
The second Brunswick map takes you to the Crosses in the Rocks location, situated along the western side of Vidlak Pond, which lies to the southwest of the Wolf Hunting Spot. After reaching the Vidlak Pond village at its southern end, follow the path along the western edge of the pond and climb the rocks at the marked point. Look for a cross atop a large rock, with a slanted fallen tree trunk nearby that you can use to reach the top.
Open the chest beneath the cross to obtain:
- Brunswick’s Plate Sleeves
- Saviour Schnapps
- 3 Bandages
You’ll also receive Brunswick’s Map IV.
Map lll
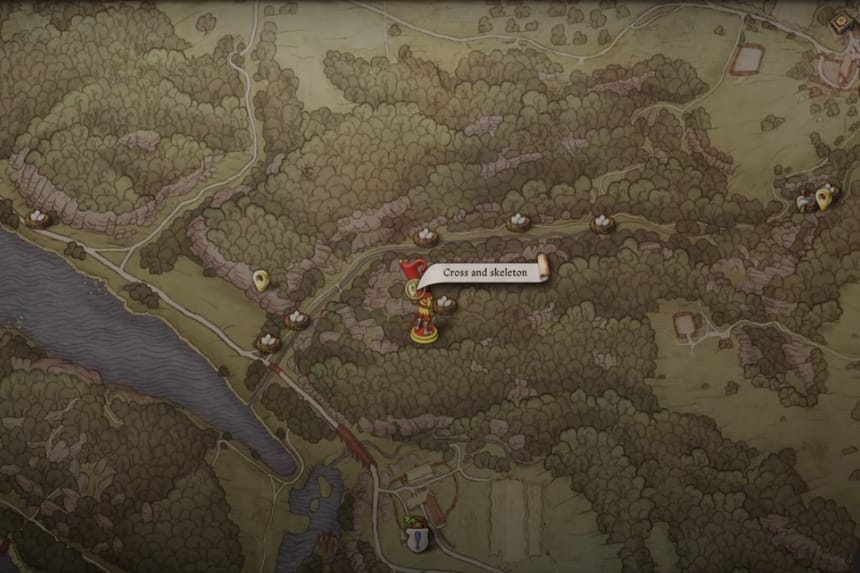
The third Brunswick map leads to the Cross and Skeleton location in the forest north of the Zhelejov Wagoners Inn, southeast of Vidlak Pond. To get there, head north across the bridge out of town, then take a right onto the forest track after the camp by the road. Turn right again onto a small trail that climbs into the cliffs, and keep an eye on your left until you spot a cross atop a rock. Further back, you’ll find a skeleton with a cross leaning against a tree.
Loot the sack beside the skeleton to obtain:
- Brunswick’s Brigadine
- 30 Apples
- Fine Wine
Map lV
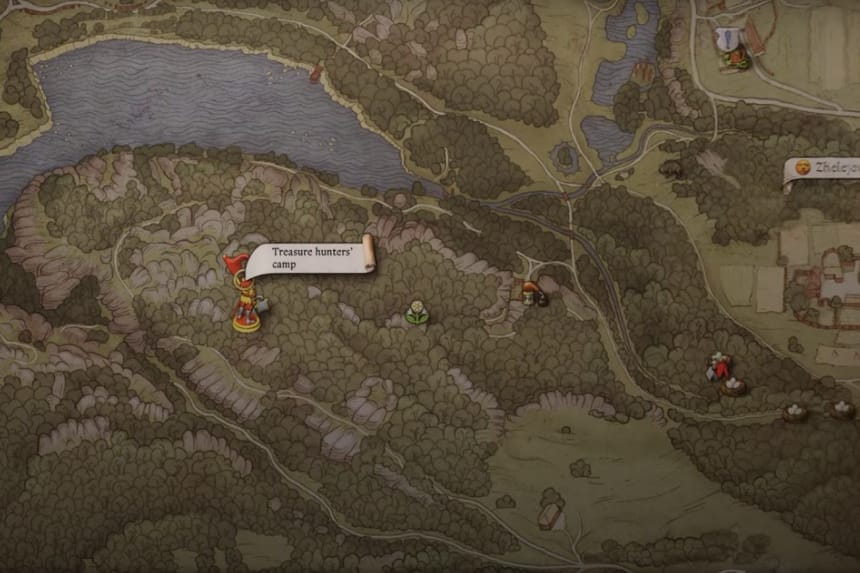
The final Brunswick map points to the Treasure Hunters’ Camp, located at the top of the hill east of the Nomad Camp and west of Bozhena’s Shack from the prologue. This location is fairly easy to find, though you’ll need to take on three bandits in the camp. It’s recommended to wait until nighttime, allowing you to either sneak past them or quietly eliminate them using the Brunswick Dagger you acquired earlier.
Your goal is the cairn with the cross at the end of the camp. Open it to receive:
- Brunswick’s Bascinet
- Shrinking Die
- Worn Rosary
Also, don’t forget to loot the Golden Chalice from the open grave near the cairn. With that, you’ve collected all the pieces of Brunswick’s Armor. Now, go out and swing a sword to celebrate!
In conclusion, the quest for Brunswick’s Armor in Kingdom Come: Deliverance 2 is an exciting and rewarding journey. By solving riddles, following treasure maps, and overcoming challenges like wolves and bandits, players can collect all the pieces of this legendary set, culminating in a powerful, exclusive armor collection.