
Highlights
- Nioh 3 has 92 hidden Kodamas found across different regions. Finding and guiding all the Kodamas will unlock the Kodama Leader Trophy.
- Each Kodama will increase Elixir at the shrine and unlock the Kodama Blessings that give permanent buffs.
- Many Kodamas are hidden on rooftops, behind fake walls, inside wells, enemy bases, or secret areas.
- Kodamas are guarded by enemies or bosses, so bring your best gear to defeat all of them and reach the Kodama.
Nioh 3 has many hidden Kodamas, which are green spirits that are found in many areas. Finding the Kodamas will reward you with useful items and unlock powerful Kodama Blessings at the shrines. After finding the Kodamas, they will guide you towards the shrines where you can rest or unlock powerful buffs. In this guide, we will walk you through all Kodama locations in Nioh 3.
All Kodama Locations
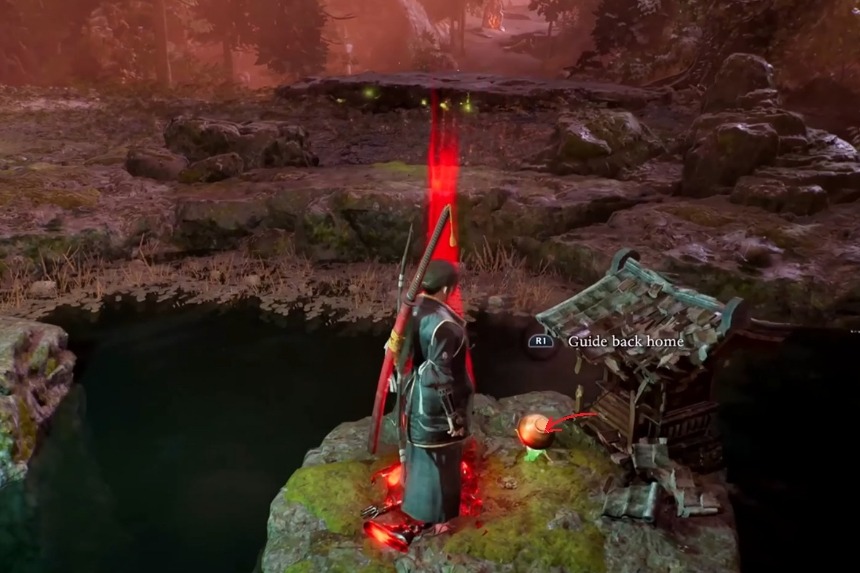
Kodamas are special NPCs that you can interact with in Nioh 3. They are hidden in different locations across each area, and when you help one, it will guide you to the nearest shrine. Nioh 3 has 92 Kodamas in total. If you find and guide all of them, you will unlock the Kodama Leader achievement. Kodamas increase your Elixir when you recover at a shrine. They will also unlock Kodama Blessings, which you can activate at shrines to get permanent buffs that help you throughout the journey.
Tenryu River
Tenryu River is the first area you visit after escaping Hitokoto Slope. This is where you and Honda arrive together and begin exploring the area. From here, you can freely explore different locations, and you can move between areas without going back to the hub.
Tenryu River Kodama 1
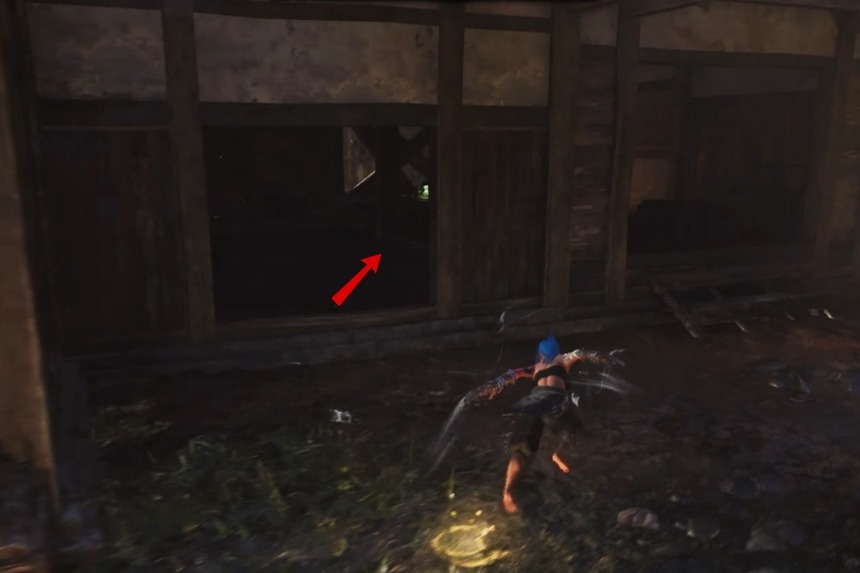
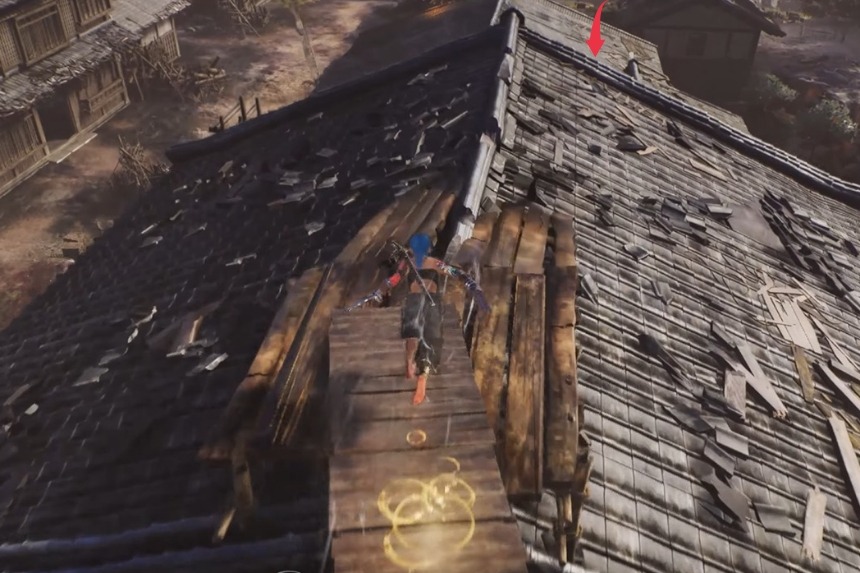
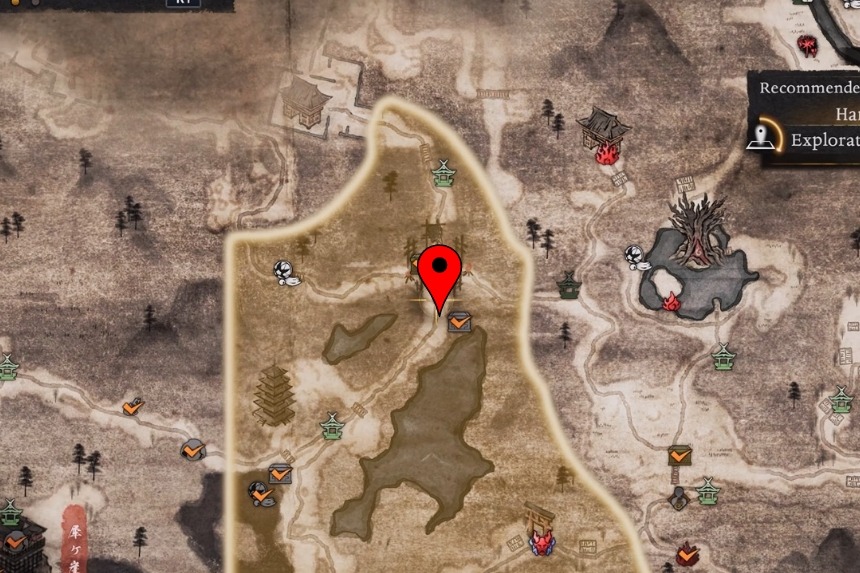
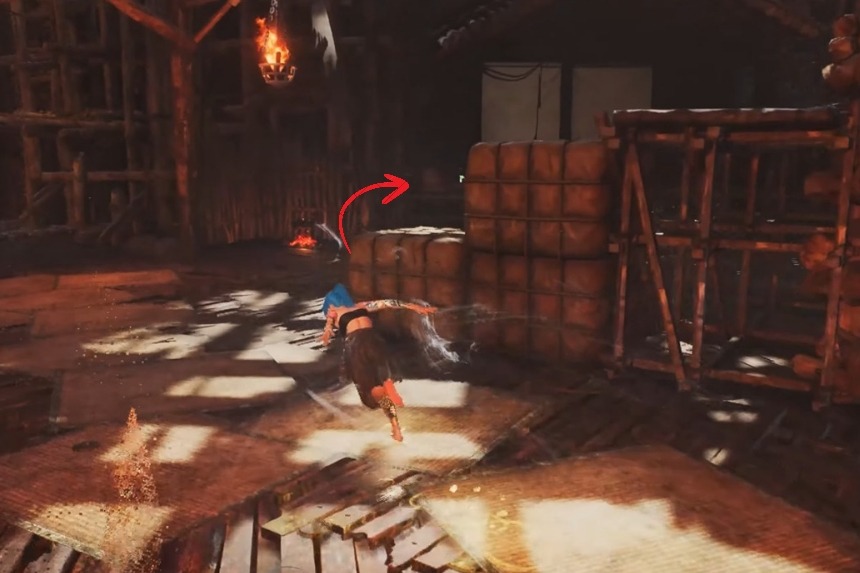
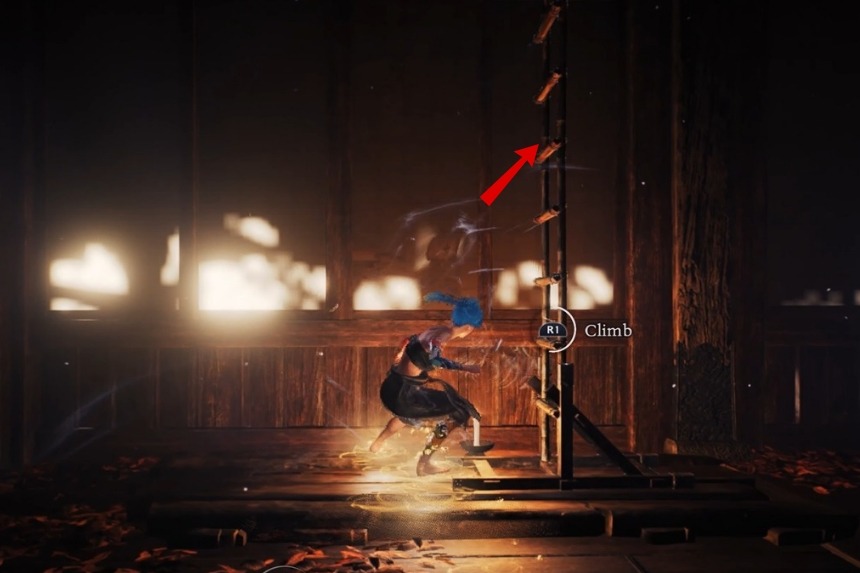
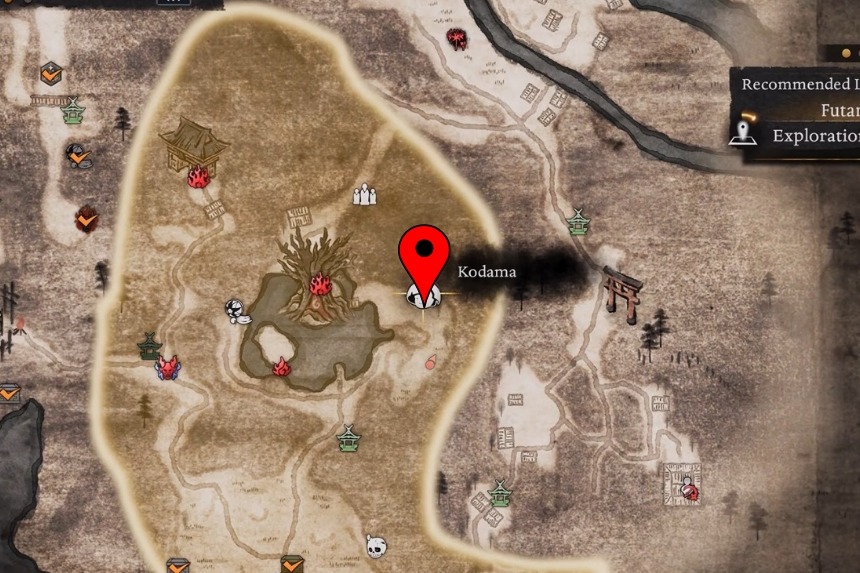
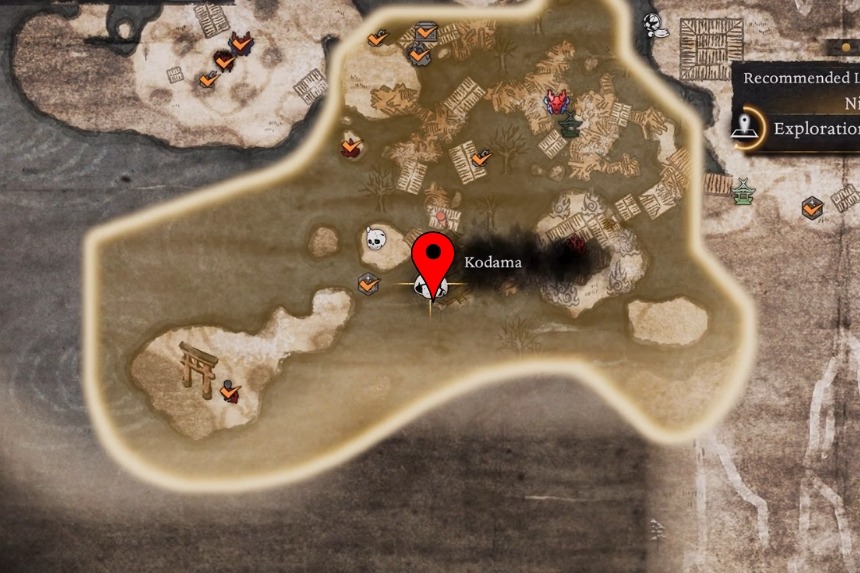
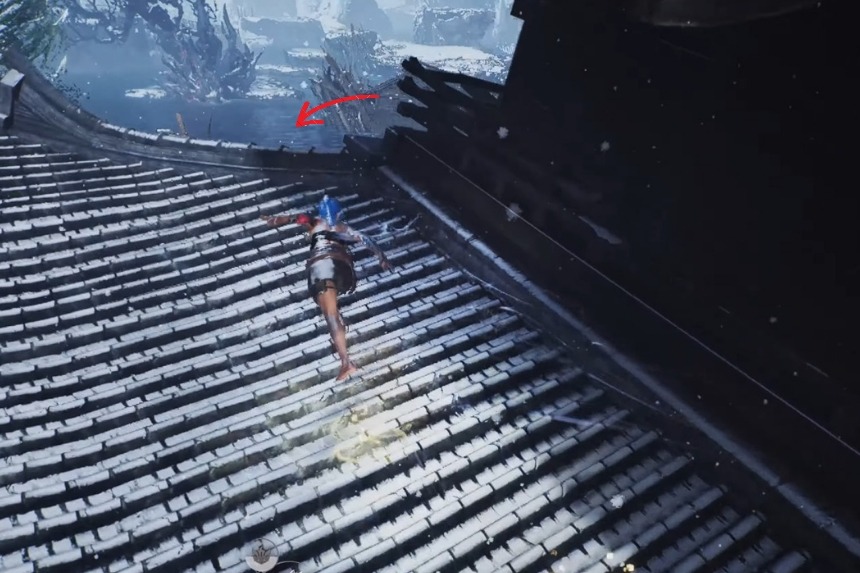
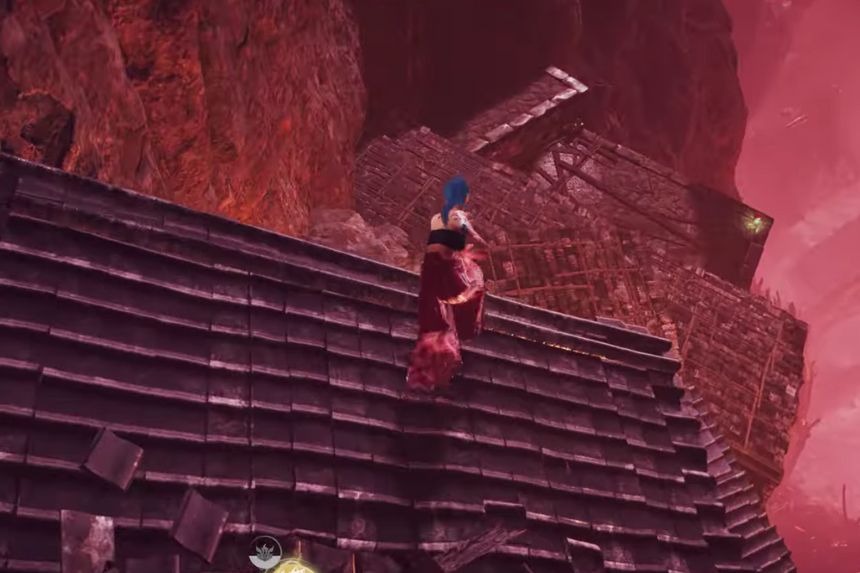
You will find this Kodama inside a building on the East side of the Tenryu river area. It’s on the upper floor, so look for the wooden planks going towards a hole in the roof and use them to get inside the building. Once you are inside the building, interact with the Kodama in the corners of the room.
Tenryu River Kodama 2


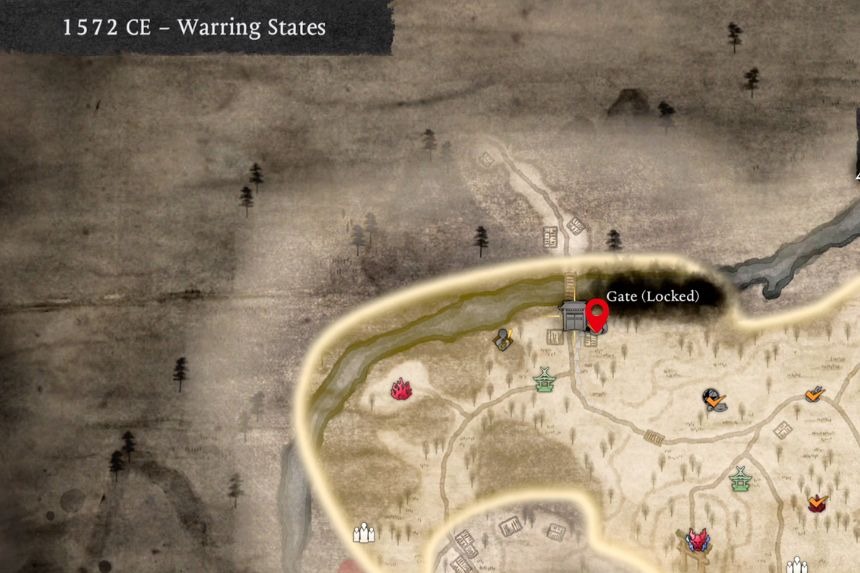
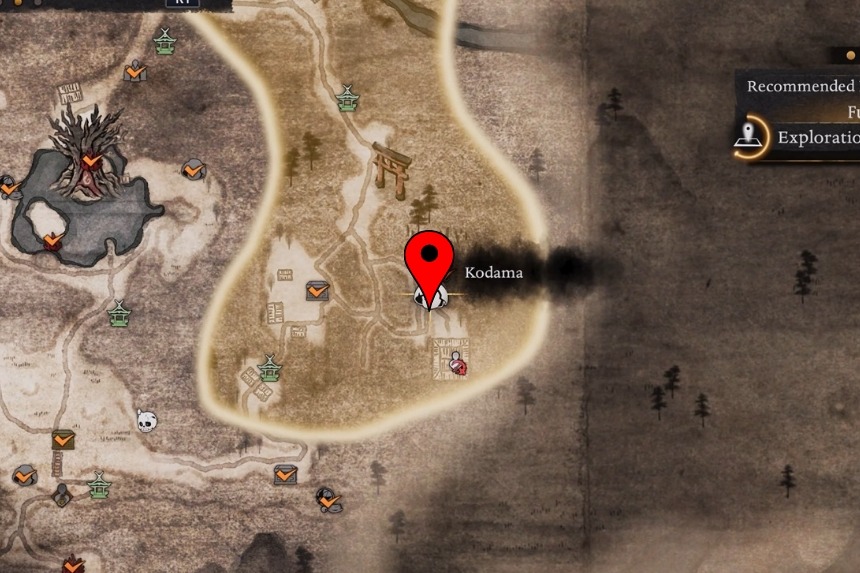
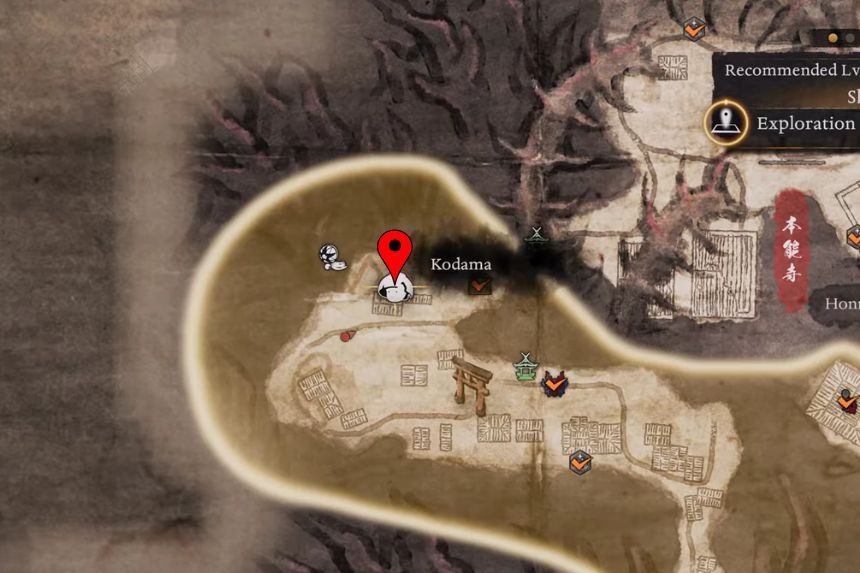
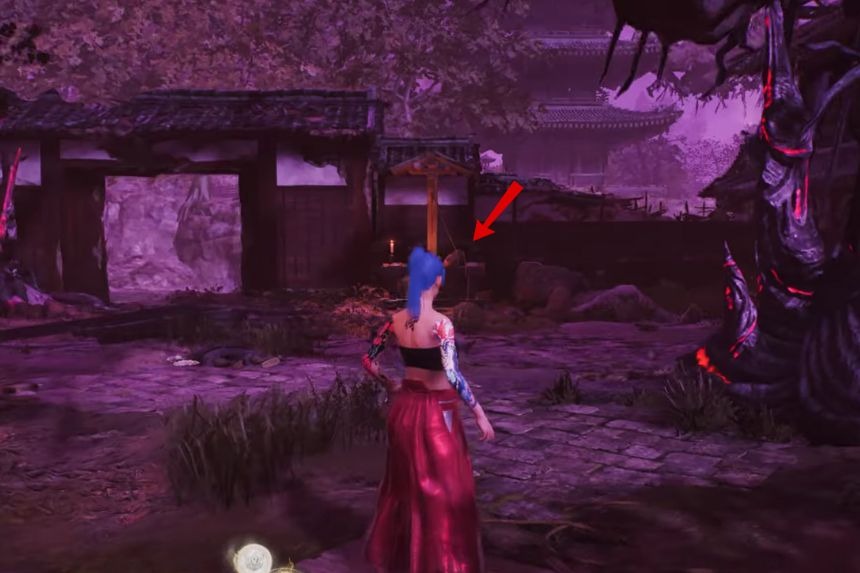
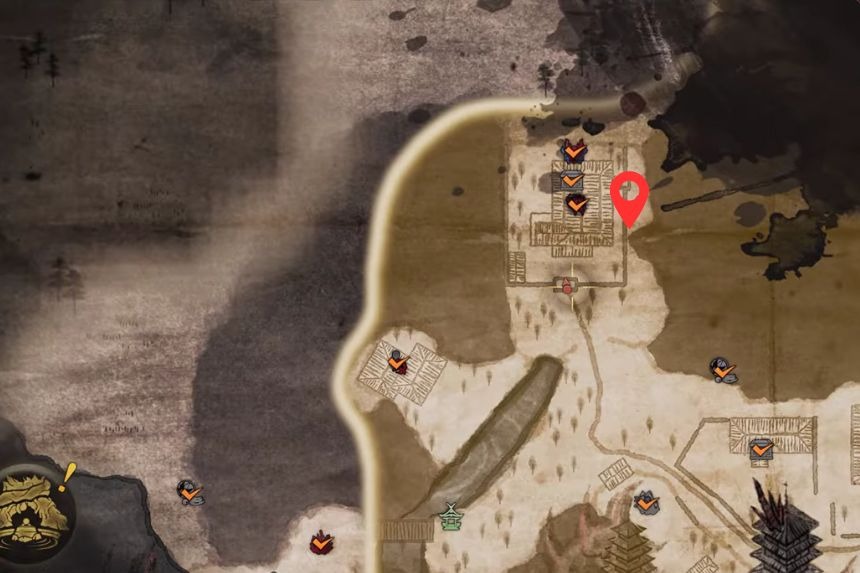
This Kodama is found in the Northern part of the Tenryu River area. The Kodama is sitting at a small shrine under a Torii gate.
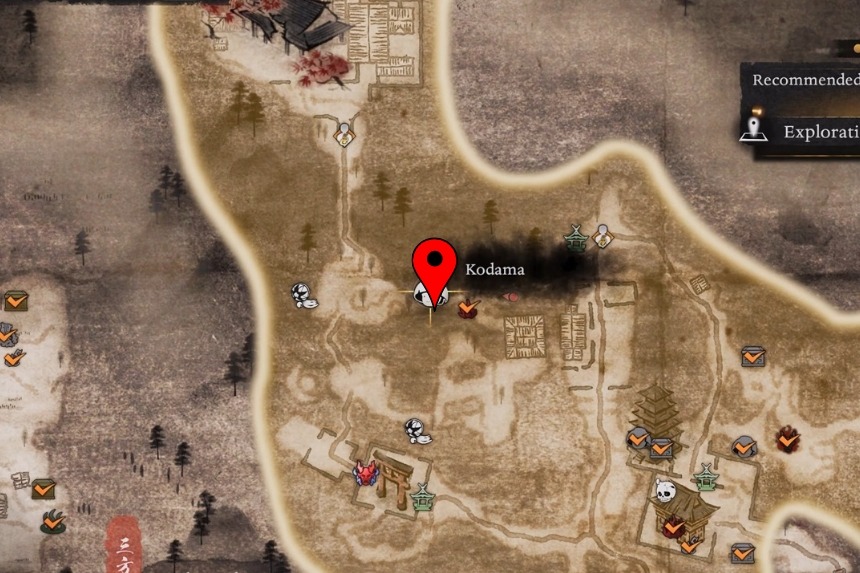
Tenryu River Kodama 3
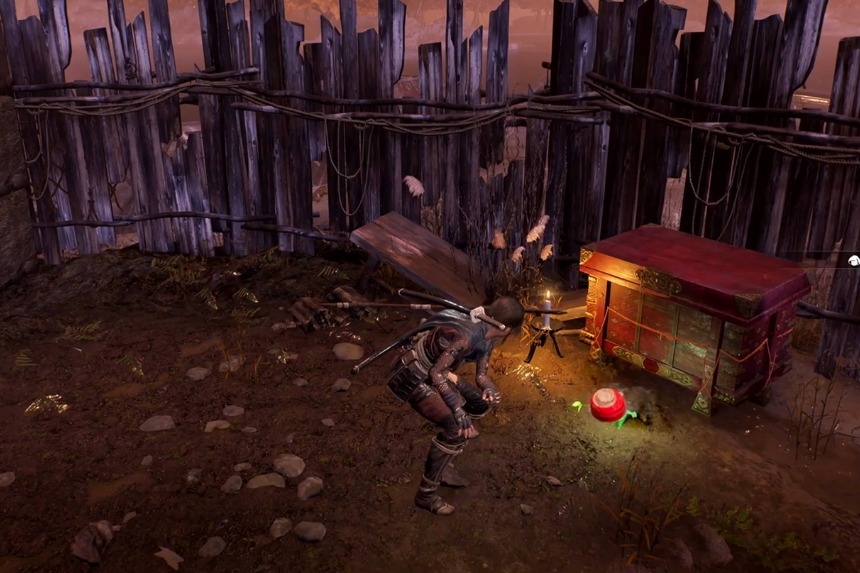
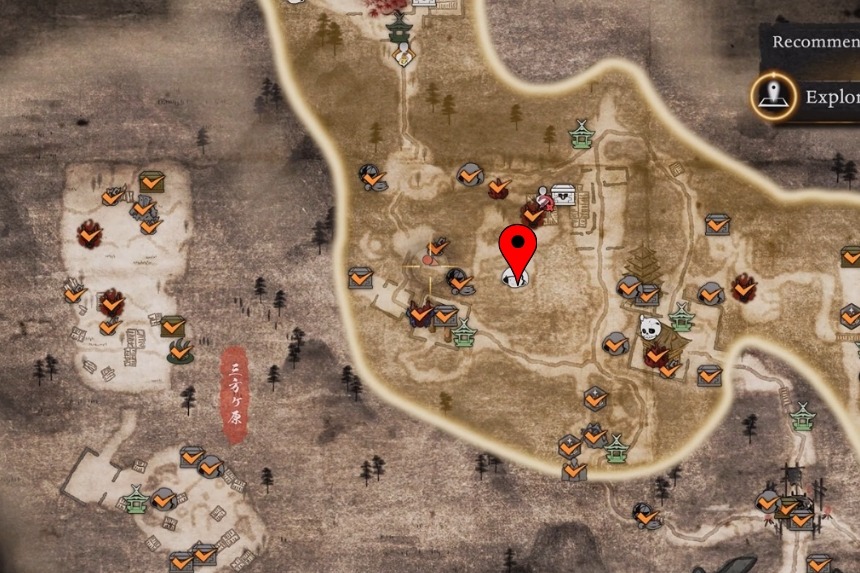
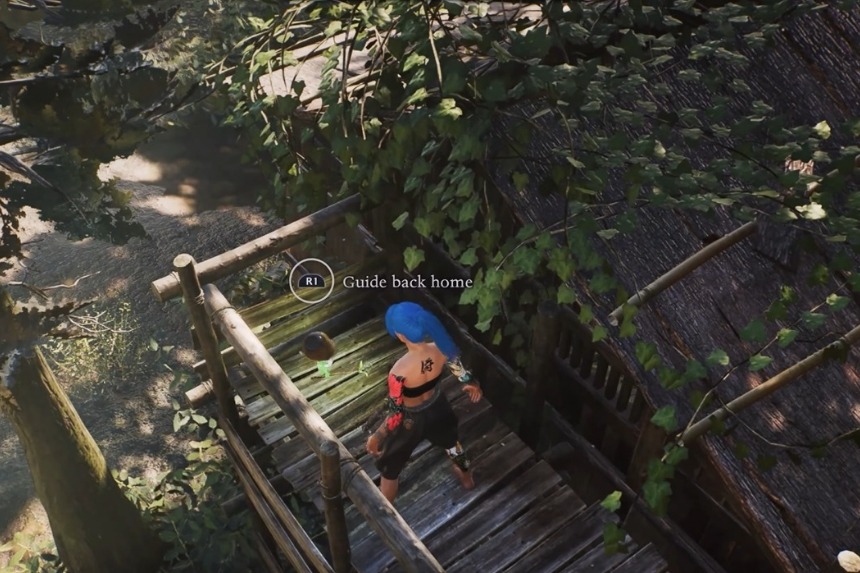
The Kodama is found inside an enemy base located north-east of Hojo Shrine. It is north of the Prospect Hill Shrine. Clear all the enemies in the area, and you will find the Kodama standing right in front of a chest.
Tenryu River Kodama 4
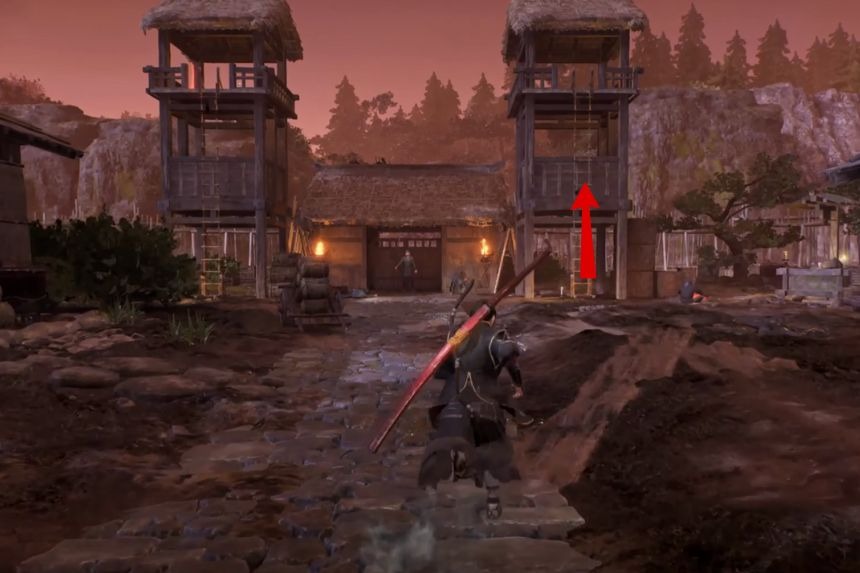
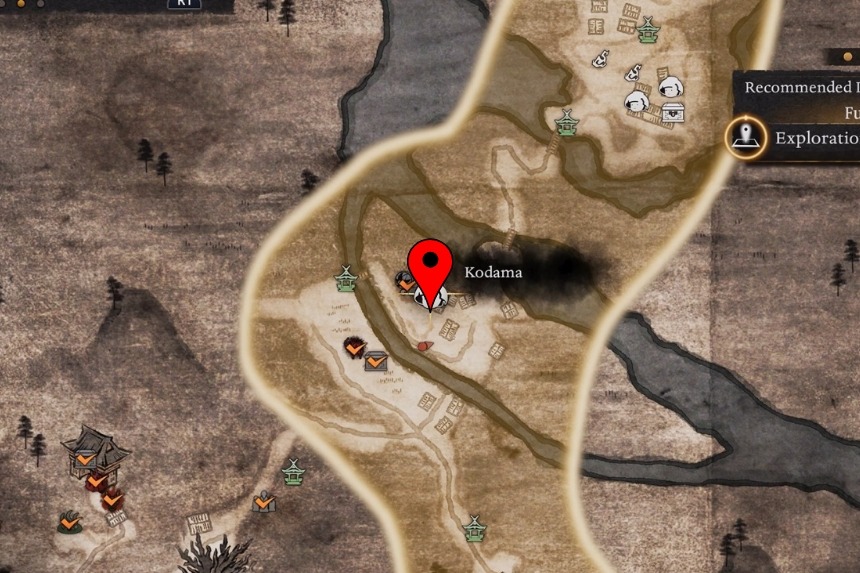
To get this Kodama, head towards the northwest side of the Tenryu River area. The Kodama is found at the top of the watchtower. Climb the watchtower with the ladder. Reach all the way to the top and interact with the Kodama.
Tokaido
Tokaido has small towns and enemy bases that are ruled by dangerous creatures. Most of the area is open fields, scattered trees, and small houses. You can freely explore Tokaido outside the missions without returning to the main hub each time.
Tokaido Kodama 1
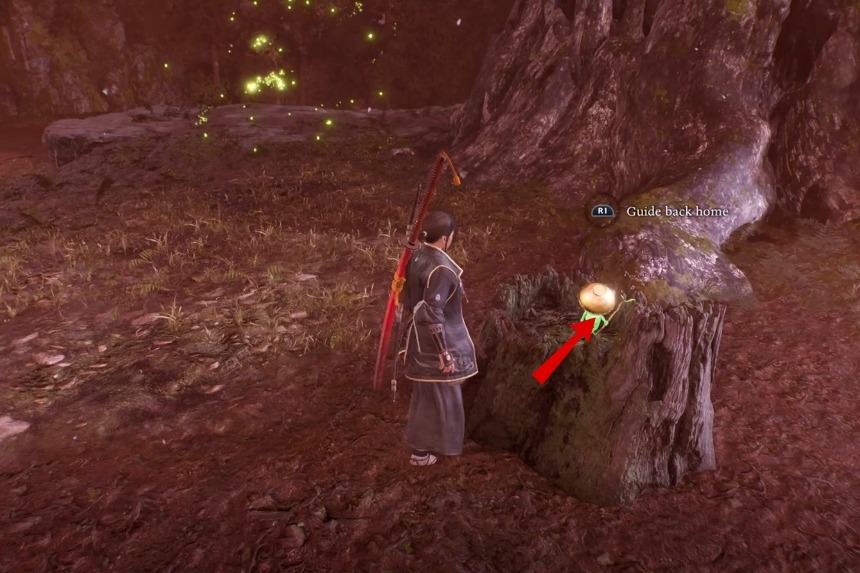
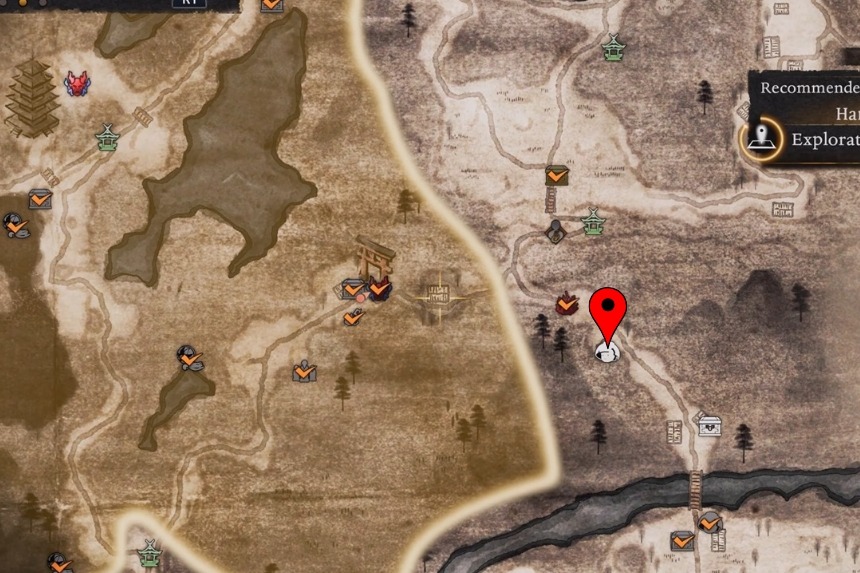
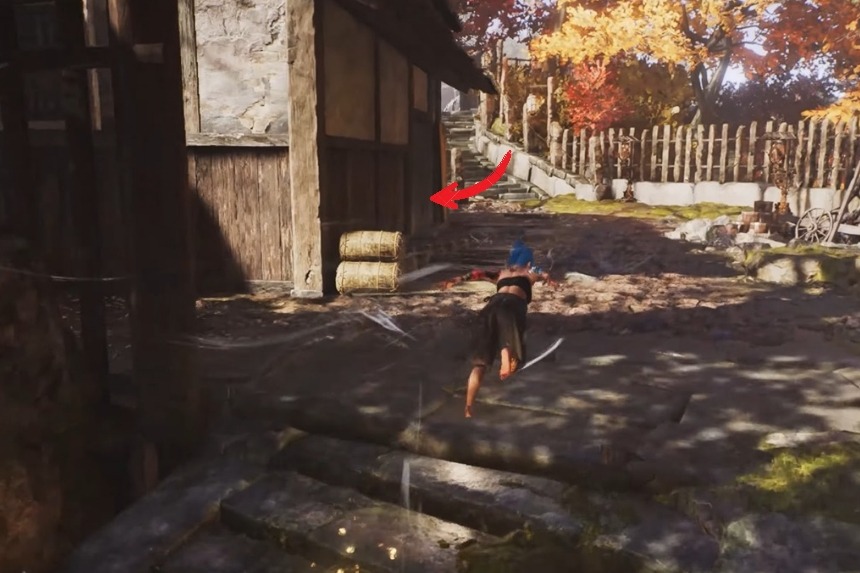
The first Kodama is found on the west side of the Tokaido region. Head southeast of the Tokaido shrine. It is sitting on the tree stump just near the shrine.
Tokaido Kodama 2
Head to the southern part of the Tokaido region. This Kodama is found sitting on a rock in the middle of a pond.
Tokaido Kodama 3
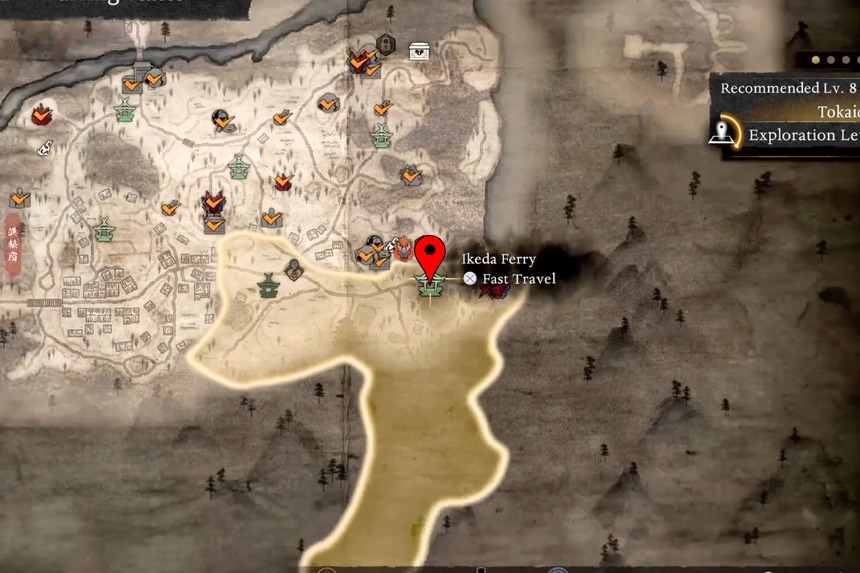
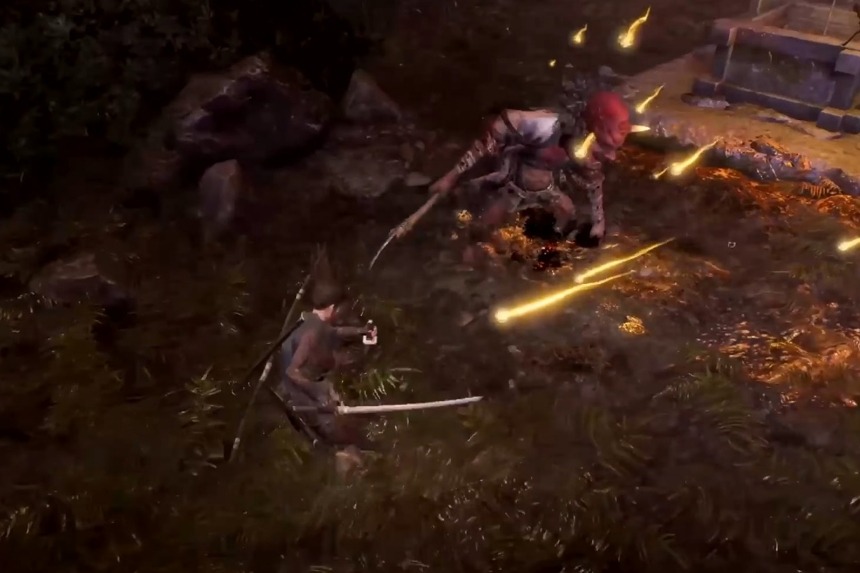
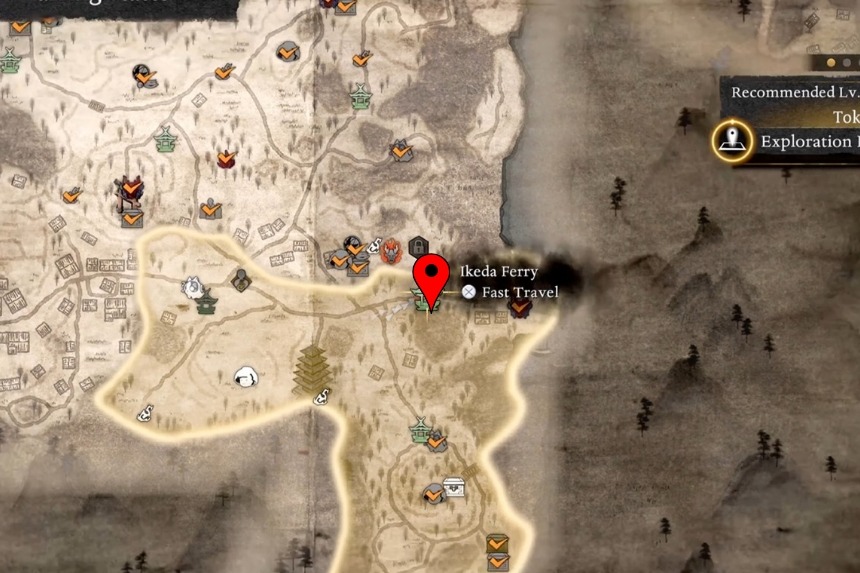
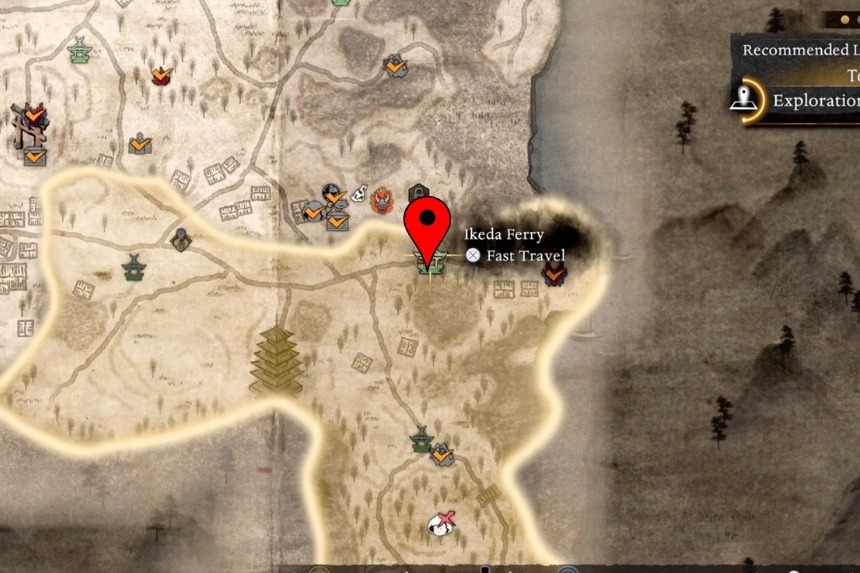
Go inside the enemy base in the northeast of the Tokaido region. You will find the Kodama just east of the Ikeda Ferry Shrine. Once the base is cleared, the Kodama will be available, and it will start guiding you home.
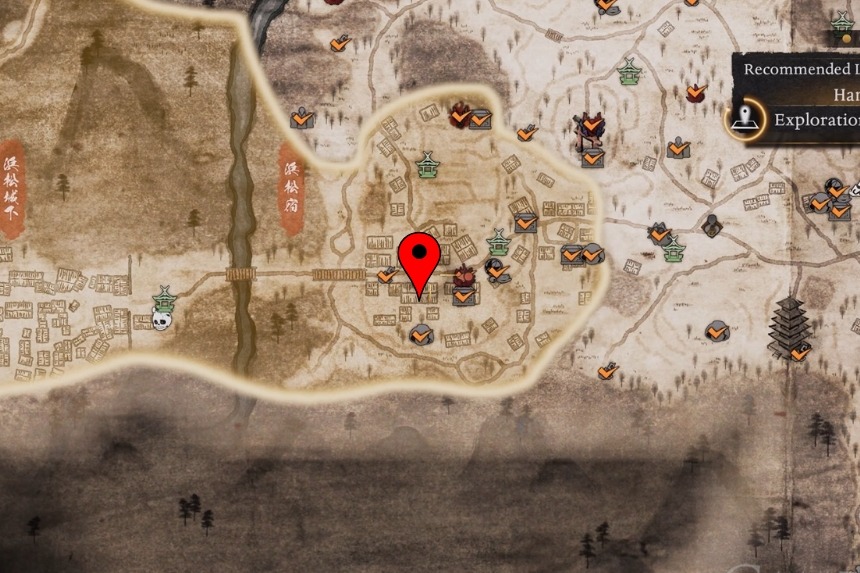
Hamamatsu
Hamamatsu is a town in the eastern part of the Warring States. It has many houses and farms spread across different areas. The residents have left the place so the town was destroyed by the Yokai and dangerous Crucible Wraiths. You can reach Hamamatsu from the northern path connected to the Tenryu River or through the southern gate along the Tokaido.
Hamamatsu Kodama 1
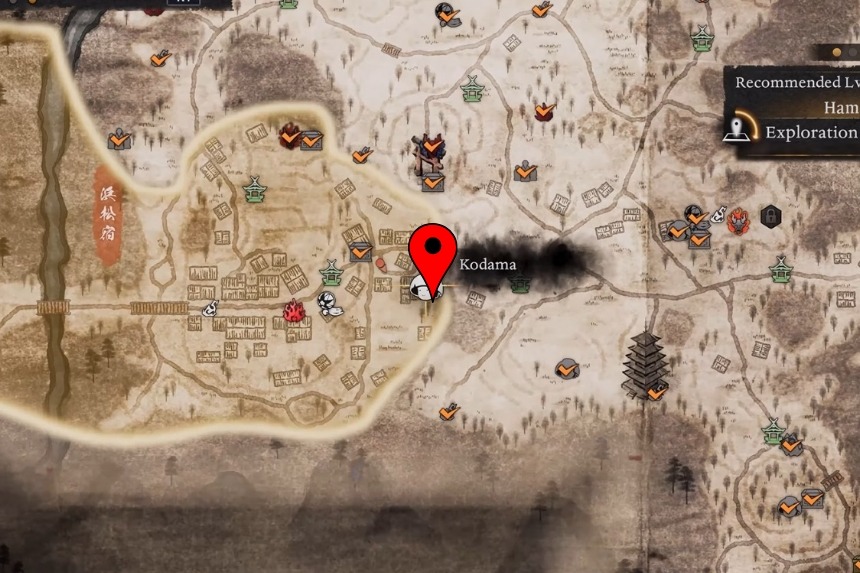
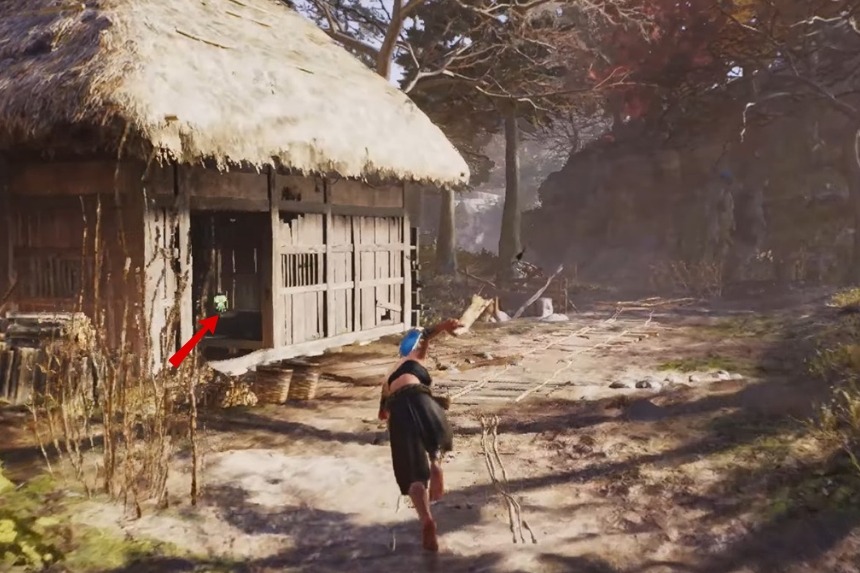
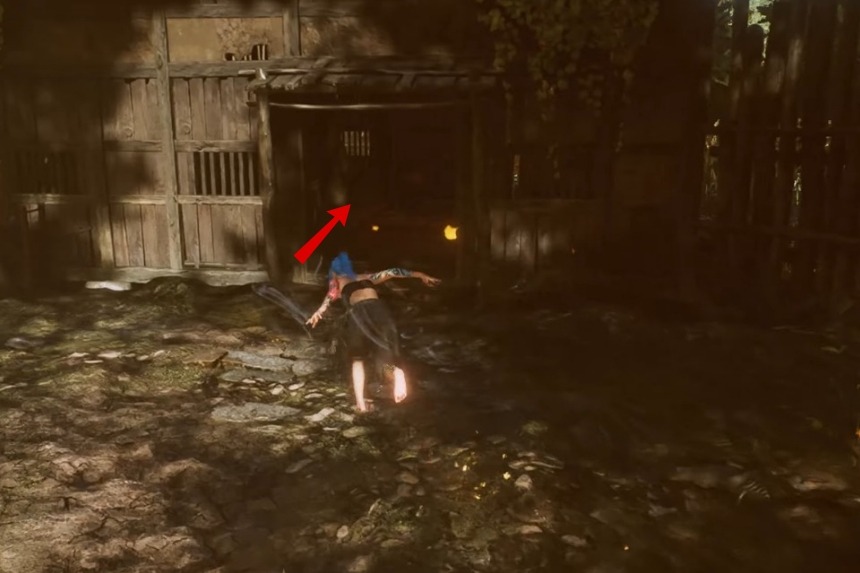
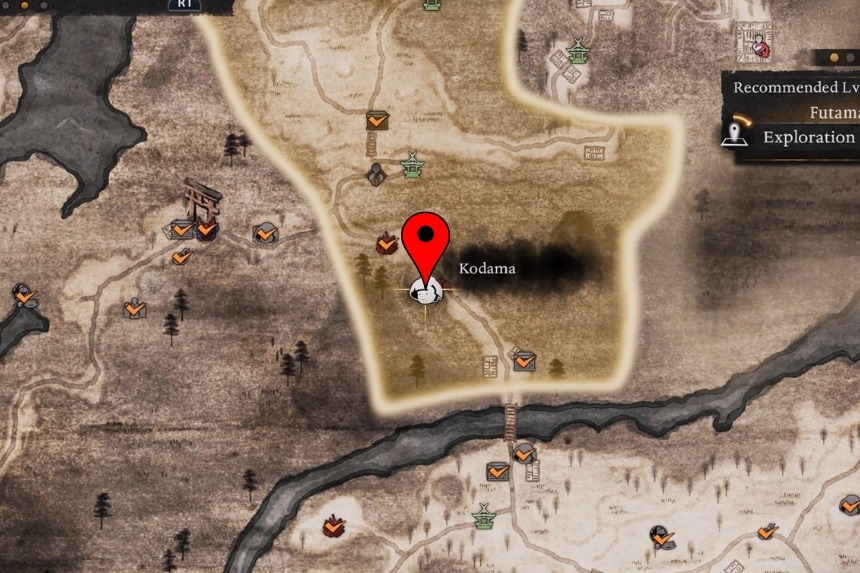
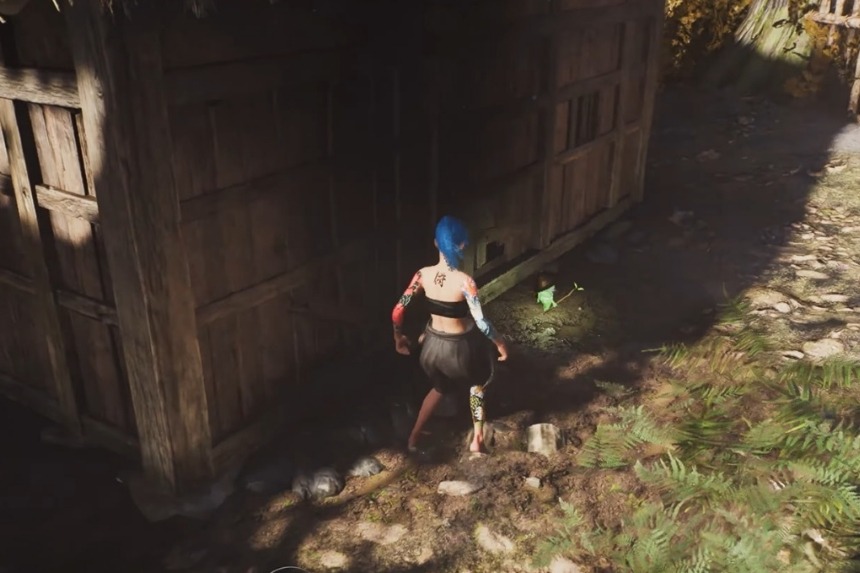
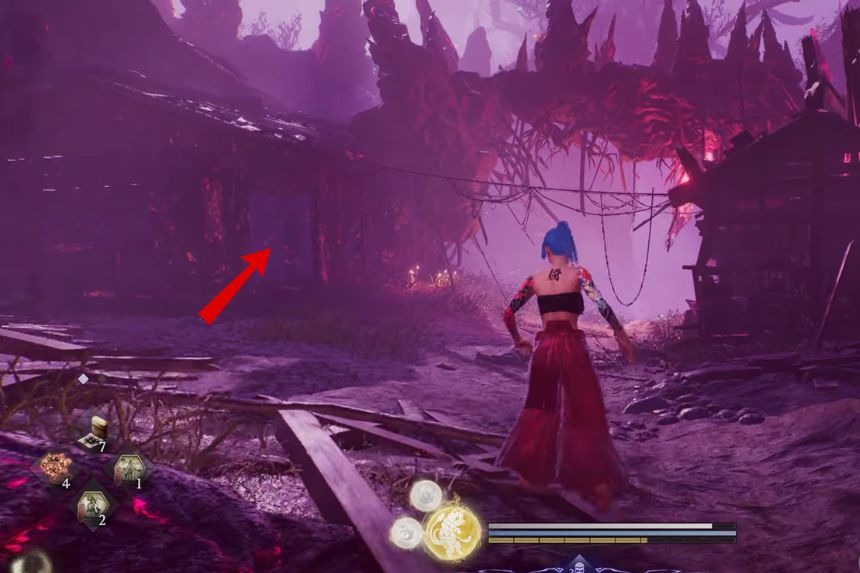
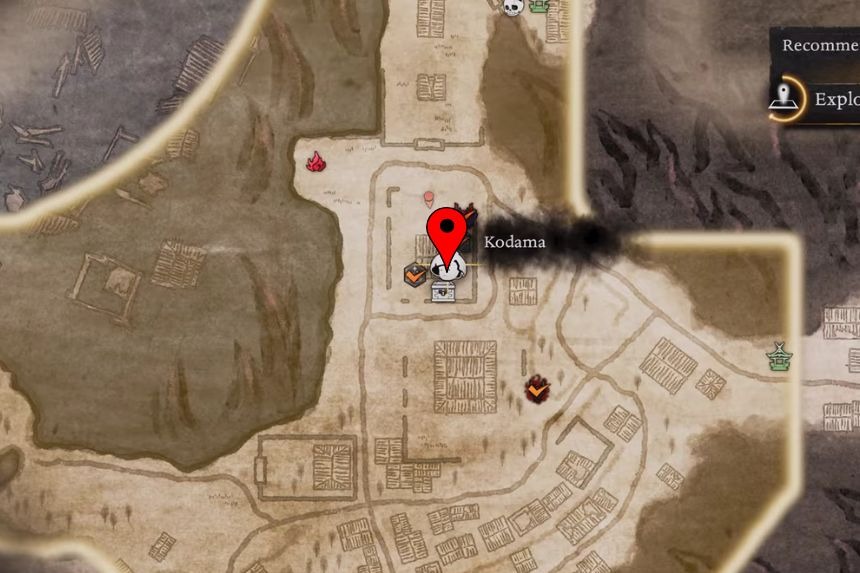
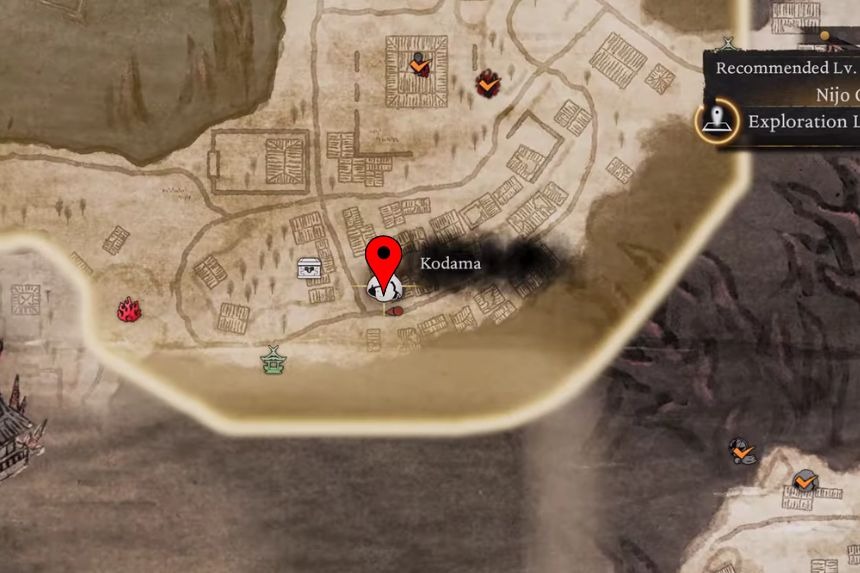
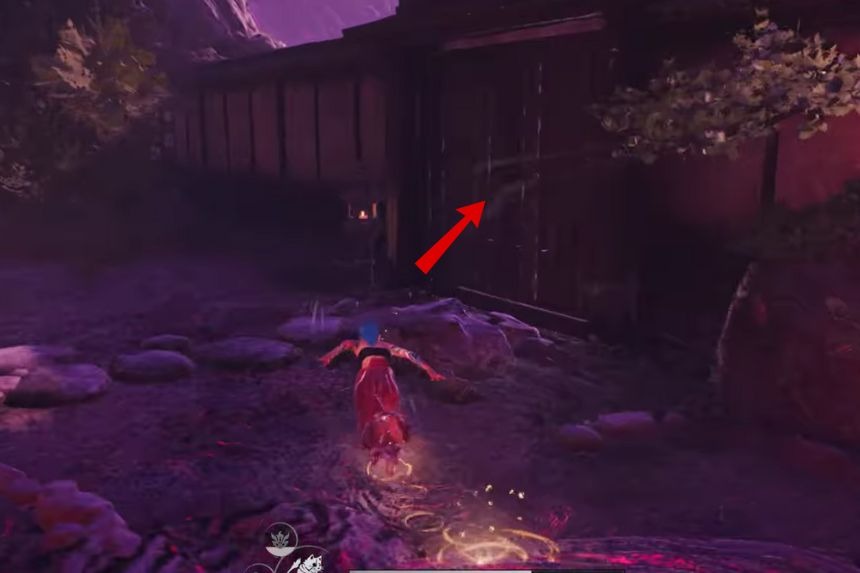
This Kodama is found inside a house located east of the shrine. To go inside, walk around the house to the west side. Here, you will find an entrance. Enter the house, and on the right side room, you will find the Kodama.
Hamamatsu Kodama 2
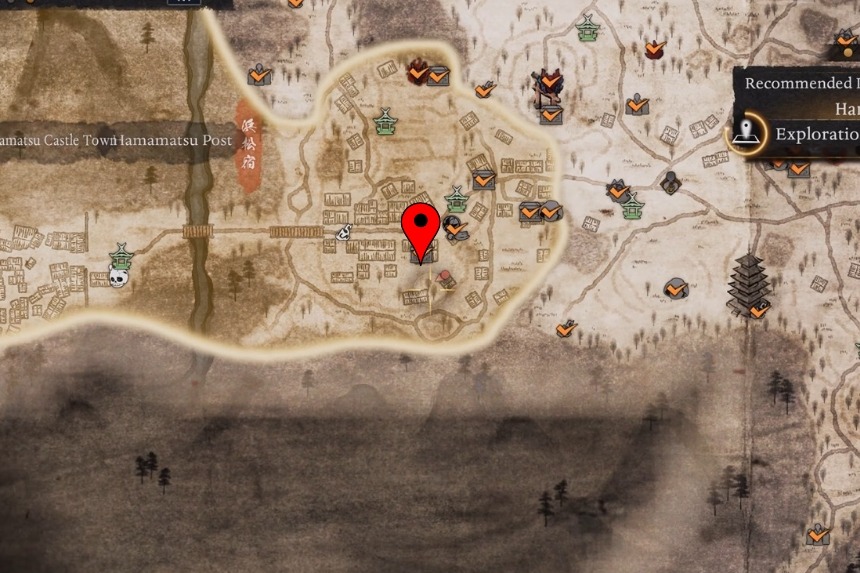

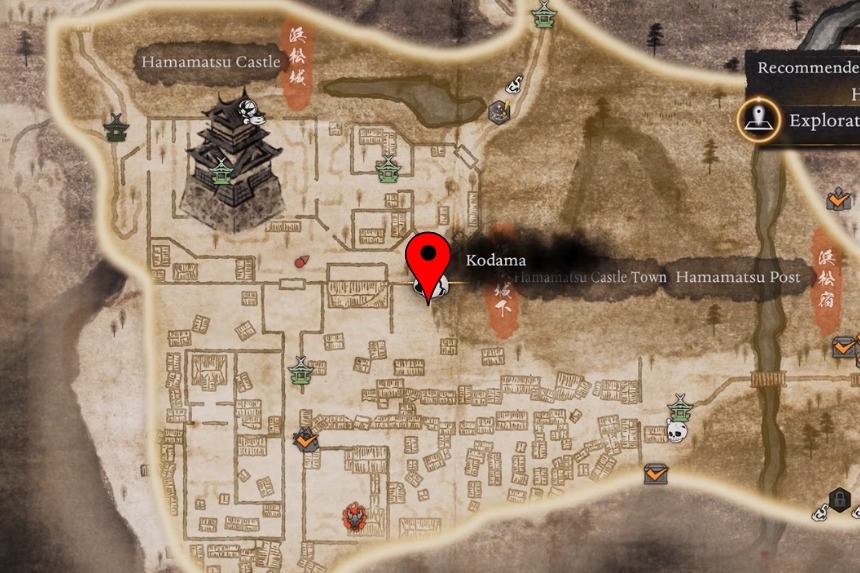
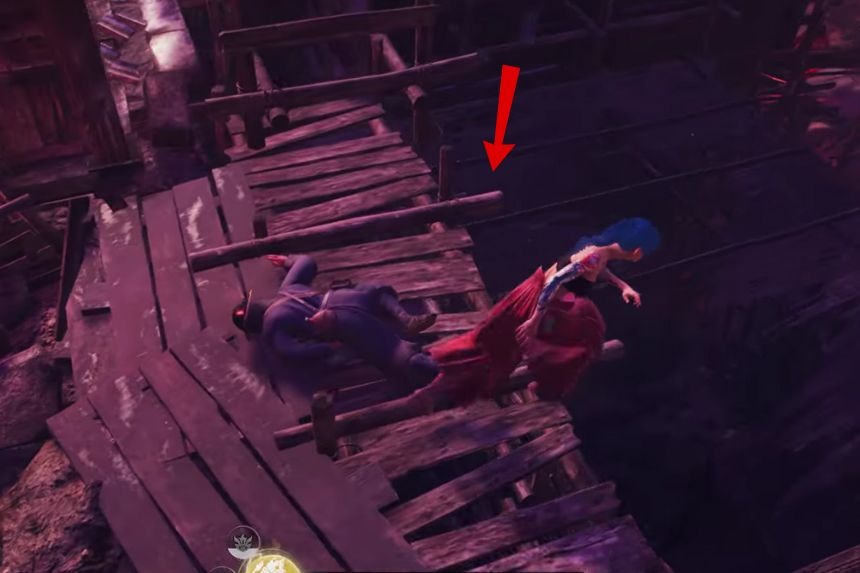
This Kodama is trapped inside a well behind a house. The house is in the southwest of the shrine. Go to the well and hit the stone inside it to free Kodama.
Hamamatsu Kodama 3
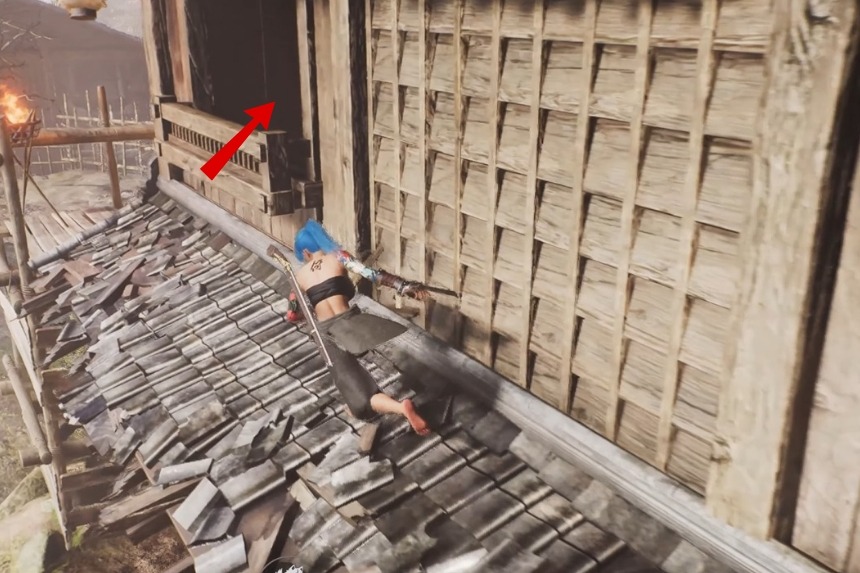
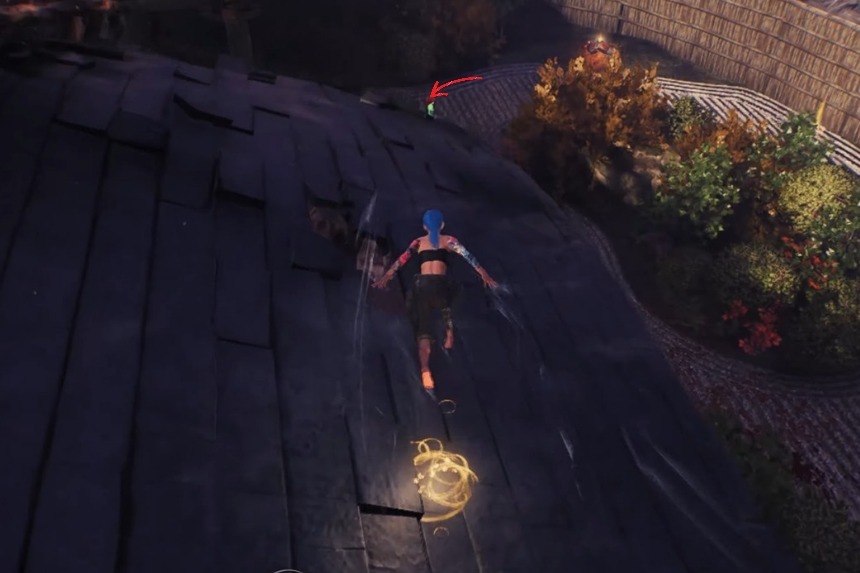
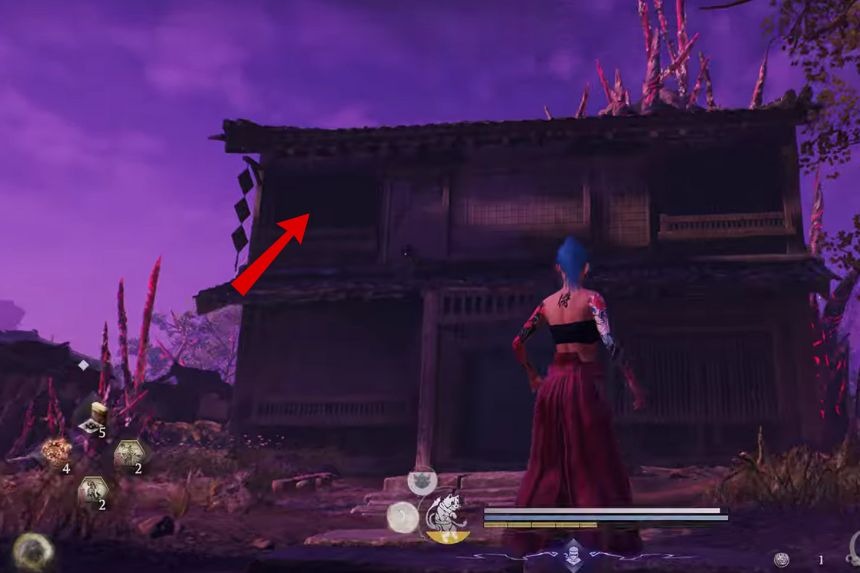
You will find this Kodama sitting on the roof of a house located towards the west of the shrine. Look around for a nearby ladder and climb it to reach the roof. Once you are there, interact with it.
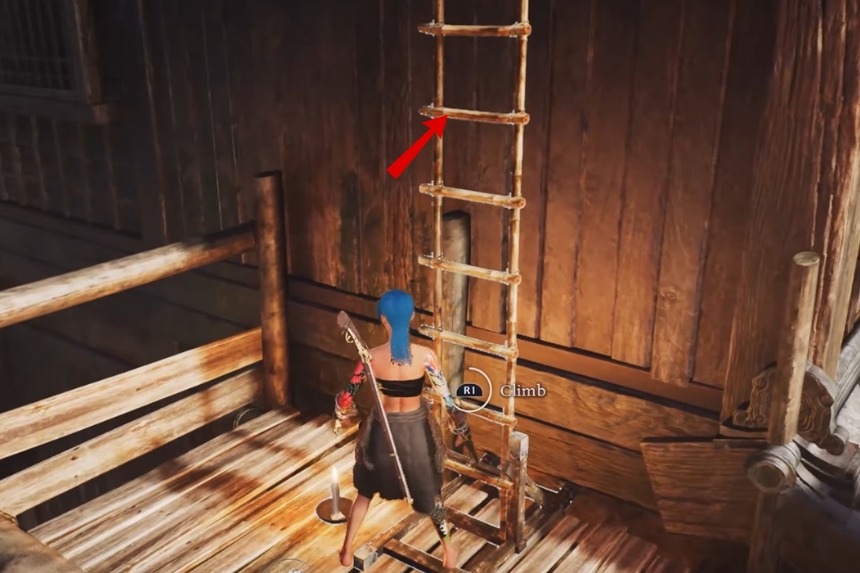
Hamamatsu Kodama 4
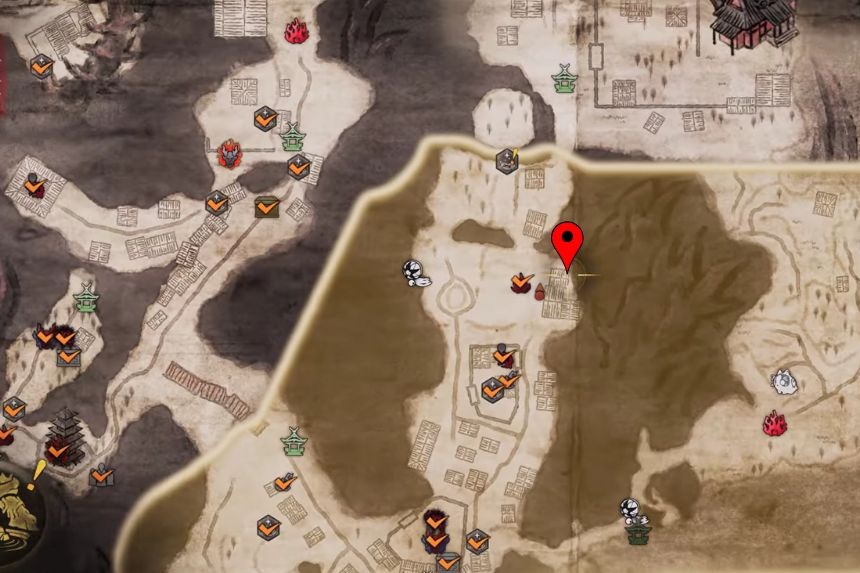
This Kodama is located north of the Hamamatsu Gate Shrine. Look for the tower near the gate and climb to the top of it. The Kodama is sitting above the haystacks.
Maisaka
Maisaka is a region in Nioh 3 that has lots of dangerous enemies. The place is destroyed by the powerful Yokai creatures, and very few people still live there.
Maisaka Kodama 1
Head inside the small hut, located in the Water Mill. Inside the hut, you will find the Kodama. Before you interact with it, defeat the enemies guarding the area.
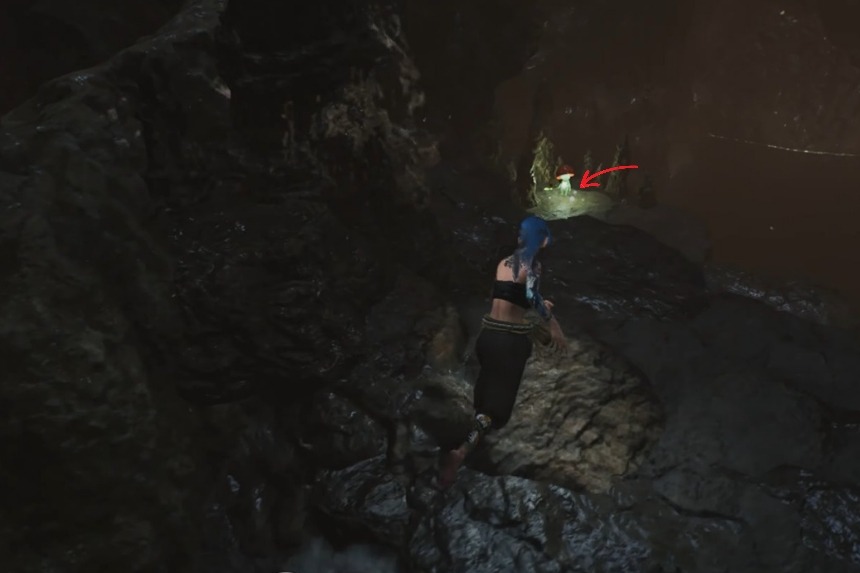
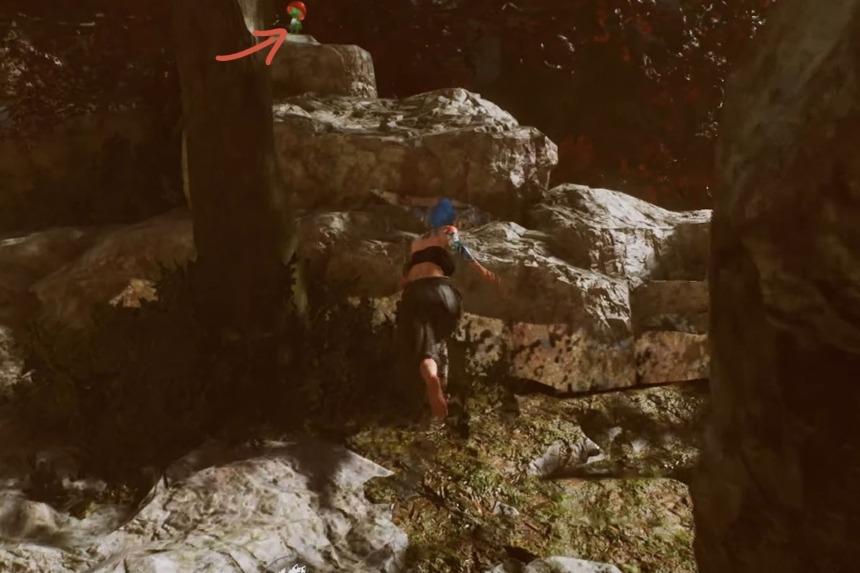
Maisaka Kodama 2
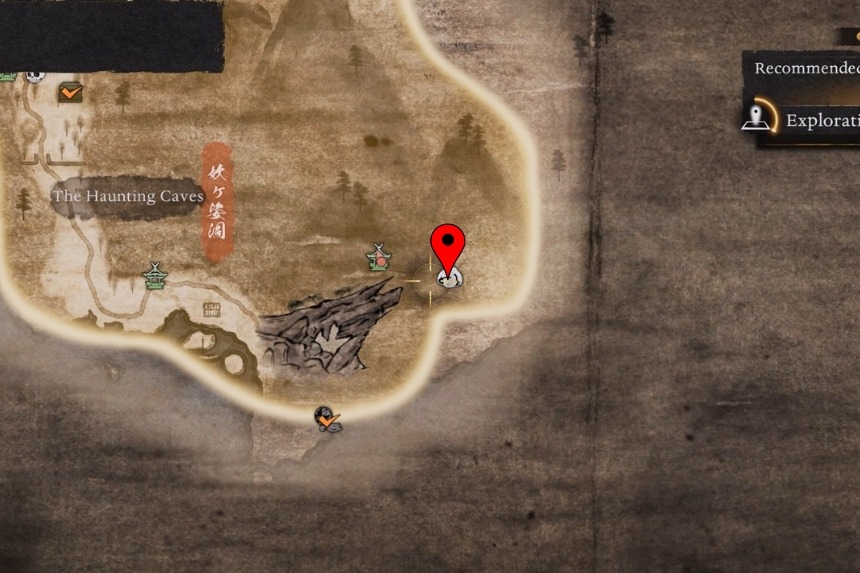

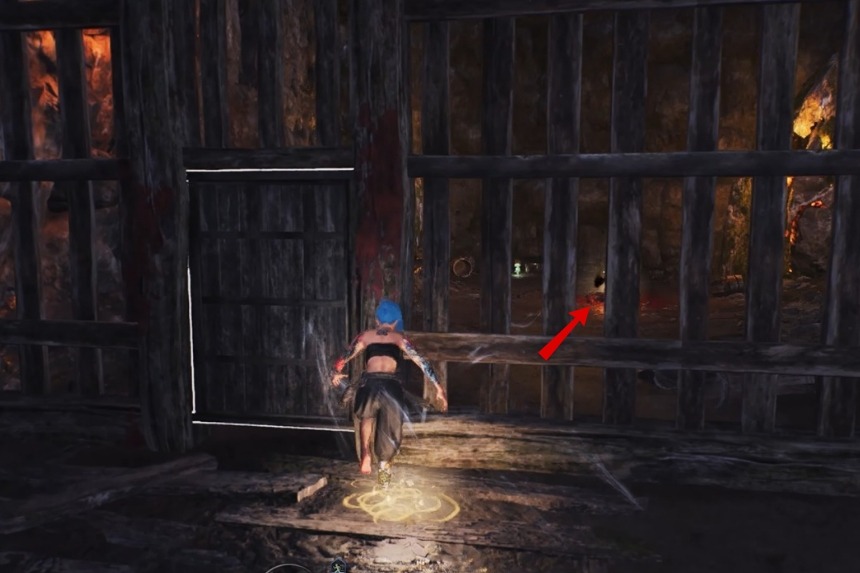
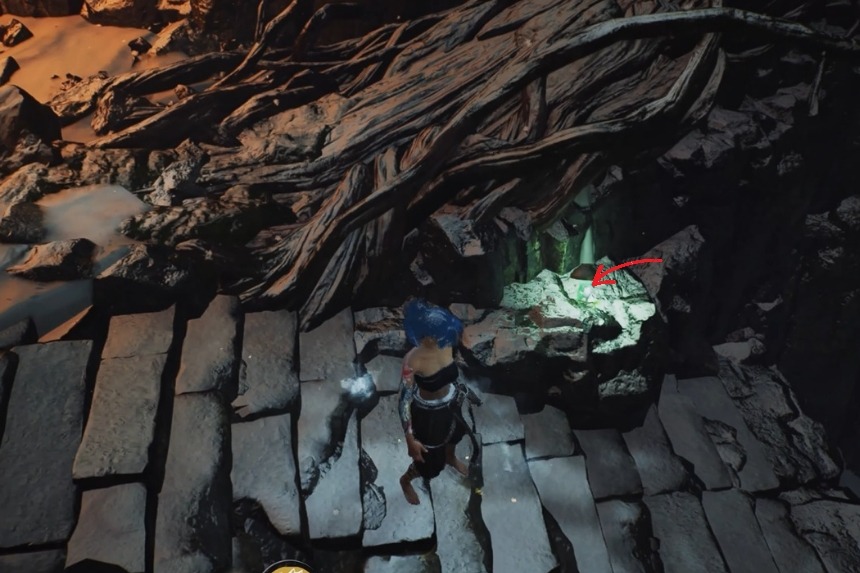
The second Kodama of Maisaka is located inside the Haunted Caves. Get past the Chamber of Enlightenment Shrine. Then move forward and crouch under a rock. From there, jump to the right and you will find the Kodama above you.
Maisaka Kodama 3


Go inside the Haunted Caves. Follow the path inside the cave till you reach an area where you can climb up. When you reach the top, turn left and follow the path to find the Kodama.
Maisaka Kodama 4
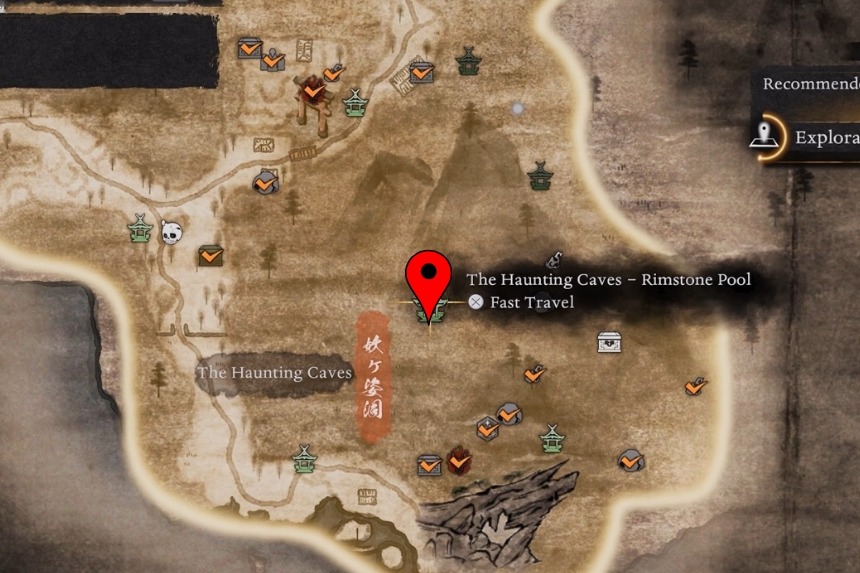
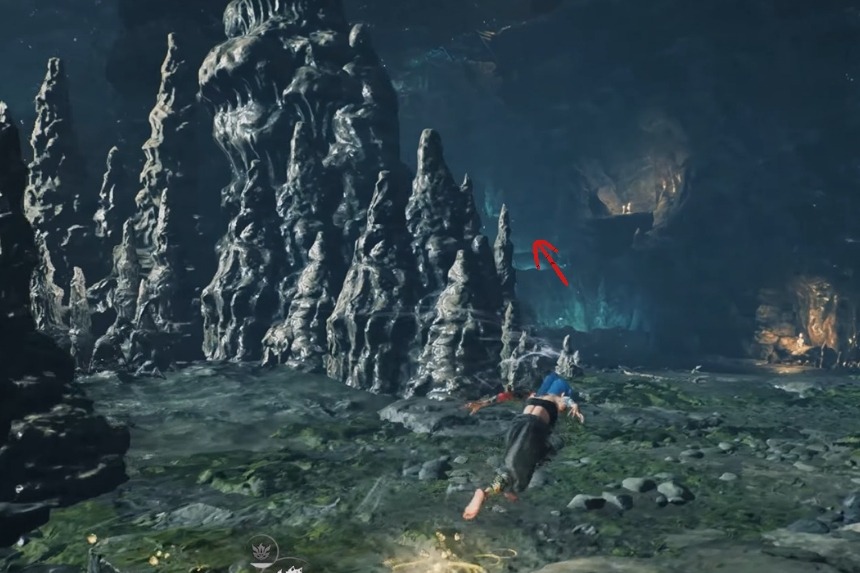
Go inside the Haunted Caves once again. Get past the Rimstone Pool Shrine. Go towards the right side of the caves, and you will find the Kodama here.
Lake Sanaru
Lake Sanaru is filled with dangerous enemies and Yokai. To travel the area, you need to cross different rivers and lakes to reach different islands. As there are very few people, you need to defeat the enemy bases and the creatures to move forward in the game.
Lake Sanaru Kodama 1
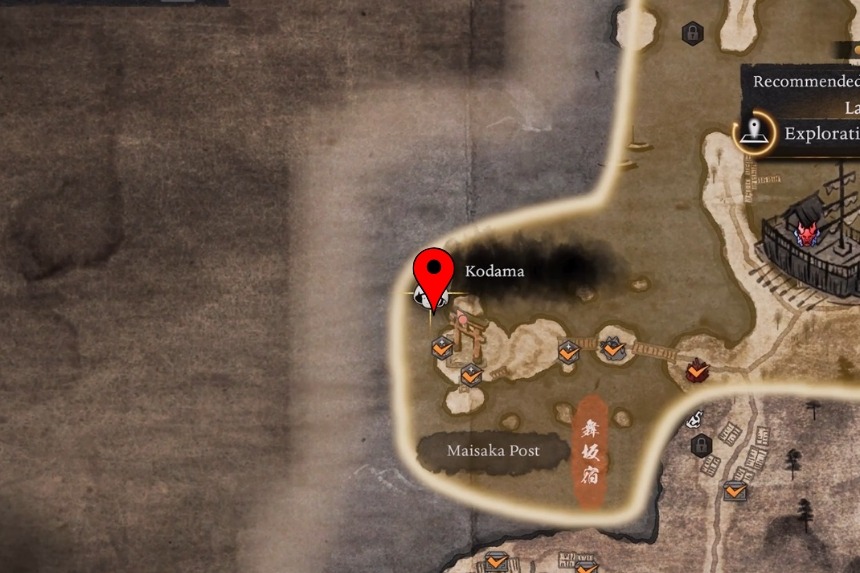
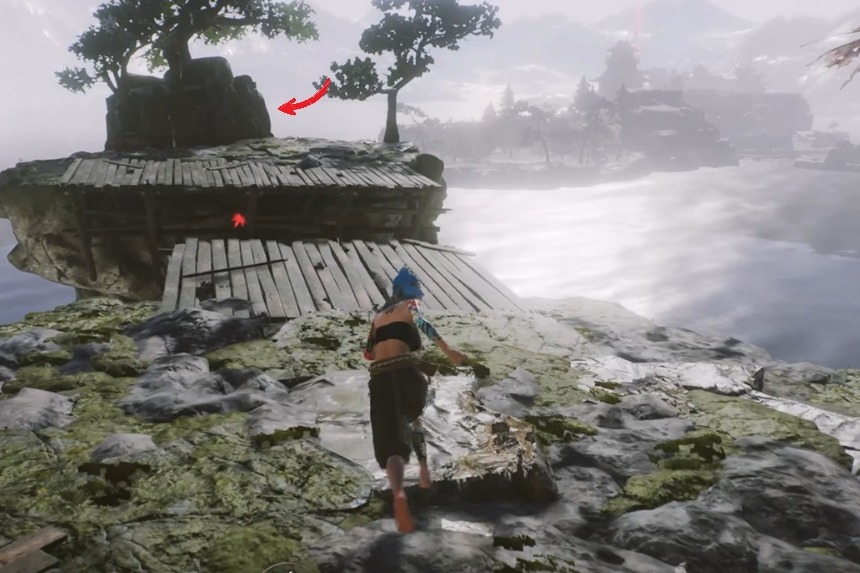
This kodama is found at Maisaka Post. Jump towards the small island. At the end of the island, you will find Kodama. Look behind the rock, and you will see the Kodama just under the tree.
Lake Sanaru Kodama 2 & 3
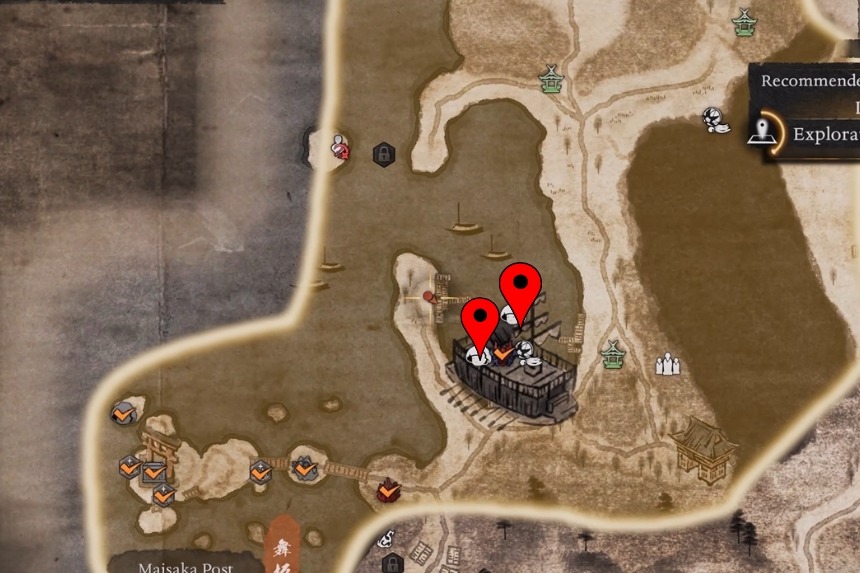
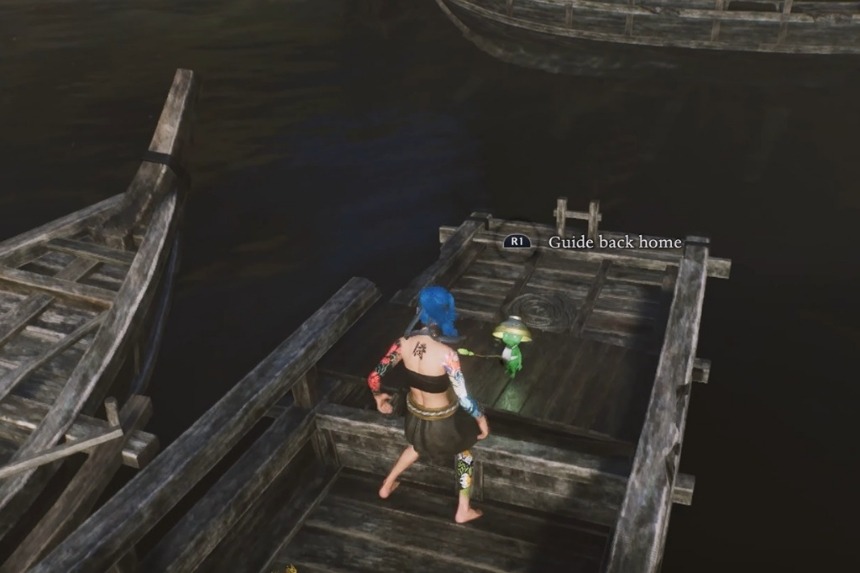
The second Kodama can be found on a small boat. The boat is on the left side of the ship. To reach it, jump across the nearby boats till you reach the boat containing the Kodama.

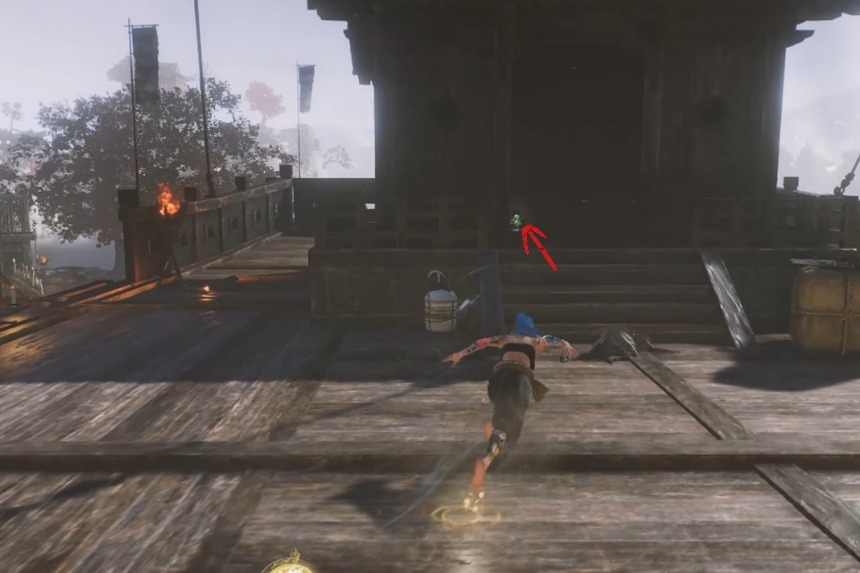
The third Kodama is located on the pirate ship near the back side of the deck. This is an enemy base, so kill all of them and then interact with the Kodama.
Lake Sanaru Kodama 4
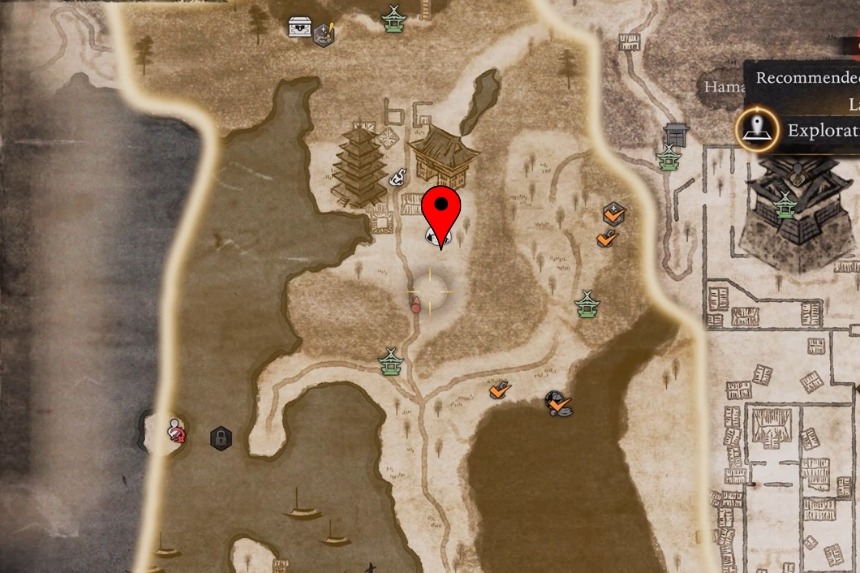
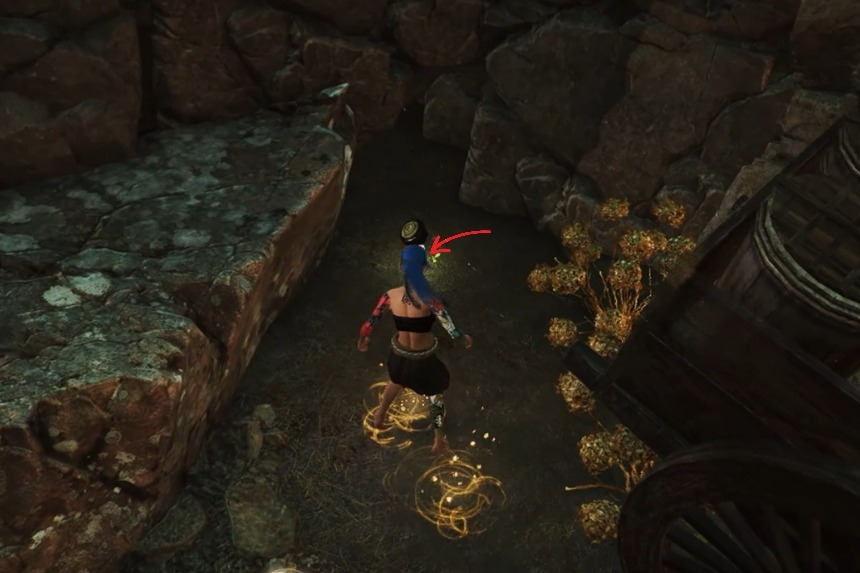
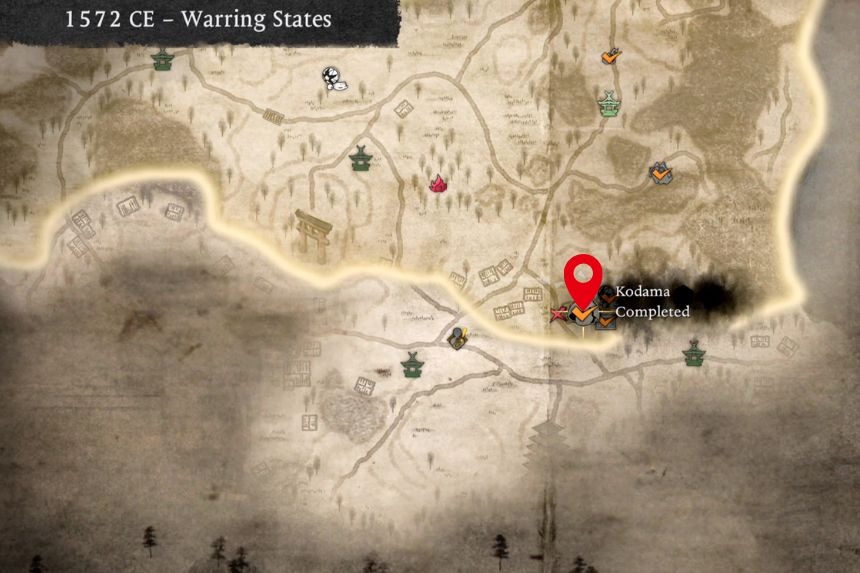
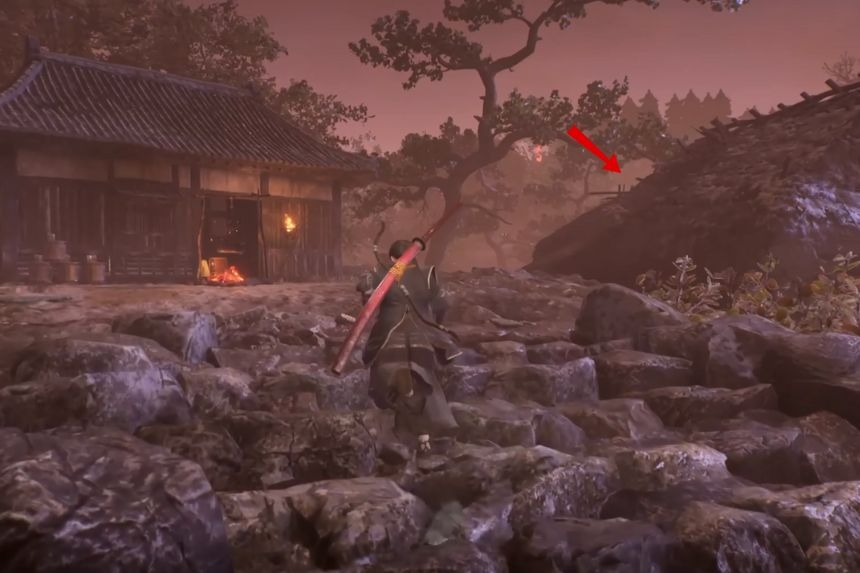
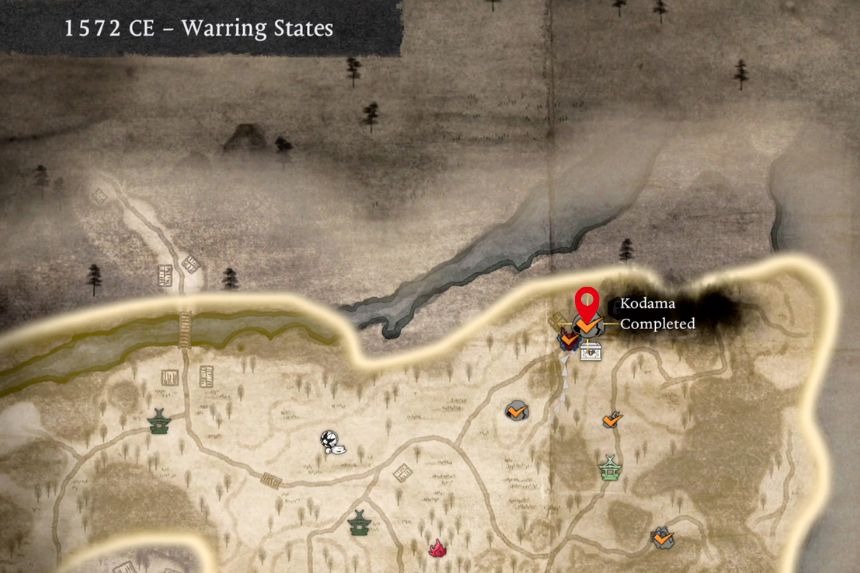
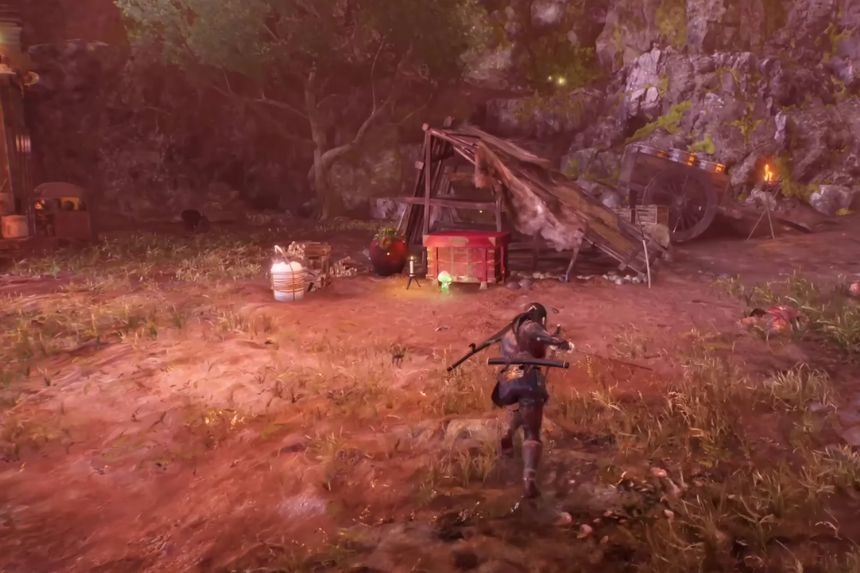
The fourth Kodama is found near Lake Sanaru, north of the shrine. From the shrine, move straight and take the right path. You will find the Kodama near a cart guarded by the enemies.
Mikatagahara
Mikatagahara has a lot of broken houses that you need to cross to reach different areas to complete the quests. The houses were destroyed due to a calamity, and all the people have fled the area. There are different types of enemies here that can deal damage to you if you are not careful.
Mikatagahara Kodama 1
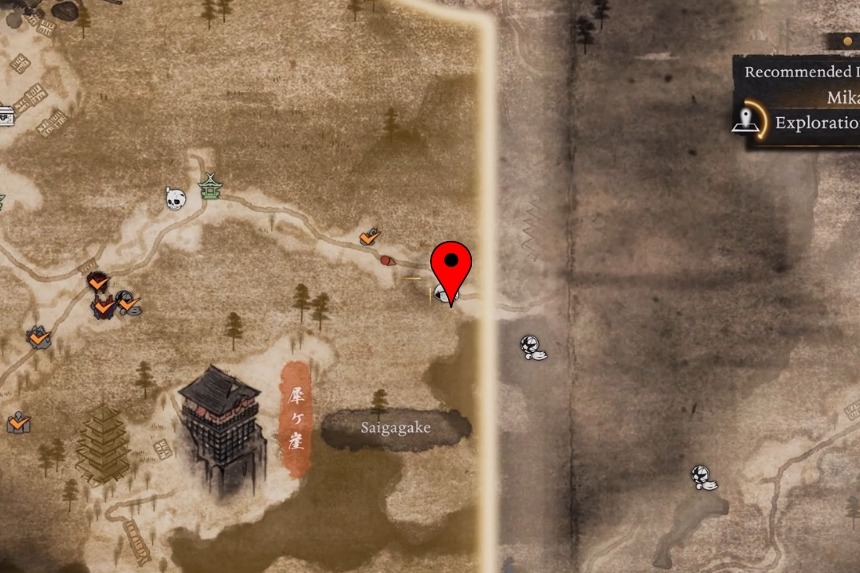
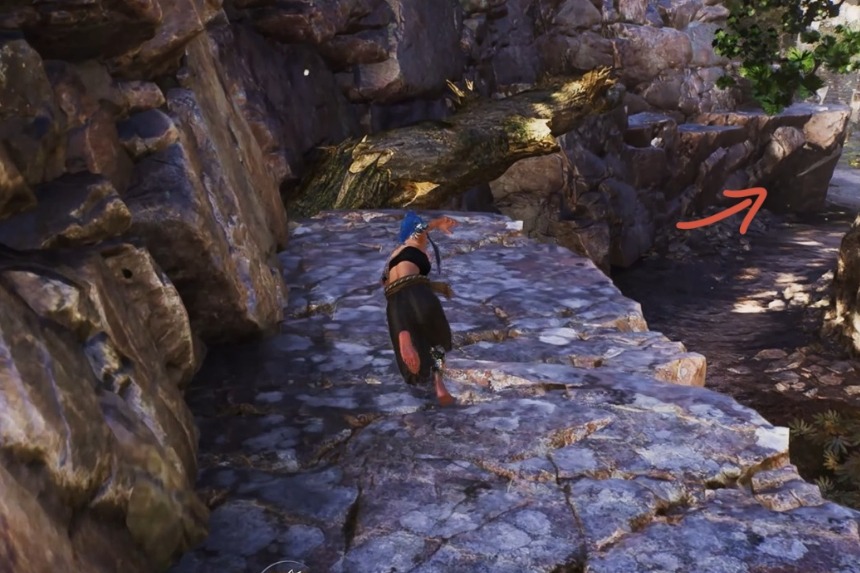
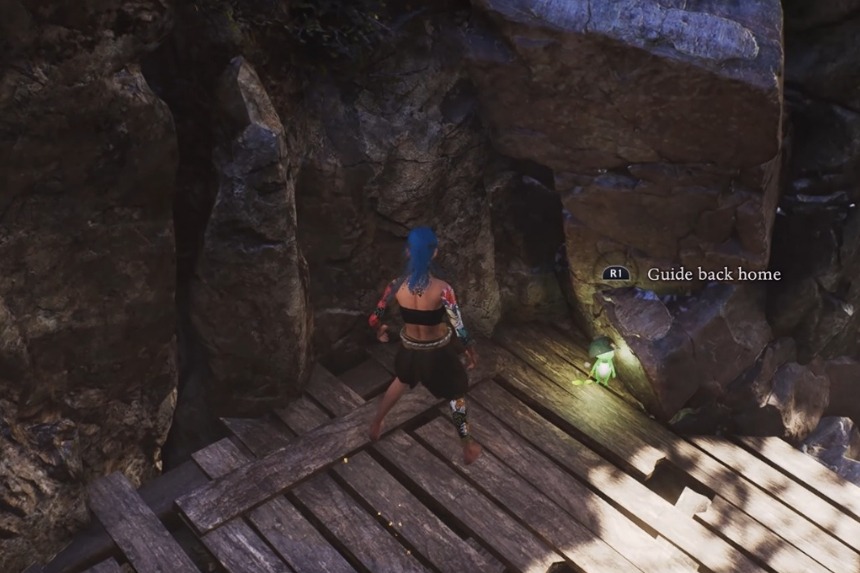
Head towards the north of the shrine. Then climb the rocks on the left side and cross the bridge made of a tree stump. On the right side, there will be a wooden plank platform. Jump to reach the platform. Here, at the corner, you will find the Kodama.
Mikatagahara Kodama 2
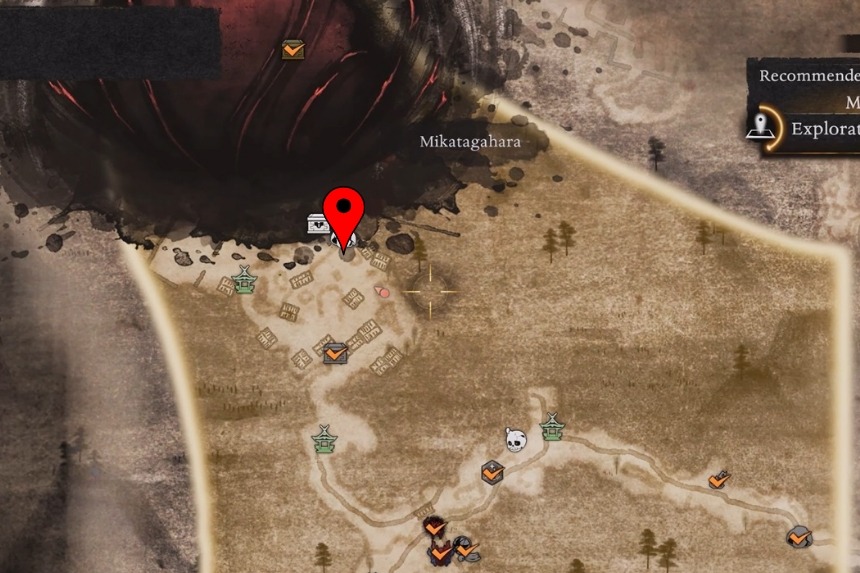
This Kodama is found inside the Kikyo Belltower Fortress. Look for a broken shack, and go through it towards the narrow passage. You will find the Kodama hidden behind it.
Mikatagahara Kodama 3
Go towards the Kikyo Belltower Fortress Shrine and enter the Fortress. Move forward, and on the right side, you will find a few boulders. Climb up the first boulder. At the top of it, you will find the Kodama.
Mikatagahara Kodama 4
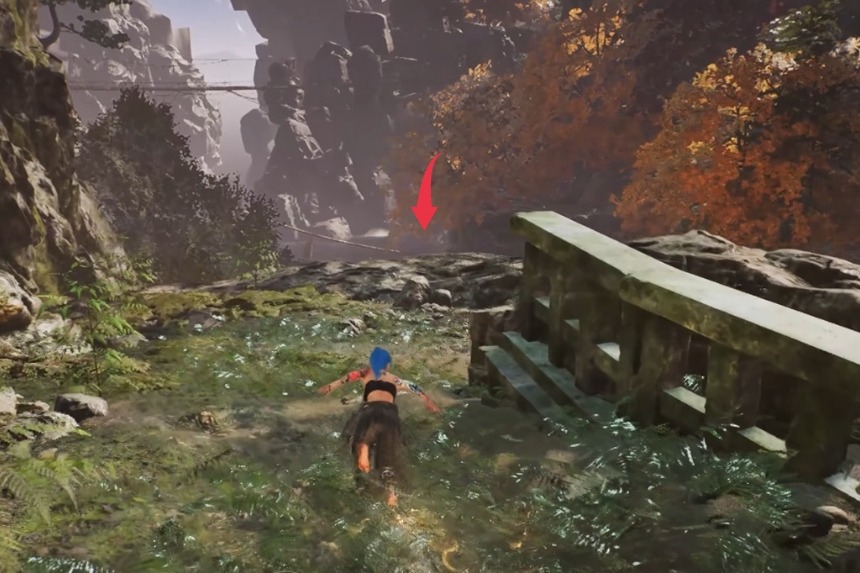
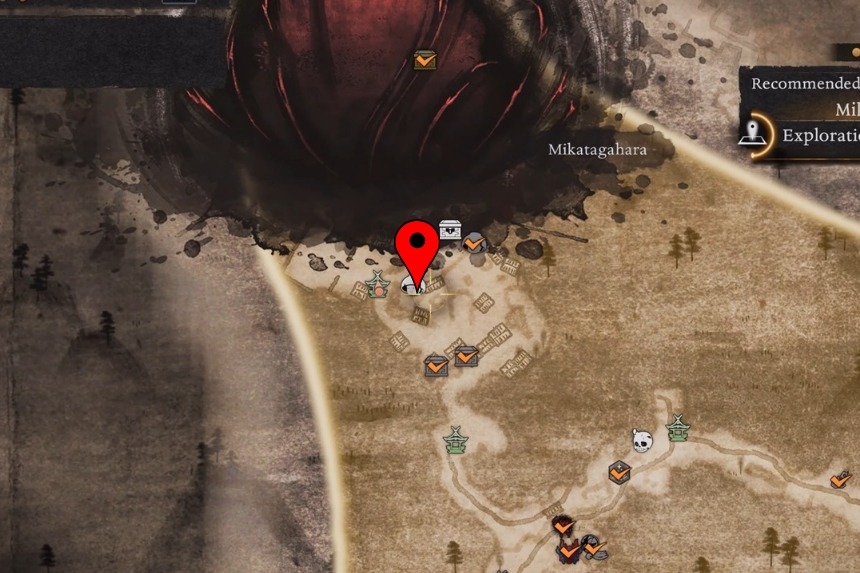
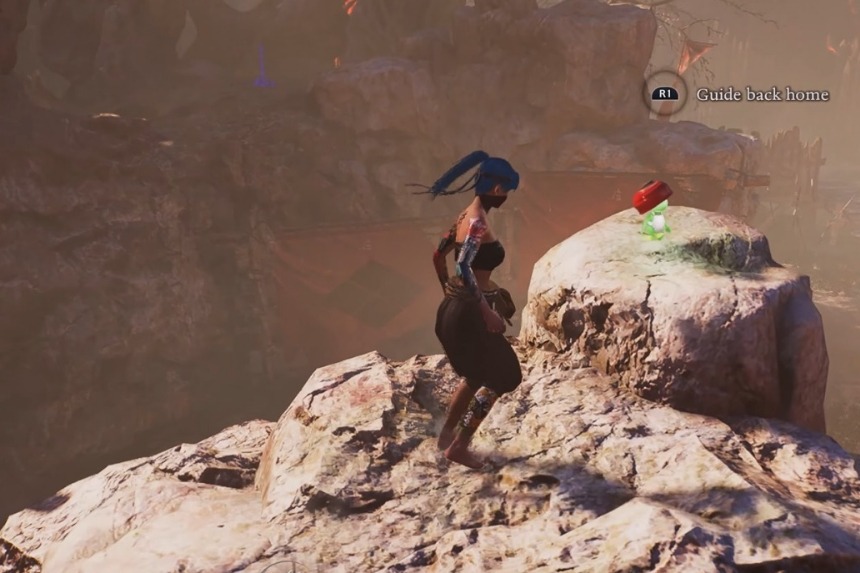
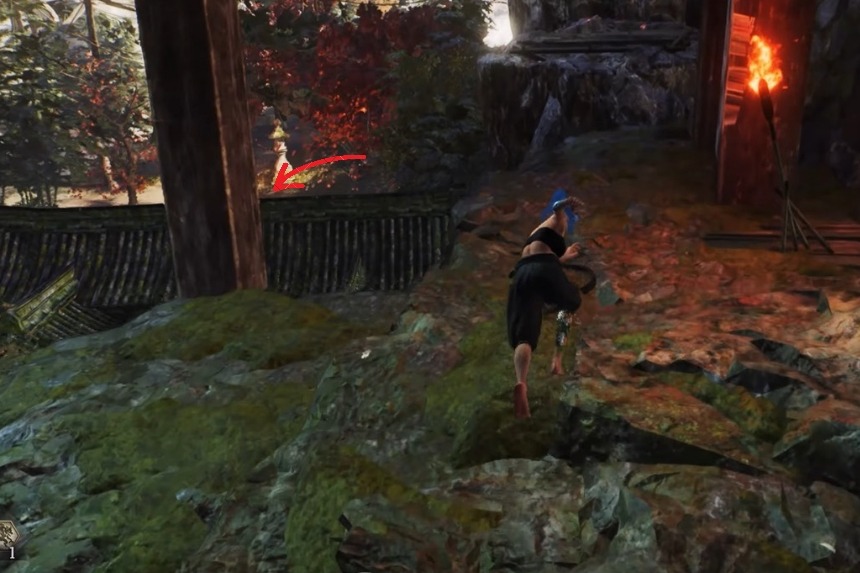
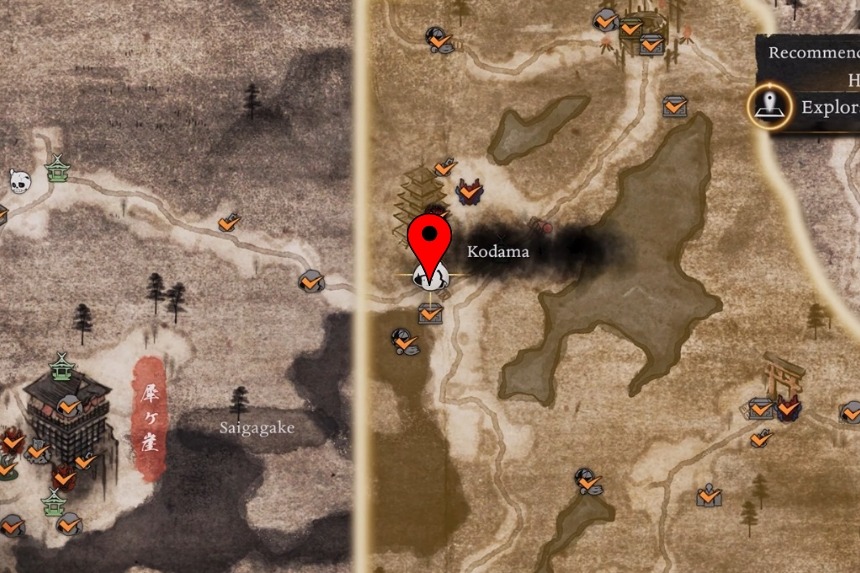
This Kodama is found near the Saigagake Bridge Shrine. From the shrine, go left and drop down towards the rocks below. The Kodama is sitting above one of the rocks.
Mikatagahara Kodama 5
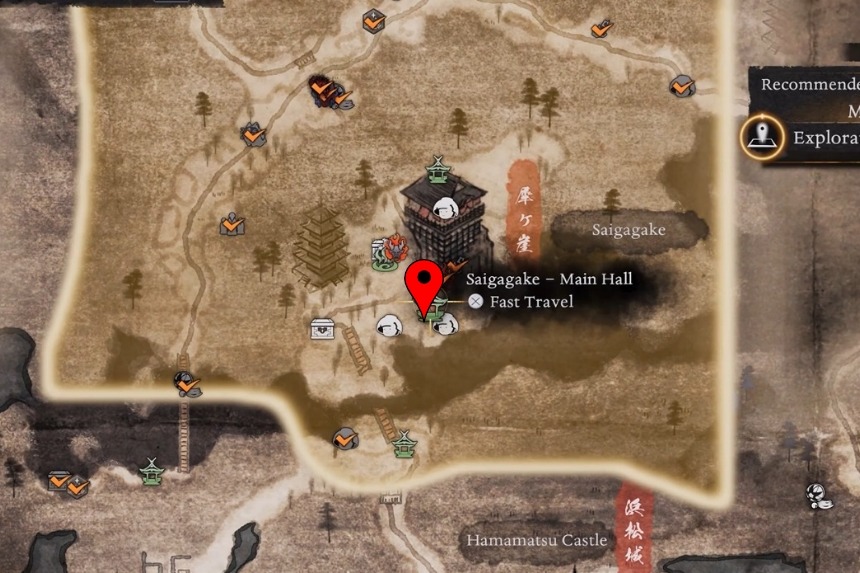
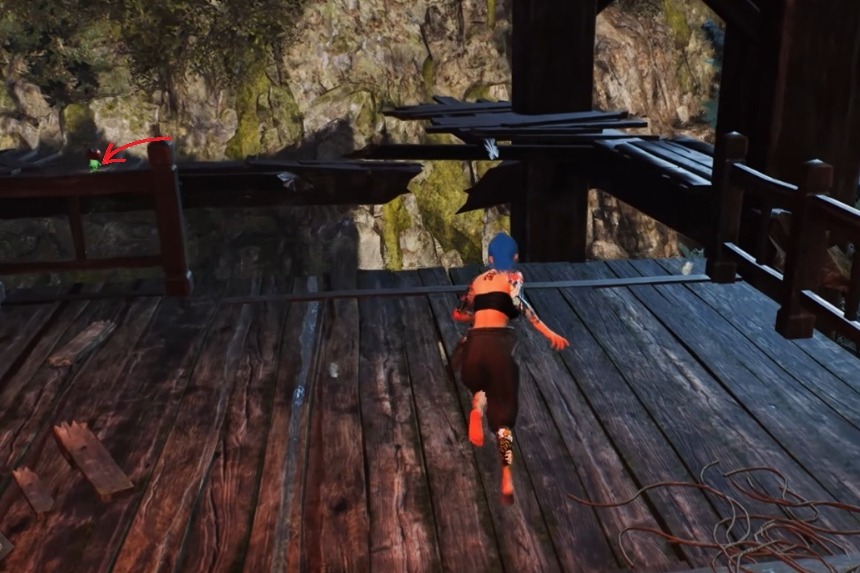
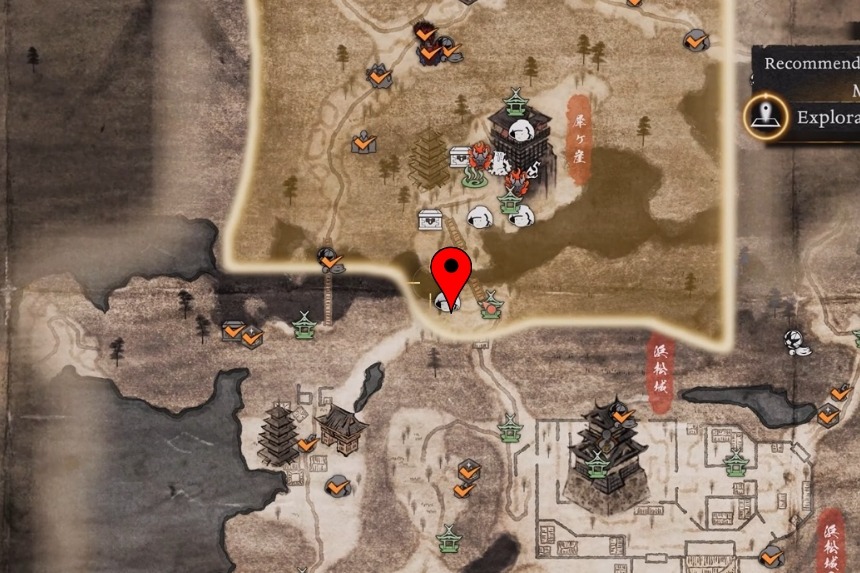
In the Saigagake Main Hall, turn back and jump towards the broken wooden planks. The Kodama is found on the left side of the wooden plank, just near the pillar.
Mikatagahara Kodama 6
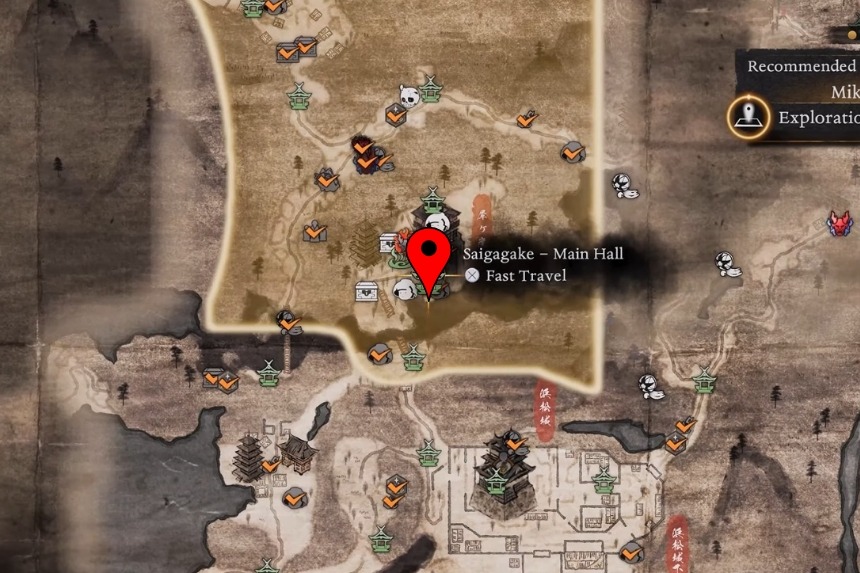
From the Saigagake Main Hall, move forward and take a left turn. Jump towards the roof in front of you. On the roof, you will find the Kodama.
Mikatagahara Kodama 7


Head towards the Saigagake Rear Approach. From the Shrine, turn left towards the building. Now, take another left and get inside the red tent. At the far end of the tent, you will find the Kodama.
Hamamatsu Hill
Hamamatsu Hill has houses near the edges of the hill. It was once a lively town where people used to travel to enjoy the scenic beauty. Now it is an abandoned village where no one lives. You can find a lot of useful items inside the abandoned houses that can be useful in your journey.
Hamamatsu Hill Kodama 1
The Kodama is found near the Mikatagahara Junction Shrine. From the shrine, go to the temple, and you will find the Kodama sitting right at the edge of the cliff.
Hamamatsu Hill Kodama 2
Head towards the north side of Juji Fortress. From here, take the right and reach the small broken building. Go inside the building to find Kodama sitting.
Hamamatsu Hill Kodama 3
To find this Kodama, head towards the border of Futamata Road. Look for a small hut on the left side of the enemy base. At the corner of the hut, you will find Kodama sitting there.
Lake Hamana
Lake Hamana is an island surrounded by a lake. There are lots of houses in the area, but no one lives inside them. The houses are now overrun by the monsters.
Lake Hamana Kodama 1
The Kodama is hidden inside the Horie Castle. Go inside the castle and look near the Lesser Crucible to find the Kodama.
Iinoya
Iinoya was a place where there used to be markets and buildings. However, now there are very few people who live in the area, as most of them have left. Here, you will find a lot of monsters that you need to defeat to get useful items that will help you in your journey.
Iinoya Kodama 1
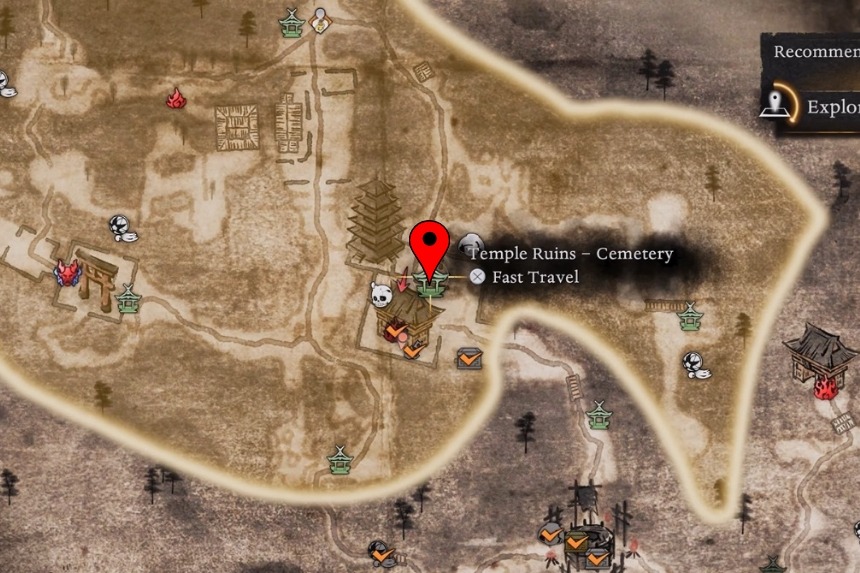
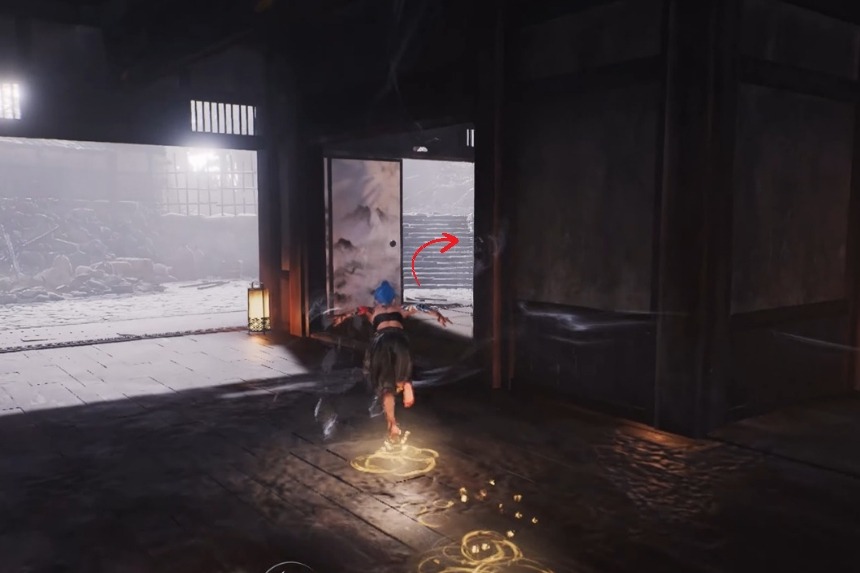
Head towards the Temple Ruins in the Cemetery Shrine. Here, unlock the door on the right side. Then climb up the tower to find the Kodama at the top.
Iinoya Kodama 2
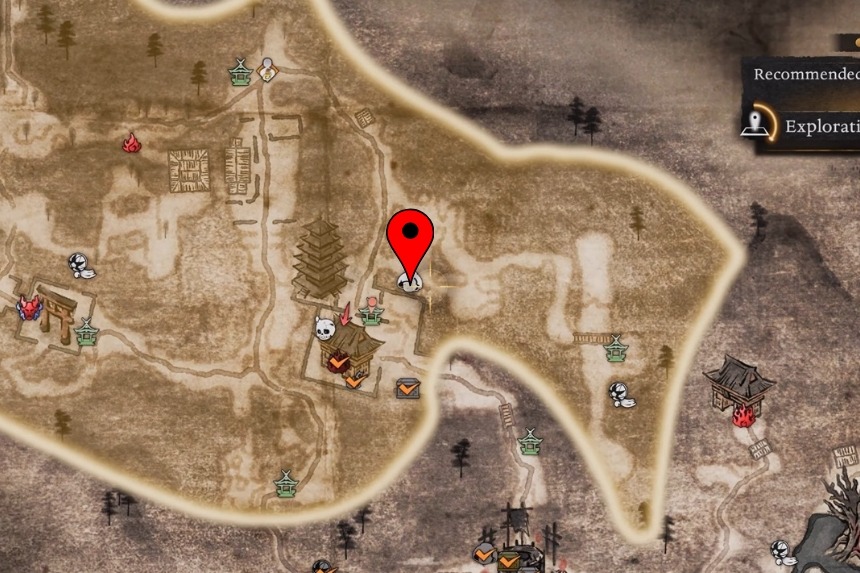
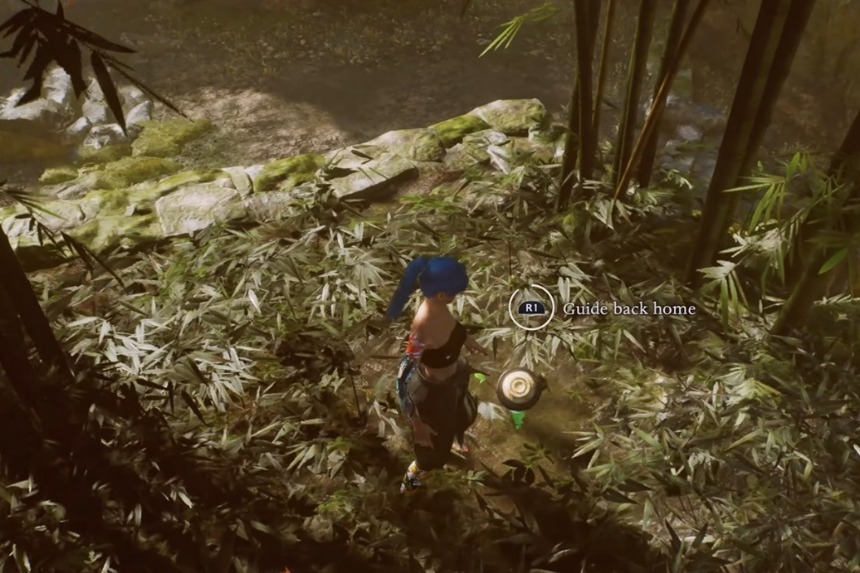
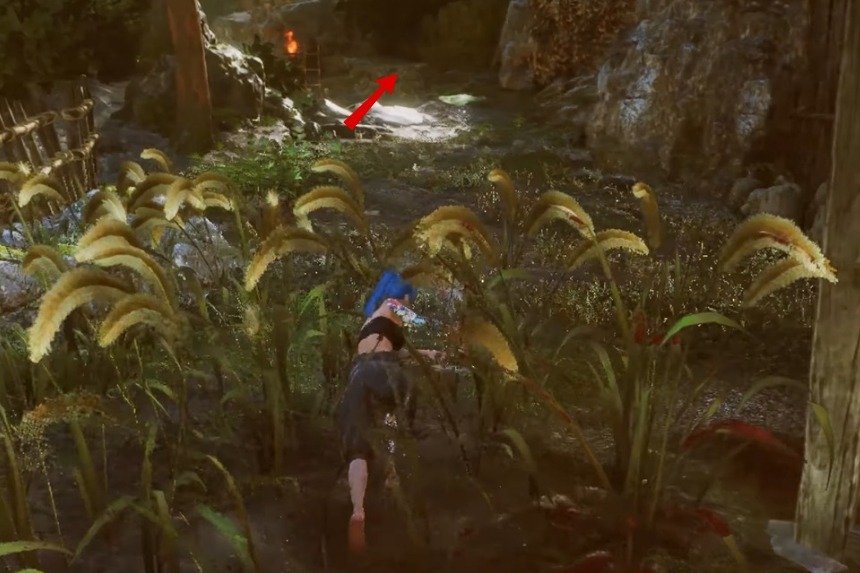
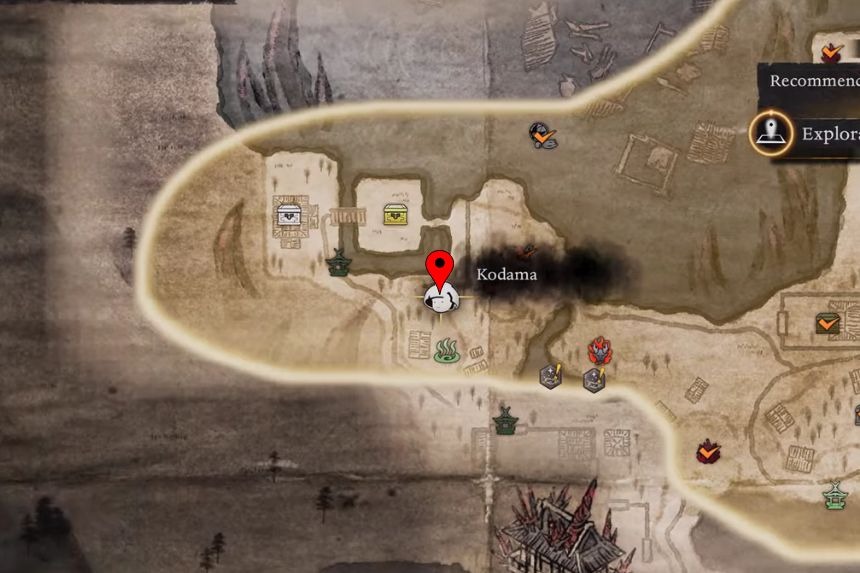
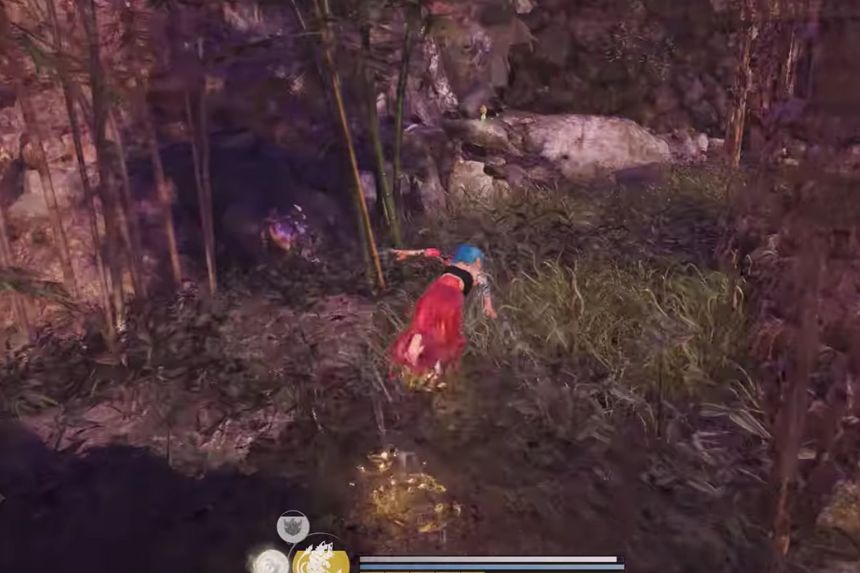
Go to the Temple Ruins in the Cemetery Shrine. Just before you enter the cemetery, look for a small forest area nearby. You will find the Kodama behind the bamboo.
Iinoya Kodama 3
This Kodama is located on the western outskirts of the temple. Go back and then climb up the nearby rocks to find it.
Iinoya Kodama 4
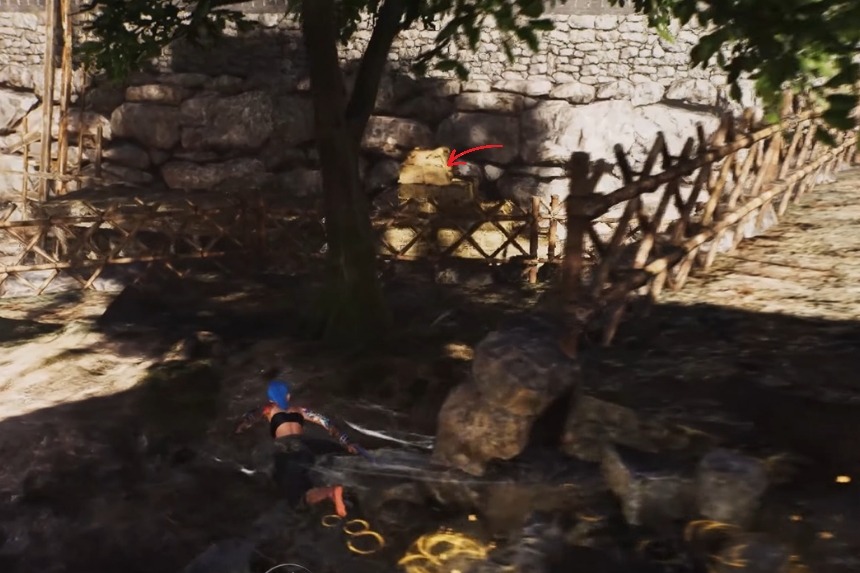
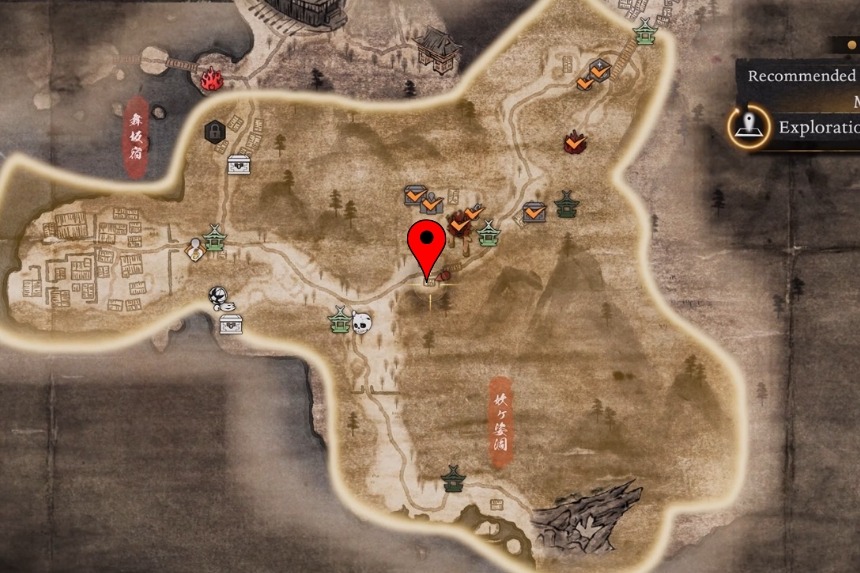
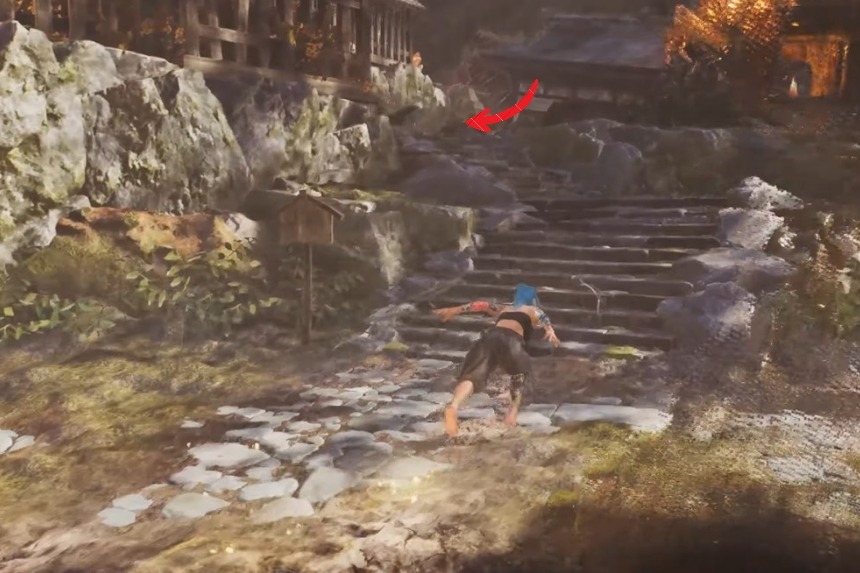
From the Iinoya Pass Shrine, go down till you see the stairs on your right. Climb up, and you will find the Kodama near the fence, just at the top of the staircase.
Iinoya Kodama 5
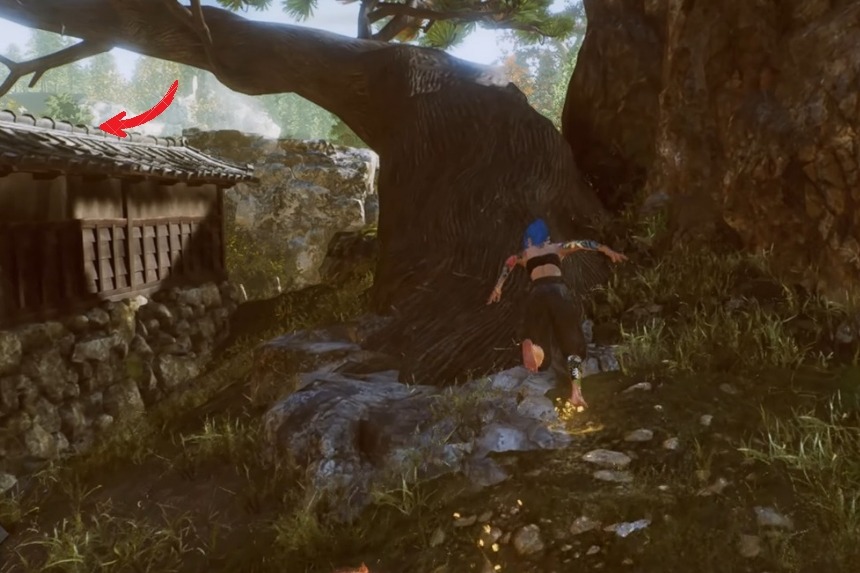
Start from the Great Ginkgo Approach Shrine, near the enemy base, and go towards the forest. Here, look for a small hut. You will find the Kodama near the hut’s fence.
Iinoya Kodama 6
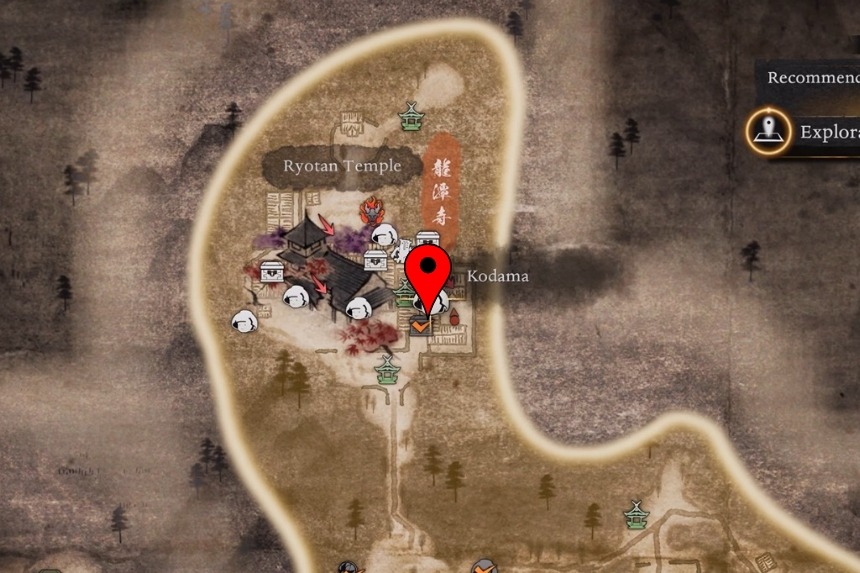
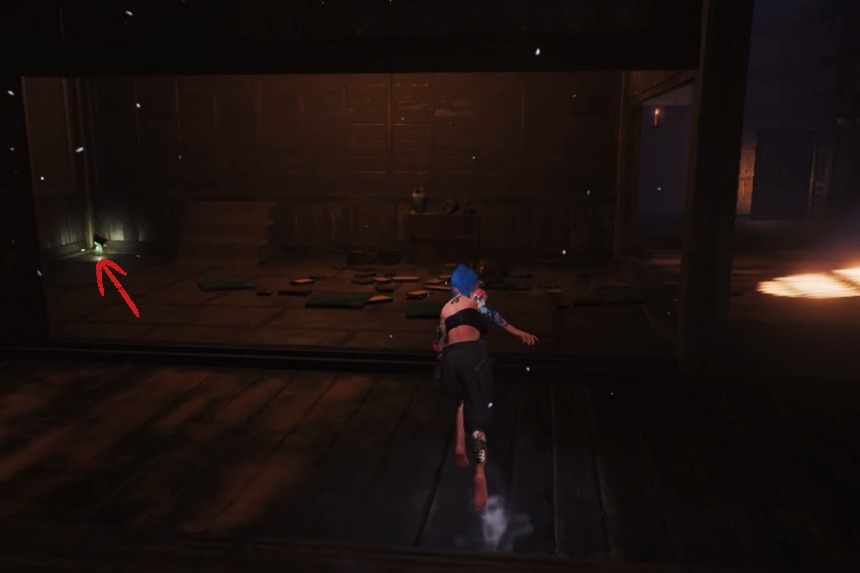
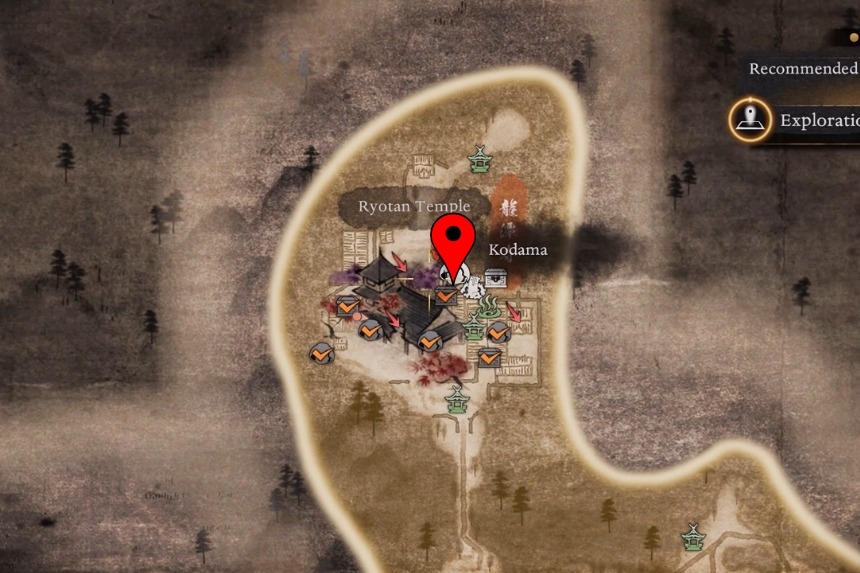
Go east of the Ryotan Temple, and you find a red leaf tree. Enter the house in front of you to find the Kodama on the left side room.
Iinoya Kodama 7, 8 & 9
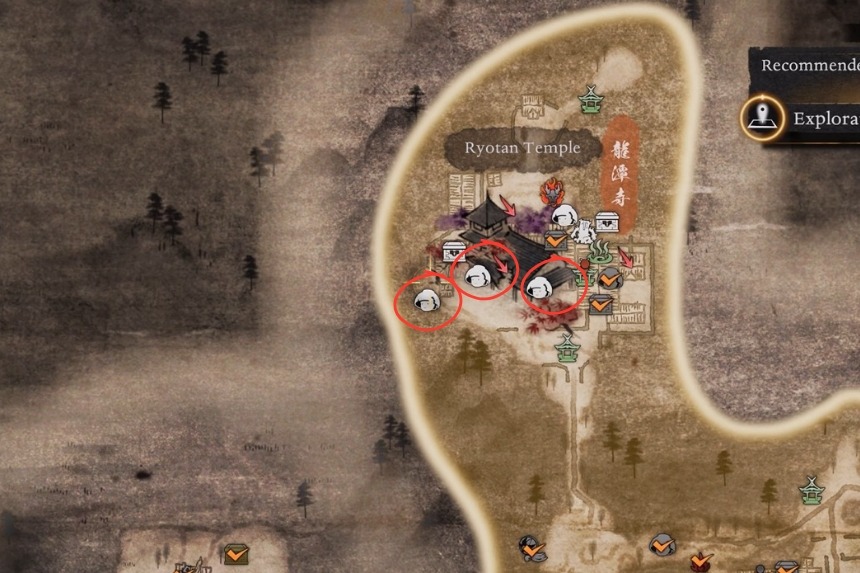
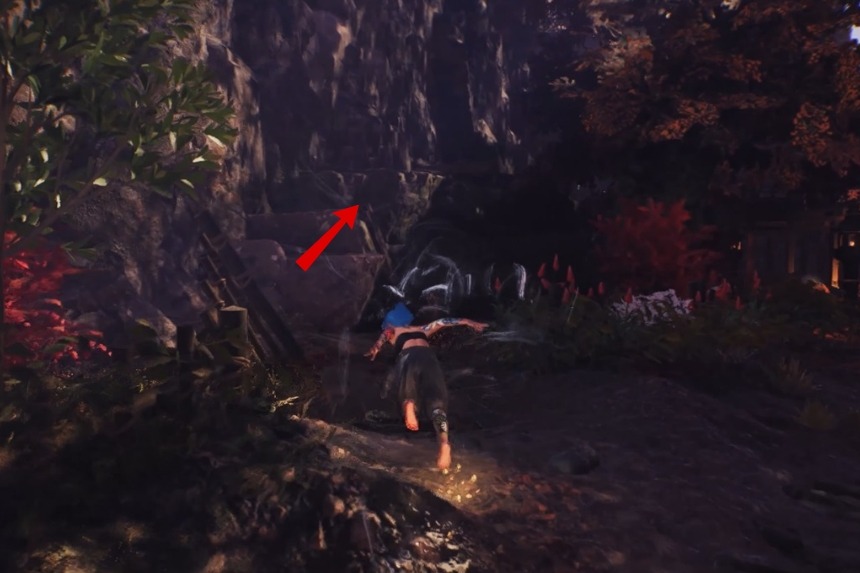
Head inside the Ryotan Temple Living Quarters. To find the seventh Kodama, start from the shrine, take a right turn, and then take a left to move outside the house. Then go towards the fence in front of you and take a right turn. Climb the rock on the left side. At the end of the path, you will find the Kodama.
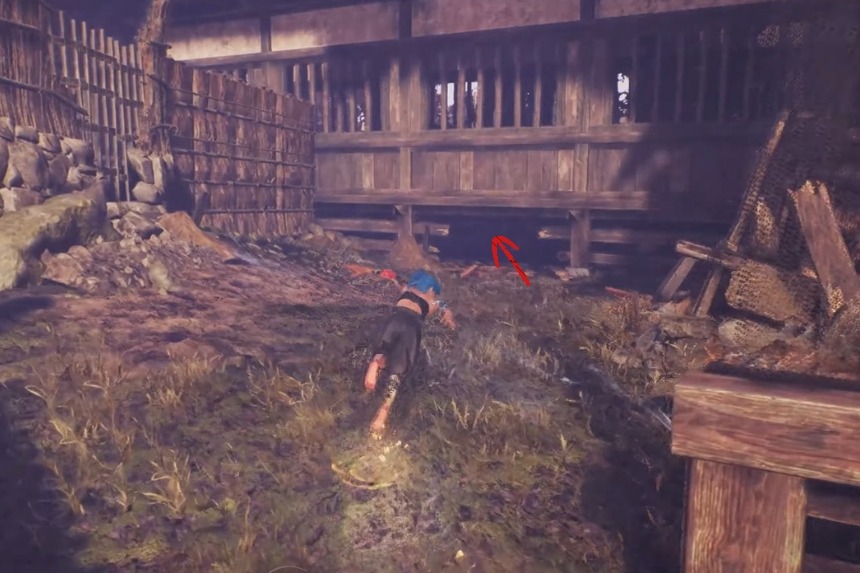
To find the eighth Kodama, move down the rocky area. Go towards the back side of the building. Crouch down under the building to find the Kodama inside.
To reach the next Kodama, return back and go inside the building from the front entrance. Climb up using the ladder and jump towards the roof in front of you. At the corner of the roof, on the main building, you will find the Kodama.
Iinoya Kodama 10
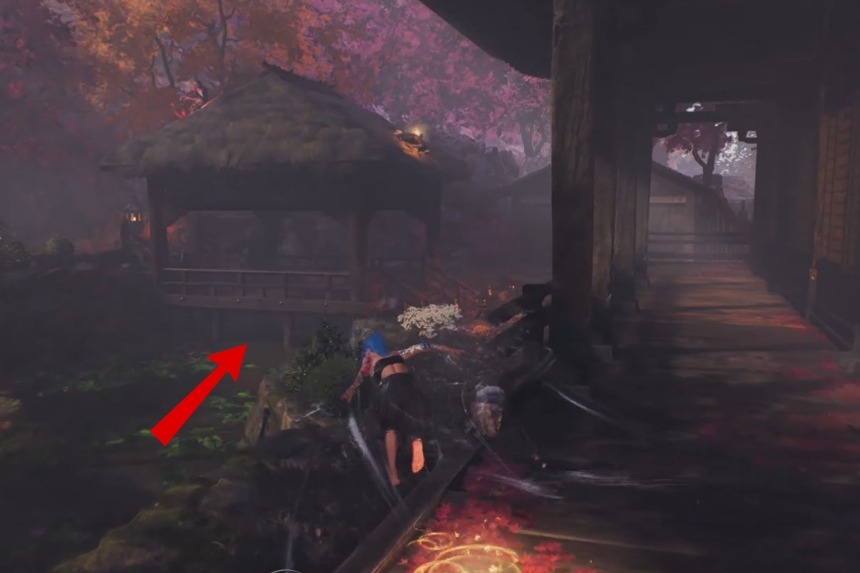
Head towards the Ryotan Temple. On the left side, you will find a small pond. Crouch down under the building of the small pond to find the Kodama.
Futamata Road
Futamata Road used to be an intersection between the two cities. There were taverns and cafes where travellers could drink and eat food. However, when the area was destroyed by the monsters, it turned into an abandoned place where no one wanted to live.
Futamata Road Kodama 1
To reach the Kodama, go towards the Tenryu River from the Silver Meadow Shrine. Follow the path, and you will find the Kodam sitting near the hut.
Futamata Road Kodama 2
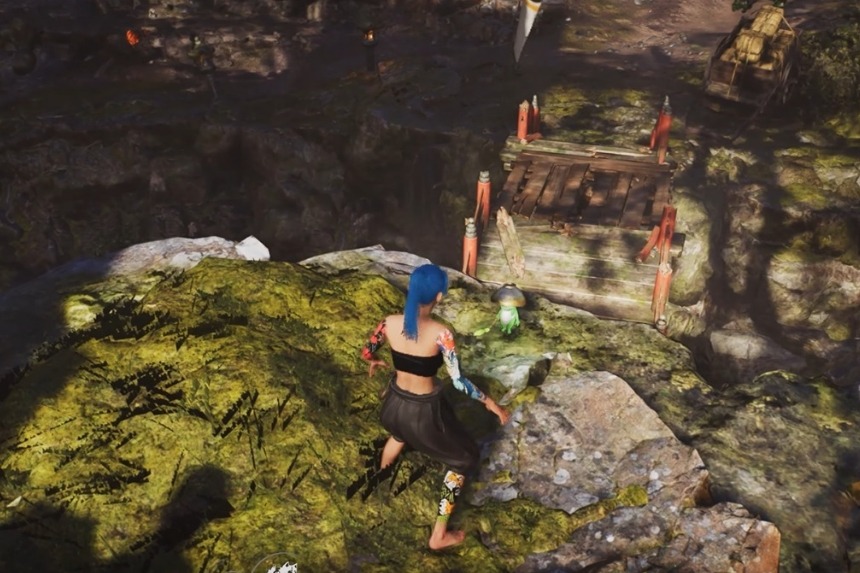
The Kodama is found very close to the Silver Meadow Shrine. Cross the bridge and turn left to find the Kodama sitting on top of a rock. There is a boss nearby that you need to defeat before interacting with the Kodama.
Futamata Road Kodama 3

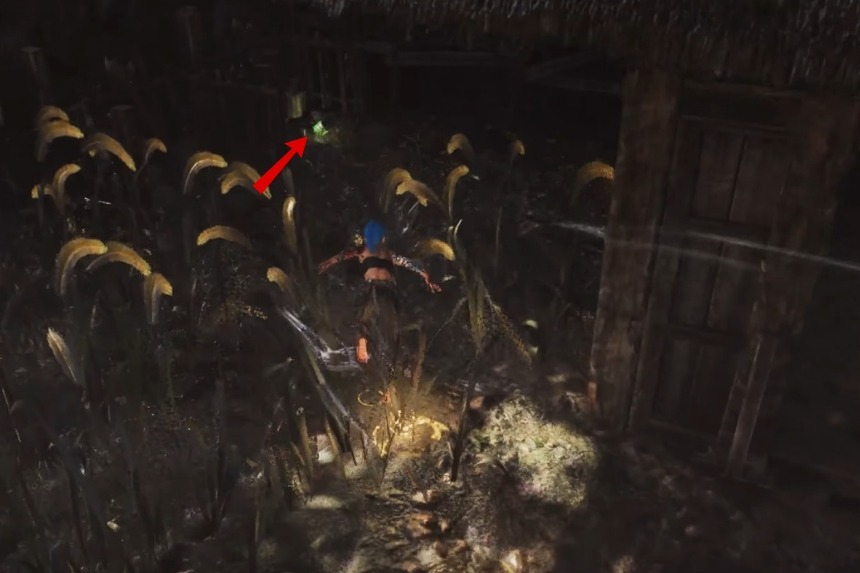
The Kodama is hidden in the Firefly Forest. From the shrine, move forward and defeat all the enemies along the path. Once you reach the water’s edge, look for a large tree branch. Climb up the branch, and you will find the Kodama sitting there.
Futamata
Futamata is present on the north side of the Futamata castle. It was once filled with lots of farms and houses. However, after it was destroyed by the monsters, there were no more humans left to tell the tale. There are lots of monsters in the area, so you need to defeat all of them to continue your journey.
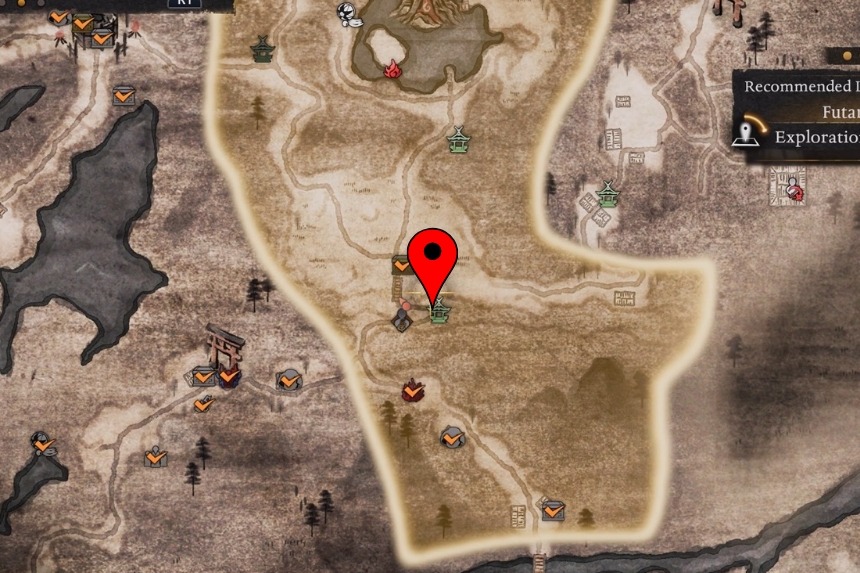
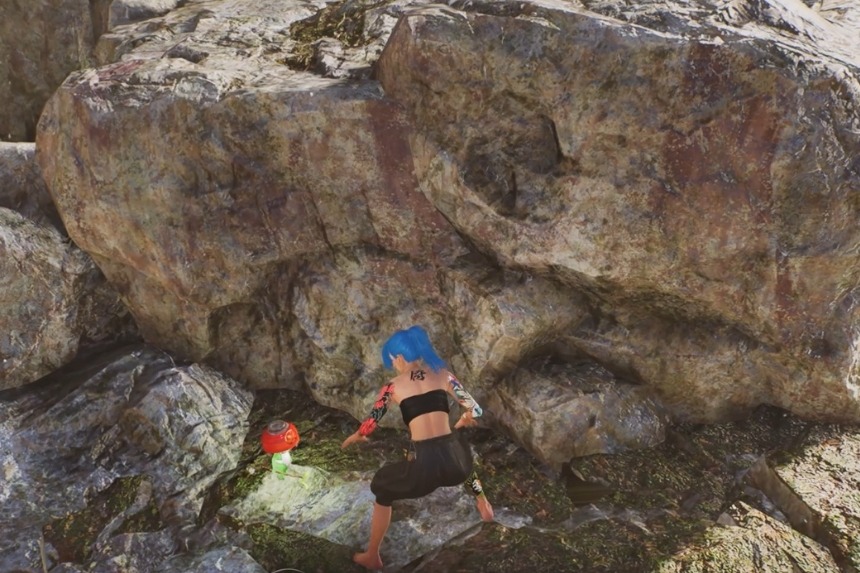
Futamata Kodama 1
Start at the Cavern of Respite Shrine. Head down towards the right to reach the Tealeaf Village. When you get there, climb up the top of the hut on the left side of the road. You will find the Kodama sitting on the balcony of the hut.
Futamata Kodama 2
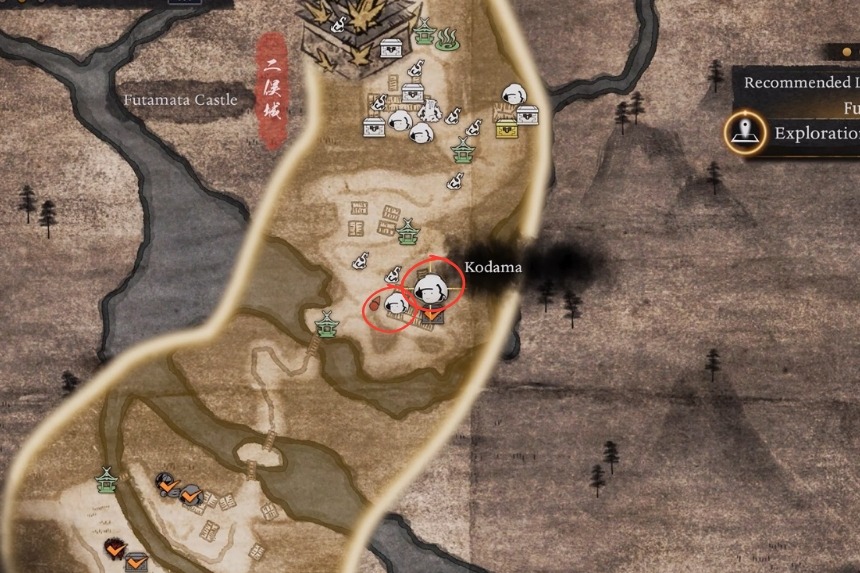
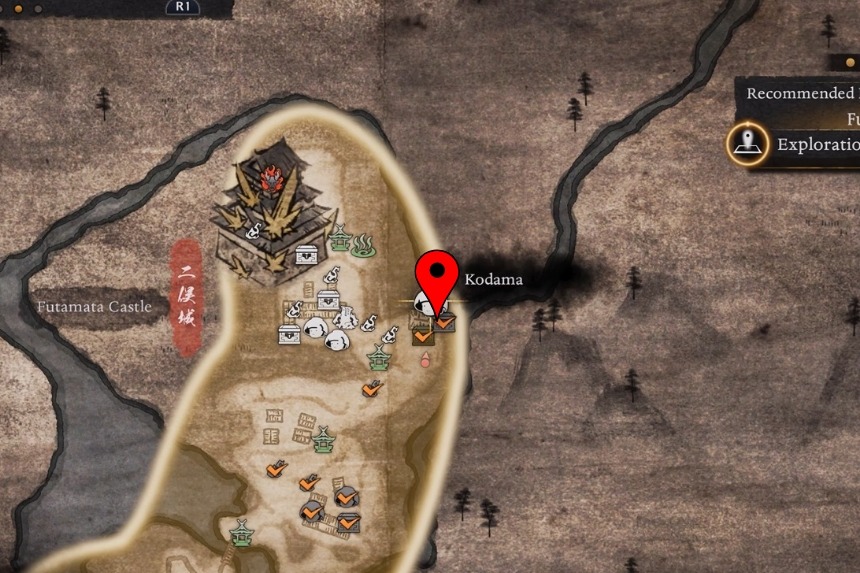
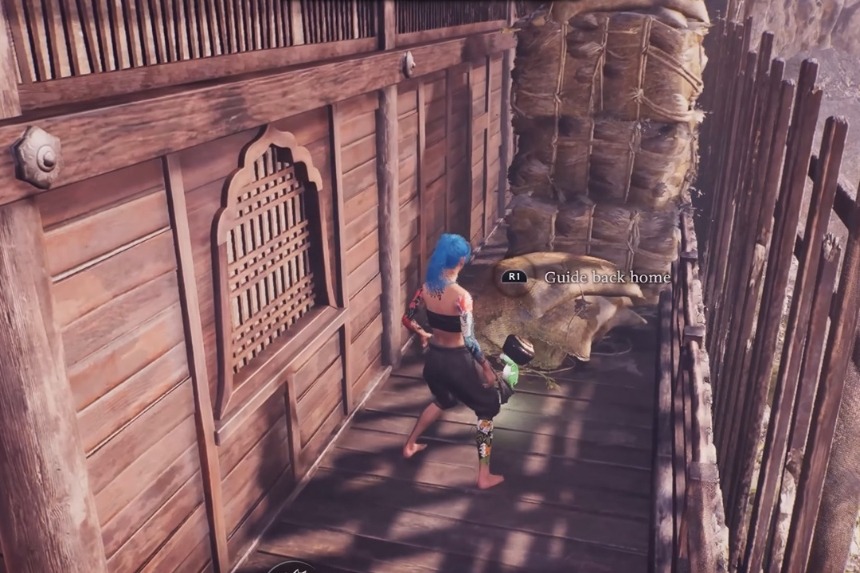
The Kodama is located near the Castle Town Shrine. From the shrine, cross the bridge and go towards the hut. Near the fence of the hut, you will find the Kodama. There will be enemies nearby. Kill them all before interacting with the Kodama.
Futamata Kodama 3 & 4

Go near the Riverside Shrine. Follow the path till you enter the castle. Get inside the building and exit from the other side till you find the third Kodama near the fence

Continue to move forward, then climb up the castle walls. The fourth Kodama is found sitting inside one of the horse paddocks. Break the door of the paddocks to interact with it.
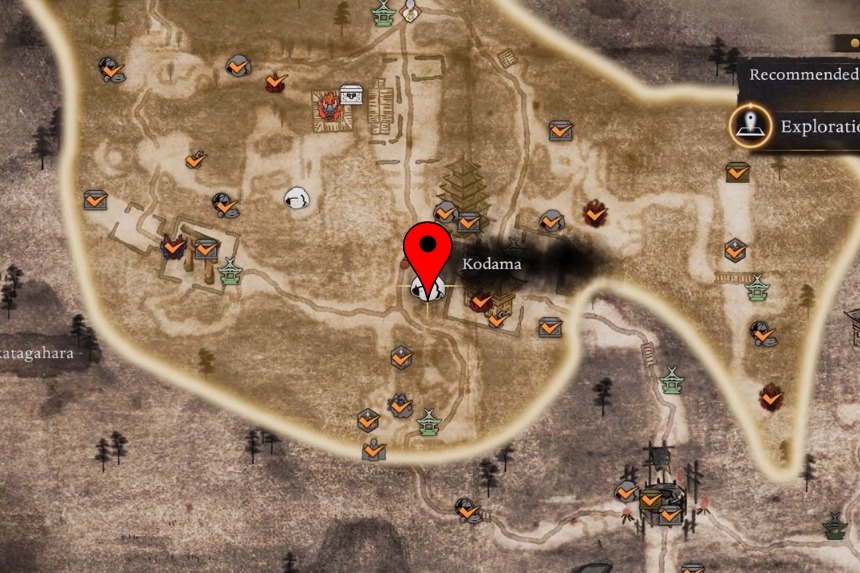
Futamata Kodama 5
Go past the Koguchi Junction Shrine and enter the first building. Then turn to the right side to find the Kodama hidden behind a haystack.
Futamata Kodama 6 & 7
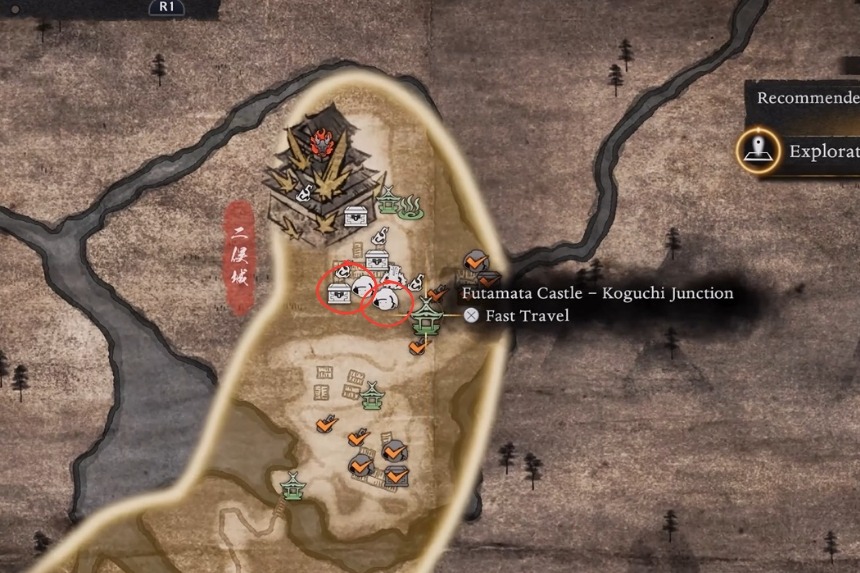
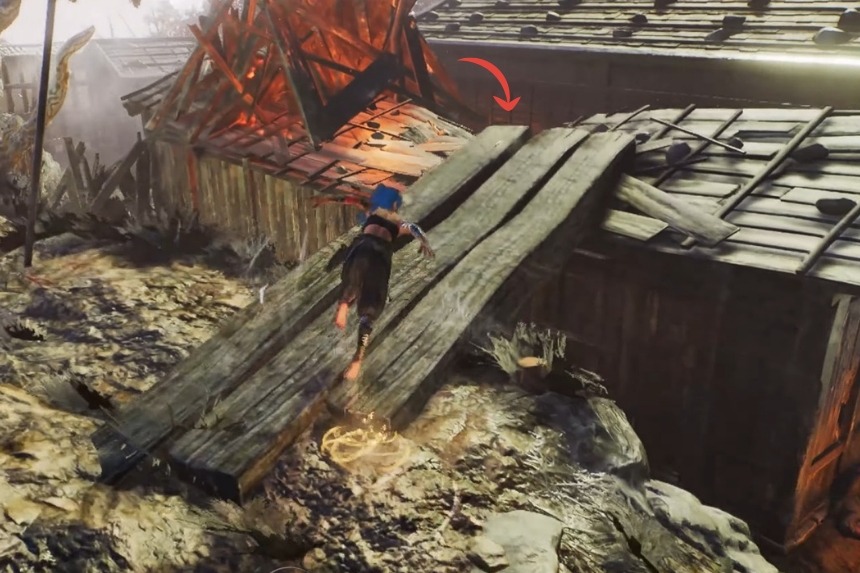
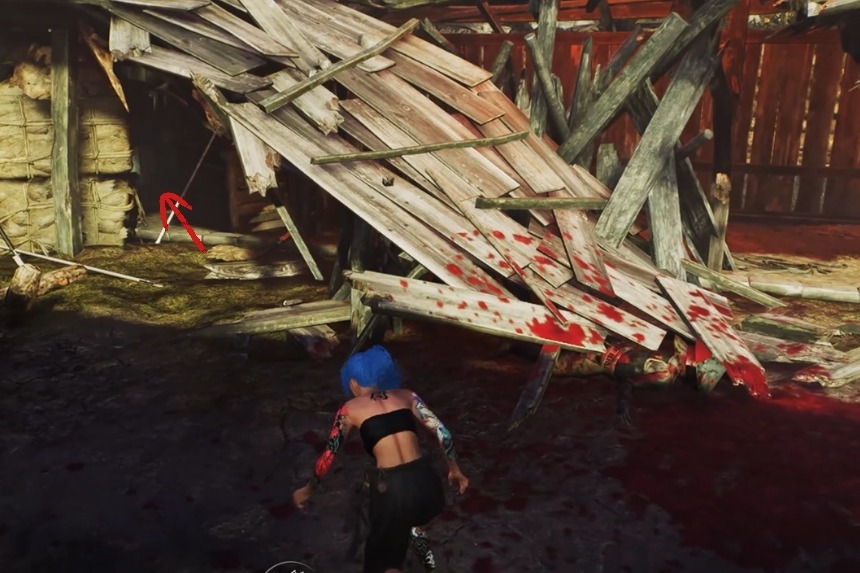
Go towards the Koguchi Junction Shrine, and climb up the stairs to find destroyed buildings. The sixth Kodama is hiding in its corner, and you can reach it by jumping on the debris.
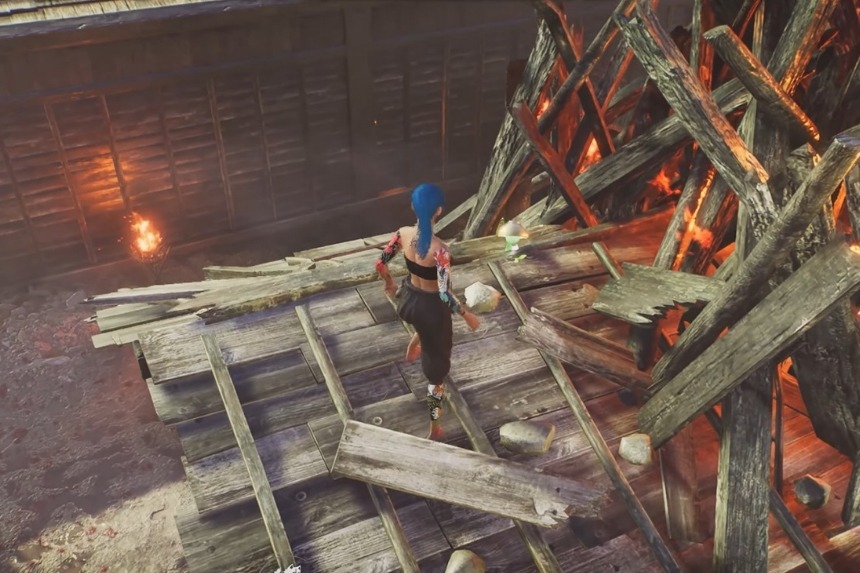
The seventh Kodama is found on the top of the roof of the same building. To reach it, move back to the centre of the area. Then take a left turn to get up on the roof.
Mount Kurama
Mount Kurama has lots of spikes, which happened due to the monster invasion. Now, due to the spike, the buildings in the area are completely destroyed. The area is home to the monsters.
Mount Kurama Kodama 1
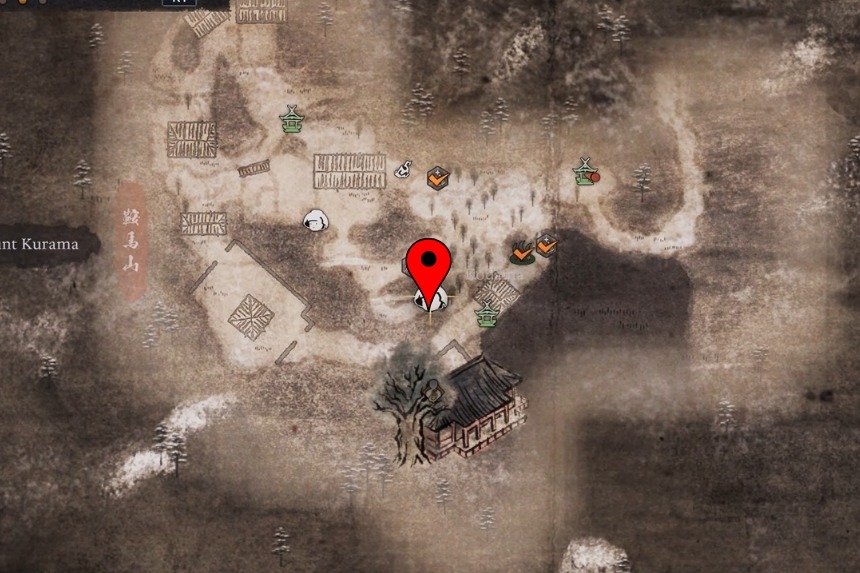
Go towards the south of Mount Kurama Kinone Michi. From the shrine, move forward and take the left path. Climb up the rocks in front of you and reach the Kodama at the end.
Mount Kurama Kodama 2
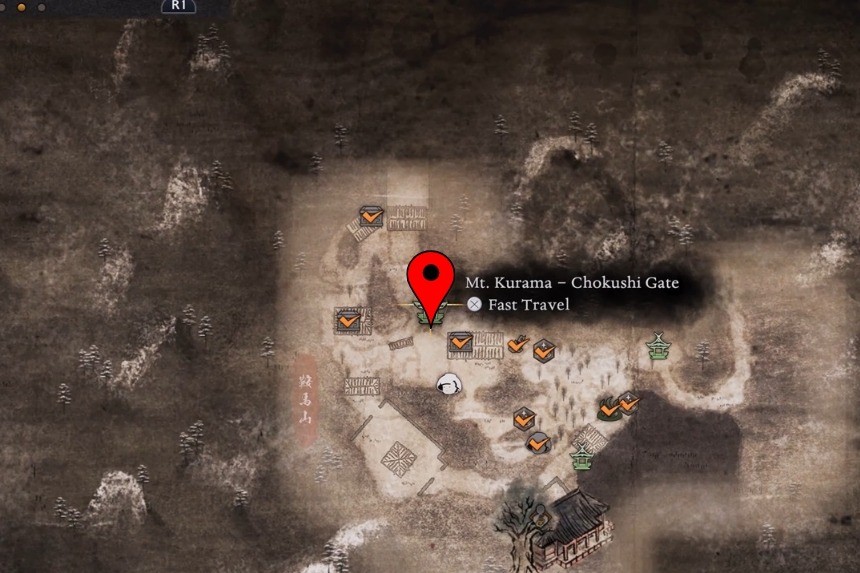
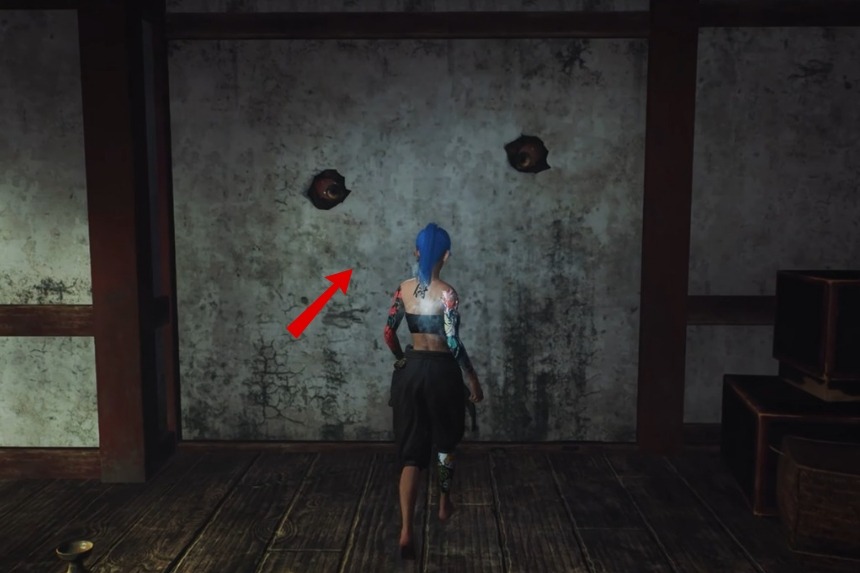

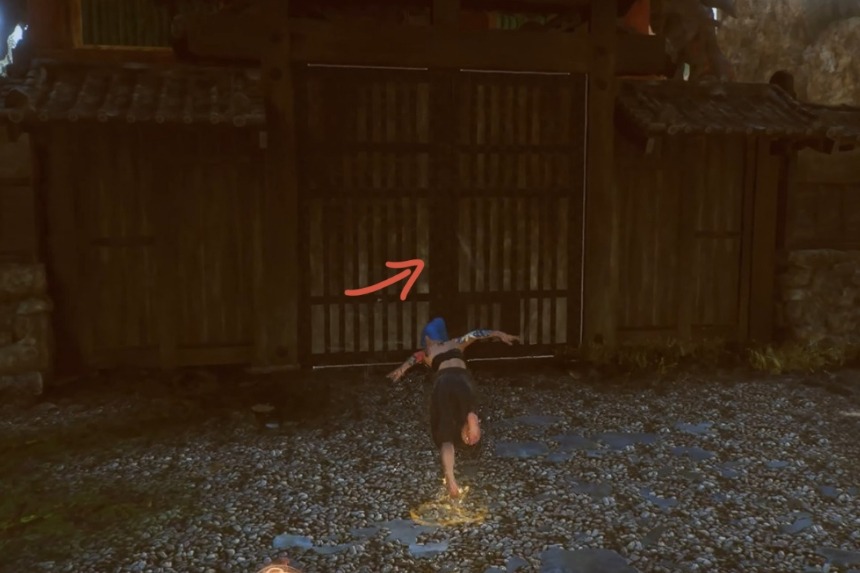
From the Mount Kurama Chokushi Gate, turn left towards the building area. Enter the left side building and make a nice pose to unlock a secret area. Get inside the secret area and climb up with the help of the ladder towards the roof of the building. At the corner of the roof, you will find the Kodama.
Mount Kurama Kodama 3

Start from the Mount Kurama Chokushi Gate, turn left towards the building area. From here, take the left again and climb up the stairs to find a small building. Jump down on the right side to find the Kodama.
Kamo Village
Kamo Village has lots of secret areas and bosses from which you can get a lot of useful items. Once it was a bustling village with lots of people, but now everyone has left the area.
Kamo Village Kodama 1
Head towards the Lesser Crucible. From there, take a left. You will find the Kodama at the end of the path leading towards the Lesser Crucible.
Kamo Village Kodama 2
Go inside the Kamo Village and head towards the building that is present uphill. At the back side of the building, there is a Kodama.
Funaokayama
Funaokayama is an abandoned place where there are lots of Yokai. It has lots of useful items that are found inside the abandoned houses. Carry your best gear and healing items, as there are many enemies in the area.
Funaokayama Kodama
This Kodama is located on the left side of the temple entrance. The temple is inside an enemy base. To reach it, take the right side and pass through the Nurikabe. Clear all the enemies and then interact with the Kodama.
Sagano
Sagano is on the west side of the Tenryu River. The place has lots of monsters and enemies. Defeat all of them to continue your journey. There are a lot of abandoned houses here that have many useful items.
Sagano Kodama 1
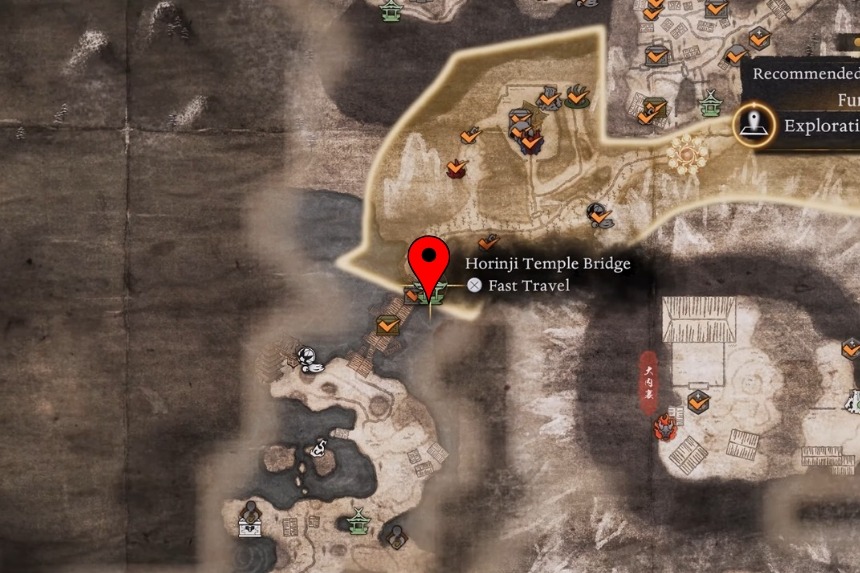
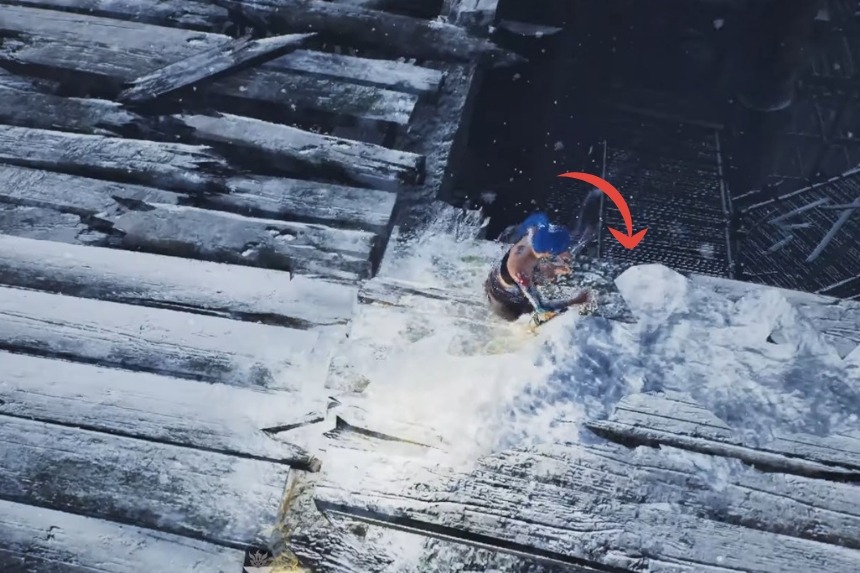
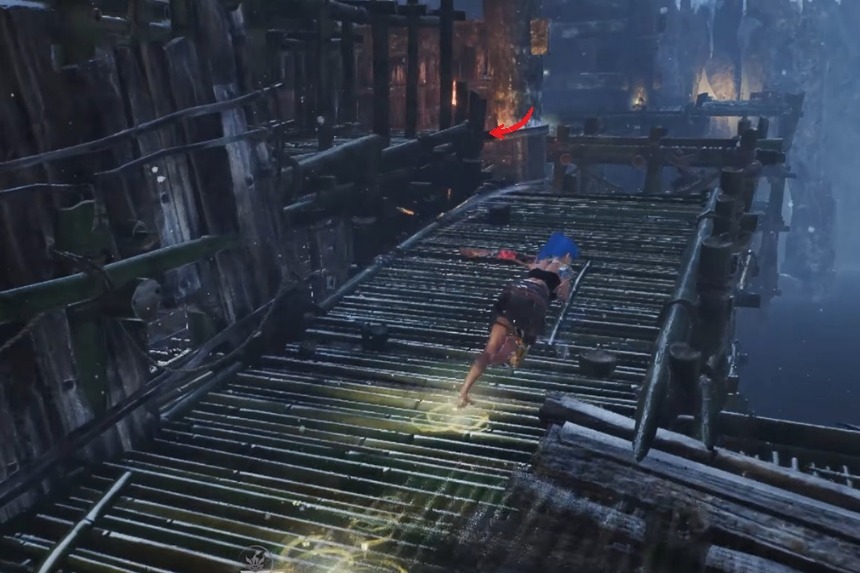
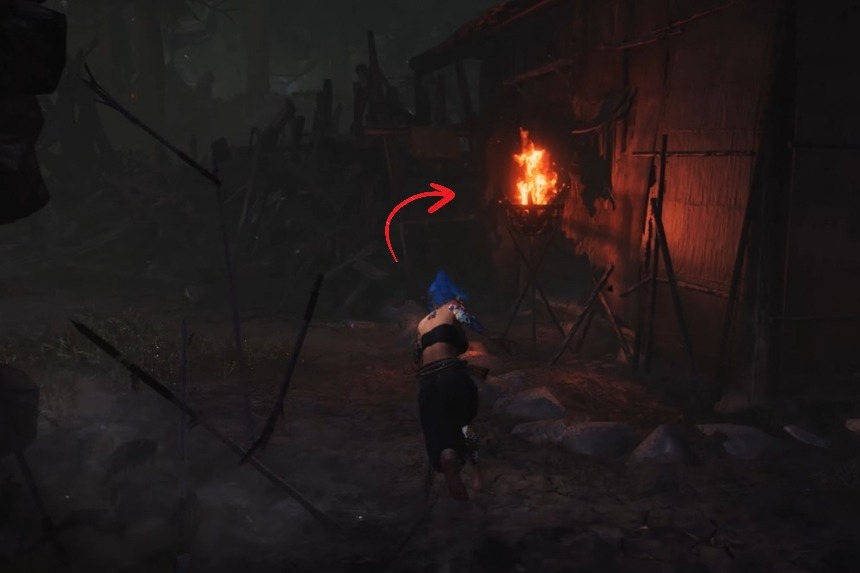
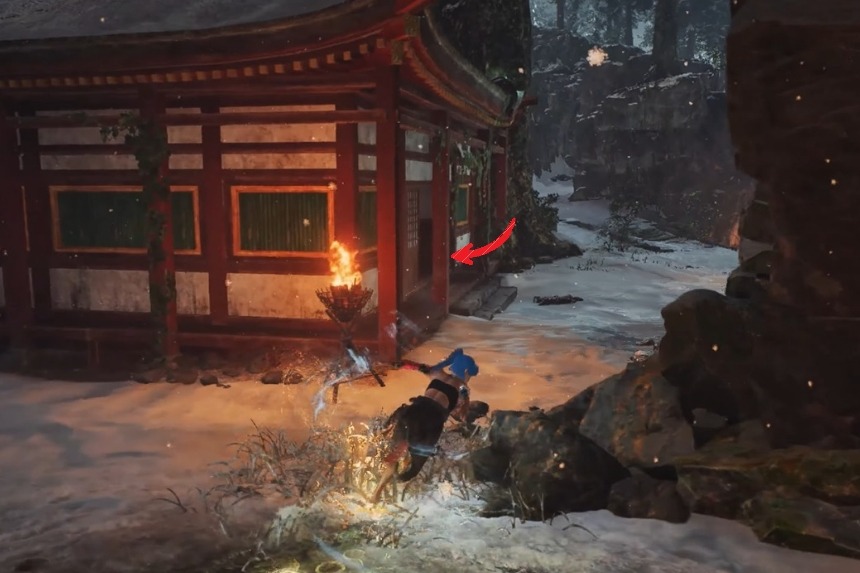
From the Horinji Temple Bridge, travel towards the broken bridge. Here, you need to jump down towards the bamboo structures. Now, move forward towards the torch. Look at the opposite side of the torch, and you will find the Kodama behind some wooden crates.
Sagano Kodama 2

This Kodama is sitting on a rock next to a small building. To reach it, climb on the roof of the building and jump towards the rock.
Sagano Kodama 3
To reach the Kodama, head towards the side of the boulder. Look around the edges and drop down to reach it.
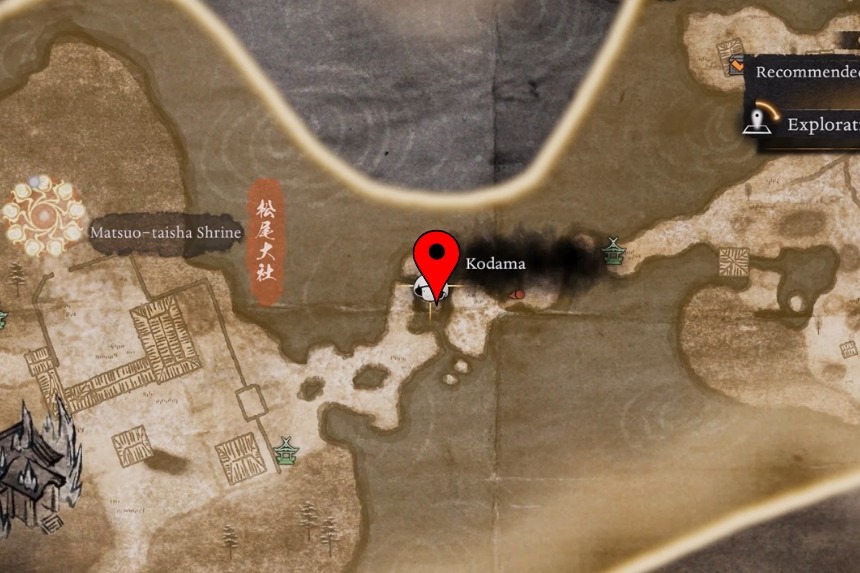
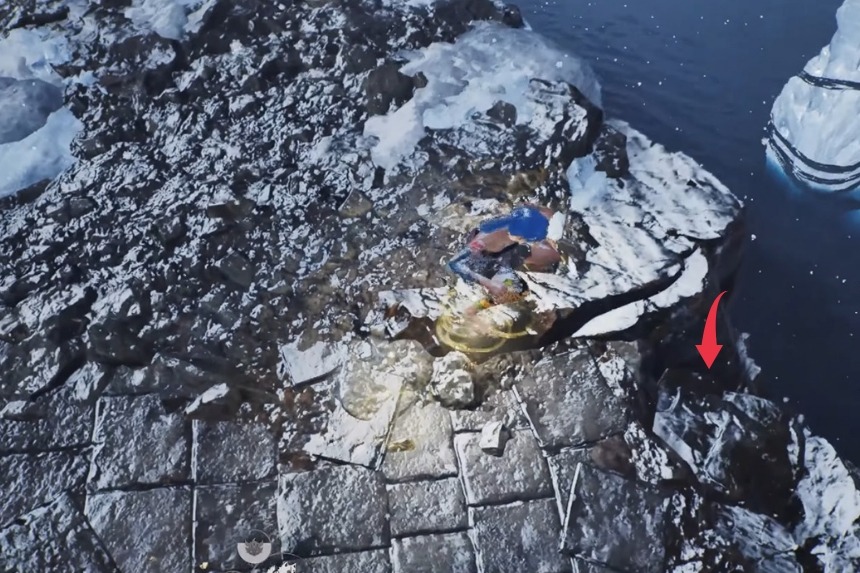
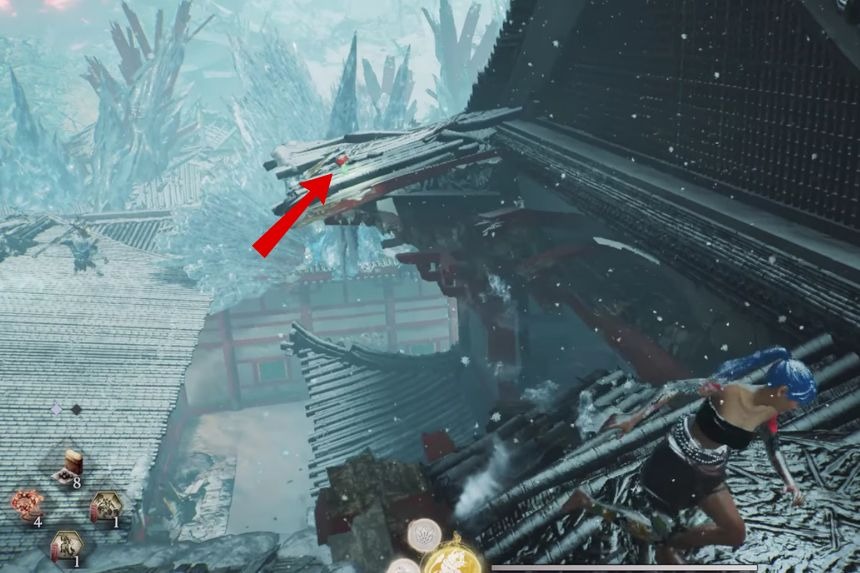
Sagano Kodama 4
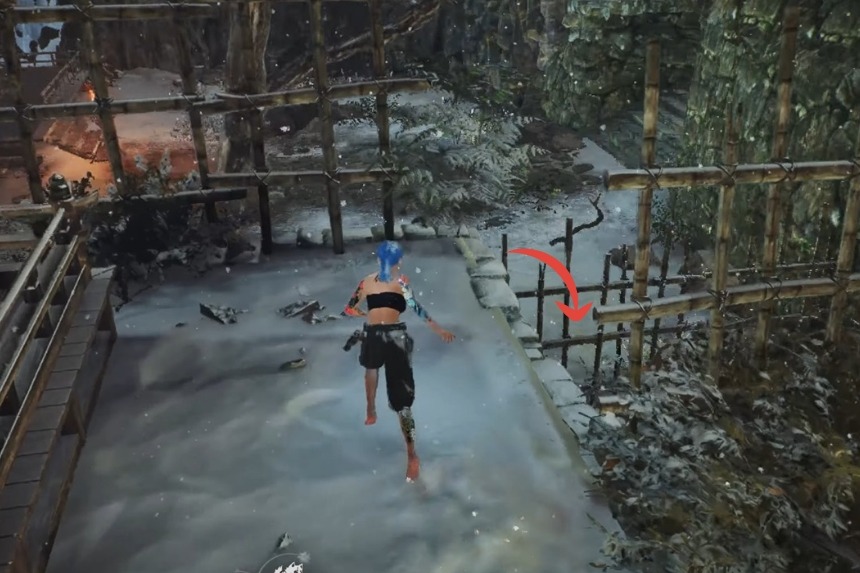
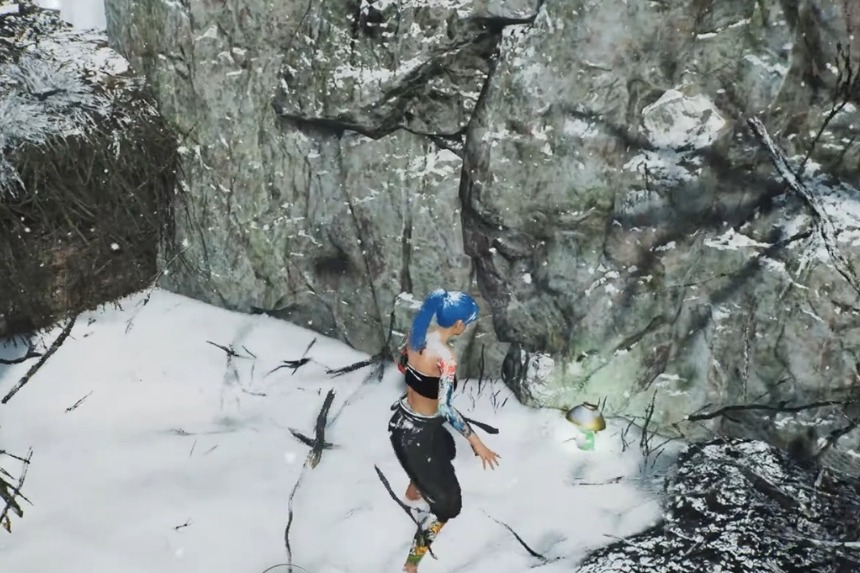
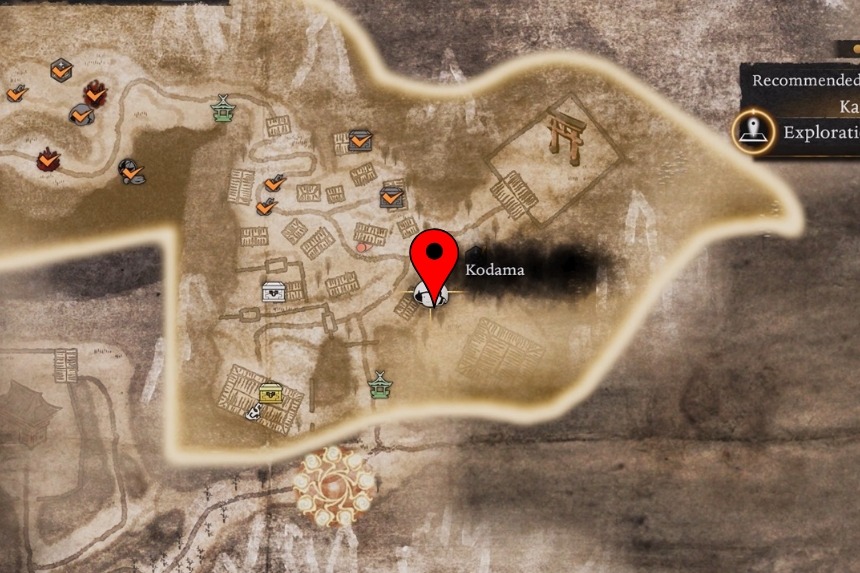
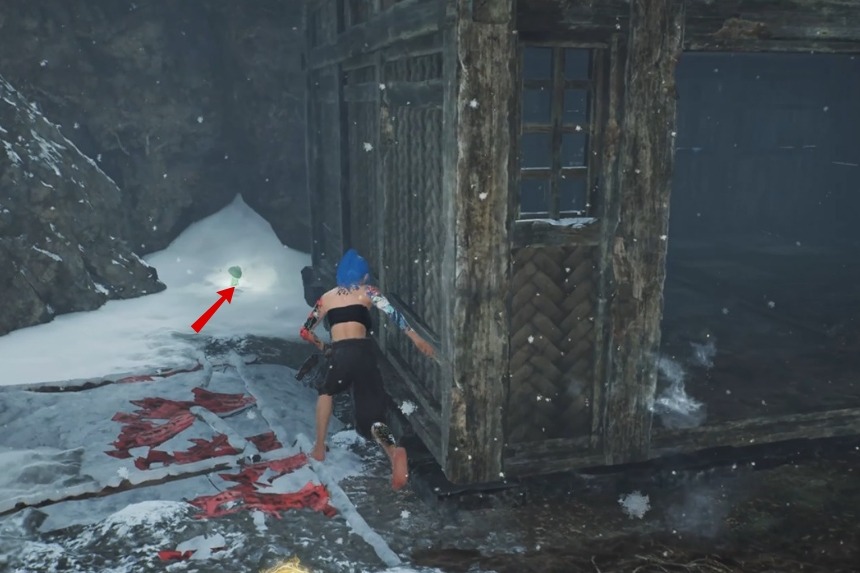
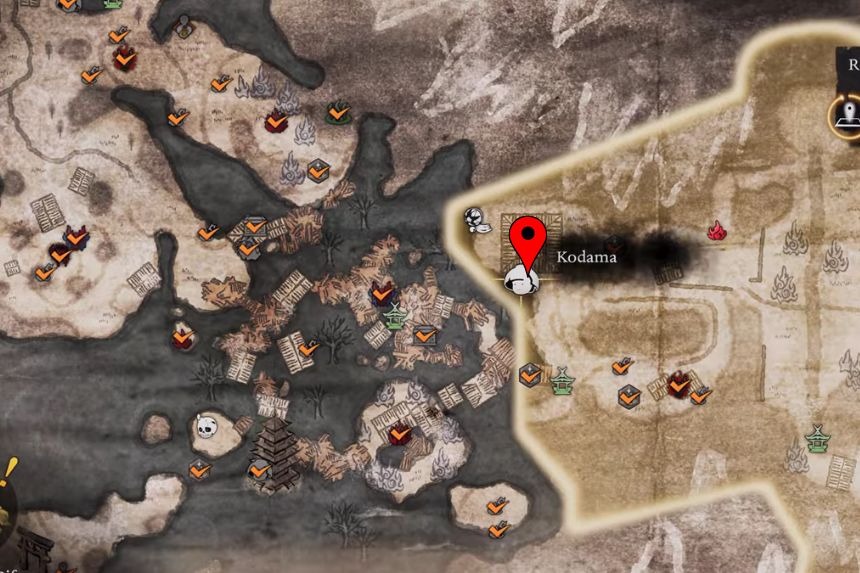
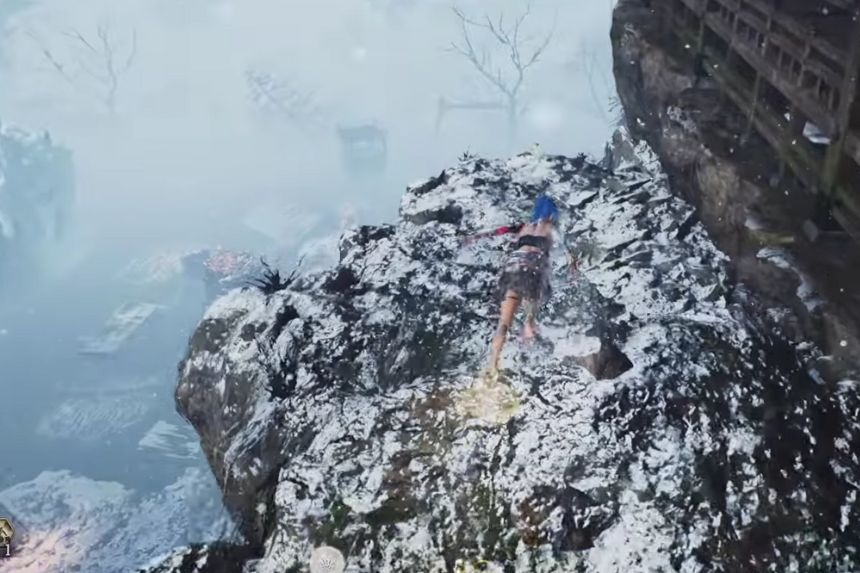
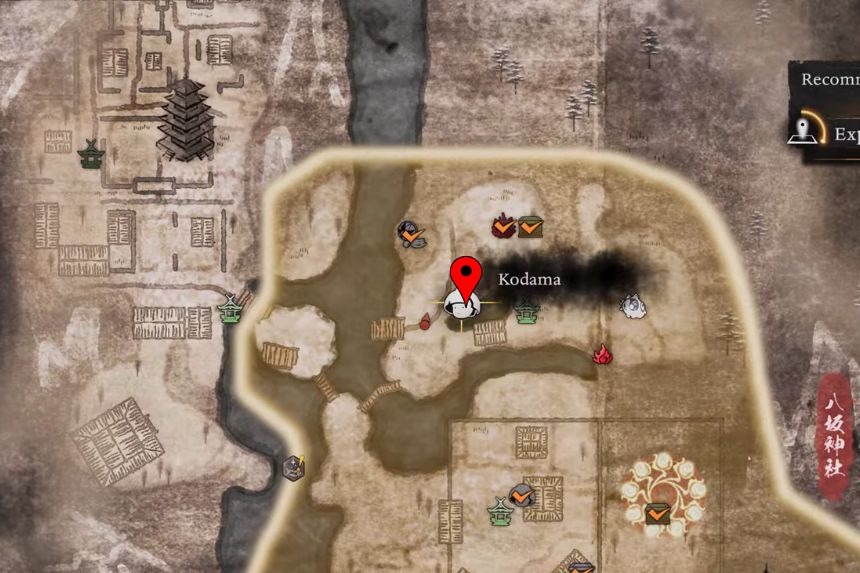
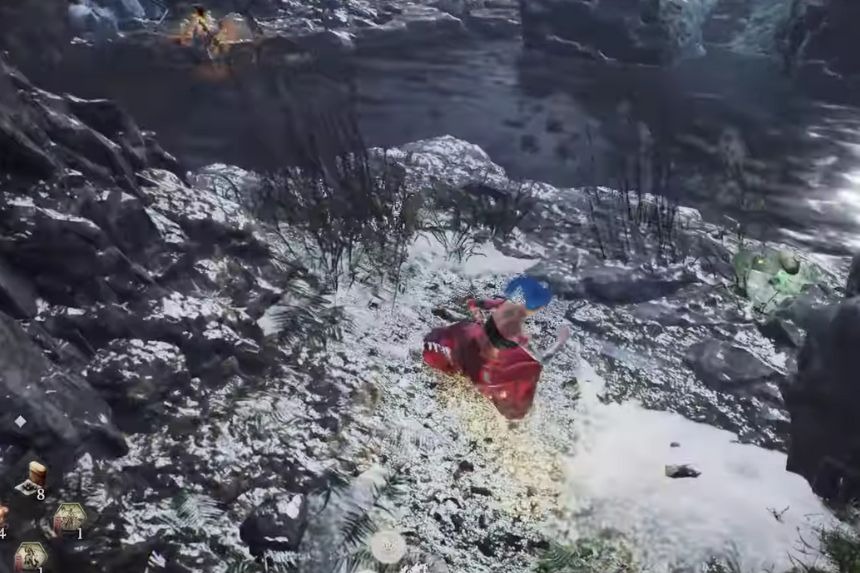
You will find this Kodama hidden behind a rock. As you go towards the icy river area during the main story, look on your right to find it.
Nishiichi
The Nishiichi area is one of the dangerous areas where you will find many tough bosses and enemies. This place was once ruled by a landlord, but now it is a place of death.
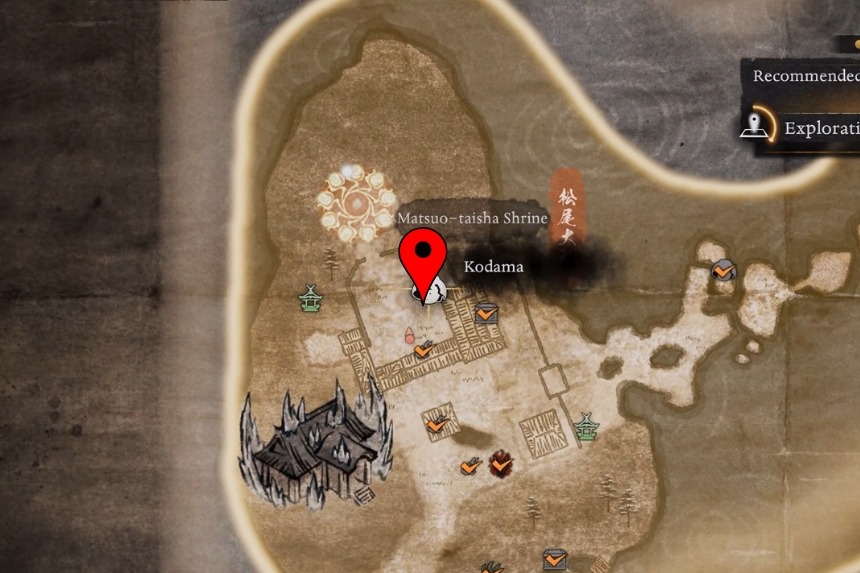
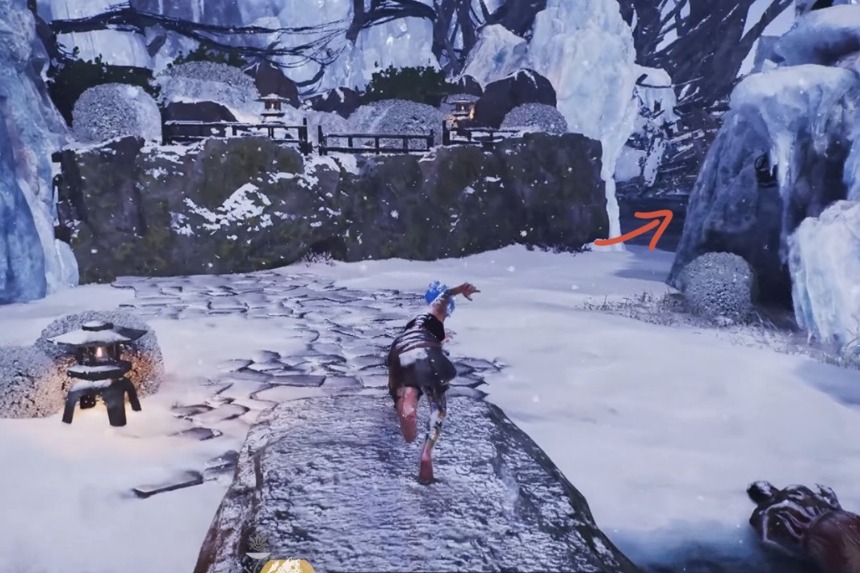
Nishiichi Kodama
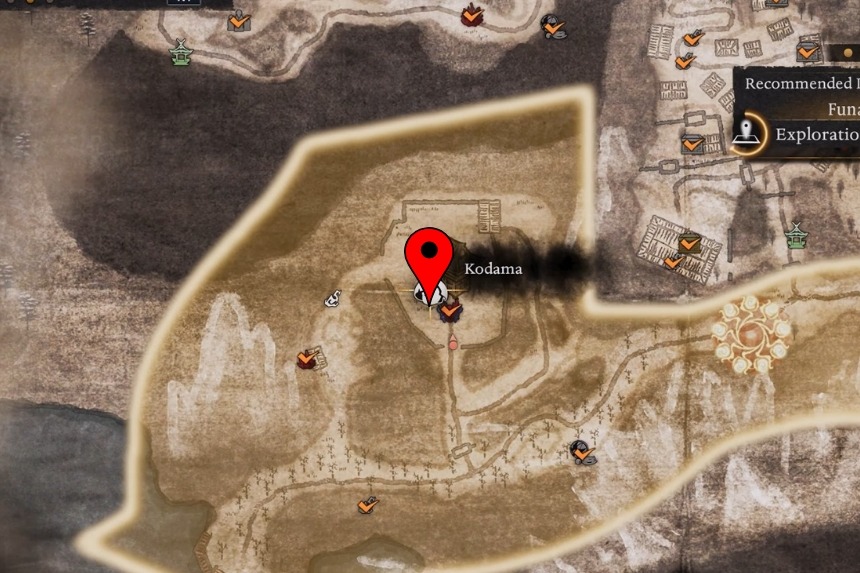
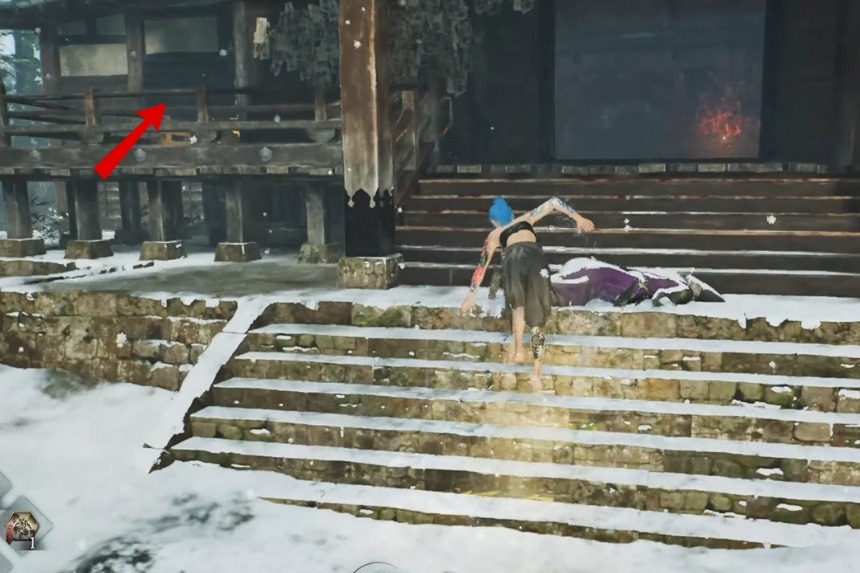
This Kodama is found on the roof of the temple, on the back side. Go towards the back of the temple and climb up to reach the roof.
Hachijo
Cross the road from Hamamatsu to reach the Hachijo. Inside the area, you will find a lot of monsters that will try to kill you. There will be lots of buildings that wil have useful items.
Hachijo Kodama 1
From the Crucible Spikes, go towards the temple and take the left path. Follow the path to find the Kodama behind the temple.
Hachijo Kodama 2 & 3
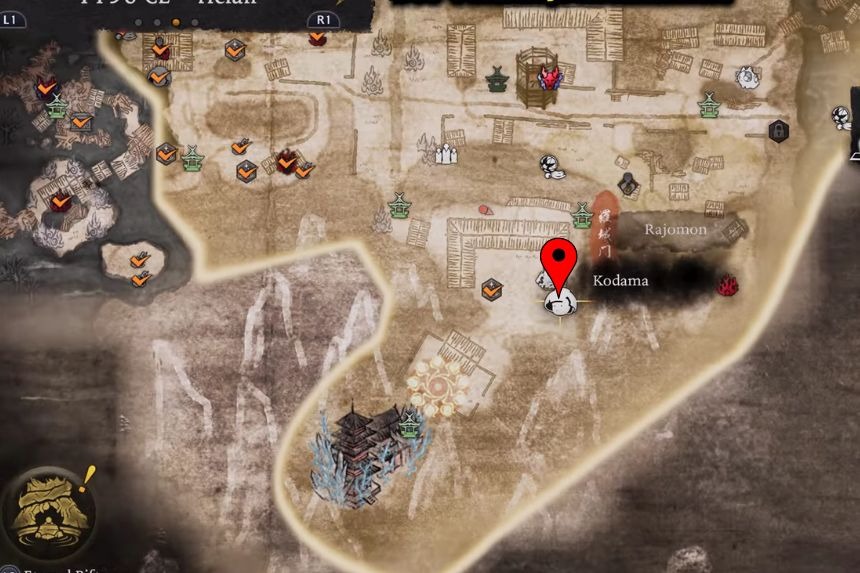
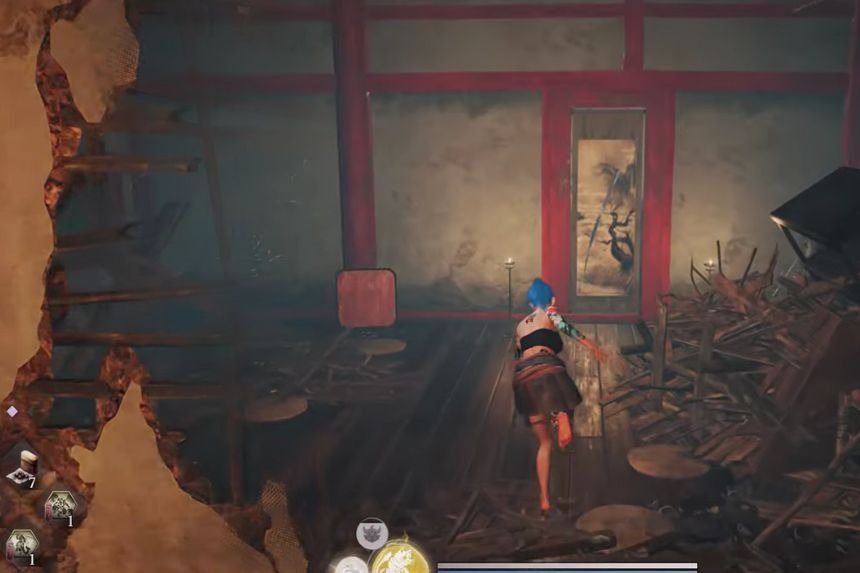
Go inside the main building and jump to reach the next part of the building. Then enter the building to find a hidden room behind a sheet of drawing. Destroy the drawing to enter the secret room and find the Kodama near some wooden crates.
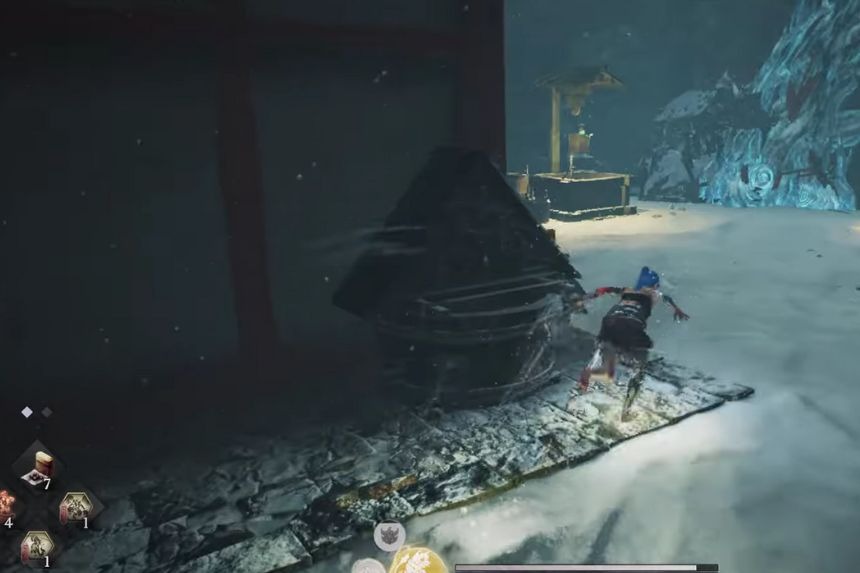
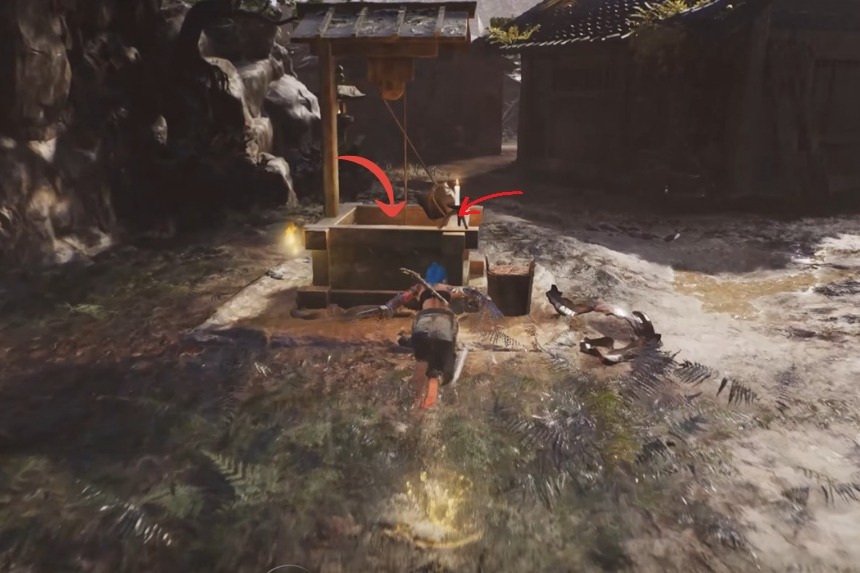
Return back and go towards the well in front of you. Inside the bucket of the well, you will find the Kodama.
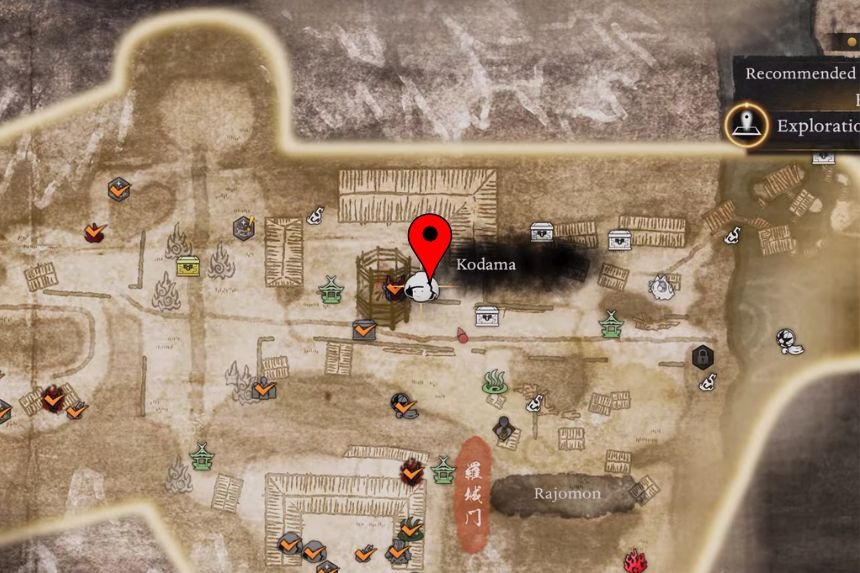
Hachijo Kodama 4
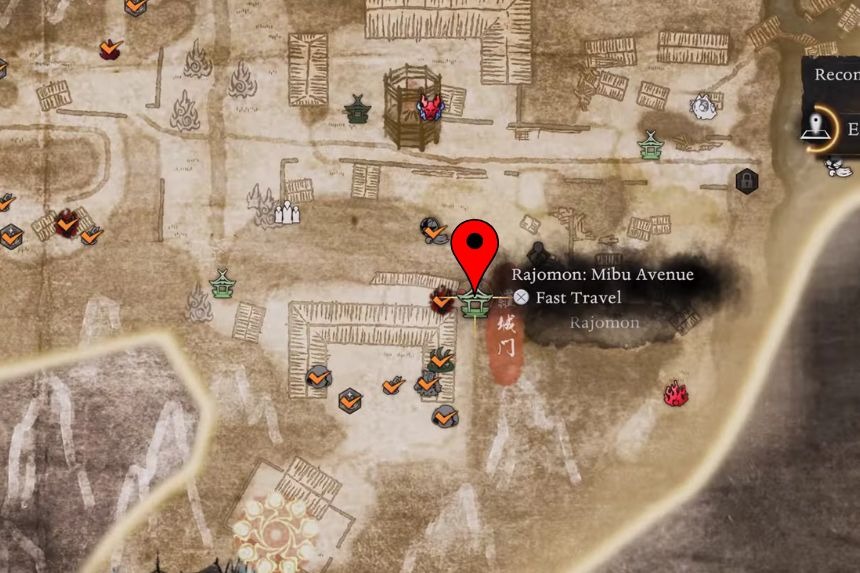
From the Rajomon Mibu Avenue, take a right turn and go towards the roof of a building. At the edge of the roof, you will find the Kodama.
Hachijo Kodama 5
Climb the watchtower with the help of the ladder. At the top of the tower, you will find the Kodama along with a chest.
Rokuhara
To reach Rokuhara, you need to complete the story quest. This area has lots of farms where you can find many useful items that can help in your journey.
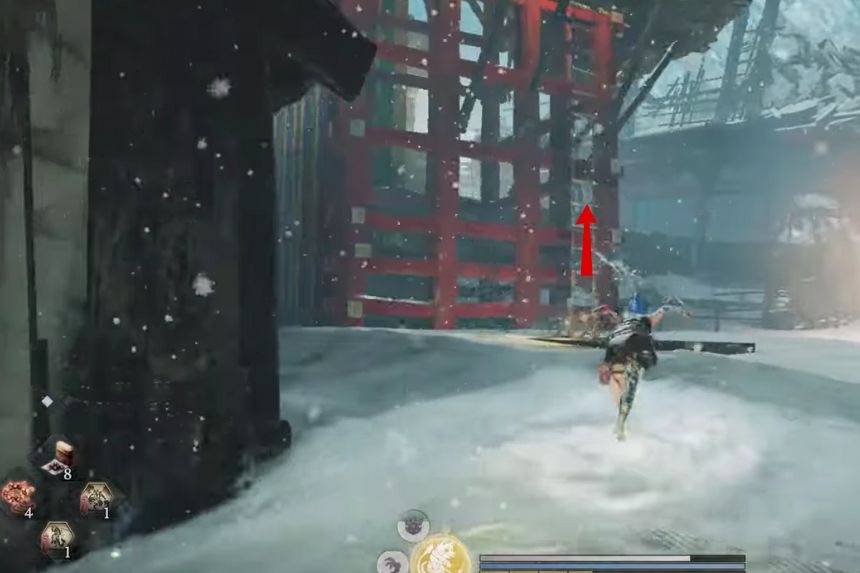
Rokuhara Kodama 1
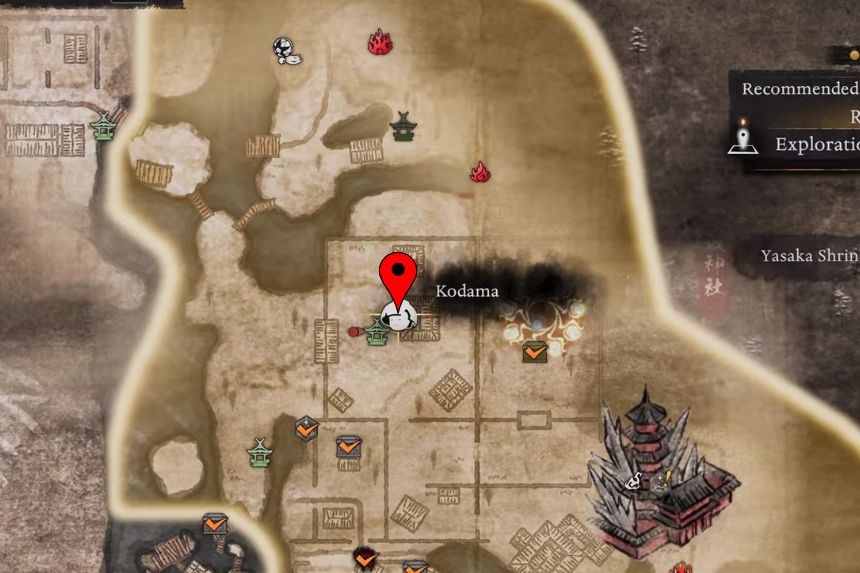

From the Yashaka Shrine Nishiro Gate, take a left turn and pass through the gate. Now, take a right turn to climb up the roof. At the corner of the roof, you will find the Kodama.
Rokuhara Kodama 2
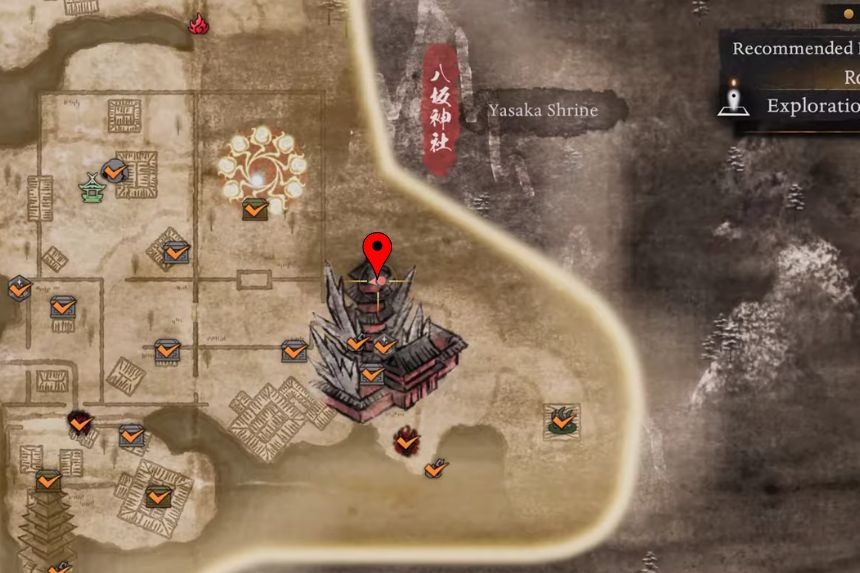
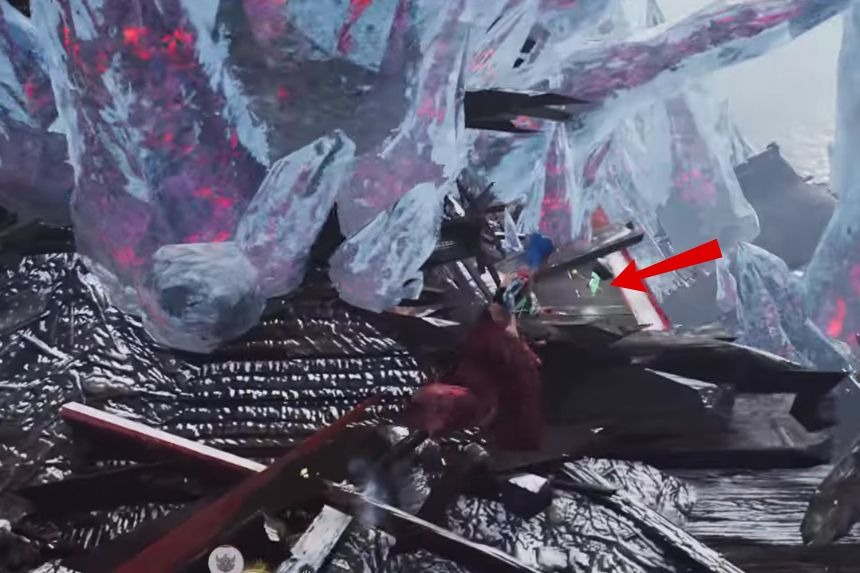
Inside the Yashaka Shrine, climb up the roof of the building on the left. Jump towards the small building in front of you to find the Kodama near the ice spike.
Rokuhara Kodama 3
Go towards the riverside area. You will see a large rock near the river shoreline. Here, you will find the Kodama near a rock.
Awawa No Tsuji
From the Tenryu River, go south to reach the Awawa No Tsuji. This area has fewer monsters compared to the other areas. So, you can easily explore the area.
Awawa No Tsuji Kodama
Go towards the Awawa No Tsuji and take a left turn towards the building. At the backside of the building, you will find the Kodama. Interact with it and guide it home.
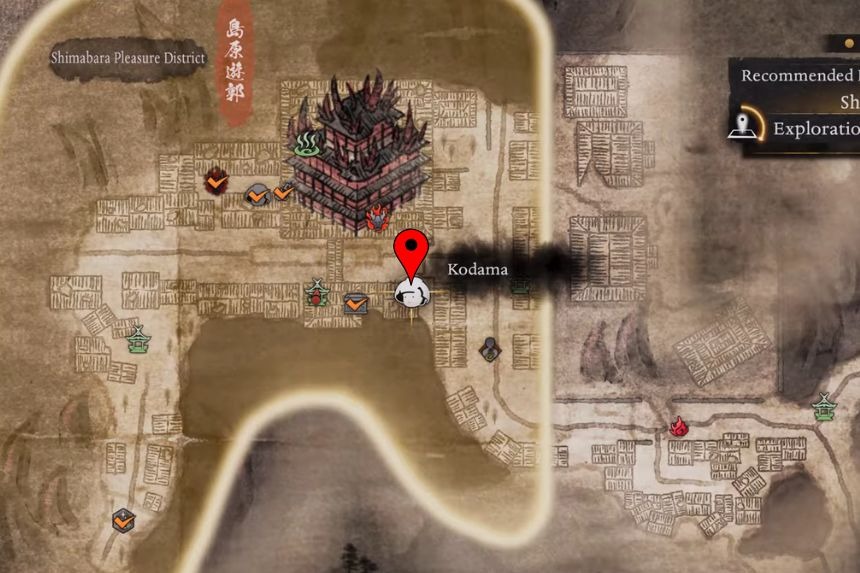
Shimabara
Shimabara is located on the west side of the map. This area is covered with forest, and inside it, there are many monsters. As the area is very dangerous so carry your best gear.
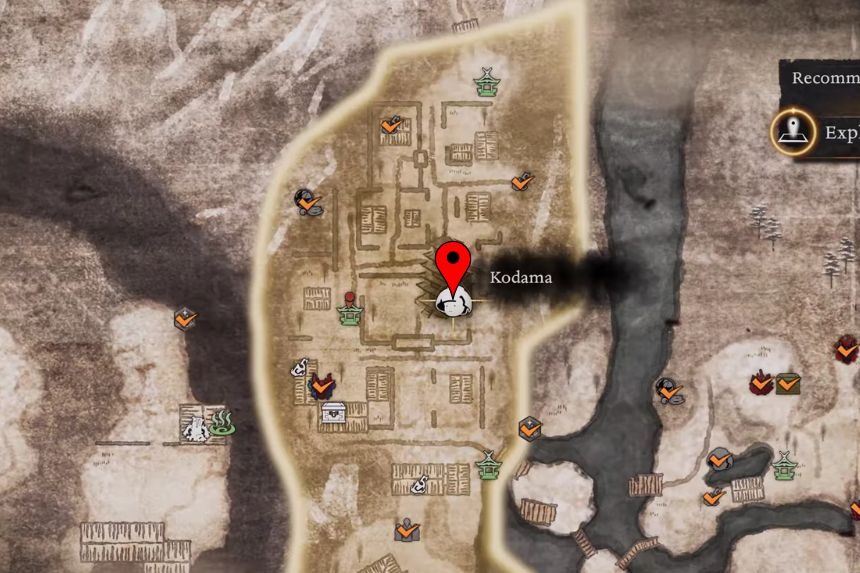
Shimabara Kodama 1
In the main building area, take a left turn and then a right turn. Now, climb up the roof with the help of a haystack. At the end of the roof, you will find the Kodama.
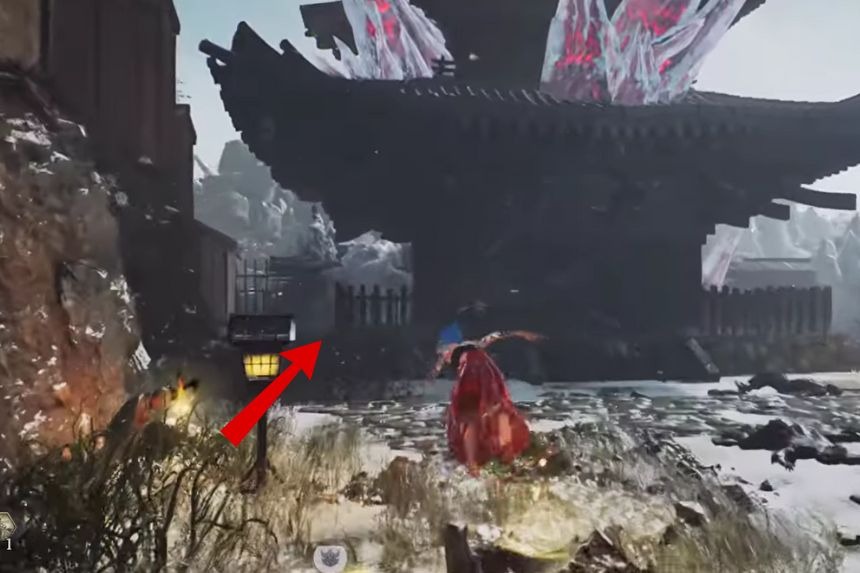
Shimabara Kodama 2
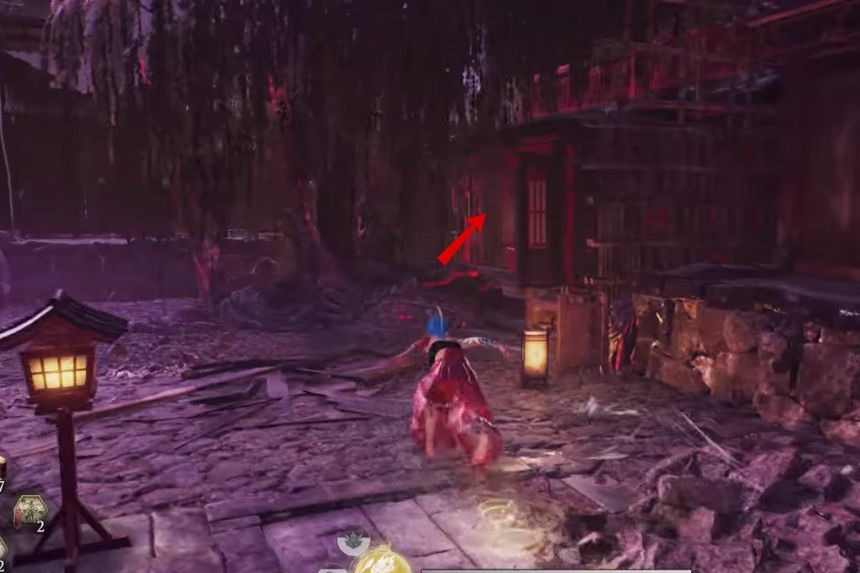
From the Shimabara Pleasure District, Geisha House, take a right turn and jump down towards the bridge. From there, take a right turn to a small building. Inside the building, you will find the Kodama.
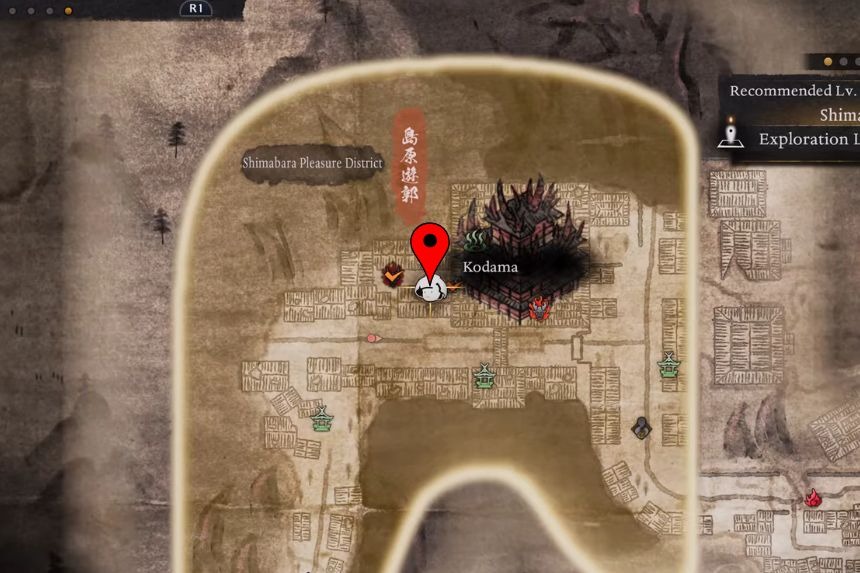
Shimabara Kodama 3

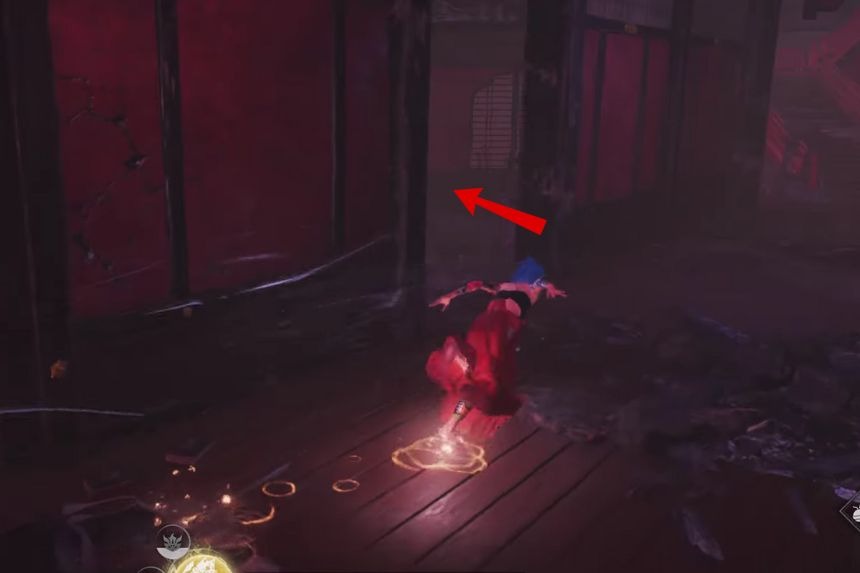
Start from the Shimabara Pleasure District and move forward. Take a right turn and then left to get inside a room. Inside the room is the Kodama.
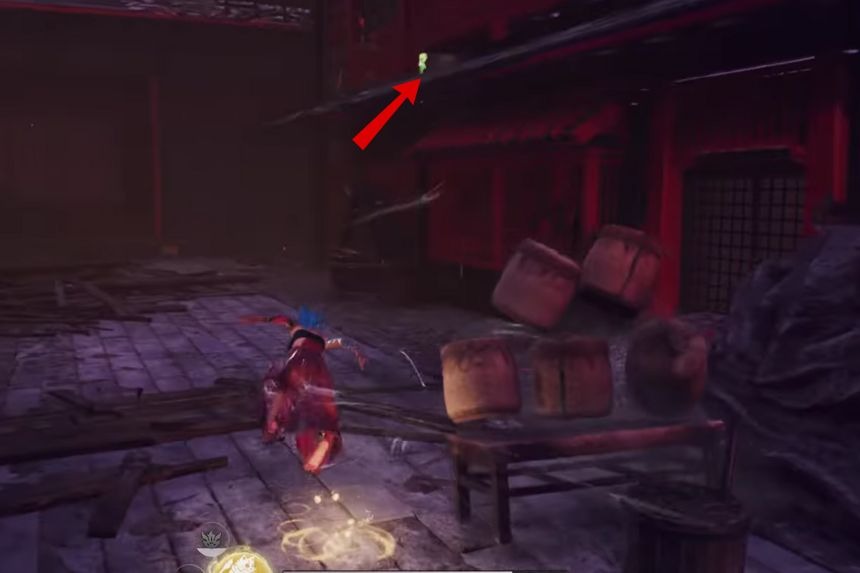
Shimabara Kodama 4
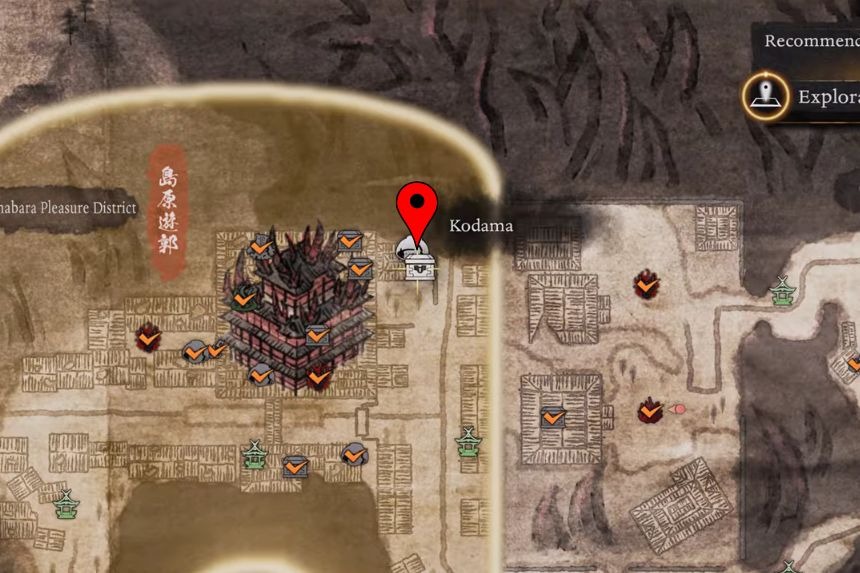

First defeat Kasha and move forward to enter the house. Inside the house, take a left turn and jump down to reach the small building. Beside the building is a cannon. Shoot it to break the wall of a hidden area. There will be an enemy inside, so defeat it and enter the building opposite to it. Inside the sitting area of the building, you will find the Kodama.
Shichijo
Shichijo is a dangerous area with lots of enemies and monsters, and you will reach it during the main storyline. This area was once filled with lots of people, but now it is abandoned and has become a deserted area.
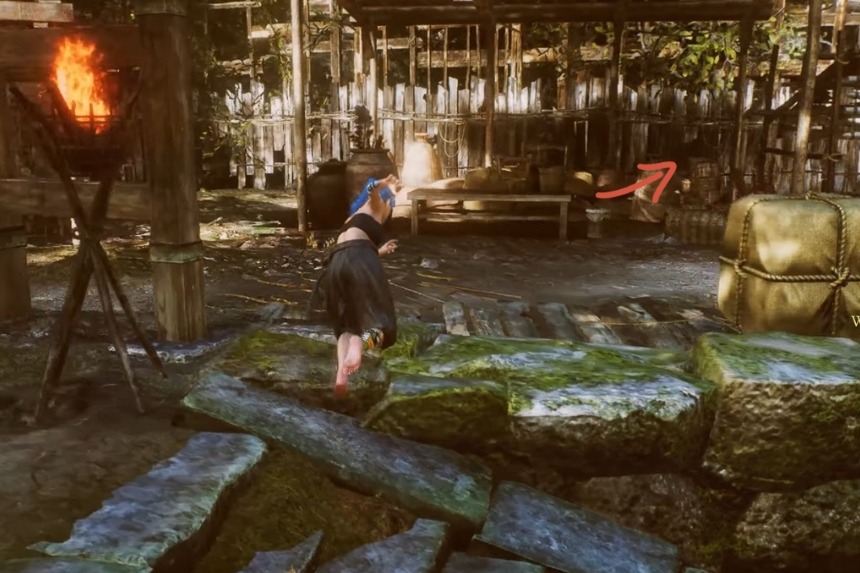
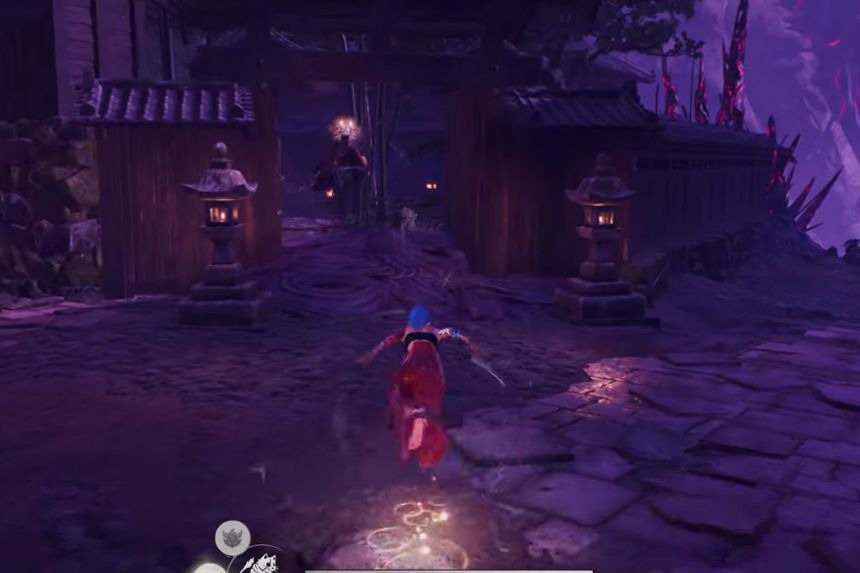
Shichijo Kodama 1
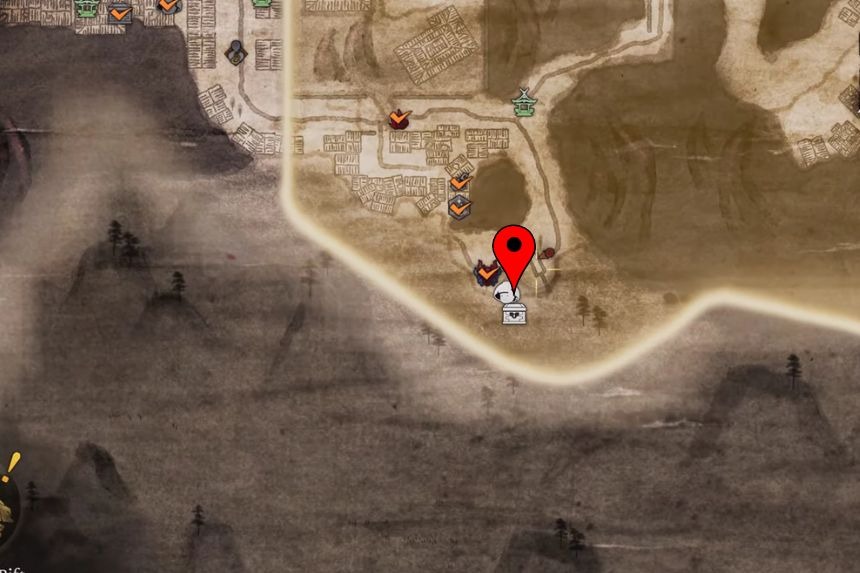
Go towards the mountain and enter the building on the left side. Near the chest, you will find the Kodama.
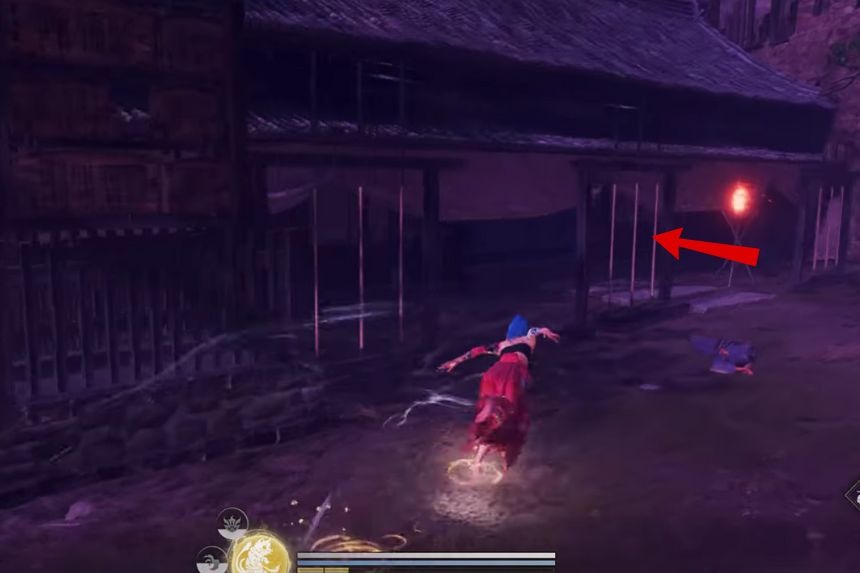
Shichijo Kodama 2
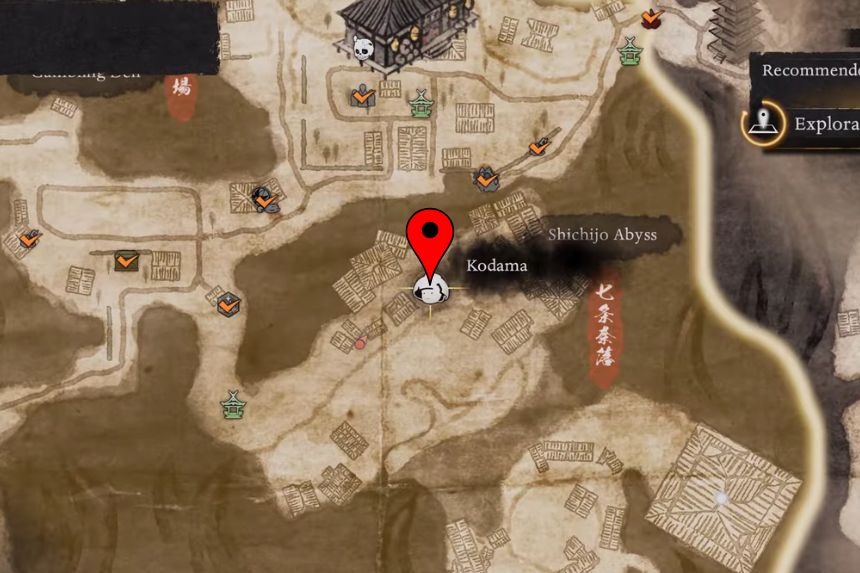
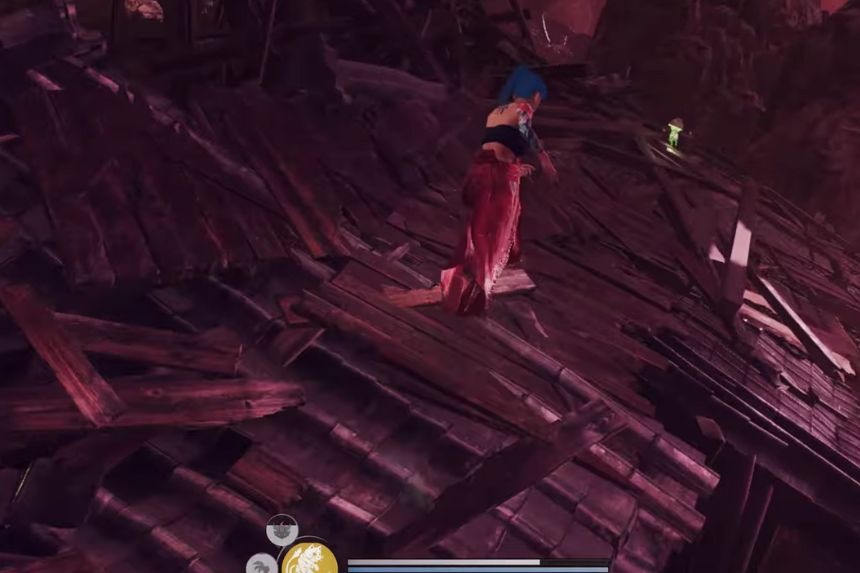
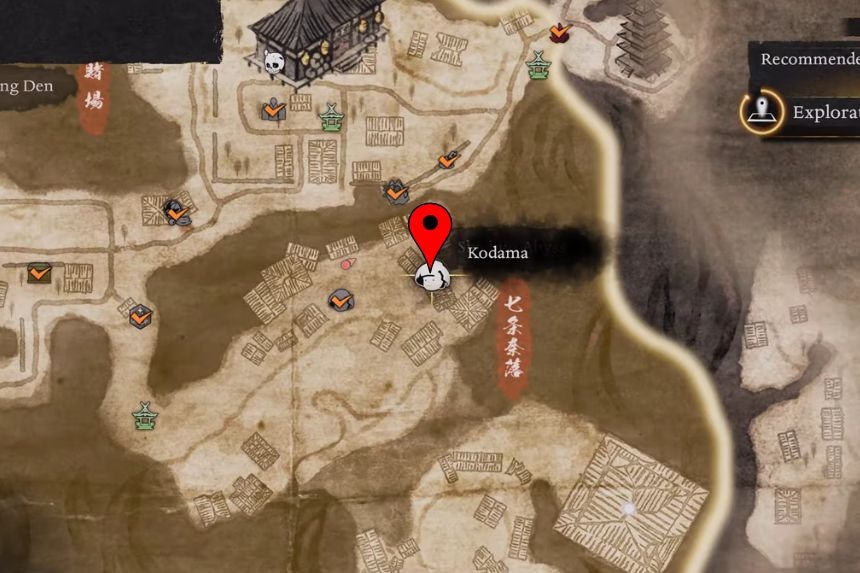
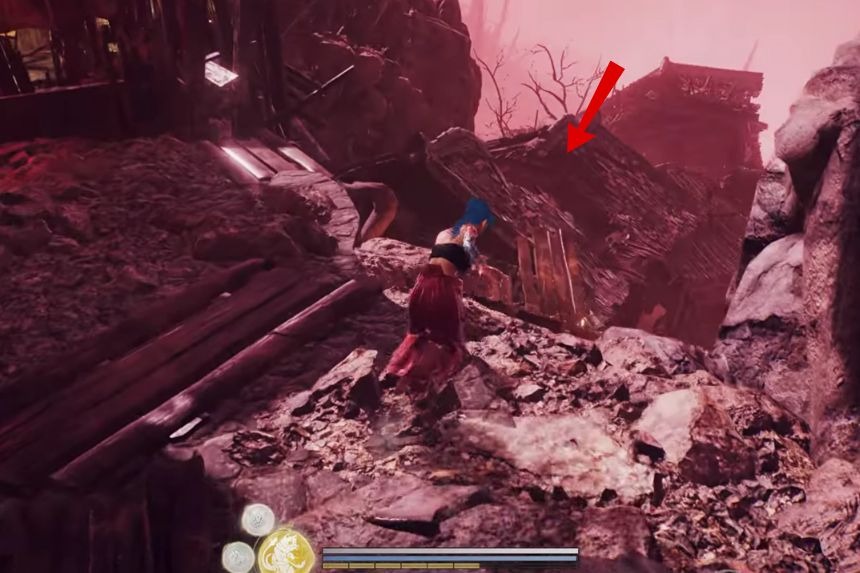
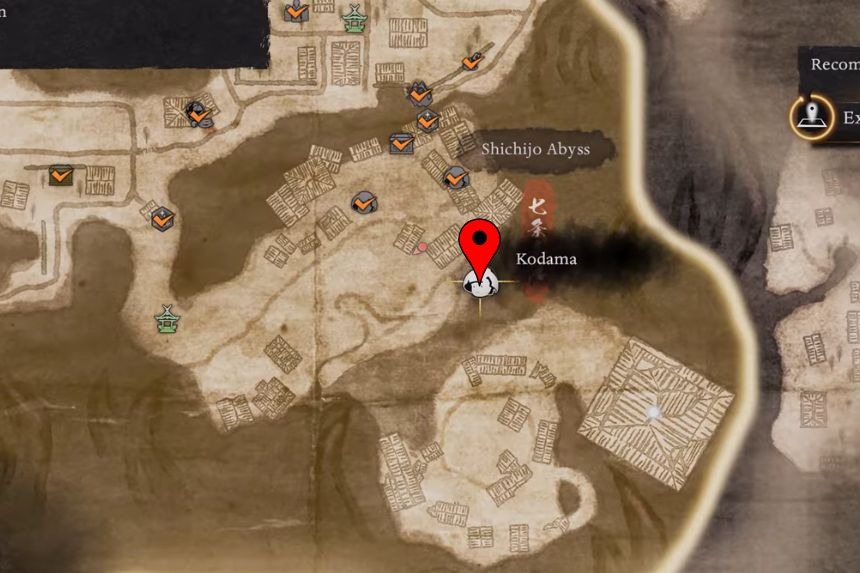
Inside the Shichijo Abyss, move forward, and climb up the roof. From the building window, jump towards the roof of the building to find the Kodama at the end of the roof.
Shichijo Kodama 3
Move down to enter a house. Inside the house, you need to head to the first floor. Then jump through the window to reach the roof of the house. You will find the Kodama on the roof.
Shichijo Kodama 4
Take the left path and jump down towards the roof of the building. From here, move forward and at the end of the building, jump down to find the Kodama at the edge of the broken house.
Shijo
Shijo is a very small place with not much to explore. There are also very few enemies and building so you can easily explore the area, but always carry your best gear because this area can sometimes have high-tier enemies.
Shijo Kodama
In the main area, go inside the building on the left. Near the candles, you will find the Kodama sitting on a rock.
Gion
Gion is also a small area, but with very big buildings that have many useful items. As the area has many dangerous enemies, be careful while exploring the area.
Gion Kodama
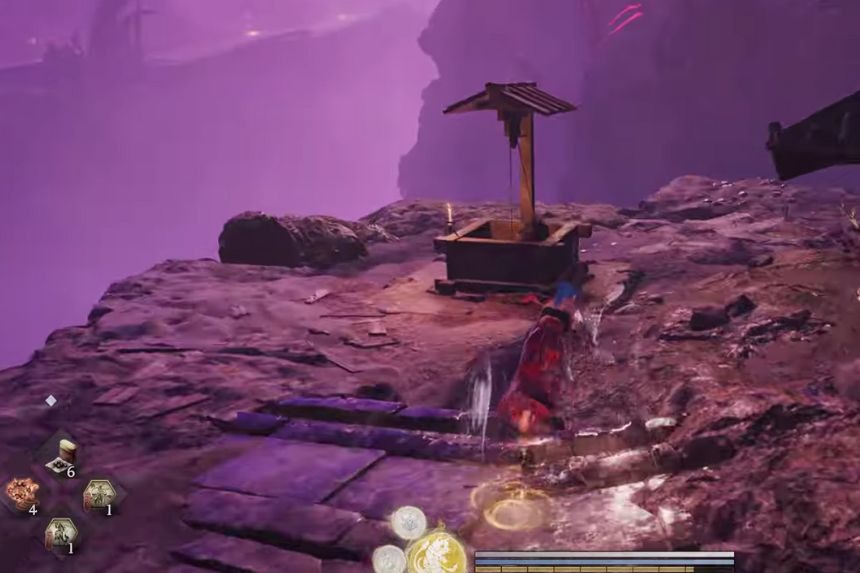
From the main building, take a right turn to find a well near the edge of the cliff. Drop the stone inside the well so the bucket inside will come up. And this will free Kodama.
Kiyomizu
Kiyomizu has lots of hill areas where you need to climb to reach the buildings. After the calamity, the place was abandoned, and it was taken over by the monsters. Kill all the monsters to move forward in the game.
Kiyomizu Kodama 1
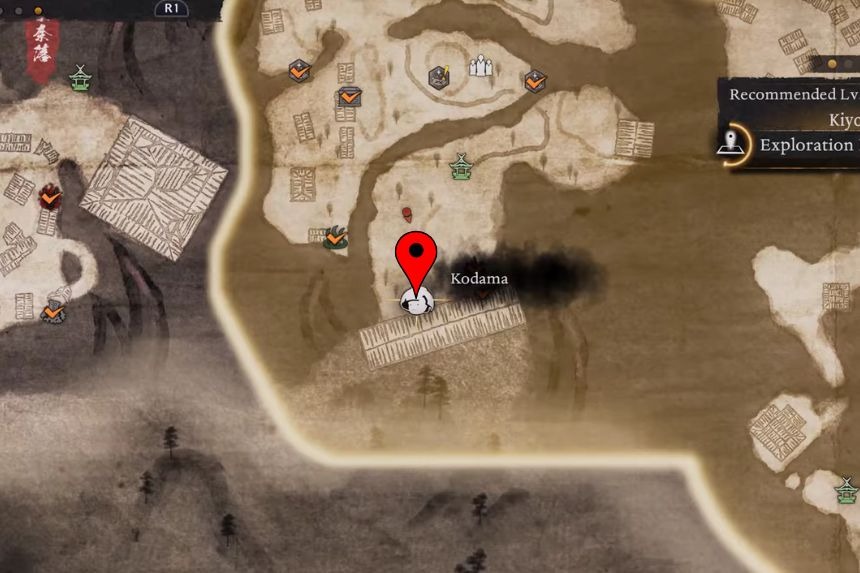
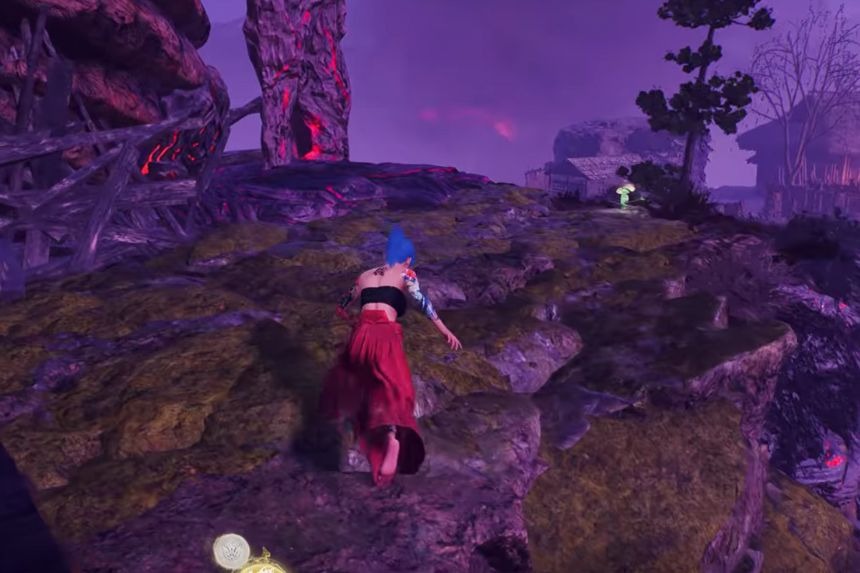
Go towards the big building in front of you and climb the rocks to reach the edge of the cliff and you will find the Kodama sitting there.
Kiyomizu Kodama 2
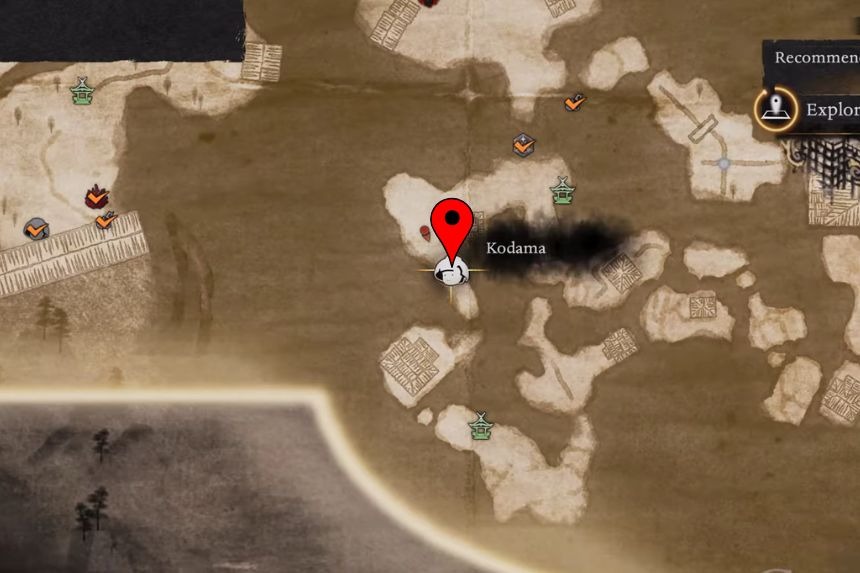

Cross the bridge and take a sharp right turn to reach a narrow path. At the end of the path, you will find the Kodama under the bridge.
Kiyomizu Kodama 3
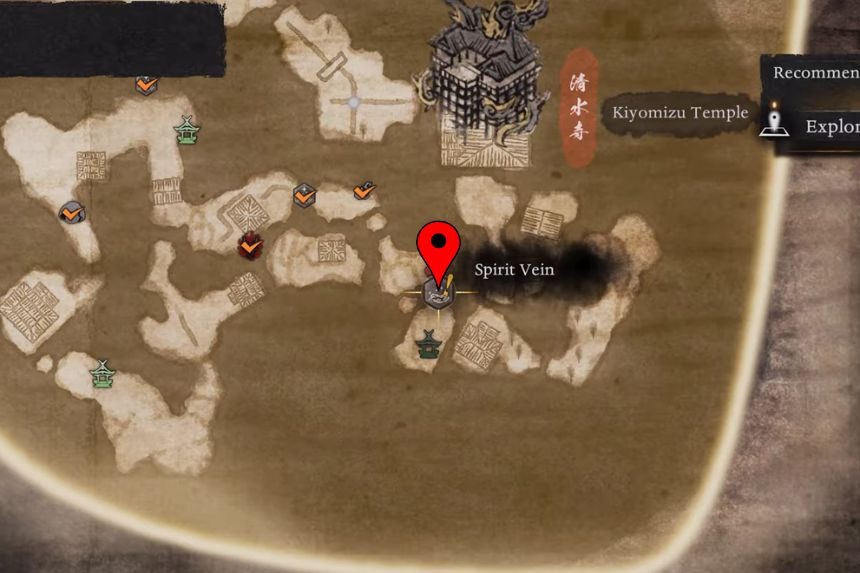
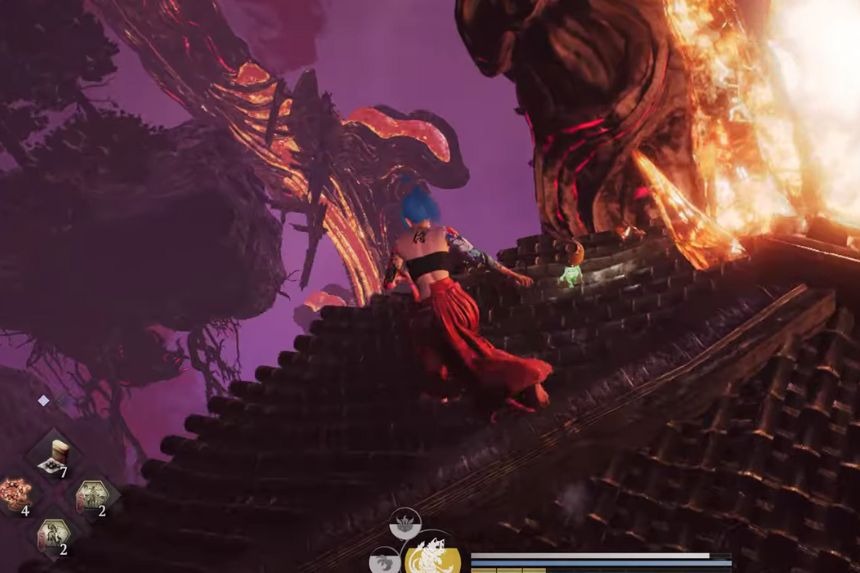
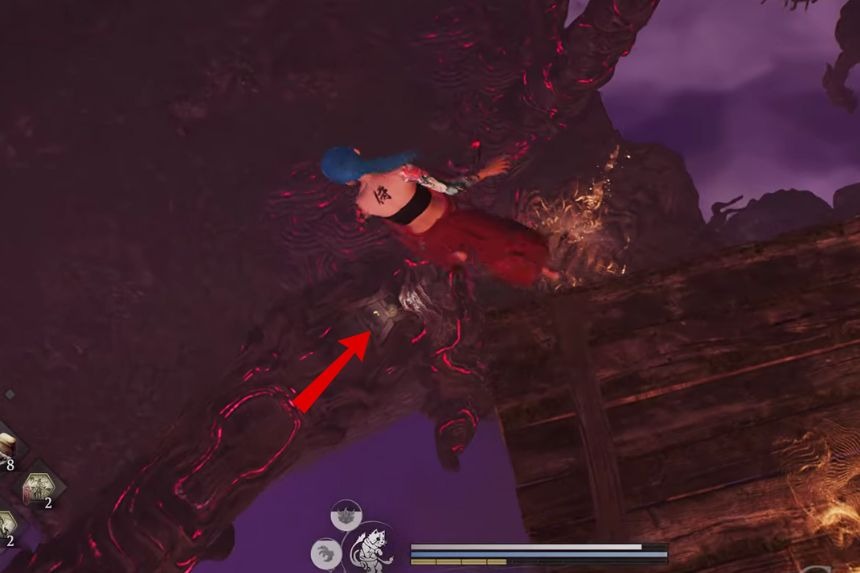
Use the Spirit Vein to move upwards and reach the roof of the building. The Kodama is sitting on the roof beside the magma crystal.
Kiyomizu Kodama 4
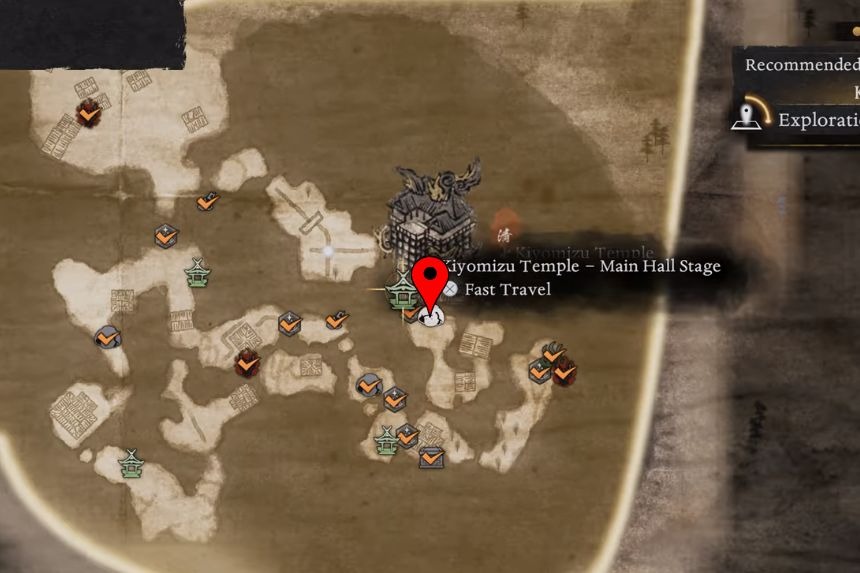
Go south to Kiyomizu temple. Here, you need to drop down from the platform to find the Kodama.
Nijo Castle
Nijo Castle was once a powerful authority, but after the monster invasion, it was left behind, and now it is only in ruins. But till now, you can find a lot of useful items inside the castle.
Nijo Castle Kodama 1
This Kodama is found on the roof of the building in front of you. To climb the roof, use the Spirit Vein which is present on the back side of the building. Climb the roof and jump down to enter the first floor of the building. Inside the room, near the chest, you will find the Kodama.
Nijo Castle Kodama 2
Go towards the castle area and climb up the stairs. Move towards the right side and go towards the wooden platform. Jump down to enter the room. Inside the room, you will find the Kodama.
Nijo Castle Kodama 3
At the back side of the building, you will find a bamboo grove. Cross the bamboo grove towards the mountain. You will find the Kodama sitting on a rock.
Mibu
Mibu was once a religious place where people from all over the world used to come. But after the calamity, no one returned to the temple, and it was destroyed by the monsters. Now, it lies on the ground with a few buildings and a temple area.
Mibu Kodama
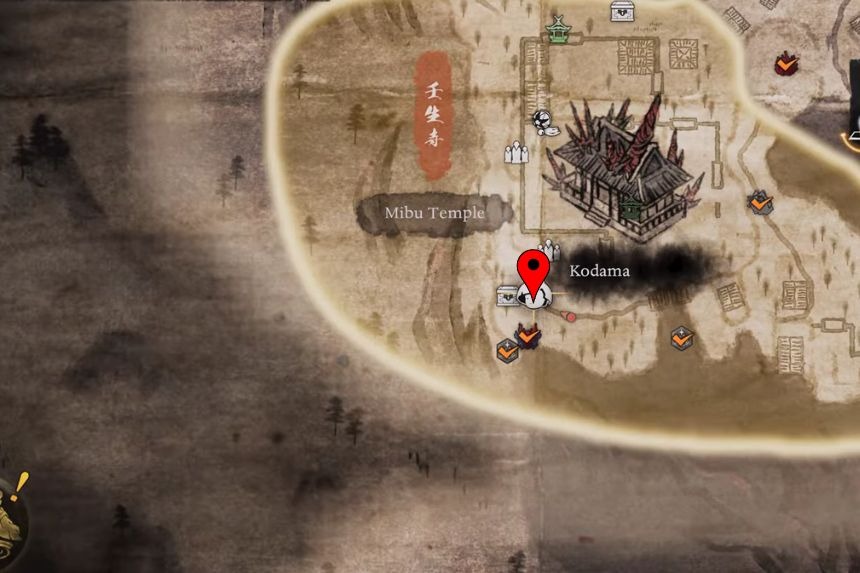
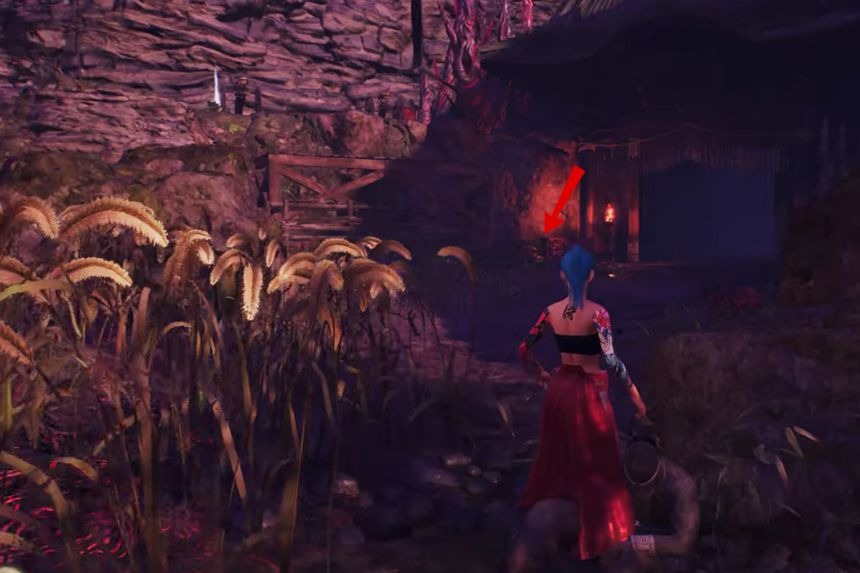
Go to the south side of the Mibu temple. You will get the Kodama near the entrance.
Shirakawa
Shirakawa used to be a small island where people used to come to enjoy the scenery. It has a lot of buildings and shrines, but now it is filled with monsters and enemies.
Shirakawa Kodama 1
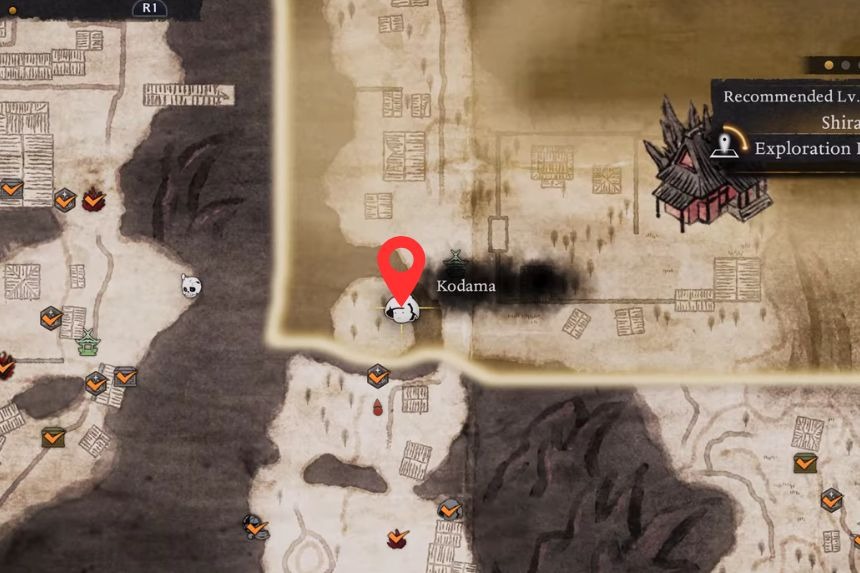
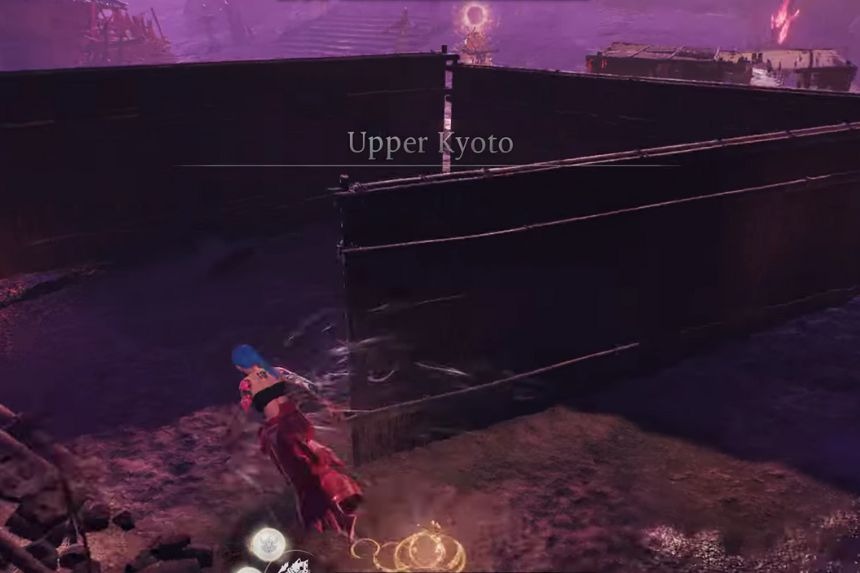
Use the Spirit Vein in front of you to reach Upper Kyoto. Then move forward, and you will find the Kodama in the corners of the bamboo wall.
Shirakawa Kodama 2

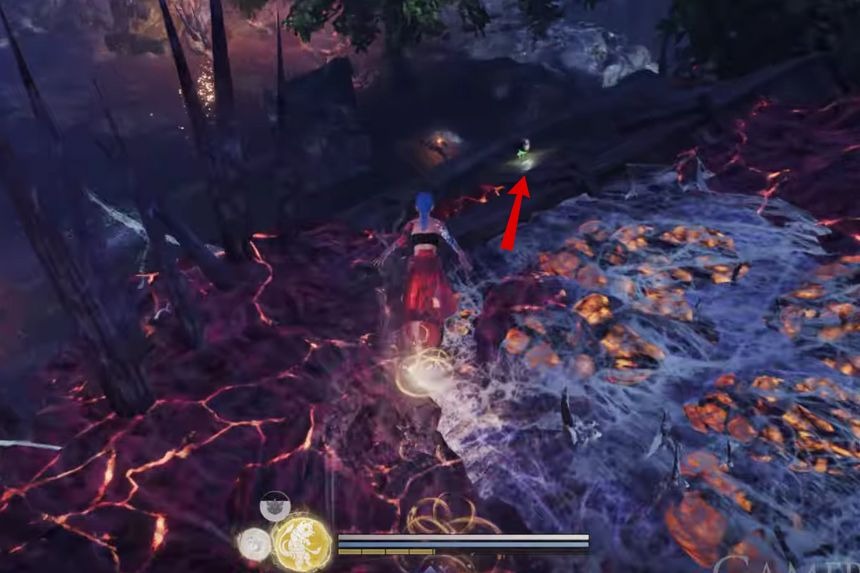
Cross the road filled with spikes to reach a tree. In front of you, there is a Kodama sitting near a roof.
Kyoto Imperial Palace
The Kyoto Imperial Palace has lots of buildings. It was once a palace where the king used to rule the area. It was the last place where the monsters invaded. You can still find some remains of the past war inside the castle. As there are a lot of dangerous enemies and monsters, you can get many useful items.
Kyoto Imperial Palace Kodama 1
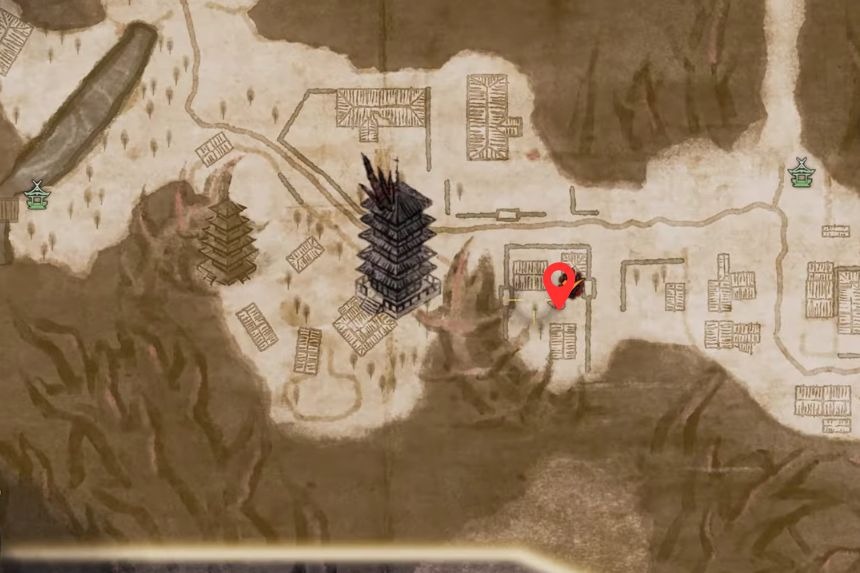
Inside the palace ground, you will find a well. Drop the stone inside to make the bucket come up. This will save the Kodama, and you can now interact with it.
Kyoto Imperial Palace Kodama 2
Inside the palace, take a right turn towards the locked door. Now, open the locked door and take a right turn again to find the Kodama sitting on a rock.