
There can be several reasons why Battlefield 6’s Open Beta isn’t working on your system. One of those reasons might be related to Secure Boot, which can be checked and calibrated on your PC. The process isn’t complex and can be executed from the BIOS menu. This is a short and handy guide to navigate through the process.
BIOS settings are not usually changed, so if you’re handling them for the first time, then seek the instructions from your Motherboard or PC manufacturer.
What is Secure Boot?
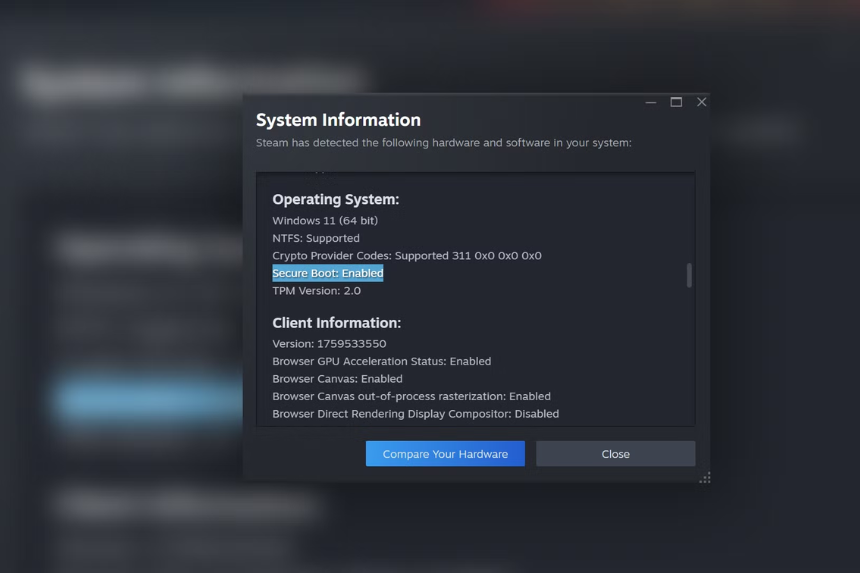
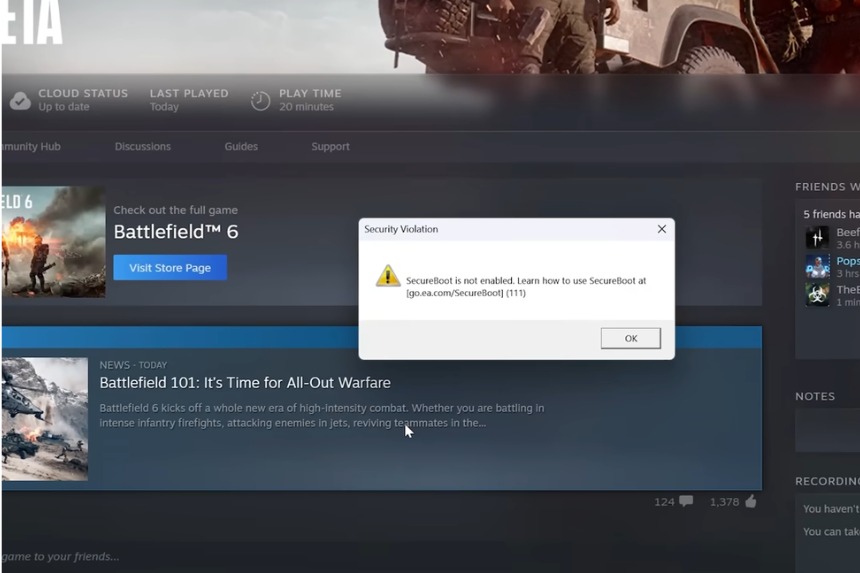
This is a system that detects malicious programs before they go into your OS, and EA is probably using this to prevent cheaters and third-party apps from exploiting Battlefield 6.
Enabling Secure Boot isn’t a complex process and can be broken into a few simple steps.
| Step | Details |
| 1 | Verifying Secure Boot |
| 2 | Checking Disk Partition |
| 3 | Converting MBR to GPT |
| 4 | Enabling Secure Boot |
Step 1: Verify SecureBoot State and BIOS Mode
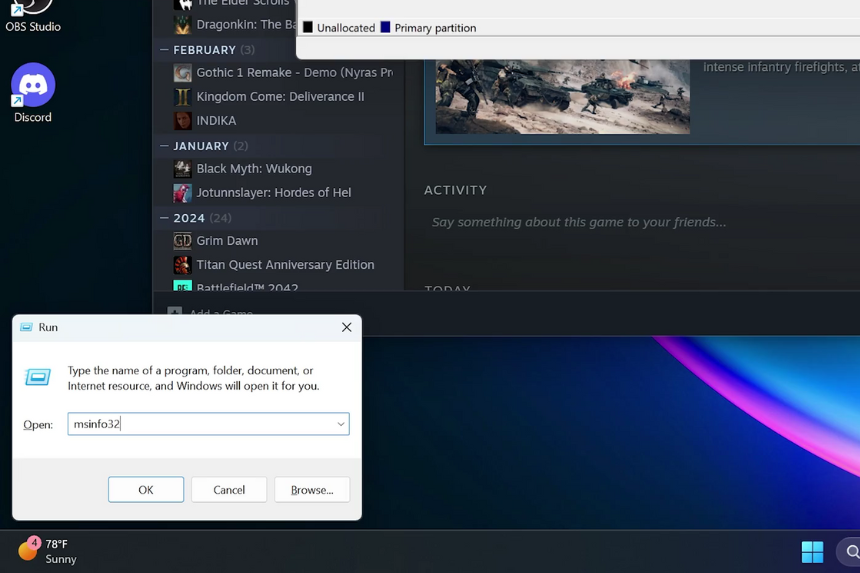
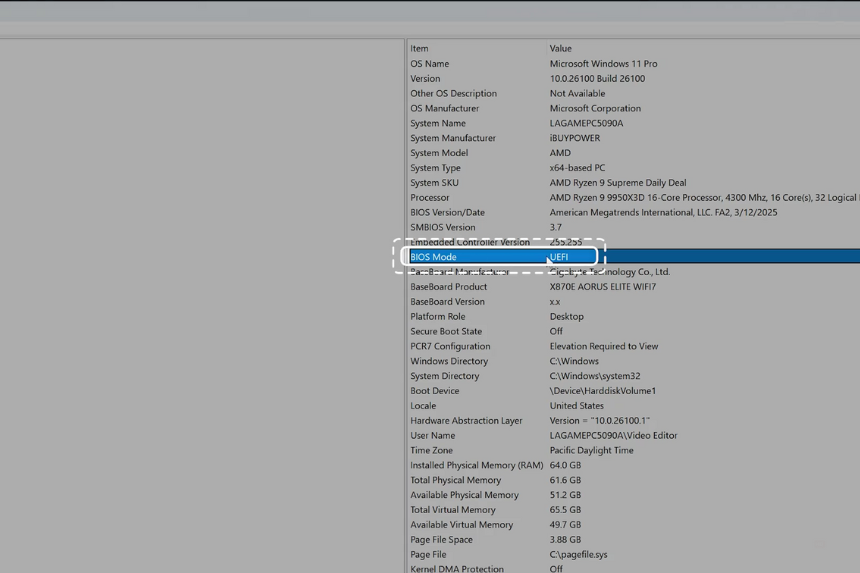
Open your System Information Window and type “msinfo32”.
- Search for the Secure Boot option and check whether it is turned on or off.
- A little above the Secure Boot would be your BIOS settings, which must be set to UEFI mode.
- After checking these requirements, move onto the next step.
(Note: If your Secure Boot is off and BIOS mode isn’t set to UEFI, then contact your PC or Motherboard manufacturer since the BIOS setting can not be changed without their assistance.)
Step 2: Check Disk Partition Style
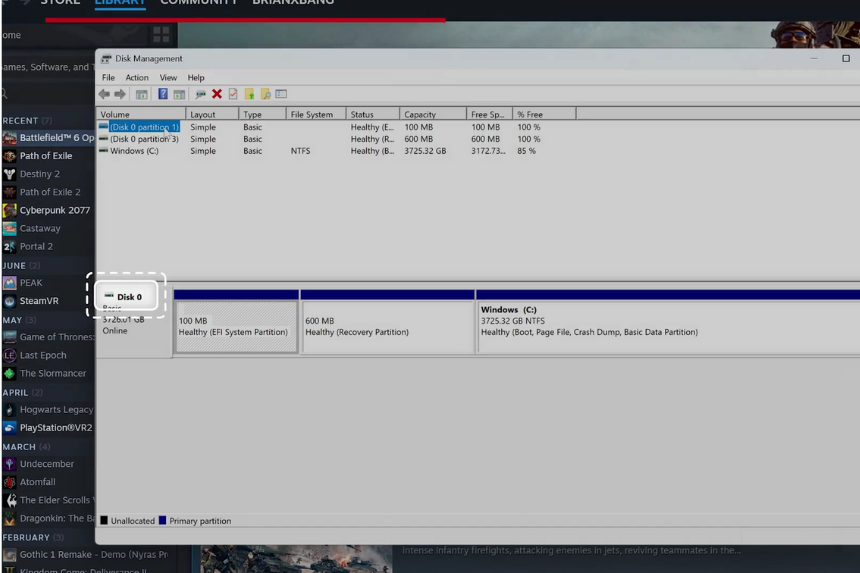
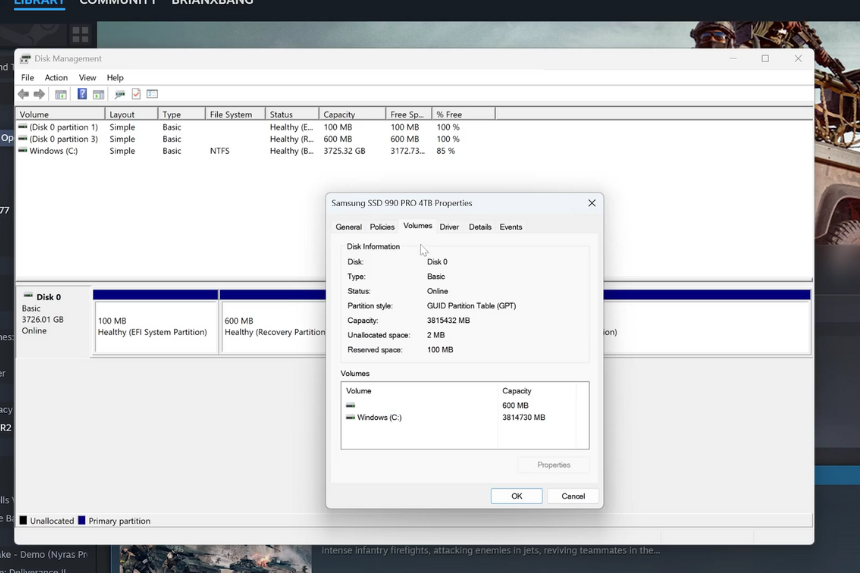
Open your Disk Management window and look for the disk where Windows is installed. (Usually the Disk C)
- Right-click the disk number on the left of the Windows C Drive
- Open Properties
- Go to the Volumes tab.
- Look at the Partition style; it must be GPT
Step 3: Convert Disk from MBR to GPT
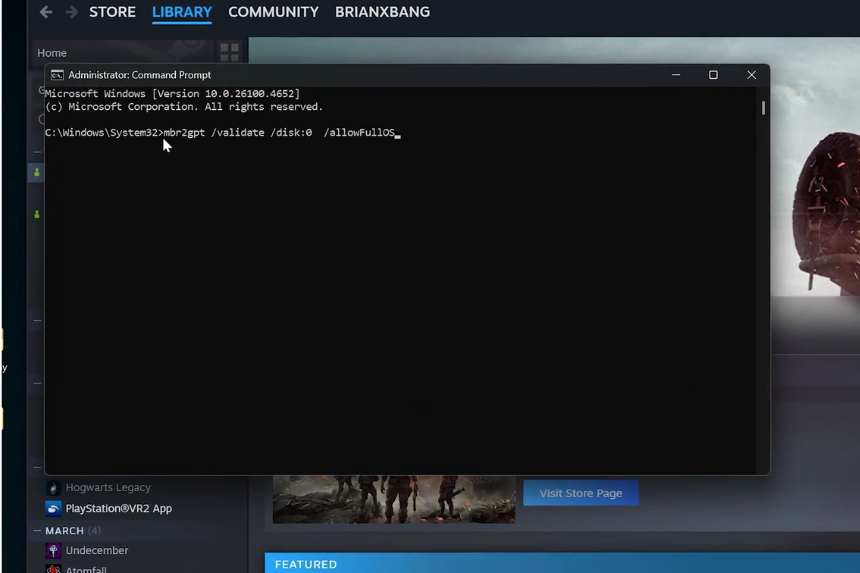
Open your Command Prompt as administrator and then convert the disk from MBR to GPT. (If your disk setting is MBR in the previous step)
Follow the steps given below to check your disk:
- Run the command, “mbr2gpt /validate /disk:X /allowFullOS”
- Replace the disk drive number with the number for the hard drive where Windows is installed. (The number is 0 in most cases)
- Run the conversion command again if the validation is successful. Replace the “/validate” with “/convert” in the command.
- mbr2gpt /convert /disk:X /allowFullOS
- Follow the procedure mentioned in the previous step to confirm the disk partition style.
Step 4: Enable Secure Boot in BIOS

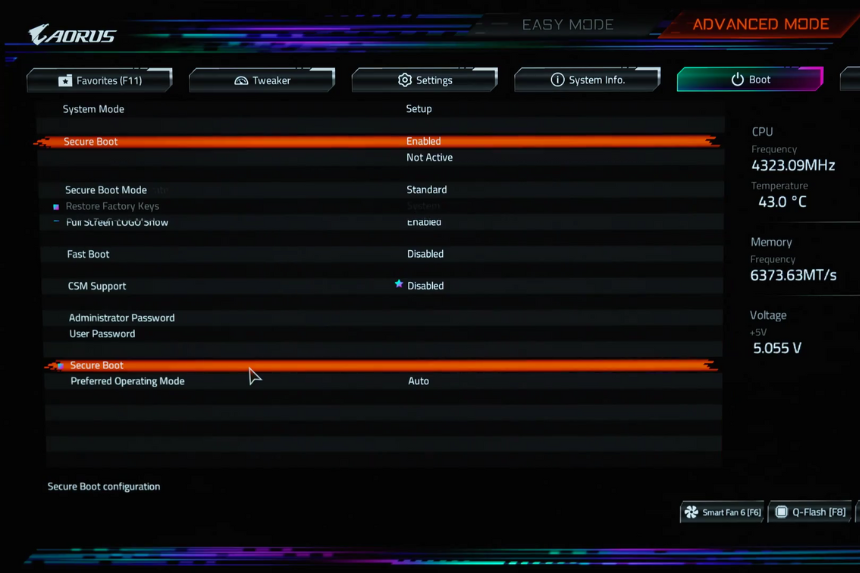
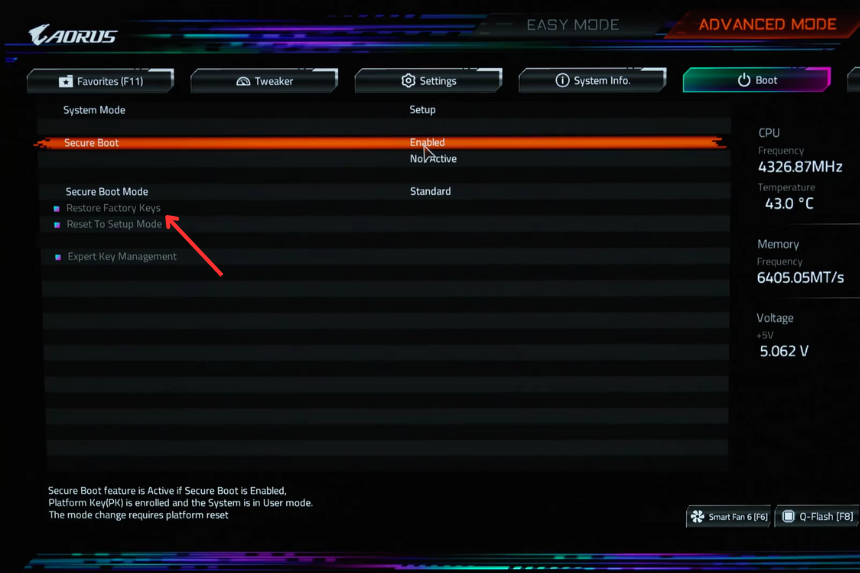
Enter BIOS setup after restarting your PC, which can be done by pressing the F12 key or the Delete key. (You must press the key while your system is being booted) Navigate over to advanced or security settings and enable Secure Boot.
(Note: Underneath that, it may also say Active or not active. Secure Boot needs to be both Enabled and Active to work.)
- If it appears as active but the Secure Boot isn’t enabled, then search for something called the “Restore Factor Keys.” (This option varies depending upon the motherboard manufacturer.
- Choosing this setting will restart your BIOS and should make it so that you are now able to set Secure Boot to Enabled and have it appear as active.