
If you’re in the Revenge of the Savage Planet and want to unlock every upgrade, then collect Printer Slurry. The moment you collect your first one, you’ll unlock the “Raw Potential” mission that sends you across all parts of the planet to gather every last Printer Slurry. In this guide, we’ve listed the location of all 41 Printer Slurry crates, along with tips on how to access each one, including the upgrades you’ll need along the way.
All Printer Slurries Locations
You’ll find Printer Slurry inside crates, just press Square (or X) to open it up and grab the item. These crates are scattered all around the world, usually hidden behind a simple puzzle or guarded by enemies you’ll need to deal with first. Printer Slurry is a key material needed to unlock upgrades, so be sure to pick it up whenever you see one. Once you collect your first Printer Slurry, you’ll kick off a new mission called “Raw Potential.” It’s a collectathon-style task that challenges you to find all the Printer Slurry out there in the world.
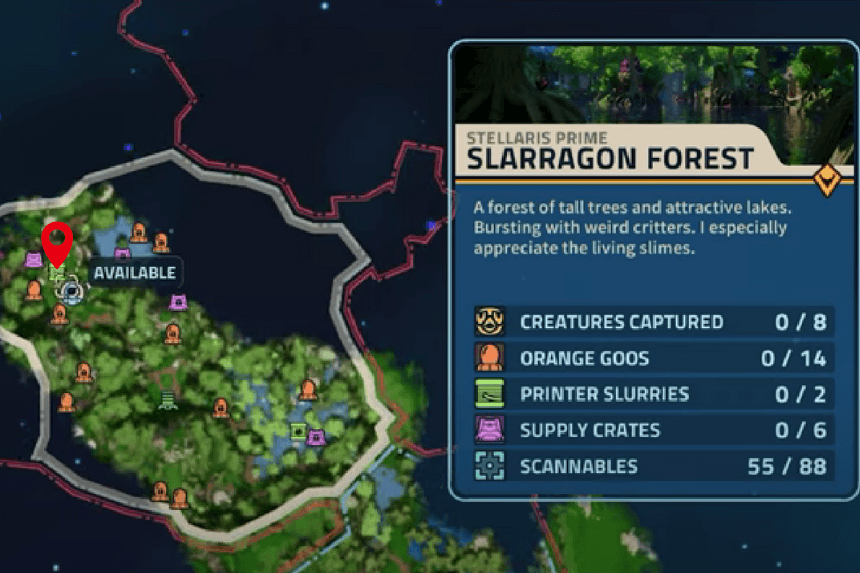
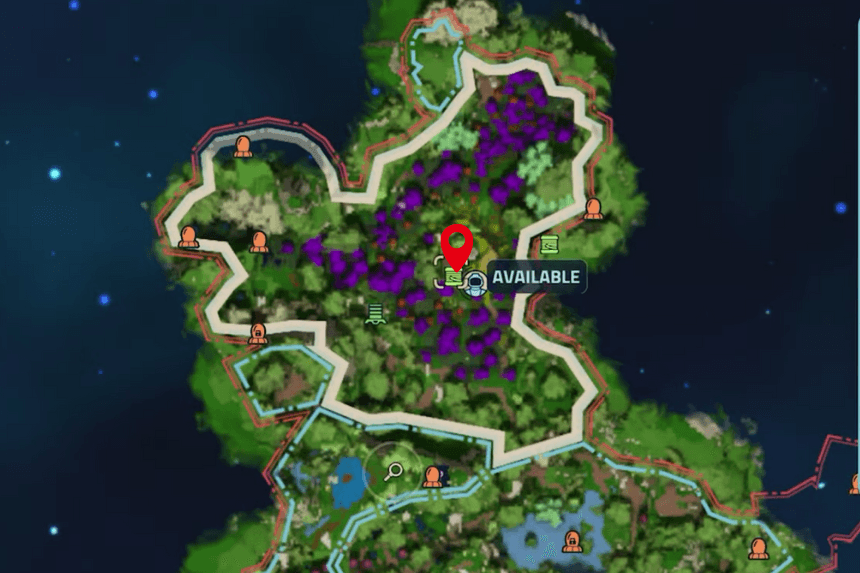
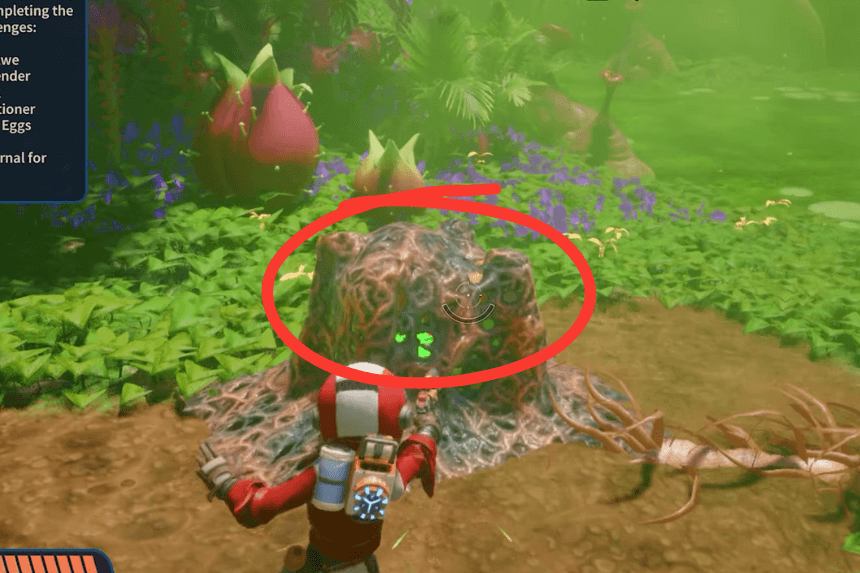
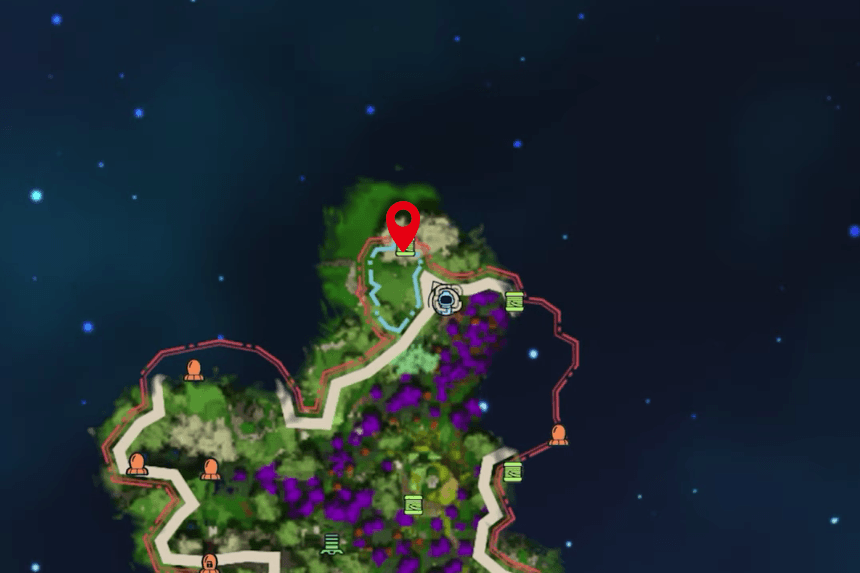
1. Stellaris Prime – Slarragon Forest
Click on the images to enlarge
Go to the location provided on the map above, dodge some green slimes, and jump on the big purple mushrooms and you will reach the area to find your first Printer Slurry to start the Raw Potential Quest and find the remaining 7 printer slurries in Stellaris Prime.
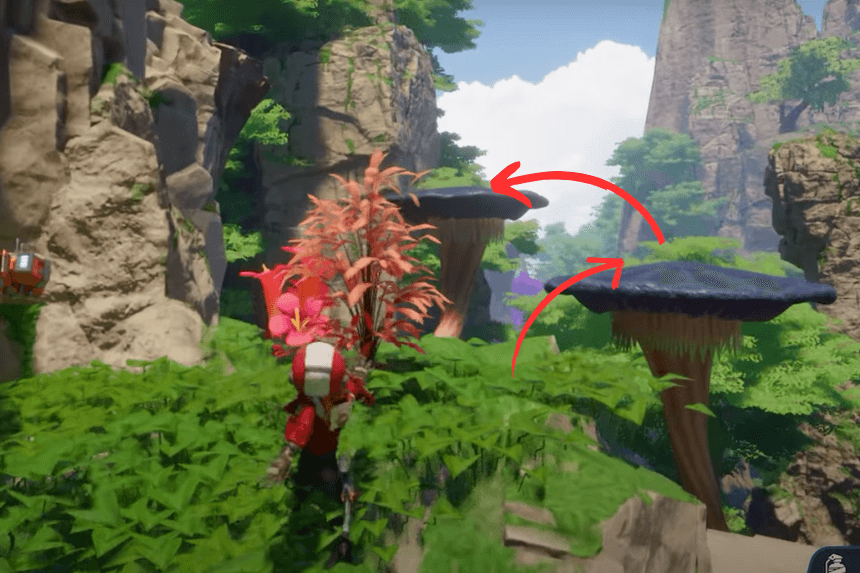
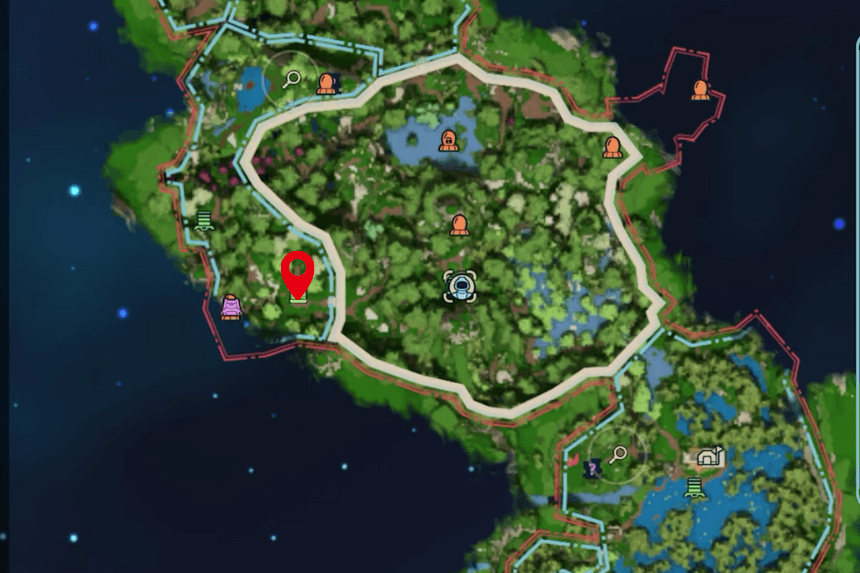
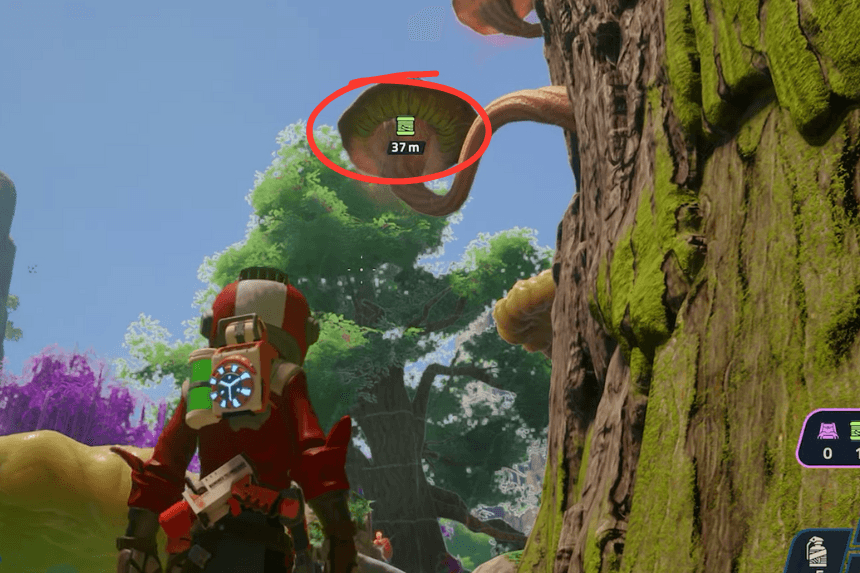
2. Stellaris Prime – Slarragon Forest
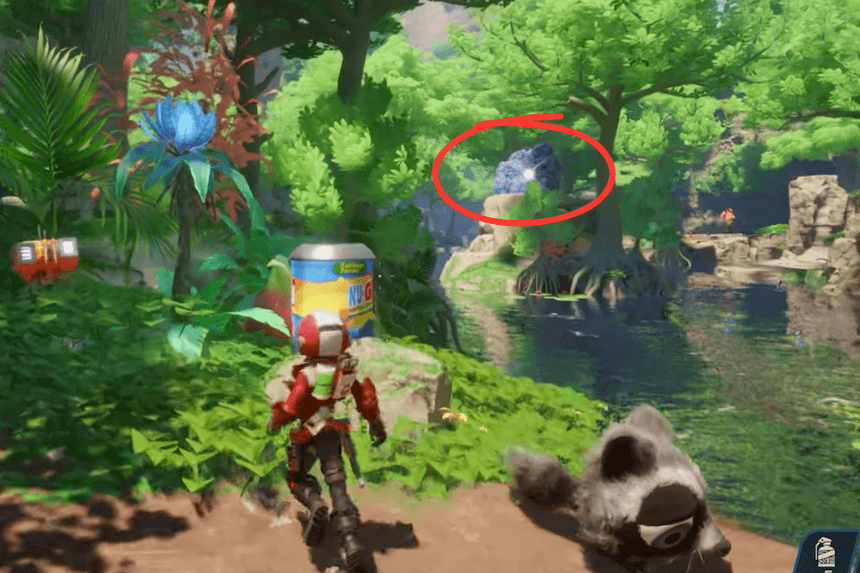
Click on the images to enlarge
Go to the location provided on the map above, move through the water and find your second printer slurry surrounded by a boulder. You need to break it to acquire it. You need to have the Proton Whip x11 upgrade to have it.
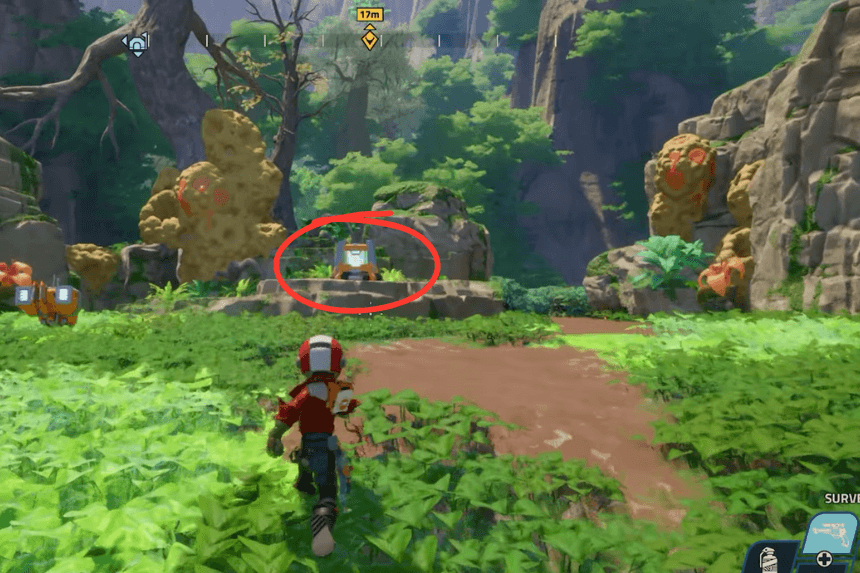
3. Stellaris Prime – Slarragon Forest
Click on the images to enlarge
Go to the location provided on the map above, move forward, and you will find your third printer slurry, which will be locked. You have to kill all the enemies nearby to unlock it. You need to have the Proton Whip Tether-I upgrade to have it.
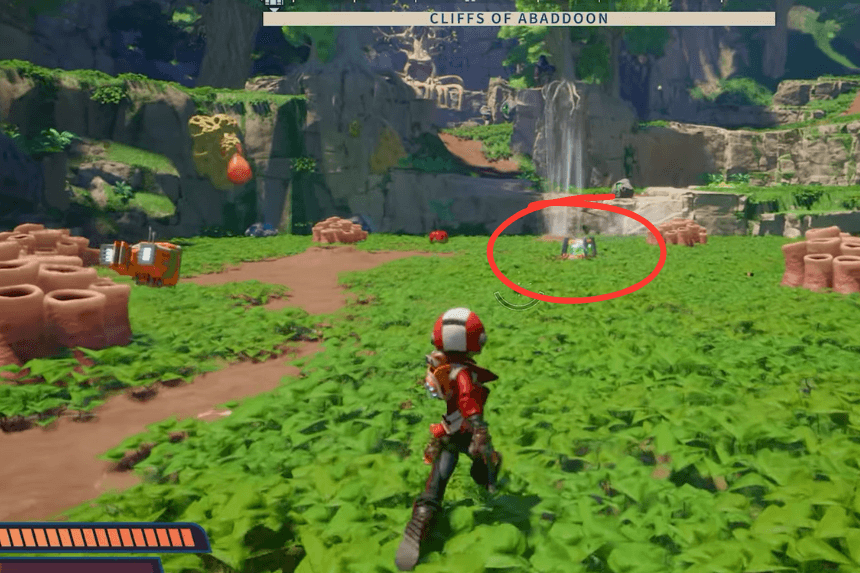
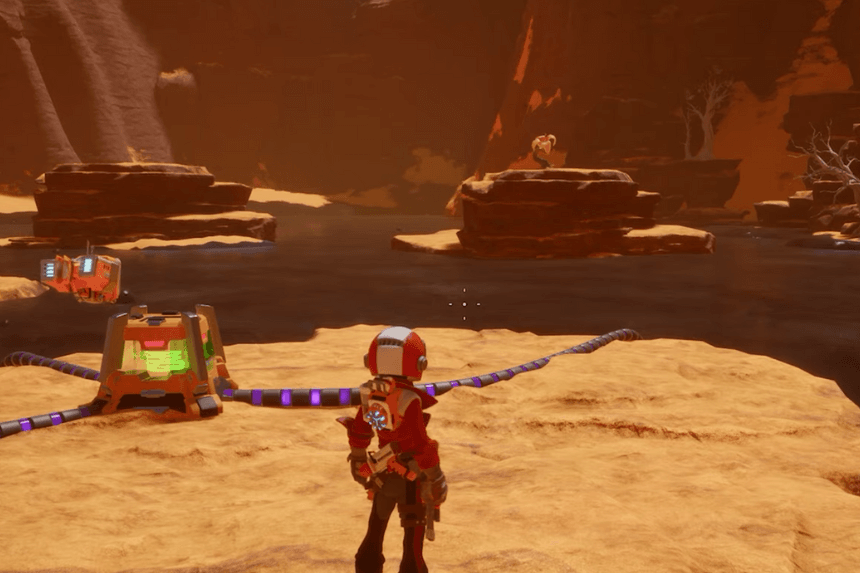
4. Stellaris Prime – Cliffs of Abaddon

Click on the images to enlarge
Go to the location provided on the map above, move forward, and you will find your fourth printer slurry between the water body. You can obtain it after capturing the Hognork.
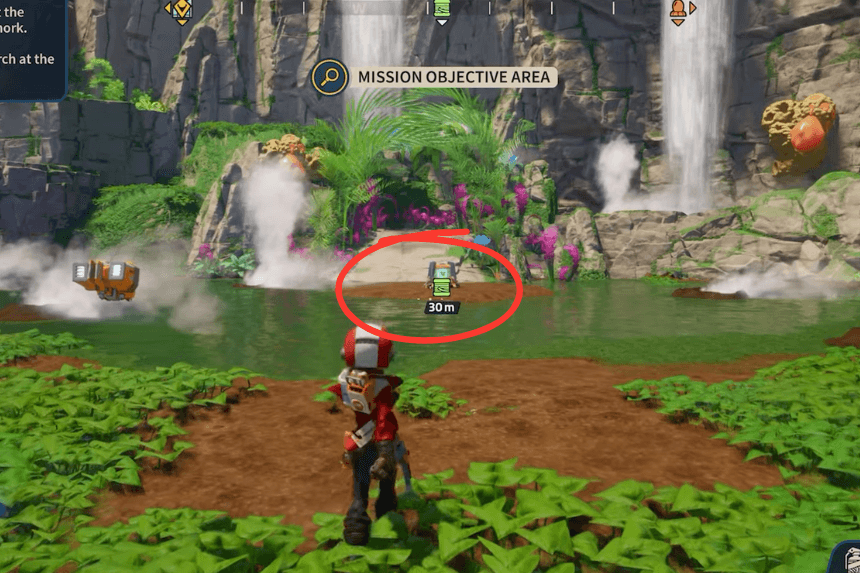
5. Stellaris Prime – Chuggler’s Swamp
Go to the location provided on the map above, move forward, dodge some enemies and move towards right, climb on some flowers and you will find your fifth printer slurry on the flower surrounded by a boulder. You need to break it to acquire it. You need to have the Proton Whip Tether-I and Spritizer Power Hose upgrade to have it.
6. Stellaris Prime – Chuggler’s Swamp

Go to the location provided on the map above, move forward, use the ray of light path to reach the cliff then jump above the lava to move forward. Then again use the ray of light path to move forward and jump to the yellow platform then jump towards the next yellow platform and on the left side you will get the sixth printer slurry. You will need the Hawx Rail Grinder and Spritizer Power Hose upgrade for gun.
7. Stellaris Prime – Chuggler’s Swamp
Go to the location on the map above and connect the two electric mushrooms to unlock the seventh printer slurry. You will need the Toxic Deshocker and Ferro Goo Tank gun upgrade to get it.
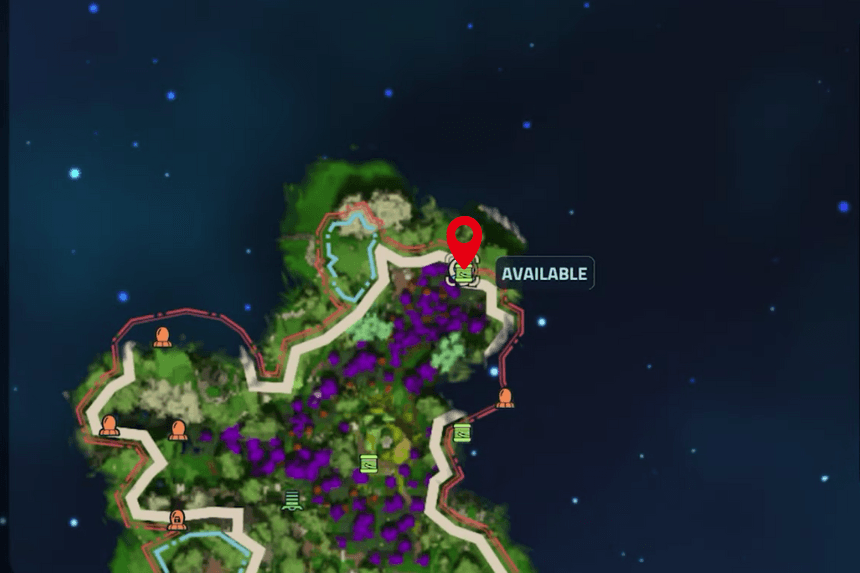
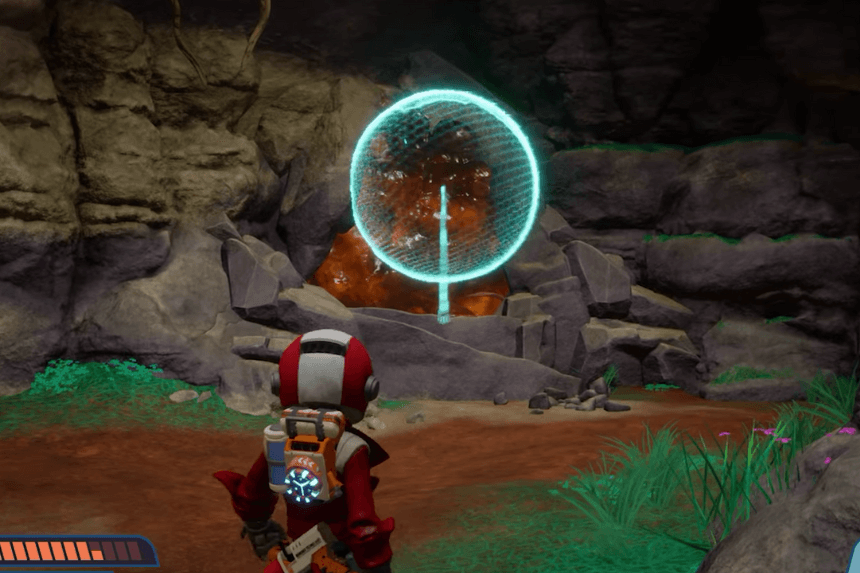
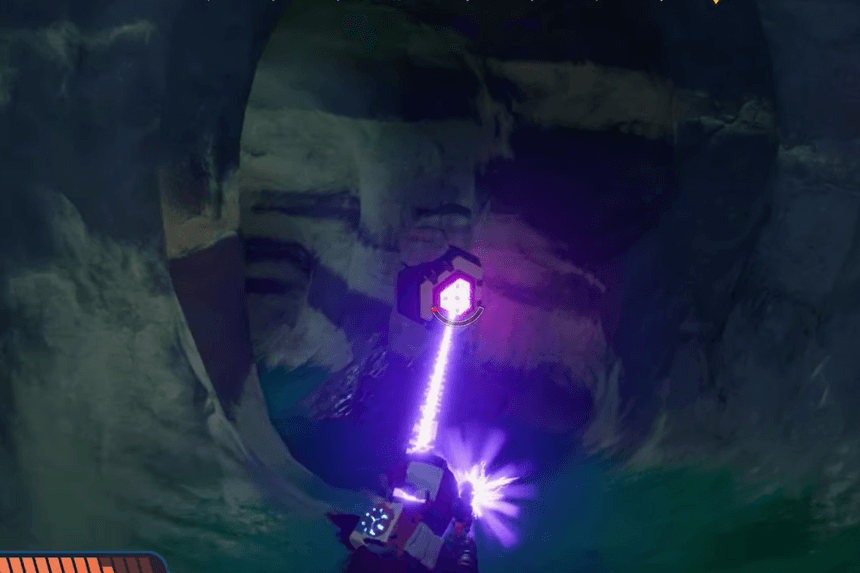
8. Stellaris Prime – Scuttling Grotto
Click on the images to enlarge
Go to the location on the map above and enter the cave. You will need to avoid the lava and shoot at the hexagon plate to deactivate the wires. Then deactivate the hexagon plate on the right side and the other one on the left side. You will find the eighth printer slurry in front of you. You need to have the Proton Whip Tether-I upgrade to have it.
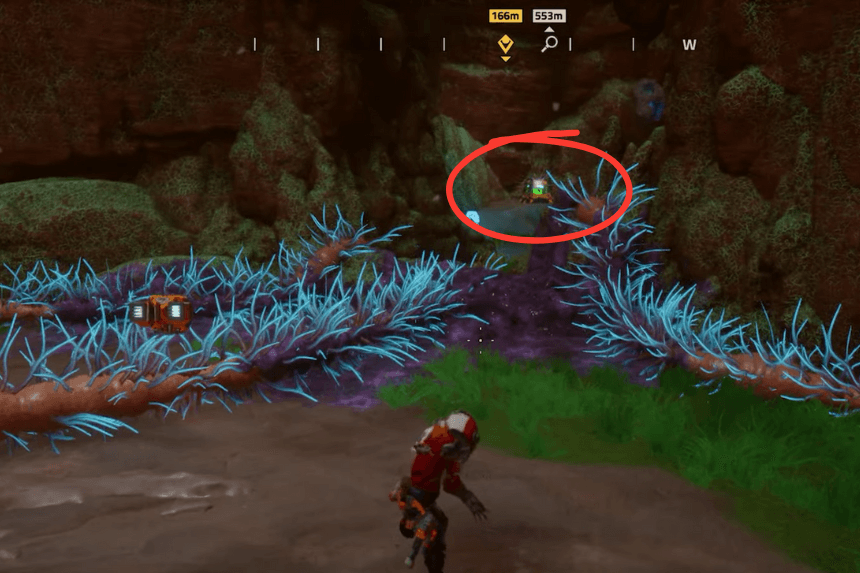
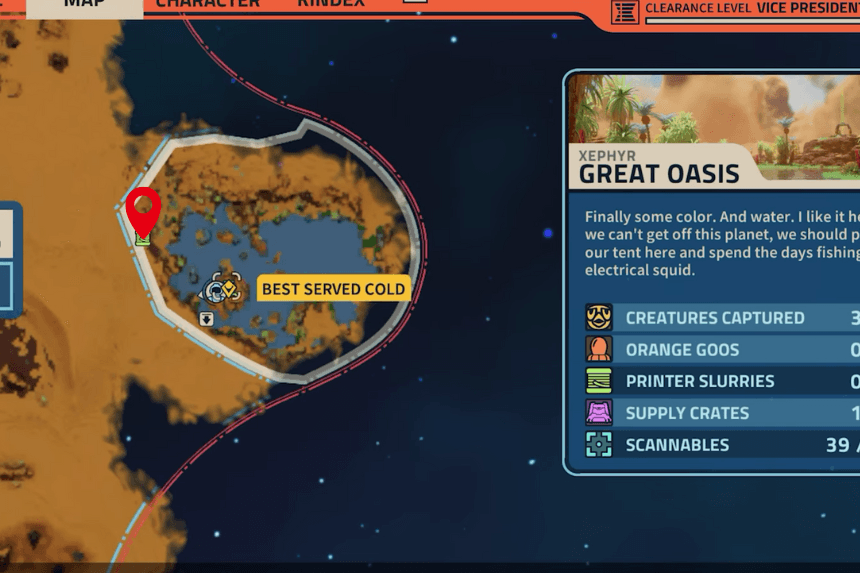
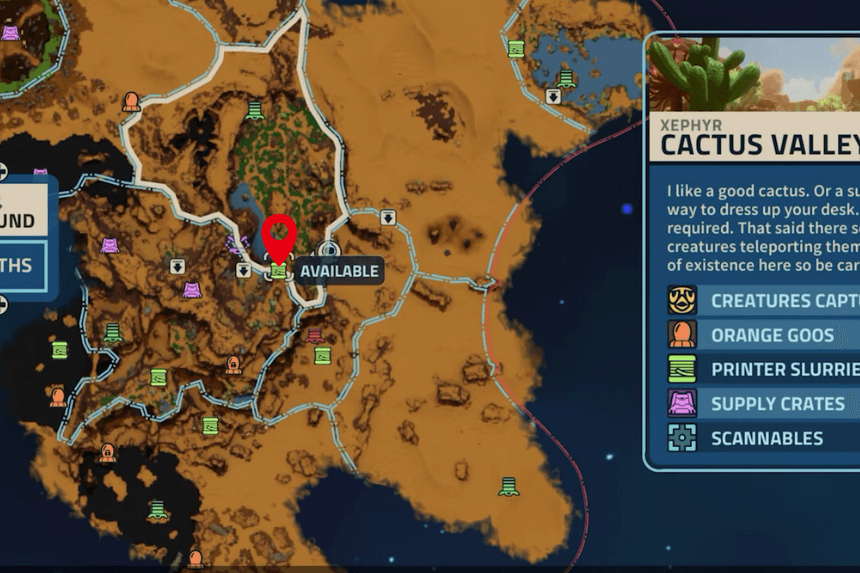
9. Xephyr – Cactus Valley
Go to the location on the map above, and you will find the printer slurry just in front of you.
10. Xephyr – G’Nortt’s High Rise
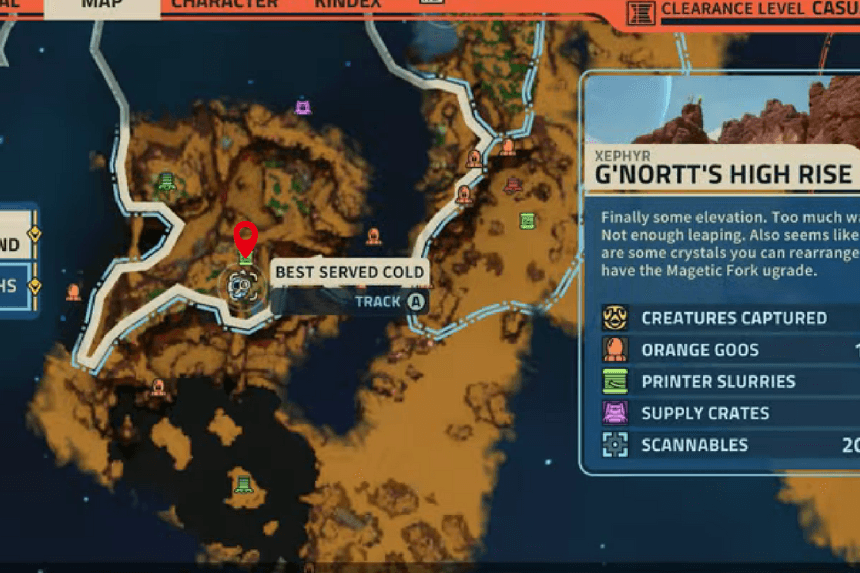
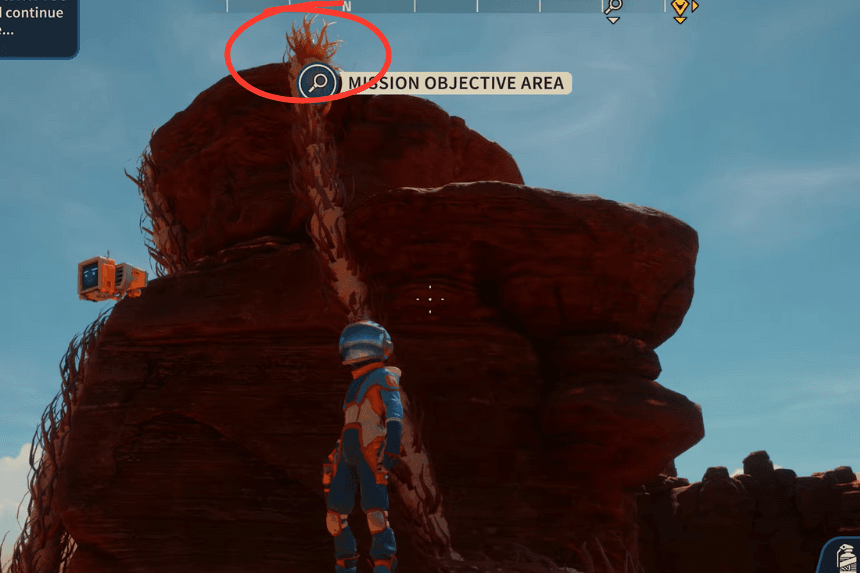
Go to the location on the map above and use the Ferro Goo Tank upgrade for the gun to connect all the lighting mushrooms to unlock the printer slurry crate on the cliff. Be careful, there are flying enemies that will shoot at you, so dodge them. If you don’t have sufficient Ferro Goo you can extract it from nearby purple-like structures.
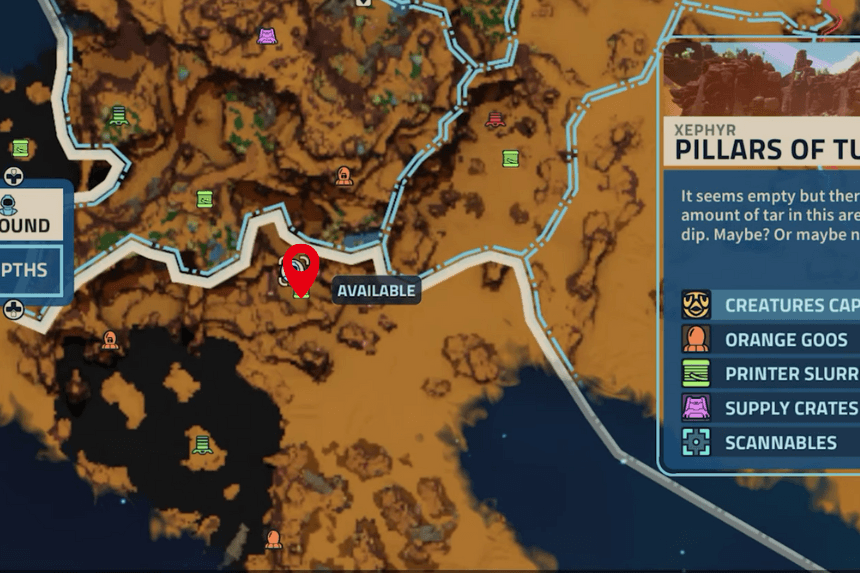
11. Xephyr – Pillars of Turpitude
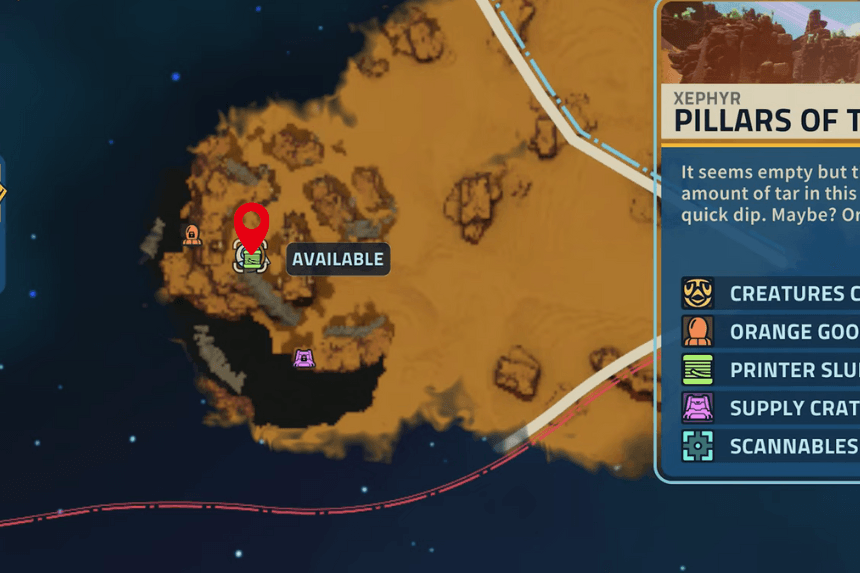
Go to the location on the map above, and you will find the printer slurry just in front of you.
12. Xephyr – Larval Roost
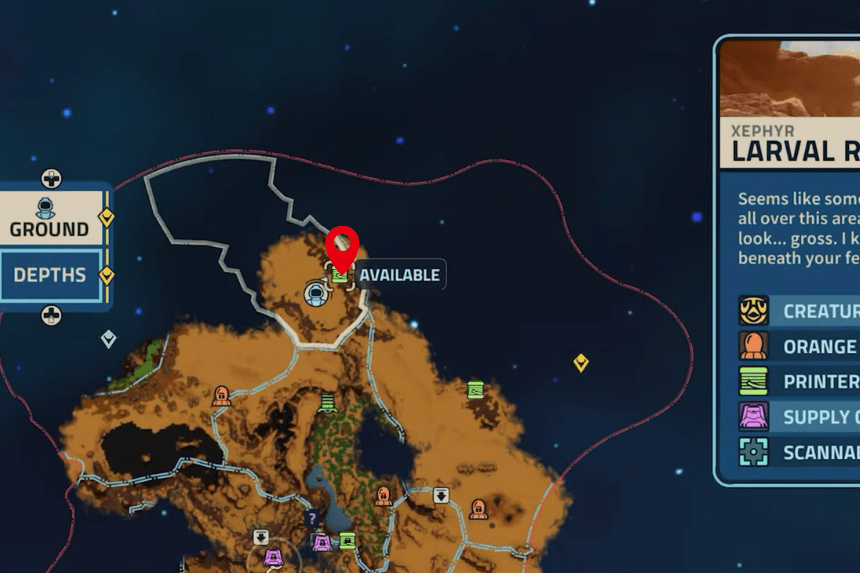
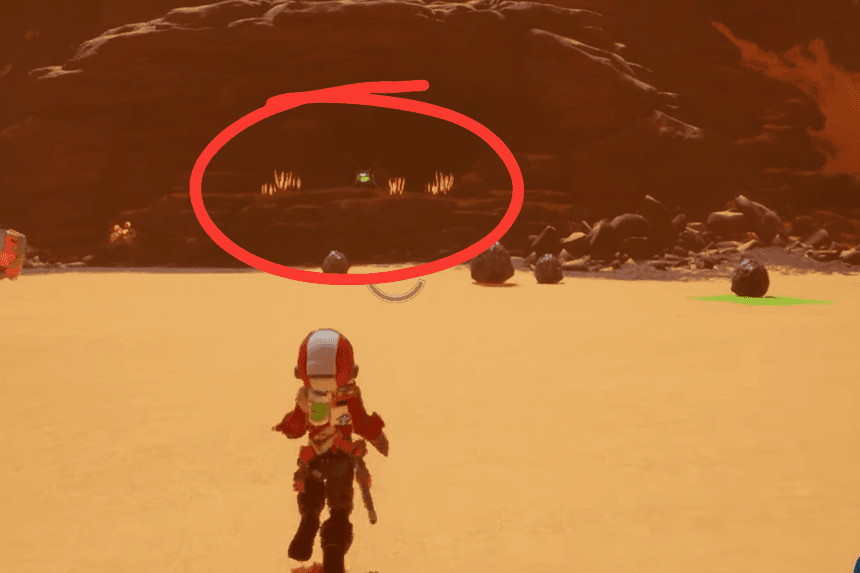
Go to the location on the map above, and you will find the printer slurry just in front of you on a small cliff; you just have to jump to reach it.
13. Xephyr – Cactus Valley
Go to the location on the map above and use the Ferro Goo Tank upgrade for the gun to connect all the lighting mushrooms to unlock the printer slurry crate on the cliff. Be careful, there are flying enemies that will shoot at you, so dodge them. You also need to break some boulders. If you don’t have sufficient Ferro Goo you can extract it from nearby purple-like structures.
14. Xephyr – Crystals Pillars
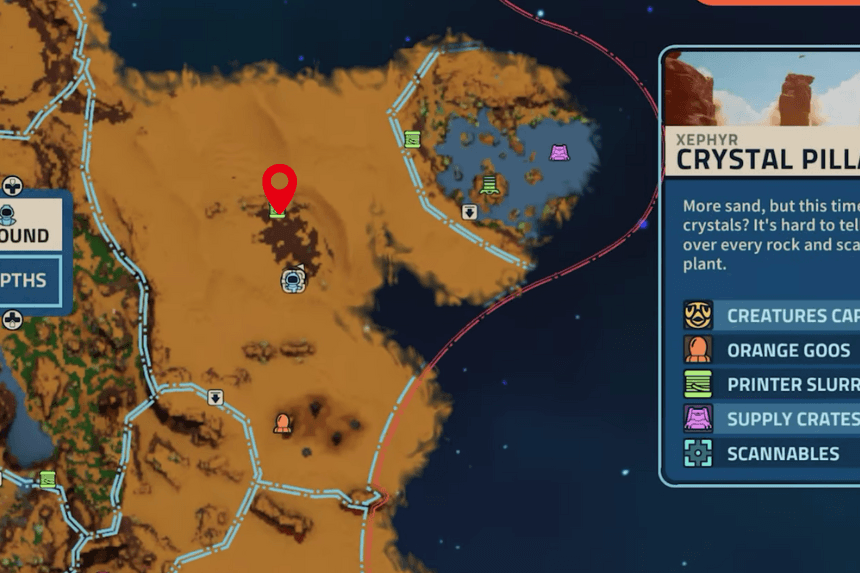
Click on the images to enlarge
Go to the location on the map above, and you will find the printer slurry just in front of you. But you need to first make your way through the invisible maze. First make a left turn then make a right turn and then jump and you will reach the crate.
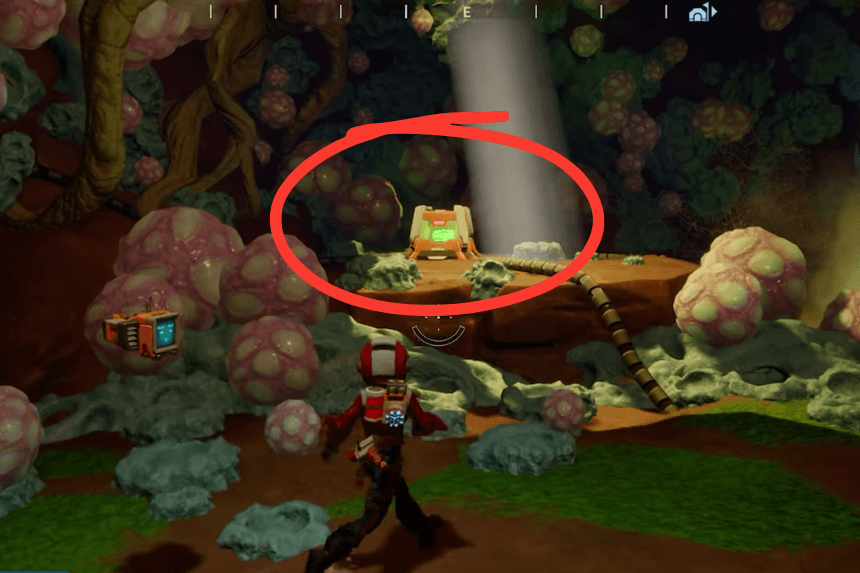
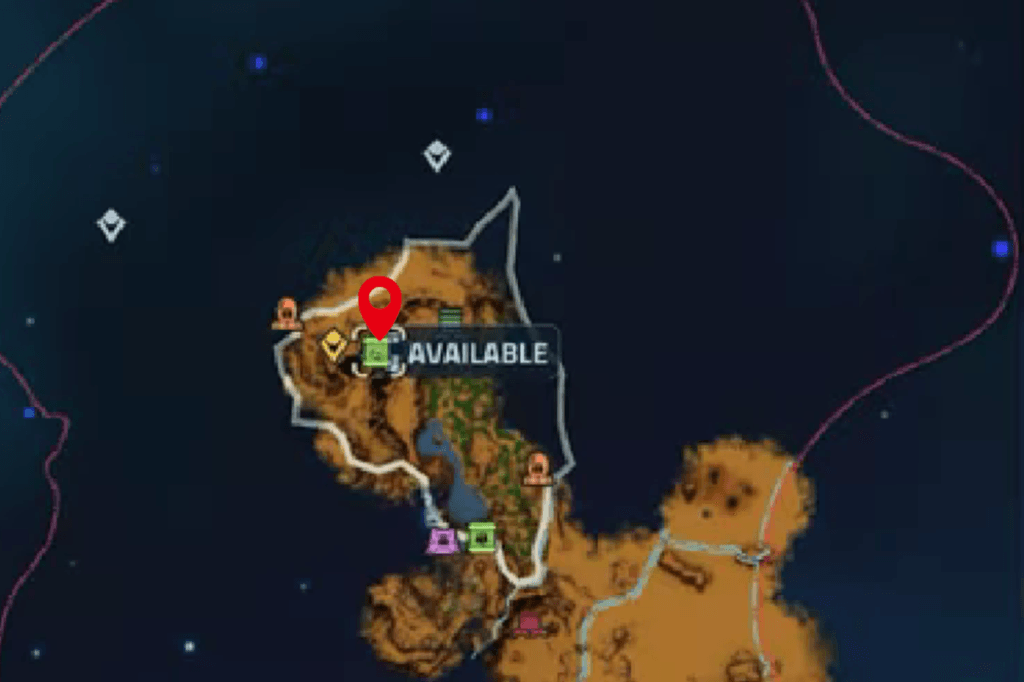
15. Xephyr – Caves of Miranyth
Click on the images to enlarge
Go to the location on the map above, and you will find a cave. Use the Ferro Goo Tank upgrade for the gun to connect all the lighting mushrooms to unlock the printer slurry crate inside the cave.
16. Xephyr – Caves of Miranyth
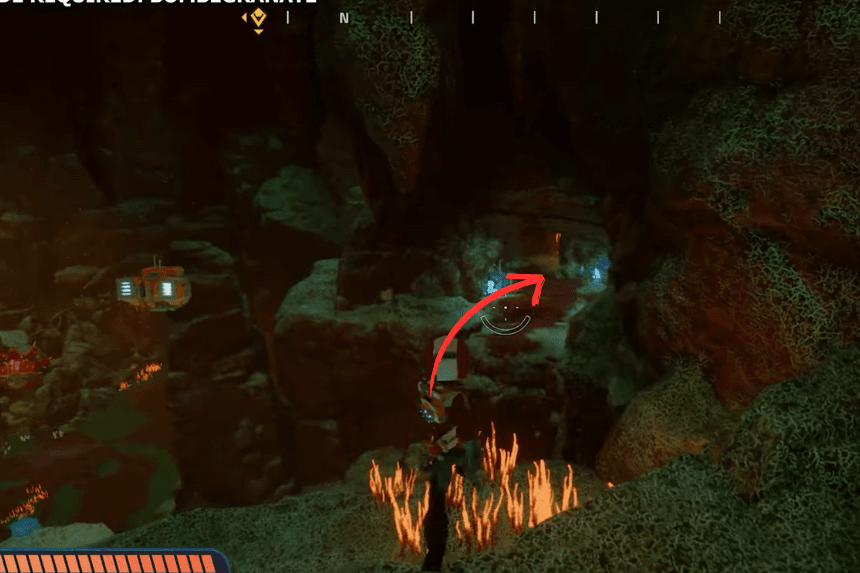
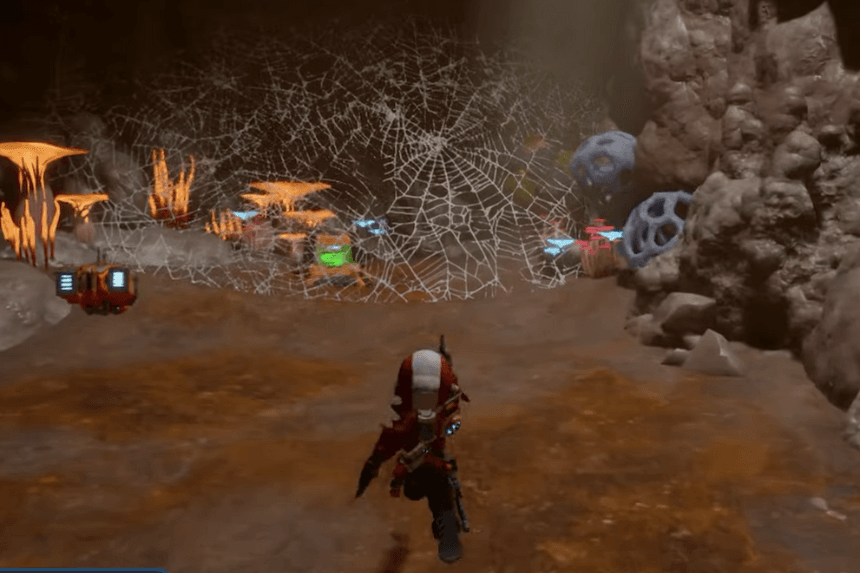
Click on the images to enlarge
From the above printer slurry crate, you need to move forward inside the cave. Then turn right and throw a bomb to break the walls and make way. In the way you will find some spiderwebs, burn them away to move forward, and you will find the printer slurry crate. You will need the Bombegranate upgrade to blow your way.
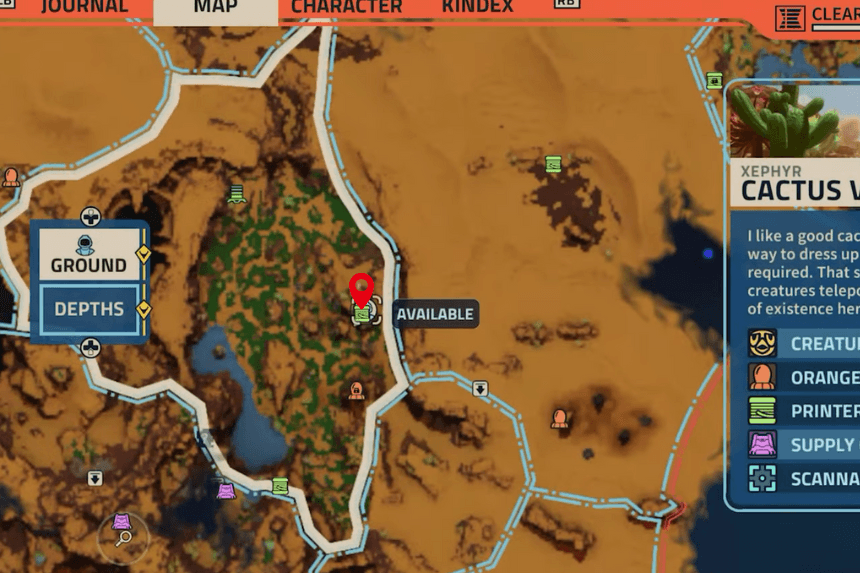
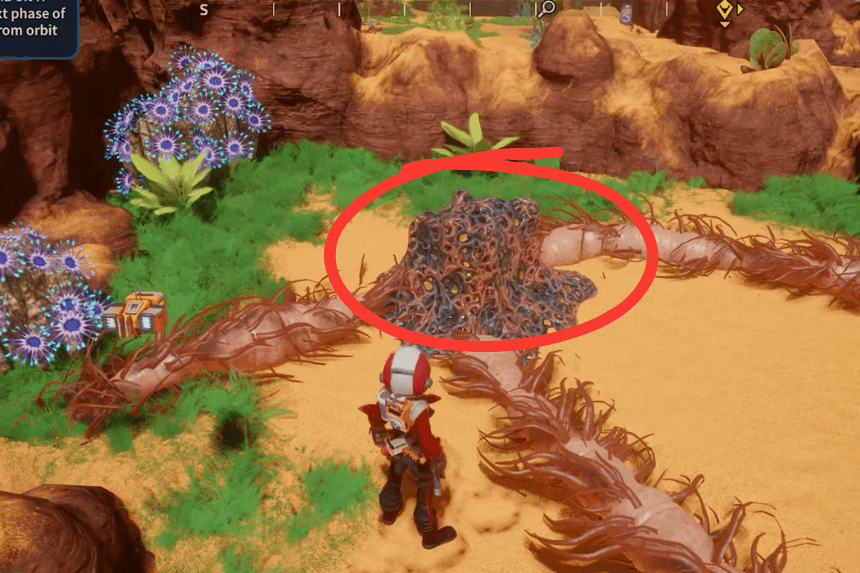
17. Xephyr – Cactus Valley
Go to the location on the map above, and you will find the printer slurry just in front of you. But you need the magnetic fork to lead the magnetic rocks toward the cave to break open the printer slurry cave.
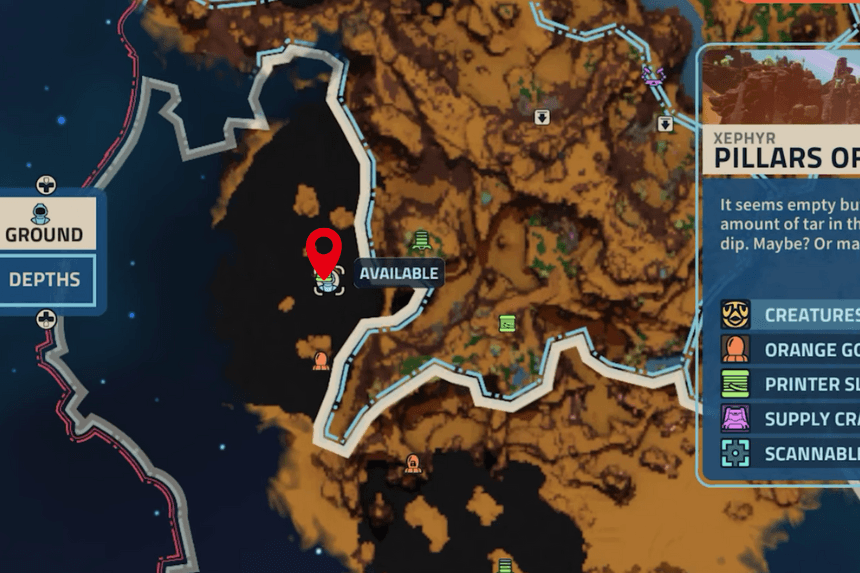
18. Xephyr – Pillars of Turpitude

Go to the location on the map above, and you will find the printer slurry just in front of you. But it will be locked, so you need to defeat a purple coloured monster, but be careful as you go near the monster, it will stun you. After that,t you will be able to get the printer slurry from the crate.
19. Xephyr – Pillars of Turpitude
Go to the location on the map. You will need to shoot at the hexagon plate to deactivate the wires. Then deactivate the hexagon plate on the right side and the other one on the left side. You will find the printer slurry in front of you. You need to have the Proton Whip Tether-I upgrade to have it.
20. Xephyr – The Frangipane Drifts
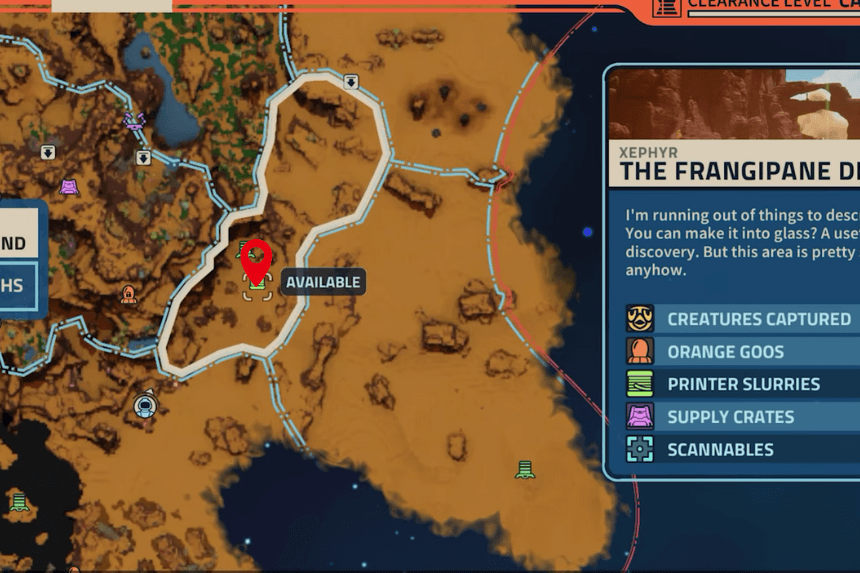
Go to the location on the map above and use the Ferro Goo Tank upgrade for the gun to connect all the lighting mushrooms to unlock the printer slurry crate on the cliff. Be careful, there are flying enemies that will shoot at you, so dodge them. If you don’t have sufficient Ferro Goo you can extract it from nearby purple-like structures.
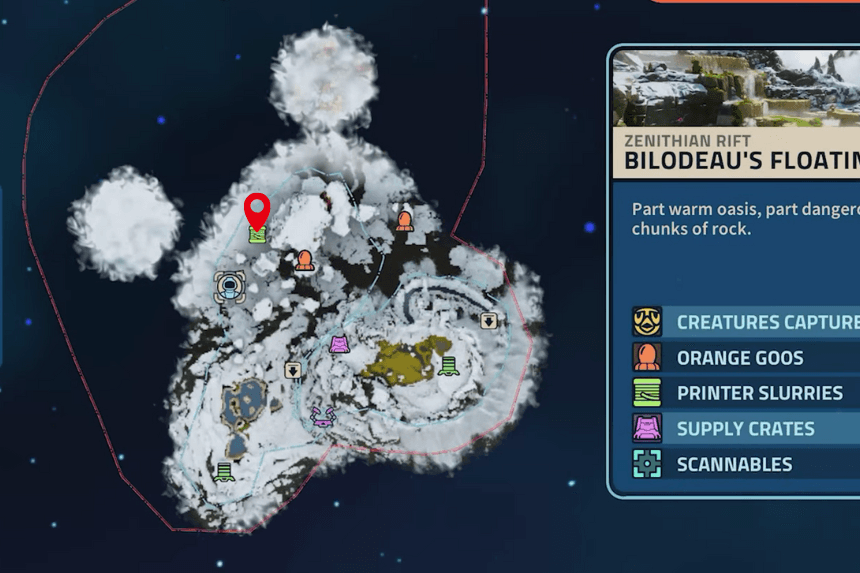
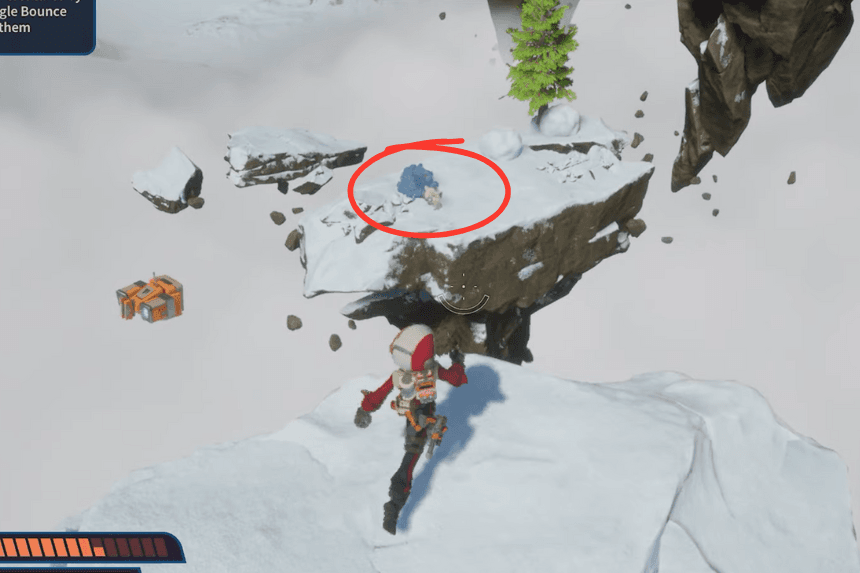
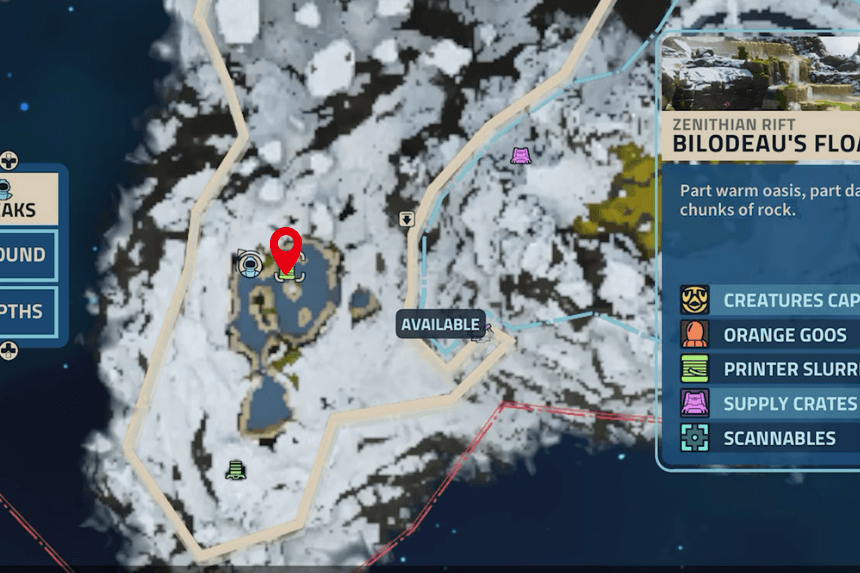
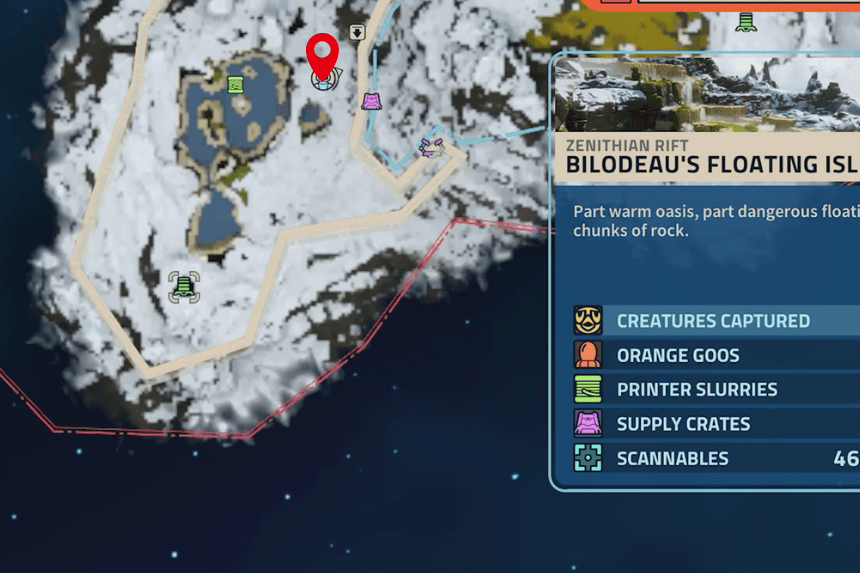
21. Zenithian Rift – Bilodeau’s Floating Isles
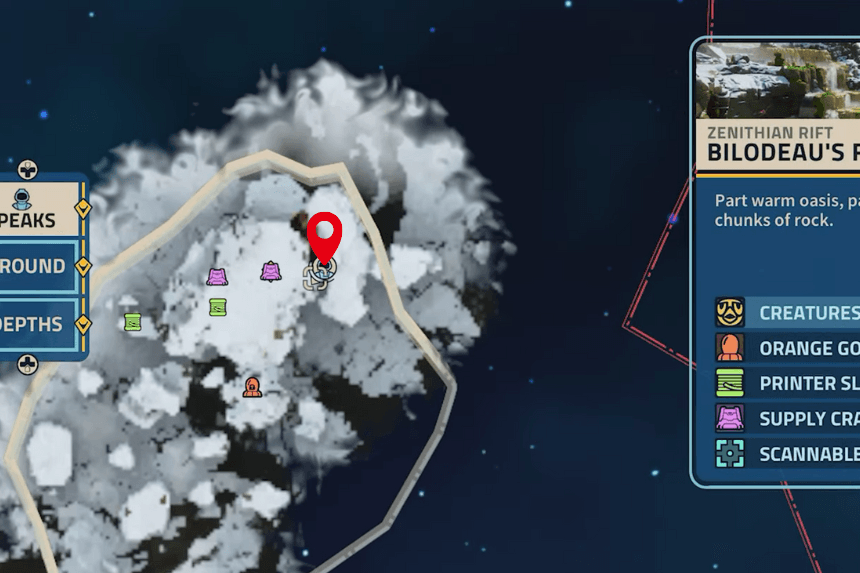
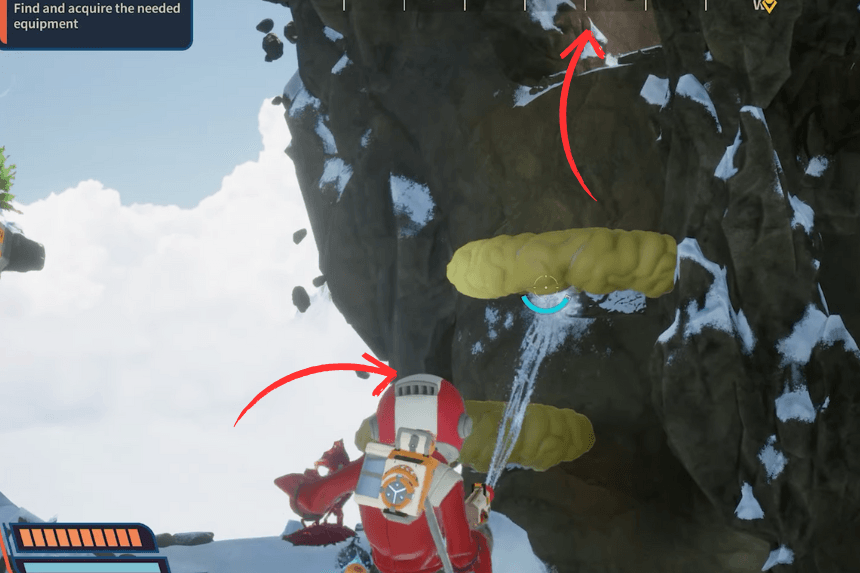
Click on the images to enlarge
Go to the location on the map above and jump towards the yellow platform. Then extract Lava from the lava tree and jump towards the yellow platform. Use your power hose Lava tank gun to melt the ice covering the printer slurry crate.
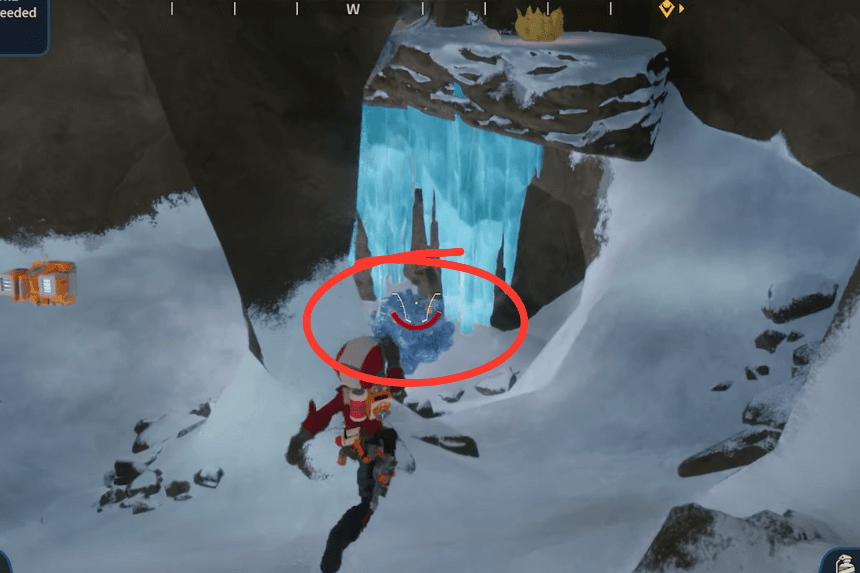
22. Zenithian Rift – Bilodeau’s Floating Isles
Click on the images to enlarge
Go to the location on the map above and jump towards the platform. Then extract Lava from the lava tree and jump towards the platform. Use your power hose Lava tank gun to melt the ice covering the printer slurry crate and an ice monster nearby.
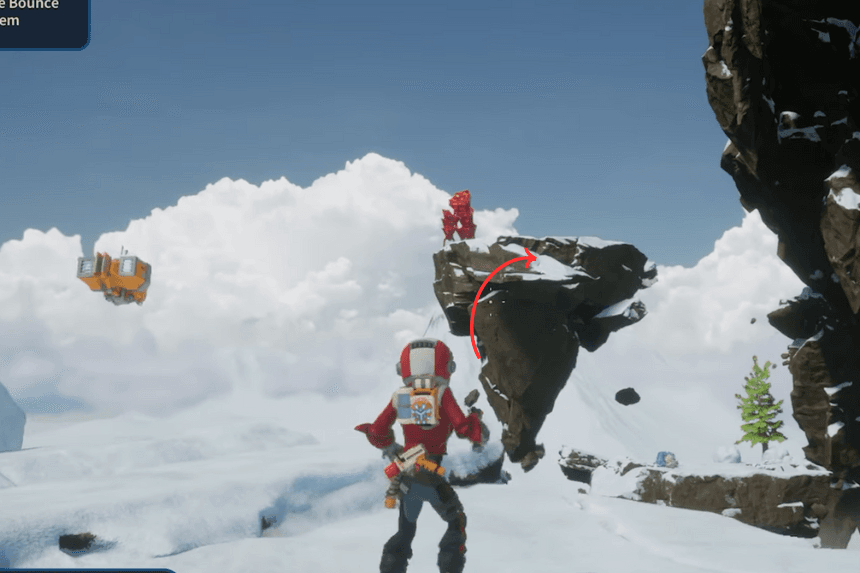
23. Zenithian Rift – Bilodeau’s Floating Isles
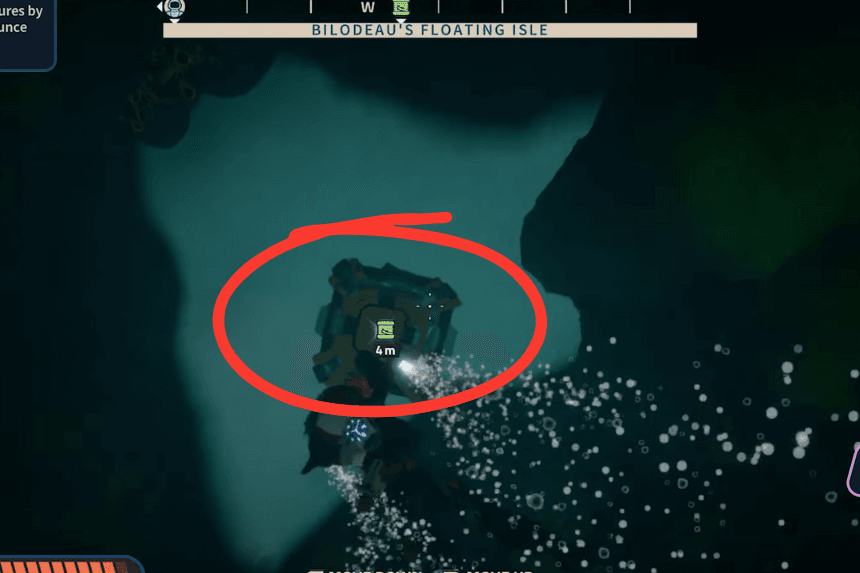
Go to the location on the map above and use the Ferro Goo Tank upgrade for the gun to connect all the lighting mushrooms. If you don’t have sufficient Ferro Goo, you can extract it from nearby purple-like structures. Use your Franx underwater scooter to dive underwater and connect the lighting mushrooms and find the underwater printer slurry crate.
23. Zenithian Rift – Frip’s Big Chill
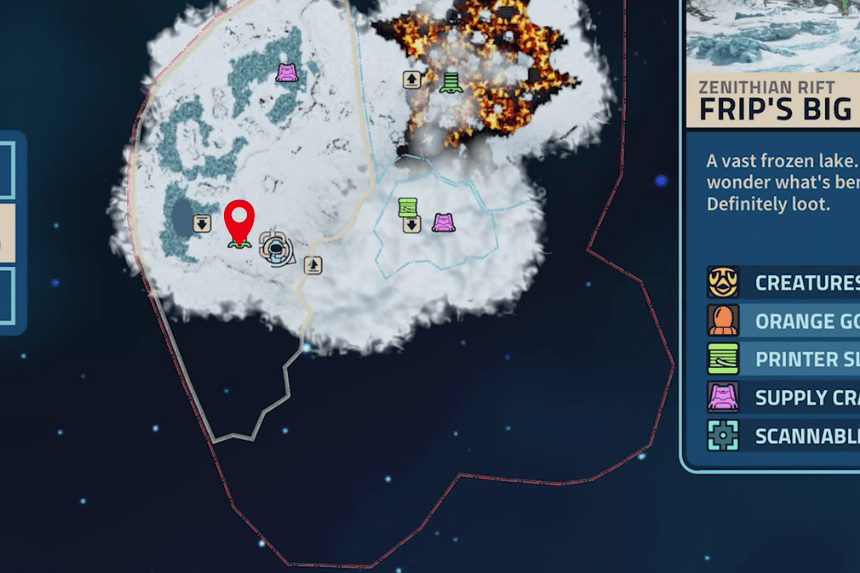
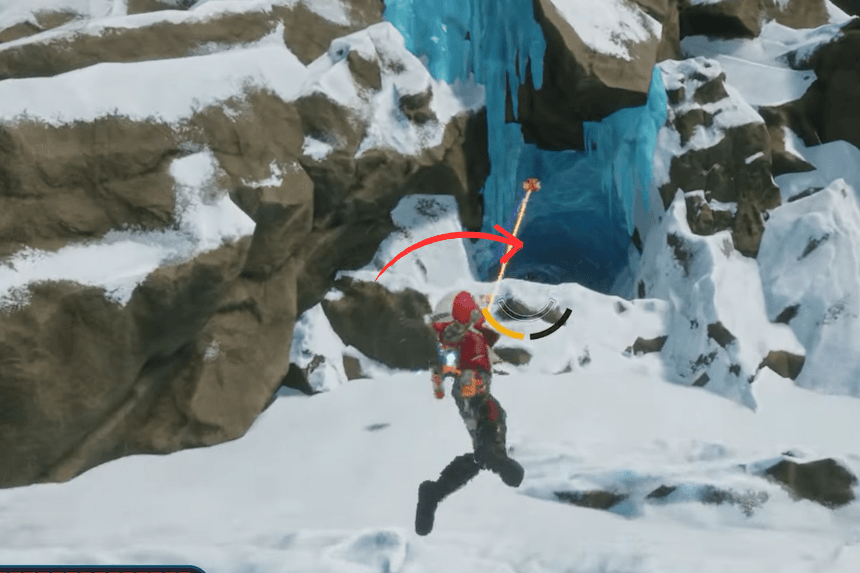
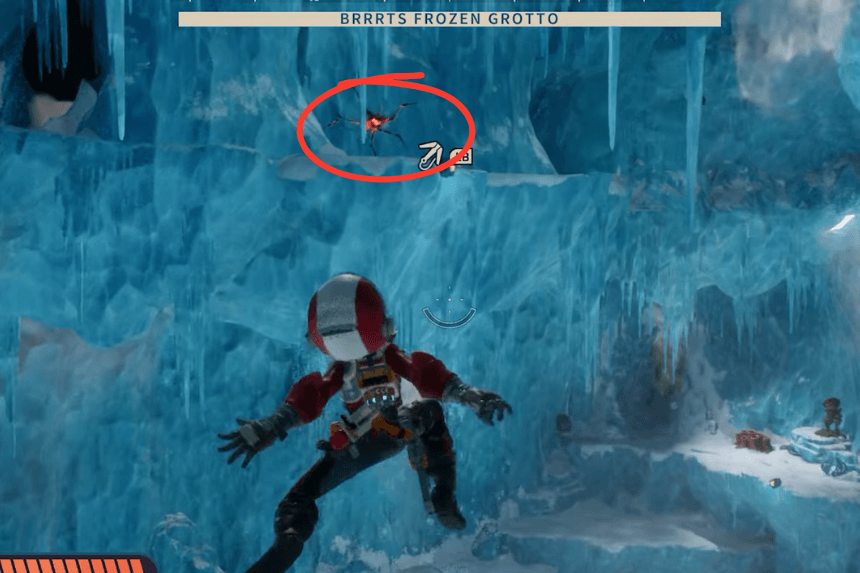
Click on the images to enlarge
Go to the location provided on the map above. Enter the ice cave and slide your way inside. Jump towards the cave wall having cracks on it. Then use the Bombegranate to blow off the wall and get the printer slurry crate.
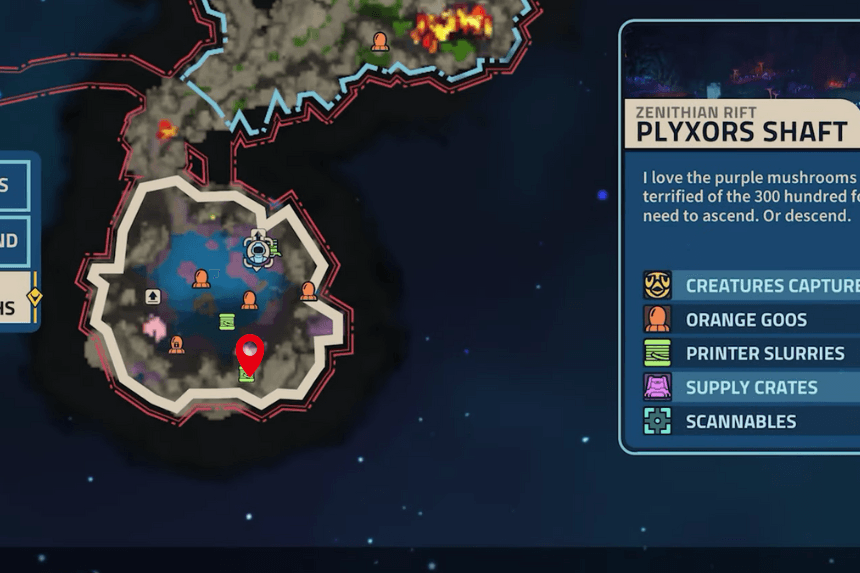
24. Zenithian Rift – Plyxors Shaft
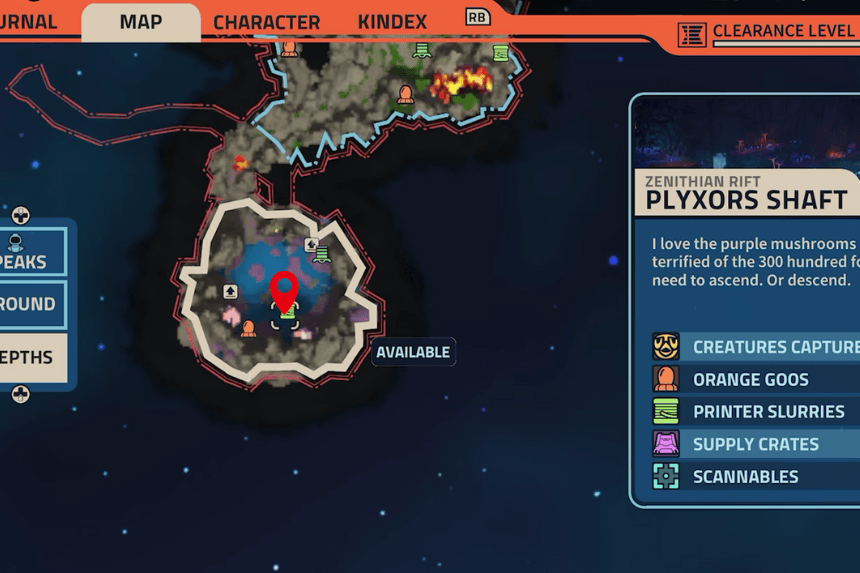
Click on the images to enlarge
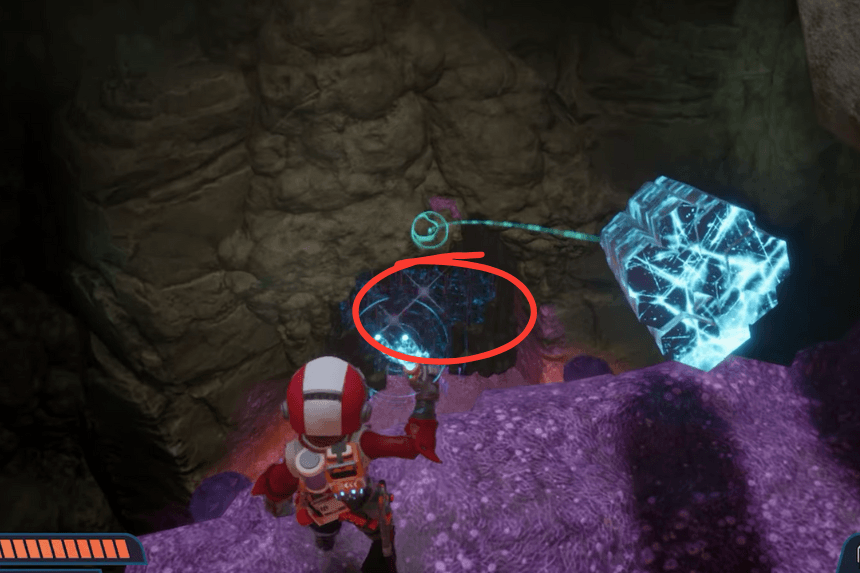
Go to the location provided on the map. Enter the cave and use a magnetic fork to throw the magnetic rock on the magnetic wall to break it. Inside it, you will find the printer slurry crate. You will find the magnetic rock just above you in the cave.
25. Zenithian Rift – Plyxors Shaft
Go to the location provided on the map. Enter the cave, and at a corner, you will find the printer slurry crate.
26. Zenithian Rift – The Depths of Trrn
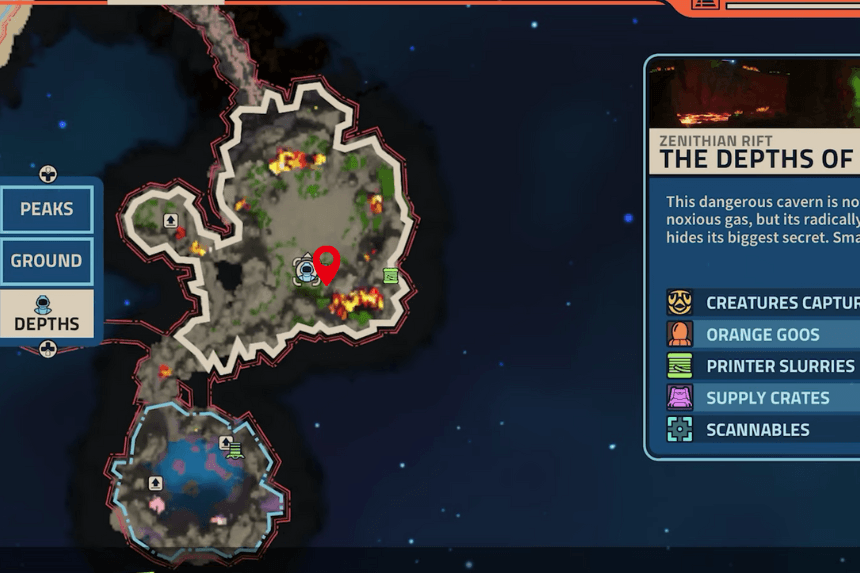
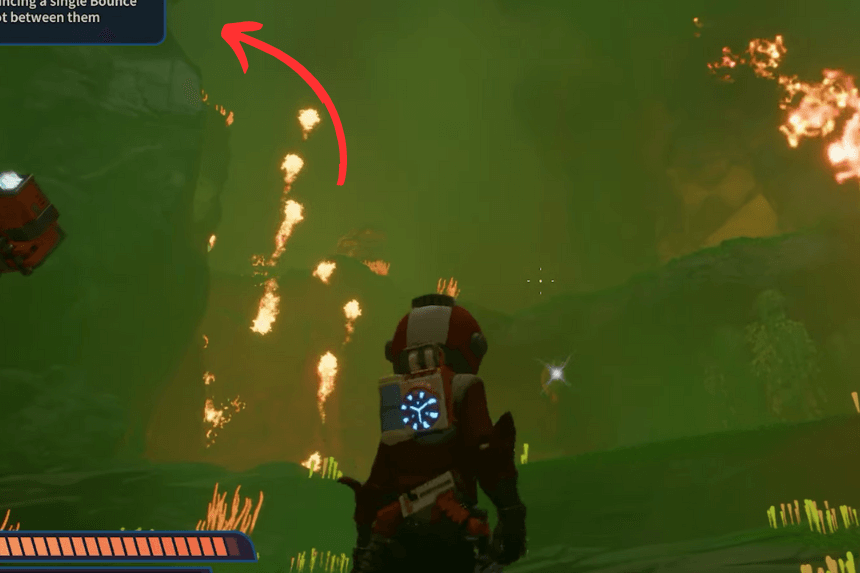
Go to the location provided on the map. Enter the cave, and jump upwards to find a small cave. Inside it, you will find the printer slurry crate. You will need the Toxic Deshocker and Proton Tether Launcher x11.
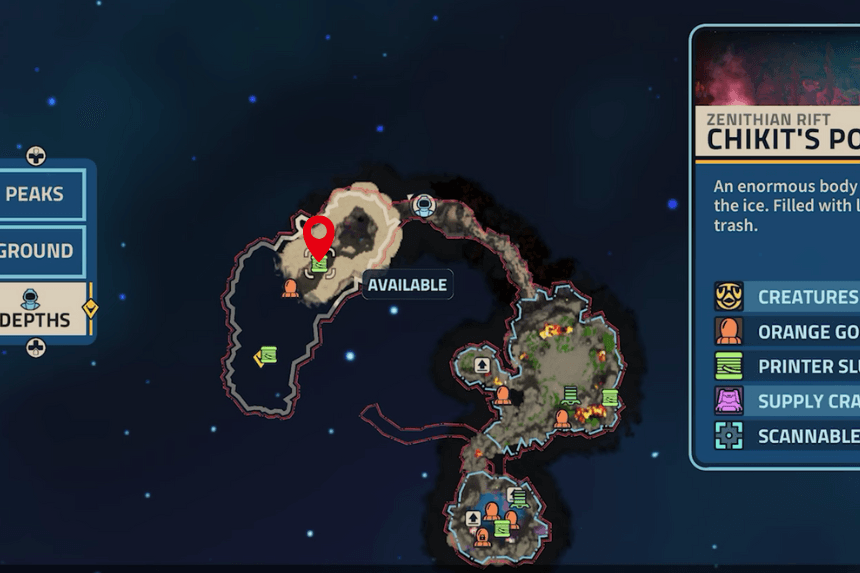
27. Zenithian Rift – Chikit’s Pools
Go to the location provided on the map above. Use the Franx Underwater Scooter to dive underwater, you will find the printer slurry crate underwater on the waterbed.
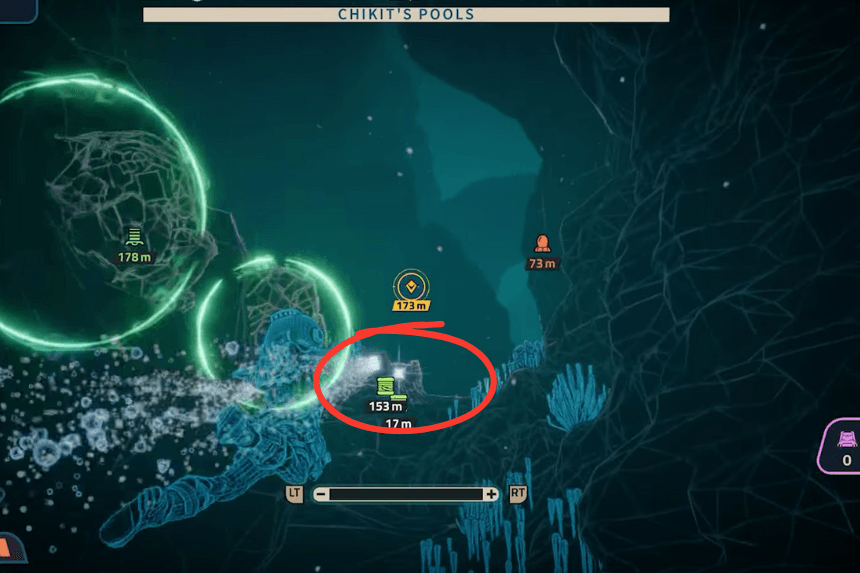
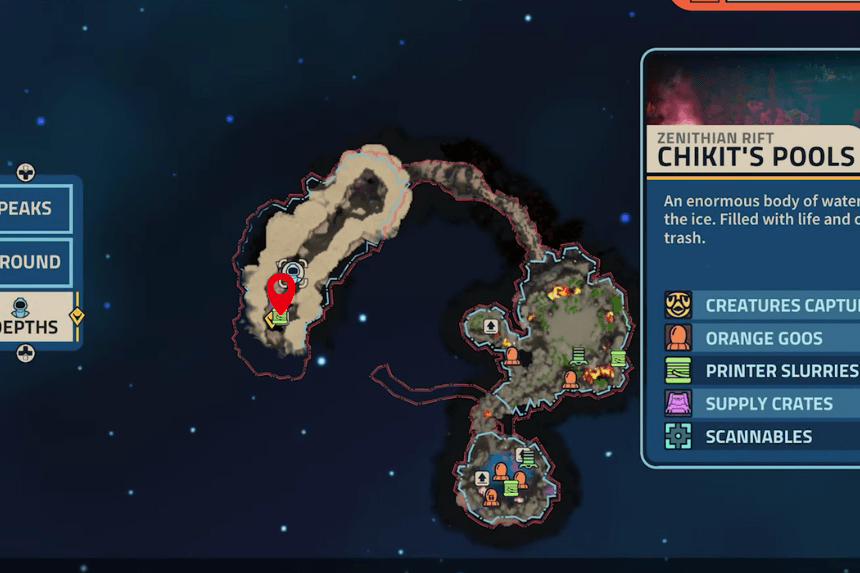
28. Zenithian Rift – Chikit’s Pools
Go to the location provided on the map above. Use the Franx Underwater Scooter to dive underwater, you will find the printer slurry crate underwater on the waterbed.
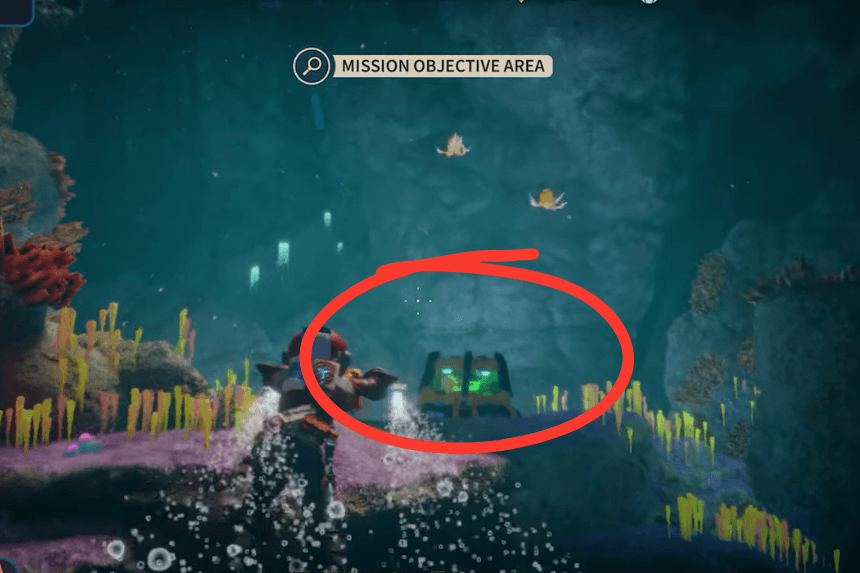
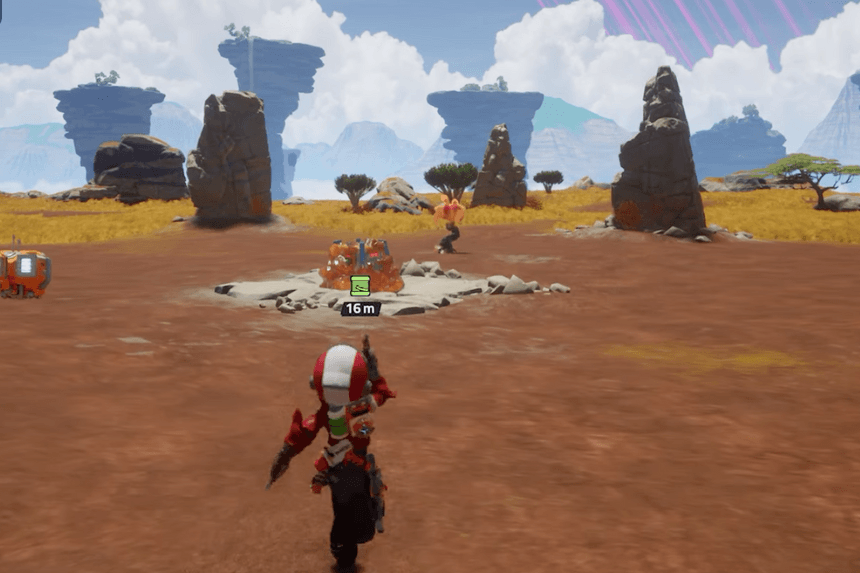
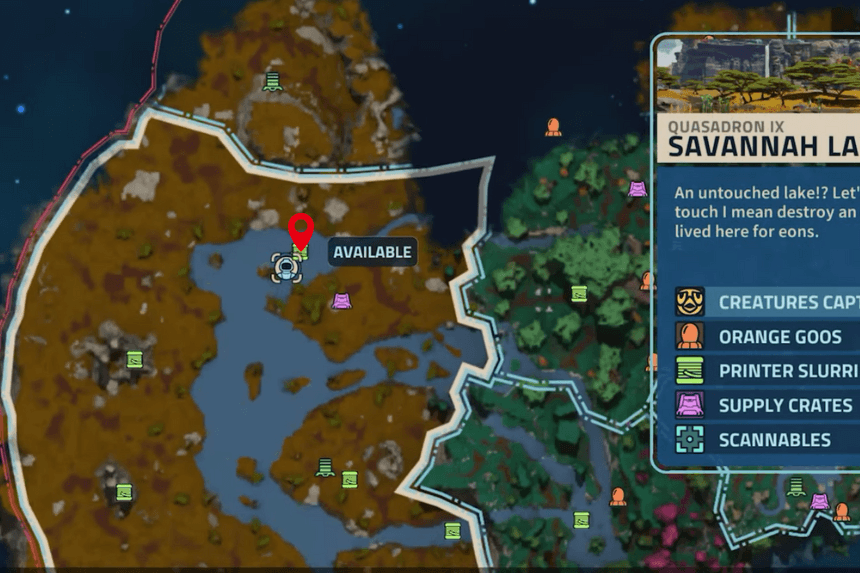
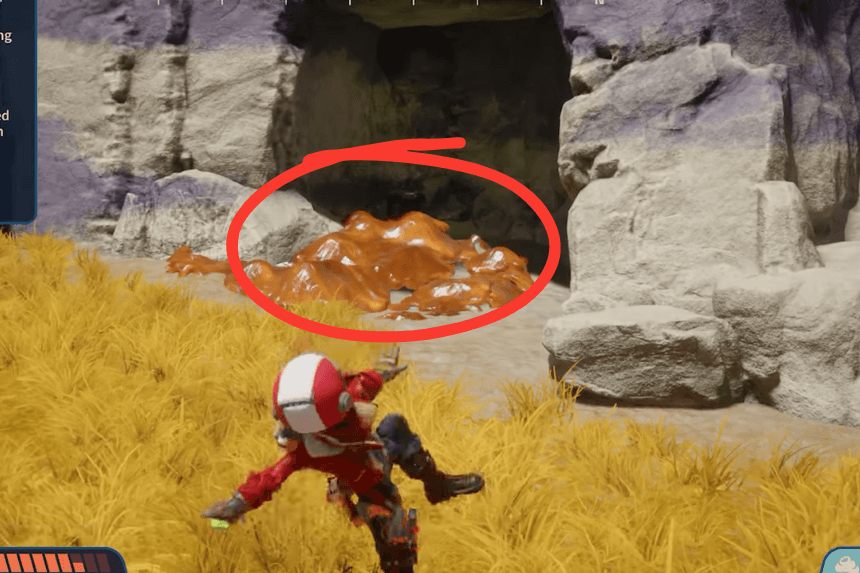
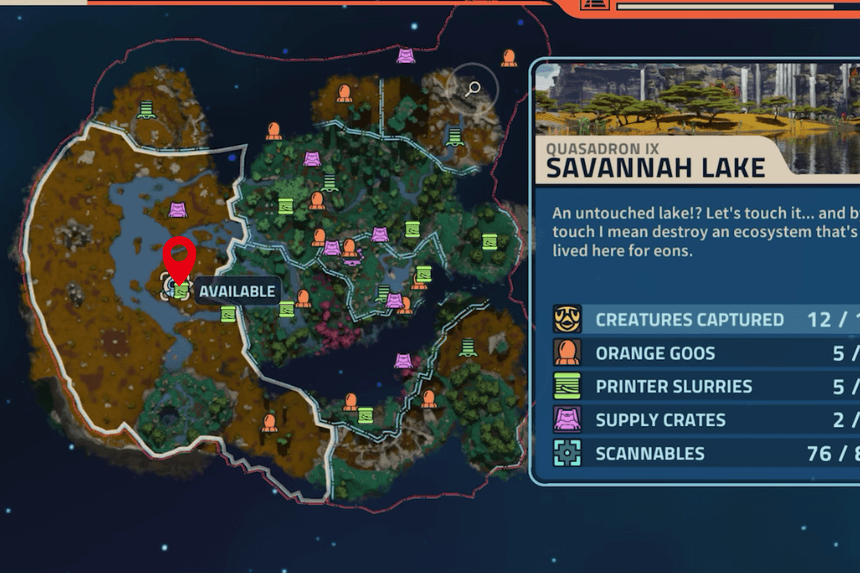
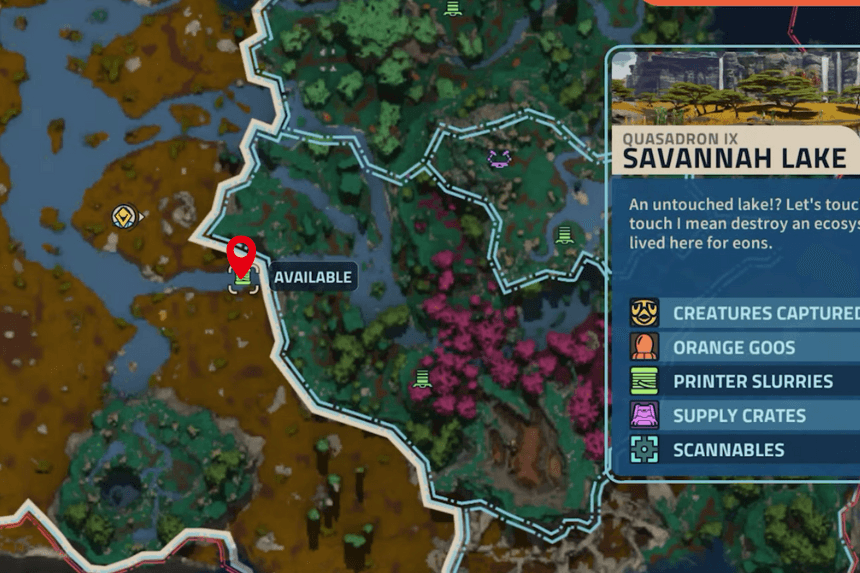
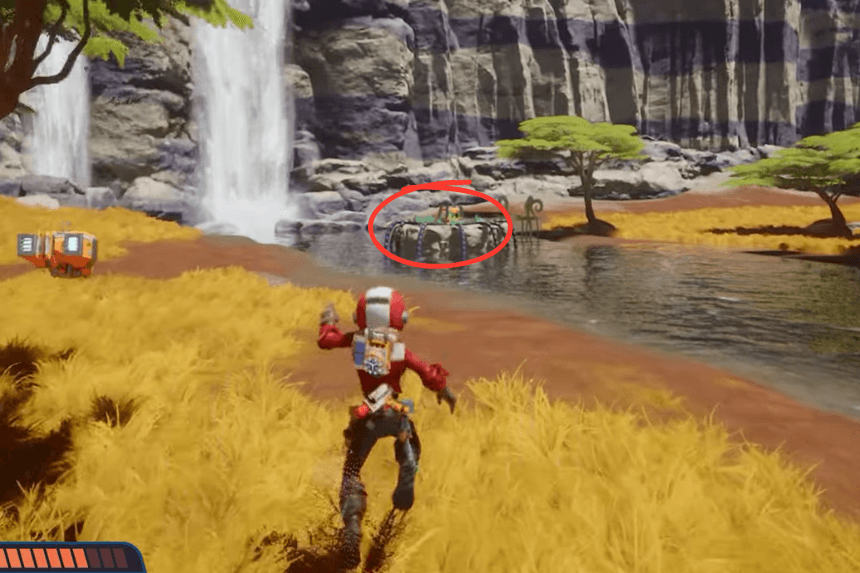
29. Quasadron IX – Savannah Lake
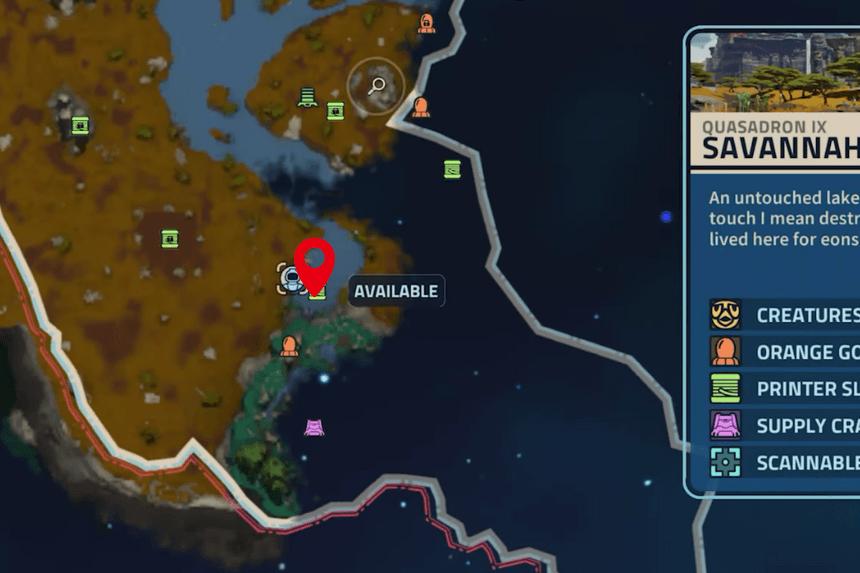
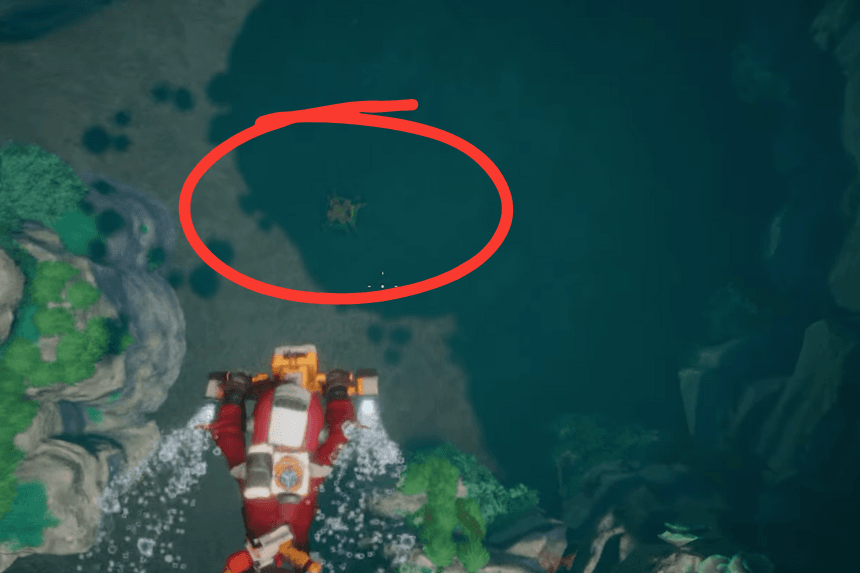
Go to the location provided on the map above. Use the Franx Underwater Scooter to dive underwater, you will find the printer slurry crate underwater on the waterbed.
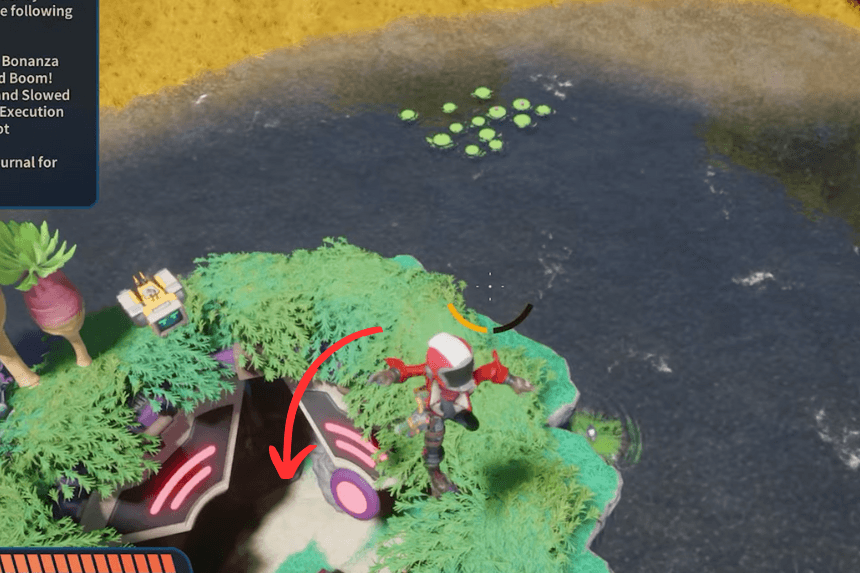
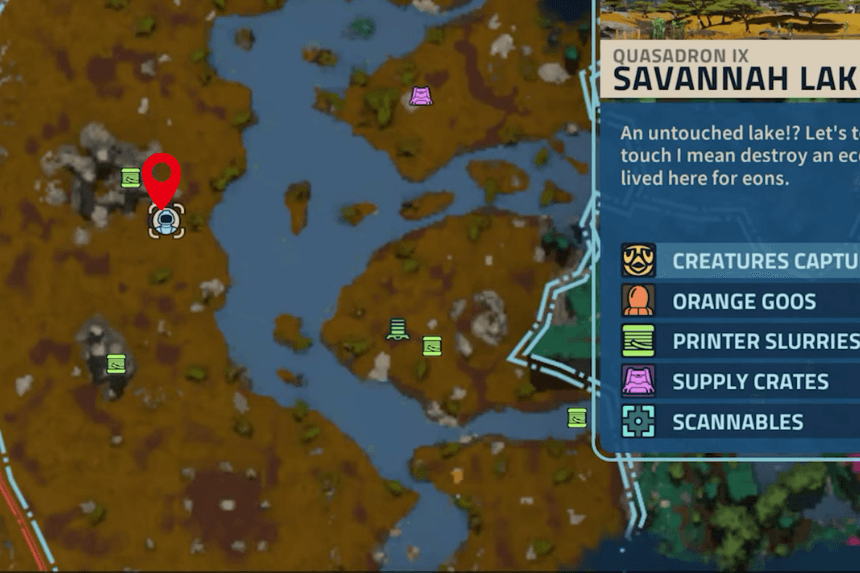
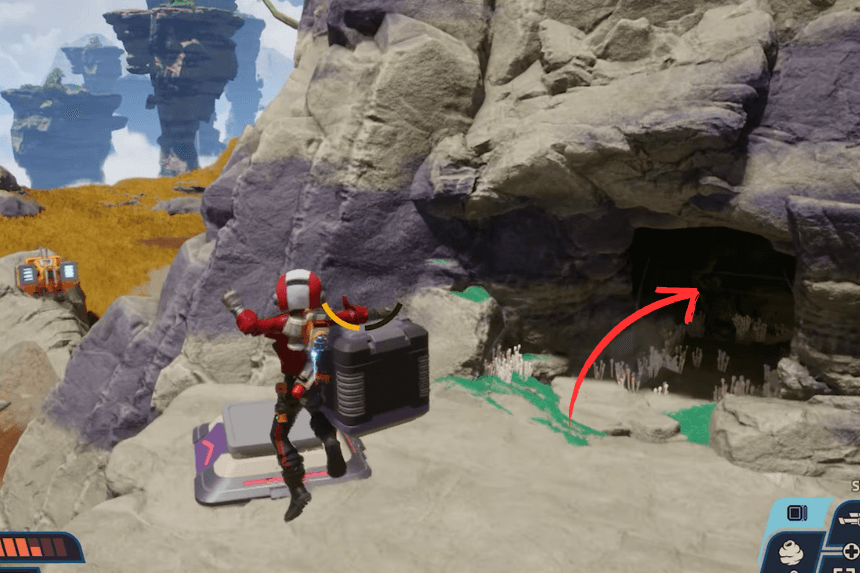
30. Quasadron IX – Savannah Lake
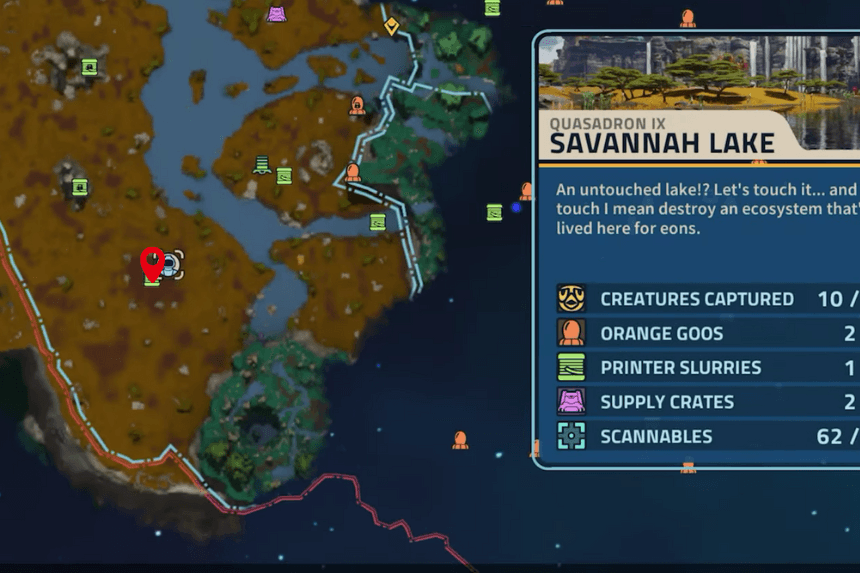
Go to the location provided on the map above, then use the Blight Bomb to unlock the printer slurry cave.
31. Quasadron IX – Savannah Lake
Go to the location provided on the map above, then use the Stomp booster to enter the cave-like structure and get the printer slurry cave.
32. Quasadron IX – Savannah Lake
Go to the location provided on the map above, then use the Blight Bomb to get the black box and place it in the platform. After that, use a Bombegranate to blow off the wall inside the cave to get the printer slurry crate.
33. Quasadron IX – Savannah Lake
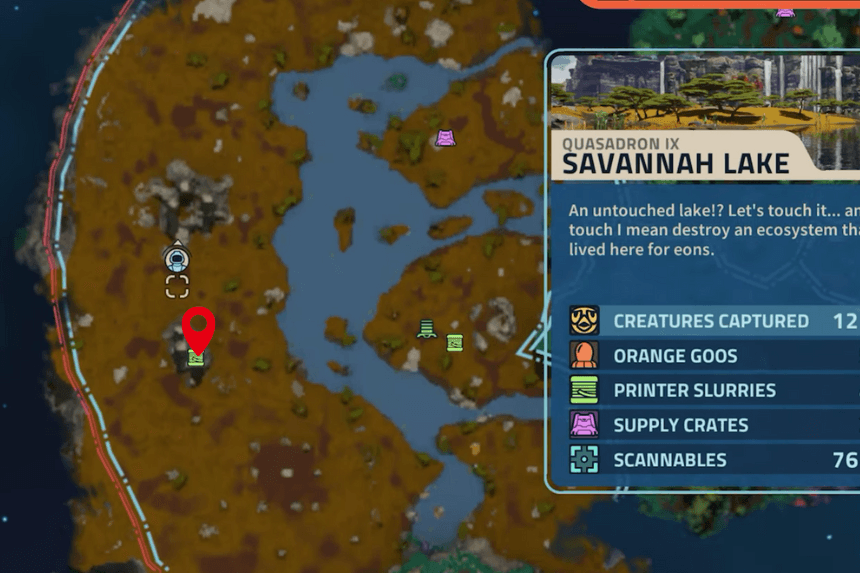
Click on the images to enlarge
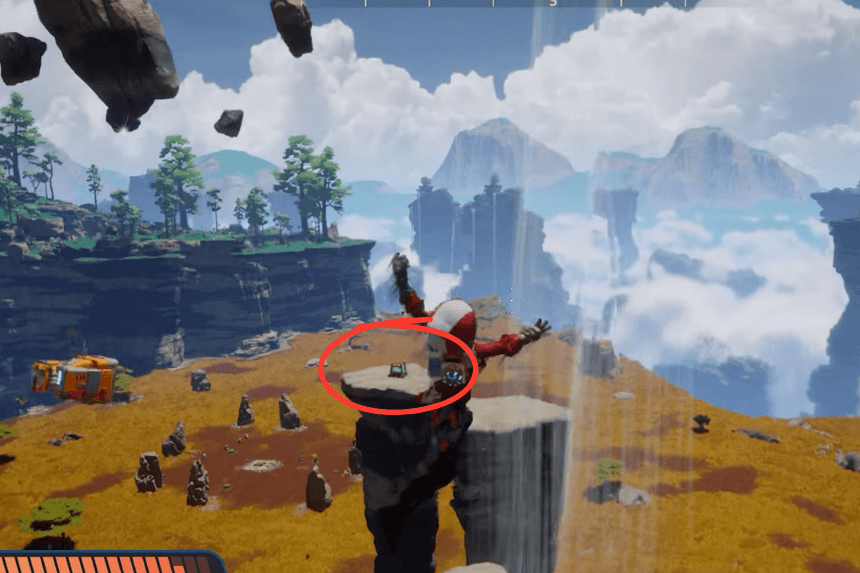
Go to the location provided on the map, then use the Power hose and the Priton tether launcher x11 to climb upwards and get the printer slurry crate.
34. Quasadron IX – Savannah Lake
Click on the images to enlarge
Go to the location provided on the map, then use the Stomp Booster to jump down the cave and then use the Blight bomb to blow off the cave walls. Inside it, you will find the printer slurry crate.
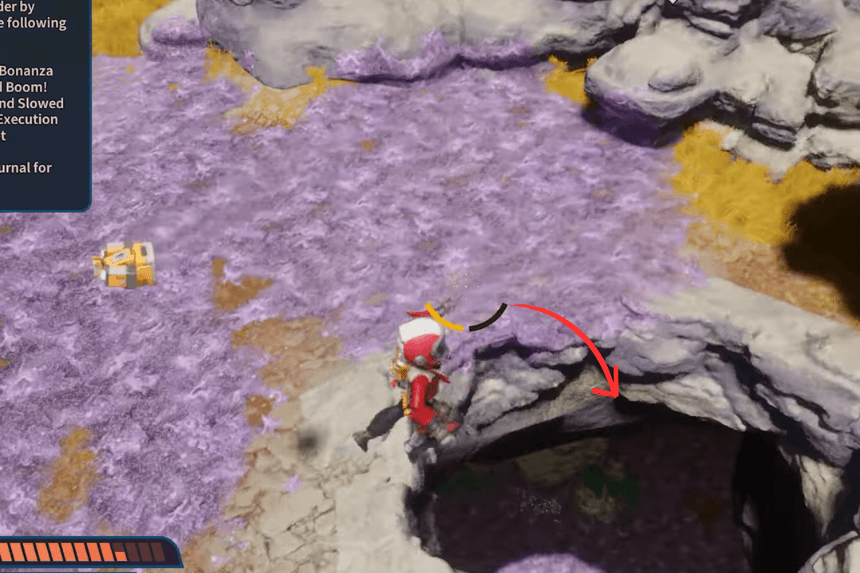
35. Quasadron IX – Savannah Lake
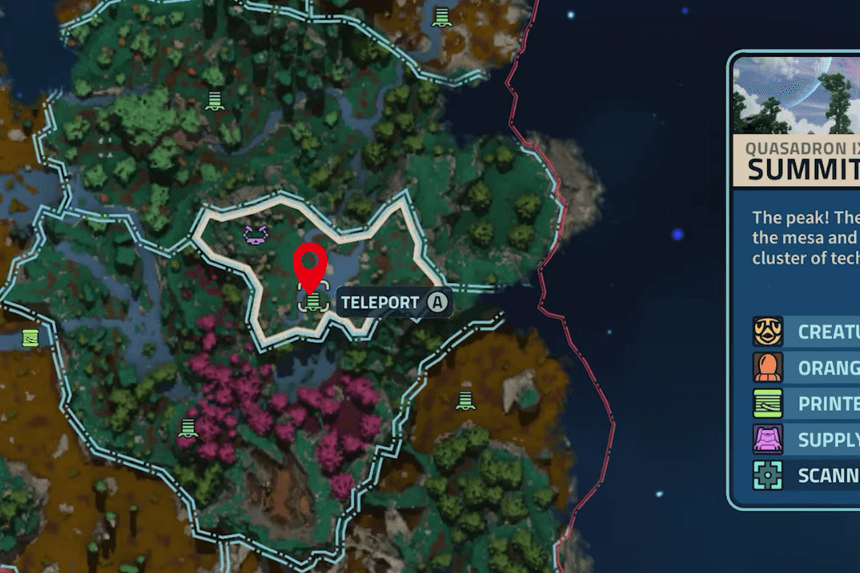

Click on the images to enlarge
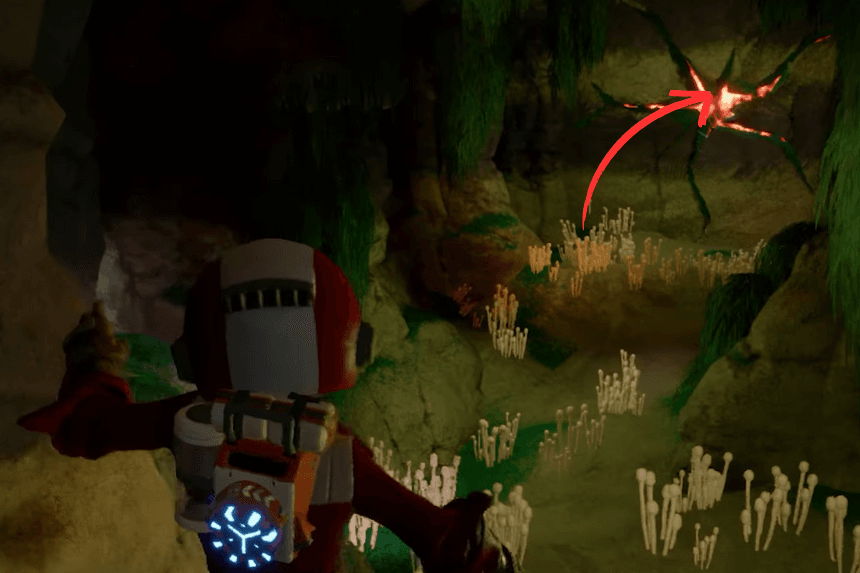
Go to location provided on the map, there you will find that the printer slurry is surrounded by many power wires. To diffuse it, you need to go to Quasadron IX Summit, as shown on the map above, and then use your blight bomb to remove the blight and then use the stomp booster to enter the cave. Inside the cave, you will find the hexagonal plates shoot them to unlock the printer slurry crate.
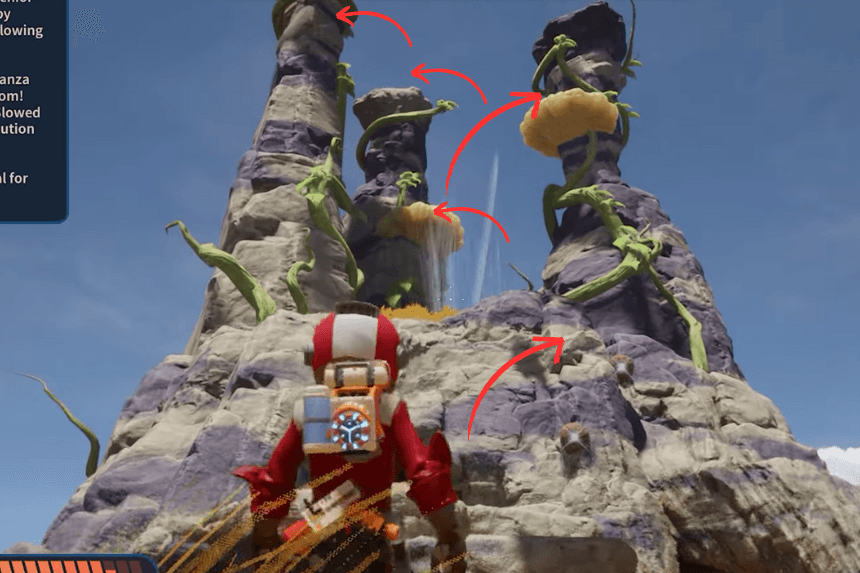
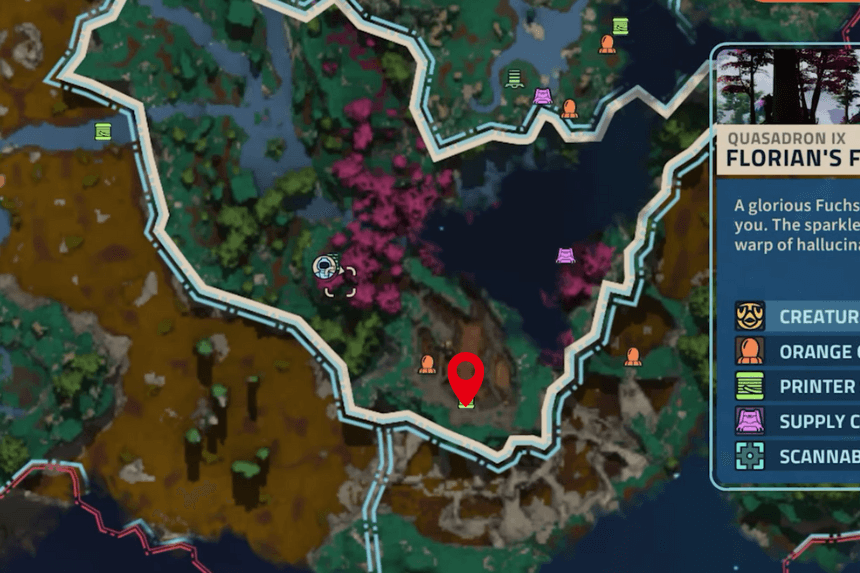
36. Quasadron IX – Florian’s Fuchsia Festvus
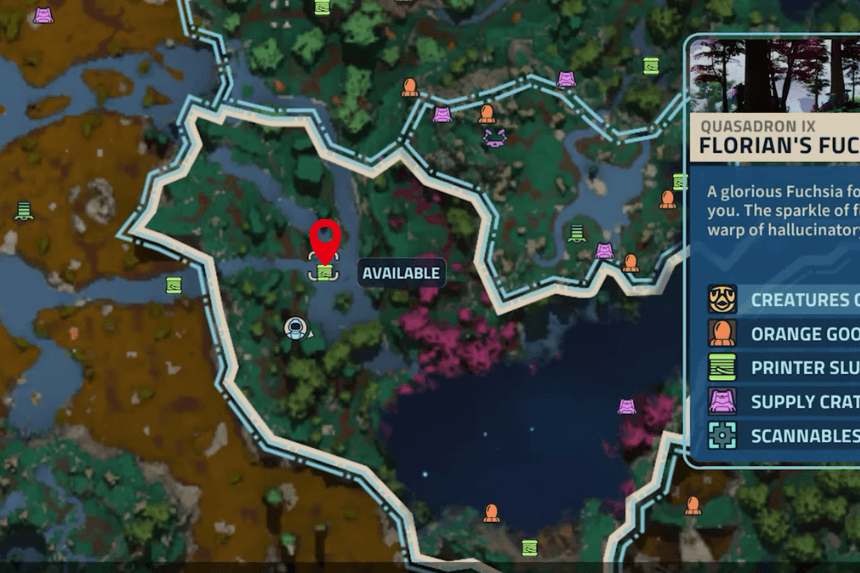
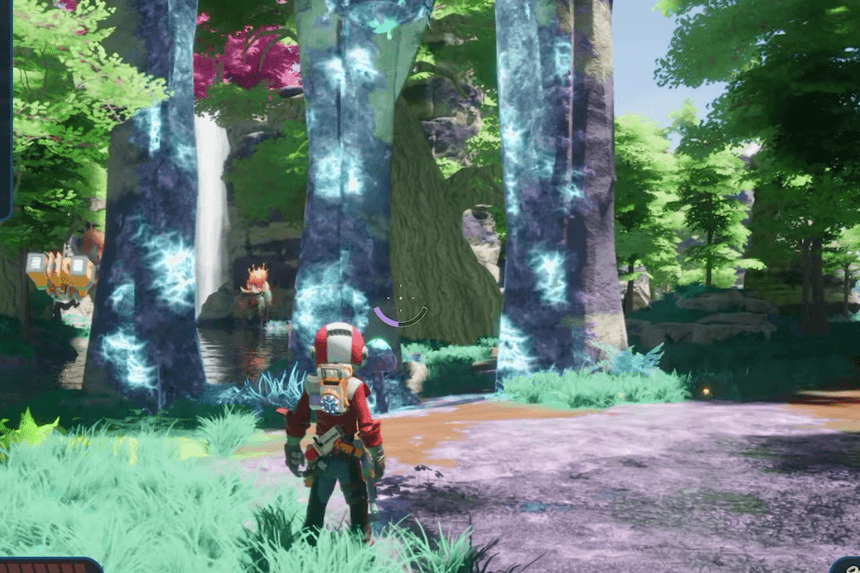
Click on the images to enlarge
Go to the location provided on the map above, then use your Ferro goo tank gun to connect the three long structures. You will find the printer slurry crate unlocked between the water bodies.
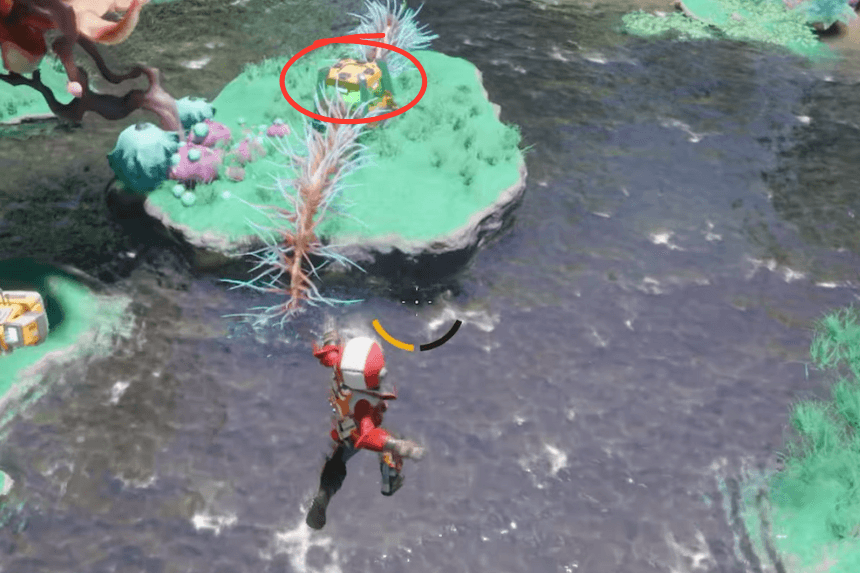
37. Quasadron IX – Florian’s Fuchsia Festvus
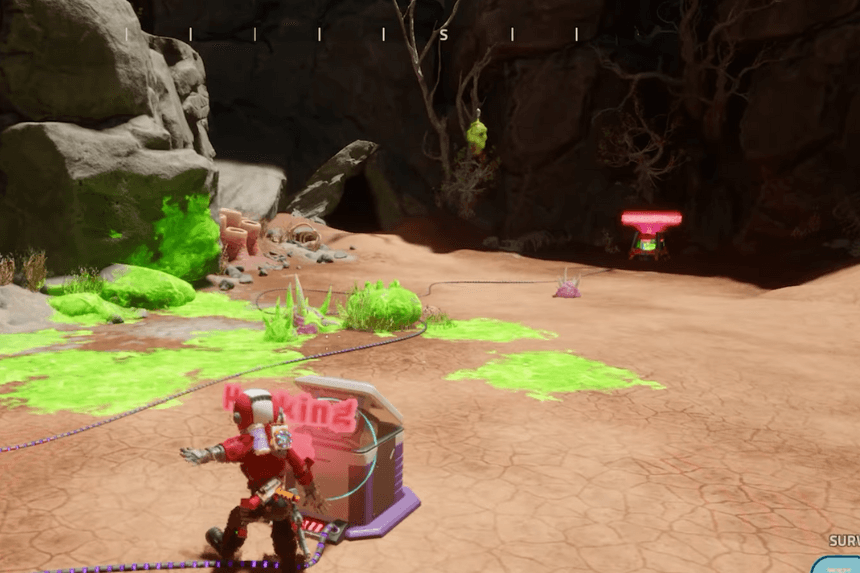
Go to the location provided on the map above, then hack the system few monsters will spawn so defeat them. After the hacking is complete, you will get the printer Slurry Crate.
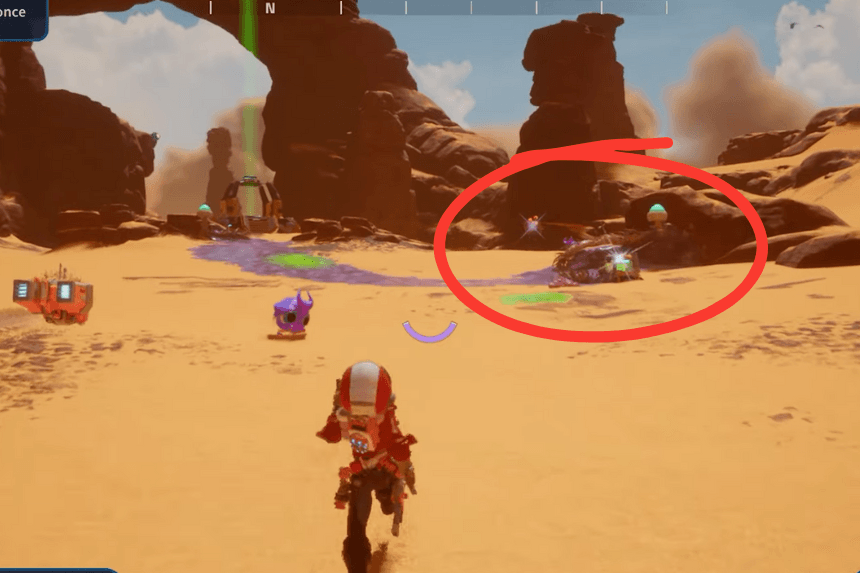
38. Quasadron IX – Summit
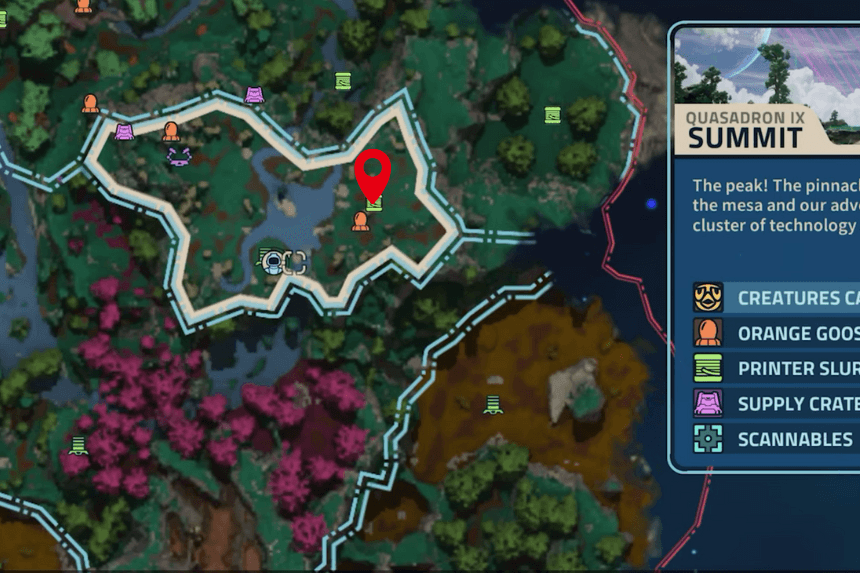
Go to the location provided on the map above. Then shoot at the hexagonal plates to unlock the Printer Slurry crate. There will be flying enemies so dodge there attacks.
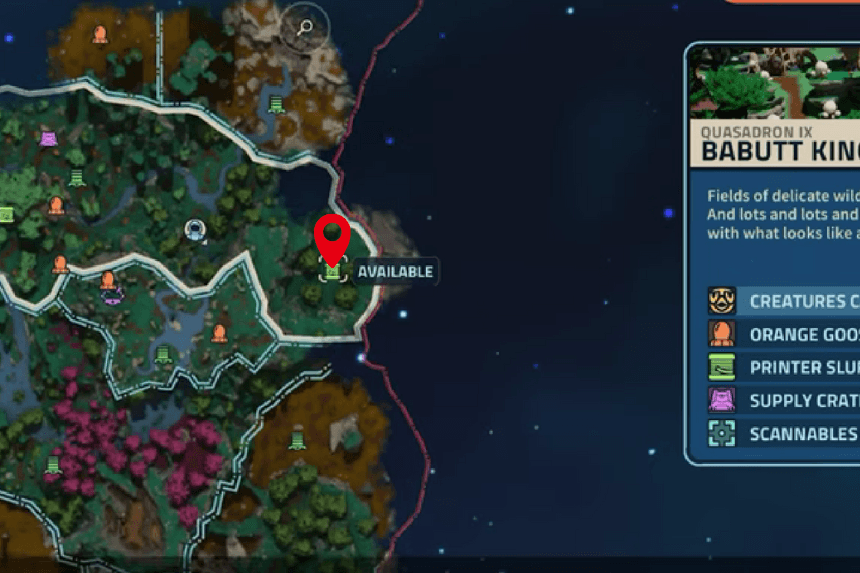
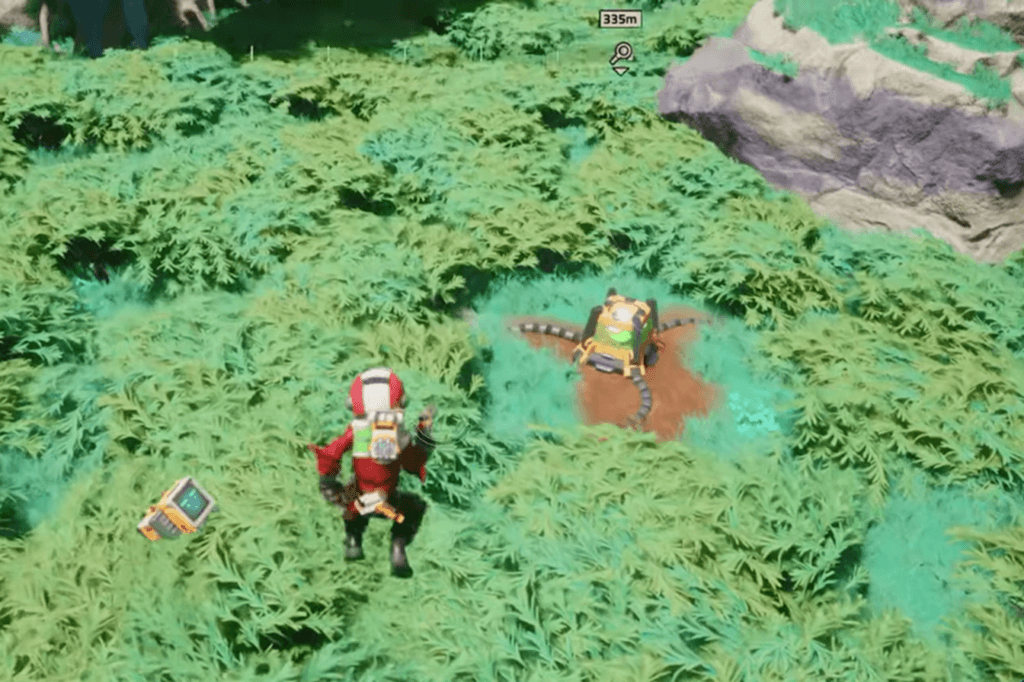
39. Quasadron IX – Babutt Kingdom
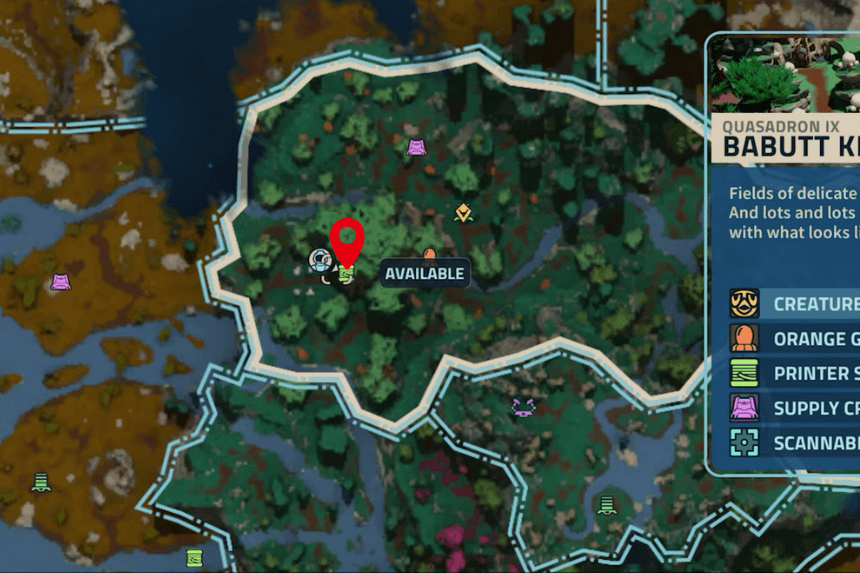
Go to the location provided on the map above. Then use the Ferro goo gun to connect the lighting mushrooms that will unlock the printer slurry crate.
40. Quasadron IX – Babutt Kingdom
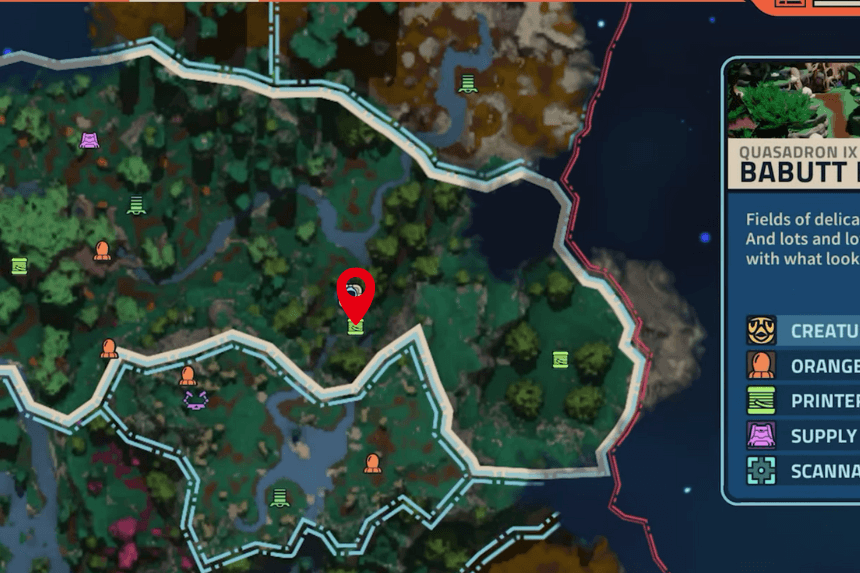
Go to the location provided on the map and use the remote drone to diffuse all the power wires to unlock the Printer slurry crate.
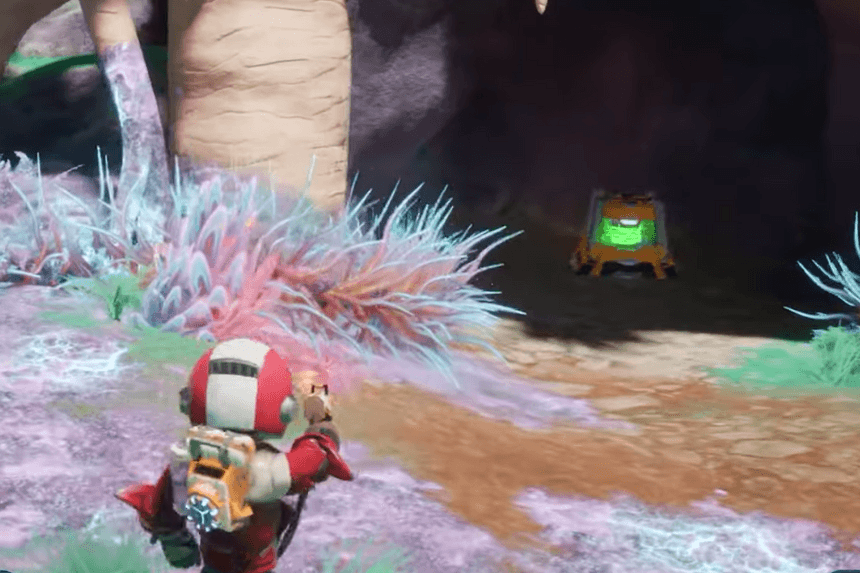
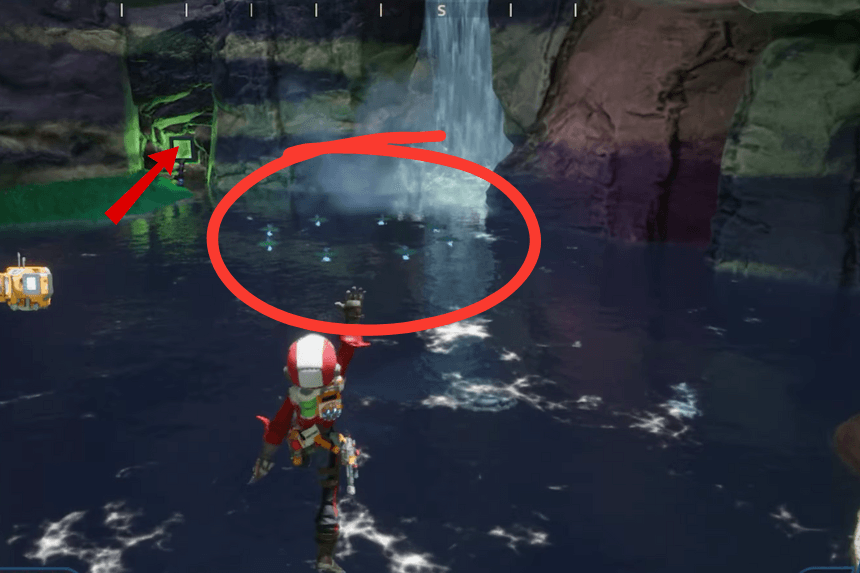
41. Quasadron IX – Babutt Kingdom
Go to the location provided on the map, and you will enter the cave. Outside the cave, you will find the printer slurry crate. You just need to diffuse the hexagon plates to diffuse the power supply and unlock the crate.