")
In Kingdom Come: Deliverance 2, treasures are hidden throughout the Trosky and Kuttenberg regions. Like the first game, their locations are often marked on vague, hand-drawn maps. However, you don’t need to acquire or read a map beforehand to find and loot the treasure.
This guide will help you locate Treasure Map II and pinpoint the exact location of the hidden treasure, making it easier to claim your rewards without the guesswork.
Second Treasure Map Location
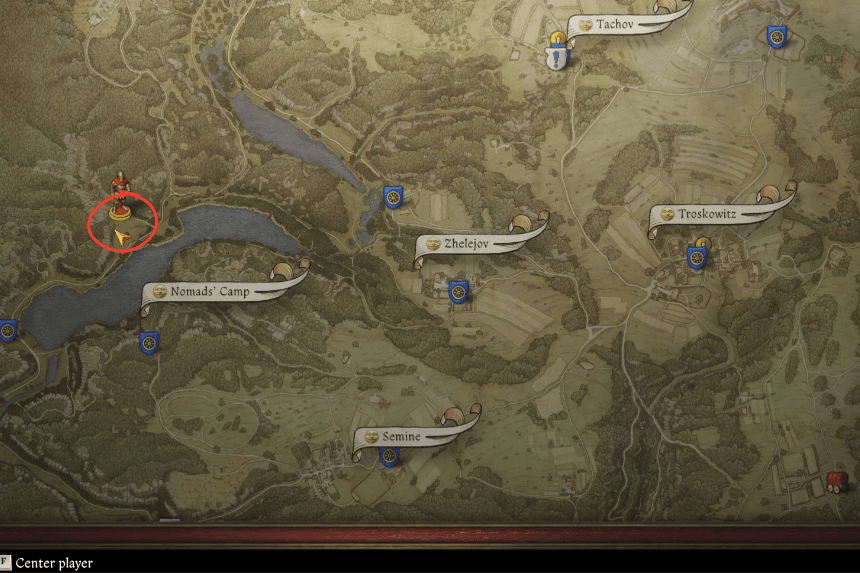
This treasure offers two separate lootable rewards in the same vicinity, near the poacher’s camp north of Rocktower Pond. One is found by climbing the Devil’s Finger rock landmark, while the other, the Skeleton with Treasure, is hidden to the south.
Getting the Treasure from Devil’s Finger: When climbing Devil’s Finger, be sure to save frequently, as the platforming can be unreliable, and Henry may lose his footing. Once at the top, approach the wooden cross—next to it, you’ll find a small pouch containing 281 Groschen.
Getting the Treasure from Skeleton with Treasure: For the Skeleton with Treasure, head south from the Devil’s Finger landmark towards the ravines. Eventually, you’ll reach a rocky formation that you can descend. As with the Devil’s Finger treasure, remember to save often to avoid missteps.
Next, turn to your right, and you’ll spot a separate rock that you need to jump onto—this is where the skeleton is hidden. Be sure to save before attempting the jump, as the landing can be tricky.
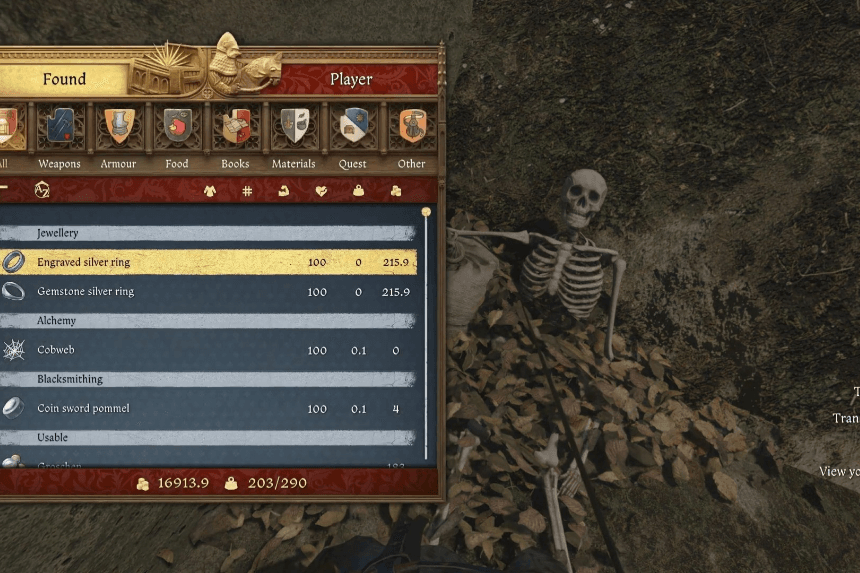
Once you make it across, you’ll find the skeleton nestled between two rock formations. Loot it to collect the following items:
- Engraved Silver Ring
- Gemstone Silver Ring
- Cobweb
- Coin Sword Pommel
- 183 Groschen
- Golden Cup
- Silver Chalice
Tips
In Kingdom Come: Deliverance 2, locating the treasure from Treasure Map II near the Devil’s Finger landmark can be challenging. Here are some community-sourced tips to assist you:
Understanding the Map’s Landmarks
- Devil’s Finger: This rock formation is marked by a wooden cross at its peak.
- Poacher’s Camp: Situated north of Rocktower Pond, this camp is depicted on the map.
Some players have noted discrepancies between the map and the actual terrain, suggesting that not all features align perfectly.
Navigating the Terrain
- Climbing Devil’s Finger and Locating the Skeleton with Treasure: The ascent and descent, both can be tricky due to unreliable platforming mechanics. It’s advisable to save your game frequently to prevent potential setbacks.
Remember, patience and frequent saving are key when navigating challenging terrains and deciphering treasure maps in the game.