
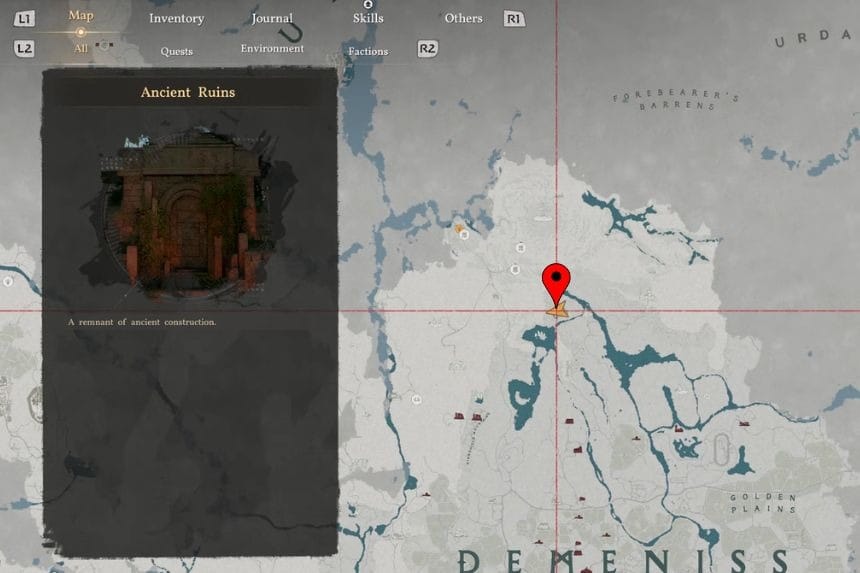
In Crimson Desert, Ancient Ruins can be found all over the map, and each Ancient Ruin has a special puzzle to solve. Solving the puzzles rewards you with Abyss Artefact, which can increase your abilities and stats, and activate Abyss Cresset. In this guide will tell you all the puzzles in Ancient Ruins we have found so far and where you need to go to solve the puzzles.
All Ancient Ruins Puzzles In Crimson Desert
Completing these puzzles will also allow you to activate an Abyss Cresset, which can be used as a fast travel point. You will also be rewarded with Abyss Artefacts, which can be used to unlock new abilities and enhance your character’s stats. You can also monitor the total number of Ancient Ruins you have discovered and completed by checking the Journal under Challenges > The Thread in the Forest. Below is a list of the Ancient Ruins puzzles we have found so far, and we will continue to add more as we discover them.
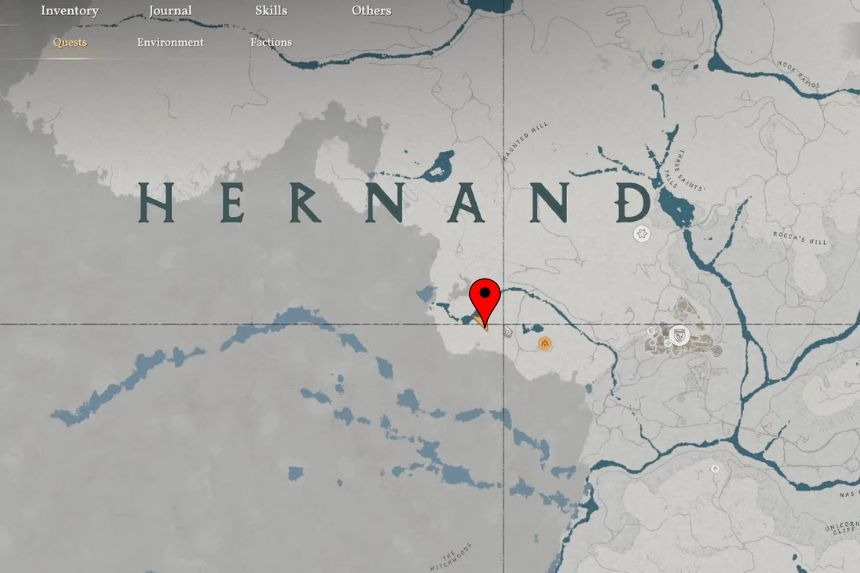
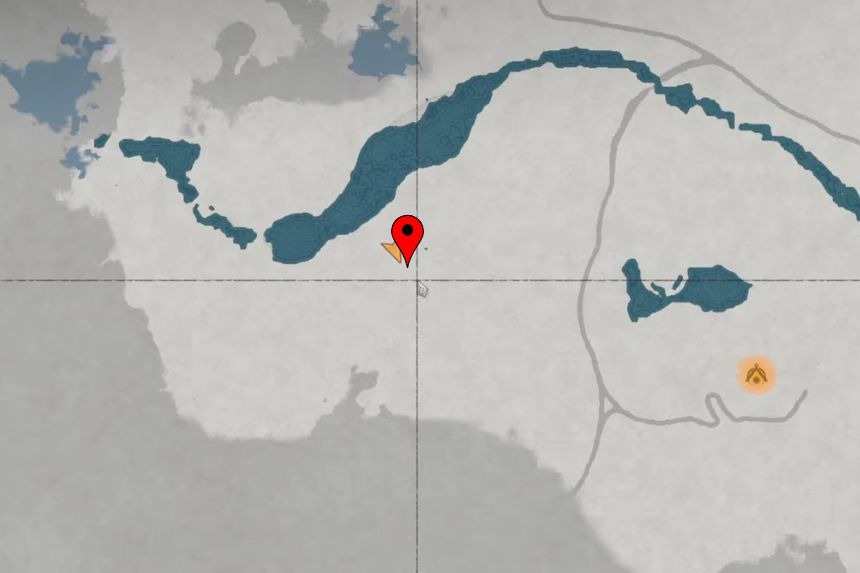
Southern Hernand Ancient Ruins: Azure Moon Labyrinth Ruins
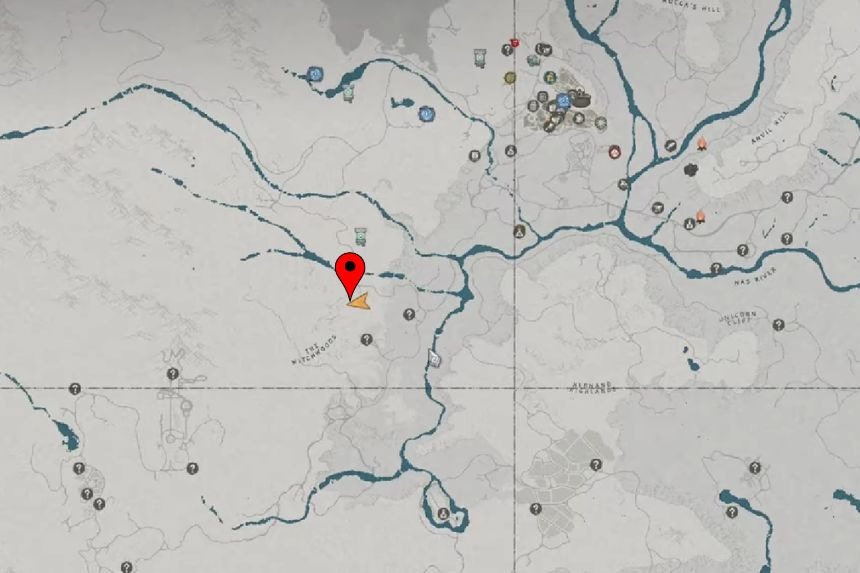
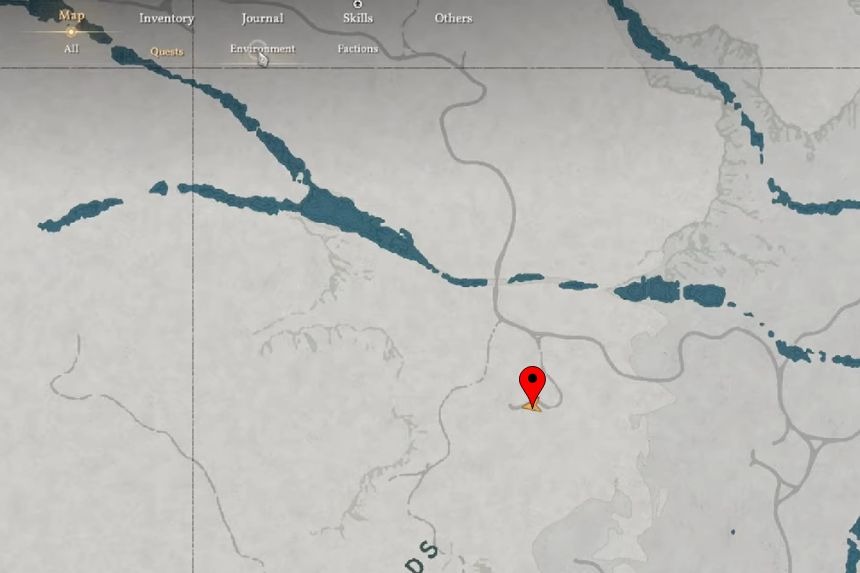
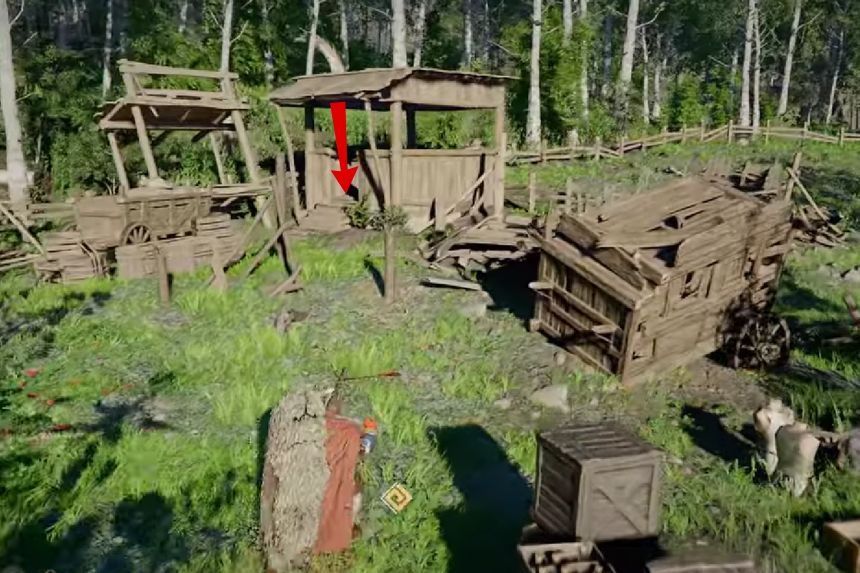
The puzzle can be found within a small village located northeast of the witch’s hut. To find the puzzle, go to the village and find the small building. Enter the building and go down through the chute to find the puzzle. To complete the puzzle, you need to collect five tree symbols located within the village.
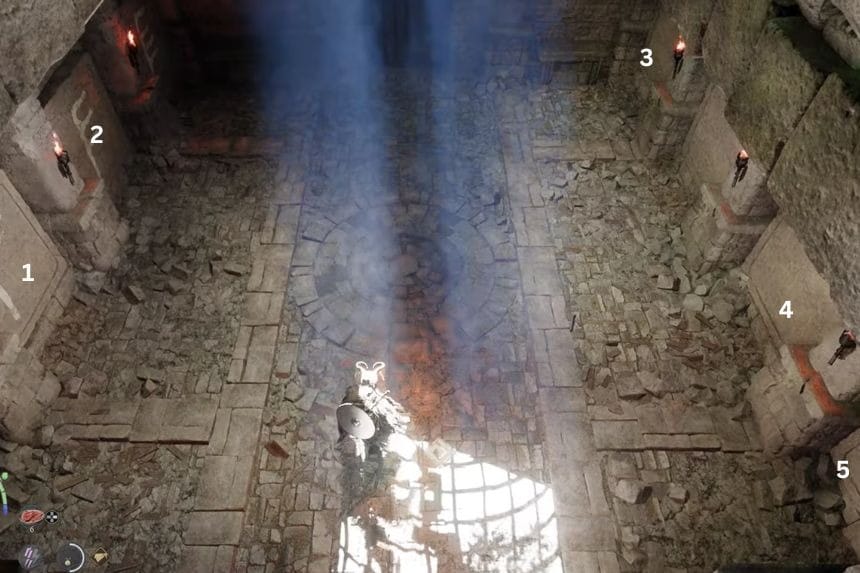
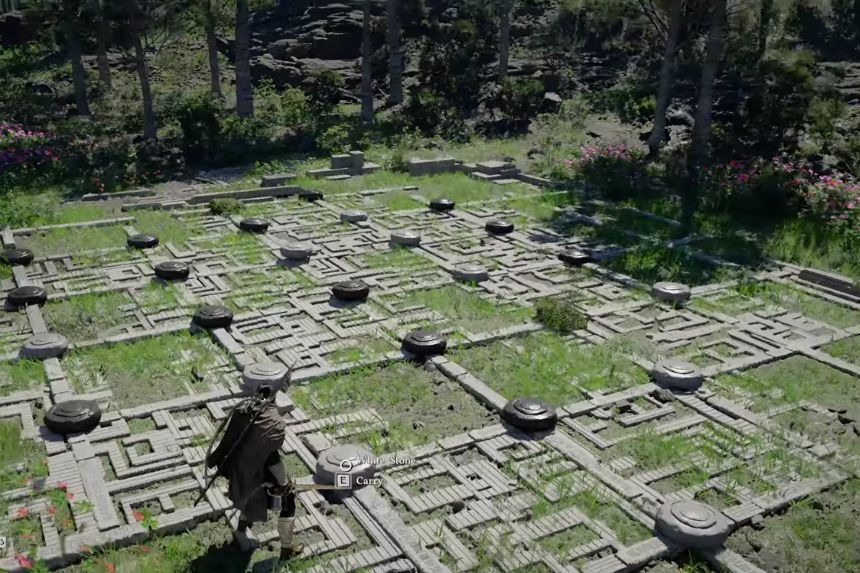
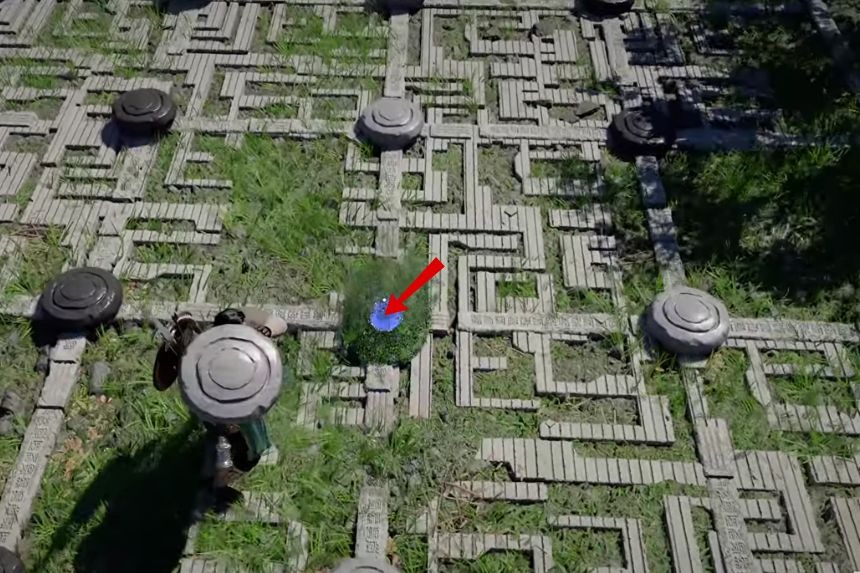
It is possible to complete the puzzle immediately without collecting the symbols. To complete the puzzle, follow these steps:
- Press the two buttons on the left
- Press the three buttons on the right
After you press the correct five buttons, the gate will open automatically. Enter the gate and interact with the Abyss Cresset to collect the Abyss Artefact and the Memory of Tide.
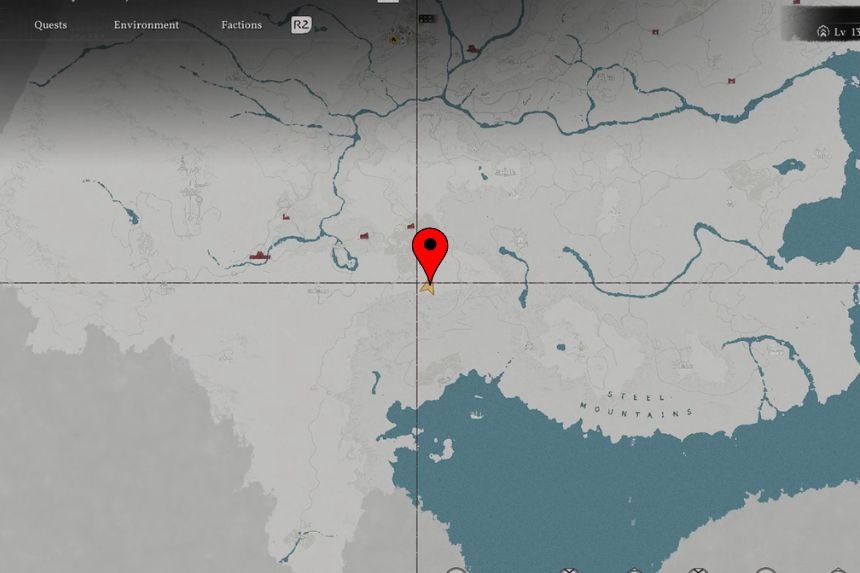
Southern Hernand: Steel Mountains Ruins
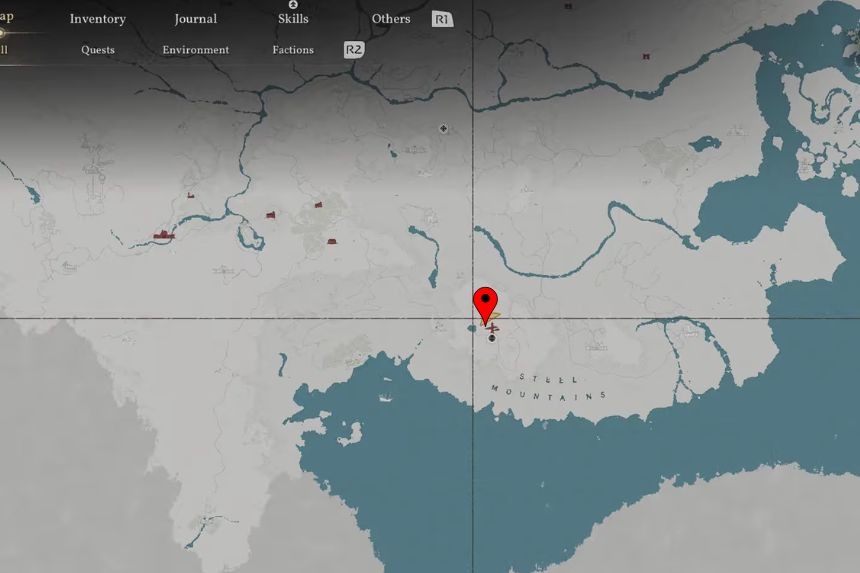
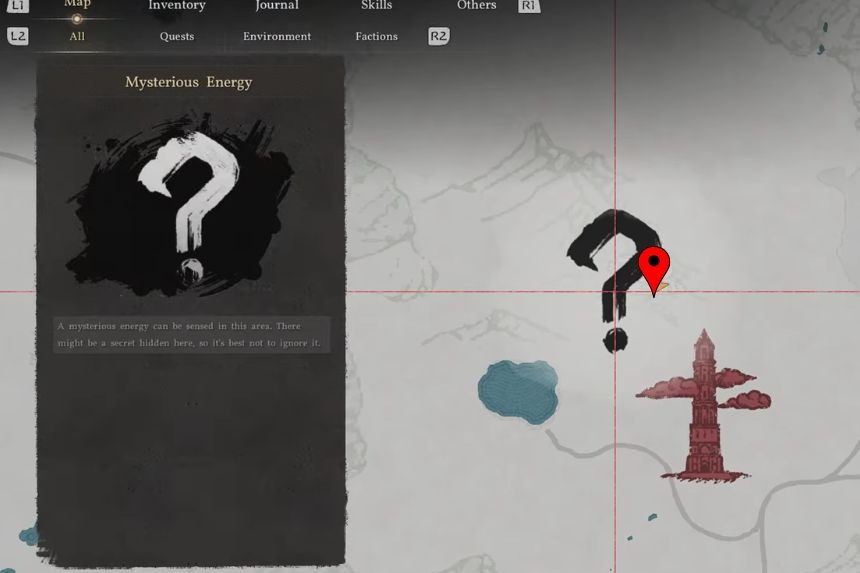
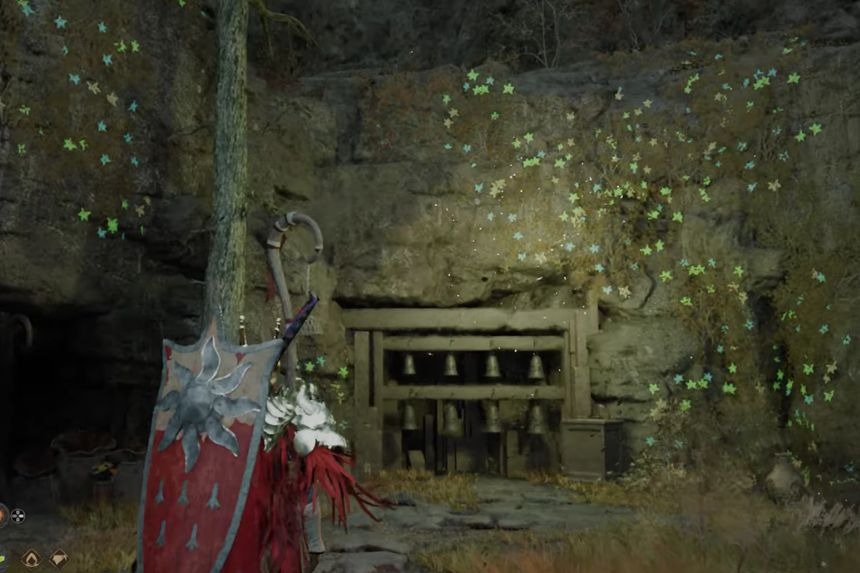
You can find the Crimson Desert Steel Mountains Ruins far to the south in the Steel Mountains, near the Spire of Insight. After you reach the location, collect the mallet placed near the bells and read the notes written on the wall next to them. The notes will indicate the sequence of actions to be followed for completing the puzzle.
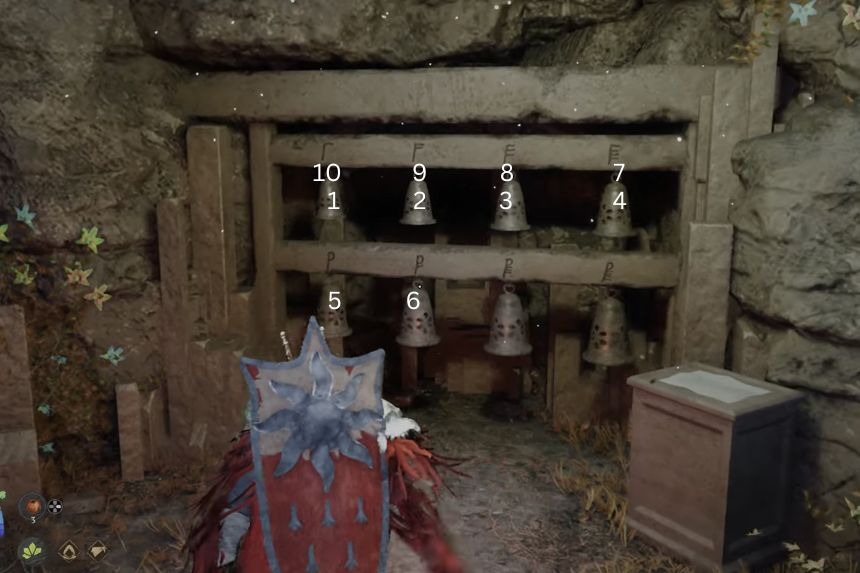
Ring the bells with the mallet in the following sequence: 1 > 2 > 3 > 4 > 5 > 6 > 4 > 3 > 2 > 1.
If you have followed the correct sequence, a rocky door on the right will open, leading you to the Abyss Cresset.
Duskwood Waterside Ruins
You can find the Crimson Desert Duskwood Waterside Ruins near the river, in between the cave and the Kilnden Workshop.
To complete the Crimson Desert Duskwood Waterside Ruins checker puzzle, you need to look next to the Abyss Cresset and collect the hidden white checker. Then, you need to place the white checker between the two white checkers already on the board, creating a straight line with the white checkers. The idea is to place the white and black checkers in a row of five identical checkers. This row could be horizontal, vertical, or even diagonal.
After you have completed the row of white and black checkers, the puzzle is complete, and you can use the Abyss Cresset to collect the Abyss Artefact.
Central Hernand: Hunter’s Cabin Ruins
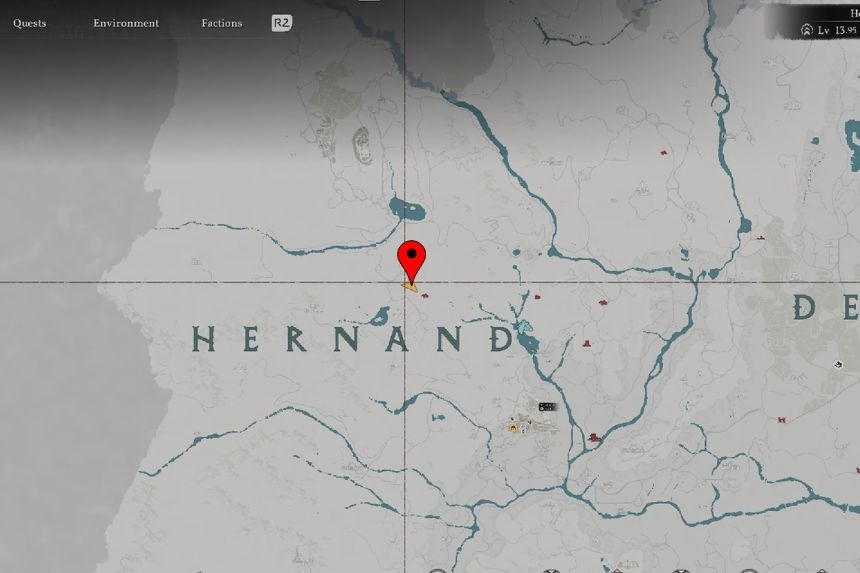
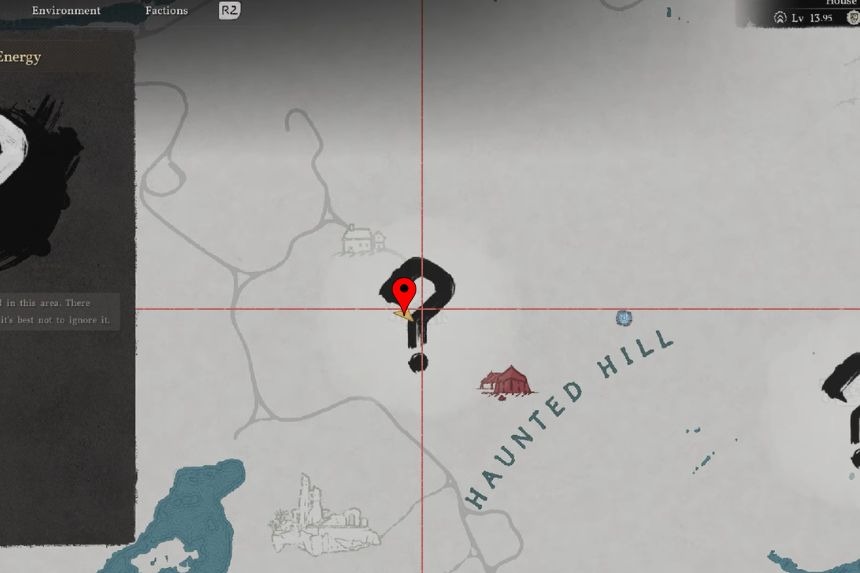
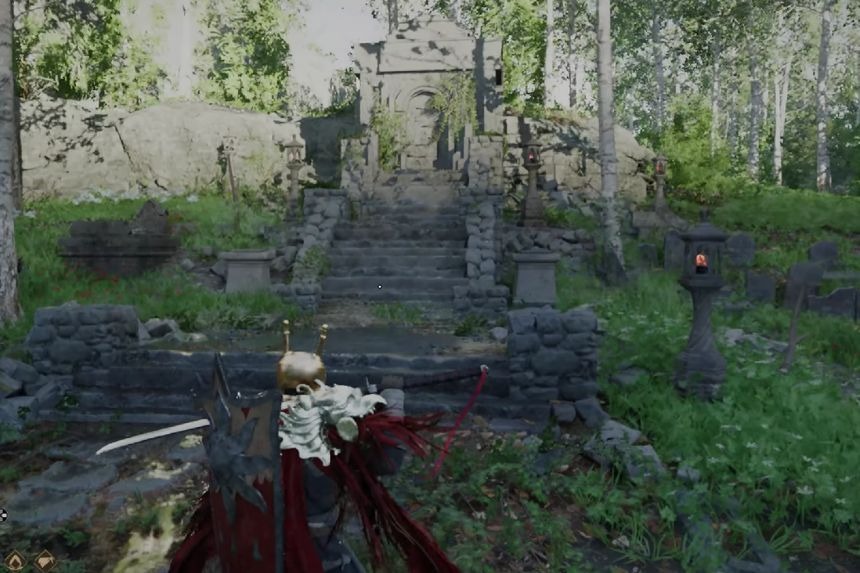
You can find Crimson Desert Hunter’s Cabin in the Hunter’s Cabin location in the Haunted Hills region, northwest of Hernand City. To solve the Crimson Desert Hunter’s Cabin graveyard puzzle, you must light all the stone lanterns around the graveyard.
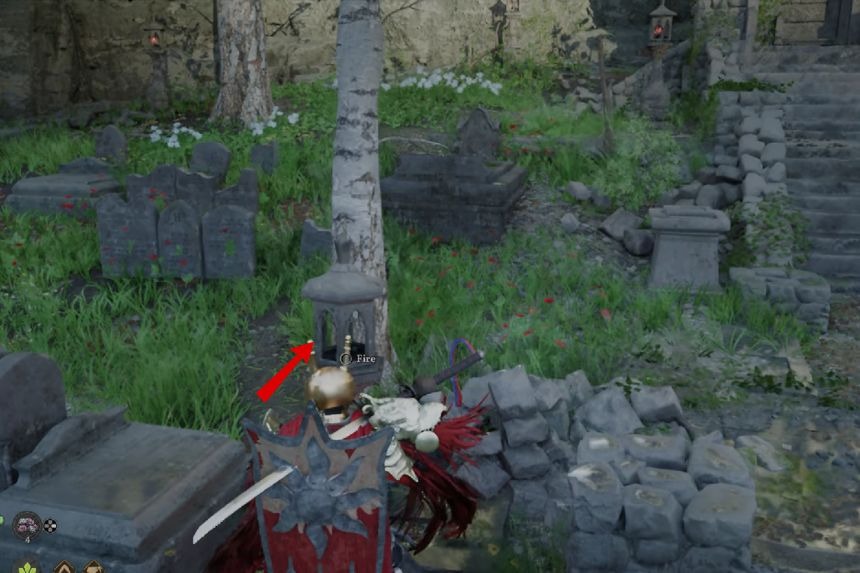
The location of the lanterns is not always the same, but it is best to search the entire graveyard and make sure none of the lanterns is unlit. Once you light all the lanterns, you have solved the puzzle and opened the tomb, where you will find the Abyss Cresset.
Central Hernand: Meandering Hills Ruins
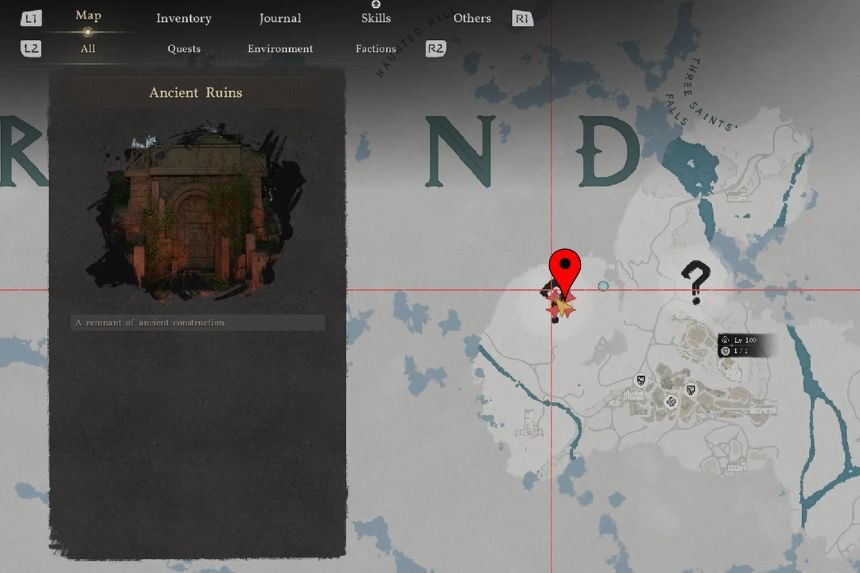
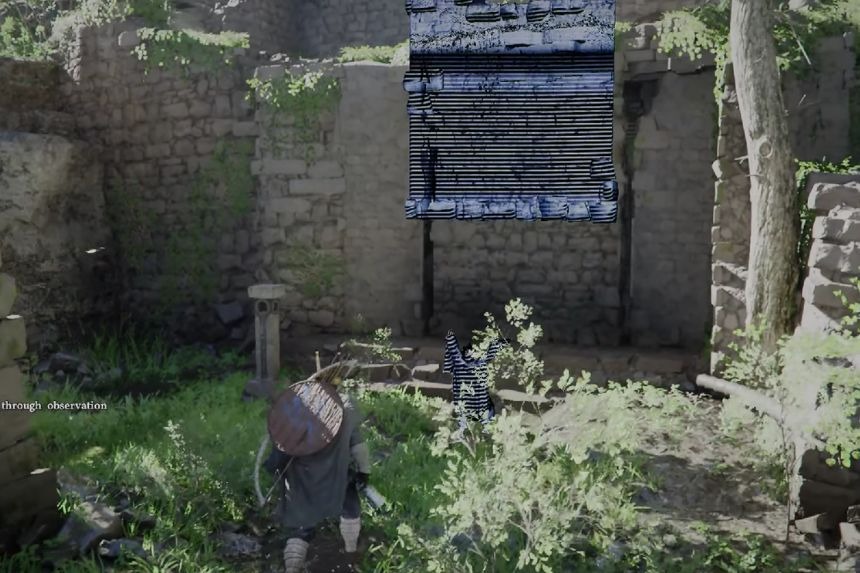
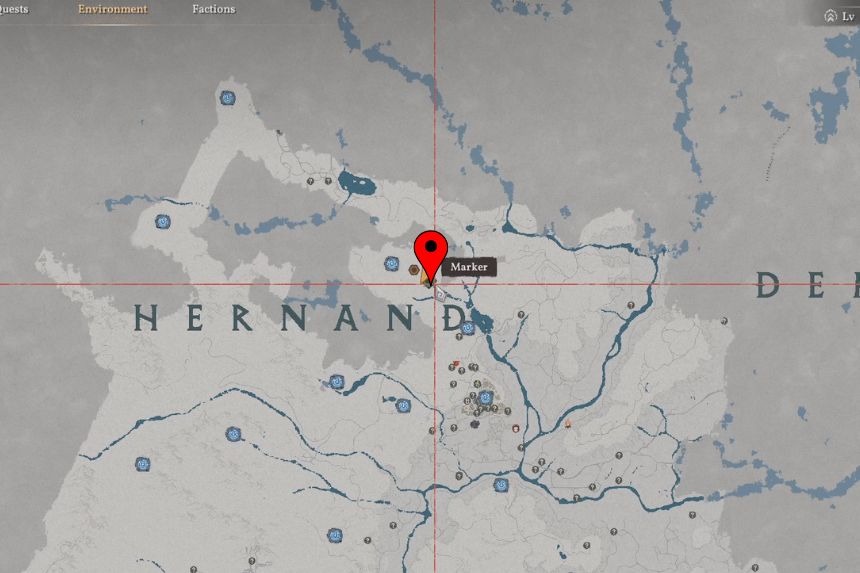
These sealed ruins can be found in the Crimson Desert Meandering Hills, northwest of the City of Hernand. To enter the ruins, you must use Nature’s Grasp on the stone gate that is blocking the entrance.
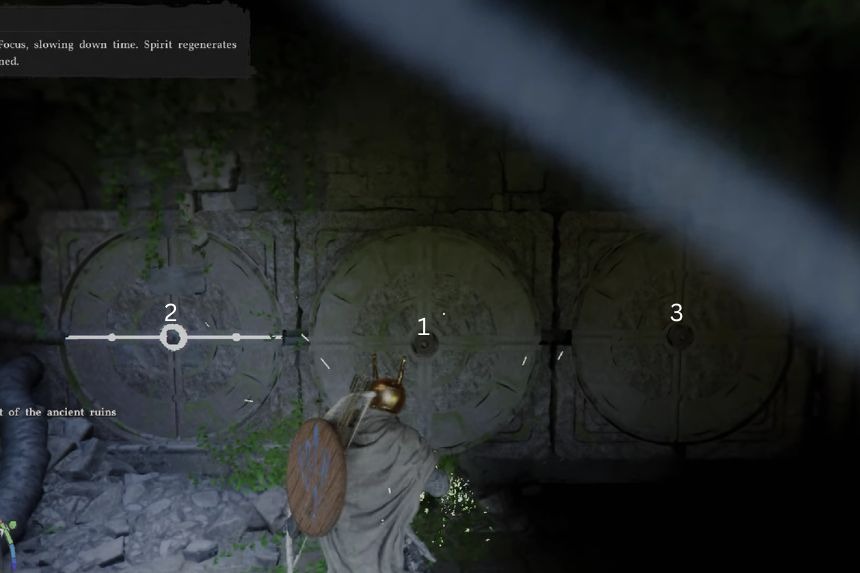
When you enter the ruins, you must use Focus Palm on the large buttons on the floor so that they remain pressed at the same time. To solve this puzzle, you must press the circular dials in the following order: the middle circular dial, the left circular dial, and the right circular dial. Once the buttons are in the correct position, the Abyss Cresset will unlock.
Southern Hernand: Sunrise Plains Ruins
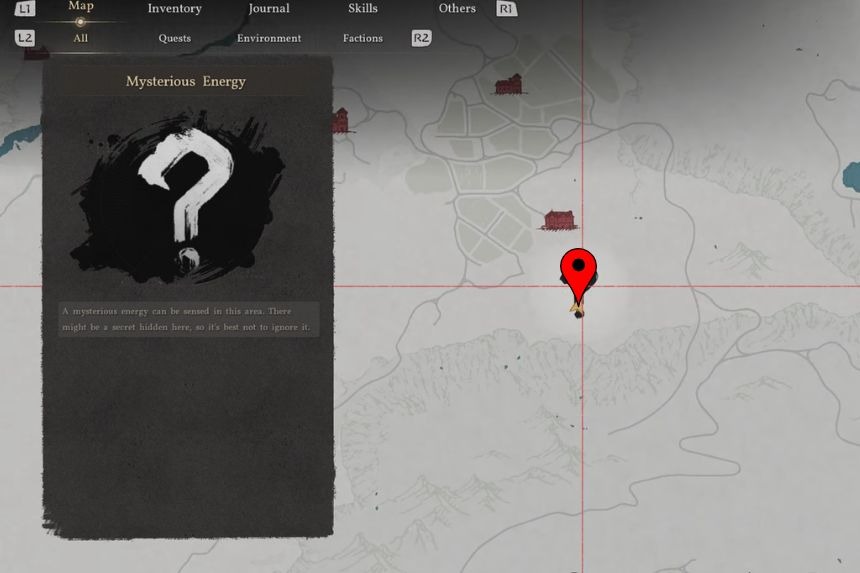
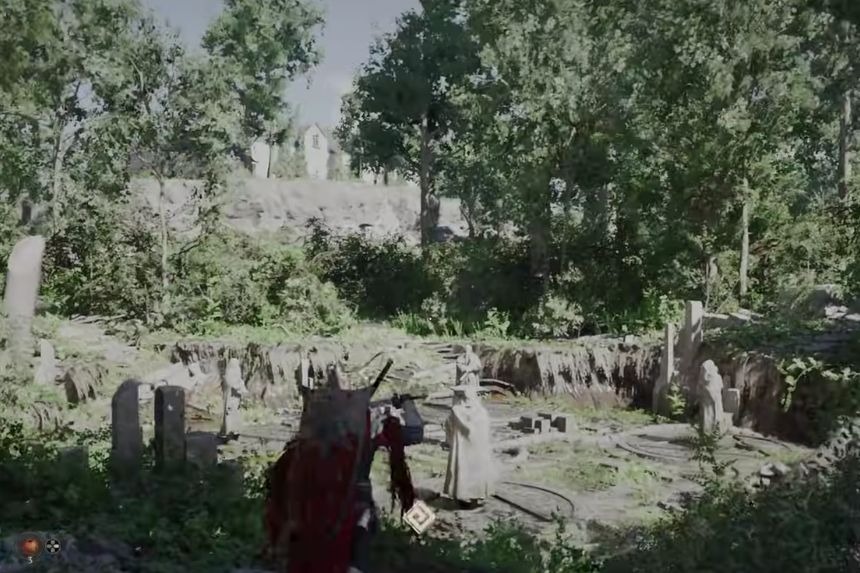
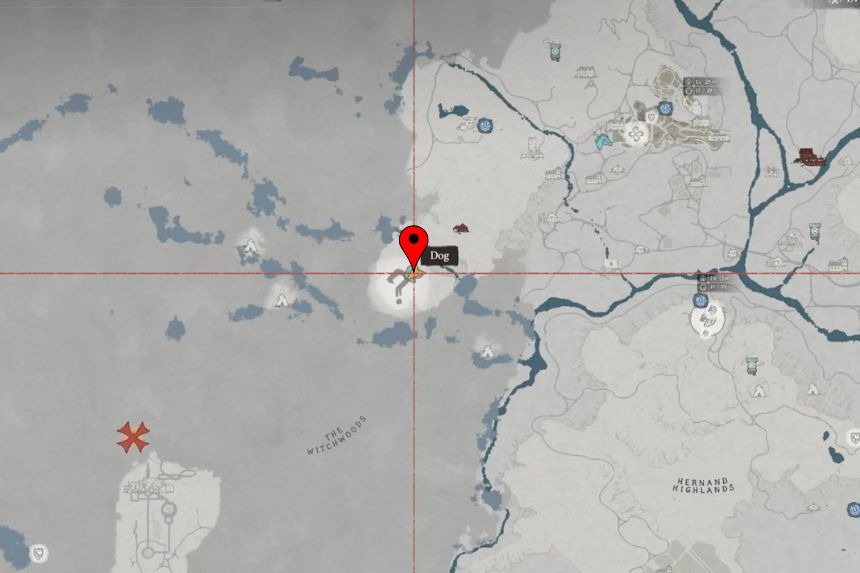
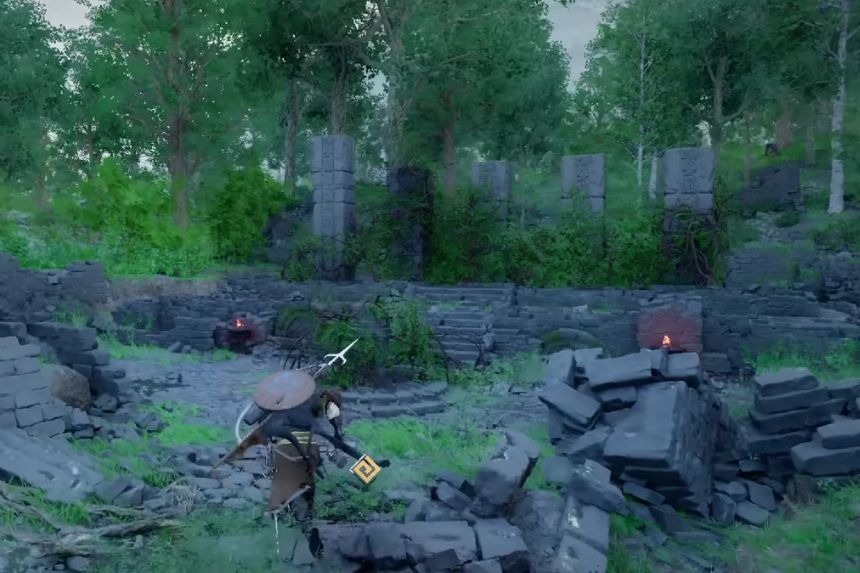
You can find the Crimson Desert Sunrise Plains Abyss Cresset puzzle after going through the vines, located south of Glenbright Manor in the Grace Estate. To unlock this puzzle, you must rotate the statues in a manner that they face the middle of the area where the Abyss Cresset is placed.
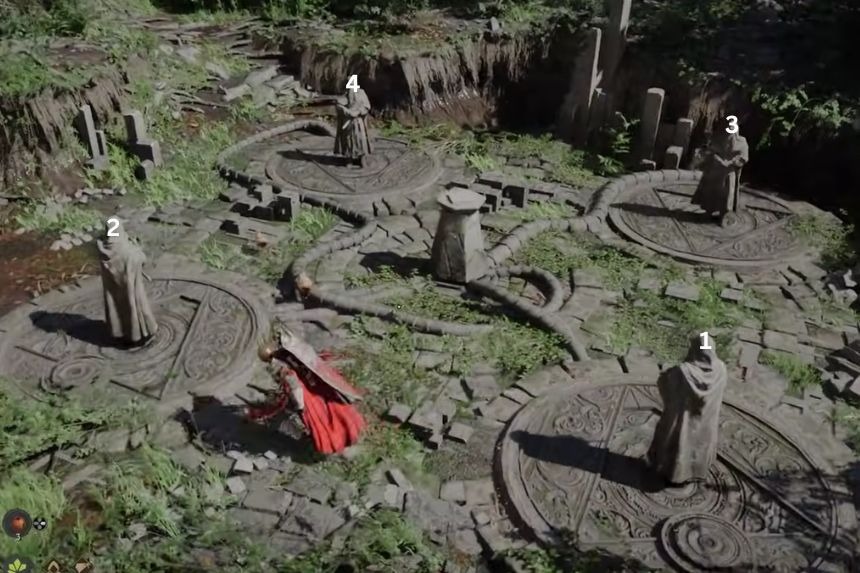
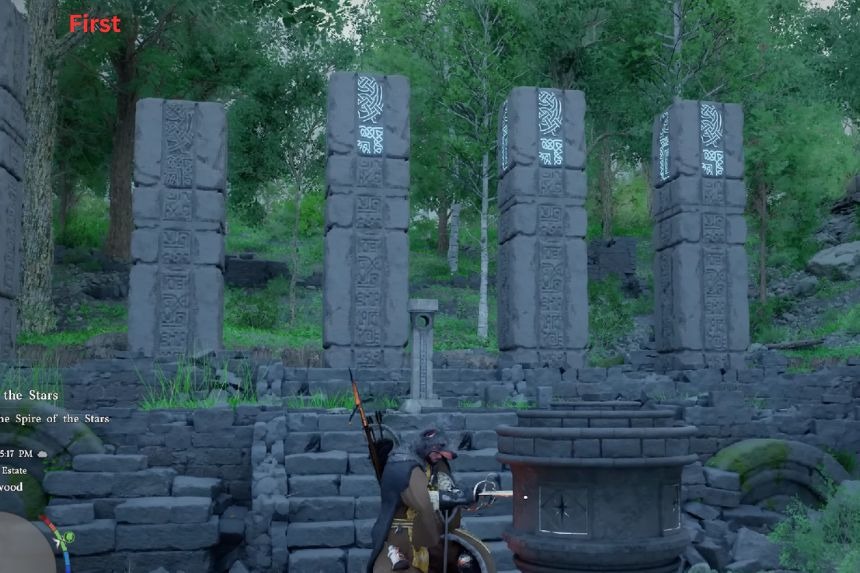
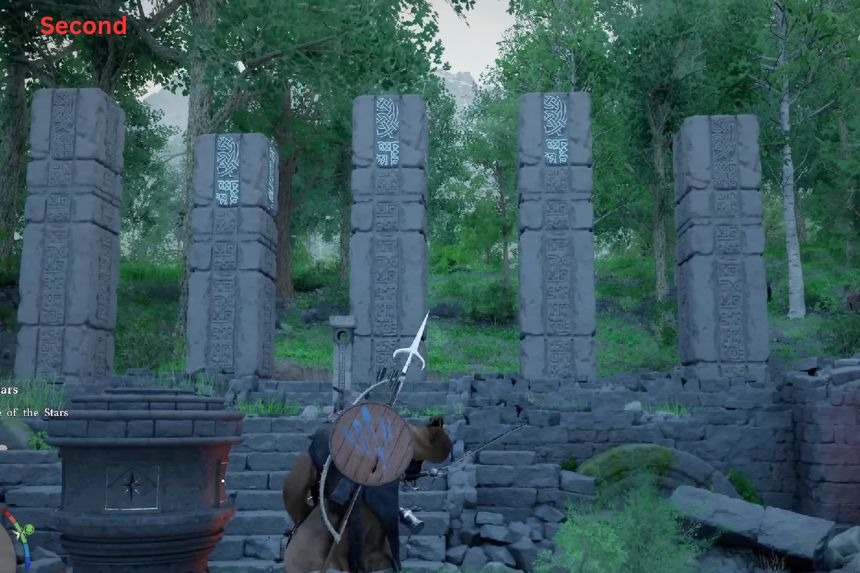
First, you need to rotate the first statue towards the middle of the room. This will automatically rotate the second statue towards the middle of the area as well. After this step, you must go towards the third statue and rotate it towards the middle of the area. This will automatically rotate the fourth statue towards the middle of the area.
Precipice of Echoes Ruins
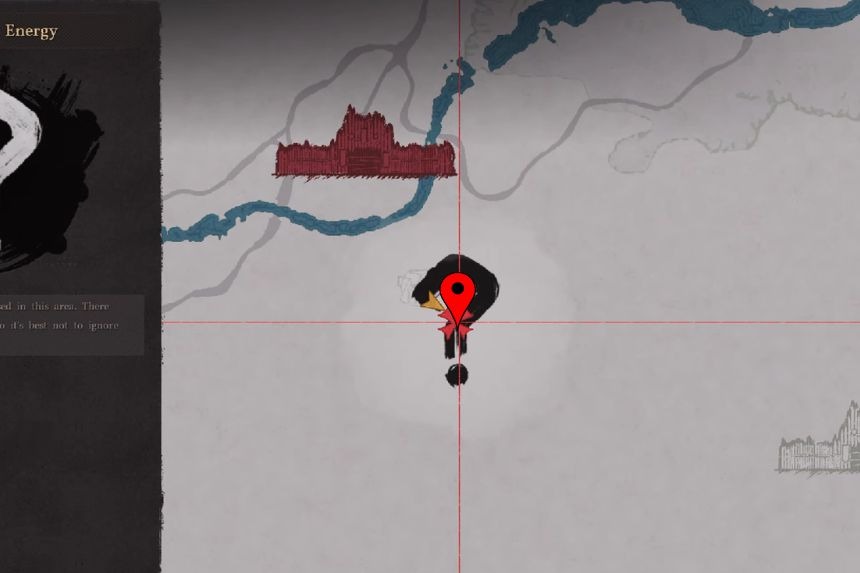
You can find the Crimson Desert Precipice of Echoes Ruins to the southeast of Fort Perwin, located at the base of the Mountain of Frozen Souls.
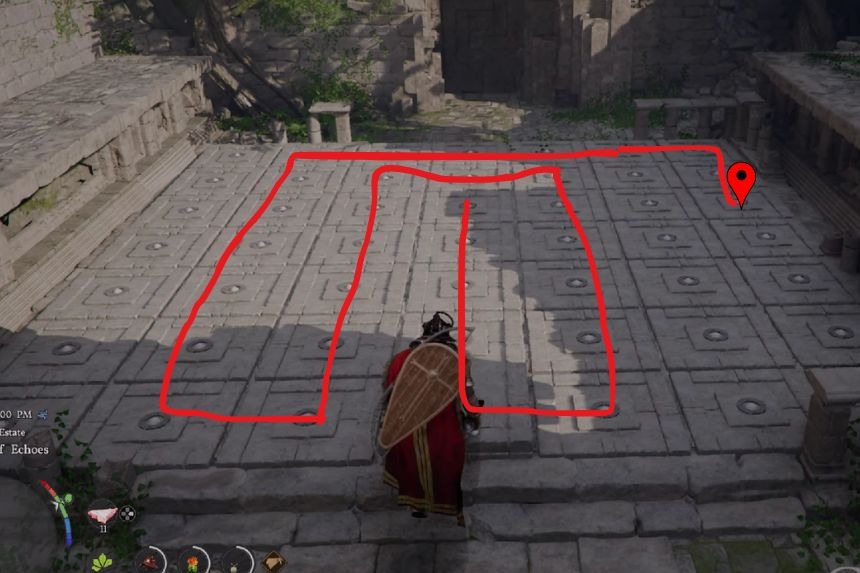

In the puzzle, you will need to complete a tile-based matching game. The objective is to match two identical icons by stepping on tiles in the correct order. However, you must make sure that you do not step on any other icon except the second icon of the matching pair.
Once you complete the pattern correctly, the door will be unlocked, and you can collect the Abyss Artefact.
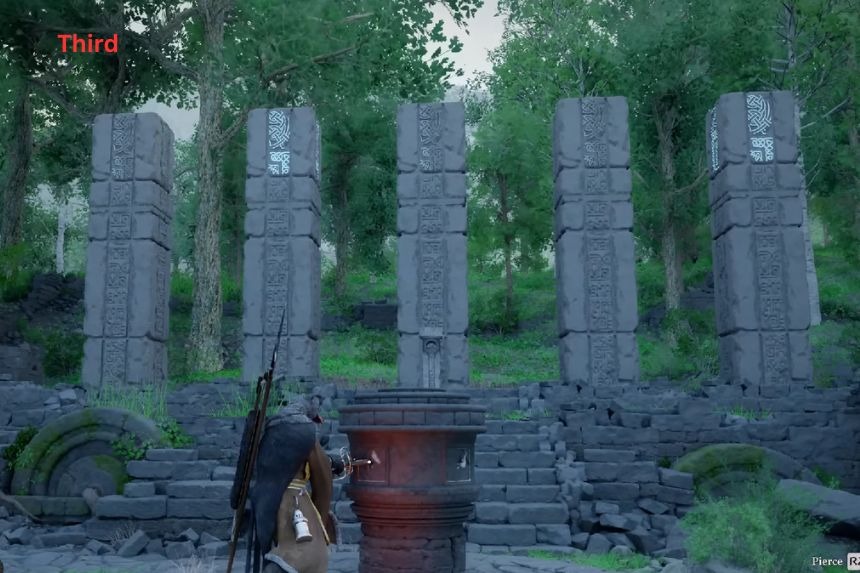
Deepfog Basin Everfrost Ruins
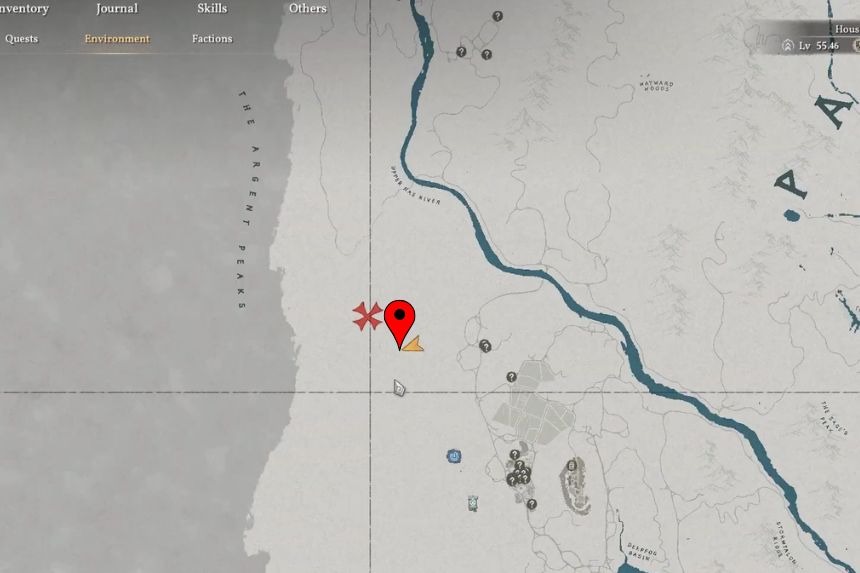
The Crimson Desert Deepfog Basin Everfrost Ruins can be found deep inside the forest, near the Argen Peaks. The puzzle requires matching the height of the pillars.
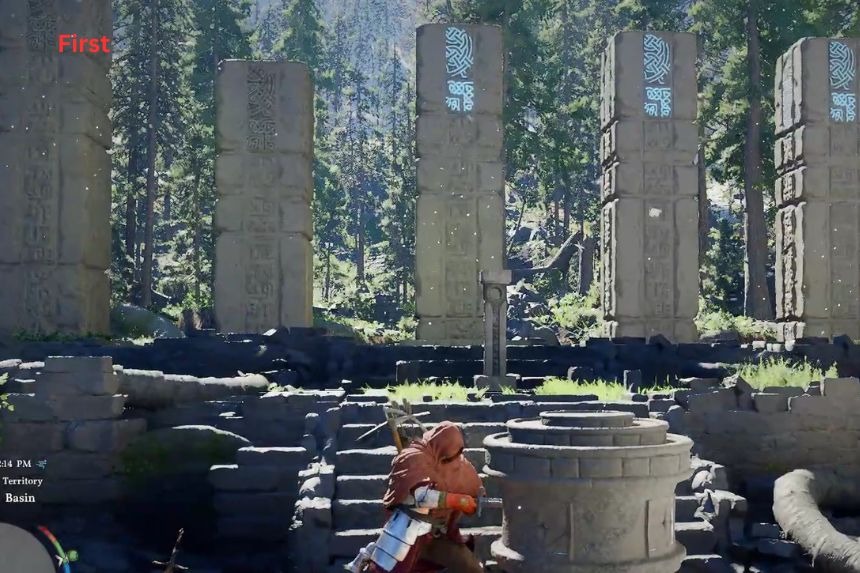
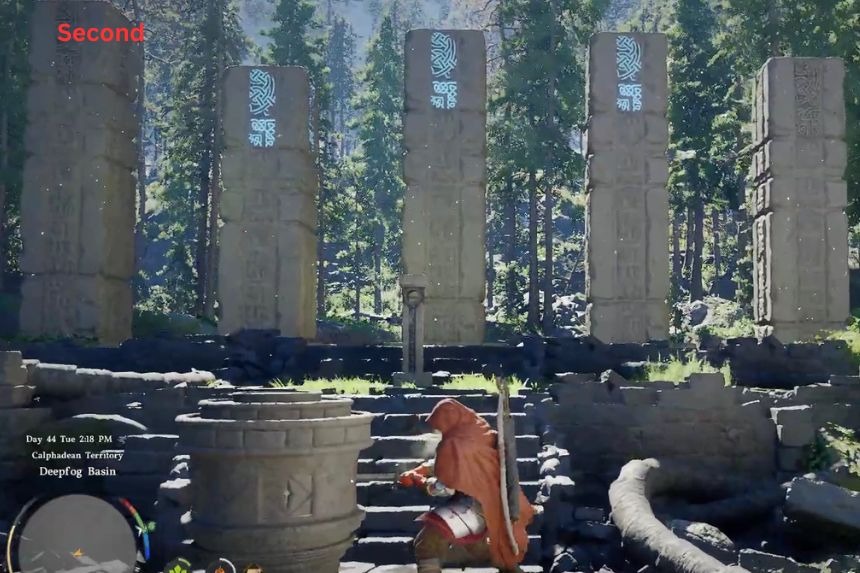
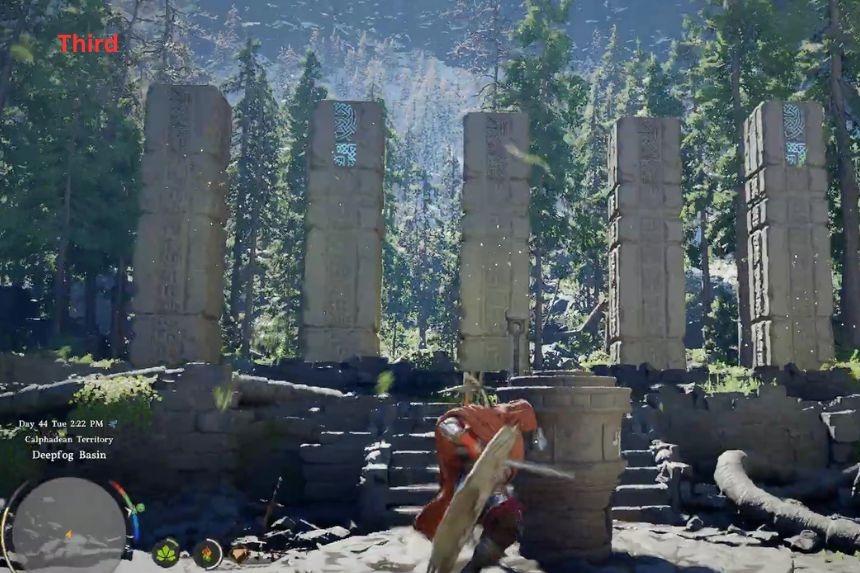
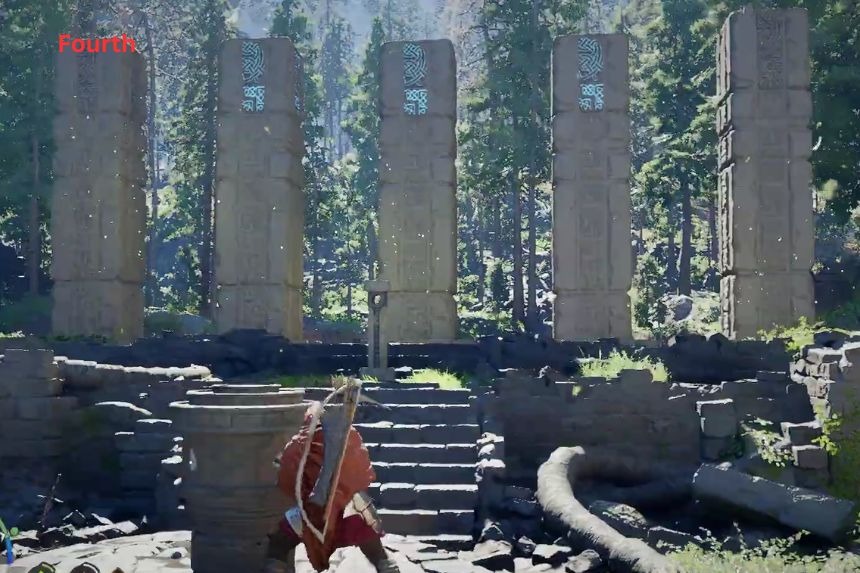
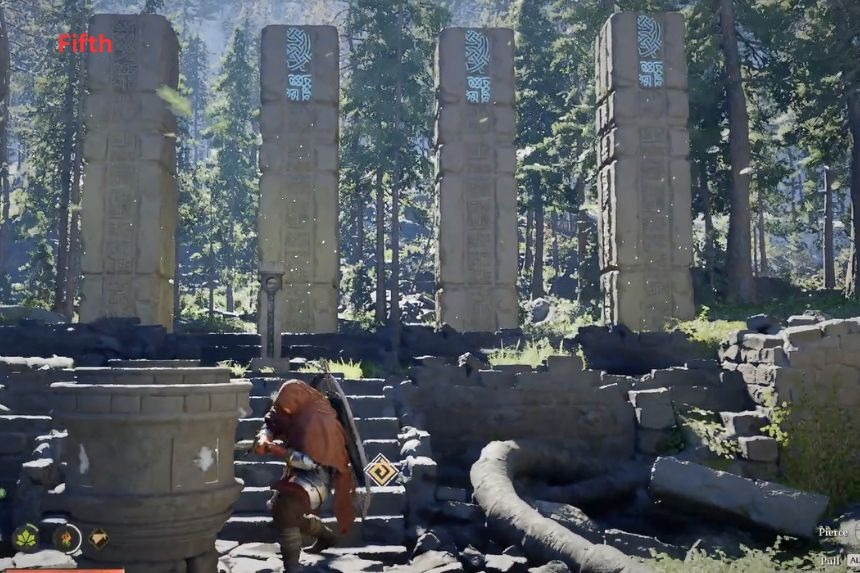
To start, use the “Stab” skill to interact with the pedestal. Then, move pillars 1, 2, and 3 halfway up to match the height of the first pillar. Move Pillar 1 to the target height, and then move Pillar 4 to match Pillars 2 and 3. Move Pillars 2, 3, and 4 so they’re all aligned properly with the first pillar. Once all the pillars are aligned, the puzzle is complete, and you can collect the Abyss Artifact.
Duskwood Hill Ruins
First, take out your sword and reflect the light onto the vines to burn them down. Once the vines have been cleared, insert the small piece of the puzzle into the corresponding slot using your “Stab” skill.
Next, line up the pillars:
- Move the first three pillars in the middle about halfway up so they line up with the first pillar.
- Next, move the middle three pillars all the way to the top.
- Finally, line up the last two pillars.
Once the pillars have been lined up correctly, the puzzle is solved, and the reward.
Deepfog Basin Dragon Head Ruins
You will find the Crimson Desert Deepfog Basin Dragon Head Ruins in the northern part of Hernand, which is near the Central Guard Post. This puzzle requires the player to place the large blocks to complete the image shown on the floor.
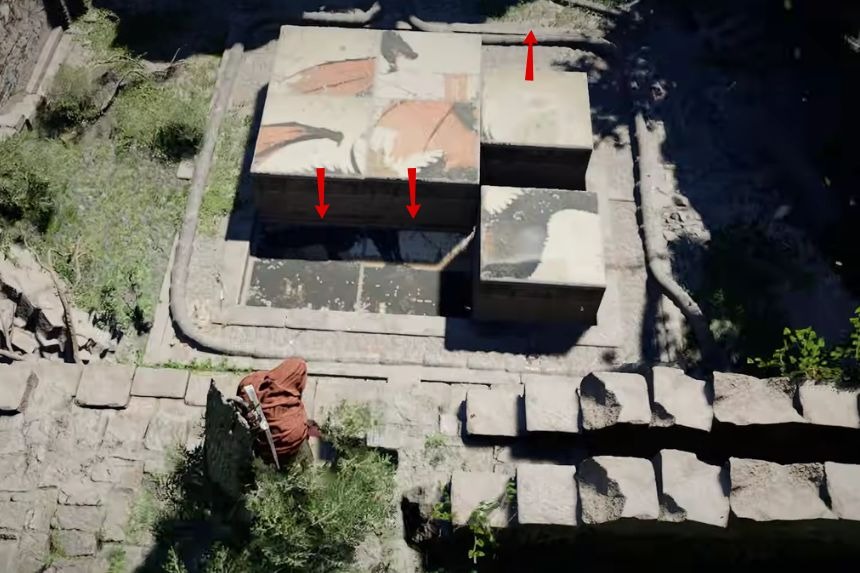
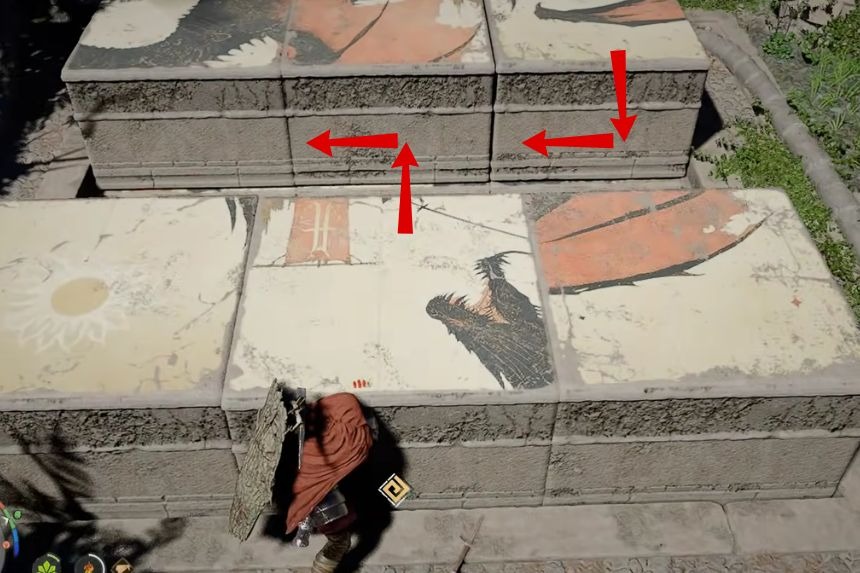
To do this, the player needs to stand near the blocks and use the Stab skill to lock the blocks. Then you will need to drag the blocks in any direction. You will need to place the blocks on the top part first. Then you will need to place the blocks on the sides first to make space, followed by the sun-shaped piece and the head-shaped blocks.
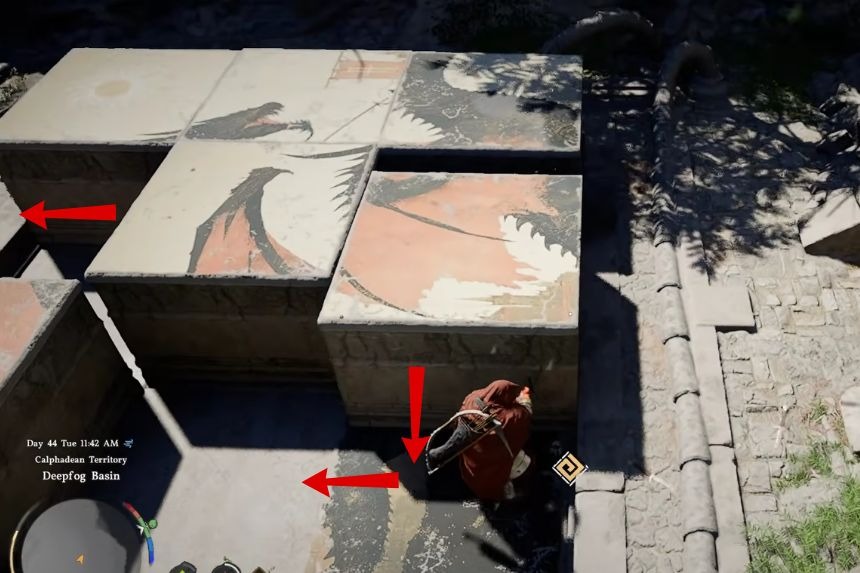
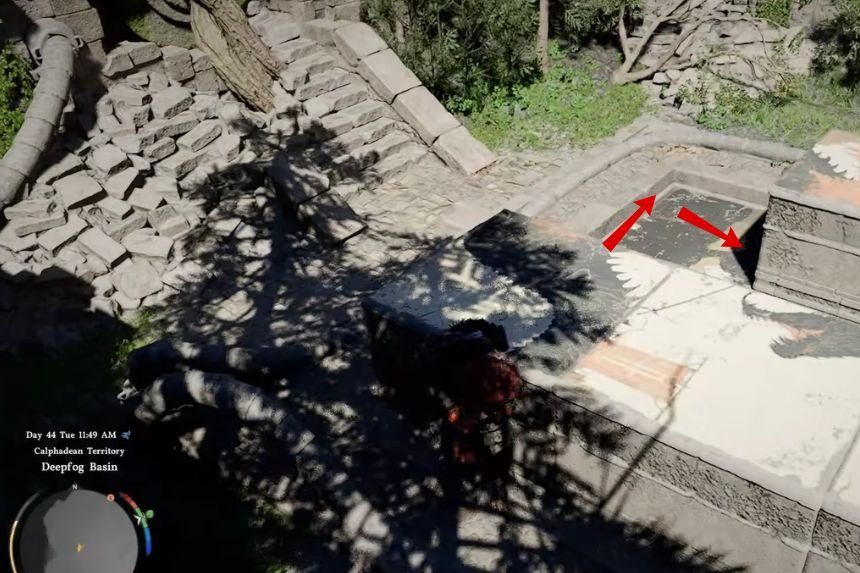
There may be some blocks that get stuck together, so you will need to move left or right to free the blocks. The player will need to adjust the blocks until the image is complete. Once all the blocks are in the correct position, the image will lock, and the puzzle will be complete. The player will then need to go inside to interact with the Abyss Cresset and collect the Abyss Artefact.
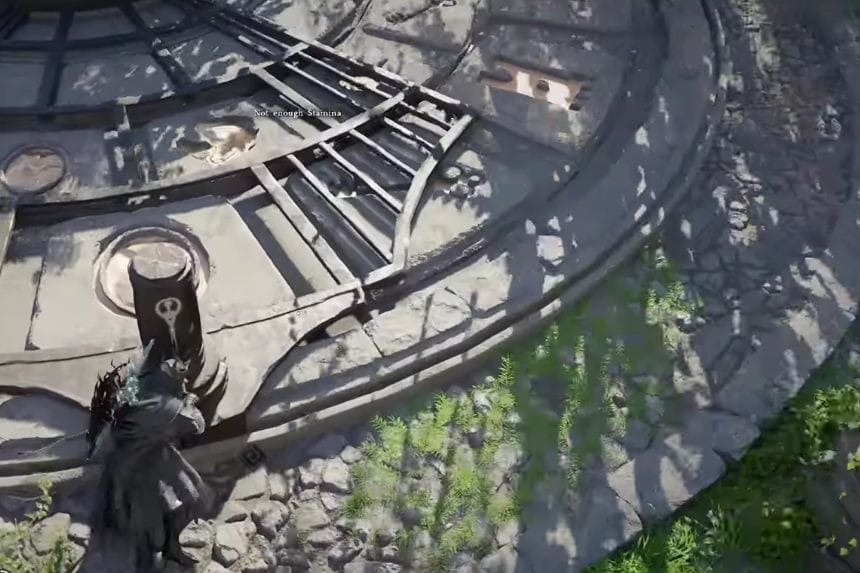
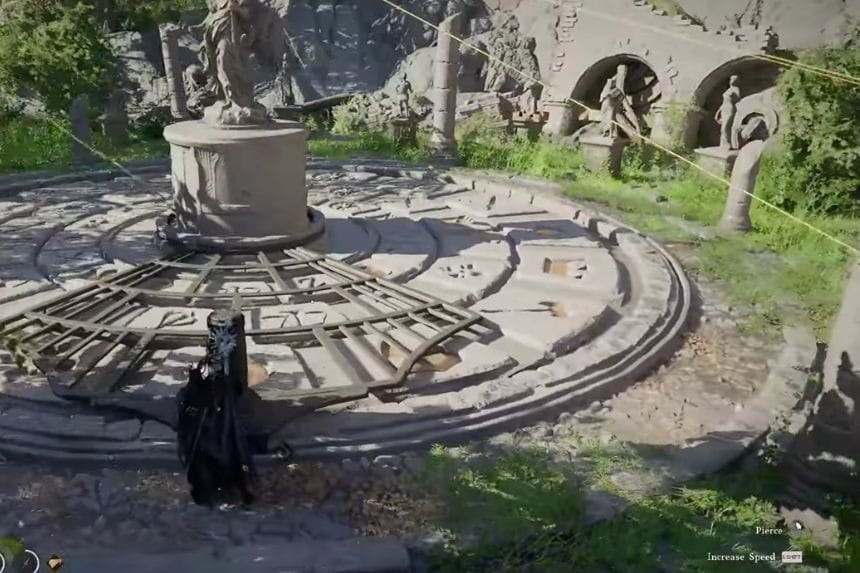
Arboria Forest Ruins
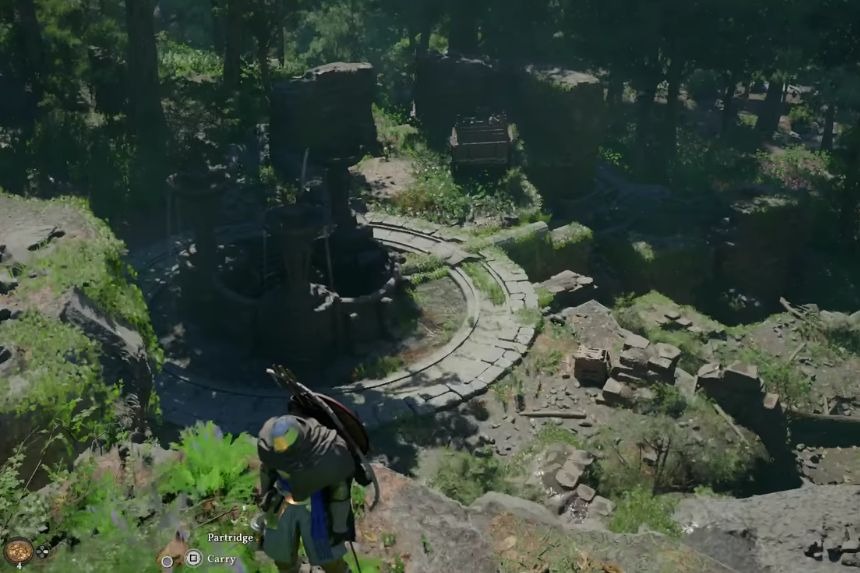
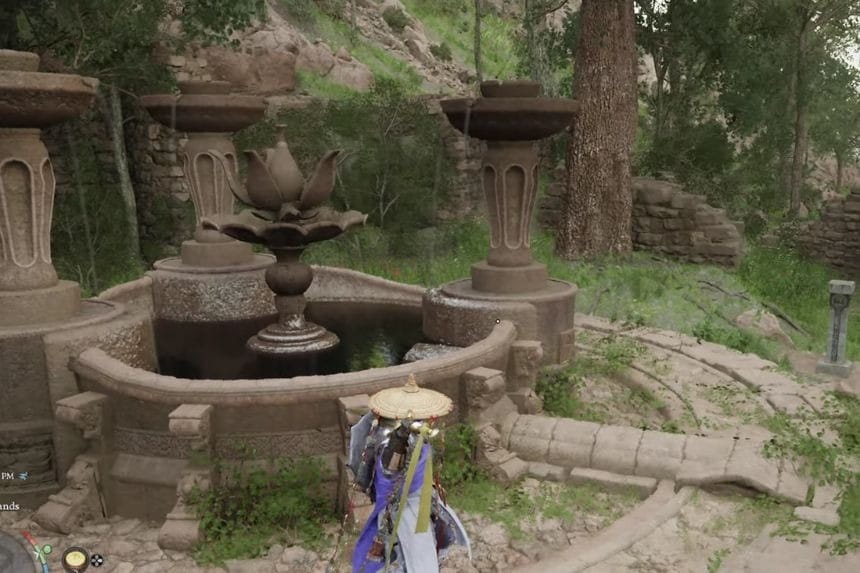
The Crimson Desert Arboria Forest Ruins puzzle can be found near three fountains in the ruin. The fountains are currently spraying water outwards, and you need to rotate them so the water shoots back inwards toward the centre. To do this, you need to draw your weapon and use the “Stab” skill on it.
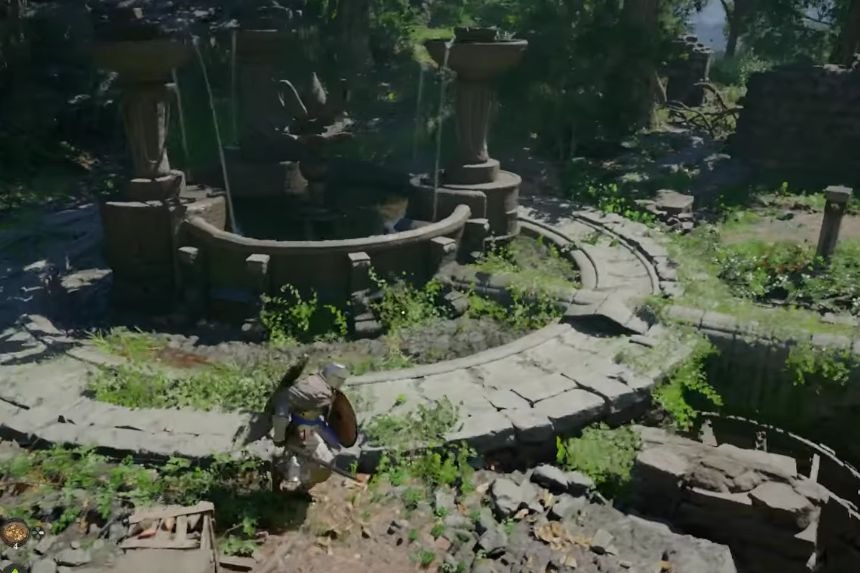
Keep rotating the fountain until the water shoots back inwards toward the centre. Repeat this process for the other two fountains so that the water shoots back inwards toward the centre. Once you have done this for all the fountains, the puzzle is complete, and you can collect your reward from the Abyss Cresset.
Haunted Hill Ruins
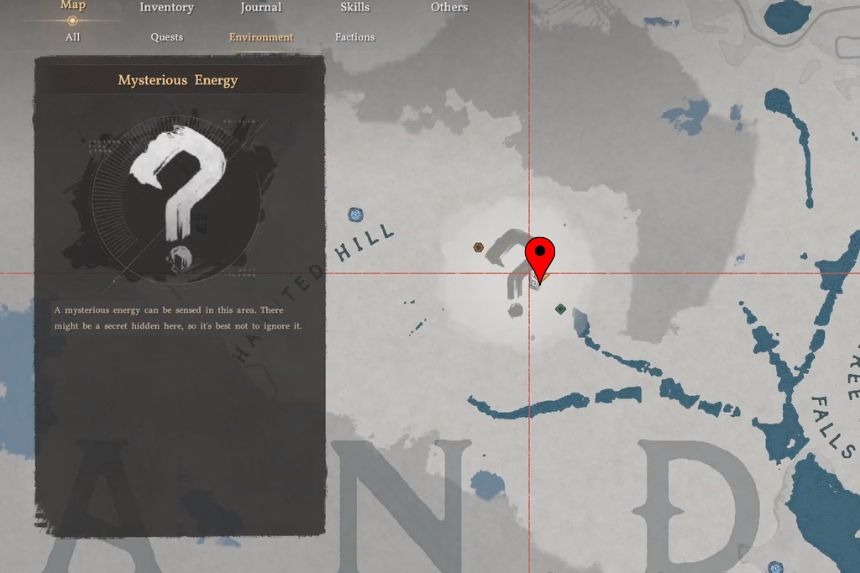
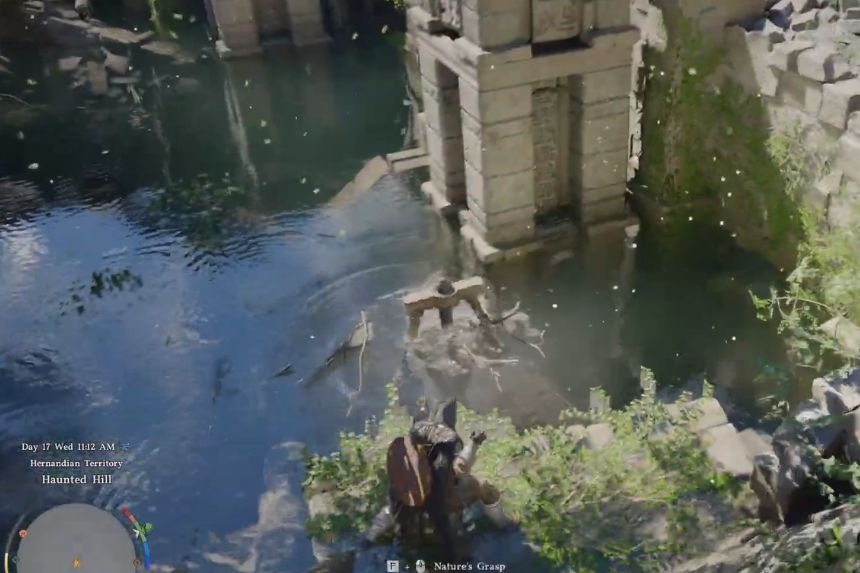
From the Crimson Desert Haunted Hill Abyss Nexus, head east. To solve the puzzle, you need to channel the Focus on the mechanism that is submerged underwater. Channel the Focus repeatedly until the mechanism is high enough to drain the water from the area. Once the water is drained, the Abyss Cresset will be unlocked, allowing you to claim the reward.
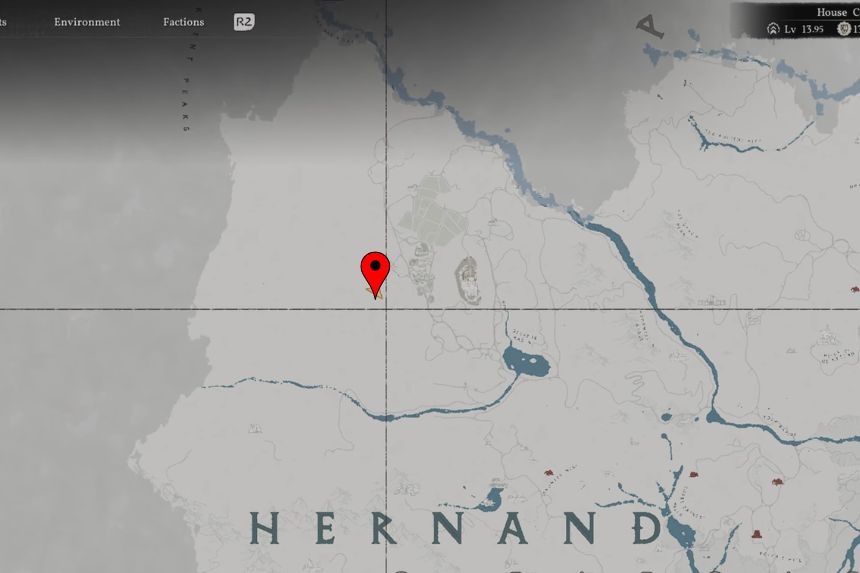
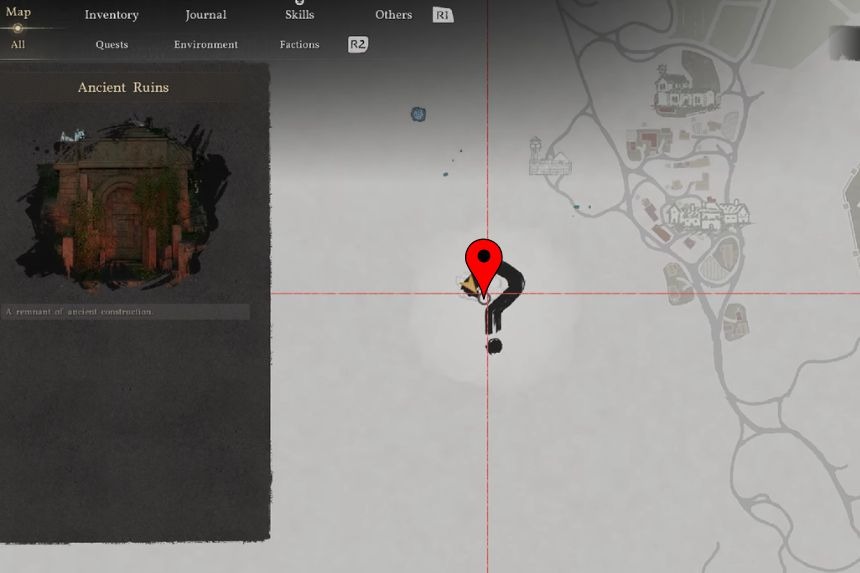
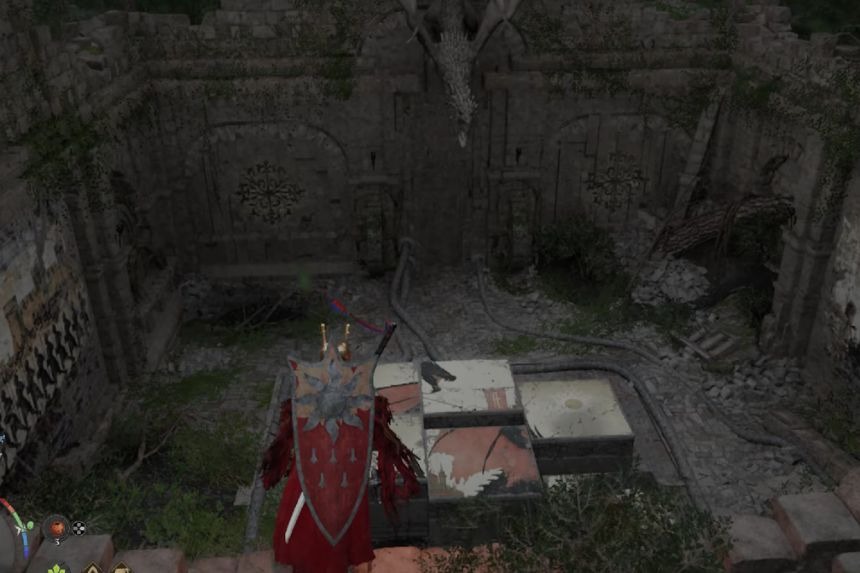
Halssius Conflux Ruins
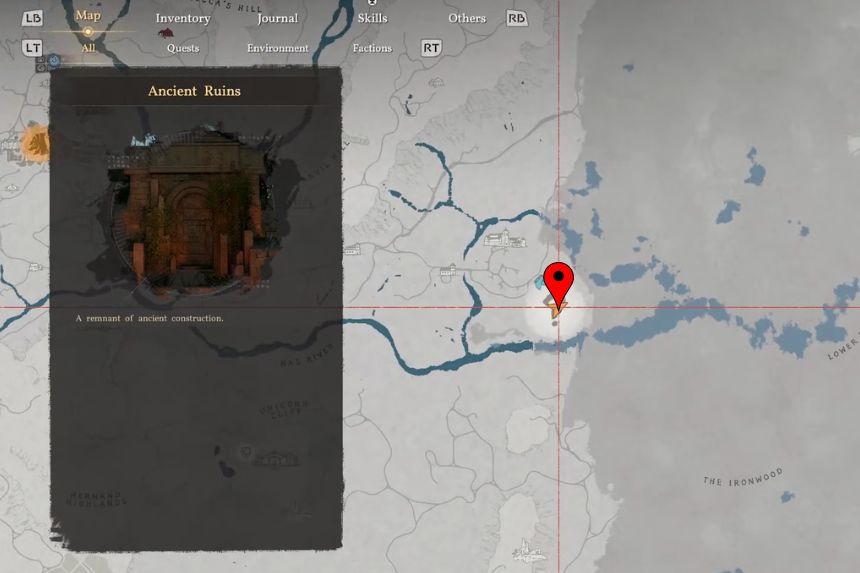
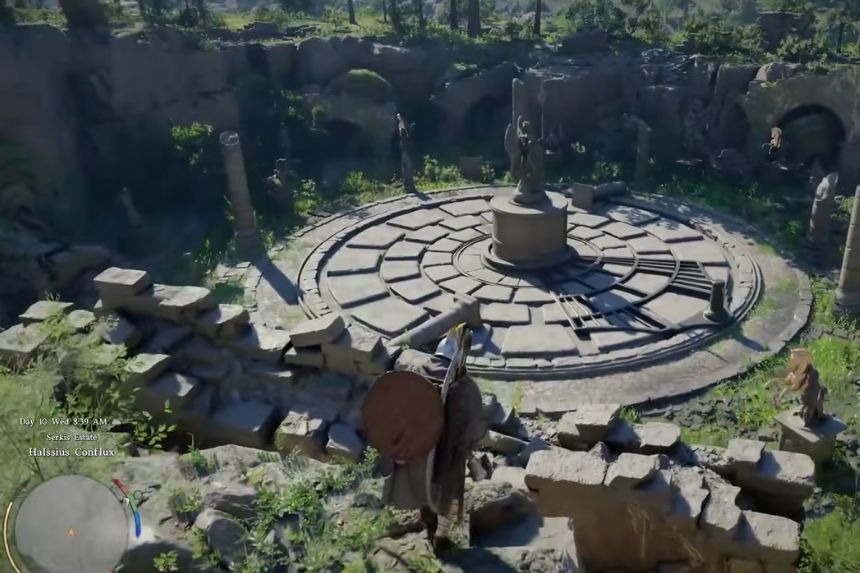
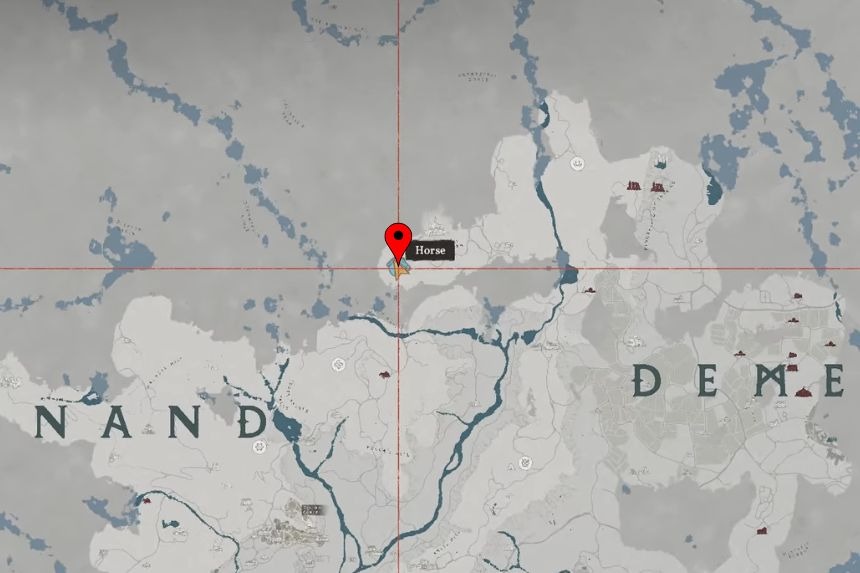
You can find the Crimson Desert Halssius Conflux puzzle near the House of Healing. This puzzle involves a movable pillar in the centre of the puzzle area. To begin, use your Stab attack on the pillar, allowing it to rotate around the centre of the puzzle area. You need to match the position of the pillar with the symbols highlighted by the light from the nearby statue.
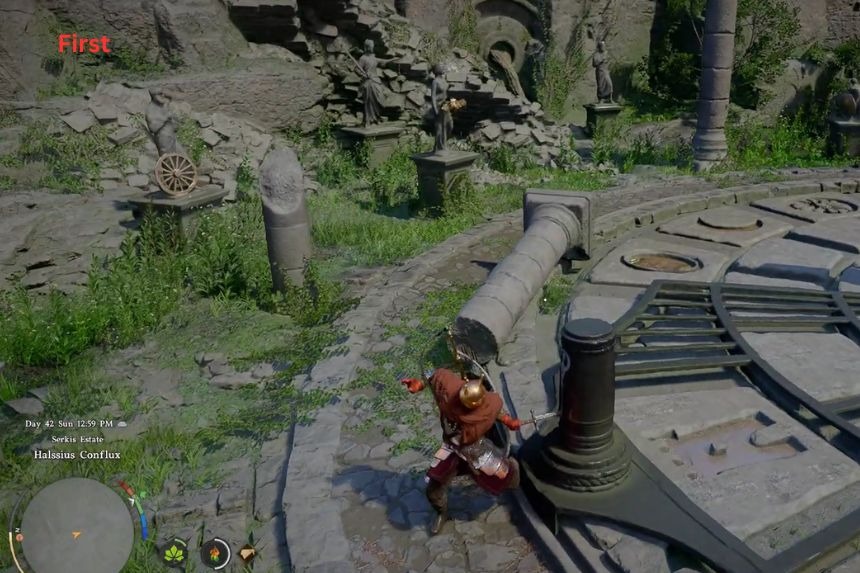
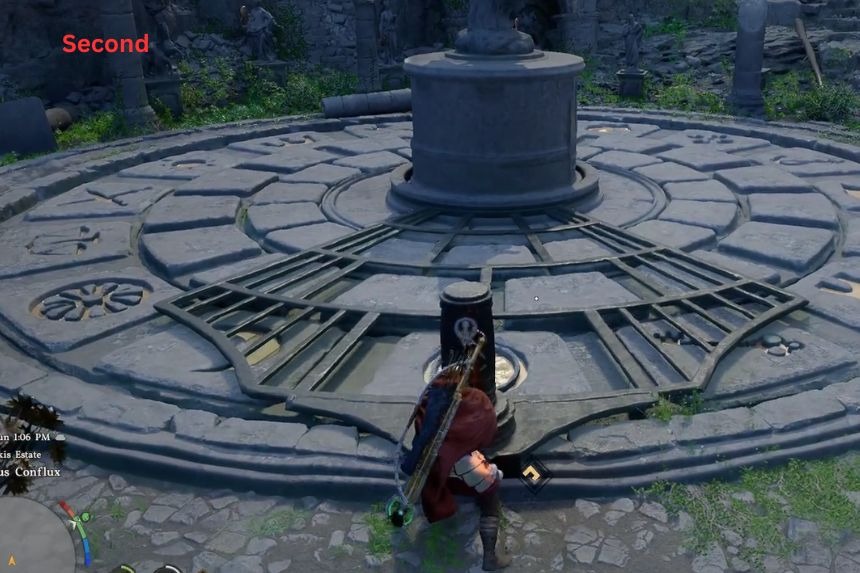
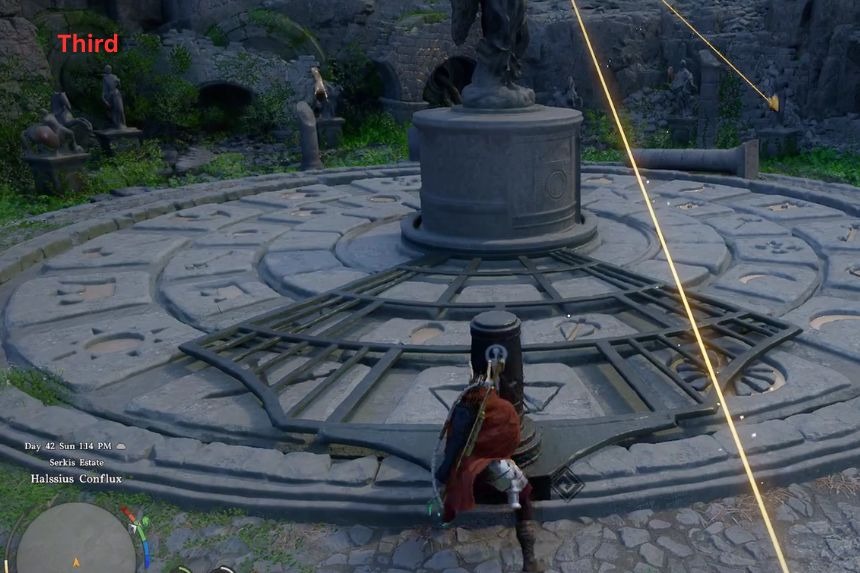
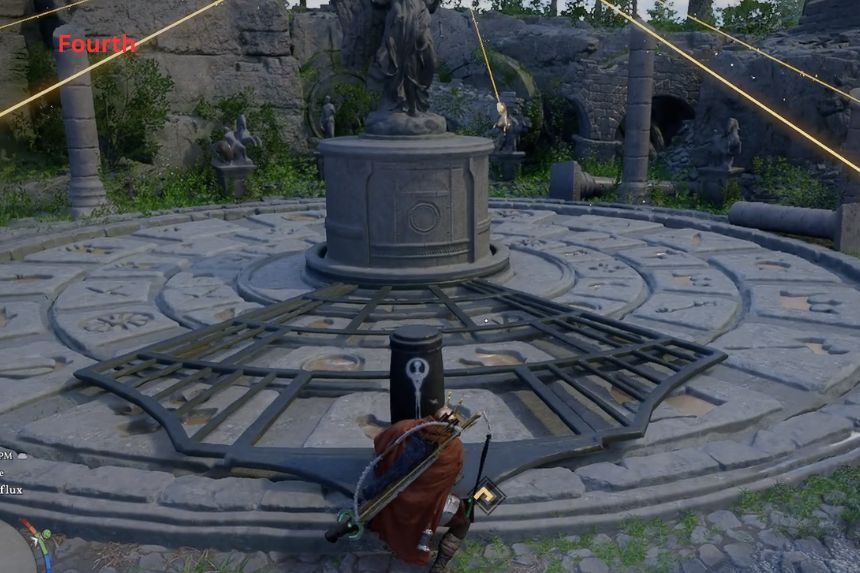
To begin, place the pillar in a position where it is aligned with the symbol of the shield. When correctly placed, it will glow, activating the next part of the puzzle. Next, place the pillar in a position where it is aligned with the symbol of the scales. To complete the puzzle, place the pillar in a position where it is aligned with the two symbols of the horse, one inside the circle and one outside the circle.
With all three symbols correctly aligned, the puzzle is complete, and the Abyss Cresset is now unlocked.
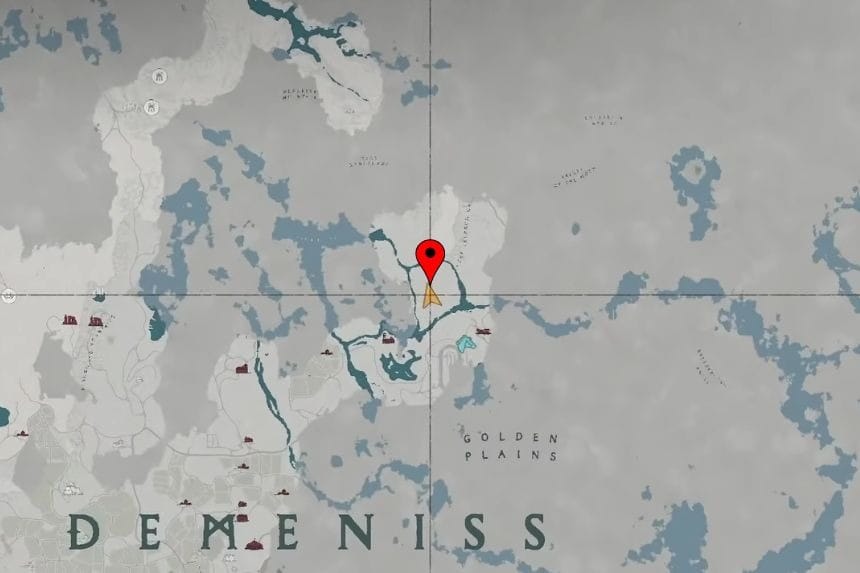
Drakesfall Gorge Ruins
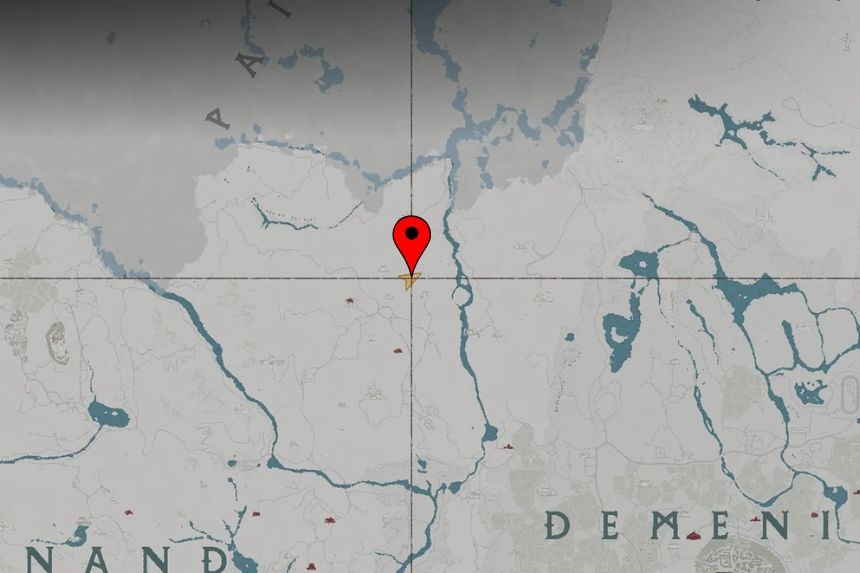
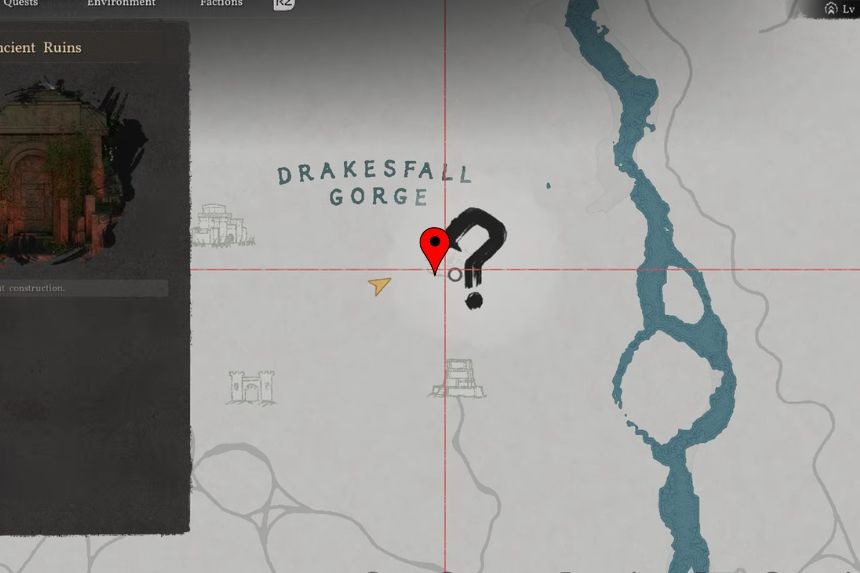
This Crimson Desert Drakesfall Gorge puzzle can be found on a plateau near the camp of the Hernand soldiers, along the border of Demeniss. To begin the puzzle, you need to stand on the stone plate at the edge of the area. This will start the puzzle, and the soldier statues will raise their swords.
Next, you need to slowly move along the path toward the king statue at the end of the area. The king statue will occasionally turn around, and its eyes will light up when it faces your direction.
When the king statue’s eyes light up, you need to immediately stop moving. If the king catches you moving, the eyes will turn red, and you need to start the puzzle from the beginning.
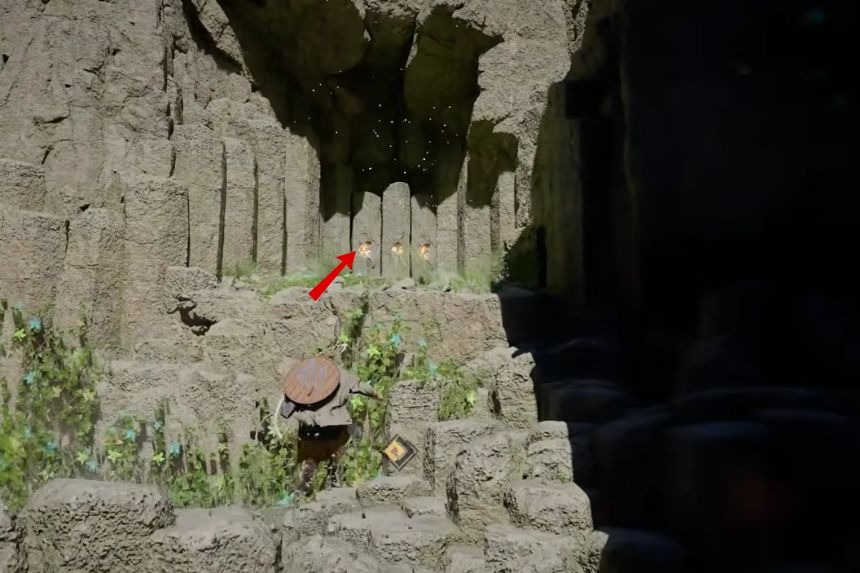
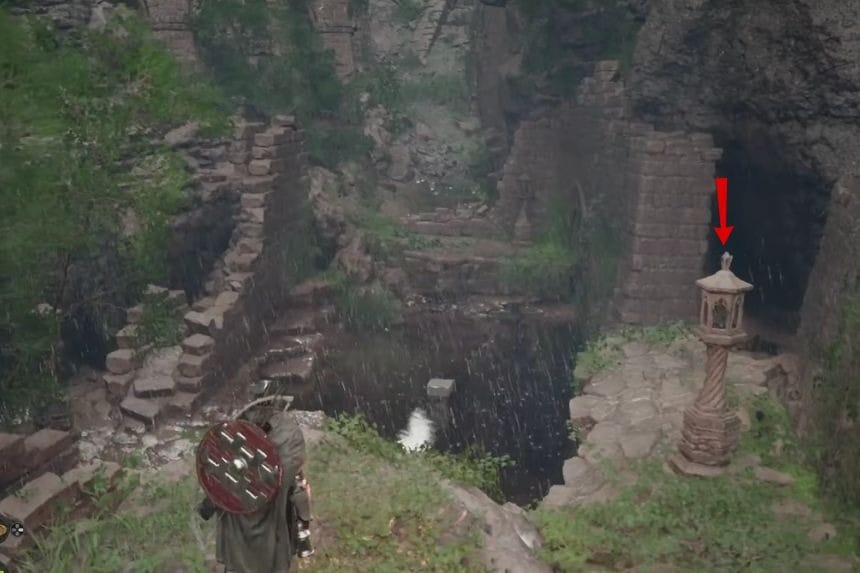
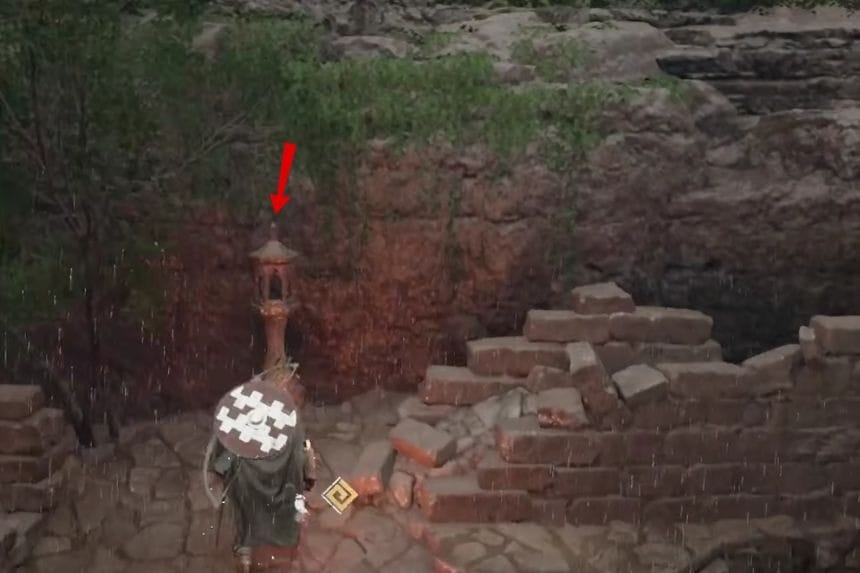
Dragon’s Stone Chamber Ruins
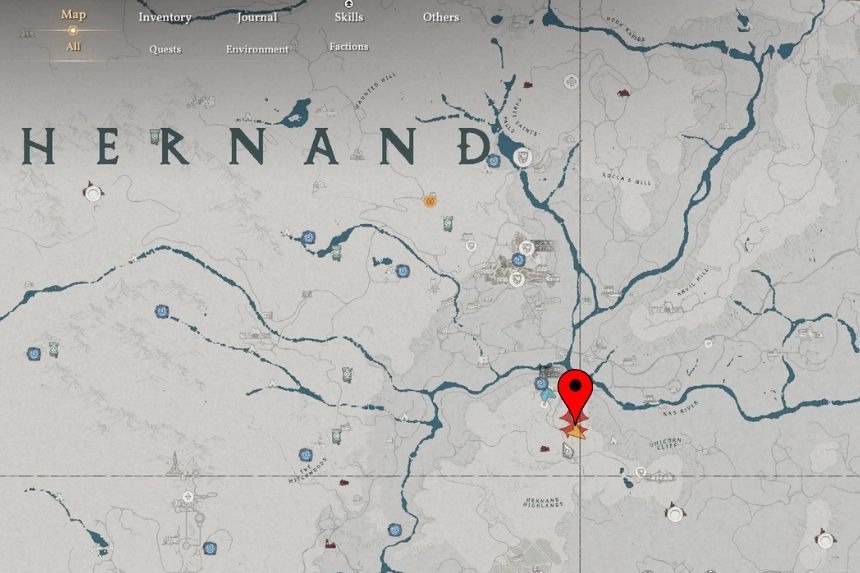
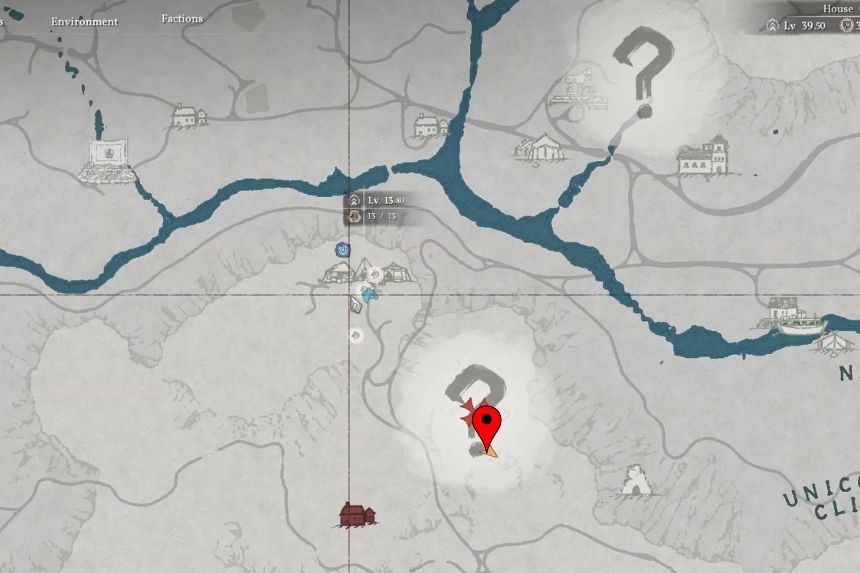
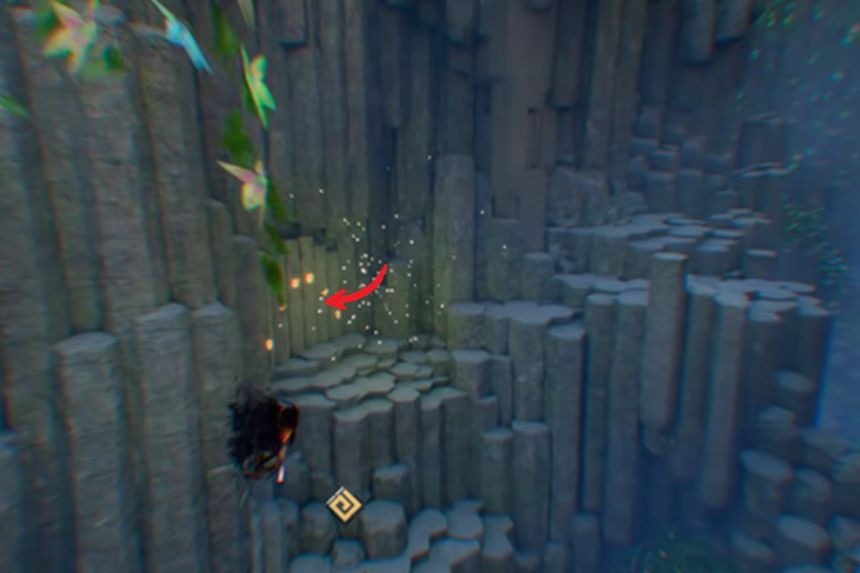
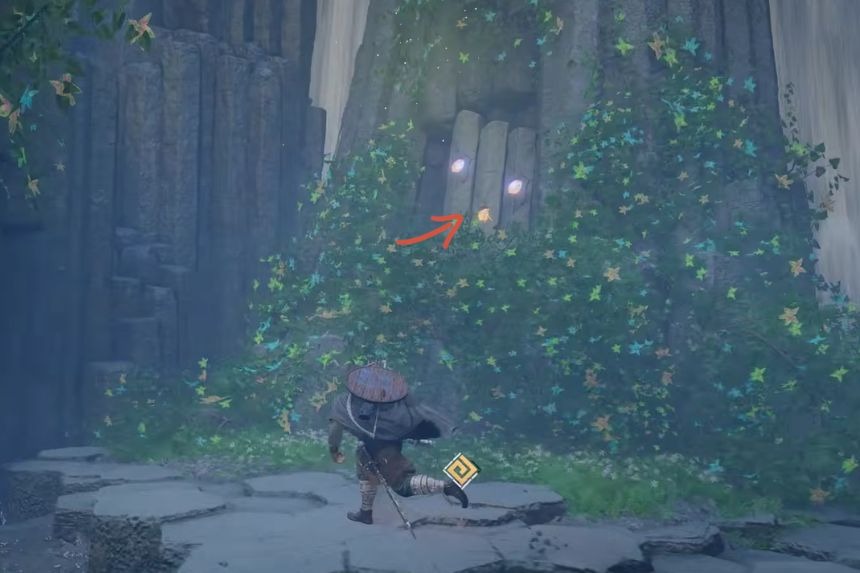
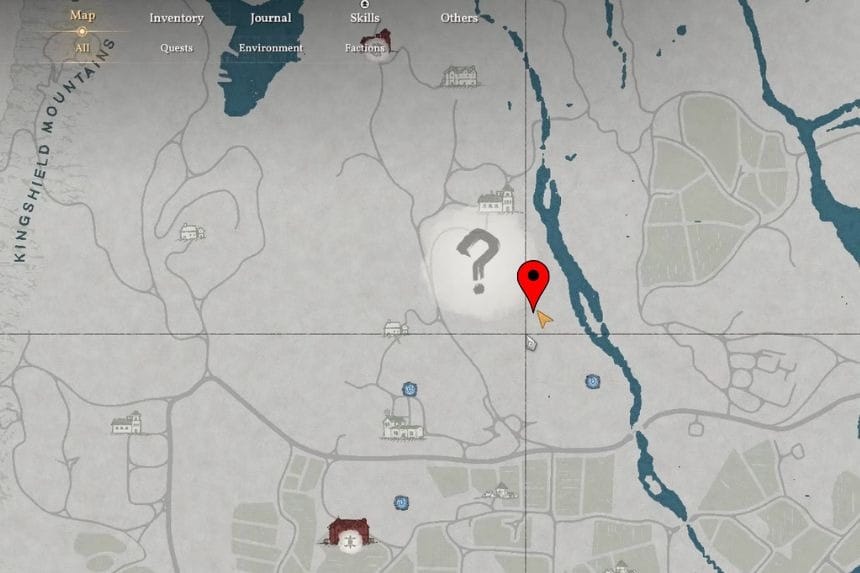
The Crimson Desert Dragon’s Stone Chamber puzzle appears on the map near Thinker’s Meadow, but the actual entrance is not there. To reach it, head south into the Hernand Highlands and drop down into the ravine beside the main road. Inside the ravine, look along the rock walls for a brightly colored mural.
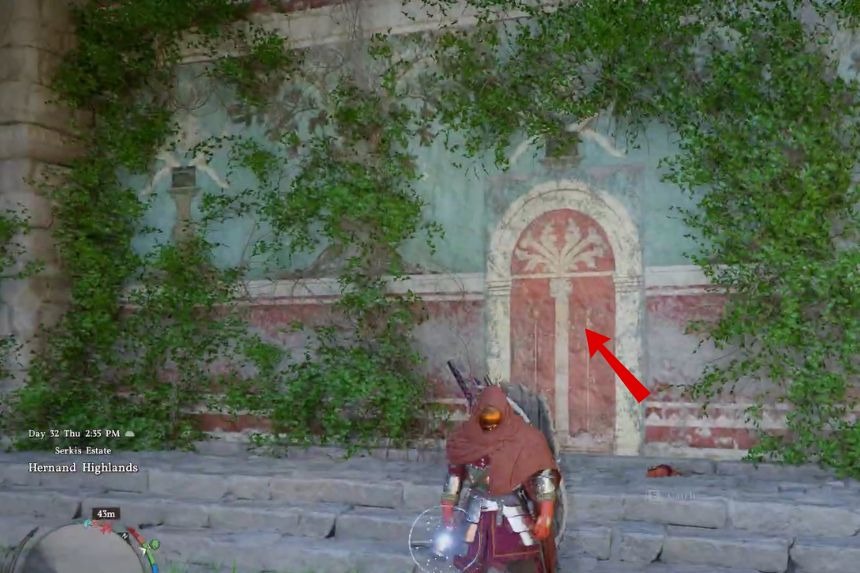
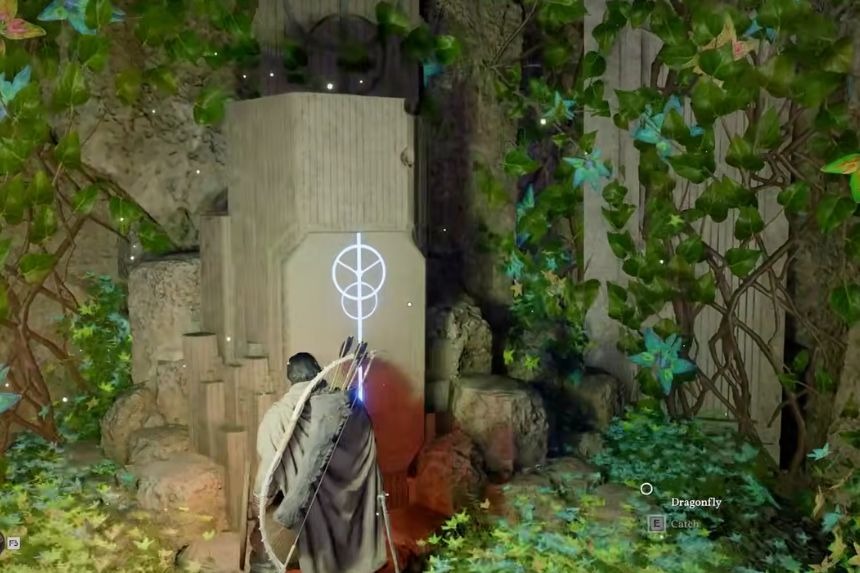
Push against the mural shaped like a door, and it will reveal the hidden entrance to the ruins. To open the door leading to the Abyss Cresset, you need to rotate the three stone dials inside the ruins until they are in the correct positions.
The proper alignment is hinted at by murals inside the ruins and around Anvil Hillside Terrace, but you do not actually need to search for those murals if you already know the correct dial positions. Once all three dials are set properly, the door will unlock.
- Set the claw symbol so it points up and slightly to the left.
- Rotate the dragon symbol so it faces toward the right side.
- Turn the sun symbol so it points straight upward.
If the dials do not move when you try to interact with them, it is usually caused by a bug. Saving and restarting the game normally fixes it. Once all three dials are lined up correctly, the puzzle is completed, and the chamber opens to get the reward.
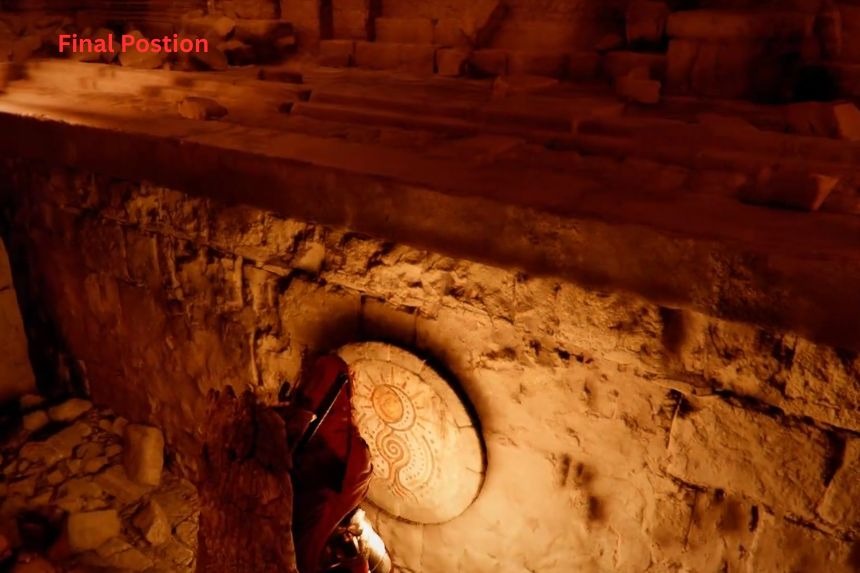
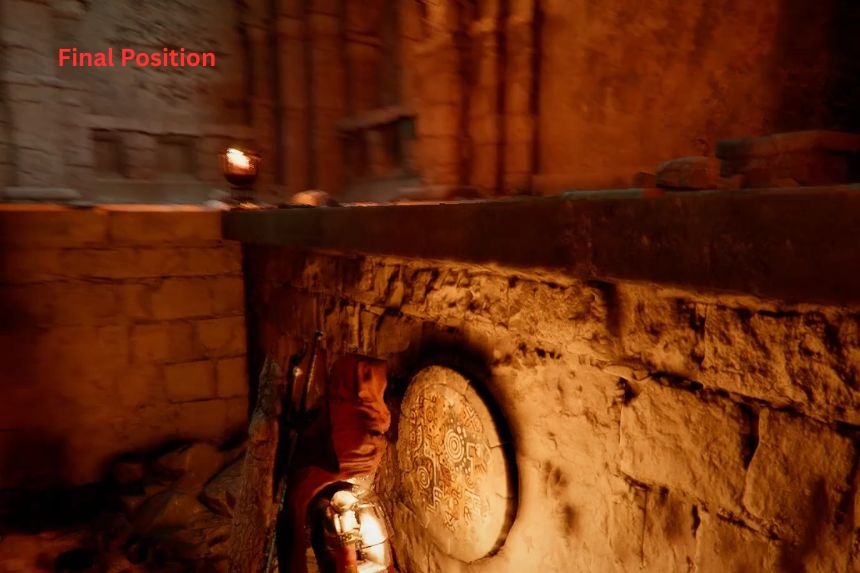
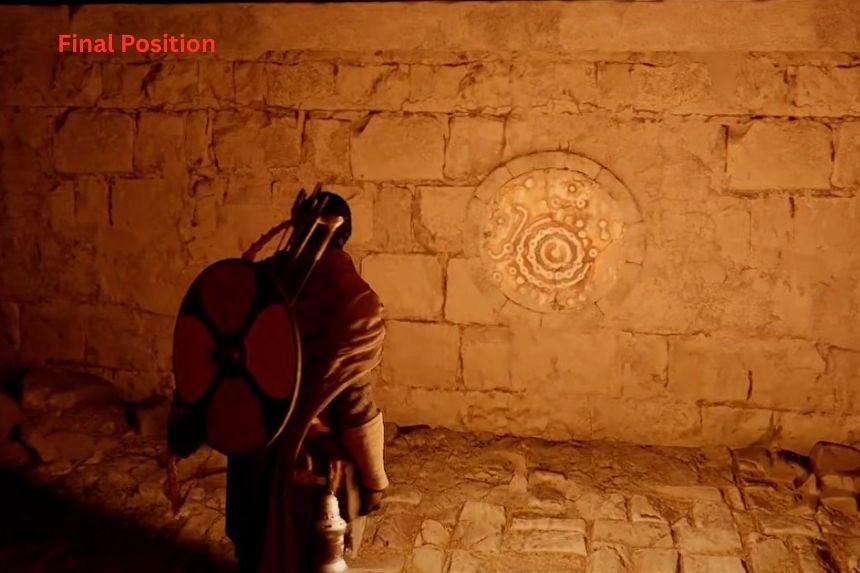
Ancient Rift Maze (Does not Count Towards Trophy)
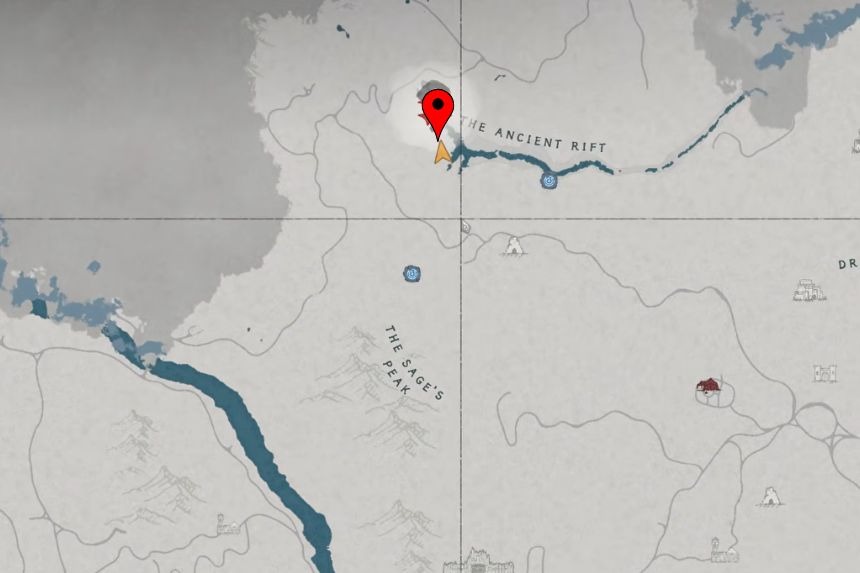
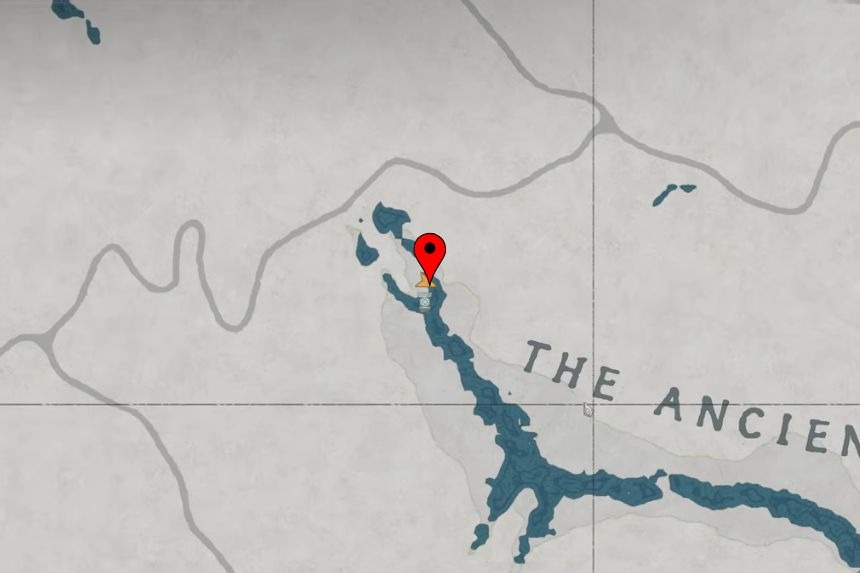
As the name suggests, for this maze, you’ll need to go to Ancient Rift Maze. Once you reach the marked location, you’ll find yourself on top of a mountain. Go down towards the right and you’ll come across a sort of cave whose entrance is blocked with four pillars.
Equip Sword of the Lord and use it to clear the path. Go inside and you’ll come across a stone structure. Use Force Punch on it and you’ll see that it has lit up on the sides and started rotating. You’ll get the Engraved Stone from here. Take the stone and exit the cave.

Next, go to the marked location that takes you to a ledge. Towards the left, you’ll find another cave entrance blocked with pillars. Use the same technique as before to access the cave and get the second Engraved Stone.
Now, exit the cave and go right from there. You’ll find a narrow passage leading you to another cave. Use the same method as before and get the third and final Engraved Stone.
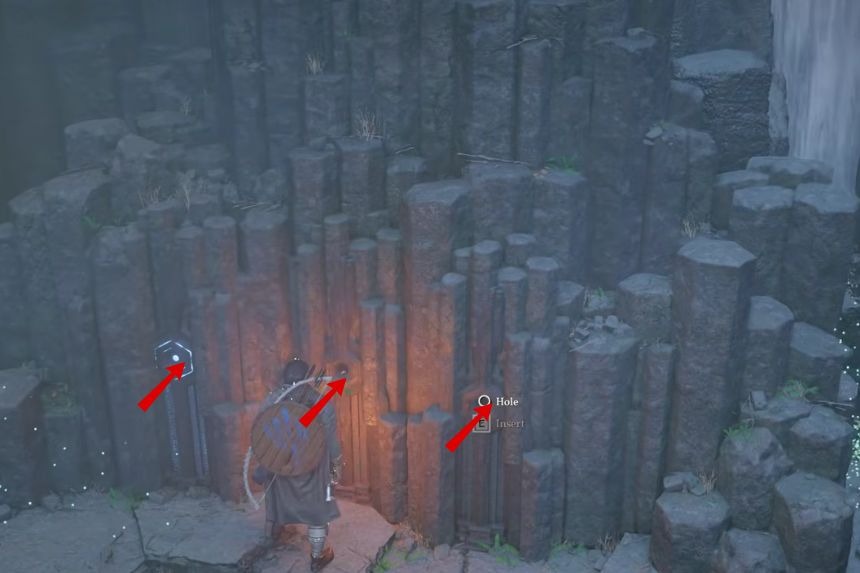
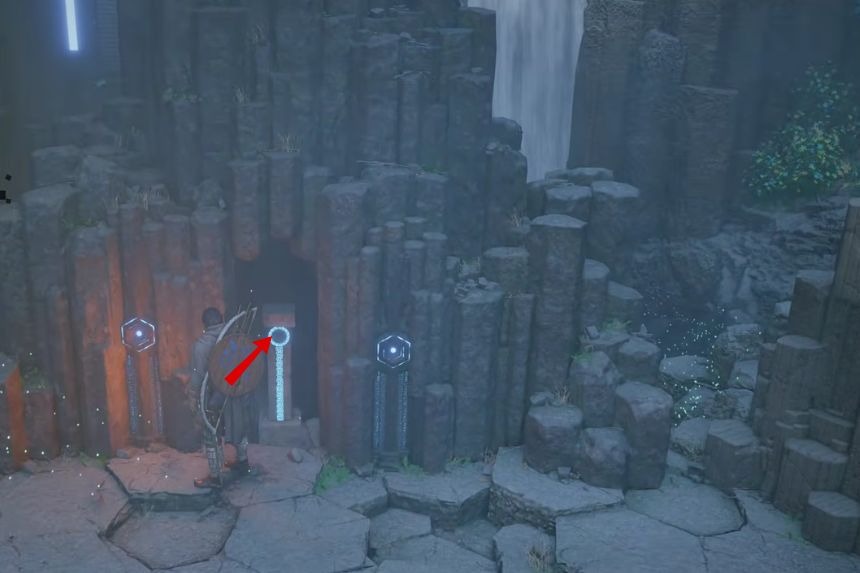
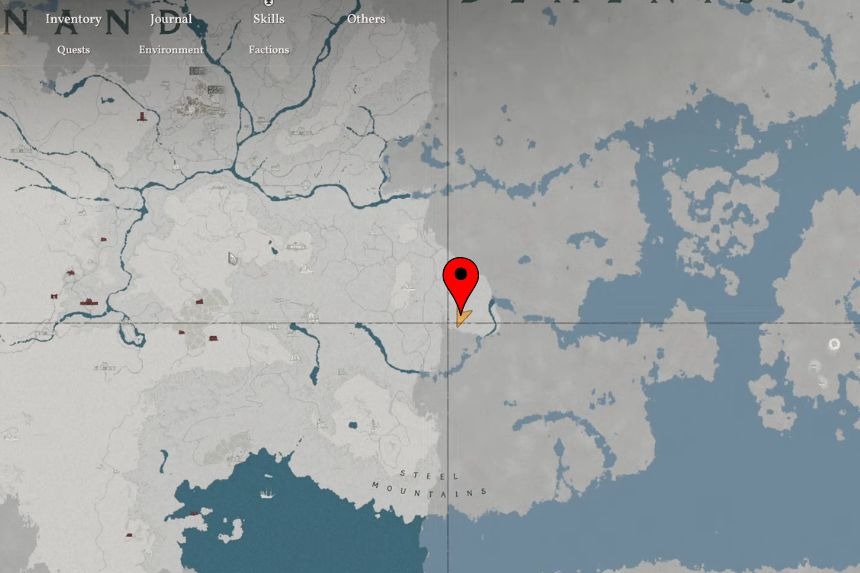
Finally, you’ll need to go to the northwest part of the map and you’ll find a sort of stone wall in front of the waterfall. There, you’ll find three holes where you’ll need to insert the Engraved Stones you got from the three caves. This will open up the front of the stone wall and you’ll be able to get the Abyss Cresset and complete the Ancient Rift Maze.
Trembling Woods Ancient Ruins
You can find this puzzle in Trembling Woods, which is located in the southern part of the Demeniss region. First, you need to turn all three pedestals to the right as far as you can turn them. Turn them one by one, starting with the left pedestal, then the middle pedestal, and lastly the right pedestal.
Next, you need to align the circles on the pedestals. Make sure the largest circle is pointing towards the northeast direction, the medium circle is pointing towards the west direction, and the smallest circle is pointing towards the south direction. Keep rotating the pedestals until you get the circles aligned in these directions.
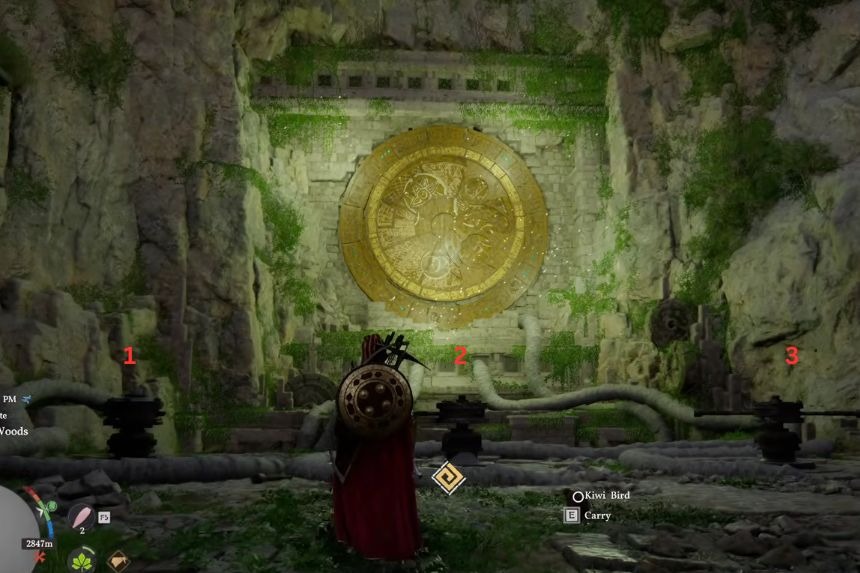
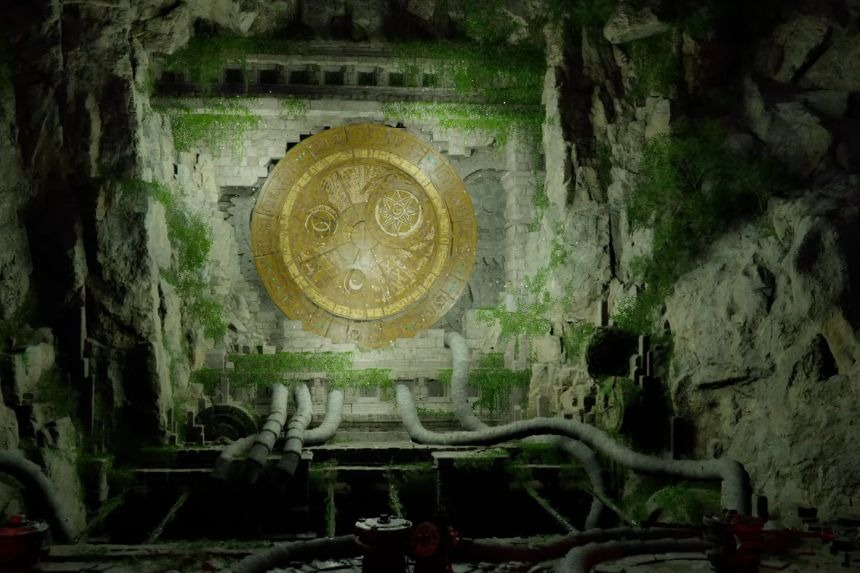
The Screaming Vault Ancient Ruins

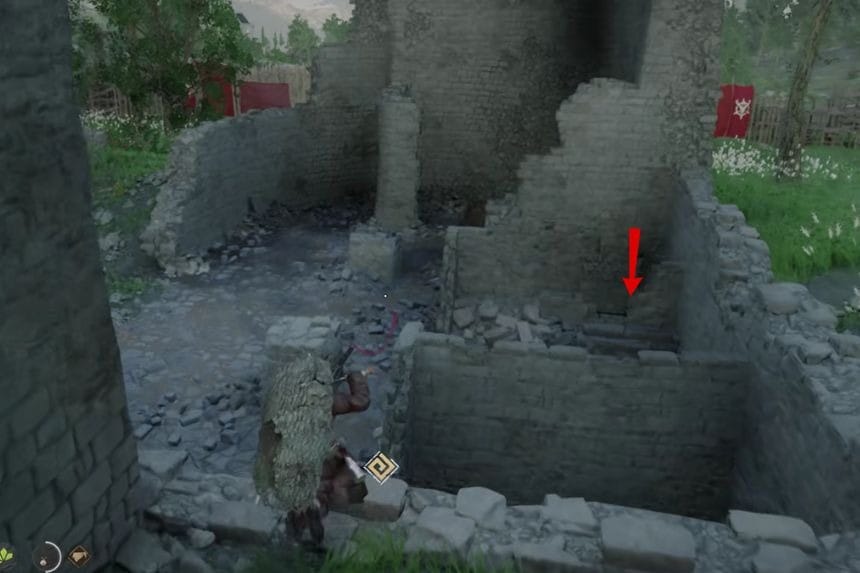
When you go inside, check the markings on the wall, as they provide a hint to solve the puzzle. The red X markings on the wall correspond to the markings on your map, indicating where the scarecrows are placed around the farm. You can try to locate the scarecrows to get the complete hint, but it is not necessary to solve the puzzle, as you can solve it directly.
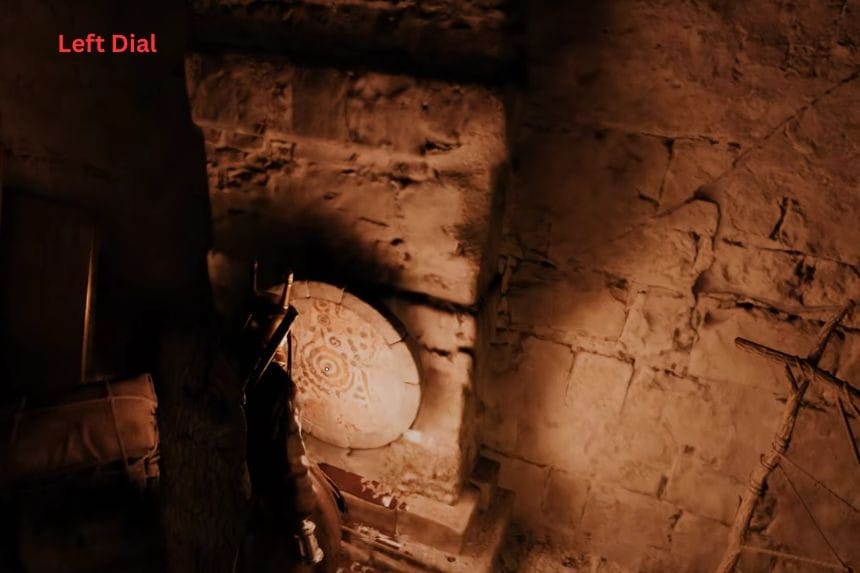

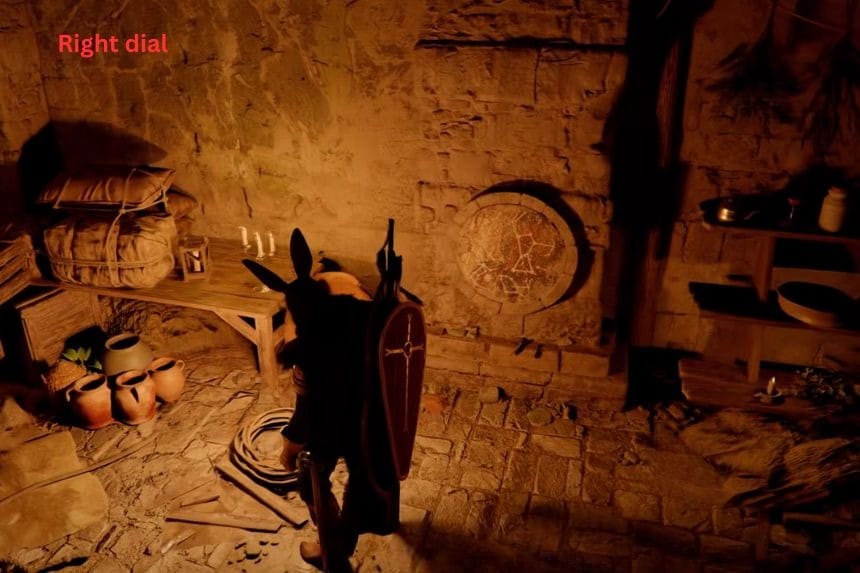
To solve the puzzle, perform the following actions on each dial:
- Left dial: Rotate it to place the small shape resembling the above image at the top.
- Center dial: Rotate it to place the two circles at the top.
- Right dial: Rotate it to place the constellation at the top.
Once you have placed all the dials correctly, the puzzle will open, giving you the artifact at the fast travel location.
Hidden Chamber of Wisdom Ancient Ruins
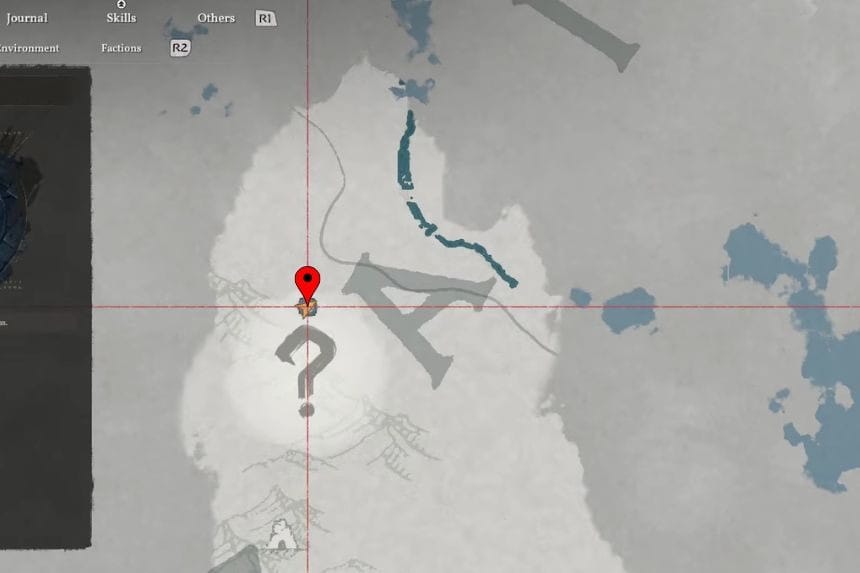
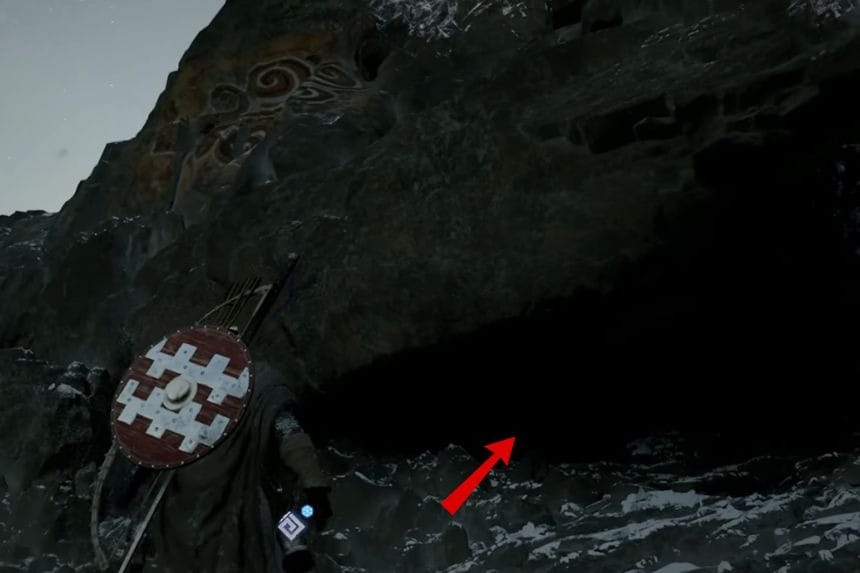
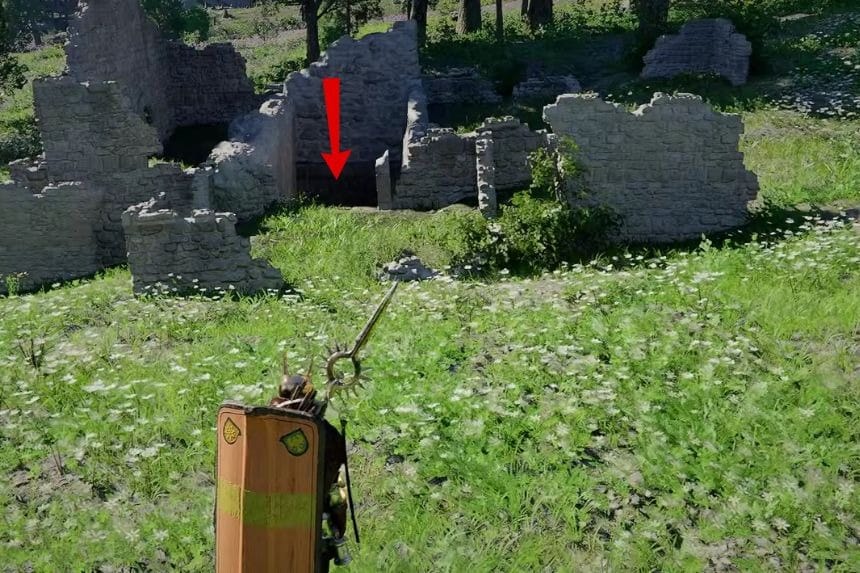
You can find the Hidden Chamber of Wisdom in the snowy mountain region near one of the witch sanctums, in the middle of this region. Go to the mountain and search for a big mural painted on the side of the mountain. Under this mural, there is a hidden hole in the ground. Go down through this hole and into the tunnel to get into the room with the puzzle.

To solve this puzzle, you need to press four buttons: Wind, Lightning, Water, and Fire. The order in which you press them doesn’t matter; you can press them in any order you wish.
You can use Axiom Force to select the button you wish to press and then use Force Current to press the button. Continue doing this until all four buttons are pressed. Once all four buttons are pressed, the wall will move out of the way, revealing the Abyss Artifact.
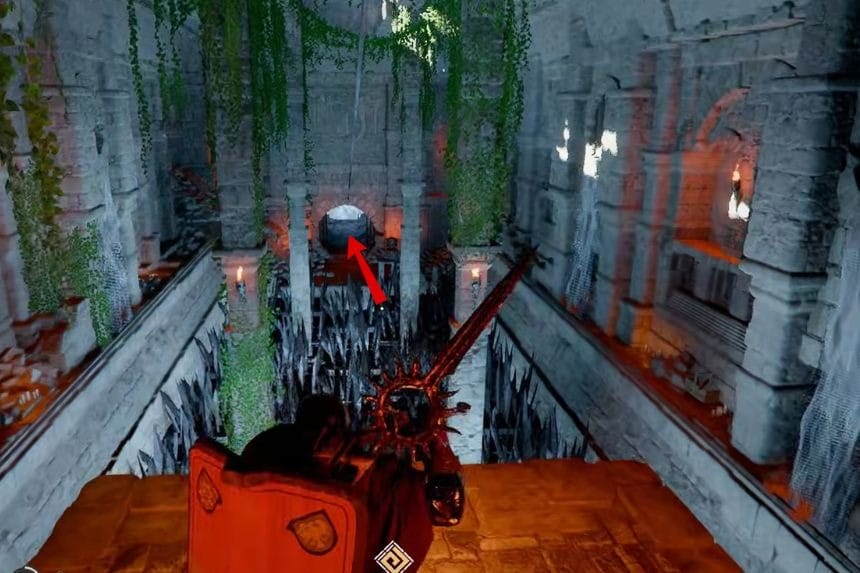
After clearing this part, you need to cross to the other side. To do that, you need to take out your lantern and shine the light on the rope hanging in the middle. When you see the Precision Jump prompt, use it to balance on the rope and walk across, avoiding the swinging fire brazier.
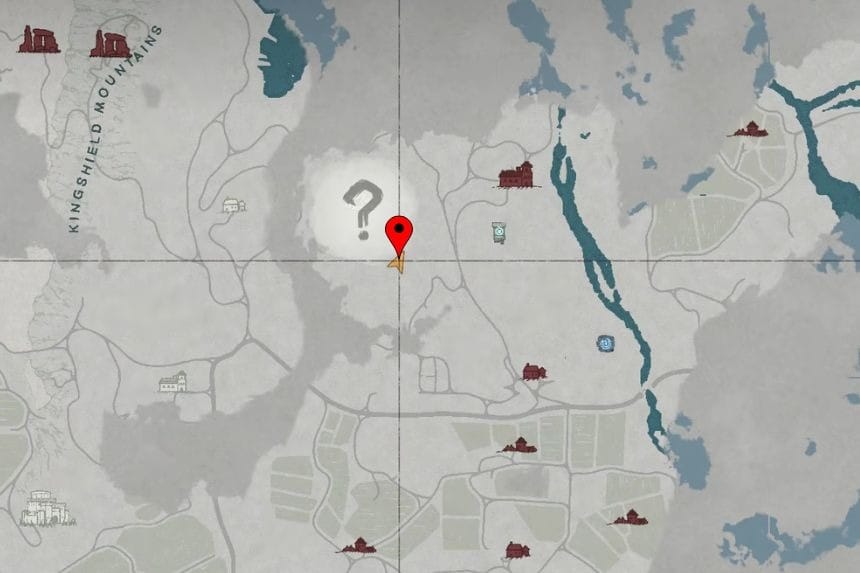
Kingshield Mountains Ancient Ruins

You can find the Kingshield Mountains Ruins just to the west of the Hexe Sanctuary. So, head in that direction from the Hexe Sanctuary, and you will find the ruins nearby. Collect the jar nearby and put it on top of the jar that is already placed in front of the Abyss Cresset to create a stack of 4 jars.
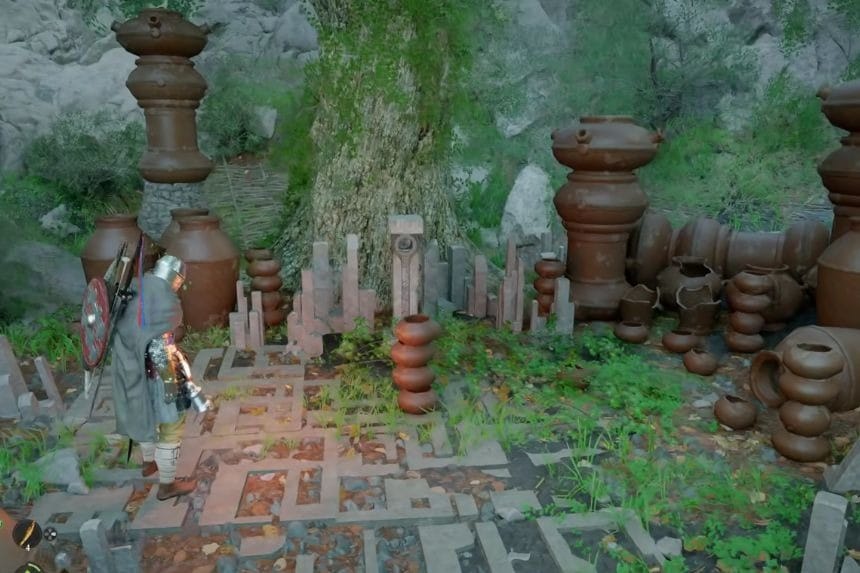
If the jar breaks during the process of placing it on the other jar while attempting to stack the jars, do not worry. Instead, keep adjusting your position and placing the jars carefully until you successfully stack four jars altogether. Once the four jars are stacked correctly, the puzzle will complete automatically after a short while by the game’s own accord, and you can collect the Abyss Artefact from the crest.
Seonangdang Ancient Ruins
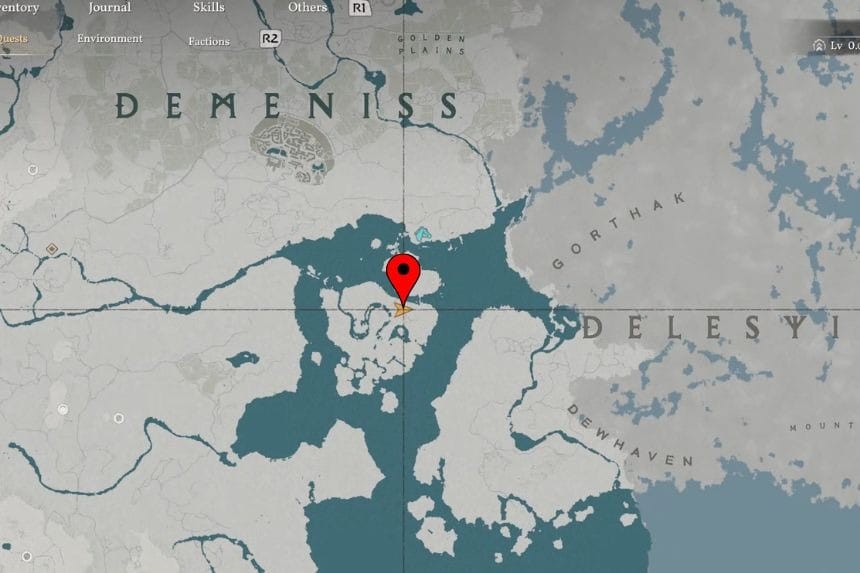

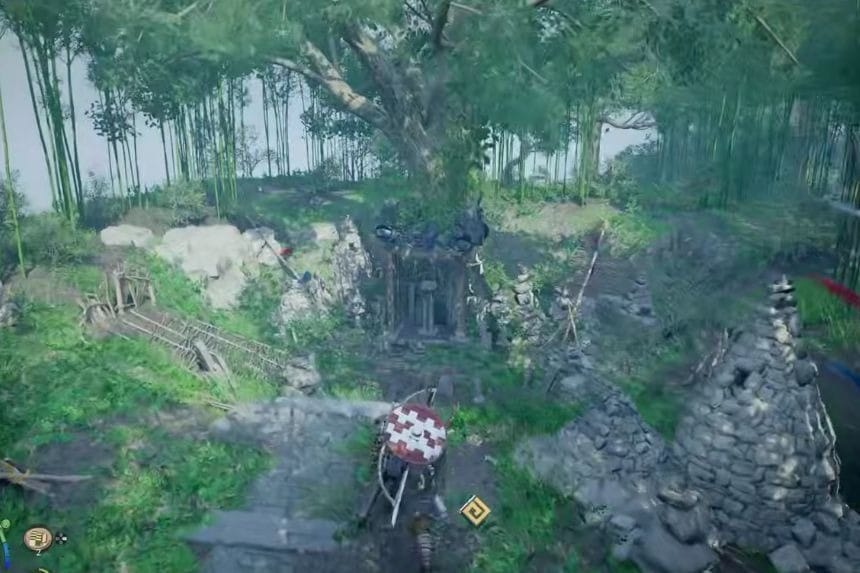
The Bamboo Forest Seonangdang Ruins are located in Demeniss, northeast of the Serpent Marsh. When you get there, your first step is to search the bamboo forest for the loose rocks.

Pick up one rock at a time and place it carefully on top of the stone pile in front of the Abyss Cresset. Continue to add more rocks to the pile, stacking them as you go, until they balance properly and don’t fall off the pile. If one falls off, don’t worry, just correct it and continue.
Once the game recognizes the stacking, the puzzle will be complete, and you can pick up the Abyss Artifact from the Abyss Creast.
Timberdale Cliff Ancient Ruins

To complete this puzzle, head to the Dewhaven Territory in Timberdale. Once you reach the marked location, you’ll find the ruins with two stone blocks on either side marking the puzzle area. Enter the area, and you’ll find circular puzzles on both the right and left walls.

Start from the right wall where you’ll find three rows of stone circles. You’ll need to use Force Punch on them in the following sequence: second stone circle in third row; second stone circle in first row; first stone circle in first row; first stone circle in second row; second stone circle in first row; third stone circle in third row; second stone circle in third row; third stone circle in third row.

After the right wall, you’ll need to solve the puzzle on the left wall. This one has three rows with five stone circles in each row. You’ll need to use Force Punch on the stone circles in the following sequence: first stone circle in first row; first stone circle third row; second stone circle in first row; third stone circle in third row; third stone circle in second row; fourth stone circle in third row; first stone circle in second row; second stone circle in first row; third stone circle in second row; second stone circle in third row; fifth stone circle in second row.
Once you’ve completed both puzzles, the stone wall in the front will reveal the Abyss Cresset marking the completion of your objective.
Golden Plains Ancient Ruins

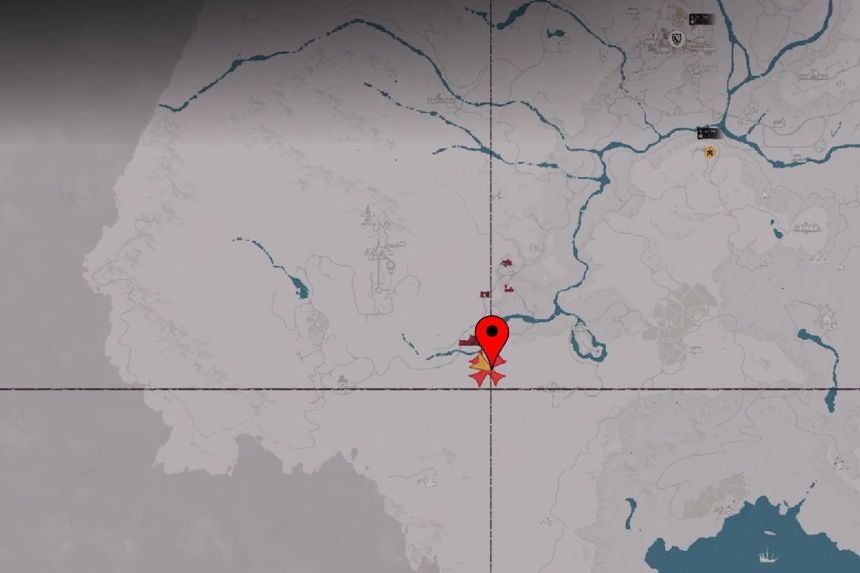
You can easily find the Golden Plains puzzle very close to the secret chamber ruins. If you are already in that area, then the Golden Plains puzzle is just a short distance away. To start with the Golden Plains puzzle, first move towards the area blocked by the bushes and vines. Then, burn them off by setting them on fire. Once the vines are out of the way, you can easily find the fourth statue hidden in the area.
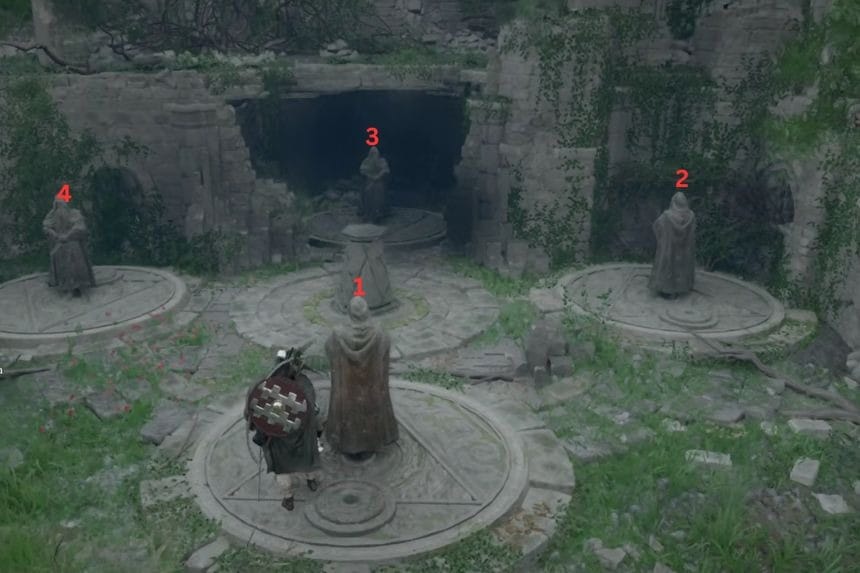
If you turn Statue (2), then Statue (1) also turns. Similarly, if you turn Statue (1), then Statue (3) turns too.
To complete the Golden Plains puzzle, first move to Statue (1) and turn it towards the center. This will also turn Statue (3) towards the center.
After that, move to Statue (4) and turn it towards the center. This will also turn Statue (2) towards the center.
Once all the statues are turned towards the center, then the Abyss Cresset appears, and you can easily obtain the Abyss Artifact.
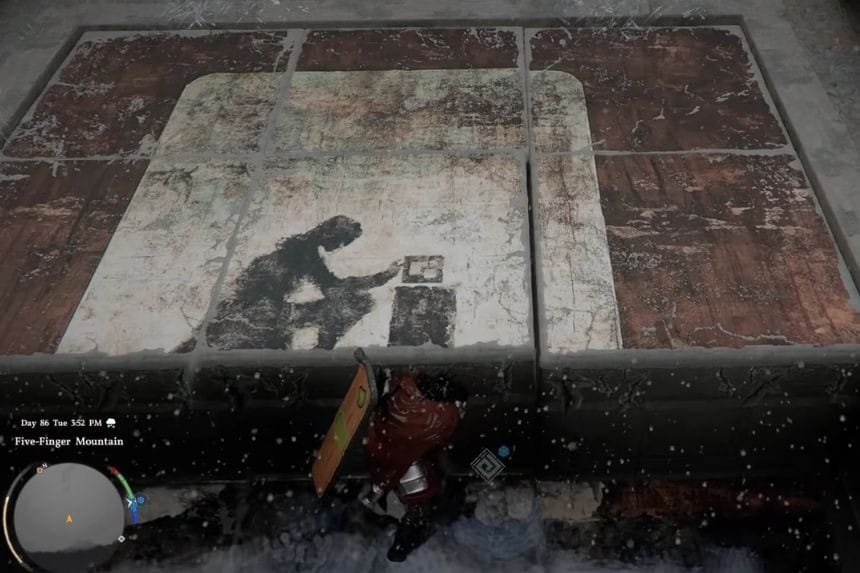
Five-Finger Mountain Ancient Ruins
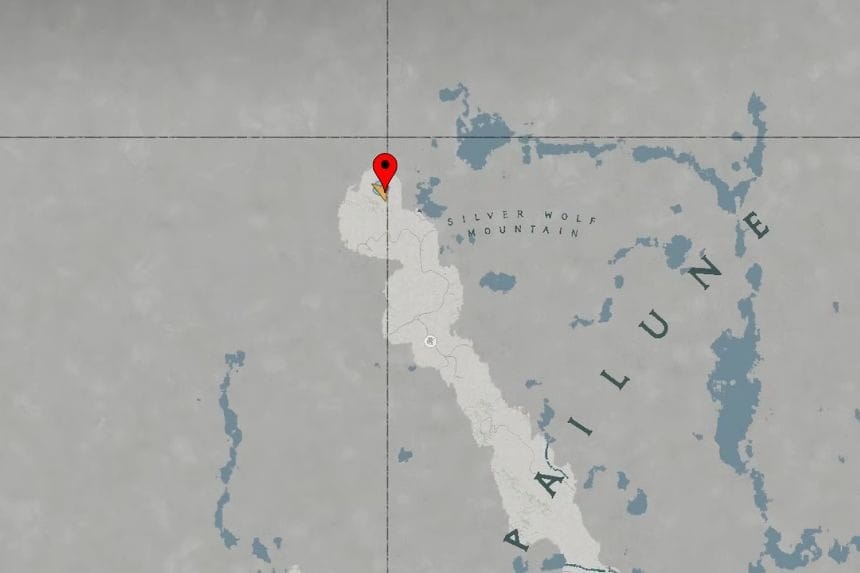


The location of the Five-Finger Mountain Valley Ruins can be found in the northwestern part of the region, slightly west of the location of the Silverwolf Mountain.
When you reach the puzzle area, the first thing to do is to move all the stone carts or machines to the end of the track. Once you have done that, climb on top of the cart and shoot the statue in front of you using your bow. Shooting the statue will make it turn as the revolving door in front opens.

Keep shooting the right side of the statue to turn it completely. If you have the Charged Shot skill, it’s better to use it as it turns the statue much quicker. Once you have turned the statue to the correct direction, you will know it’s the right direction when the eyes start to glow.
Repeat the same process for the two other carts and statues. Once all three statues are in the correct direction, the puzzle is now complete. You may now approach the Abyss Cresset to obtain the Abyss Artifact.
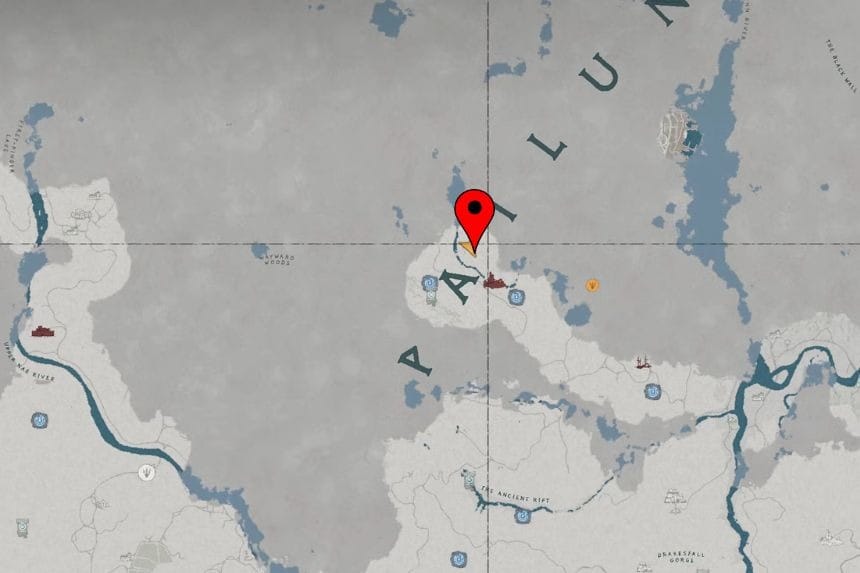
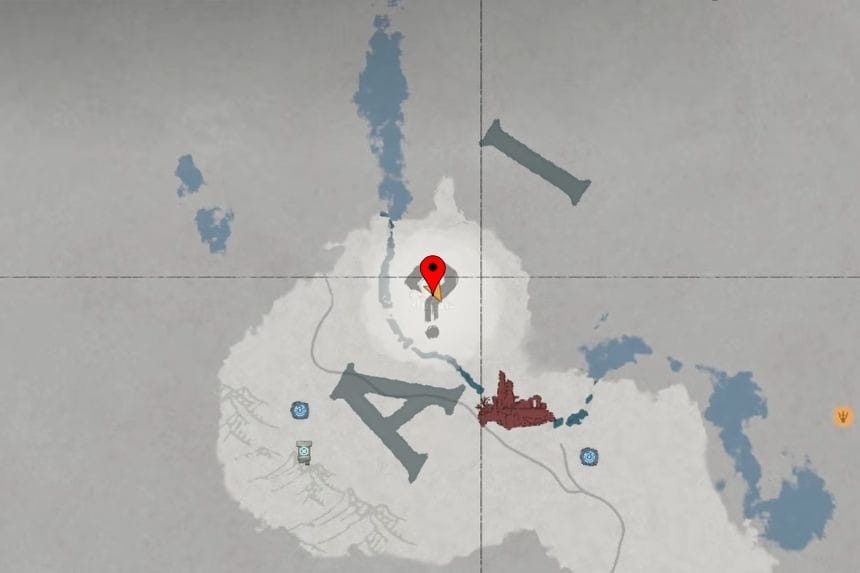
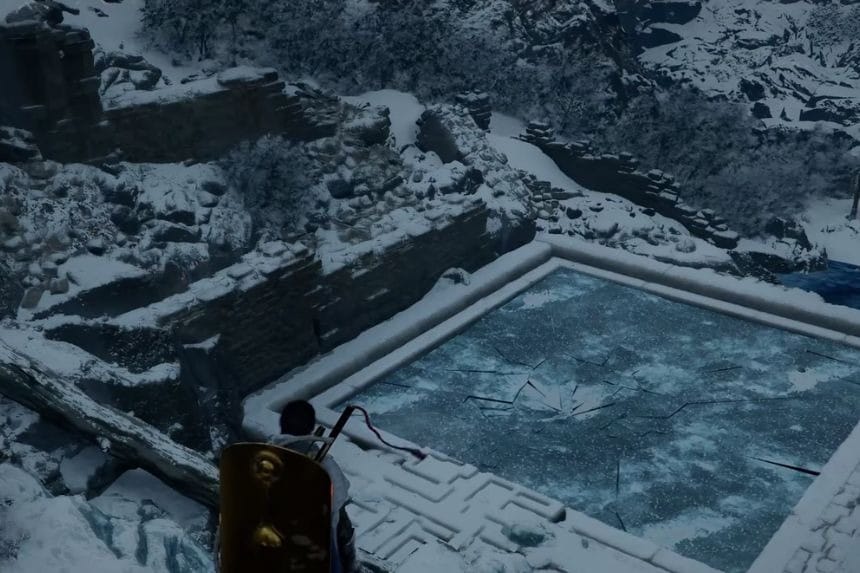
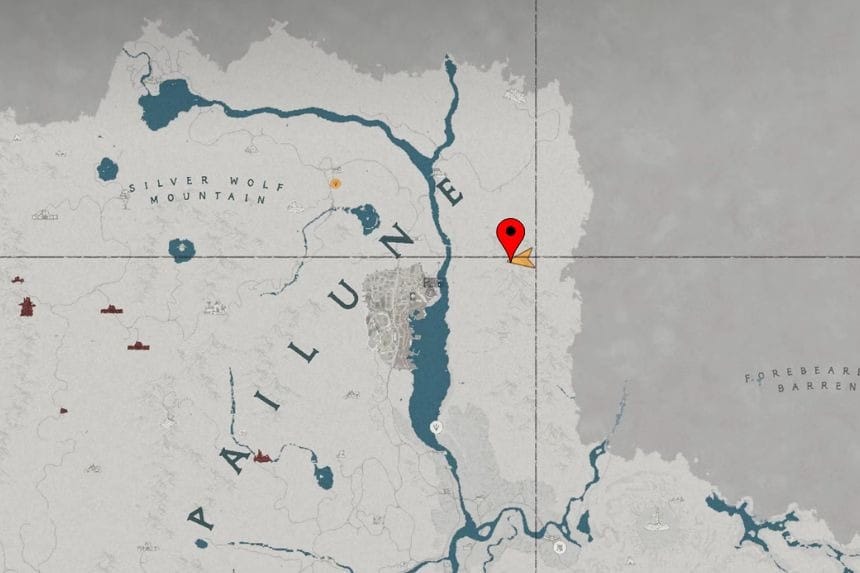
Five-Finger Mountain Icy Ruins


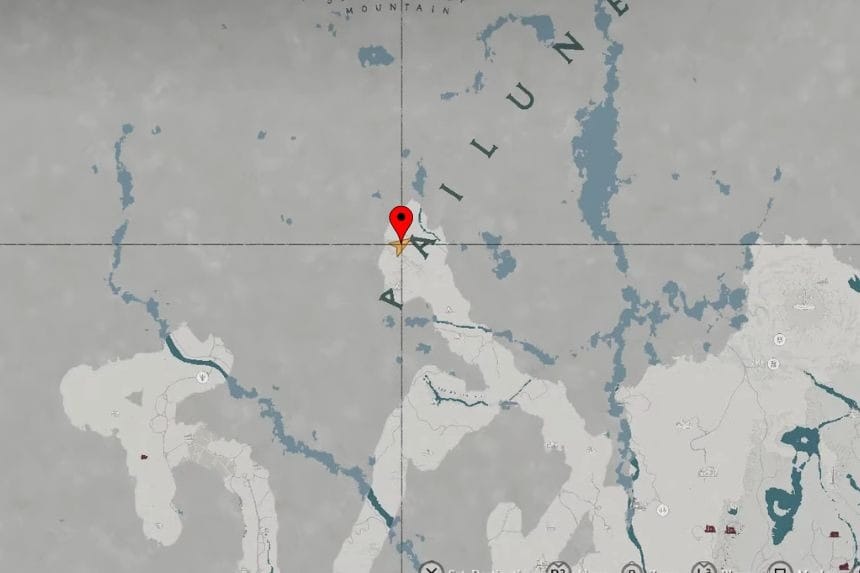
You can find this puzzle close to the west of Pailune, not far from the Abyss Nexus and the Abyss Cresset. As you reach this puzzle, you will find that there is ice in front of you. You need to use Turning Slash to melt this ice first. After that, you need to move down slightly to the lower area of this puzzle, where you will find a crack in the ground that is partially frozen. You need to use Turning Slash here to melt it so that water flows out.
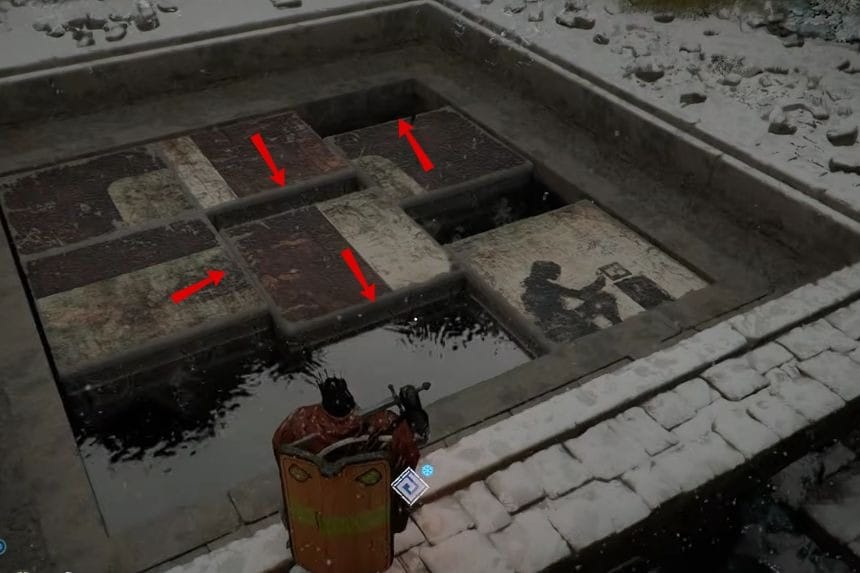

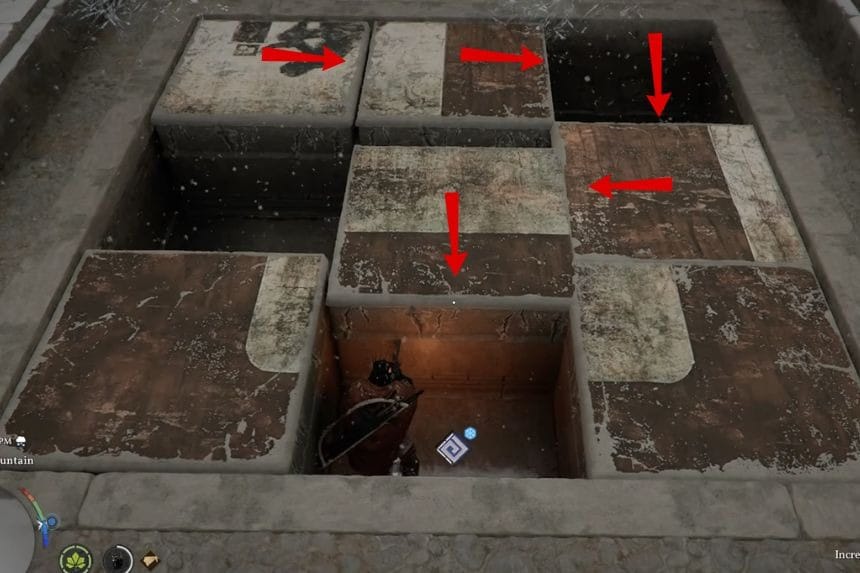
Once the water flows out, you can now interact with the Moving Block puzzle. To solve this puzzle, you need to refer to the images above.
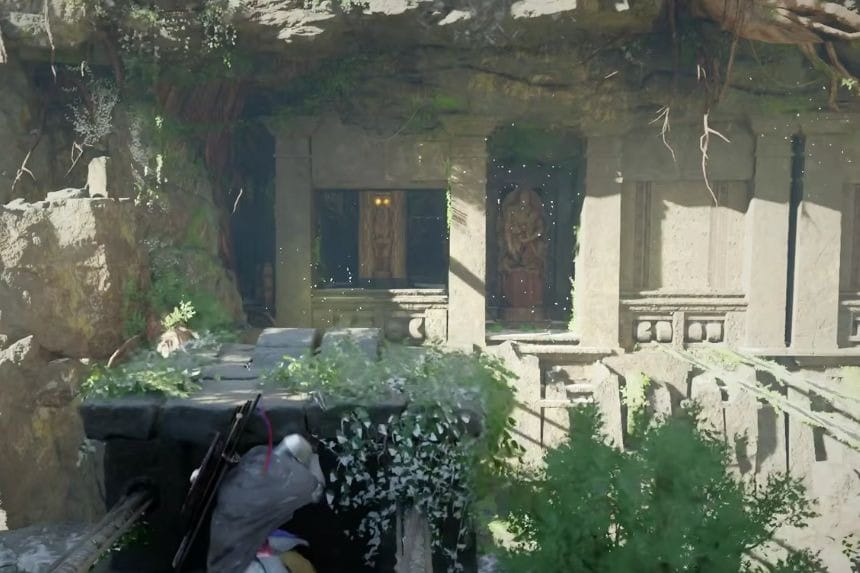
Secret Chamber of the Golden Plains
To clear the Secret Chamber of the Golden Plains in Crimson Desert, you need to go inside. Instead of waiting for the fire to go away, you can go straight through it. You also need to avoid touching the plants nearby because they will burn you again.
Jump to the ledge on the side, then move towards the small alcove halfway across. Jump to the next ledge and go up quickly before the saw reaches you. Keep going however, you need to be careful when making your final jump because there are spikes below.
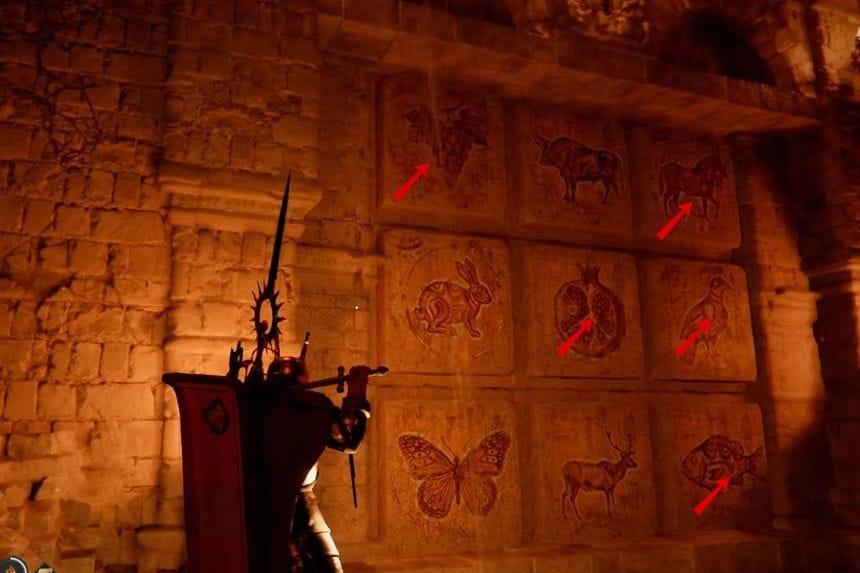
Once you pass the trap chamber, you will find the mural puzzle. The objective of this puzzle is to press the symbols in the correct order. You need to press these symbols: grapes, onion, bird, fish, and horse. Once you press all these symbols correctly, the wall will open up to get your rewards.
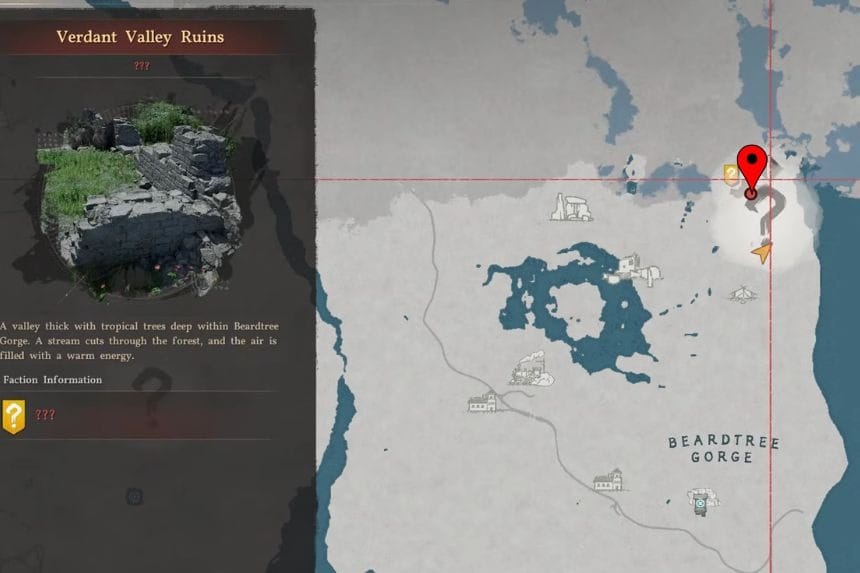
Beardtree Hills Sunflower Ruins


You can find Beardtree Hills Sunflower Ruins by going east from Beardtree Hills Rock Ruins. In this puzzle, you will find two devices, but one of the devices will be partially submerged in water. To solve the puzzle, you should use Nature Snare to lift the partially submerged device to the surface to make it accessible for use. After that, you should use Nature Snare on the other device to complete the puzzle.
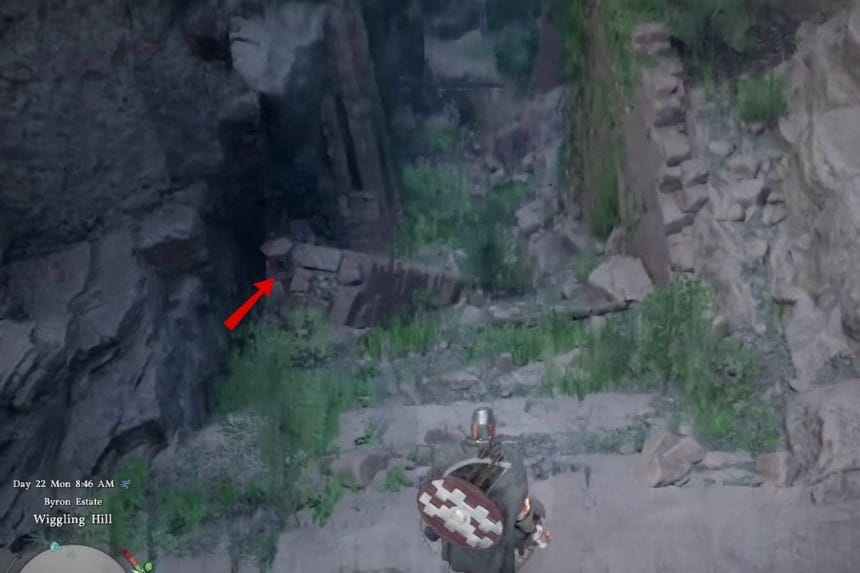
Wiggling Hill Ruins

Wiggling Hill Ruins can be found within a ravine located to the northwest of Golden Gallop Racecourse. To find Wiggling Hill Ruins, go to that side of the area and enter the ravine. Once inside, Wiggling Hill Ruins can be found within the area.

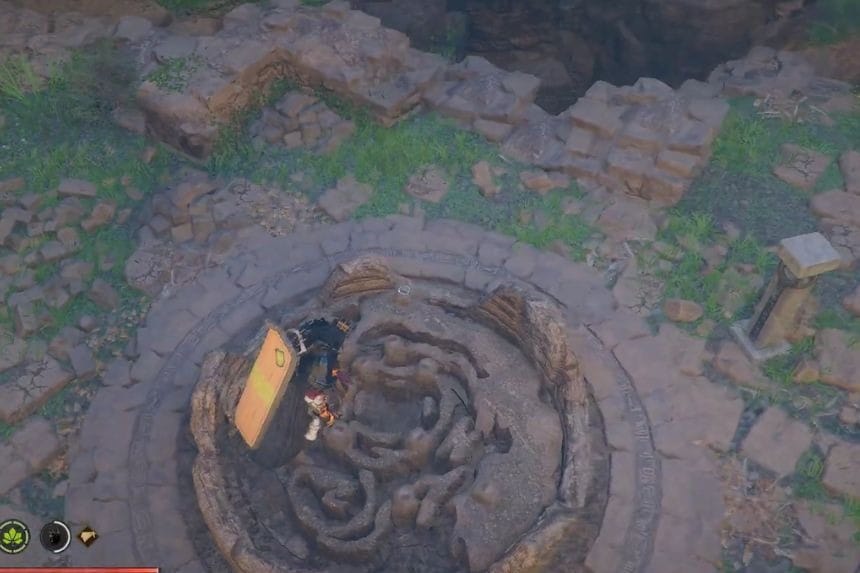
To complete the puzzle in Wiggling Hill Ruins in Crimson Desert, stand next to the device that is located near Abyss Cresset and use Focus. Then, use Nature’s Snare to rotate the device until water is drained from the area.
Once the water has gone, your next task is to light five lanterns around the ruins.
The first lantern can be found by turning around from the device and climbing up the broken ground. The lantern will be at the top. Pick up the lantern and press “Turn On” to light it.

The second lantern can be found by going south from the first lantern.
The third lantern can be found by going north and behind the broken wall.

The fourth lantern can be found by going north from the device.
The fifth and final lantern can be found by going north from the fourth lantern, right next to a broken stone column. Now use the wind snare again on the device to activate the Abyss Cresset. This will complete the puzzle, and you will get the Abyss Artefact.
Smoking Lands Desert Mouth Maze (Does not Count Towards Trophy)
You can find the Desert Border Maze puzzle in the Smoking Lands, located in the northern region of Demeniss. In order to solve the puzzle, you have to rotate all 11 stone plates so that the symbol facing up is correct. You can do this by using Axiom Force to rotate the plate and then using Force Current to flip it in the opposite direction so that the symbol is correct.
To ensure that you have made the correct choice of symbol, you can see the platform in the centre of the room near the Abyss Cresset. When you have set the symbol correctly, you will hear a click sound and see that a portion of the center platform will be glowing blue.

Plate 1: From the main puzzle area, turn south to find the first plate and set it to the sun symbol.

Plate 2: Turn northeast from there and change the next plate to the moon symbol.

Plate 3: Head northwest and look up toward the cliff above you. Climb up beside the plate and rotate it to the moon symbol.

Plate 4: Go east and move behind the wall. The next plate is there, and this one needs to be set to the sun symbol.

Plate 5: Head southeast and climb up the wall to reach the fifth plate. Rotate it to the sun symbol.
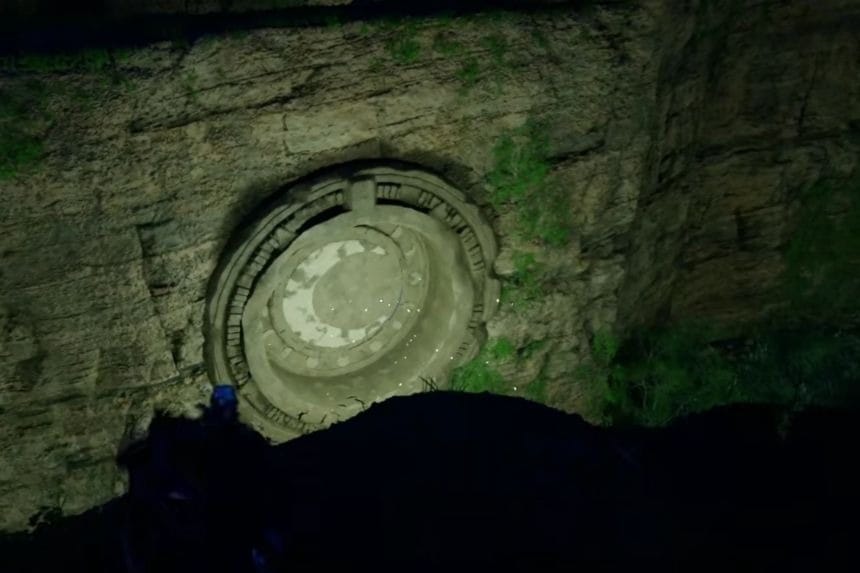
Plate 6: From the fifth plate, climb higher and look at the wall behind it. The next plate also needs to be turned to the sun symbol.

Plate 7: Go southwest on the edge of the area and change this plate to the moon symbol.

Plate 8: Next, glide down through the gap in the ground to the south. Walk straight down the tunnel, then left, then right, then left again. At the end of the tunnel, you will find the next plate. Change this one to the sun symbol.
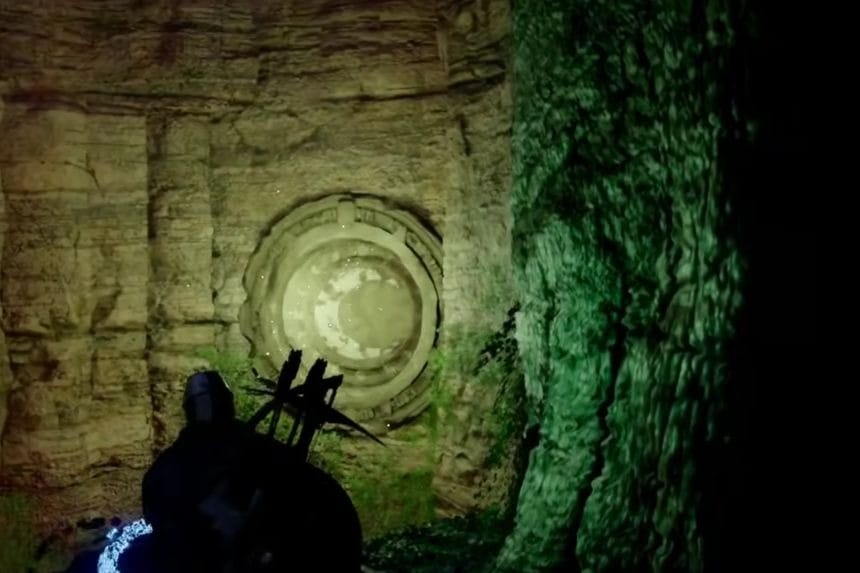
Plate 9: Now, return to the Abyss Cresset and climb the northeastern wall. Then, drop down to the plate below and change it to the moon symbol.

Plate 10: Next, move northwest to find the next plate. Change this one to the moon symbol.
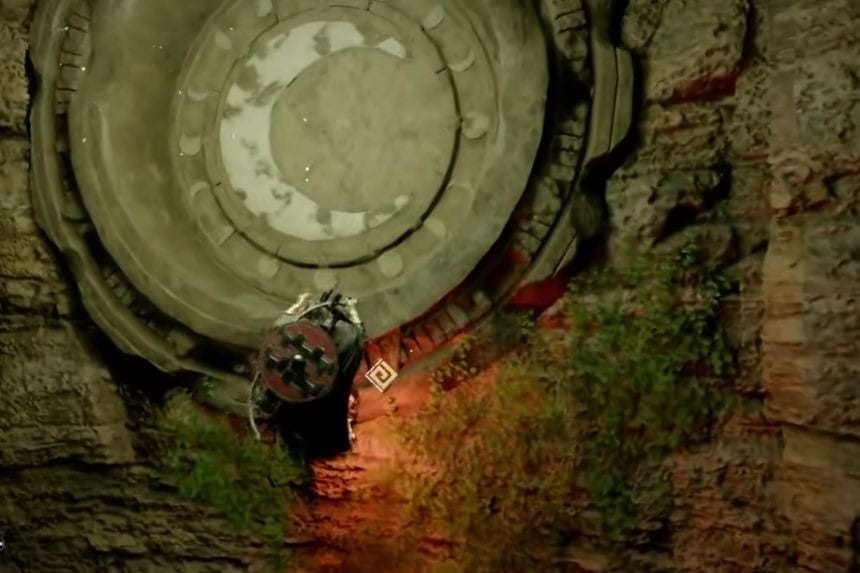
Plate 11: Now, return to the Abyss Cresset once again and head west to the broken wall. Then, drop through the gap in the ground, walk straight, and turn right to find the final plate. Change this one to the sun symbol.
When all the plates are set to the correct symbols, the middle platform will open, the Abyss Cresset will unlock, and you will get your reward, the Abyss Artefact.
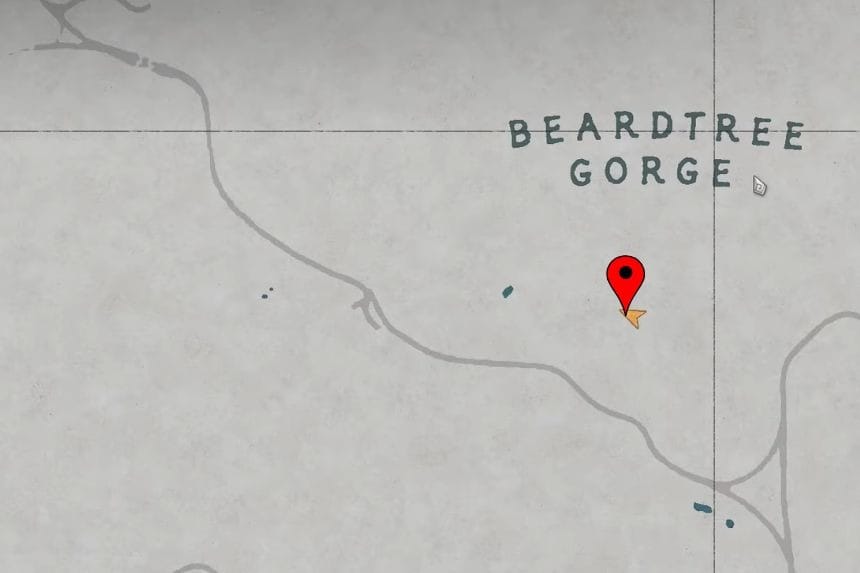
Beardtree Hills Rock Ruins

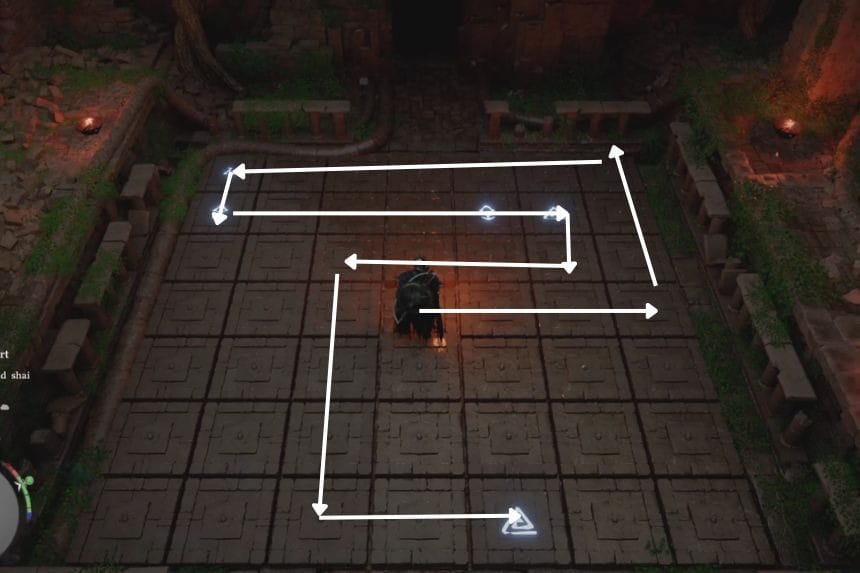

Beardtree Hills Rock Ruins is located just west of the Beardtree Gorge. This area has a Stepping Stone Symbol puzzle, where the objective is to reach the other side of the floor by stepping only on the correct plates. The key is to take your time, as stepping on the same floor plate twice will reset the puzzle. You can also use the images above to guide yourself through the correct path, stepping on the correct plates one step at a time.
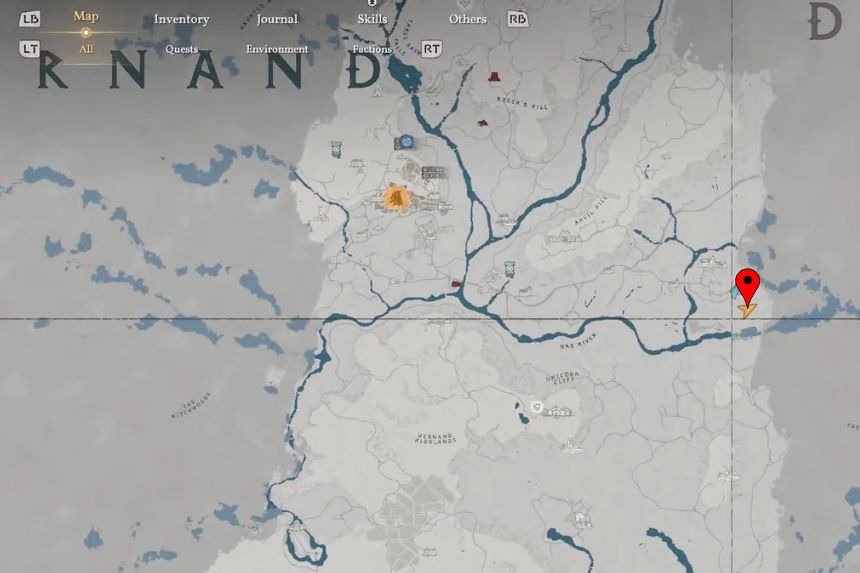
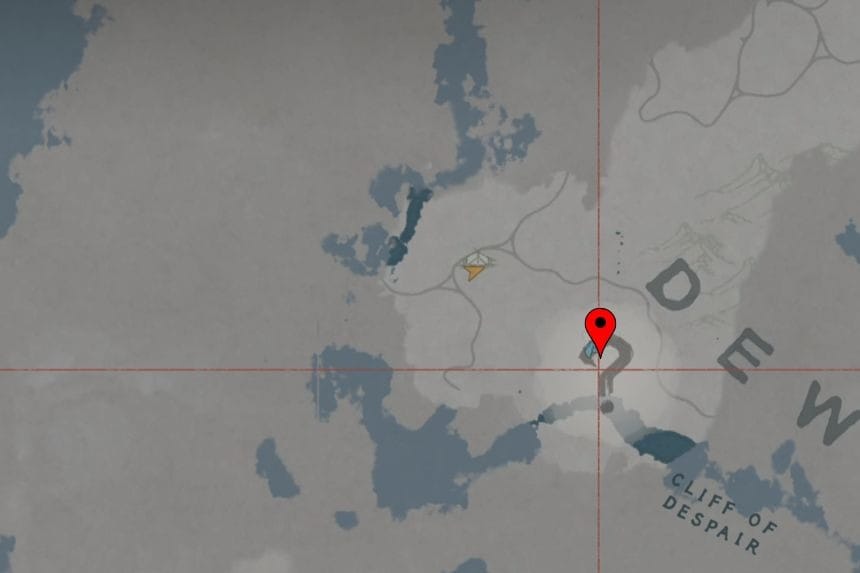
Red River Ancient Ruins
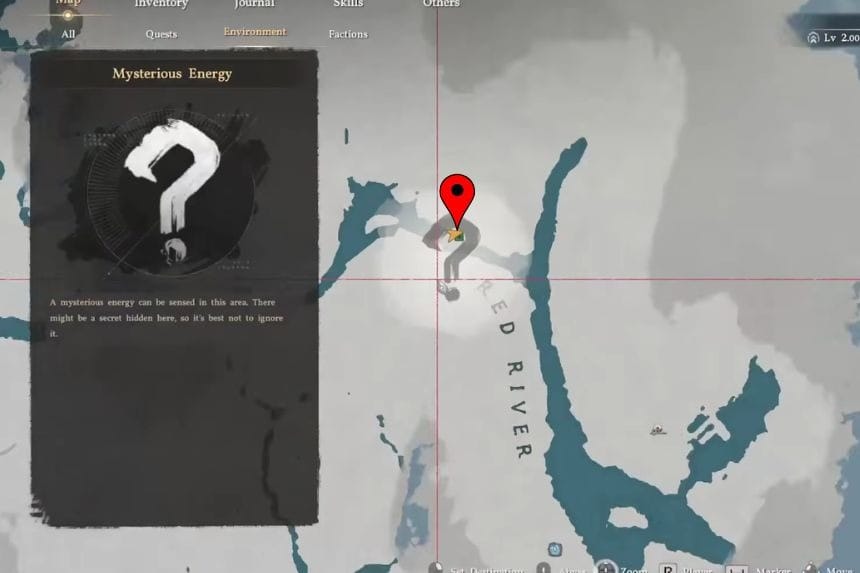
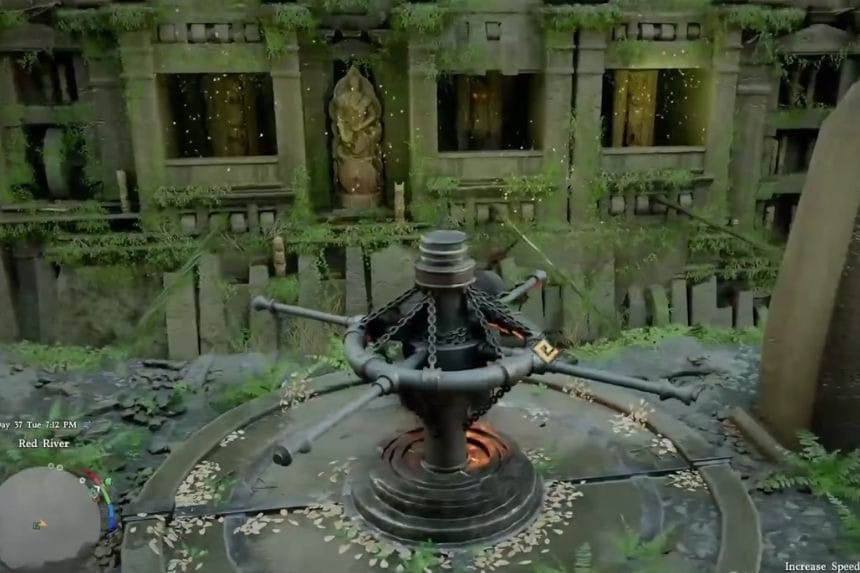
You can find this puzzle in the Red River, at the southeastern corner of Crimson Desert. When you find this puzzle, the first thing you have to do is push the lever on this device. This will then make the totems appear in the gap. There is only one lever that controls all three walls and totems, and you will have to work with this every time the totems appear. The goal of this puzzle is to make the correct side of the totem face you. You have to shoot the side of the totem to make it turn.
To solve this puzzle, use the Focused Shot ability when you are able to see all three totems. You should then slow down time and mark all three totems to make sure you hit them many times before they disappear. You will know that you have turned the totem correctly if the eyes are already red.
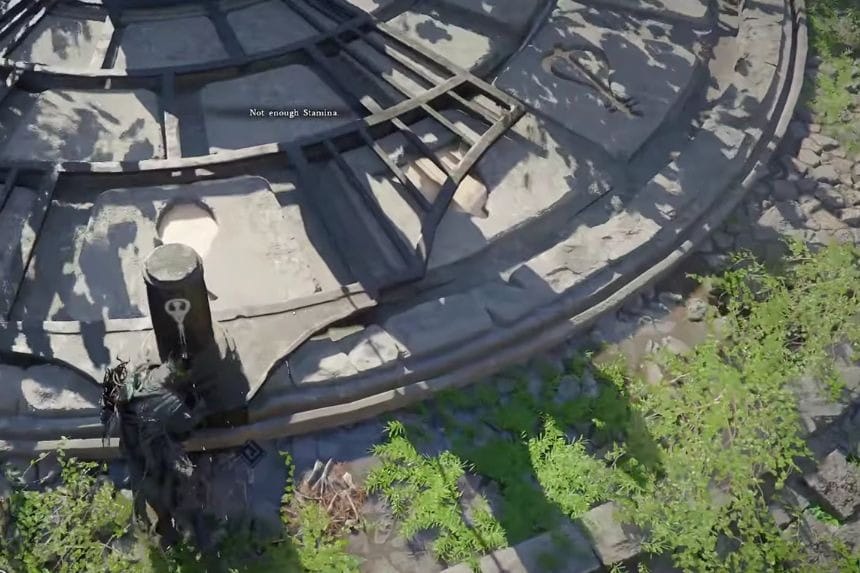
Timberdale Gorge Ancient Ruins

You can find the Timberdale Gorge Ruins in Dewhaven within the Cliffs of Despair. When you arrive at the location, you need to look down at the lower section and find the cracked wall. Using the ability Turning Slash to break the wall. When the wall is destroyed, you will see the water flow out and open the way to the puzzle.
The next step to solve the puzzle is to put the wall blocks in the correct position so that they can be connected to conduct the energy. You need to put the blocks in the correct position to complete the energy connection. If you are not sure about the correct position of the blocks, you can refer to the images above to find the correct solution.
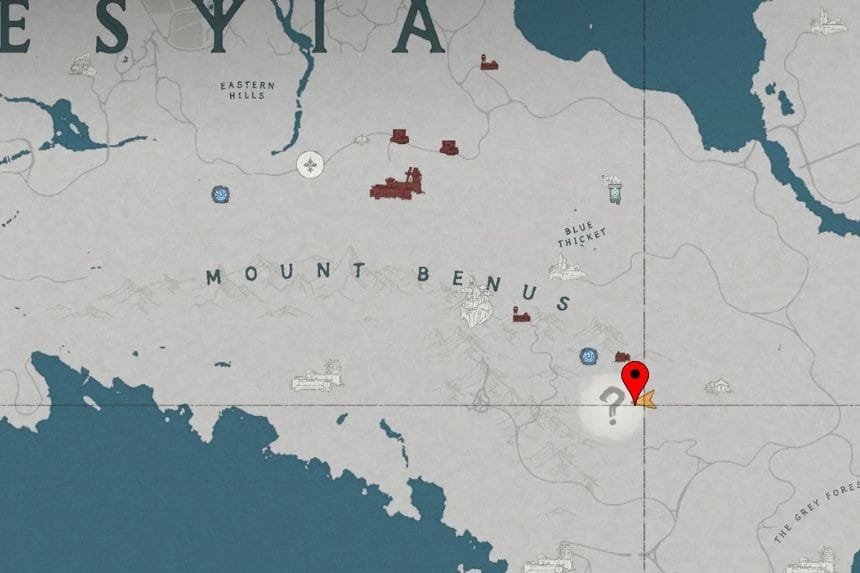
Grey Forest Ancient Ruins
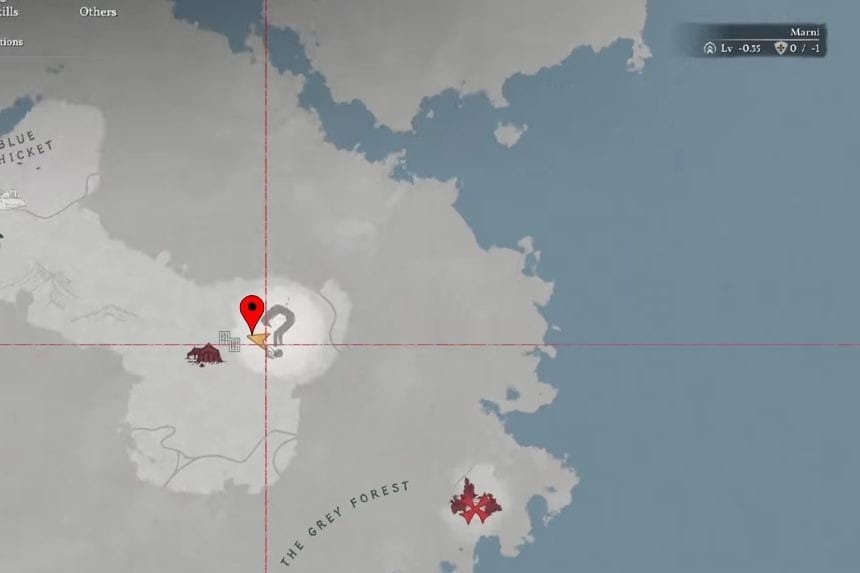
To find the Grey Forest Ruins, you will need to go east from Mount Benus Ruins, near the Benus Bandit Camp. First, you will need to go to this area near the camp and find a movable pillar and remove the broken pillar from the path.
When you look at this area, you will see that there are several symbols. Each one corresponds to the objects you see on the statues near this puzzle area. You need to move this platform to a position where each area is lined up with one of these symbols on one of the statues.
The first statue has a symbol for a jar. Move this platform until it is lined up with this symbol.
Then, you will need to look for a statue that has a symbol for a horse and two trays. Once you see this, you can move this platform to line it up correctly.
The final section will have you line up the symbol. The symbols you will see here are shown on the image above.
Keep pulling the platform until all the symbols are correctly aligned. Once all the symbols are correctly aligned, the puzzle is complete, and you can then pick up the reward item.
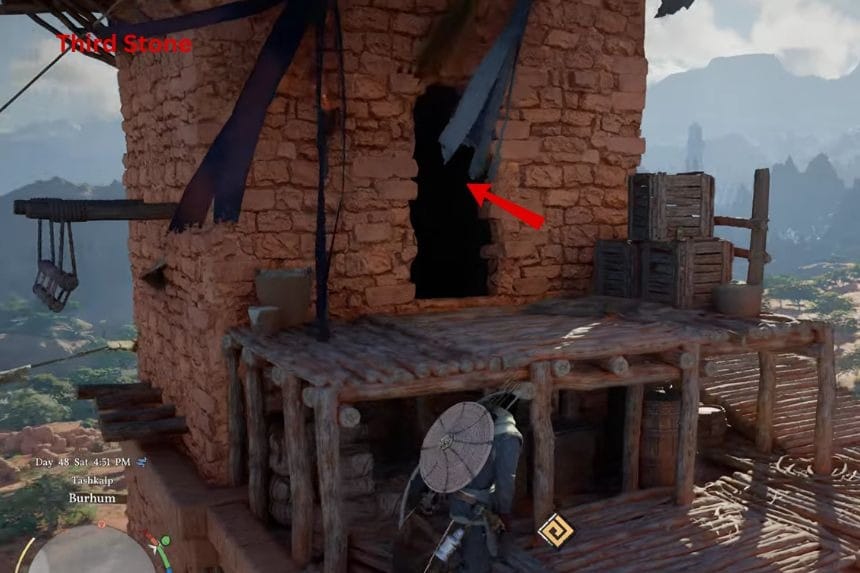
Burhum Maze (Does not Count Towards Trophy)

You can find this puzzle in Burhum, just south of Forbearer’s Barren. The Burhum Maze challenge is about collecting three Engraved Stones hidden inside different buildings, then placing them in the receptacles at the tallest tower.
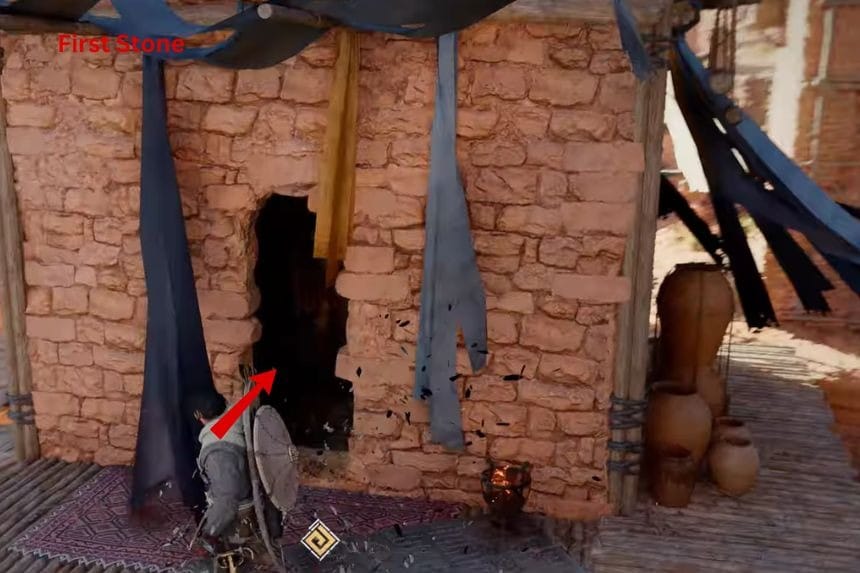
Start with the first Engraved Stone, which is located behind the first row of buildings. Look for a room with a broken wall, then enter through the crack. Inside, hit the stone column with Force Palm to break it and collect the stone.
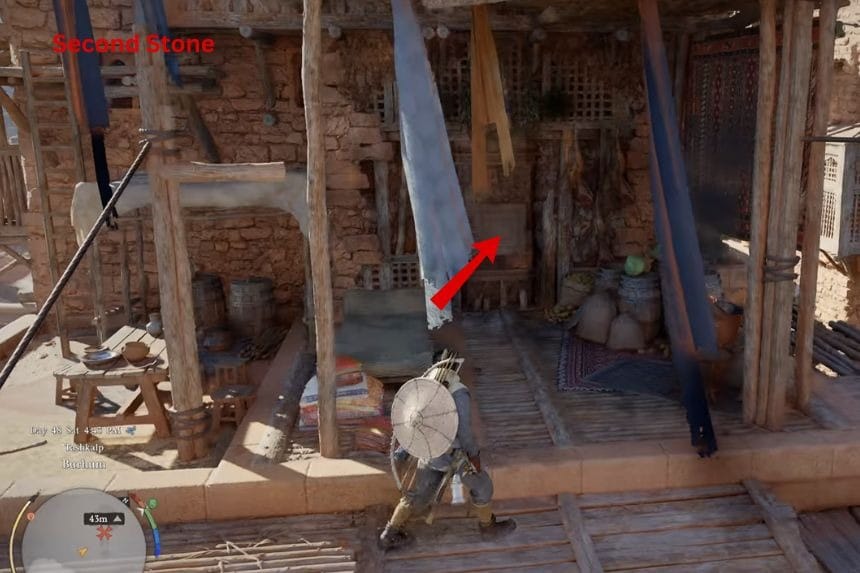
The second Engraved Stone is inside a nearby building. Go inside and check the balcony-like section near the bed. You will find another stone column there. Break it with Force Palm to collect the second stone.
For the third Engraved Stone, stay in the same building and climb higher. You will find another room that can only be entered through a cracked opening. Get inside, hit the stone column, and take the final stone.
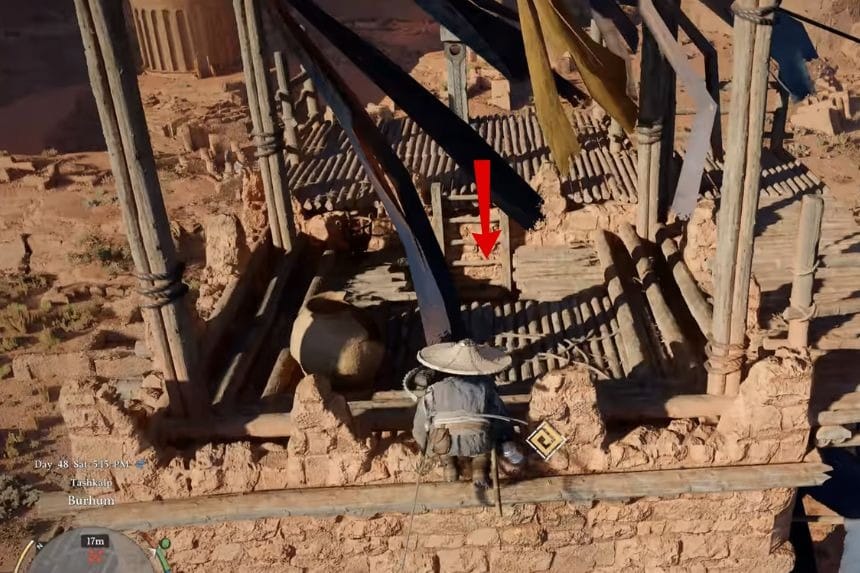
Once you have all three, climb to the highest part of the same building, where you will find the receptacles. Place all three Engraved Stones there to complete the puzzle and claim your reward.
Silver Wolf Mountain Ruins
The first thing you have to do is to remove the ice that blocks the mechanism. After removing the ice, you will see water and a tap mechanism. Use Nature’s Snare and get close to the tap mechanism. Hold it until the wind effect turns the tap mechanism upwards.
Hold it until it stops and will not move anymore. After completing the first tap mechanism, another tap mechanism will appear. Use Nature’s Snare and hold it until it completely turns and will not move anymore. After completing the tap mechanisms, the puzzle will be complete.
Black Wall Ruins
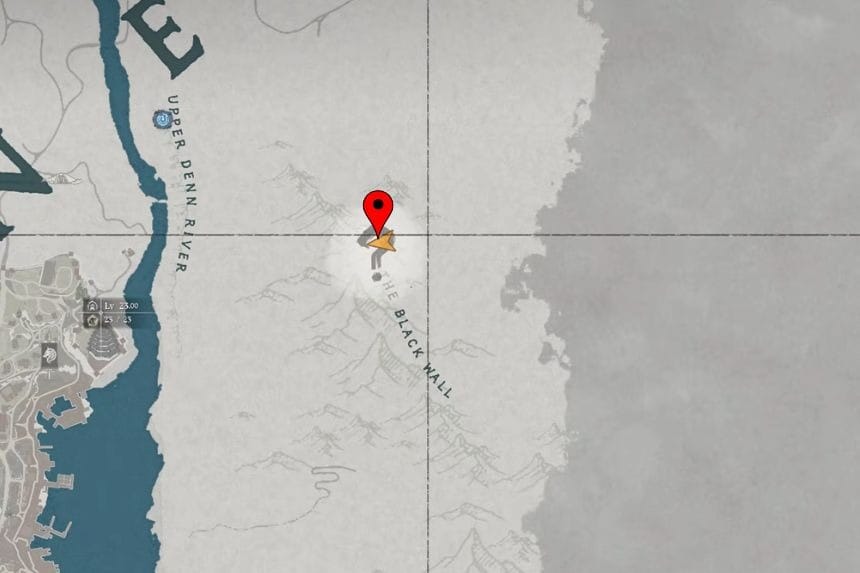

The Black Wall Ruins can be found in the northern part of the Black Wall range. To start, use Nature’s Grasp on the large stone wall to lift it and open a path. After doing this, enter through the opening in the wall, and you will find an Abyss Cresset inside. After finding this, exitt and complete the challenge
Memory Laden Ruins

You can find Memory-Laden Ruins north of Beardtree Hills, Sunflower Ruins and east of Stoneback Crab Wetlands. Once you get there, you should see a house with thorny vines. You need to burn the thorny vines to clear the way.
Next, you should see wooden planks hanging in a gap. You need to target the rope holding those wooden planks, causing them to drop. That way, you’ll be able to cross safely.


Push the buttons as shown in the image above. After pushing the buttons, the gate will open, and you will be able to get your reward.
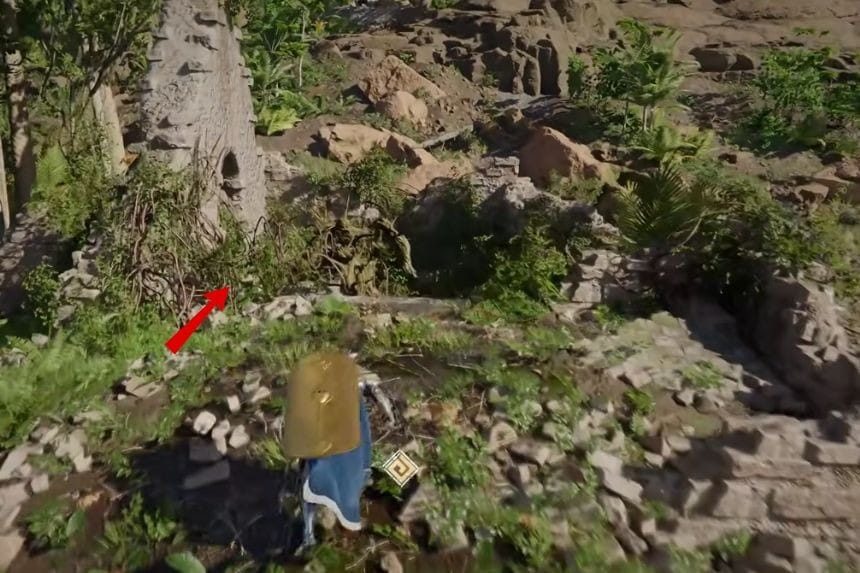
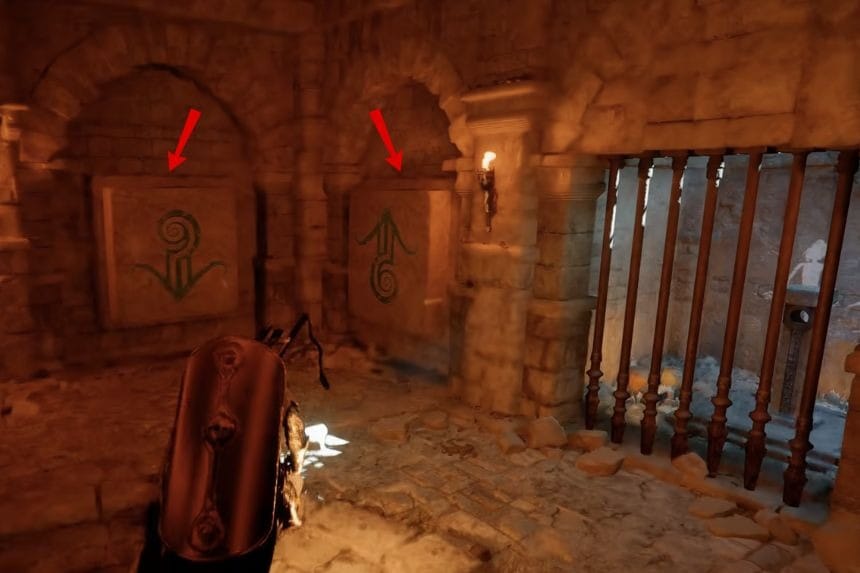
Blue Thicket Ruins
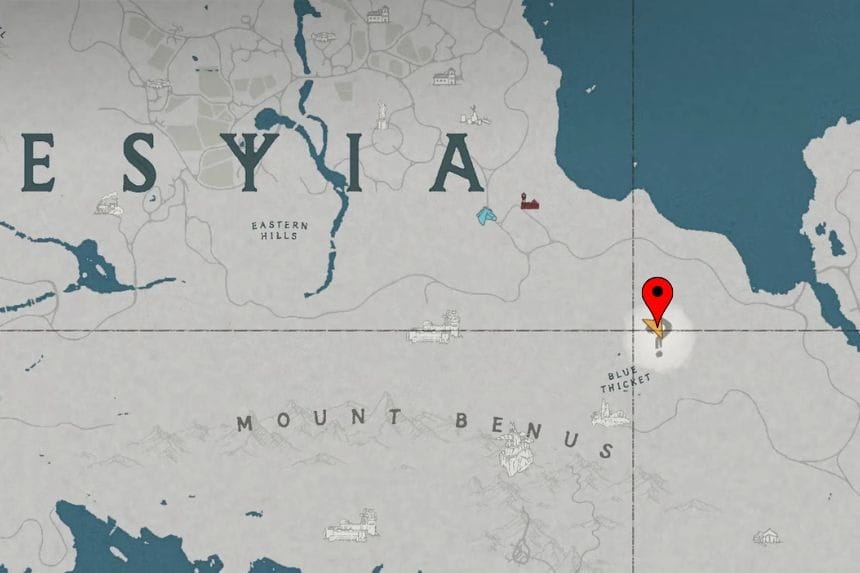
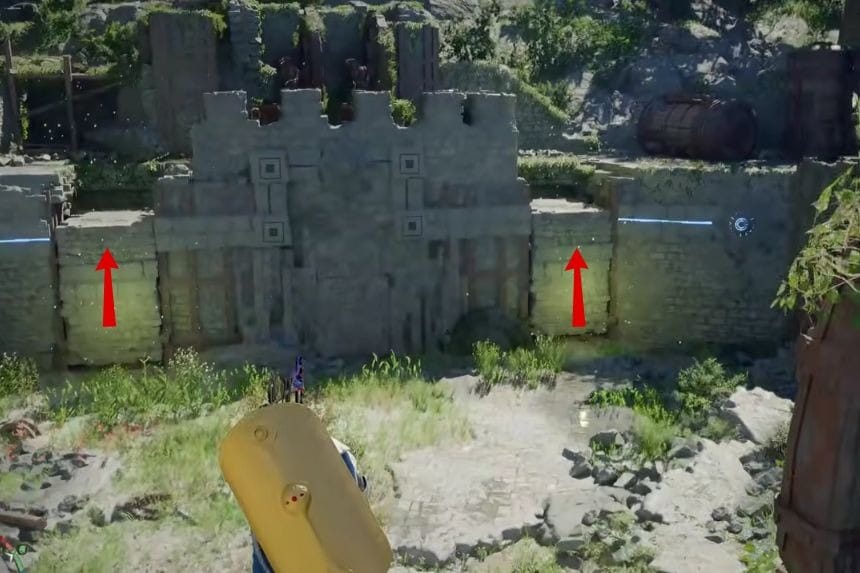
You can find Blue Thicket Ruins by travelling south from the capital until you reach the area. Once there, use Nature’s Grasp to lift the movable walls on both sides of the central circular device.
Each time you raise a wall, it pushes a large object outward and locks it in place. After both sides are lifted, the energy will be redirected into the centre, and the puzzle will be complete.
Mount Benus Ruins

You can find Mount Benus Ruins southeast of the “S” in Mount Benus on the map. To solve this Ancient Ruins puzzle, start by clearing the area first. Defeat the Abyss-tainted enemies and stand on the stone path.
Be careful while walking from the starting point to the statue at the far end. The ground here is muddy, so Kliff can easily slide if you stop too suddenly. Move slowly and carefully until you reach the statue.
Fuming Lands Ruins


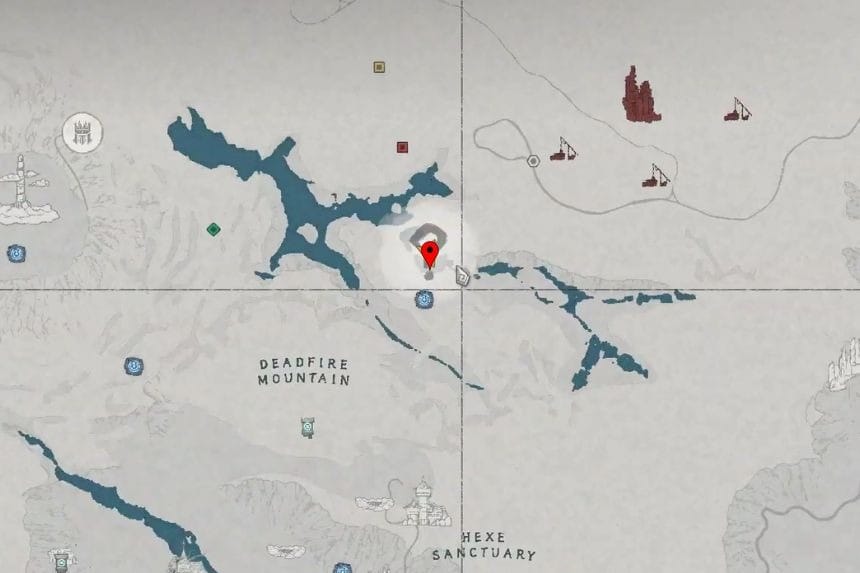
Head to the ruins located far to the northeast of the town. On the map, you will find them east of Deadfire Mountain and southeast of the Celestial Maze.
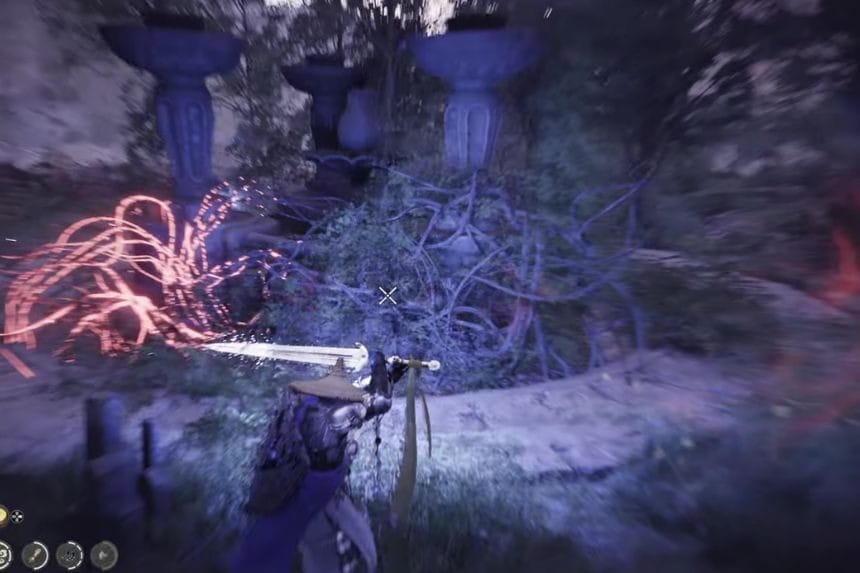
Go near the abyss crescent and burn the thorny bushes covering the fountains until they turn red and catch fire. All three fountains are covered in these thorny bushes, so make sure you burn away every set before moving on.
Once the bushes are cleared, interact with the fountain heads using the Pierce Skill. Your goal is to turn them so the water streams flow inward into the fountain. Keep rotating them until all six streams of water are directed correctly into the centre. As soon as all six water streams are flowing into the fountain, the puzzle is solved.
1 Comment
Great work, ur explanation is more complex than the game itself.