
After escaping the eerie depths of the Revenant Temple in Wuchang: Fallen Feathers, players step into a new kind of nightmare—Lightzen Temple. Don’t let the calm architecture fool you; danger is waiting around every corner. Among the infected threats roaming this sacred place is your first big challenge: Master Raider – Man-Eating Dhutanga. This guy may be your introductory boss, but he’s anything but easy. With punishing attacks and a fiery second phase, this fight demands precision, patience, and preparation. This guide walks you through everything—from gearing up to learning his attack patterns—so you can take him down without breaking a sweat.
How to Fight Man-eating Dhutanga
When you first reach Lightzen Temple—after scaling Worship’s Rise—make sure to activate the shrine located in the center of the temple grounds. It’s your lifeline if things go sideways during the boss battle.
Before heading to the boss arena, take time to eliminate nearby enemies. Not only will this make your path safer, but they’ll also drop Red Mercury, which you can use to boost your character’s level. Focus on upgrading Strength (for more damage) and Endurance (for more stamina). Vitality is less important here, since most of the fight relies on dodging cleanly instead of tanking hits.
From the central shrine, head up the stairs to your right. You’ll run into two infected monks in the courtyard—deal with them first. Then, make your way across the area and loop around the next structure to reach the boss door. Once you open it, the showdown begins.
Dhutanga wields a massive halberd and brings a fast, two-stage fight full of dangerous close-range attacks. Let’s break down what he does and how you can respond.
Dhutanga Moveset
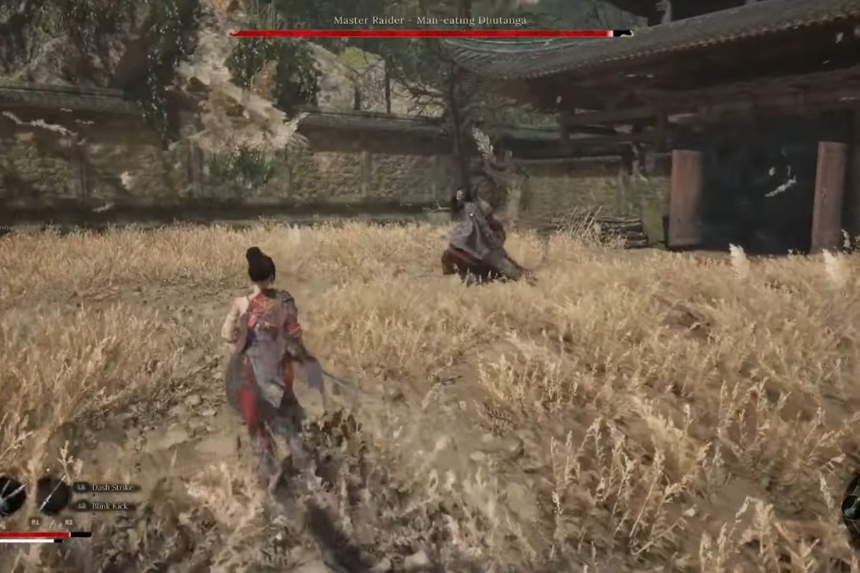
Phase One
- Piercing Rush: Dhutanga ducks low and rushes at you with his halberd out front. Step to the side to avoid being skewered.
- Earthbreaker Tremor: Occasionally, he’ll smash the halberd into the ground and follow up with a heavy stomp, sending out a shockwave in a small radius. Back away the moment you spot this wind-up animation.
- Skyfall Crush: If you see him lift one leg and swing the halberd off to the side, get ready. He’s about to leap and slam it into the ground. Dodge at the last second and you’ll earn some Skyborn Might for your troubles.
Phase Two
Once Dhutanga’s health drops below half, the fight escalates. Here’s what to watch for:
- Internal Downpour: He triggers a wide-range AOE attack that rains fire down from above. The blast zone is much larger than his stomp attack, so get clear fast.
- Ember-Forged Halberd: Dhutanga’s weapon catches fire in this phase, and every hit now builds up burn damage over time. He also becomes noticeably quicker, so you’ll need to tighten up your dodges.
Combat Tips
- Stick to Charged Heavies: These attacks help fill the stagger bar quickly, which opens him up to devastating Obliterate finishers.
- Skyborn Mastery Helps: If you’ve unlocked the ability to instantly launch a charged attack while using Skyborn Might, it’s a game-changer here.
- Use Madness Wisely: Going into the fight with a full Madness meter can give you an edge—if you’re good at evading, the bonus damage is worth it.
- Longsword Loadout: If you’re running the default longsword, consider using Blink Kick when Skyborn Might is active, followed by quick light attacks. This combo helps chip away at Dhutanga’s health and build stagger quickly.
Rewards
Defeating Dhutanga nets you two key items: the Copper Jug and the Lightzen Temple Key. With the key in hand, you can unlock the next area and continue your adventure through Wuchang’s dark and deadly world.
