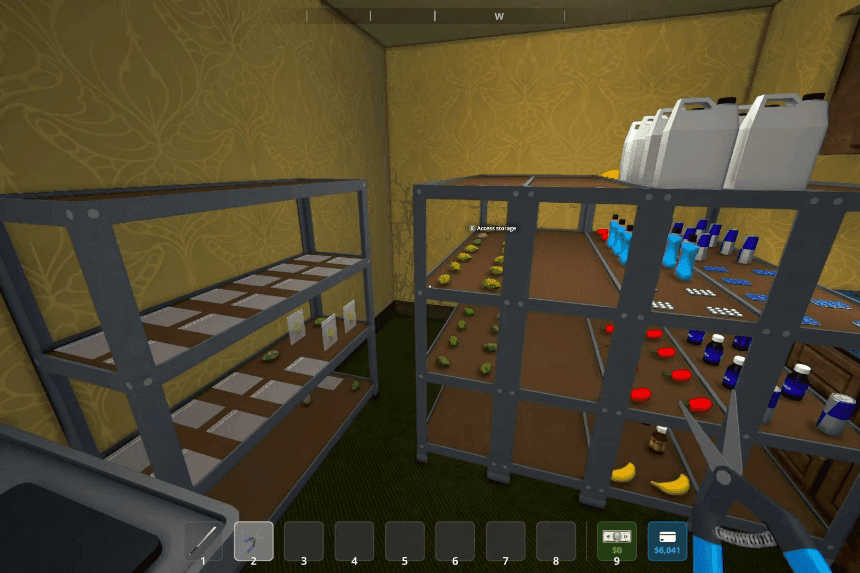
The Mixing Station in Schedule 1, unlocked at Hoodlum 1, lets you create powerful recipes. Automation, achieved by hiring a Handler and Chemist ($1000 each at the warehouse), is key to efficiency. Assign them beds, ensure funds ($200/$300 daily), and set up your station with raw product and ingredient shelves (order matters!). Use the clipboard to create Handler routes from shelves to the mixer and assign the Chemist to the mixer. Designate an output shelf and loop it back to the mixer with another Handler route. The Chemist will then automatically mix your pre-defined recipes.
How to Make Your Mixing Station Automatic
The Mixing Station is where the real magic happens it’s your chance to experiment and come up with powerful new recipes to keep your operation running strong. Before you can get started, you’ll need to reach Hoodlum 1 Rank, which unlocks the option to buy the Mixing Station from Dan’s Hardware for $500 credit. Once you’ve got it set up, you can start testing different ingredient combos to discover new products. To take things to the next level, automating your mixing station whether you’re using the Mixer Mark 1 or Mark 2 is a game changer. It boosts your efficiency and saves you from constantly repeating the same steps.
Hire the Right Employees
To begin automation, you’ll need two specific employees:
- Handler – Moves items between stations and shelves
- Chemist – Operates the mixer
Where to hire:
At night, visit the warehouse on the far west side of the map. Head upstairs to hire both for about $1,000 each.
Assign Beds and Set Up Payments
Back at your base:
- Use the clipboard (slot 9) to assign both employees to beds.
- Select “None” under the clipboard menu, then left-click a bed to assign.
- Ensure the briefcase has funds:
- $200/day for the Handler
- $300/day for the Chemist
You can pre-load funds to avoid interruptions.
- $200/day for the Handler
Prepare Your Mix Station
Set up your mixing station and make sure:
- Raw product (e.g., crystal) is stored on a dedicated input shelf
- Ingredients are stored on another ingredient shelf
- The mixing station is placed near both
Important:
The order of items on the shelf matters! Mixing goes left to right, top to bottom. Place ingredients in the exact order you want them added.
Setup Handler Routes
Use the clipboard to interact with your Handler and set up these routes:
- From: Raw product shelf → To: Mixer
- From: Ingredient shelf → To: Mixer
The Handler will carry up to 20 items at a time (or the largest stack available).
Assign the Chemist to the Mixer
Use the clipboard to:
- Interact with your Chemist
- Under Assigned Stations, left-click the Mixing Station
Tip: To select multiple stations, hold Shift. Click again while holding Shift to deselect.
Set the Output Shelf
After mixing, the output product will sit in the mixer. To keep the loop going:
- Place a new, unused shelf nearby (as an output buffer)
- With clipboard, interact with the Mixer, press E, and set the output destination to that shelf
Loop the Output Back
Now, create another Handler route:
- From: Output shelf
- To: Mixer
This will feed the mixed product back into the mixer for the next ingredient.
Watch It Work
Your chemist will automatically start mixing once the product and ingredients are in place. The Handler will keep things moving.
If you haven’t discovered a mix yet, you’ll need to manually name it the first time on the machine. The chemist won’t continue until it’s confirmed.
Add More Ingredients (Optional)
You can go beyond 8 ingredients by:
- Waiting for the current queue to finish
- Then adding new ingredients after the existing items on the ingredient shelf
Items placed above or earlier in the order will be taken first, so be careful not to interrupt the sequence.
Final Step: Packaging
Once your product has gone through all mixing stages:
- Move it to a packing station shelf
- If you have a Packer employee set up, they’ll handle the rest.

