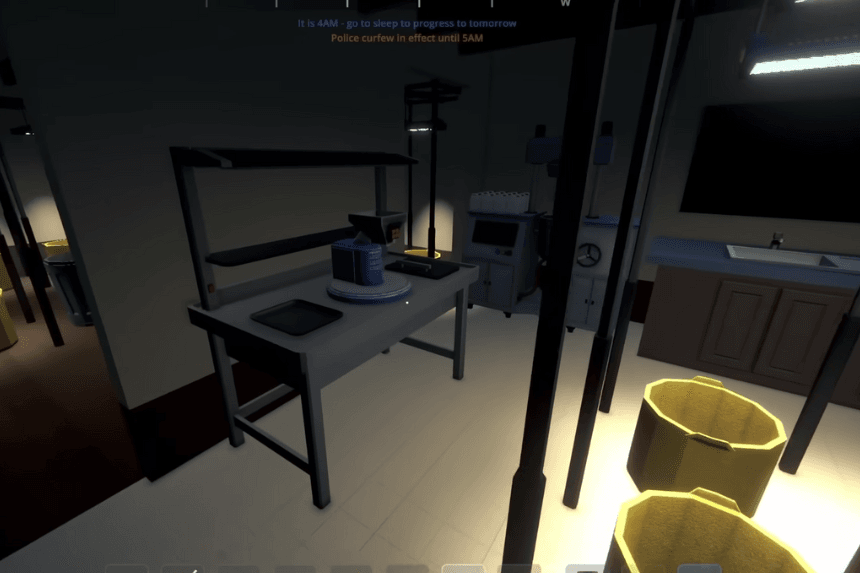
Congratulations on acquiring the Bungalow in Schedule 1! This significant upgrade unlocks the true potential of your operation by providing ample space for expansion and, most importantly, full automation. This guide will walk you through the process of transforming your spacious new abode into a highly efficient, self-sustaining peddling enterprise. By strategically organizing your equipment across the Hall, Kitchen, and Bedroom, hiring and assigning roles to a dedicated workforce, and carefully setting up machine routing and worker tasks, you’ll be able to sit back and watch your bungalow become a well-oiled, profit-generating machine. Let’s dive into the steps required to automate your Bungalow and maximize your earnings.
How to Make Your Bungalow Automatic
Buying the Bungalow is one of the most important upgrades in Schedule 1. It opens the door to hiring more workers and fully automating your production, making everything run much smoother. But once you move in, it’s easy to feel unsure about where to begin or how to set things up efficiently. The Bungalow gives you three roomy areas the Hall, Kitchen, and Bedroom making it an ideal spot to build a streamlined, automated peddling operation.
Equipment List
- 16 Suspension Racks
- 16 Best Grow Lights
- 16 Best Pots
- 7 Large Storage Racks
- 6 Beds (5 for workers, 1 for you)
- 2 Mixing Stations (MK1 or MK2)
- 1 Packaging Station
- 2 Trash Cans
Room-by-Room Setup
Your biggest added expense in the bungalow, is hiring more employees now that you actually have the space for everyone. Pick up a bed for each worker from Oscar at the warehouse and set them up in your bungalow. Most of your equipment will go in the room to the right of the front door, except for a few shelving units in the kitchen and some extra grow tents tucked into the leftover space.
Living Room
- 3 Grow Racks near the main door (with a trash can in the center).
- 3 More Racks along the back wall (by the back door).
- 5 Racks on the left wall.
- 1 Rack on the right side wall (near kitchen entry).
- 2 Large Storage Racks:
- One near the back door
- One near the walkway to the kitchen
Use these for seeds and soil.
- One near the back door
Kitchen
- 4 Grow Racks arranged in a square.
- 1 Large Storage Rack (right wall) for packaging supplies.
- 1 Large Storage Rack (back wall) for finished product.
- Mixing Stations (2 total) – anywhere convenient.
- Packaging Station
- 1 Trash Can (kitchen corner)
Bedroom
To free up some space in the bungalow, you can place the beds in motel rooms instead. That extra room can then be used for a few more Large Storage Racks. And if all the Growing Pots start to feel like too much to manage, consider swapping a few out for Drying Racks they’ll help boost the quality of your final product.
- 6 Beds: 5 for workers, 1 for you.
- 3 Large Storage Racks:
- 2 for mixing ingredients (1 type per rack)
- 1 for miscellaneous or backup storage
- 2 for mixing ingredients (1 type per rack)
Automation Setup
Machines & Routing
- Mixing Station 1 ➡ Mixing Station 2
- Mixing Station 2 ➡ Packaging Station
- Packaging Station ➡ Final Product Rack (Kitchen)
Worker Roles
- 2 Botists (planting)
- 1 Handler (logistics)
- 1 Chemist (mixing)
- 1 Cleaner (trash)
Assign Beds
Use Manage to assign each worker to any bed.
Handler Setup
Assign handler to the Packaging Station, then add these routes:
- From Mix Ingredient Rack 1 ➡ Mixing Station 1
- From Mix Ingredient Rack 2 ➡ Mixing Station 2
- From Packaging Supply Rack ➡ Packaging Station
Botanist Setup
Botanist 1:
- Assign Supply Rack 1
- Assign these Pots:
- The first few in the living room
- The three racks in back
- Two from the left wall
- The first few in the living room
Botanist 2:
- Assign Supply Rack 2
- Assign the remaining Pots:
- Leftovers in the living room
- All Pots in the kitchen
- Leftovers in the living room
Pot Routing
Make sure all pots route to Mixing Station 1 (whichever mixing station leads to the second one and then to packaging).
Chemist Setup
- Assign both Mixing Stations to your chemist.
Cleaner Setup
- Assign both Trash Cans to your cleaner (one in kitchen, one in living room).
Paying Workers
- Use Shift+Click to give $1,000 to each worker’s briefcase (or more, as needed).
Important Tips
- If using a new mix, you must interact with the mixing station and click Done to confirm the discovery.
- Use the phone’s Deliveries tab to deliver baggies, jars, etc. store up to 16 stacks in your driveway.
- The Jeeper (second car at dealership) is excellent for bulk storage and supply runs it holds 16 full stacks.
Once everything is set up, let the system run for a cycle to ensure everything flows correctly. You now have a fully automated, high-efficiency operation in your bungalow!

