
Looking for a way to speed through the harsh deserts of Arrakis in Dune: Awakening? This guide contains all the information you need to get your first Sandbike—from unlocking the schematic, gathering parts, crafting, fueling, repairing, and looking after your bike. Enjoy a smooth ride across Arrakis while ensuring your survival in the wasteland.
Getting Your First Sandbike on Arrakis
If walking on endless dunes while trying to avoid sandstorms has been growing on you, it might be time to get an upgrade. In comes the Sandbike-your very own stage across the wilds of Dune: Awakening. But first, to really appreciate cruising the wastelands, you have to go through a bit of build-up.
First, you have to unlock the Sandbike Mk1 Assembly via the research menu under the vehicles tab. For those in the guided mode, it’s alright-you will naturally reach this stage through the quest “Across the Gap.” This mission takes you inside Imperial Testing Station 2, where you will scavenge for parts and then proceed to build your bike.
Collecting the Bike Parts
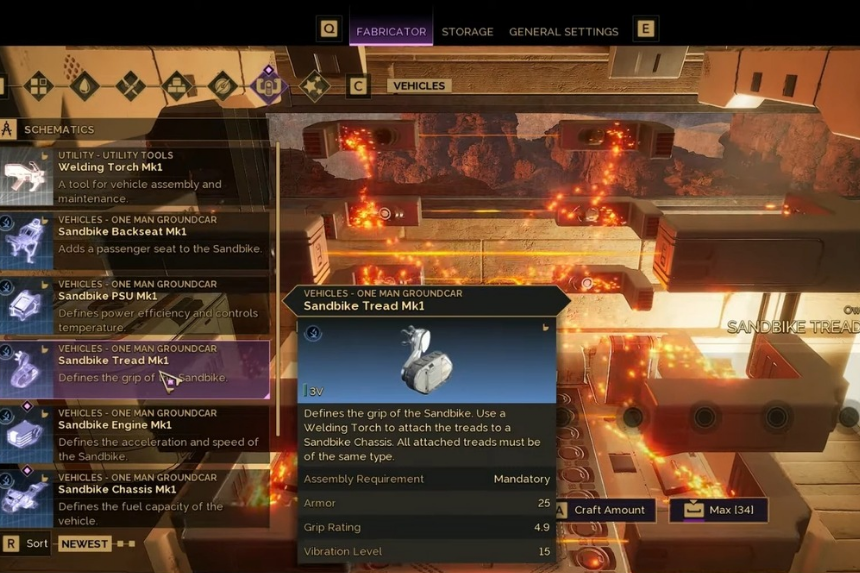
Think of your sandbike as a jigsaw puzzle—you’ll have to gather and craft multiple components before it’s ready to roll. Here’s a breakdown of what goes into it:
- The Power Unit (PSU Mk1) and Engine Mk1 both require copper ingots and particle capacitors.
- Treads (x3), Chassis, and Hull are a mix of copper and advanced servoks.
In total, you’ll need quite a few copper ingots, so stock up. Copper ore is pretty common—you can mine it from bluish rocks using your cutteray, and then refine it in your small ore refinery (which you should already have if you completed “A Touch of Civilization” earlier in the game).
Good news: some of these parts, like the PSU and Engine, can already be found inside chests at Imperial Testing Station 2, along with many of the servoks and capacitors you’ll need. That cuts down on your crafting time.
Essential Tools and Extras
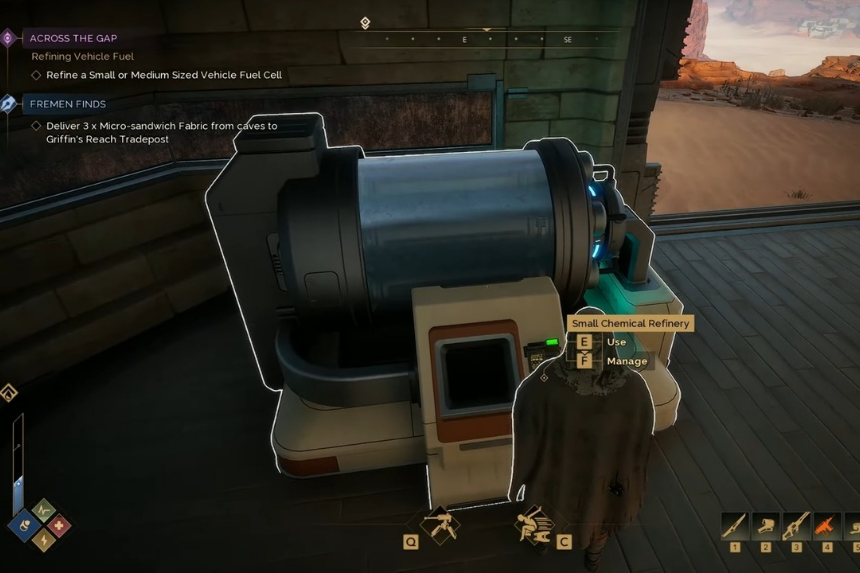
Before you start assembly, make sure you’ve got a welding torch—you can’t put the bike together without it. You’ll also need a fuel cell (small or medium size) to get it running. These power sources degrade over time, so keep extras handy. You can make them yourself at a small chemical refinery, provided you’ve researched and built one, or loot them from outposts and scavenger camps.
Assembling the Bike
Once you’ve gathered all the parts, it’s go time. Equip the welding torch, lay down the modules, and attach them one by one. When it’s all connected, interact with the finished bike and select the fuel option to top it up.
How to Protect Your Sandbike
Leaving your bike out in the open is just asking for trouble. Between scavengers, storms, and other players, it’ll get destroyed or stolen. You’ve got two solid ways to avoid this:
- Garage Setup: Build a secure spot at your base to keep the bike safe. It keeps your inventory module intact and deters thieves, provided your base has fuel powering the locks.
- Vehicle Backup Tool: Perfect for explorers who might need to log off while away from home. This tool lets you store the whole bike in your inventory. Just a heads-up—you’ll need to empty its inventory first before storing it.
Dealing with Damage
Out in the wastelands, your ride won’t stay pristine for long. Enemy fire and bad weather can wear it down fast. To patch it up, you’ll need welding wire—just switch your torch to repair mode and weld the damaged modules. The wire slowly gets used up as you repair, but note that you can’t fix it completely this way. Some damage (the red portion) stays until you properly restore the part.
If the sandbike ends up badly broken—or totally trashed—you can detach its parts using your torch and fix them individually at a repair station (once that’s researched and built).
