
The Black Line Bunker, also known as the Blacklime Bunker, is one of the locations you can explore in Borderlands 4. Hidden in the Howl region, this bunker is packed with enemies, tricky platforming, and a challenging boss fight at the end. In this guide, we’ll walk you through how to get inside, navigate the bunker, take on the boss, and collect the loot along the way.
Black Line Bunker Location in Borderlands 4
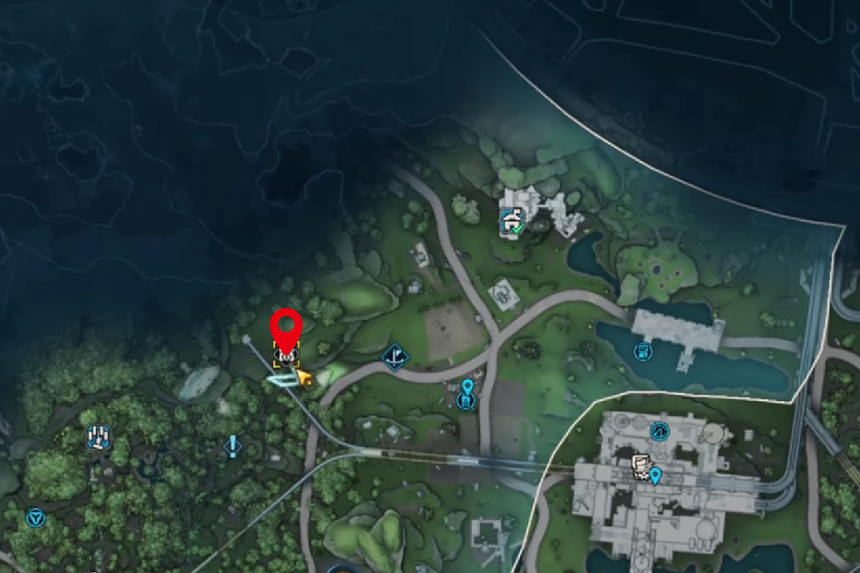
The Black Line Bunker in Borderlands 4 is located in the Howl region of the map. To access it, you’ll first need to complete the mission called One Foul Swoop. Without finishing that mission, the bunker remains locked. Once you’re ready, here’s how to navigate through it and take on the boss inside.
Blacklime Bunker Order Bunker Walkthrough
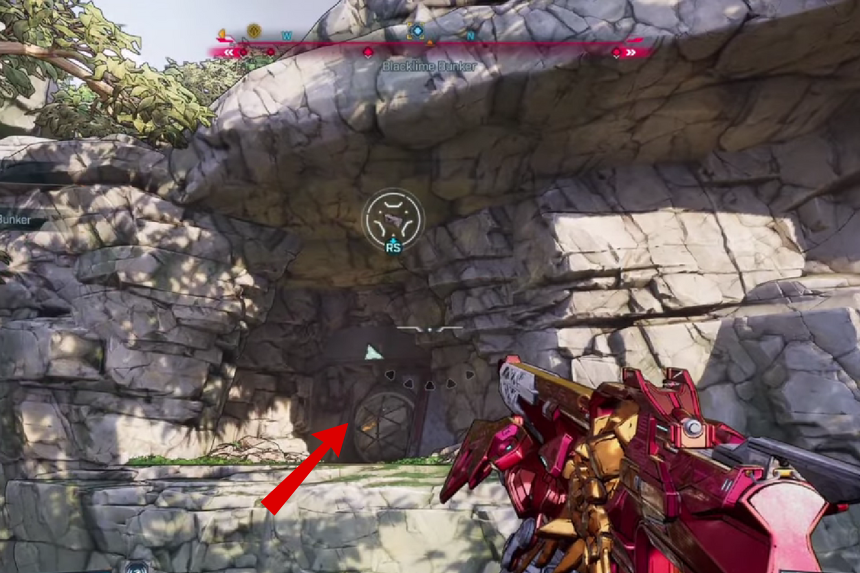
When you reach the bunker, you’ll notice the entrance is up high and not directly reachable. To get there, follow the rock walls along the path until you find a spot you can grapple onto. Once you’re up, head toward the opening you initially spotted. Use your double jump and glide abilities to reach the platform in front of you.
From here, you’ll need to interact with an object to open the next section. You can either throw it or glide with it to get it into place. Once that’s done, the door opens automatically, letting you continue deeper into the bunker.
Inside the Bunker
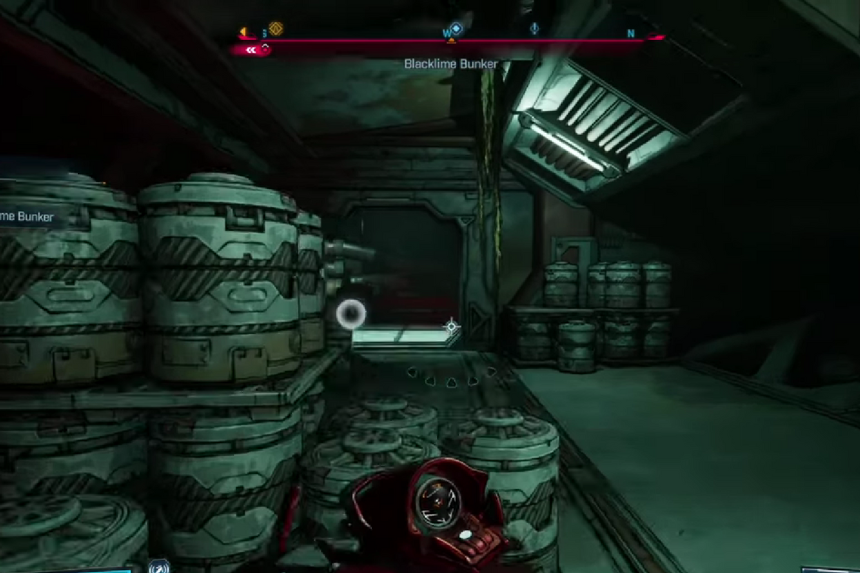
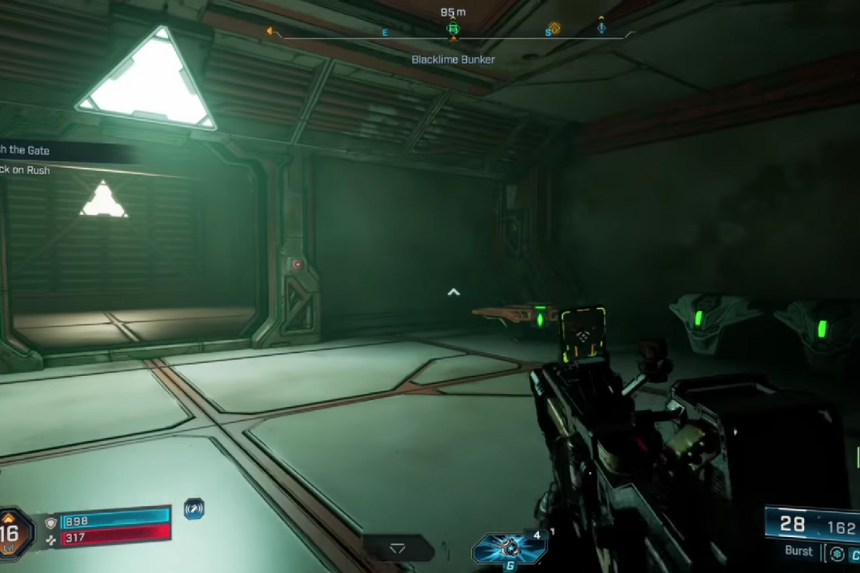
Once inside, you’ll find a respawn point and plenty of ammo to stock up on. As you progress, you’ll encounter enemies along the way. You can fight them all if you want, but it’s not necessary.
Keep moving forward, gliding over gaps, crouching under pipes, and pressing buttons to unlock doors as you go. At one point, you’ll need to swim through a small water section and then climb some stairs to reach a room with vending machines. Make sure to refill your ammo here before the boss fight.
The Boss Fight
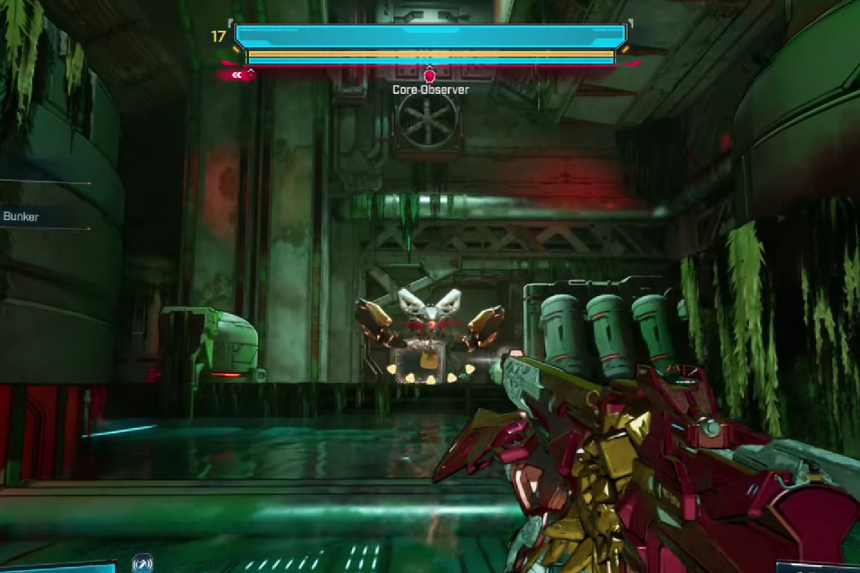
The boss fight in Black Line Bunker is all about movement and positioning. Stay mobile, moving left and right, to avoid taking full damage. You can also use objects in the room as cover, but if you’re far enough away and gliding sideways, the boss may not be able to hit you at all.
The boss has a critical weak spot in the center, which is tricky to hit while it’s moving. Using a sniper rifle can help deal significant damage, especially when aiming for the eye. Be aware of small enemies that spawn during the fight they’re annoying but manageable.
Once the boss enters stage two, it activates a beam-like attack. You’ll need to keep your distance and aim carefully for critical hits. After defeating the boss, you’ll receive random loot, which can include weapons, ammo regenerators, healing items, enhancements, and grenades. While nothing is guaranteed legendary, this is a good place to farm for rare loot.
Resetting the Boss and Exiting
After defeating the boss, you can head to the south side of the bunker to teleport back to the beginning, reset the boss, and fight it again for more loot. Don’t forget to check every chest along the way, as they may contain useful items.
When you’re done, use the elevator in the bunker to exit safely. Some players have experienced glitches when opening the menu near the elevator, so watch out for that.