
Trying to solve Beardtree Hills Ancient Ruins puzzle and no luck? You’re not alone. I’ve tried many combinations for doing this and failed miserably. But you don’t have to fret now because I’ve found the solution for this puzzle and you just need to follow my instructions on this one as I will be guiding you on how to solve the puzzle of Beardtree Hills Ancient Ruins in this guide.
Beardtree Hills Ancient Ruins Puzzle Location
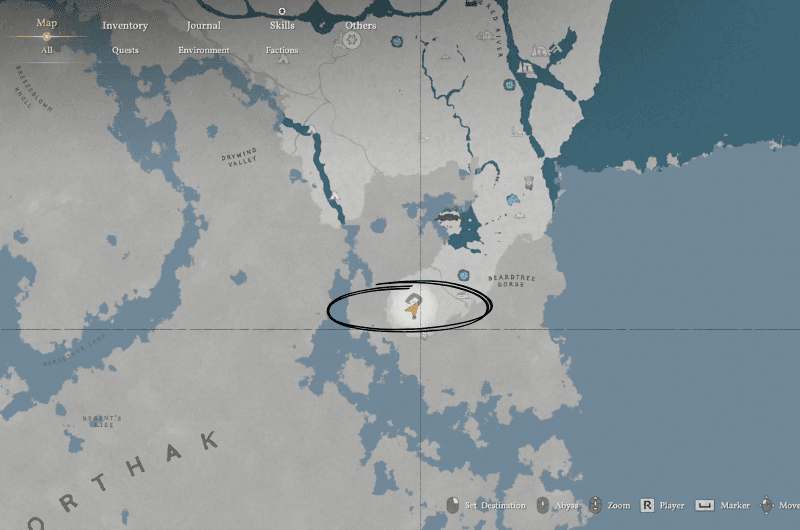
Head to the marked location on the map shown in the above image which is south west from the Memory Laden ancient ruins fast travel checkpoint near the Beardtree Gorge. When you reach nearby the location, a point of interest area appears on the map which is indicated by a shaded circular area with a question mark on it. When you reach the puzzle’s location, it will activate the puzzle sequence for you to solve.
Beardtree Hills Ancient Ruins Puzzle Solution
Solving the puzzle is relatively easy, the puzzle requires you to step on the tiles in a sequence which will solve the puzzle. But you need to be careful of not stepping on the wrong tiles as this will reset the entire puzzle and you have to start again from the beginning. And that’s where I come in, I’m gonna guide you to solving this puzzle.
The Solution
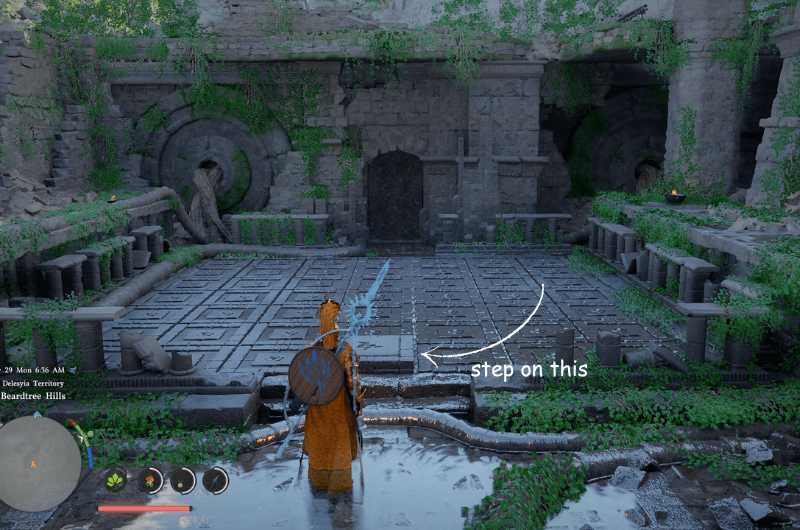
When the puzzle sequence activates, a starting tile will be presented to you. Step on the tile and you will be presented with the next sequence.

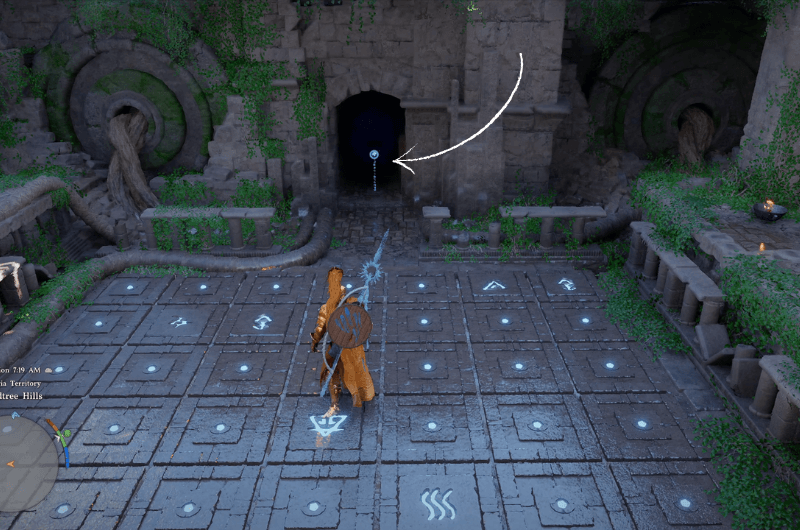
In the second sequence, only a single tile will be presented and the tiles for the sequence would be glowing with symbols. Just walk straight to the next tile and step on it, this will activate the next sequence and this is where it starts to get interesting as you will need to activate multiple tiles but one wrong move and you’re set to start at the beginning.
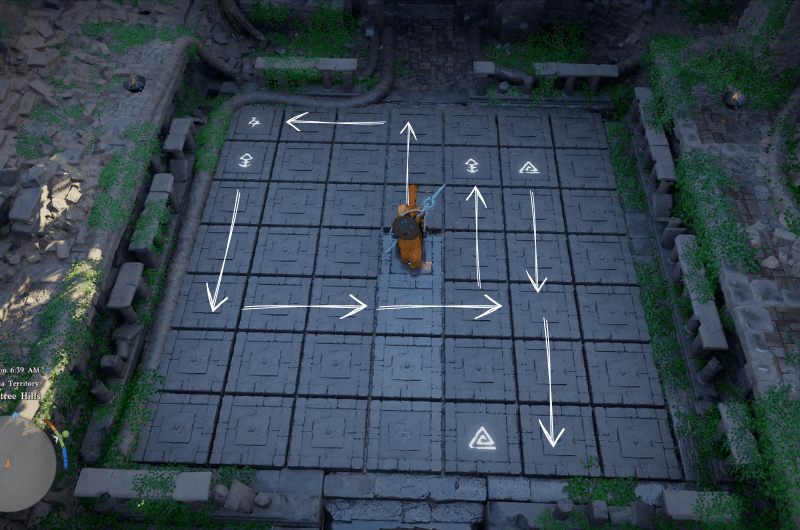
For the next sequence, I’ve marked the tile path in the above image that you need to take in order to complete the sequence. Just follow the path and you’ll activate the next iteration.
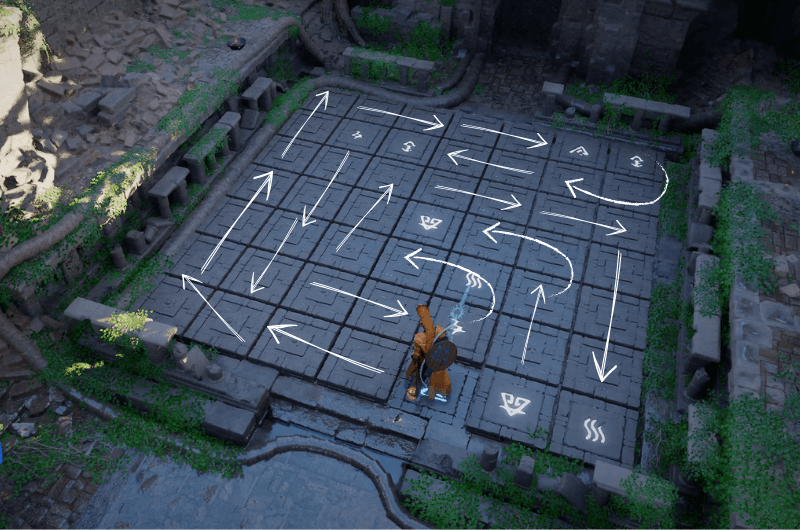
This next sequence was complex, I’ve had my share of tries on this one. It does look a bit complex but if you just follow the path I’ve drawn on the above image, you should be just fine. And since this is the last sequence in solving the puzzle, it will unlock the Abyss Cresset which you can claim.
This is it for this guide but I hope to see you again in the next one.