
In Crimson Desert, Spire Challenges are special locations that are spread across different parts of the map. Some Spires are easy to find, but some are hidden, or you will need a mechanic to solve to enter the Spire. Completing them will unlock the abyss and also reward you with useful weapons, blueprints, and other valuable items. In this guide, we will show you all the Spire challenge locations & puzzle solutions in Crimson Desert.
All Spire Challenge Locations & Puzzle Solution
In Crimson Desert, Spires are landmarks that you will find while exploring the maps. They will help you to reach the abyss and many of them also contain some of the strongest rewards and valuables that you can collect in the game. Below is the list of all the Spires that we have found till now, and we will update this article as we get to know more about them.
Spire Of Clockwork
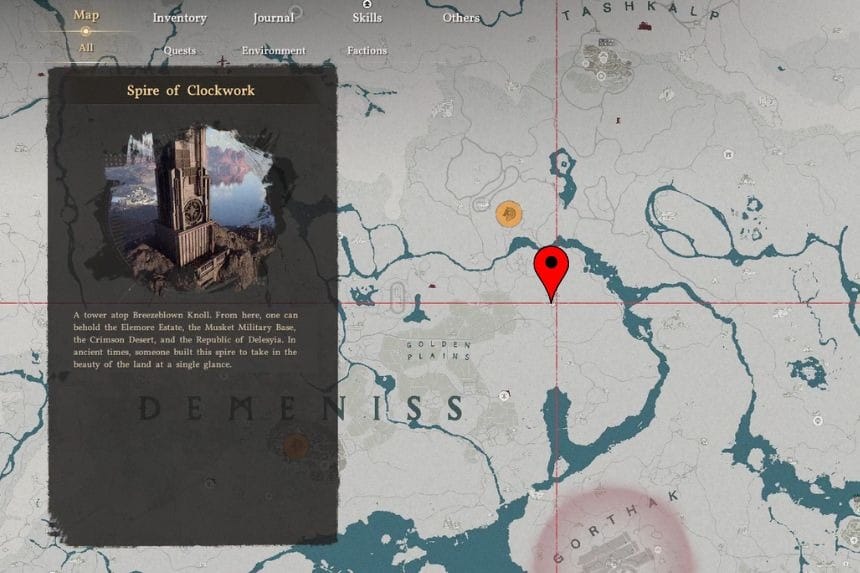
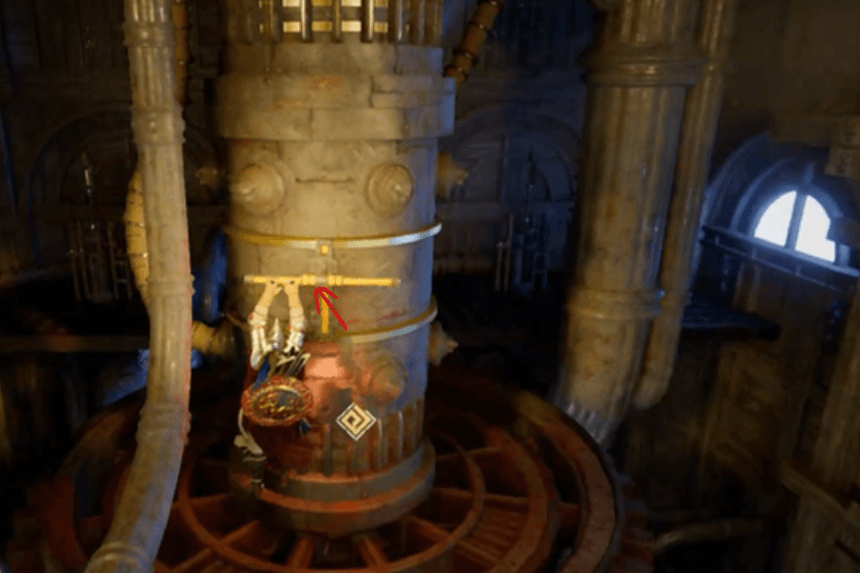
Before you can activate the Spire of Clockwork, make sure you have obtained the key for this spire, as it is obtained in the story. Once inside, head straight in and pull the lever by the entrance. After this, head towards the centre and climb up onto the next level of cogs. Once on this level, you will see another lever, and you will need to pull it.
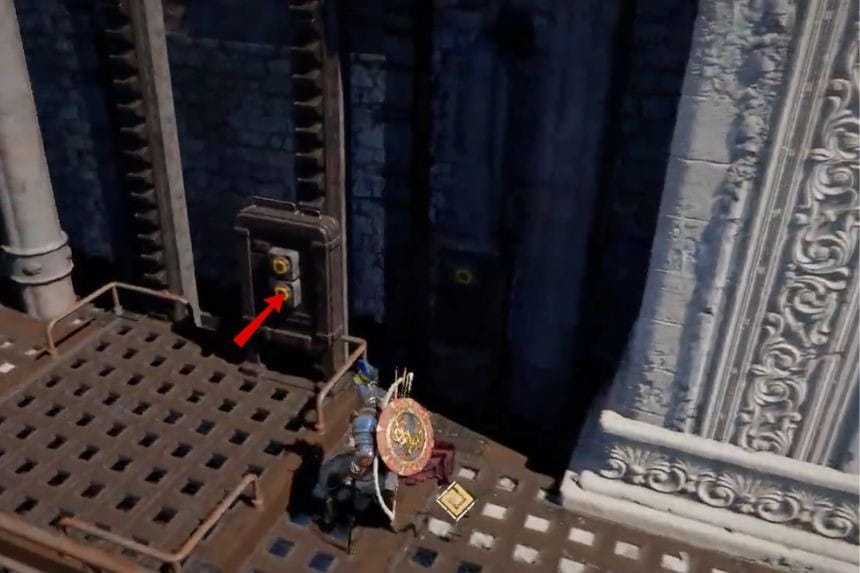
From there, continue climbing upward until you reach the top section. At that point, a path will be opened that enables you to go outside. At the top, activate the elevator that will take you to the upper platform. From there, press the final buttons to activate it.
Spire of Frost
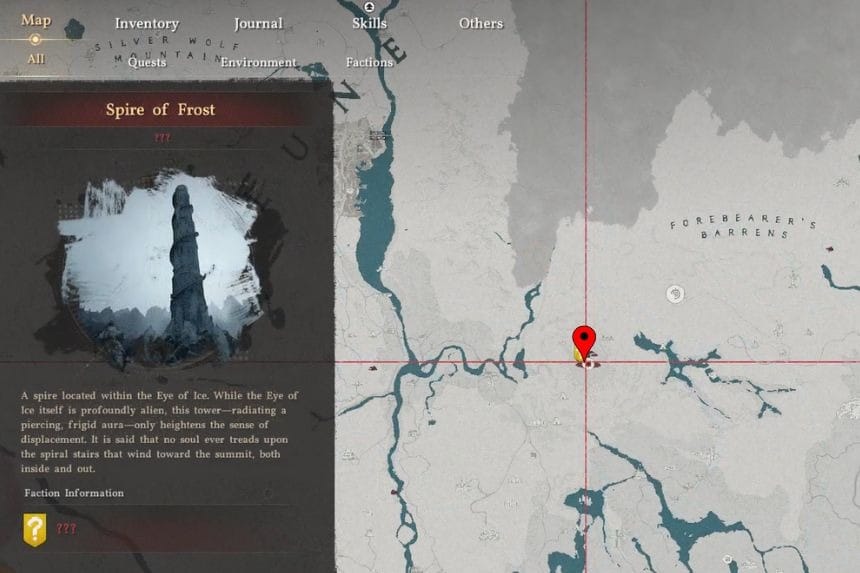
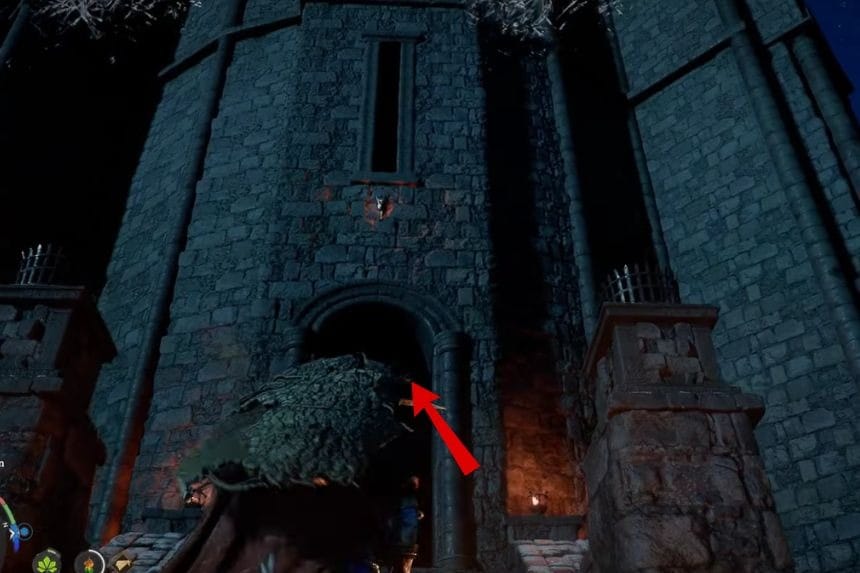
The Spire of Frost can be found along the road to the east of Beighen, north of Demeniss, and near the southeast of Pailune. If you are in the area, look out for a frosty spire along the road. To access it, look to the southern side of the spire. This is where the entrance can be found; however, it can be easy to miss at first glance.
Near the doorway, you can also find a stone lantern placed in front of it. If it’s still covered in ice, melt it first. After that, interact with it once the button prompt appears to light it. As soon as it’s lit, the doorway opens to allow entrance to the Spire of Frost.
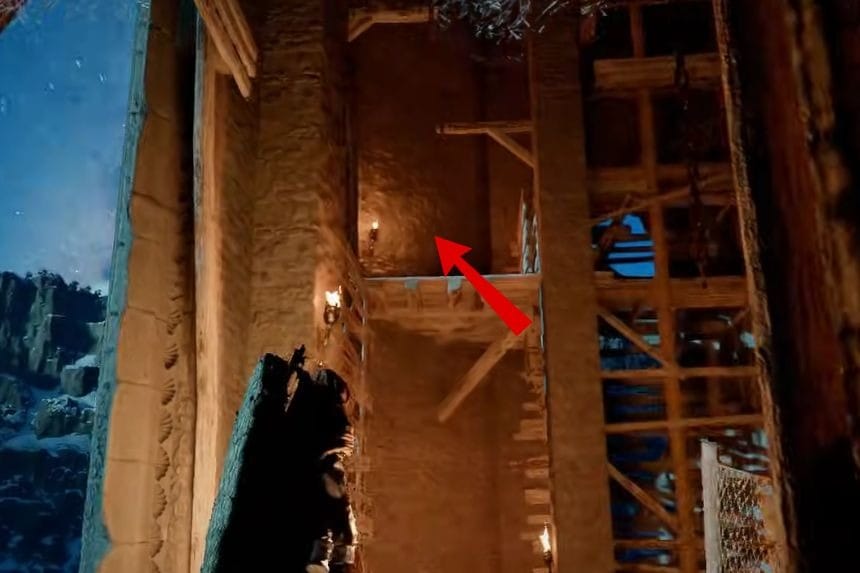
Inside the Spire of Frost, you are required to light all seven stone lanterns that are located throughout the Spire. Begin climbing up the spiral stairs, and you will reach the second stone lantern, which is covered in ice. Continue climbing up the stairs and then go right on the outer staircase. On this path, you will encounter an Abyss Cell. Continue forward and light the third lantern.
As you enter the inner section of the tower, you will continue climbing the staircase inside the tower and light the fourth lantern. When you are directed outside again by the path, you will find the next lantern placed higher up on the tower. The last lantern can be found at the top of the tower inside the last chamber. Once all seven lanterns are lit, the Spire of Frost is complete.
Spire of Insight
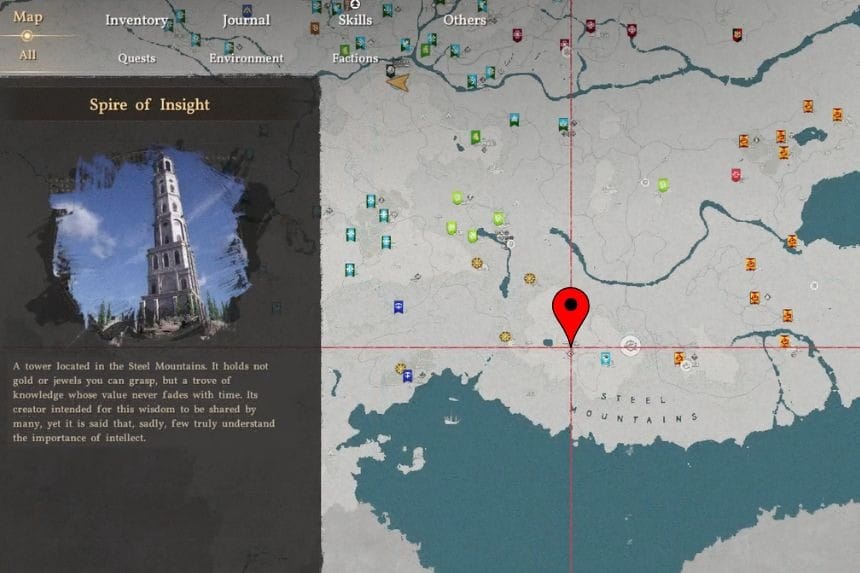
To get the Spire of Insight, you have to go south from Hernand and proceed beyond Pororin Village. A while later, you will be able to see the Spire of Insight. When you are near the Spire of Insight, the first thing you will notice is the thorny vines covering the entrance.
Take one of the small pebbles lying around and put it inside the bowl. As soon as you do so, the bowl lights up and opens the path forward in the tower. When you are on the first floor, read the riddles and take the grave stone lying around on the dresser and put it inside the bowl. As soon as you put it inside the bowl, switch the switch around it to start the lift.
At the top of the riddle, it will display three round objects. These are scattered around the room. So, collect all three of these and put them in the bowl to solve the last riddle. This completes the Spire of Insight in Crimson Desert.
Spire of Ringing Truth
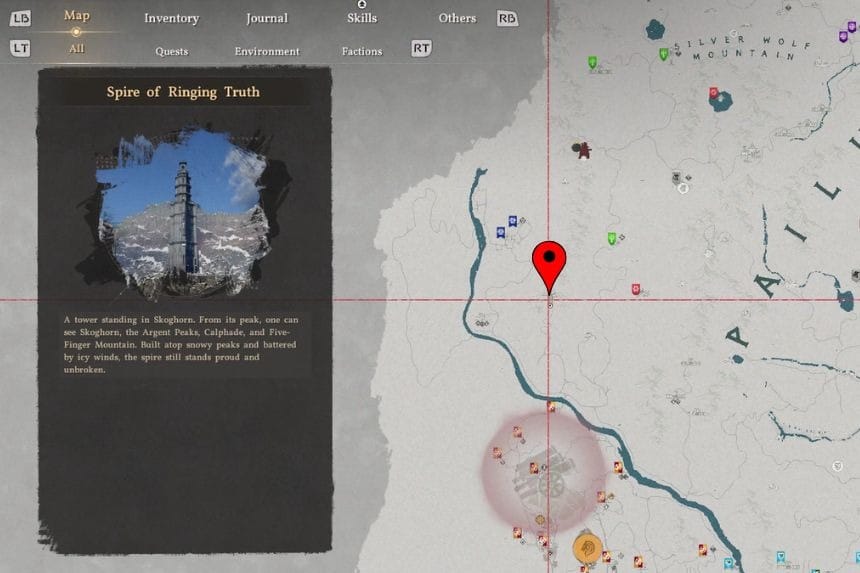
The location of the Spire of Ringing Truth is in the Five-Finger Mountain area, which is in the Pailune region. When you get inside, look for the first window that you can climb through. As you get inside, continue climbing until you get to the highest window that you can enter. When you get inside, continue climbing through the ladders on your way. After using the Axiom Force, continue climbing through the ladders and go up through the wooden planks.
Continue moving forward until you reach the top, where the bell is located. When you get there, hit the white wooden support attached to the bell, which will break, causing the bell to fall and smash the debris that is blocking your way to the basement. After that, jump down to the area below, where you need to fight Priscus the Ancient.
Spire of Soaring
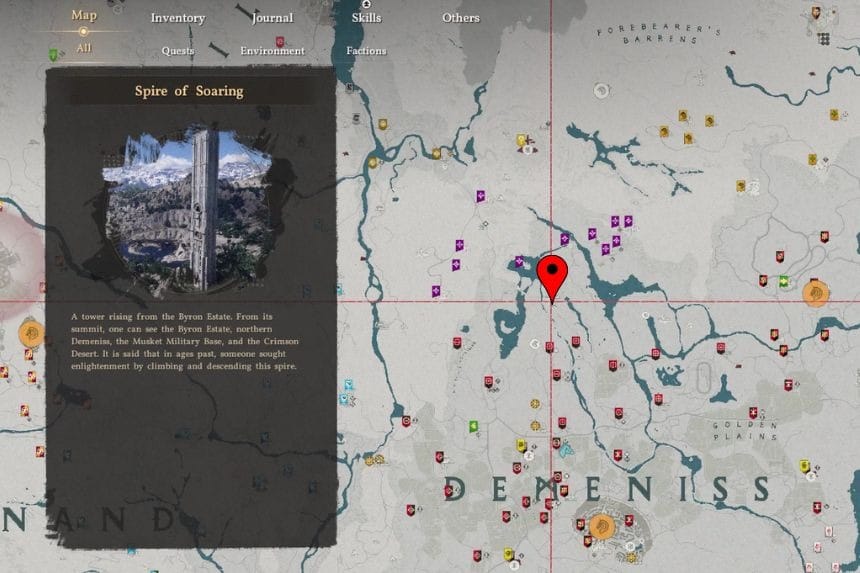
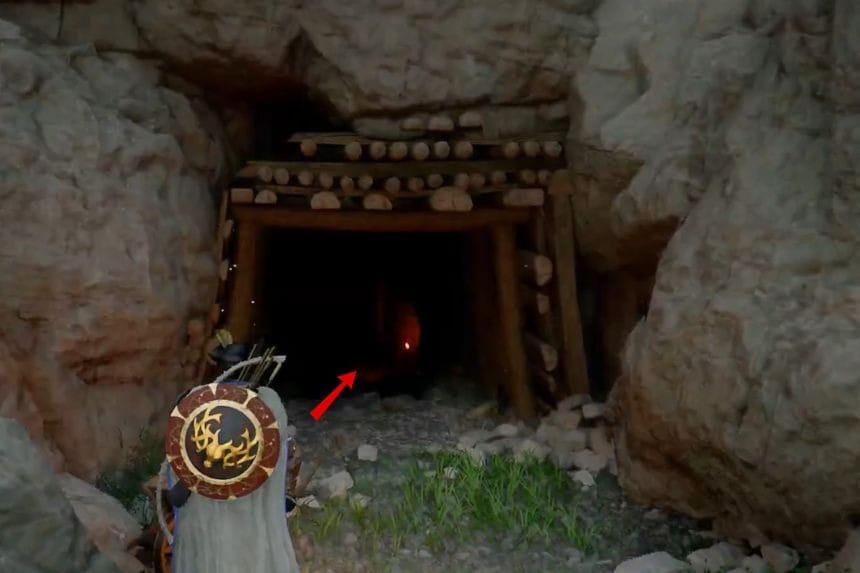
The spire is visible up on the mountain, but the real entrance is through a cave located to the southeast of the spire. Instead of climbing directly toward the tower, head down and look carefully for the cave opening in that direction. Once you find the cave, follow the path inside, and it will lead you directly into the Spire of Soaring.
Spire of the Stars
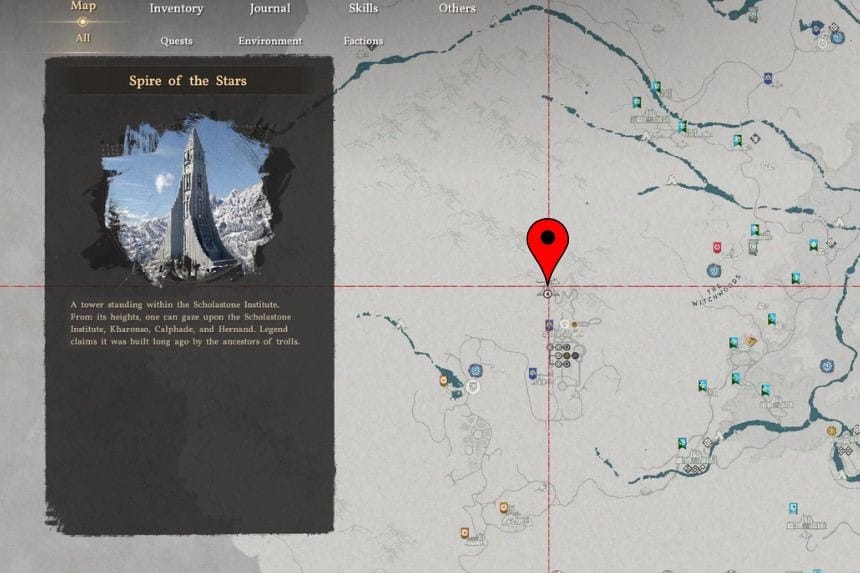
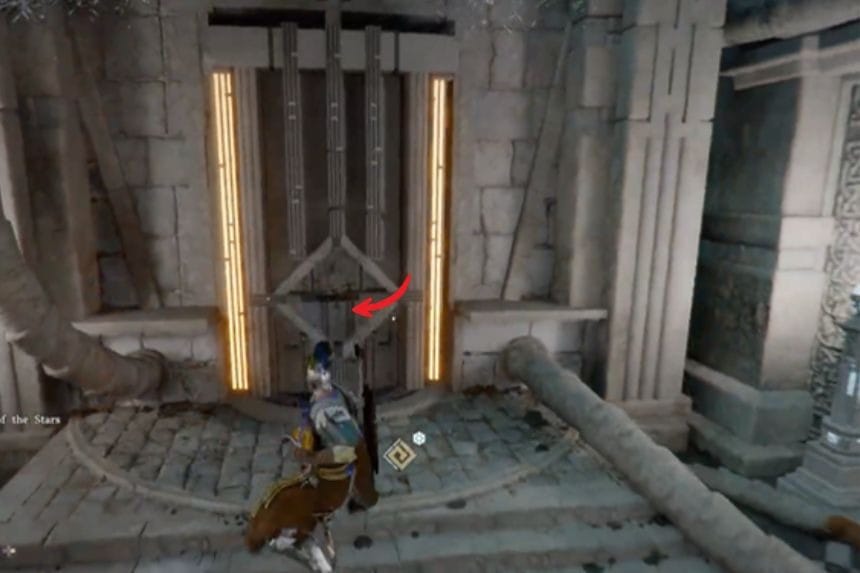
Check all four corners of the room. In each corner, you will find a small device. Use your focus punch to smash them. In three of the devices, you will find cubes, so you will only need to pick up the three missing cubes. Once you’ve picked up the cubes, you can then put them in the empty slots near the centre of the puzzle area. Once all slots are active, you can adjust the pillars.

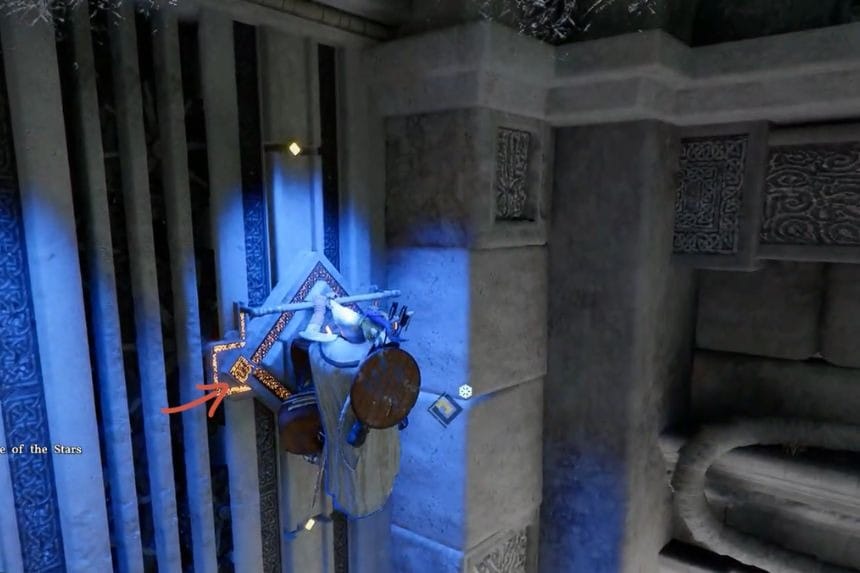
Now look at the symbols shown on the wall. Each symbol tells you where its matching pillar needs to be placed.
- The circle symbol needs to be raised to the highest position first. After lifting it, climb up, hang from the edge, and drop it down until it reaches the third slot.
- The next symbol should stay at the lowest level, so if it is already there, you do not need to change it.
- The infinity-shaped symbol needs to be moved all the way to the top position.
- The last symbol must also be adjusted until it matches the wall marker.
When every pillar is in the correct place, the whole room lights up. At that point, the elevator activates, and you can ride it to the top to continue.
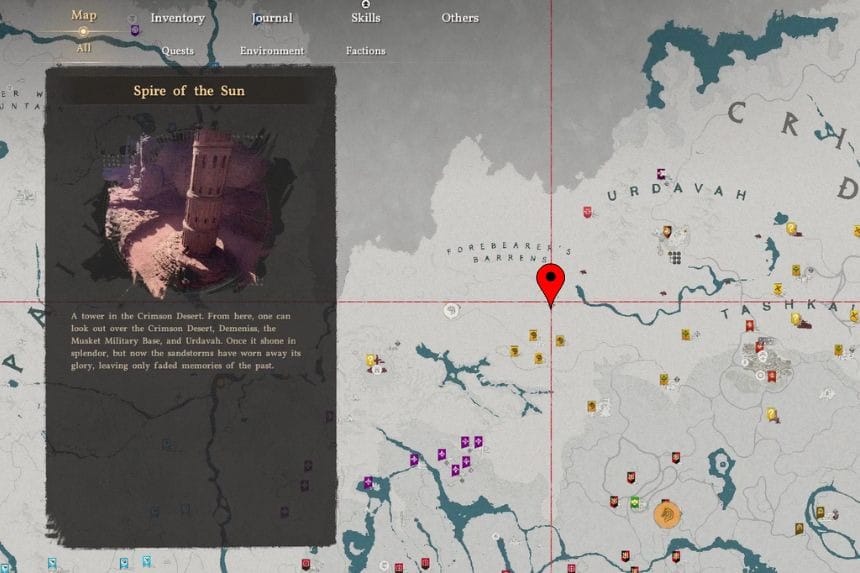
Spire of the Sun
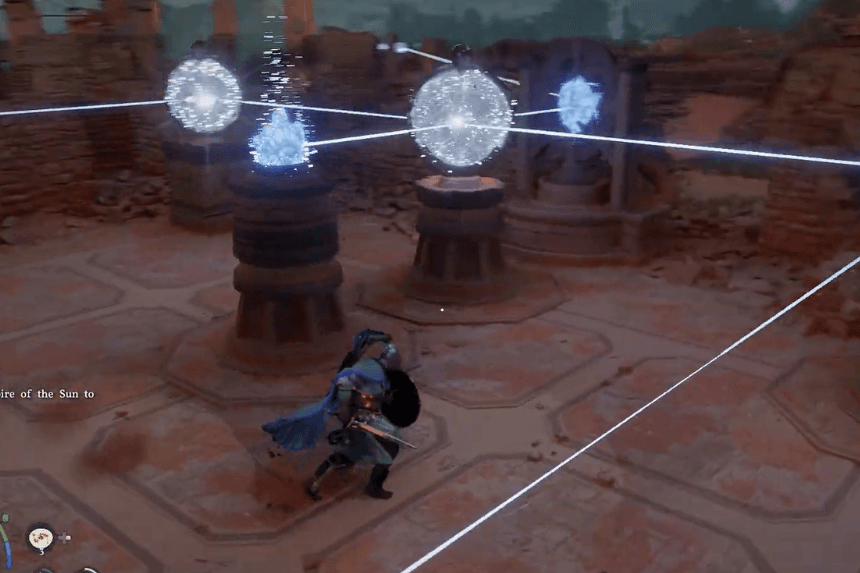
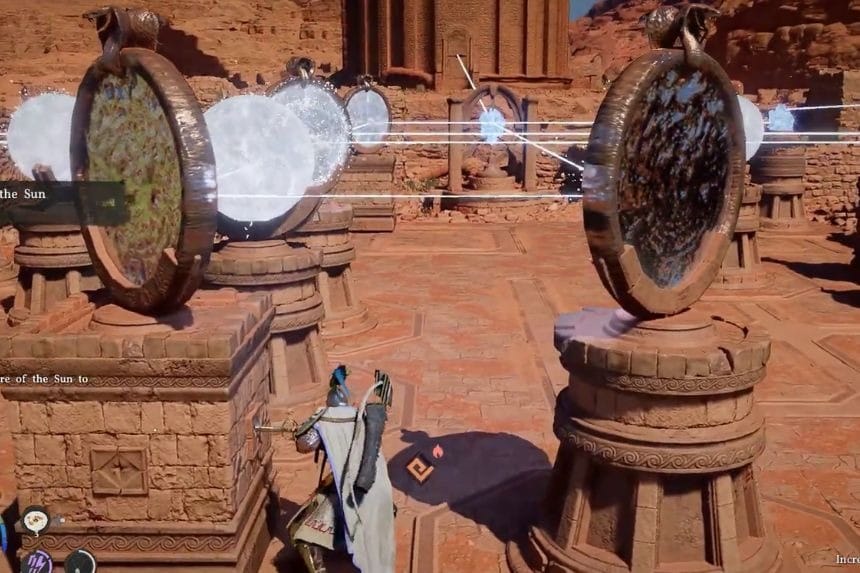
To move the mirror platforms, use your thrust attack on each of them. Each time you hit it, it will move into a different position. In the first part of the level, move one of the mirrors to one of the corners and the other mirror to the opposite corner. This will align the laser beam and open the rest of the puzzle.
In the second section:
- First, move one mirror into the correct middle position so the laser reflects through several mirrors.
- Then place another mirror nearby to keep the beam moving forward.
- Next, position the two side mirrors so they continue guiding the light across the room.
- Finally, move the last mirror at the back so the laser travels upward and hits the final gem.
Once the beam reaches the crystal, the puzzle is complete, and the next area opens.
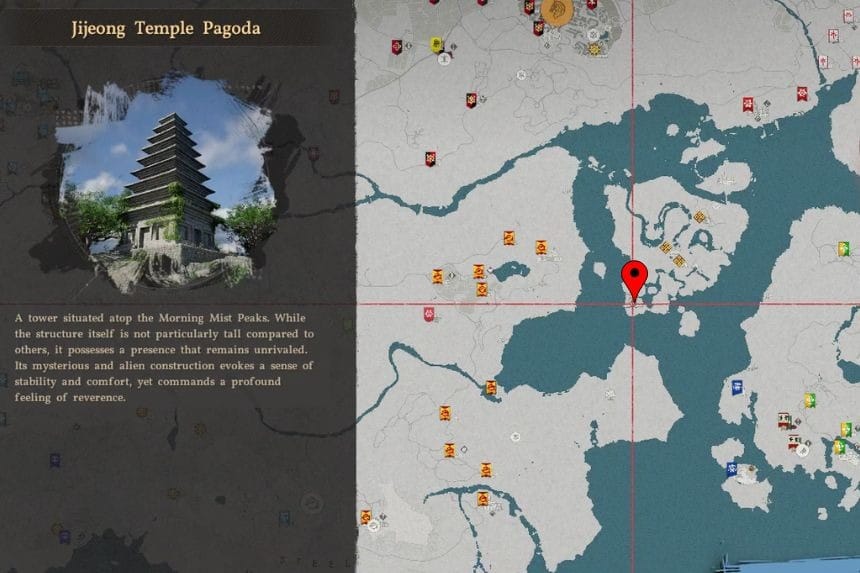
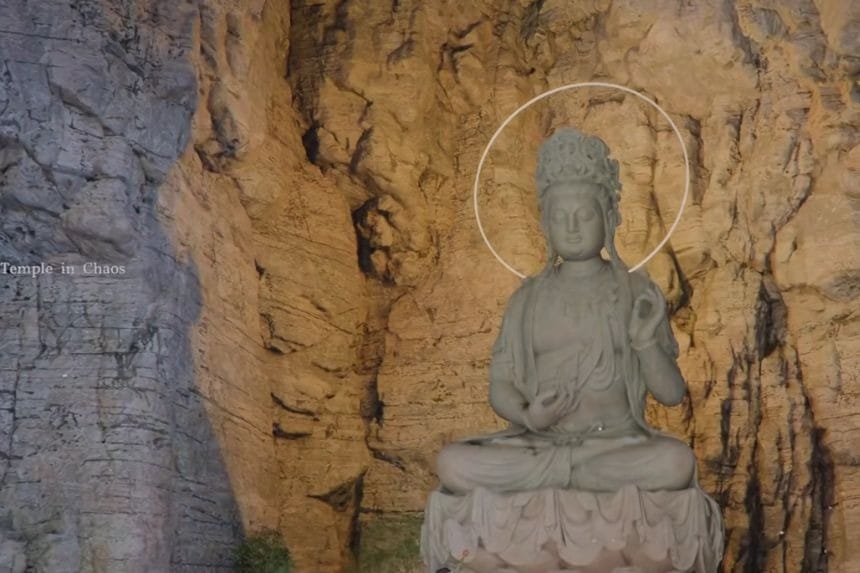
Jijeong Temple
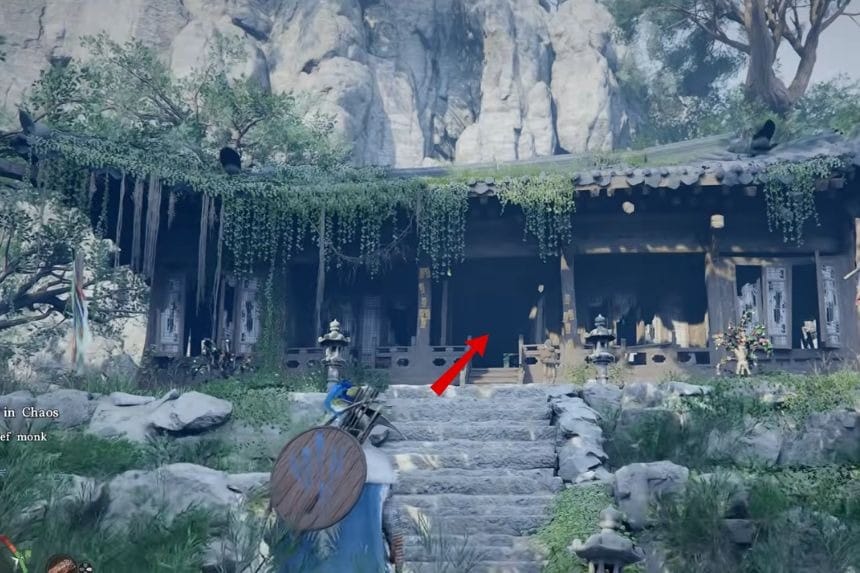
To complete the Temple in Chaos, you must repair three statues after talking with the monk inside the hut. First, you must leave the monk’s hut and go towards the first statue.
First Statue
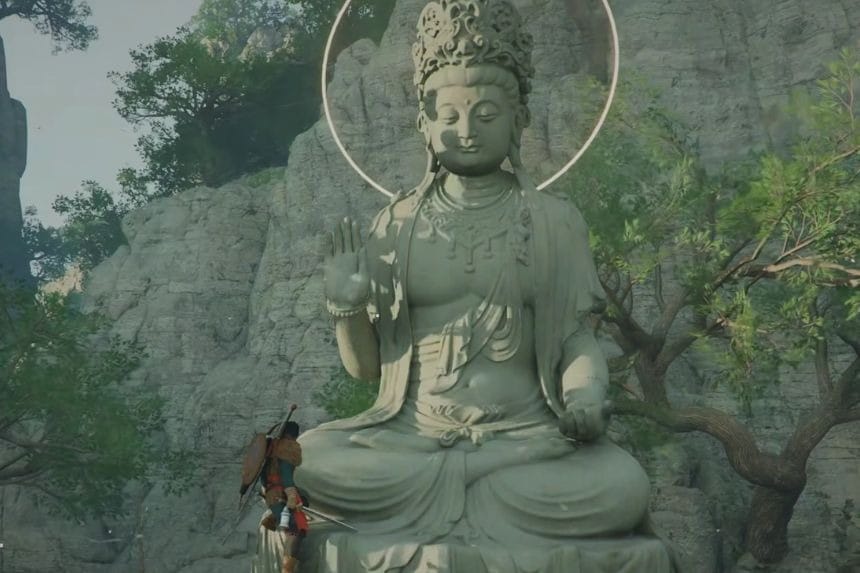
The first statue has two hand pieces to be fixed in the right position. Take the first hand and line it up by checking the thumb position.
The second hand is located on the other side of the room. Before you attach both hands, you should ensure the statue is fixed correctly on the base. If the statue is not fully fixed in place, the hands will not be able to connect.
One hand should have the thumb facing the right direction, while the other should have the exact pose required by the statue. Be careful as you climb the statue since the floating hand pieces should not be touched, as this will cause them to detach and require you to restart.
Once both hands are attached correctly, a cutscene will start, and the first statue will be complete.
Second Statue
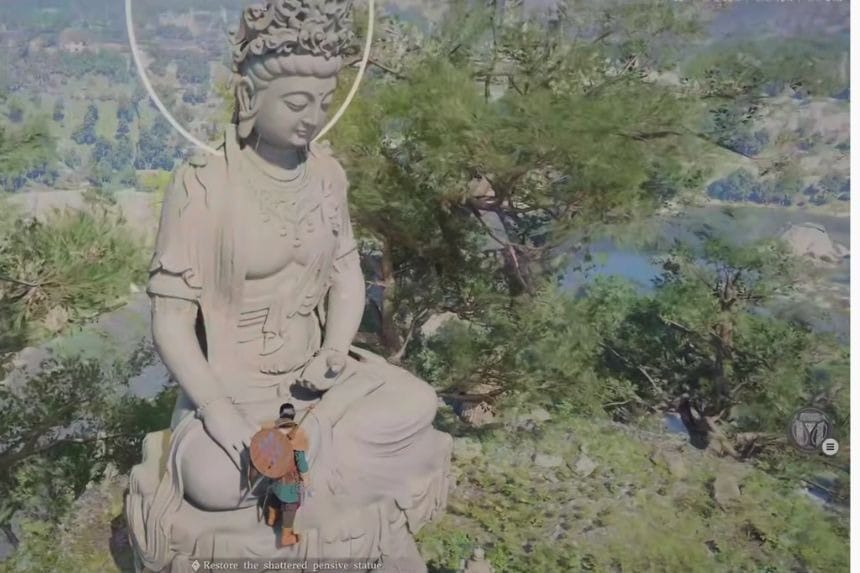
As you approach the second statue, the pieces are scattered around the area but are shown on the mini map, making it a bit easier to locate them. Take the one on the lower ledge and move it to the top.
The main body of the statue is hanging near the trees. Carefully place it on the base and ensure it is facing the right direction before releasing it. When the statue is secure on the base and no longer floating, use the jump ability to reach the top of the head of the statue. Ensure the statue is no longer floating before moving on to the hands.
First hand should be facing the right direction for the thumb, and the second hand should face upwards. If everything is facing the right direction, the second statue should move.
Third Statue
A staircase runs all the way up, but the entrance is near the water, so you need to glide across carefully to avoid losing too much stamina. The pieces are scattered near here, so collect them before moving them into place. If a hand does not fit, turn it slowly until it matches the required angle. Once the last statue is repaired, the Temple in Chaos puzzle is complete.