
Chapter 9, The Ancestral Forge, has many hidden places filled with gold, special items, and a collectible tos. If you look closely and explore carefully, you can find secret paths, breakable walls, and locked gates that lead to valuable rewards. This guide will help you find all nine secret areas and a collectible toy step-by-step.
All Secret Areas & Collectible Locations in Chapter 9
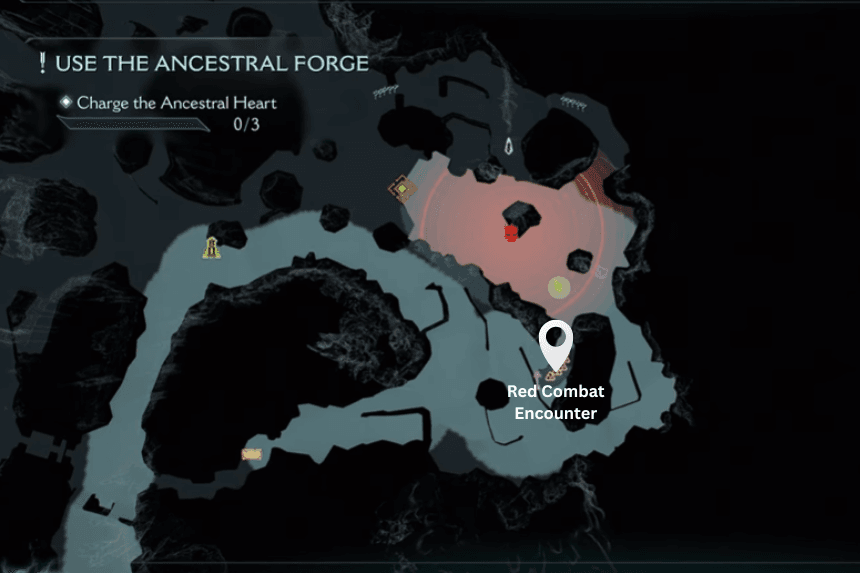
Chapter 9 of Doom: The Dark Ages has a total of nine Secret Areas. In these hidden spots, you’ll find things like Collectible Toys, Rubies, and other cool rewards.
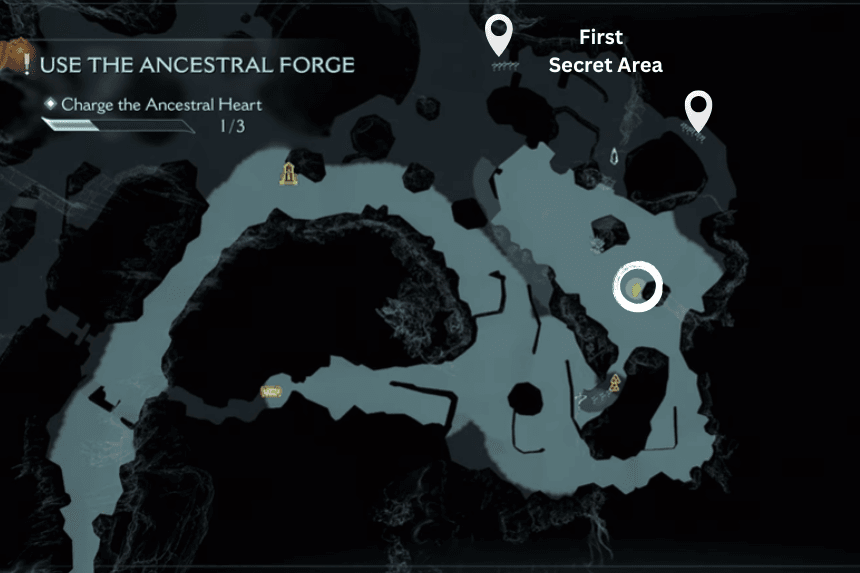
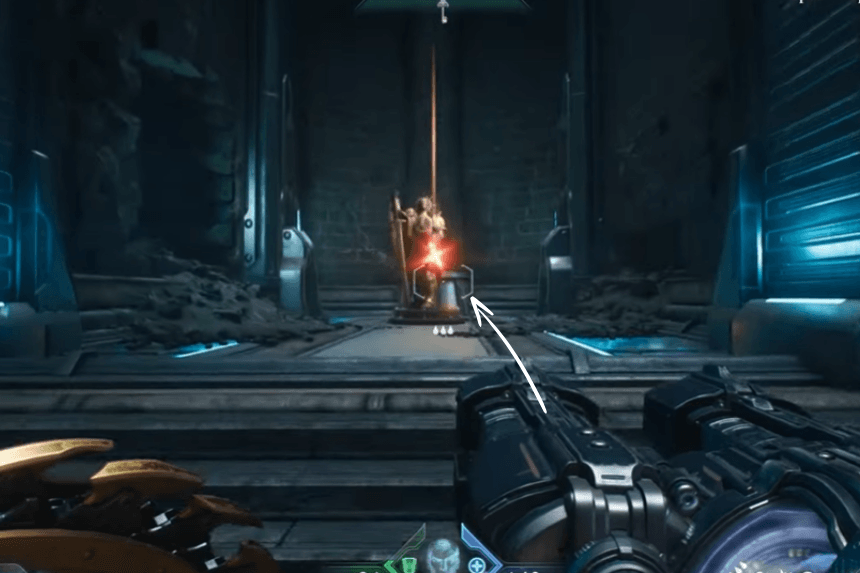
1. First Secret Area
Click on the images to enlarge
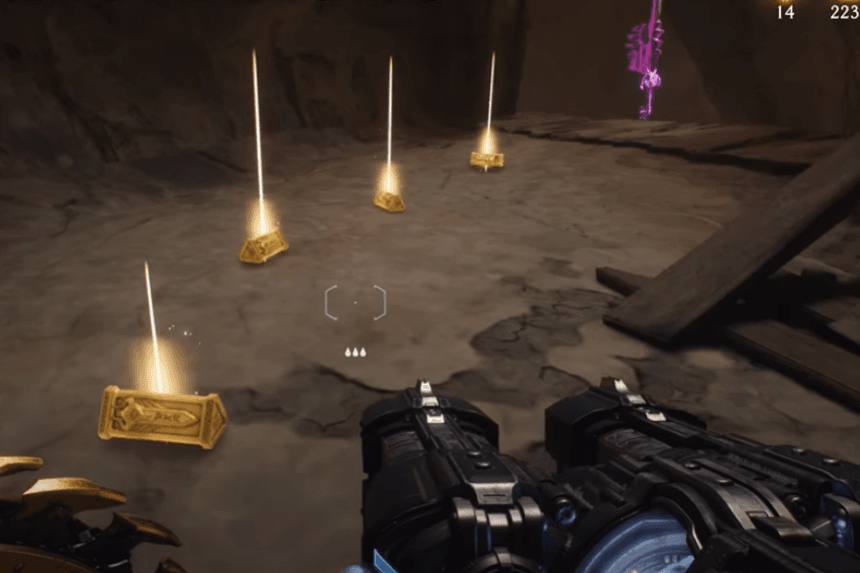
Turn around and go back the way you came after completing the first red combat encounter. A breakable wall will appear; destroy it with your shield. There are five gold coins and the secret key within. Drop down and proceed straight ahead from there. A gate will appear, which you must open to reveal a crate of fifty gold.
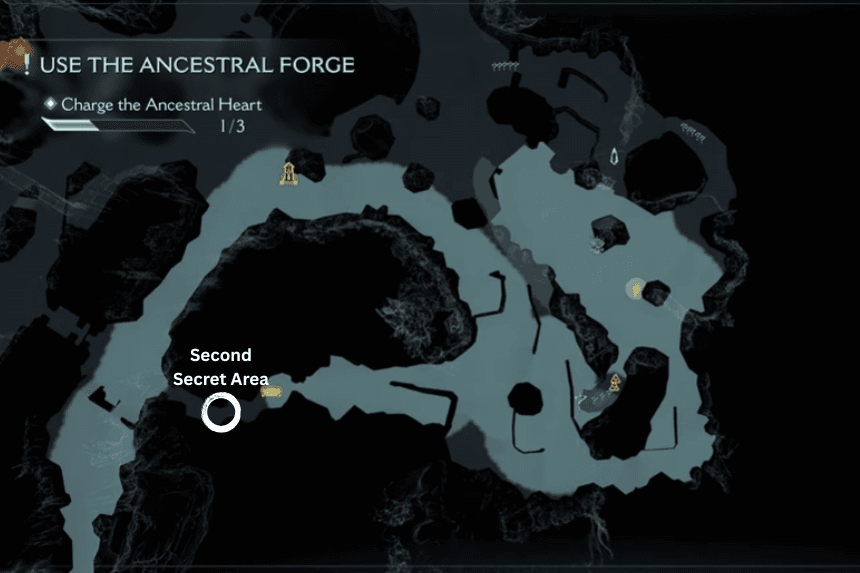
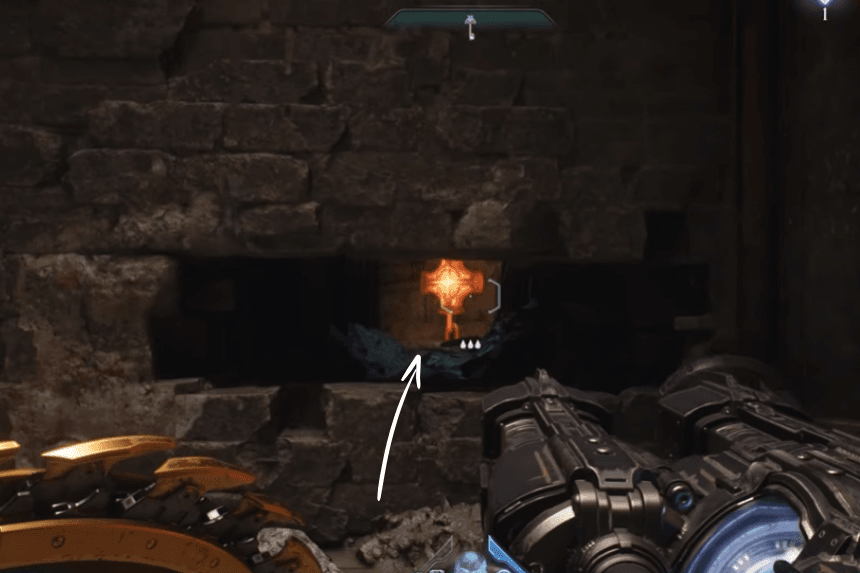
2. Second Secret Area
Click on the images to enlarge
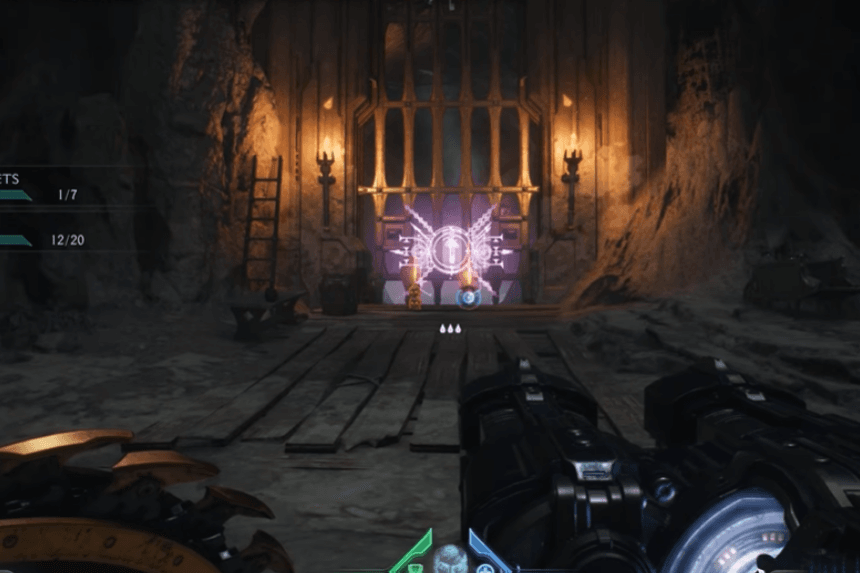
From the beginning of the level, follow the road until you come to the Sentinel Shrine in the middle. There is a gate nearby that you can open using a secret key. You must toss your shield at the wolf statue behind it in order to destroy it.
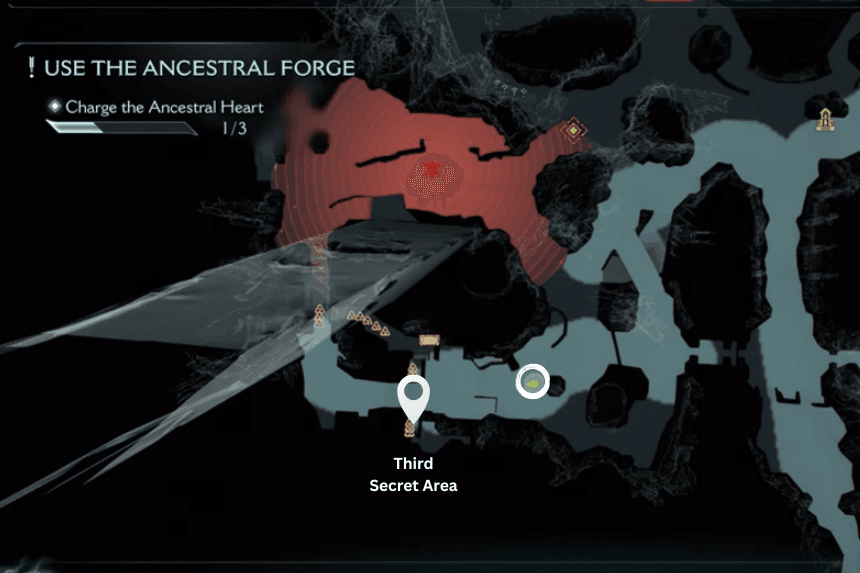
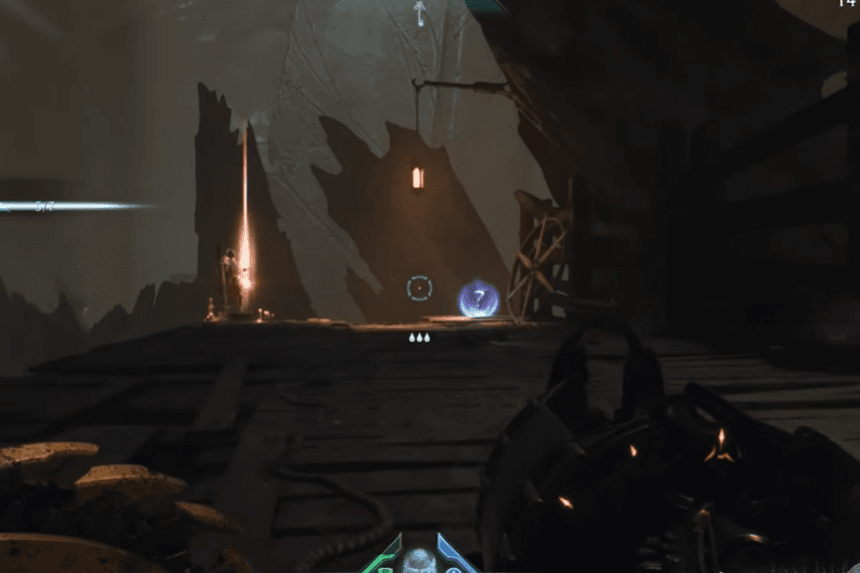
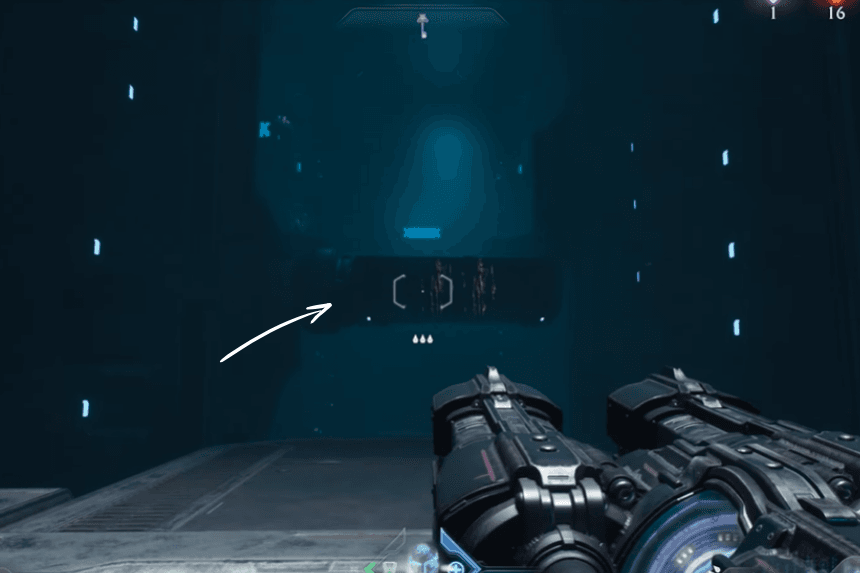
3. Third Secret Area
Click on the images to enlarge
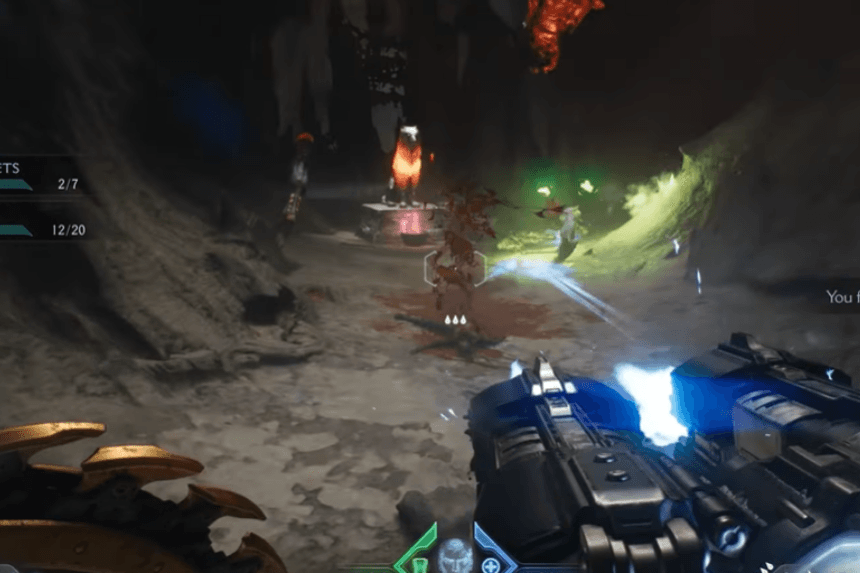
Follow the passage to the lower left from the Ancestral Heart. You will see the green corpse there. Then throw your shield at it. You can then pick up six gold by moving higher.
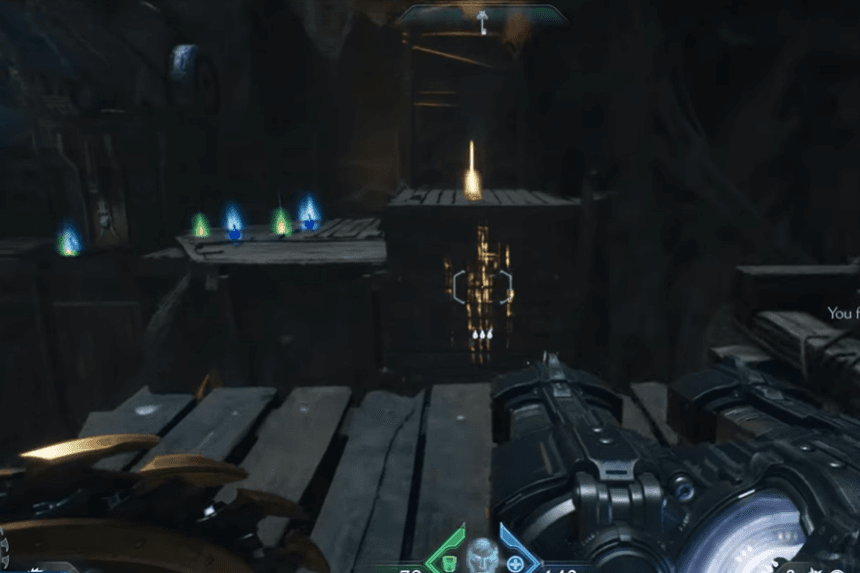
4. Fourth Secret Area
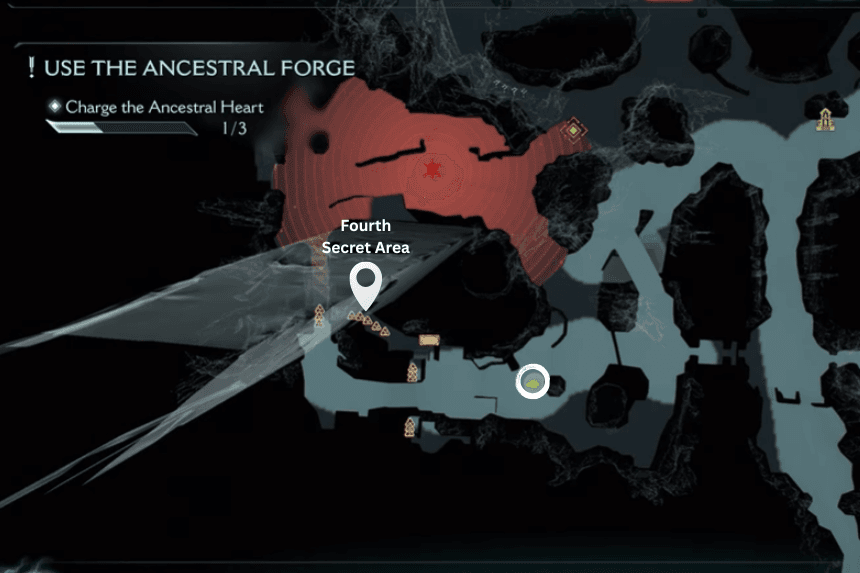
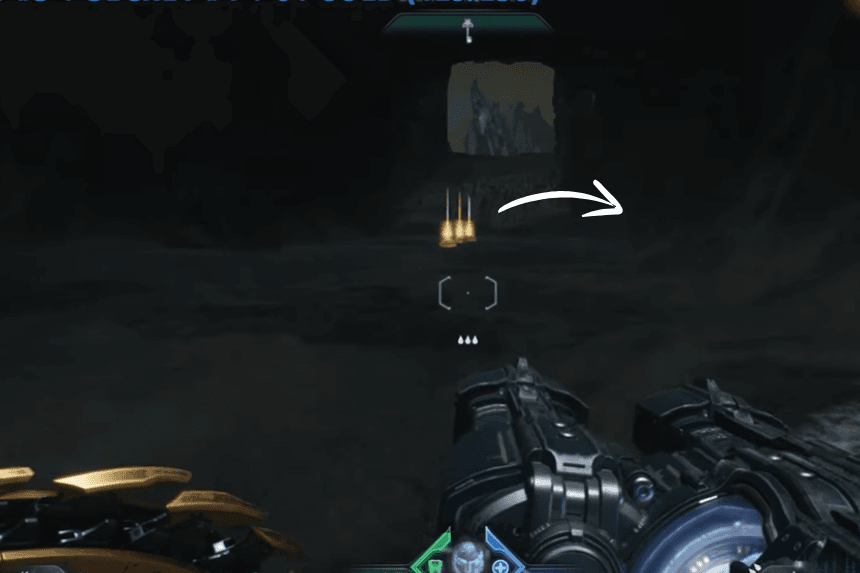
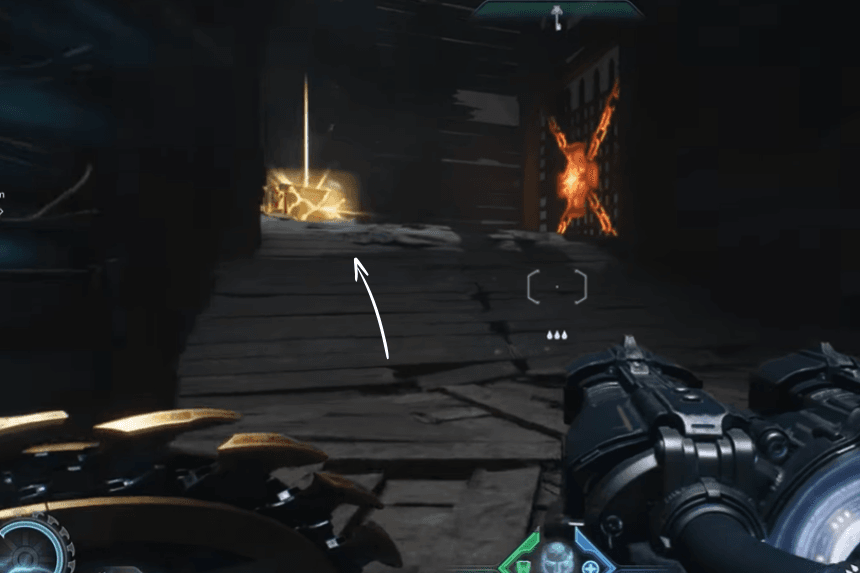
Click on the images to enlarge
You will encounter three gold along the route if you continue on. Next, find five more Gold by dropping to the right, which will take you to a chest with fifty Gold.
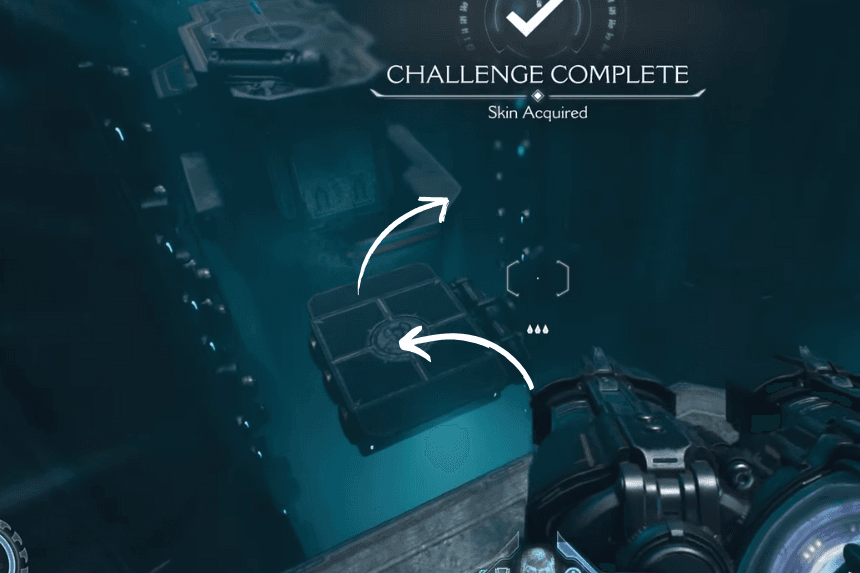
5. Fifth Secret Area and Collectible Toy

To get to the top, climb the platforms and open the Secret Key gate. A ruby and a collectible toy can be found there. Here, you will face many enemies.
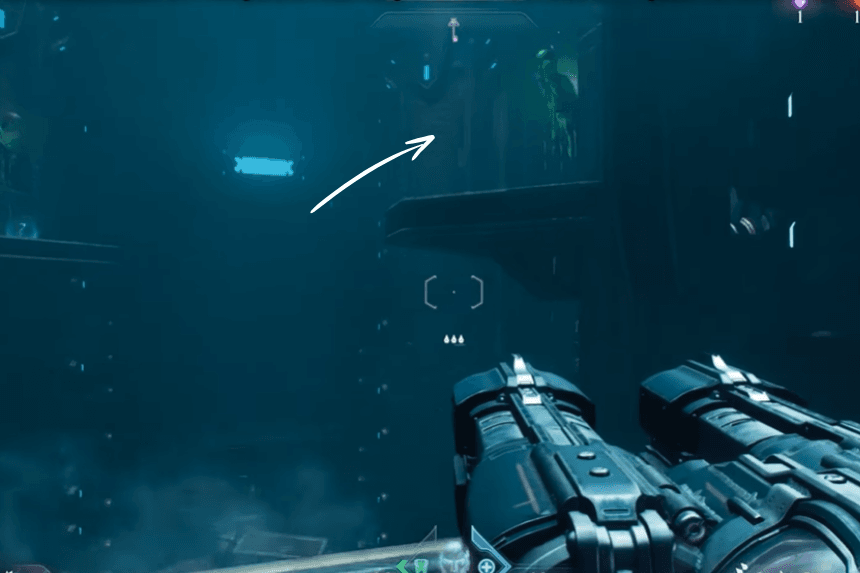
6. Sixth Secret Area
Click on the images to enlarge
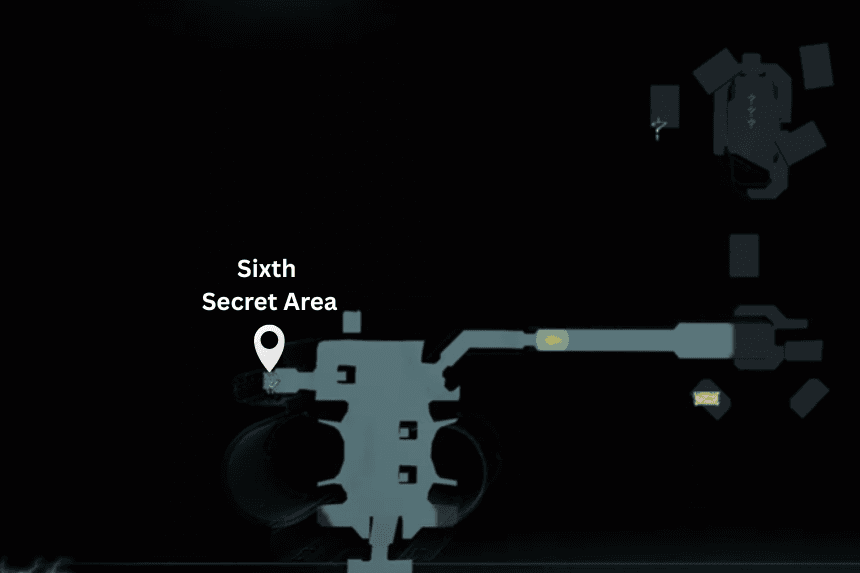
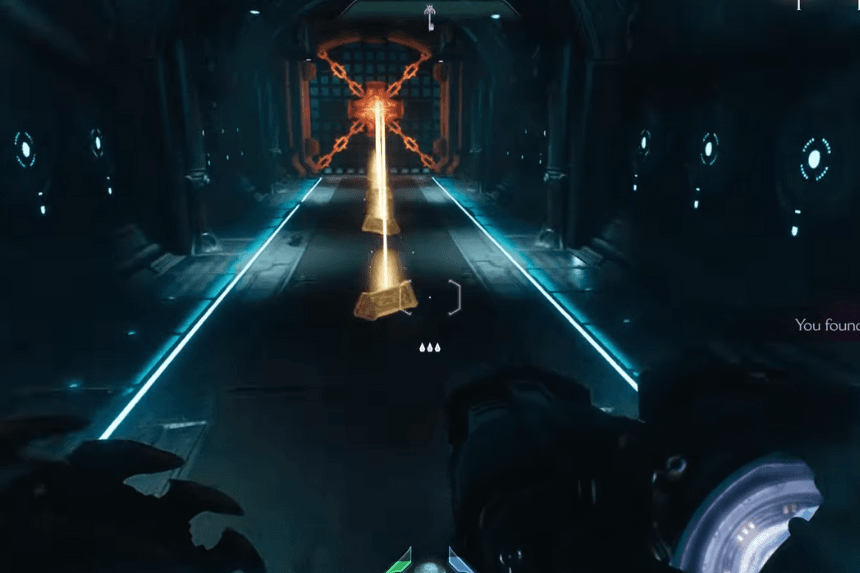
Go right ahead after descending the elevator into the Ancestral Forge. Use your shield to crush the breakable wall on your left before you enter the tunnel. To obtain the Ruby, throw your shield at the orange chain within the gate.
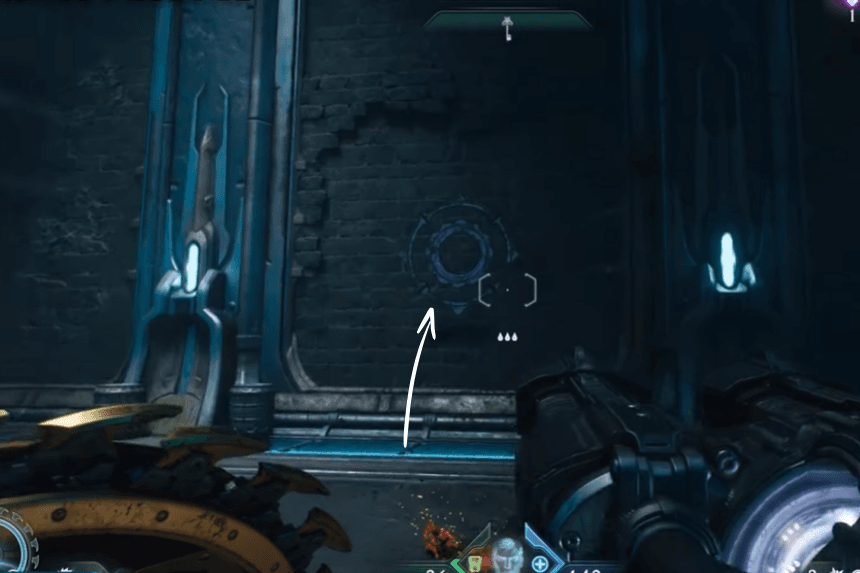
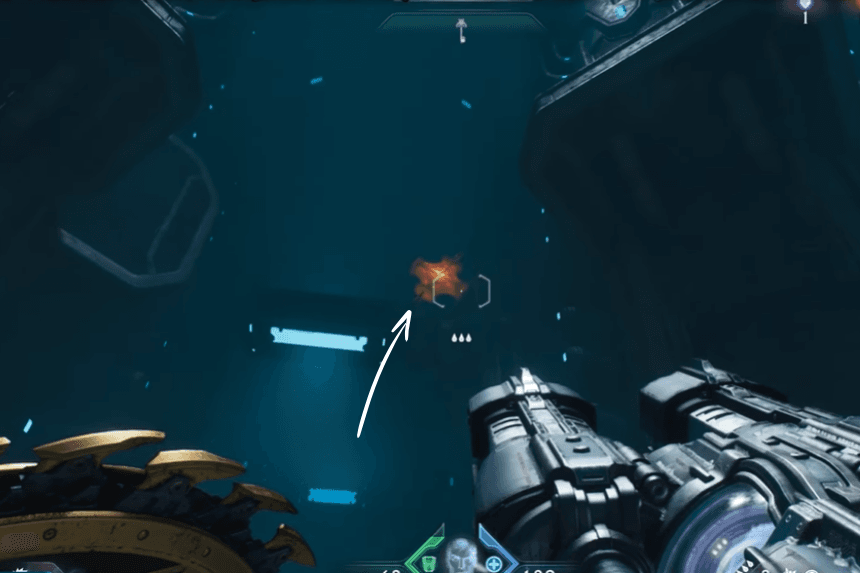
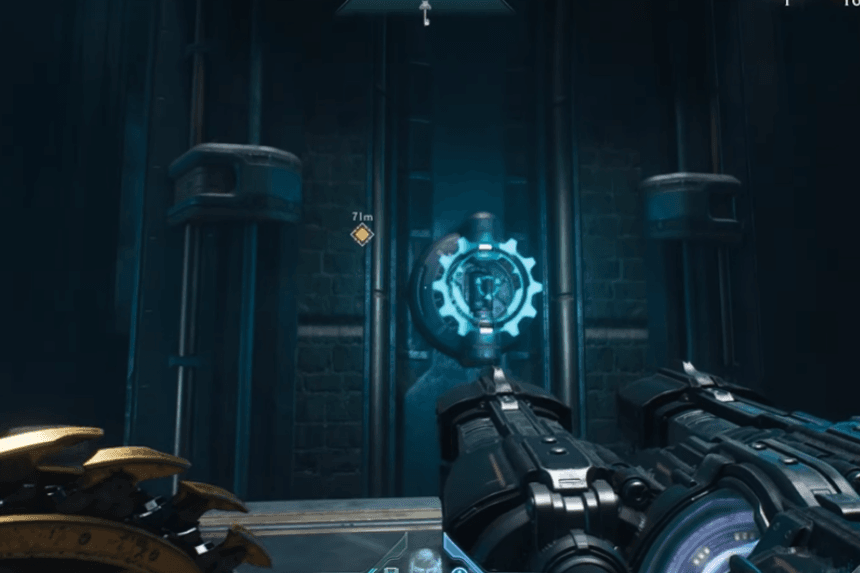
7. Seventh Secret Area
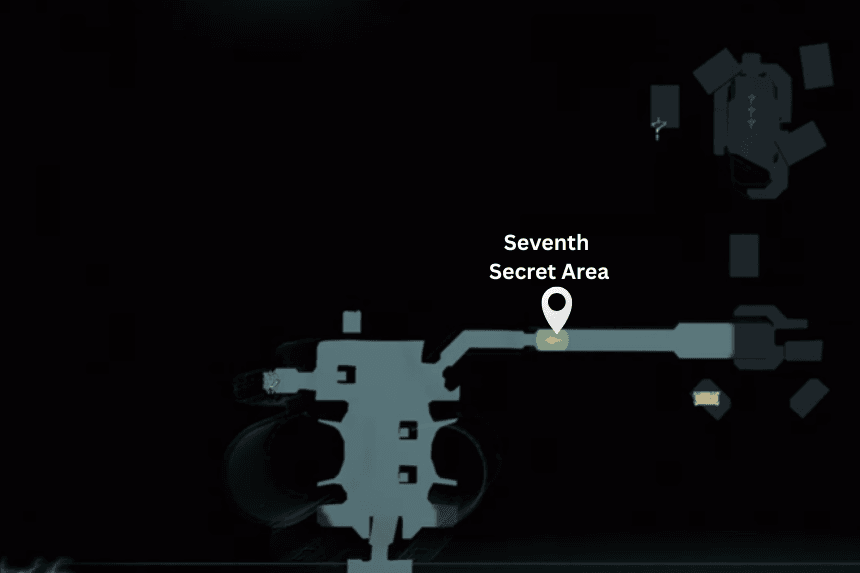
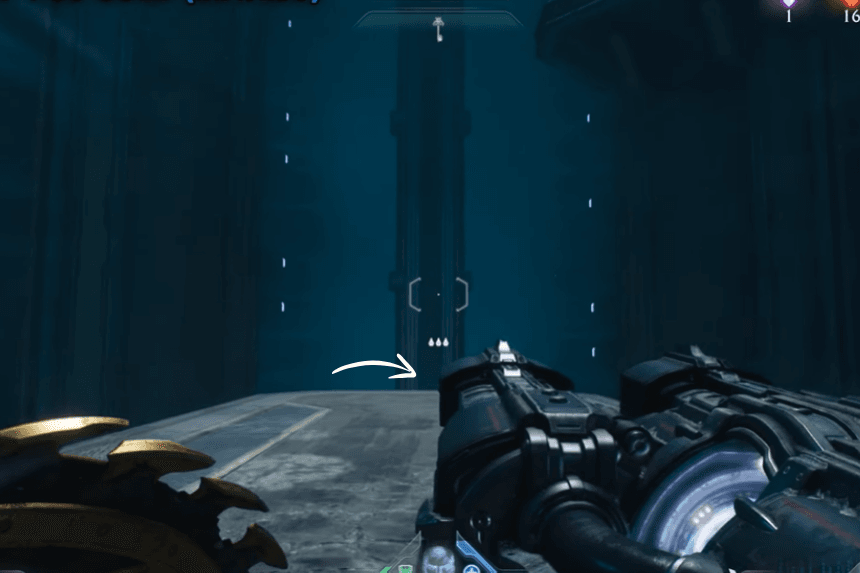
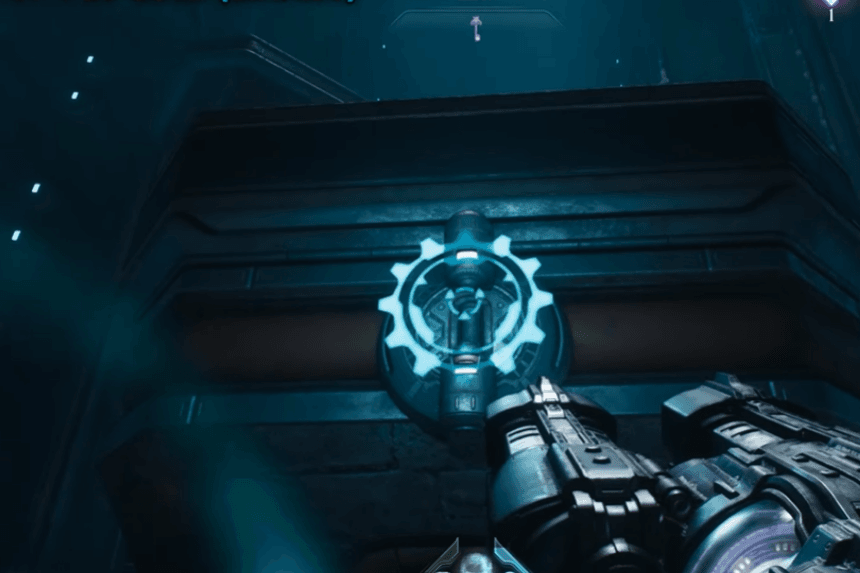
Head straight into the tunnel, then descend from the ledge. Throw your shield at the blue gear you’ll notice when you turn around. By doing this, the platform will rise, enabling you to leap to a chest containing 50 Gold.
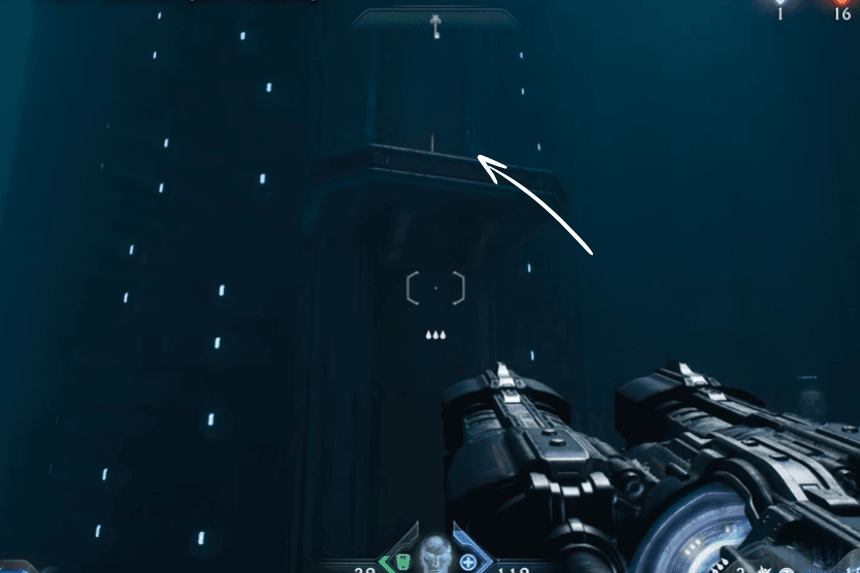
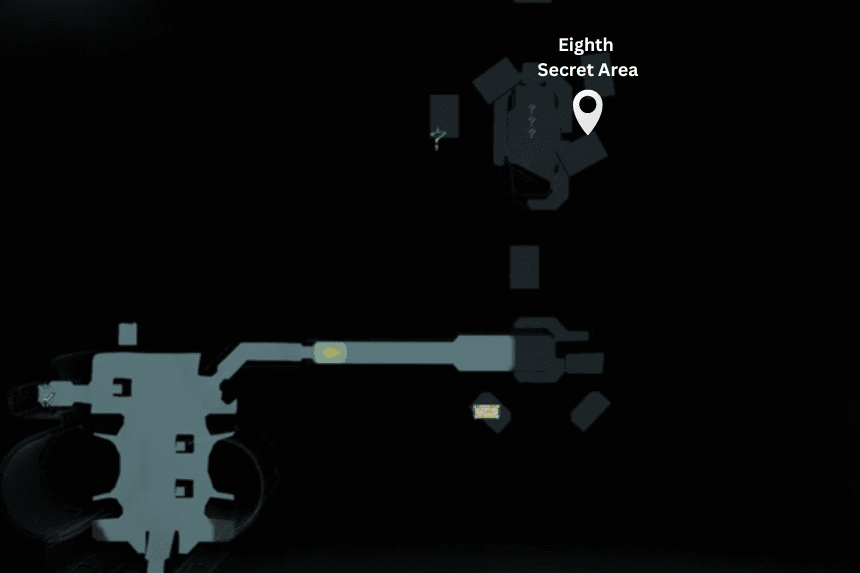
8. Eighth Secret Area
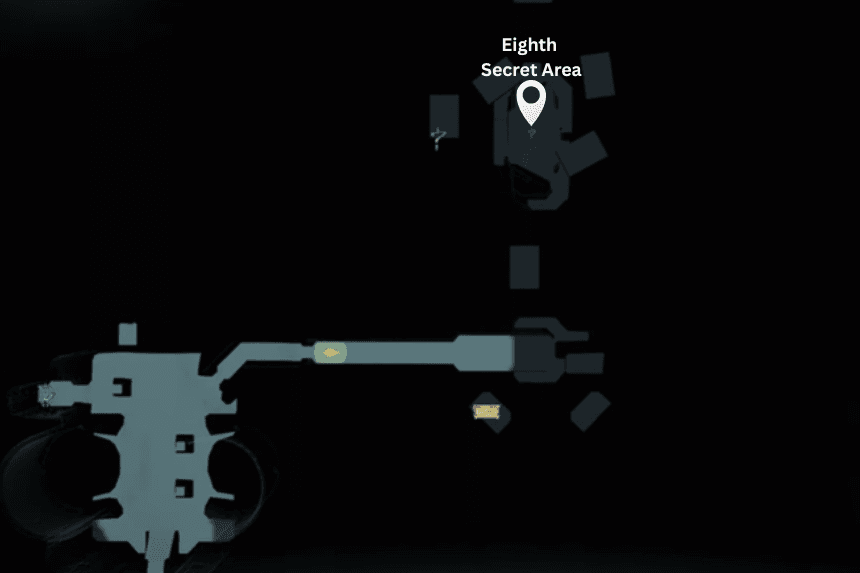
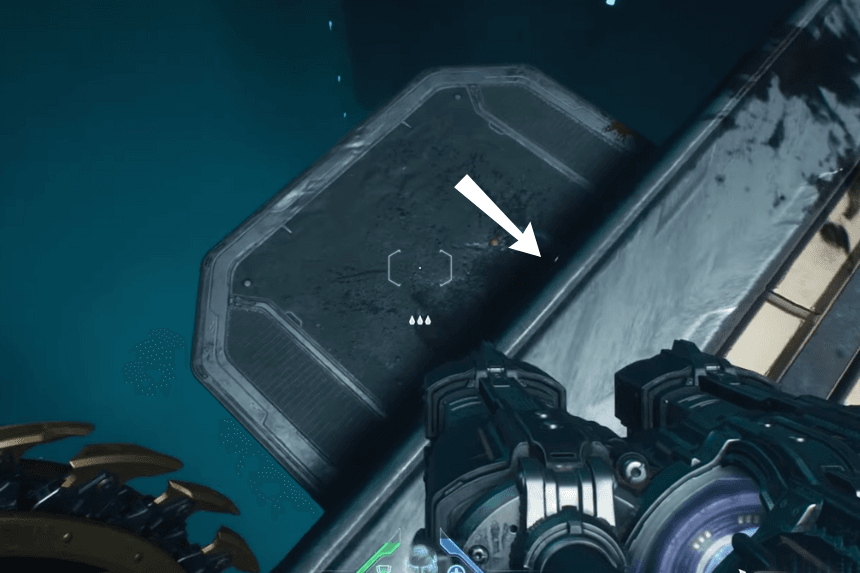
Continue across the platforms until you reach a little wall that you must scale. You can descend the ledge directly in front of you to reach a secret platform that contains the final six Gold.
9. Ninth Secret Area
You can break an orange chain if you climb to the top of the platform and look up. Jump over to an adjacent blue gear after breaking the chain. Raise your platform and charge it with your shield. Then, leap to the ledge where the orange chain snapped.