
Red Dead Redemption 2 has several treasure map chains that lead you to hidden valuables across the world, each offering big rewards like gold bars, cash, and rare items. In this guide, we will show you all treasure map locations & solutions in Red Dead Redemption 2.
Treasure Map Locations & Solutions
The Jack Hall Gang, High Stakes, Landmarks of Riches, and Poisonous Trail maps each send you through multiple locations, ranging from Caliban’s Seat and Cotorra Springs to Barrow Lagoon, Mount Shann, and the deep caves behind Elysian Pool, eventually rewarding you with piles of gold bars.
Other standalone hunts include the Sketched Map near Annesburg (leading to a gold ingot), the Torn Treasure/Mended Map that reveals Ottis Miller’s Revolver in Rattlesnake Hollow, and the Elemental Trail, available only in the Epilogue, ending at Coot’s Chapel with horse items and a gold bar. Finally, the Le Tresor Des Morts map, found in Limpany and solved in Saint Denis, grants several gold bars as well. These treasure hunts offer some of the richest rewards in the game.
The Poisonous Trail Map 1
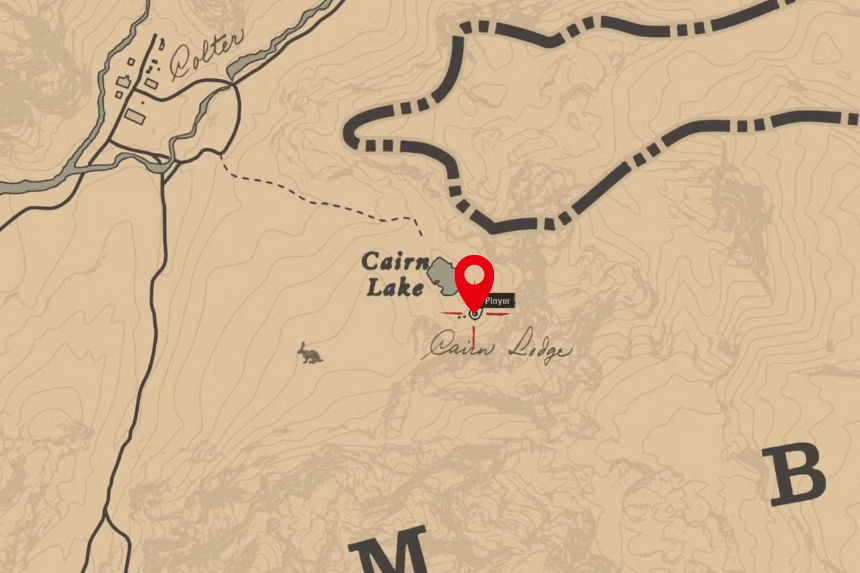
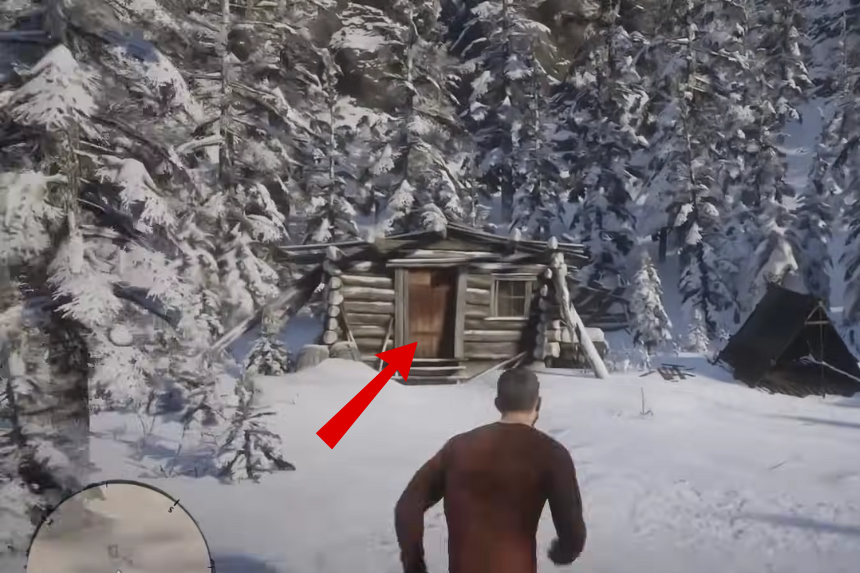
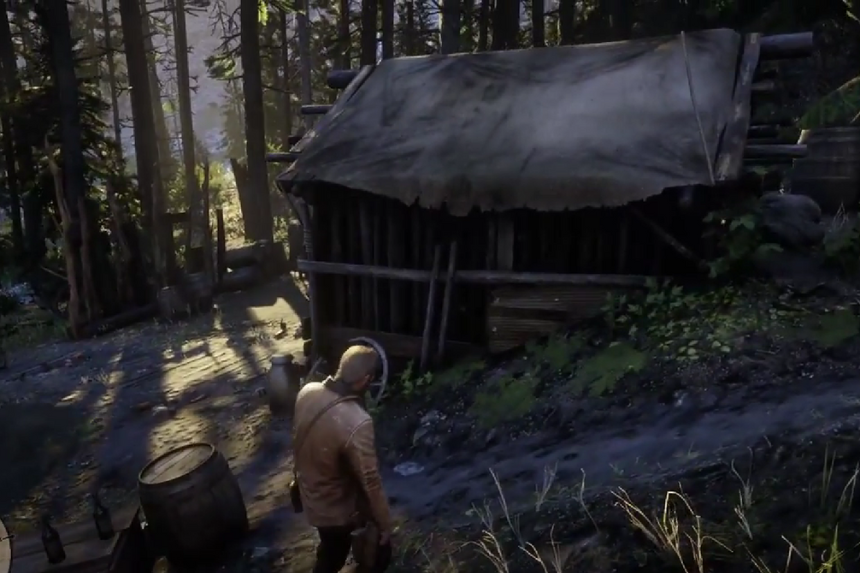
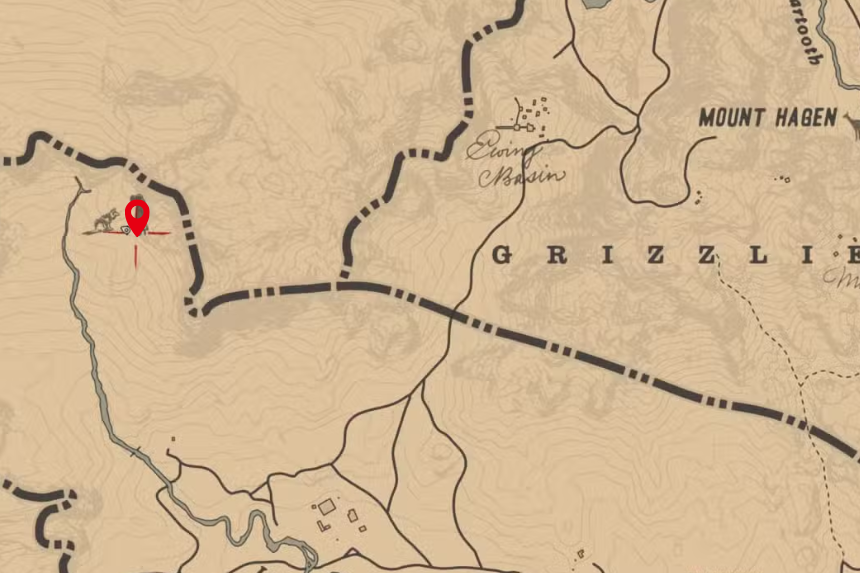
Go to Cairn Lodge at Cairn Lake, east of Colter. Inside the cabin, check under the bed for a lockbox containing the first Poisonous Trail map.
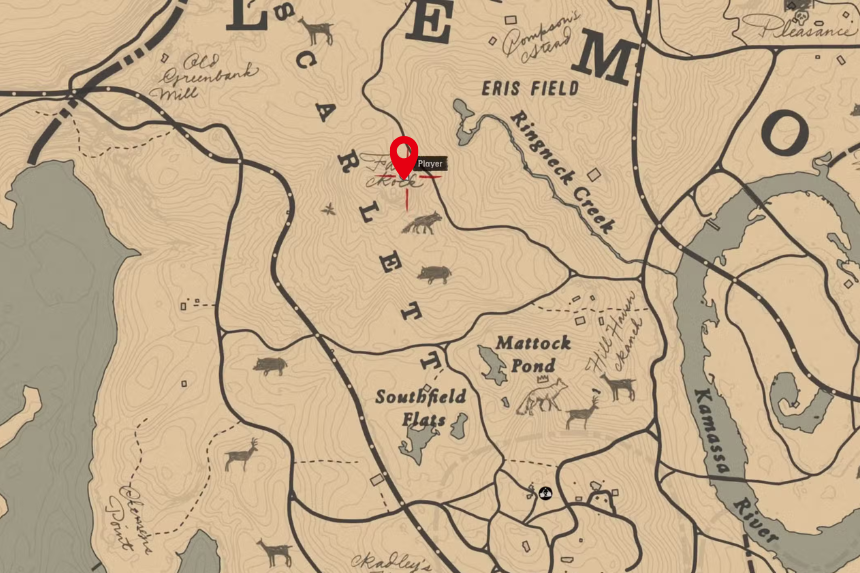
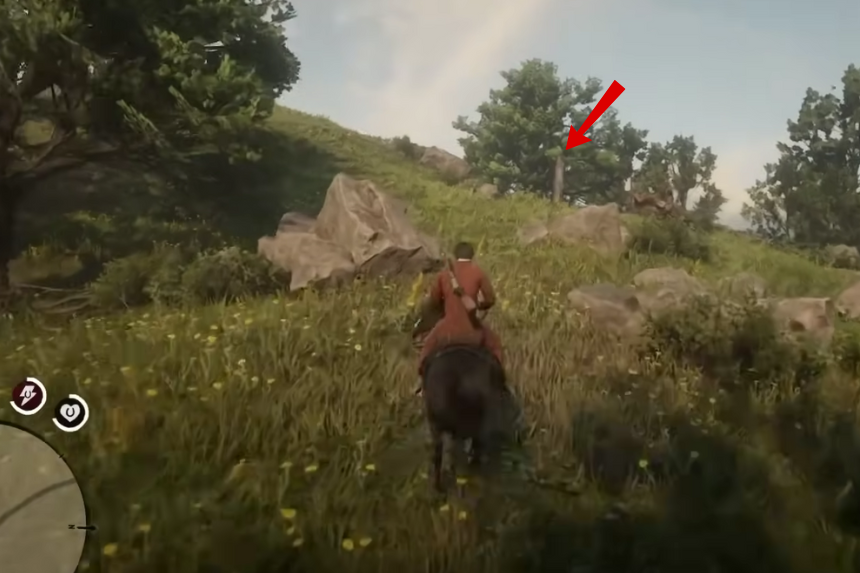
To solve it, ride to Face Rock in Scarlett Meadows (north of Rhodes) and search the dead tree stump next to two fallen trees. Inside, you will find the $10, The Poisonous Trail Map 2.
Treasure Map 1


Next, go south of Van Horn Trading Post. Look for a rocky mound between Fort Brennard and Van Horn Mansion. The treasure is right in the middle. Inside, you will find the Platinum Spring Bracelet, The Poisonous Trail Map 3.
Treasure Map 2

For the final treasure, head to the Elysian Pool in Roanoke Ridge and go behind the waterfall into the cave. It’s dark, so bring a Lantern. Inside, follow the tunnel upward, take the right path at the fork, then immediately take a left. Keep following the left-side path until you reach a drop. Jump across on the left side, continue deeper, and eventually drop down into a small water pool. Climb up from there to reach a pile of rocks containing the treasure. Inside, you will find the 4 Gold Bars.
High Stakes Treasure Map

The first High Stakes map comes from a random encounter with an old treasure hunter near Lenora View, just north of Strawberry. When you see him, you will have to rob him or loot the map from his body.
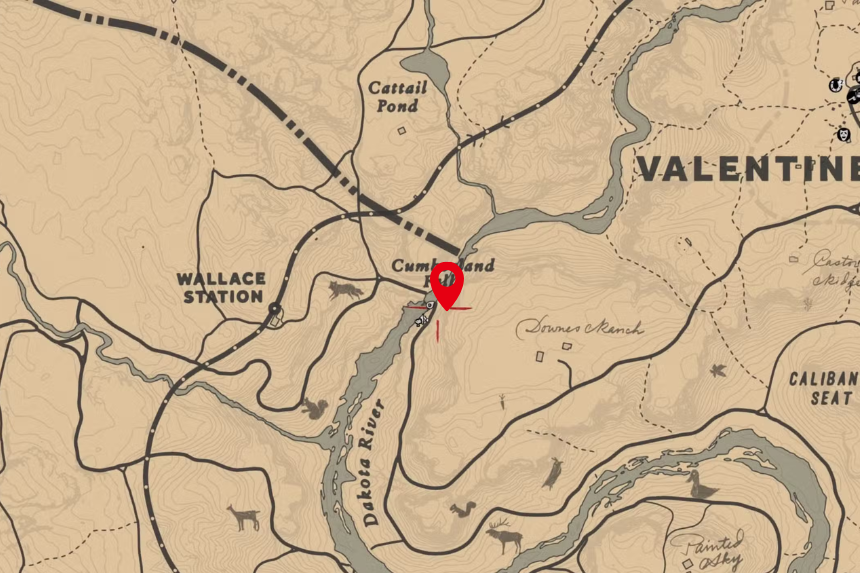
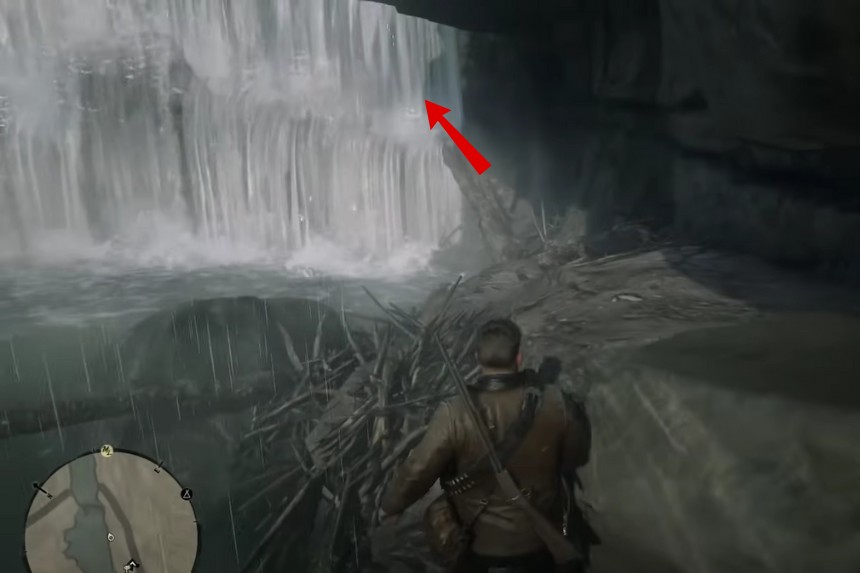
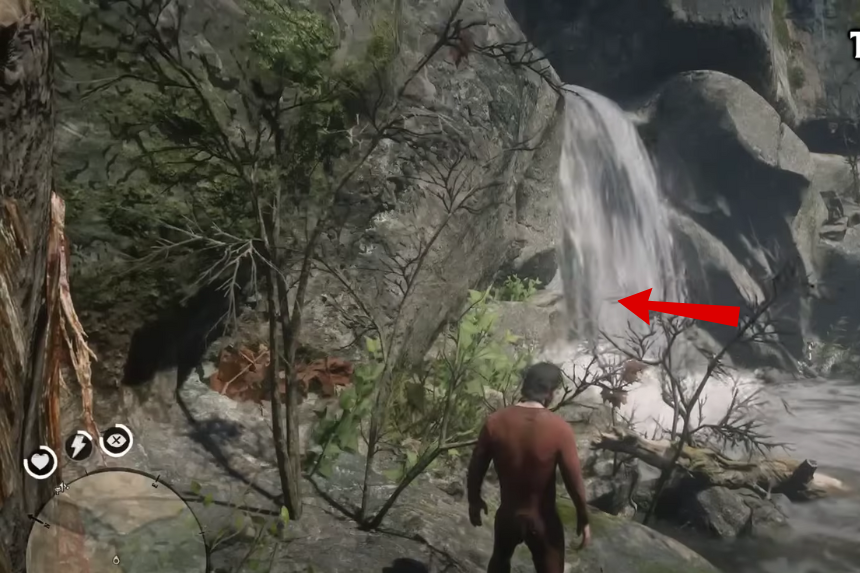
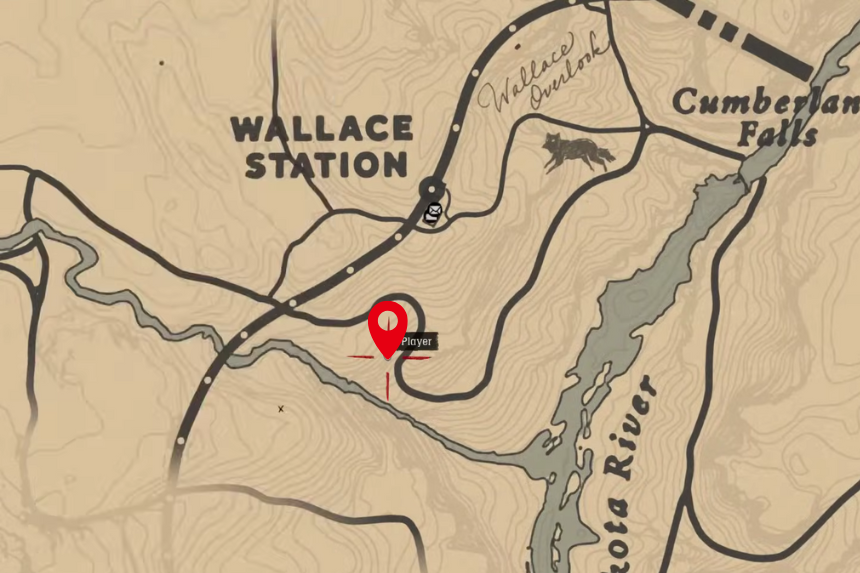
To solve it, go to Cumberland Falls (east of Wallace Station). Walk behind the waterfall, and you will find the next map. Inside, you will find the $5 High Stakes Treasure Map 2.
Treasure Map 1
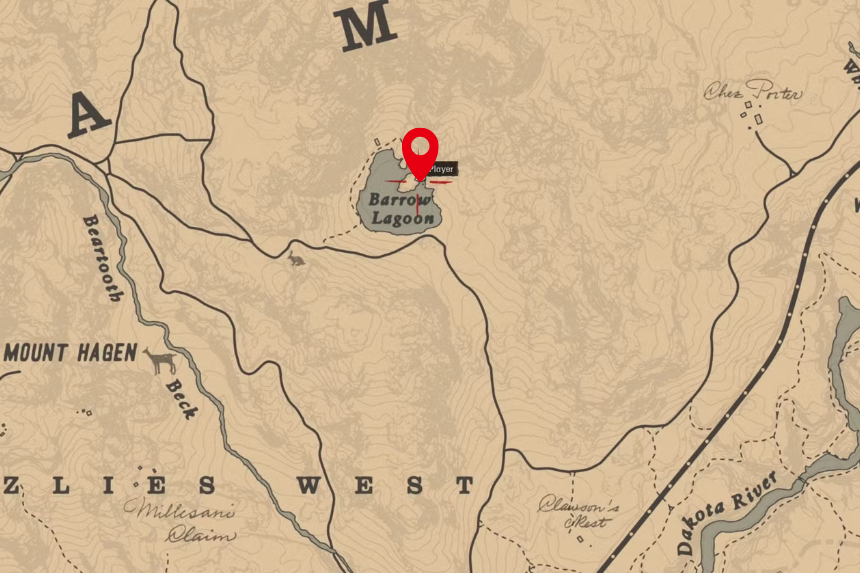

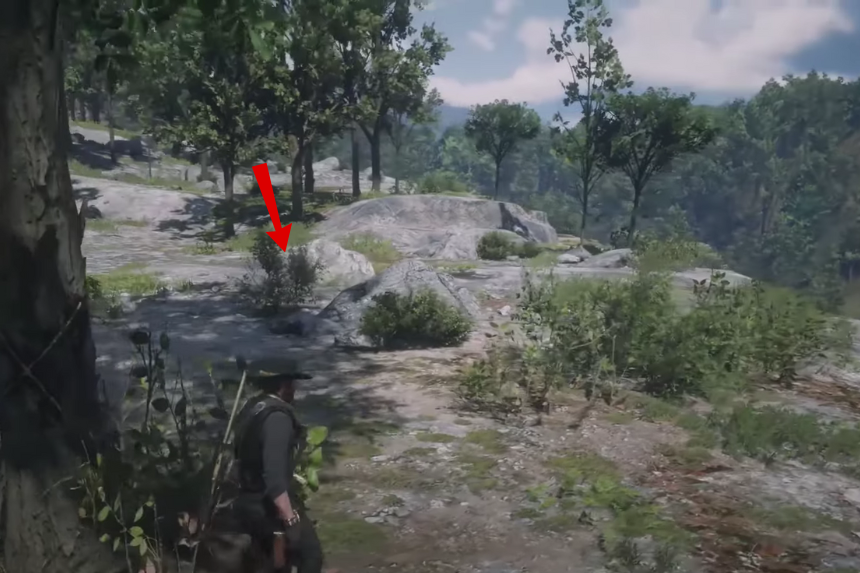
Now travel to Barrow Lagoon in the northern Grizzlies West. Cross the frozen lake and climb the fallen tree that forms a natural bridge. Halfway across the log, look inside the hollow to find the treasure. Inside, you will find the $15 High Stakes Treasure Map 3.
Treasure Map 2
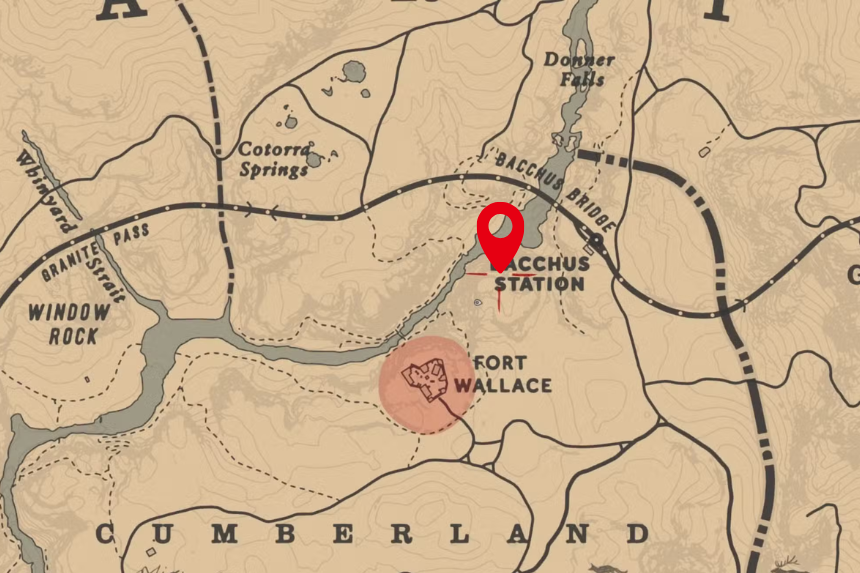
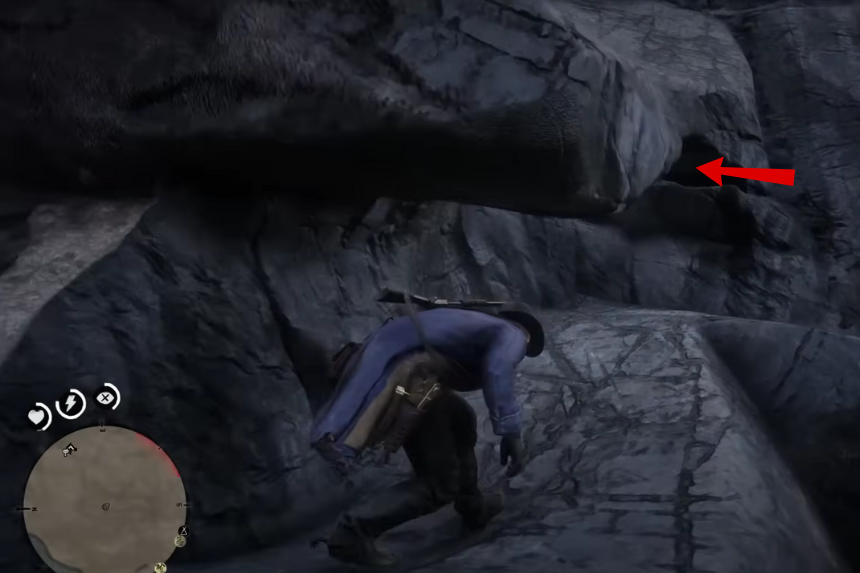
The last treasure is just north of Fort Wallace in Cumberland Forest. Follow the rocky path that snakes below the cliff. The trail is steep, so be careful, Arthur can easily slip. You will find the treasure hidden inside a crack in the rock wall. Inside, you will find the 3 Gold Bars.
Le Tresor Des Morts Map
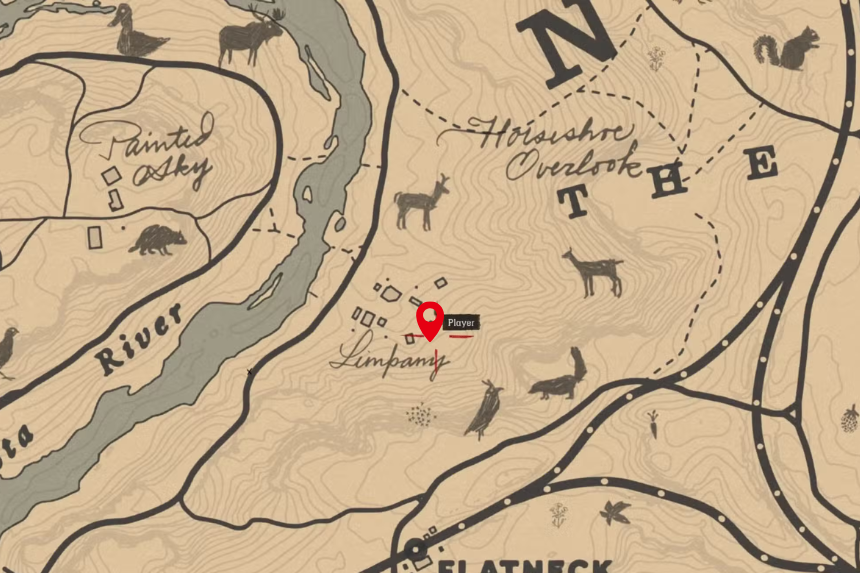
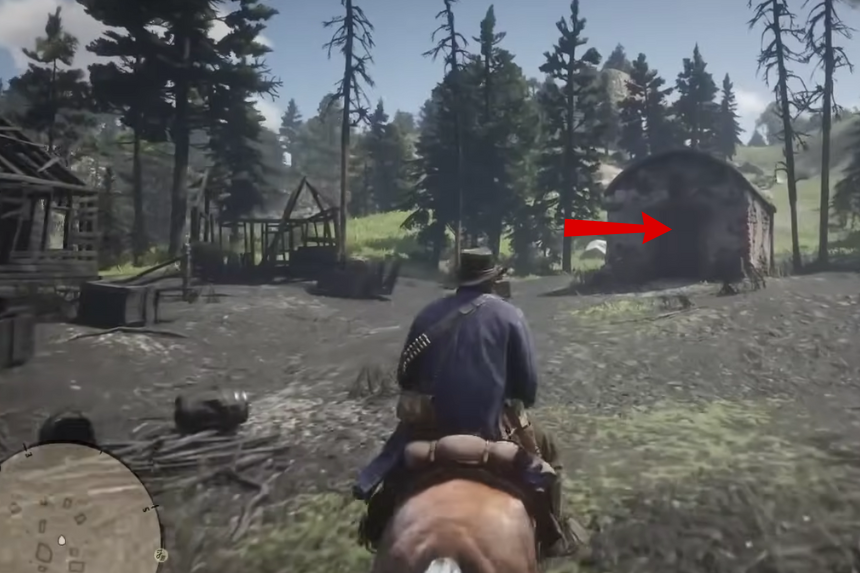
This map is found on a corpse inside the abandoned jail cell in Limpany.


To solve it, go to the underground tunnel in Saint Denis near Cornwall Shipping Yard and inspect the wooden crate against the wall.
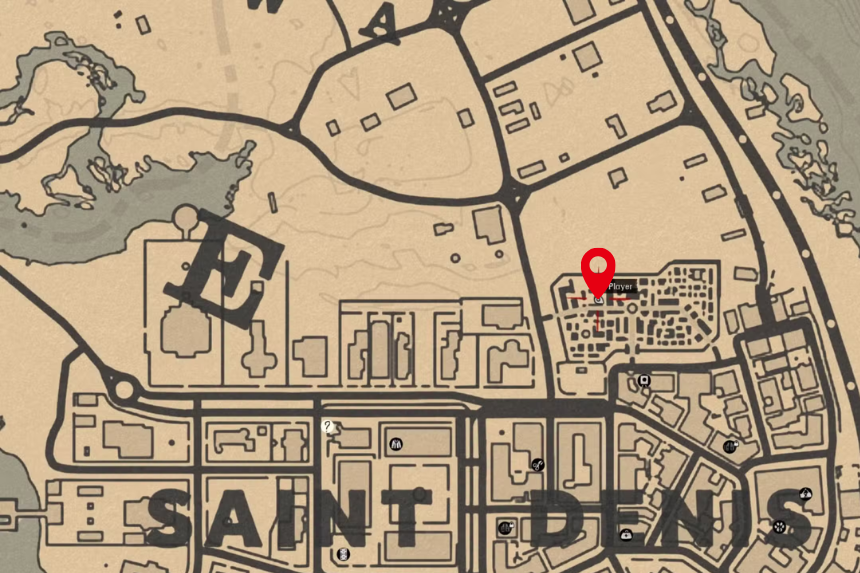
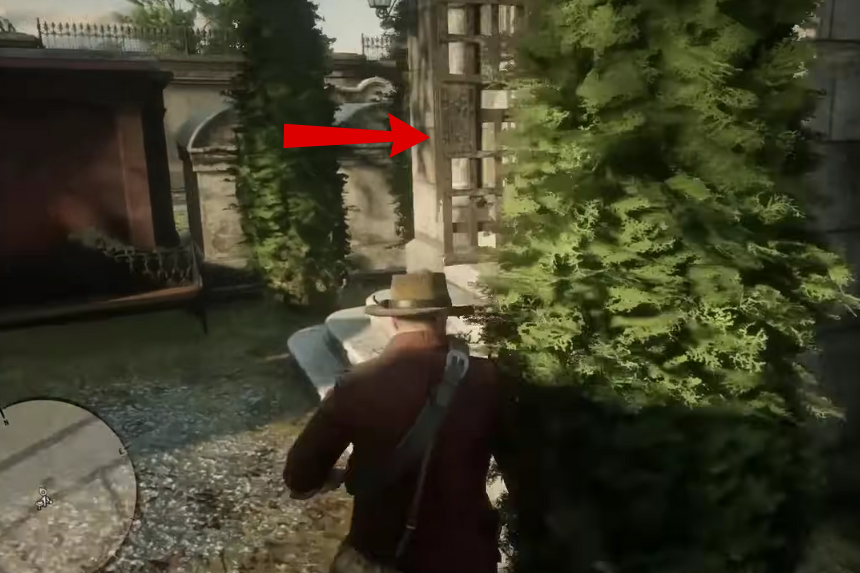
Then head to the Saint Denis cemetery. Inside the open chapel in the northwest corner, inspect the panel on the wall to find the treasure. Inside, you will find the $30, 6 Gold Bars.
Landmarks of Riches Map
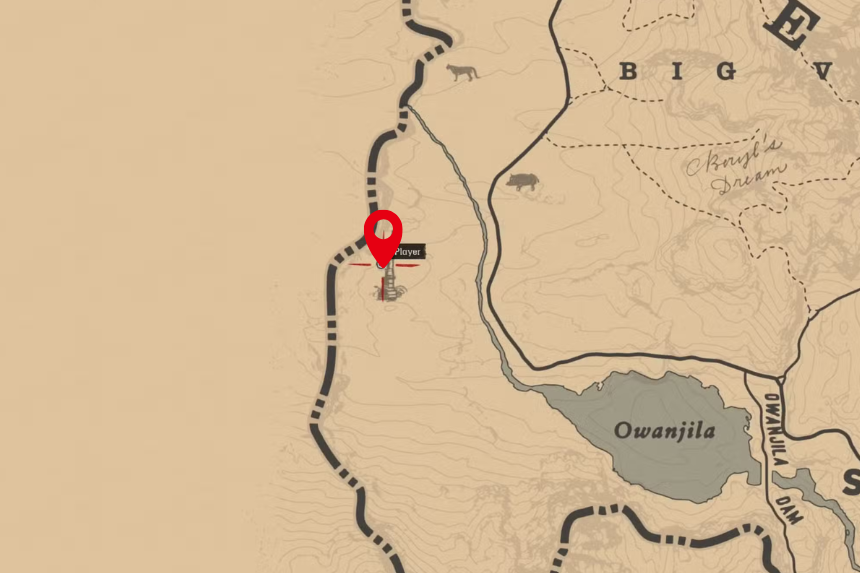
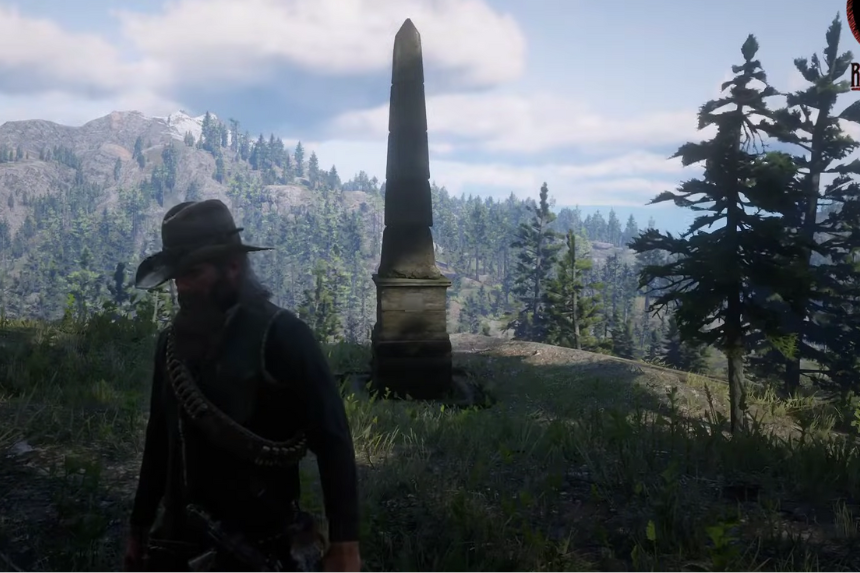
You will find Map 1 northwest of Owanjila at the Obelisk landmark.
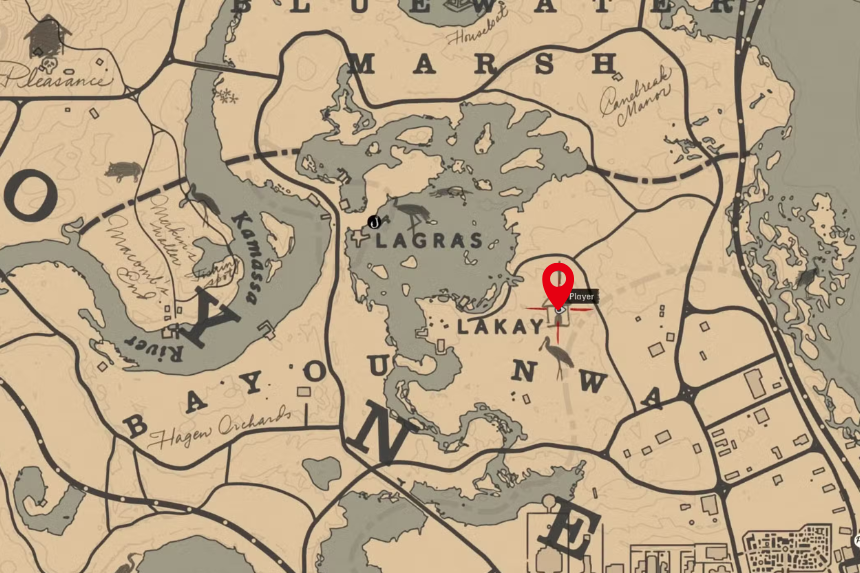
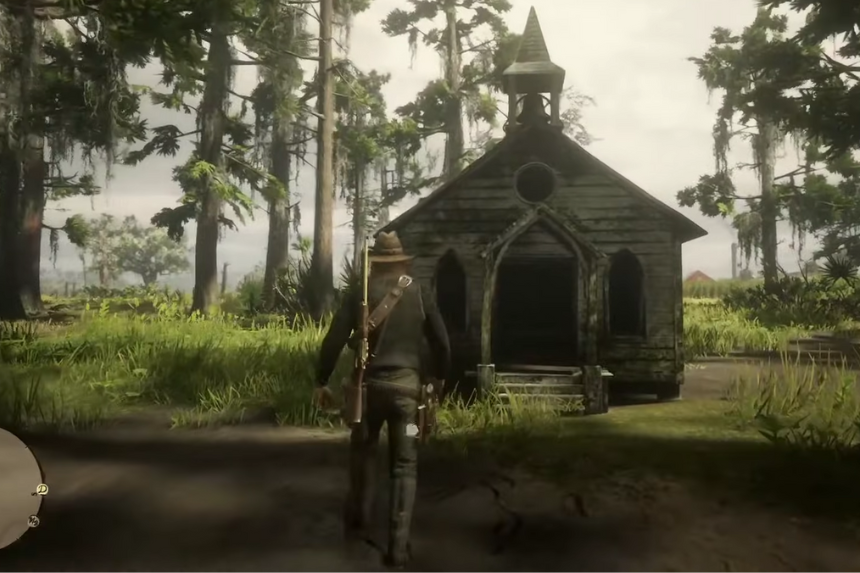
To solve it, travel all the way to the tiny church in Lakay, Bayou Nwa, and climb up to the roof to inspect the church bell. Inside, you will find the Gold Earring, Silver Earring, and Landmarks of Riches Map 2.
Treasure Map 1
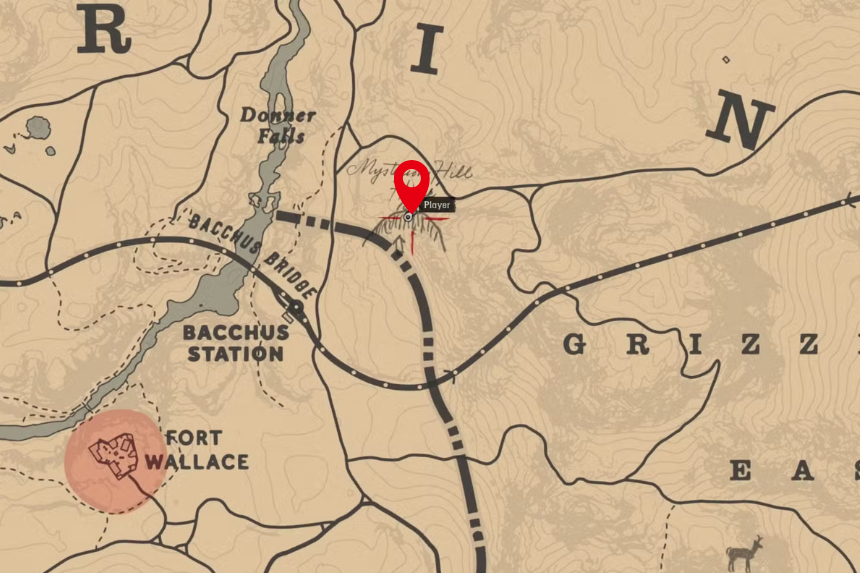
This map leads you to the Mysterious Hill Home, north of Bacchus Station. Climb up onto the roof and check the crack in the little rooftop window. Inside, you will find the Gold Jointed Bracelet, Landmarks of Riches Map 3.
Treasure Map 2

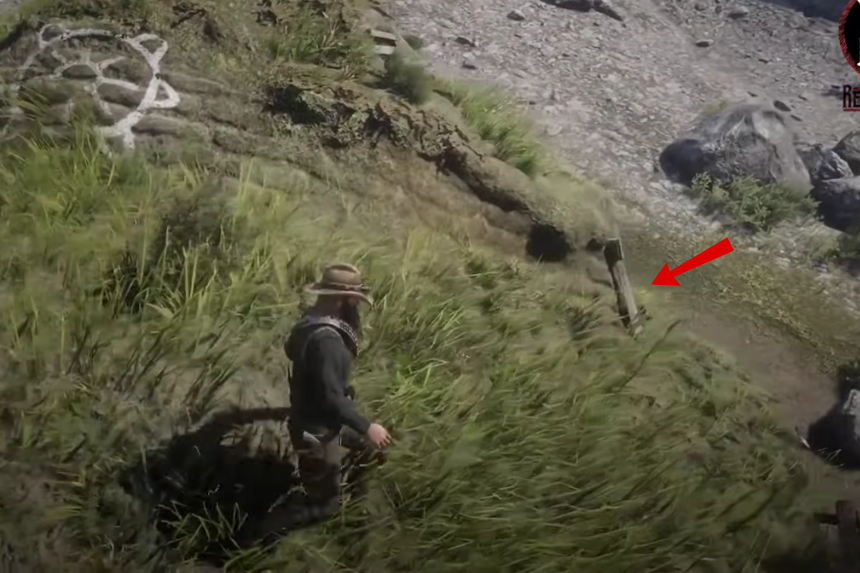
Next, go to Bolger Blade in Scarlett Meadows, east of Braithwaite Manor. Look for a straight, dead tree away from the ruined buildings; your treasure is there. Inside, you will find the Silver Chain Bracelet, Landmarks of Riches Map 4.
Treasure Map 3
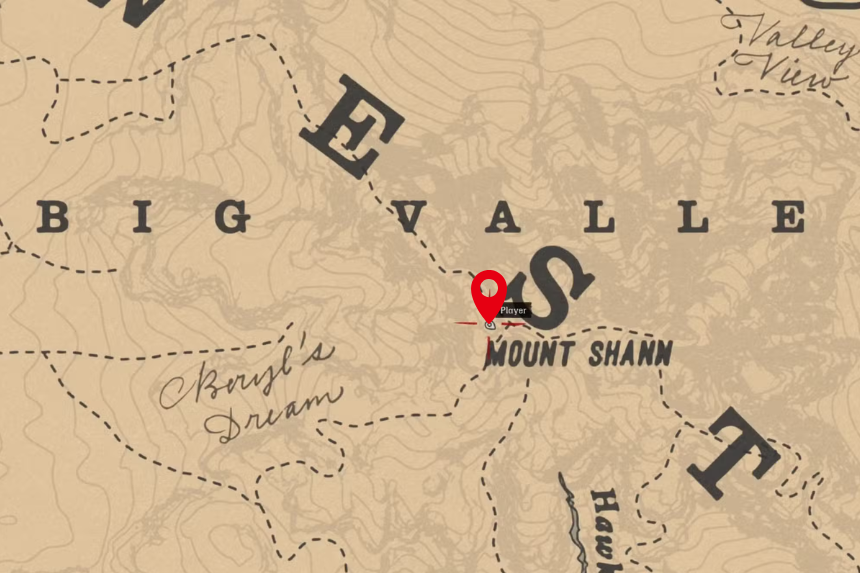
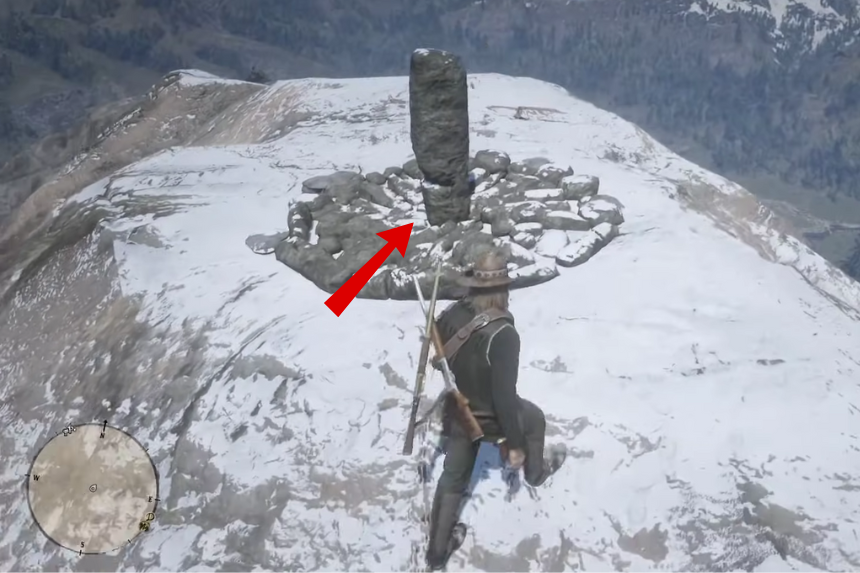
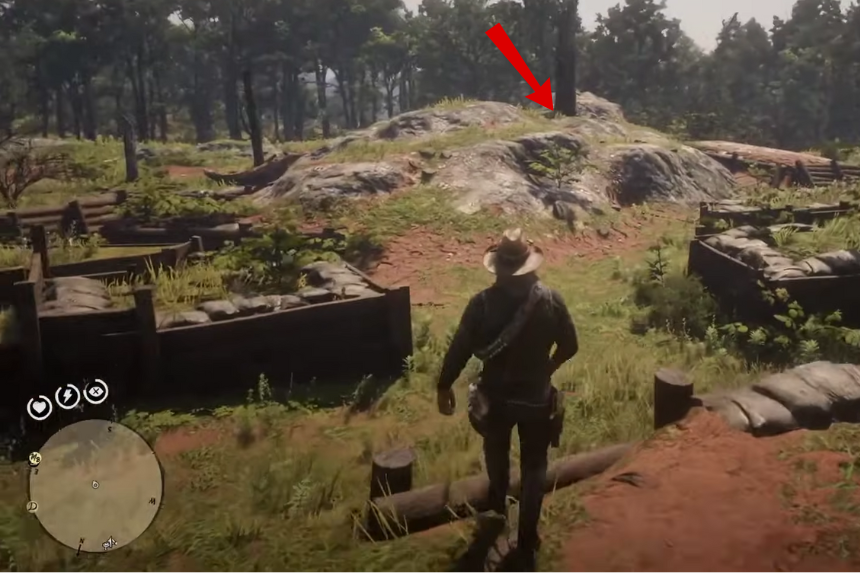
For the final treasure, head up Mount Shann in Big Valley. At the top is an old sundial. Look under the rock that sits where the “7 o’clock” position would be. Inside, you will find the 6 Gold Bars.
Jack Hall Gang Map
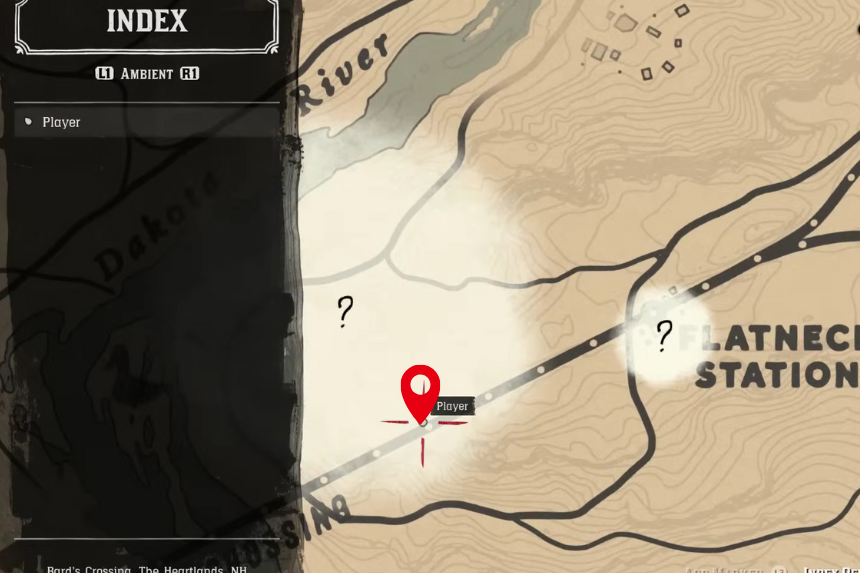

To get the first Jack Hall Gang map, you will need to meet Maximo Cristobal Valdespino during the All That Glitters stranger mission. You will usually find him west of Flatneck Station in The Heartlands. He will offer to sell you the map for $10, though you can rob him if you want.
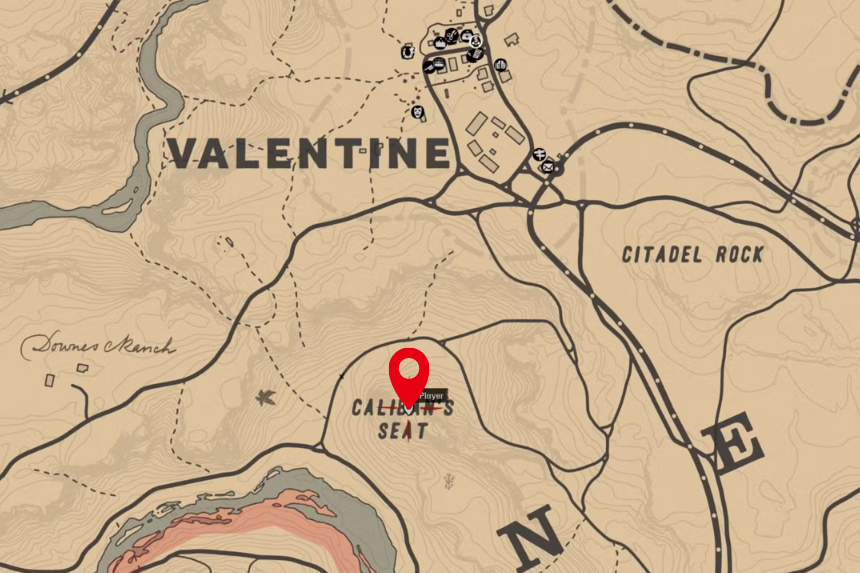
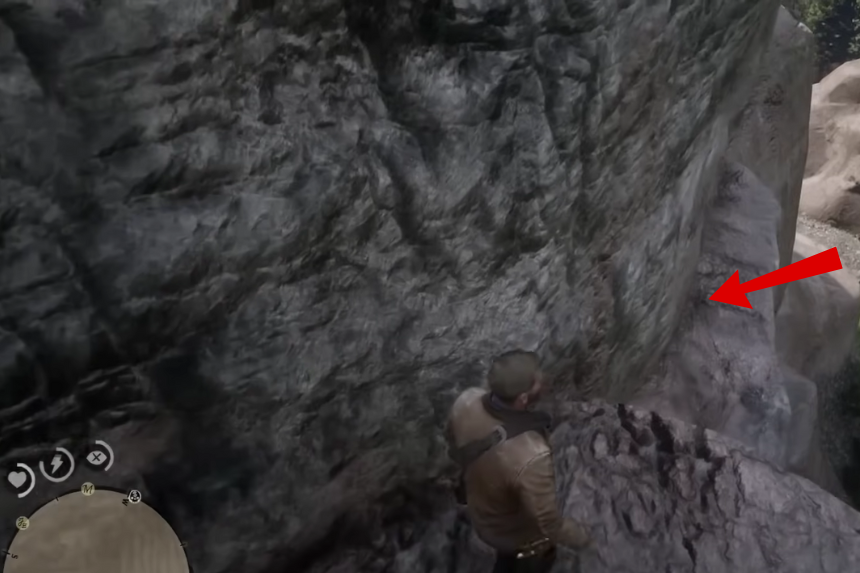
To solve this map, ride to Caliban’s Seat, just south of Valentine. Follow the narrow rock path, squeeze through a few gaps, and make the jumps until you reach a small hole in the granite. Inside, you will find the Pearl Necklace and Jack Hall Gang Map 2.
Treasure Map 1
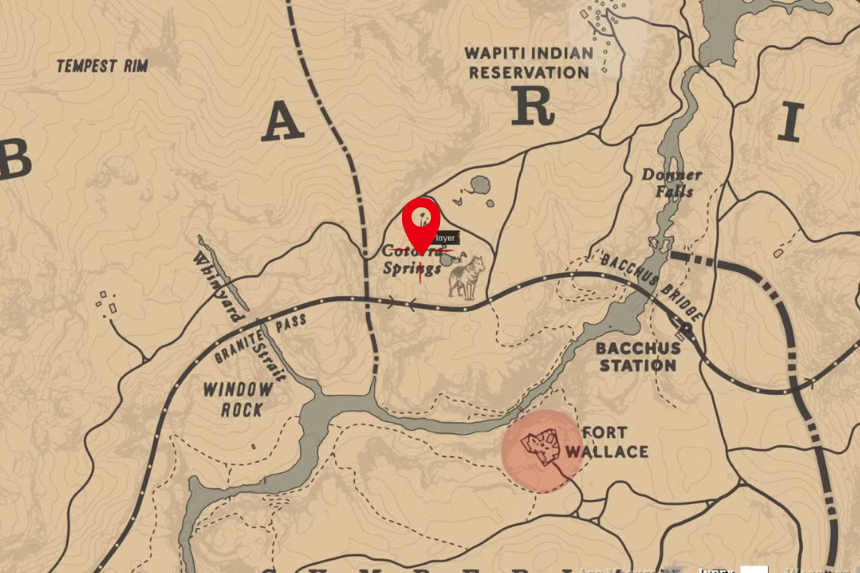
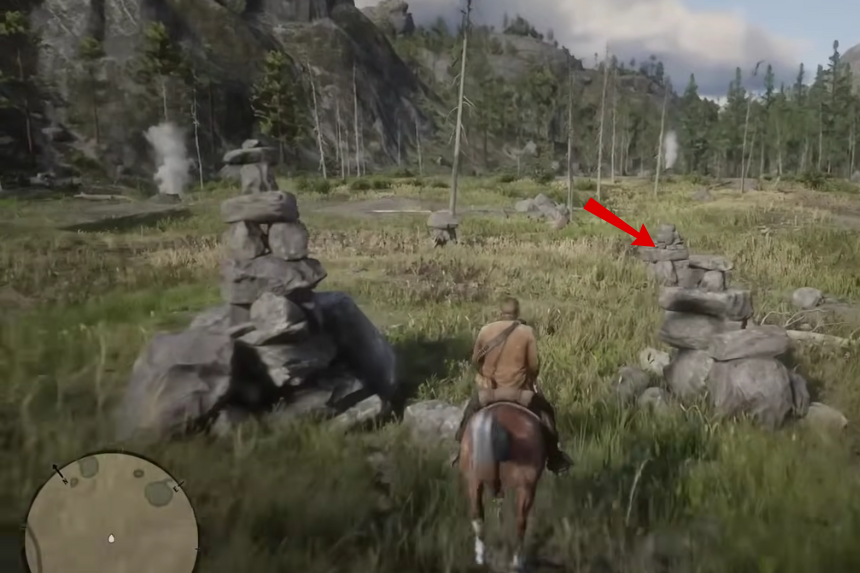
Once you have Map 2, head to Cotorra Springs, north of Fort Wallace. Look for a big rock in the centre of a ring of smaller rocks. Inside, you will find the $15 Jack Hall Gang Map 3.
Treasure Map 2
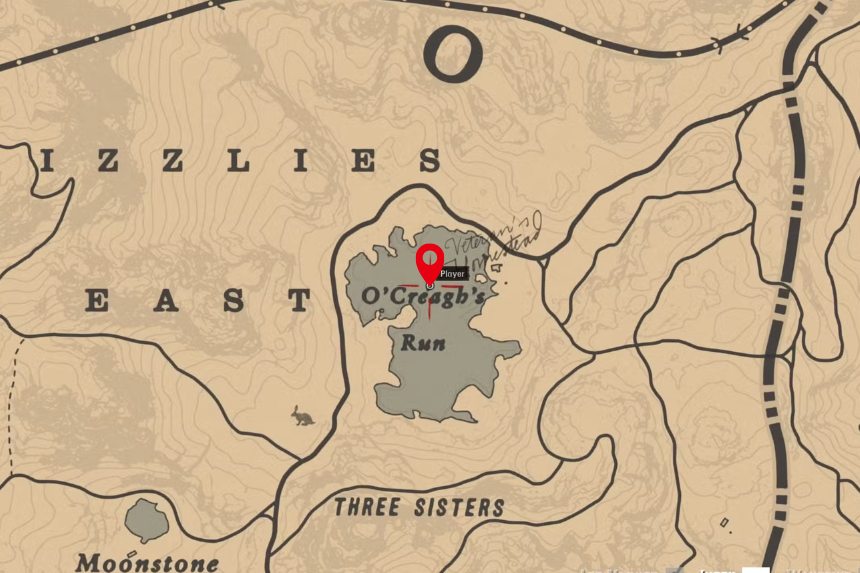
The final Jack Hall Gang treasure is on the small island in the middle of O’Creagh’s Run in the Grizzlies East. Swim or ride your horse across, and look under a rock on the north side of the island. Inside, you will find the 2 Gold Bars.
Sketched Map
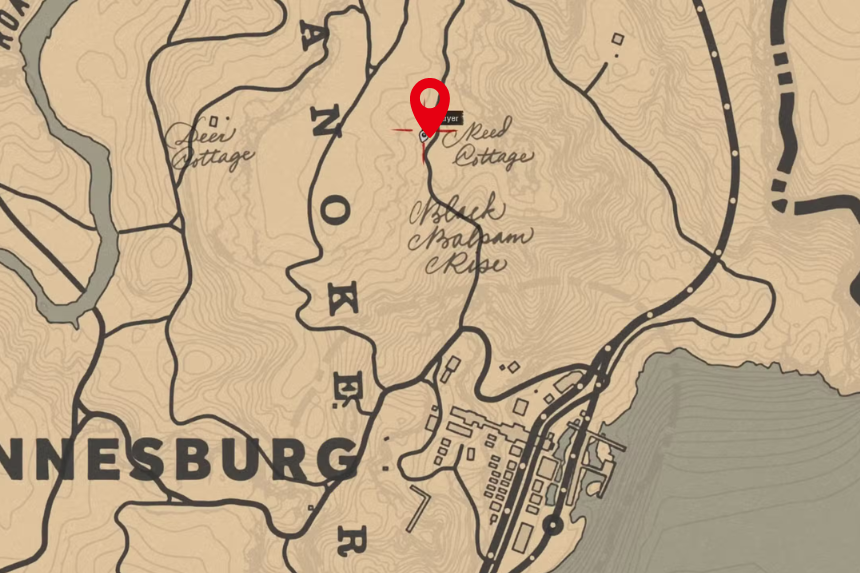

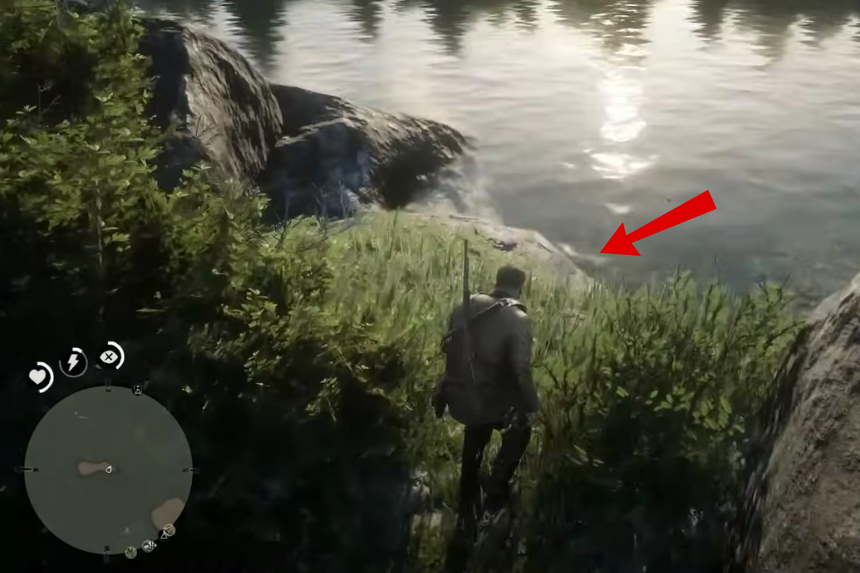
Check the fireplace inside Reed Cottage, north of Annesburg, to get the map.

To solve it, go to the Kamassa River near Elysian Pool and search under a small rock beside a big one on the cliff. Inside, you will find the Gold Ingot.
Torn Treasure Map 1

Enter Manito Glade (north of Annesburg) and deal with the Hermit inside. Search the drawer next to the armchair to find Torn Treasure Map 1. You will need the second half before you can solve it.
Torn Treasure Map 2
The second half is in the Hermit Woman’s cabin in northwest West Elizabeth near Little Creek River. She and her dogs will attack, so be ready. The map is in the drawer beside the bed. Once you have both pieces, you get the Mended Map.
Mended Map
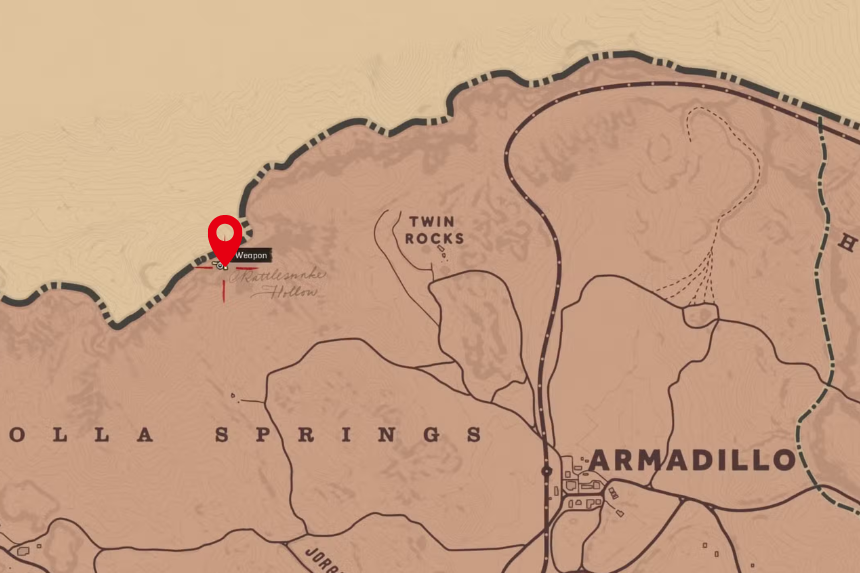

This treasure is inside Rattlesnake Hollow, west of Twin Rocks in New Austin. Note that this area is only accessible during the Epilogue; going early will get you instantly sniped. Inside, you will find the 5 Erotic Photographs, Ottis Miller’s Revolver.
The Elemental Trail Map

In the Epilogue, go to the southwest corner of New Austin. You will find a man hanging by a rope, shoot him down and loot the map.

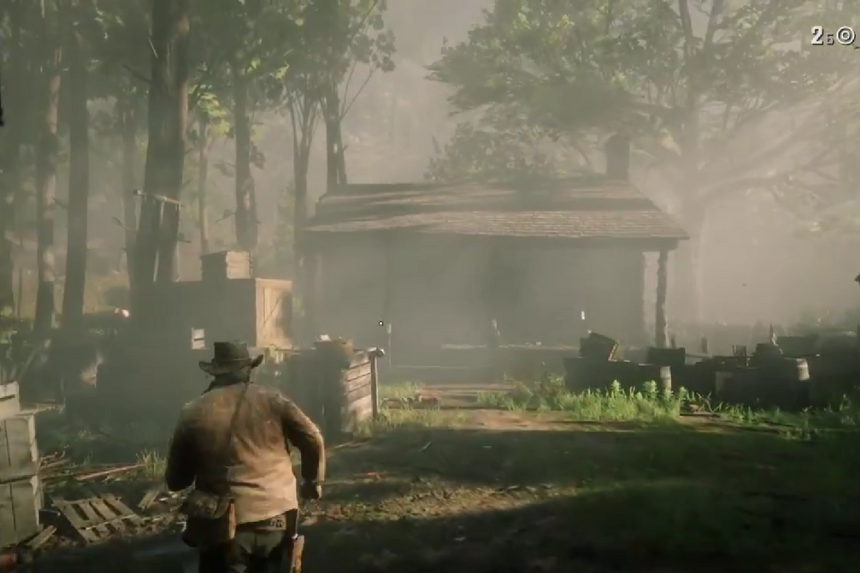
Travel to the abandoned cabin at Greenhollow (east of Lake Don Julio) and check the fireplace for the next treasure. Inside, you will find the Horse Meal, The Elemental Trail Map 2.
Treasure Map 1
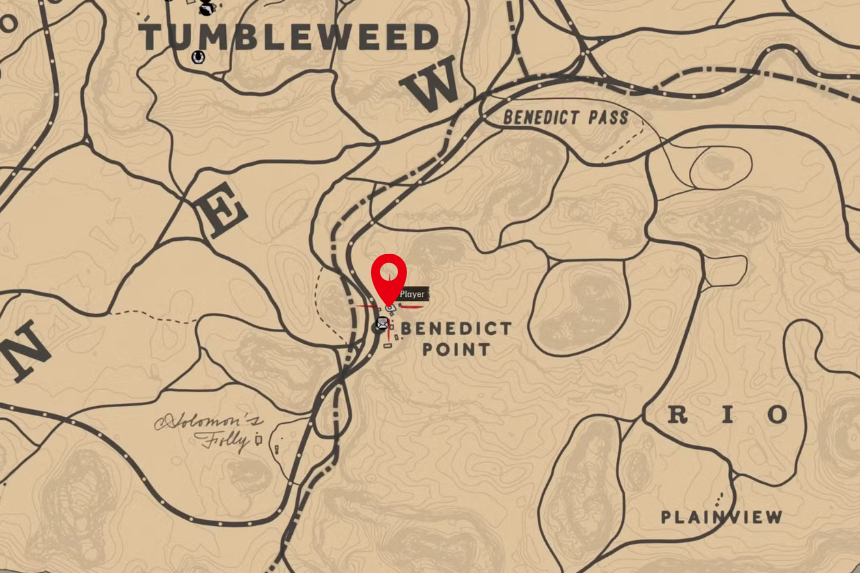
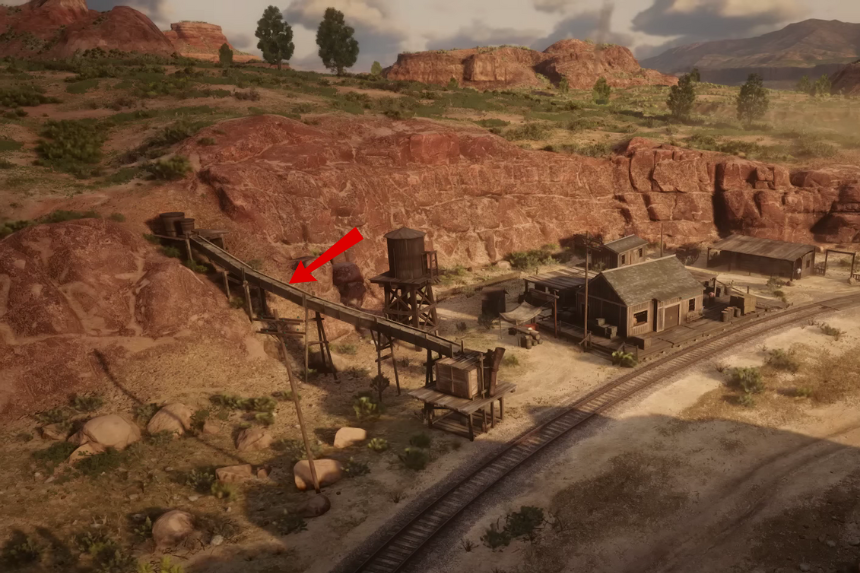
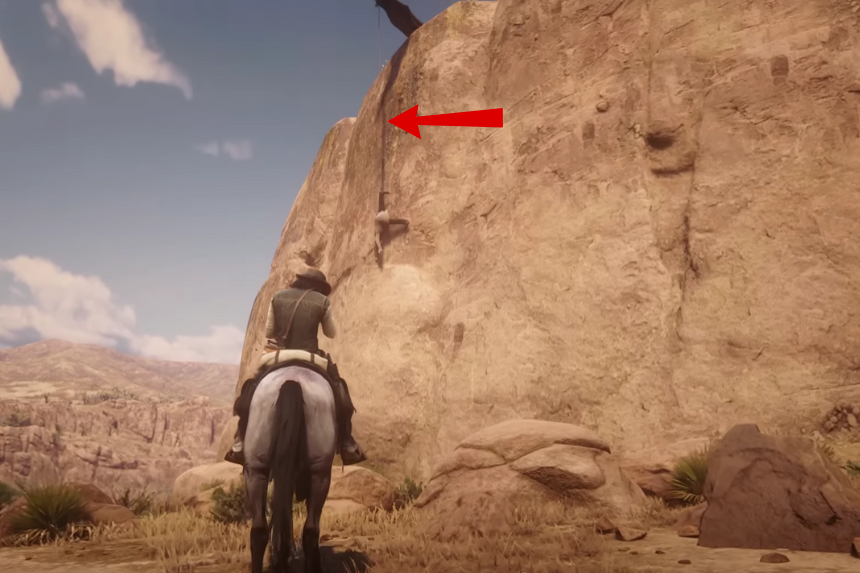
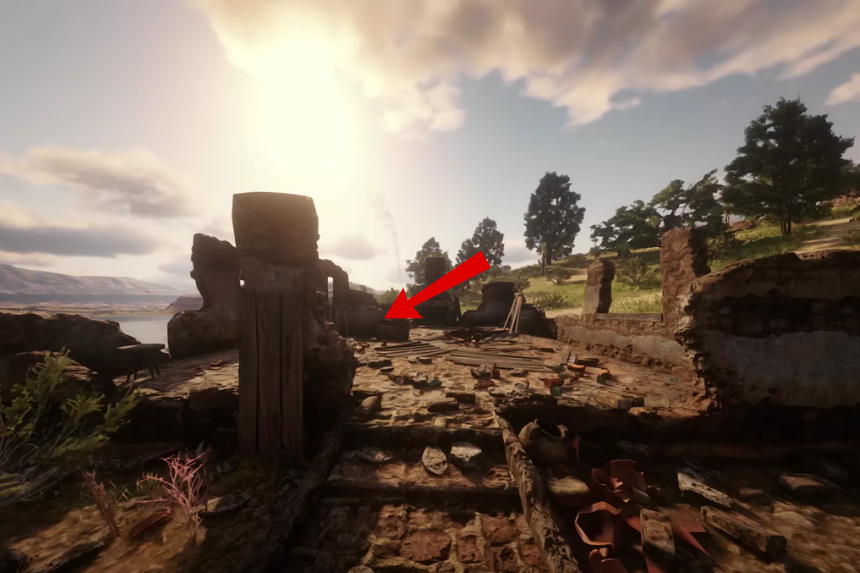
Head to Benedict Point (south of Tumbleweed). Climb the wooden structure by the tracks, walk across the shaky bridge, and look in a gap halfway across. Inside, you will find the Horse Reviver, The Elemental Trail Map 3.
Treasure Map 2
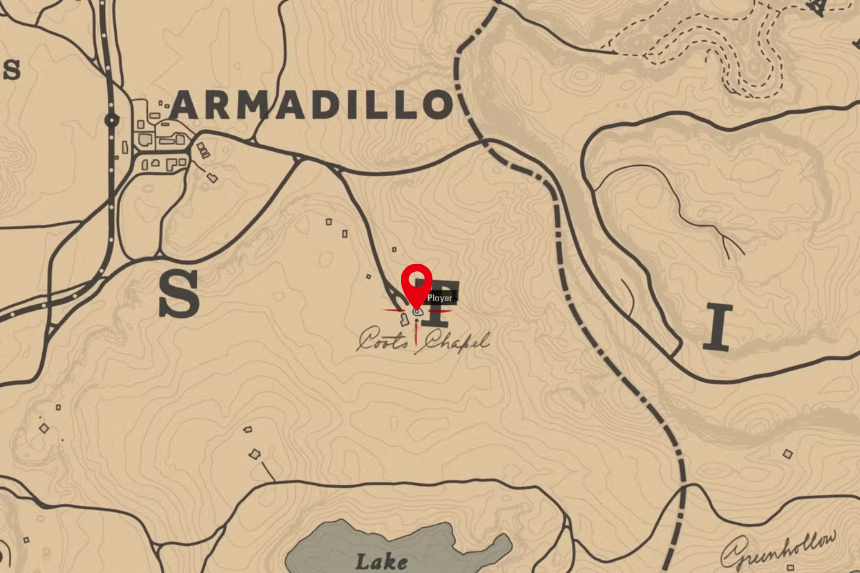
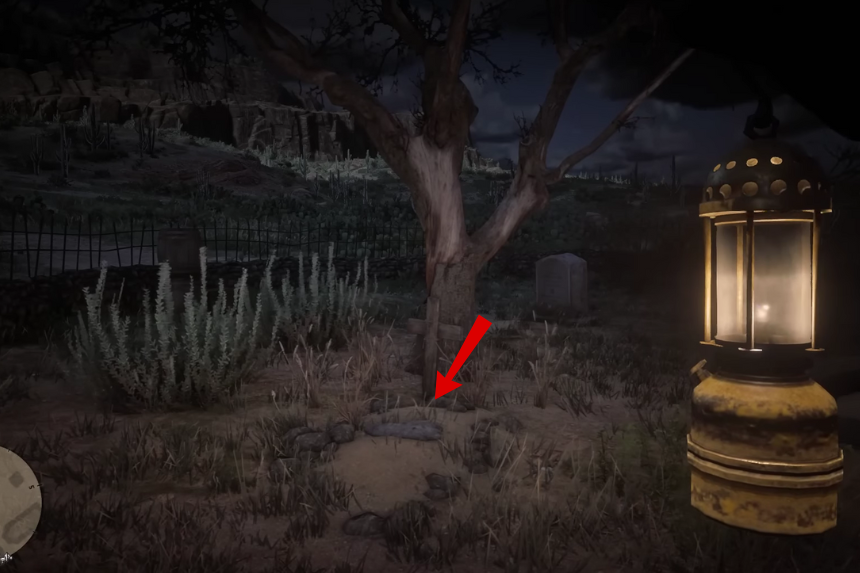
The final treasure is in Coot’s Chapel, south of Armadillo. Look under the rock sitting on top of a wooden gravestone beneath a tree. Inside, you will find the Special Horse Stimulant, Special Horse Medicine, Gold Bar, and Crow Beak Trinket.