
Legendary Blueprints are hidden all across the map in Dying Light: The Beast. These blueprints let you craft some of the strongest weapons in the game, like The Needle SMG, Hands of Glova, The Elite Pistol, and the deadly Sawblade Launcher. This guide shows you exactly where to look and what to do to collect every Legendary Blueprint.
All Legendary Blueprint Locations
In Dying Light: The Beast, Legendary Blueprints like The Needle, Hands of Glova, The Elite, Ciupaga, Eraser, and the Sawblade Launcher are hidden across key locations such as ranger stations, train yards, bunkers, and safe zones. Some legendary blueprints like Hand Grenades and Bandages are available by default. Below are the legendary blueprints we have found so far.
NOTE: You can click on the images to enlarge
The Needle Legendary Blueprint Location
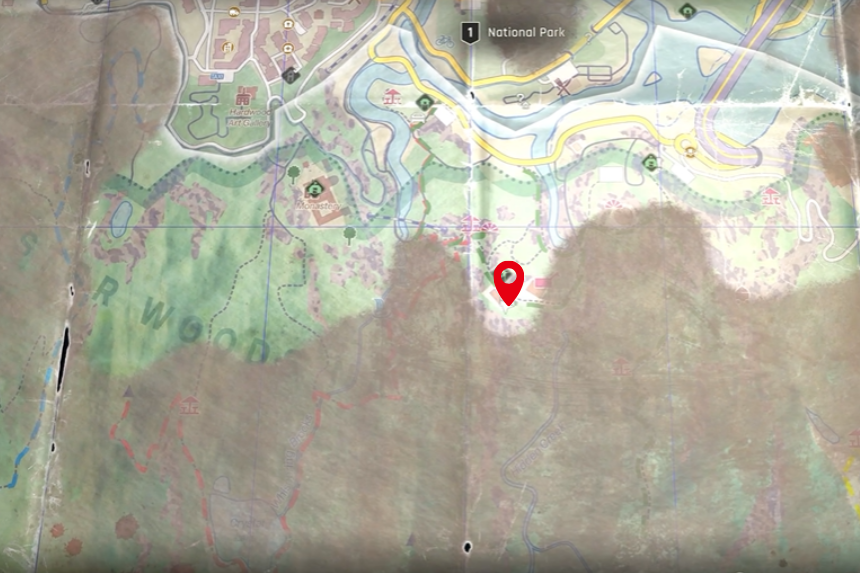
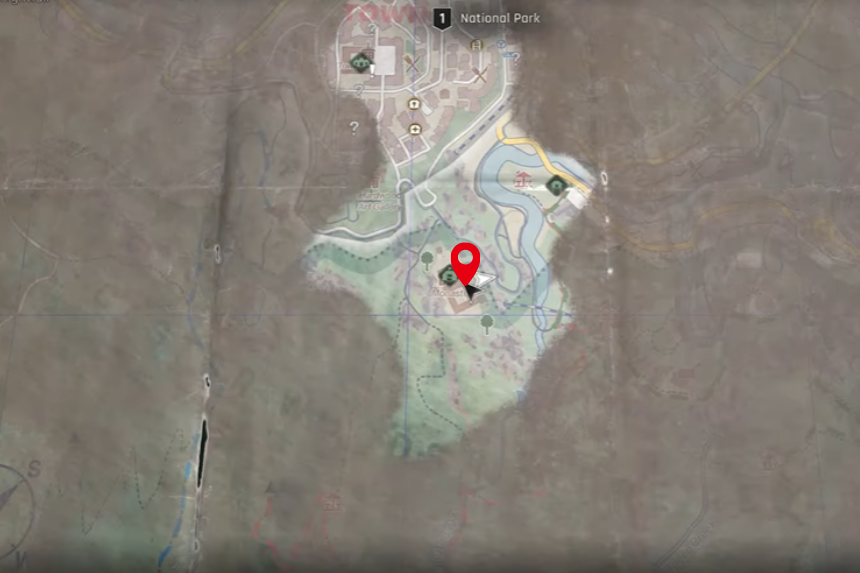
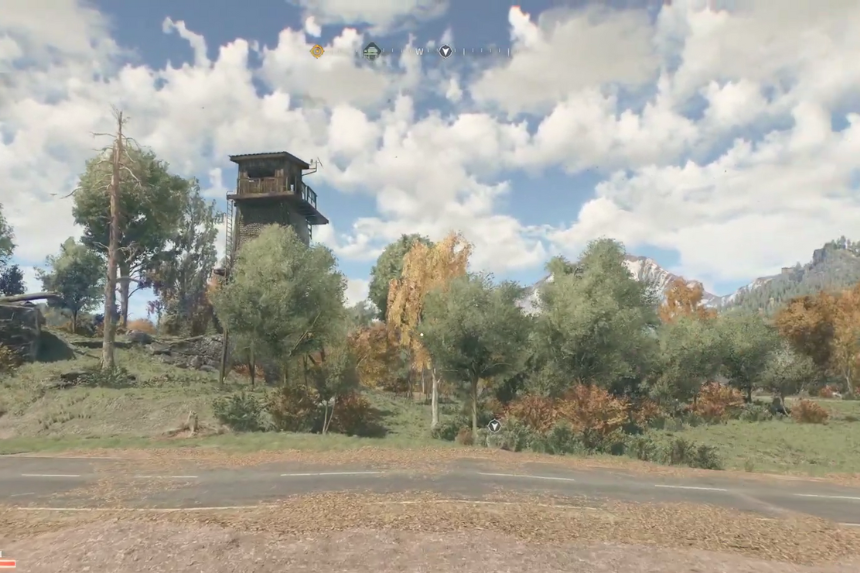
If you want to get The Needle, a legendary SMG in Dying Light: The Beast, you can grab it pretty early in the game. Head over to the forest area inside the National Park. Look for the Mountain Shelter Tower on your map, just below it, there’s a ranger station, but it’s locked at first.
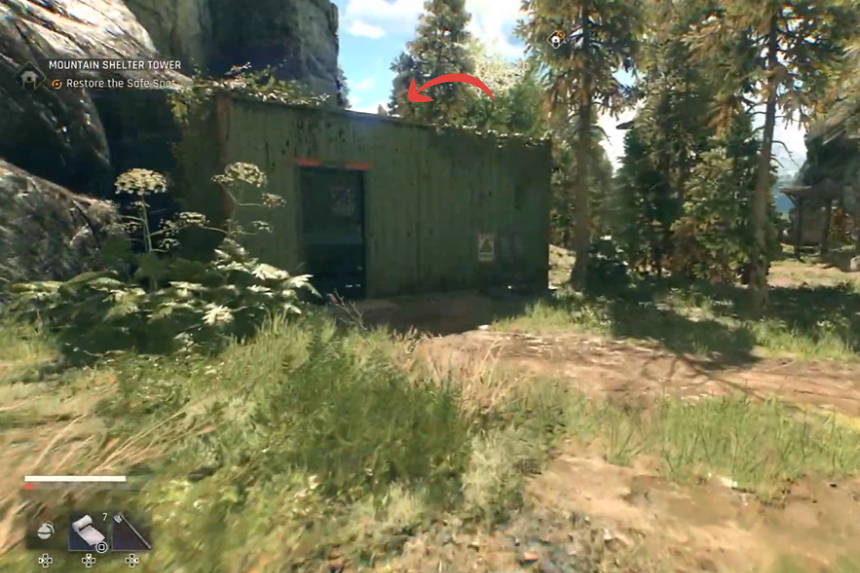
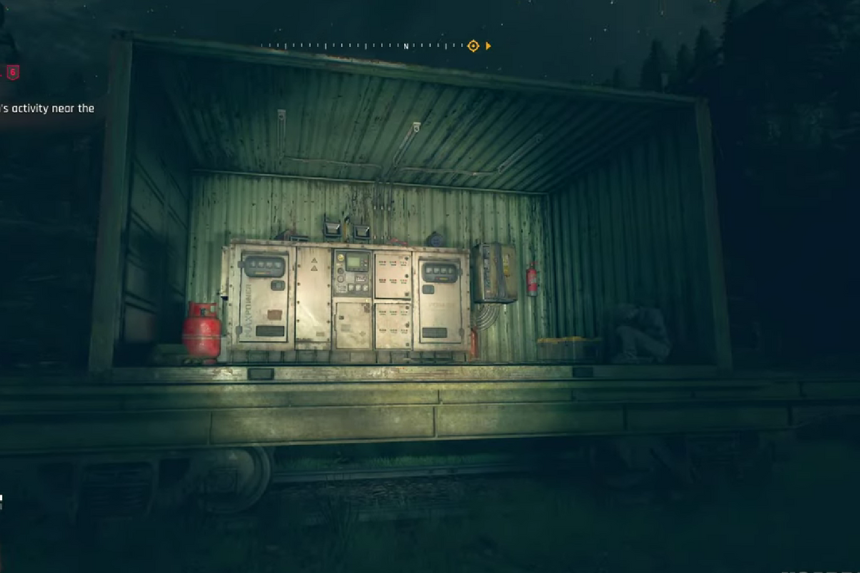
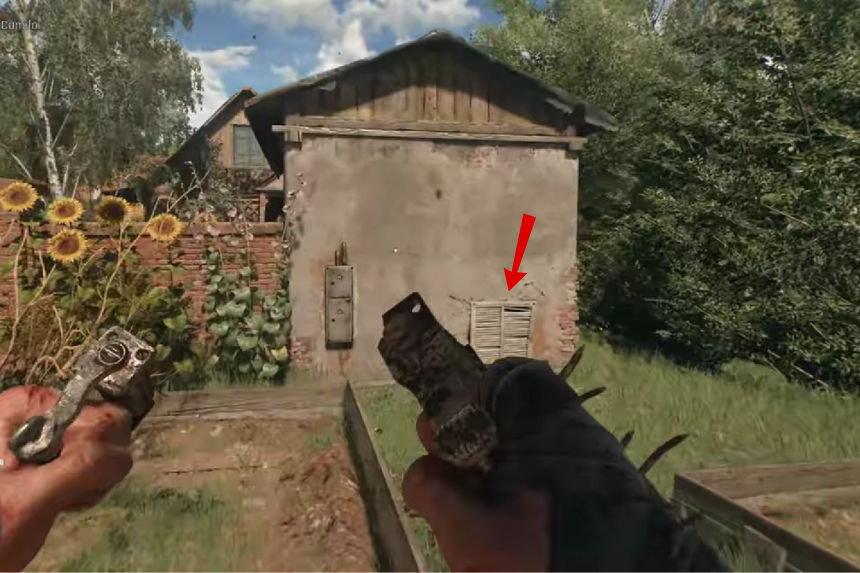
To get inside, go around the station until you find a small shed with a power switch. That’s where you will need to go. Climb the roof of the shed and you will find a lid to go inside. Drop down inside the shed. Now, unlock the door, and turn on the generator to start things up.
You will get a power cord, and the cable route isn’t very long, you will just need to climb out through the roof to continue. Be ready though, once you activate the power, it will open the ranger station’s shutter, and a bunch of zombies will come rushing out. Take them down quickly, then plug the cord into its slot.
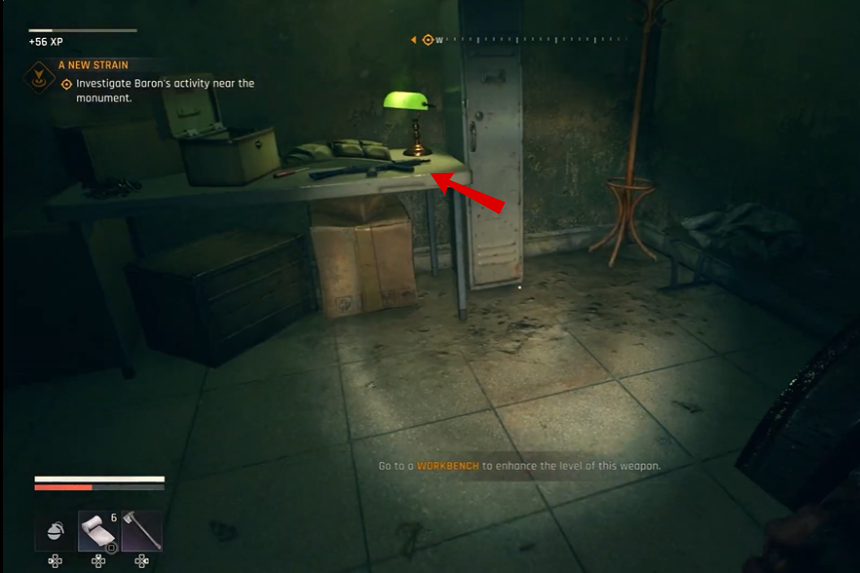
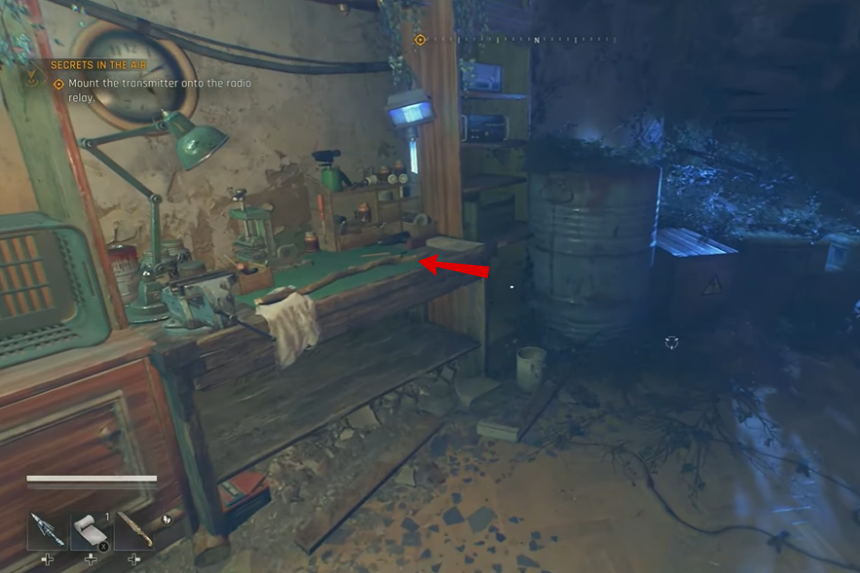
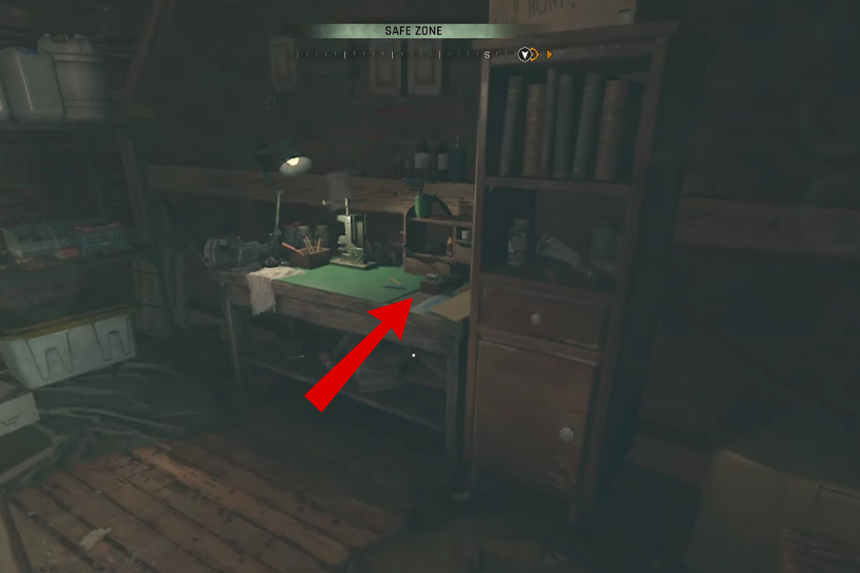
Inside the station, there’s a door you will have to lockpick. Once you are inside, you will see The Needle SMG right on the table.
Hands of Glova Legendary Blueprint Location
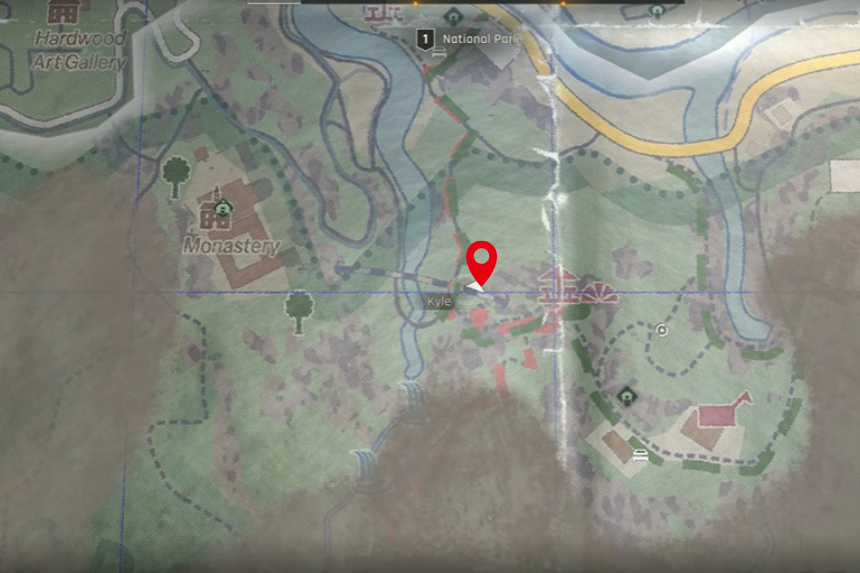
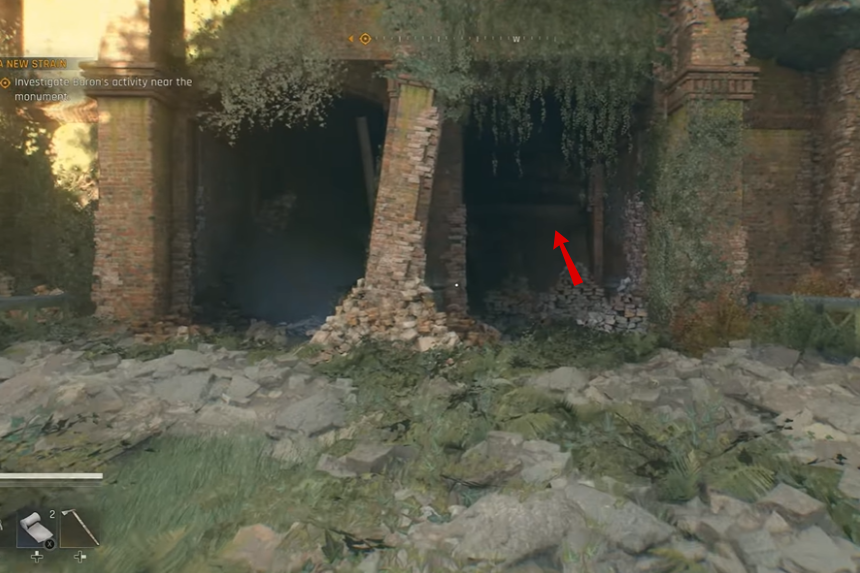
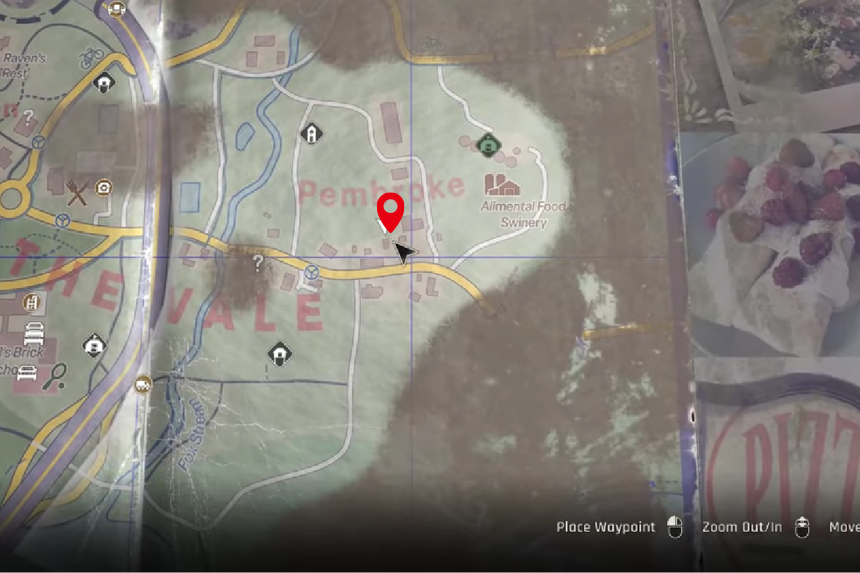
Go to the location marked on the map above, you will reach a train yard. Here, you will find a abandoned train station. Go inside the train station, you will find a broken wall with rubbles. This is a secret area, so you need to pass through the wallto reach it. Navigate through the corridors of the secret area to find a pixeleted wall.
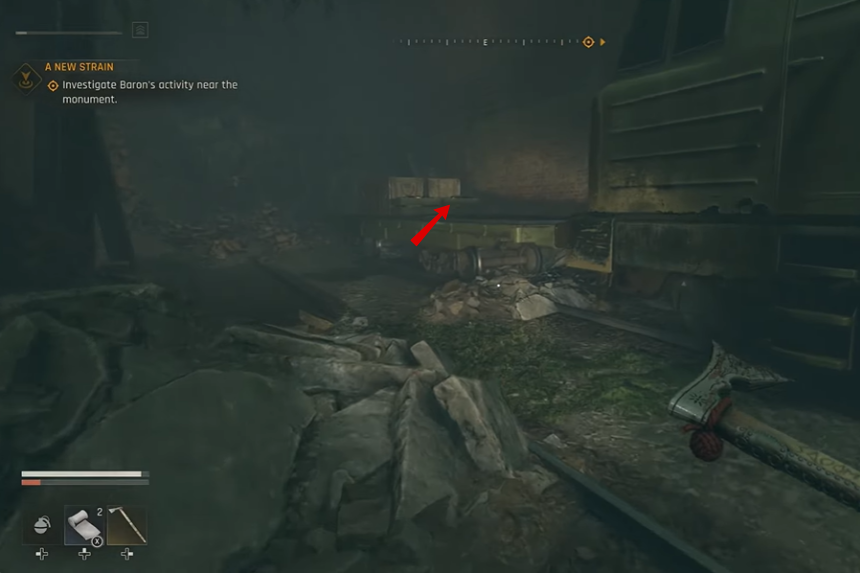
Break the pixeleted wall with your hammer, to make you way. You will find many zombies inside. Kill them and move forward. Here, you will find a white door. Open it to reach a new area, where you will find trains. On the train carriage, you will find Hands of Glova Legendary Blueprint and some gold.
Ciupaga Legendary Blueprint Location
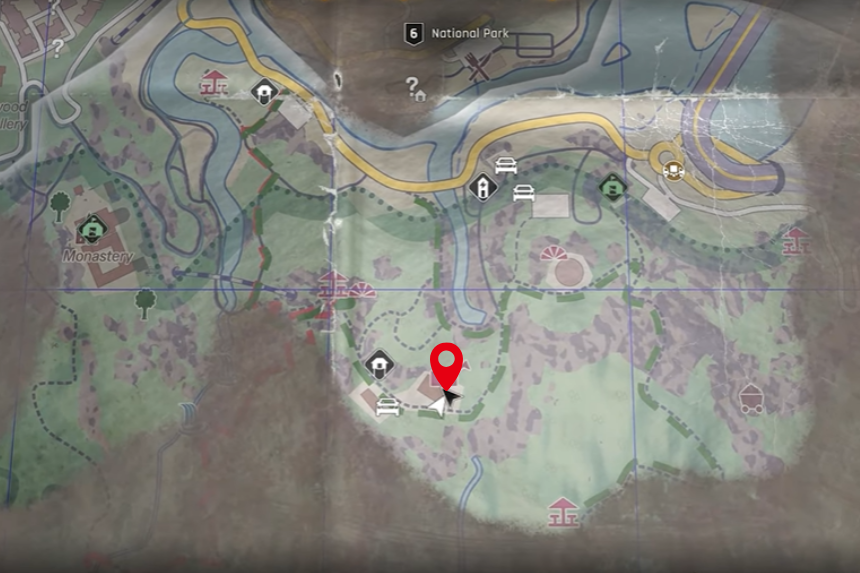
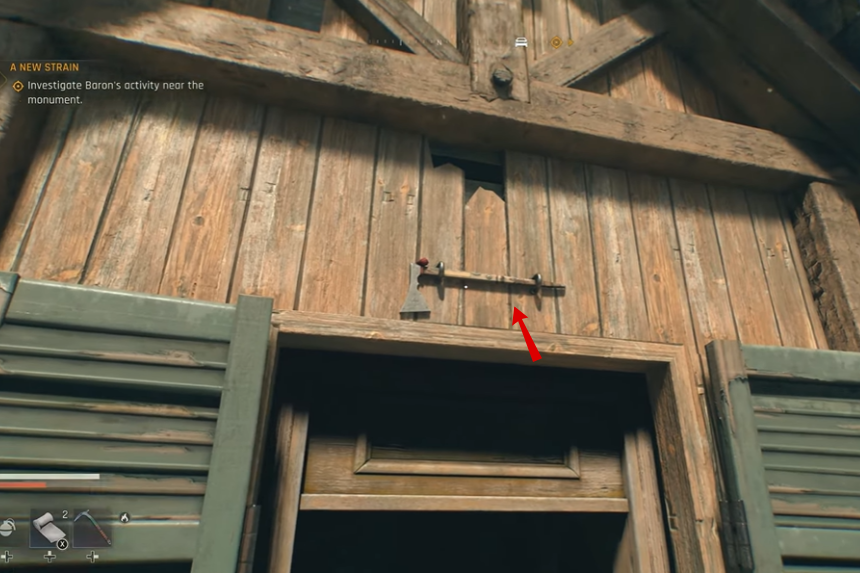
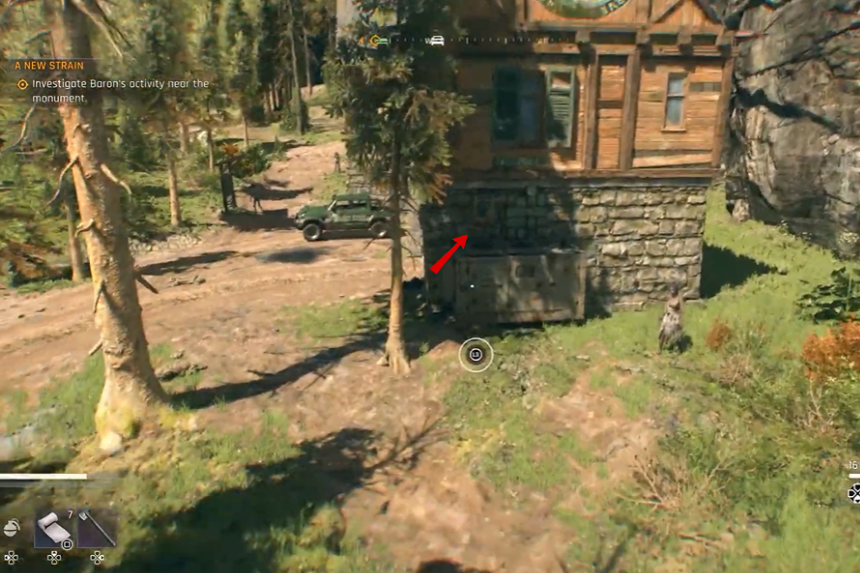
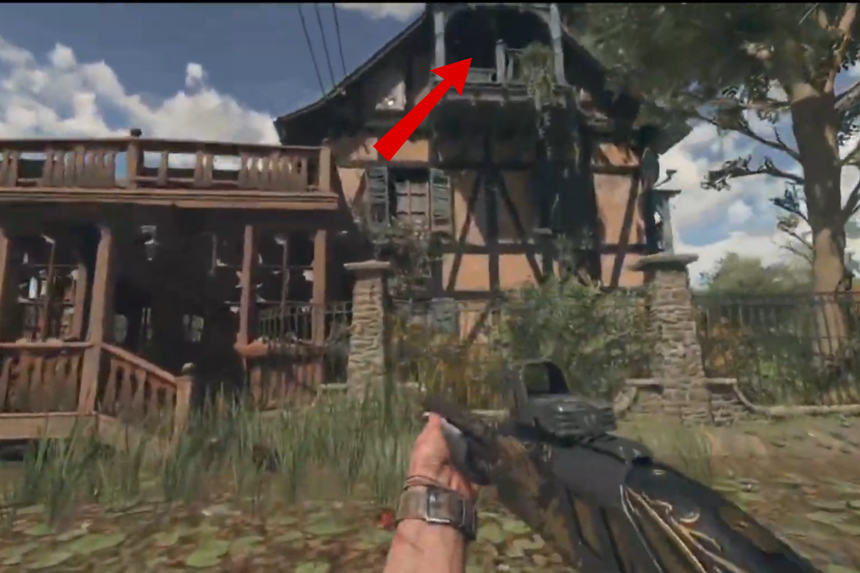
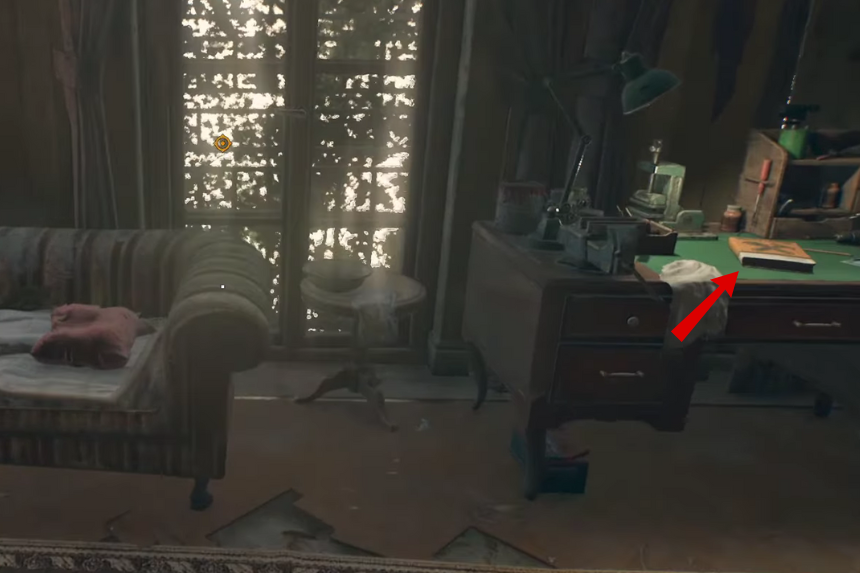
Go to the location marked on the map above. You need to climb the big house in front of you, and reach the balcony. Above the door, you will find the Ciupaga Legendary Blueprint.
Hand Grenade Legendary Blueprint Location
Hand Grenades are one of the best tools to have on you while fighting through the zombie chaos. Hand Grenades are unlocked by default, so you get access to them right from the start. It’s perfect for clearing out groups or escaping when things get messy.
Bandage Legendary Blueprint Location
Bandages are one of the first things you get in Dying Light: The Beast. Bandages are unlocked by default. They are worth using your materials on, especially when it comes to upgrades.
The Elite Legendary Pistol Location
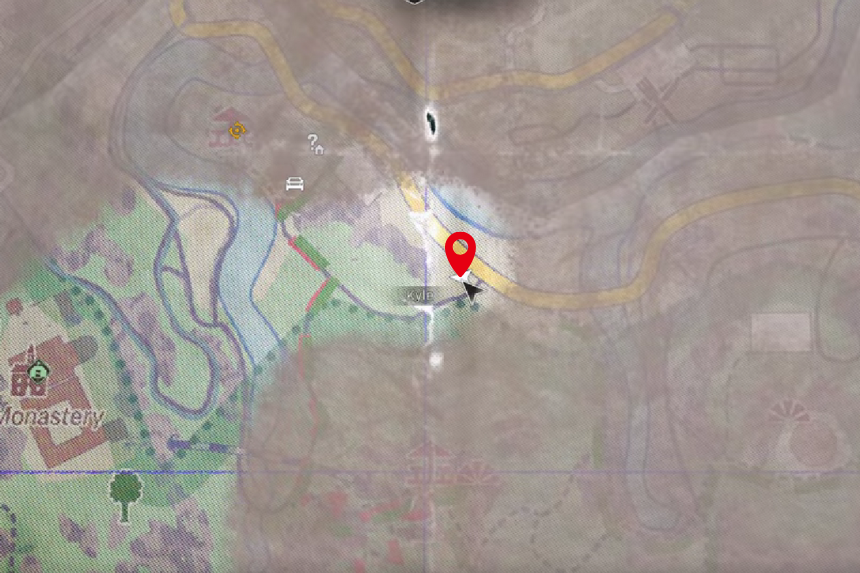
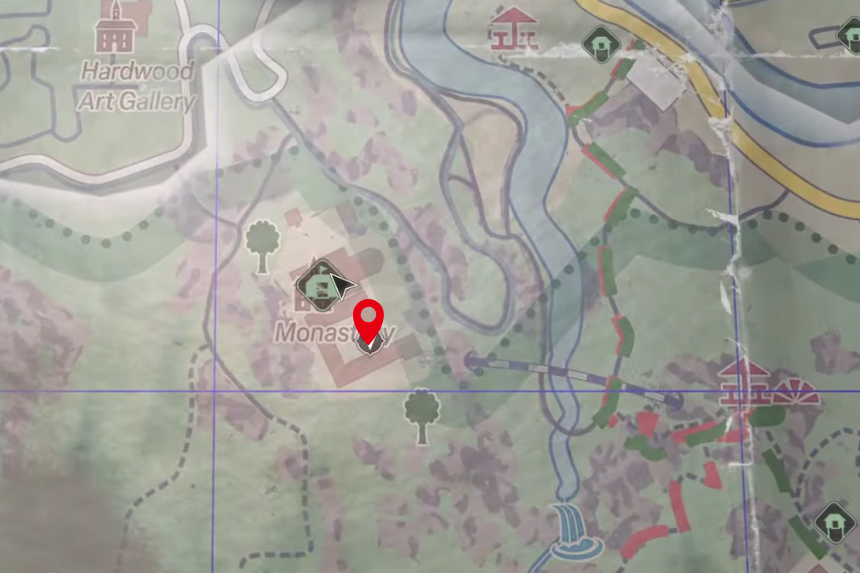
You can find The Elite, a powerful Legendary Pistol, early in the game inside a locked military convoy on a bridge west of the Monastery Safe Zone. This Safe Zone is unlocked right at the start. To get there, head to the west edge of the hill near the Monastery, you will spot a broken bridge with some old train cars on it. Once you’re on the bridge, be ready to fight off the zombies.
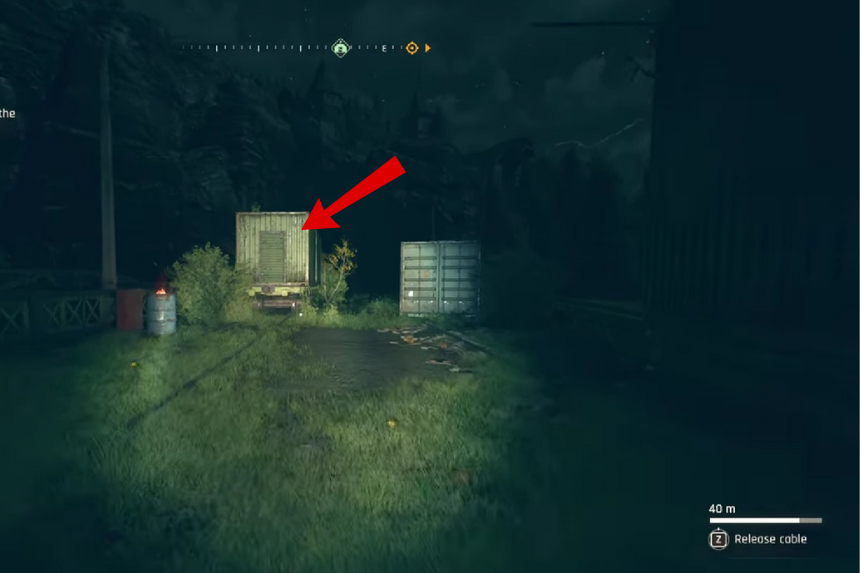
Here’s what you need to do:
- Find the open train car on the west end of the bridge and hit the green button to turn on the generator.
- Grab the power cable next to it and drag it all the way east, to the locked bunker car.
- You will need to pick the lock to open the door. Inside, plug the cable into the power point.
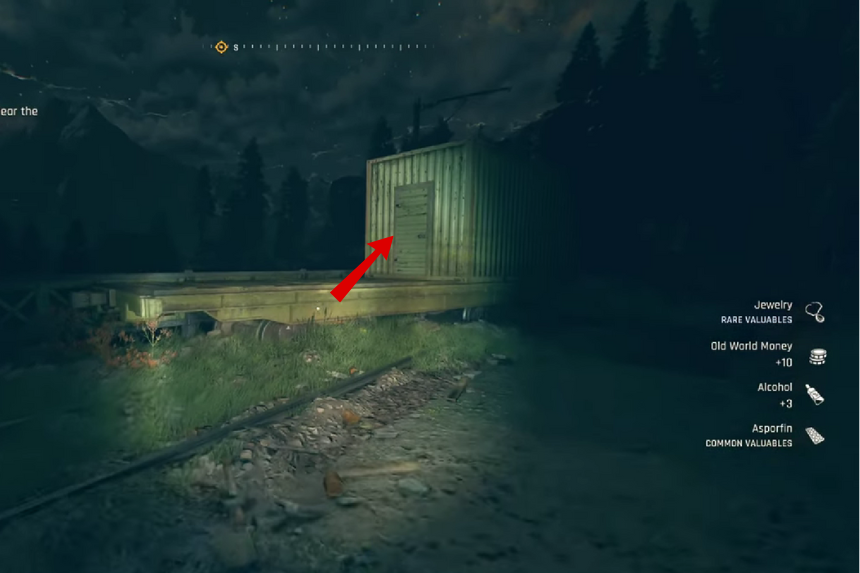
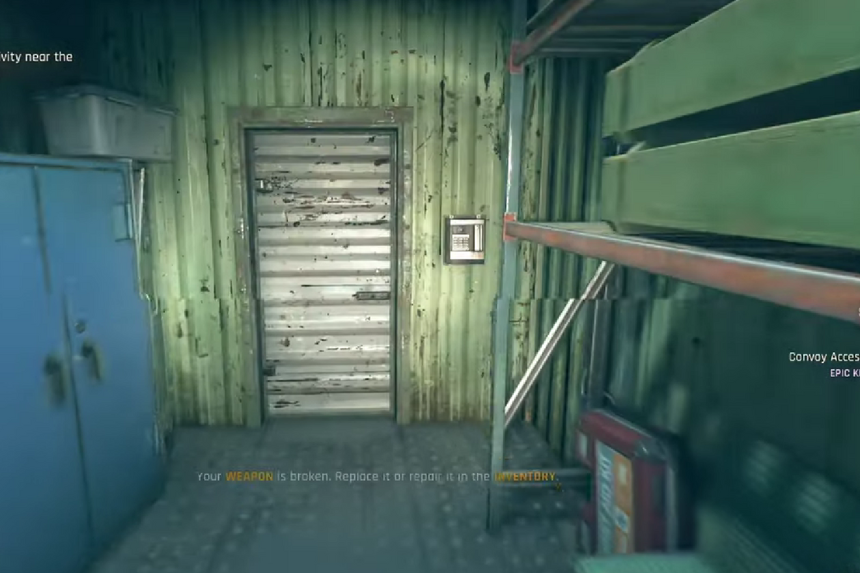
Now, to get into the room where The Elite is stored, you need a keycard. Take out the zombies in military outfits around the area in the container. Loot a card from them, head back to the bunker car, and use it on the card reader. Inside the locked room, The Elite will be on a shelf to your right, along with some pistol ammo. Also grab the Old World Wine on the left.
Sawblade Launcher Legendary Blueprint Location
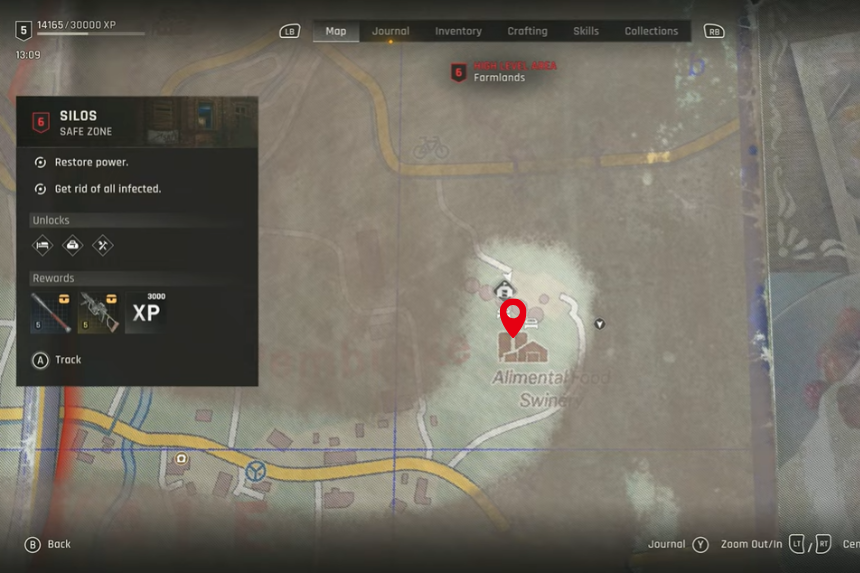
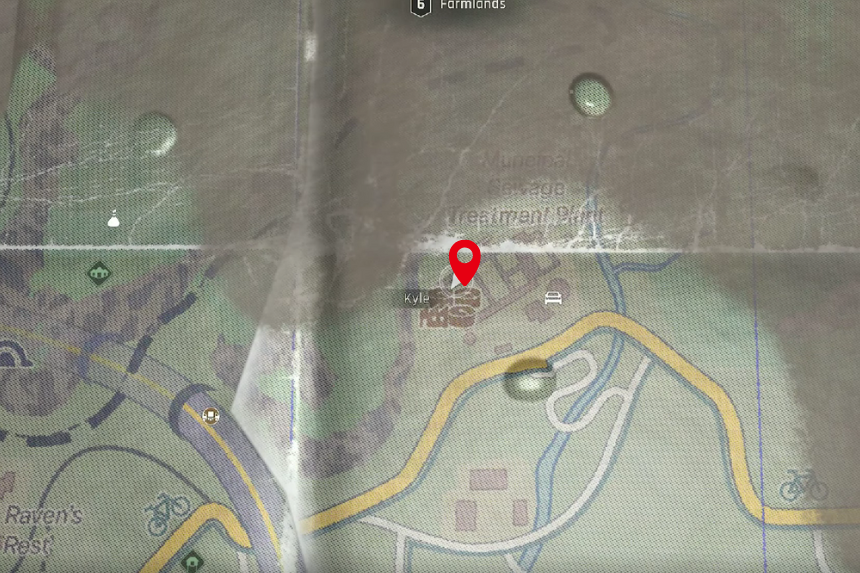
The crafting blueprint for the Sawblade Launcher is hidden inside the Silos Safe Zone, which you will find in the Farmlands region. You can miss this legendary weapon because the game doesn’t clearly point out where to find it. Your main goal will be to restore power to the facility and deal with the infected found around the area.
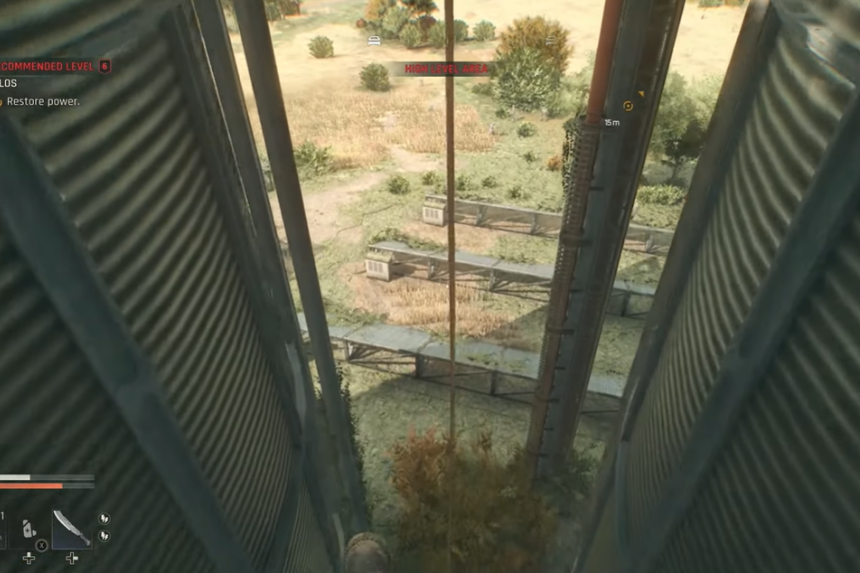
The Silos Safe Zone is at the top of the large silo structures. You can reach it by carefully parkouring your way up the outside. Don’t miss the rope swing, and make sure to unlock both ladders on the way up, they will save you time if you fall.
Once you’re at the top, take out any zombies. After that, go back down to where you first started climbing. That’s where the circuit box is. Carefully jump down while holding the cable, making sure the wire stays straight and doesn’t get too long.

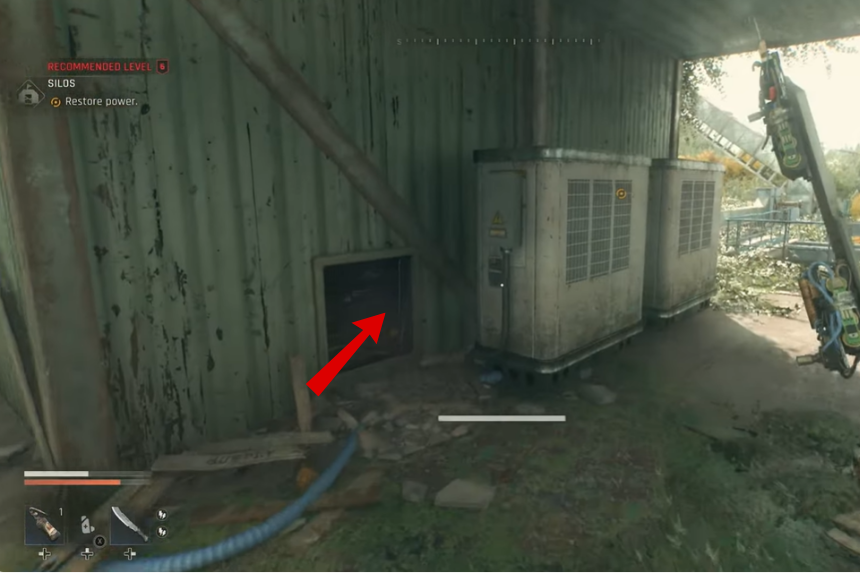
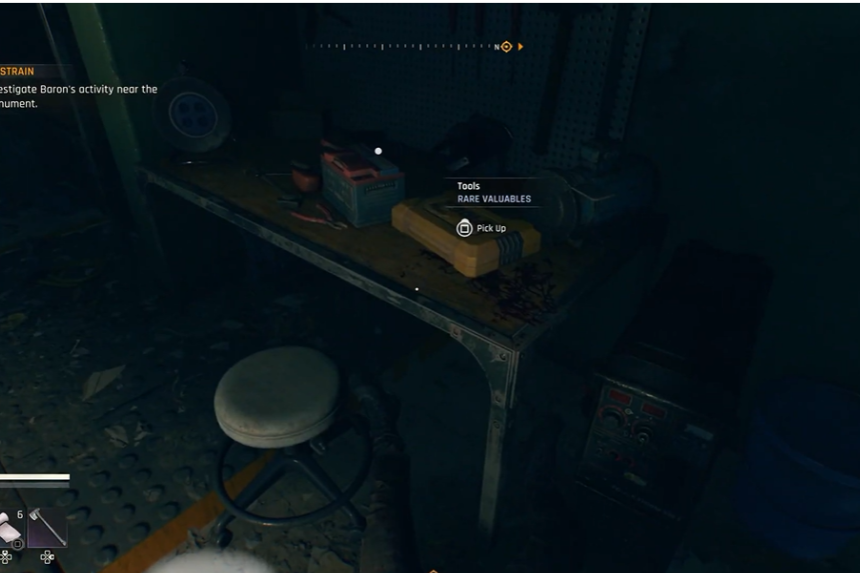
Once the power is back on and the area is clear, look for a hidden vent. Crawl through it, and you will find a workbench with the Sawblade Launcher blueprint there.
If you want to know more about Sawblade Launcher, read our guide on The Sawblade Launcher Location – Dying Light The Beast.
Eraser Legendary Rifle Location
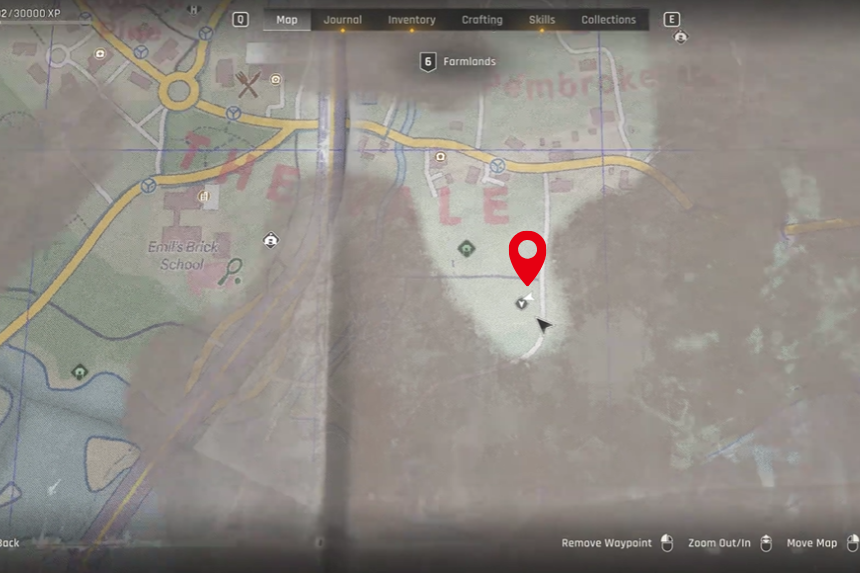
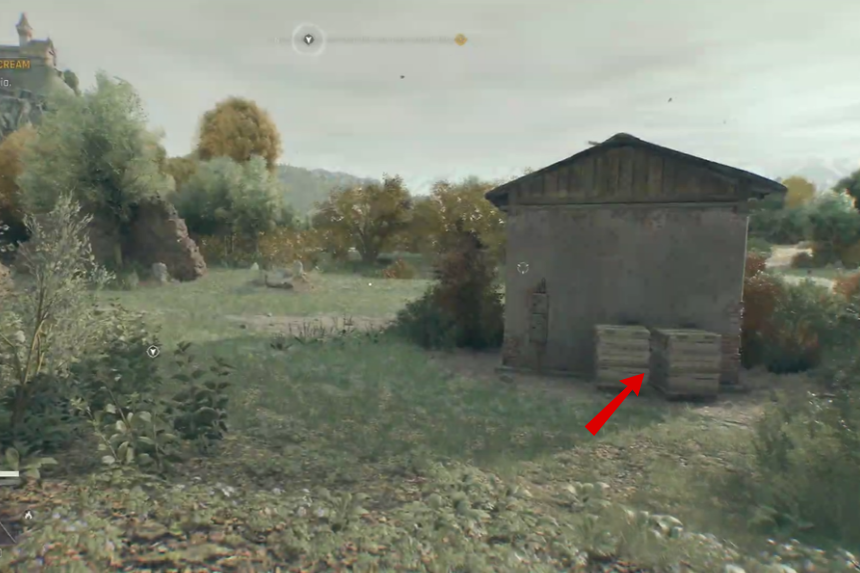
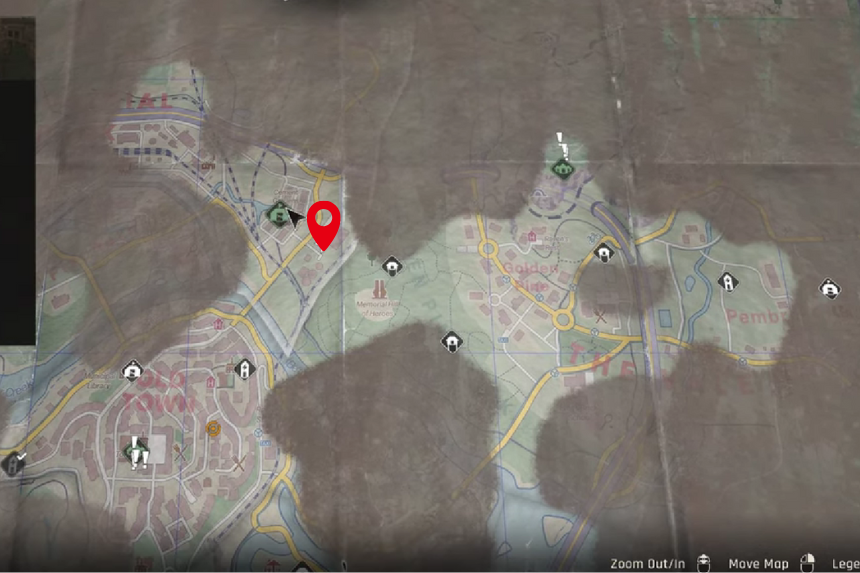
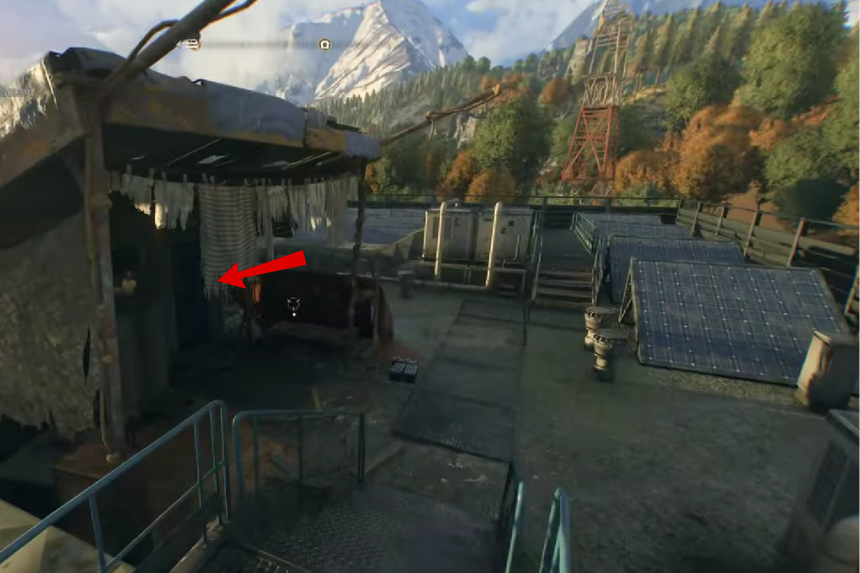
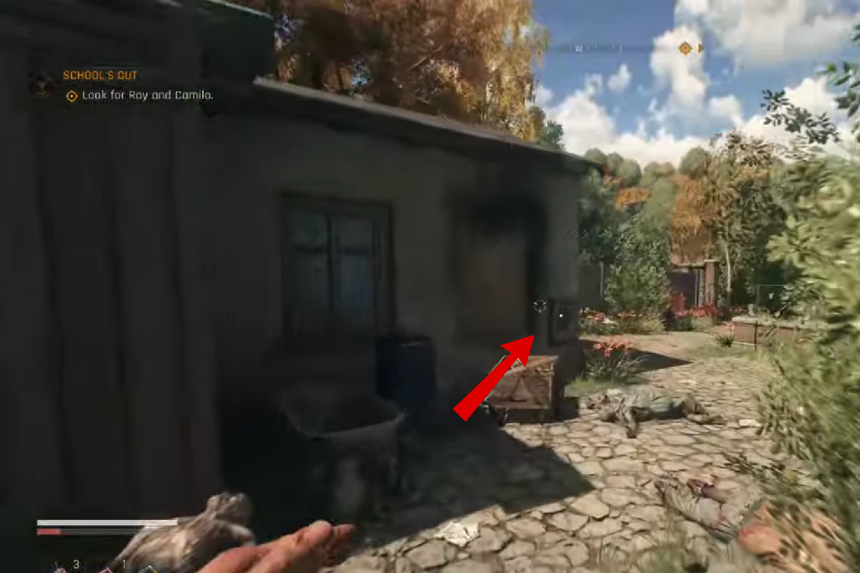
Go to the location marked on the map above. You will find a small shed there. Behind the shed, you will find wooden crates. Break the crates to enter the shed. Now, switch on the generator to restore the power to the shed. Open the door of the shed and connect the electric wire to the broken building in front of you.
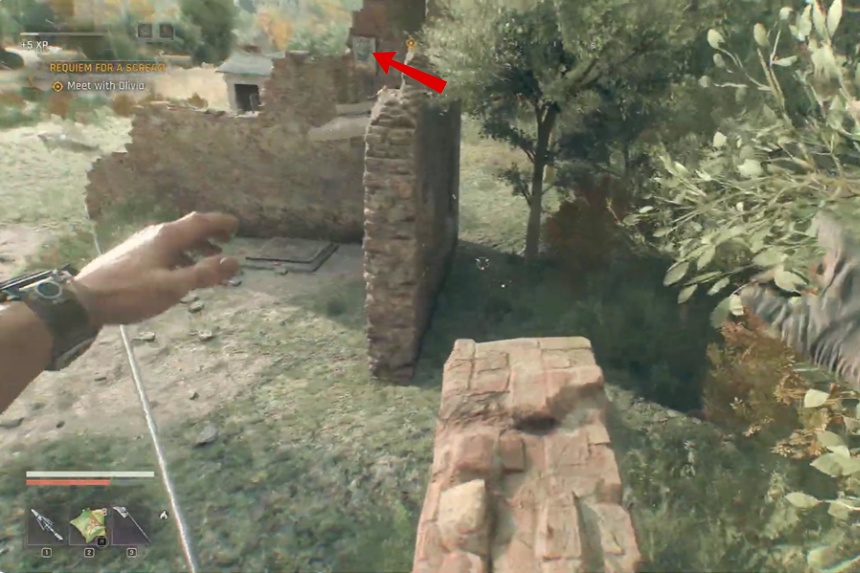
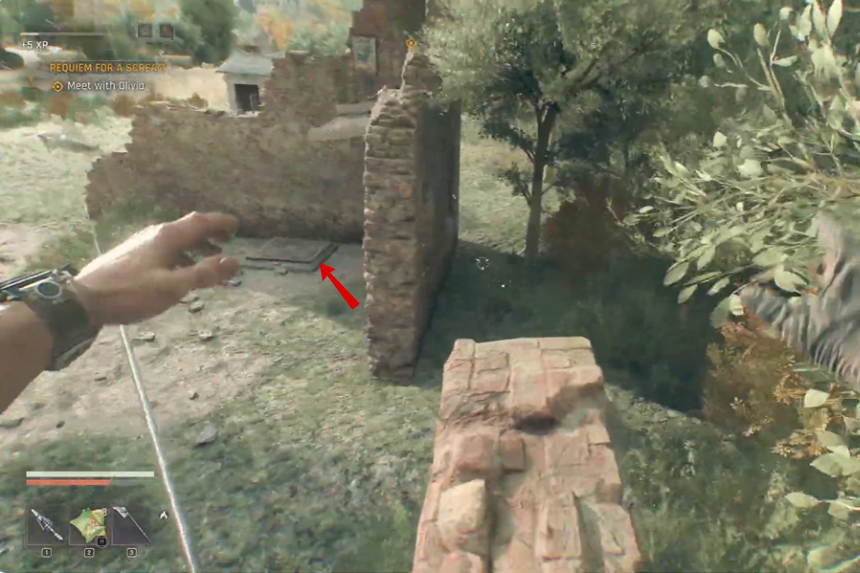
You need to climb the broken building to restore the power of the underground bunker. Once you restore the power, you can go inside it.
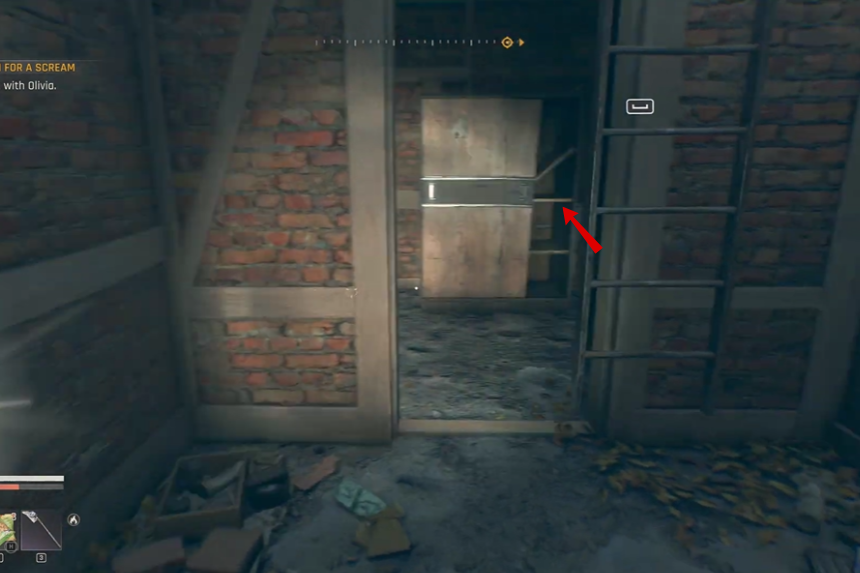

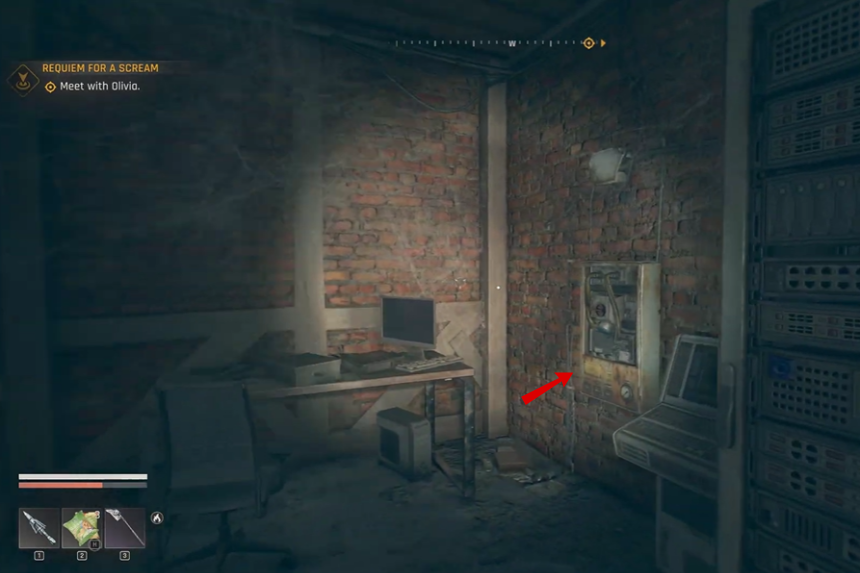
Inside the bunker, move the big wooden cupboard. Behind the cupboard, you will find a ventilation door. Break open the door and crawl through it to reach the office area. Now go back and leave the bunker. After that, detach the power line and connect it to the bunker’s office area. This will open all the doors of the bunker.
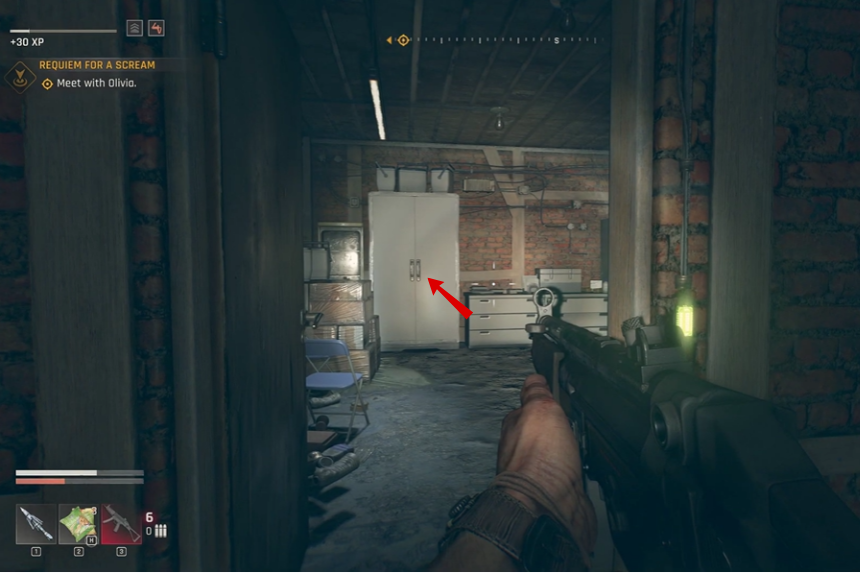
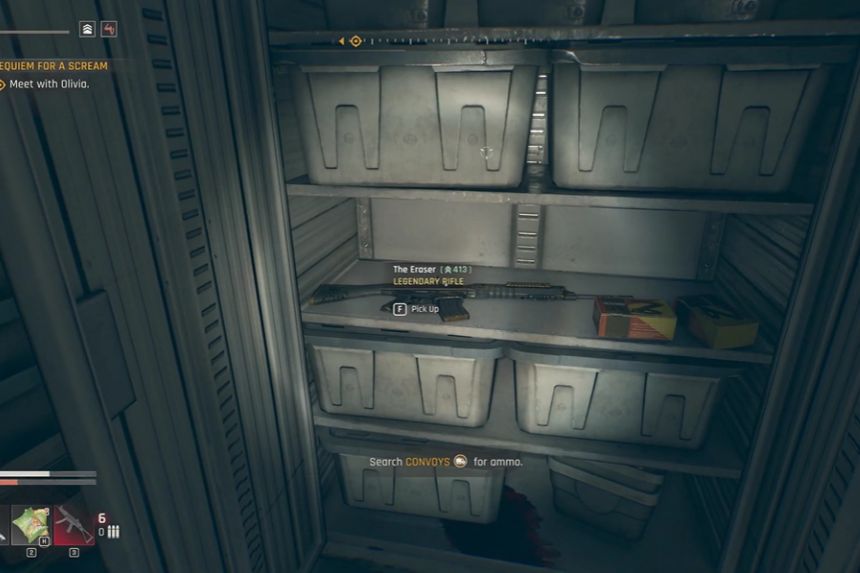
Behind one of the doors you will find an operating room. Inside the room you will find a white cupboard. You need to pick the lock of the cupboard to open it. Inside you will find Eraser Legendary Rifle.
Strauss & Broda Machete Location
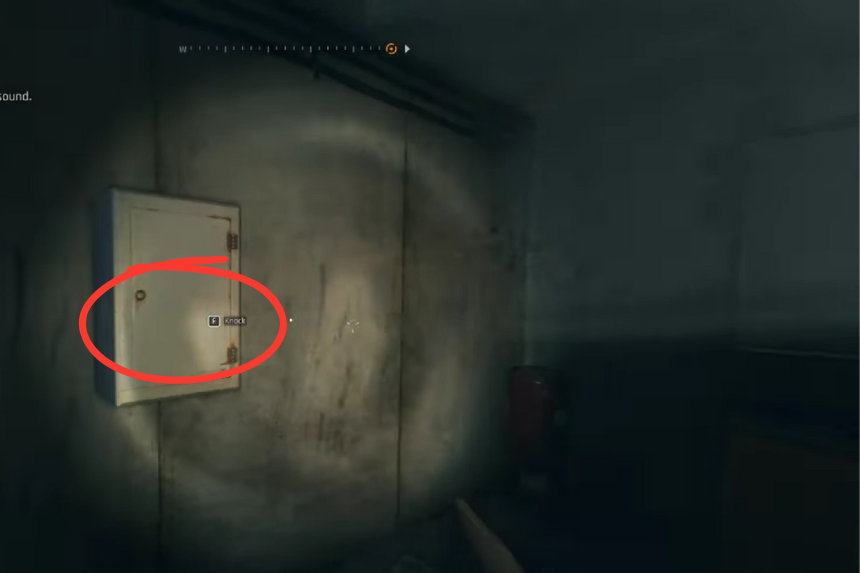
Head over to the Industrial Zone and look for the tall building in the area. Don’t stop on the first floor make your way all the way up to the rooftop. Once you’re there, you’ll spot a small locked cabinet fixed to the wall. Knock on it exactly 77 times. When it finally pops open, you’ll be rewarded with the legendary Korek Machete, a powerful weapon that adds a shocking electric effect to your strikes.
Sunray Revolver Location
Head over to the Abandoned Rocker House in D6, just north of the Vanity Store Dark Zone. Inside, you’ll find a safe. The combination is 2-2-19, a nod to the date of the Bloody Rabbits concert. Crack it open, and you’ll get the Sunray Legendary Revolver along with some extra revolver ammo.
The Statement Shotgun Location
Go to the location marked on the map above. You will find an abandoned house, and on the outside, you will find a ventilation shaft. You need to break open it and crawl through it to get inside the building.
Inside the house, you need to turn on the generator and connect the power supply from the building to another building in front of it by opening the locked door. This will open the garage door of the building, and on the workbench, you will find the Statement Shotgun.
Excalibur Location
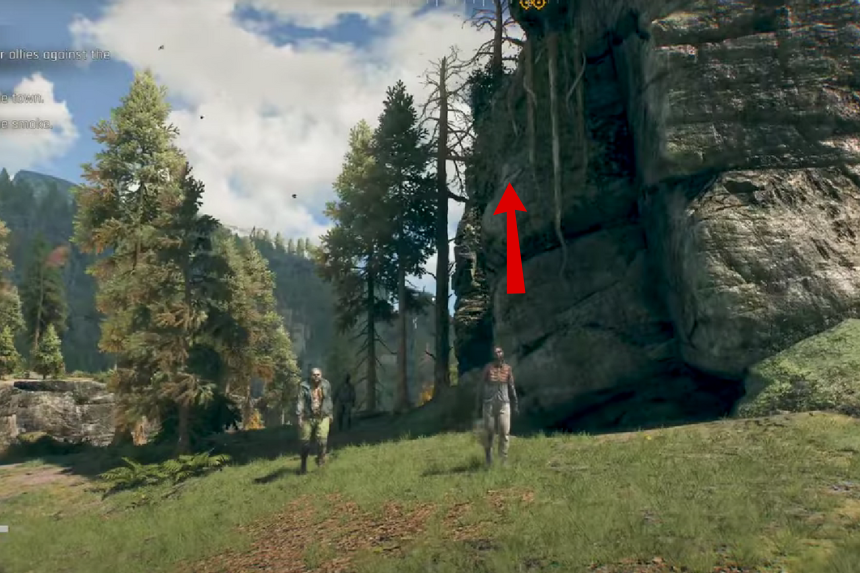
If you’re looking for the legendary Excalibur sword, start at the monastery and head northeast across the river until you hit the road. From there, keep an eye out for the tall cliffs in the distance.
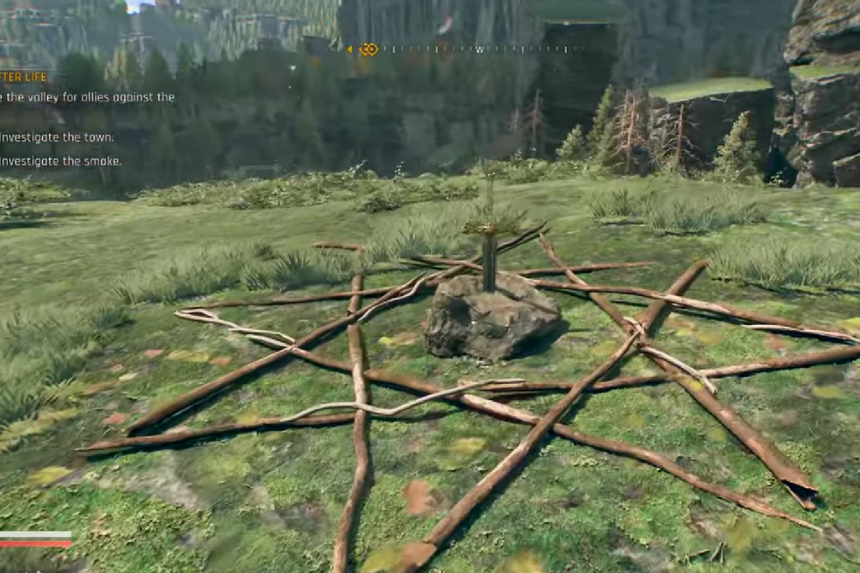
Use the tree roots to climb up one of the hills, then keep going until you reach the very top of the highest peak. There you will find the fabled Excalibur. To claim it, you’ll need to place 8 stones onto the sticks holding the sword in place.
The Beaver’s Stick Legendary Weapon Location
You need to collect 6 branches to complete the unfinished dam. After that, you need to unlock a secret cave, where you will get the Beaver’s Stick Legendary Weapon. Here’s the location of all 6 branches.
Stick 1 Location
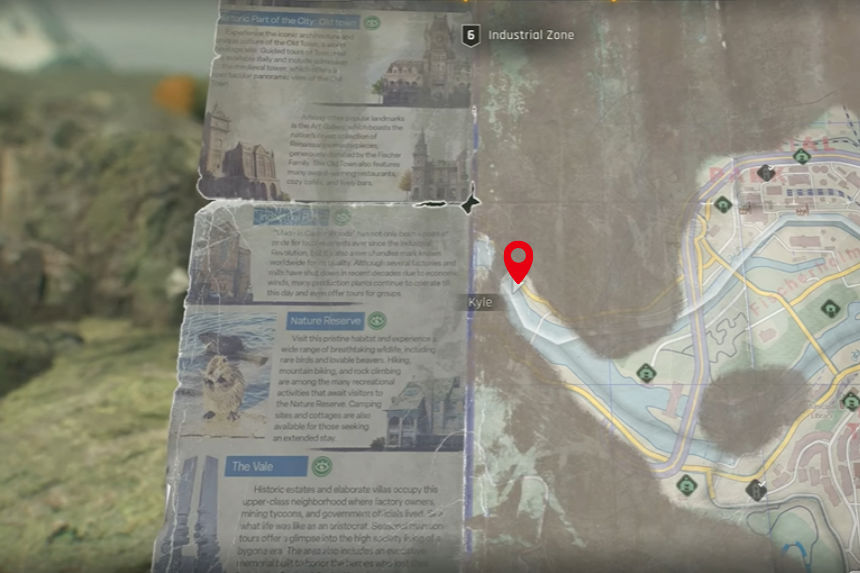

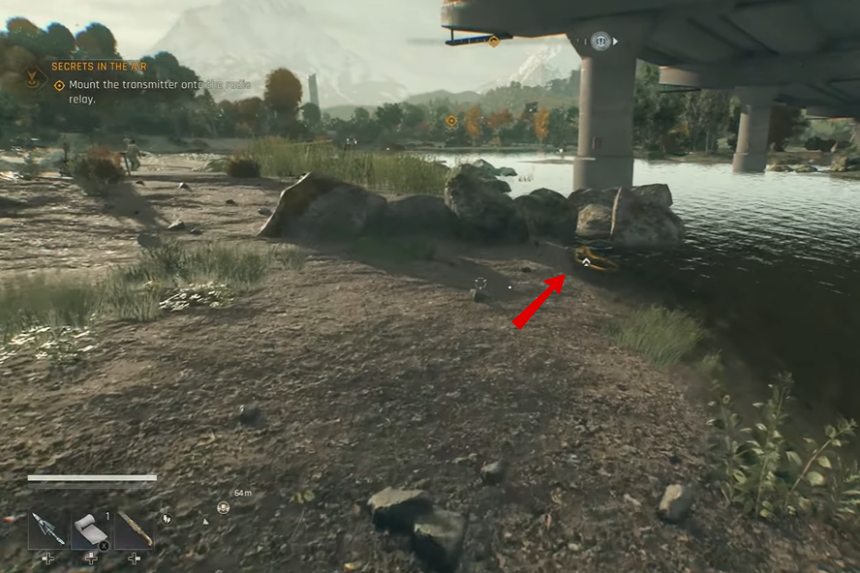
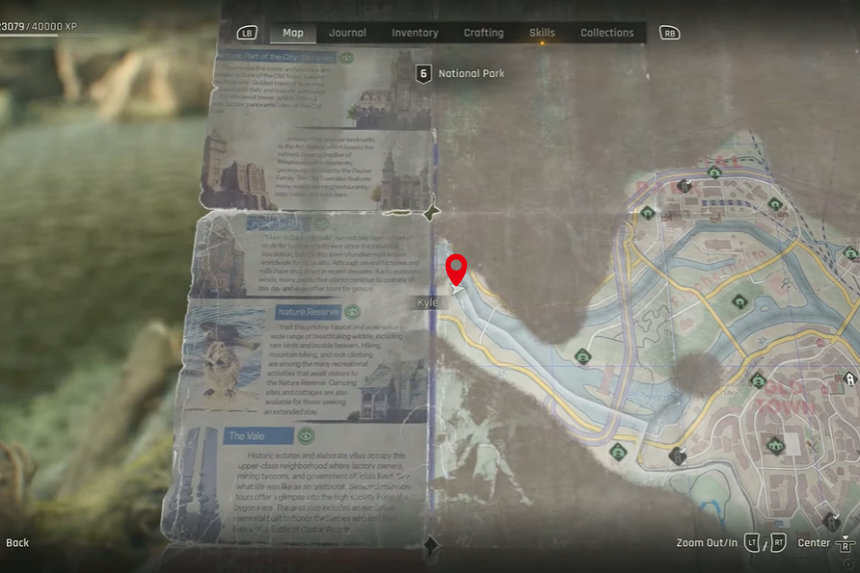
To collect the first stick, go to the location marked on the map above in the industrial zone. You will find the first stick on a rock near the river.
Stick 2 Location
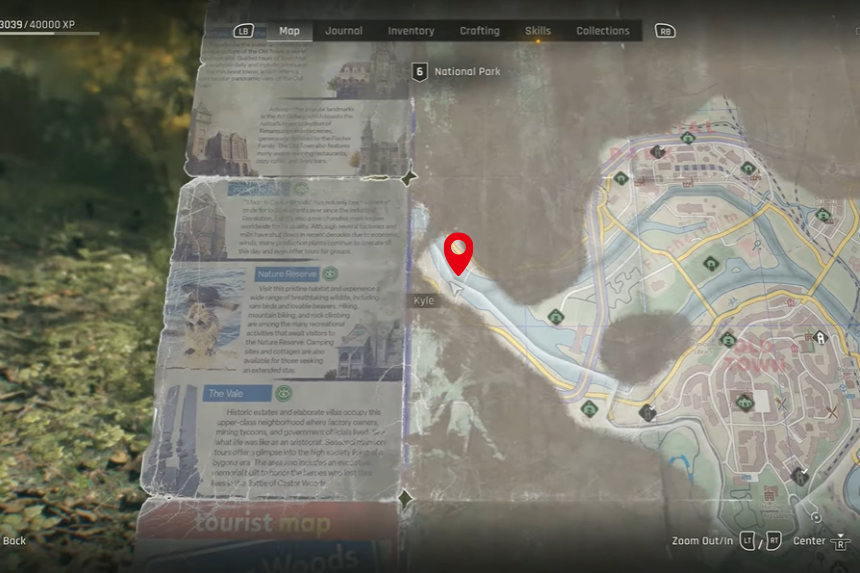
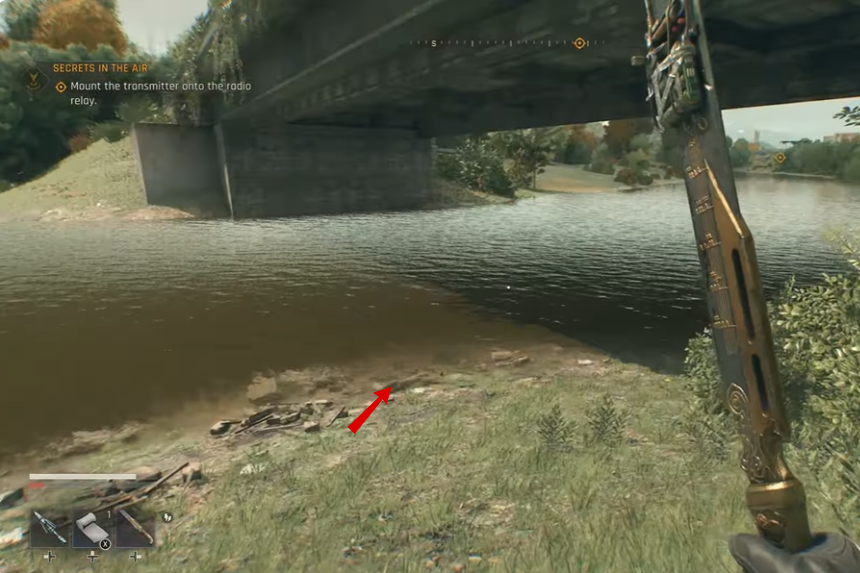
In the National park region. You will find the second stick under a bridge, near the river.
Stick 3 Location
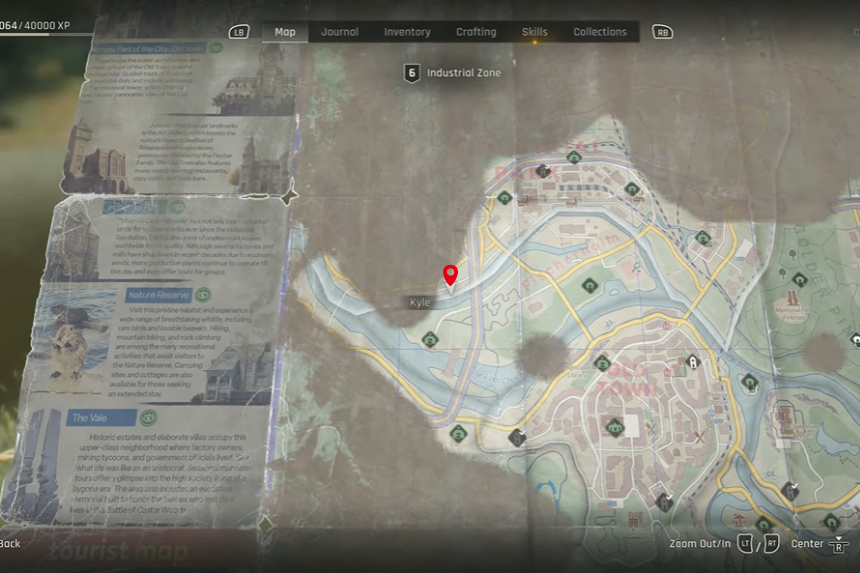
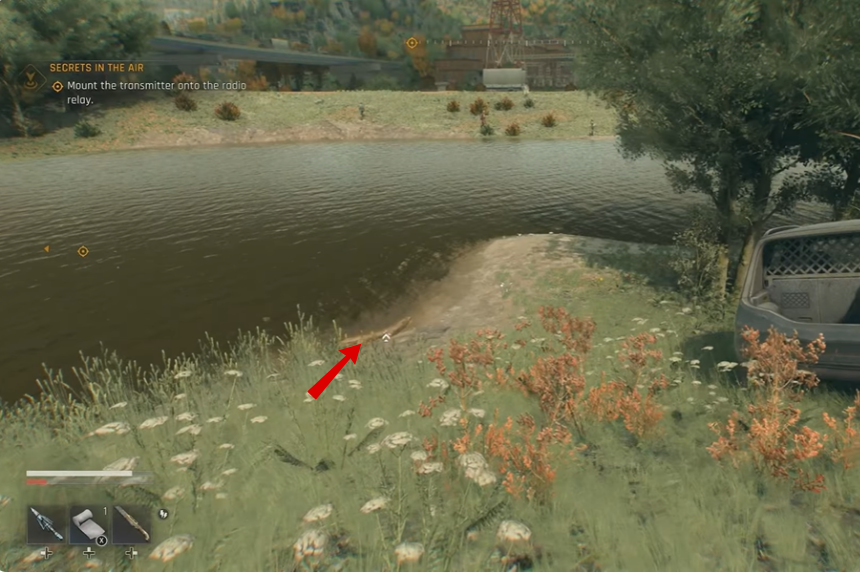
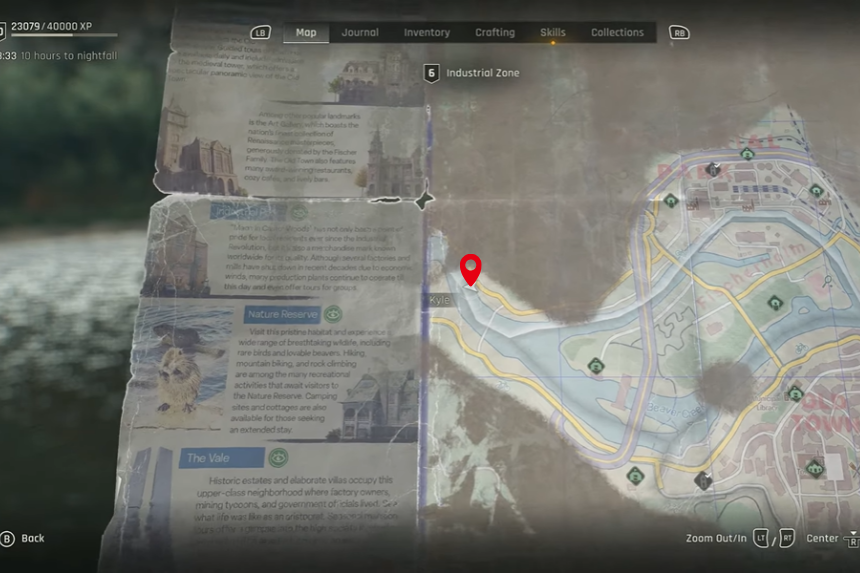
In the industrial zone, you will find the third stick near an abandoned car on the river banks.
Stick 4 Location
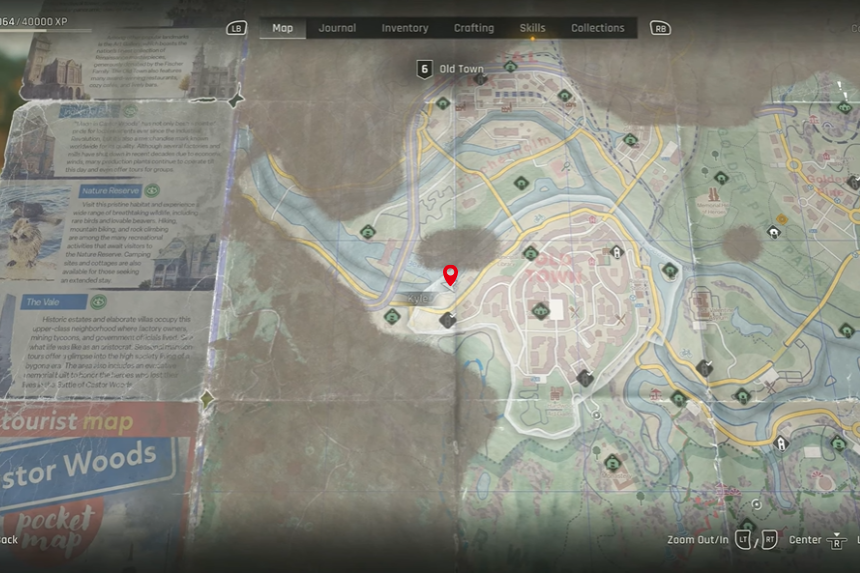
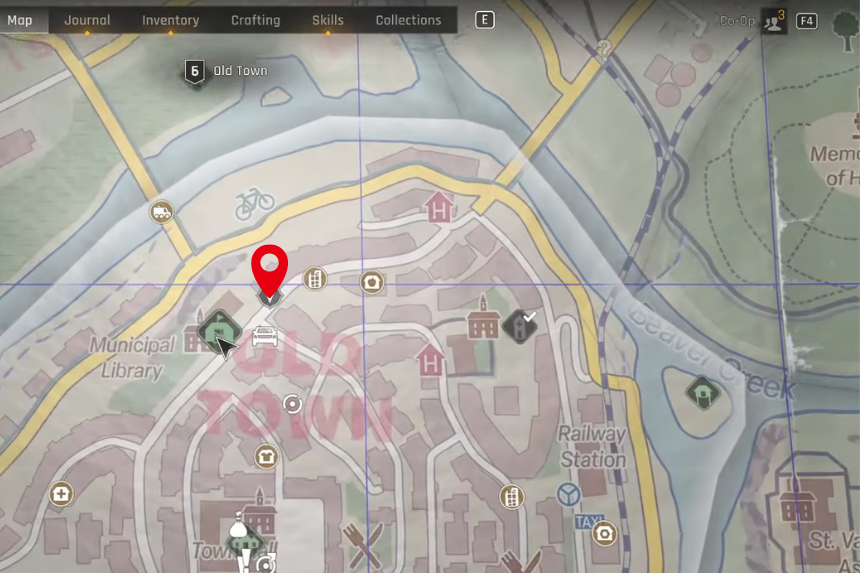
Head towards Old Town, you will find the fourth stick near the banks of the river.
Stick 5 Location
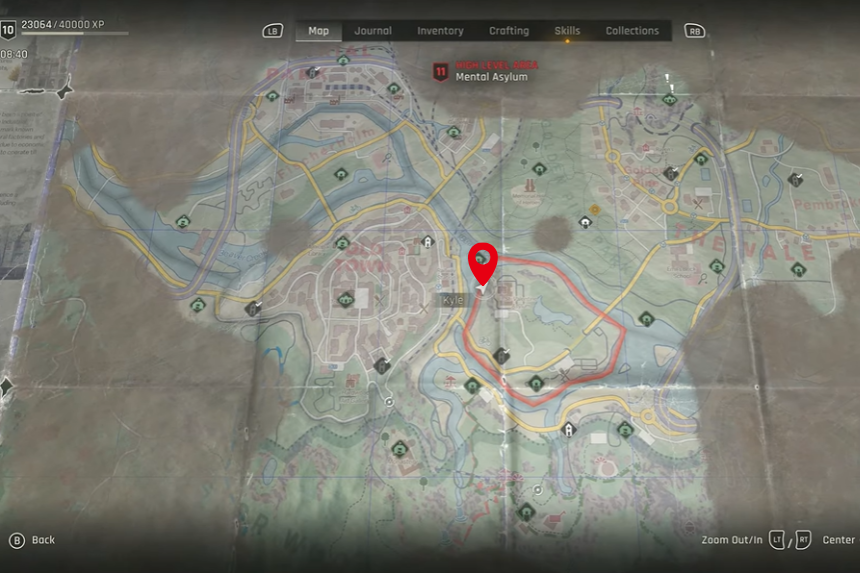
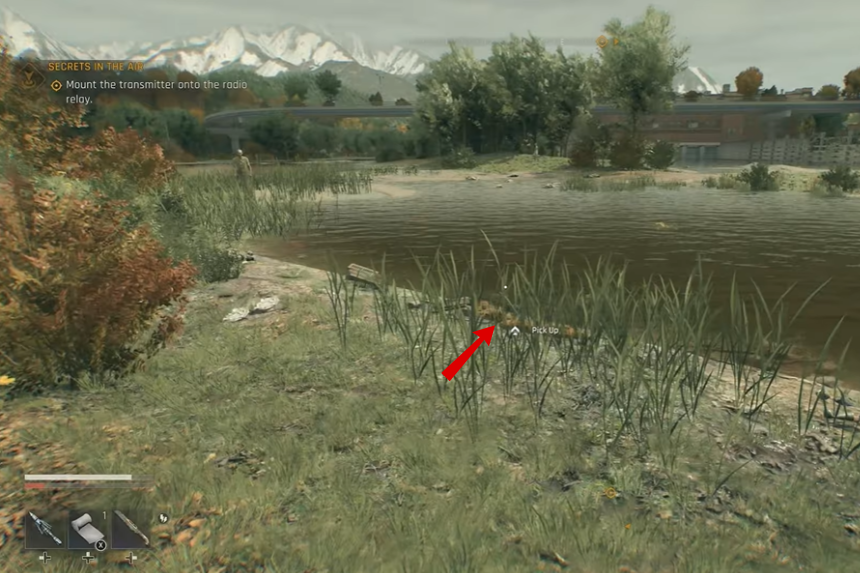
In the mental asylum area, you will find the fifth stick on the river banks near a big tree. This is a high-level area, so be careful, as many zombies will be there.
Stick 6 Location
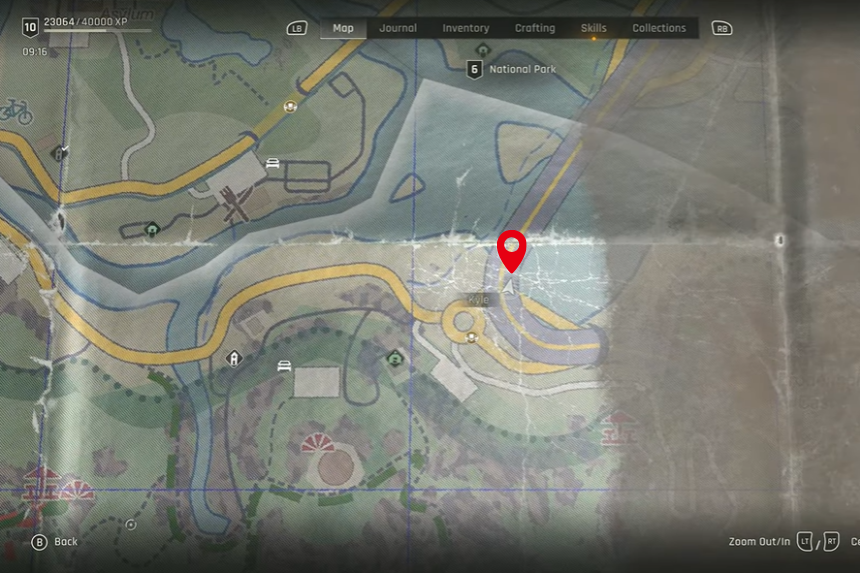
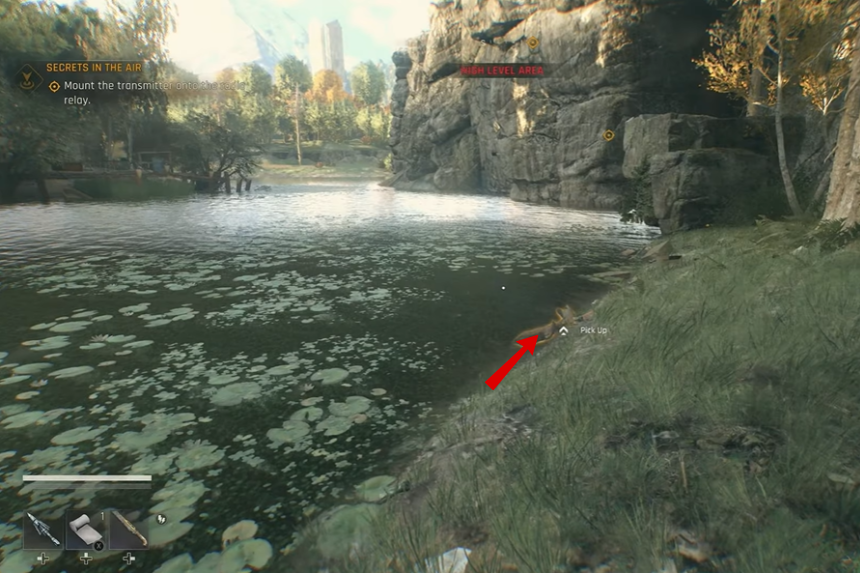
In the National Park region, you will find the sixth and final stick under a bridge, near the rocks.
Beaver Cave Location
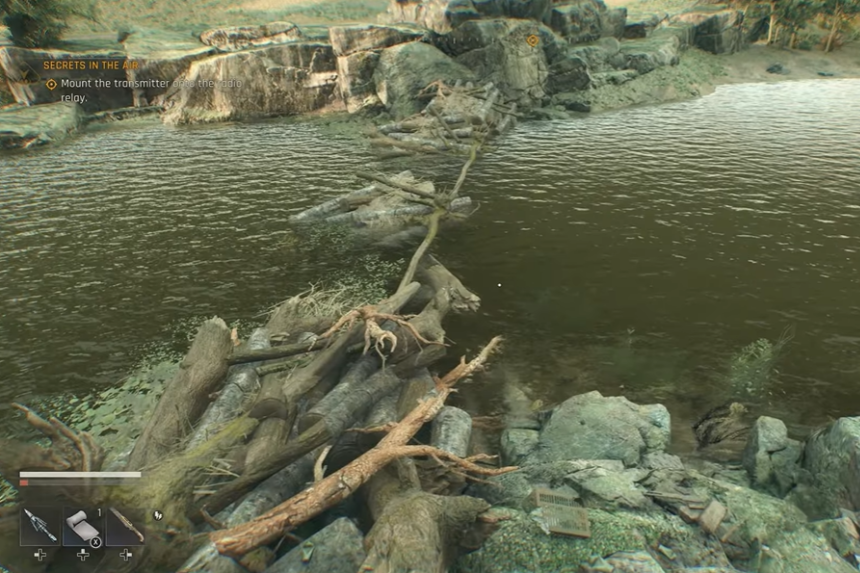
Go to the National Park region, and you will find an unfinished log dam. To complete it, put all the stickers that you have found in the dam. After you have completed the dam, you will find a secret cave. To get into the secret cave, swim downwards towards the light to get inside the cave.
Inside the cave, you will find a Beaver family room. Move towards the garage area to find a bed. Rest on the bed till the next morning. When you wake up, you will meet a big human-sized Beaver. On the workbench, you will find the Beaver’s Stick Legendary Weapon.
SPAS Decoy
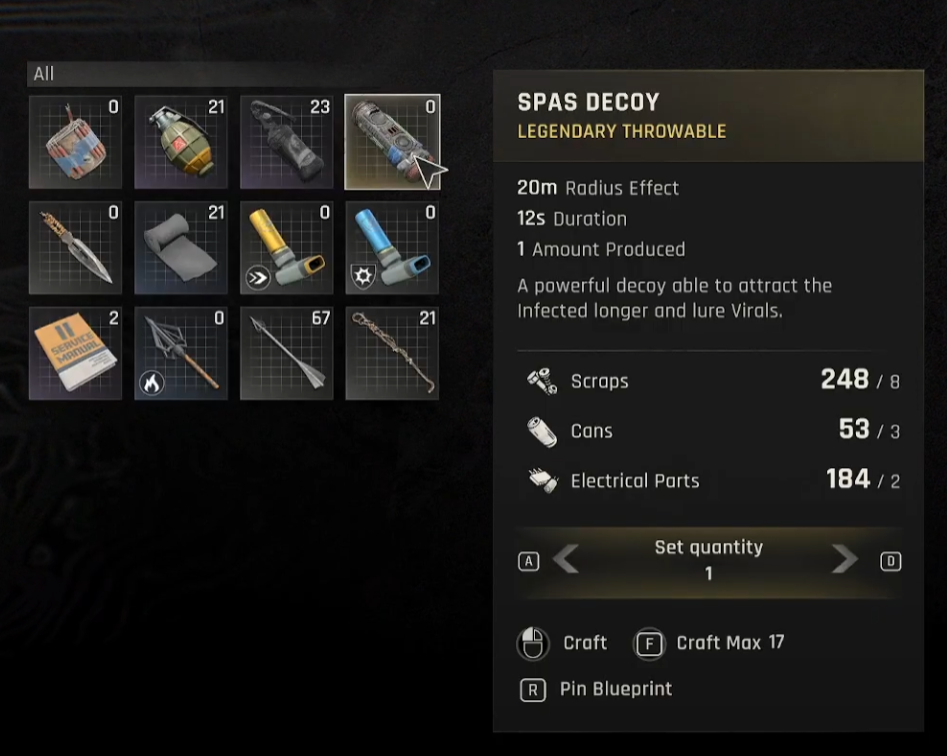
You will get the Spas Decoy by completing the Good Vibrations Sidequest. Once you complete the Power main story mission, head towards the Town Hall.
Good Vibrations Sidequest
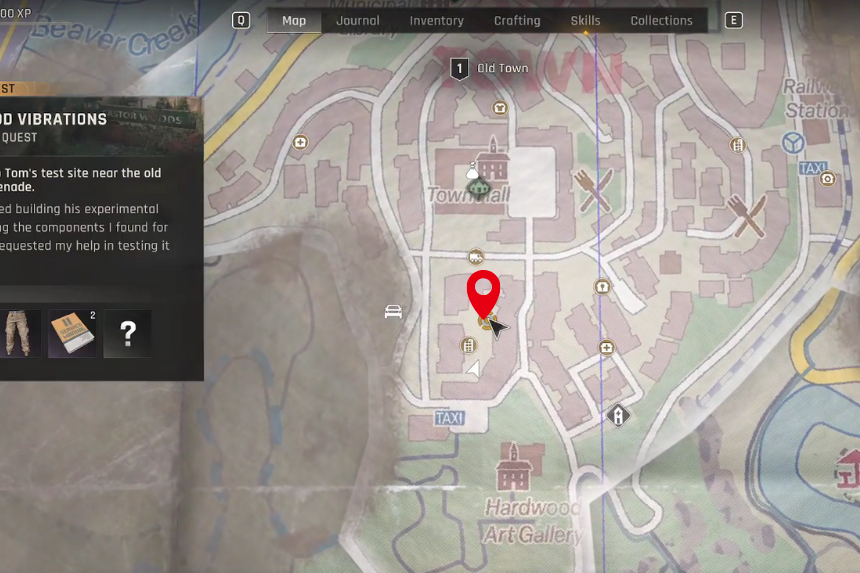
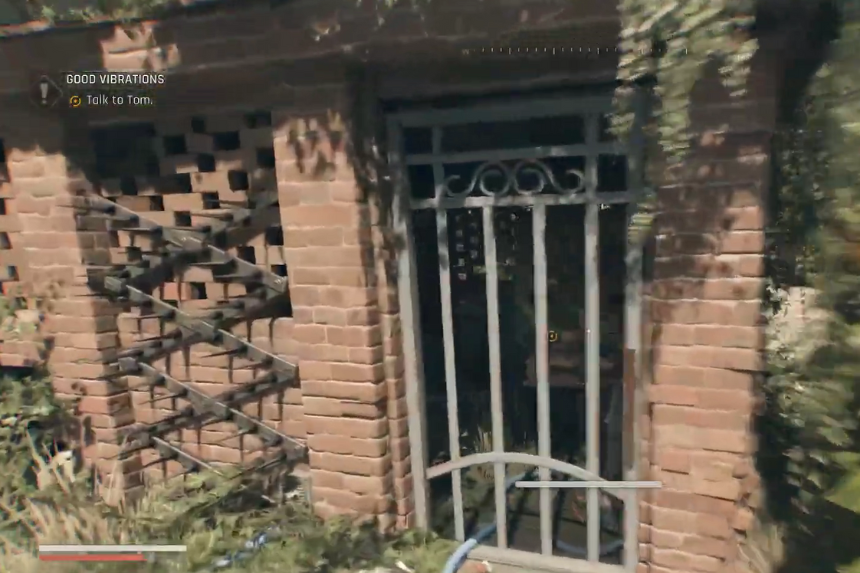
In this quest, you will need to help Tom test his experimental device near the Old Promenade. After going there, you need to talk to Tom. Tom tells you that the device he is making generates specific frequencies which scare off monsters.
When he starts his machine, the machine malfunctions and attracts more monsters. Now you have to kill these monsters as Tom is busy repairing his machine. After defending the loudspeaker, you need to connect the wire to the loudspeaker.
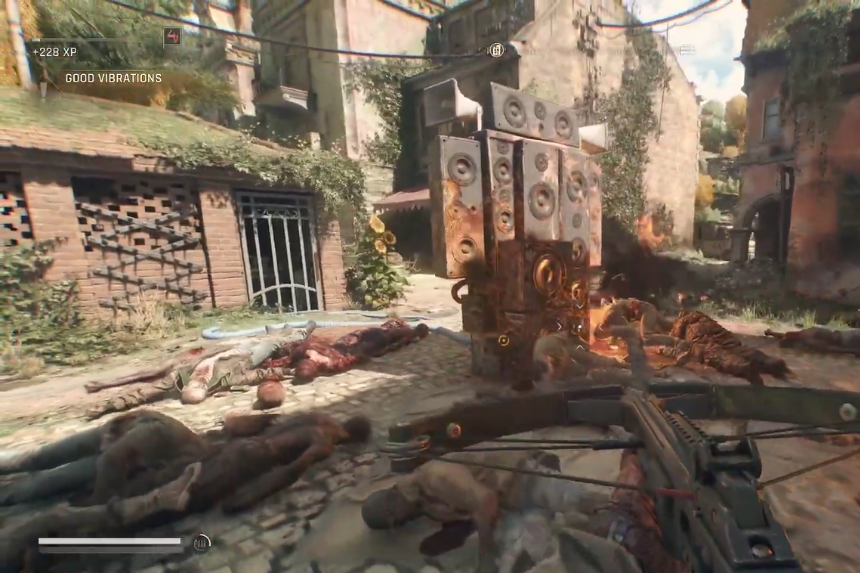
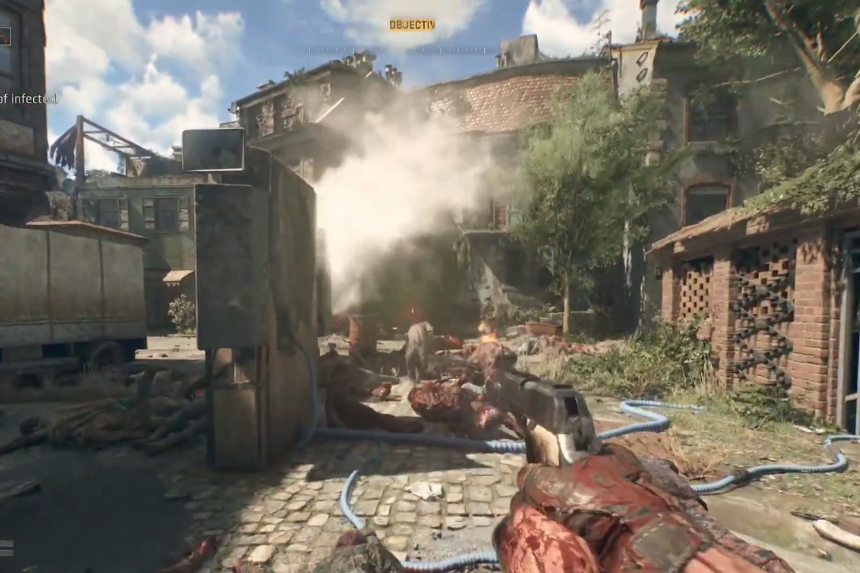
After connecting the wire, the loudspeaker will generate a particular frequency that scares off the monsters. After some time, the loudspeaker will blast off. You will need to then kill all the zombies in the area after that. After clearing the area, talk with Tom. After talking with him, he will gift you the blueprint of the SPAS decoy. And officially, you will complete the Good Vibrations Sidequest.
Grenade Launcher
The Grenade Launcher is great for taking out large groups of Infected fast. Its blueprint is already legendary when you unlock it. To get it, you just need to unlock the Grenade Launcher Survival Skill. To craft it, head towards any of the workbenches present in the game. Once you reach there, you will need two skill points to unlock the blueprint.
Flamethrower
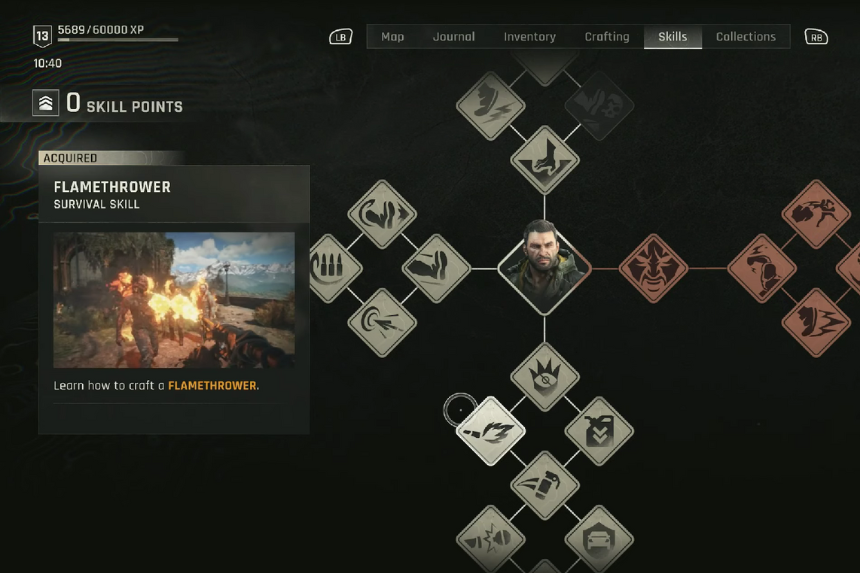
You can unlock the Flamethrower through the skill tree by spending skill points. Once unlocked, head over to any workbench, and you will be able to craft it. The Flamethrower is a powerful weapon, perfect for dealing with large groups of enemies.
Here’s what you need to craft it:
- 100 Scraps
- 10 Weights
- 3 Oxidizers
- 1 Fuel
To make extra Flamethrower Fuel, you will need 3 Fuel and some Resin.
Tempered Crowbar
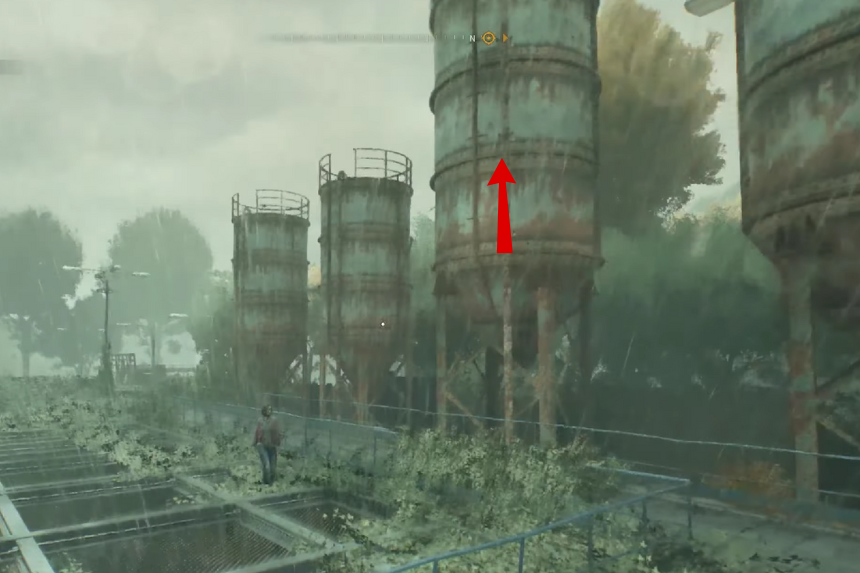
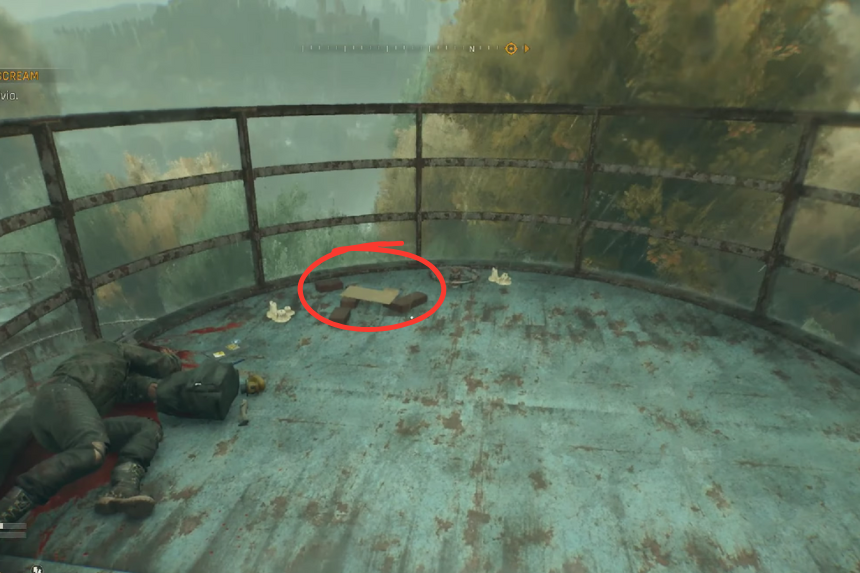
Go to the Farmlands region in the Silos area marked on the map above. Climb the middle Silo in front of you. Be cautious, as zombies will be roaming the area. At the top of the Silo, you will find the Tempered Crowbar blueprint lying near a dead body.
IGA Legendary One-handed Mace
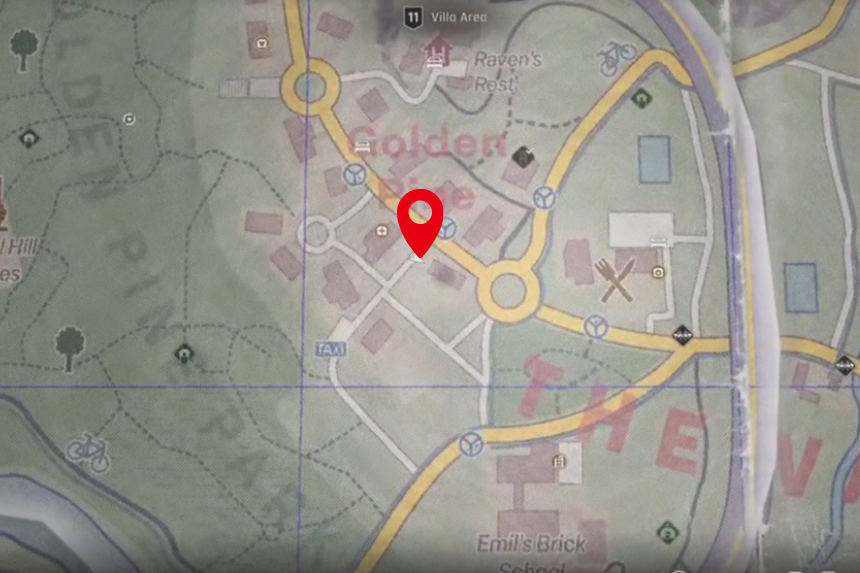
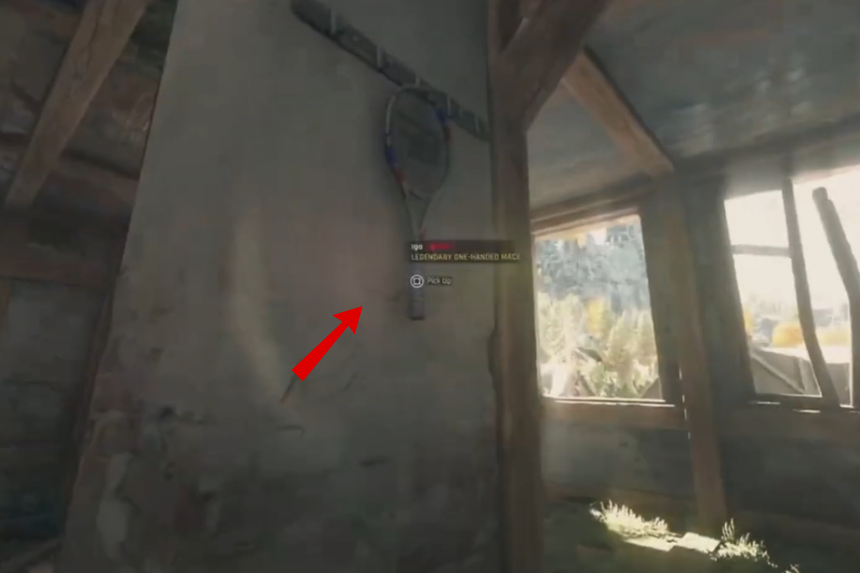
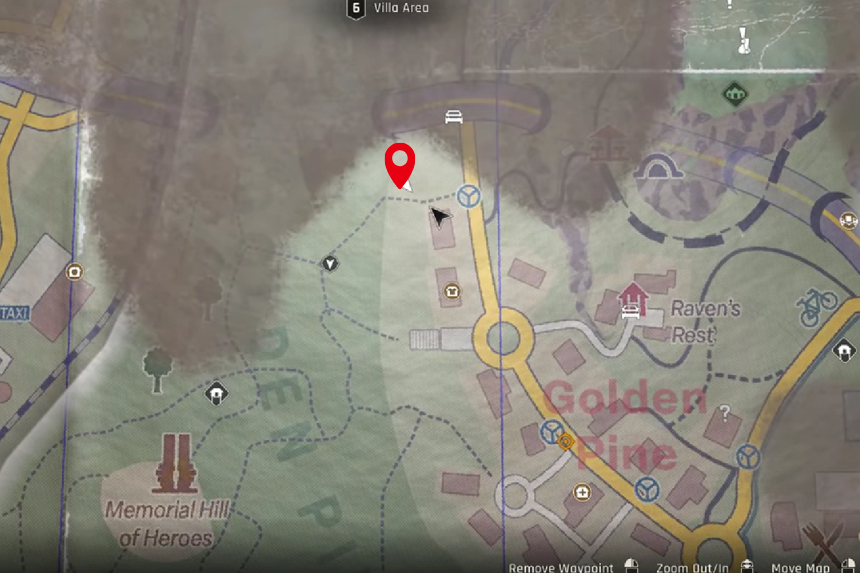
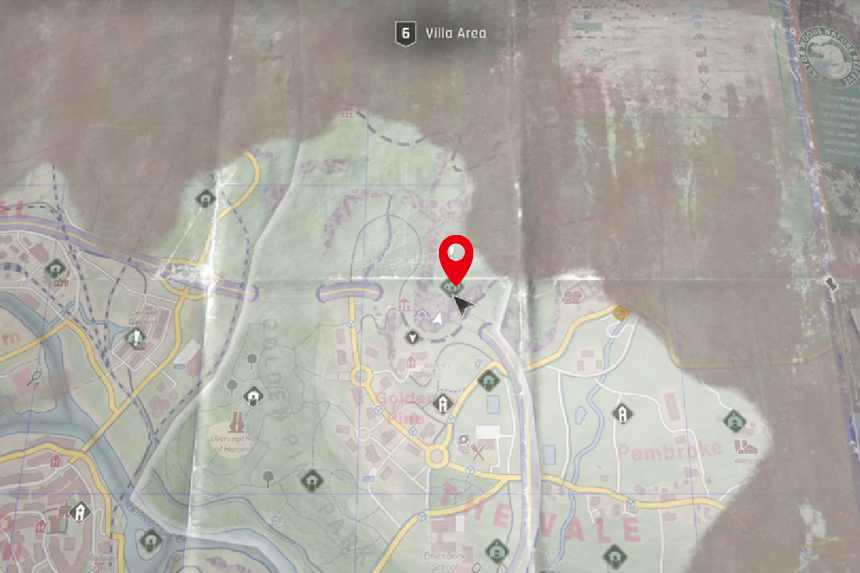
Go to the villa area, marked on the map above. Here, you will find an abandoned bungalow. Climb towards the attic of the bungalow. You will find the IGA legendary one-handed mace on the pillar.
The Legacy Katana – Legendary Long Sword Location

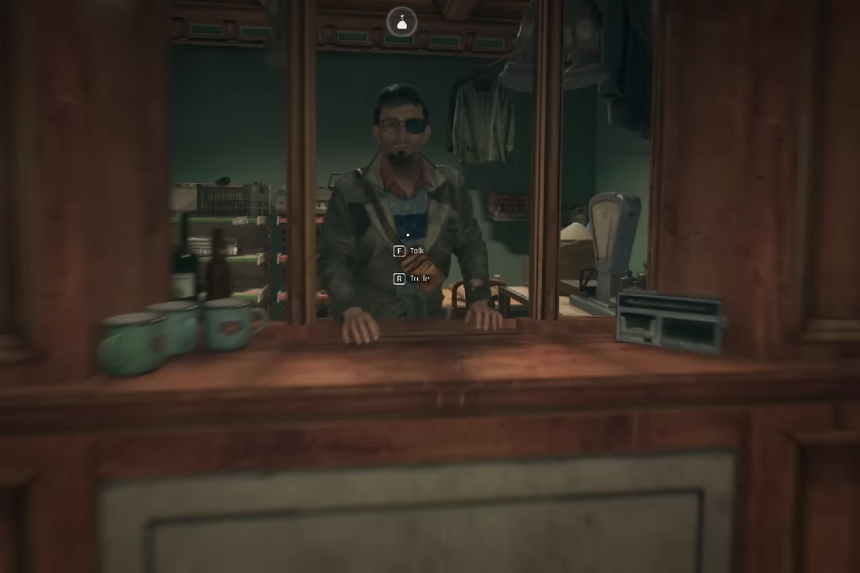
You will get the Legacy Katana Legendary Weapon in Doug’s shop. This shop will provide you with all the legendary weapons that are not found in the open world. You need to respawn Doug’s shop by running towards the fence and returning to Doug. Legendary weapons will appear in the shop starting at level 11. The higher your level is, the greater the chances of getting the legendary weapon.
The Breslau Blade Legendary Machete
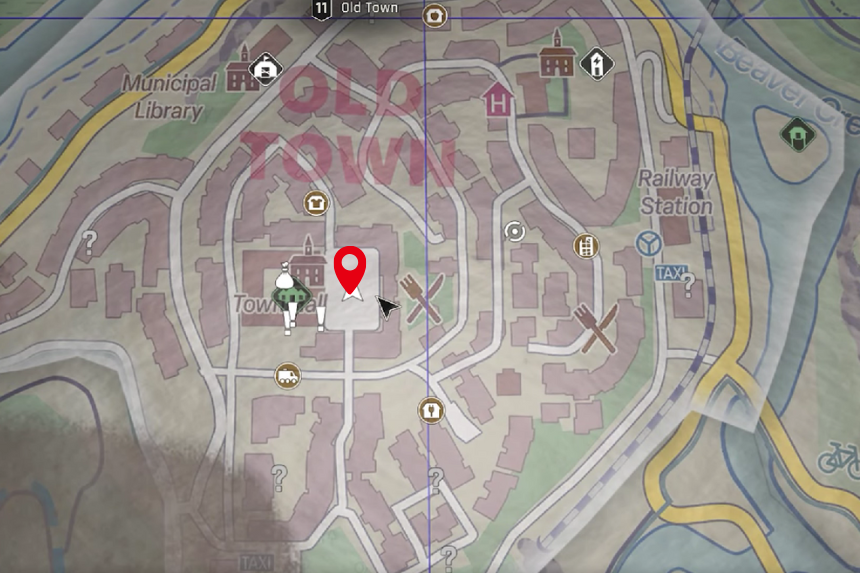
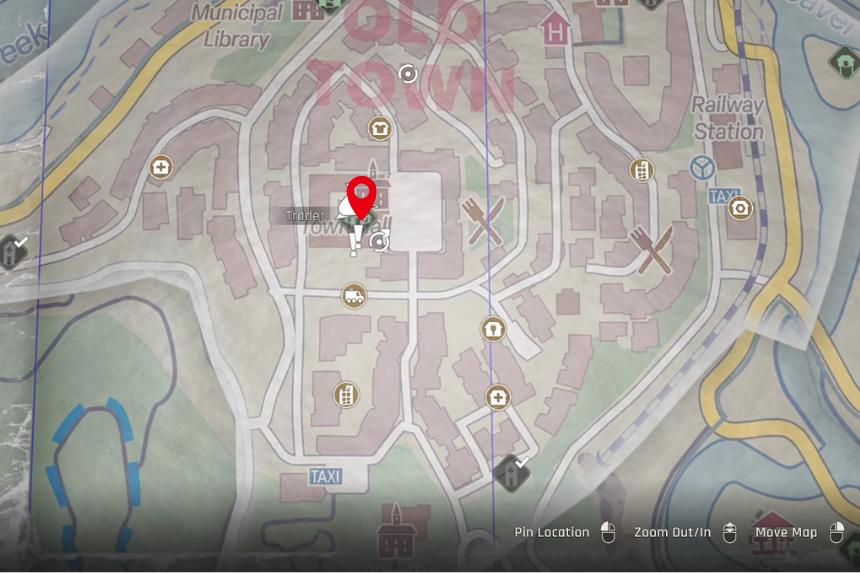
Head over to the Town Hall entrance, where you’ll see a statue standing in the middle of the square. The statue is holding the Breslau Blade Legendary Machete, but you can’t just grab it. There’s a puzzle you’ll need to solve first.
All Stone Tablet Locations
To unlock the weapon, you’ll need to shoot and destroy 9 stone tablets hidden around the square. Once all tablets are destroyed, you’ll be able to interact with the tomb beneath the statue and claim the blade.
1st and 2nd Tablets
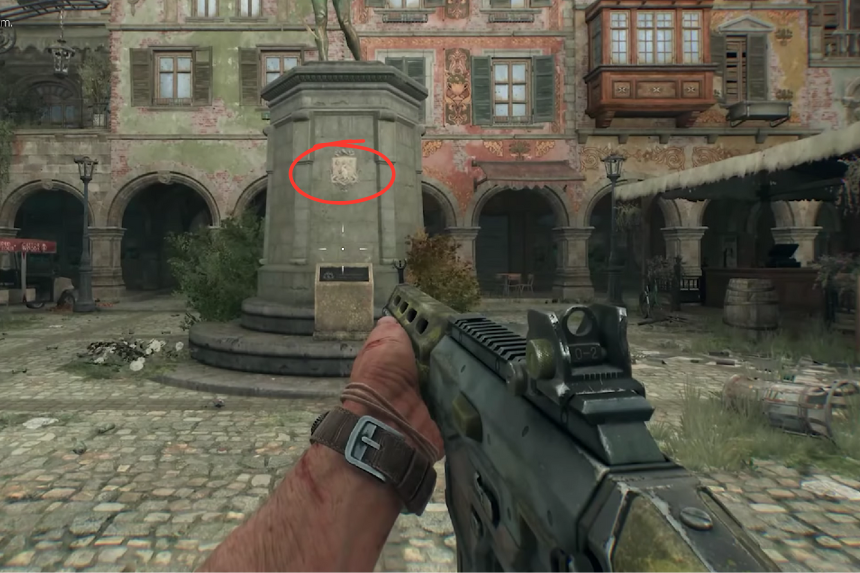
The first two are on the statue itself, one on the front side of the pillar beneath it, and the other is on the back side.
3rd Tablet
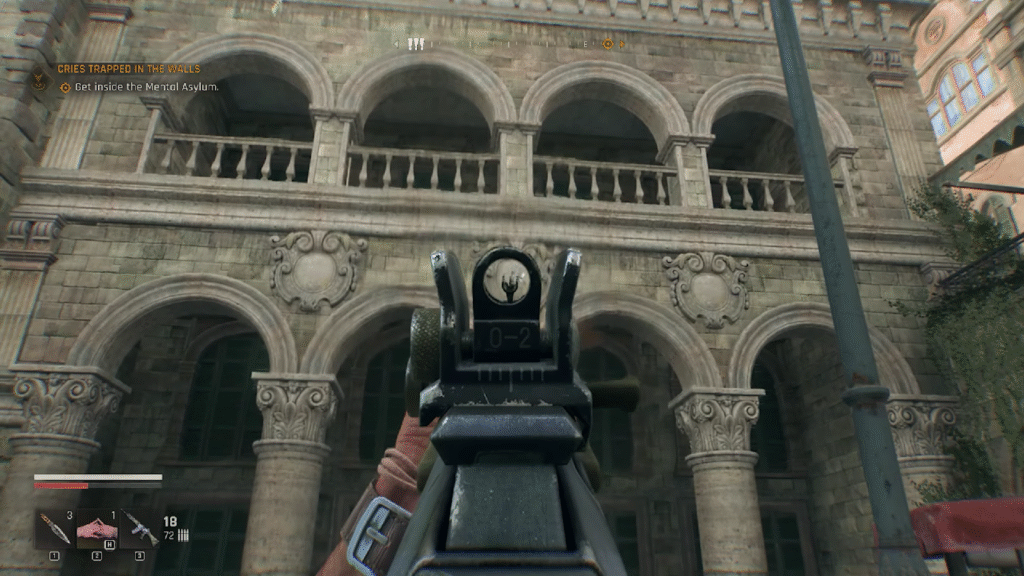
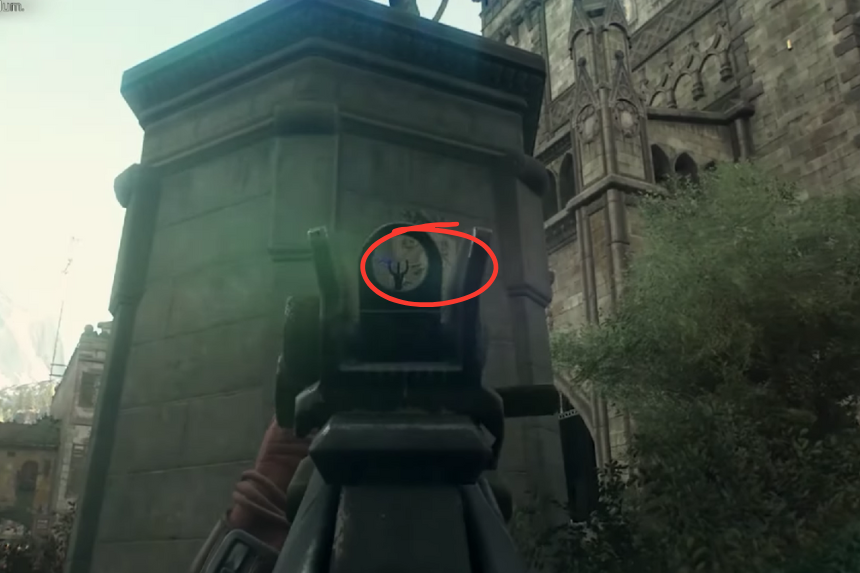
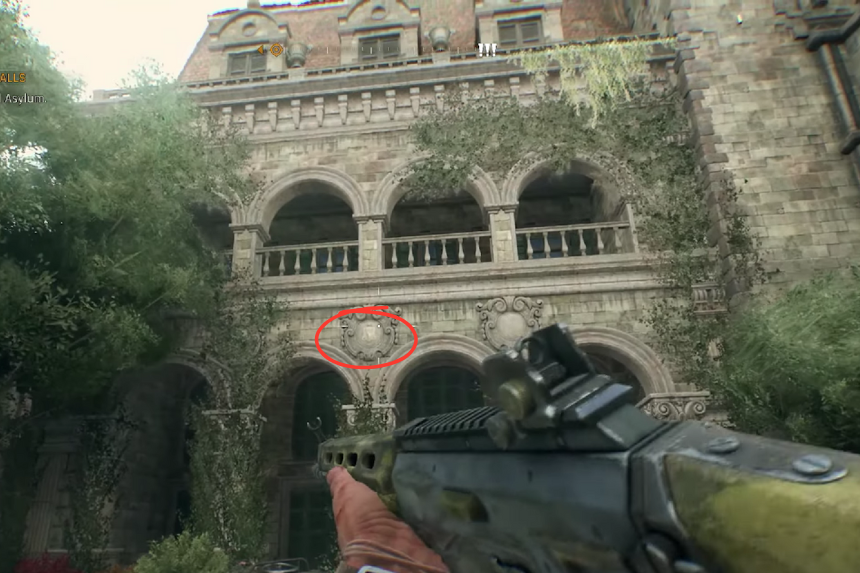
The next crest is on the building with the Castor Woods Guided City Tour poster out front. Look above the archway, you’ll see three emblems there. The crest you need is the one right in the middle.
4th Tablet
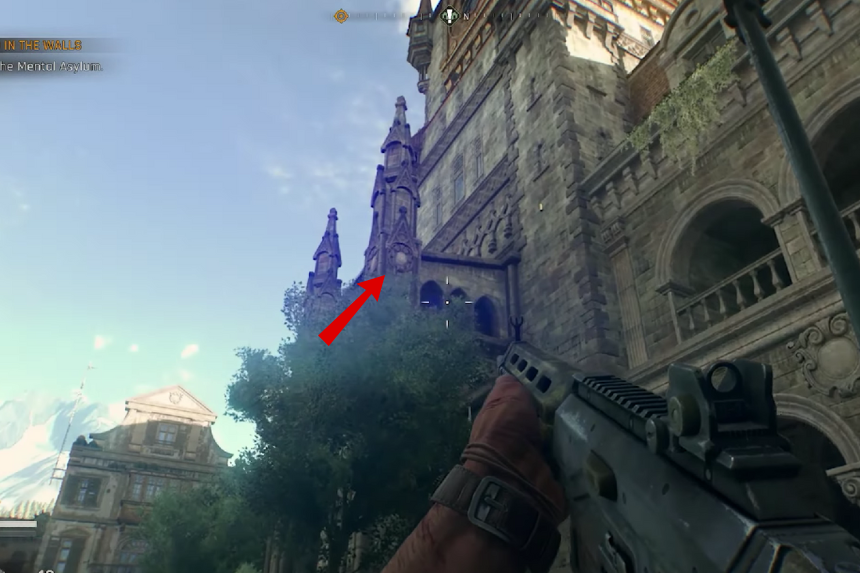
On the left side of the building, look toward the nearby tower while facing north. You’ll spot the fourth crest sitting on one of the pillars.
5th Tablet
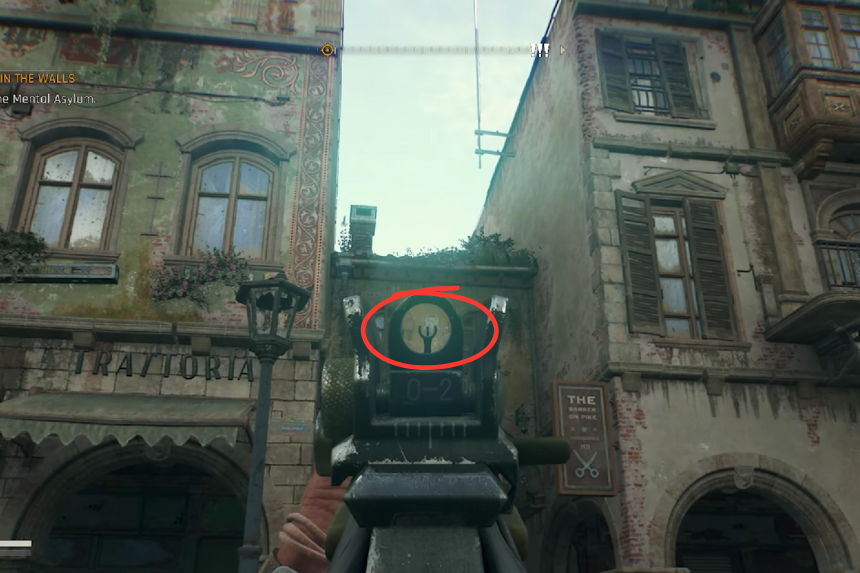
From here, look to your right. You’ll spot another tablet on the bridge connecting two buildings near Trattoria.
6th Tablet
Still facing right, check the white building nearby. The sixth tablet is attached there.
7th Tablet
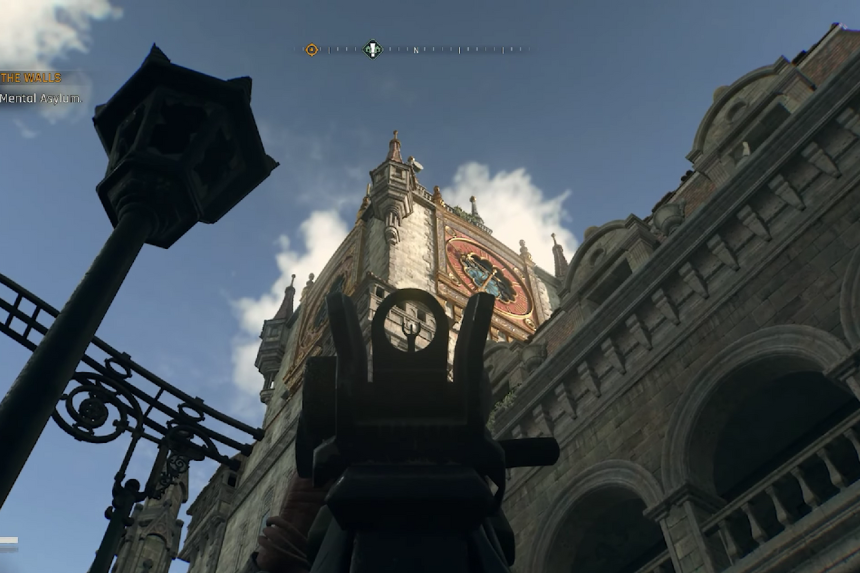
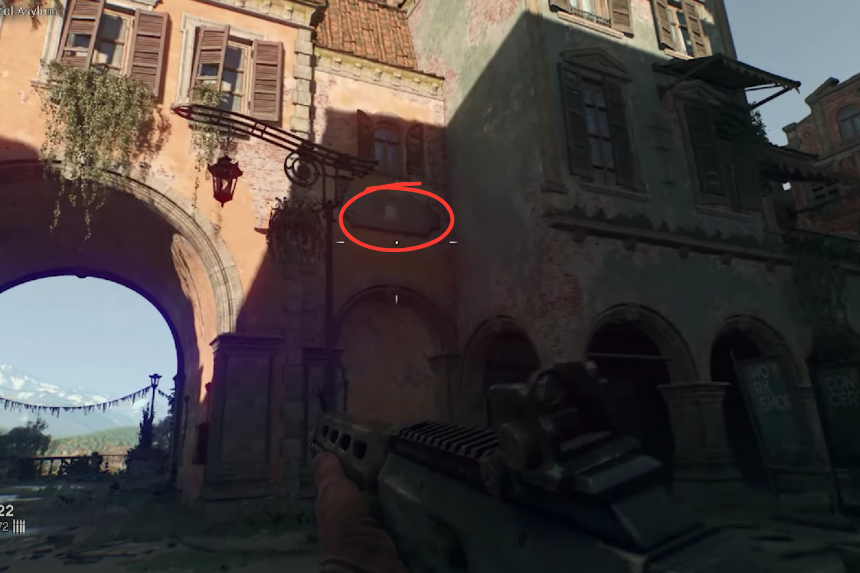
Keep heading straight north and check between the alleyways. Look up at the wall above, and you’ll see the seventh crest there.
8th Tablet
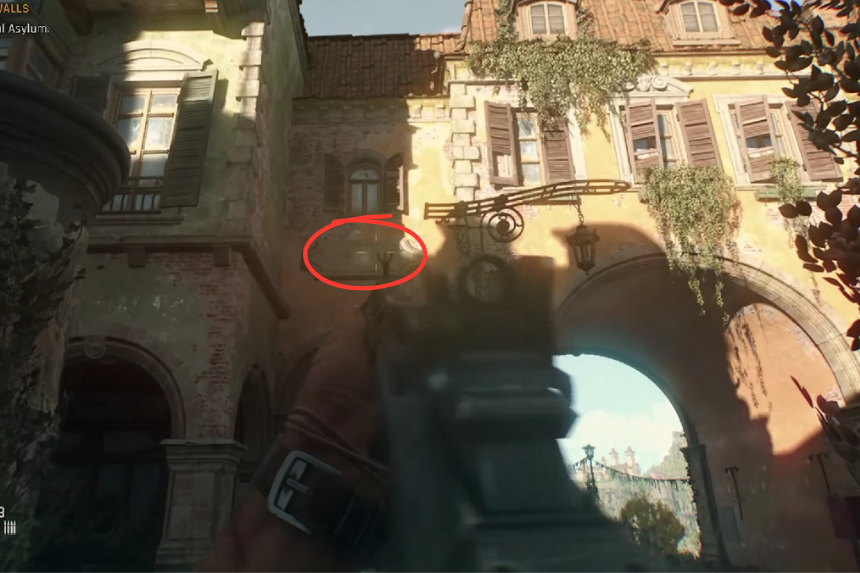
Turn around and look to your right. On the right side of the main entrance to this area, you’ll find the eighth crest.
9th Tablet
The ninth crest is on the left side of the main entrance. After you’ve got it, check the plaque in front of the statue.
Once all nine tablets are destroyed, go back to the statue. Interact with the Castor Wood undefeated fighter’s tomb located beneath it. Doing so will finally let you take the Breslau Blade Legendary Machete.
Cleaver Legendary Polearm, The Piercer Legendary Crossbow, The Separator Legendary, and Sanctuary Legendary Axe Location
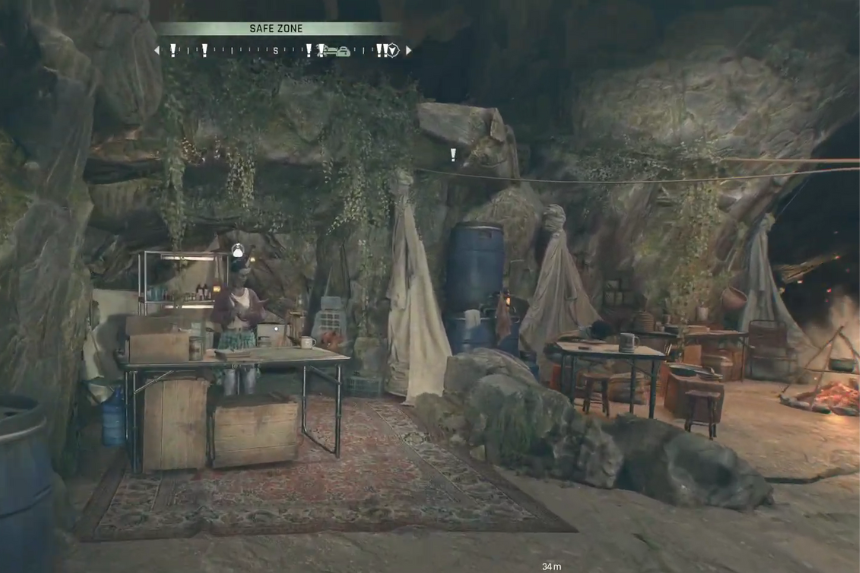
You will get the Cleaver Legendary Polearm, The Separator Legendary, The Piercer Legendary Crossbow, and Sanctuary Legendary Axe from Exile’s Cave Trader. This shop will provide you with all the legendary weapons that are not found in the open world. You can refresh the loot Exile’s Cave Trader by running from the Trader to the Highway Tower and back. Legendary weapons will appear in the shop starting at level 11. The higher your level is, the greater the chances of getting the legendary weapon.
All 13 Legendary Weapons at Doug’s Shop
- Medieval Legendary Mace Location
- Zen Legendary
- The Duelist Legendary Machete
- The Maimer Legendary
- Legendary Knuckledusters Slashers
- Legendary Two-Handed Axe – Double Trouble Legendary
- Long Stick – Good Night
- Legendary Knuckledusters – Break Knuckles
- Legendary Two-Handed Mace – Workout
- Legendary One-Hand Machete – Reforged Khanjar
- Legendary Knife – Stiletto
- Legendary Long Sword – The Rust
- Legendary Knife – Hunting Knife
You will get the Zen Legendary, The Duelist Legendary Machete, The Maimer Legendary, Legendary Knuckledusters Slashers Legendary Two-Handed Axe – Double Trouble Legendary Long Stick – Good Night Legendary Knuckledusters – Break Knuckles Legendary Two-Handed Mace – Workout Legendary One-Hand Machete – Reforged Khanjar Legendary Knife – Stiletto Legendary Long Sword – The Rust Legendary Knife – Hunting Knife and Medieval Legendary Mace Location in Doug’s shop.
This shop will provide you with all the legendary weapons that are not found in the open world. You need to respawn Doug’s shop by running towards the fence and returning to Doug. Legendary weapons will appear in the shop starting at level 11. The higher your level is, the greater the chances of getting the legendary weapon.
Legendary Bow – Hunting Bow
You can unlock the Hunting Bow blueprint by getting it from the Monastery workbench. Once you have it, you’ll be able to upgrade the bow all the way up to Legendary using Manual Pages.
Legendary One-Hand Mace – Extinguisher
You’ll get the Extinguisher after finishing the Library Tower Safe Spot. Just like other gear, you can upgrade it all the way to Legendary with Manual Pages.