
In Marathon, keys are one of the best ways to unlock locked loot rooms, which have valuable gear and items. These keys are scattered across different maps, and each one unlocks a specific room that can have equipment for your character. However, reaching these rooms can be difficult as they are located in dangerous areas with AI enemies and other players nearby. In this guide, we will show you all the key locations and uses in Marathon.
All Keys Location and Use
In Marathon, keys are very important because they let you open locked loot rooms that have good gear and items. You can find the keys by exploring the map. When you are looting different areas, you may find different keys for different areas.
Each map can have keys that are used on a different map, so search all the buildings, containers, or enemy drops. All these areas can be very dangerous because they have high-level AI enemies and are also common places for players moving across the map.
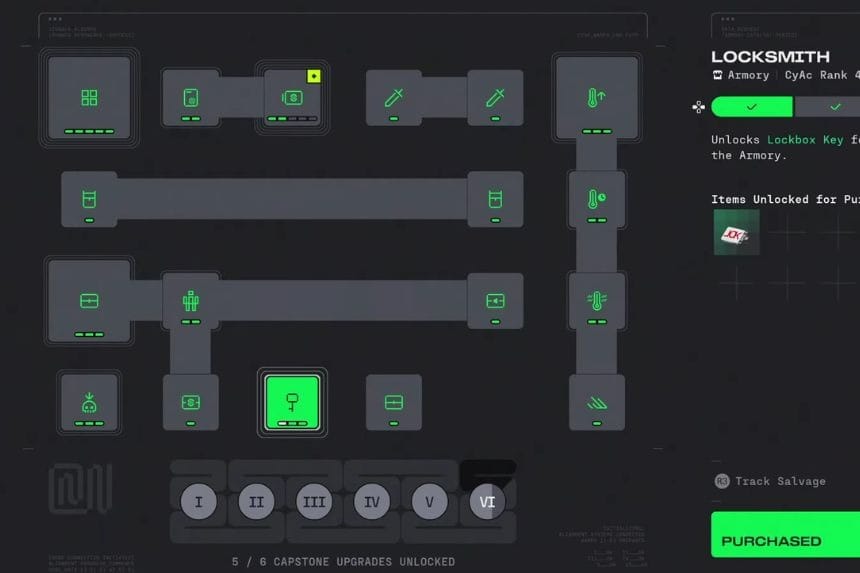
You can also make your own key once you have enough reputation with a faction. Go to the faction menu and open the first faction to check the Upgrades section.
When your Reputation with the faction reaches Rank 4, you can unlock the Locksmith upgrade. This lets you craft basic lockbox key templates. At Rank 16, you will be able to make Deluxe key templates, and in Rank 28, you will unlock Key Maker Plus, which allows you to make Superior key templates.
After unlocking these upgrades, go to Loadout and then to Armoury. Look under the Cyber reputation section and scroll down till you see the Keys and Templates.
You can buy a key template using Credits. To make an actual key, take the templates into a raid. Visit the specific area connected to that template and extract from the raid. After you successfully extract, the template will turn into a real key for that zone.
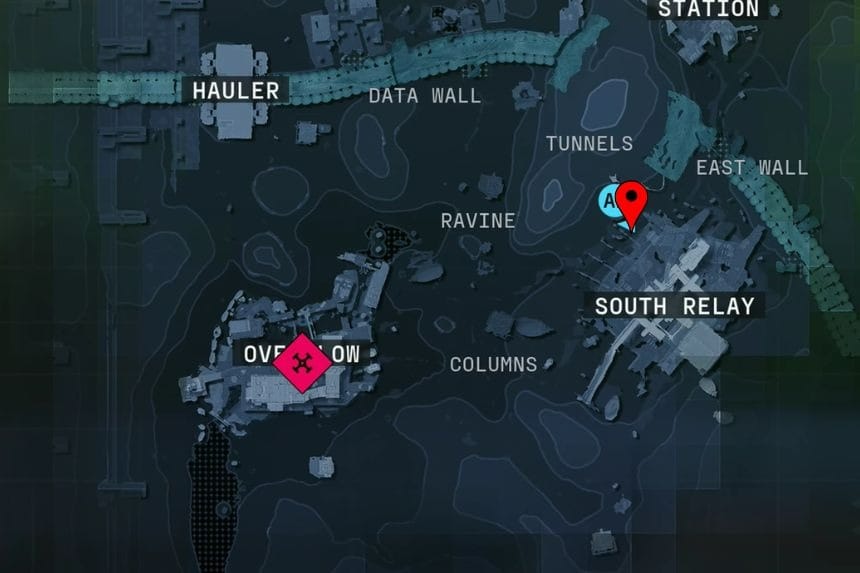
South Relay Observatory Key
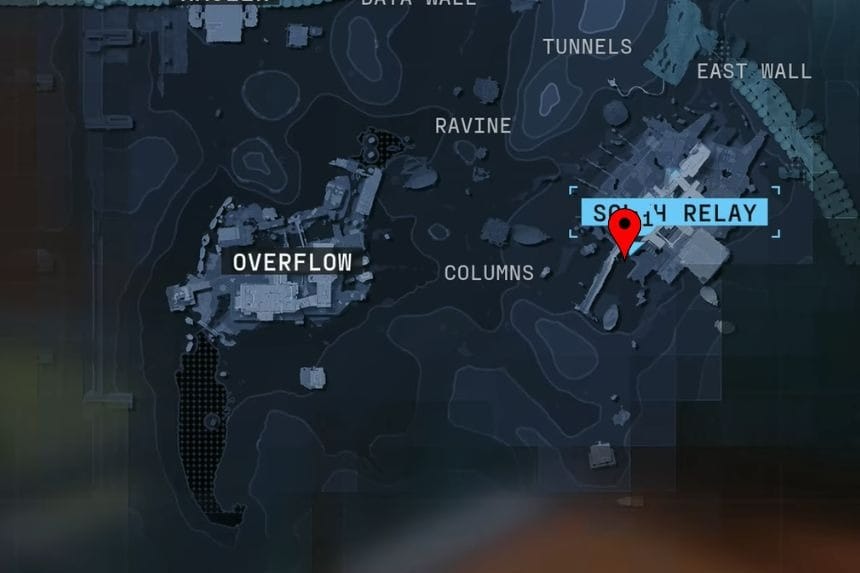
To find the South Relay Observatory Key room on the Perimeter map on Marathon, go to the southeast part of the Perimeter map. Look for the South Relay Observatory area and find a room that is on the top of the structure. To reach the room, you need to jump onto the large container nearby. From there, keep jumping and climbing upwards to move across the platforms till you reach the ladder. Climb the ladder and once you reach the top, follow the path forward. You will find the key room at the end of the path.
North Relay Storage Key
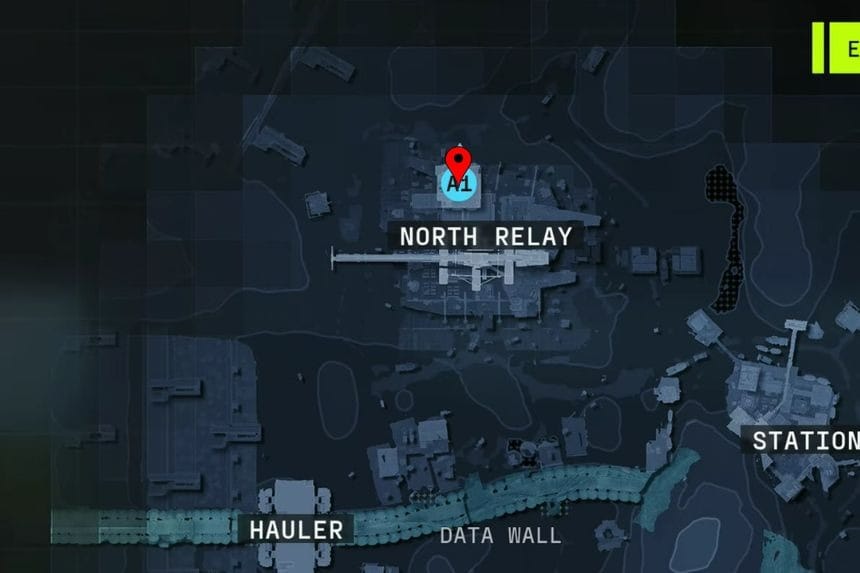
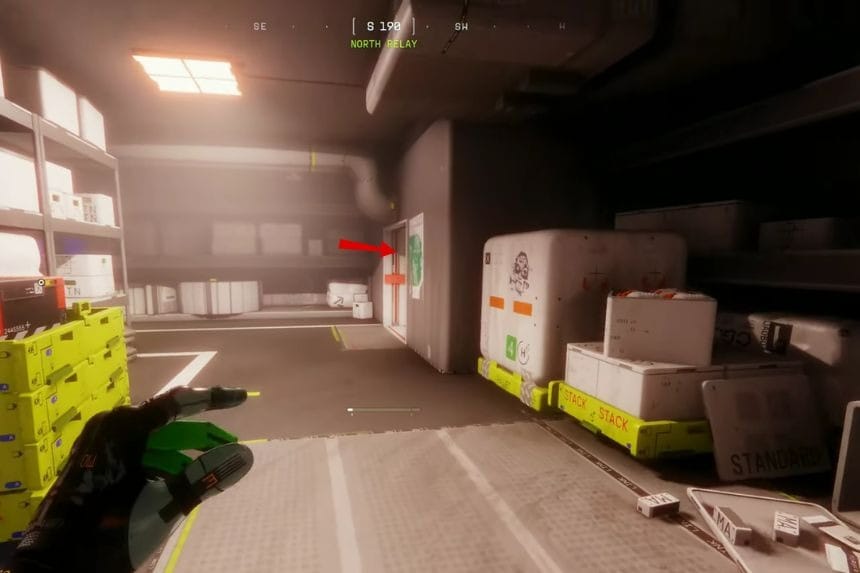
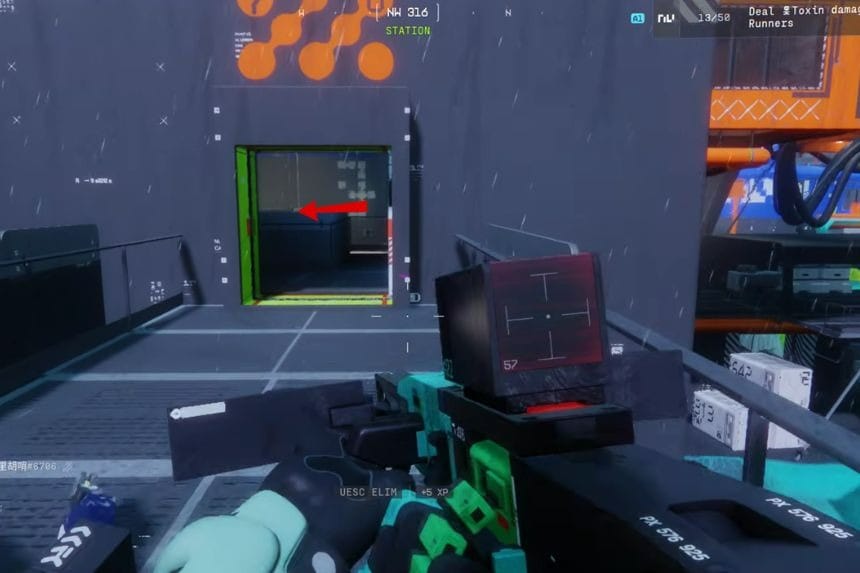
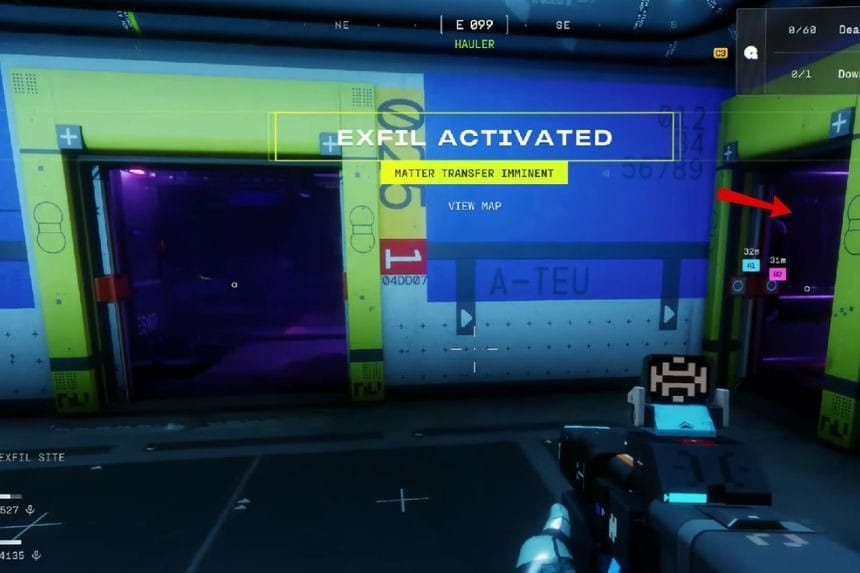
Go to the northern part of the Perimeter map, where you will find the North Relay area. Head towards the north side of the main building, and you will see a few trucks parked nearby. Get inside the building, take a right turn and then go straight up the stairs. Once upstairs, run across the room directly in front of you. At the other side of the room, you will find the North Relay Storage locked room, where you can use your key.
Station Security Office Key
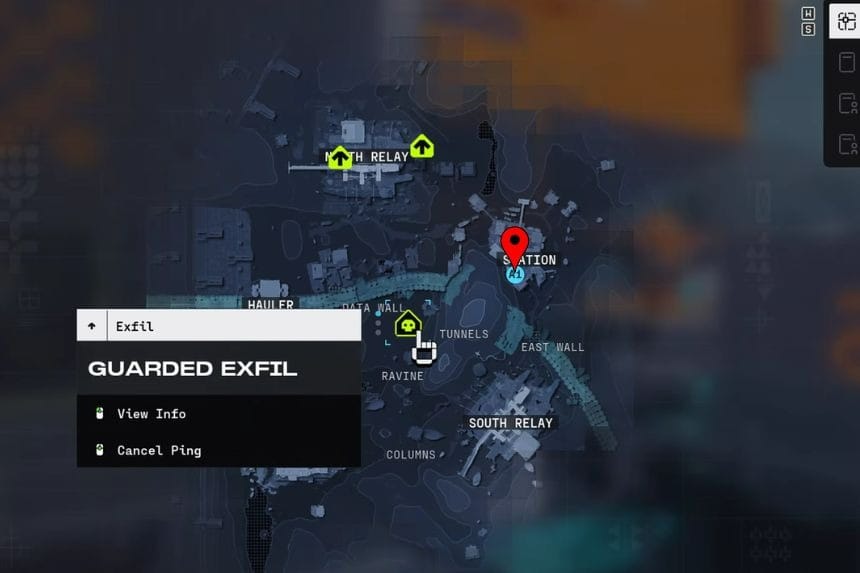
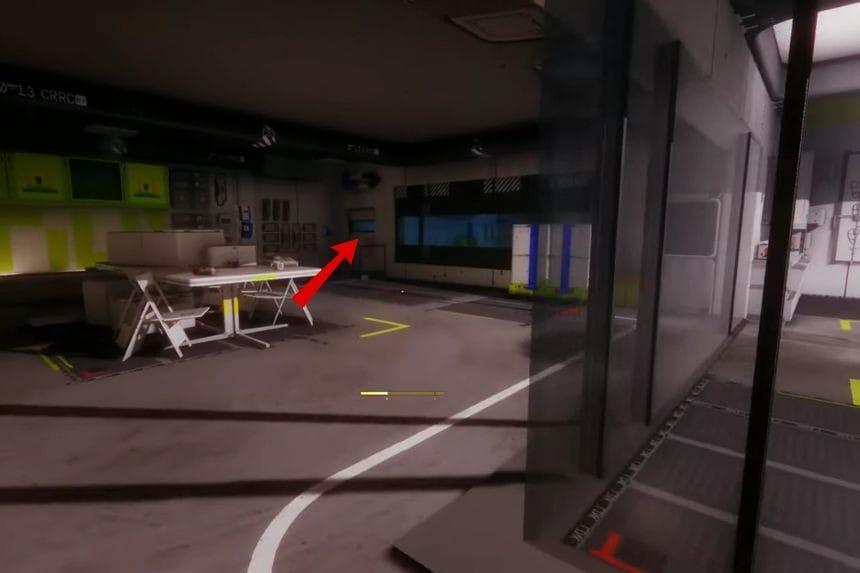
Go to the eastern side of the Perimeter map near the Station area. When you get there, look for a walkway that is opposite Buildings 1 and 2. Follow the walkway into the building. Once you enter the room, turn left. The Station security officer’s room will be there after you turn left.
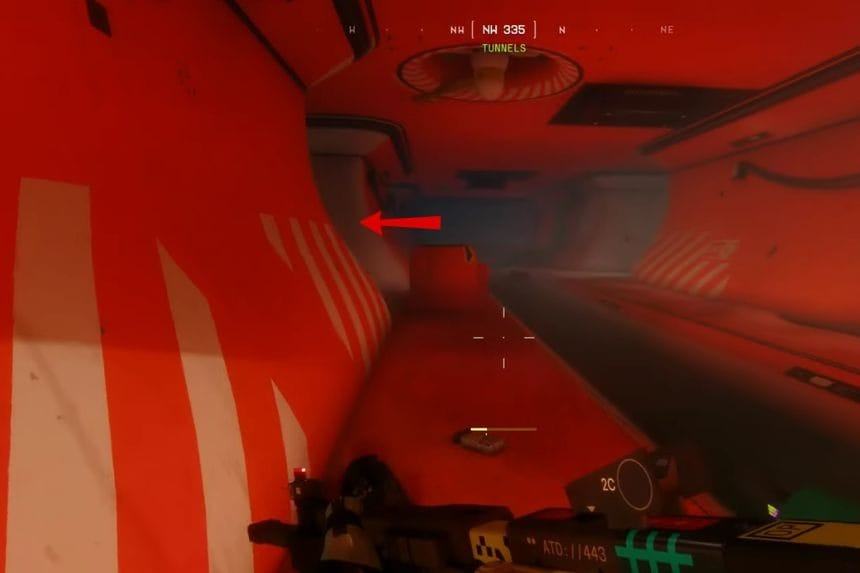
Terrace Key
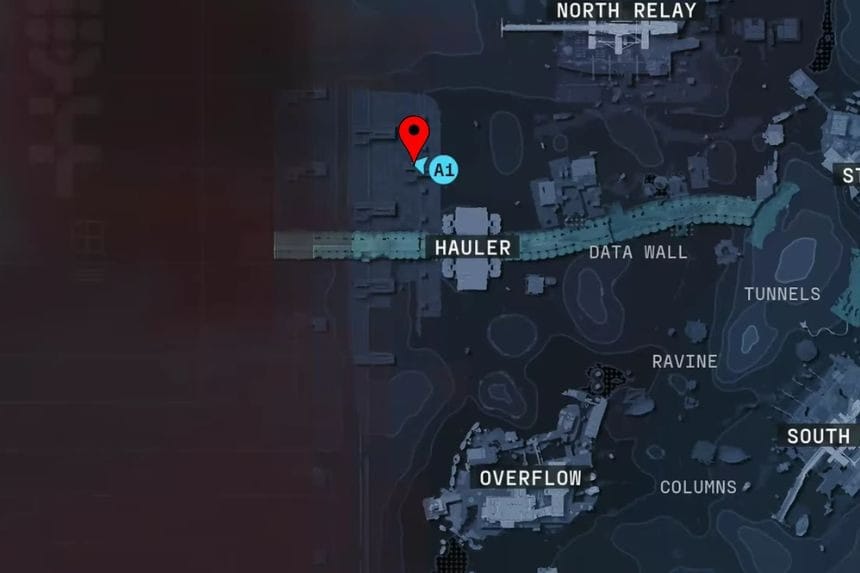

Head towards the western part of the Perimeter map and look towards the north of the Hauler area. Once you reach the area, try to find a large red slope. Be careful, as this area has turrets, which will attack you if you get too close. Follow the red slope upwards, and when you reach the corner, at the top, you will see the entrance to the Terrace Key room.
Overflow Laboratory Key
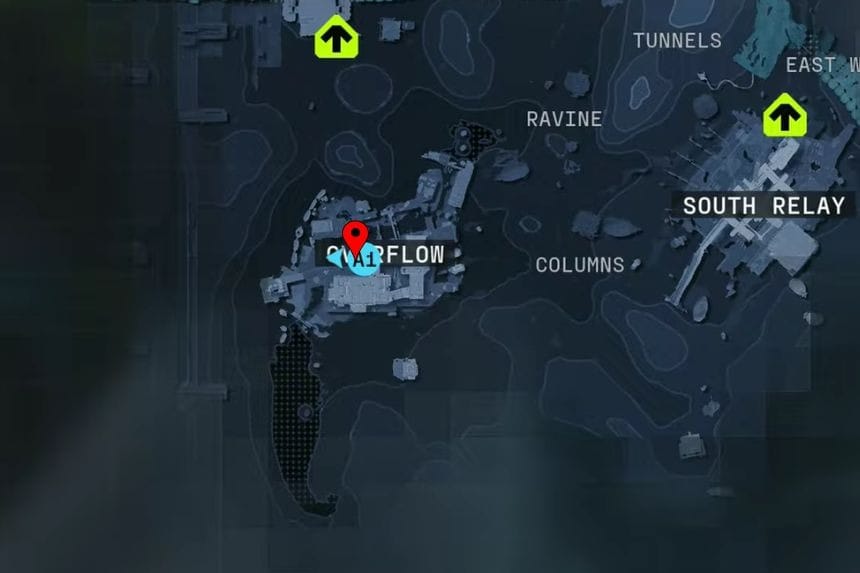
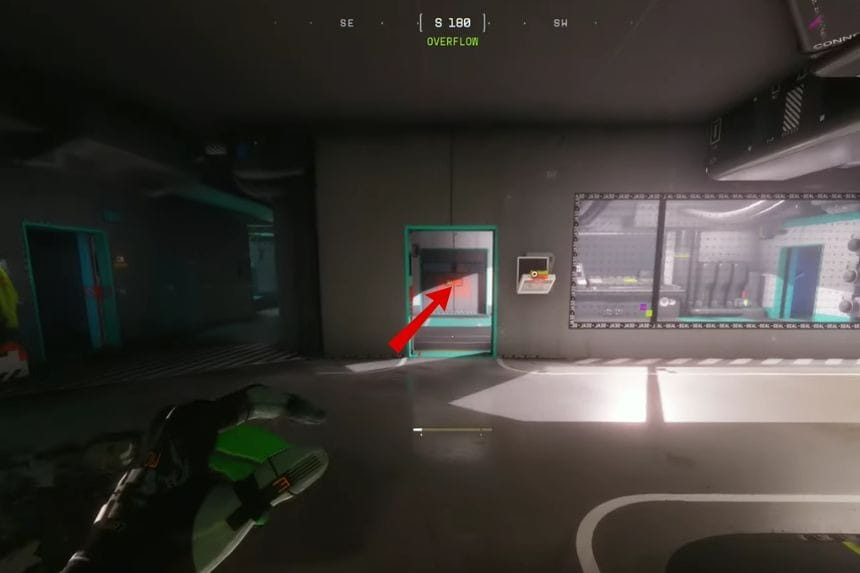
Go to the southwest part of the Perimeter map towards the Overflow area. Once you reach there, look for a raised walkway that goes towards a building. Follow the walkway and enter the building from the north side. As you step inside, turn right, and the Overflow Laboratory room will be in front of you.
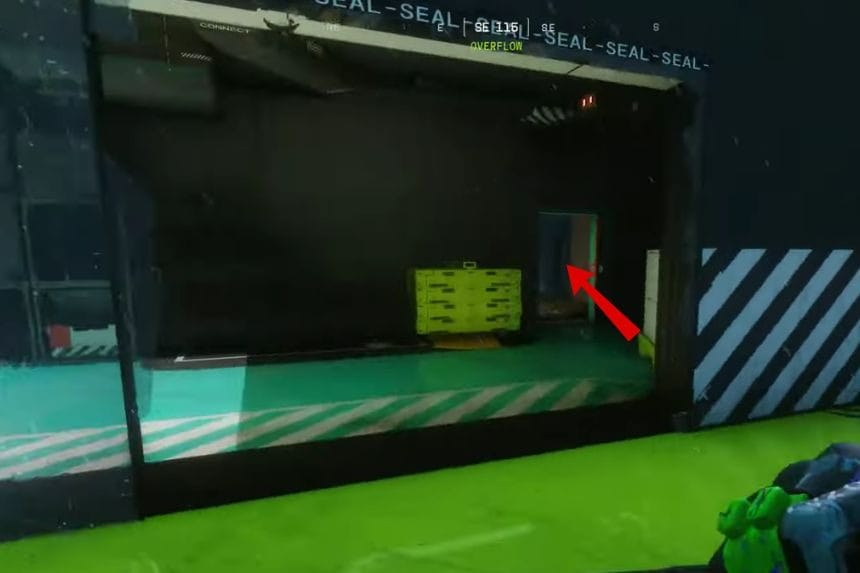
Data Wall Upper Level Key


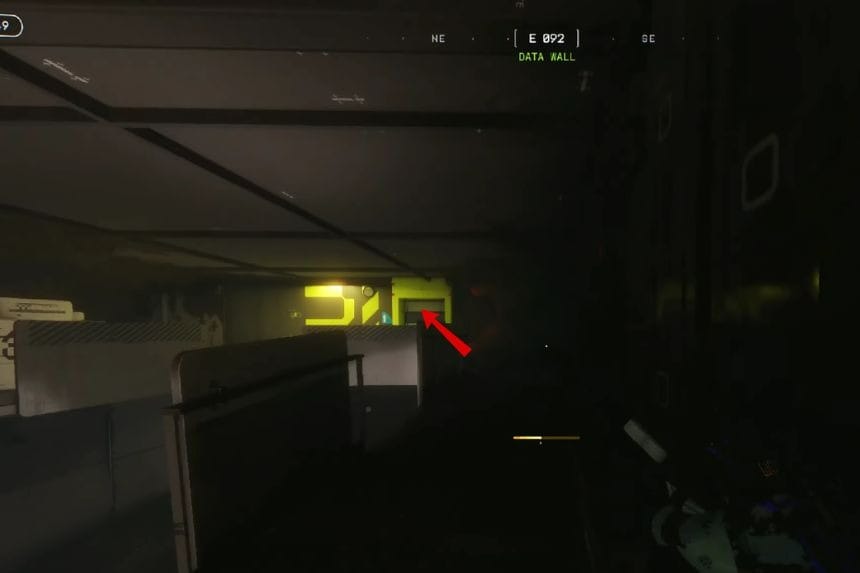
Go to the central part of the Perimeter map, just north of the Tunnels area. When you arrive, look forward to a group of containers. You will find a crack or opening in the wall. Move through the crack, and you will see a ramp leading upwards. Walk up the ramp and keep going straight, and at the top, you will find the Data Wall Upper Level room.
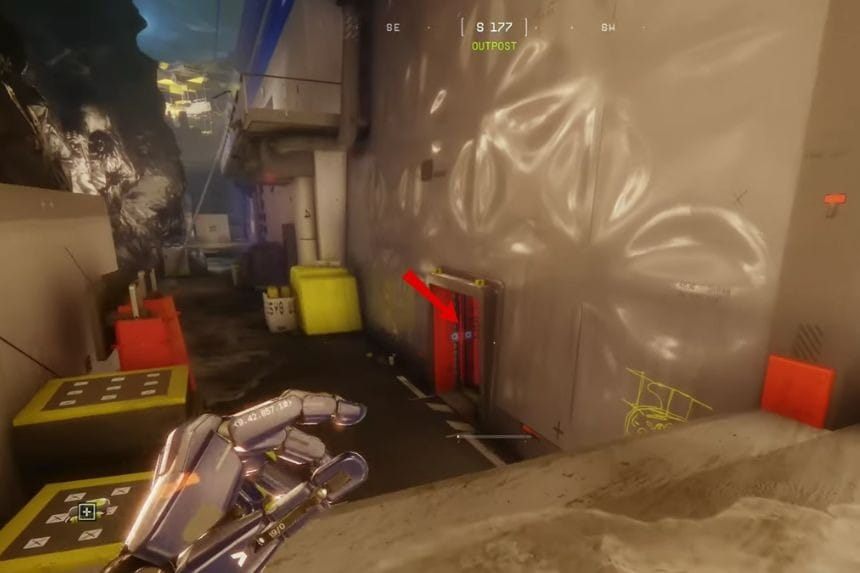
Tunnels Office Key
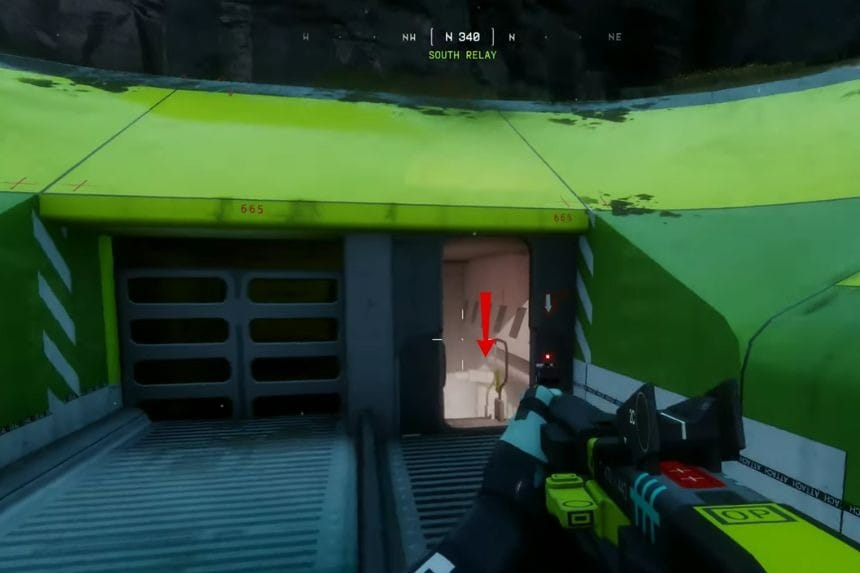
Go to the southeastern part of the Perimeter map, just south of the Tunnels area. When you reach the location, look for a small area with a door. Once you find it, drop down into the area and go inside. After entering, turn right and move forward to take the first left. Then turn left again to find the Tunnels office door, where you can use your key.
Hauler Observation Key
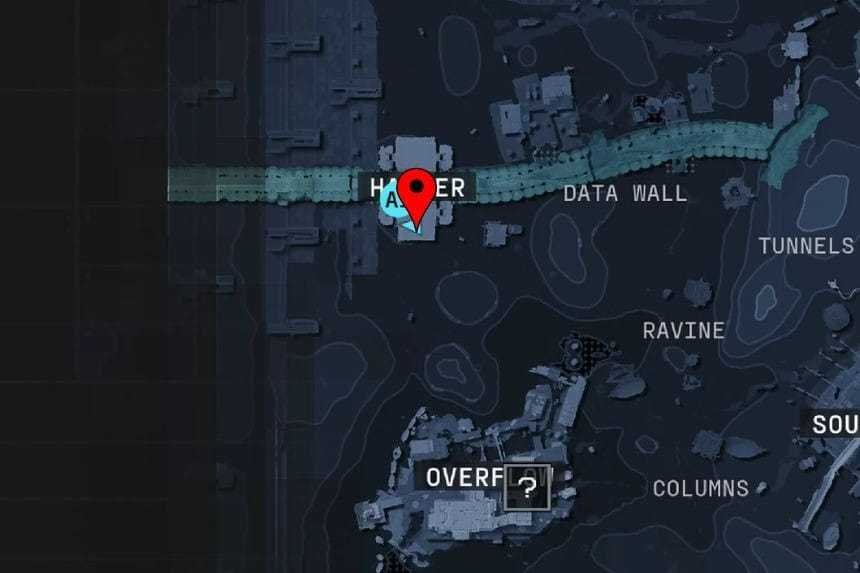

Go to the western side of the Perimeter map towards the Hauler point of interest. When you reach the location, you will notice two doors at the entrance. Take the right door and follow the hallway till you reach the next room. Once you enter the room, turn left and go up the stairs to find the Haulier Observation room at the top.
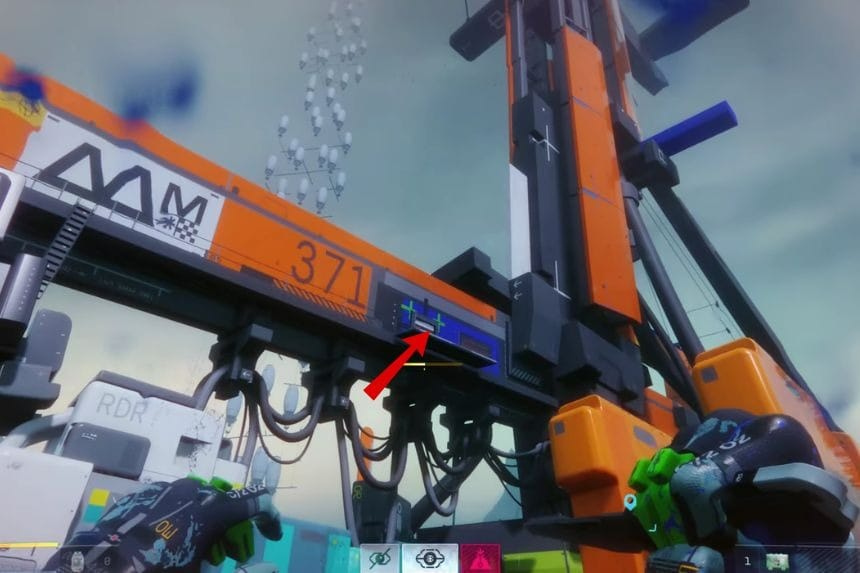
Access Key
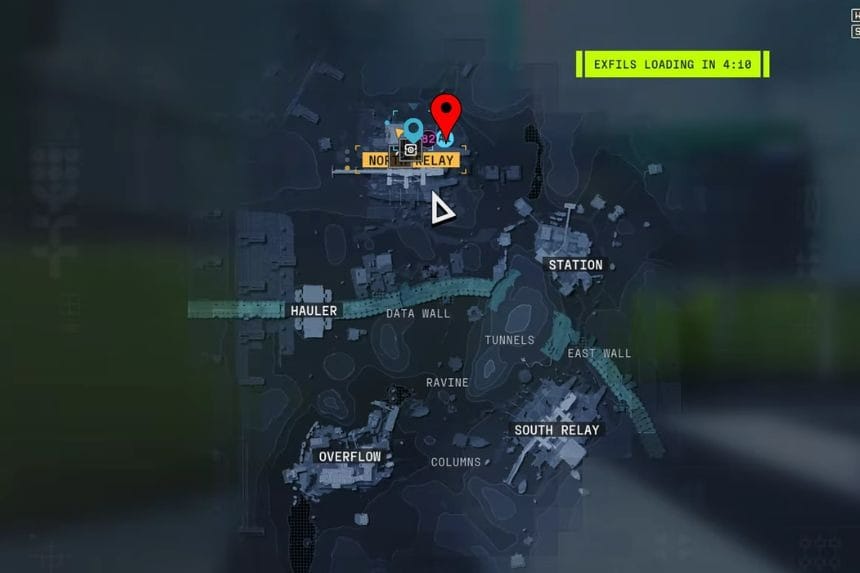
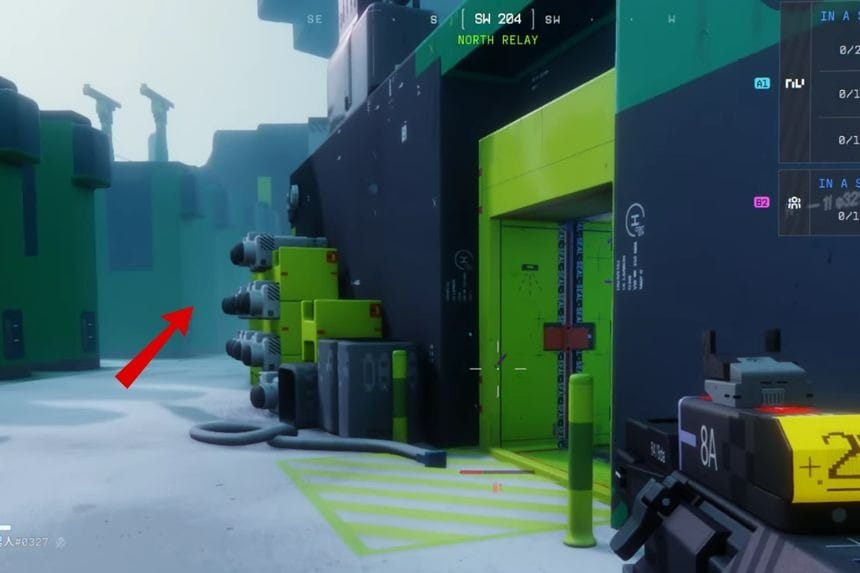
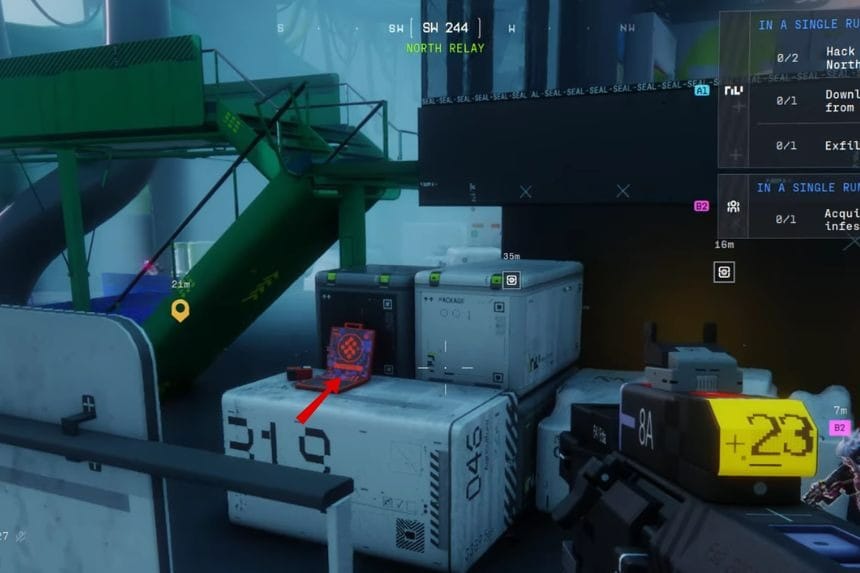
Go to the North Relay Point and climb the stairs in front of you. Take a left turn and then a right turn to go towards the containers. Then move forward to find the Access Key on a container marked with the number 319.
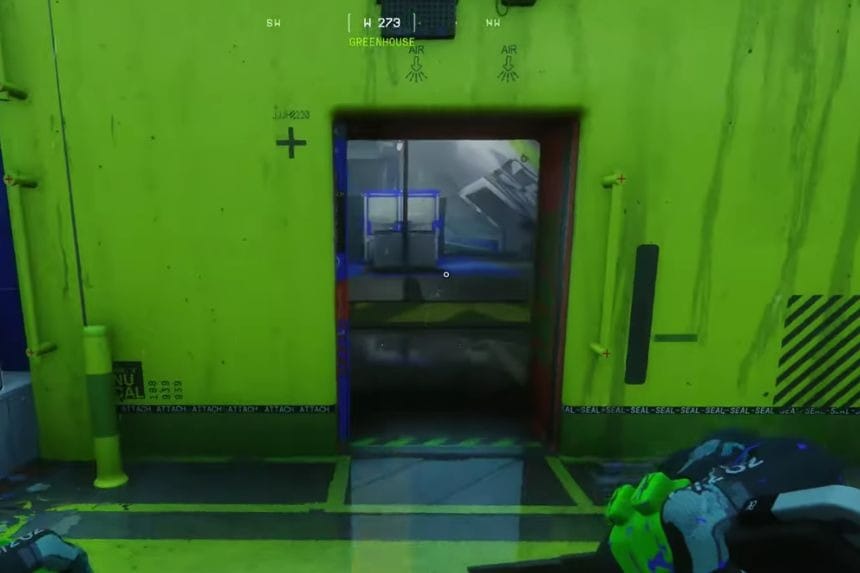
Greenhouse Lab Key
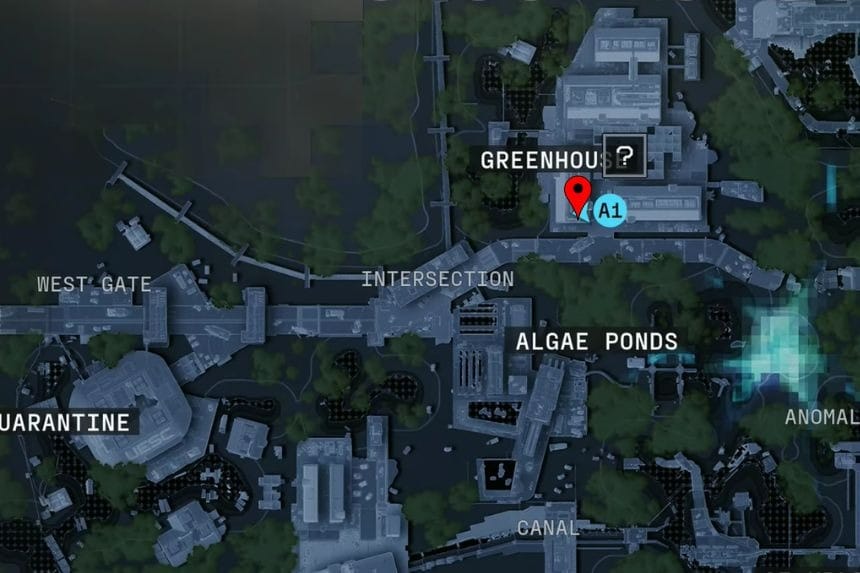
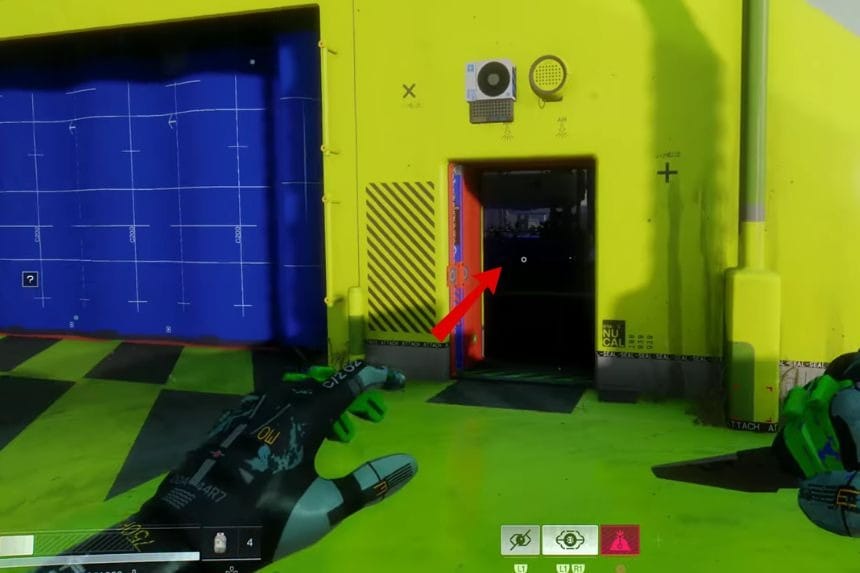
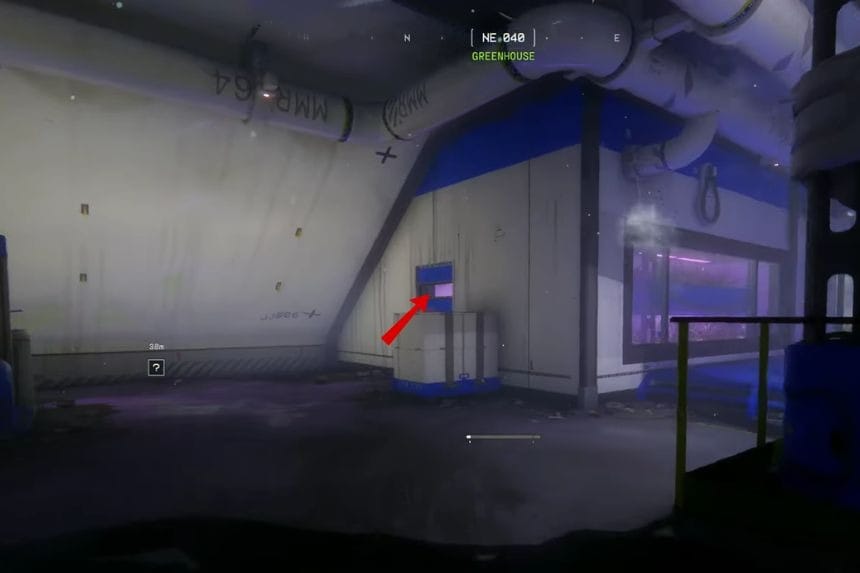
Go to the northern part of the Dire Marsh map, towards the Greenhouse area. Once you arrive, look for a building with yellow and blue colours. Go inside the building and take a left to find the Greenhouse Lab room.
Greenhouse Operations Key
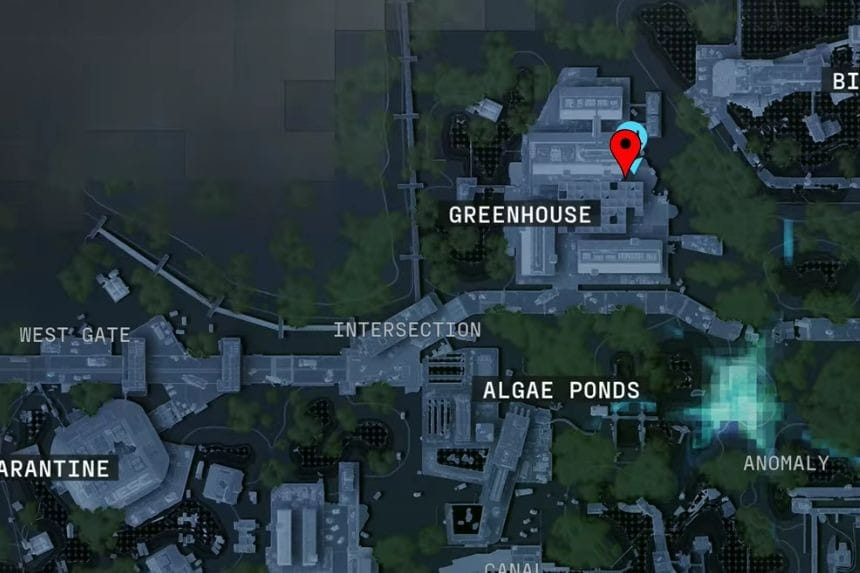
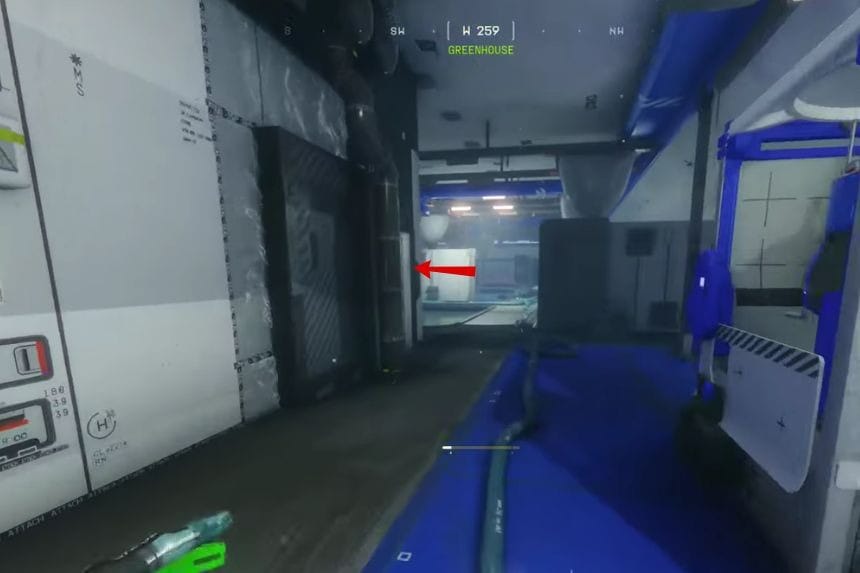
Go to the northern part of the Dire Marsh map, where the greenhouse area is located. When you arrive at the location, enter the building from the northeast side. Go inside and take the first left to find a door. This door will take you to the Greenhouse Operations room.
Complex Shed Key
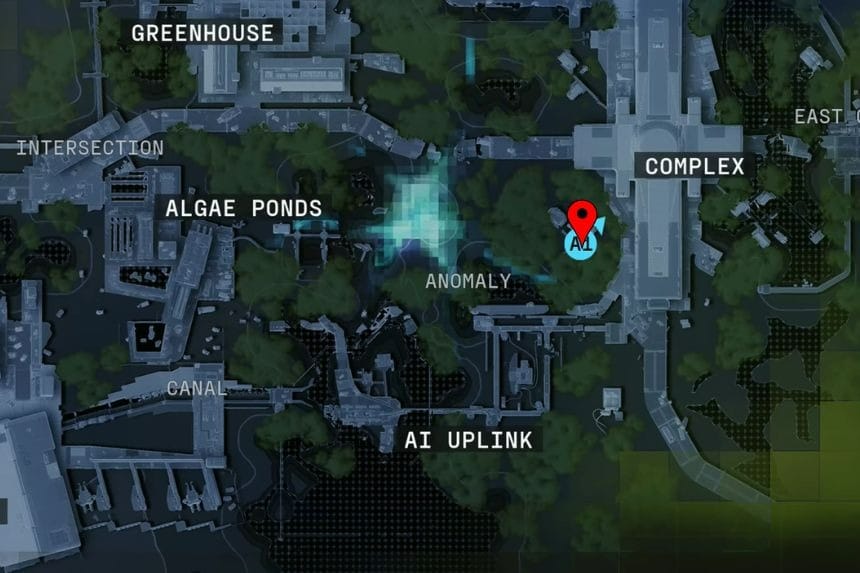
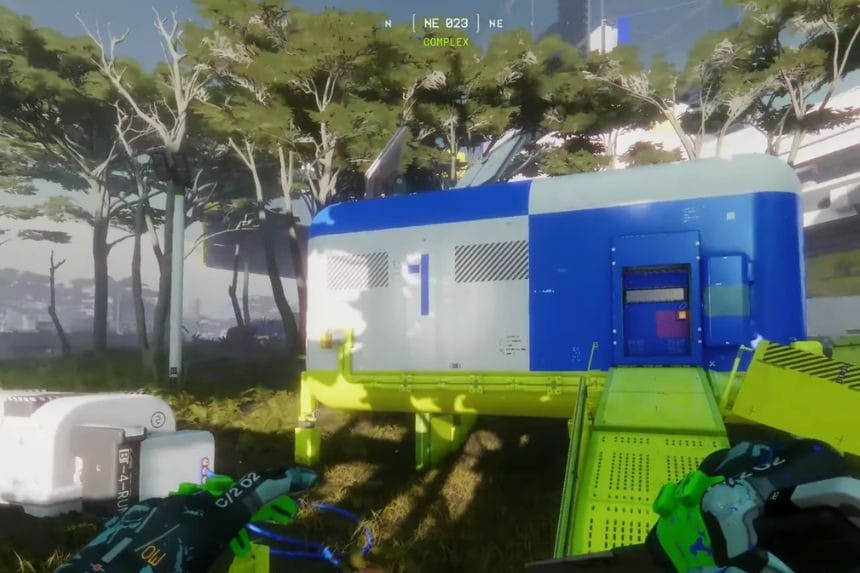
Move to the eastern part of the Dire Marsh map, just west of the Complex area. When you reach the location, you will see three buildings close to each other. Find the building which has Number 1 marked on it. This is the building where you will find the Complex Shed room.
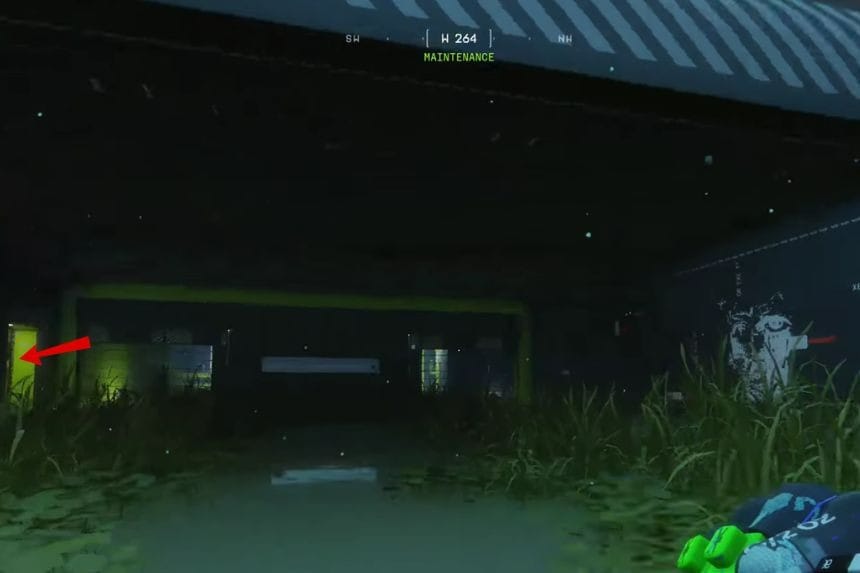
Maintenance Key
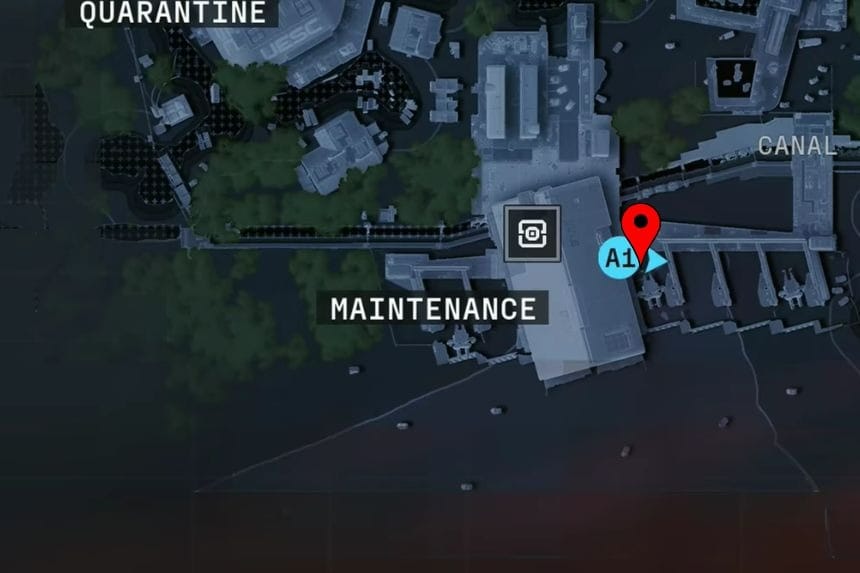
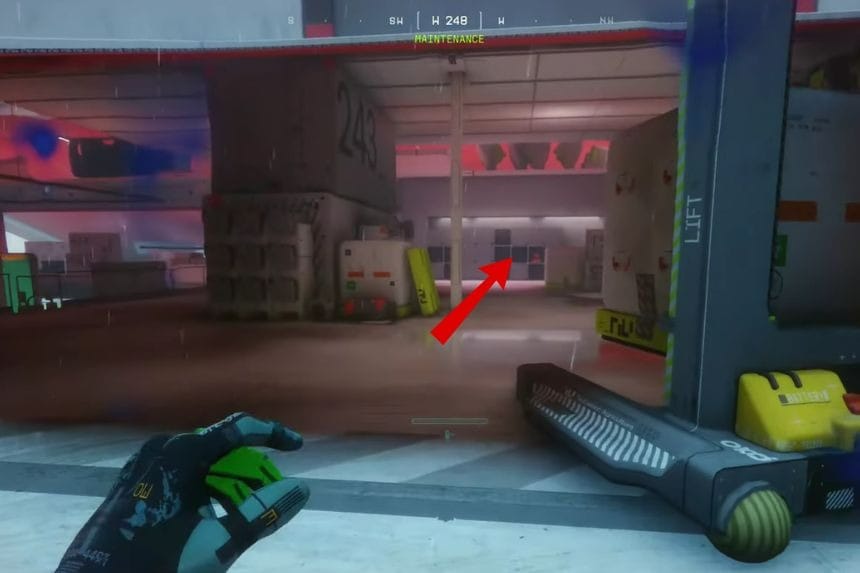
Move towards the southwestern part of the Dire Marsh map to the Maintenance area. When you reach the Facility, enter the building from the east side. Once inside, go straight towards the back of the building. Then take a right turn. Here, you will find the Maintenance room to use your key.
Airfield Key
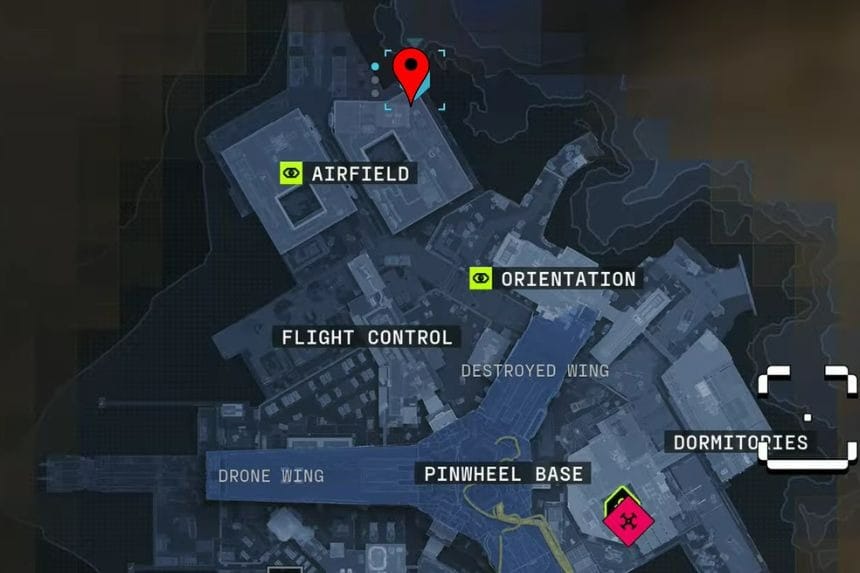
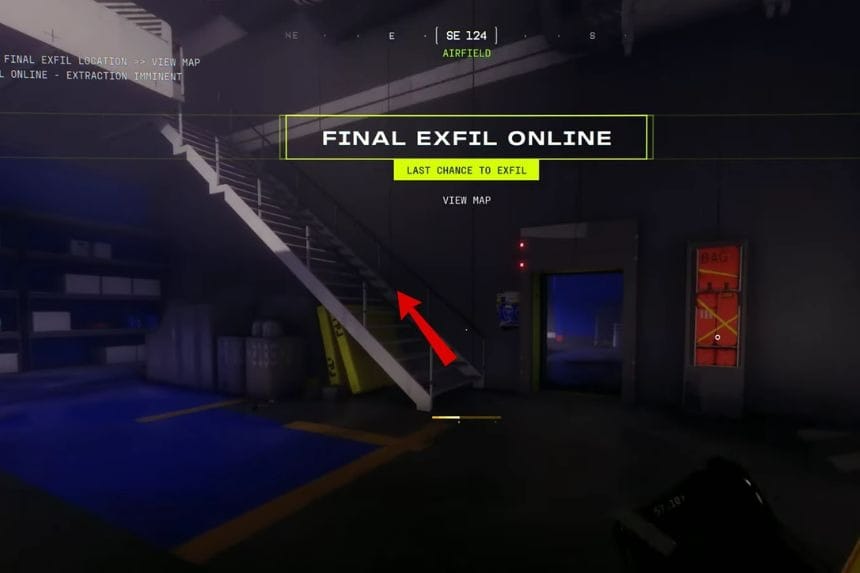
Go towards the northern part of the Outpost map to the Airfield. When you reach the area, look for a path that goes around the outside of the building. Follow this path till you reach the entrance of the building. Once you enter the building, turn left to cross the room and then go up the stairs. After reaching the upper room, take a left turn, and you will find the Airfield key room.
Bio-Research Tank Key
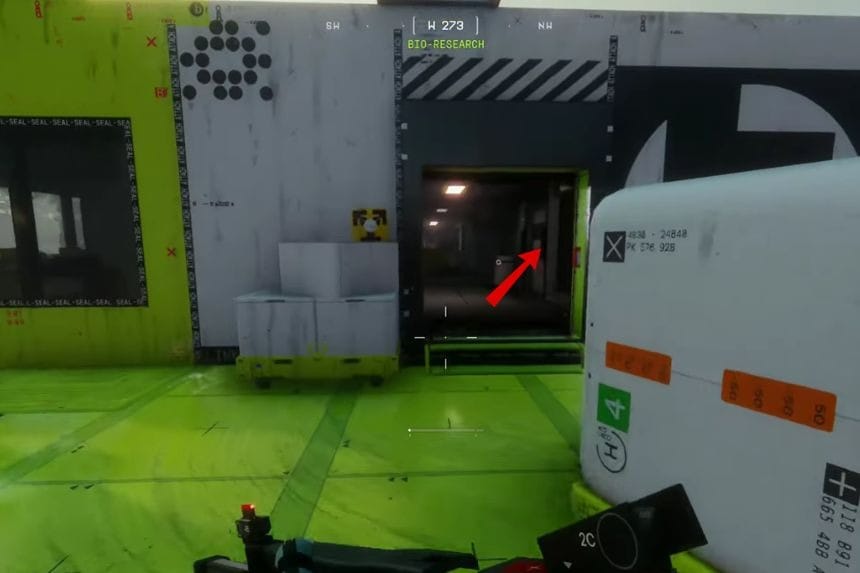
Go to the northeastern part of the Dire Marsh map towards the Bio-Research area. When you reach the area, look for a raised walkway going inside the building. Follow the walkway and enter the building from the south side. After entering the building, look to your right to find the Bio-Research Tank room.
Quarantine Morgue Key
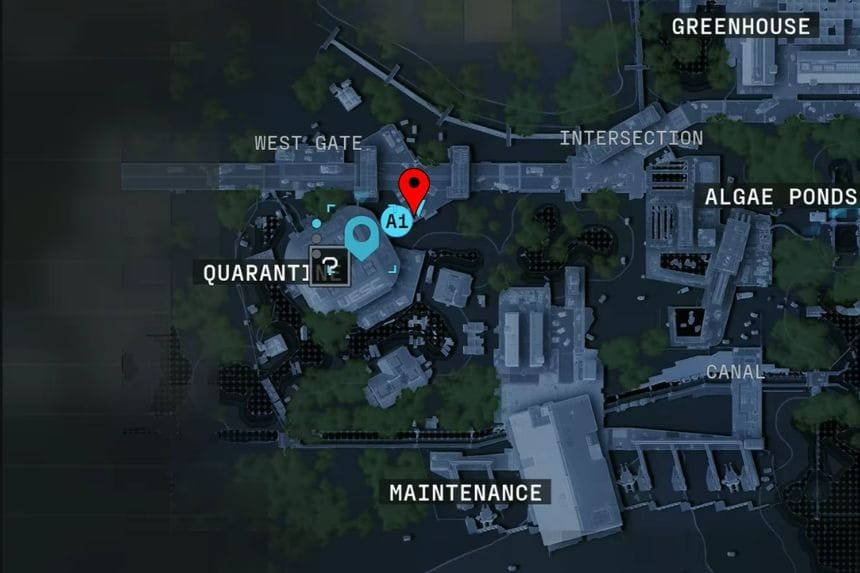
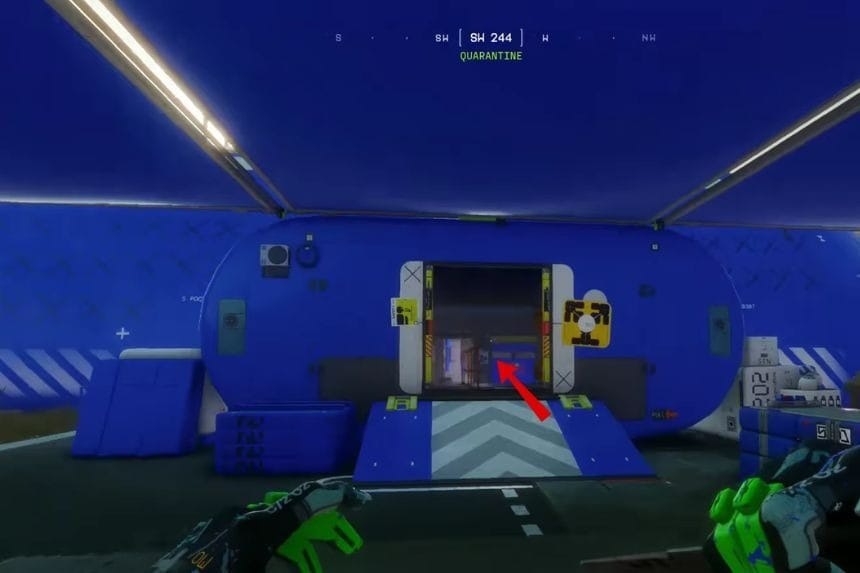
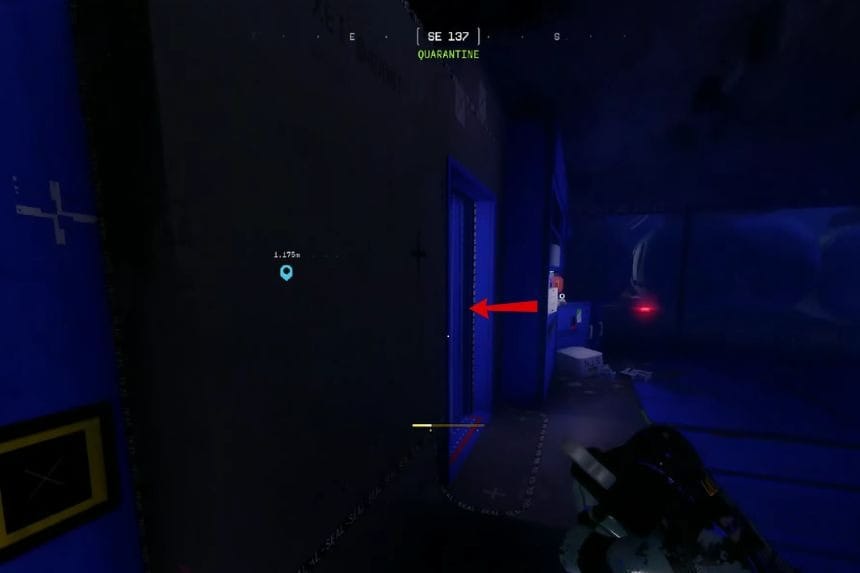
Head to the western part of the Dire Marsh map towards the Quarantine area. Once you arrive, enter the building through the main entrance and from there run past the first two rooms. After passing through the room, take a left turn twice. Continue moving forward till you reach the stairs going down. Go all the way down the stairs till you find the Quarantine Morgue locked room at the bottom.
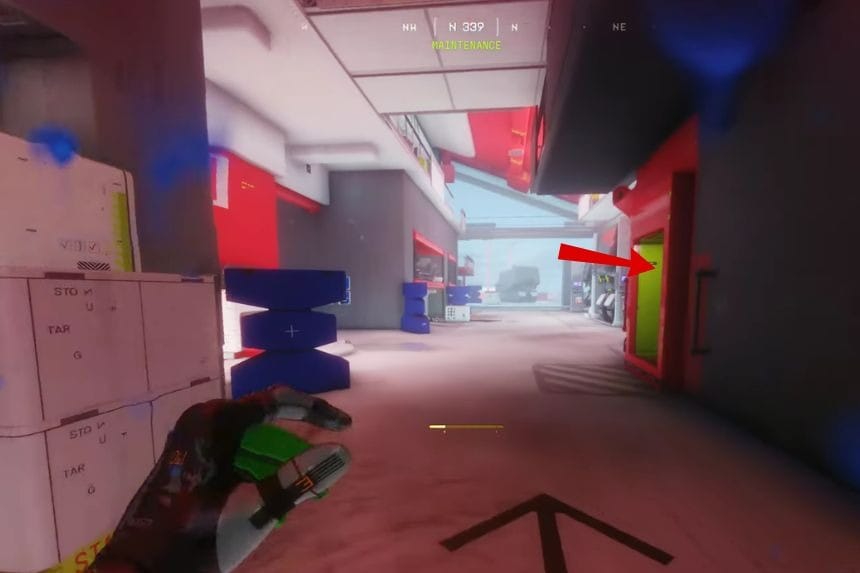
Maintenance Canal Key
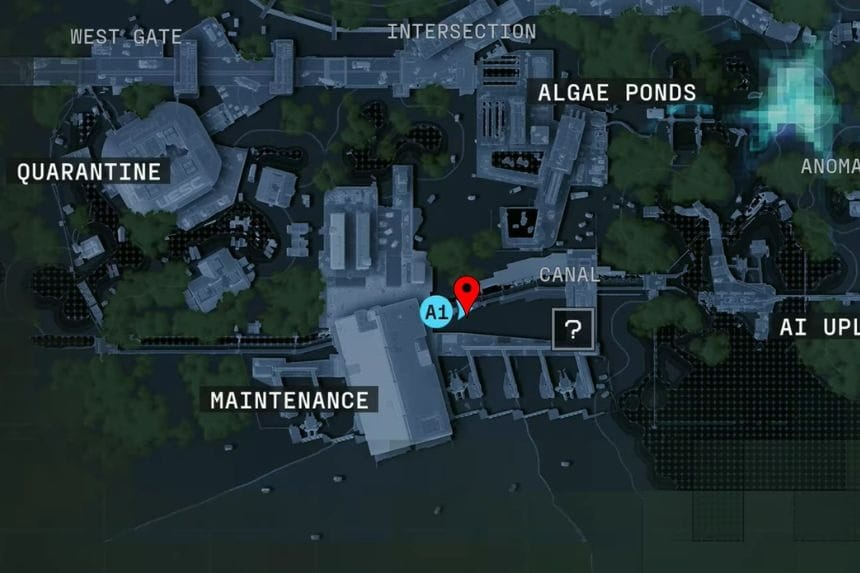
Go to the southwestern part of the Dire Marsh map near the Maintenance area. Once you arrive, find a stream of water. This stream will take you to the Canal entrance. As soon as you go inside the Canal, take a left turn, and you will find the Maintenance Canal room.
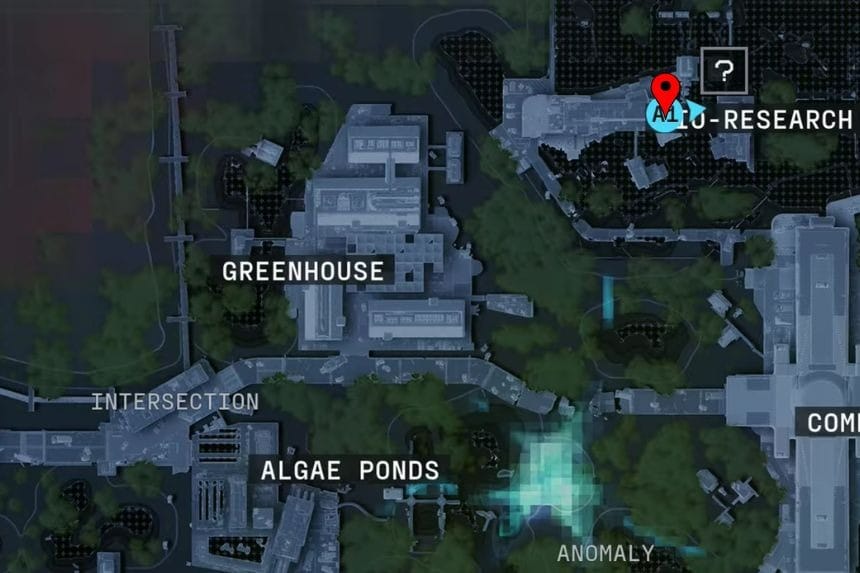
AI Uplink Key
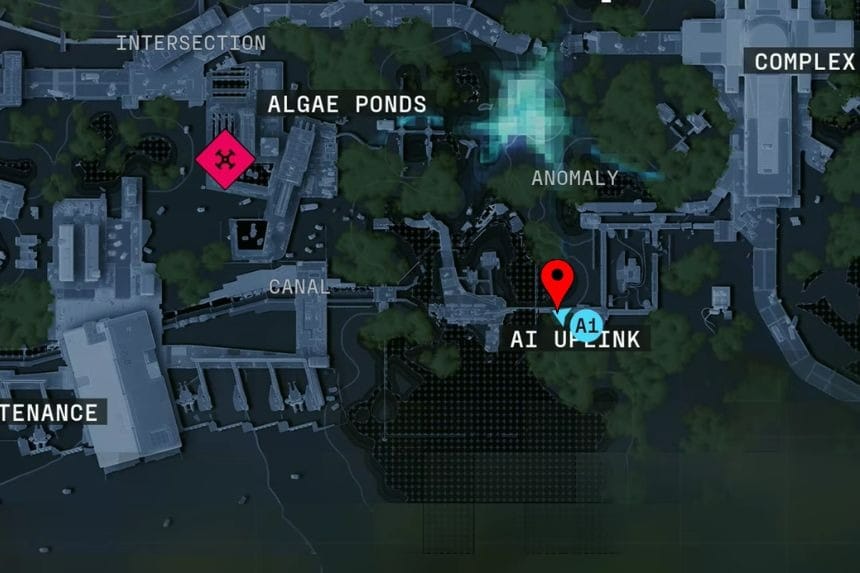
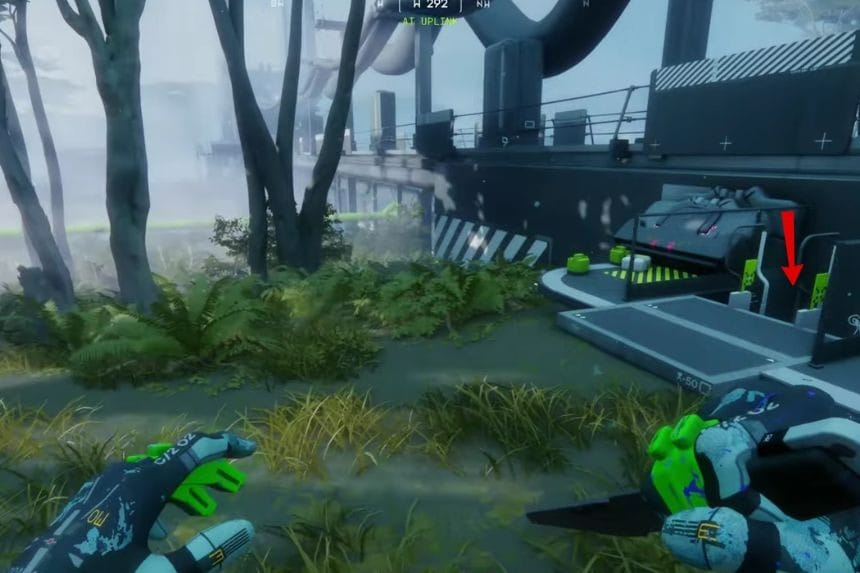
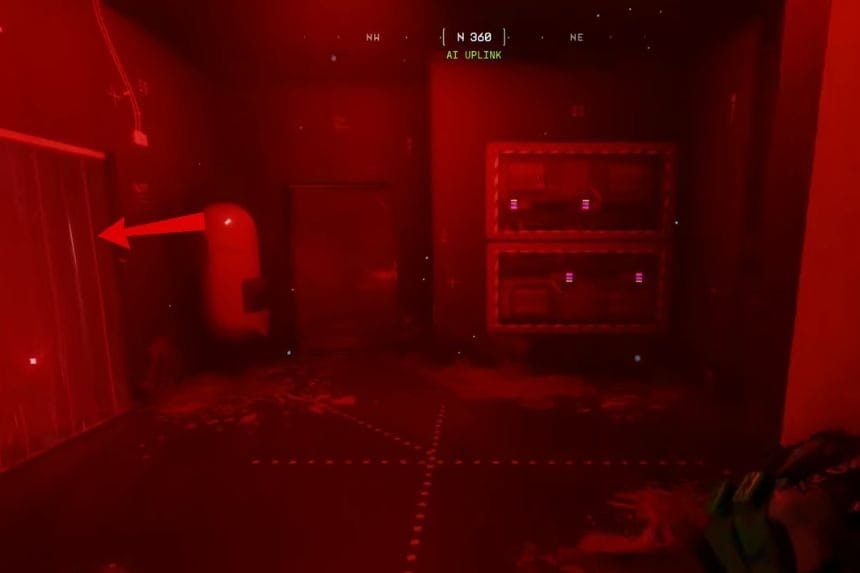
Go to the southern part of the Dire Marsh map, towards the AI Uplink area. Look for a large cable running above the entrance. This is the building where you need to go. Once you enter the building, climb down the ladder nearby, and reach the bottom to take a left turn. The AI Uplink room will be in front of you.
Algae Ponds Office Key
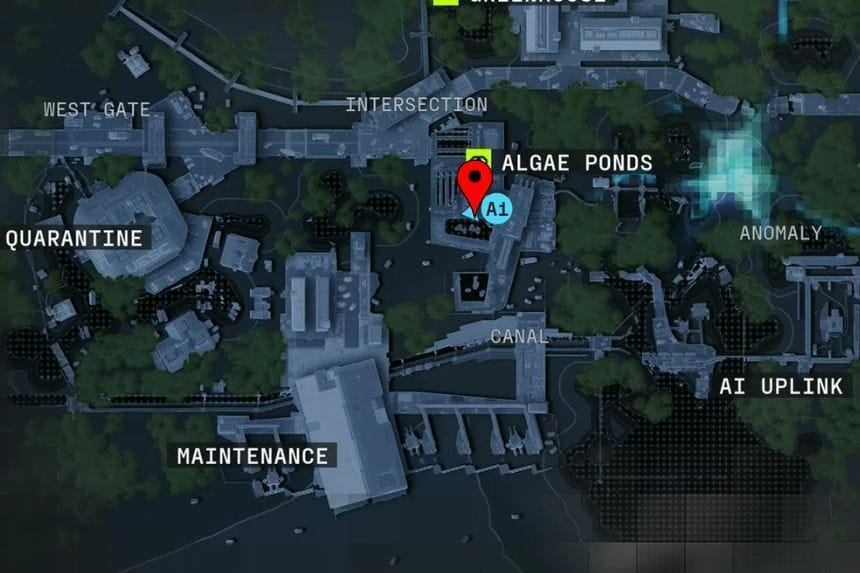
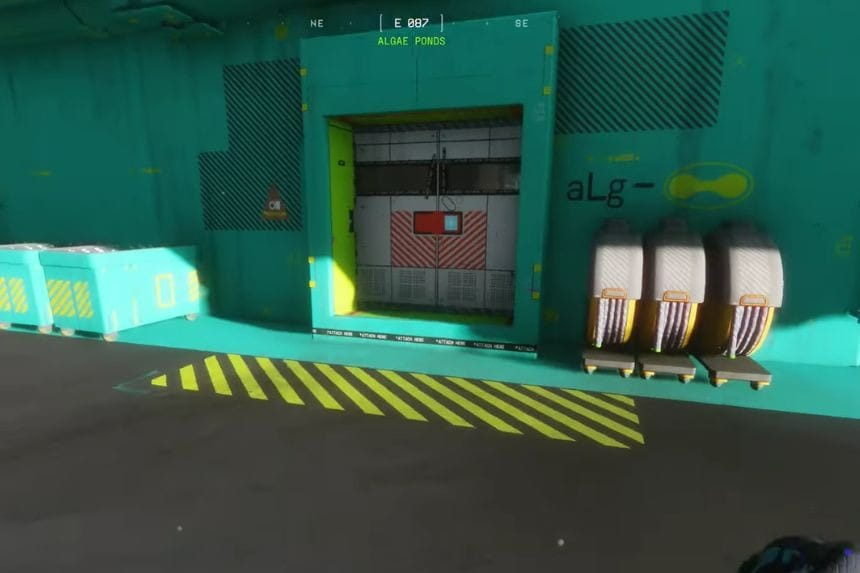
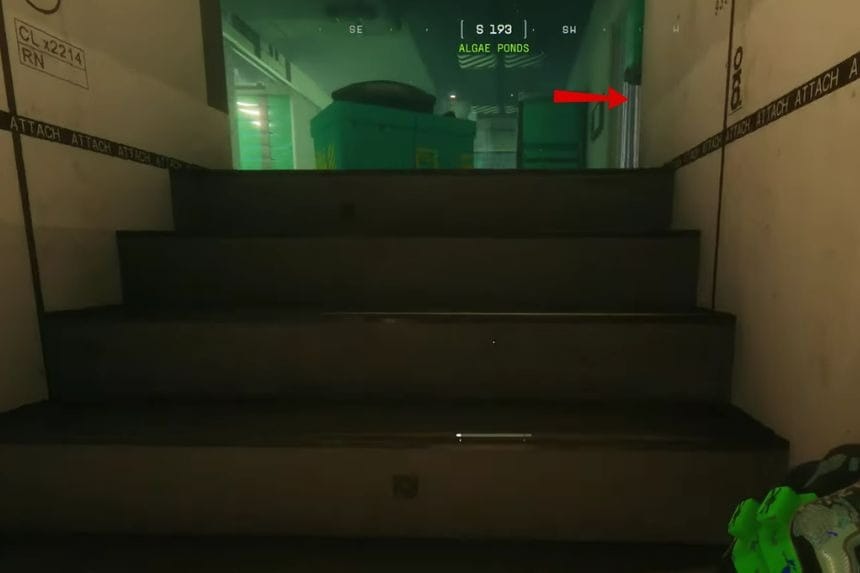
First, go to the central part of the Dire Marsh map, towards the Algae Ponds area. Once you reach the area, find a large blue building. Go inside the building through the west entrance and then turn left. Go straight up the stairs, and when you reach the top, turn right to find the Algae Ponds Office room across the area.
Dormitories Key
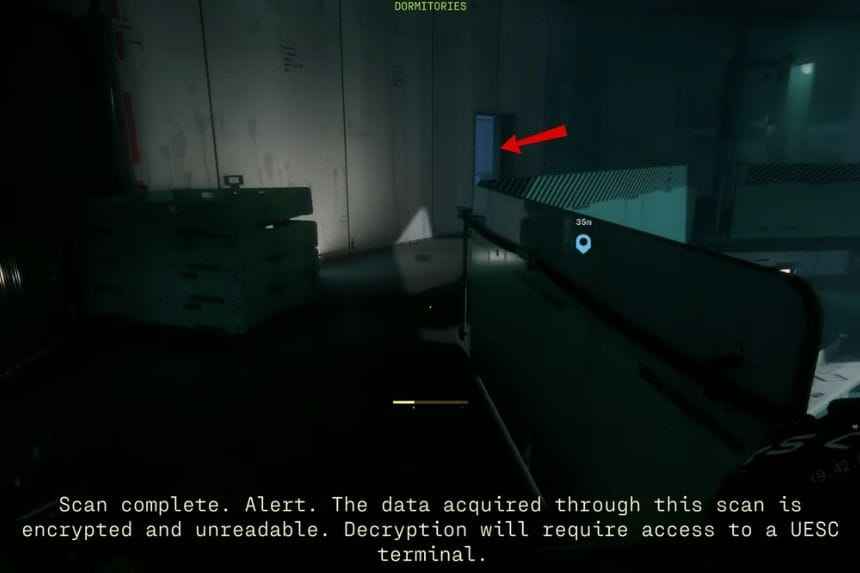
Go to the southeastern part of the Outpost map, on the outer edge of the Dormitories area. When you reach the building, enter through the west side entrance. Once you’re inside, go upstairs to the first floor. Then go around the hallway to find the dormitory room along the outer corridor.
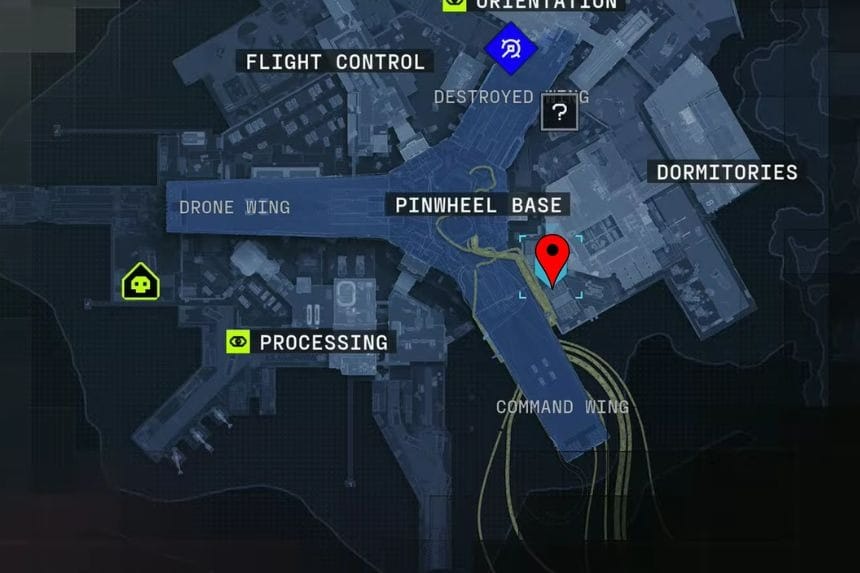
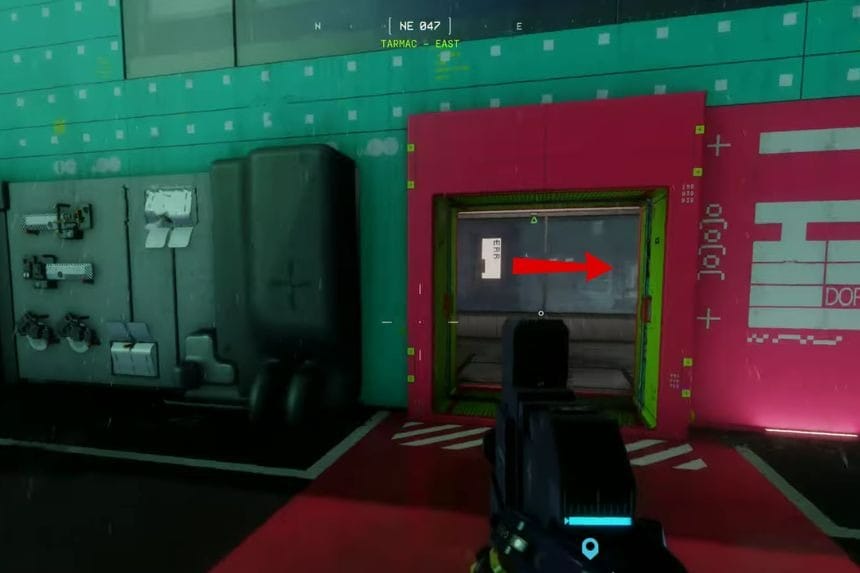
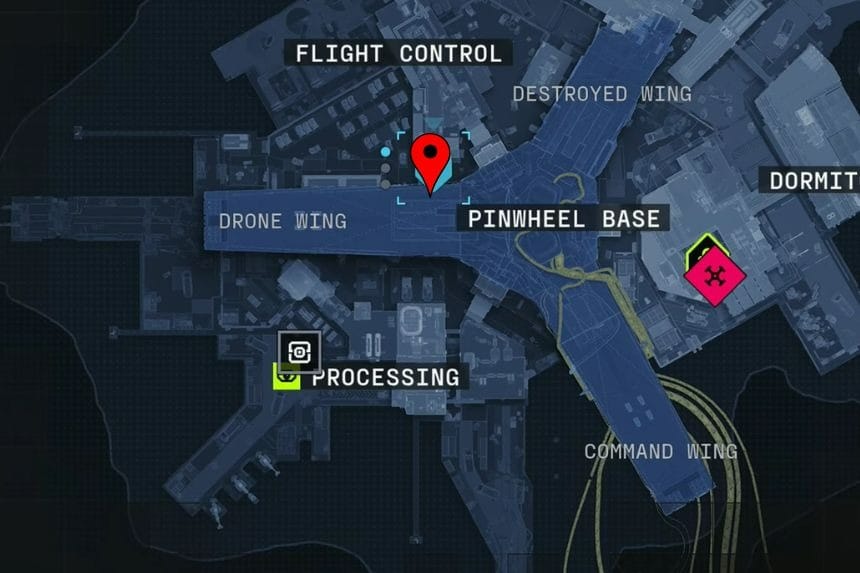
Drone Wing Key
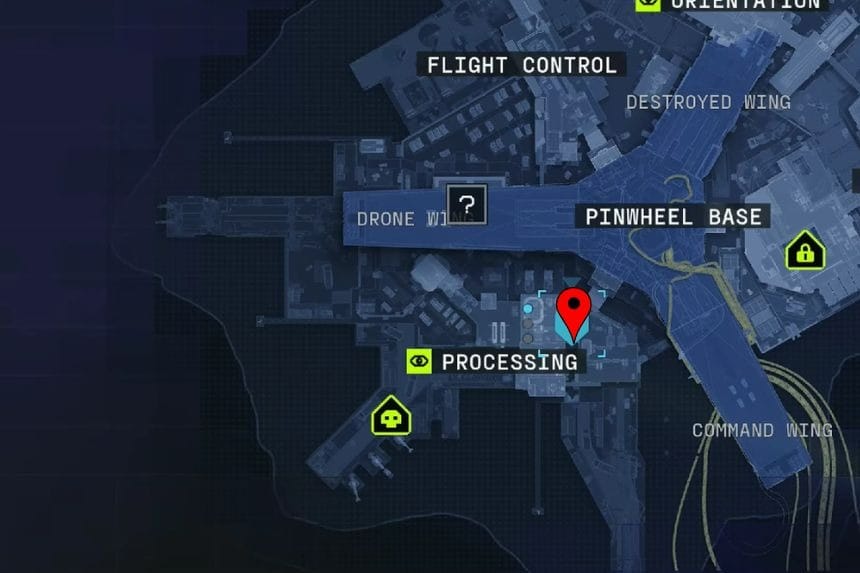

Go to the southwestern part of the Outpost map, near the Processing area. When you reach the location, look for a walkway that leads into the Pinwheel Base structure. Once you gain access and take the elevator to the upper level, you will arrive inside the Drone Wing section of the building.
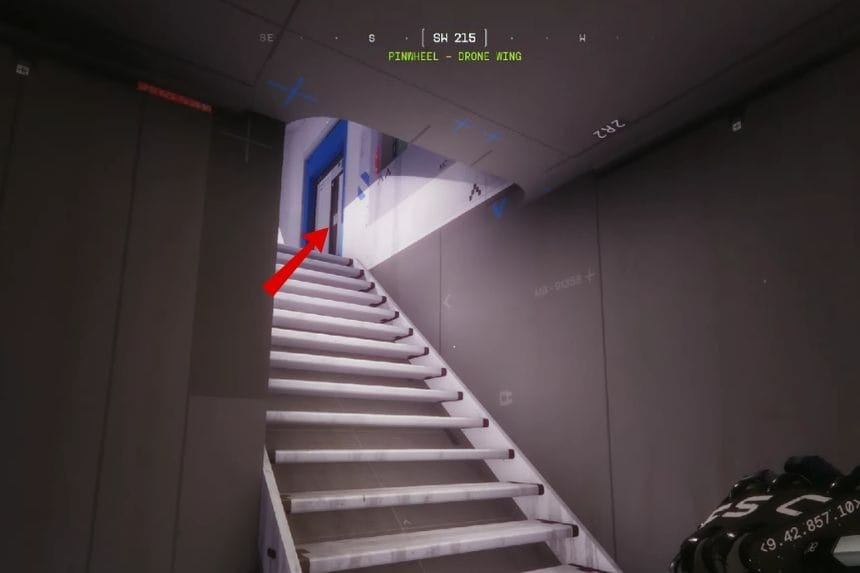
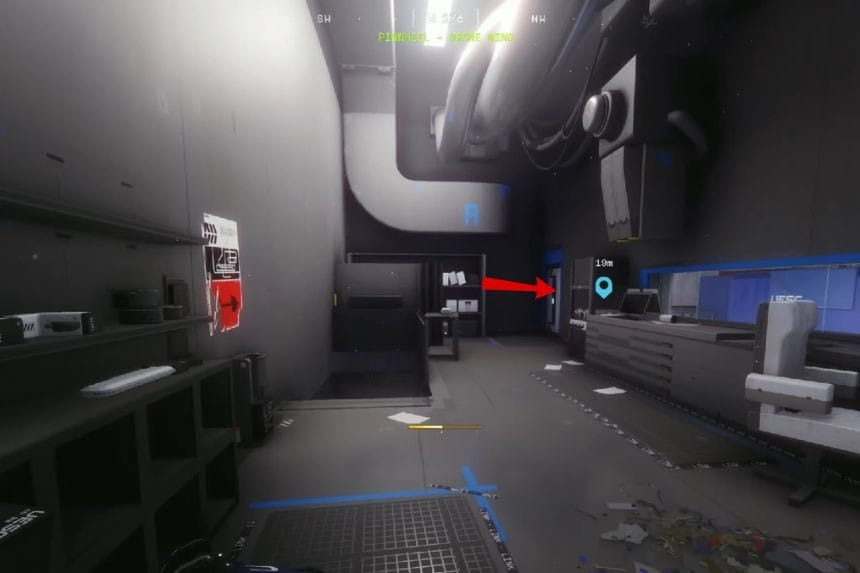
From the elevator, follow the hallways and corridors through the Drone Wing. Keep moving toward the very end of the wing. The Drone Wing locked room will be at the end of this path.
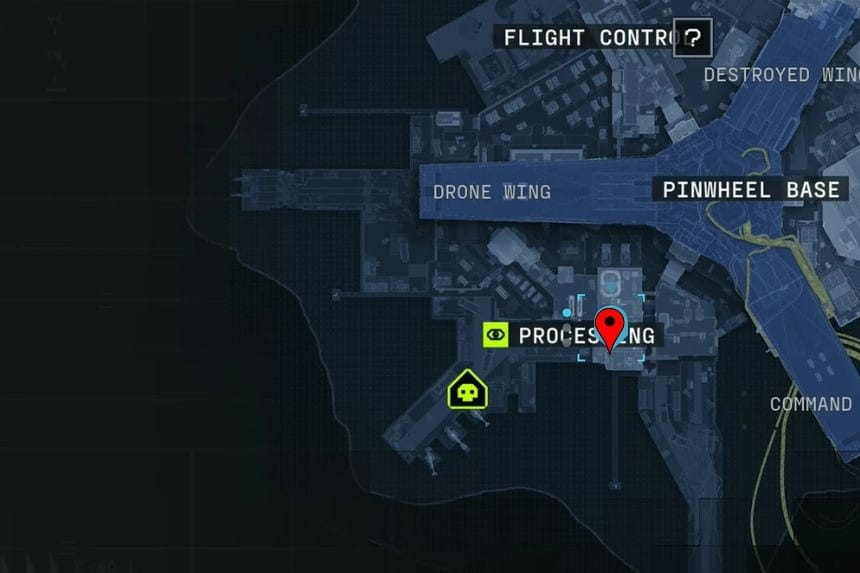
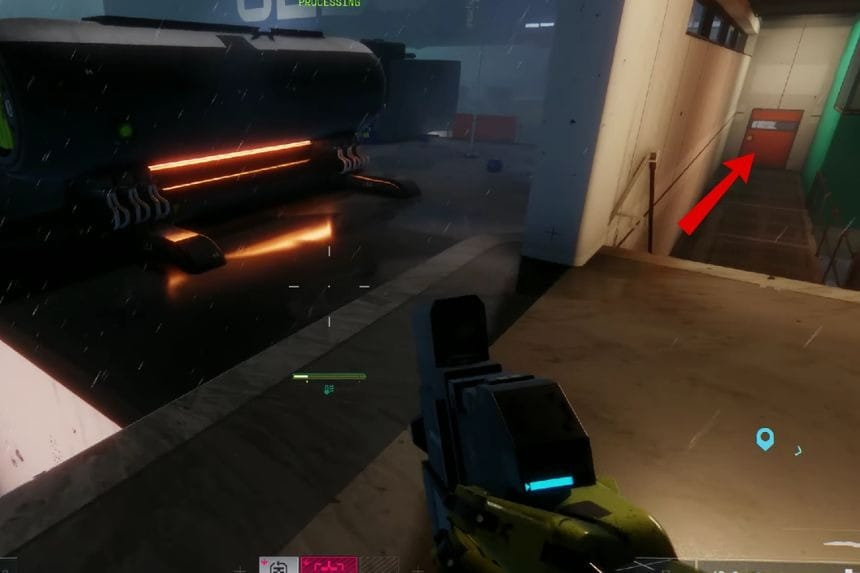
Processing Basement Key
In the central part of the Outpost map, just south of the flight control area, look for a staircase in one of the corners of the building. Underneath the staircase, you will find a ladder that goes down into the basement. Climb down the ladder and go straight forward. Take a left turn twice, and you will find the Processing Basement door on your left.
Processing Upper Key
Head towards the southern part of the Outpost map, where you will find the Processing area. Use the stairs nearby to reach the roof of the building. Once you are on the rooftop, go to the corner of the room, and you will find the Processing Upper room located along the corridor.
Destroyed Wing Key
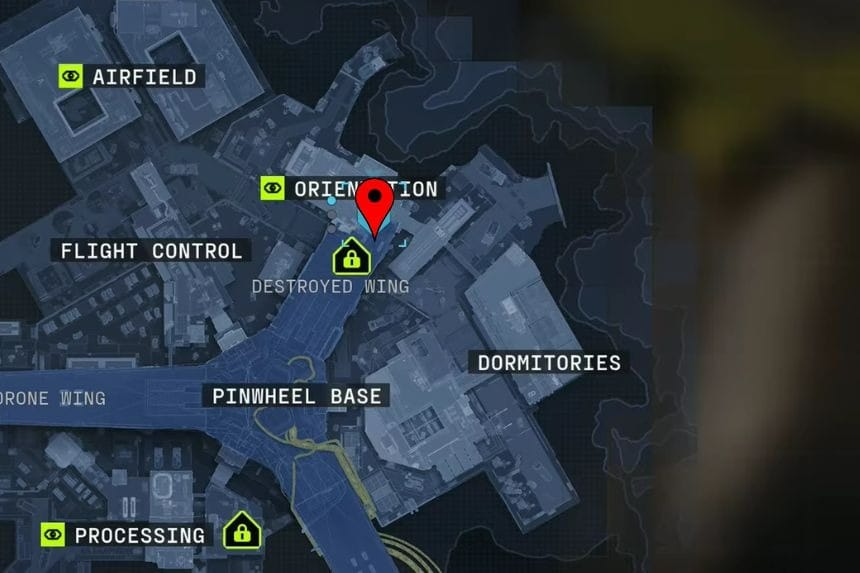
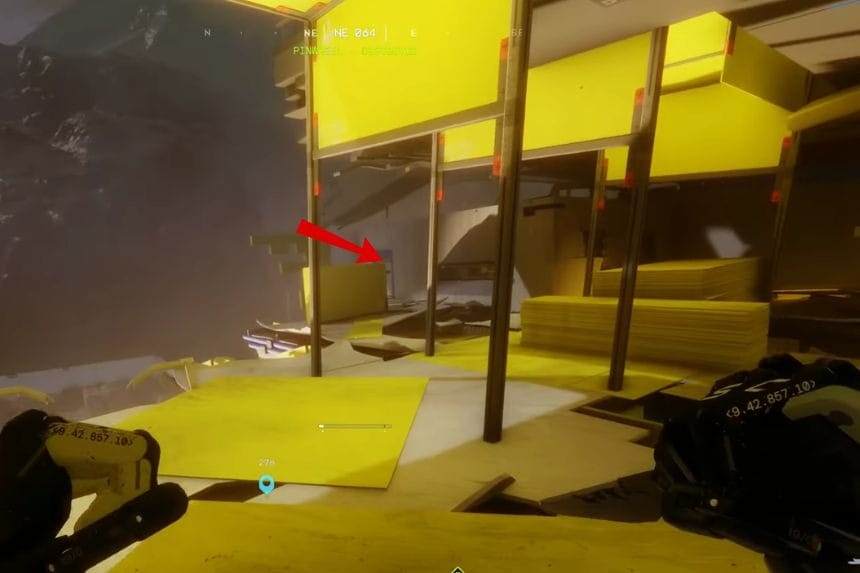
Start by going to the northeastern part of the Outpost map, near the Orientation area. Once you arrive, you will need to climb onto the roof. Jump onto the Destroyed Wing structure and keep climbing upward through the different levels. There are two floors, and you need to reach the top. After reaching the top floor, move to the opposite side of the roof. The Destroyed Wing room will be located there.
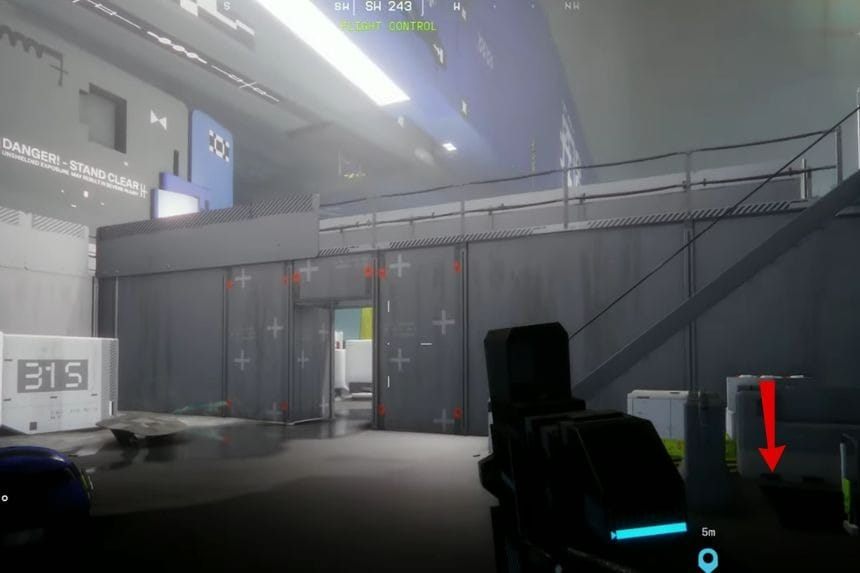
Flight Control Key
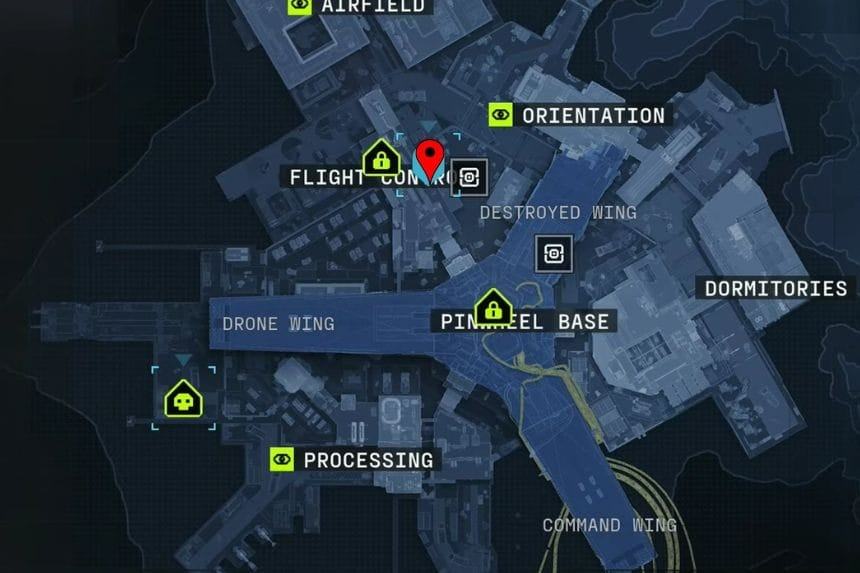
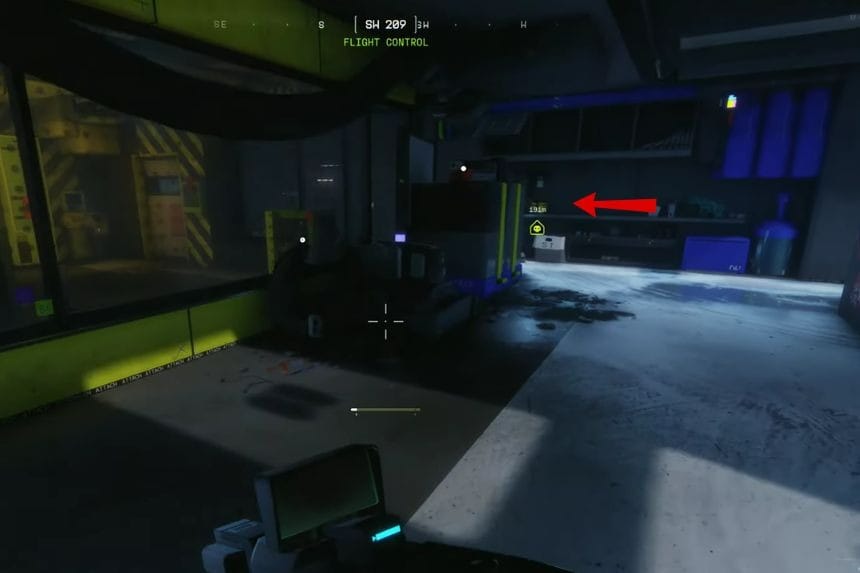
First, go towards the north-central part of the Outpost map to fight the Flight Control area. Look for red paint on the floor. From there, jump towards the nearby ledge. After climbing onto the ledge, jump through the window to enter the building. Then move through the next room to take a left turn, and you will reach the flight control room.
Welcome Centre Key

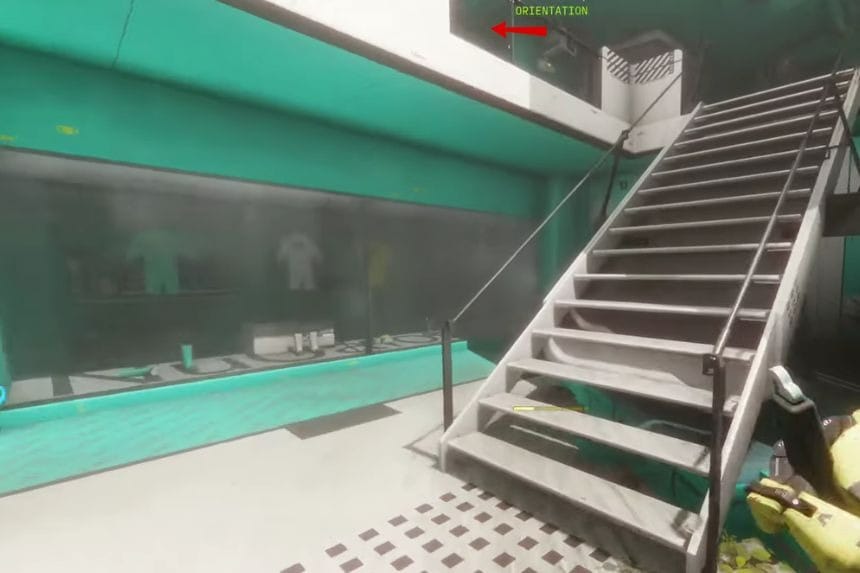
Go to the northern part of the Outpost map near the Orientation area. Look for a walkway just north of the destroyed wing area. This walkway will take you to a building that you need to enter. Once you enter the building, clear the enemies and then go up the stairs. Turn left at the top, and the Welcome Centre locked room will be on the other side of the room.
Prestige Key
The Prestige Key in Marathon can be found on the Perimeter map; you need to defeat a UESC Commander. These enemies have a chance to drop the Prestige Key when you defeat them. The Prestige Key can be used in the endgame area called the Cryo Archive.
