
If you want to unlock the Man of the People trophy or achievement in Hell Is Us, you will need to complete 26 Good Deeds. These are small side quests where you help people by finding items and giving them back. Some of them can be missed if you wait too long or move too far in the main story, so it’s a good idea to finish them as you play. This guide will show you how to complete all 26 Good Deeds, one by one, so you don’t miss any.
All Good Deeds (Man of the People Trophy / Achievement)
There are 26 Good Deeds to complete in Hell is Us. Many of them can be missed if you don’t do them at the right time, so it’s a good idea to complete them as you progress through the story. Rewards for Good Deeds aren’t always given right away. In some cases, you will need to continue the story or talk to a specific character later on to receive your reward.
Good Deeds are like small side quests; most of the time, you will be asked to find an item and deliver it to someone. Finishing these not only helps the people in the world but also earns you rewards from the Watcher’s Nest.
The Golden Watch
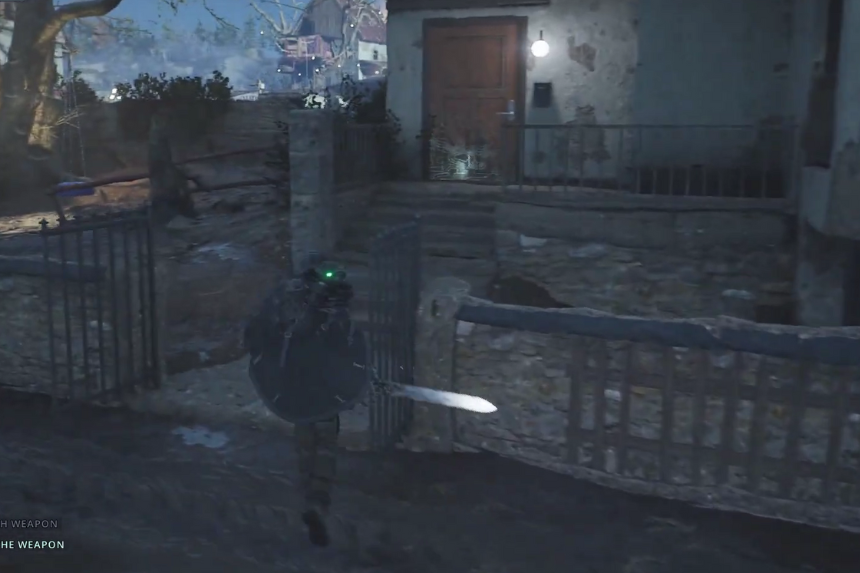
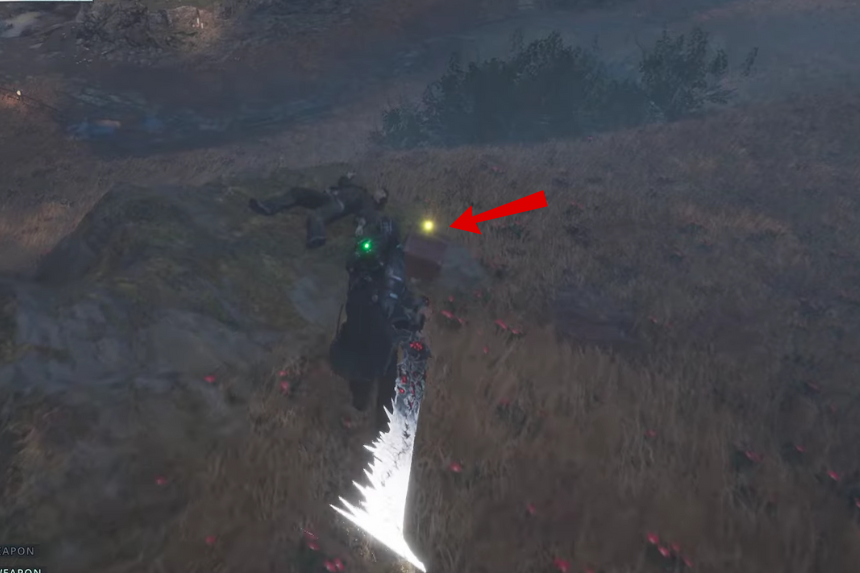
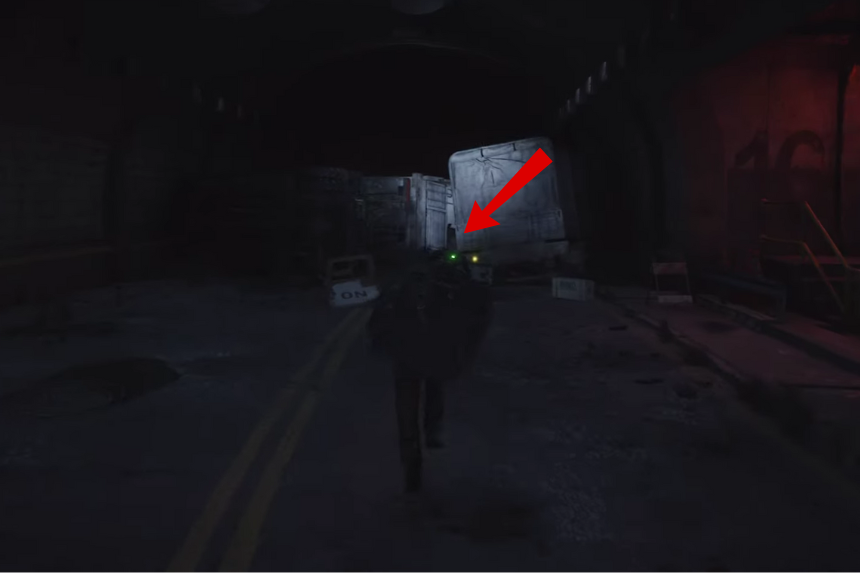
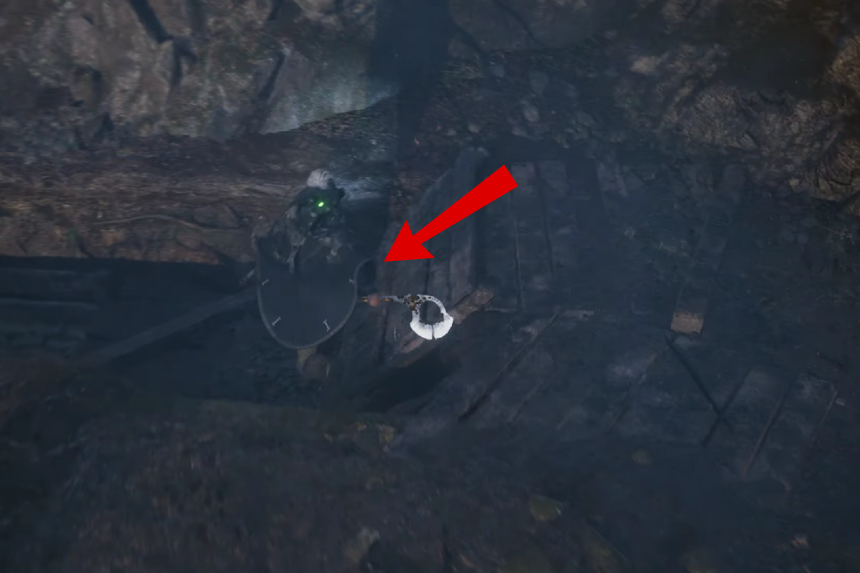
Once you are out of the Senedra Forest, follow the path through the trenches, and when you see a path to the right, take it. There, you will find a small table with a Golden Watch and an unsent letter lying on top. Picking up the watch will start the quest.
The letter gives a bit of backstory about how the watch ended up there. If you inspect the watch closely, you will notice the name “Otis Caddell” engraved on the strap, which hints that it may belong to someone related to Ernest Caddell, the man living at the nearby farmhouse.
To return the watch, head back to your APC and go through the forest path with the wind chimes to reach Ernest Caddell’s farmhouse. Be careful, there may be enemies along the way, so stay alert.
Once you reach the farmhouse, find Ernest Caddell and trade him the Golden Watch. This completes the Good Deed. While the act of giving the watch to him ends the quest, any rewards you may receive for doing so will be available at a different location.
Asunder
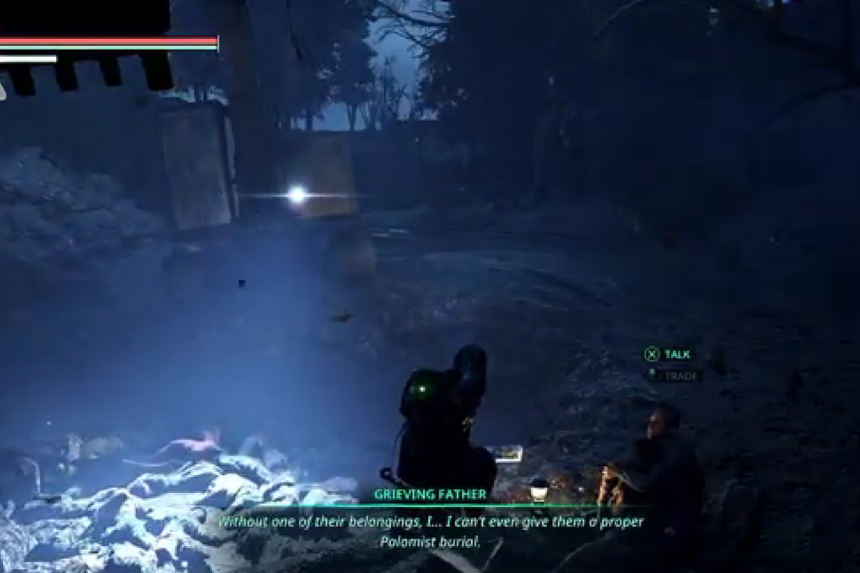
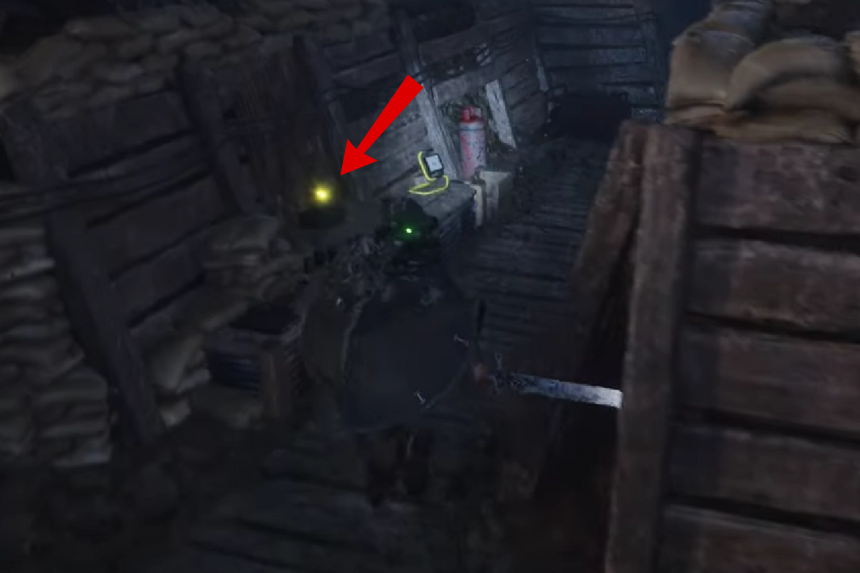
The Good Deed called “Asunder” begins when you find the Letter – Worried Wife, which comes with a rosary. These items need to be delivered to the Grieving Father, who is trying to give his late wife and daughter a proper Palomist burial. He needs something that belonged to them to do so.
Before you can begin the quest, head to the Acasa Marshes and speak to the Grieving Father near the mass grave. He will tell you that he lost his wife and daughter during the evacuation in Tulsi and wishes to bury them with something personal to honour their memory.
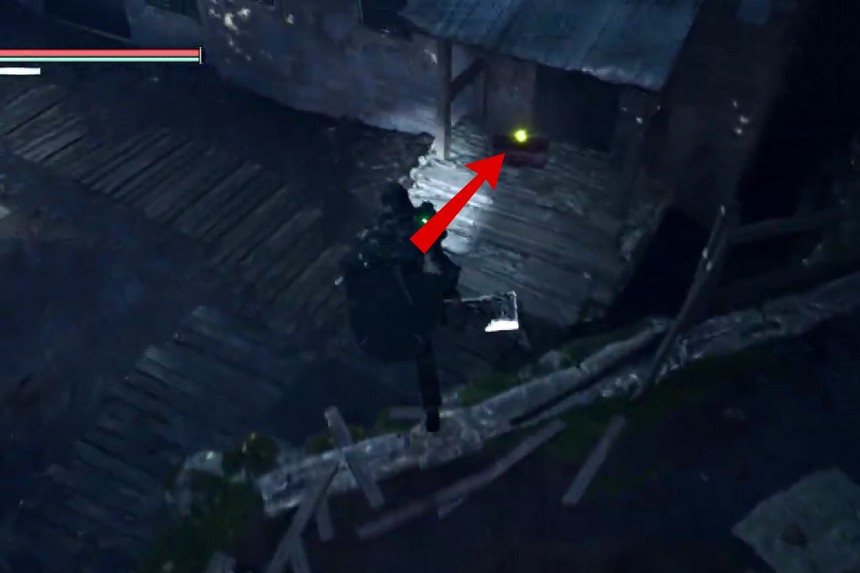
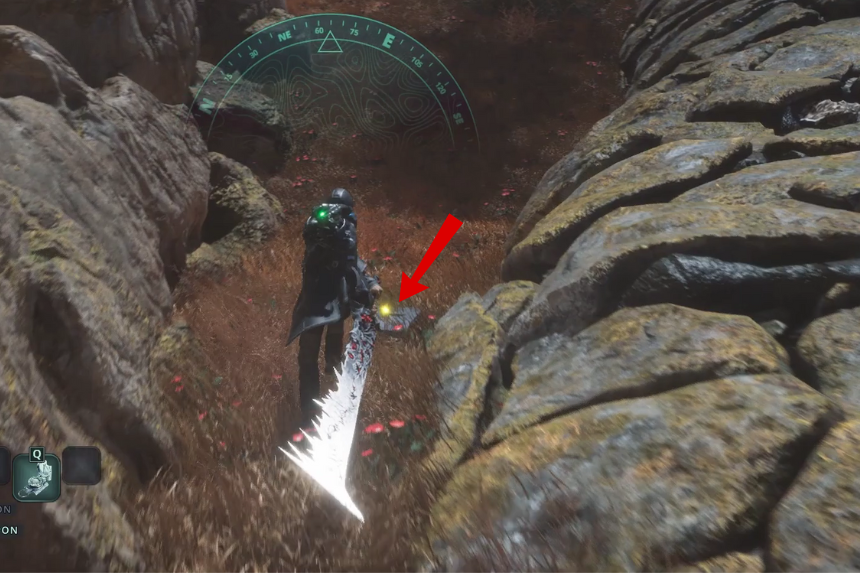
To find what he’s looking for, go to the Village of Jova and look for the well at the centre of the village. Nearby, there’s a road with a yellow generator. Pass it, then go up the wooden planks on your right. You will see a red box on the doorstep of a house. Inside the box, you will find a rosary and the Letter – Worried Wife. Take both items.
Now, you need to go back to the APC. From there, follow the road to the right until you come across the Grieving Father and his child standing near the mass grave. Give him the letter and rosary. He will recognise them as belonging to his wife, Camille, and will thank you for helping him say goodbye properly.
Remember, you need to complete this before Act 1 ends. If you don’t, the Grieving Father will still bury his family – but without their belongings, and you won’t receive any rewards for it. So it’s worth taking the time to help him before moving on.
Land of Milk and Honey
Land of Milk and Honey is a Good Deed you can complete in Act 1. It begins when you find an empty baby bottle near a woman named Judith Karry, who is struggling to care for a hungry baby named Uli. To complete this quest, you will need to find some milk and bring it back to her before the end of the act.
Find the Empty Bottle
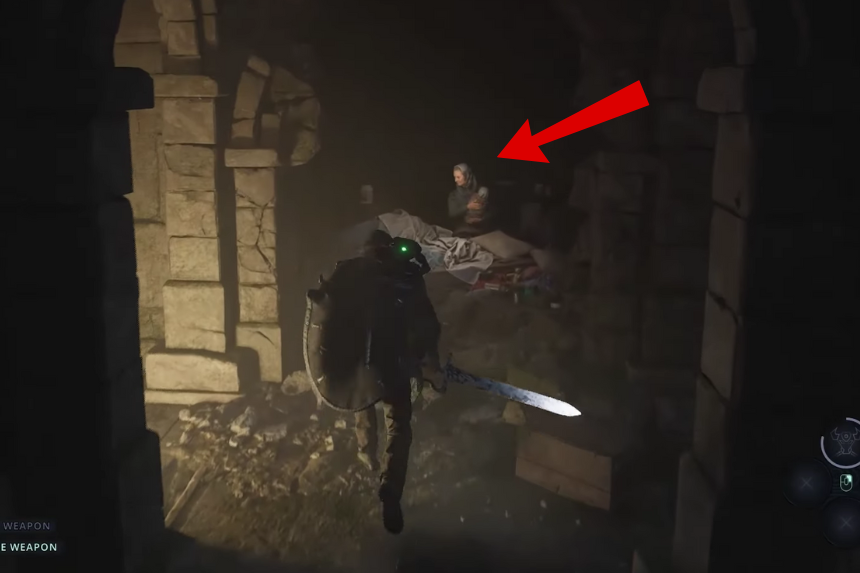
Start in the Village of Jova. Look for the well, climb down, and follow the hallway to the right. You will soon come across a ladder, go down it to reach a lower underground area. Keep going forward until you enter a room filled with Hollow Walkers. Defeat the enemies, then head into the hallway on the right. On the left side, you will see another ladder, climb up. As you continue, you will start to hear the faint sound of a crying baby.
Keep following the path to the right, and you will come to another ladder going down. The crying will get louder. Follow the sound until you reach Judith Karry and the baby, Uli. Talk to Judith, and she will explain that Uli is crying because he’s hungry, and she’s out of milk. Right next to them, you will find the Empty Baby Bottle. Pick it up to activate the Good Deed.
Trade the Bottle for Milk
Now, fast travel to Senedra Forest. From the APC, take the path to the left until you reach Caddell Farm. Go inside and speak to Ernest Caddell. He will take the empty bottle and fill it with milk for you.
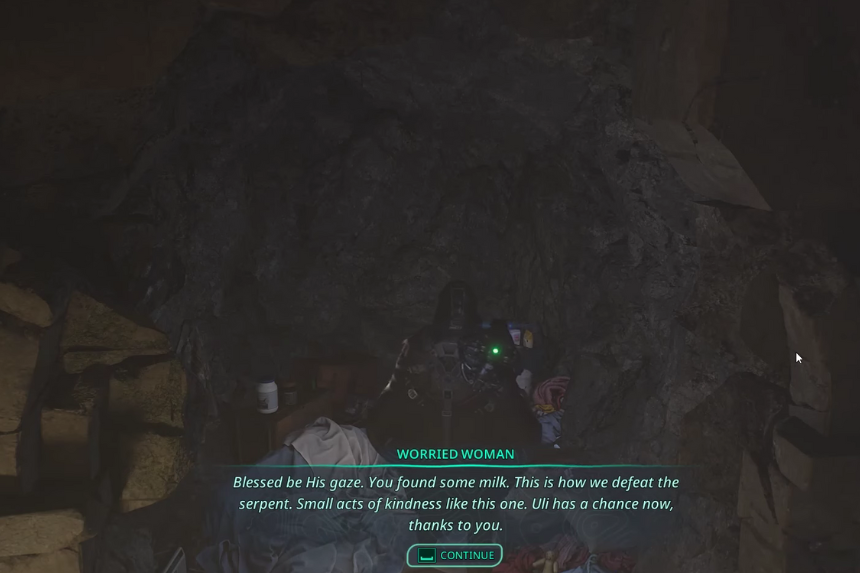
After receiving the Baby Bottle – Filled, fast travel back to Jova, return to the underground area, and follow the sound of the crying again to reach Judith and Uli. Now, give her the bottle of milk, and she will be incredibly thankful. Feeding Uli will complete the Land of Milk and Honey Good Deed.
Love Thy Neighbour
Love Thy Neighbour is a Good Deed that starts when you pick up a Bloodied Plushie under a large oak tree in the Acasa Marshes. You will need to complete this task before Captain Vaas leaves for the Abbey, or you will lose the chance to finish it. Once that moment passes, the Good Deed can no longer be completed
Find the Plushie
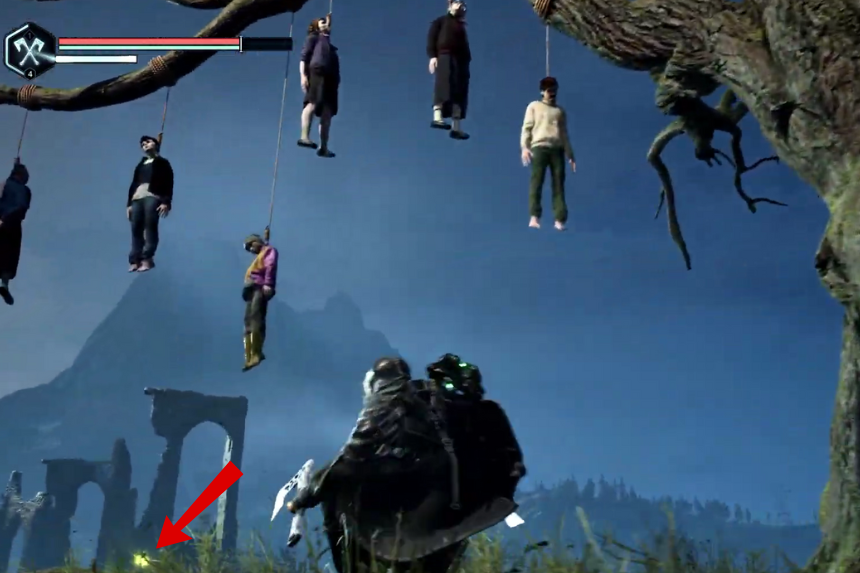
Head to the outskirts of the Village of Jova, where you will spot a lone oak tree up on a hill. There are hanging bodies in its branches, and underneath the tree, you will see a Bloodied Plushie. Pick it up, this will trigger the Good Deed.
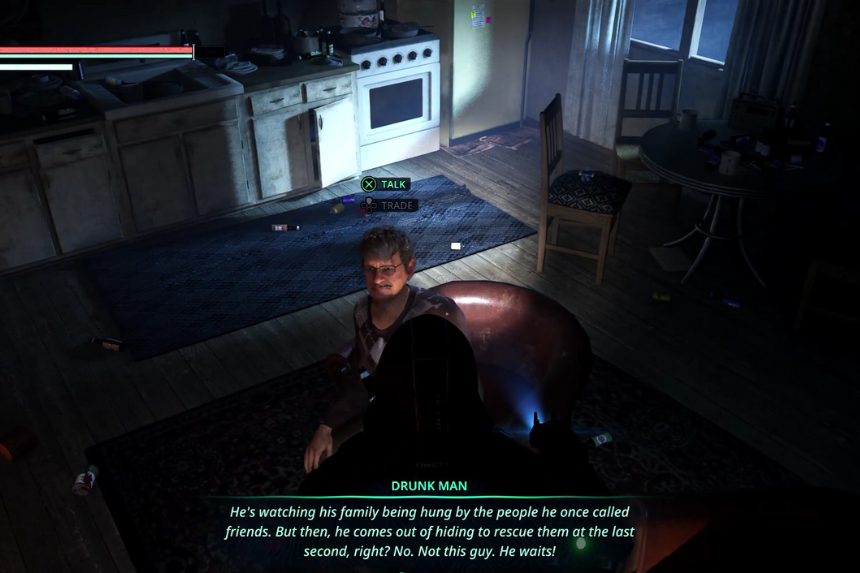
After picking up the plushie, go into the village and look for a Drunk Man. He’s inside a run-down brown house near the cemetery. Give him the plushie, and in return, he will hand you a Classroom Picture.
Deliver the Picture
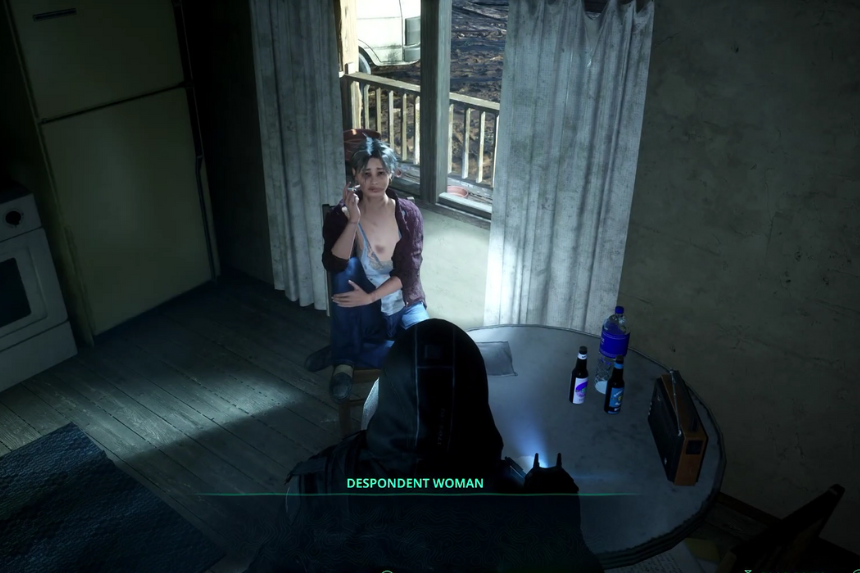
Next, find the Despondent Woman. She’s inside a home near a mural that shows Sabinian Soldiers. Give her the Classroom Picture. She will talk about her past, how she once taught local children, including the son of Thomas Kuhn, one of her neighbours. This completes the Love Thy Neighbour Good Deed.
Victor’s Vigil
Victor’s Vigil is a Good Deed quest that begins when you find and pick up the Car Keys from the balcony of Vitalis’s House. These keys are used to open the trunk of an old car in the Acasa Marshes, where you will find a few important items, including a Necklace that belongs to Victor Gaz. Returning this necklace to him will complete the quest.
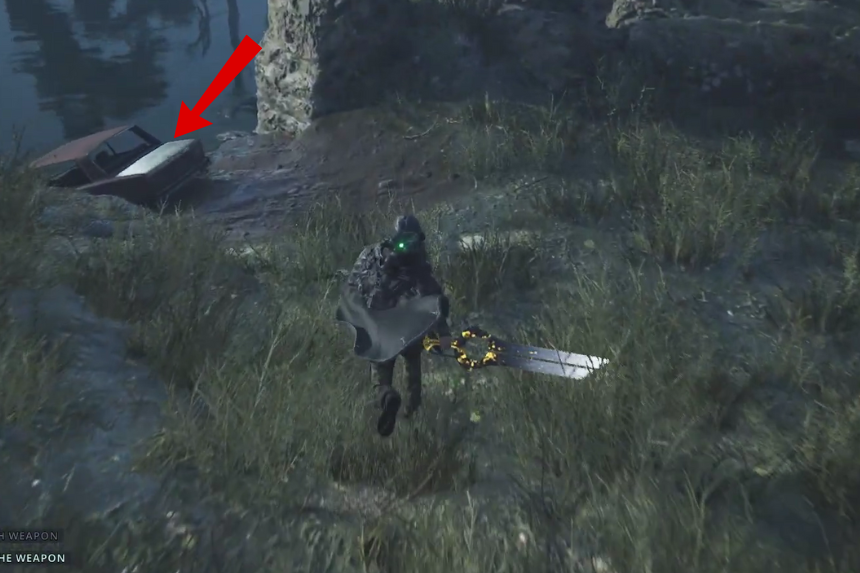
While exploring the Acasa Marshes, you might notice a rusty old car parked near a large oak tree covered with hanging bodies. When you examine the car, you will see that the trunk is locked and needs a key.
To find the key, go back to the Village of Jova and head to Vitalis’s House. You will find it right across from the house with the Sabinian soldiers mural. You will need Vitalis’s House Key first to get inside.
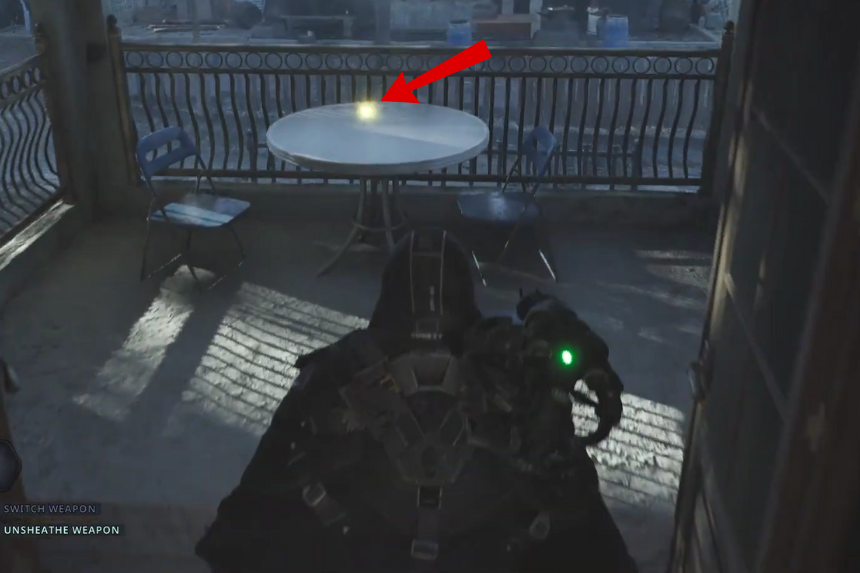
Once inside the house, go up to the balcony. On a table, you will find the Car Keys. Take them and return to the Acasa Marshes, back to the car you found earlier.
Use the keys to open the trunk. Inside, you will discover a few items:
- Recording – Vitalis’ Departure
- A Necklace with Victor’s name engraved on it
- Lymbic Twin Axes
- Glyph – Chromatic Shield
- Lymbic Imbuing
Finding the necklace officially activates Victor’s Vigil Good Deed. Now, return once again to the Village of Jova and visit Victor at the Blacksmith’s Shop. Give him the necklace, and he will thank you sincerely for bringing it back to him. This completes the Good Deed.
Performance of a Lifetime
Performance of a Lifetime is a Good Deed quest that starts when you pick up either of the two Sabinian classical music sheets. Your task is to collect both sheets and give them to Cyan Karsh, a Sabinian fiddler who’s staying at the Village of Jova.
This quest has a deadline; you need to finish it before Captain Vaas leaves for the Abbey in Act 1. If you wait too long, Cyan Karsh will be killed, and you won’t be able to complete the quest anymore. So it’s best to take care of it as soon as possible.
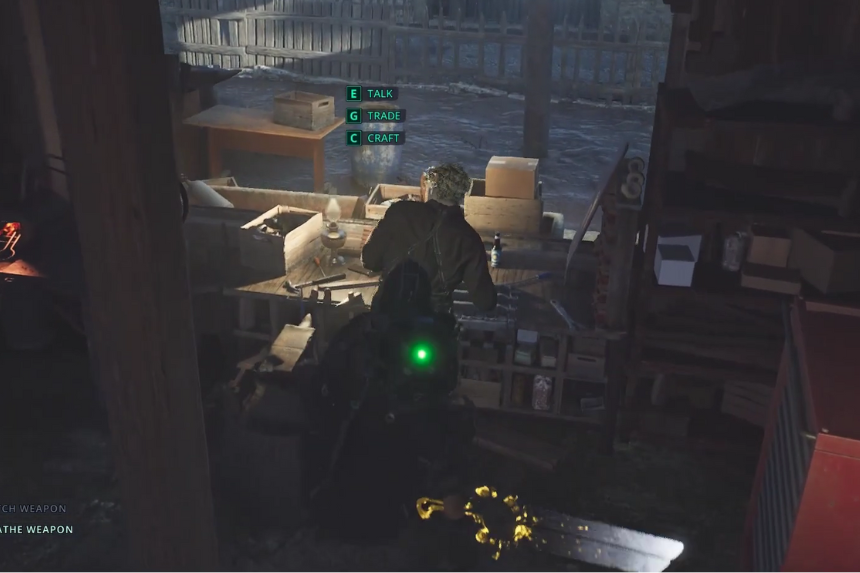
To begin, find Cyan Karsh, also known as the Fearful Fiddler, in the Sabinian camp located in the middle of the Village of Jova. Talk to him, and he will explain that he needs to learn new music to impress Captain Vaas. That’s where you come in; you will need to find two special music sheets for him.
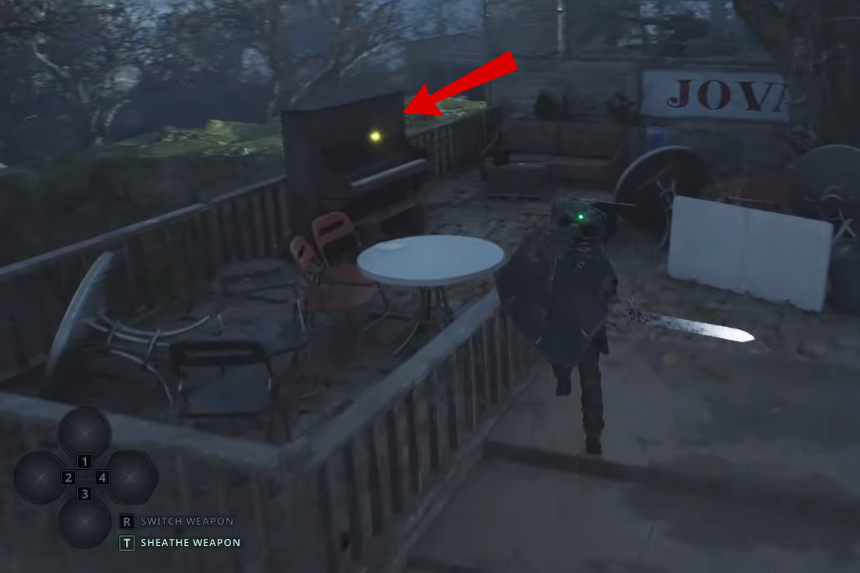
The first sheet, called Our Pride, can be found nearby. Go to the Jova Java café in the village. Outside, near the dining area, there’s a piano; you will find the first sheet sitting on it.
Once you’ve grabbed that, fast travel to Vyssa Hills to get the second sheet. From the APC (armoured vehicle) drop-off point, look for a smoky, dimly lit area hidden behind the pine trees. Head in that direction until you reach a rundown spot with a burning tree branch.
Follow the road covered with broken ON vehicles until you reach the riverside. There, next to the body of an ON Soldier, you will find a red box. Open it to get the second music sheet, called Losilus Dreaming.
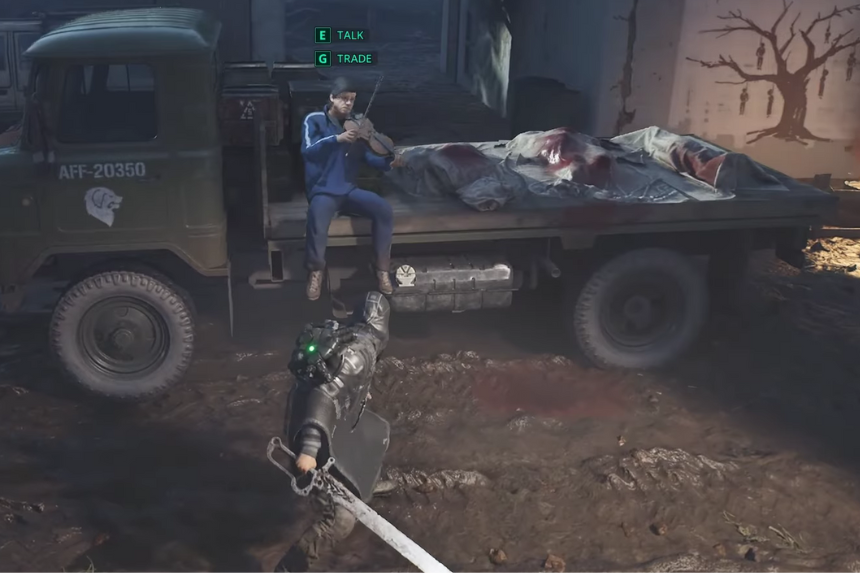
With both music sheets in hand, return to the Village of Jova. Now go to the Sabinian camp by following the tire tracks. You will find Cyan Karsh sitting on a green truck.
Give both music sheets to him, and the Good Deed will be complete. It’s a small but meaningful mission, helping an anxious musician find the courage to perform, just in time.
Death’s Door
The “Death’s Door” Good Deed begins when you find the Pill Bottle – Atenolol inside a lost piece of luggage. This medicine is important for Diana Kos, who needs it to manage her heart condition. Your goal is to find her medicine and return it to her before it’s too late.
You will want to finish this task before Act 1 ends, and especially before completing the Heart of Gold quest, or Diana won’t survive. So make this a priority.
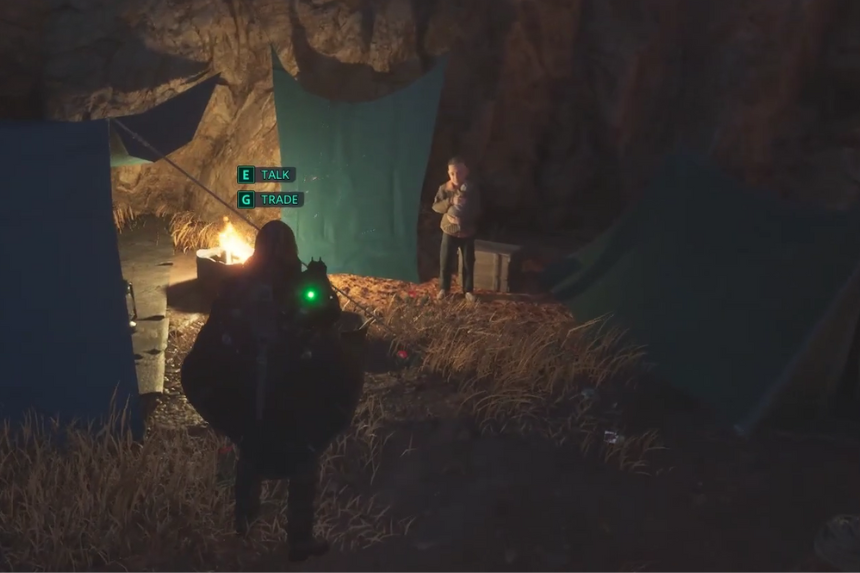
First, fast travel to Vyssa Hills and head up to the Refugee Camp. To get there, take the road leading left from the APC. In the camp, you will meet Diana Kos. She is sitting next to a tent. Talk to her, and she will explain that she lost her luggage, which had her heart medicine inside.
After speaking with her, leave the camp and climb back down. Once you see the mine entrance in Vyssa Hills, go left. Near the side of a small hill, you will spot the luggage lying on the ground. Open it to get the Pill Bottle – Atenolol. Picking it up will activate the Good Deed.
Once you have the medicine, head back up to the Refugee Camp and speak to Diana again. Trade her the pill bottle to complete the Good Deed. You’ve now helped her survive a critical moment.
What happens to Diana Kos depends entirely on your timing:
- If you give her the medicine in time, she survives, and you will see her later in Senedra Forest.
- If you wait until after Act 1 ends, she will die. You will find her grave in the Senedra Forest. Or you may find it in her Refugee Camp.
- If you finish “Heart of Gold” before giving her the medicine, the result is the same – she dies, and her grave will appear in one of those locations.
To get the best result and complete the Good Deed, be sure to deliver the medicine before Act 1 ends and before starting Heart of Gold. Timing really matters here, so don’t delay if you want Diana to survive.
Where the Heart is
Where the Heart Is begins when you pick up a photo called Photograph – Girl inside a tunnel. Your goal is to return this photo to Lieutenant Zao Ru, who can be found in the Village of Jova. Giving her the photo completes the quest.
However, this quest becomes available only after the burning trucks in the tunnel have been cleared. Lieutenant Zao Ru won’t appear until Captain Vaas leaves for Pathem Abbey. Once both of these things happen, the quest becomes fully accessible. There’s no deadline, so you can complete it whenever you’re ready.
After Captain Vaas has left the village, head toward the ON building with a flag hanging outside. You will find it by going past the Sabinian Soldiers mural, then jumping down to the road below. There’s a small building there with a woman sitting beside a table; this is Lieutenant Zao Ru, someone you might remember saving earlier from the burning tunnel. Talk to her, and she will tell you that she once had a photo of her daughter, which she left behind in a truck’s safebox.

To find the photo, head into the marshes and follow the long paved road that leads to the tunnel. This is the same tunnel where you met Victor Gaz and Zao Ru during an earlier part of the game. You will know you’re on the right track if you pass the save point on the bridge nearby. Inside the tunnel, there are Hollow Walkers waiting; take them out first. Once it’s safe, go toward the boxes near the now-extinguished trucks. Among the boxes, you will find the Photograph – Girl. Picking it up activates the Good Deed.
After grabbing the photo, head back to the Village of Jova and speak with Lieutenant Zao Ru again. Give her the photograph. She will be grateful for having this memory of her daughter returned, and this touching moment will mark the completion of the Good Deed.
Man’s Best Friend
Man’s Best Friend is a Good Deed that starts after you rescue a dog named Max and receive his collar. Your goal is to bring this collar to Alban Vosh, an elderly man in Vyssa Hills, who feels guilty for leaving Max behind when they fled their home in the Village of Jova. There’s no time limit for this quest, so you can complete it whenever you’re ready.
Meet the elderly couple in the Refugee Camp in Vyssa Hills. They will share their regret about having to leave their dog behind. However, you won’t be able to rescue the dog just yet – you need to progress through the main story until the Sabinian Patrols leave the Village of Jova. Before that, there’s a soldier guarding the area, making it impossible to free Max.
Once the patrols are gone, go back to the Village of Jova. Head toward the centre of the village, where you will find a well. Nearby, look for a house next to a red car and a green car. Around this area, you will spot Max tied up near his doghouse. Walk up to him and interact to free him. After doing so, you will receive a Dog’s Collar with his name engraved on it.
Now it’s time to head back to Vyssa Hills. From the main area, take the path going left until you reach a ladder. Climb up and follow the wooden platforms. You find the elderly couple here again. Now give Alban the Dog’s Collar. This completes the Good Deed.
As a small bonus, if you manage to save Max before Aabot Jaffer leaves Vyssa Hills, you will later see Max resting happily beside Rebeca at Lake Cynon.
Heart of Gold
Heart of Gold is a Good Deed that begins after you finish an important task. Once you close the Timeloop in Vyssa Hills, you’ll find the body of an ON Soldier. Search the body to find the Keys – ON Vehicle. These keys are needed by Atticus, who wants to use them to help save a group of refugees staying at a nearby camp.
There’s no strict time limit to complete this Good Deed, but the final outcome can change depending on what other refugee-related Good Deeds you’ve completed. So, the timing of when you finish Heart of Gold can really affect what happens next.
Find Atticus
Head to Vyssa Hills and look for a Timeloop. Near it, there’s a road with a wooden archway. Follow this road until you see a ladder. Climb up the ladder and you will find Atticus waiting at the top. Talk to him, and he will tell you his plan to rescue the refugees. Now, go into the Timeloop and shut it down using an Amine Prism – Sigma. Make sure you’ve already learned how to use Timeloops before attempting this.
Collect the Vehicle Keys
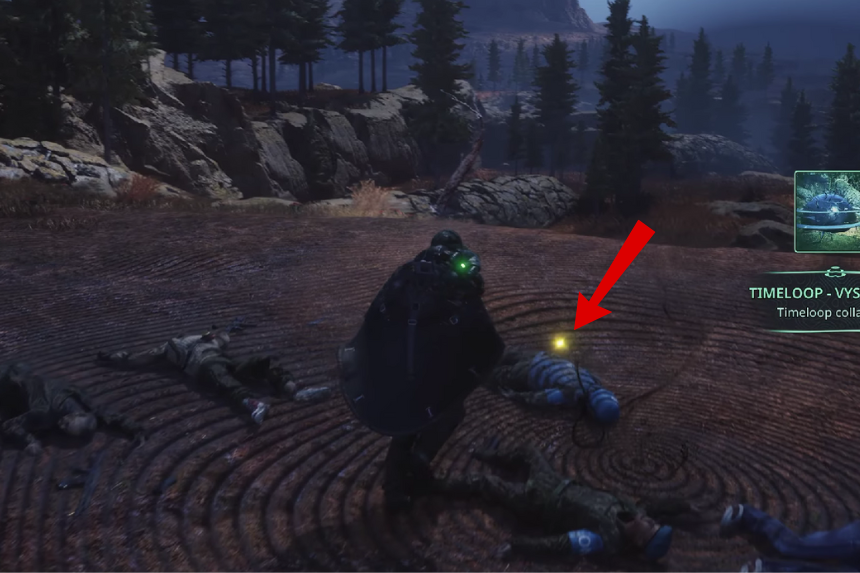
After you close the Timeloop, the body of an ON Soldier will appear nearby. Search the corpse to get the Keys – ON Vehicle. Now, bring the keys back to Atticus. Giving him the keys will activate and complete the Heart of Gold Good Deed, allowing him to carry out the rescue.
A Light in the Dark (1,2,3,4)
The “A Light in the Dark” quest begins once you pick up the Signal Flares from a box just outside the Town Hall. Your goal is to find four missing survivors and trade a Signal Flare with each of them before the evacuation truck leaves Talju. Each time you successfully trade a Flare, you complete one part of the quest. Remember, if you miss one survivor, it won’t stop you from completing the others.
To start, talk to the Medic inside the Town Hall. They will tell you that some townspeople are still missing. When you exit the building, look for a box between a dead body and a yellow generator. Open it and take the Signal Flares. This will officially activate the Good Deed quest.
First Survivor – Aska Tiflis
Head straight from the Town Hall until you see a green truck blocking the road. Turn left, defeat the Hollow Walker near the burnt house, and follow the path. You will come across a house overlooking a pond. Go behind the house and climb the ladder up to the second floor through a broken wall.
Inside, you will find Aska Tiflis standing by a window. Trade a Signal Flare with her to light the first flare. That completes the first part of “A Light in the Dark.”
Second Survivor – Boro Juven

Right behind Aska’s house, unlock and open the gate. Follow the road, and you will loop back near the APC. From here, look for a garage in front of the gas station. It’s on the left side of the APC.
There are enemies in the area, so take out the Hollow Walkers first. Then go into the garage and meet Boro Juven. Trade a Signal Flare with him to light the second flare. That’s the second part done.
Third Survivor – Charlotte Topam

Back at the Town Hall, head toward the sidewalk and walk all the way to the end. You will find metal stairs leading up to the second floor of an office building.
Inside, you will find Charlotte Topam. Trade a Signal Flare with her to light the third flare and complete the third part of the quest.
Fourth Survivor – Ylio Botham
On the other side of the office building, hop down and continue forward. You will run into a Timeloop Guardian and a Big Hollow; defeat them to move on. Keep going until you reach a red barn.
This area is filled with Hollow Walkers, so clear them out first. Enter the barn and head up to the second floor, where you will find Ylio Botham. Trade the final Signal Flare with him to light the fourth and last flare.
A Light in the Dark: All Outcomes
After lighting all four flares, continue with the main story. Your next goal is to help everyone evacuate Talju. Once you defeat the boss, fast-travel to Marastan. This is when “A Light in the Dark” will officially be completed.
- The outcome of the “A Light in the Dark” quest depends on how many Signal Flares you manage to deliver before the truck leaves Talju.
- If you deliver all four Signal Flares in time, then all four survivors will safely escape Talju with the other evacuees. This is the best possible outcome.
- If you only deliver some of the flares, only the survivors you helped will make it out alive. The others who weren’t given a Signal Flare will be left behind.
- However, if you wait too long and deliver the flares after defeating the boss in the parking lot, the survivors will reject your help. They will tell you it’s too late, and later, you will find their bodies near the places where you originally found them.
It’s best to finish this Good Deed before starting Caspian’s quest, so you don’t miss your chance.
Rewards
After saving the survivors and finishing the main story events, head back to the Watcher’s Nest and talk to Gildas Brom. He will give you your reward for completing the Good Deed. You will receive several powerful items: Glyph – Interrupt – Enhanced, Idol of Grief – Anger, Tuning Stone – Strong, Sword of Terror, and Knell of Ebbing Ecstasy.
Forlorn Fate
The “Forlorn Fate” Good Deed begins when you loot a charred corpse in Talju and collect two items: the Symbol – Flame and the Map – Senedra Mountains. These items are important because they help you unlock a sealed door in Senedra Forest, where Dolo and Yohan Dulwich are trapped inside a hidden basement.
Start by heading into Senedra Forest from the APC. Go down into the woods until you spot a cellar door that leads into a hidden basement. Here, you will find a sealed door. Behind the door, you will find Yohan and Dolo Dulwich. Talk to them through the door, and they will tell you how a smuggler locked them inside and fled to Talju, with the only way out.
Fast travel to Talju and head toward the office building. To get there, go to the sidewalk in front of the Town Hall and follow the path to the right. You will see a metal staircase leading to the second floor of a building and enter the office.
At the end of the hallway, look for a messy room with a whiteboard. You will find a charred corpse on the floor. Here you will find the Symbol – Flame and Map – Senedra Mountains. This action activates the Good Deed.
Now that you have the Symbol and Map, return to the basement in Senedra Forest. Use the Symbol – Flame on the sealed door to unlock it. Go inside and speak to Dolo Dulwich, then trade her the map you picked up earlier. This completes the Good Deed and allows them a chance to escape safely.
Forlorn Fate: All Outcomes
What happens to Yohan and Dolo depends on your timing, especially when you collect the Third Keystone:
- If you open the door and give the map to Dolo before getting the Third Keystone, the couple will escape safely. They will disappear from the basement later, meaning they made it out.
- If you open the door but forget to give Dolo the map before getting the Third Keystone, they will vanish, but the Good Deed will be marked as failed.
- If you wait until after getting the Third Keystone to open the door, it’s too late. You will find them dead inside, and the Good Deed will also fail.
To get the best result, make sure to open the door and give Dolo the map before obtaining the Third Keystone. That way, both civilians make it out alive, and you successfully complete Forlorn Fate.
Incognito
Incognito is a Good Deed that starts when you pick up the Woman’s Clothing from a hidden room inside the Office in the Ministry building. Once you have the outfit, take it to Mireille Dallaire, who needs it to safely escape the building without being recognised. Giving her the clothing completes the Good Deed.
If you leave Lethe – Ministry of Cultural Primacy without helping her, you will later find Mireille dead, so make sure to do this before you exit.
Find the Keycard
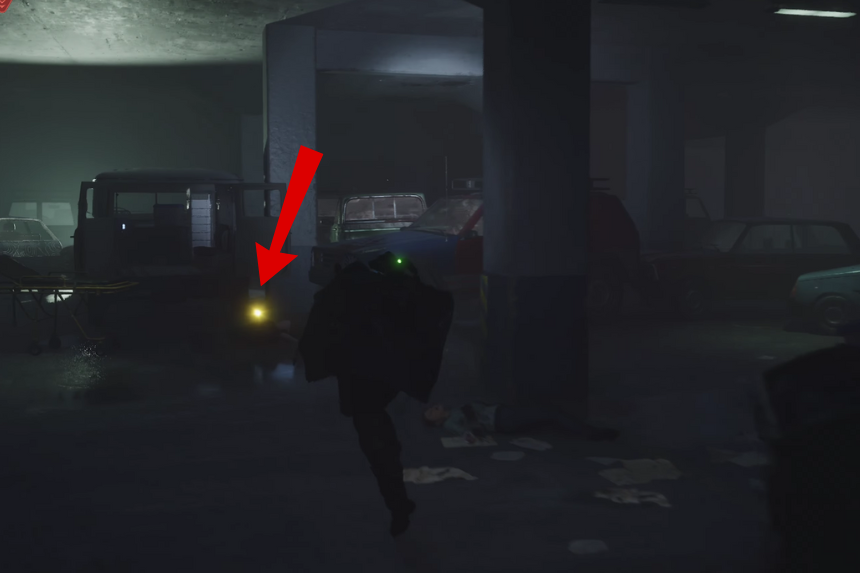
Fast travel to Lethe – Ministry of Cultural Primacy. Go down to P2 Basement Parking and look behind the ambulance. You will find a dead body there – loot it to get the Keycard – Ministry.
Head up to the third floor and look for the Lounge. Here, you will find Mireille Dallaire. Talk to her and she will explain that she needs a proper outfit to leave unnoticed.
Return to Mireille

From the Lounge, head back to the Reception area, then go past the Conference Room and follow the hallway. Look for the Office near the Secretary’s Room. Inside, there’s a locked room you can open with the Keycard – Ministry. Use it to unlock the door, and you will see Woman’s Clothing on the sofa. Picking it up will activate the Incognito Good Deed.
Go back to the Lounge and give the clothing to Mireille. She will say it’s perfect for blending in and returning to her unit safely. This completes the Good Deed.
Waylaid
Waylaid is a Good Deed that begins when you pick up either the Satellite Radio or the Metformin Pill Bottle. These two items are needed by a pair of ON Peacekeepers hiding under a Lymbic Monolith on the edge of the Acasa Marshes, just outside the Village of Jova. You can find and deliver these items in any order, but both must be handed over to complete the quest. However, this Good Deed comes with a time limit; you must complete it before obtaining the Third Keystone in the main story. If you wait too long, both Peacekeepers will die and the quest will fail.
To start, head to the Monolith near the marshes. There, you will meet two Peacekeepers. Roho Katungi, who sounds frustrated, will ask for a Satellite Radio to contact their unit. Typhon Guile, who is clearly distressed, will tell you he’s running out of Metformin, a medicine he needs for his illness. Your goal is to find these two items and bring them back before it’s too late.
To get the Satellite Radio, fast travel to Lethe – Ministry of Cultural Primacy. Head to the P2 basement parking area. There you will find a corpse just near the ambulance. Loot it to get the Keycard – Ministry. Then, go up to the second floor, find the Office, and use the keycard to unlock a room. From there, pass through another door to reach the hallway. Just outside, you will find another corpse; loot it to collect the Satellite Radio. Once you have it, hold onto it and move on to find the pills.

Now, fast travel to Talju. From the Town Hall, take the sidewalk to the right, then turn left until you see a bridge with a burning tree in the distance. On the bridge, there’s a corpse holding the Pharmacy Key. Take the key, go back past the Town Hall, and find the Infirmary in the neighbouring building. Now use the key to open the back door. In the clinic bedrooms you will find the Pill Bottle – Metformin.
Once you have collected both items, return to the ON Peacekeepers at the Monolith. Give the Metformin to Typhon Guile, and he will be relieved and thank you for saving his life. Then hand the Satellite Radio to Roho Katungi, though you will soon learn that there’s no response from the other end. After delivering both items, the Good Deed will be completed.
The outcome of this quest depends entirely on when you complete it. If you return the items before getting the Third Keystone, both Peacekeepers will survive and later appear in the Village of Jova. But if you wait until after getting the Third Keystone, you will return to find them both dead under the Monolith. So, if you want to save them, make sure to complete Waylaid before advancing too far into the main story.
Insult to Injury
Insult to Injury is a Good Deed that begins when you find the Key – Antenna on the body of a fallen soldier near a barn in Marastan. You will need this key to open a locked lever box on the village antenna and shut down a propaganda broadcast that’s being aired throughout the area. There’s no time limit for this quest, you can complete it at any point during your playthrough.
Talk to Batran Keol
In Marastan, the village is constantly being flooded with a propaganda broadcast. To learn more, go speak with Batran Keol, who lives in the residential area. To find his house, start at Shamino’s Pawn and Thrift, then take the road to the right and loop left. You will spot his home near a truck and a van parked outside.
After speaking with Batran, make your way through the Blood Queen’s Cave and exit on the other side. This will lead you to the antenna that’s responsible for the broadcast. You will see Father Bramante, a Palomist priest, standing with three ON soldiers near the antenna. You can talk to them to hear some extra dialogue about what’s going on.
Shut Down the Broadcast
From the antenna area, look for a ladder behind the parked cars and climb up. Drop down on the other side and continue down the road. You will spot a blue car near a fence. Head behind that car and look for a white barn with a red door. On the road in front of it, you will find a dead soldier.
Loot his body to get the Key – Antenna. This will trigger the start of the Insult to Injury Good Deed. Head back to the antenna. On its side, you will find a sealed lever box. Use the Key – Antenna to unlock it. Once you pull the lever, the propaganda broadcast will shut off, and the Good Deed will be complete.
Power to the People
Power to the People is a Good Deed that you can start anytime during the game. There’s no deadline for it, so you can complete it whenever you like.
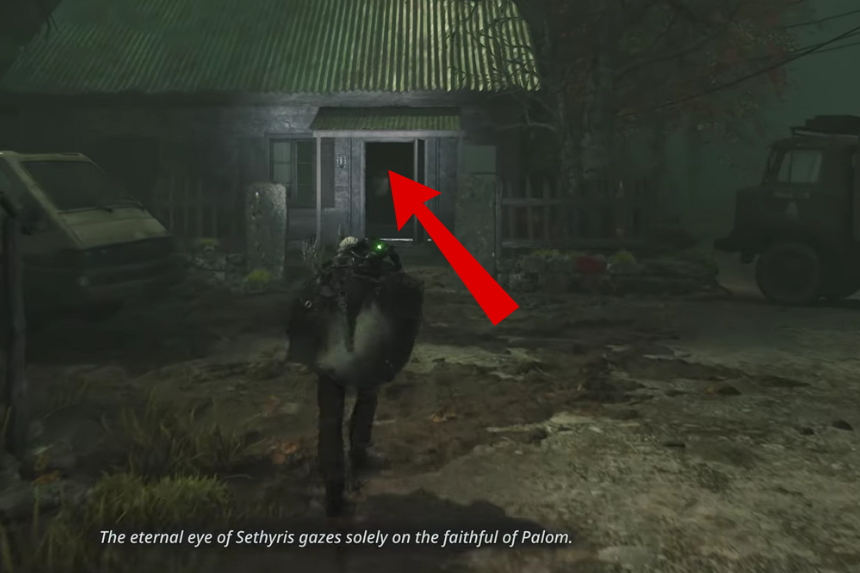
While you are exploring Marastan, you will notice that a few houses don’t have electricity. To find out more, talk to Fylias Emlyn. You will find his house right next to The Soaring Eagle.
After speaking with him, head down the road to the right of his house. You will pass Shamino’s Pawn and Thrift Shop, and eventually come across Keol & Sons. Keep going along that road until you reach a yellow house at the end, this is Seurat Albo’s home, the local mechanic.
Go inside and check the garage to pick up some Fuses. Doing this officially starts the Good Deed. Now it’s time to restore power to three houses using those Fuses:
First Fuse
Head back to Fylias’ home. Near the front entrance, there’s an electric box. Open it and place a fuse inside to bring the lights back on.
Second Fuse
From Fylias’ house, go left down the road. At the end, you will see Batran Keol’s house, look for the van and truck outside. Go inside, find the basement, and exit through the back to reach their electric box. Insert the second fuse there.
Third Fuse
After finishing up at Batran Keol’s place, continue along the road. You will come across a staircase on the right that leads up into the caves. Follow the path until you reach the Meloo family’s house. Look near the window for their electric box and insert the last fuse.
Once you have powered all three houses, you will have completed the Power to the People Good Deed. It’s a great way to help out the community and bring some light back to Marastan.
The Depths of Hell
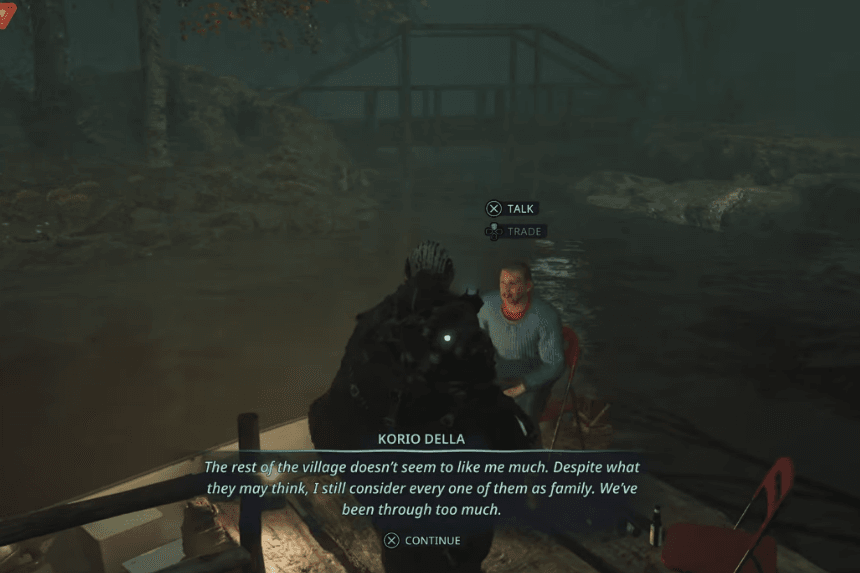
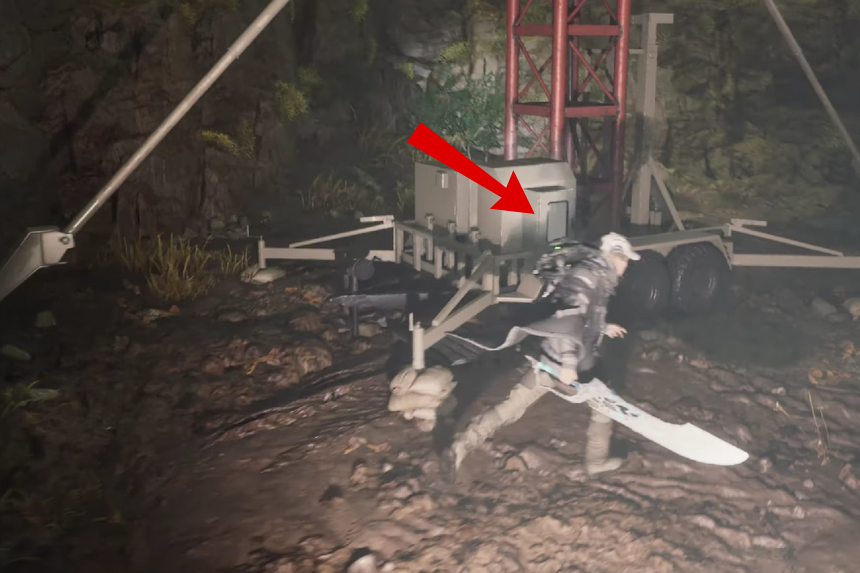
The Depths of Hell is a Good Deed that starts when you pick up a Gas Canister from the Deimos Camp. You will need to bring it to Korio Della, who needs it to fuel his boat so he can go rescue some women being held hostage.
This quest has no time limit, so you can complete it whenever you’re ready. However, you must finish the “Power to the People” quest first. Until then, Korio won’t appear, and you won’t be able to use a certain radio that helps move the story forward.
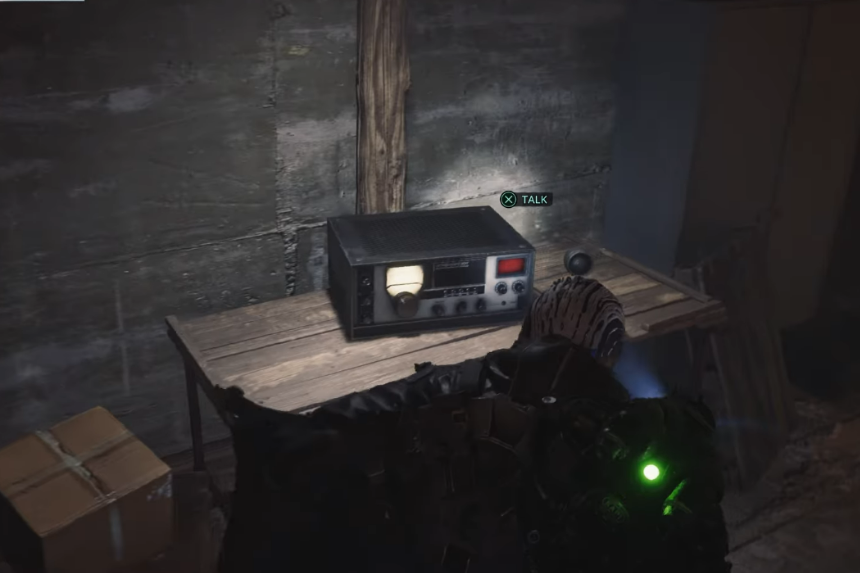
Once Power to the People is complete, head back to the house near the Blood Queen’s Cave, the one that previously had no power. Inside, check the radio on the dining table. Now that electricity is restored, you will be able to listen in. The message reveals that some women are being held in a barn by soldiers.
Next, go to the blue house near the APC drop-off point at the entrance to Marastan. Head downstairs, near the river, and you will find Korio Della sitting there. Talk to him, and he will tell you he wants to help rescue the women, but his boat doesn’t have any gas. If you haven’t finished Power to the People yet, he won’t be there.
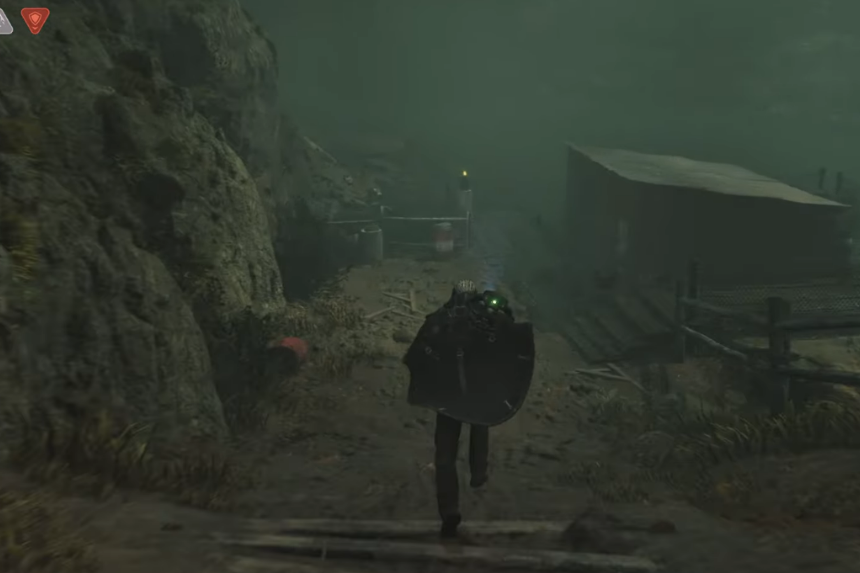
To find the gas, make your way through the Blood Queen’s Cave and continue on to the Deimos Camp. Down by the docks, you will see a Gas Canister sitting on top of a drum. Pick it up, this will activate the Good Deed.
Finally, return to Korio Della and give him the Gas Canister. He will refuel his boat and prepare for the rescue. This completes the Good Deed.
Samo’s Keys
Samo’s Keys is a Good Deed that begins when you pick up a set of spare keys from Samo’s General Store. Your goal is to deliver these keys to Dorno Grisibel, so he and his daughter can safely escape Marastan using their car. There’s no time limit for this quest, so you can complete it whenever it fits into your journey.
To start, make your way to Samo’s General Store. From there, follow the road that runs behind the store until you see Grisibel’s Auto-Repair Shop. Around the back, you will find a ladder. Climb it to reach the rooftop, where Dorno Grisibel is hiding out with his daughter. He will tell you about their situation and how they’re trying to avoid the Hollow Walkers.
After you talk with Dorno return to Samo’s General Store. Head behind the counter, and you will find Samo’s Spare Keys sitting there. Picking them up will officially activate the quest.
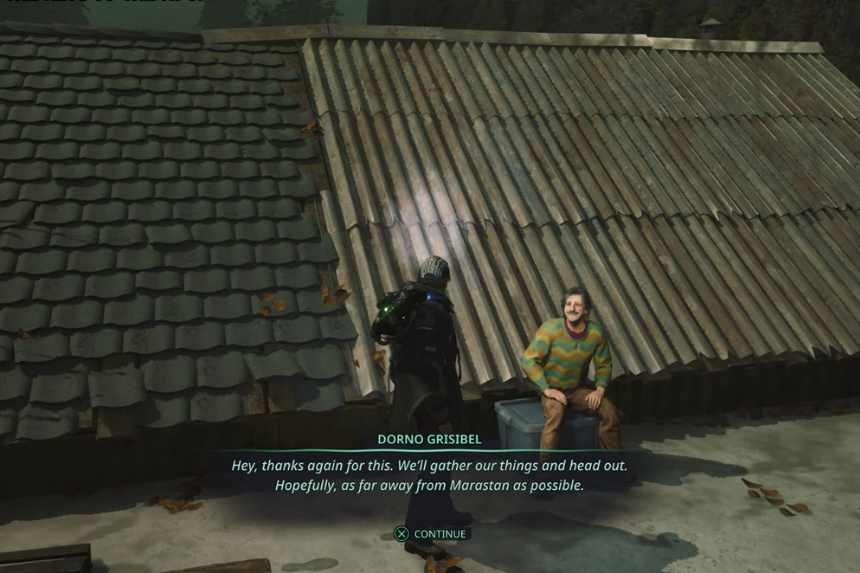
Now, just head back to Dorno Grisibel on the rooftop of his repair shop. Give him the keys, and he will thank you for helping him and his daughter get a chance to escape. This completes the Good Deed.
Separated
After you defeat the Big Walkers in Jeljin, there are three major enemies you will need to take down, and you can defeat them in any order. Once all of them are gone, the Good Deed will be completed. There’s no time limit, so you can do it at your own pace.
Start by heading out from the APC and looking around the crypts nearby. Behind one of the walls, you will find Edwyn Tosan hiding. She’s worried and explains that she’s been separated from her brother.
Now make your way to the church, and climb the scaffolding at its side. Up top, you will find her brother, Ilio Zarate, leaning against the rails. Talk to him, and he will explain how the Hollow Walkers in the plaza are what kept them apart.
Next, head further into Jeljin until you come across a large gazebo with a mausoleum nearby. Go down the stairs that lead to the plaza, where you will face a horde of Hollow Walkers. Defeating all of them will officially activate the Separated Good Deed.
Once that’s done, continue up the stairs to the parking lot. Here, you will face a Tank Walker. Be careful, because while you’re fighting it, an Artillery Walker from above will also be firing at you.
After defeating the Tank Walker, you will need to get to the Artillery Walker. First, locate a crane truck nearby. But before you can use it, you will need to find the Crane Keys, which are on a corpse in the Jeljin Cemetery.

Once you have the keys, come back to the crane truck and use them to adjust the scaffolding floor. This will create a path so you can reach the Artillery Walker. Go up the scaffolding, unlock the gate near the building, then return to the crane truck to finish adjusting the floor.
Now go back to the unlocked gate, you will see that new wooden flooring has formed a bridge to the Artillery Walker. Cross it and take down the final enemy.
Once all three Walkers are defeated, the Good Deed will be complete. You will have helped reunite two siblings by clearing out the threats that tore them apart.
Never Worn
Never Worn is a Good Deed that starts once you pick up the Archaeology Camp Key from the underground area of Jeljin. You will use this key to unlock a locker on the surface, collect a pair of Red Shoes, and deliver them to a house in the Village of Jova. There’s no time limit for this quest, so you can do it whenever you feel ready.
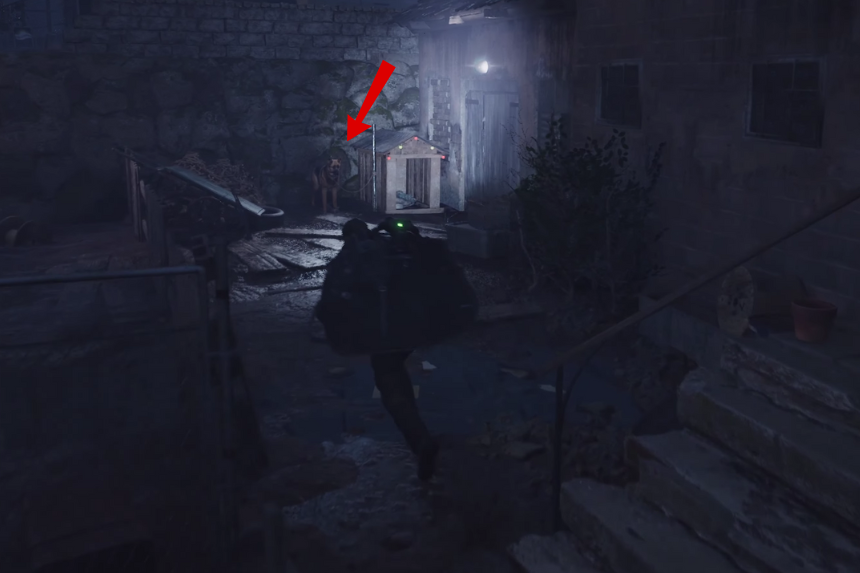
To begin, head into the undergrounds of Jeljin. Keep going deeper, go down twice until you spot a hole to your left. Climb down the ladder, and on the left side of the area, you will find a man named Istian Blainey, injured and trapped under fallen rocks. Speak with him. In a heartfelt conversation, he talks about his family, especially his daughter, and the red shoes he bought but never got to give her.
From where Istian is lying, take the path to the left and head down the stairs. You will see a hidden canal tunnel behind the stairs, go through it, then climb the ladder at the end. At the top, there’s a Timeloop you can access later. Just beside it, you will find the Archaeology Camp Key lying on the ground. Picking it up officially starts the Good Deed.
Now make your way back up to the surface of Jeljin. Near the entrance to the underground area, you will find a small camp. Look for a locker there and unlock it using the key. Inside, you will find the Red Shoes and a letter titled Daughter’s Hope.
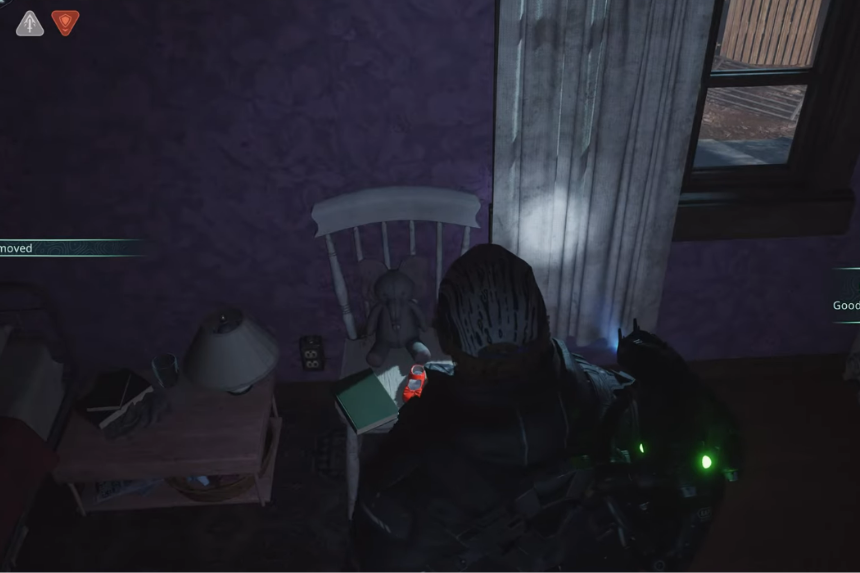
Now head to the Village of Jova. Find the well, then go to the house nearby with graffiti on the wall. Head upstairs to the bedroom, and gently place the Red Shoes on the chair with the elephant plushie. Once you do that, the Good Deed will be complete.
Family Feud
The “Family Feud” Good Deed begins when you pick up an Urn from a cabinet inside a house in Marastan. The Urn contains the ashes of someone’s father, and your goal is to return it to its rightful resting place in a columbarium in Jeljin. This quest has no time limit. You can complete it whenever you like during your playthrough.
Start by fast travelling to Jeljin. Look around the crypts near the APC, and you will find Edwyn Tosan hiding there. When you talk to her, she will explain that the Urn contains her father’s ashes and that her brother has been avoiding the responsibility of laying him to rest.
Next, fast travel to Marastan. You’re looking for a house located behind Keol & Sons. Once there, find the ladder near the garage and climb up to reach the second floor. Enter the room upstairs and look on top of the cabinet to collect the Urn along with a note titled “Letter – Getting Out.” Picking up the Urn will officially activate the Good Deed.
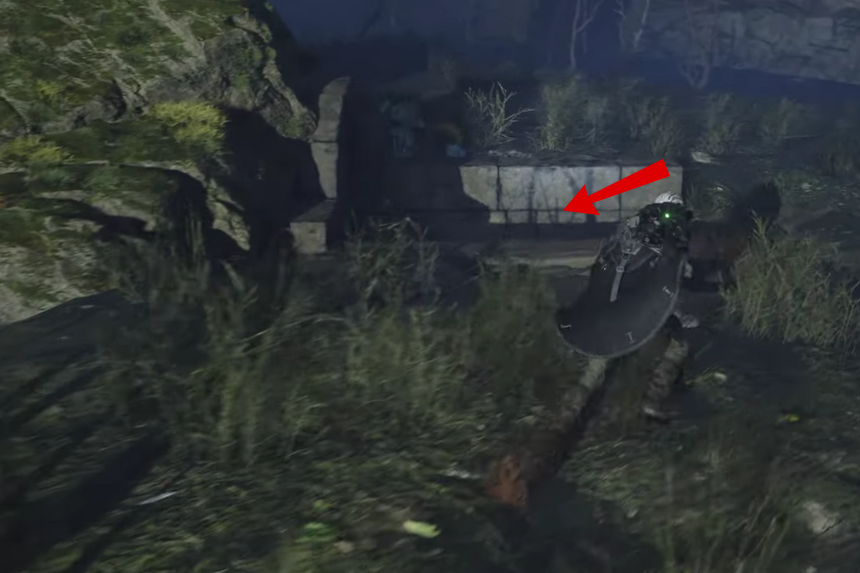
Go back to Edwyn Tosan in Jeljin and give her the Urn. She will be relieved to finally have it in safe hands. The Urn will now appear on a nearby bench beside her. Pick it up again, along with the Key – Columbarium, which she gives you to access the mausoleum.
Now, make your way to one of the mausoleums near the underground entrance of Jeljin. Inside, you will find the proper columbarium meant for Edwyn’s father. Use the key to unlock it, then place the Urn inside. Doing this will complete the Family Feud Good Deed.
A Way Out
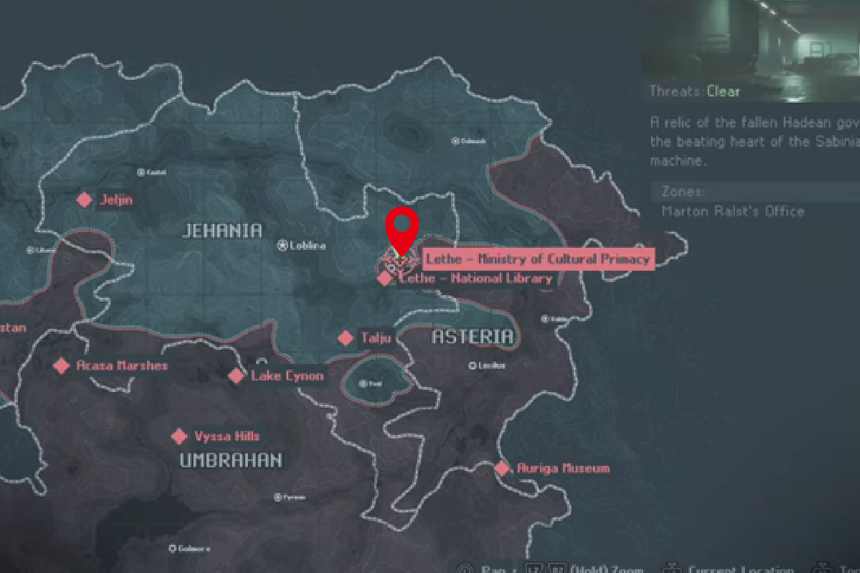
You will begin the “A Way Out” quest when you pick up either the Blank ID Cards or the Official Hadean Stamp inside the Office Rooms at Lethe – Ministry of Cultural Primacy. These two items are needed by Agathe Terra, who’s trying to forge fake documents to escape from Hadea. Your job is to find these items and deliver them to her.
First, head to the Lethe – National Library and go down to the Book Restoration area. You will find Agathe Terra standing near the Restoration Office. Talk to her, and she will explain that someone named Locke was helping her forge documents for civilians trapped in Hadea.
Next, if you haven’t already, unlock and enter the Restoration Office. Inside, look on the right-hand side of the room and read the note titled “Favors Owed.” This note confirms the agreement between Agathe and Locke, and it mentions a passcode for a safe that contains the supplies she needs.
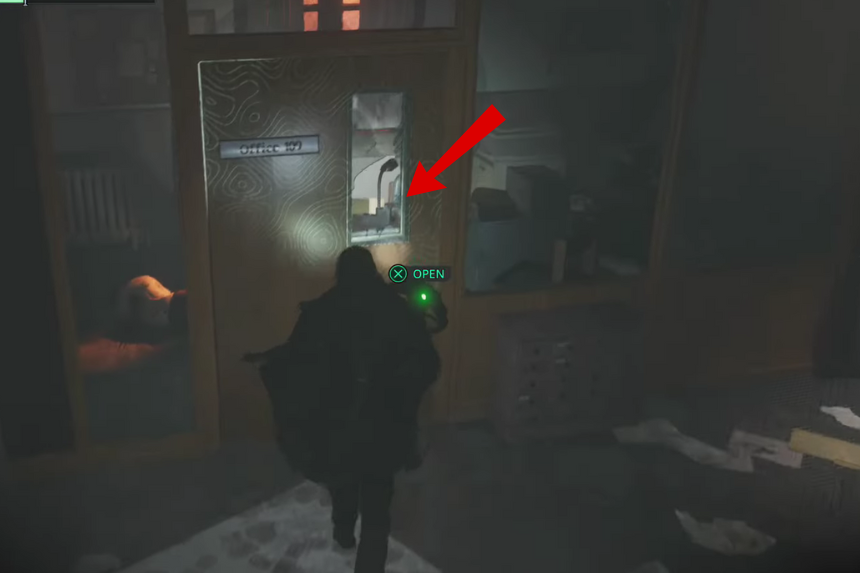
Now, fast travel to the Lethe – Ministry of Cultural Primacy and head to Cafeteria II, where Maeve Tristana was previously staying. Jump down the hole in the hallway to reach the Exposition Room, and keep following the path until you get to the Office Rooms. Enter Office 112, go behind the desk, and pick up the Blank ID Cards. This is what triggers the quest officially.
Next, go into Office 110 nearby. There’s a safe here you can interact with. Use the code 2703, which was mentioned in the note you read earlier, to unlock it. Inside, you will find the Official Hadean Stamp.
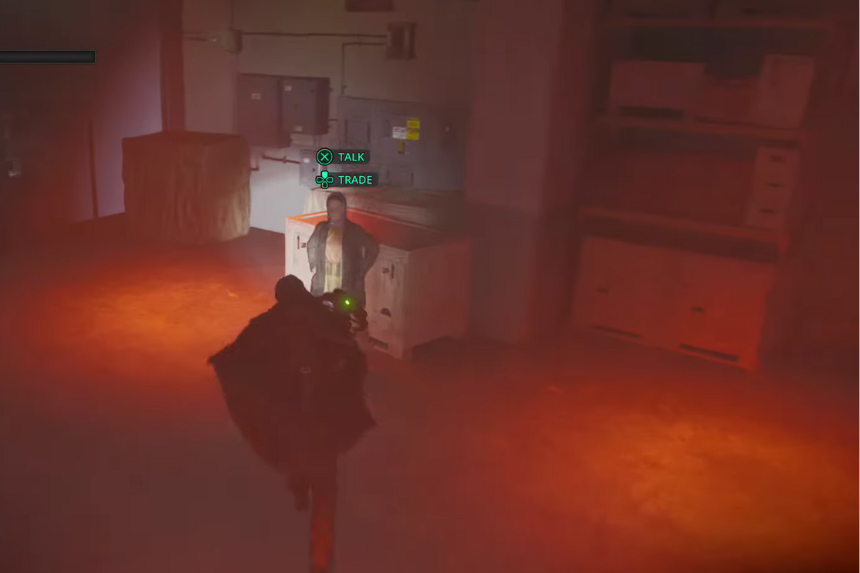
Once you have both items – the Blank ID Cards and the Hadean Stamp – return to Agathe Terra in the National Library. Give her the items, and that’s it! You’ve completed the “A Way Out” Good Deed and helped her take a big step toward escaping Hadea.
Mementos
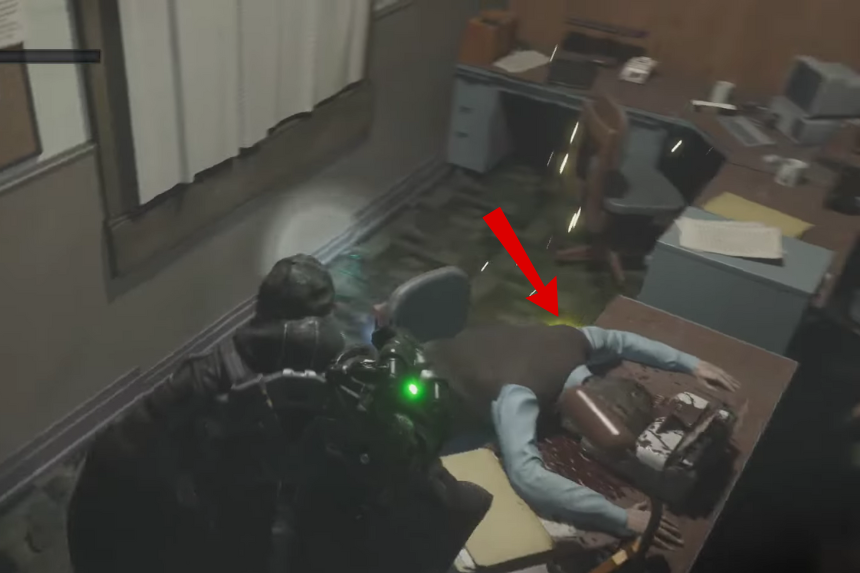
Mementos is a Good Deed quest that starts when you pick up either the Hand-Made Ring or the Cigarette Case from two corpses inside the Auriga Museum. These items belonged to people who died while imprisoned, and your goal is to return them to their loved ones. You can return the items in any order.
There’s no time limit to complete this quest, so you can take your time. However, you will need to finish the Depths of Hell quest first before you can speak with Elzina Tibor, one of the recipients.
To begin, head into the Training Room of the Auriga Museum and defeat the Hollow Walkers there. After the fight, go through the metal door on the far left side of the room to reach the prison cell block.
Search the corpses in the open cells:
- In Cell 02, you will find the Hand-Made Ring
- In Cell 04, you will find the Cigarette Case
Once you’ve collected both items, go back to the viewing area near the Training Room. Look for the Yellow Room outside the cell block and access the computer at the back. This will give you information about who the items belonged to and who you should return them to.

Next, fast travel to Senedra Forest and find Caddell Farm. There, give the Hand-Made Ring to Dag Samson. He will tell you the ring was made for him by his mother. After that, go to Marastan and look for a blue house near the APC (armoured vehicle). Go inside and give the Cigarette Case to Elzina Tibor. This completes the Mementos Good Deed.