
Cuspid Climb in Borderlands 4 is home to 44 unique collectibles, including Echo Logs, Dead Bolts, Propaganda Speakers, Lost Capsules, Auger Shrines, Vault Symbols, Evocariums, Vault Fragments, and Vault Hunter’s Guides. These items are scattered across caves, cliffs, structures, and enemy areas, often guarded or hidden in tricky spots. This guide details each collectible’s precise location and any nearby landmarks to help you find and collect them all efficiently.
All Collectibles in Cuspid Climb
Here’s a list of all the 44 collectibles you can find in Cuspid Climb:
ECHO Logs
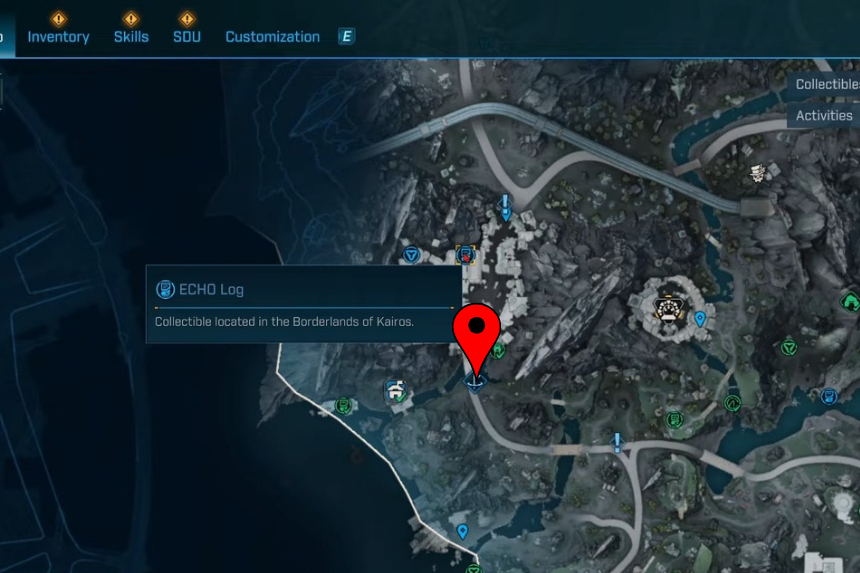
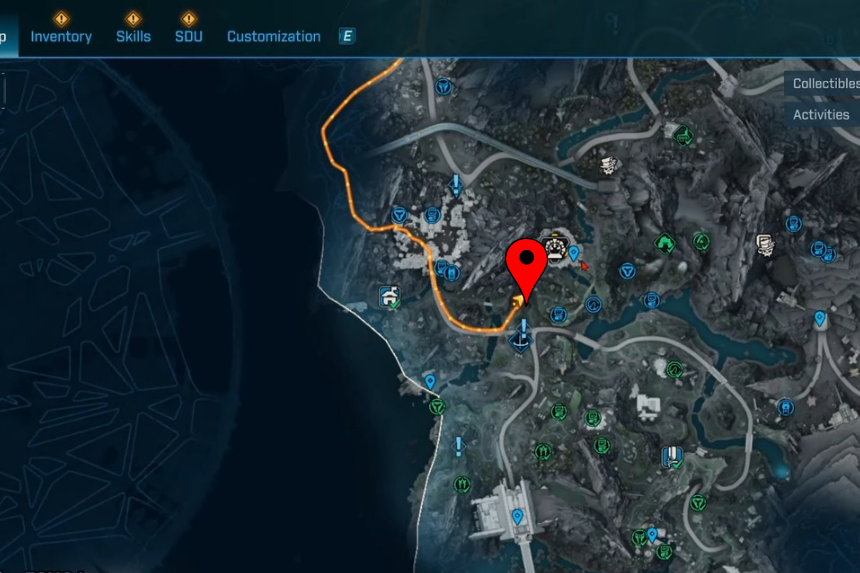
1. Echo Log #1
The Death! Echo Log can be found on the top floor of the large machine. Once you climb up to the highest section, you’ll see it placed securely on a crate, standing out as soon as you reach the area.
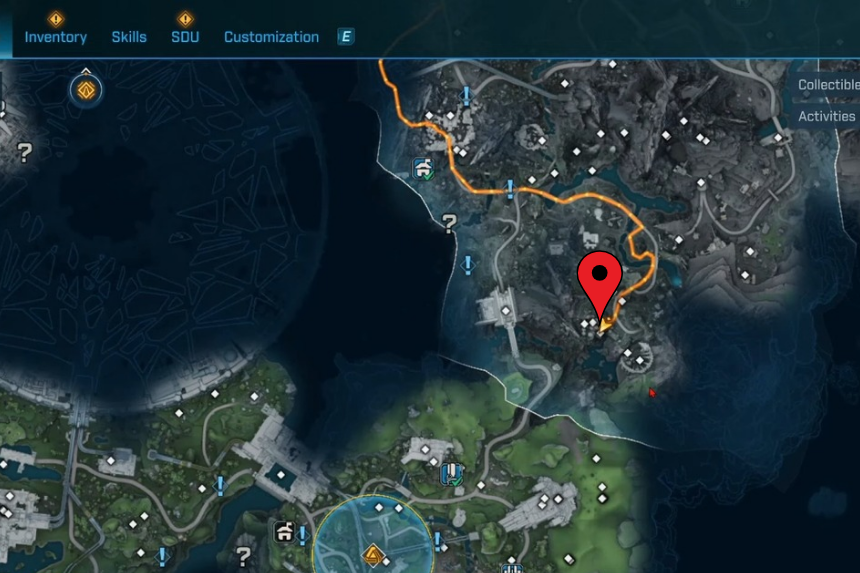
2. Echo Log #2
The You’re Mine Echo Log is located inside The Lambent Mines. In the first large room of the lower area, check the surroundings carefully and you’ll spot it sitting openly on top of a crate, easy to pick up once noticed.
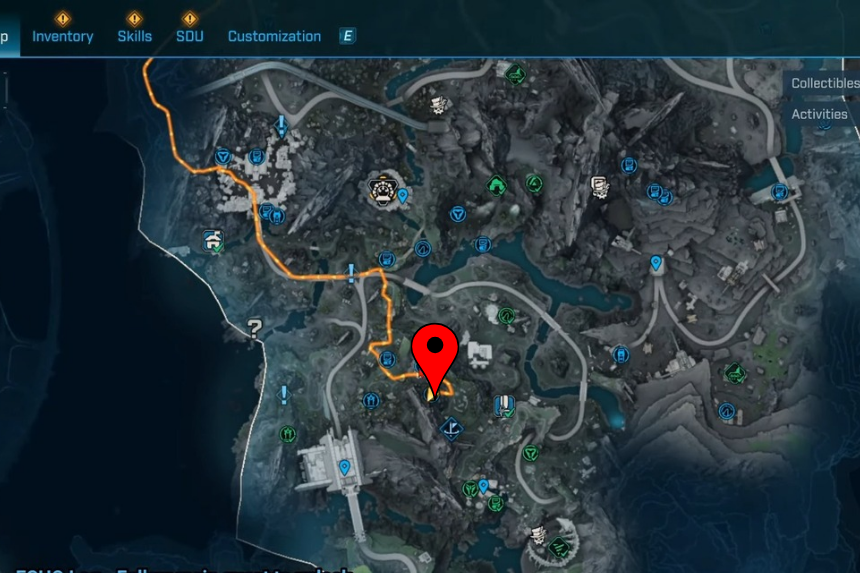
3. Echo Log #3
The Lictor’s Grasp Echo Log is also hidden within The Lambent Mines. This one is tucked inside a grinder, right beside the first beacon that controls the second forcefield, making it hard to miss once you reach that point.
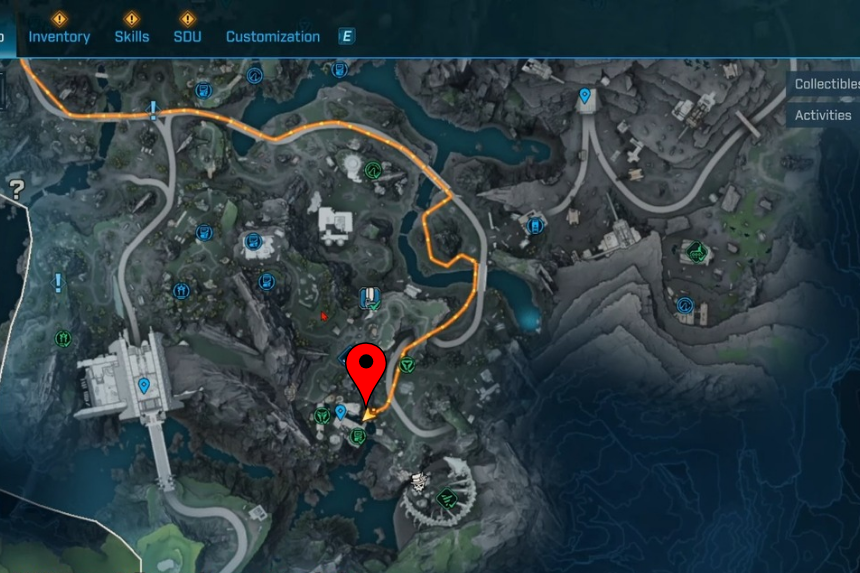
4. Echo Log #4
The False Start Echo Log lies deeper inside The Lambent Mines. It is placed in Calder’s office, resting directly on top of a control panel, ready to be collected when you enter the room.
5. Echo Log #5
The Rafa Lives Echo Log can be collected in Dusk’s Advent. It is positioned high up on a central tower, set next to a group of lockers, making it clearly visible from the top.
6. Echo Log #6
The Book Smarts Echo Log is tucked away inside an Auger building. Look toward the shelves once you step inside, and you’ll find it resting there.
7. Echo Log #7
The A Siren Scam Echo Log is located within Cloudbank. Head down the hall inside the GIM, and at the very end you’ll notice it placed on top of a pot, waiting to be taken.
8. Echo Log #8
The Welcome to the Conclave Echo Log is found on the edge of Cloudbank. It sits on top of a barrel positioned along the cliffside, offering a clear view over the edge.
9. Echo Log #9
The Pick a Clave Echo Log is situated outside on an outpost. It rests on top of the structure, placed directly beneath a window, where it’s easy to spot once you approach.
10. Echo Log #10
The A Guide to Gorgeousness Echo Log is discovered at the lowest level of a mountain base. On this level, it rests on top of a barrel positioned close to the edge of a ledge.
11. Echo Log #11
The Coalition Echo Log is located inside the building at the very top of the cliff. Once you enter, you’ll notice it sitting on a crate inside the room.
12. Echo Log #12
The Tore the Gods Asunder Echo Log is found higher up the cliff. It is resting on top of a couch placed on a ledge, easy to spot once you climb up.
13. Echo Log #13
The A Siren’s Silence Echo Log is positioned on top of a tall plateau. You’ll find it placed on a metal sheet that hangs slightly over the edge of the plateau.
14. Echo Log #14
The Vex’s Biggest Fan Echo Log is located within the shrine at the top of the hill. Step inside the shrine and you’ll see it waiting there.
15. Echo Log #15
The A Radical View Echo Log is tucked away inside a building. Once inside, it is placed clearly on top of a workbench.
16. Echo Log #16
The Thresher Overboard Echo Log is located on the marooned ship. Go up to the upper deck, where you’ll see it resting openly.
17. ECHO Log #17

The Sticky Fingers ECHO Log collectible is located on a catwalk inside the huge building in Checkpoint Vermillion.
Dead Bolts
18. Dead Bolt #1
The Goals Dead Bolt can be found on the roof of a vehicle. It is positioned directly beneath a skewered body, making it immediately noticeable once you approach the spot.
19. Dead Bolt #2

The Stretched Out Dead Bolt is located inside an Auger house in Cloudbank. Look inside the room where a dead body rests against a bed, and you’ll see the Dead Bolt lying right beside it.
20. Dead Bolt #3
The Togetherness Dead Bolt can be discovered at the bottom of a cliff. It is placed on the base of a pillar with a dead body nearby, clearly marking the location.
21. Dead Bolt #4
The Chase Dead Bolt is situated at the very edge of a cliff. It rests on top of a crate, with a body positioned next to it, making it easy to identify.
22. Dead Bolt #5
The Toll Dead Bolt can be found on the rooftop of a building level with the cliffside. A burning vehicle close by serves as a clear marker for the location.
23. Dead Bolt #6
The Put Up or Shut Up Dead Bolt is located high above the ground. It rests on top of the large pipes, with a dead body next to it to help guide you to the right spot.
24. Dead Bolt #7
The Confidence of the Inexperienced can be found near the shore on a small rock. Once you’re there, it’s pretty easy to spot.
Propaganda Speakers
25. Propaganda Speaker #1
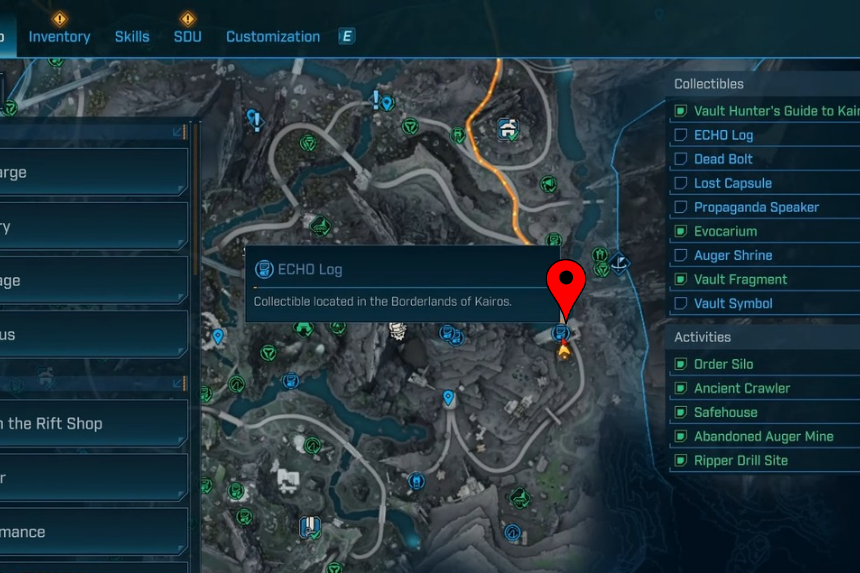
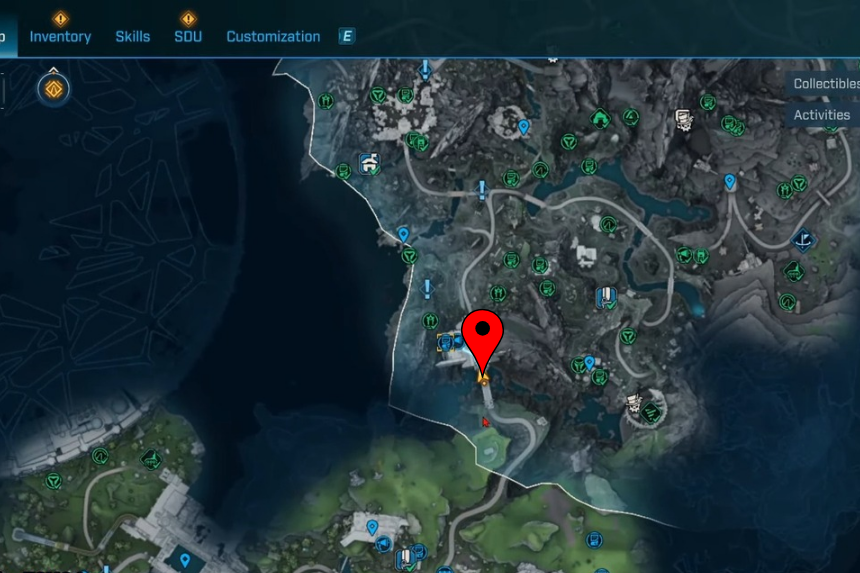
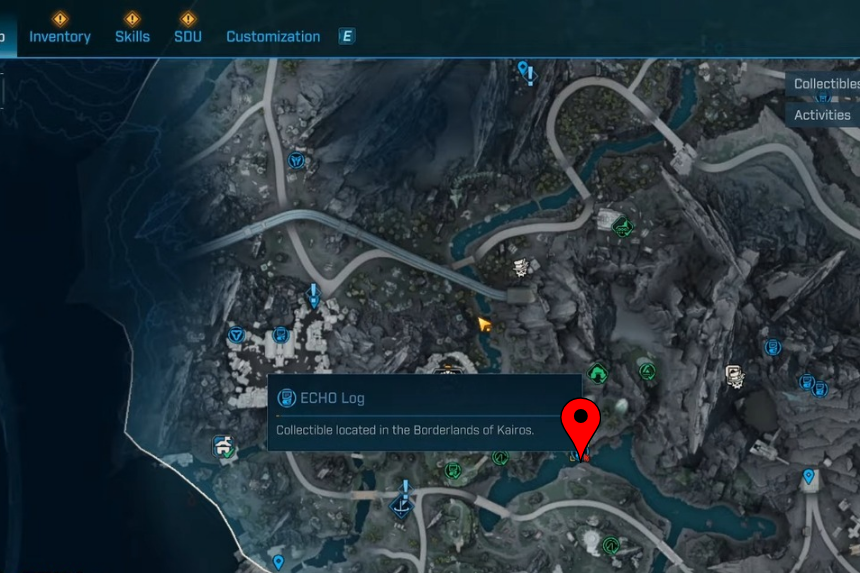
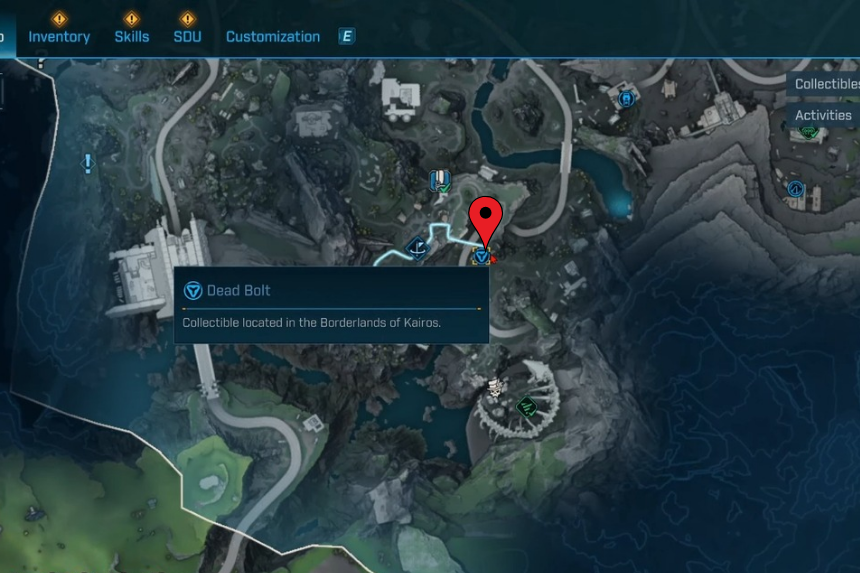
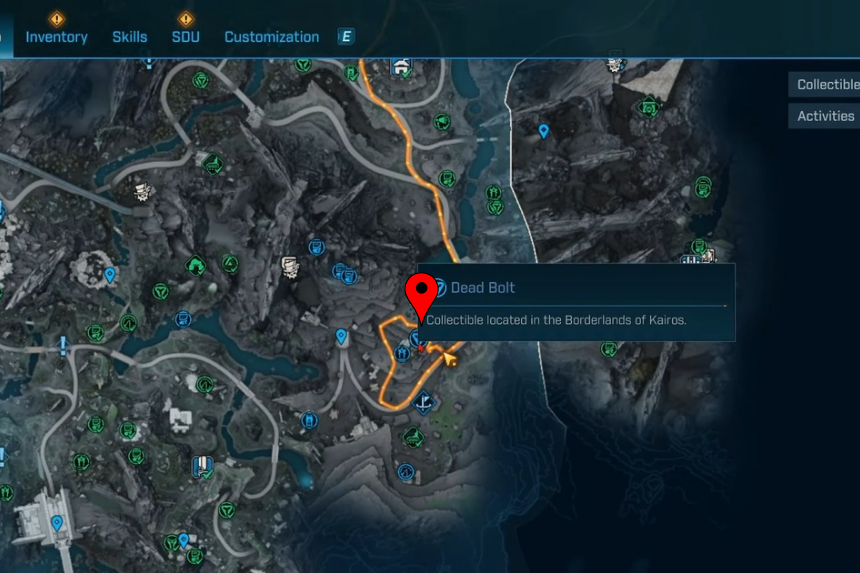
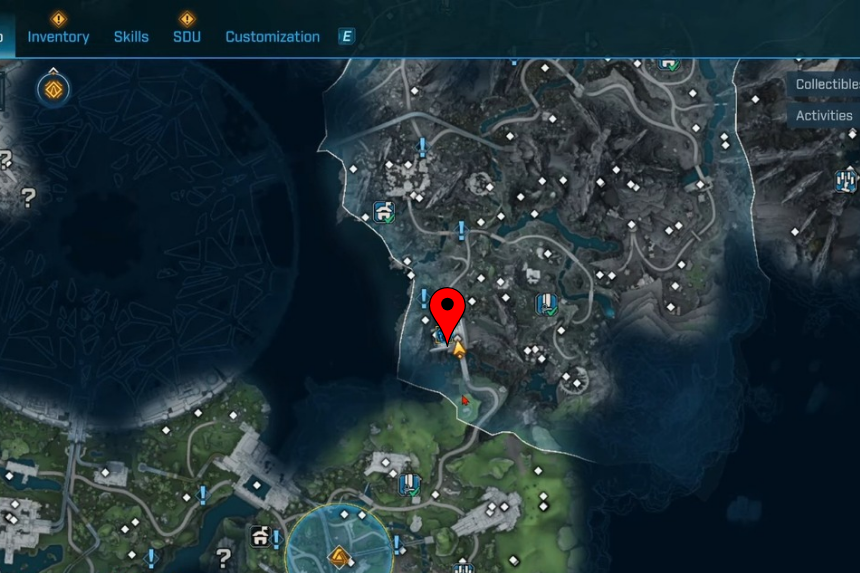
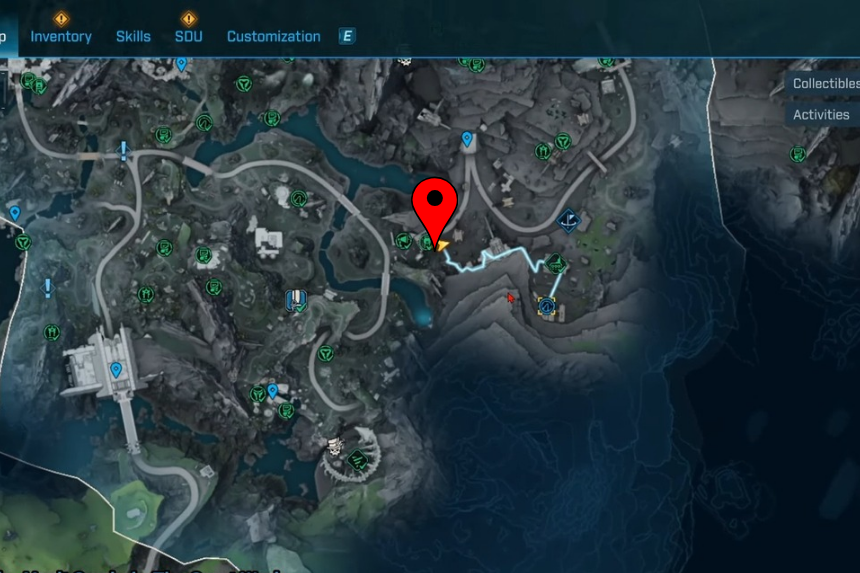
For this Propaganda Speaker, you’ll need to travel out to the borderlands of Kairos. Stay alert, as enemies patrol the area, and make your way near the snowy mountains where the collectible is located.
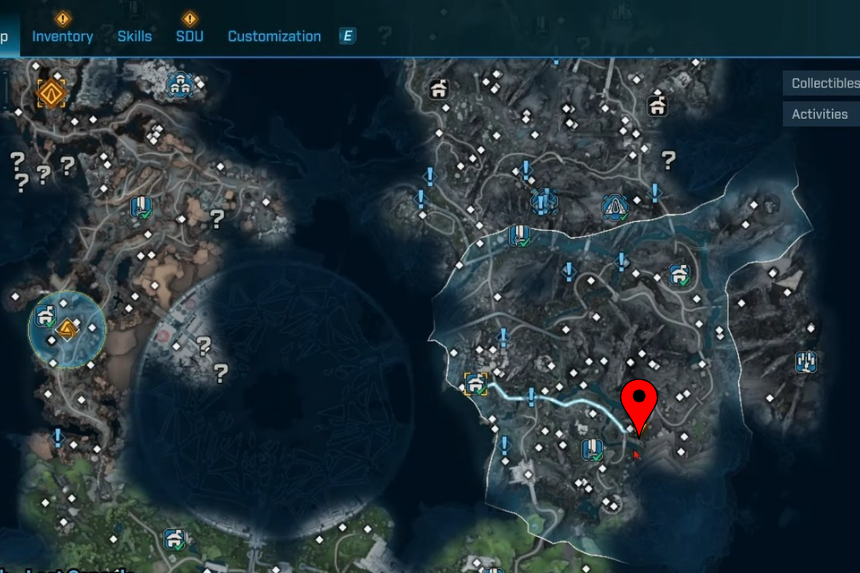
26. Propaganda Speaker #2
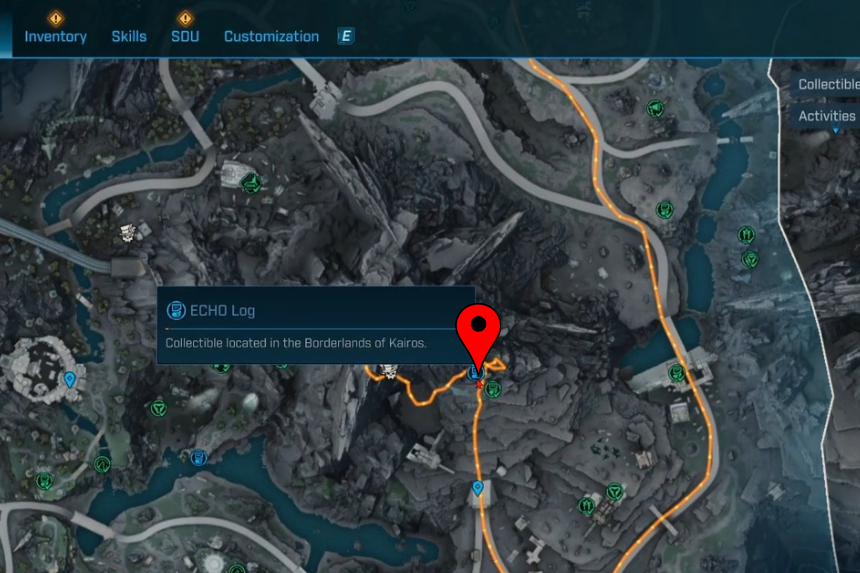
The second Propaganda Speaker is also hidden within the borderlands of Kairos. This one is positioned directly in front of a cave, with enemies lurking close by, so be prepared before approaching.
27. Propaganda Speaker #3
The third Propaganda Speaker can be found at Checkpoint Vermillion. Once inside, look toward the right-hand side of the large room, where the speaker is set up and ready to be collected.
Lost Capsules
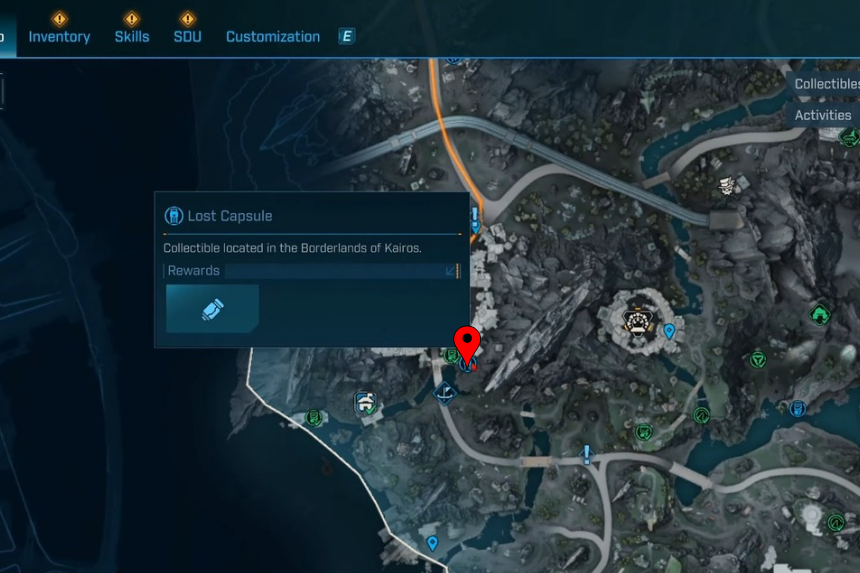
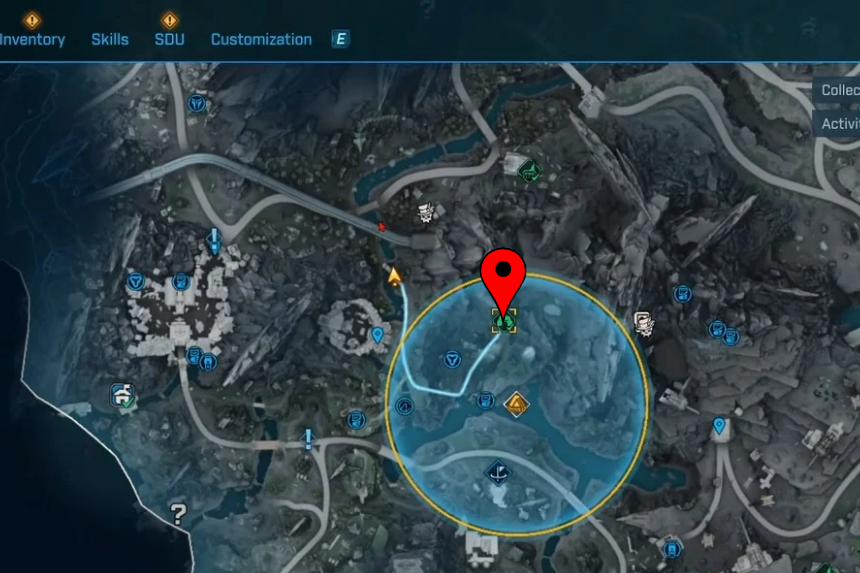
28. Lost Capsule #1

The first Lost Capsule can be found deep inside the canyon. Head toward the back of the cave, and you’ll spot it placed securely on top of a crate. Once collected, this capsule decrypts at Heritage Opus.
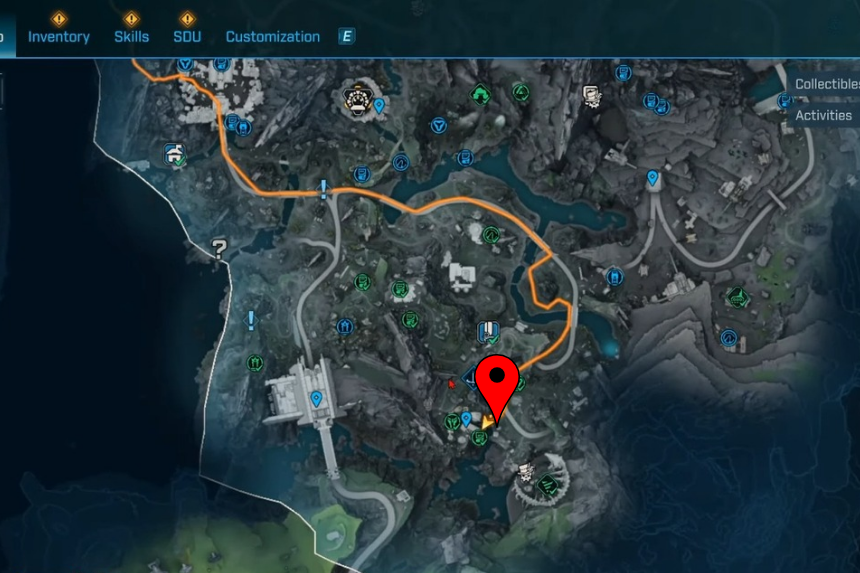
29. Lost Capsule #2
Another Lost Capsule is positioned halfway up the cliff. It rests on a metal ledge that juts out from the rock face, making it easy to notice once you climb high enough. This particular capsule decrypts at Grey Havenage.
30. Lost Capsule #3
The third Lost Capsule is located in the building above the elevator on the cliffside. Make your way to the very top floor, where it rests on the catwalk overlooking the area. After collecting it, the capsule decrypts at Heritage Opus.
Auger Shrines
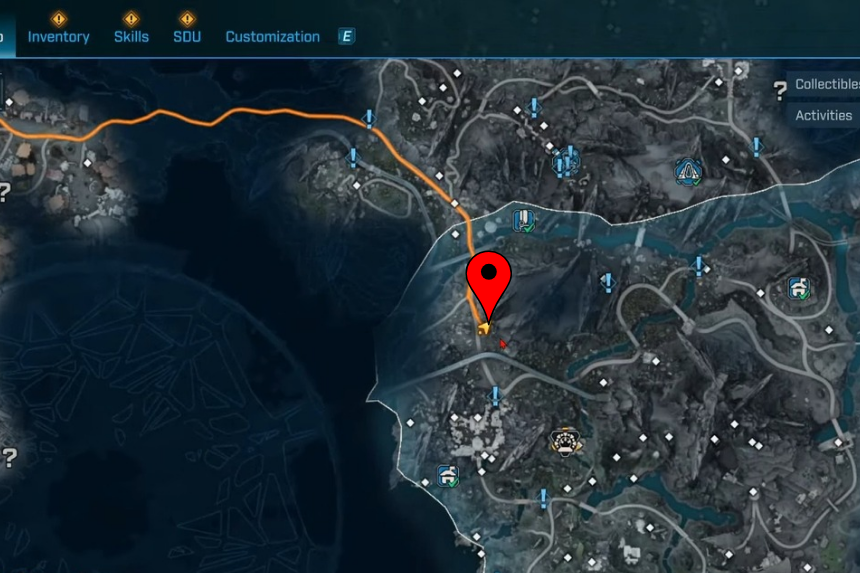
31. Auger Shrine #1
The first Auger Shrine in Terminus Range can be reached by climbing the mountainous terrain to your right. Keep making your way upward, and eventually you’ll come across the shrine positioned right in front of a cave.
32. Auger Shrine #2
The second Auger Shrine also requires climbing. Continue upward along the rocky path until you reach a ledge, where the shrine is clearly placed and easy to spot once you arrive.
33. Auger Shrine #3

To find the third Auger Shrine, you’ll need to enter the enemy camp. Carefully navigate through the area, defeating enemies as you go, until you reach the shrine hidden within the camp.
34. Auger Shrine #4

The fourth Auger Shrine is related to The Heart of the Mountain. Travel to the Mountain Apse and make your way through it, where you’ll find the shrine. Fortunately, this area doesn’t have many enemies, making the path easier to manage.
35. Auger Shrine #5
The fifth and final Auger Shrine in Cuspid Climb is located at the very top of the mountain. There, you’ll find a structure, and on its terrace sits the shrine, waiting to be collected.
Vault Symbols
36. Vault Symbol #1
The first Vault Symbol in Cuspid Climb can be found on the wall of a machine. Look up toward a ledge on the side of the structure, and you’ll spot the symbol marked there.
37. Vault Symbol #2
Another Vault Symbol is hidden inside a small cave partway up the cliff. Step through the waterfall at the entrance, and you’ll see the symbol painted clearly on the cave wall behind it.
38. Vault Symbol #3

The third Vault Symbol is located high above a ledge on the cliffside. Climb up to reach the area, and the symbol will be visible once you’re standing above the ledge.
39. Vault Symbol #4
The fourth Vault Symbol can be found on the terrace of the huge structure located at the top of the mountains toward your right. It sits prominently on the terrace, making it quite easy to spot once you reach the location.
Evocariums
40. Evocariums #1
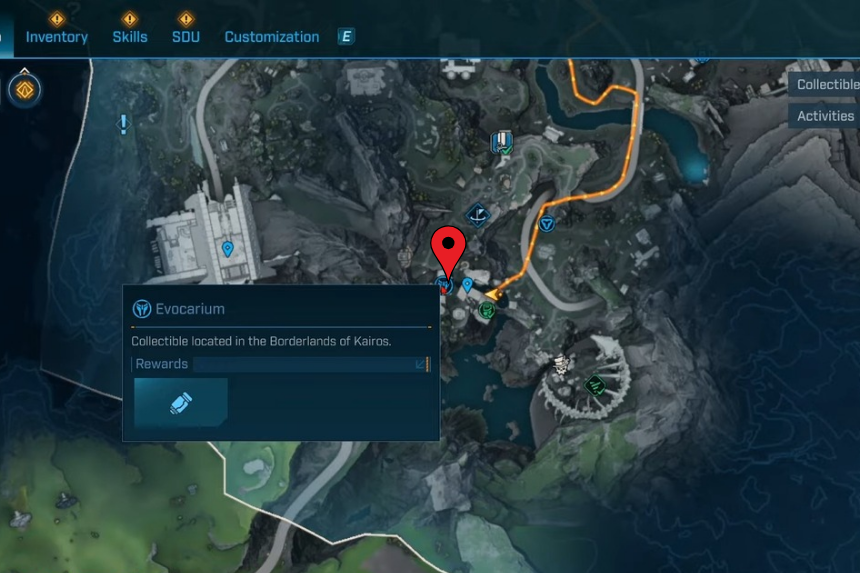
The first Evocarium is located in Cuspid Climb, specifically within Hollowhome.
41. Evocarium #2
The second Evocarium can also be found in Cuspid Climb, positioned north of Cloudbank.
Vault Fragments
42. Vault Fragment
This Vault Fragment is located inside a cave high up on the cliff in Cuspid Climb. You’ll find it positioned at the back of the cave, resting between two bodies, making it easier to identify once you reach the spot.
Vault Hunter’s Guide to Kairos
43. Vault Hunter’s Guide to Kairos #1

The Home on the Range collectible is located in Cuspid Climb. You’ll find it attached to the side of a tree in a forested area, positioned near a crate for easy spotting.
44. Vault Hunter’s Guide to Kairos #2
The Terminus Range collectible can be found on the side of a tree up on a cliff in Cuspid Climb. It sits next to a cave entrance and is accessible by progressing through the side mission It’s a Whole Phase Situation.
Looking for More Borderlands 4 Guides? If you enjoyed this guide on Ancient Crawler Locations, be sure to check out our other Borderlands 4 resources to maximize your adventure and loot: All Elemental Resistance Explained – Borderland 4, All Claptrap Locations in Borderland 4, All Vault Key Fragment Locations – Borderlands 4
