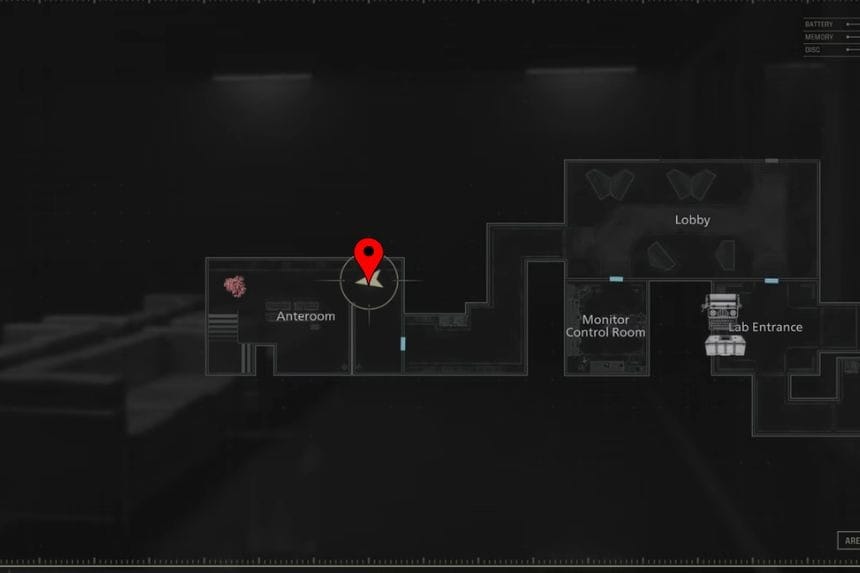
 – Resident Evil Requiem")
To collect everything in Resident Evil Requiem, you need to complete the story files and find important items like Mr. Raccoon statues, Antique Coins, safes, weapons, charms, and trophies. While finding the collectibles you will be attacked by mutant creatures, so always carry your weapons with full ammo, which will help you to defeat them and continue your journey forward. Many of the collectibles are missable while following the story, so check every corner to find all of them. In this guide, we have provided all collectible locations (Files, Mr. Raccoons, Safes, Containers, and More) in Resident Evil Requiem.
All Collectible Locations in Resident Evil Requiem
In Resident Evil Requiem, every collectible is missable because the game doesn’t have a chapter select feature. To avoid missing anything, keep a manual save of each area, so you can reload and return if needed. All the collectibles are tracked through the in-game menu which makes it easier to see what you have found and what needs to be collected.
Wrenwood
At the start of Requiem, you follow Grace Ashford as she returns to the Wrenwood Hotel, the place where her mother, Alyssa, died eight years ago. At the same time, Leon Kennedy is battling his way through a swarm of zombies that are overrunning the midwestern city of Elbridge.
Investigation Report

Right from the start of the game, you will have the Investigation Report in your inventory. To check it out, press the Touchpad and go to Items. Select the Investigation Report, zoom in, and rotate it until you can interact with the photo in the folder. Reading it gives you important background information for your investigation.
Wrenwood City Guide
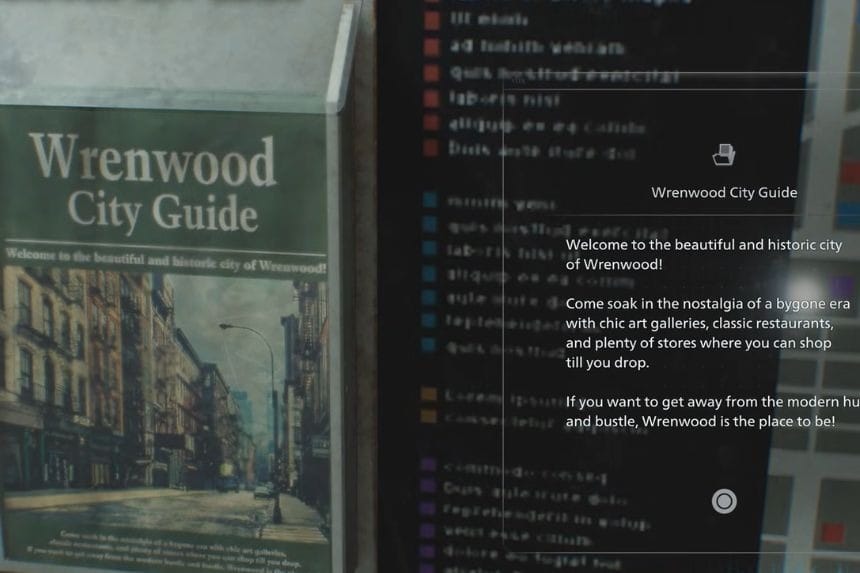
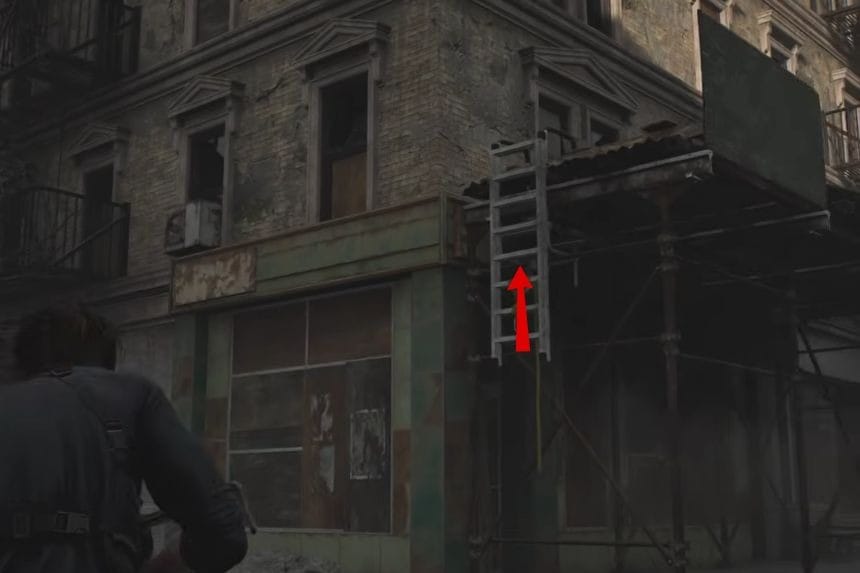
As you walk through Wrenwood City, keep an eye on the City Map on the right side of your screen. It will help you navigate the streets and find important locations as you explore.
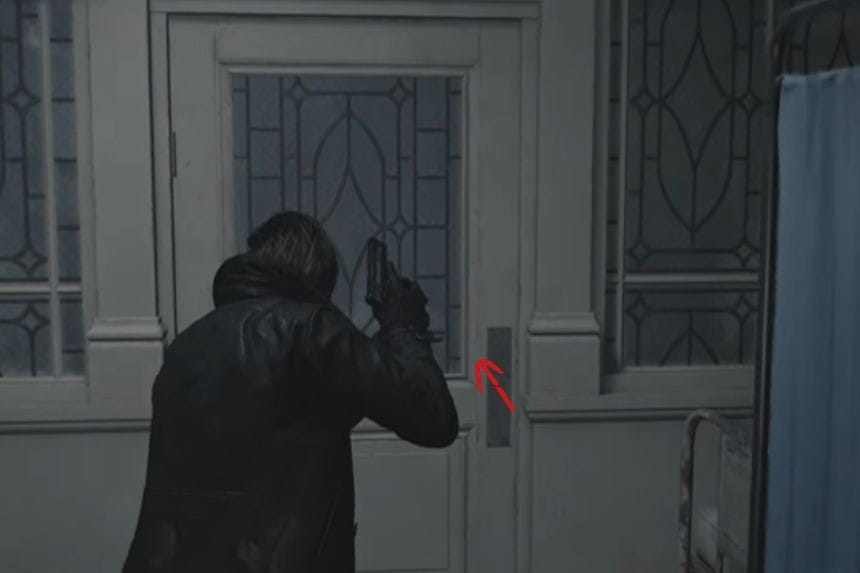
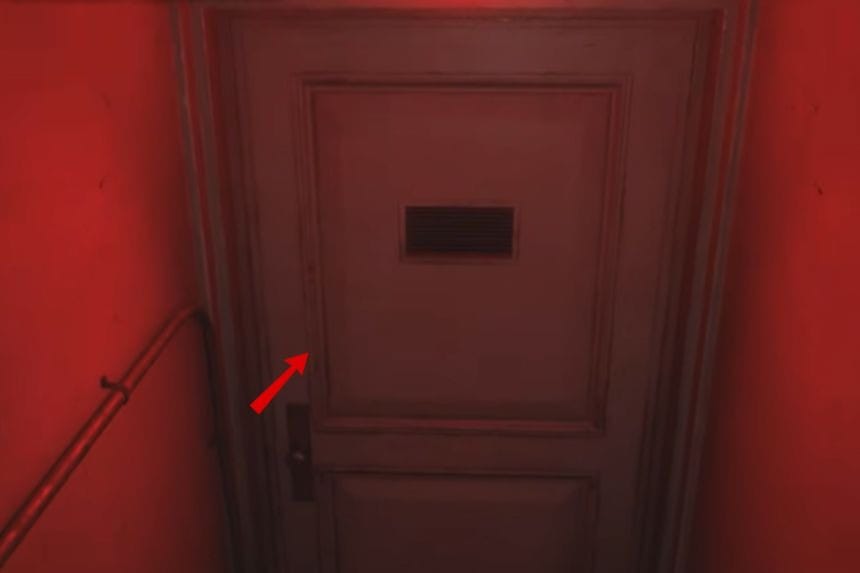
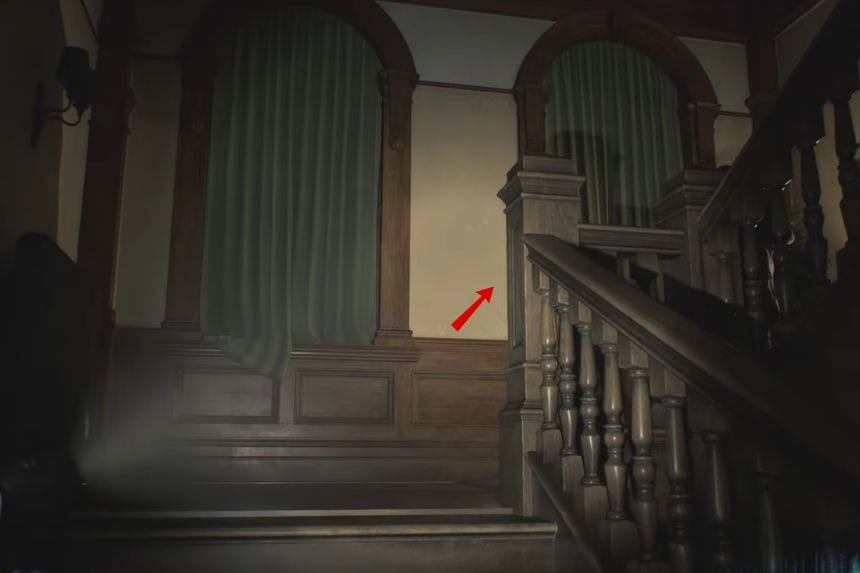
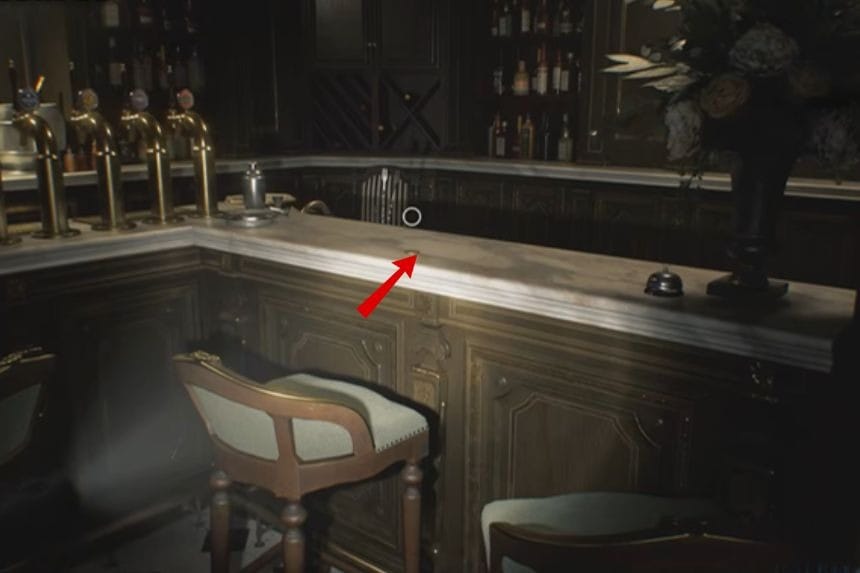
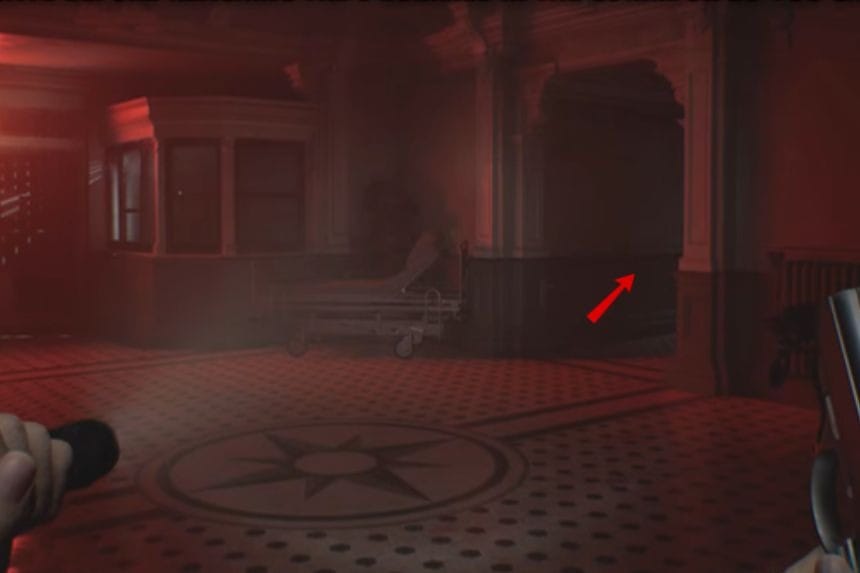
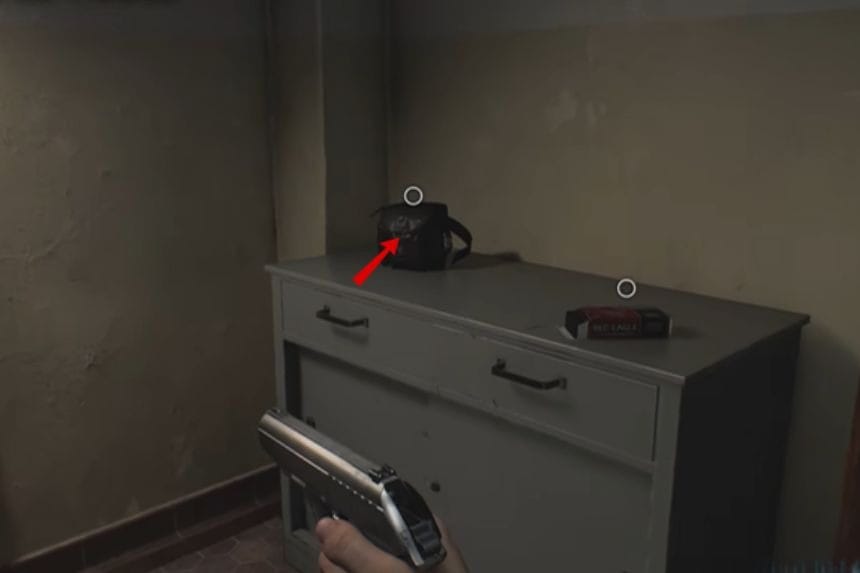
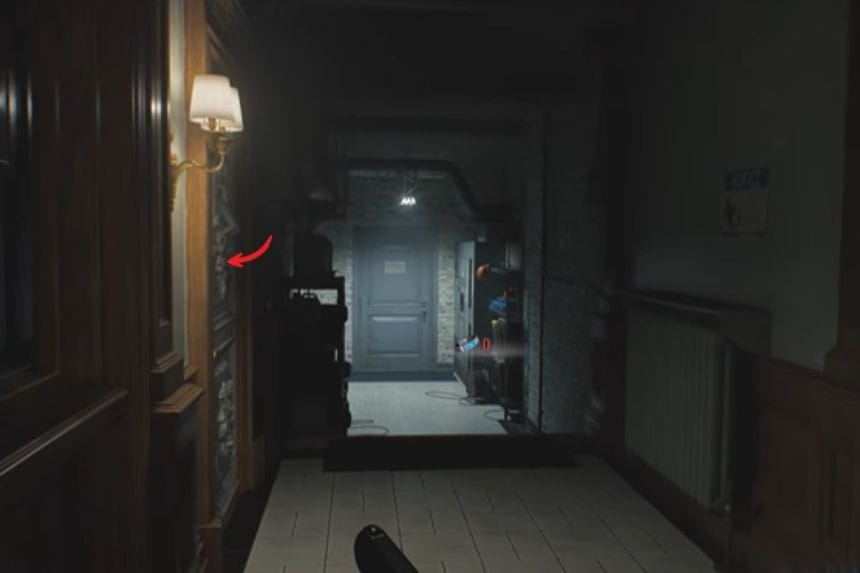
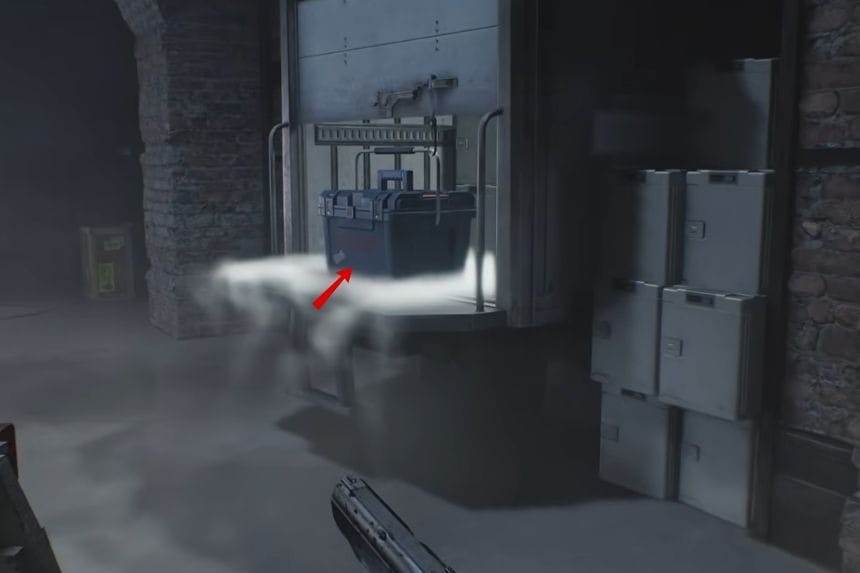
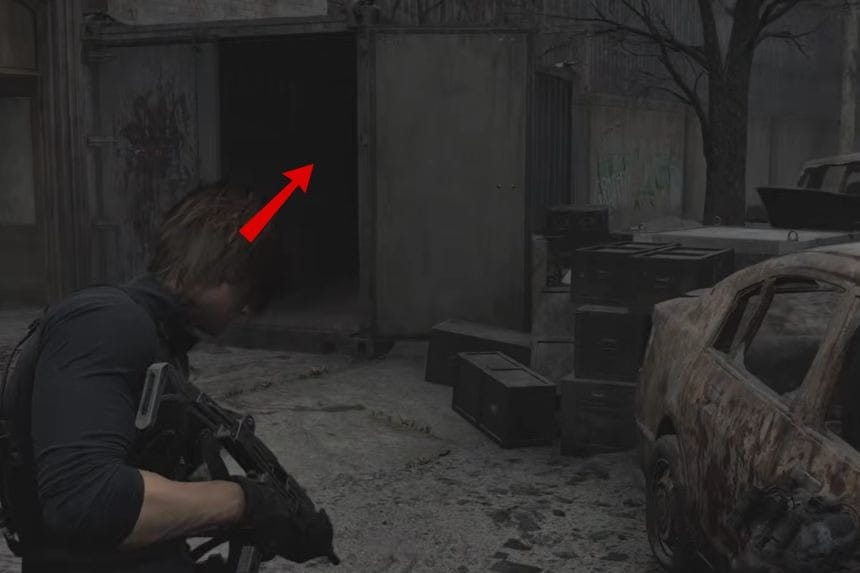
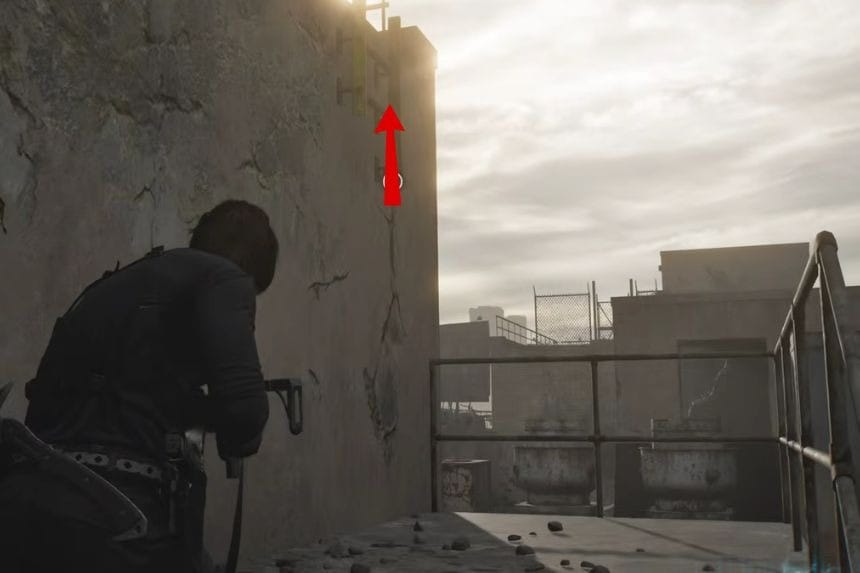
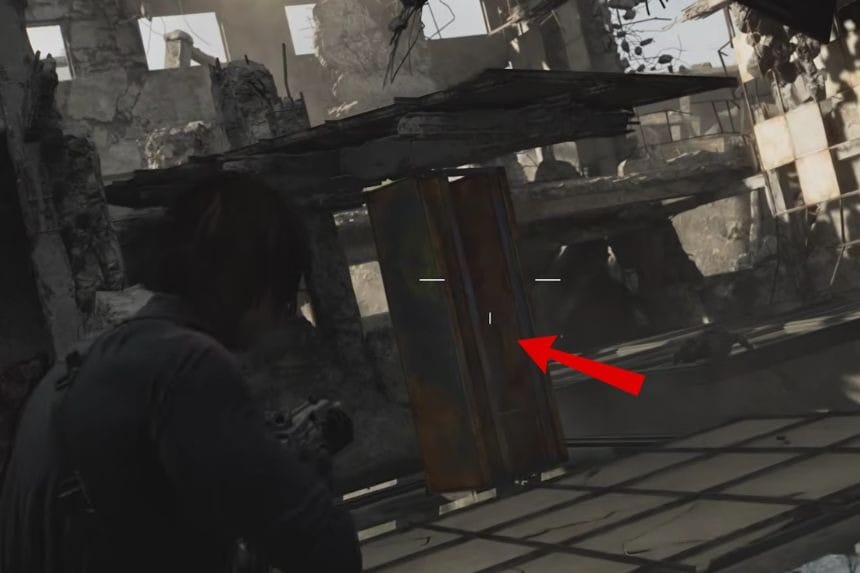
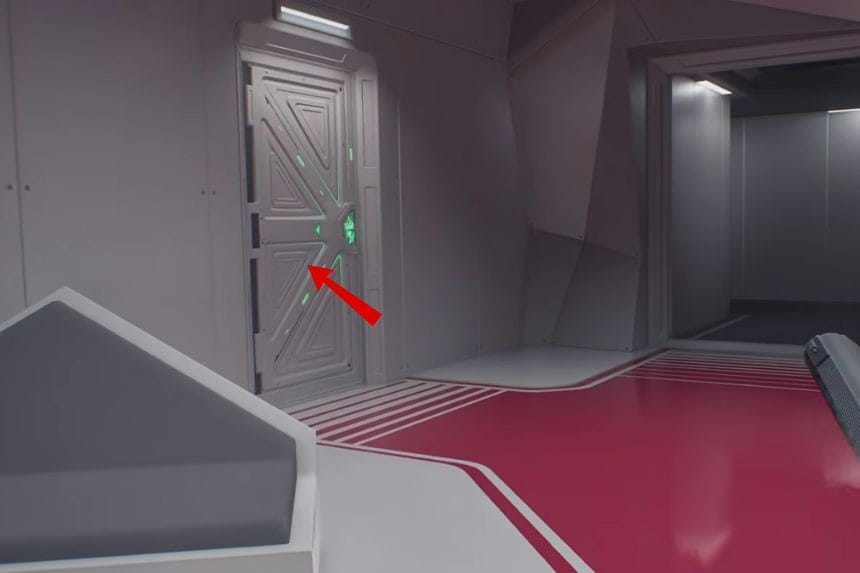
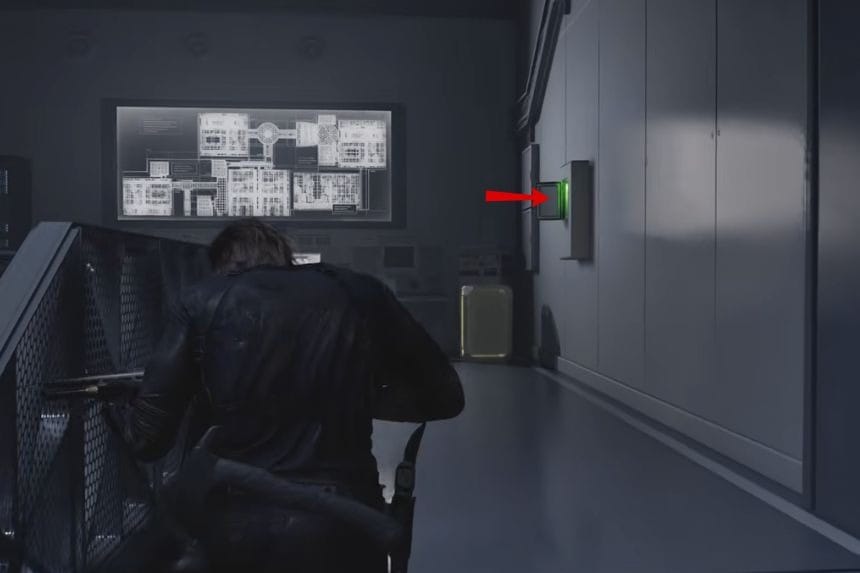
Old Key – Lounge & Bar
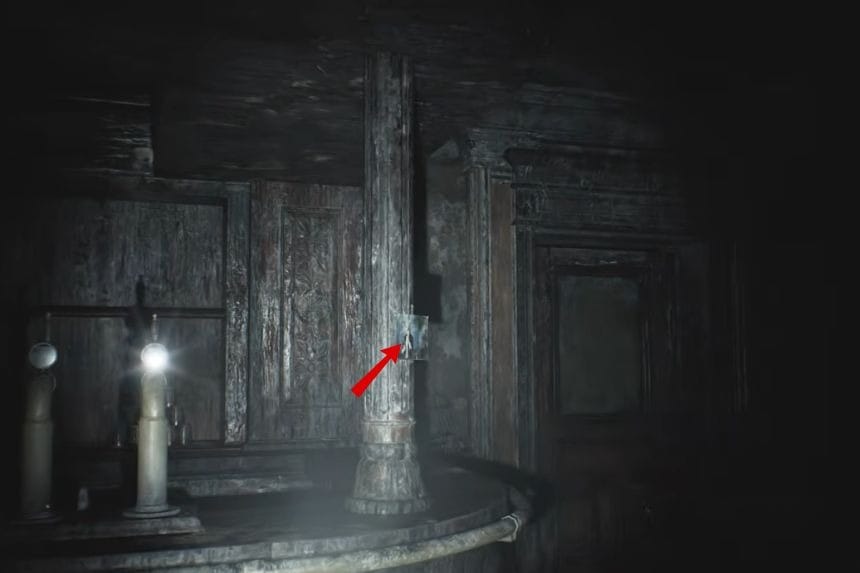

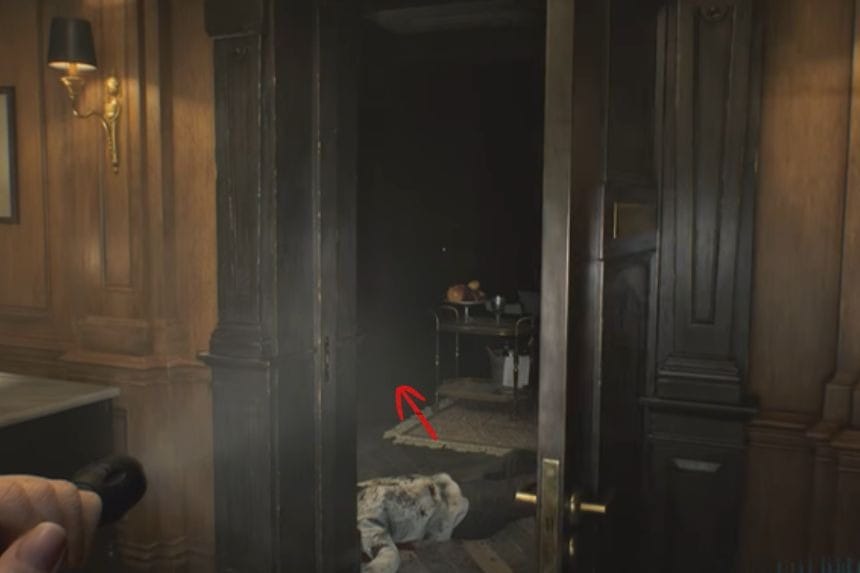
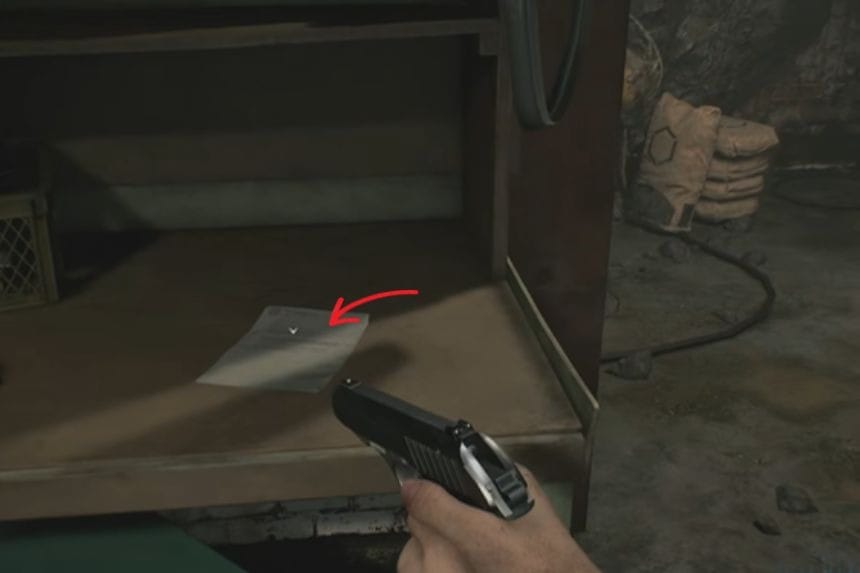
You will find the Old Key in a dark part of the lounge and bar area. After passing through the kitchen, enter the very dark room. Look for a photo taped to the bar, and examine the back of it. You will find the key there.
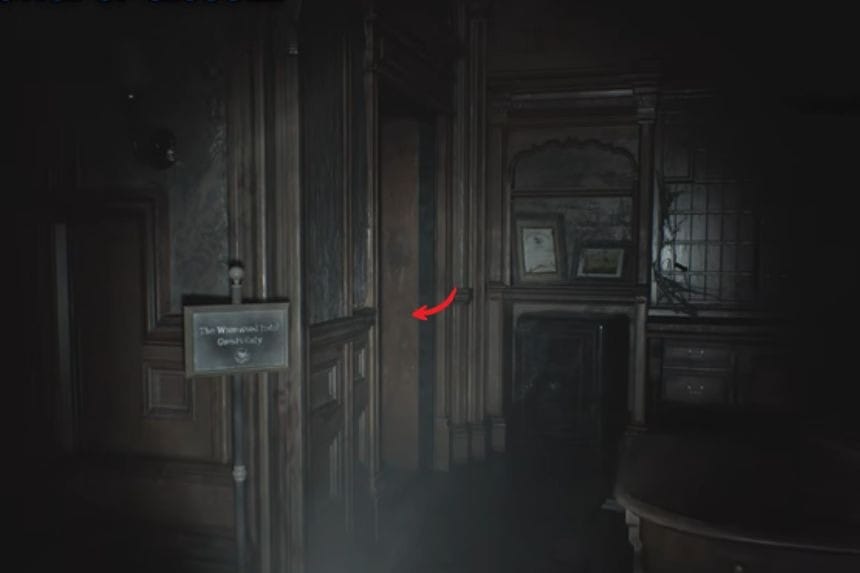
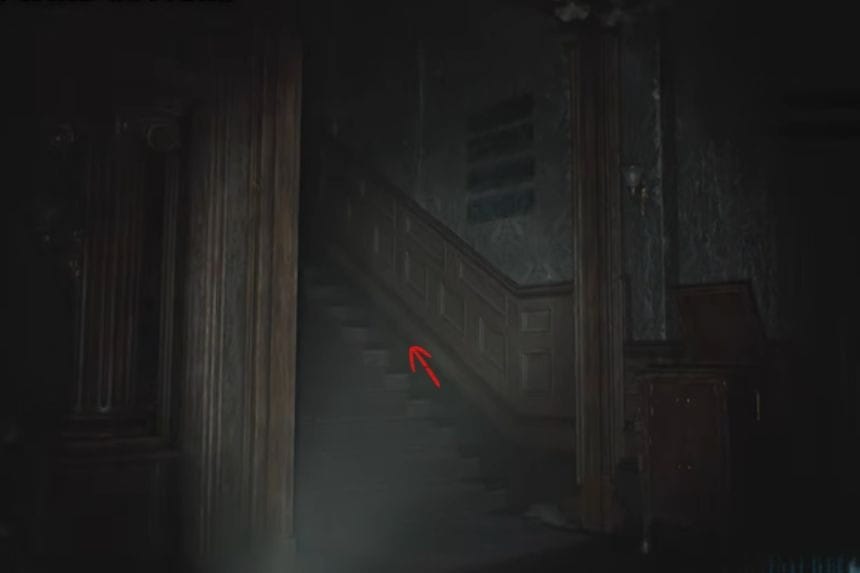
Hotel Pamphlet – Lobby


Once you use the Old Key to open the hotel door, head forward to a room with stairs leading upstairs. On the floor, you will find a paper, the Hotel Pamphlet, which contains useful information for your exploration.
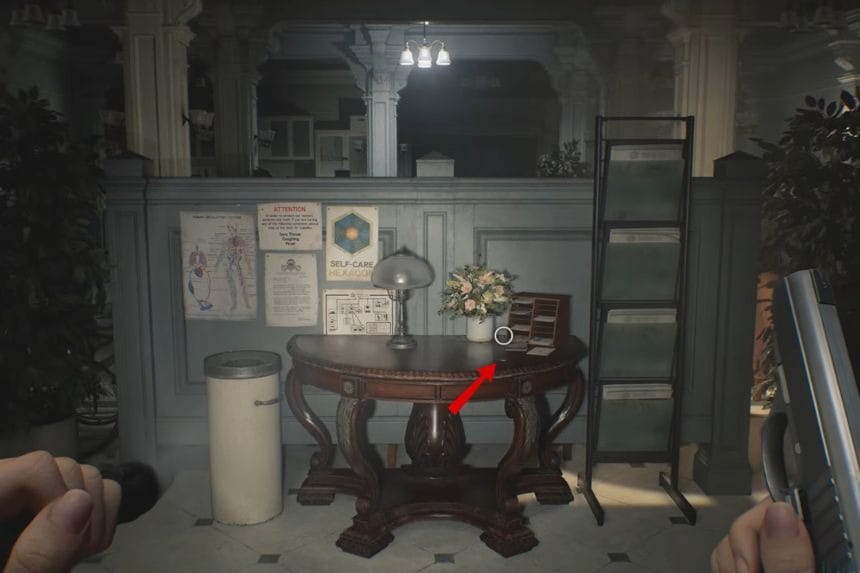
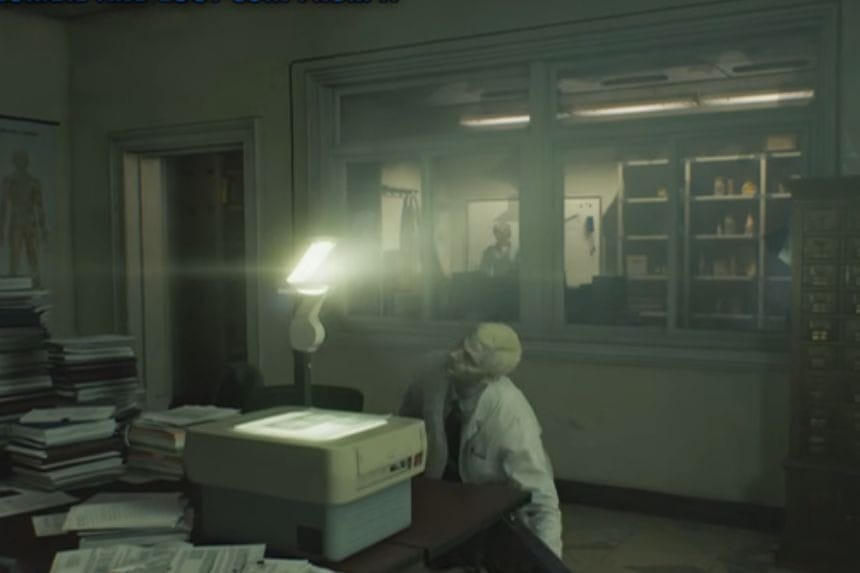
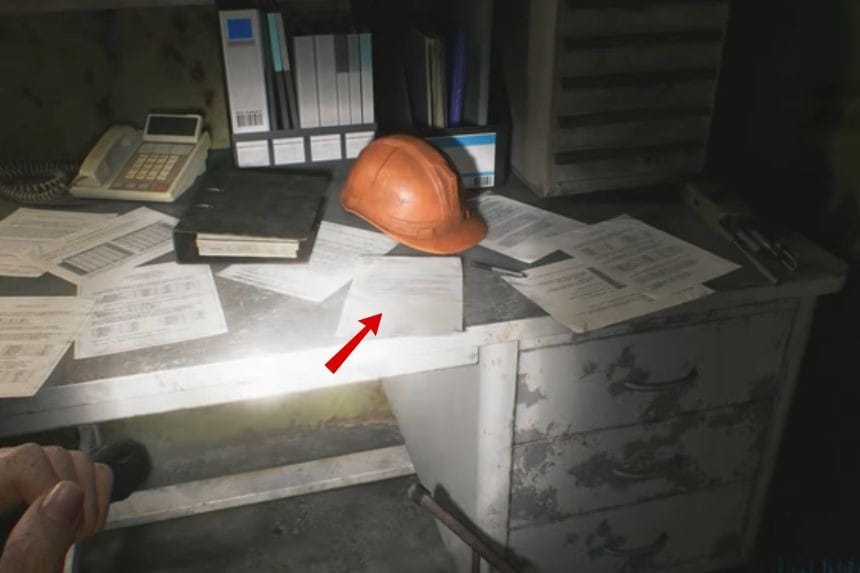
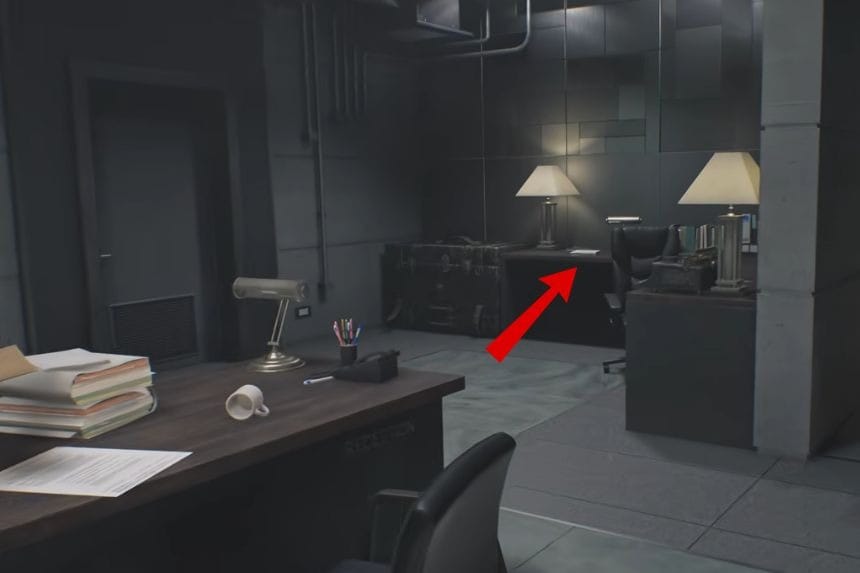
Notice of Closure – Office
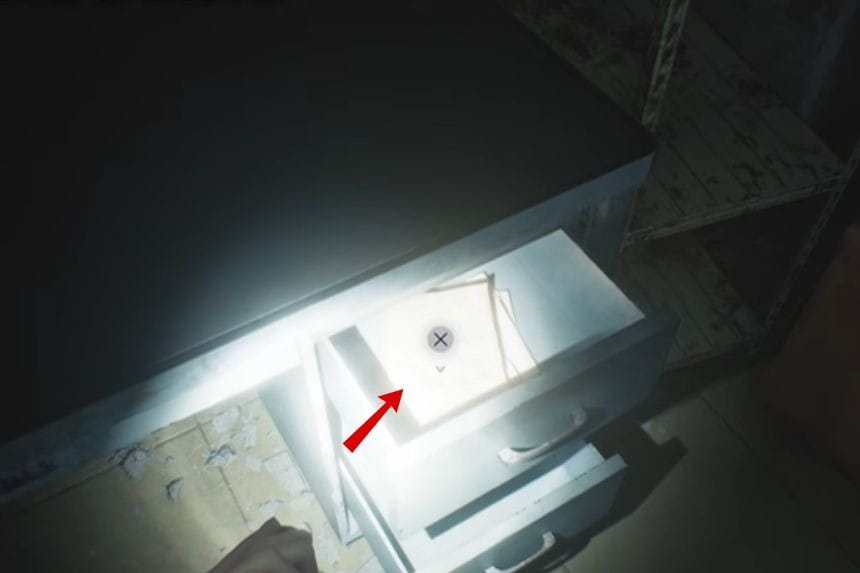
In the office area, go behind the reception desk and follow the path to the backroom. Open the blue drawer to find the Notice of Closure. This file gives you clues about the hotel’s operations and its history.
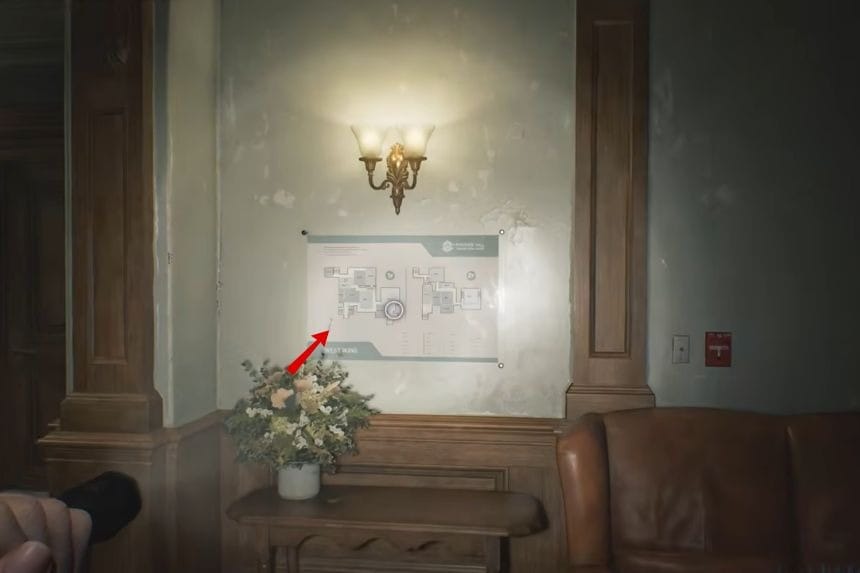
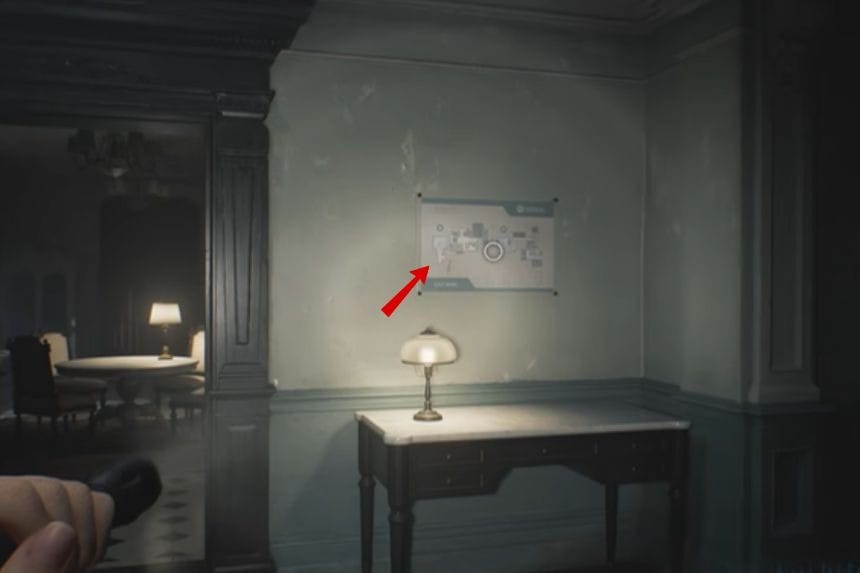
Wrenwood Hotel Map
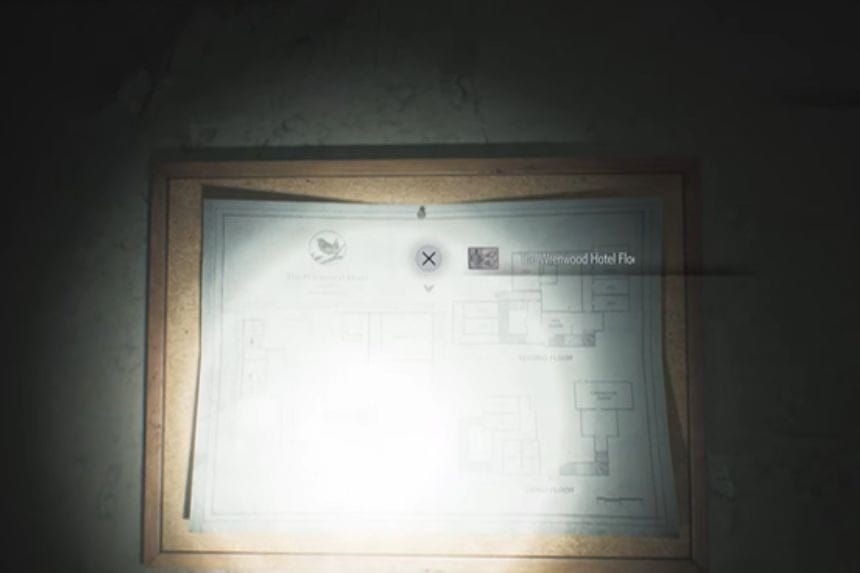
In the same office room, check the wall for the Wrenwood Hotel Map. This will help you navigate the hotel more efficiently.
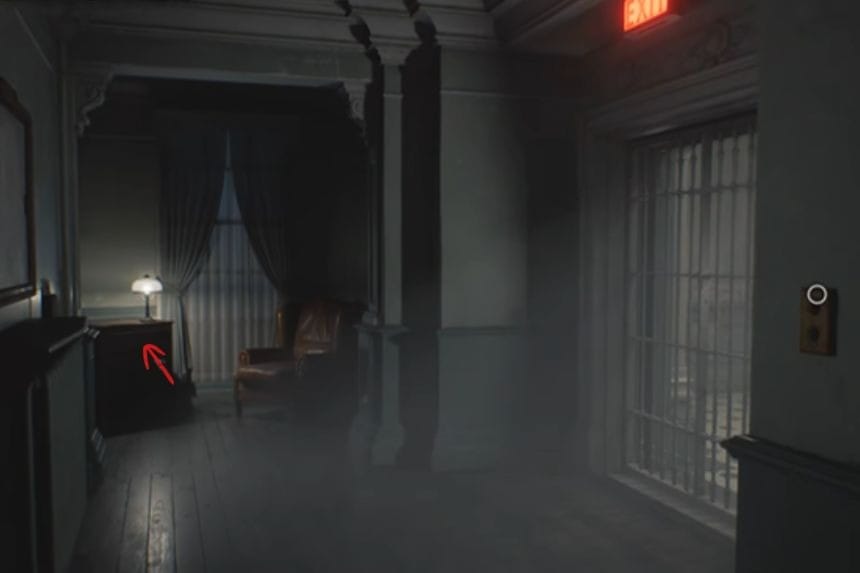
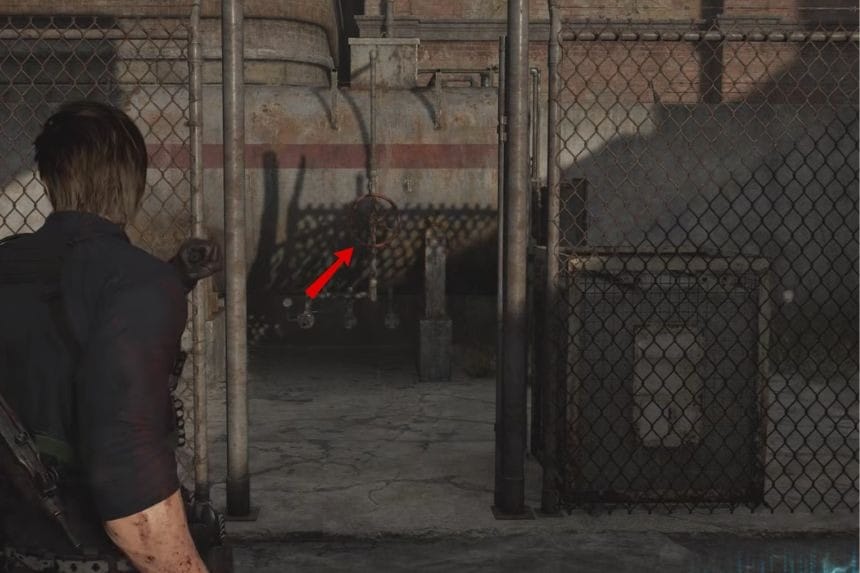
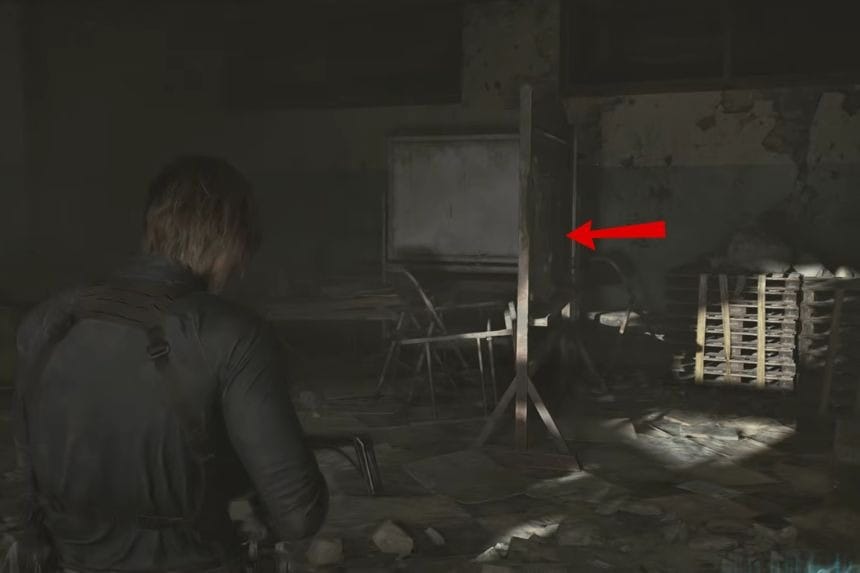
Wire Cutters – Rec Room (2nd Floor)
Head upstairs to the rec room, where you will see a pool table. The Wire Cutters are located on the table.
Alyssa’s Journal & Emergency Exit Key
As the story progresses, you will automatically receive Alyssa’s Journal after interacting with the painting downstairs. You will also get the Emergency Exit Key.
Report on Victor Gideon – Wrenwood – Leon
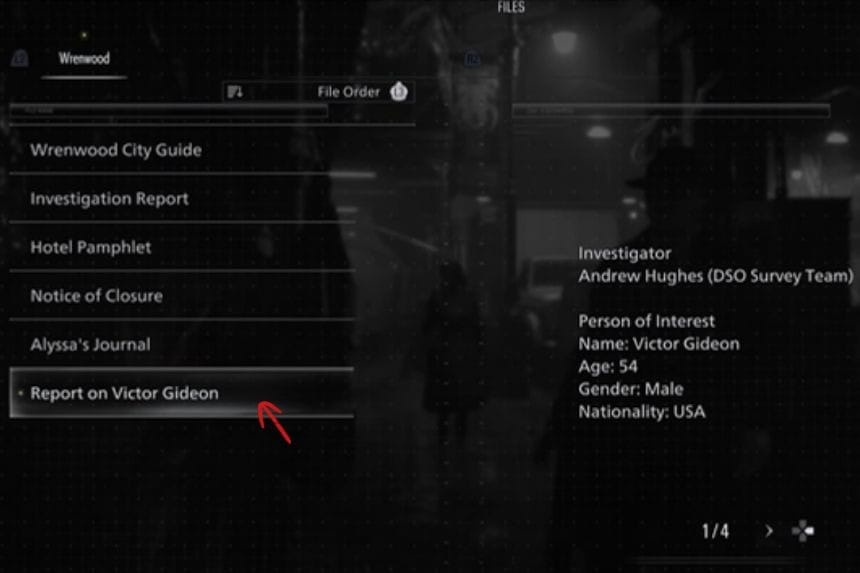
The Report on Victor Gideon is given automatically during a cutscene. Reading this report provides more context about the characters and their connections in Wrenwood.
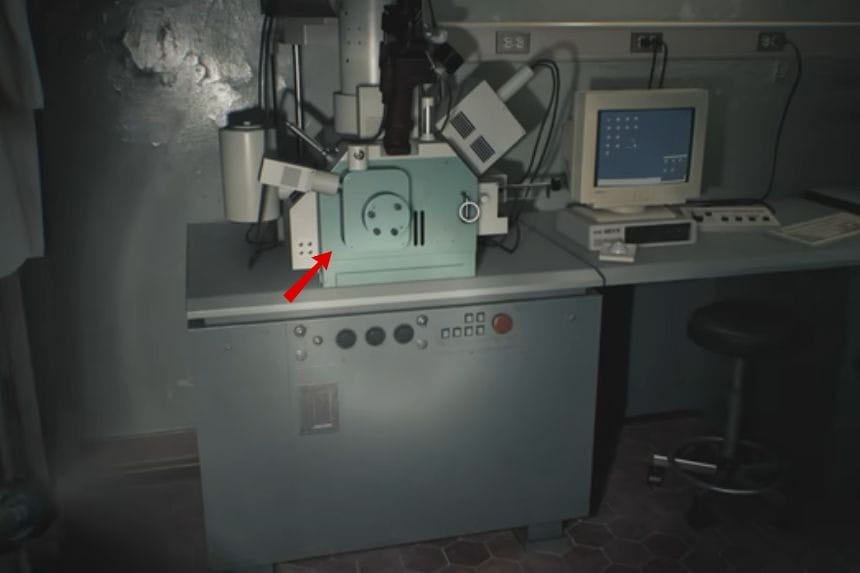
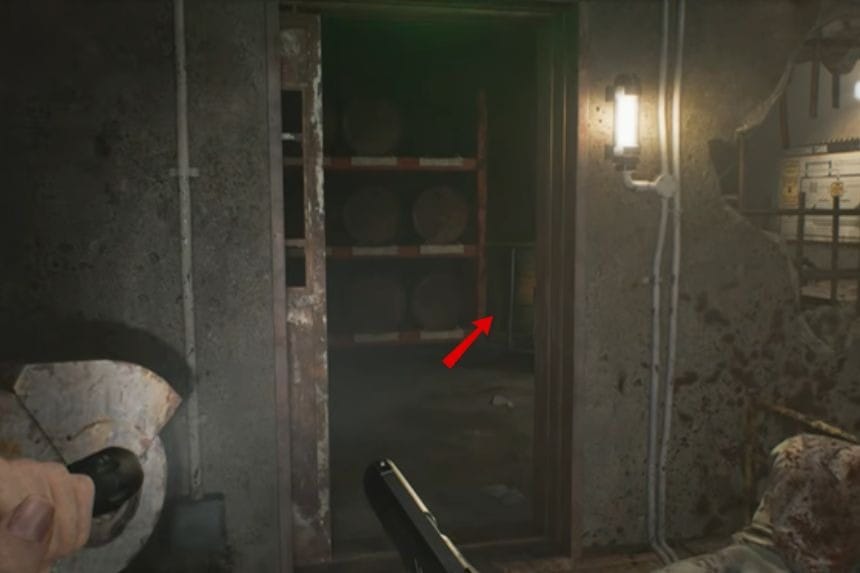
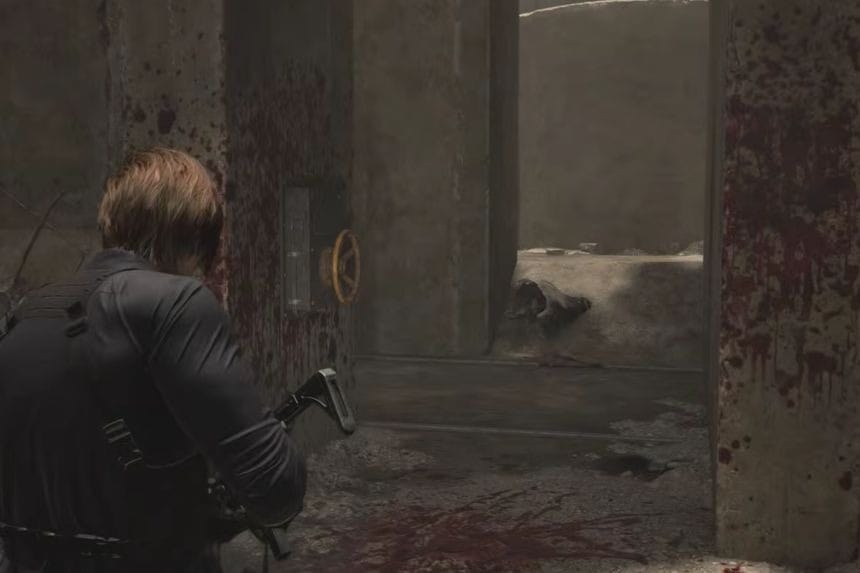
Rhodes Hill – Care Center
Grace will wake up in the Rhodes Hill Chronic Care Center, a mental hospital, where there is the dangerous Victor Gideon. The Girl, a big, terrifying creature, is also on the loose, turning Grace’s life into a nightmare. Meanwhile, Leon is facing his own challenges in Rhodes Hill.
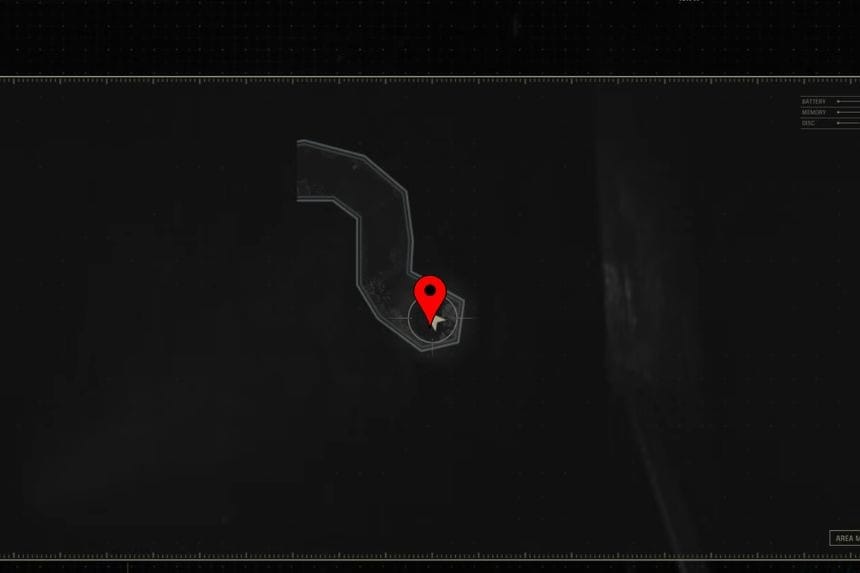
Progress Notes – Room 203
Once you get control of Grace, head into Room 203. On the small table, you will find the Progress Notes. Reading these gives you information about what has been happening with the patients and the staff.
Cherub Key – Locked Gate
Nearby, you will notice a drawer next to a locked gate that has a fuse box beside it. Inside the drawer is the Cherub Key, which you will need to unlock Room 201.
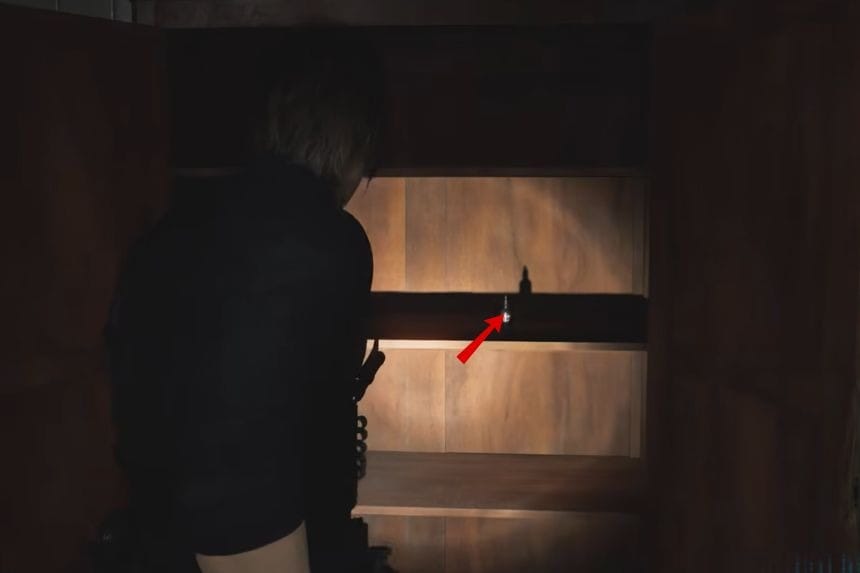
Lighter – Room 201

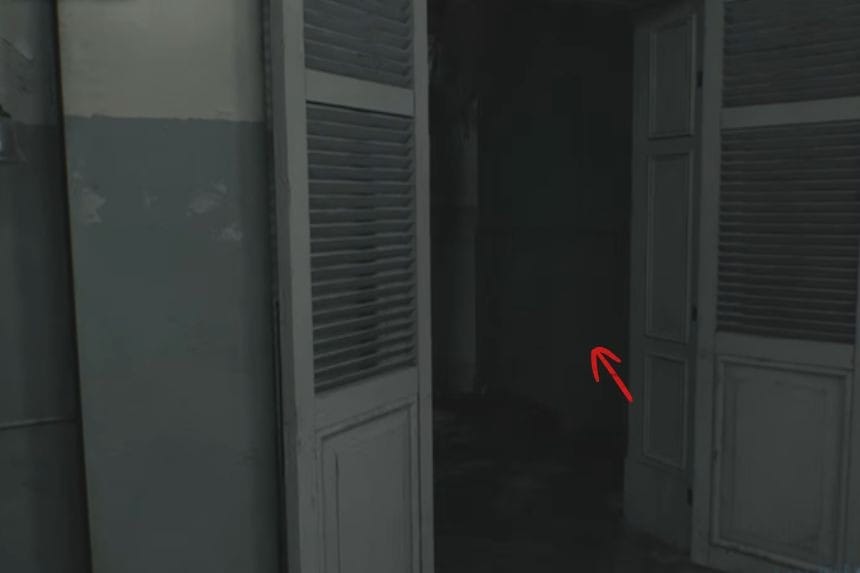

Inside Room 201, look next to the green fuse box to find the Lighter.
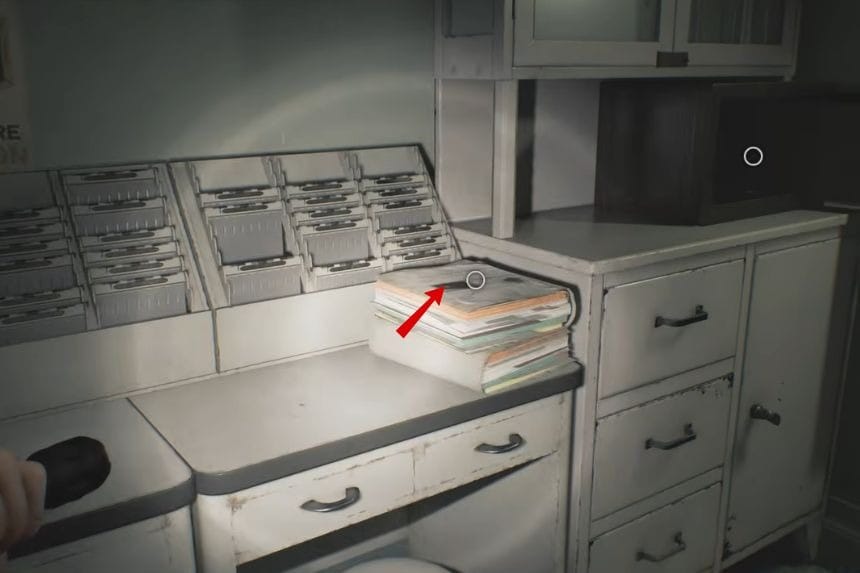
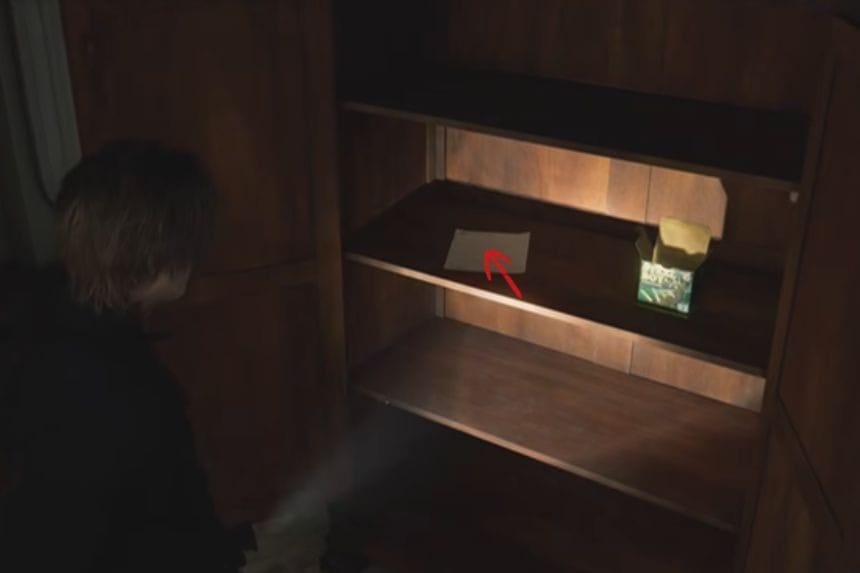
Note on Cardboard Box – Room 202

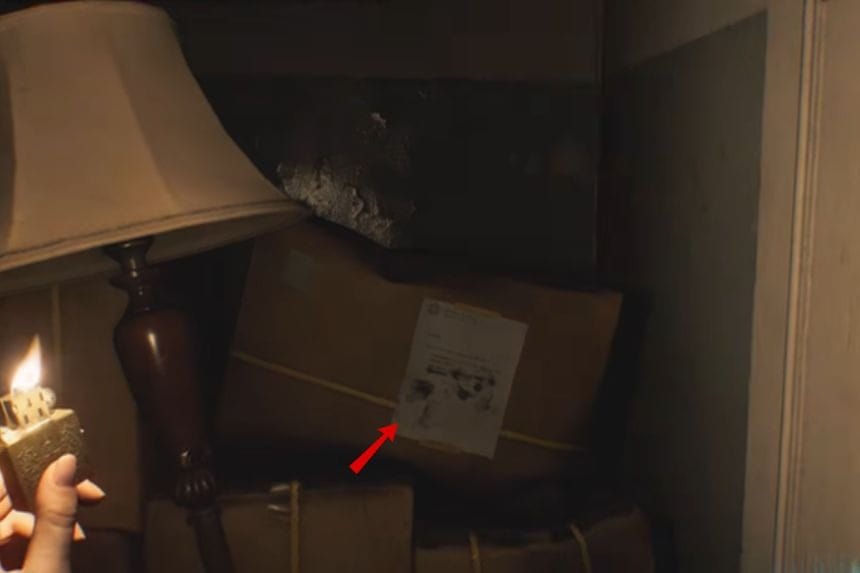
In Room 202, open the closet to find a hidden Note on a Cardboard Box. This file gives additional hints and details about the room and its contents.
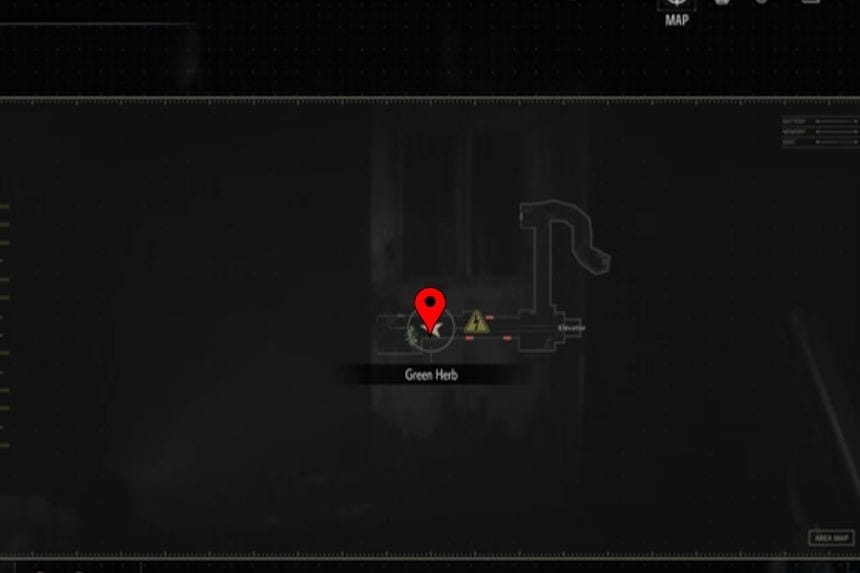
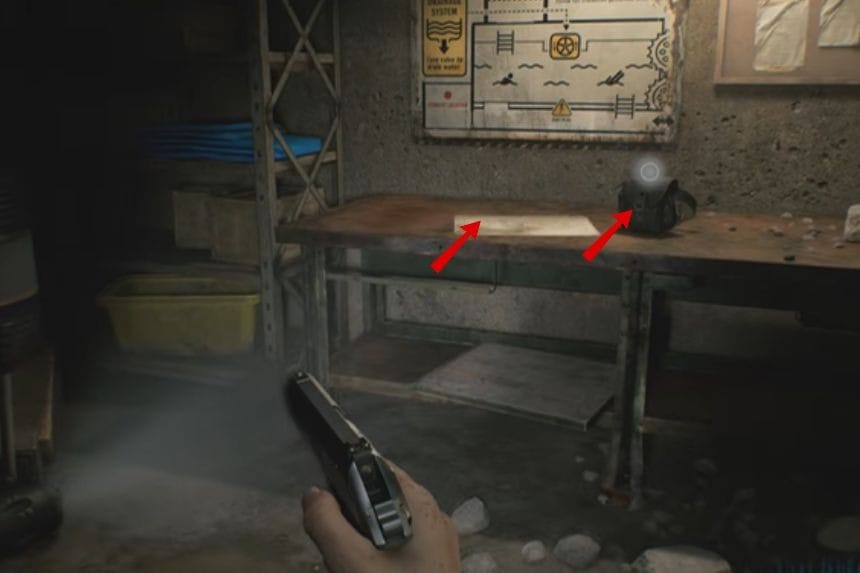
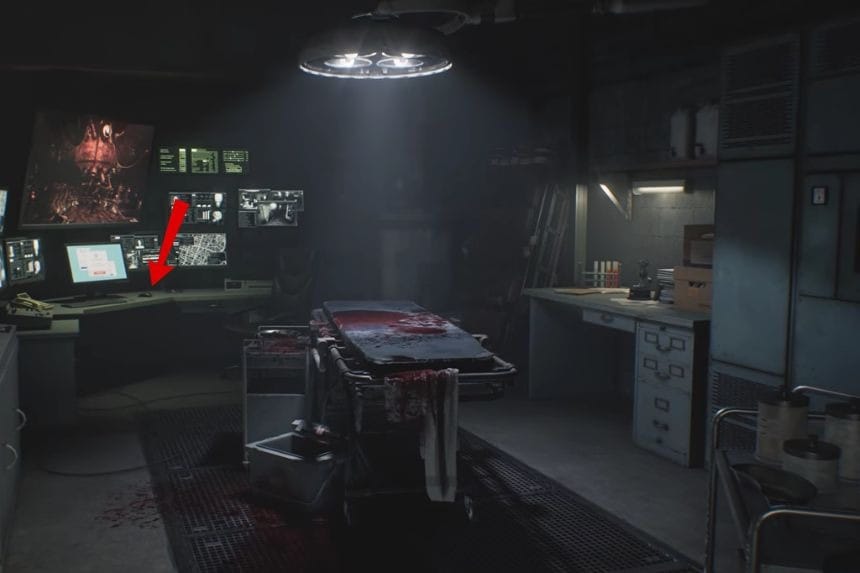
Screwdriver – Nurses’ Station
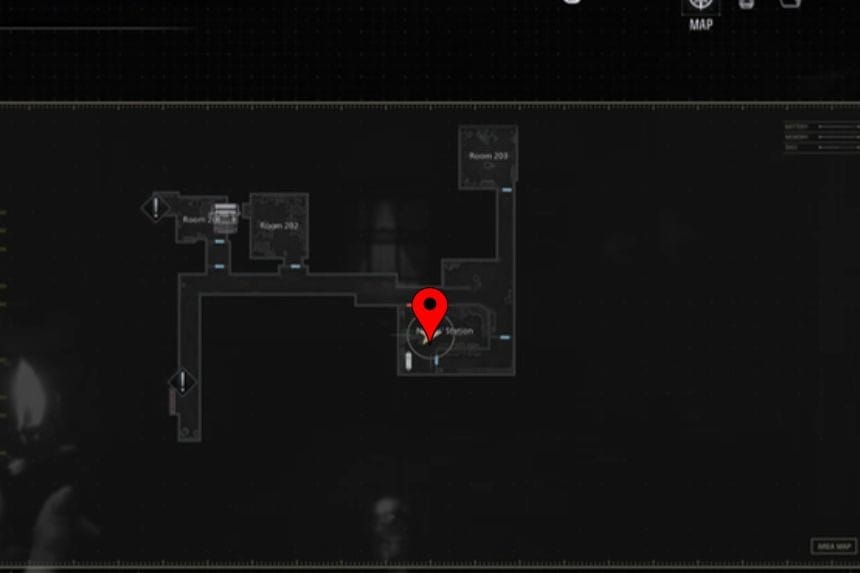
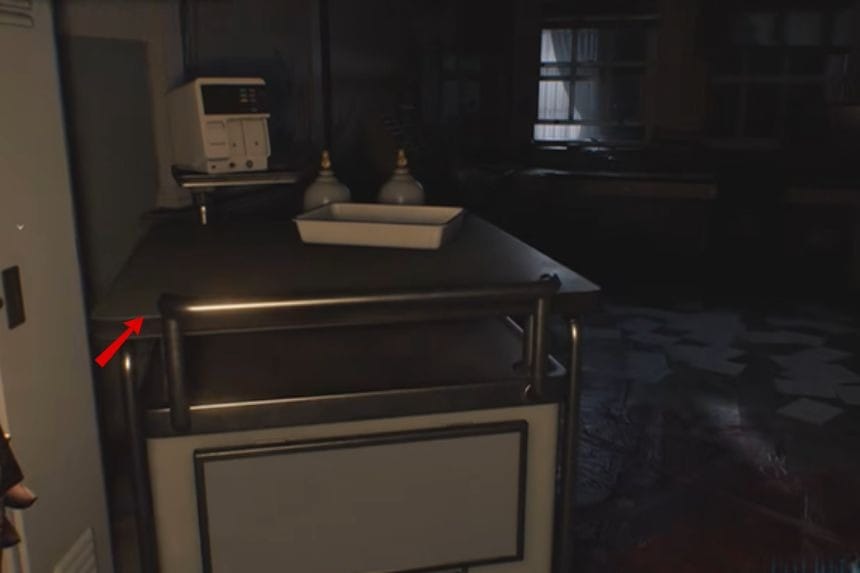
At the Nurses’ Station, check the shelf for a toolbox. Inside, you will find the Screwdriver. You may need to move the cart in the room to fully access it.
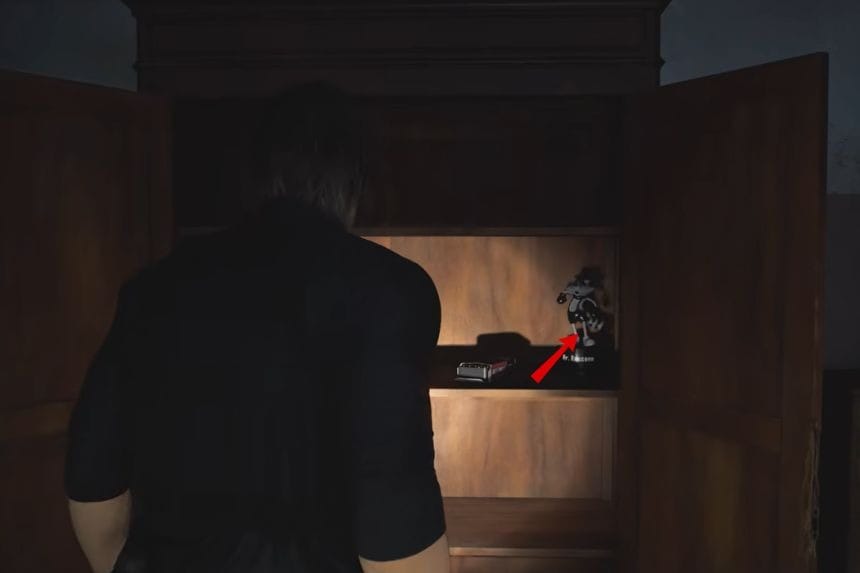
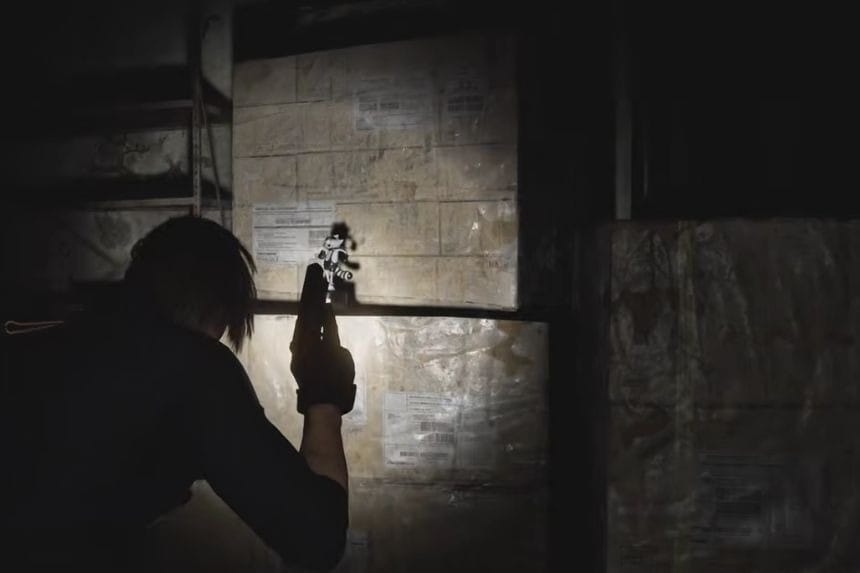
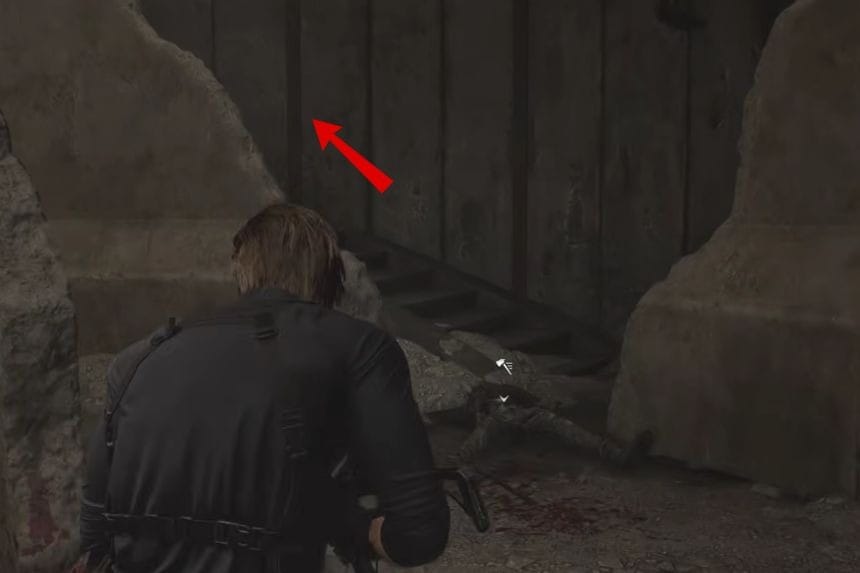
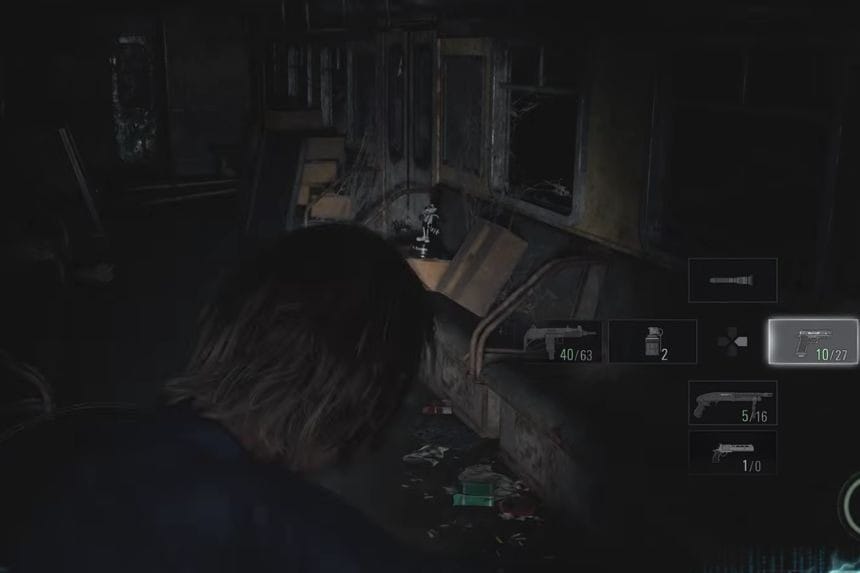
Mr. Raccoon #1
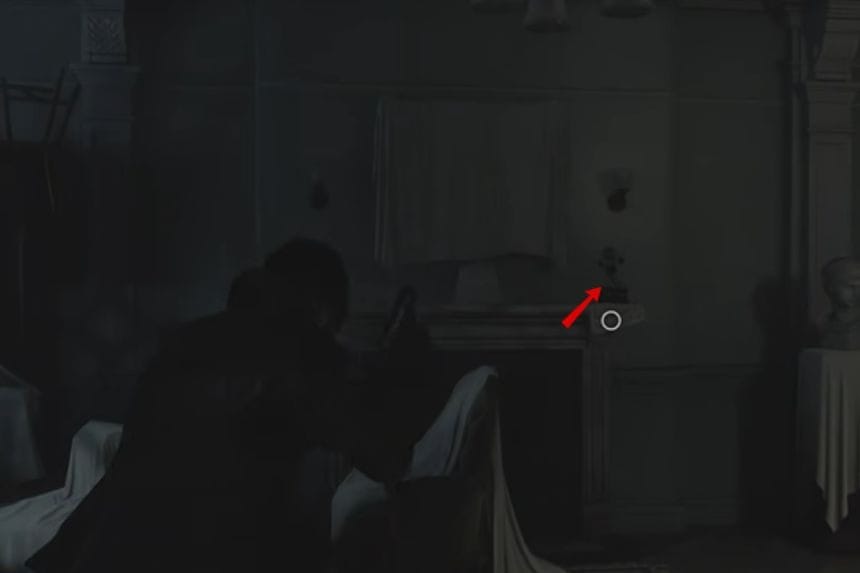
After using the chainsaw to cut open a door, continue through the next doorway. You will find Mr. Raccoon #1 sitting on the fireplace in front of you.
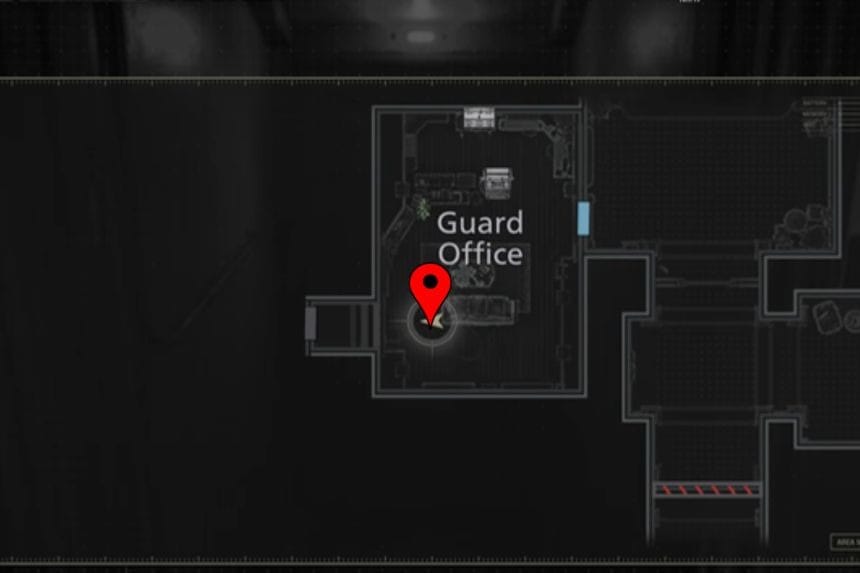
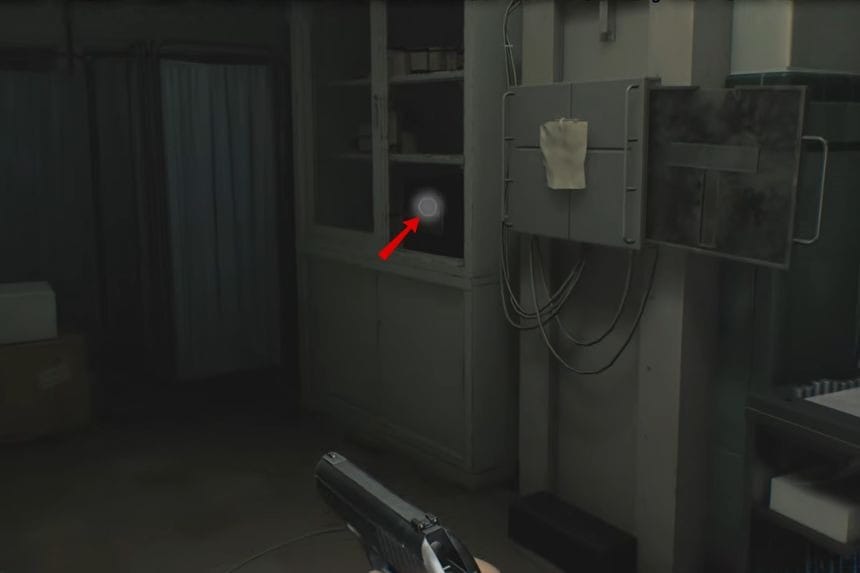
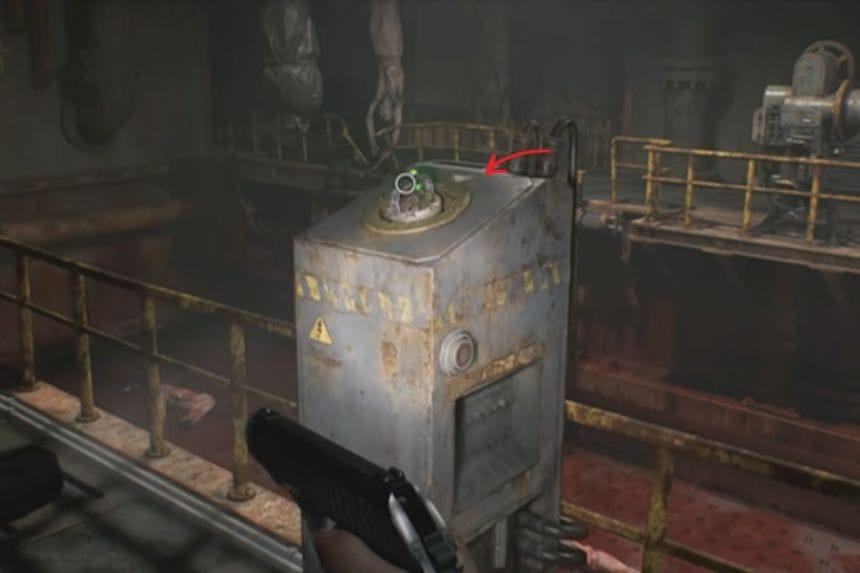
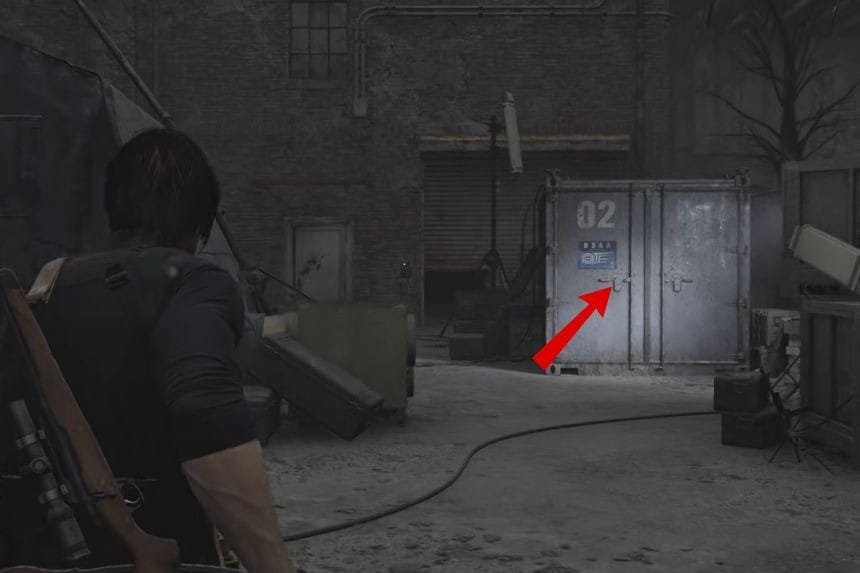
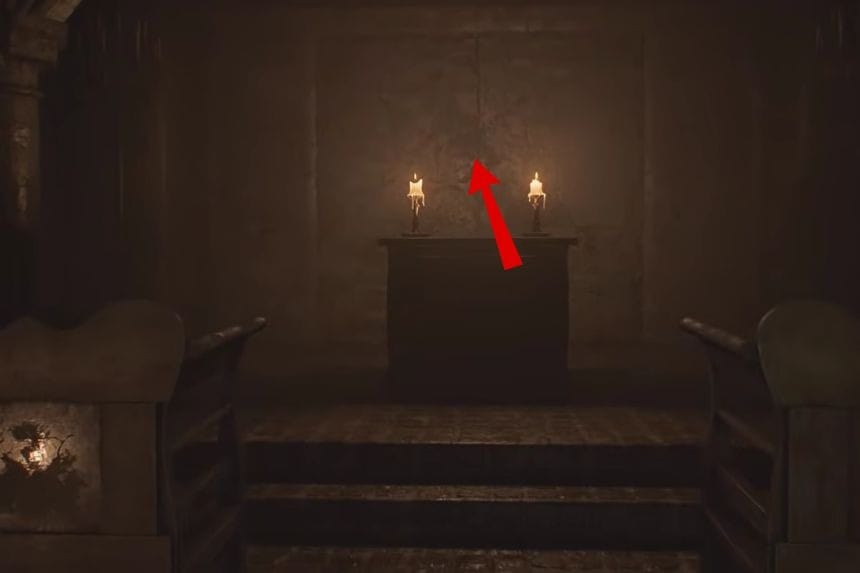
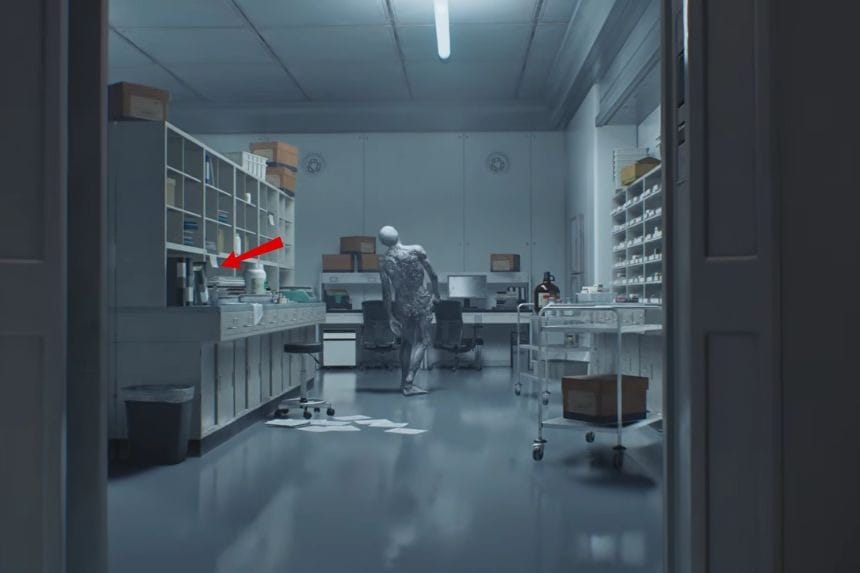
Antique Coin #1 – Guard Office


Starting in the Guard Office, go downstairs and enter the Safe Room. On the desk, you will will find Antique Coin #1.
Care Center Pamphlet – Guard Office
In the same Safe Room, check the couch table to find the Care Center Pamphlet. This file provides extra information about the facility and its operations.
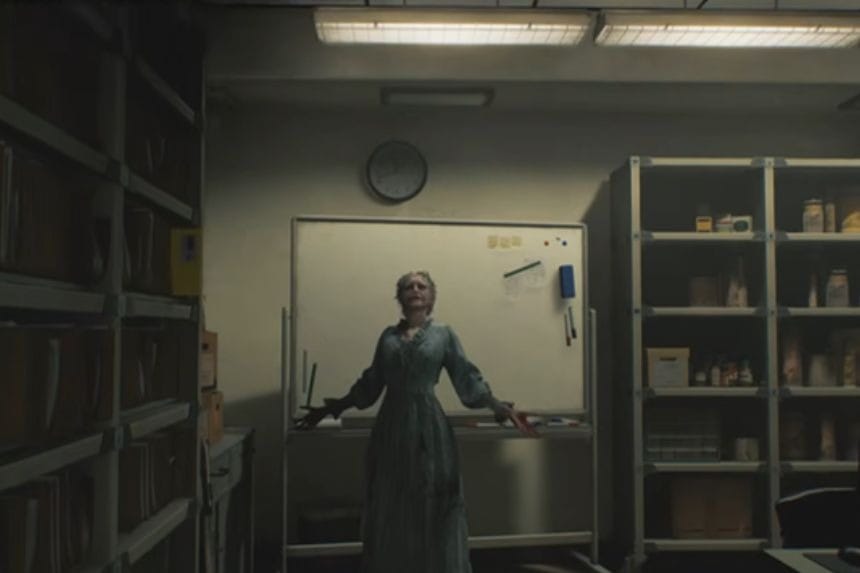
Whiteboard Scrawl – Guard Office
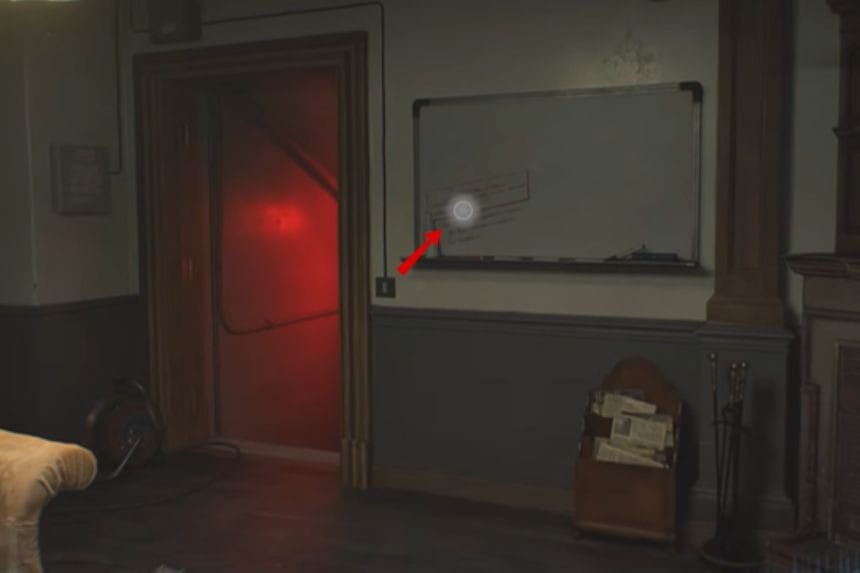
Before leaving the Safe Room, take a look at the whiteboard on the wall. Here, you will find the Whiteboard Scrawl, which gives clues and notes about what’s going on in the Care Centre.
Trophy: Out of Sight, Out of Mind – Guard Office
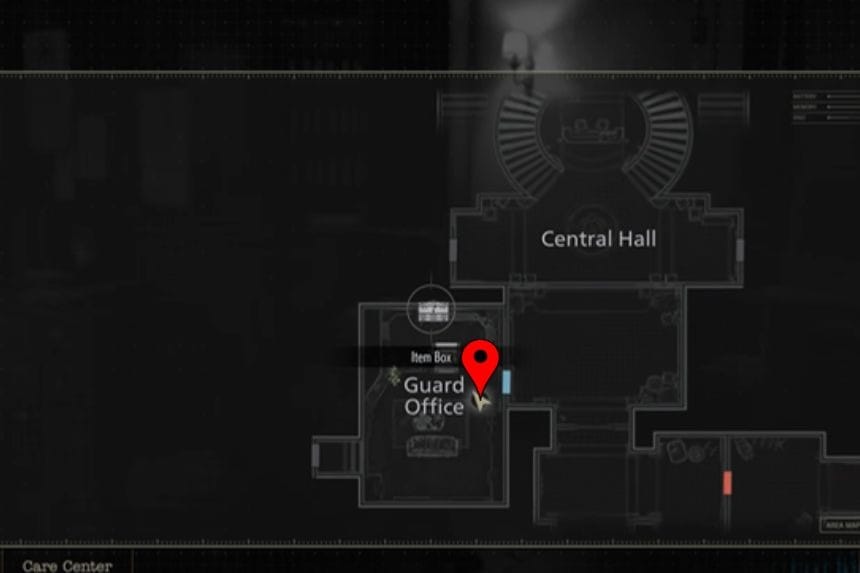
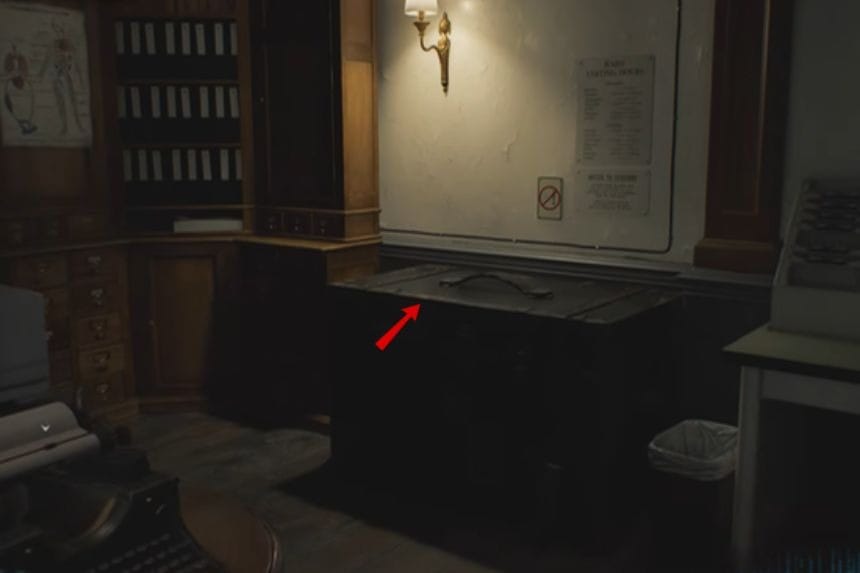
Also in the Safe Room, there’s a box labeled Out of Sight, Out of Mind. Interact with it and place any item inside to unlock the trophy.
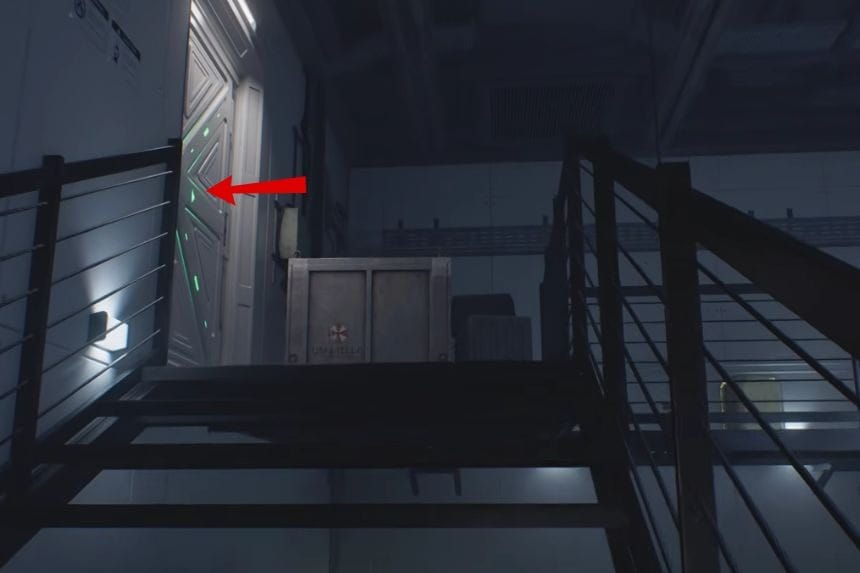
West Wing Keycard – Safe Room
As you move through the Safe Room, head through the red-lit door, and you’ll automatically pick up the West Wing Keycard. You’ll use this keycard in the Central Hall to unlock the door to the West Wing, opening up a new area to explore.
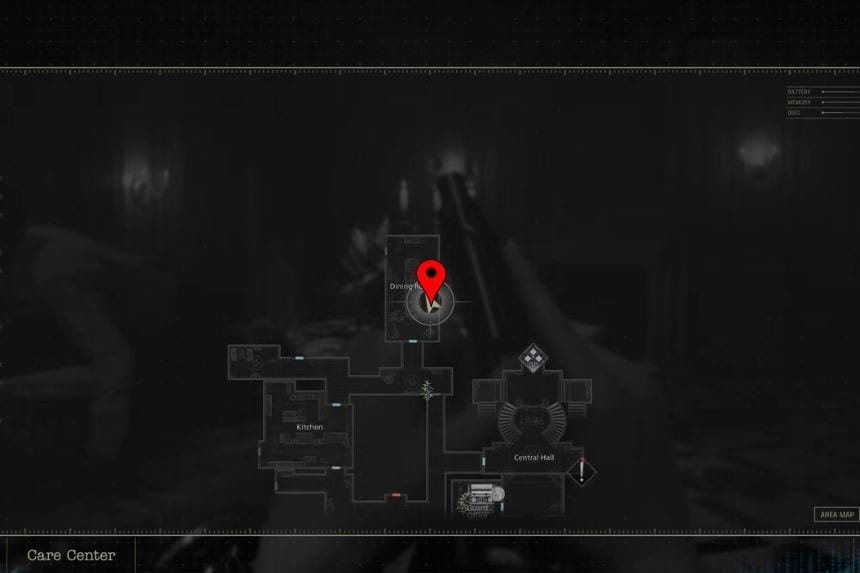
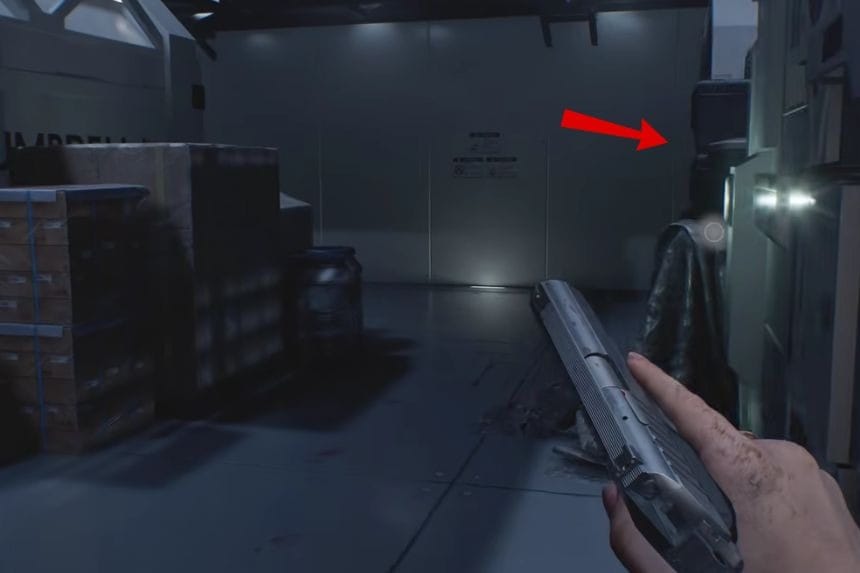
B934 Pistol – Dining Room
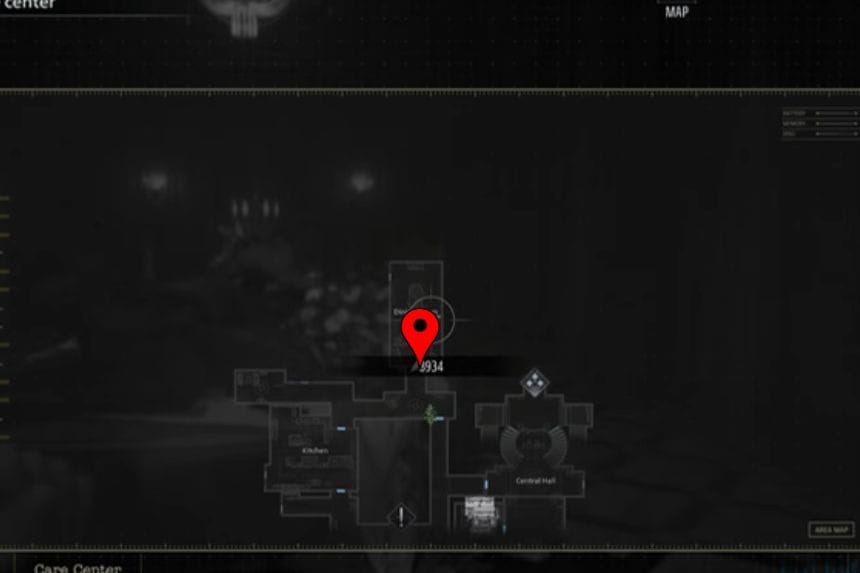
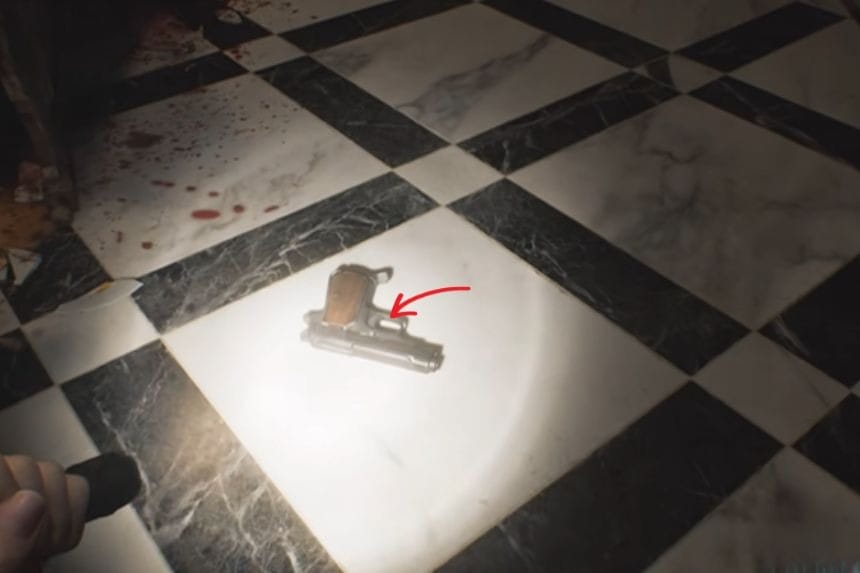
After passing through the kitchen, enter the Dining Room. On the floor, you’ll spot the B934 Pistol. This weapon will be useful for defending yourself against enemies in this section of the game.
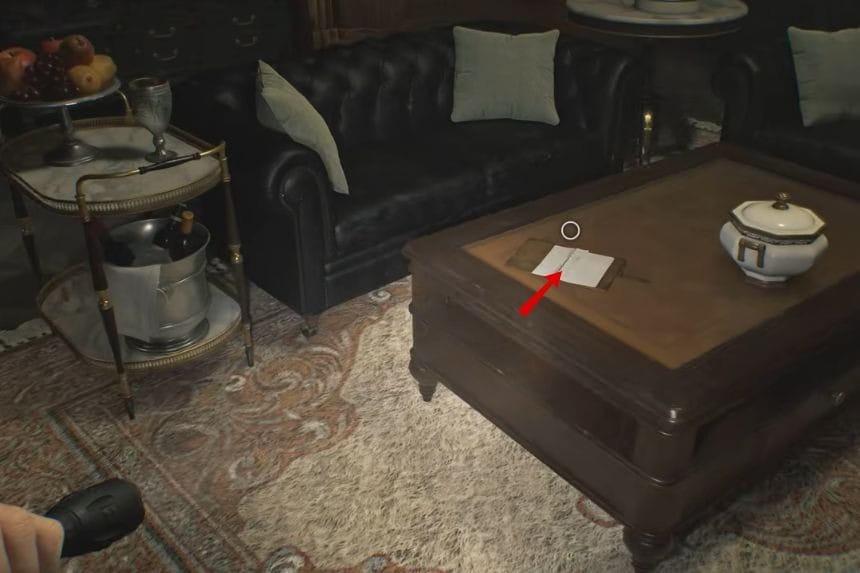
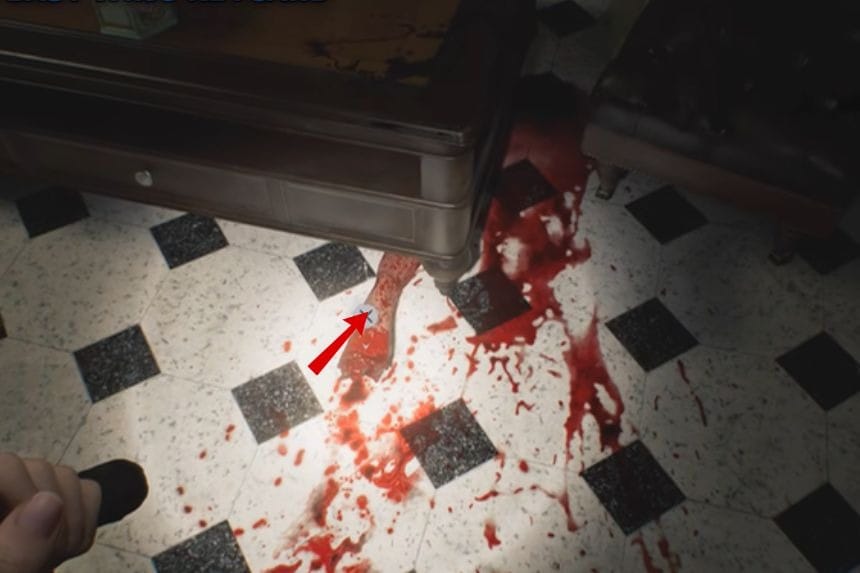
Empty Bottle – Dining Room
In the same Dining Room, check the left side behind the table. On the shelf, you’ll find an Empty Bottle. Pick it up and keep it with you, or store it safely—it will be required later to unlock the trophy “Internal Dispute.” Be careful not to throw it away!
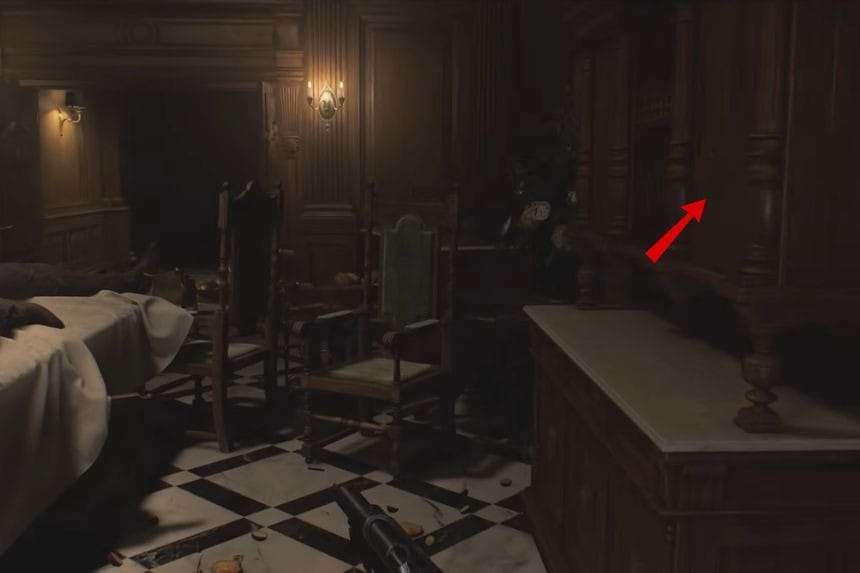
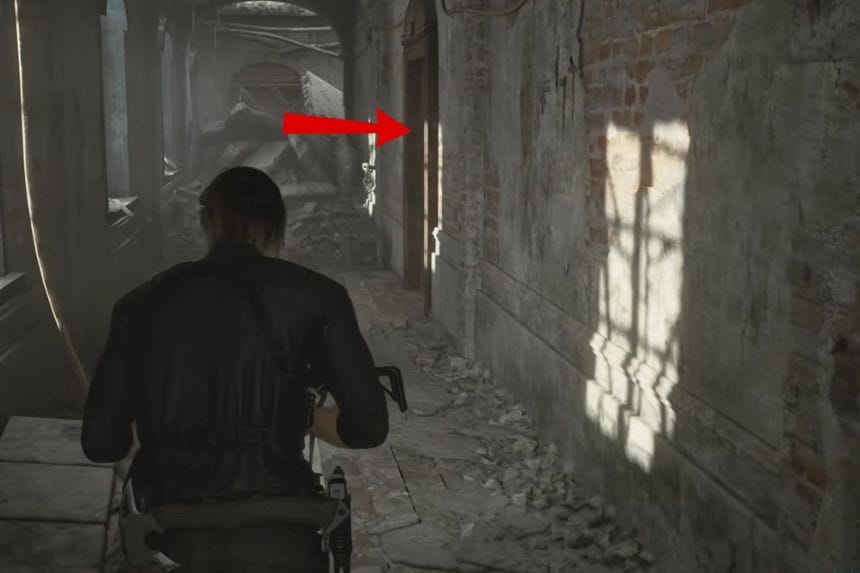
Makeshift Knife – Filing Room

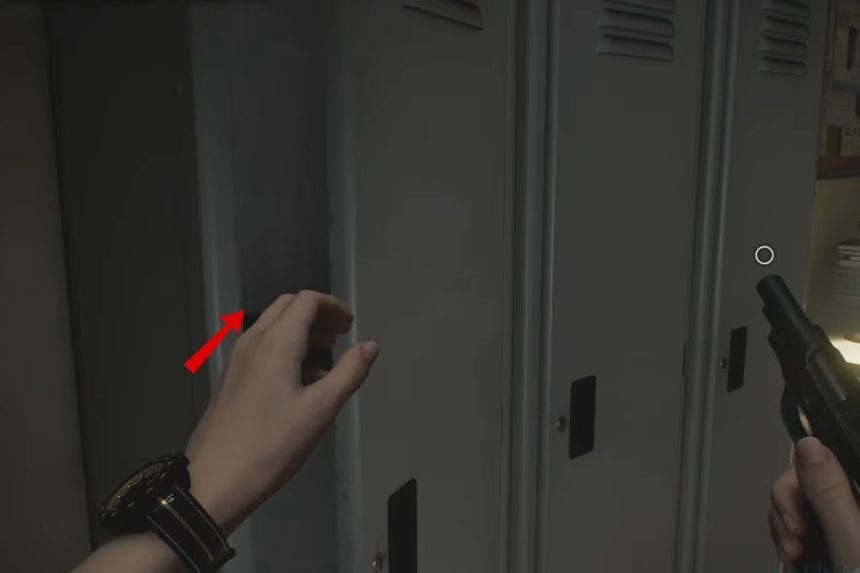
Next, head to the Filing Room, located next to the Dining Room. Inside a locker, you’ll find a Makeshift Knife, a handy weapon for close combat situations.
Hunting Knife – Enemy Drop
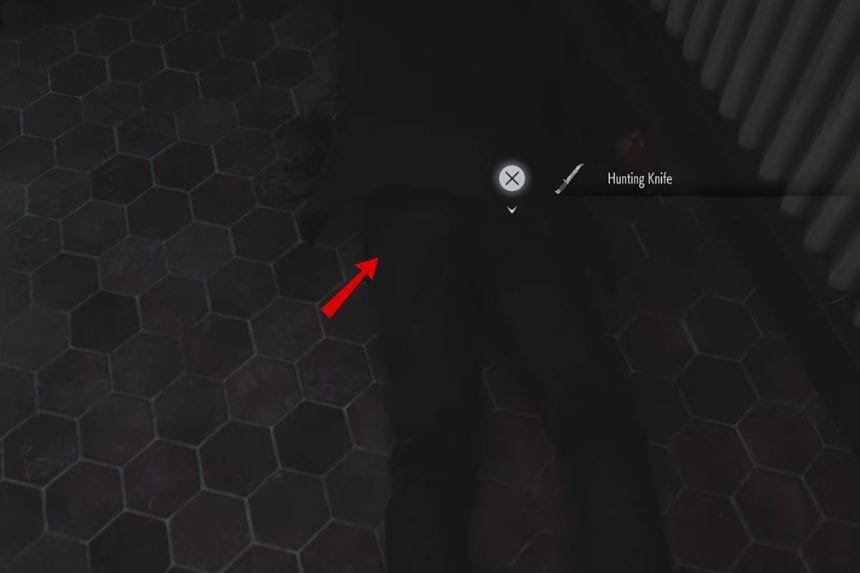
A Hunting Knife can be obtained by defeating one of the enemies near the Dining and Filing Rooms. The enemy carries the knife in their hand, so make sure to pick it up after taking them down.
Antique Coin #2 – Corridor North of Filing Room
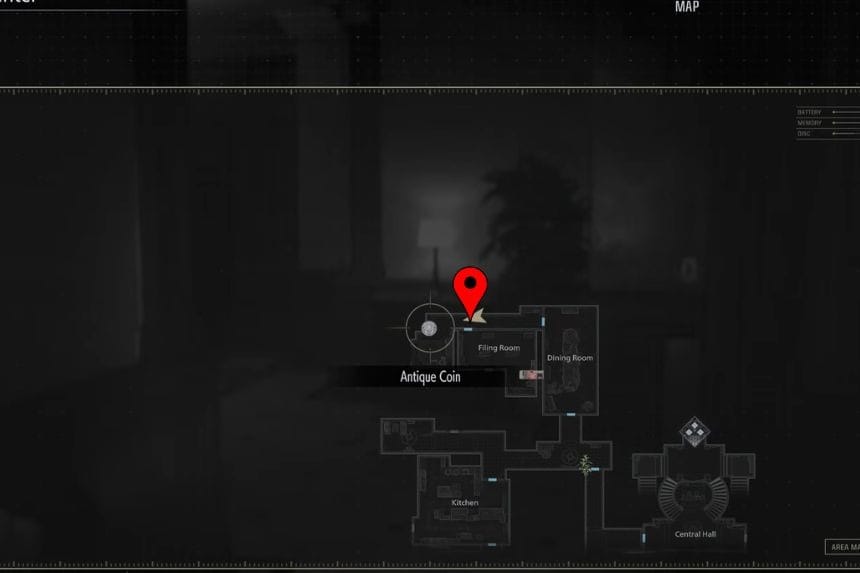

As you explore the area north of the Filing Room, you’ll come across Antique Coin #2 in the corridor. Keep an eye out as you move through—these coins are scattered but easy to spot if you’re paying attention.
West Wing Map – First Staircase
After climbing the first set of stairs in the West Wing, check the wall to find the West Wing Map. This map will help you navigate the new area and locate key rooms more easily.
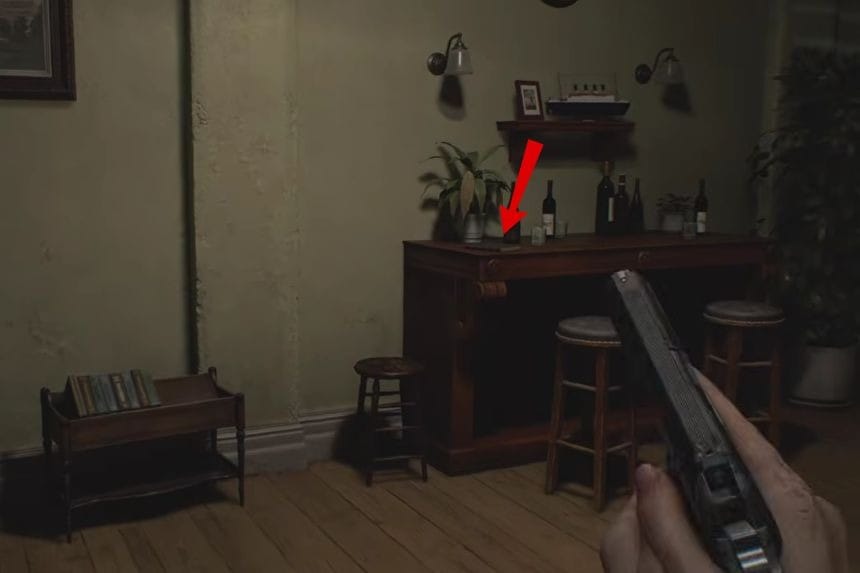
Antique Coins #3 & #4 – Bar & Lounge
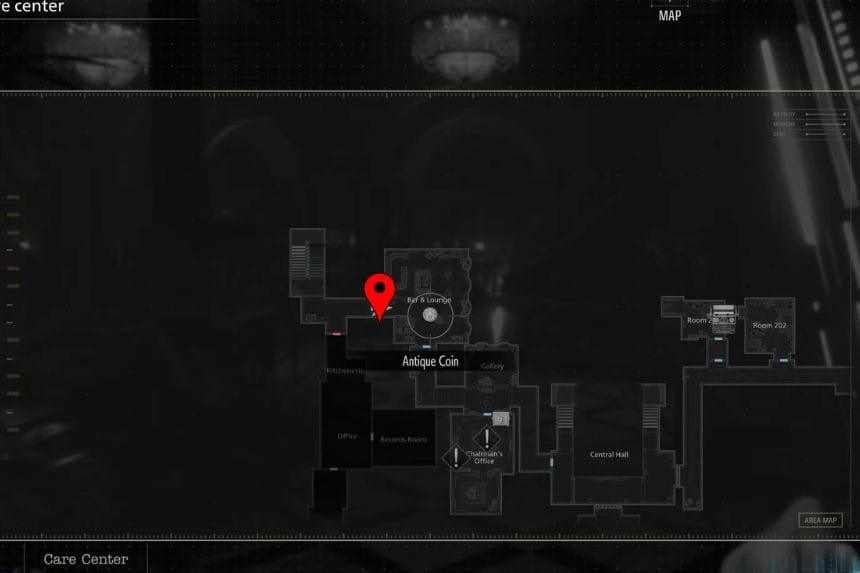

In the Bar & Lounge, you’ll find Antique Coin #3 resting on the piano.
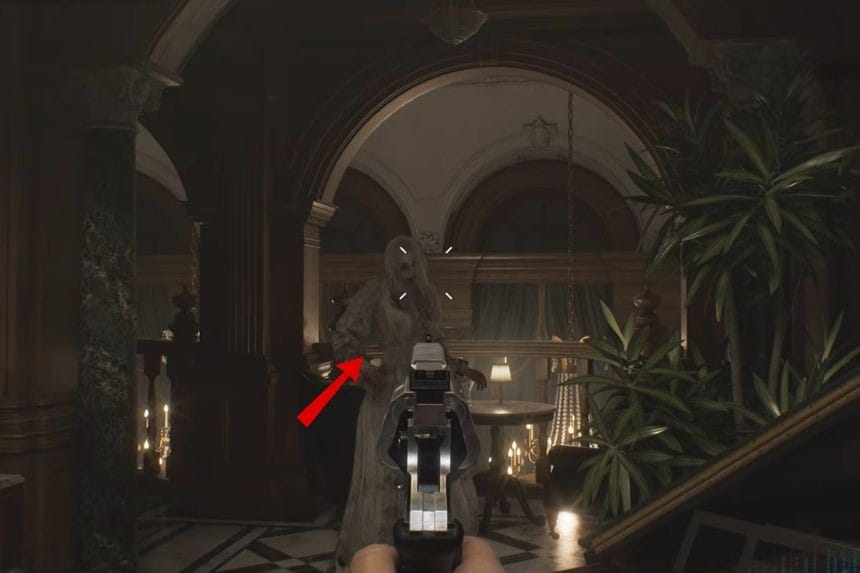
Antique Coin #4 is a bit trickier—it’s carried by the singing lady enemy in a white dress. Defeat her to collect the coin.
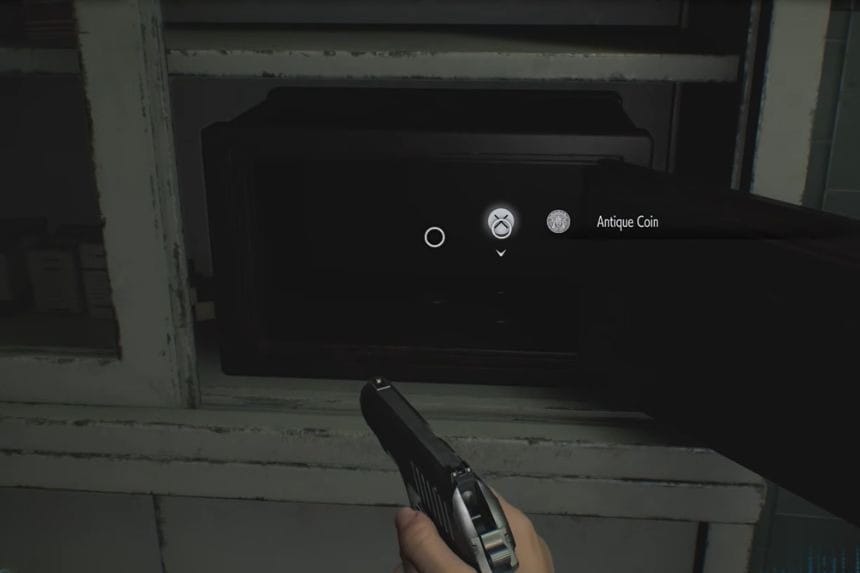
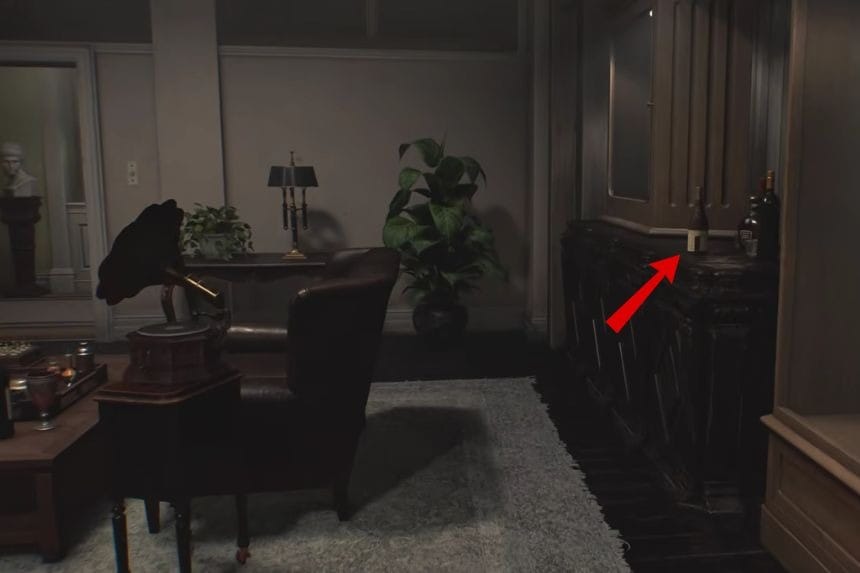
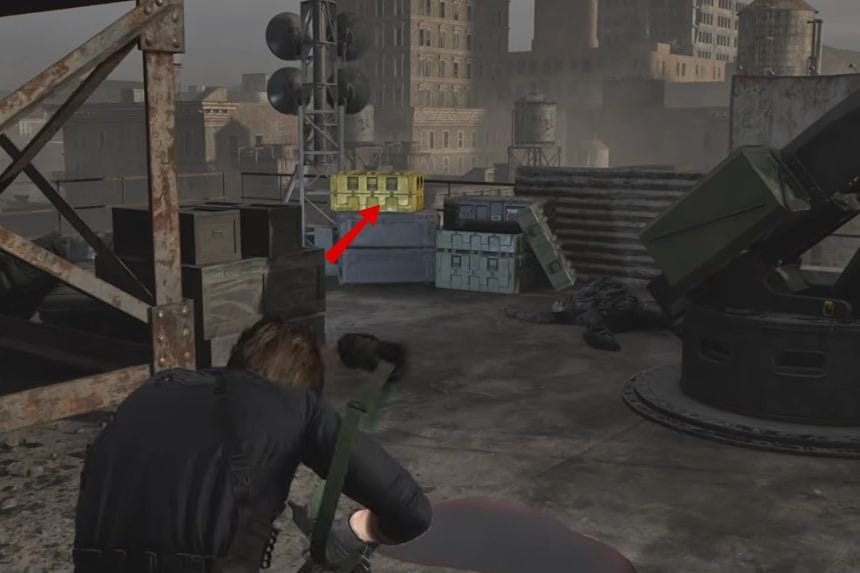
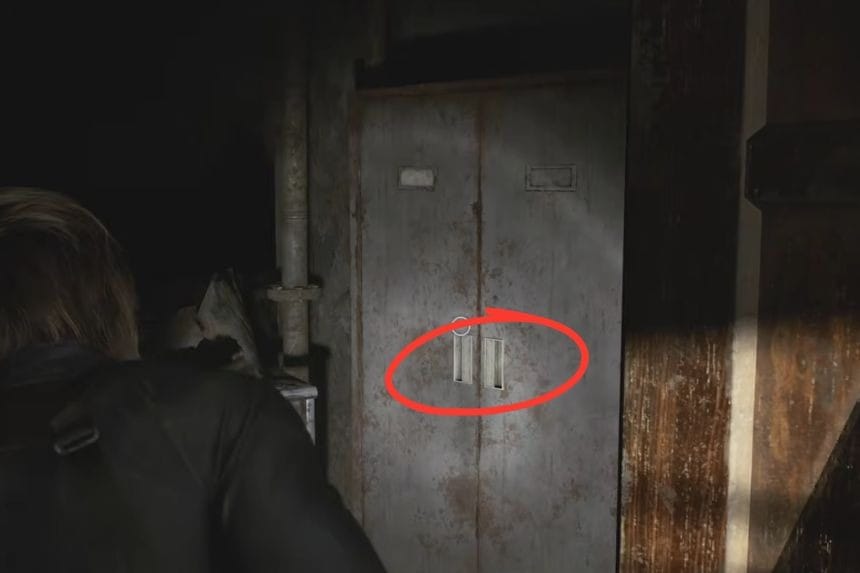
Safe #1 & Antique Coins #5-#7 – Bar & Lounge
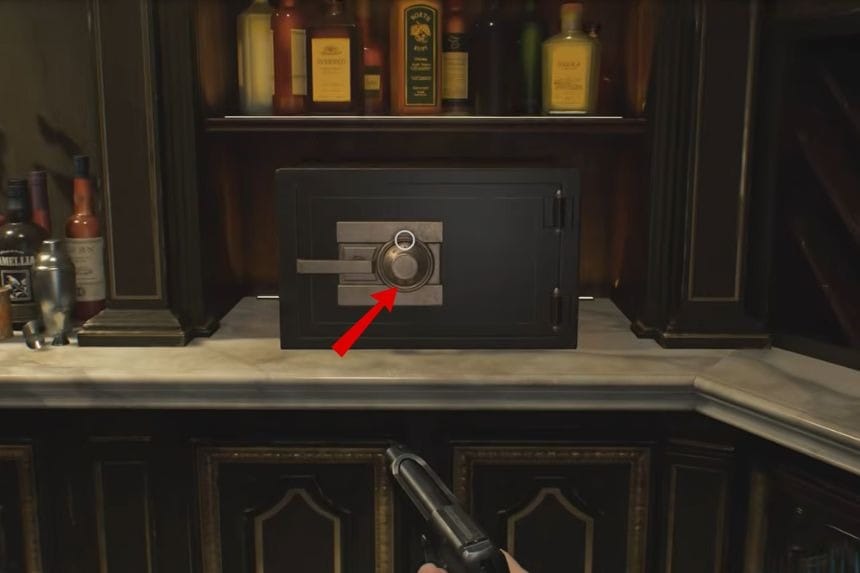
Still in the Bar & Lounge, there’s a safe on the bar counter behind some enemies.
On Casual difficulty, the combination is Left 10 – Right 80 – Left 30, and it contains three Antique Coins (#5–#7).
On Insanity difficulty, the combination is Right 20 – Left 50 – Right 30.
Normally, you’d find the code later in File #23 – Bar & Lounge Safe Code, but you can open it now if you already know the combination.
S&S M232 Weapon – Bar & Lounge
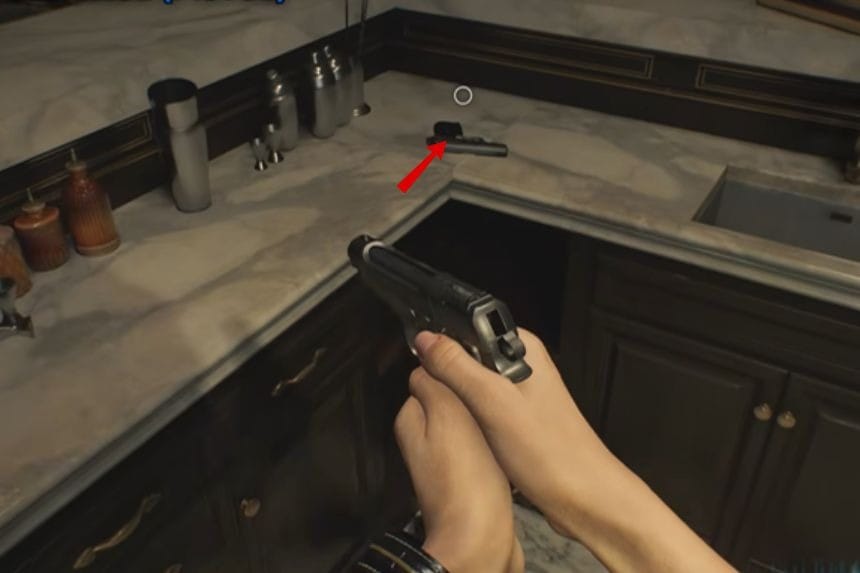
On the same bar counter, you’ll also find the S&S M232, a powerful weapon to help you deal with enemies in this area.
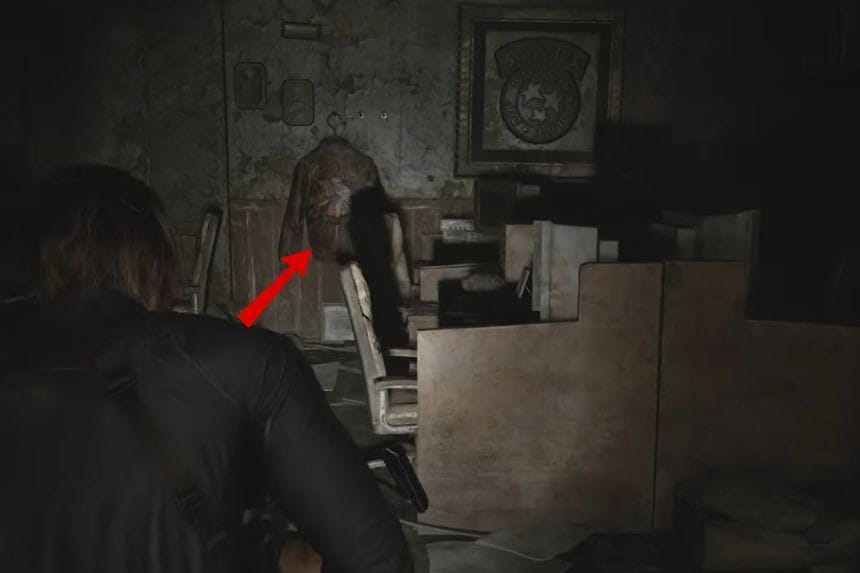
Folded Note – Gallery
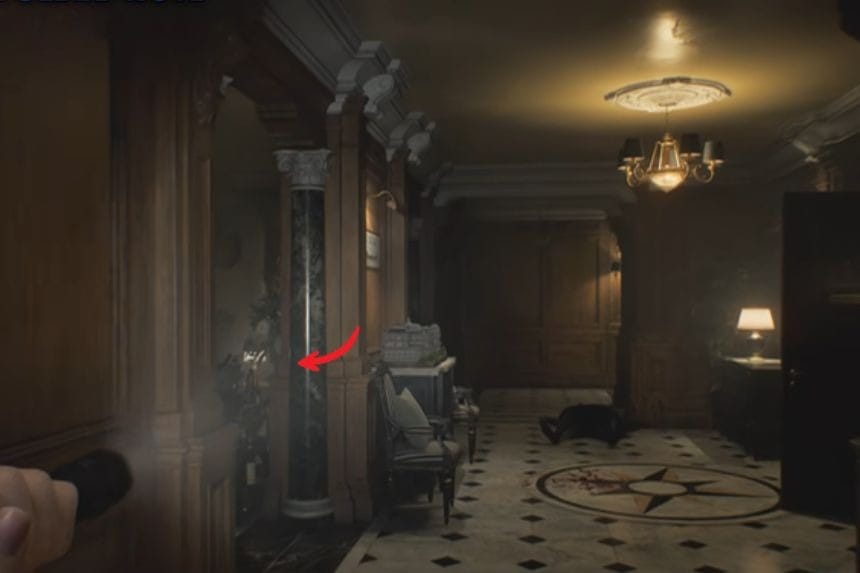

After leaving the Bar & Lounge, follow the corridor and turn left to reach the Gallery. Look for a white coat hanging on the wall, and inspect it to find the Folded Note. This file contains additional story details and clues for your journey.
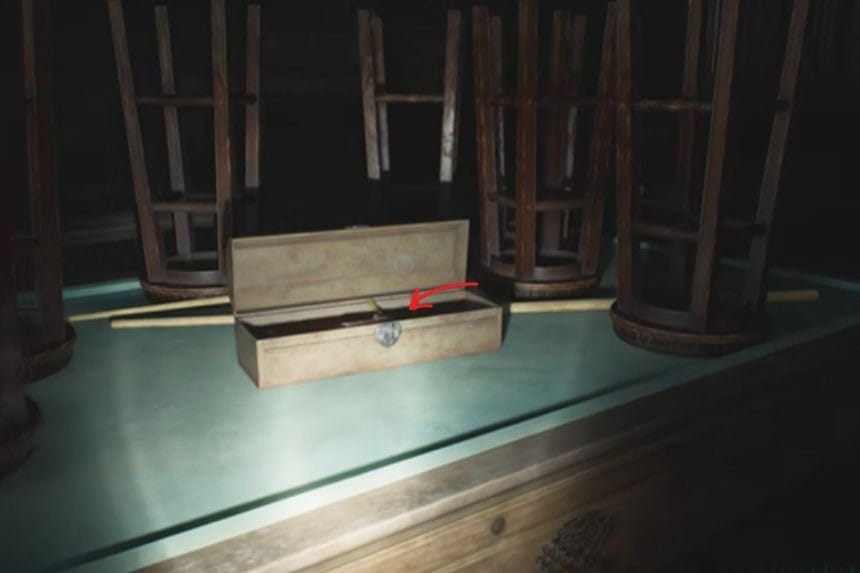
Red Jewel – Unicorn Trinket Box (Chairman’s Office)
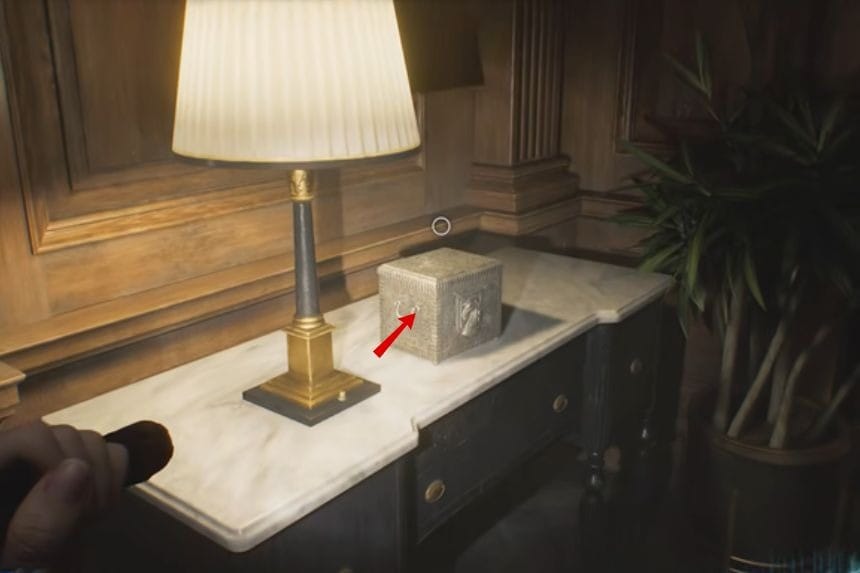
In the Chairman’s Office, look in the left corner of the dark room to find the Red Jewel inside a Unicorn Trinket Box. If you’re playing on Insanity difficulty, the jewel is moved slightly to the back of the room, near a zombie.
Copy of an Email to a Manager
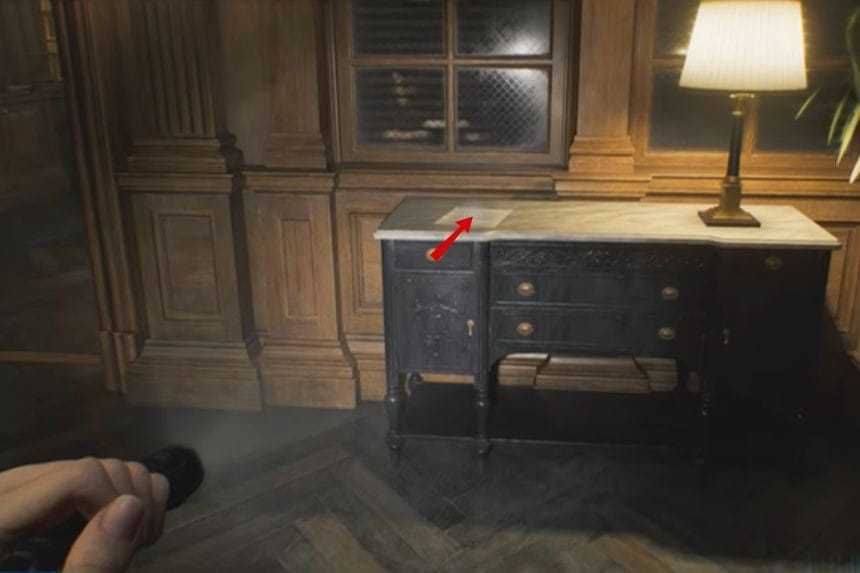
In the same office, check the cupboard to find File #12 – Copy of an Email to a Manager, which provides background on office communications.
Note to a Chairman

Head into the backroom of the Chairman’s Office, where a zombie lurks, and search the trash bin to find File #13 – Note to a Chairman.
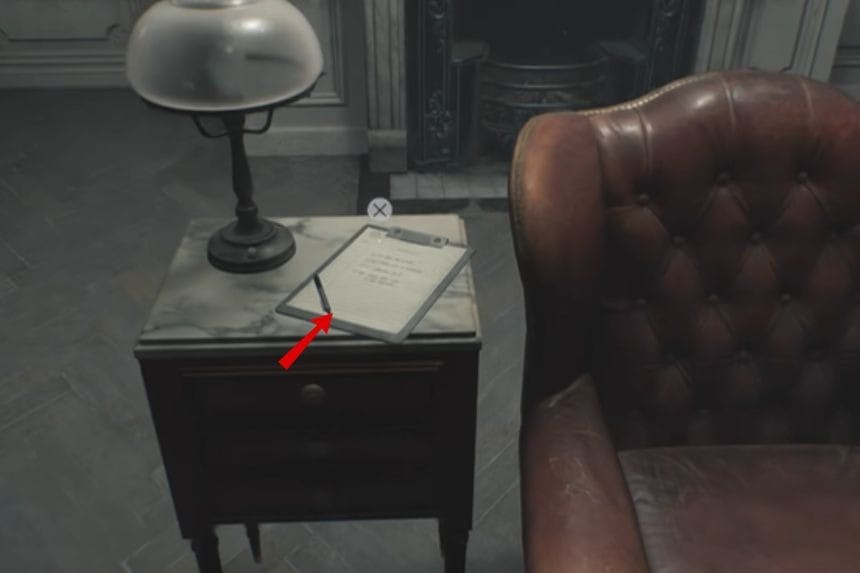
Pencil
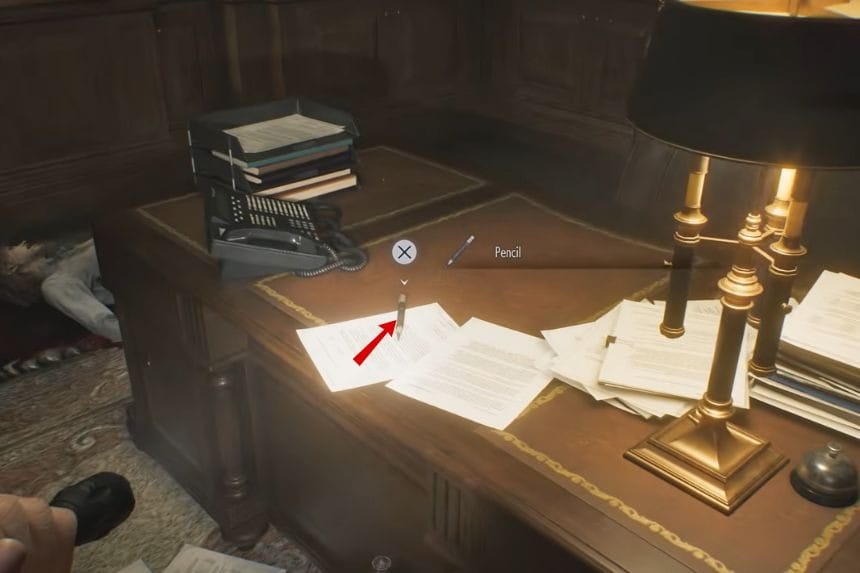
On the table in the Chairman’s Office, you’ll find a Pencil, which is needed to interact with certain puzzles in the room.
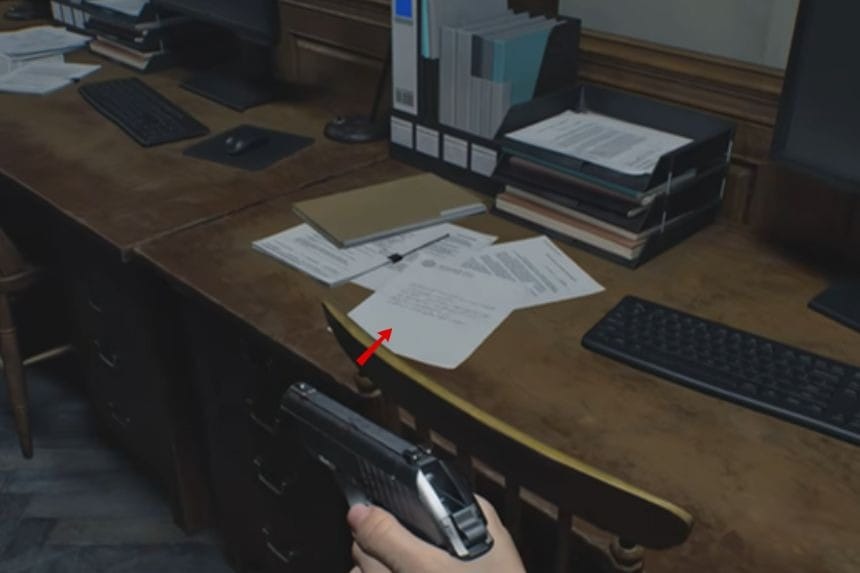
Chairman’s Note
After using the Pencil to shade in the note on the desk, you’ll receive File #14 – Chairman’s Note, which contains important hints for the next steps.
Moon Quartz – Puzzle Safe
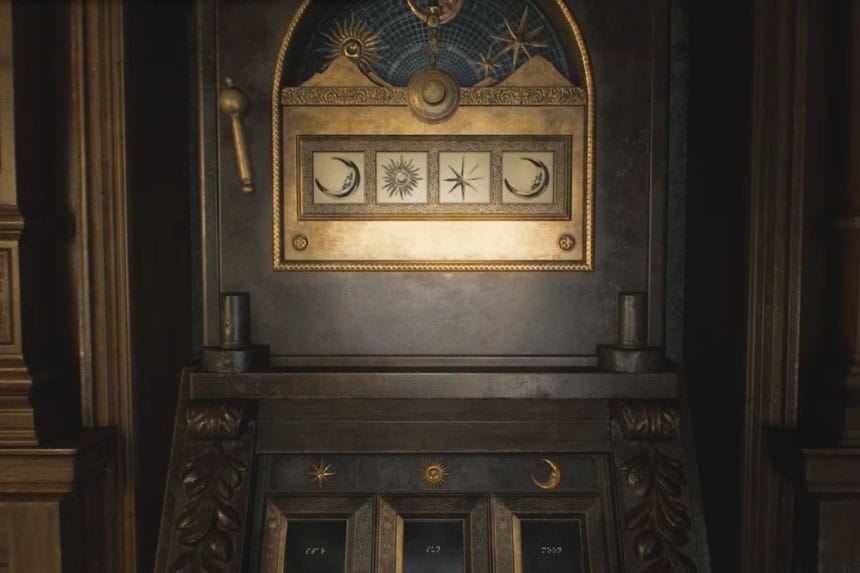

Still in the Chairman’s Office, interact with the puzzle safe to obtain the Moon Quartz. You’ll use this key item on the Quartz Door in the Central Hall. The solution for the puzzle is Moon – Sun – Star – Moon.
Antique Coin #8

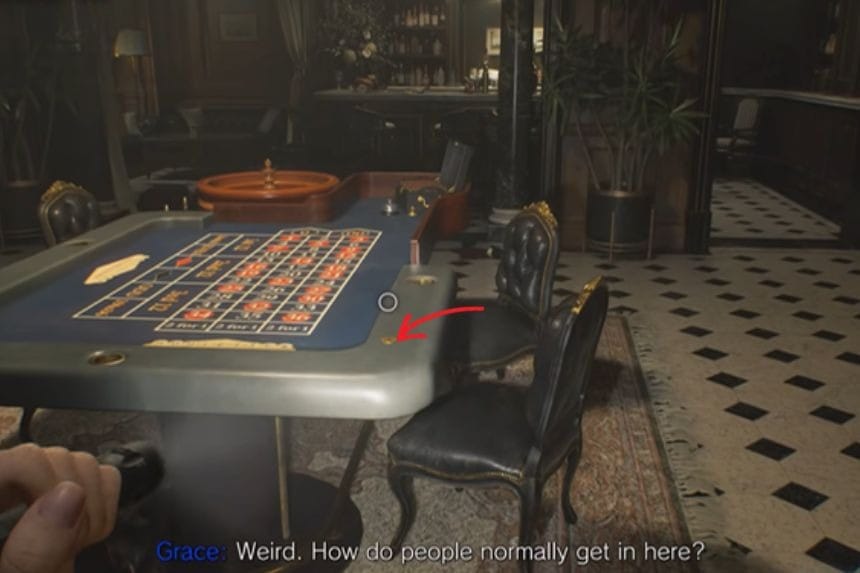
After going back downstairs through the West Wing, use the Red Jewel on the Parlor door to gain access. Inside, you’ll find Antique Coin #8 sitting on the Roulette table.
Antique Coin #9
In the same Parlor, check the bar counter to pick up Antique Coin #9.
East Wing Keycard – Parlor
In the Parlor, inspect the severed arm in the back left corner of the room. Doing so will give you the East Wing Keycard, which is needed to access new areas in the East Wing.
Upgrades in the Parlor
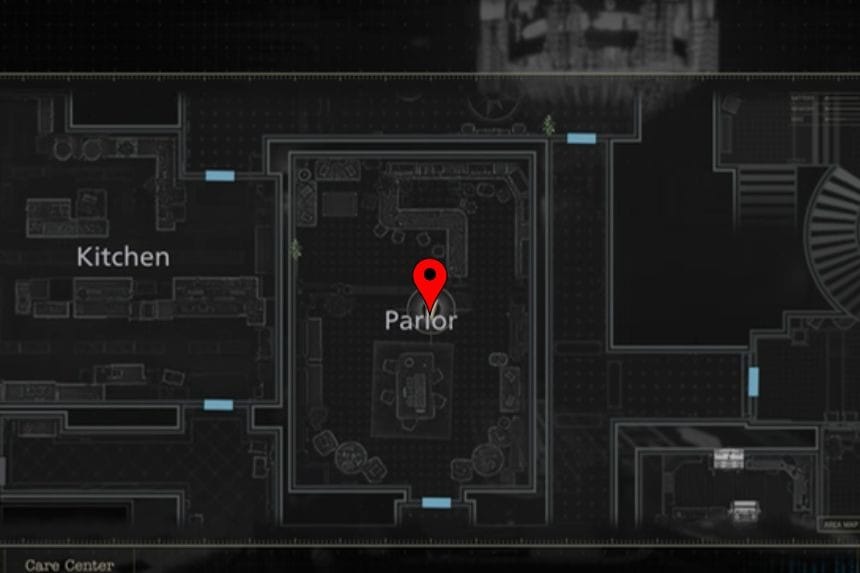
The Parlor also contains four lockers that hold useful upgrades: the Hip Pouch, Stabilizer, Steroids, and Override Manual. You’ll need Antique Coins to open these lockers—17 in total for all four. By this point, you should have around 8–9 coins, so grab whichever upgrade you can and come back later for the rest.
On Insanity difficulty, the items are slightly different: Hip Pouch, 30x Handgun Ammo, RIP Knife, and Override Manual.
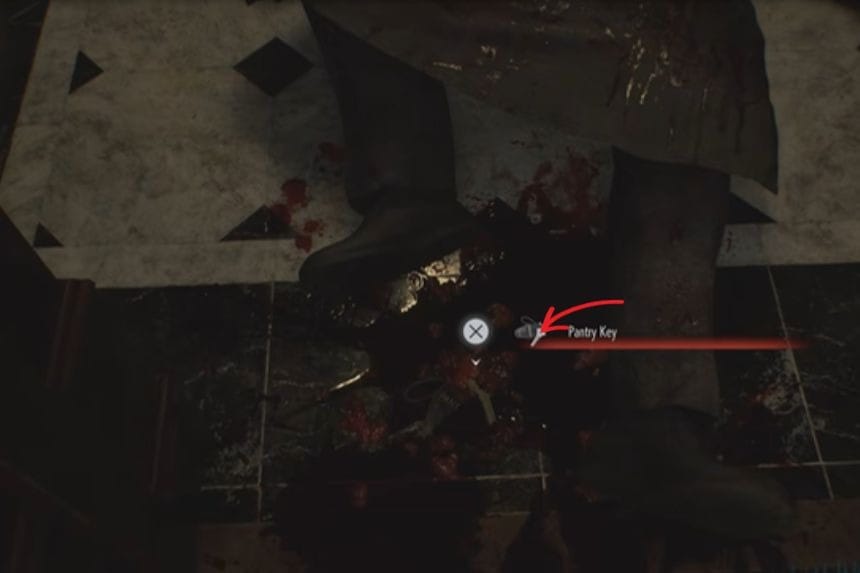
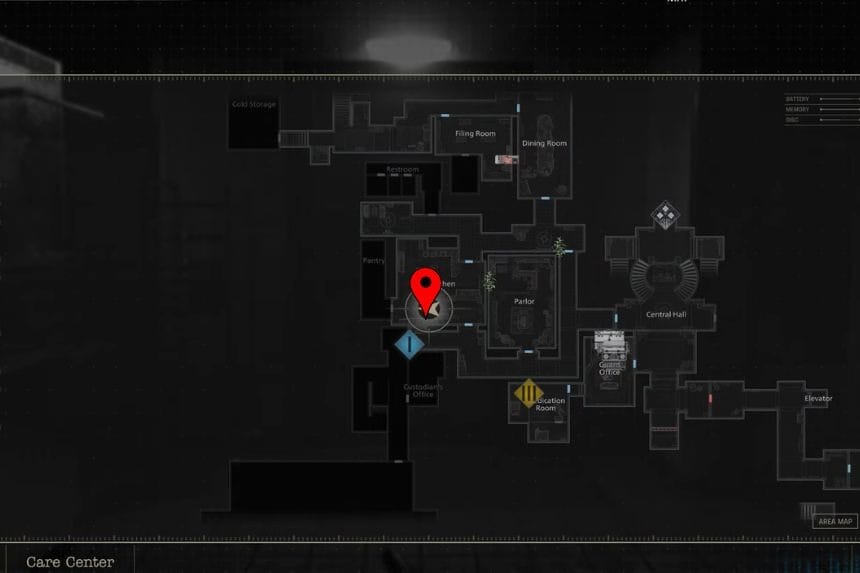
Trophy: Order Up! & Pantry Key – Kitchen
To get this trophy and the Pantry Key, defeat the Chef in the Kitchen area. He’s the large enemy carrying a cleaver. On Casual difficulty, one headshot with the Requiem pistol and 4–5 headshots with any other pistol will take him down. On higher difficulties, you may need more ammo—so if you’re low, come back later once you’ve stocked up.
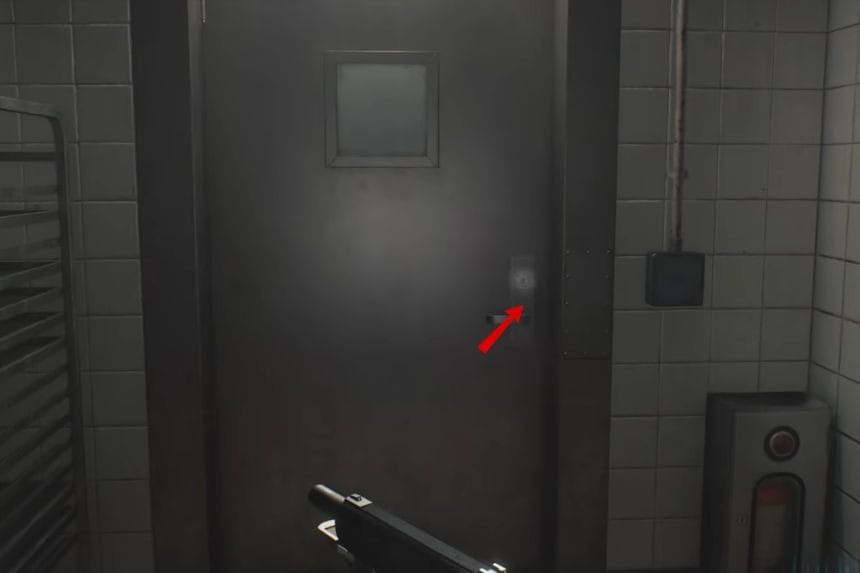
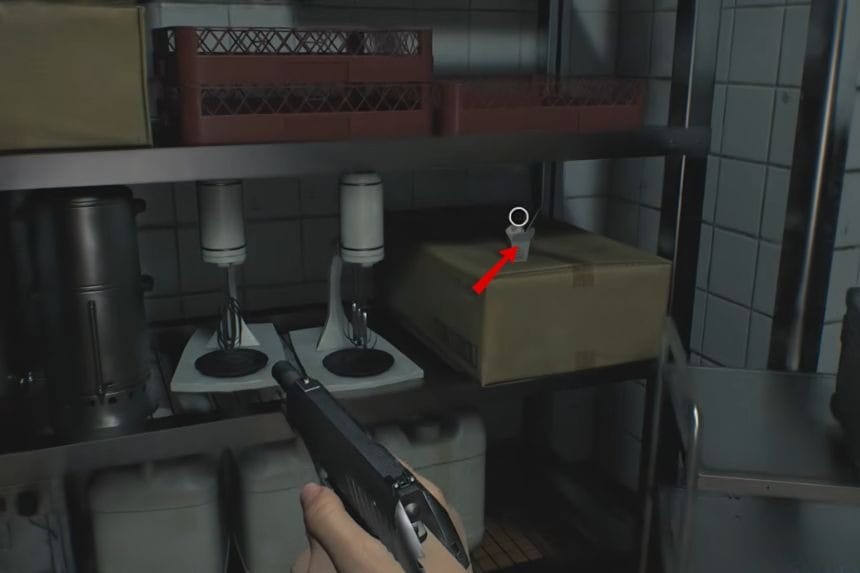
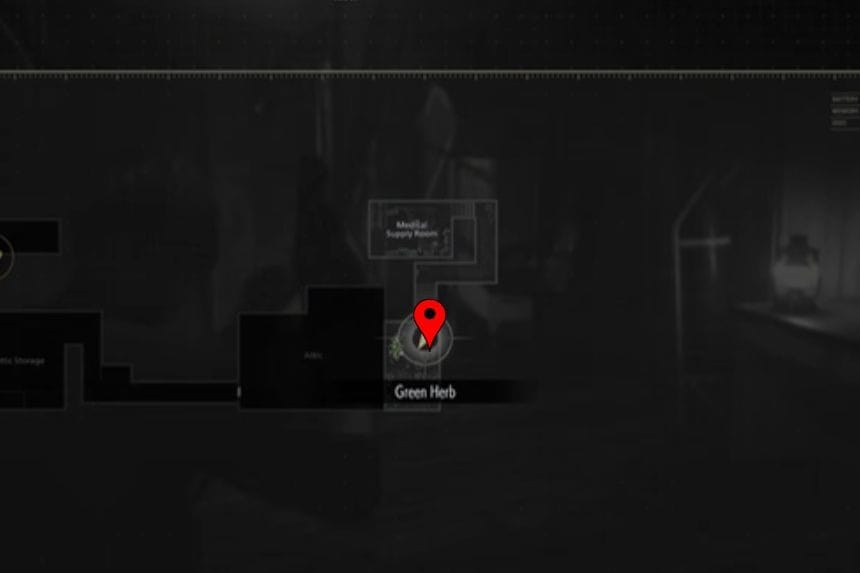
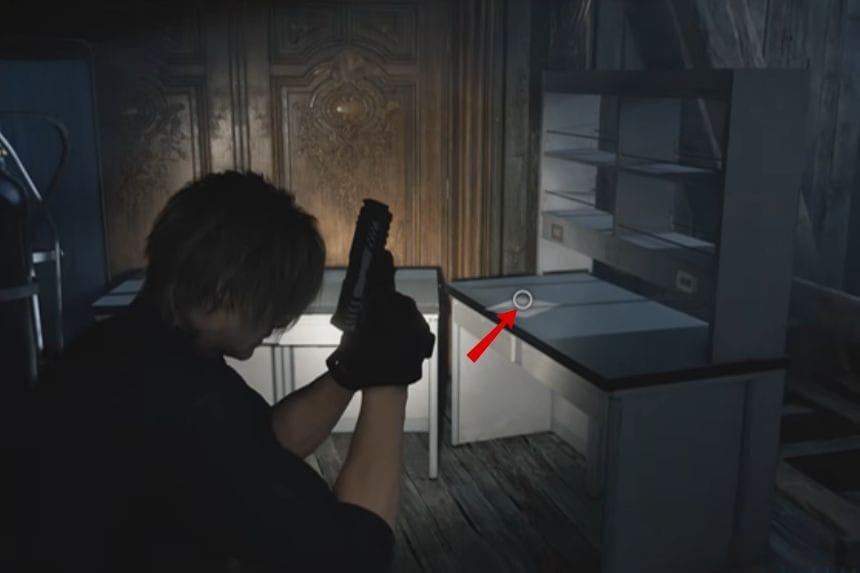
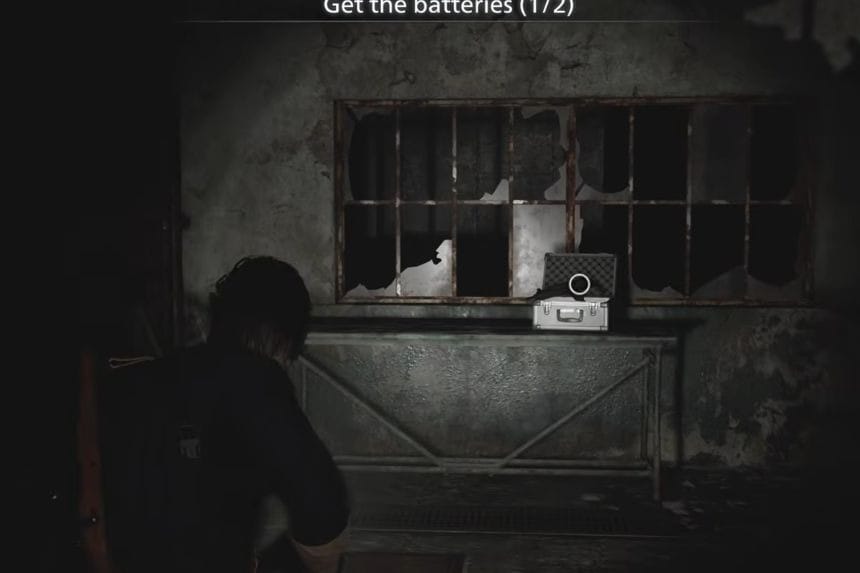
Charm: Stakeout Takeout – Pantry
Use the Pantry Key on the door in the Kitchen to enter the Pantry. Inside, at the back of the room, you’ll find the Stakeout Takeout Charm. There’s also a lockbox with ammo here. If you weren’t able to defeat the Chef earlier, come back now to grab both the Charm and the supplies.
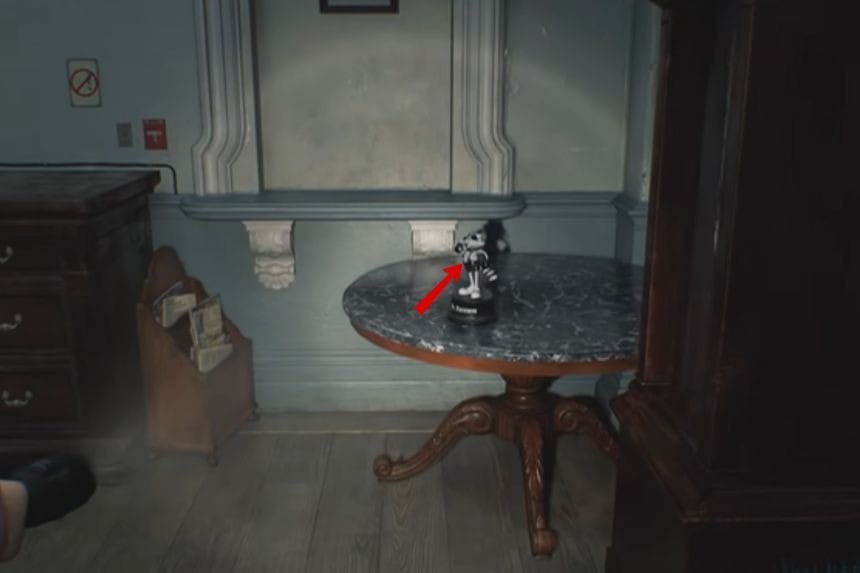
Mr. Raccoon #2 – East Wing Lobby

Go to the Central Hall and use the East Wing Keycard on the door to the East Wing. Inside the lobby, you’ll find Mr. Raccoon #2 sitting on the reception desk, ready to be collected.
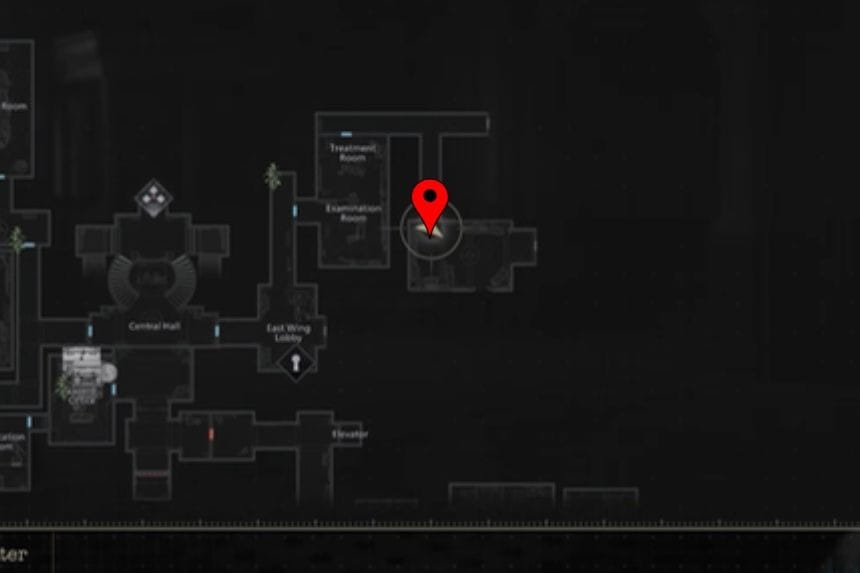
Trophy: Fatal Dose – Examination Room
In the Examination Room, pick up the Hemolytic Injector from the white desk. While remaining crouched in stealth, sneak up to the nearby zombies. Press the action button (:r2: / :rt:) from behind to use the Injector on a zombie, instantly killing it and unlocking the Fatal Dose trophy. There’s a zombie with its back turned directly to the left of where you found the Injector—use this opportunity to stay undetected.
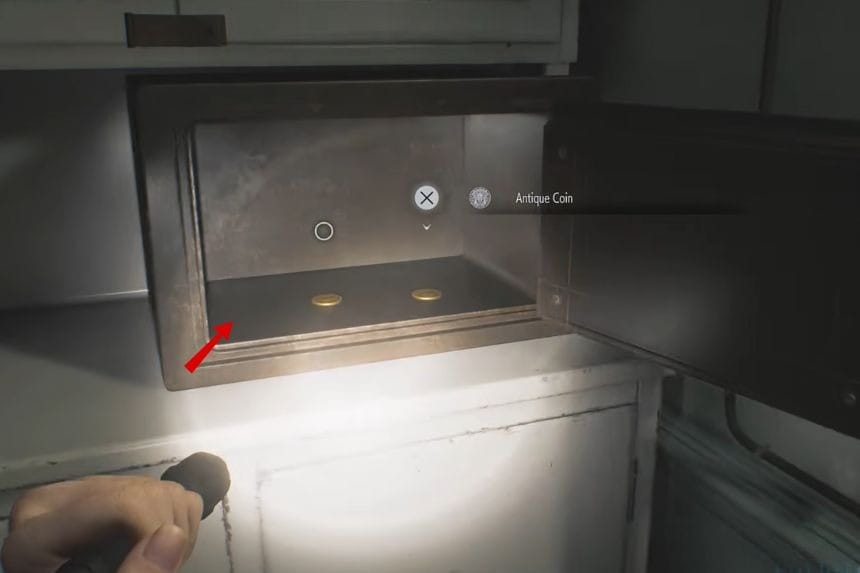
Safe #2 & Antique Coins #10–#12 – Examination Room

In the Examination Room, check the corner cabinet to find Safe #2. Inside the safe are three Antique Coins (#10–#12).
On Casual difficulty, the combination is Right 30 – Left 10 – Right 50.
On Insanity difficulty, the combination is Left 50 – Right 30 – Left 90.
Normally, you’d discover the code later in File #26 – Examination Room Safe Code, but if you already know the combination, you can open it now.
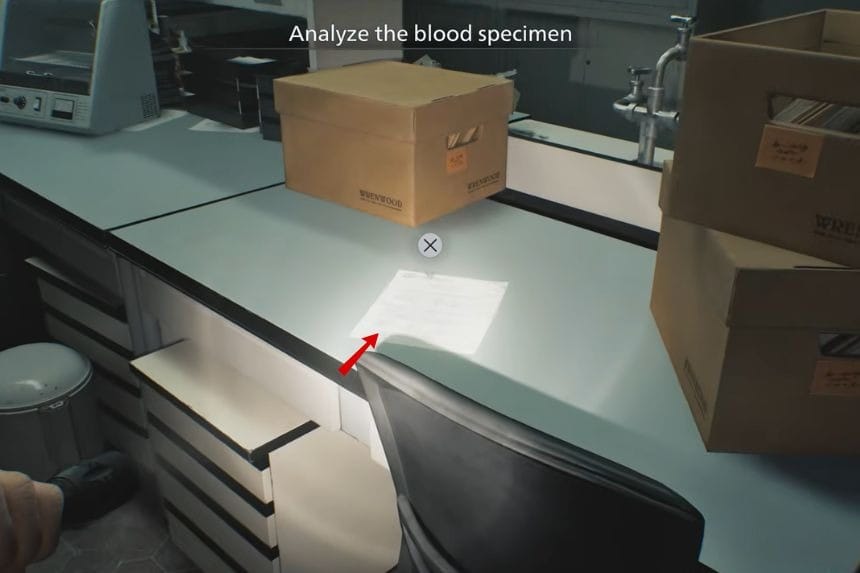
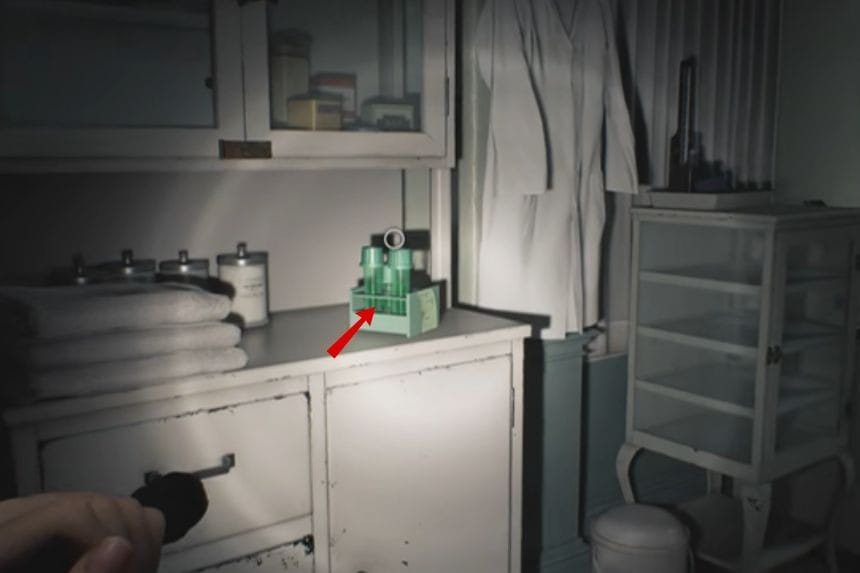
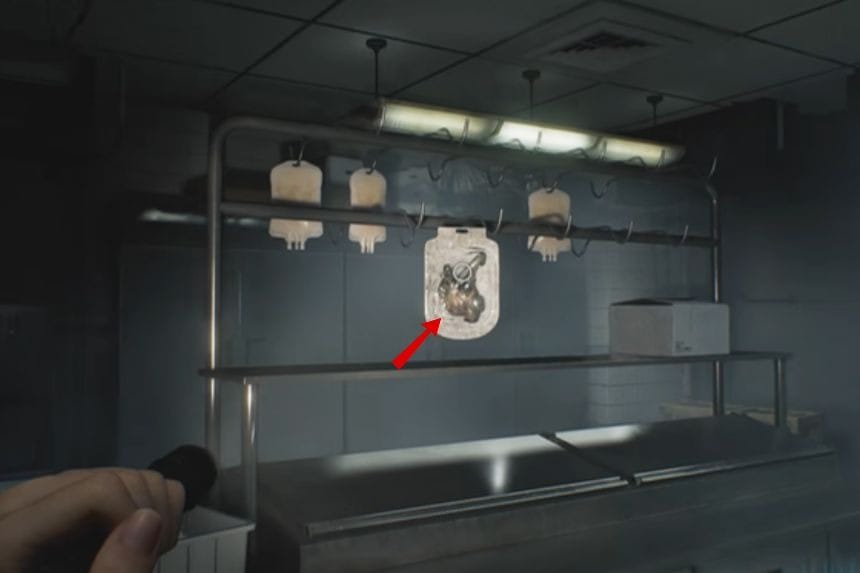
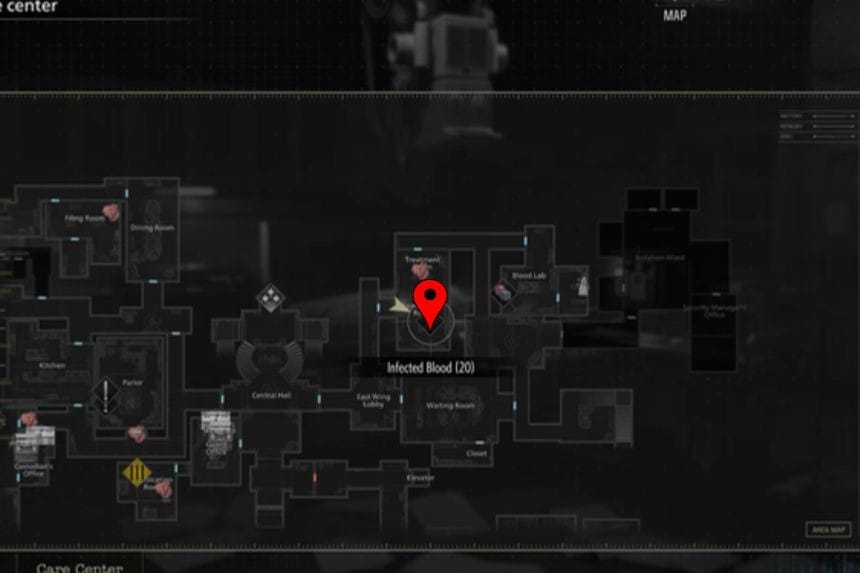
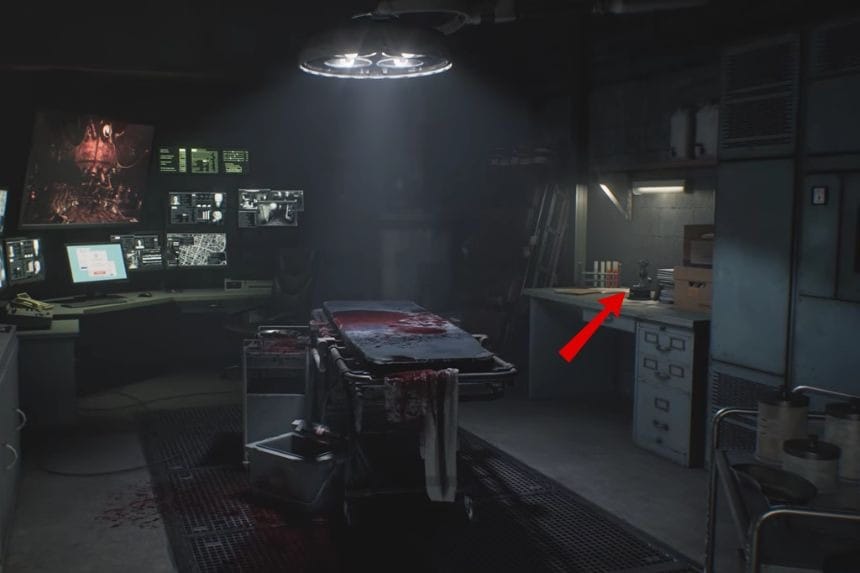
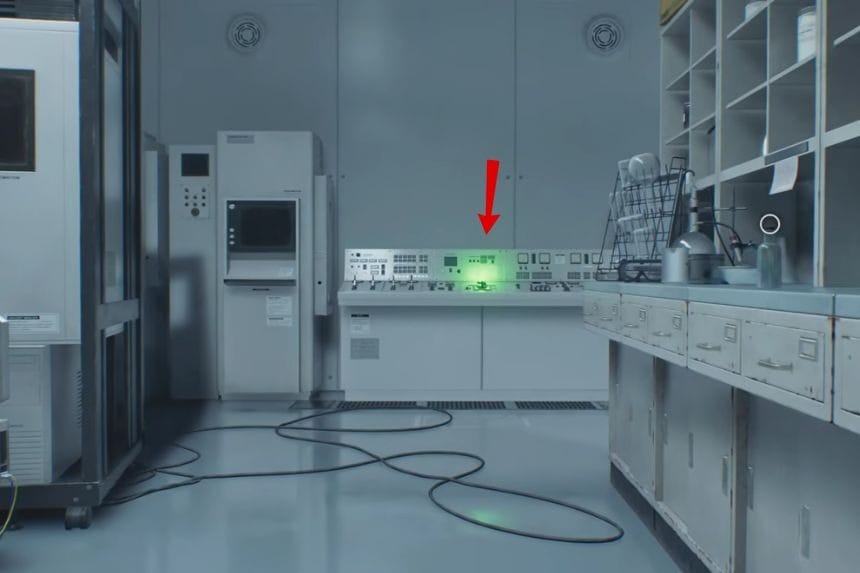
Blood Collector – Blood Lab
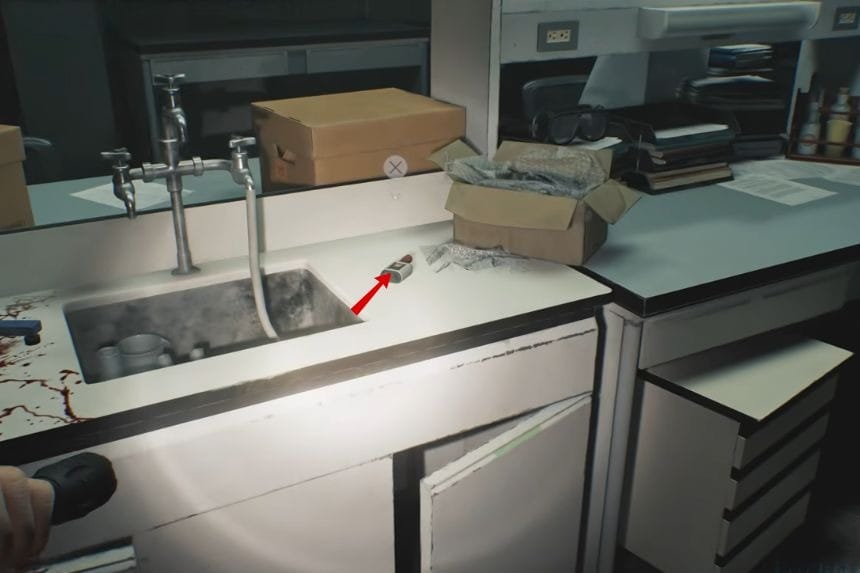
After leaving the Treatment Room, follow the corridor to the Blood Lab at the end. On the table, you’ll find the Blood Collector, which is a key item for interacting with blood samples and progressing crafting.
File #15 – Blood Compound Synthesis
In the same room, on the other side of the table, you’ll find File #15 – Blood Compound Synthesis. Reading this gives you important notes on blood properties and lab experiments.
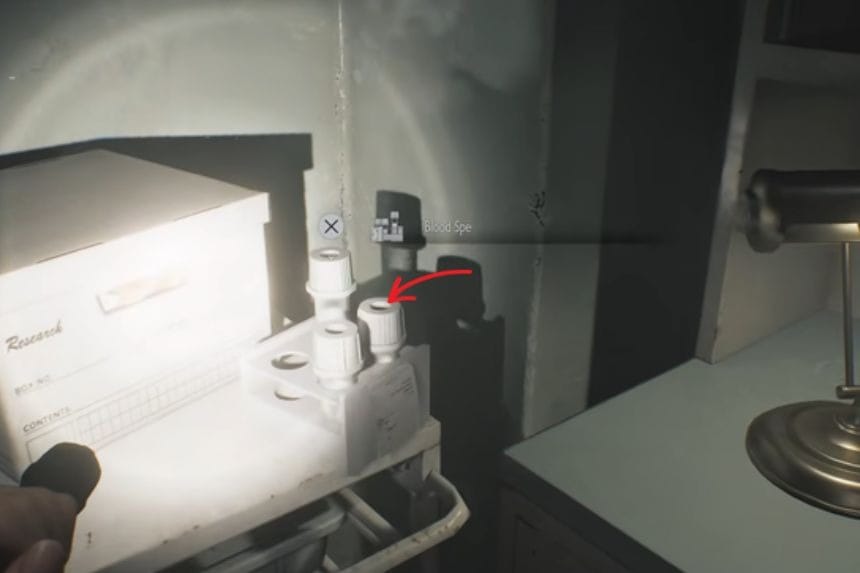
Blood Specimen (Denatured) – Purple
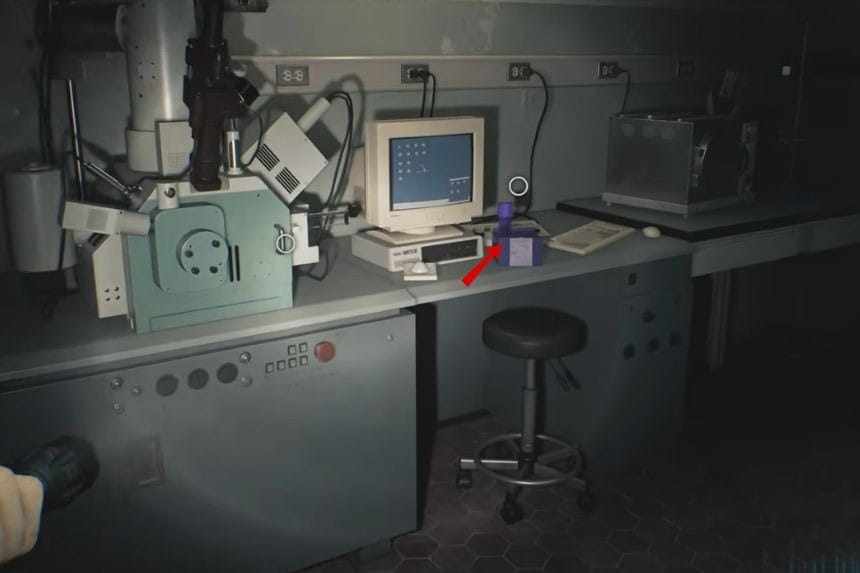

Interact with the purple blood sample on the desk. Use it on the Analyzer right next to it, and adjust the atoms until they’re all red. Doing this unlocks crafting recipes for Handgun Ammo and the Hemolytic Injector, giving you new tools for combat and survival.
Trophies: Science! & The Power of Blood

Once you use the Analyzer to unlock the crafting recipes, you’ll automatically earn the Science! trophy.
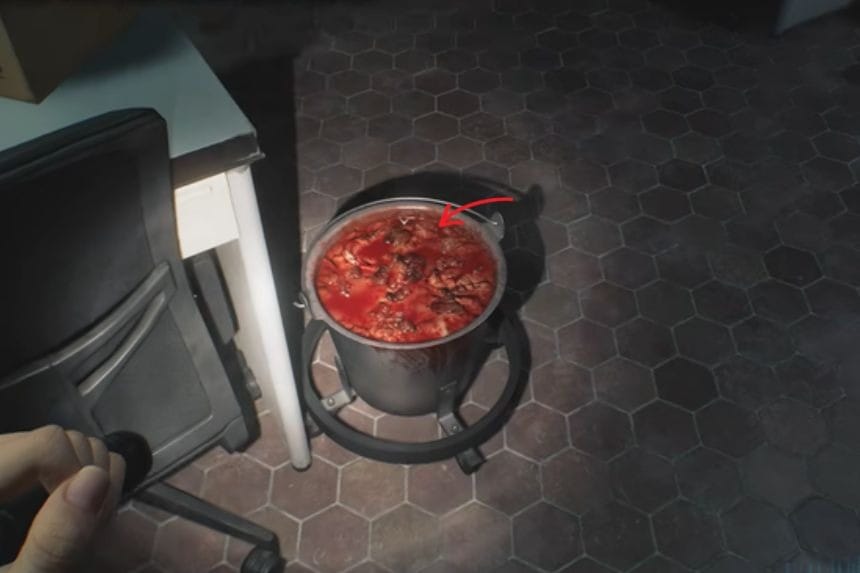
To unlock The Power of Blood, interact with the blood bucket on the floor—or use blood from defeated zombies—then press the Touchpad to access the Crafting Menu. Craft Handgun Ammo to claim the trophy. If you need Scrap for crafting, there’s some available in a locker in the same room.
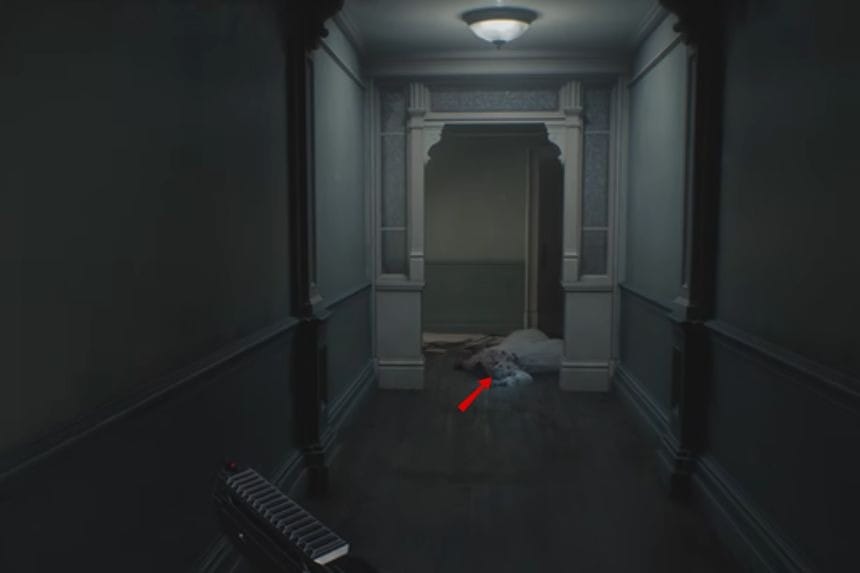
Trophy: Internal Dispute – Hospital Wards
Before attempting this trophy, make sure you have the Empty Bottle from the Dining Room in your inventory. It’s also a good idea to make a manual save, because this trophy can be tricky and may take several tries. If you fail, you’ll need to reload your save.
From the Blood Lab, head south until you reach the red-lit corridor. Three zombies will appear—take them out quickly. Then enter the Waiting Room through the door on the right.
Inside, your goal is to make the blind zombie in the white gown attack the maid zombie in the black dress. To do this:
- Destroy the first vase on the right in the room.
- Hide in the corner—this will lure both zombies toward the destroyed vase.
- When they are standing next to each other, throw the Empty Bottle at the maid zombie.
- The blind zombie will then attack the maid, unlocking the Internal Dispute trophy.
Important tips:
- Make sure neither zombie hears your footsteps, or they’ll chase you instead.
- Don’t let the maid zombie leave the room.
- If you accidentally kill either zombie before triggering the trophy, you’ll need to reload your save and try again.
Antique Coin #13 – Waiting Room

When you enter the Waiting Room, you’ll find Antique Coin #13 sitting on the table right in front of you.
File #16 – Safe Replacements & Coins #14-#15
In the same room, next to the open safe behind the counter, you’ll find File #16 – Safe Replacements. Inside the safe itself, there are two more Antique Coins (#14 and #15), located directly beside the file.
Mr. Raccoon #3 – East Corridor
Head east down the corridor from the Waiting Room, just before going upstairs, and you’ll spot Mr. Raccoon #3 waiting for you.
Antique Coin #16

Next to Mr. Raccoon, on a small table, you’ll find Antique Coin #16.
East Wing Map – Upstairs
From the location of Mr. Raccoon, go upstairs. The East Wing Map is mounted on the wall, helping you navigate the upper floors with ease.
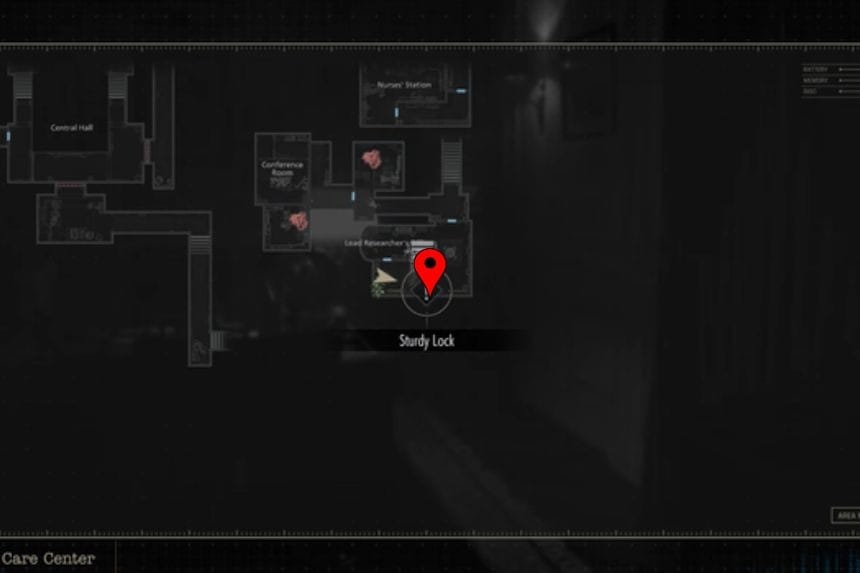
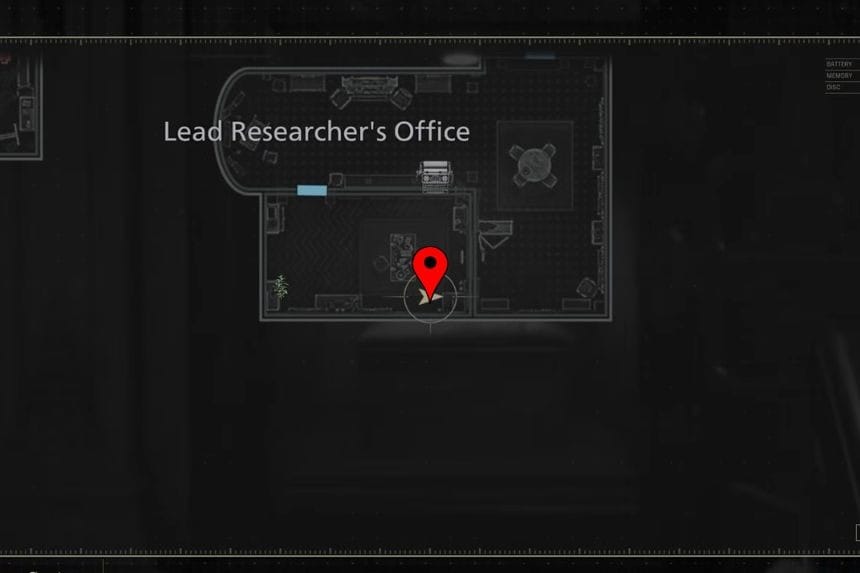
Lead Researcher’s Office Files – Upstairs Safe Room
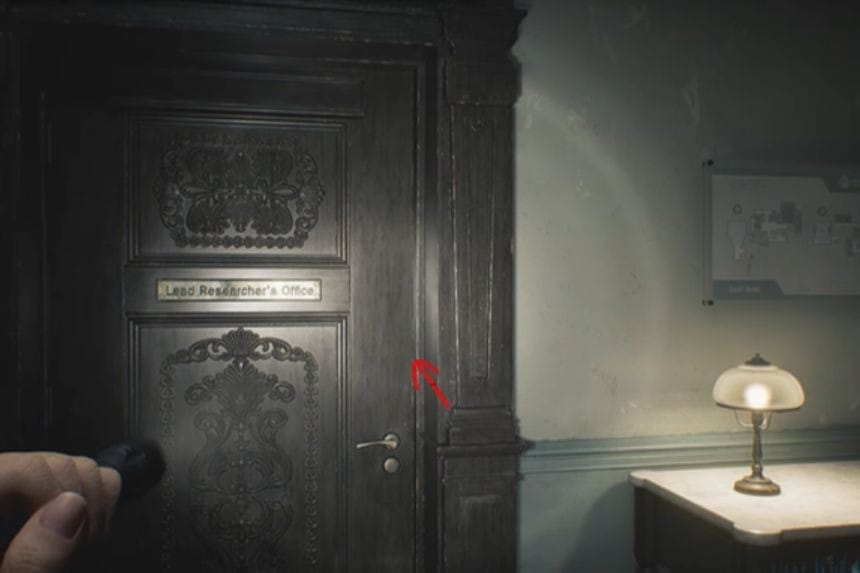
In the Lead Researcher’s Office, there’s a safe room upstairs with several important files:
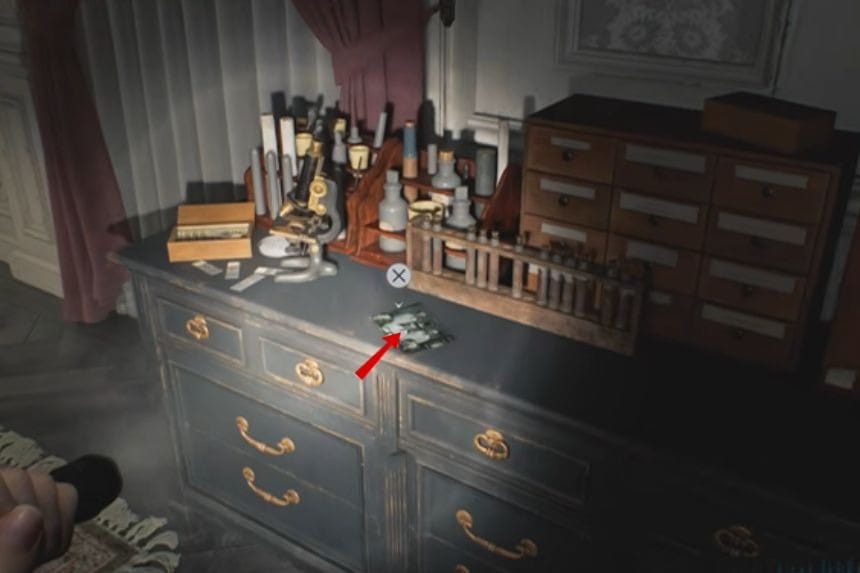
File #17 – Lead Researcher’s Picture 2: Found in the back room, on a cupboard.
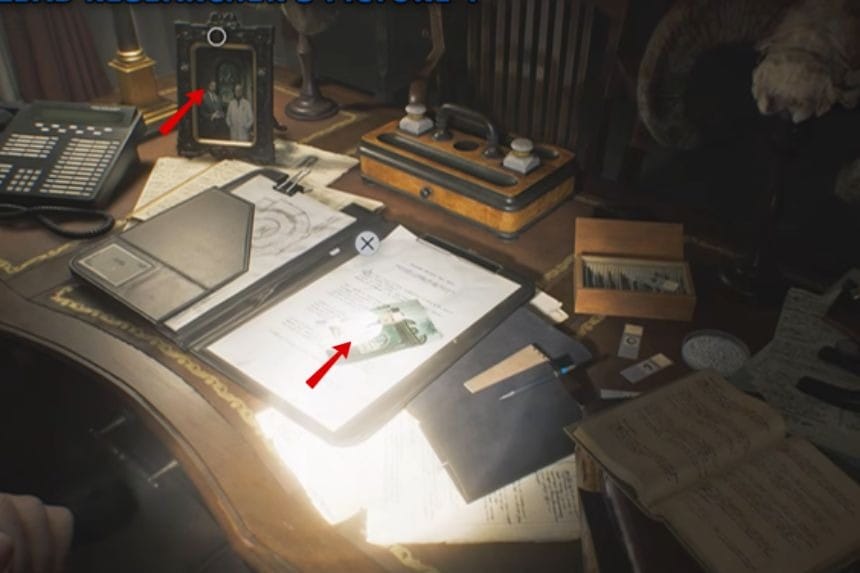
File #18 – Lead Researcher’s Picture 1: On the desk in the same room.
File #19 – Lead Researcher’s Picture 3: Also on the desk, in a framed picture.
File #20 – Lead Researcher’s Message: On the other cupboard in the same office.
These files give more context about the research team and the experiments happening in the East Wing.
Trophy: Like Mother, Like Daughter – Lead Researcher’s Office
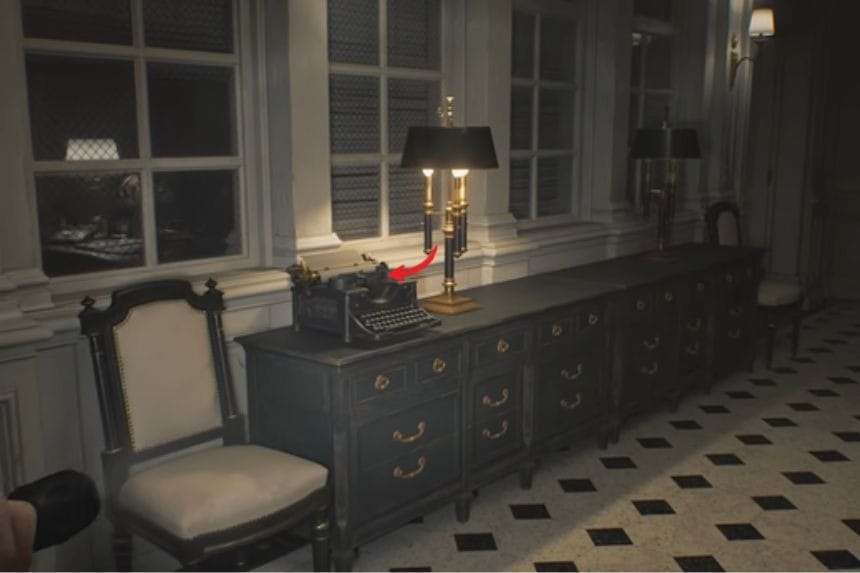
In the Lead Researcher’s Office, pick up the Lockpick to the left of the typewriter. You can use this on any locked drawer, such as one in the East Wing Lobby. Opening a drawer will also give you a Rare Metal, which is useful for crafting x2 Requiem ammo—essential for defeating the Chunk in the next trophy. It’s a good idea to collect this now so you’re prepared.
Key Item: ID Wristband (Level 1) – Corridor
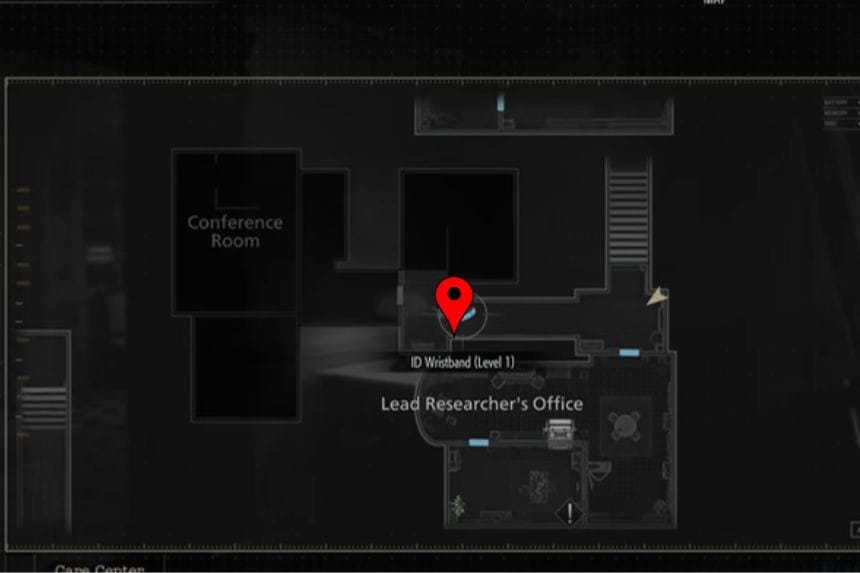
Just outside the Lead Researcher’s Office, in the corridor, you’ll find the Level 1 ID Wristband. This allows you to open all the blue Level 1 doors, giving you access to new areas and items.
Trophy: Grace and Goliath + Charm: Eye Spy Charm
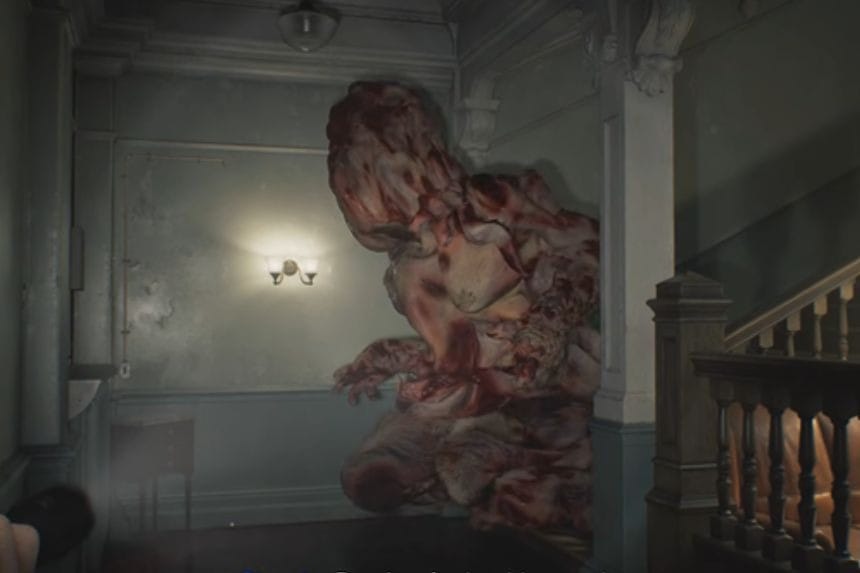
After picking up the wristband, the Chunk enemy will appear. Defeat it to earn the Grace and Goliath trophy and the Eye Spy Charm, which drops when the enemy dies.
On Casual difficulty, it can be defeated with either:
- 1 headshot with the Requiem and 15 headshots with the S&S M232, or
- 3 headshots with the Requiem alone.
You can also use Injectors on it if needed. If you’ve been thorough with looting and crafting, you should already have enough ammo. If not, make sure to come back after crafting more Requiem ammo—the guide will remind you before leaving the area.
Blood Specimen (Converged) – Green – Closet

After getting the ID Wristband, go downstairs and use a Level 1 door in the Waiting Room to reach the Closet. Inside, pick up the Green Converged Blood Specimen. Bring it back to the Blood Lab and use it on the Analyzer to unlock crafting recipes for the Med Injector and 12.7x55mm Ammo.
File #21 – Victor’s Journal Entry – Blood Lab
Backtrack to the Blood Lab and use the Level 1 door to enter a new room. On a table inside, you’ll find File #21 – Victor’s Journal Entry, which provides additional story details about the experiments and Victor’s work.
Blood Specimen (Reversible) – White – Blood Lab
In the same Blood Lab room, pick up the White Reversible Blood Specimen. Use it on the Analyzer to unlock crafting recipes for Steroids and the Stabilizer, both of which are valuable upgrades for survival and combat.
Upgrade: Hip Pouch – Filing Room
Finally, backtrack to the Filing Room in the West Wing. Behind a Level 1 door, you’ll find the Hip Pouch upgrade, which increases your inventory space—always useful for carrying more items and crafting materials.
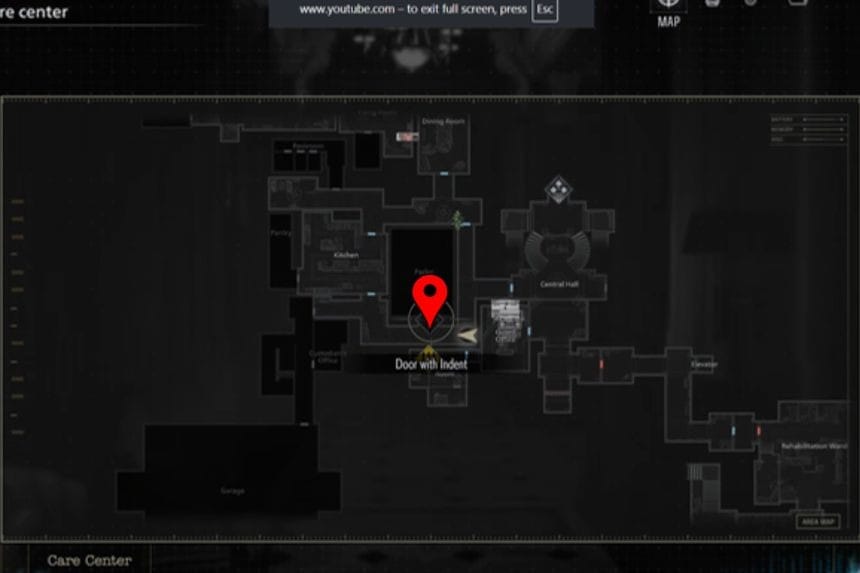
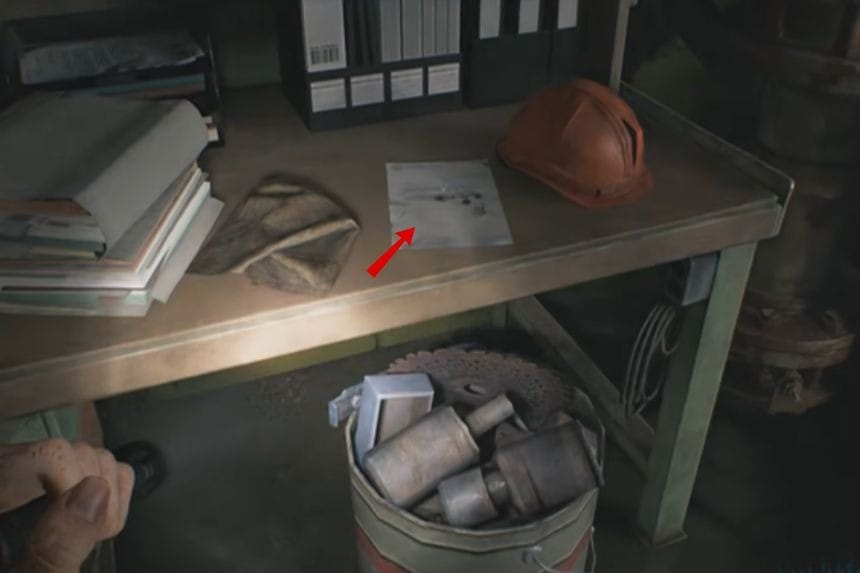
File #22 – Construction Notice – West Wing

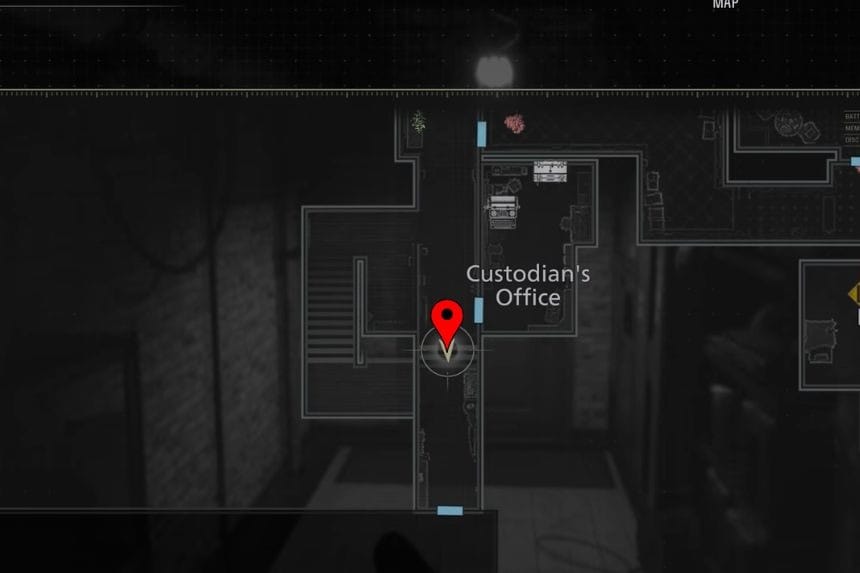
In the West Wing, head south from the Kitchen and open the Level 1 locked gate. In the next corridor, check the whiteboard on your right, next to the Custodian’s Office on the map, to find File #22 – Construction Notice. This file provides information about ongoing construction and blocked areas in the West Wing.
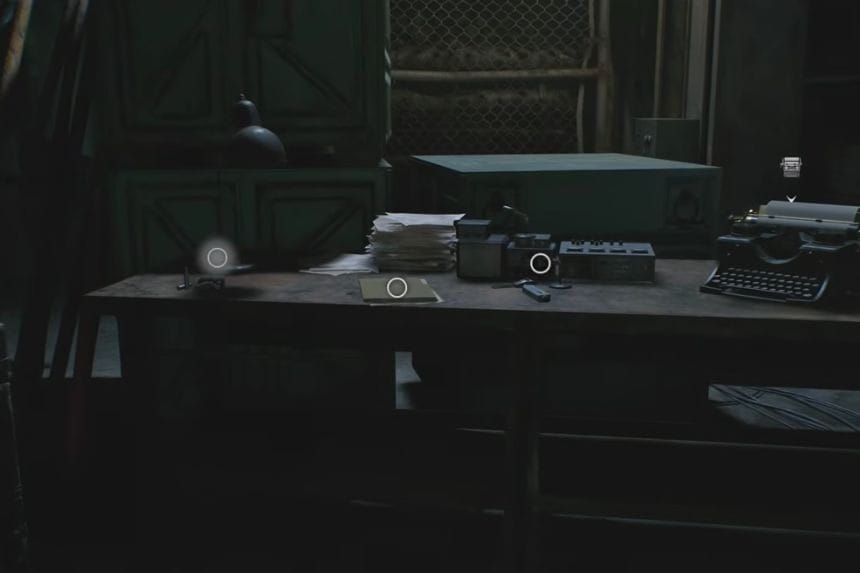
Key Item: Wrench – Custodian’s Office
Inside the Custodian’s Office, there’s a safe room next to the typewriter. Open it to find the Wrench, which you’ll need to access certain locked doors and interact with machinery.
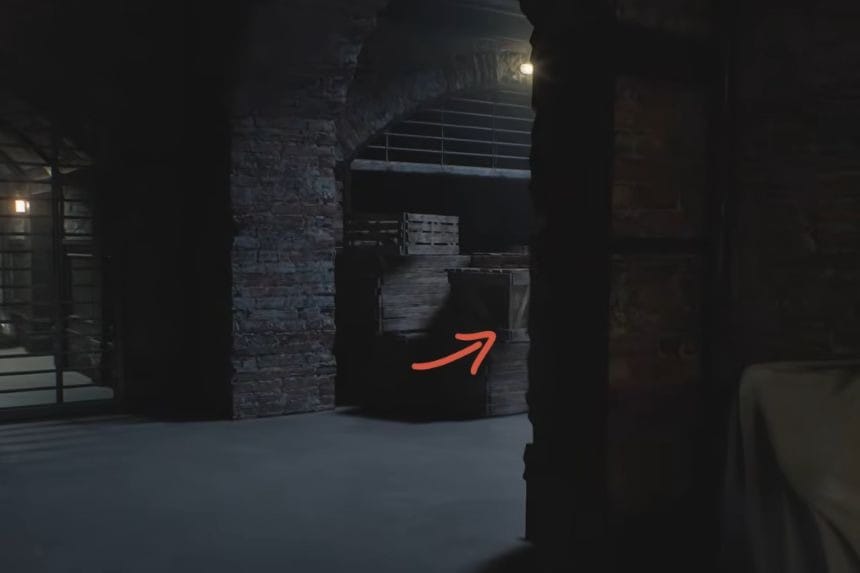
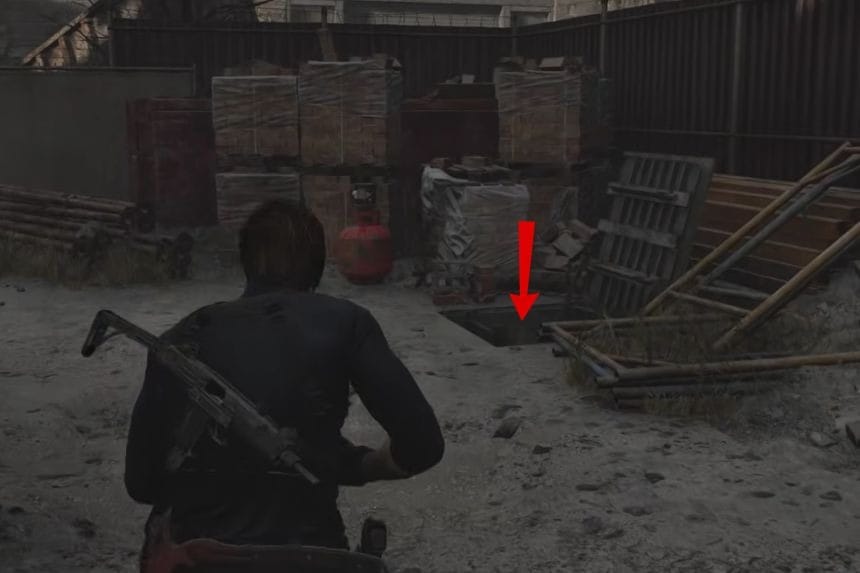
Key Item: Organ Transport Box – Garage
Go to the Garage, and at the end, on the back of a truck, you’ll find the Organ Transport Box. This is a key item required for later objectives.
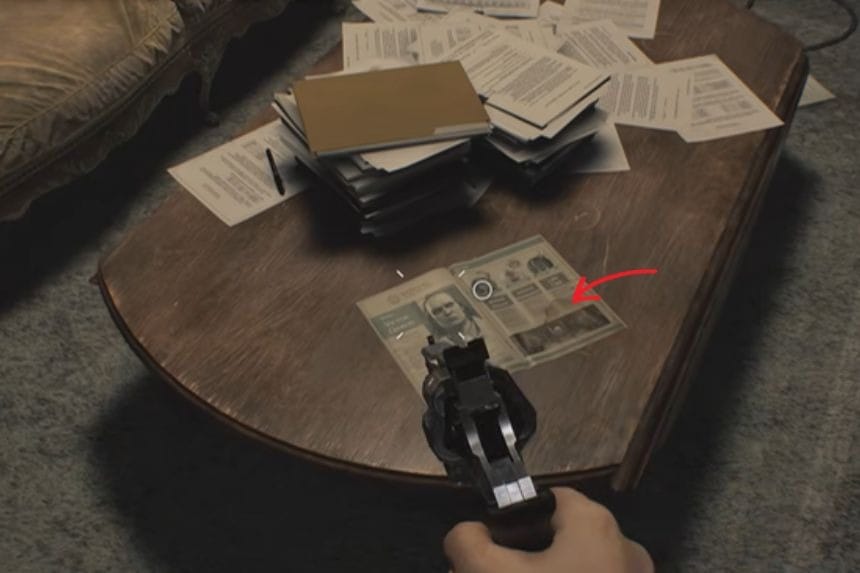
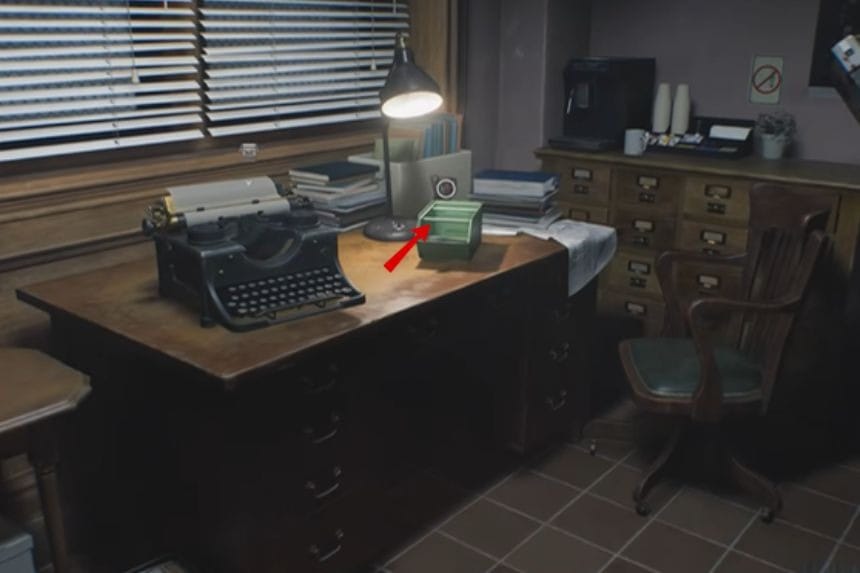
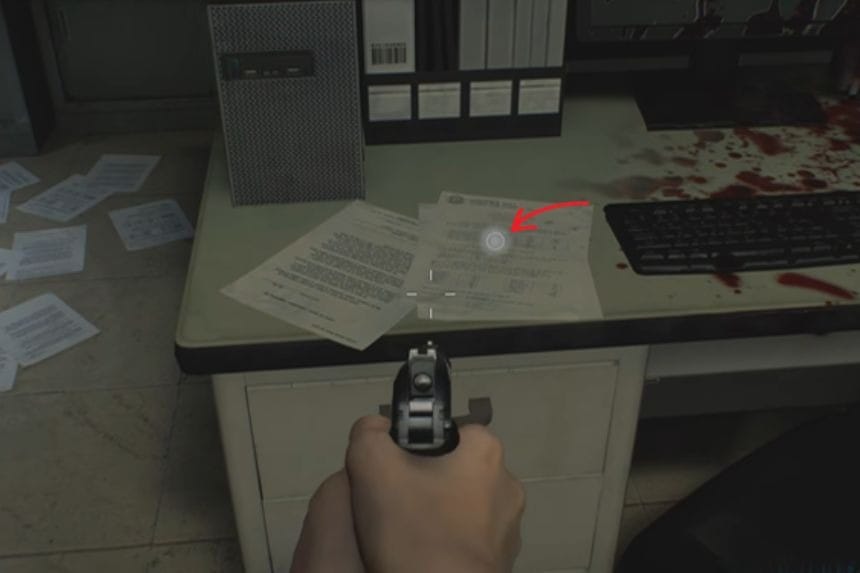
File #23 – Bar & Lounge Safe Code – Office
After leaving the garage, go upstairs to the Office. On the first desk, you’ll find File #23 – Bar & Lounge Safe Code. This provides the combination for the safe you may have opened earlier in the Bar & Lounge (Left 10 – Right 80 – Left 30).
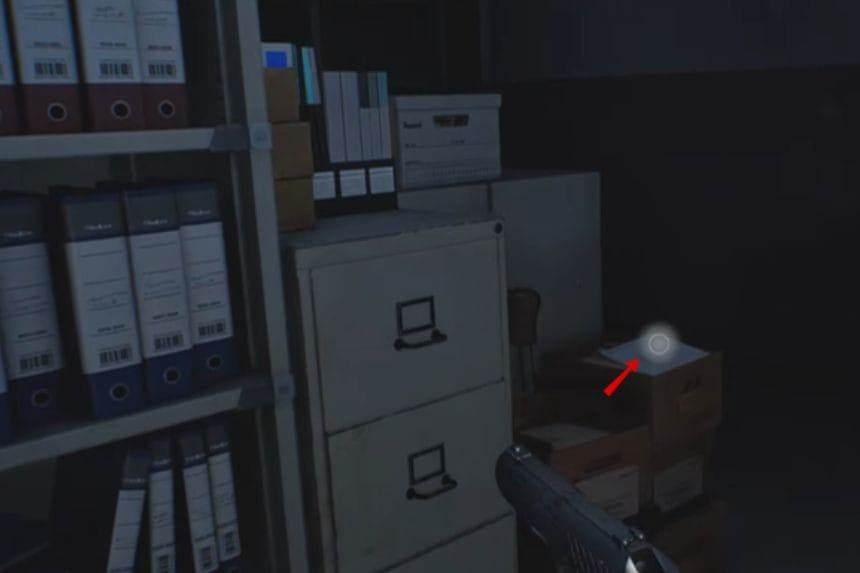
File #24 – Background Check – Office

In the same Office, check the desk in the back right corner to pick up File #24 – Background Check, which gives details on employees and personnel.
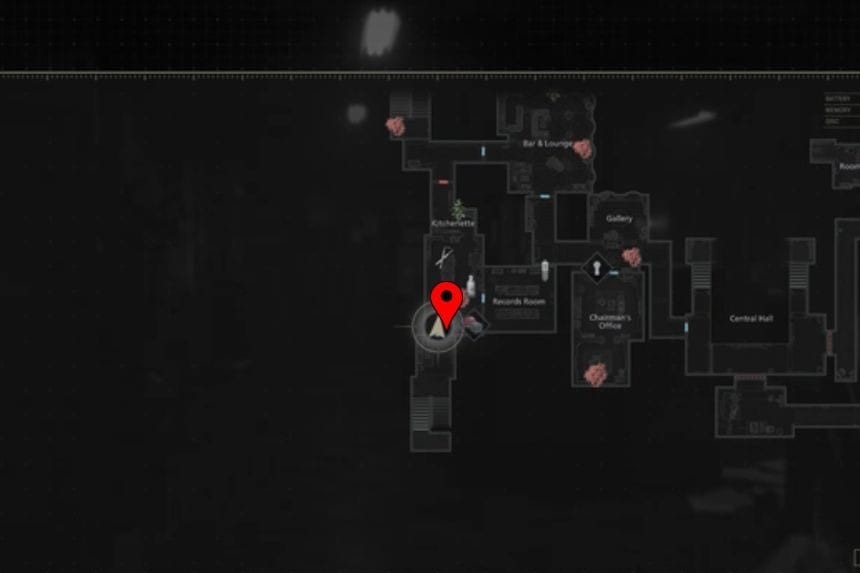
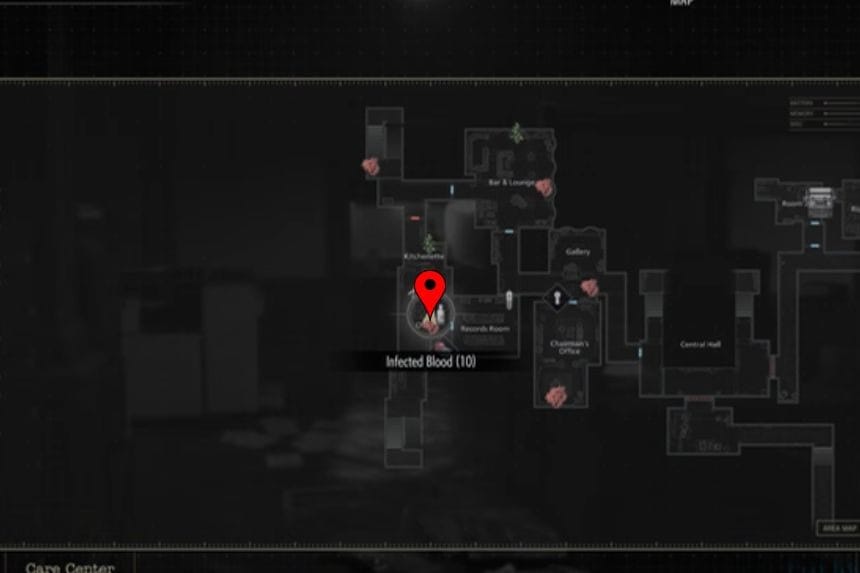
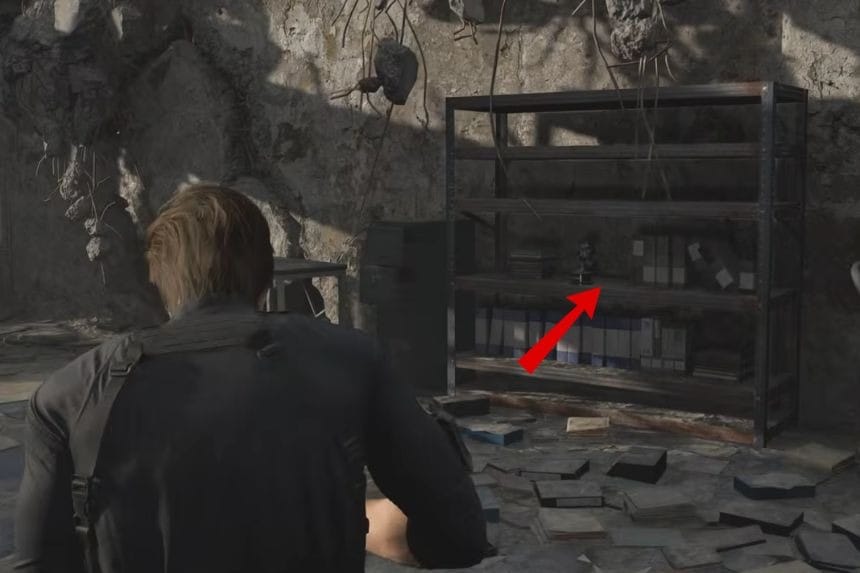
File #25 – Disposal Team Report – Records Room

From the Office, enter the Records Room on the right. At the end of the middle row of shelves, you’ll find a cardboard box containing File #25 – Disposal Team Report. While there, you may hear a Mr. Raccoon in the closet, but this one cannot be collected yet—you’ll need to backtrack later.
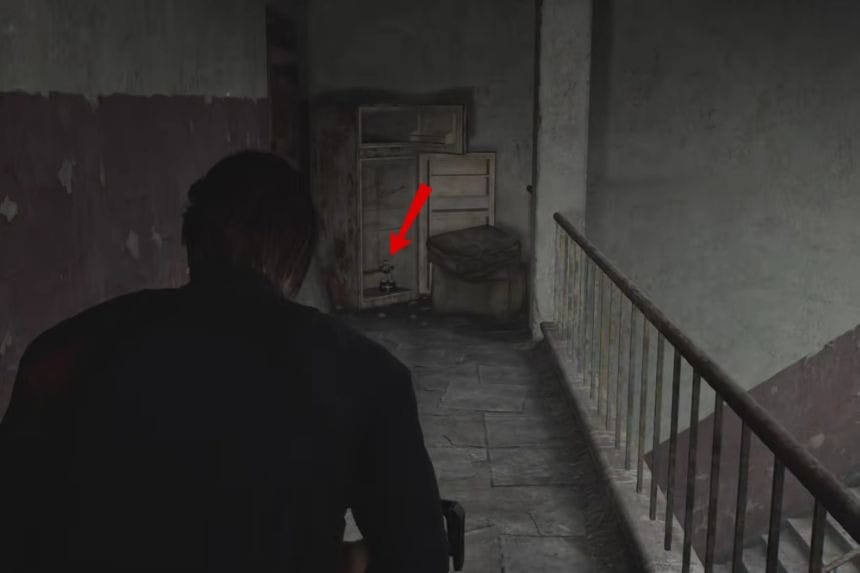
Mr. Raccoon #4 – Kitchenette
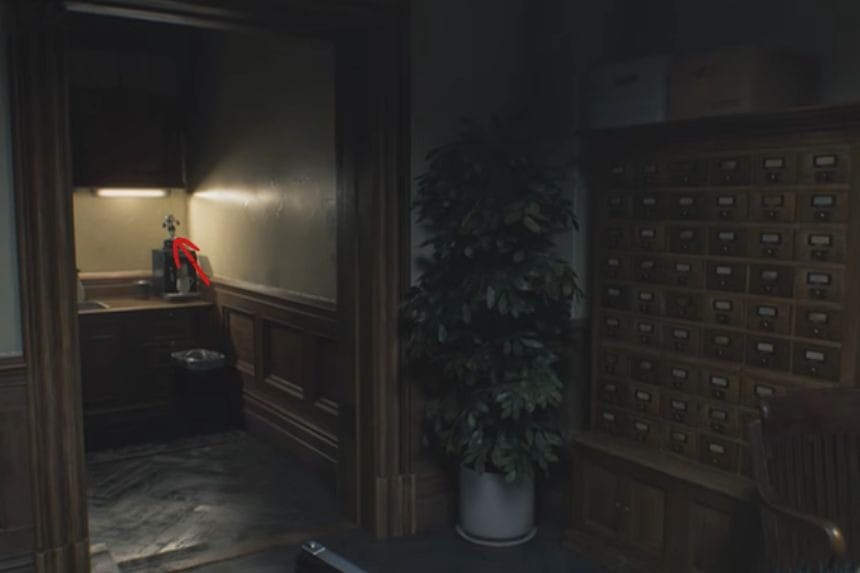
Take the northern exit from the Office to reach a small Kitchenette/coffee break room. Mr. Raccoon #4 is sitting next to the sink, ready to be picked up.
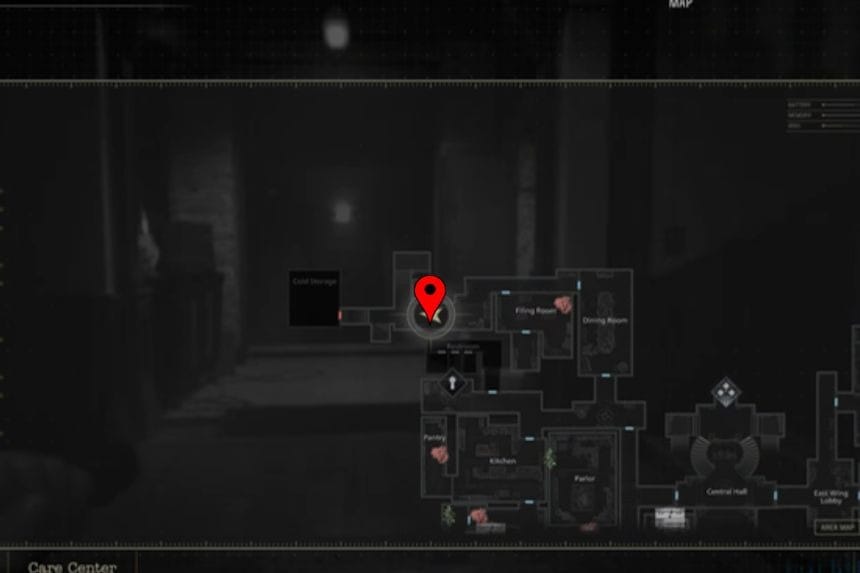
Key Item: Artificial Heart – Cold Storage
Go to the north-west corner of the West Wing (1st floor) and use the Wrench on the door to enter the Cold Storage. Inside, you’ll find the Artificial Heart, a key item required for later objectives and puzzles.
File #26 – Examination Room Safe Code – East Wing 2nd Floor

Backtrack to the East Wing 2nd Floor, where you first encountered the big Chunk monster and collected the Level 1 ID Wristband. In the room where the Chunk appeared, check a locker to find File #26 – Examination Room Safe Code. This file reveals the combination for Safe #2 (Right 30 – Left 10 – Right 50), which you may have already opened.
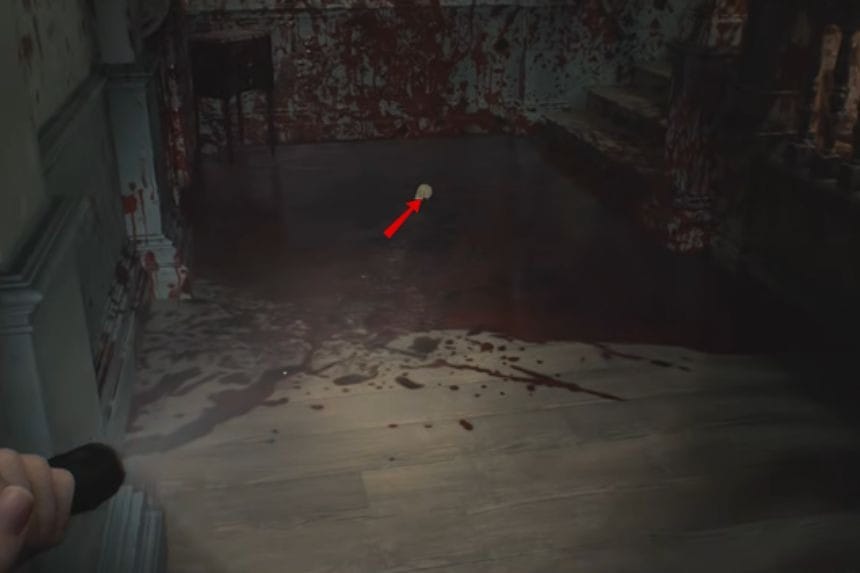
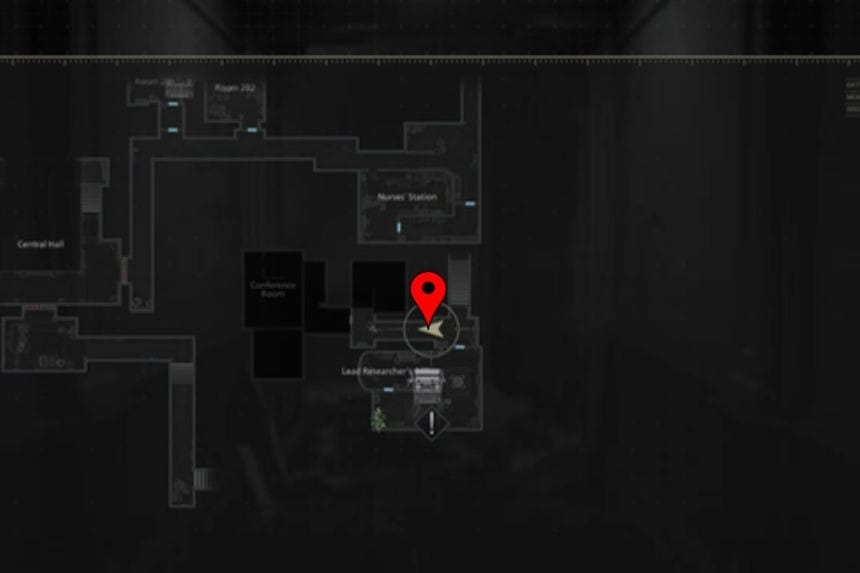
Antique Coin #17 – Conference Room
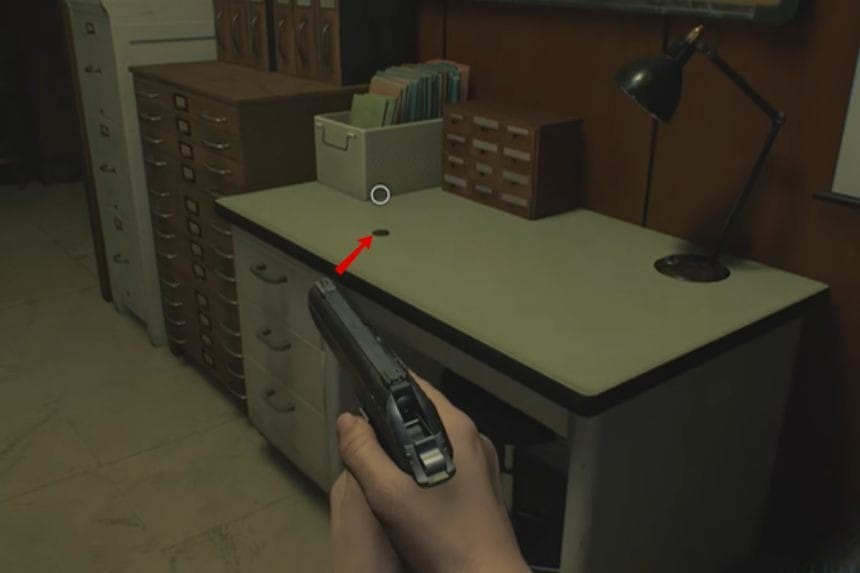
From the locker, enter the Conference Room, which is right next door. On a white desk inside, you’ll find Antique Coin #17.
Trophy: Deadly Duet – Conference Room & Bar & Lounge
To earn the Deadly Duet trophy, you need to defeat two singing zombies:
- The first one is in the Bar & Lounge (2nd floor of the West Wing), which you probably already killed.
- The second one is in the Conference Room—take it out now.

After defeating the Conference Room zombie, it will drop Antique Coin #18.
File #27 – Patient Medical Records – Conference Room
In the same Conference Room, on a desk near the singing zombie, you’ll find File #27 – Patient Medical Records, which provides further context on the patients in the facility.
Key Item: Corrosive – Conference Room
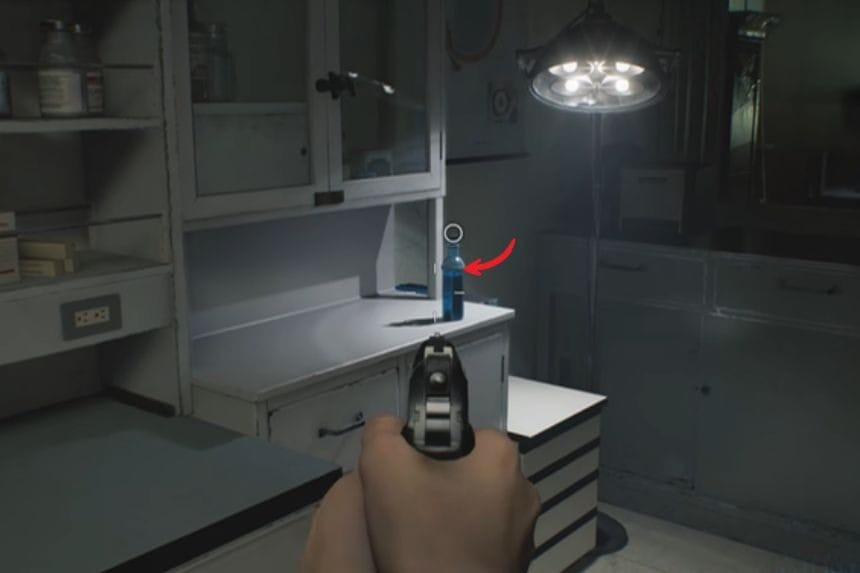
Also in the Conference Room, pick up the blue Corrosive bottle, which is a key item for unlocking locked puzzle boxes later.
Unlocking the Organ Transport Box – File #28
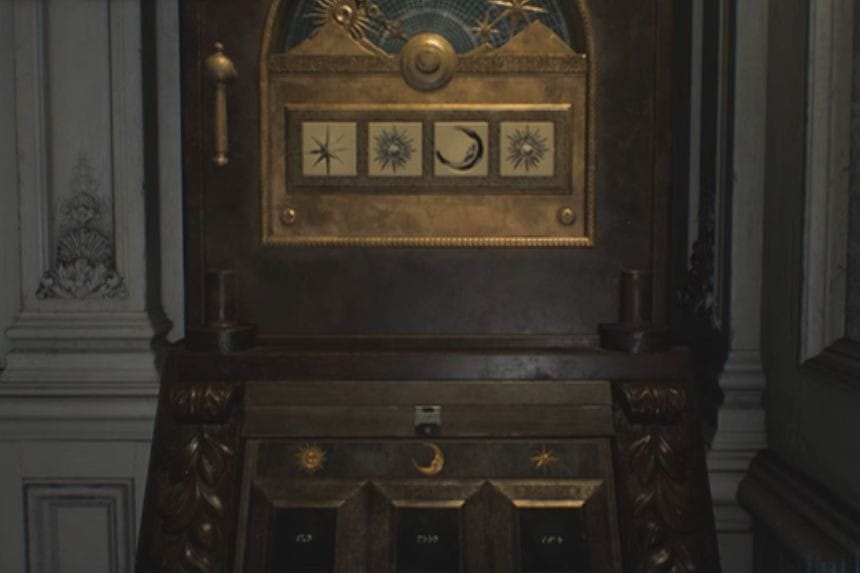
Return to the backroom of the Lead Researcher’s Office. Interact with the padlock on the Puzzle Box and use the Corrosive to open it. Inside, you’ll find File #28 – Unlocking the Organ Transport Box.
Casual Puzzle Solution: Star – Sun – Moon – Sun
Spencer’s Research I – File #29

In the same Puzzle Box, you’ll also find File #29 – Spencer’s Research I, contained in a leatherbound notebook.
Sun Quartz – Lead Researcher’s Office
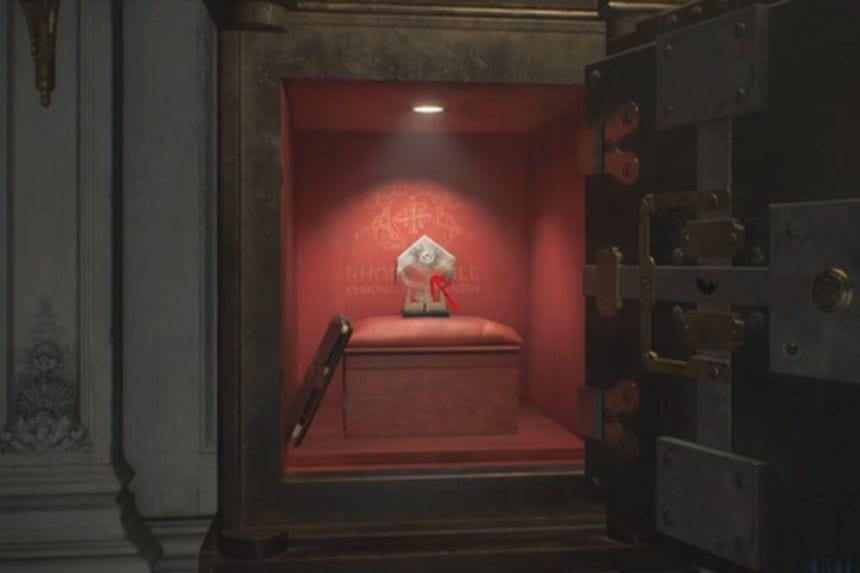
The Puzzle Box also holds the Sun Quartz, a key item that you’ll use later on the Quartz Door in the Central Hall.
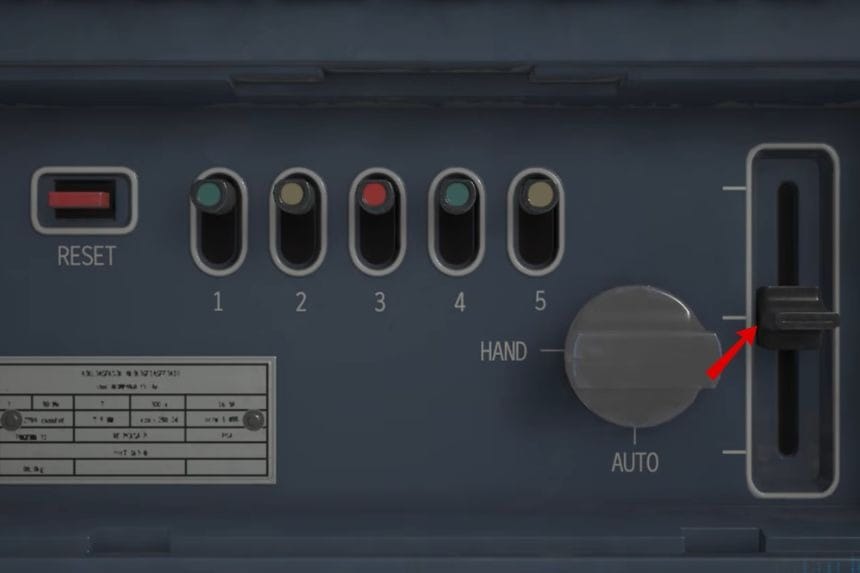
Key Item: Artificial Lungs – Organ Transport Box
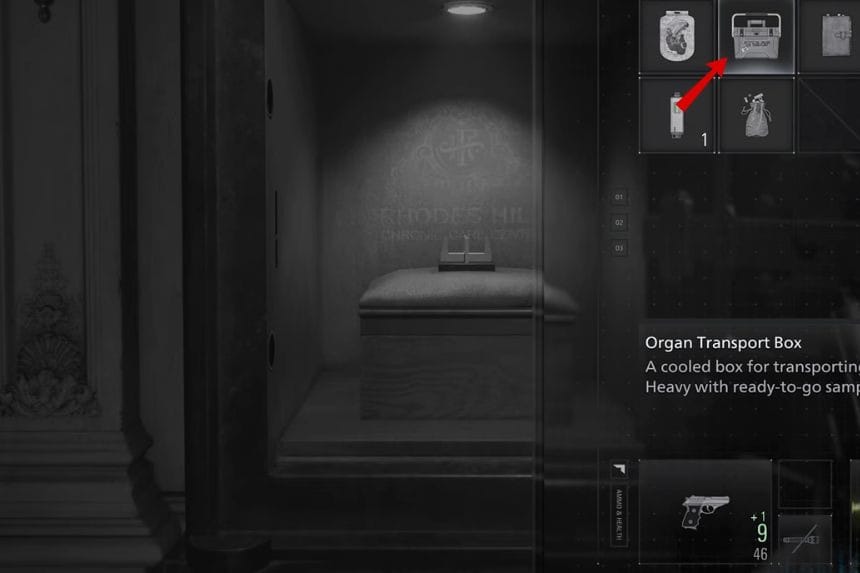
Finally, examine the Organ Transport Box in your inventory. Turn it around and interact with the back panel to retrieve the Artificial Lungs.
Solution for Opening the Box:
- Set the bottom right switch to HAND.
- Adjust the right switch to the middle level.
- Press Button 5, then Button 2.
- Set the bottom right switch back to AUTO.
- Take out the Artificial Lungs.
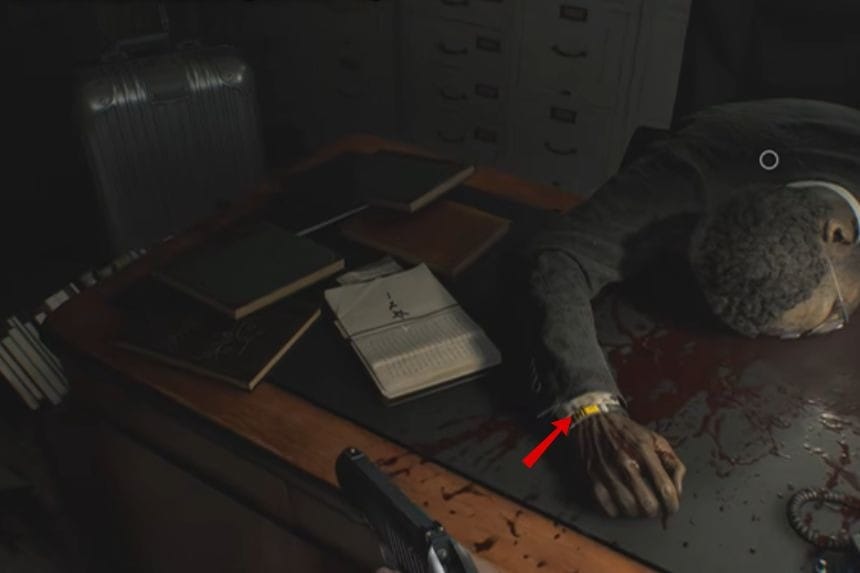
Key Item: ID Wristband (Level 2) – Examination Room
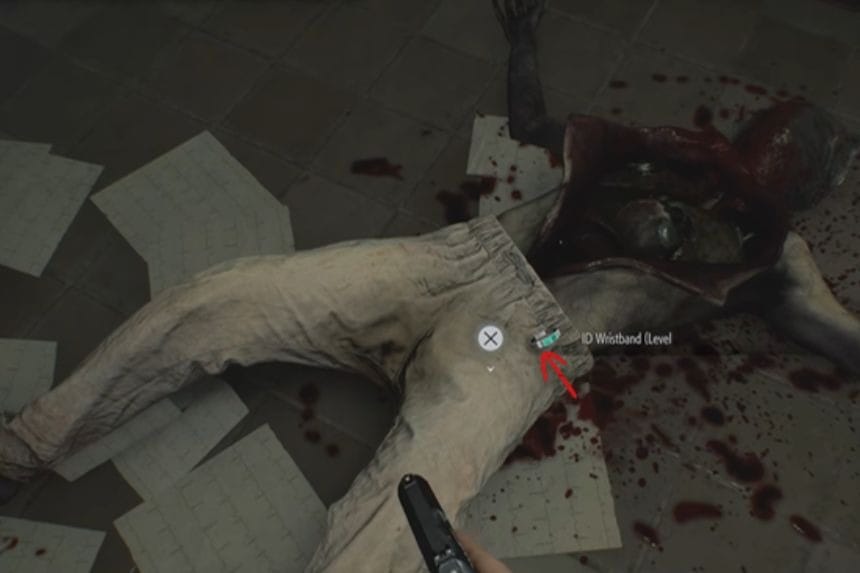
In the East Wing Examination Room, you’ll encounter an Organless Corpse. Use the Artificial Heart and Artificial Lungs on it, then defeat the resulting zombie. After the fight, loot the Level 2 ID Wristband from the corpse. This wristband allows access to new locked doors in the East Wing.
File #30 – Double Mutation – Isolation Ward

With the Level 2 ID Wristband, go to the green lock door in the north-east corner of the East Wing, between the Blood Lab and the Waiting Room. This opens the Isolation Ward. Inside, enter the office on the right to find File #30 – Double Mutation, sitting on a cardboard box. This file provides insights into the experiments taking place in the Isolation Ward.
File #31 – Nurse’s Log – Isolation Ward
In the same office, check the desk to pick up File #31 – Nurse’s Log, which gives additional context about the staff and patient care in the facility.
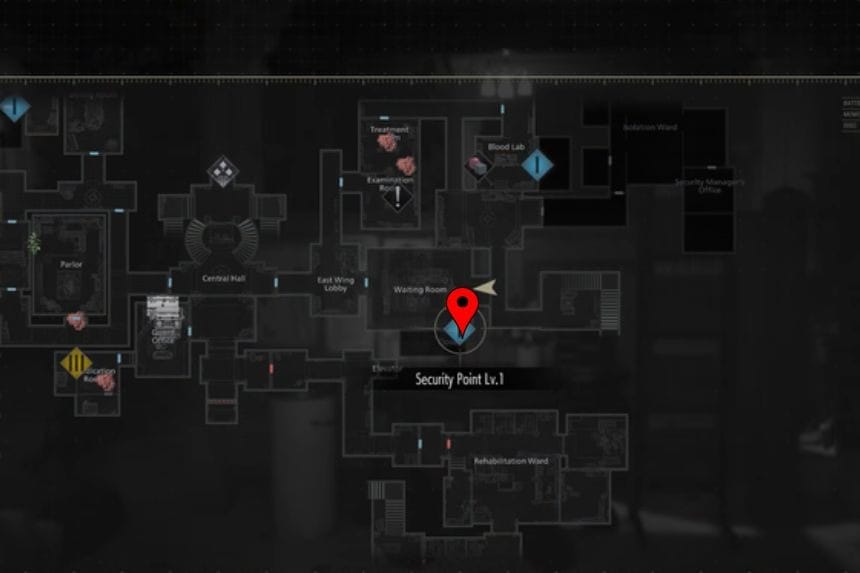
Key Item: ID Wristband (Level 3) – Security Manager’s Office
At the end of the Isolation Ward, enter the Security Manager’s Office. Interact with the note on the table and then the puzzle box to trigger a cutscene. After this, you will automatically get the Level 3 ID Wristband from the body in the room. The puzzle box itself cannot be opened yet, but the wristband gives you access to higher-level doors for future progression.
File #32 – Satiety Suppression Medical Records – Attic
When you’re playing as Leon again, head forward through the next door in the Attic. At the back of the room, opposite the cupboard you push to progress, you’ll find File #32 – Satiety Suppression Medical Records. This file provides more background on the experiments and patient treatments.
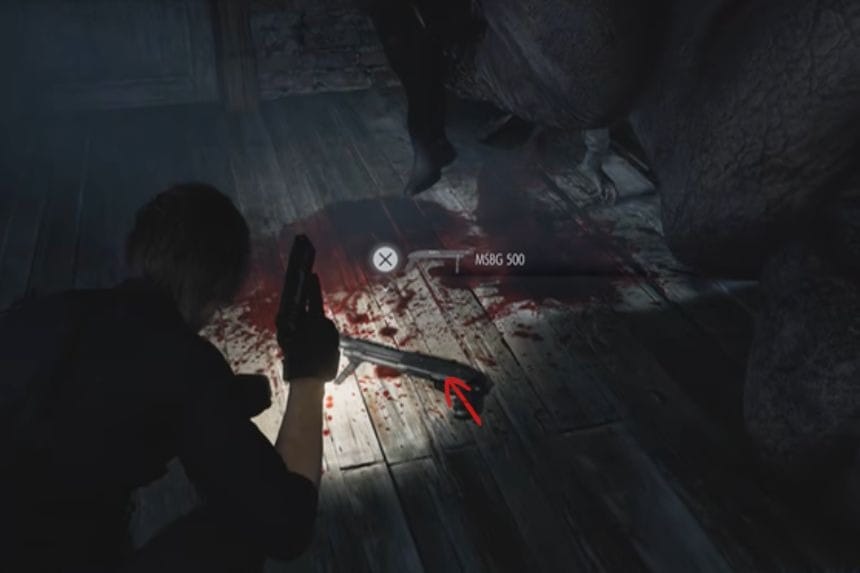
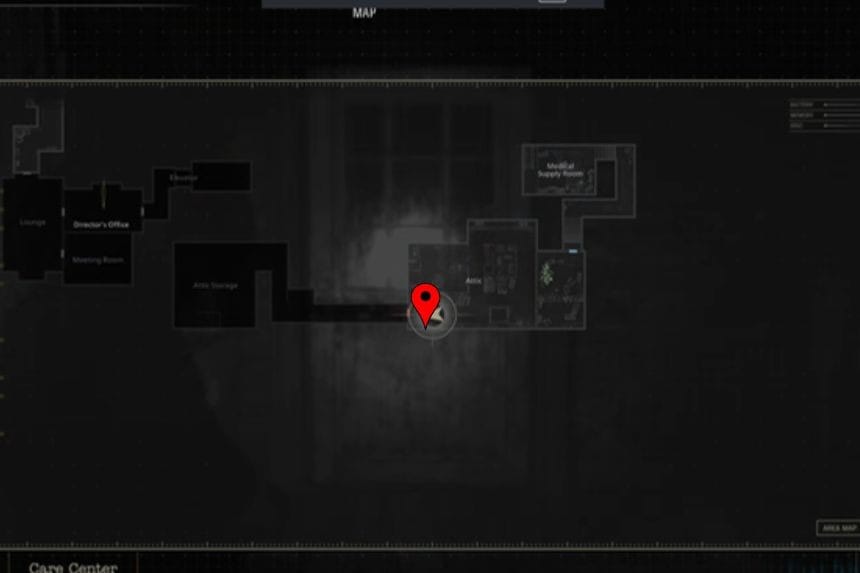
MSBG 500 (Shotgun)

On the main path in the Attic, you will find a Chunk monster. On the floor nearby, you willl find the MSBG 500 Shotgun, a powerful weapon for taking down tough enemies.
Hand Grenade
After defeating the Chunk monster, it will drop a Hand Grenade. Pick it up to use for combat or environmental interactions.
File #33 – Basement Safe Code + Weapon Part: Compensator
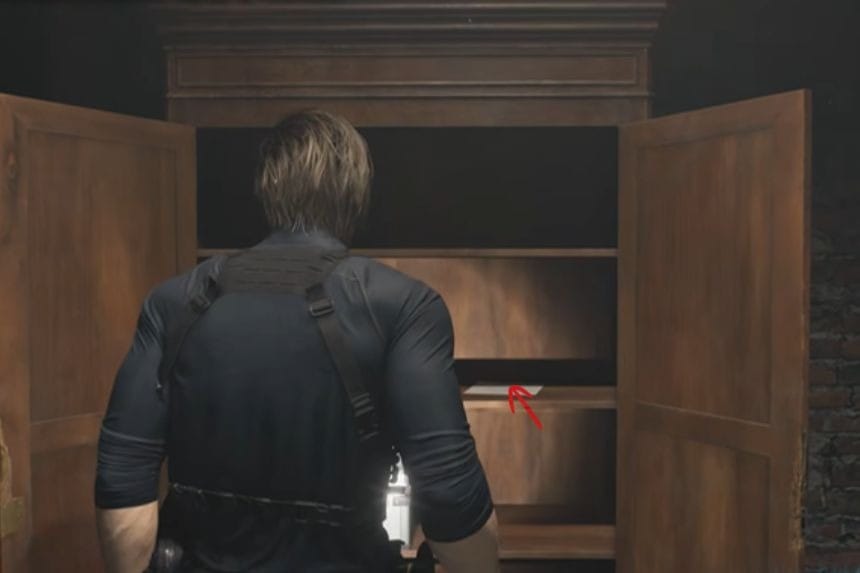
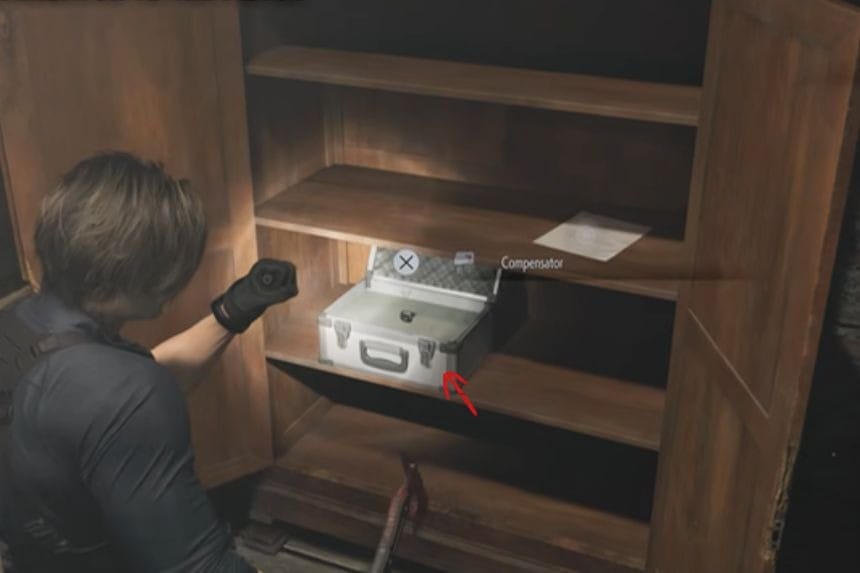
After leaving the Attic, take the first closet on the right before going downstairs. Use Leon’s Hatchet to break it open. Inside, you will find File #33 – Basement Safe Code, which gives the combination for a safe (Right 60 – Left 40 – Right 80) and a Compensator.
Trophy: Tailor Made – Weapon Upgrade
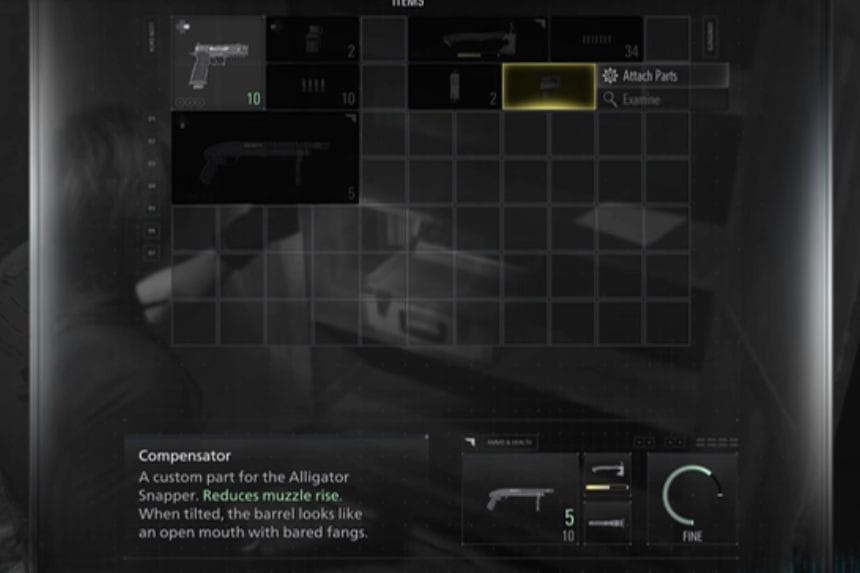
Attach the Compensator to Leon’s Pistol from your inventory to unlock the Tailor Made trophy.
File #34 – Dishwasher’s Note – Chairman’s Office Area

Head left from the Chairman’s Office and break open the closet to find File #34 – Dishwasher’s Note. This file contains notes from the facility staff.
Mr. Raccoon #6 – Records Room

In the Records Room, you will hear Mr. Raccoon #6 inside a closet. Only Leon can break it open using his Hatchet to collect the raccoon.
Charm: Connoisseur Charm – Pantry
In the Pantry, check the closet to find the Connoisseur Charm. If you didn’t get the Pantry Key as Grace by defeating the Chef, you can do it now while playing as Leon to access this room and collect the charm.
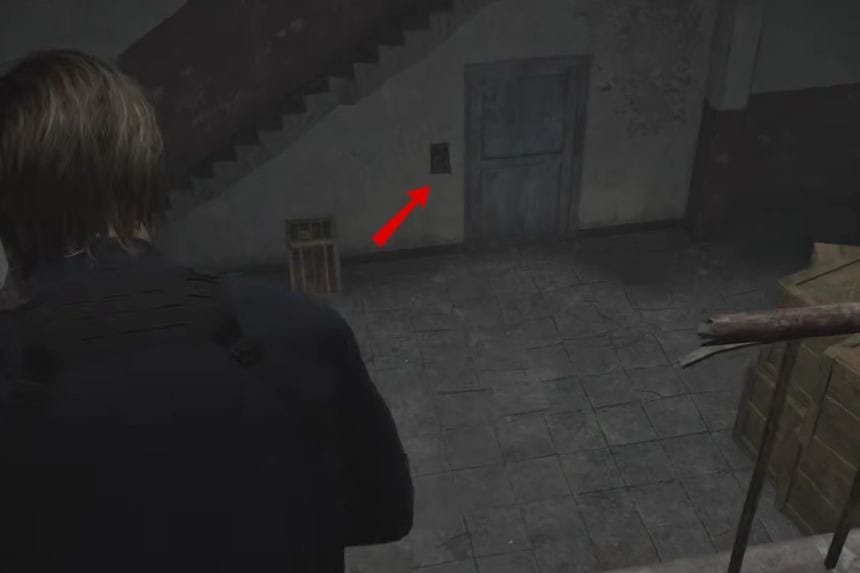
Rhodes Hill – Care Center Basement
Grace descends into the dark, damp Rhodes Hill Basement, where her first big challenge is rescuing her new companion, Emily. Along the way, she’ll face zombies locked in cells, tricky puzzles, and plenty of tense, bloody encounters before she can finally bring Emily back to safety upstairs.
File #35 – Special Directive for Raccoon City & File #36 – Report on Raccoon City Syndrome

As soon as you start playing as Grace again, you’ll automatically receive File #35 and File #36. A “New File” popup will appear in the top-right corner. You can view both files anytime from the Files menu.
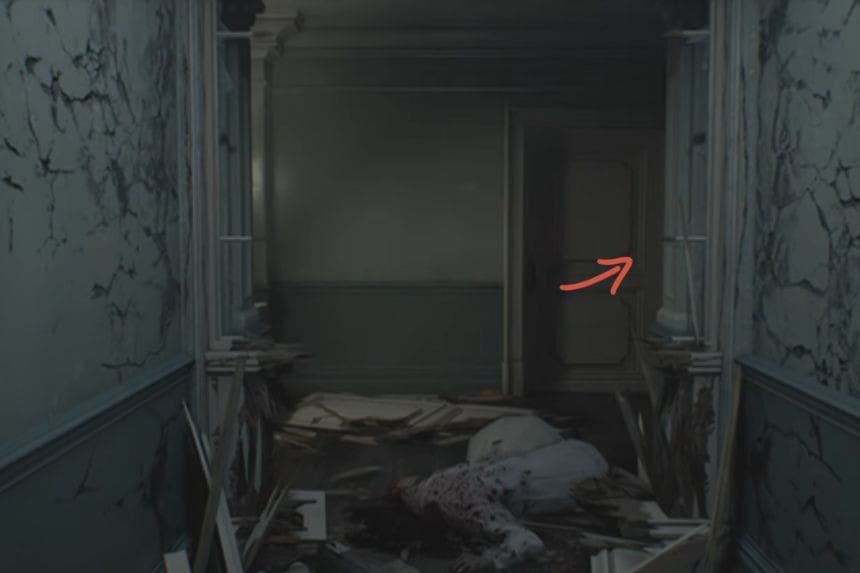
File #37 – Staff Member’s Last Words – Tunnel


Immediately after taking control of Grace, walk forward a few steps in the tunnel. Next to a corpse, you’ll find File #37 – Staff Member’s Last Words, providing insight into the fate of the facility staff.
File #38 – Operation to Eliminate “The Girl”
In the Security Room, look in the safe room with all the CCTV monitors to find File #38 – Operation to Eliminate “The Girl”, which details a secret operation targeting the girl.
File #39 – Unlocking the Cells – Holding Cells
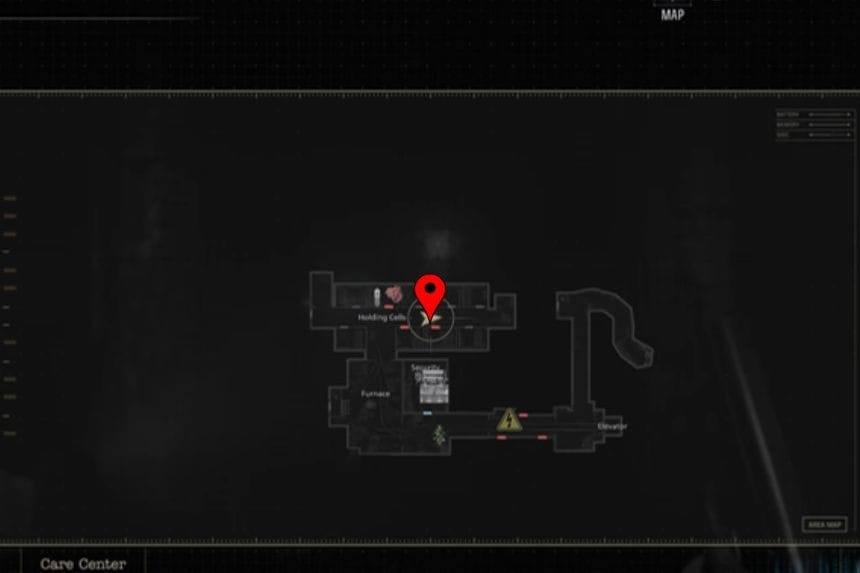
After the next cutscene at the end of the corridor, check above the lever you need to pull for story progression. You’ll find File #39 – Unlocking the Cells there.
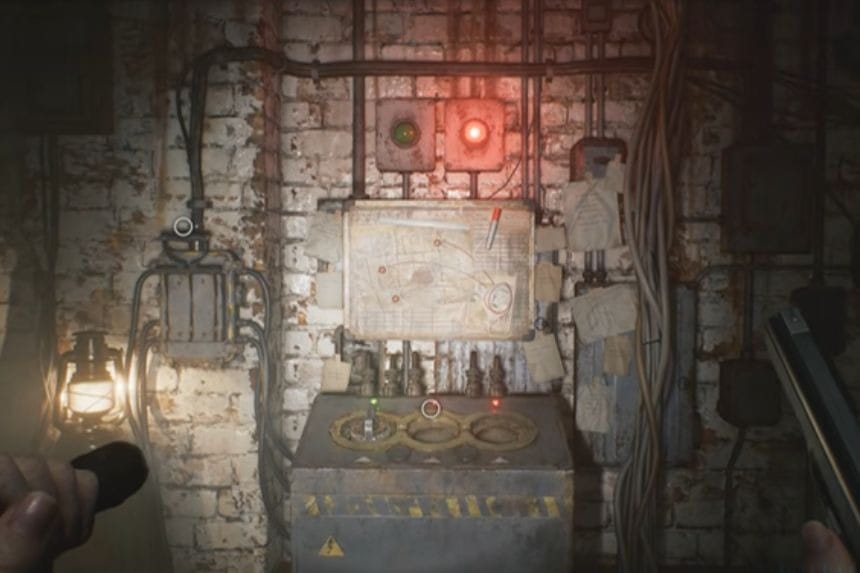
Key Item: Joint Plug #1 – Holding Cells
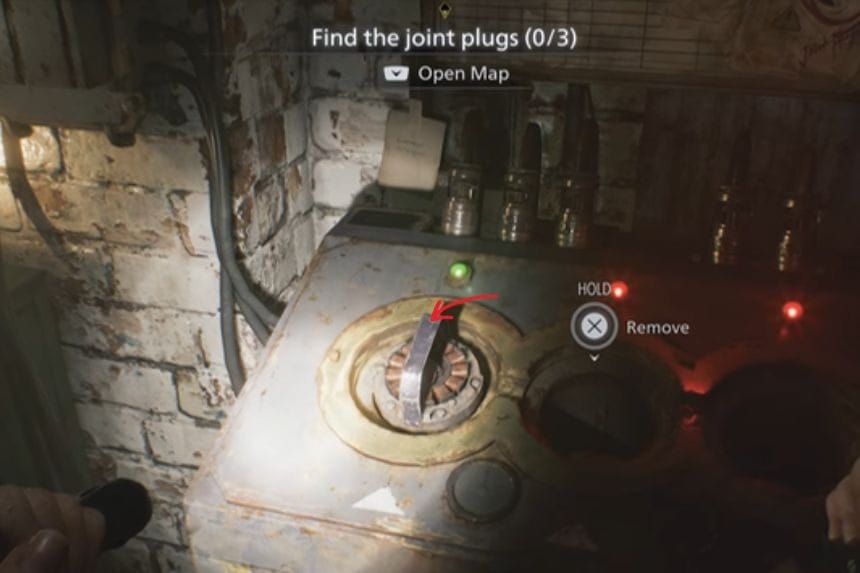
In the same spot as File #39, you’ll also find Joint Plug #1. This item is needed to unlock a door later in the Holding Cells corridor.
Mr. Raccoon #7 – Workshop
At the opposite end of the Holding Cells corridor, insert the Joint Plug to open the door to the Workshop. Inside, right in front of you on the workbench, you’ll find Mr. Raccoon #7, ready to be collected.
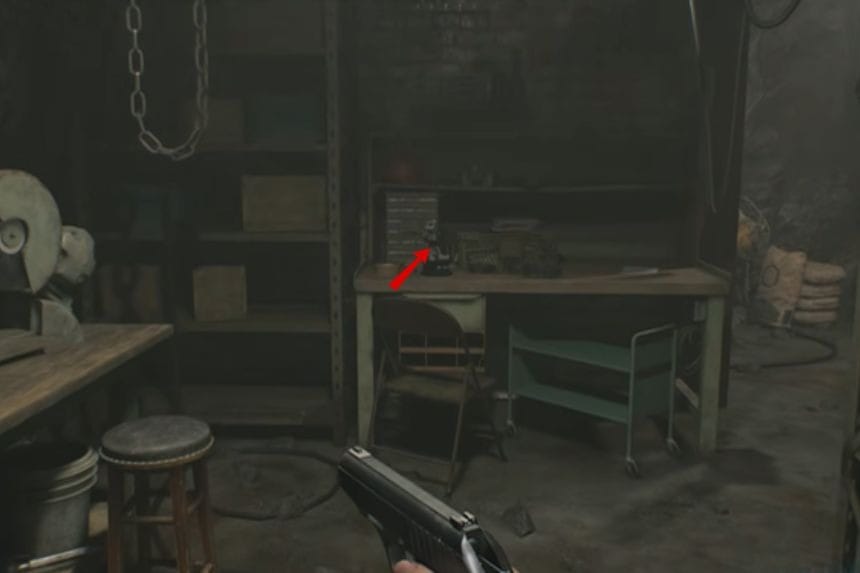
File #40 – Technician’s Note – Workshop
In the Workshop, right next to Mr. Raccoon #7, you’ll find File #40 – Technician’s Note. This provides some background on the facility’s operations and maintenance work.
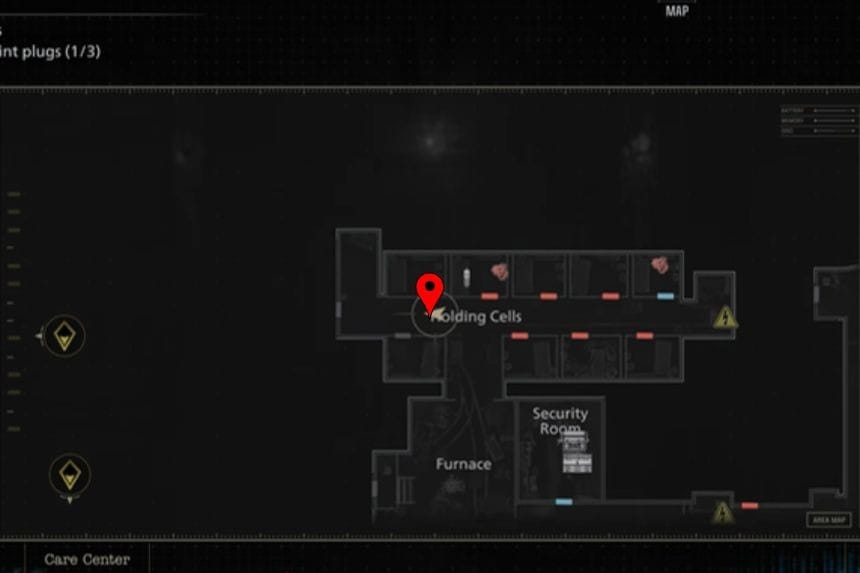
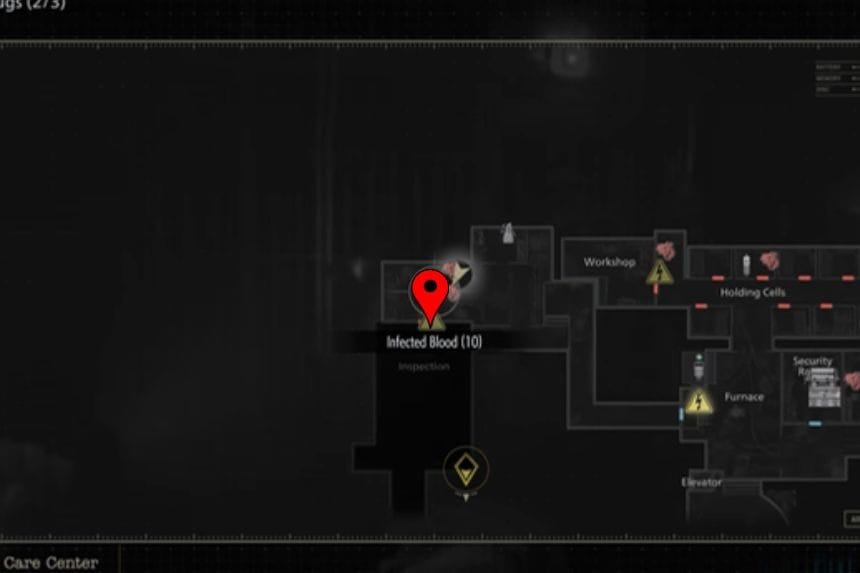
Safe #3 + Raccoon Roundup Map (Rhodes Hill) – Furnace


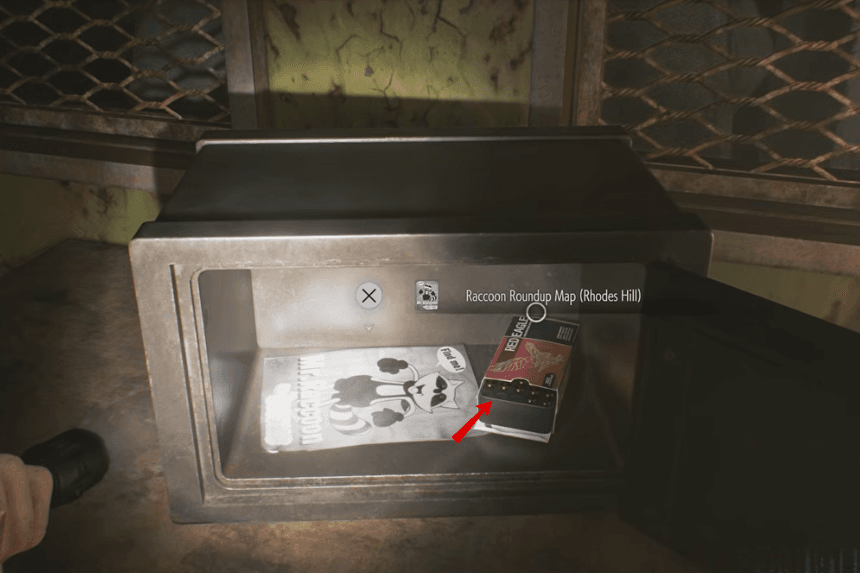
Take the Joint Plug you collected from the Workshop door and insert it into the Furnace room door (the central room). Inside the next room, in a side office on the right, you’ll find Safe #3.
The safe contains a document that shows the locations of all the Mr. Raccoons on the map (Raccoon Roundup Map – Rhodes Hill).
Safe Combinations:
- Casual: Right 60 – Left 40 – Right 80
- Insanity: Left 70 – Right 50 – Left 20
Note: The combination comes from File #33 – Basement Safe Code found earlier while playing as Leon, but you can open the safe even if you don’t have the file.
File #41 – Security Guard’s Report – Furnace
In the same room as Safe #3, you’ll also find File #41 – Security Guard’s Report, which contains details on the facility’s security and patrols.
Key Item: Joint Plug #2 – Furnace
Next to the forklift in the Furnace room, you’ll find Joint Plug #2, needed to unlock more rooms in this area.
Mr. Raccoon #8 – Bunkroom
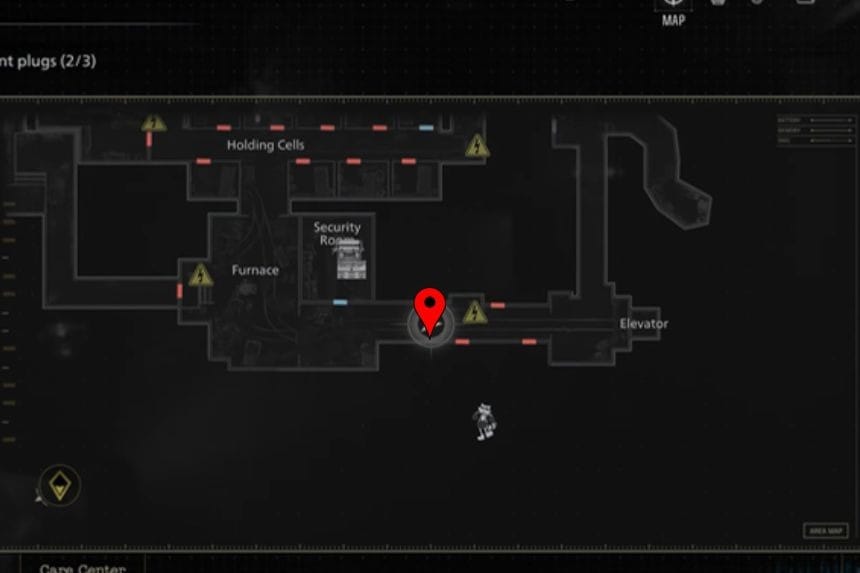

Use the Joint Plug at the Boiler Room in the corridor to the right of the Security Room on the map (marked with a yellow “!” icon). This opens multiple rooms. Enter the bunkroom to the right of where you inserted the plug, and you’ll find Mr. Raccoon #8 sitting on the TV.
Crafting Recipe: Molotov Cocktail – Bunkroom
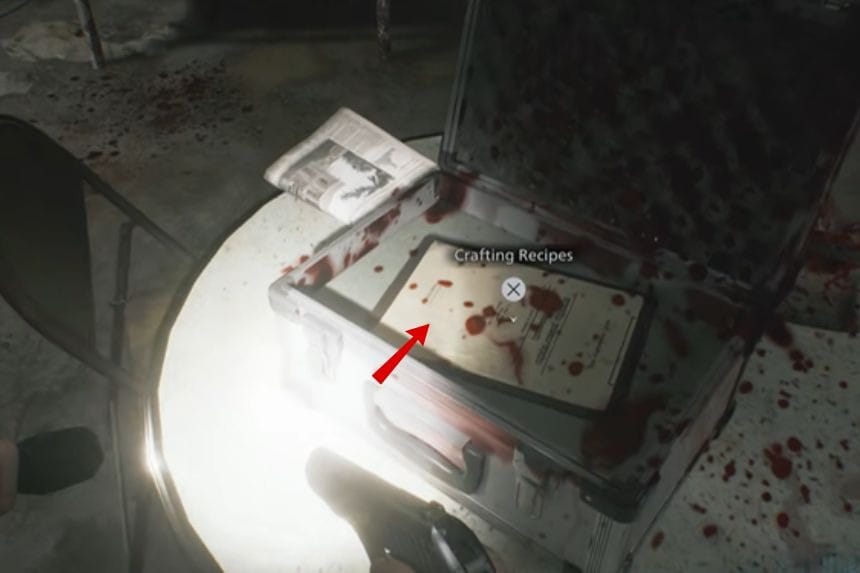
In the Bunkroom, you’ll find a box in the middle of the room on the table. Inside is the crafting recipe for the Molotov Cocktail. Note that this isn’t a file—it just adds a new recipe to your crafting options.
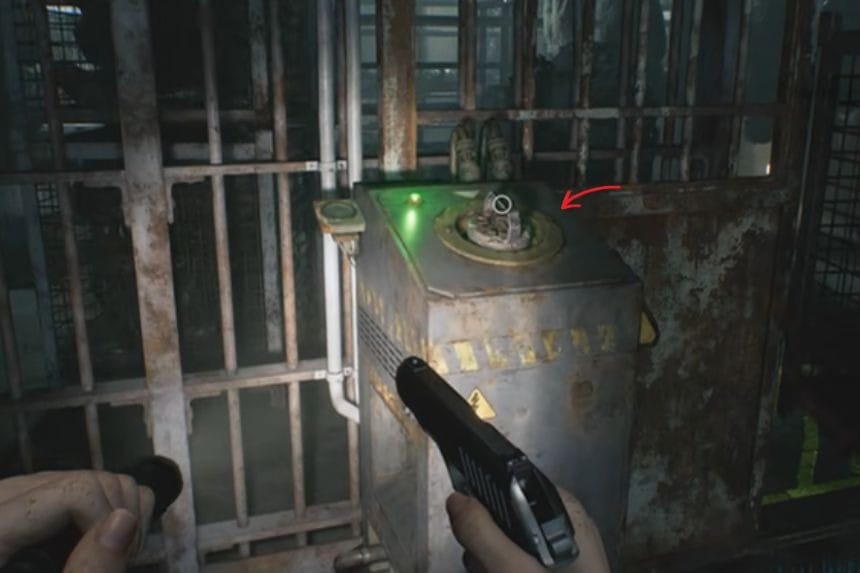
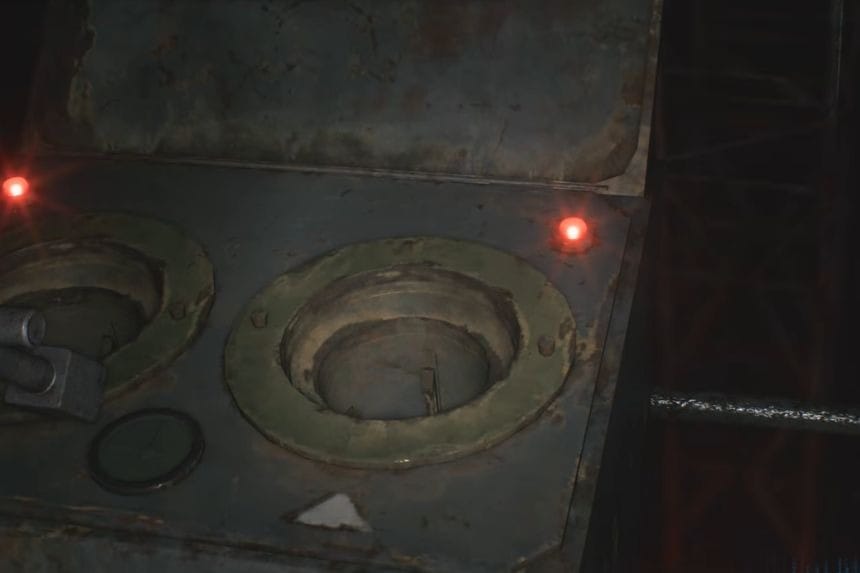
Key Item: Square Socket Wrench – Boiler Room
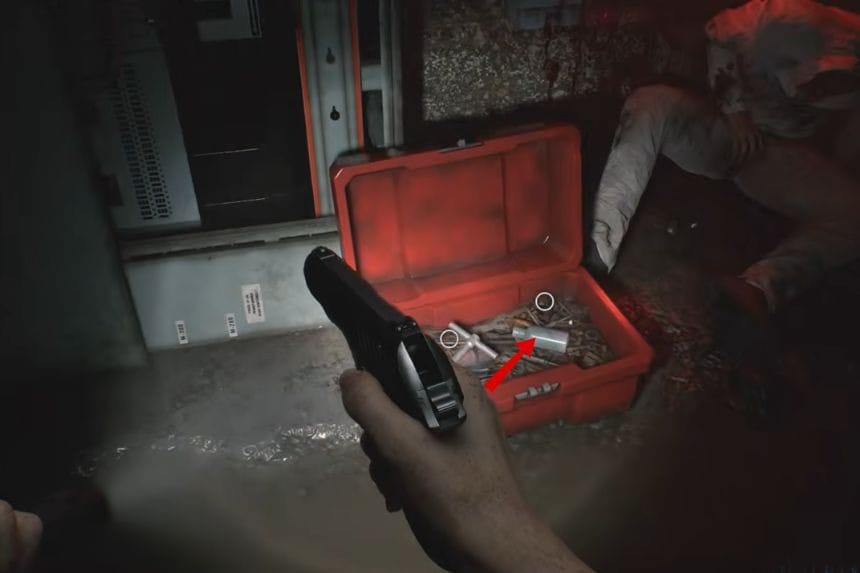
Backtrack to the start of the dark tunnel in the north-east corner of the map. Remove the Joint Plug from the Boiler Room and insert it into the door at the tunnel entrance to gain access to the Boiler Room.
Inside, push the crate and go through the fence to reach the back of the room. Here, you’ll find the Square Socket Wrench.
Important: If the plug is still inserted near the Bunkroom, the water is electrified and will shock you, so make sure you’ve removed it. You’ll later use this wrench to interact with a button in the Collection Pool.
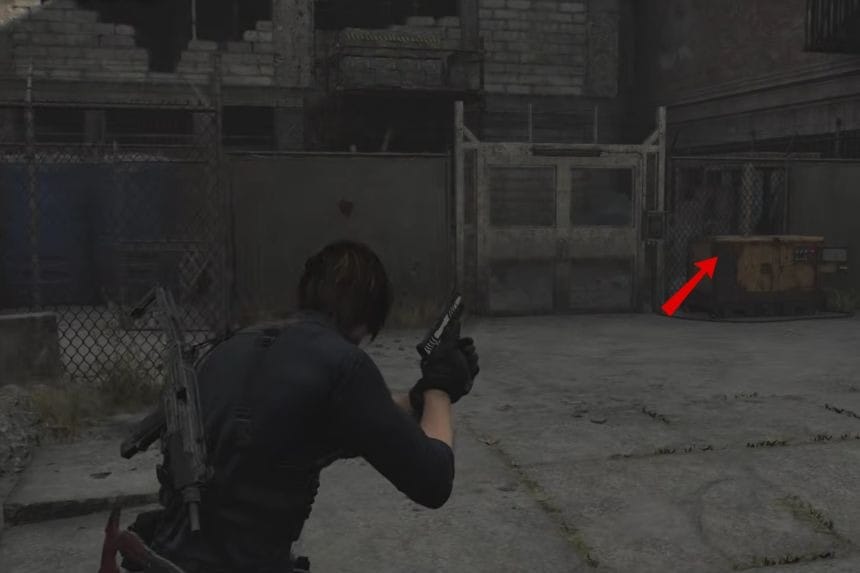
Key Item: Forklift Key – Processing Area
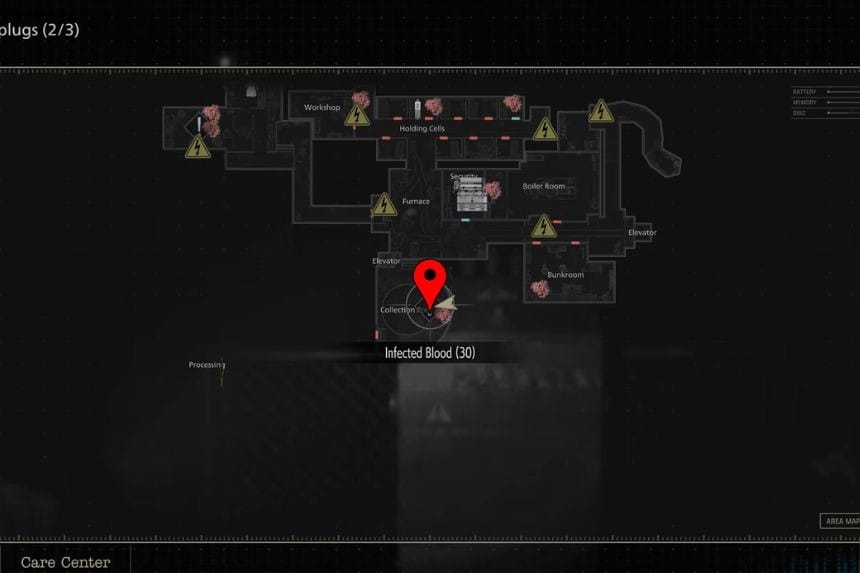
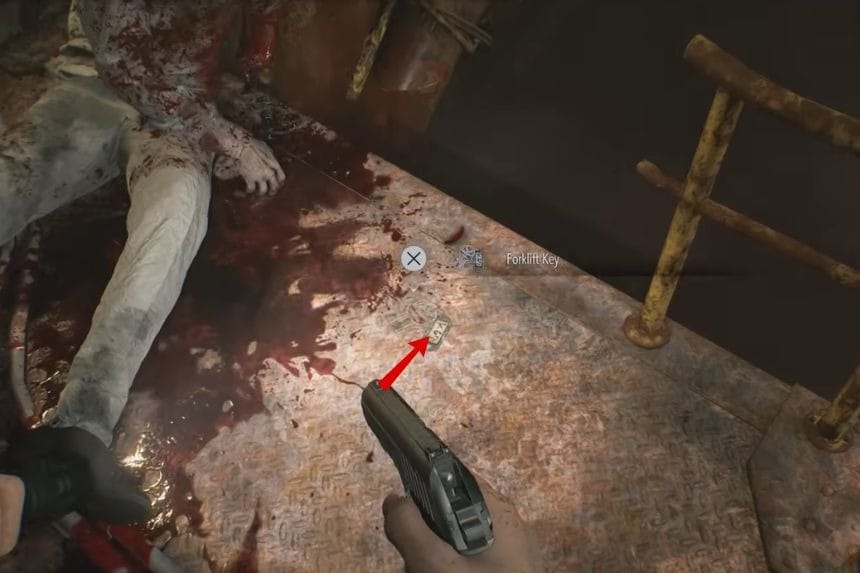
Head to the Collection Pool in the south of the map. Use the Square Socket Wrench on the console button, then insert two Joint Plugs to power the door leading to the Processing area. At the end of this area, you’ll find the Forklift Key on the floor next to the forklift.
Upgrade: Hip Pouch + Map: Care Center Basement Floor Plan – Processing Area
Use the Forklift Key on the forklift and go through the door to the Processing area. Inside, you’ll find an Upgrade: Hip Pouch and the Care Center Basement Floor Plan. Make sure the plug remains in the console so the door stays open while you collect these items.
Key Item: Joint Plug #3 – Processing Area
Keep the plug inserted in the console and backtrack to the forklift behind the Furnace door. Bring the two plugs from the Collection Pool with you.
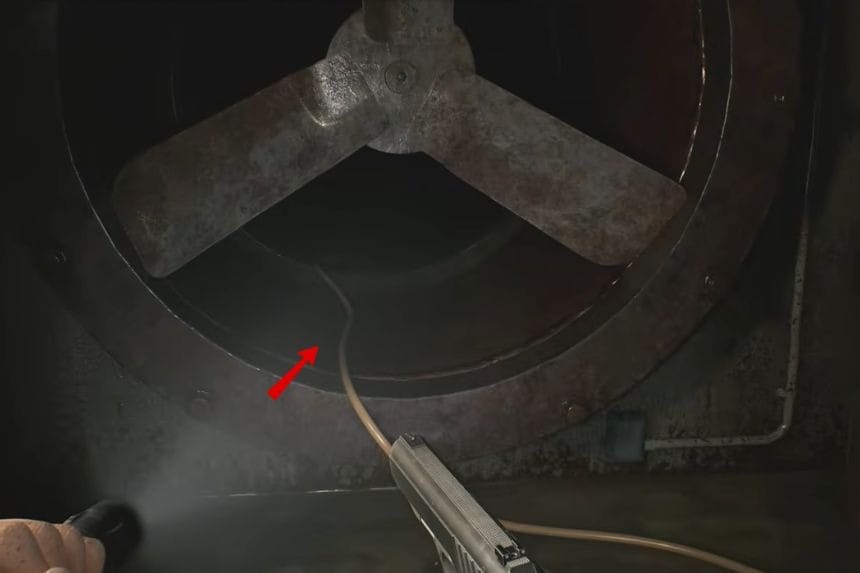
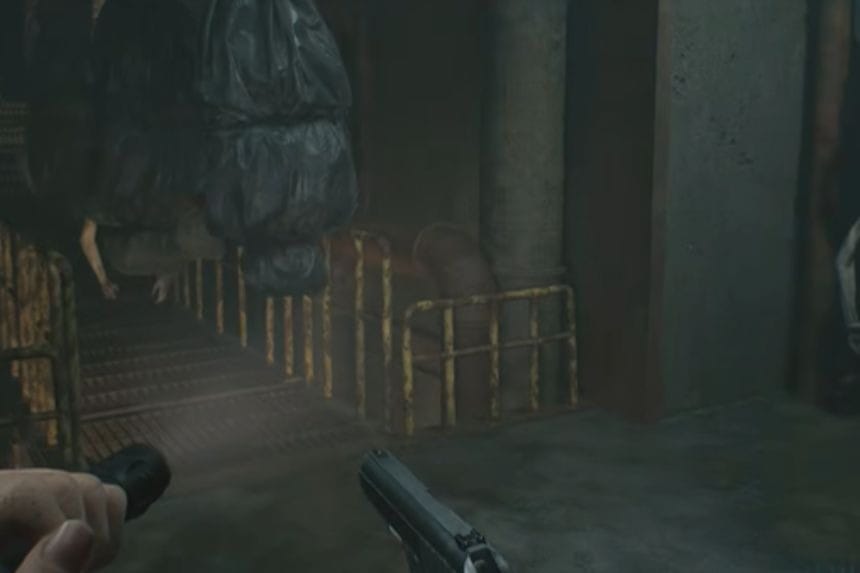
Use the Forklift Key on the forklift there and insert a plug next to it to open a new path. Carefully move past the hanging body bags (don’t flip the switch yet). Push a cart to create a shortcut, then return to the start of the room and flip the switch.
Go back through the shortcut and move the corpse bags to the end of the room. Turn the wheel to drain the water, then collect the third Joint Plug that was waiting at the end.
Key Item: Severed Hand – Elevator Area – Star Quartz
At the same time you receive the Star Quartz, you can also pick up the Severed Hand in front of the elevator door.
At the same time you receive the Star Quartz, you can also pick up the Severed Hand in front of the elevator door.

You can bring the hand to the Analyzer in the Blood Lab. Interacting with it triggers a screen displaying “Let’s play” along with an amino acid sequence. The first letter of each amino acid spells GLITCH.
Rhodes Hill – Care Center Courtyard
Grace is close to leaving Rhodes Hill, but a few challenges still stand in her way. She needs to find a key for a helicopter, while Leon puts his sniping skills to use to help out.
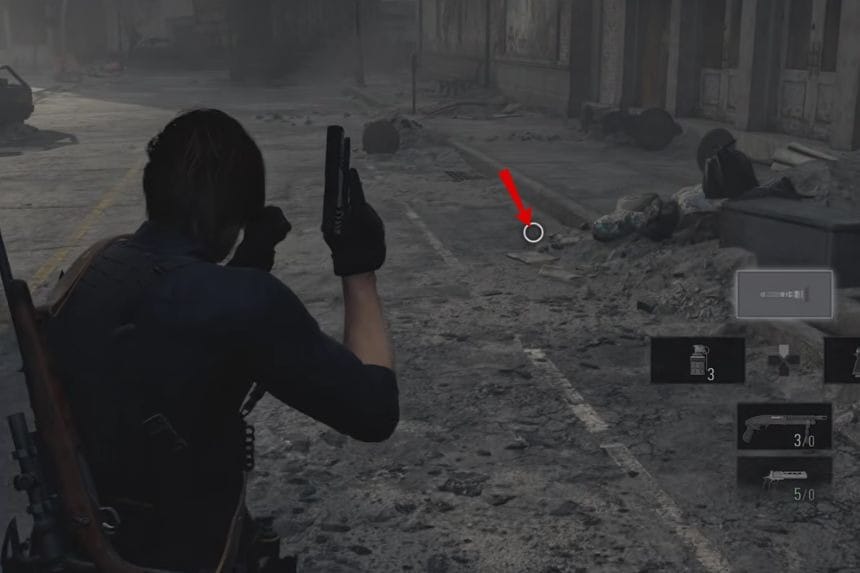
Antique Coin #19 – Courtyard
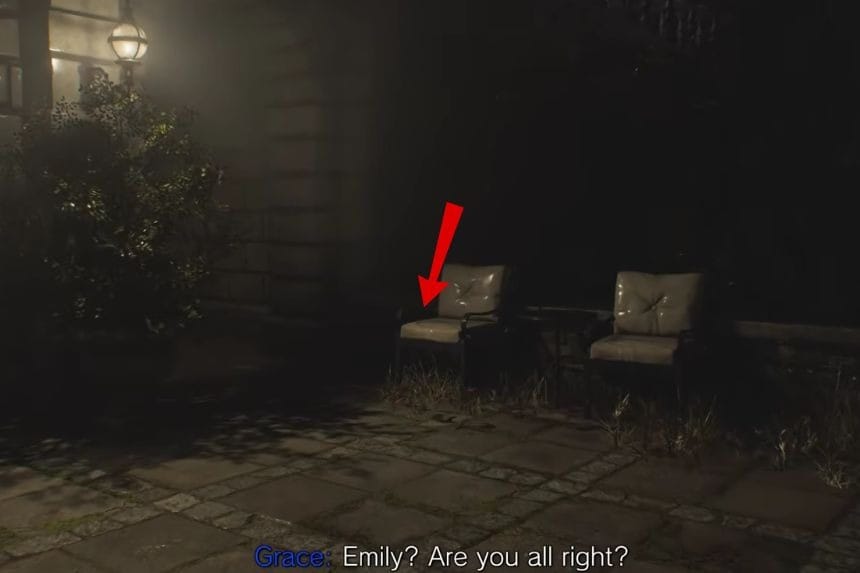
After opening the Quartz Door in the Central Hall, head down the round staircase. Turn around and look carefully at the chairs between the stairways. There, you’ll find Antique Coin #19 waiting to be collected.
File #42 – Visitor Record – VIP Suite
Following the courtyard cutscene, enter the next house to reach the VIP Suite. Inside, check the wooden cupboard to find File #42 – Visitor Record, which contains details about the guests visiting the facility.
File #43 – Note Regarding Research Results – VIP Suite
In the VIP Suite, go to the next room and inspect the main desk. Here you’ll find File #43 – Note Regarding Research Results, offering more context about ongoing experiments.
Key Item: Hourglass – VIP Suite

Also on the same desk, examine the hourglass. Interact with both sides to loosen the screws and remove the glass. You can let the sand run out and inspect it.
Key Item: Double Helix Model – VIP Suite
In the VIP Suite, inspect the wine bottle on the desk. Rotate it carefully to reveal a hidden double helix model inside. Once revealed, place the helix on the lectern at the desk to progress the puzzle.
File #44 – Spencer’s Research II – Reception

After using the helix to activate the elevator, head to the Reception area. On the desk next to the typewriter, you’ll find File #44 – Spencer’s Research II, which provides further insight into ongoing experiments.
File #45 – Subject 170 Record – Collection & Testing
From the typewriter, go downstairs to the Collection & Testing area. Near the exit, on a stretcher, you’ll find File #45 – Subject 170 Record, documenting one of the facility’s subjects.
File #46 – Grace Ashcroft Blood Analysis Report – Private Lab
From the previous area, go upstairs and through the next door to reach the Private Lab. On a desk in this room sits File #46 – Grace Ashcroft Blood Analysis Report, giving detailed research on Grace’s blood.
Mr. Raccoon #9 – Private Lab
In the same Private Lab, check another desk to collect Mr. Raccoon #9.
Key Item: Helicopter Key – Private Lab
Also in the Private Lab, on the CCTV desk, you’ll find the Helicopter Key, needed to unlock the helicopter later in the game.
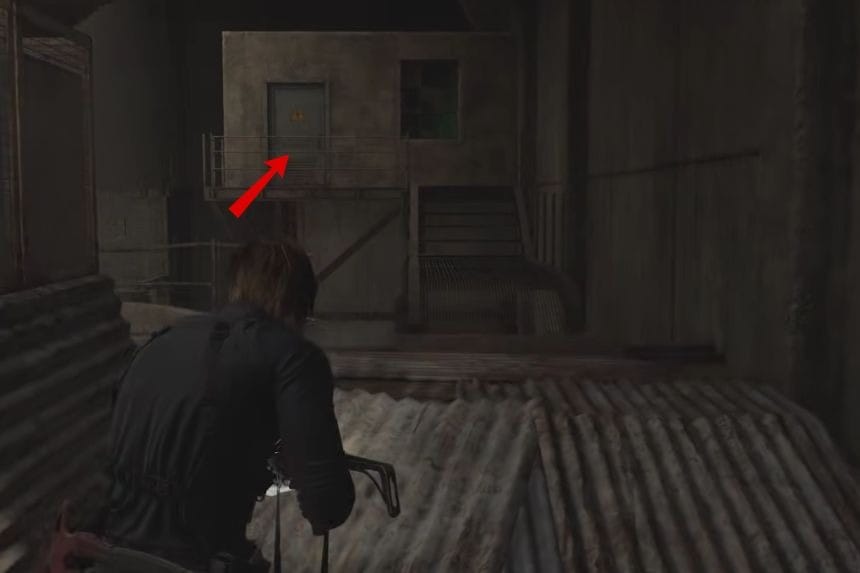
Mr. Raccoon #10 – Rooftop Garden
Right at the start as Leon, climb over the window in front of you. Cross the roof and drop down on the left side. You’ll see a staircase ahead go to the top, but don’t enter the wooden door yet.
Turn left at the staircase and look down at the lit lamps in the garden area. Mr. Raccoon #10 is sitting on the pedestal of one of these garden lights.
To collect it, use the Classic 70 sniper rifle to shoot the pedestal from a distance.
File #47 – Roof Hatch Manual – Storage Bay
When playing as Grace again, move forward until you lay down Emily and enter a safe room with a typewriter. Next to the typewriter, you’ll find File #47 – Roof Hatch Manual, which contains instructions for accessing the roof hatch.
Trophy: Bring Out the Big Guns – Safe Room
While in the safe room, make sure you equip the Requiem revolver. Pick up the 12.7x55mm ammo from the typewriter table, and grab any extra ammo you had stored. After you go downstairs in the next section, you’ll encounter “The Girl”, the big monster, again. Shoot her once with the Requiem to unlock the Bring Out the Big Guns trophy.
Key Item: Crank Lever – Filing Room

In the Filing Room, check the shelves to find the Crank Lever. You’ll use this in the Control Room to turn on the power and progress further in the story.
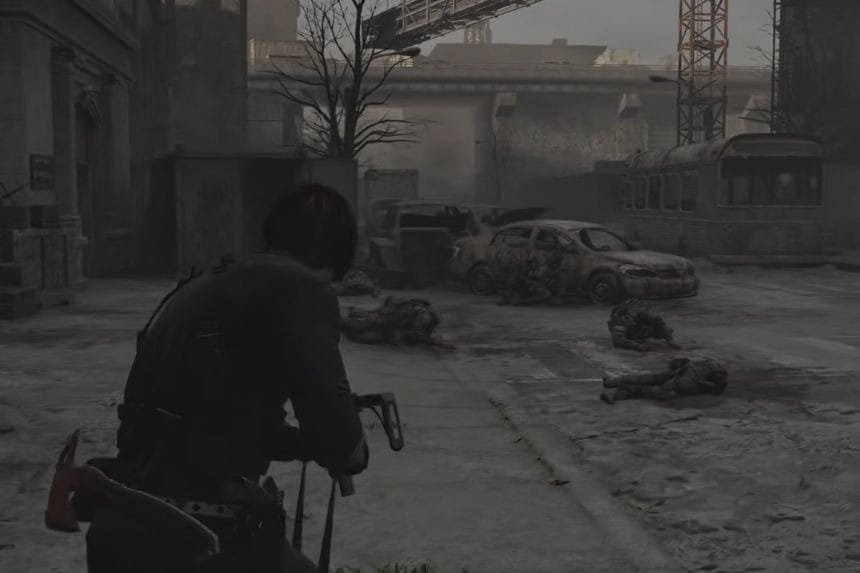
Raccoon City – East Raccoon City
Leon navigates the outskirts of Raccoon City, trying to get past a locked gate near the site of the first Resident Evil games. Expect plenty of objectives, hordes of tough zombies that feel straight out of Mad Max, and an epic motorcycle chase that’s as intense as they come.
File #48 – Report on the Raccoon City Incident – Automatic
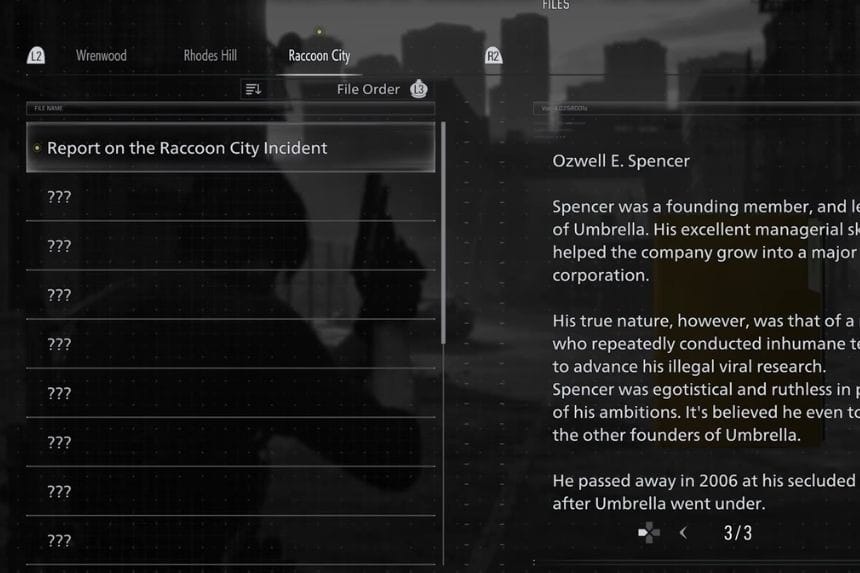
As soon as you arrive in Raccoon City playing as Leon, you automatically receive File #48 – Report on the Raccoon City Incident. It’s added directly to your Files menu, providing background on the events unfolding in the city.
File #49 – Raccoon City Incident Newspaper – Streets
From your starting point, walk forward a few steps. On the right-hand side, near some trash bags on the ground, you’ll find File #49 – Raccoon City Incident Newspaper, giving more context on local events.
Mr. Raccoon #11 – Café Oasis
From the start, head forward until you reach an intersection. Turn right, then enter the first open building on your left, which is the Café Oasis. Inside, you’ll find Mr. Raccoon #11 tucked behind the counter.
File #50 – Orders for the Engineer Corps – Central Camp
Use the revolving door at The Applegate Hotel and follow the story path until you encounter the Incomplete Bomb cutscene. After the cutscene, turn left to enter Central Camp.
Inside the blue BSAA tent, you’ll find File #50 – Orders for the Engineer Corps. You arrive here automatically during the story to turn on the power generator.
Key Item: Tactical Tracker – Central Camp
After activating the power generator in Central Camp, check the supply box next to the save point laptop to pick up the Tactical Tracker.
From now on, killing enemies will give you credits, which can be used at Supply Boxes to trade for items, upgrades, and other useful resources.
Weapons & Upgrades – Supply Box
At this stage, you can purchase several weapons and upgrades using the credits earned from defeating enemies. Available items include:
- Silencer 9 (Pistol)
- 990-TAC (Shotgun)
- Stiri REVO3 A1 (SMG)
- Body Armor
- Case Upgrade (8×13)
- Body Armor Level 2 becomes available after buying Level 1.
Combat Axe Tip: You can use the combat axe infinitely. To resharpen it anytime, press L1 + Square (or LB + X1). Its durability is unlimited, so you can rely on it in combat without worry.
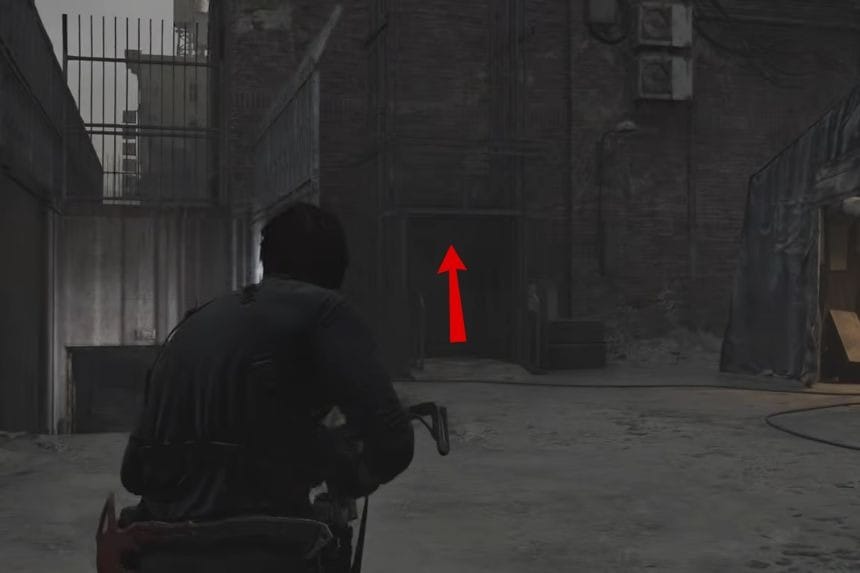
Key Item: Cedarbrook Apartments Key – Logistics Warehouse 2F


At the back of Central Camp, press the red button on the wall to raise a shutter. Move through the Warehouse, shooting down the hanging crates along the way, until you reach a dark room on the 2nd floor.

Here, you’ll find the Cedarbrook Apartments Key hanging on the wall by the door. This key lets you access the Apartments later in the story.
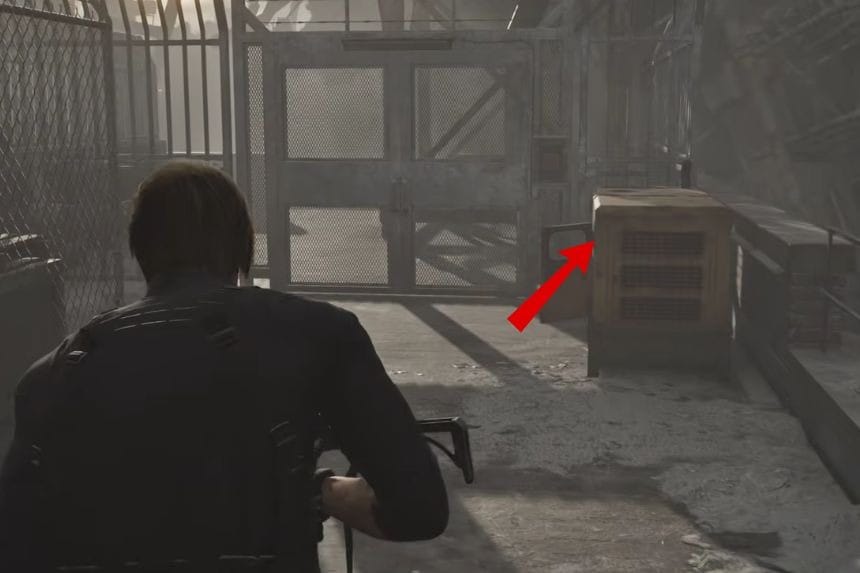
Key Item: Distributor – Logistics Warehouse Roof
Climb to the roof of the Warehouse and go left. You’ll find the Distributor inside a yellow box. This key item is required for certain electrical puzzles and story progression.
Mr. Raccoon #12 – Logistics Warehouse Roof
After picking up the Distributor, you’ll automatically use binoculars to scout the area. Turn around toward the elevator and face east on the map toward the highway.
Mr. Raccoon #12 sits on top of a car wreck on the highway, specifically on the van in front of a delivery truck. Use your sniper rifle to collect it from a distance. This one is cleverly hidden, so make sure to look carefully.
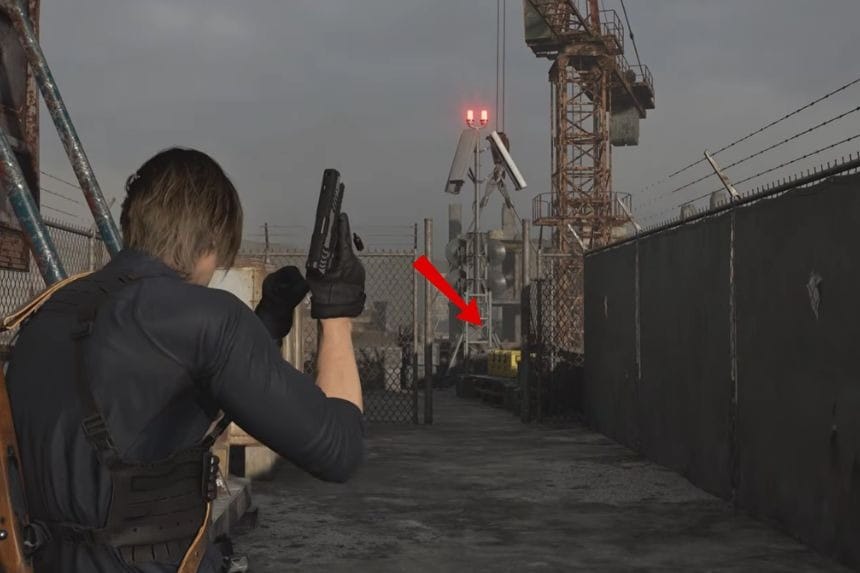
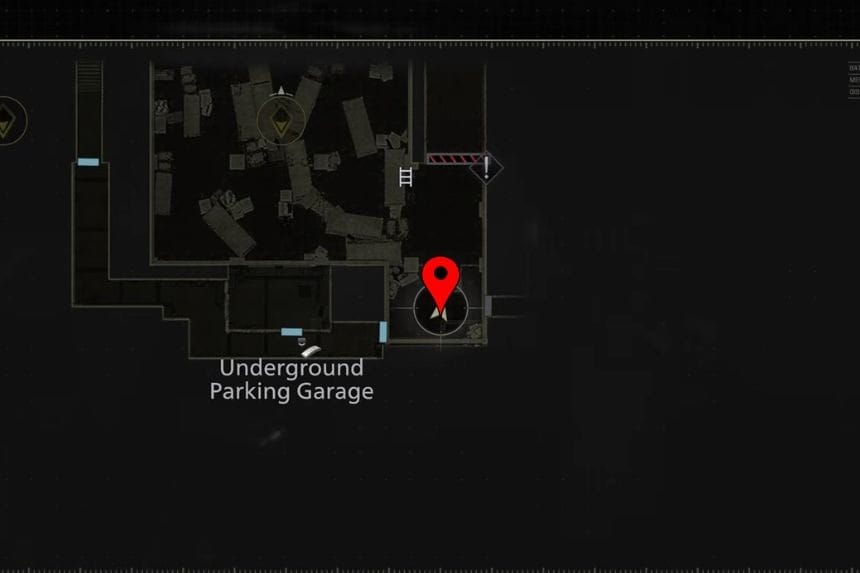
Mr. Raccoon #13 – Underground Parking Garage

Use the Apartments Key on the gate in Central Camp, next to the elevator. Go through the door on the right downstairs to enter the Underground Parking Garage.
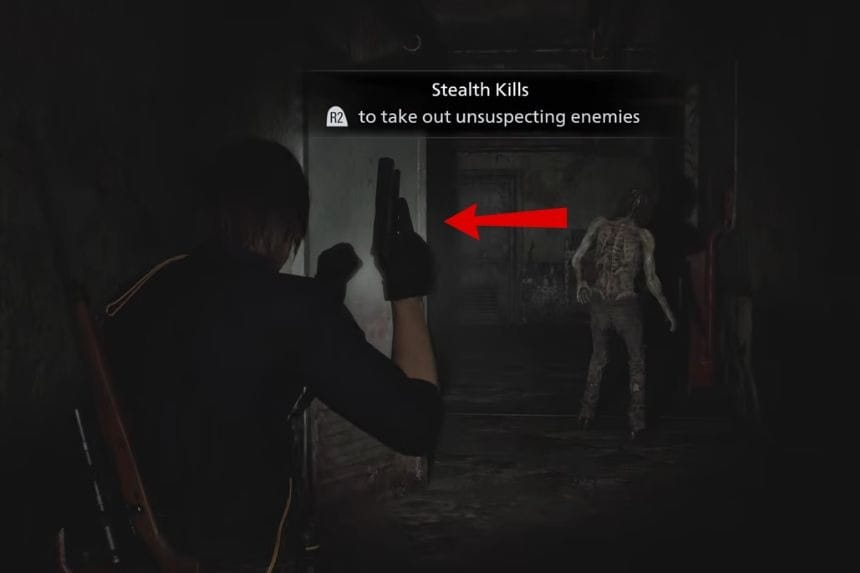
At the first enemy encounter (where you learn stealth kills), enter the room on the left. Inside, Mr. Raccoon #13 sits on a box waiting to be collected.
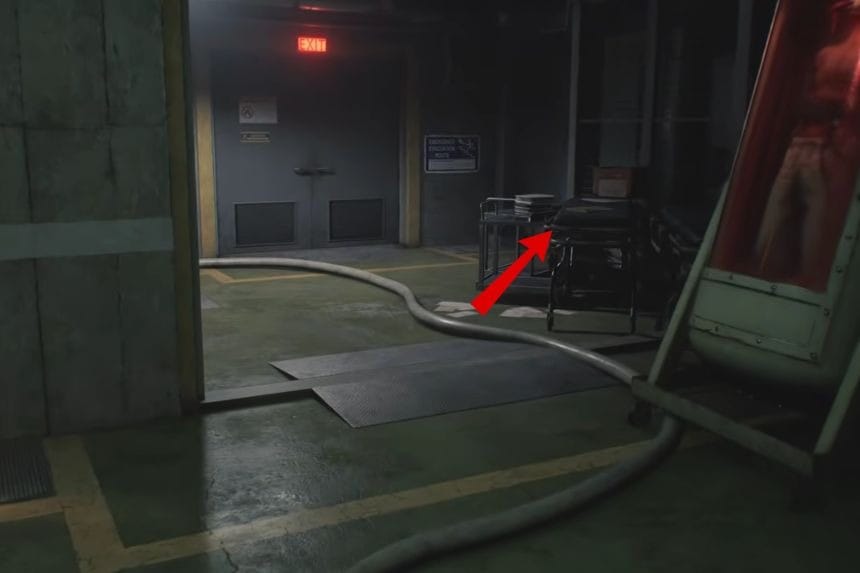
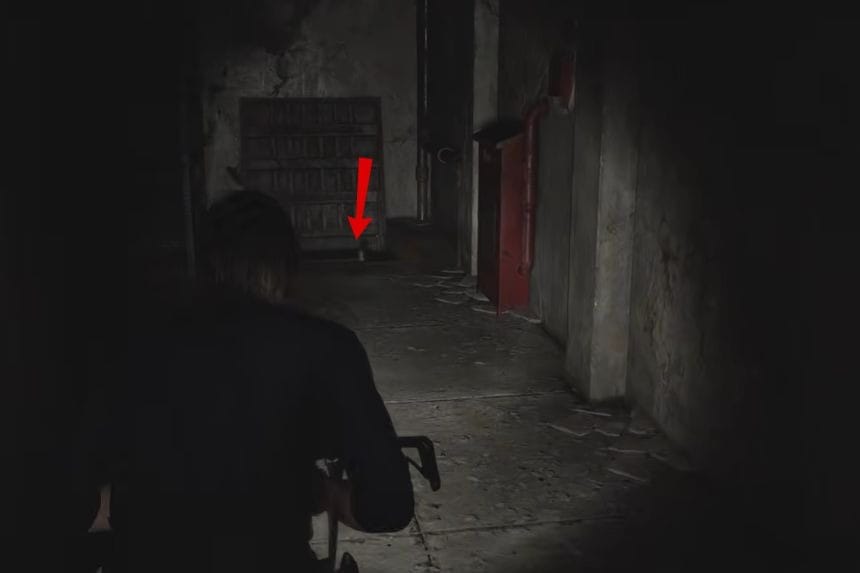
File #51 – Battery Storage Locations – Underground Parking Garage
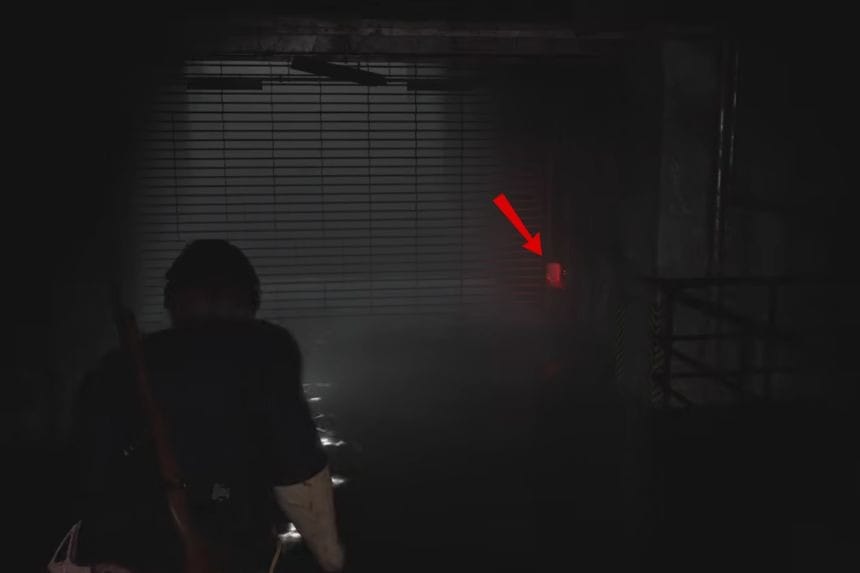
From your previous spot in the Underground Parking Garage, move into the next section and turn left. You’ll come across a flooded area with a single zombie. Look to the right of the gate to inspect a red-lit box and collect File #51 – Battery Storage Locations, which shows where the facility keeps its batteries.
Key Item: Battery #1 – Underground Parking Garage


From the red-lit box, turn around and climb over the ladder. Make your way to the north-west corner of the flooded garage. Inside a small room on the wall, you’ll find Battery #1, needed to power certain gates.
Weapon: Gal (SMG) – Small Room
In the same room as Battery #1, check a silver box to collect the Gal SMG, a handy weapon for close-to-medium range combat.
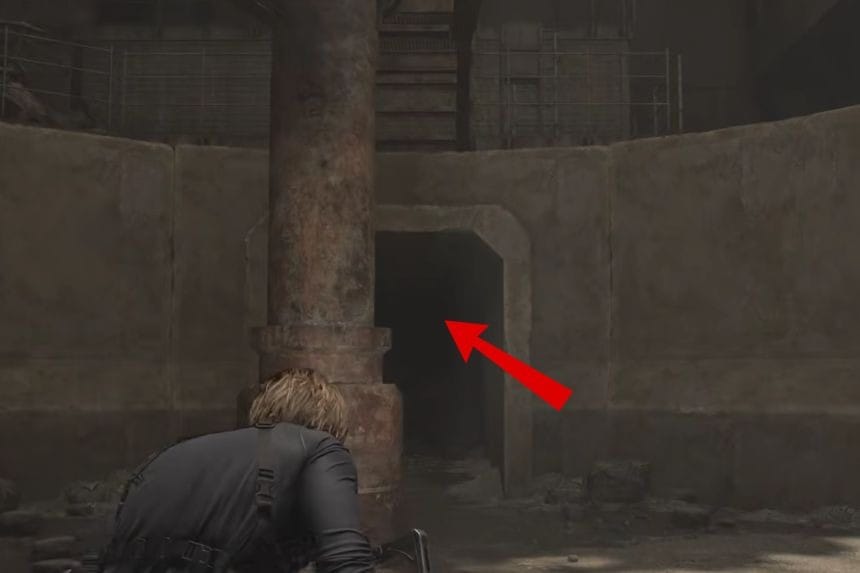
After collecting these, climb the ladder in the room, move across the roofs, and drop back down to the closed gate. Insert the battery to power the gate. Then head back up the stairs and go through the blue door on the side to enter the Sewage Facility.
Key Item: Valve Handwheel – Sewage Facility
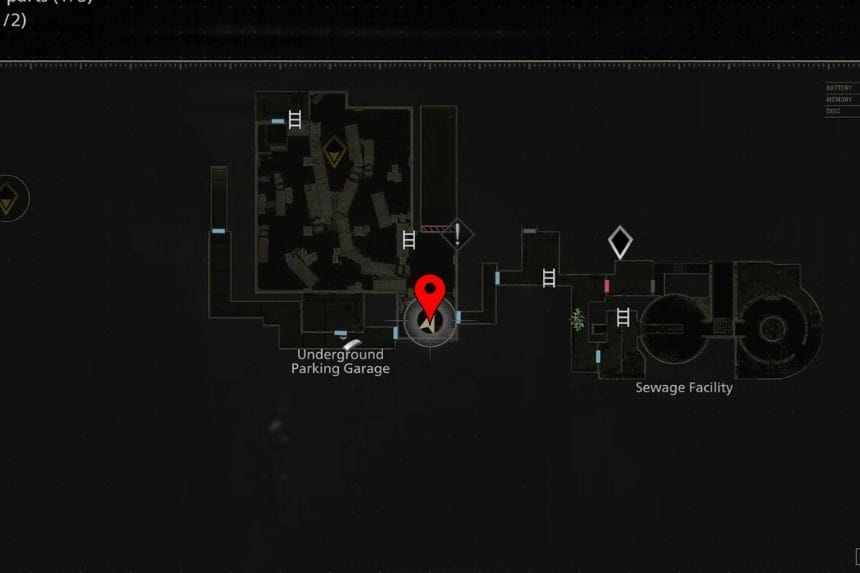
As you move through the Sewage Facility, after dropping down, you’ll spot the Valve Handwheel along the path. This will help manipulate water and bridge systems in the next puzzles.
Key Item: Battery #2 – Sewage Facility
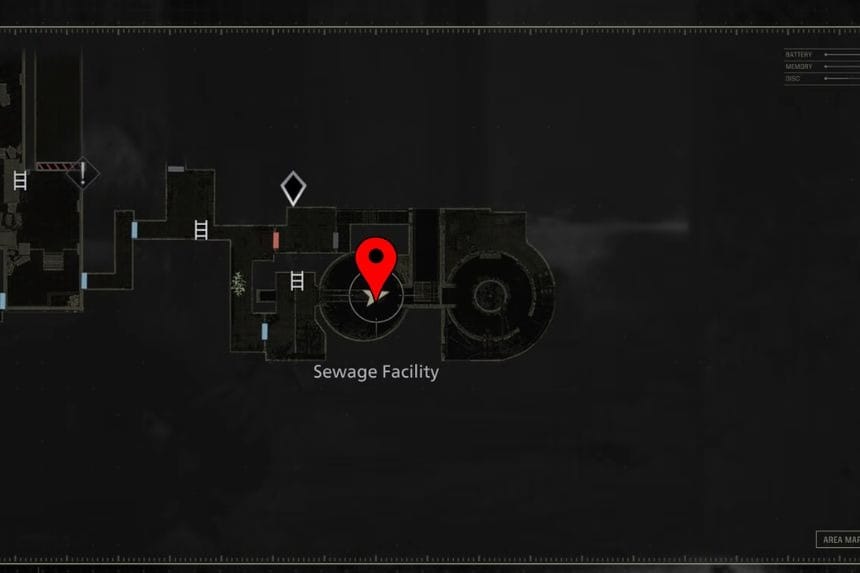
Use the Valve Handwheel on the door directly across from you. Turn it fully to create a walkable bridge at the top of the room. Follow the path to reach Battery #2, which is needed to fully power the flooded garage gate.
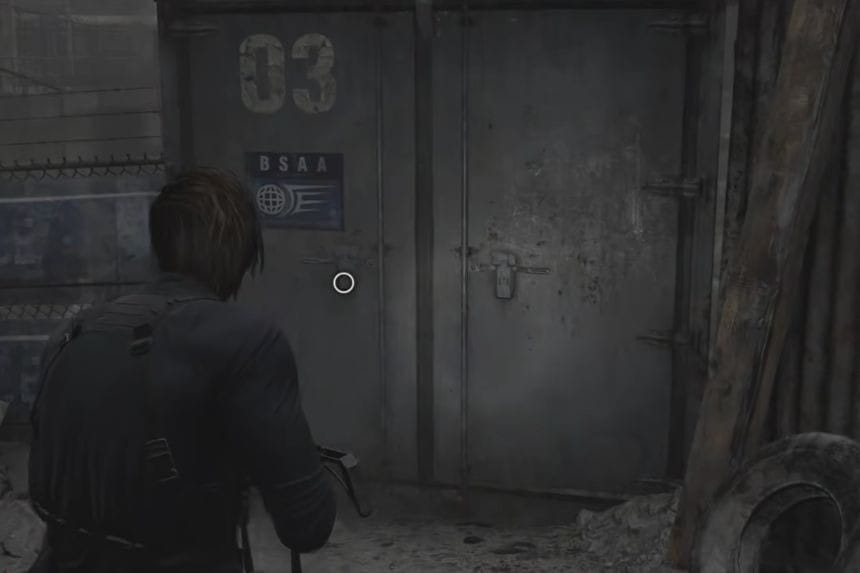
Key Item: BSAA Container Keys – Flooded Garage
Return to the flooded garage and insert both batteries at the gate. Move forward and to the left to trigger a cutscene, after which you automatically receive the BSAA Container Keys. These keys are essential for opening the three BSAA containers, which will be important later for the Bronze Trophy “Crate Expectations”.
File #52 – Inventory List – Cedarbrook Apartments Entrance
After the cutscene where you receive the BSAA Container Keys, look immediately to your left inside an open container just in front of the Cedarbrook Apartments entrance to collect File #52 – Inventory List.
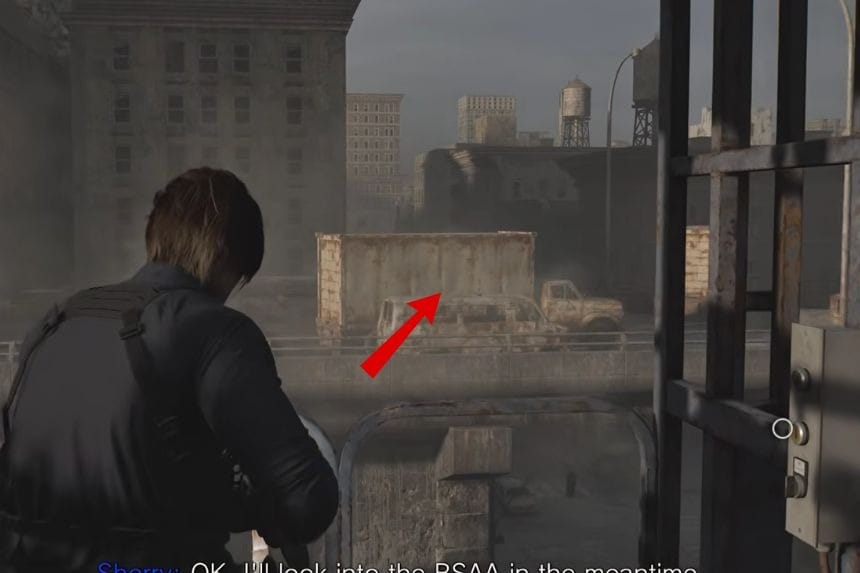
Mr. Raccoon #14 – Bus Near Apartments
Right next to the container where you found the file, check the driver’s seat of the bus to collect Mr. Raccoon #14.
Key Item: Rusty Crank – Cedarbrook Apartments 1F

Move through the Cedarbrook Apartments and pick up the Rusty Crank. Use it to operate the door on the bottom floor, which will also allow access to the upper floor for story progression. Later, you’ll use it in the Sewage Facility to reach some consumables.
Mr. Raccoon #15 – Upper Floor Apartments
After collecting the crank, return upstairs. Use the crank on the balcony gate, climb the next ladder, and turn right to enter the upper floor. Head to the stairwell, then walk to the back of the floor to find Mr. Raccoon #15 inside an open fridge. Don’t go downstairs, as it’s all on this upper level.
Key Item: Broken Signal Receiver & Distributor – Cedarbrook Apartments Roof
Climb to the rooftop and carefully navigate past the rocket launchers. At the end of the roof, you’ll find a yellow box containing the Broken Signal Receiver. Combine this with the Distributor you collected earlier to continue story progression.
File #53 – Engineer Corps Note – Cedarbrook Apartments Roof

On the rooftop, to the right of the yellow crate where you found the signal receiver, you’ll spot File #53 – Engineer Corps Note.
Mr. Raccoon #16 – Gas Station

Shoot down the ladder on the street opposite the Cedarbrook Apartments entrance. Climb it to drop into the Gas Station. Inside, look on a metal shelf to collect Mr. Raccoon #16.
Key Item: Gas Can / Gas Can with Fuel – Gas Station
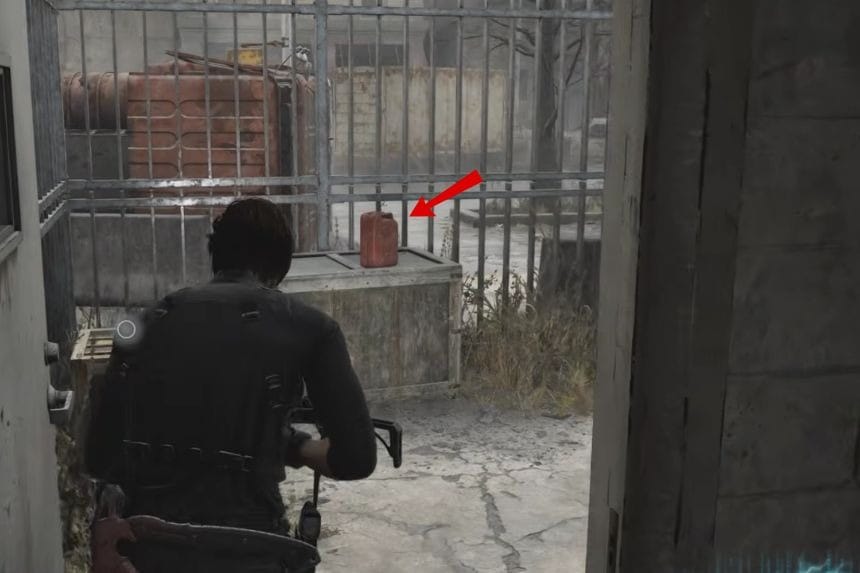
Move through the Gas Station to find the Gas Can. Go to the back of the Gas Station yard to fill it, turning it into a Gas Can with Fuel. Use it on the generator where you initially picked it up to power the area.
BSAA Container #1 + Weapon: Marksman 1A – Main Road
At the east end of the main road between the Gas Station and Cedarbrook Apartments, climb behind the truck to reach a big blue container. Use your BSAA Container Keys to open it. Inside, you’ll find BSAA Container #1 and the Marksman 1A Sniper Rifle. If your inventory is full, you can still buy the rifle later at supply boxes.
Mr. Raccoon #17 – Crane & Sewage Pipe
Head to the west end of the main road to find a big crane. Flip the switch to create a shortcut back to Central Camp. While moving over the shortcut, look down and to the left to spot Mr. Raccoon #17 inside an open sewage pipe.
BSAA Container #2 + Key Item: Repair Kit – Central Camp
Backtrack to Central Camp and locate the big blue container in the corner next to the tent. Open it with your BSAA Container Keys to collect BSAA Container #2 and a Repair Kit. Use the Repair Kit on the Distributor & Broken Signal Receiver to restore functionality and advance the story.
Mr. Raccoon #18 – Ridgewood Station
Travel along the main road between the Gas Station and Central Camp. Use your fuel can on the generator at the big crane to open the nearby gate. Follow the path underground via the ladder and continue through the tunnel. You’ll automatically arrive at a train compartment, where Mr. Raccoon #18 sits on a passenger seat. This same path also leads back to the starting area of Raccoon City, where the final BSAA Container can be found.
BSAA Container #4 + Charm: BSAA Emblem Charm


From the train compartment, continue through Ridgewood Station until you exit to the area near The Applegate Hotel. Open the blue BSAA container outside the hotel to get BSAA Container #4 and the BSAA Emblem Charm, which boosts firepower when your scope is not equipped.
Mr. Raccoon #19 – Willis Tower
Backtrack to Central Camp and head again through Ridgewood Station. After passing the first revolving door, stick to the left and go through another revolving door that brings you back to Central Camp.
Take the elevator to the roof and climb down the ladder on the right to reach a generator. Fill it with fuel and press the red button, then use the zipline to reach Willis Tower.

Once on the tower, go upstairs, turn right, and follow the sofas into a room to find Mr. Raccoon #19 sitting on a shelf.
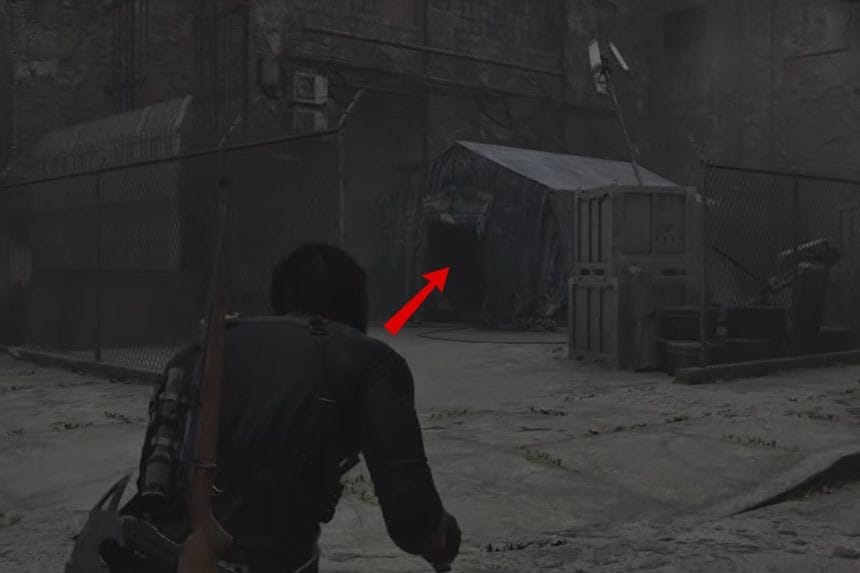
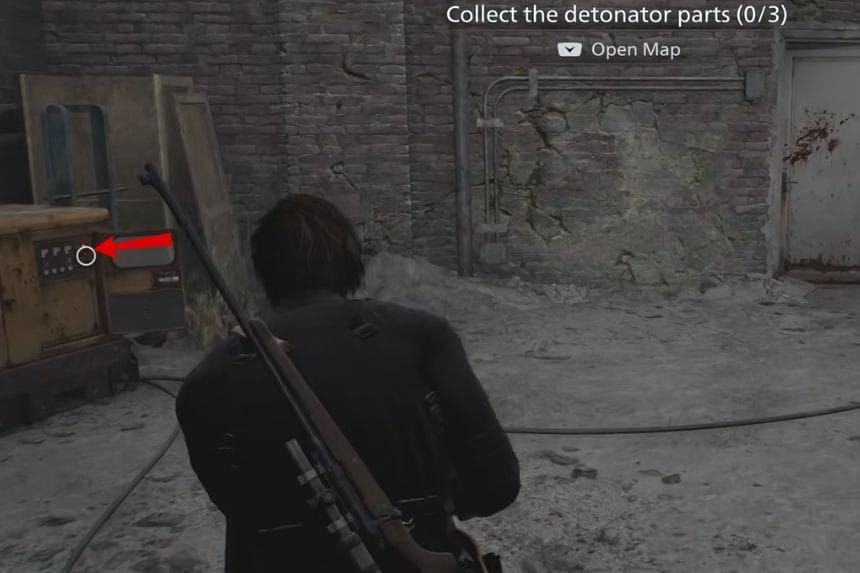
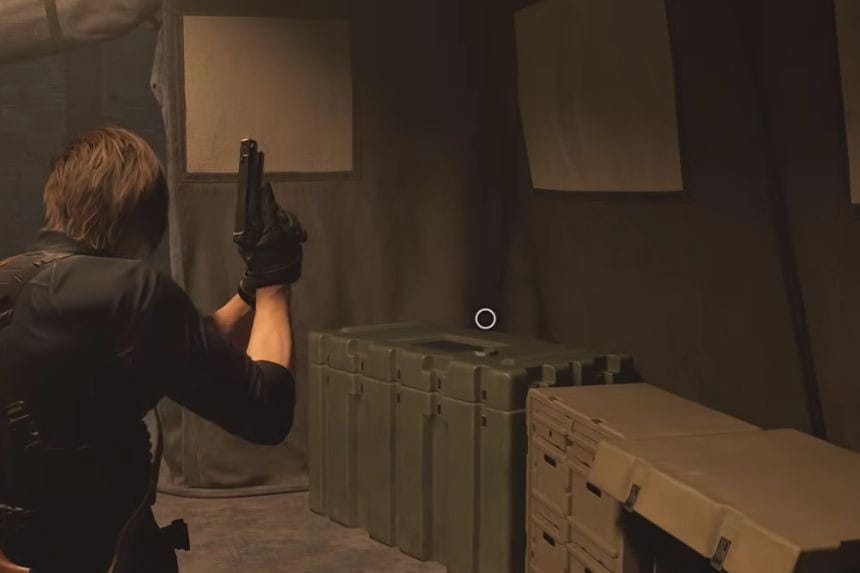
Key Item: Relay / Detonator
Advance through Willis Tower, shooting barricades on doors to create paths and bridges. At a point with armored zombies walking over glass, shoot the glass beneath a metallic support beam on the right to form a ramp and continue upward.
At the end of Willis Tower, collect the Relay / Detonator. Combine it with other parts to complete the Detonator.Use the two wheels on either side of the red elevator in the middle of the roof, then ride the elevator back down to street level. Use the Detonator on the gate east of Central Camp to progress further.
Trophy: Road Rage – Motorcycle Section

During the motorcycle chase, look for Victor on his bike. Wait until the red arrow appears above his head, which signals he’s about to fire the RPG. Shoot him at that exact moment to unlock the Road Rage trophy. If you miss it, quickly reload one of your most recent autosaves. The earliest opportunity comes the second time you see Victor riding the bike.
Raccoon City – Raccoon City Center
Leon revisits iconic spots from Resident Evil 2, like the Raccoon City Police Department. He’ll run into some familiar enemies before heading deeper into the city. At the same time, Grace uncovers shocking truths about her past.
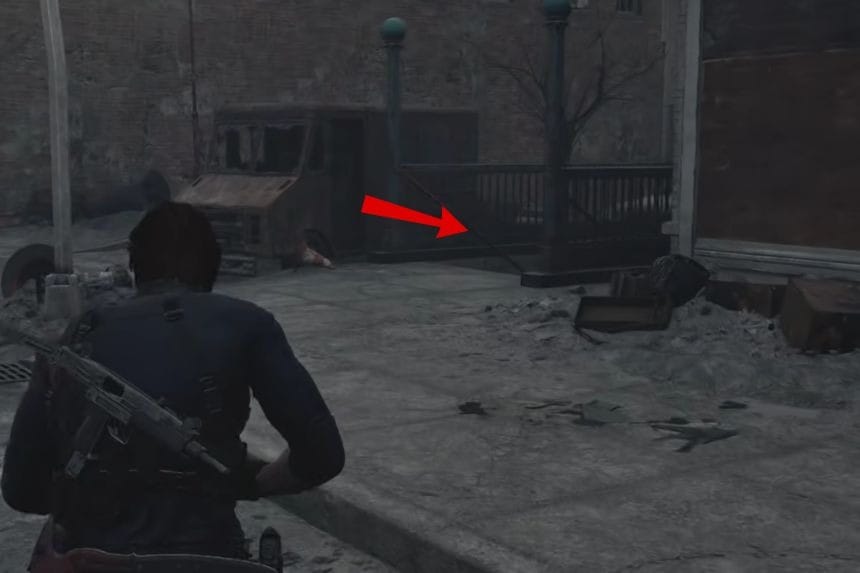
Mr. Raccoon #20 – After Motorcycle Section

Once the motorcycle section ends and you’re back on foot, turn slightly left. You’ll find Mr. Raccoon #20 sitting in front of the destroyed tanker among the rubble.
File #54 – R.P.D. Perimeter Report
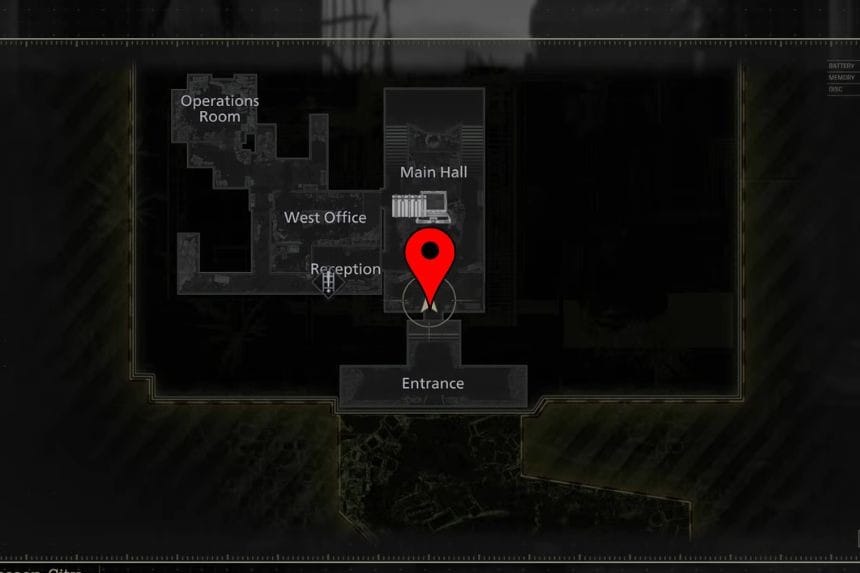

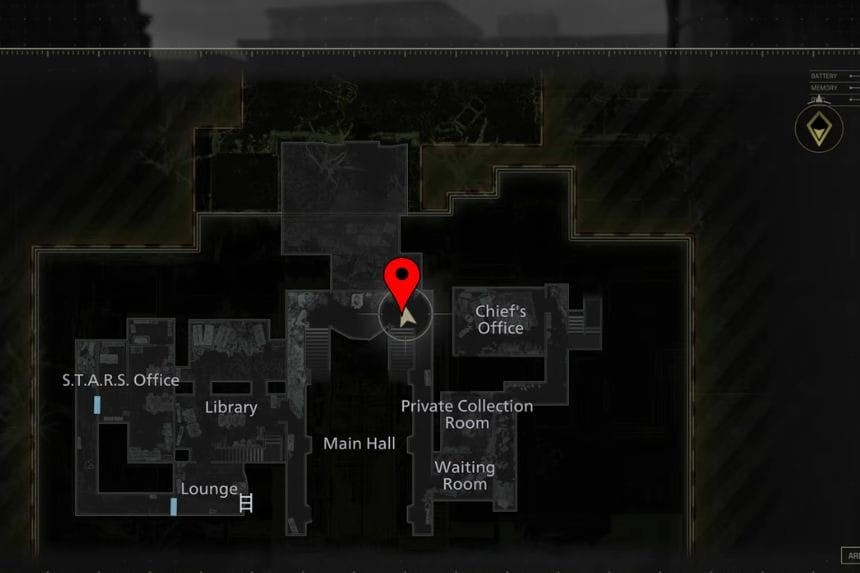
Follow the story path into the R.P.D. building. Near the save point, you’ll spot this file sitting on a box in the Main Hall.
File #55 – Top Secret Operation
From the Main Hall, go to the West Office, which is the room next to the save point. The file is on the first desk to your right.
Mr. Raccoon #21 – Operations Room

Inside the Operations Room, check the left side behind a wooden barricade among some rubble to find Mr. Raccoon #21.
File #56 – Record of Events
In the same Operations Room, you’ll find this file on the chalkboard.
Scavenger Hunt – Clue 2 (File #57)
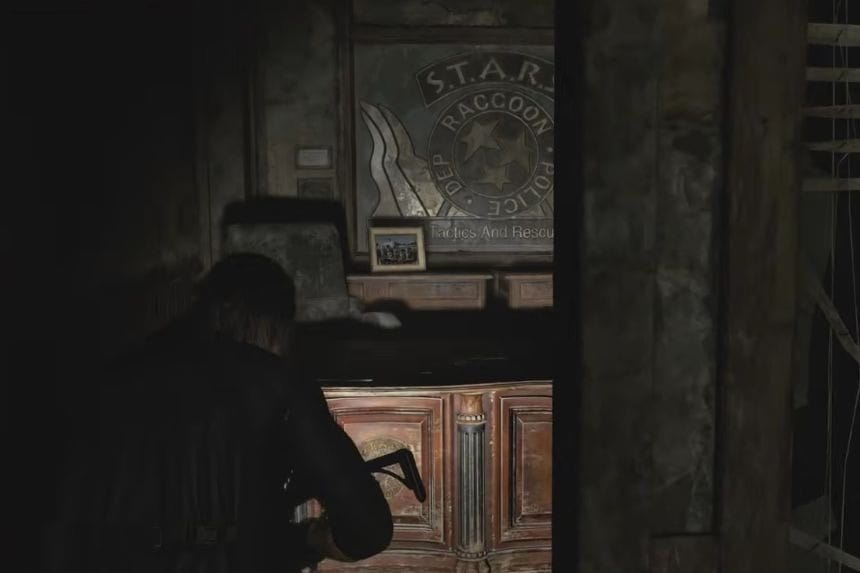
From the Operations Room, head south toward the Reception with the locked shutter. Shoot down the ladder, climb up, and go straight down the corridor. Enter the S.T.A.R.S. Office at the end, then check the shelf on the right. Turn the file around to read the note.
Library Card (File #58)
In the same room, enter the side office to the left. Open the desk drawer, wait a moment, and the file appears.
Scavenger Hunt – Clue 1 (File #59)
Still in the S.T.A.R.S. Office, look directly opposite the door. Interact with the brown jacket hanging on the wall between the desks, then turn the file around to see the note.
Barry’s To Do List (File #60)
In the same room, this file is on the leftmost desk.
Charm: Power Shades Charm
Also in the S.T.A.R.S. Office, go to the left corner locker room. Inside a locked briefcase, enter the code RRR to open it and collect the Power Shades Charm, which gives limitless bullet penetration and boosts the last bullet in your cylinder.
Key Item: Locker Key

After reading both Scavenger Hunt Clues, return to the Operations Room. Turn right, climb the crate in the corner in front of the chalkboard, and look at the TV mounted on the ceiling. The Locker Key will appear only if both S.T.A.R.S. Office files are read.
Charm: S.T.A.R.S. Emblem Charm

Go back to the West Office, use the Locker Key on the locker marked with a “!” icon. Inside, collect the S.T.A.R.S. Emblem Charm and view the zoo tickets, completing the scavenger hunt.
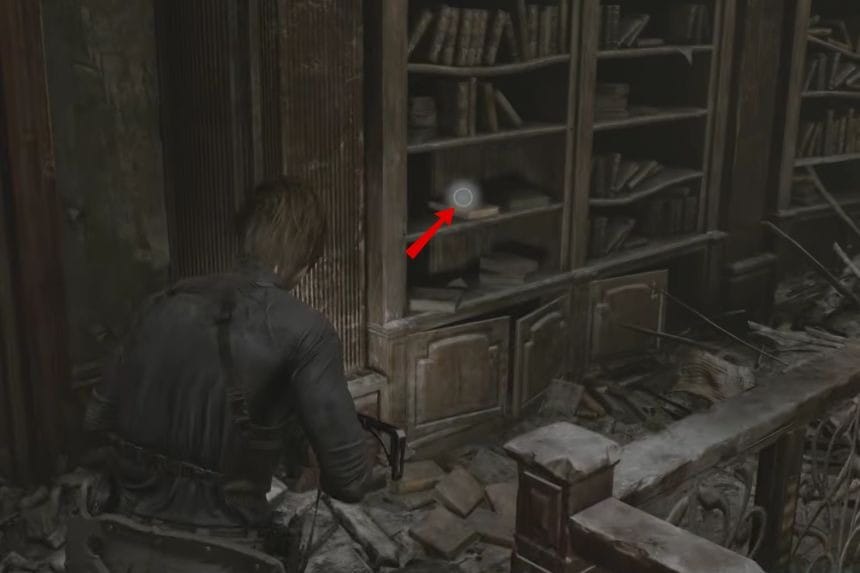
Key Item: Mechanic Jack


From Operations Room, head south to Reception. Climb the ladder to the Library’s 2nd floor, then enter the door on the right. The Mechanic Jack is on the floor in the northern part of the Library.
Mr. Raccoon #22 – Library

Inside the Library, go to the tall central bookshelf. On the north-facing side, check the bottom row of shelves, second from the left, hidden behind a pile of books to find Mr. Raccoon #22.
File #61 – Photograph
In the Library, go upstairs and turn left across the walkway toward a locked wooden door. To the right of the door, inspect the brown leather book in the bookshelf. Open it to view the photograph. This file only appears after you’ve read all four S.T.A.R.S. Office files: Barry’s To Do List, Scavenger Hunt – Clue 1, Scavenger Hunt – Clue 2, and Library Card.
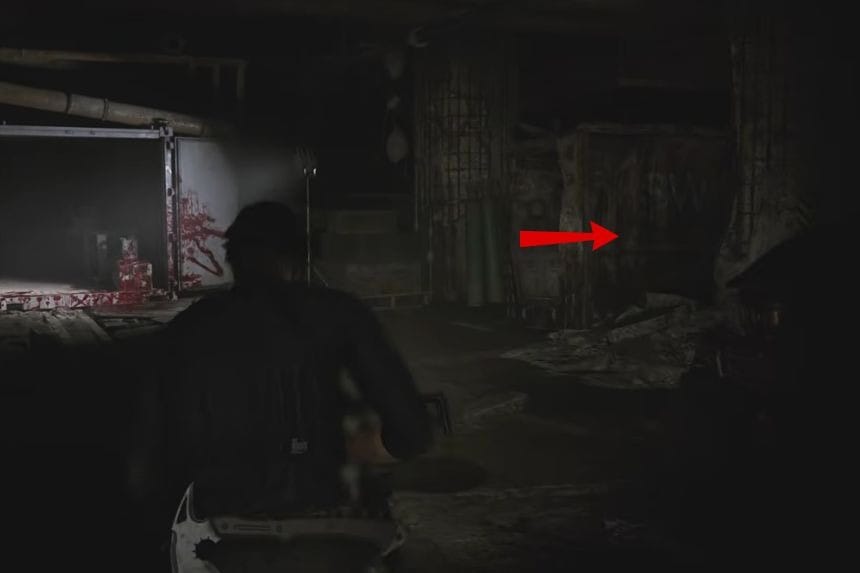
File #62 – Toe Tag

After you use the wall lever in the Underground Chapel, a side door will open. Step through it, and you’ll immediately see black coffins. Open the coffin on the right to find the file inside. Make sure to turn it around and read the back for all the details.
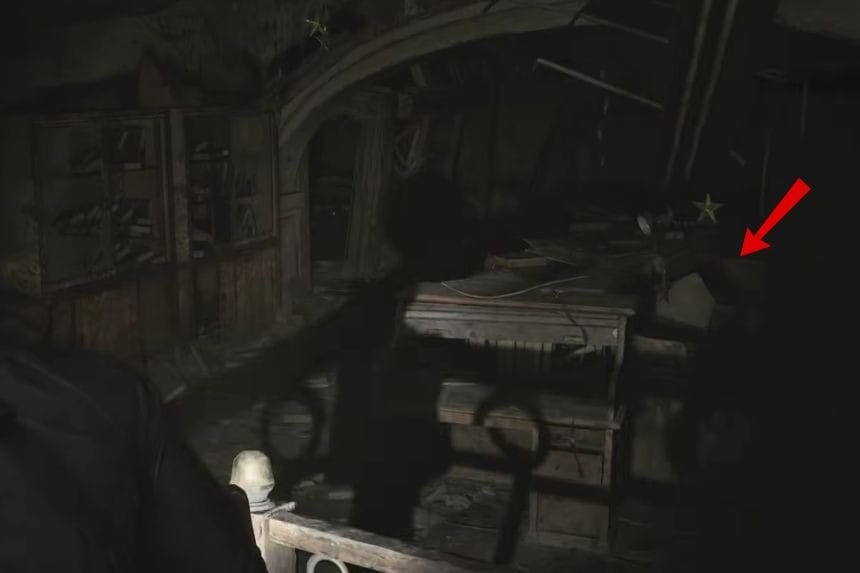
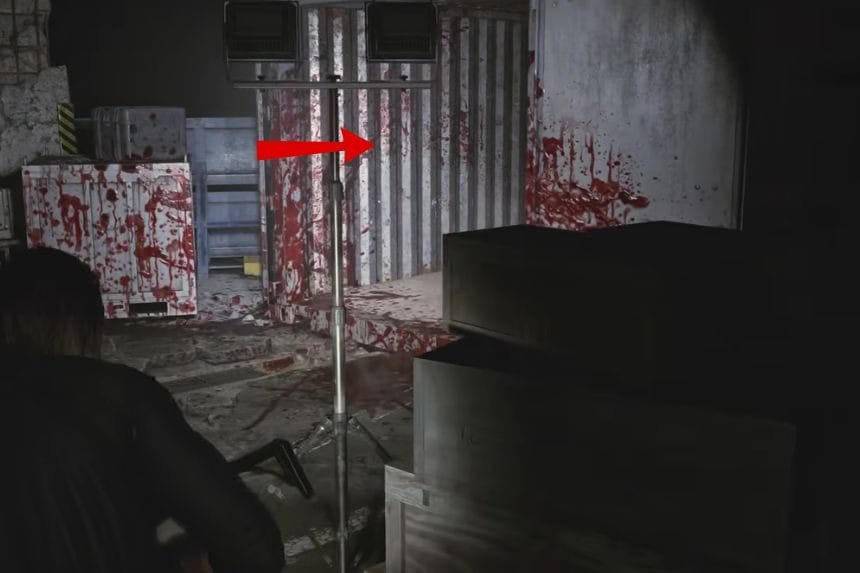
Fire Poker
When you reach the area behind the coffins, you will see a locked gate blocking your way. Look to the right side and pull out the coffin lying on the floor. Once it’s moved, you can use the three coffins as steps. Climb up them and vault over the gate. On the other side, pick up the Fire Poker, then use it to open the gate and continue forward.
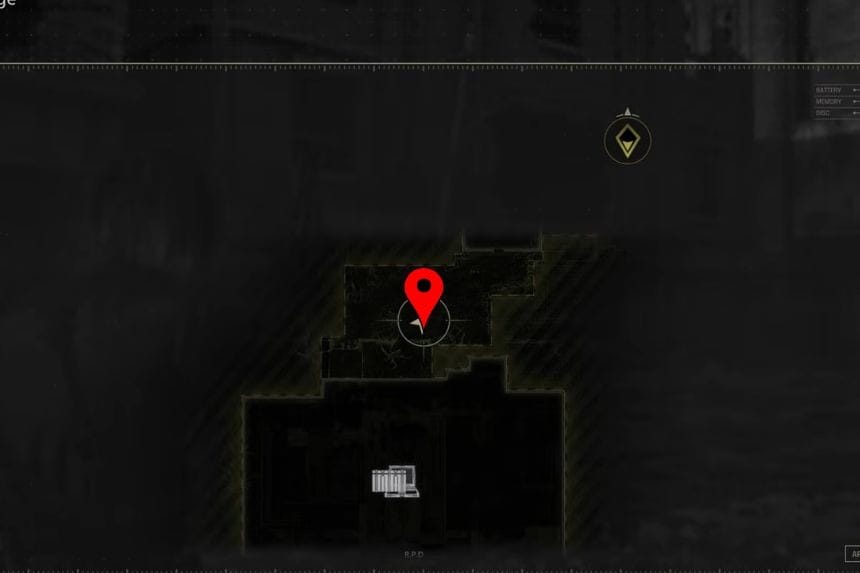
File #63 – Series 60 Results


Once you escape the Underground Chapel and arrive at the lab head through the first green-glowing door on the right. The file will be right in front of you as you enter.
File #64 – New Researcher’s Notebook

In the same lab room, go to the back right corner and check the desk. You’ll find the New Researcher’s Notebook there.
File #65 – Guide Pamphlet
When playing as Leon again, progress through the story until you reach the Main Hall after a cutscene. Once the cutscene ends, turn around and you’ll find this file sitting on a bench on the eastern upper floor of the hall.
Charm: Cute Bear Charm
This charm boosts mid-range firepower but slightly reduces close-range effectiveness. After leaving the R.P.D. building, head left into the dark parking garage. Straight ahead, you’ll see an open container with lights on. Look to the right of the container on the ground to pick up the charm. This area is optional, just before the path that leads to Gun Shop Kendo.
Weapon Part: Silver Finish Scope (Classic 70)
Inside the same lit container in the parking garage, you’ll find the Silver Finish Scope for the Classic 70 sniper rifle.
Weapon: W870 Police (Shotgun)

Exit the parking garage and enter Gun Shop Kendo on the side of the road. After the cutscene inside, turn around and check the shelf behind the door to pick up the shotgun.
Mr. Raccoon #23
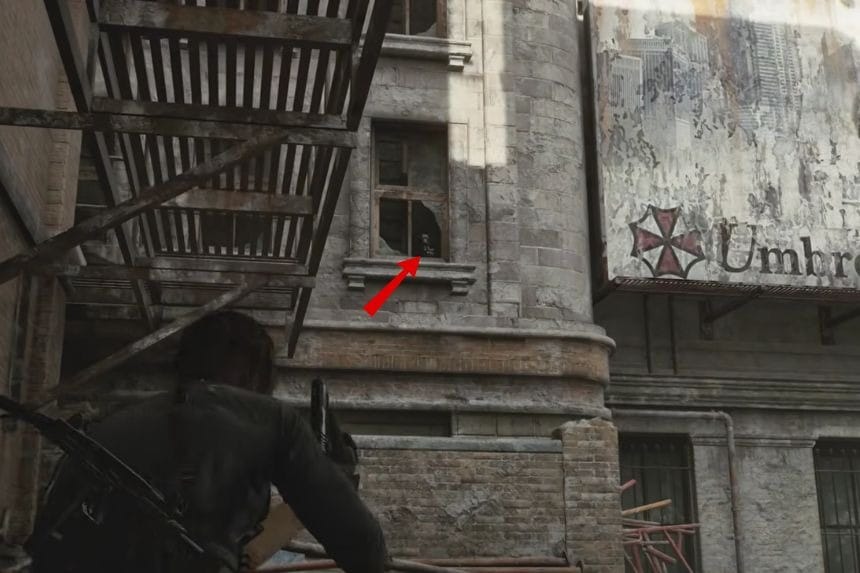
Right after the cutscene in Gun Shop Kendo, go into the open alley on the side. At the end of the alley, look up to see the Raccoon sitting in an open window. It’s located to the left of the “Umbrella” billboard.
Trophy: Not Today, Buds! (Collect 9 Plant 43 Seedlings)
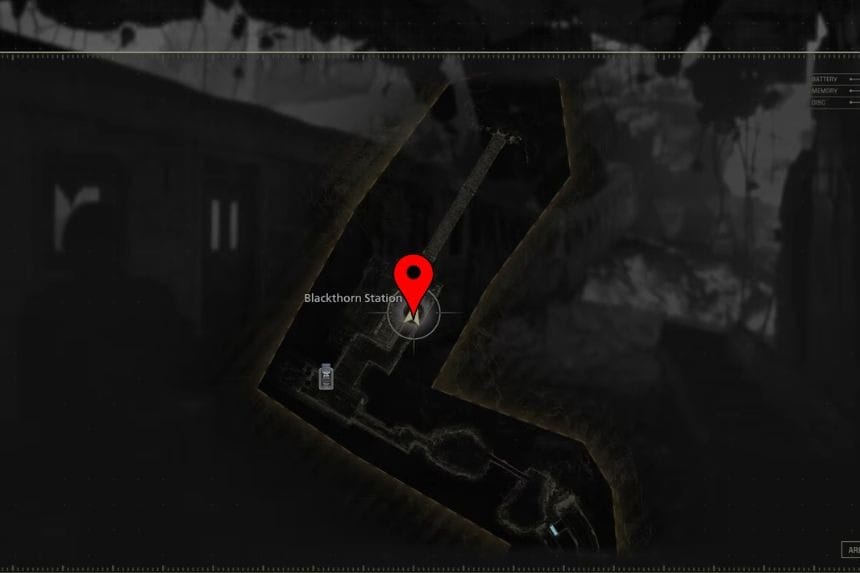
After a boss fight, continue along the story until you enter a train. The first Plant 43 Seedling attacks automatically. These are vine-like plants with sharp teeth, and you need to shoot them when their “mouth” opens to defeat them.

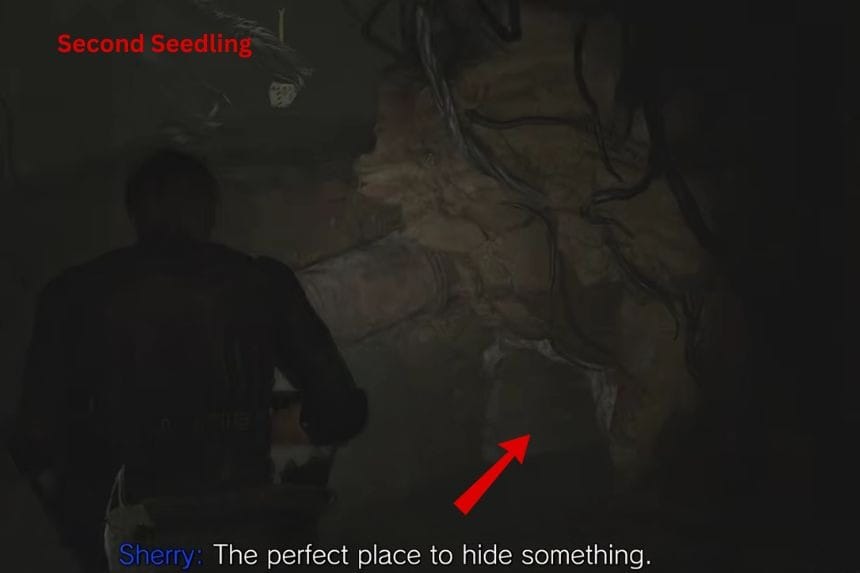
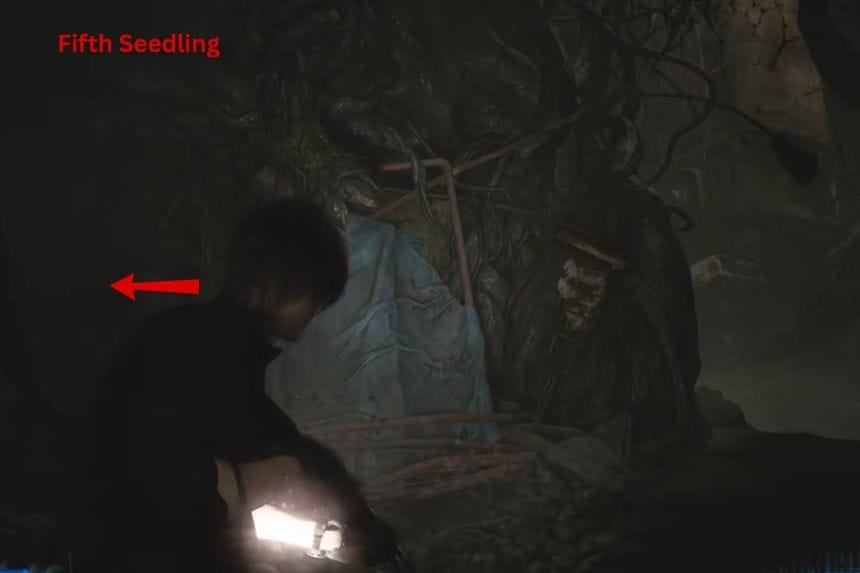

There are 9 seedlings total:
- First Seedling: Appears on the train.
- Second Seedling: At the start of the cave after you rappel down.
- Third & Fourth Seedlings: Along the main path in the next section of the cave.
- Fifth Seedling: On a side path to the left of the previous two; it will try to grab your feet.
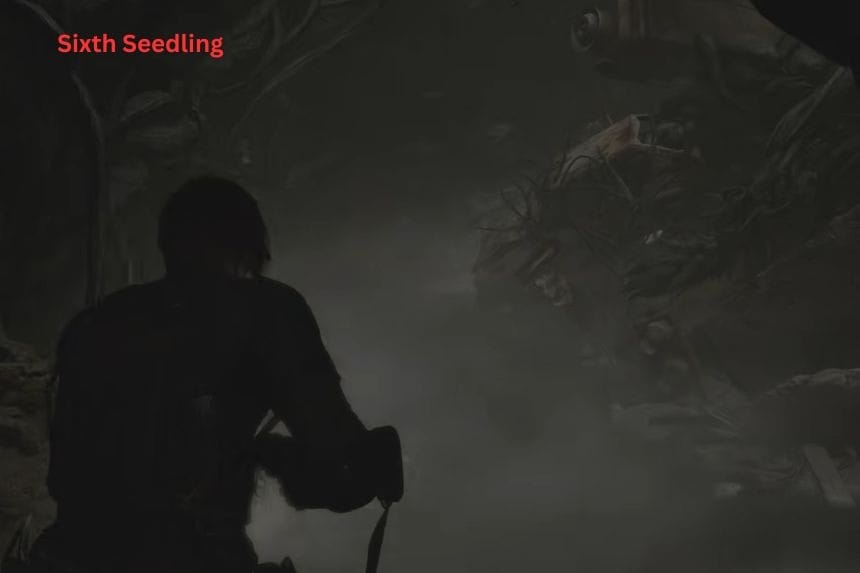
- Sixth Seedling: On the main path in the flooded cave section.
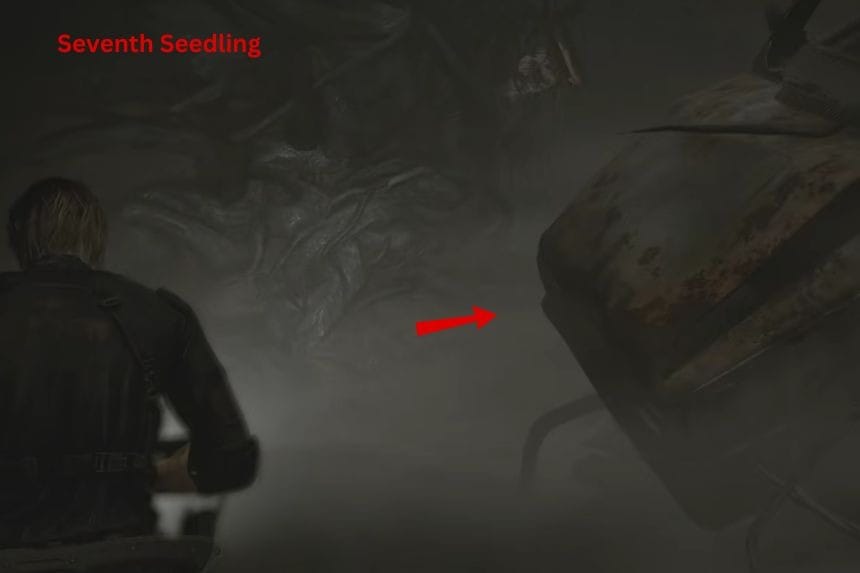
- Seventh Seedling: Directly to the left of the sixth on the main path.
- Eighth & Ninth Seedlings: On the main path near the light at the end of the cave.
Explore carefully to make sure you collect all nine seedlings and unlock the trophy.
ARK
Leon dives into the crater at the heart of Raccoon City and uncovers ARK, a hidden base like no other. With shocking revelations hitting from all sides, the big question is can Grace and Leon work together to uncover the truth behind the mysterious Elpis?
File #66 – N0-AH Status Report

After passing through the decontamination tunnel, turn left and go through the green door to find a save point. Check the monitor on the wall to pick up the file.
Mr. Raccoon #24
From the safe room, leave and go straight, then look right behind the boxes in the corridor before heading downstairs.
Files #67-69 – Raccoon City Bioweapon Research + Product Catalogs 1 & 2

After climbing the stairs decorated with golden skeleton statues, enter the green door on the right to reach the Guest Lounge. Check all three monitors on the walls to collect the three files.
Weapon: Mortal Edge
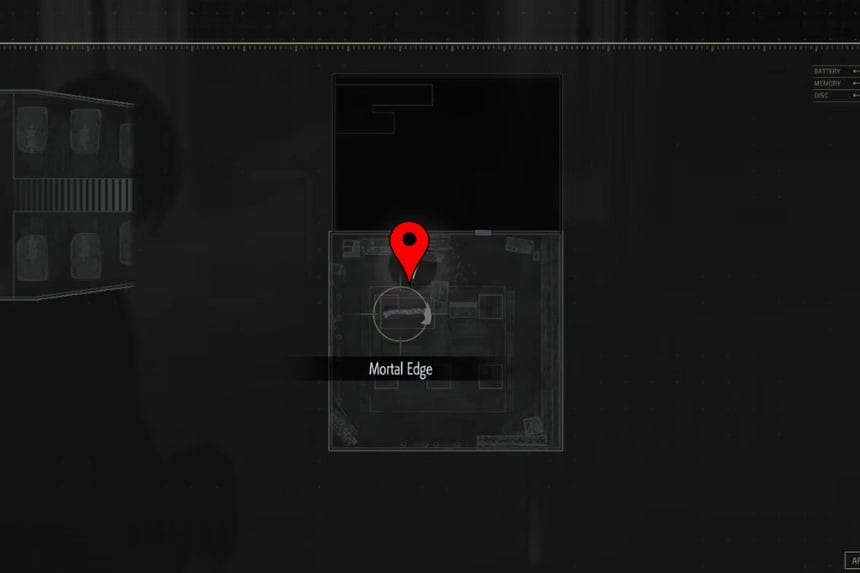
After defeating a boss, loot the Mortal Edge Hatchet. You can unequip your current Hatchet and equip this one it deals more damage and has better durability.
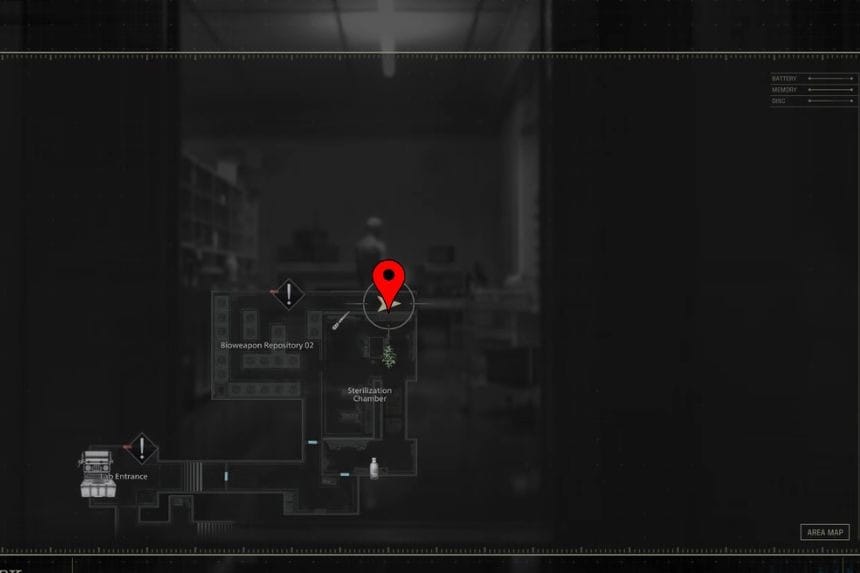
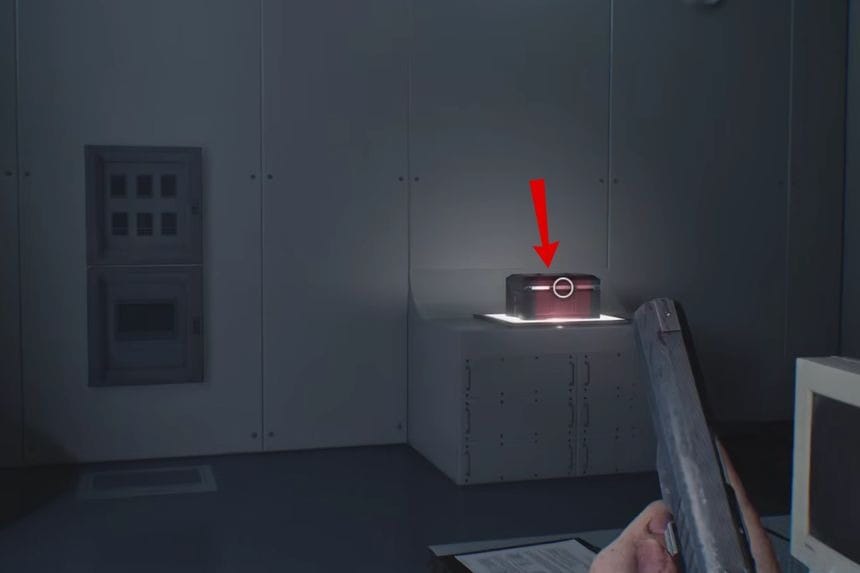
Safe #4 – Sterilization Chamber
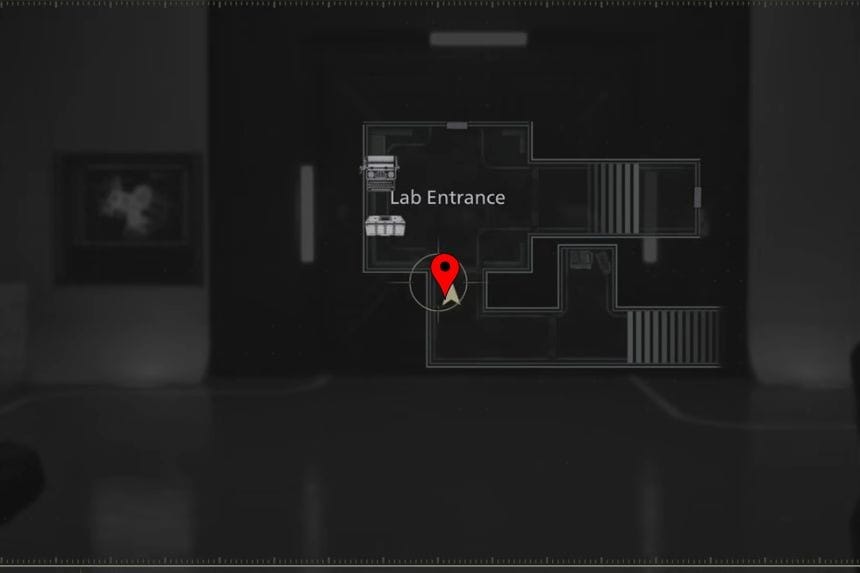
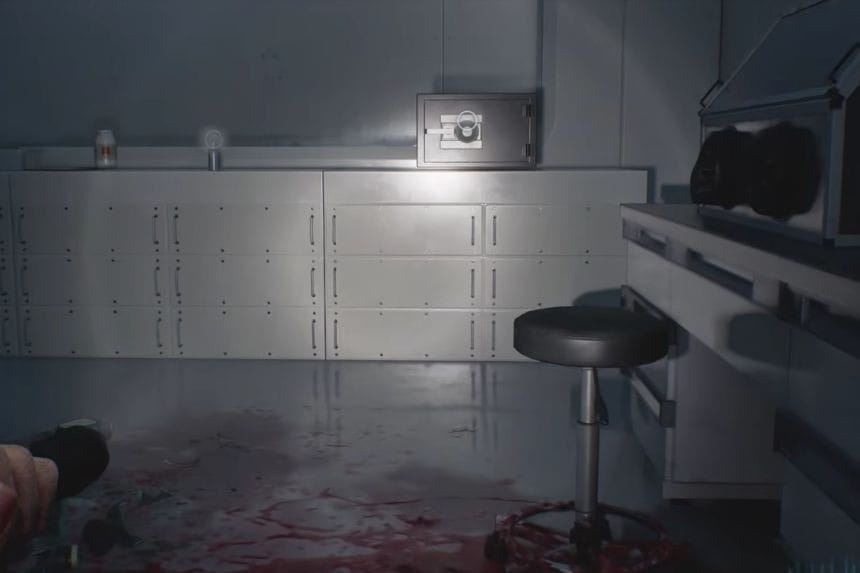
While playing as Grace, advance to the next typewriter save point, then go through the open door on the right to reach the Sterilization Chamber. The safe is on the window directly in front of the entrance. Sneak past enemies to access it.
Casual Combination: Right 10 – Left 90 – Right 20
Insanity Combination: Left 80 – Right 50 – Left 0
Weapon: Bottle of Acid
In the Chemical Storage room, the Bottle of Acid is sitting on the table right as you enter.
Key Items – Override & Magnetic Keys
Override Key (Dump Control Room): At the end of Chemical Storage, glowing green on a computer panel. Backtrack and use it on the console in the Dump Control Room.
Magnetic Key: After using the Override Key and triggering a cutscene, it’s on the wall in the same room inside a green glowing panel.
File #70 – Access Log: 51st Assembly Minutes
Use the Magnetic Key on the red door near the typewriter upstairs, leading to a lobby with red floor paint. Enter the first green door on the left and inspect the monitor on the right wall.
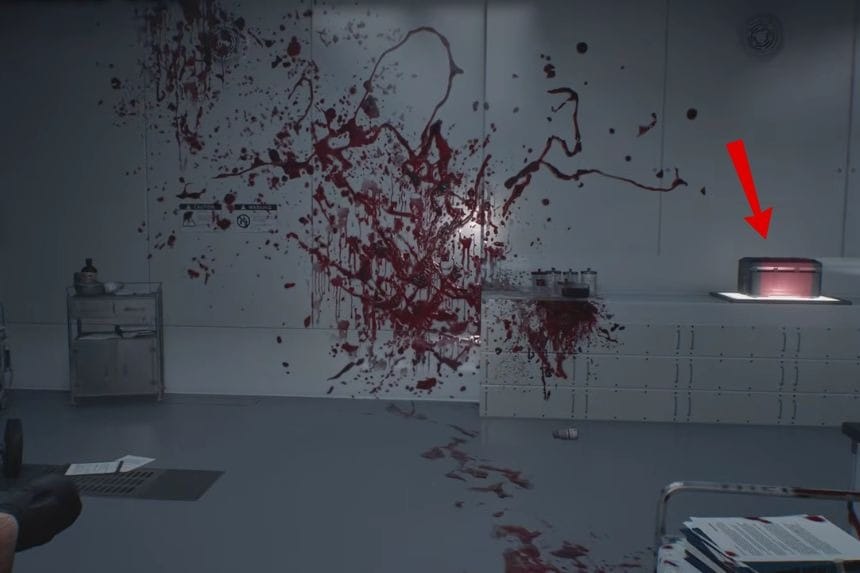
Safe #5 – Monitor Control Room

In the same room, the final safe is on the counter, unlocking the No Safe is Safe trophy.
- Casual Combination: Left 50 – Right 60 – Left 80
- Insanity Combination: Right 20 – Left 0 – Right 70
Nearby, you’ll also find the Crafting Recipe: Bottle of Acid on the left side of the safe.
File #71 – Sterilization Chamber Safe
Go through the next green door to the Anteroom, descend the stairs, and check the first corner on the right the file is on a crate before entering Bioweapon Repository 05.
Upgrade: Hip Pouch
Inside Bioweapon Repository 05, after collecting the previous file, open the first container on the left to find the upgrade.
File #72 – Monitor Control Room Safe
In the same room, check the middle row, rightmost open container. Clear enemies using Molotovs, Acid Bottles, and headshots. Other containers hold crafting materials to recover ammo used during the fight.
Mr. Raccoon #25

In the Operations Room, after triggering an alarm, the final Raccoon sits in front of the big monitor.
Key Items – Noblesse & Animus Orbs
Noblesse Orb: Next to the Raccoon in a red box.
Animus Orb: Backtrack upstairs to the first typewriter in Lab Entrance, go north through Bioweapon Repository 02, and find it in the Cleanroom inside a red box.
File #73 – Access Log: First Assembly Minutes
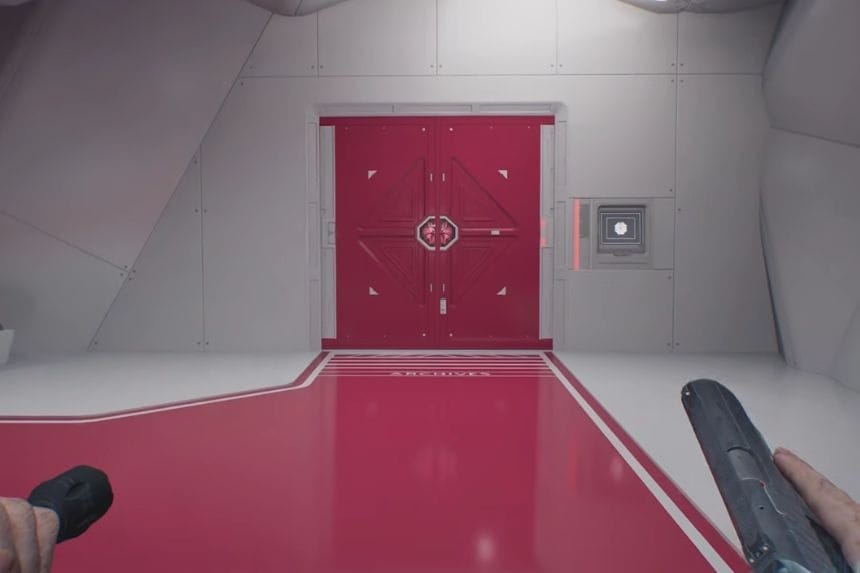
Use the two orbs in the Lobby to access the Archives. Check the last monitor on the right wall to collect the file.
Trophy: Cat Got Your Tongue?
While playing as Leon, parry a Licker’s tongue attack. Timing must be precise block just before the tongue hits you. Successfully doing this cuts off the tongue and unlocks the trophy.
Key Item: Override Key (Bioweapon Repository 11)
Found on the wall in Systems Management.
Files #74-75 – Alyssa’s Interview Notes & Letter from Patrick
These files are automatically obtained during the next cutscene. Collecting them unlocks the Case Closed trophy. If you miss them, you can retrieve them from the Files menu or in a future playthrough.