
If you’re working toward full antique completion in Where Winds Meet, this guide keeps things simple. Each location below lists only what you need to do, no filler, no guessing, and no unnecessary detours. Since many antiques depend on story progress or paired items, follow the steps carefully to ensure they register properly. Use it as a checklist and clear each region at your own pace.
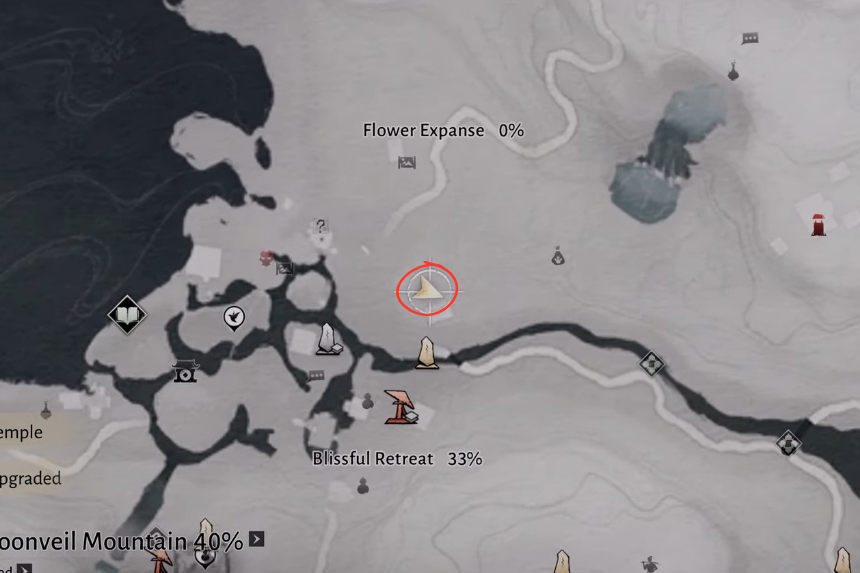
Blissful Retreat
Here’s how you can get all the Antiques in Blissful Retreat:
Old Bracers
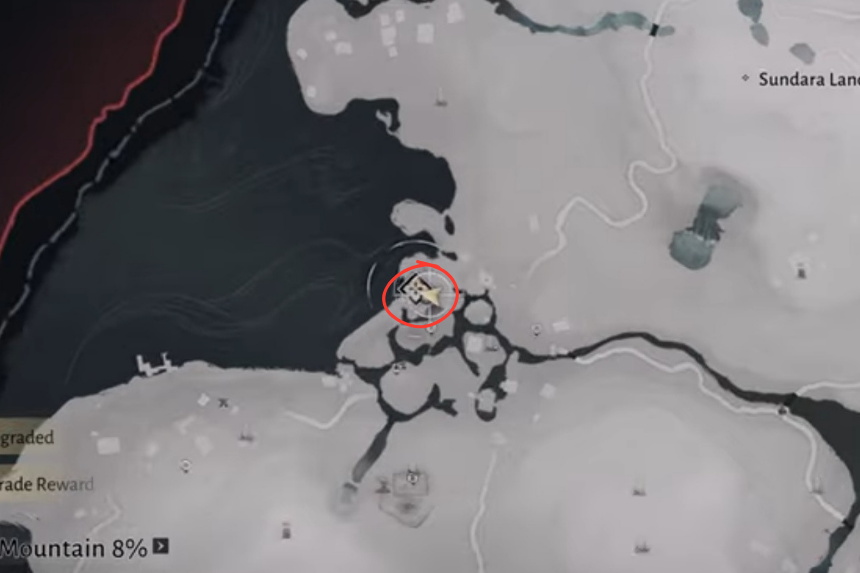
You don’t actually need to go searching for this one. It’s tied to the main storyline early on. When you reach the underground area beneath the Wine Tower, you’ll pick up a handful of items before leaving, the Old Bracers are one of them, and you’ll get them without having to do anything extra.
Artisan Bracers
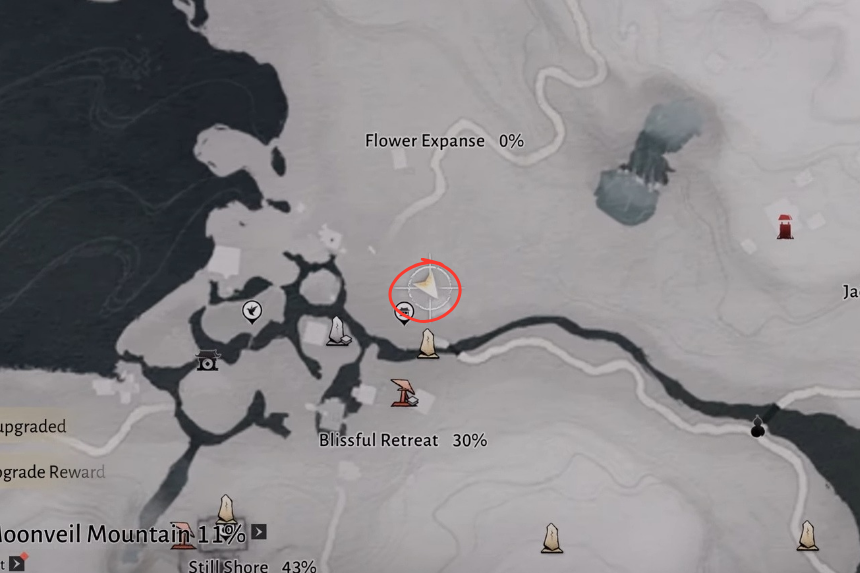
This antique is split between two separate chests.
- One chest is inside a small house on the left side.
- The second is located back in Stonewash Strand inside another house.
Whichever chest you open first doesn’t matter, the antique only registers once both have been looted. These same two chests also count toward the Stonewash Strand antique collection, so you’re basically hitting two checklists at once.
Cicada Wing
For this one, head into the house with a chest on the right side and open it. After grabbing what’s inside, walk the path nearby until you reach a tree. Hidden just behind it is an interactable object. Examine it, and that completes this antique.
Willowleaf Blade
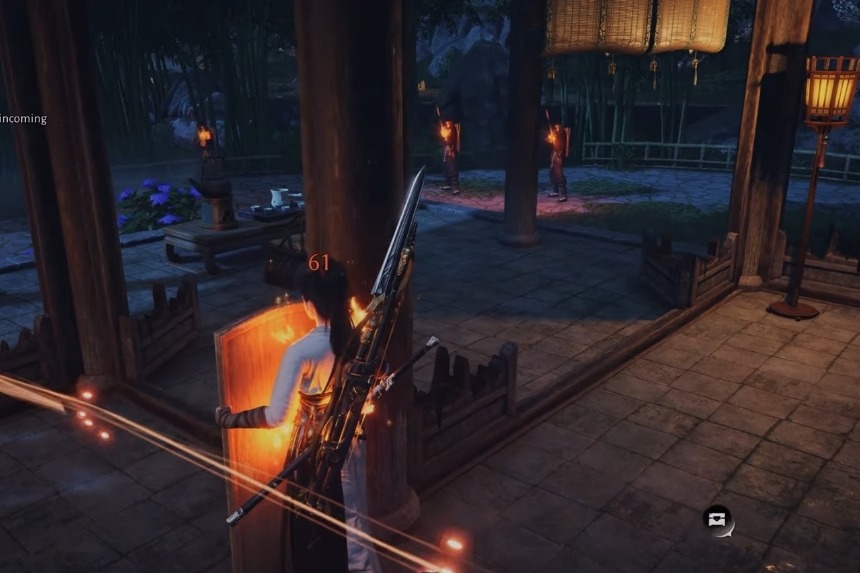
Half of this is gained automatically during the story, specifically the sequence where you’re under attack inside a house and blocking flaming arrows with a shield. Once the story moves ahead past the major events in Blissful Retreat, visit the camp shown in the quest area and pick up the mysterious account letter on the ground. With both parts, the Willowleaf Blade is considered complete.
Colorful Longevity Thread
This one only becomes valid after you’ve worked through the story events here, especially the fire-related sequence. Once that’s done, check the chest sitting beneath the tree. If you already opened it before progressing the story, that’s fine. The antique will still register once your quest progression reaches the correct point.
Crescent Ring
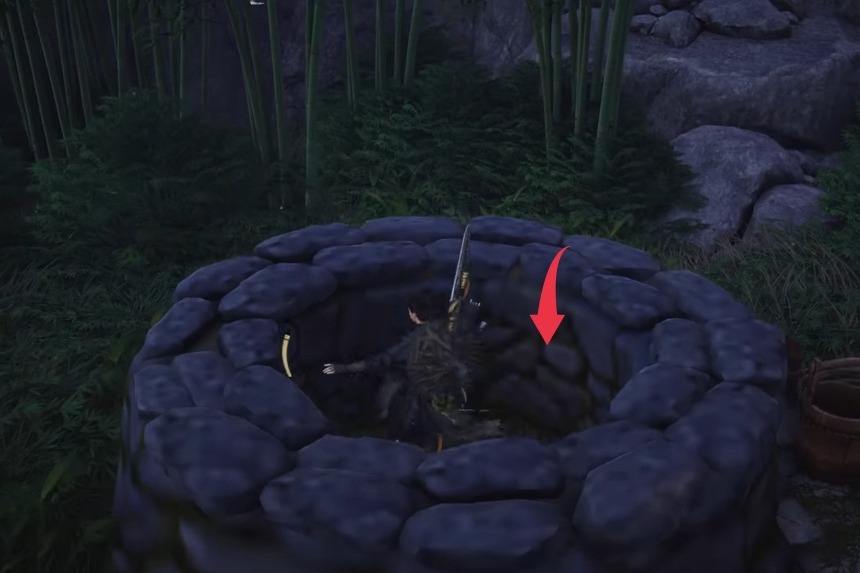
Once again, storyline progress is required before the game recognizes this antique. After things advance far enough (using the fire sequence as your checkpoint), go around the clinic and drop down into the well behind it. Down in the larger chamber at the bottom, there’s a small box on the right. Inspect it to get the Crescent Ring.
Even though this location technically belongs to Still Shore, the Crescent Ring counts under Blissful Retreat.
Lovesick Handkerchief
First, loot the chest that contains the handkerchief. After that, make your way to the Peace Bell Tower at Moonville Peak.
Inside the tower, there are multiple investigation spots to interact with as you climb:
- One near the broken staircase on the pillar
- Another along the wall beside the next set of stairs
- A hanging scrap of cloth before stepping outside
- The large bell at the center of a room a few floors up
- Near the top, a letter tucked behind the staircase
- One final inspection point right beside it

When all these have been checked, go back down. The elder will now be waiting outside. Before talking to him, step inside once more and interact with the spot on the floor where he was originally standing.
Then talk to him and choose the option referring to the “two heroes.” Repeat that same dialogue more than once (twice, sometimes three times). Once done correctly, the final antique unlocks.
Heaven’s Pier
Here’s how you can get all the Antiques in Heaven’s Pier:
Peace Pendant
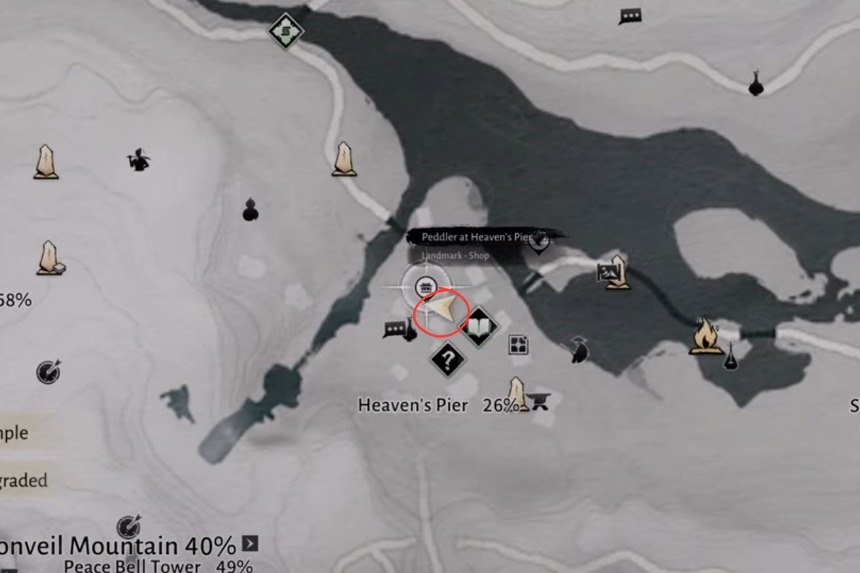
To get this antique, you’ll need to take care of two steps in the Heaven’s Pier area.
Start by going to the merchant located in Heaven’s Pier. Nearby, there’s a chest, open it, and inside you’ll find the Peace Pendant. That’s the first requirement done, but it won’t register on its own.
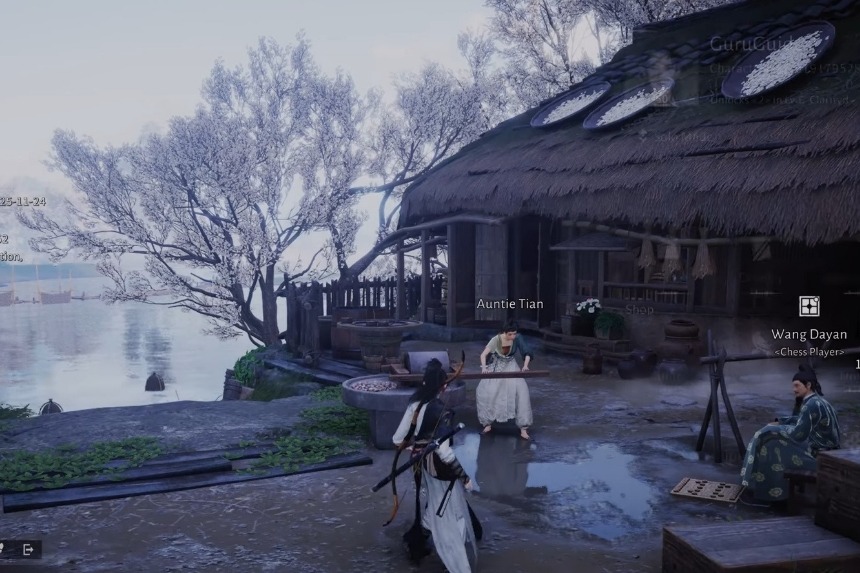
Next, make your way to the lower part of the village where Auntie Tian can be found. She’ll be using a roller when she’s present. If you don’t see her there, change the in-game time until Shen hour (around 5 PM).
Once she appears, talk to her and go through every dialogue option until she has nothing left to say. Opening the chest and finishing the conversation with Auntie Tian completes the antique requirement for this region.
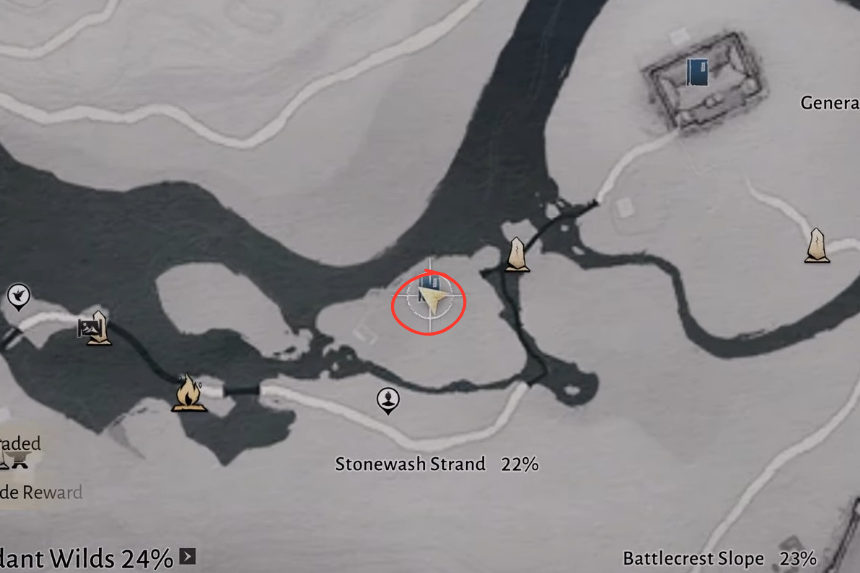
Stonewash Strand
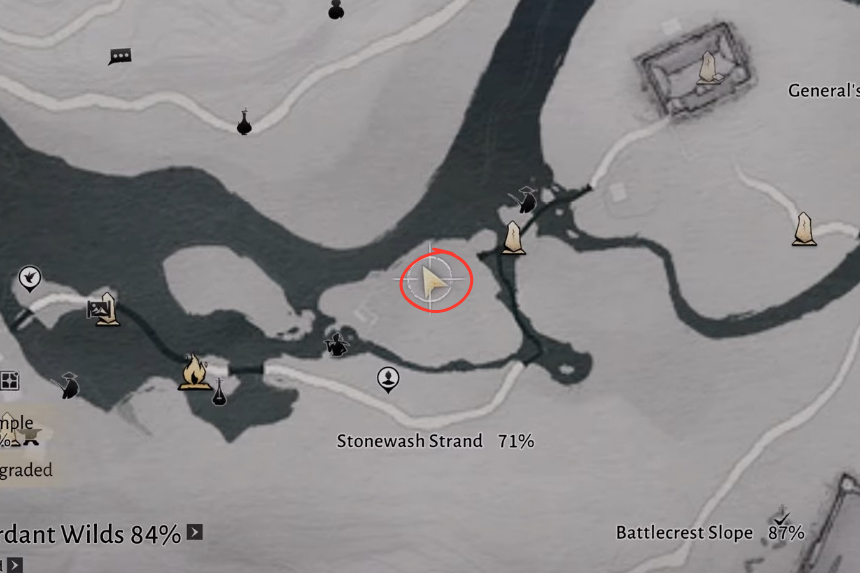
Collecting the antique for Stonewash Strand requires grabbing two specific chests. Begin by locating the chest that contains the Artisan Bracers. Open it, that’s the first half of this requirement.
Next, travel to the Blissful Retreat fast travel point. Just a bit north of the marker, there’s a house. Head inside and loot the larger chest found along the left wall.
Once both chests have been opened, the Stonewash Strand antique is considered complete.
Bamboo Abode
Here’s how you can get all the Antiques in Bamboo Abode:
Antique 1
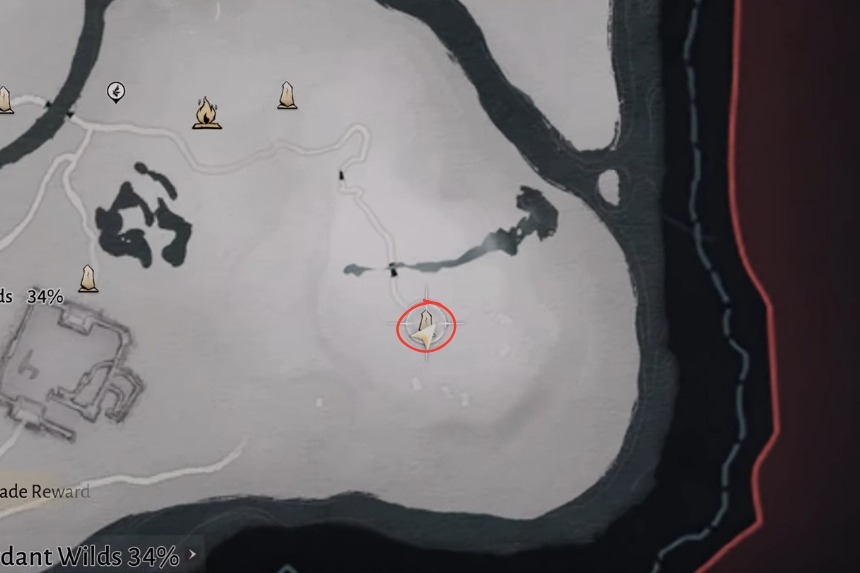
You won’t need to hunt this one down, it’s awarded early in the game when you obtain the Old Spear, so there’s nothing extra required here.
Antique 2
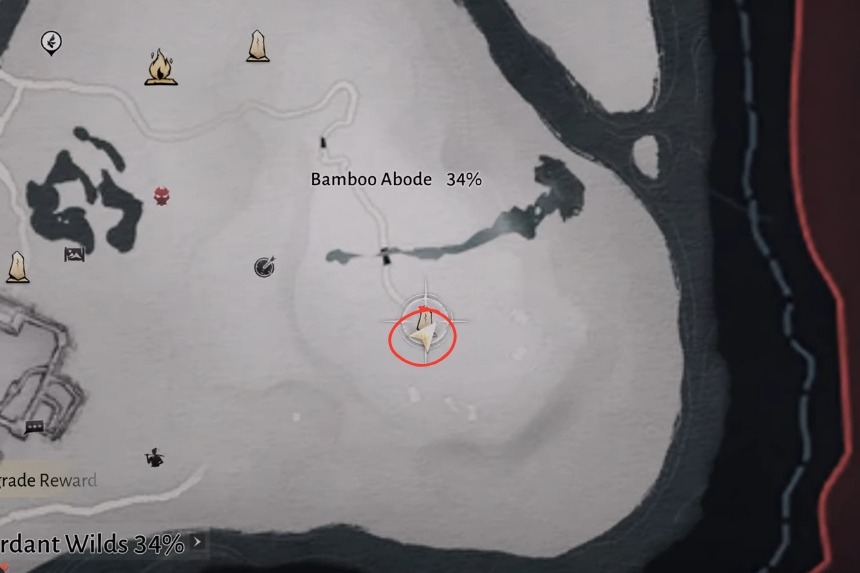
To unlock the second antique, you’ll need to complete two tasks. First, near the starting area, look for a house on the right. Inside, there’s a chest, open it. That’s the first step.
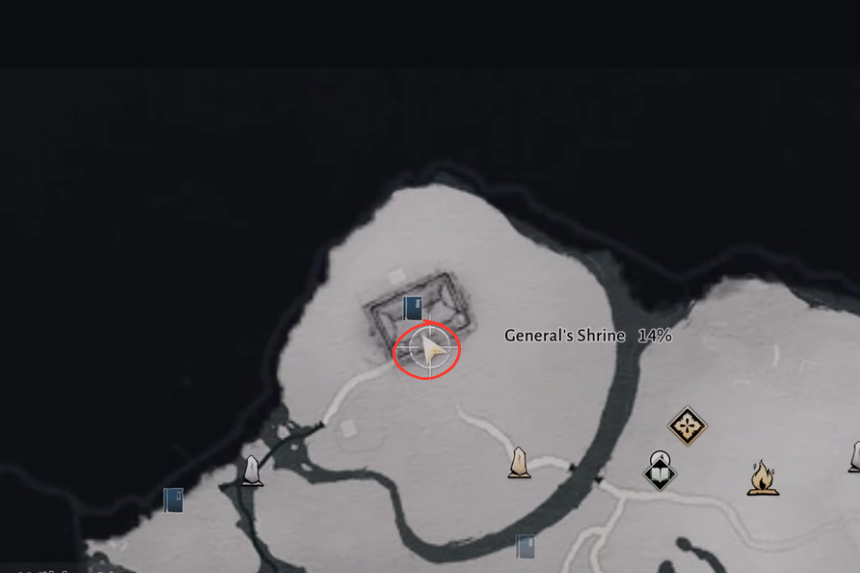
Next, head to the General Shrine and make your way to the underground section. Use a jump + L3 slam to break through and reach the lower area, then follow the only available path, it’s straightforward and will lead into a larger room with a statue of the General.
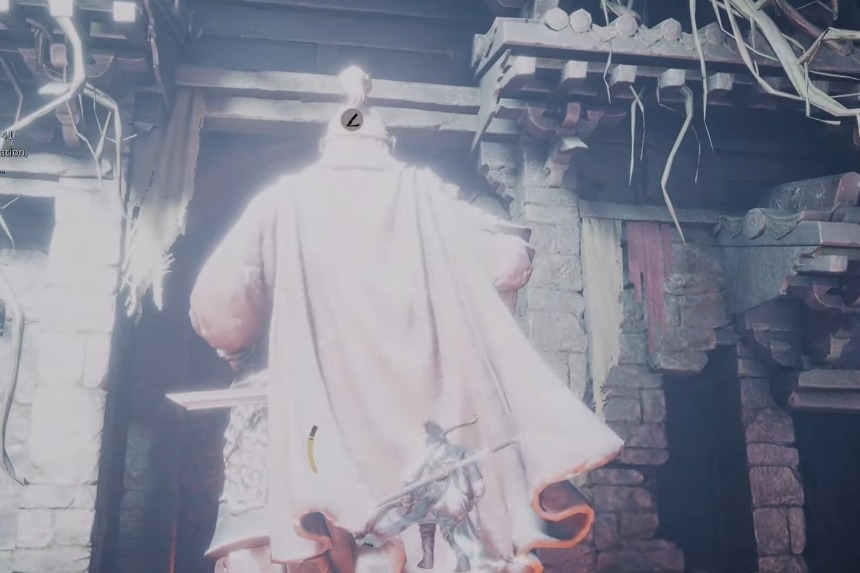
The item you need is the compendium entry located on top of the statue’s head. Reaching it can be a little awkward, stand on the left side of the cape where there’s a small ledge, then jump up and repeatedly hit L3 until the interaction registers.
Battlecrest Slope
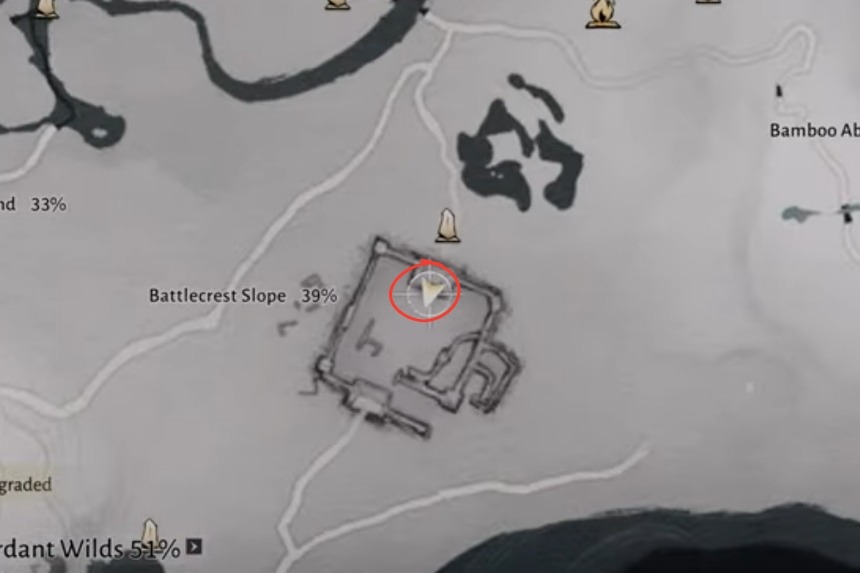
You’ll need to head beneath the Northern Vow Ruins to unlock the antique for this region. Once you’re inside the underground area, there are only two actions required. First is to loot to make your way to the waterfall chamber. Behind the water, above the headless statue, you’ll find a chest. Open it, this is the first required item.
Next, continue into the following room. There’s a pile of corpses there, and you’ll see an investigation prompt. Interact with it to obtain the Yan Yun Armor. After completing both actions, the antique for the Battlecrest Slope will be added automatically.
Palace of Annals
Here’s how you can get all the Antiques in Palace of Annals:
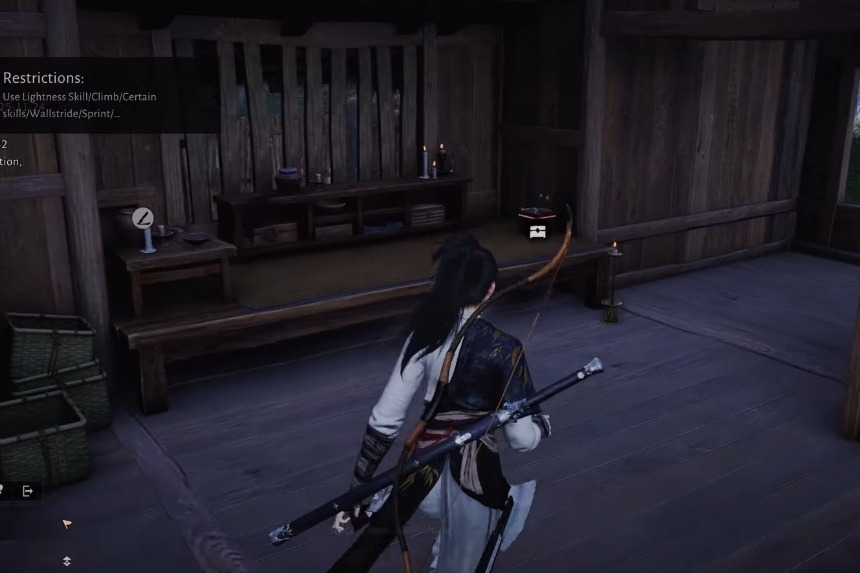
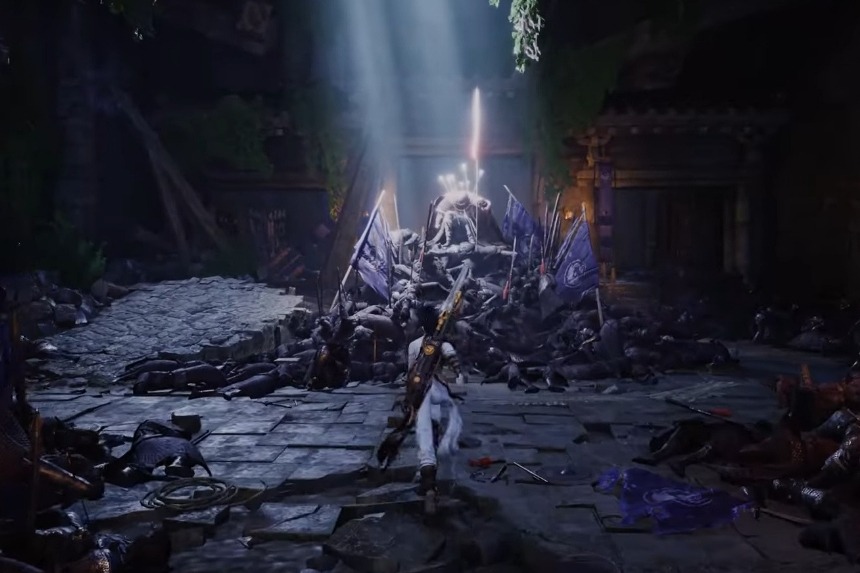
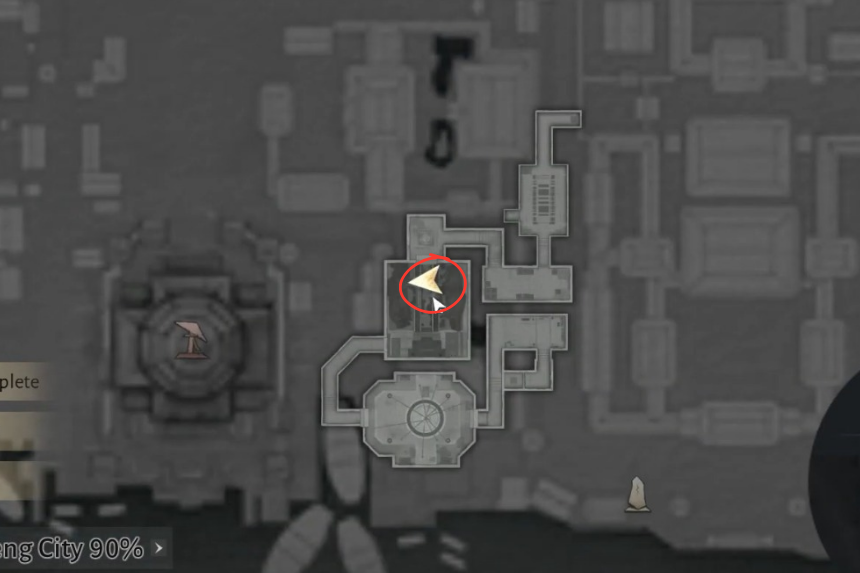
Engraved Bow
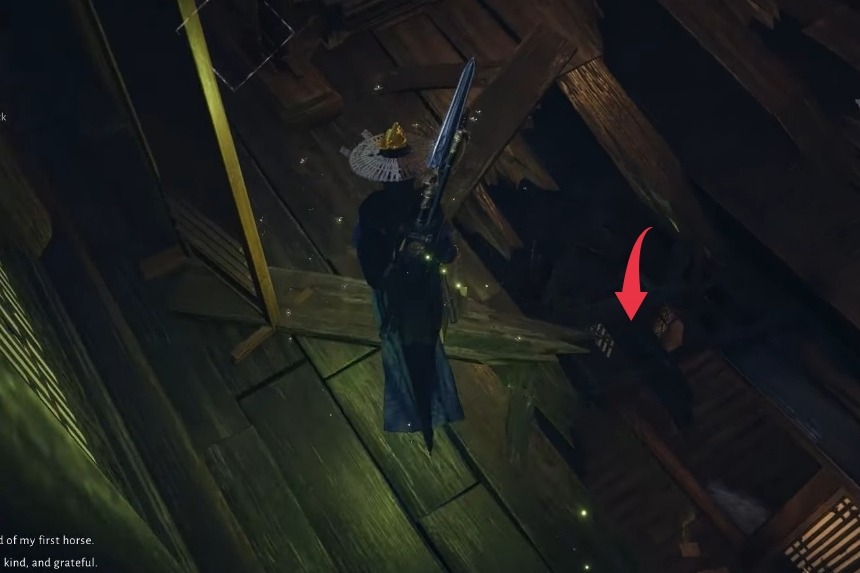
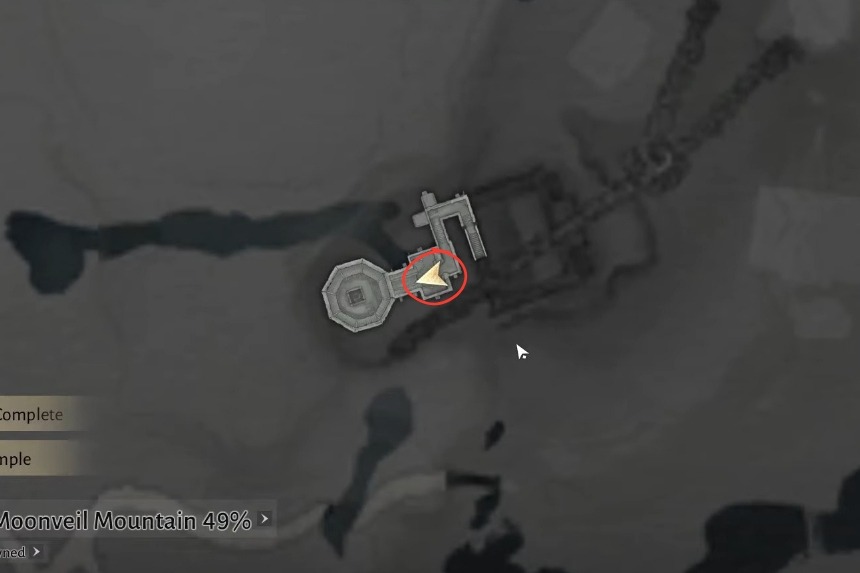
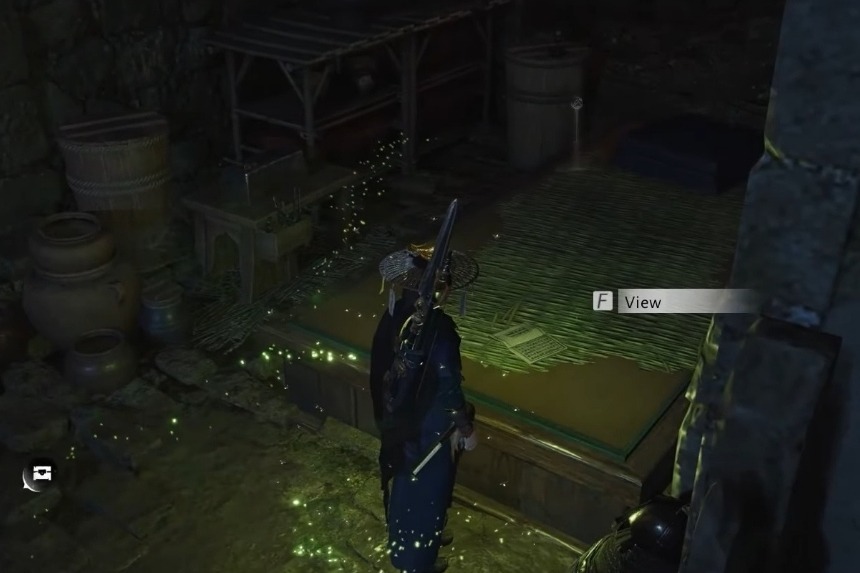
To get the Engraved Bow, head over to the location that’s marked on the image above. As you enter, you’ll come across a corpse, investigate it and then head upstairs to the dimly lit room where you’ll find the antique below a huge map that’s hanging.
Dusty Thumb Ring
To get this one, turn left and you’ll find a chest that you’ll need to interact with. You’ll find an opening from there that will take you to another room with a chest that has loot in it.
Then, head downstairs, to the Forsaken Quarter, keep towards your left and you’ll come across some documents, interacting with it will add the antique to your inventory.
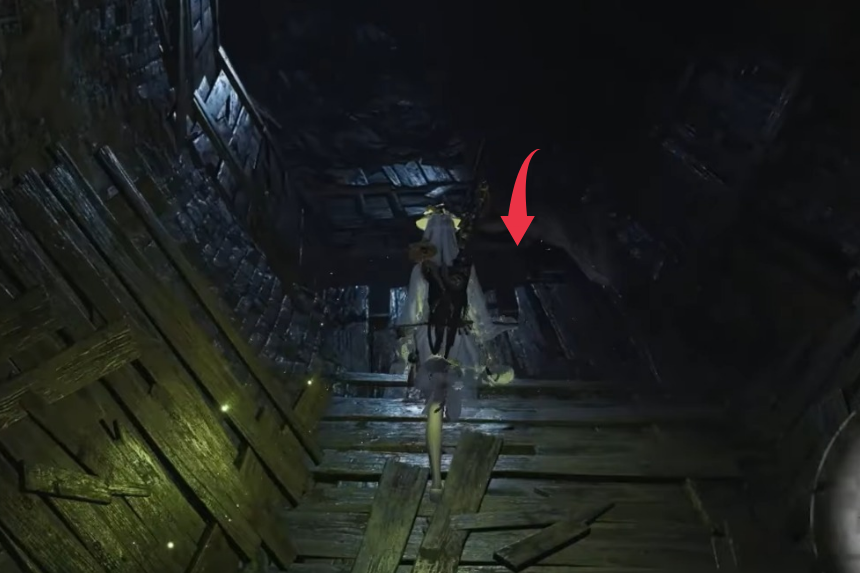
General’s Shrine
A lot of players get stuck here, and there’s a perfectly understandable reason. The antique isn’t locked behind a single action. The game expects you to do two separate tasks, and until both are finished, the antique will never count.
Step 1
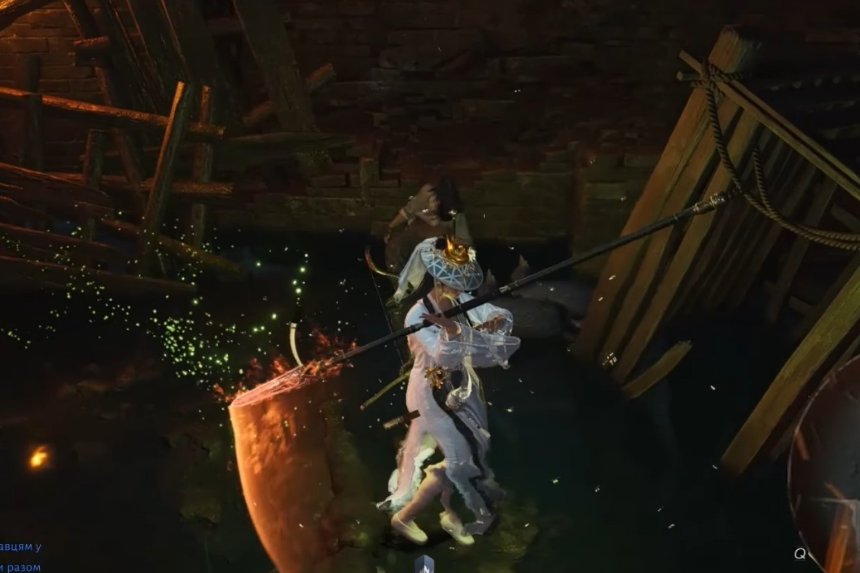
This document isn’t inside the General Shrine at all. Head down to the Northern Vow Ruins and speak with the NPC positioned outside the main gate. This starts a small side sequence. Go inside, fight everyone in the courtyard (including a small boss), then interact with the torches:
- Turn on the torch directly opposite the entrance.
- Turn on the torch near where the mini-boss was.
- Ensure the two torches on the towers are also lit.
Those are the only four that should be active. If you’ve been toggling torches beforehand, just reset them to match this setup. Once the correct four are lit, open the chest. A short cutscene will play showing that the floor can be broken. Do a jump + L3 slam to open the passage.
Continue downward, interact with the quest marker to gain a pose, then proceed into the statue room. Use the new pose on the statue to rotate it and open the next puzzle chamber.
Inside the puzzle room:
- On the right wall: press the same two buttons shown in the original layout.
- On the left wall: press only the far-left button.
If you’ve already moved things around, match the final configuration before progressing. Once correct, the door will unlock.

Walk behind the waterfall in the following area and pull the lever. That opens the final chamber. Inside, you’ll see a large chest containing a Touch of Death mystic skill. Just to the left of that chest is what you’re really here for: The Lea Yan’s Final Words document. Pick it up, then go to your inventory → Quest Items → read/archive it.
Step 2
Go back to the General Shrine entrance. Break the floor panel on the left side (again: jump + L3). Drop into the underground section, defeat the enemies, and clear a few simple interactions as you move forward.
Keep going until you reach the ladder that connects back to the shrine’s upper area. At the top of that ladder is a chest. The antique completes when:
- You’ve opened this chest
- You’ve read/archive Lea Yan’s Final Words
If you opened the chest earlier, don’t worry, reading the document afterward still counts.
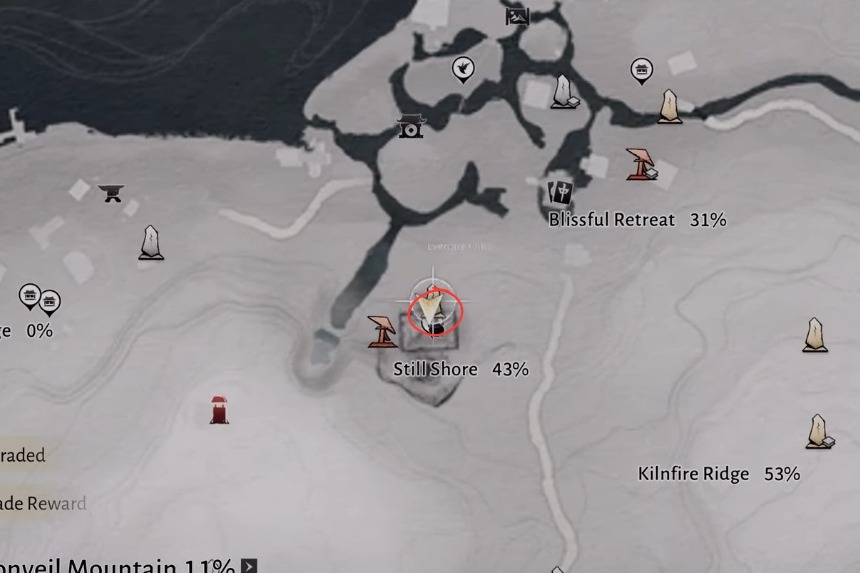
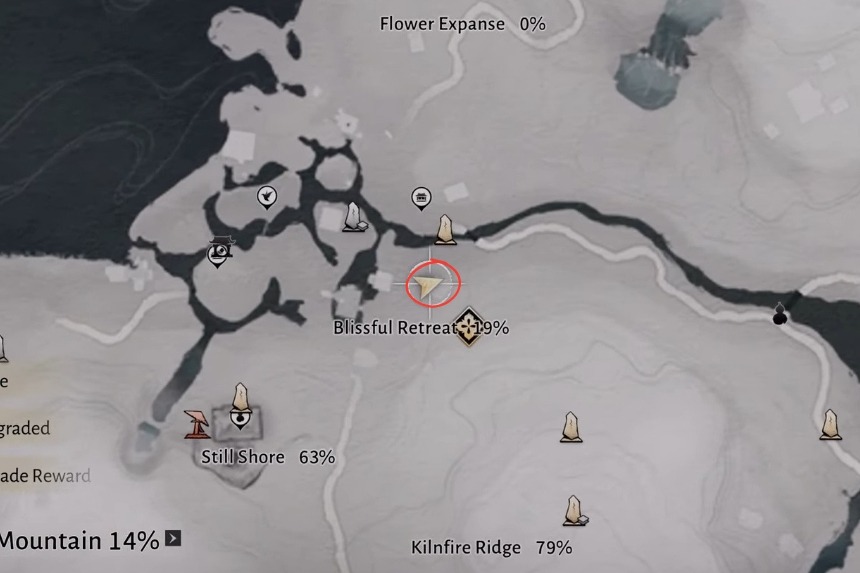
Still Shore
Here’s how you can get all the Antiques in Still Shore:
Warding Chest Armor
This one is straightforward, head inside the Everare Clinic and loot the chest located on the ground floor. That’s enough to trigger the first antique, as long as your main quest progress is far enough.
If you opened the chest already and nothing registered, you’re not doing anything wrong, the game simply wants you to move further along in the story first. Once that happens, the antique will count.
Water Lady Crown
This one takes a couple more steps, but everything is still centered around the same location. Here are the steps you need to follow to acquire it:
- Go upstairs inside the clinic. There’s a chest directly ahead of the ladder, loot it to obtain the Water Lady Crown. If you’re unable to reach the second floor yet, you’ll need to continue the main storyline a little longer.
- Head behind the clinic and climb down the well. That leads you to the Stillshore dungeon.
- Progress through the dungeon. After moving through a few hallways and dropping to the lower level, you’ll eventually reach a room with a chest on the right side.
- Check the shelf in the same room. There’s a scroll tucked in the right corner. Interact with it, that’s the final step to complete the antique entry.
Bodhi Sea
To obtain the antique at Bodhi Sea, you must first complete the Bodhi Sea campaign side quest in the swamp area. During this quest, you’ll need to activate three drums and then defeat the boss Ye Wanshan at the end.
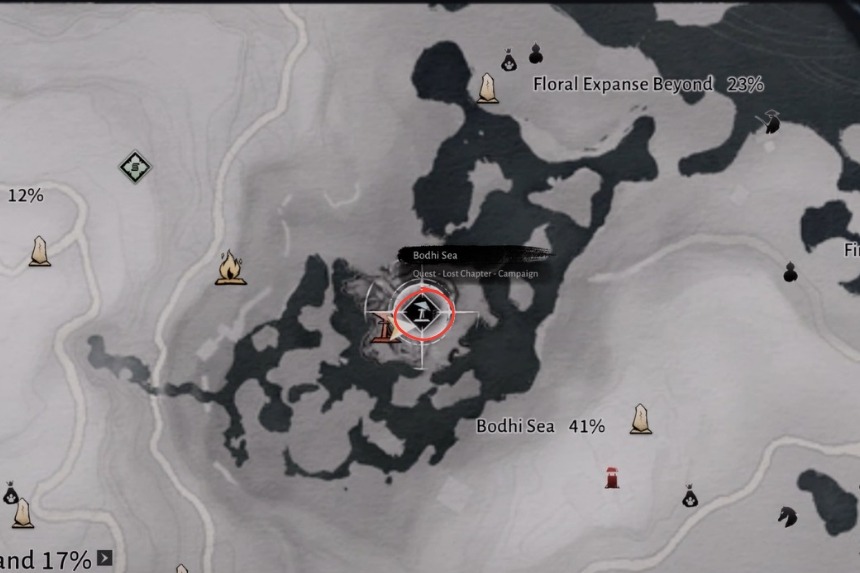
After defeating the boss, a chest will appear nearby. Looting this chest gives you the Iron Heart Armor, which is required to trigger the antique. If the chest doesn’t appear or the antique doesn’t register immediately, make sure the side quest is fully completed. The chest only spawns after finishing the quest.
Learning about the backstory is also important at this point. For this, travel to the crossroads between the Witherworlds and the Peace Bell Tower. A monk should be standing there. If he isn’t present, wait or pass time until the Shen hour. Speak with him and select the “Pagoda of Karma” dialogue option. Once the dialogue is exhausted, the Bodhi Sea antique will be completed.
If the Pagoda of Karma option doesn’t appear, it means the Iron Heart Armor is missing, either it wasn’t looted or it was accidentally recycled. Lost antiques can be recovered by visiting Halo Peak and speaking to the monk there to reclaim discarded items.
Fishwood River
Here’s how you can get all the Antiques in Fishwood River:
Red Fish Sword
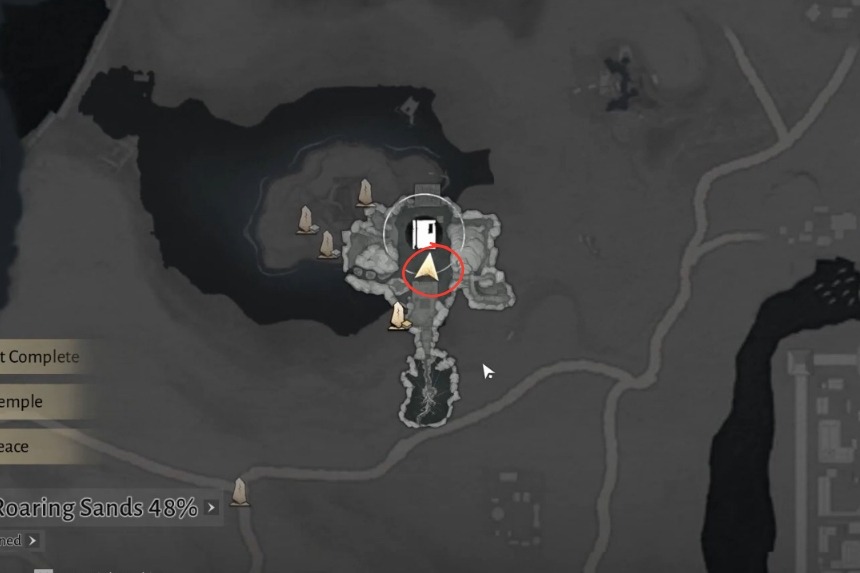
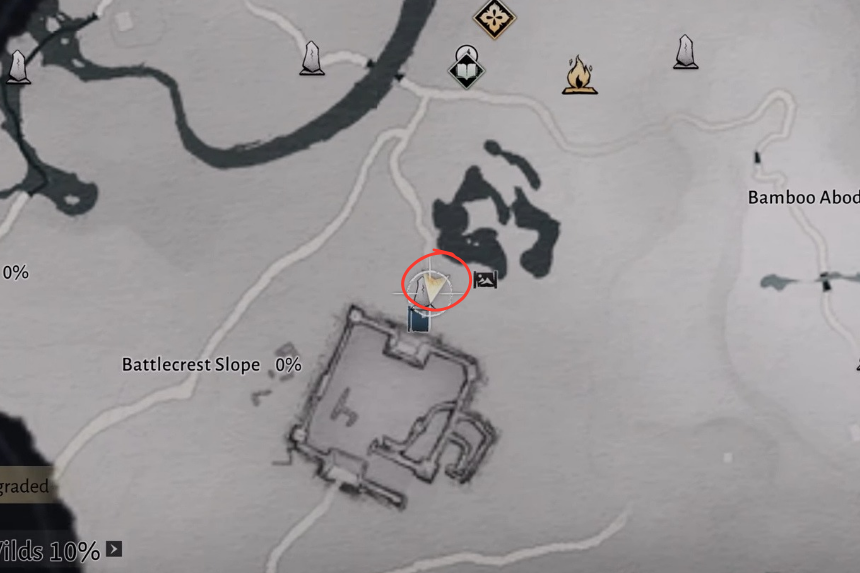
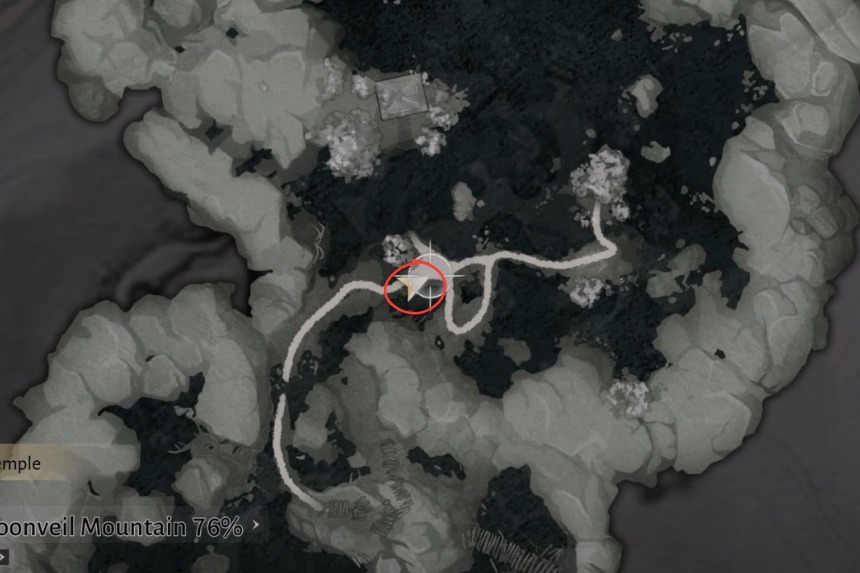
To get this antique, you’ll have to take part in the side quest The River’s Fury. Start with talking to the Eccentric Elder near the signpost whose location is marked on the map image above.
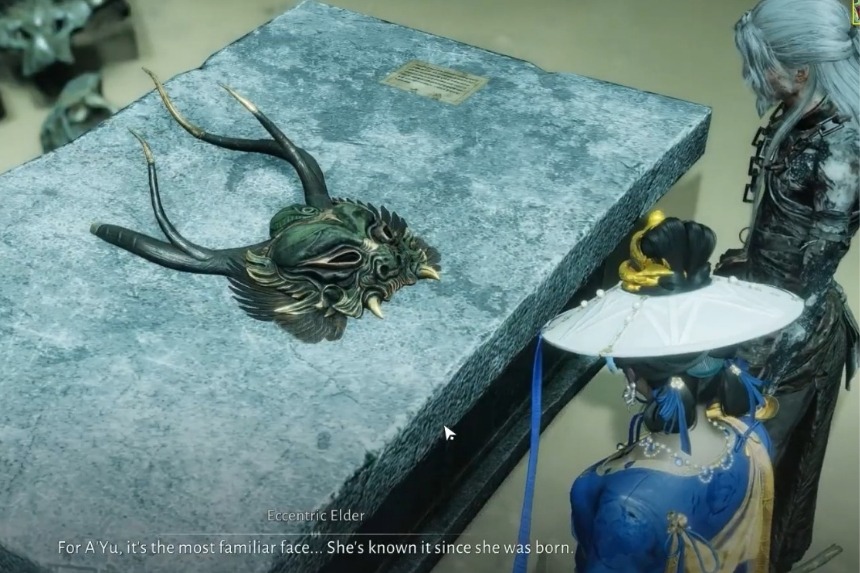
The Elder will tell you about A’Yu the fish, and the task of putting the Nuo Dance mask on her so that she becomes obedient. The task is pretty straightforward since A’Yu isn’t much of a hassle. Once you complete the task, the Red Fish Sword antique will be yours.
Red Sleeve Disc
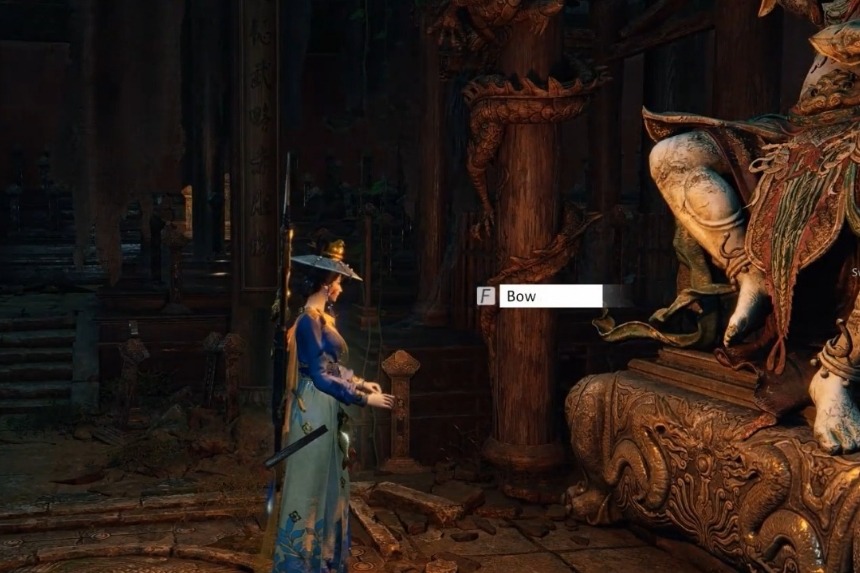
This too is part of The River’s Fury quest. Go to the Statue of River Master’s shrine and perform Zuoyi Salute by bowing in front of the statue and this will complete the quest. Successful completion of the quest rewards you with the Red Sleeve Disc antique.
Heavenfall
Here’s how you can get all the Antiques in Heavenfall:
Dragon’s Rite Scroll
You’ll find this antique during the Heavenfall main quest in the Kaifeng region. Your objective is to defeat the guards in order to open the Floodgate and reach the small brown colored structure. Go to the cooking area and you’ll find the chest containing the Dragon’s Rite Scroll.
Red Sleeve Armor
For this one, your objective is to find the underground canal exit of the Yellow River and the “Imperial Jade Seal” in order to obtain the Red Sleeve Armor. Once you’re inside the underground canal, keep swimming to your left and you’ll come across a sort of dead end with a lot of netting around. Take another left and you should be able to find the canal exit where inside a chest, the Red Sleeve Armor could be found.
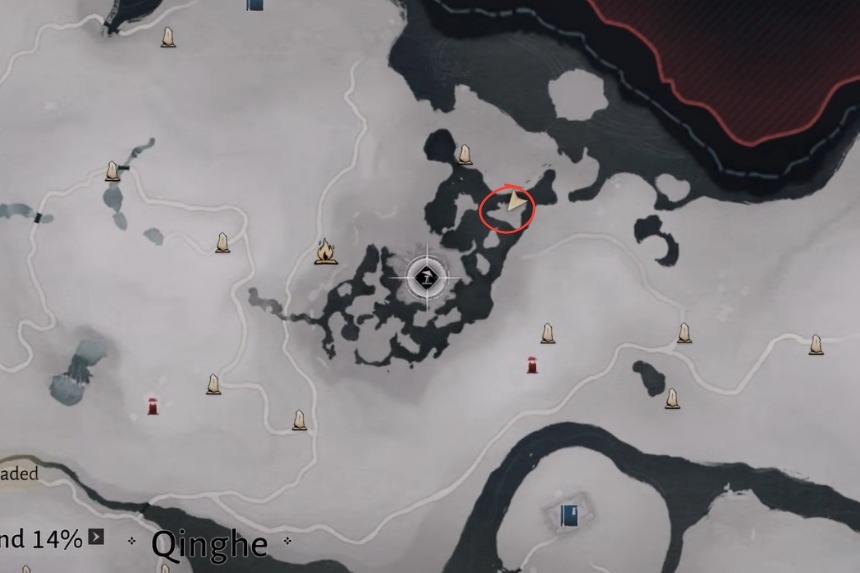
Mercyheart Monastery
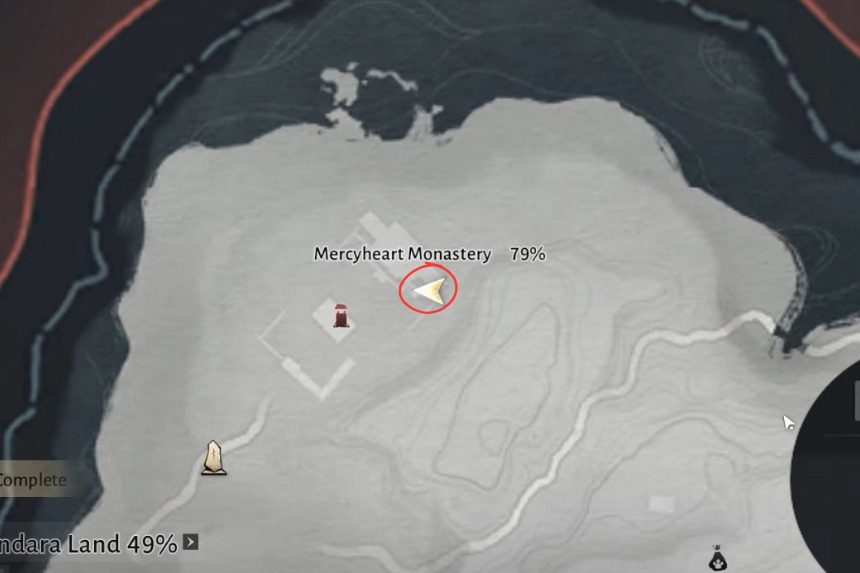
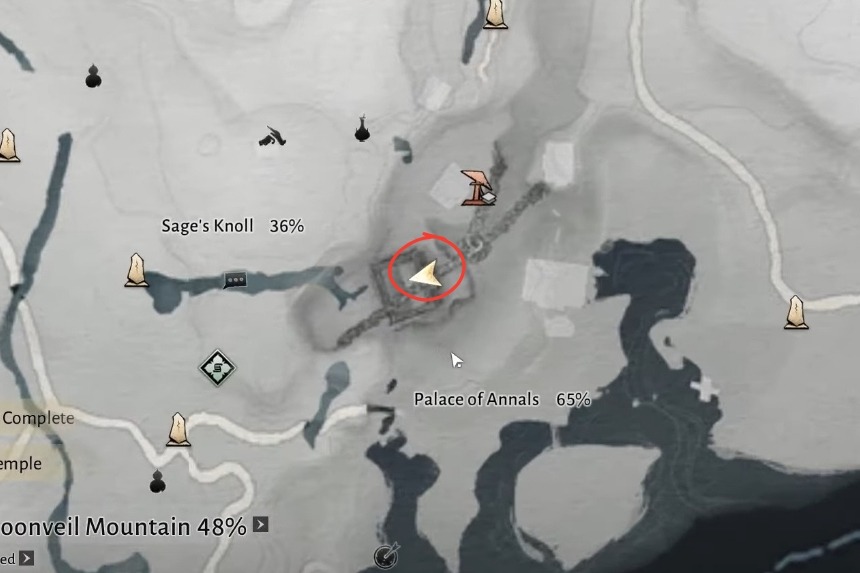
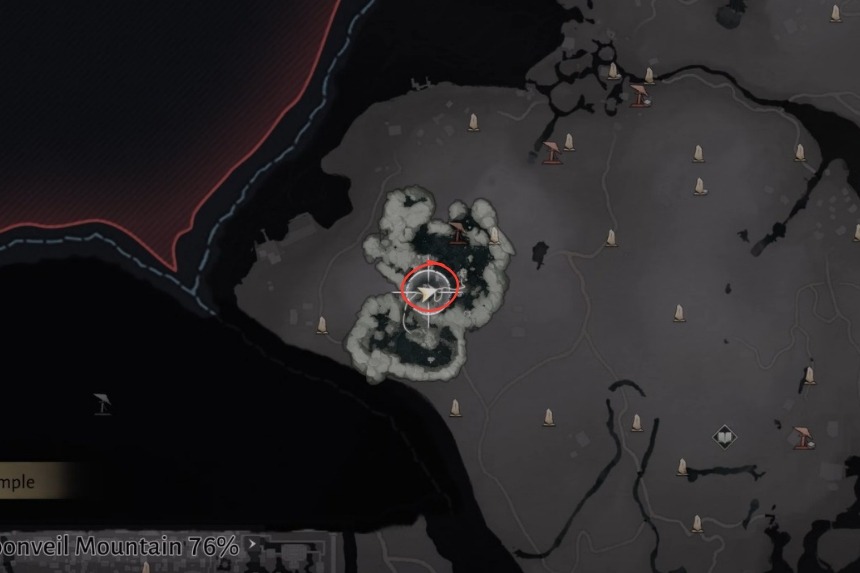
To get the antique at the Mercyheart Monastery in Qinghe region, you’ll have to get two Imperial Jade Hooks. For the first one, you’ll need to destroy the four Daturas in the Mercyheart Monastery.

Once done, go to the region near Halo Peak that’s shown in the above map image and interact with Miao Jue to get the second Imperial Jade Hook in order to complete both objectives and get the antique.
Gleaming Abyss
Here’s how you can get all the Antiques in Gleaming Abyss:
Tang Palace Hairpin
Start by locating the Tang Palace Hairpin inside the Gleaming Abyss. From the main center room, enter the crawl space on the right-hand side and follow the dark corridor to the end. Loot the chest there to obtain the hairpin.
To complete the antique, you must also unlock its backstory. After completing the dungeon’s main campaign, take the shortcut bridge on the left side of the main room to reach the end without fighting the Void King again. Interact with the ghost sitting in front of the tombstone and wait until the entire conversation finishes. Once it ends, the antique will be completed.
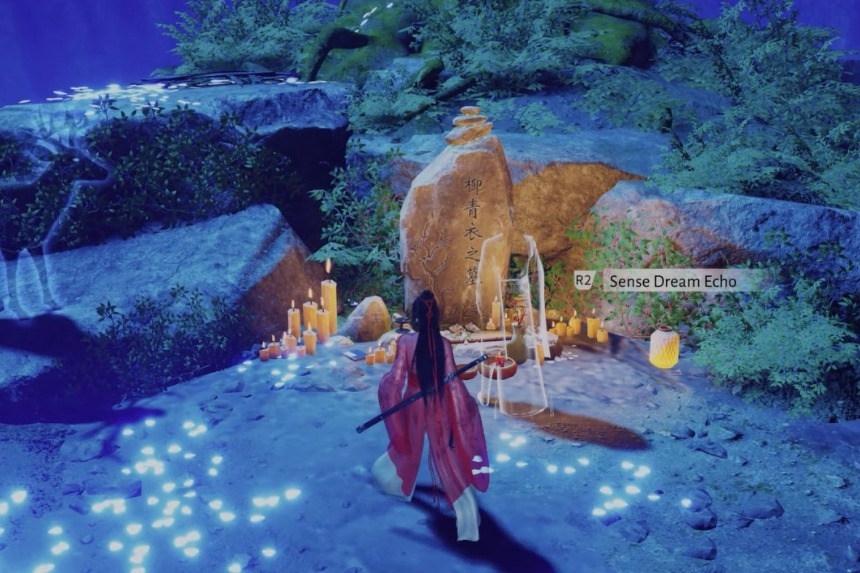
Silver Longevity Lock
The Silver Longevity Lock is obtained automatically while progressing through the main campaign quest in the Gleaming Abyss. When you’re required to speak with three groups of ghosts, the group on the left will give you the lock.
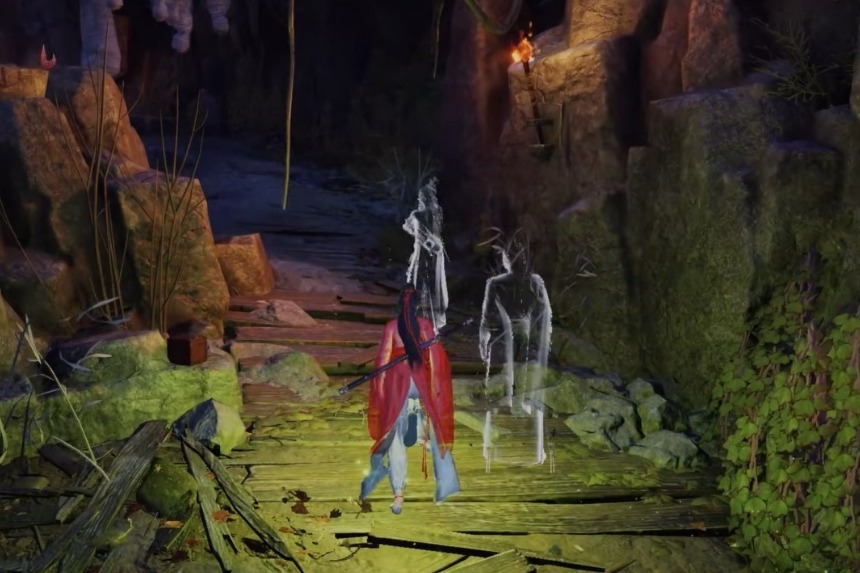
To finish the antique, interact with the coffin along the main path to teleport to the second section of the dungeon. After exiting, take the wooden plank path on the left that was previously shot down with fire arrows. You’ll soon find two ghosts, sense the echo and wait for their full conversation to end. Once the dialogue finishes, the Silver Longevity Lock antique will be completed.
Unbound Cavern
Here’s how you can get all the Antiques in Unbound Cavern:
Cloudcrane Blade
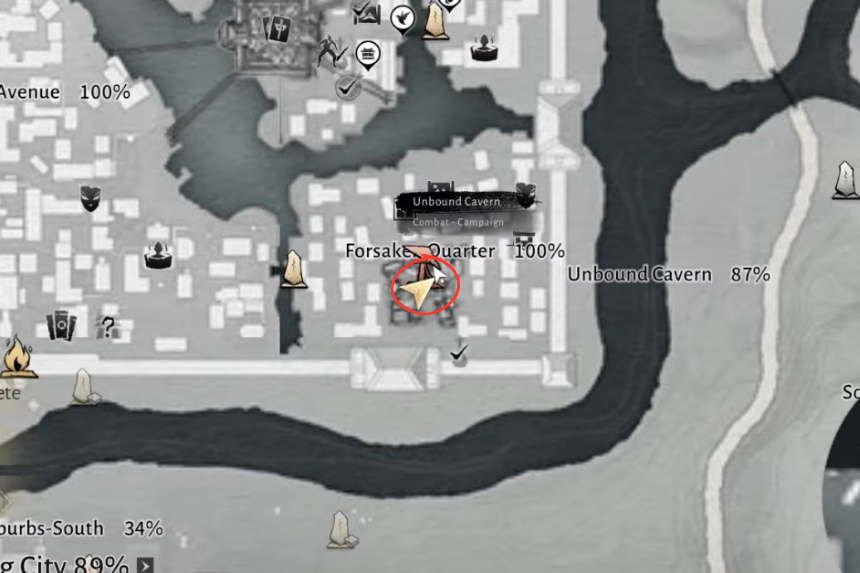
To get this antique, you’ll have to start at the Unbound Cavern campaign. Once you go to the Forsaken Quarter during the mission, you’ll come across a tunnel of sorts inside which you’ll find an opening that leads you to a cave where you’ll find the Bell Ringer. Here, you’ll find the Old Mo blade, interact with it and the Cloudcrane Blade antique is yours.
Grain-Patterned Disc

This one too can be found at the Ghost Revelry Hall. What you’ll need to do is find the Mysterious Woman’s room. An easy way to identify the room is to look for the Venomous Hermit (can be found on the path leading to the room) and two men sitting near the Mysterious Woman’s room. Upon entering the room, turn right and you’ll find a shelf with a jewelry box. This is where you’ll find the Grain-Patterned Disc antique.
Four-Sea Sword
For this one, you’ll have to jump into the sewer and use the tunnel to reach an area with a dead body. What you’ll need to do is use the Old Sword near the body for dealing with the few rat-like creatures present there and you’ll be able to obtain the Four-Sea Sword antique.
Skyward Pendant
You get this as part of the Unbound Cavern main quest. When you escape the Scy Blessing Voyage after defeating Zhuxie Guleand and reach the Ghostlight Market, you’ll find the Skyward Pendant antique at the entrance.
Velvet Shade
Here’s how you can get all the Antiques in Velvet Shade:
Begonia Jade Disc
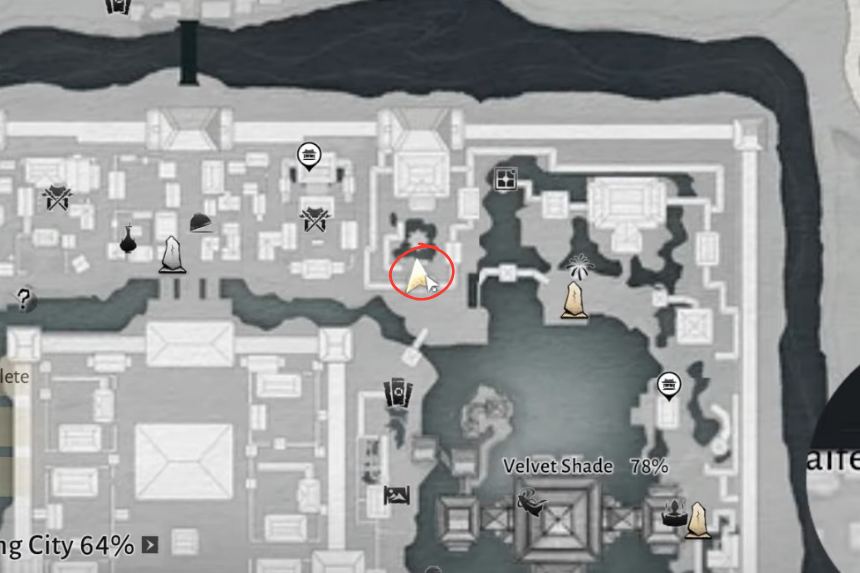
To get this one you will have to complete the Velvet Shade Tale 3 – Reverie of Blossoms. Speak to Hua Jieyu who is distressed. Offer some Crabapple Wine and talk, and you’ll see that Hua Jieyu has fallen asleep.
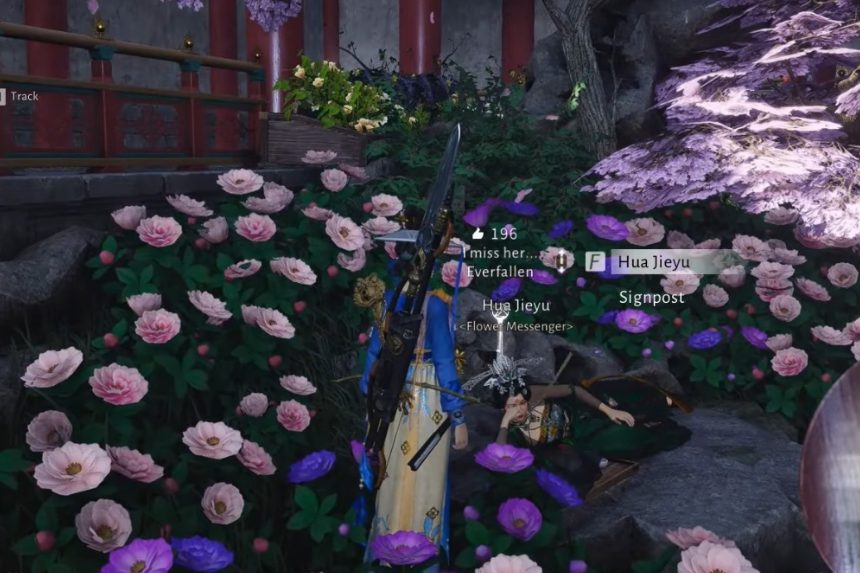
Leaning against the rock, you’ll doze off as well, and when you wake up, there will be no Hua Jieyu. But Hua Jieyu leaves you a love letter which will complete the Reverie of Blossoms and get you the Begonia Jade Disc antique.
Peach Blossom Pendant
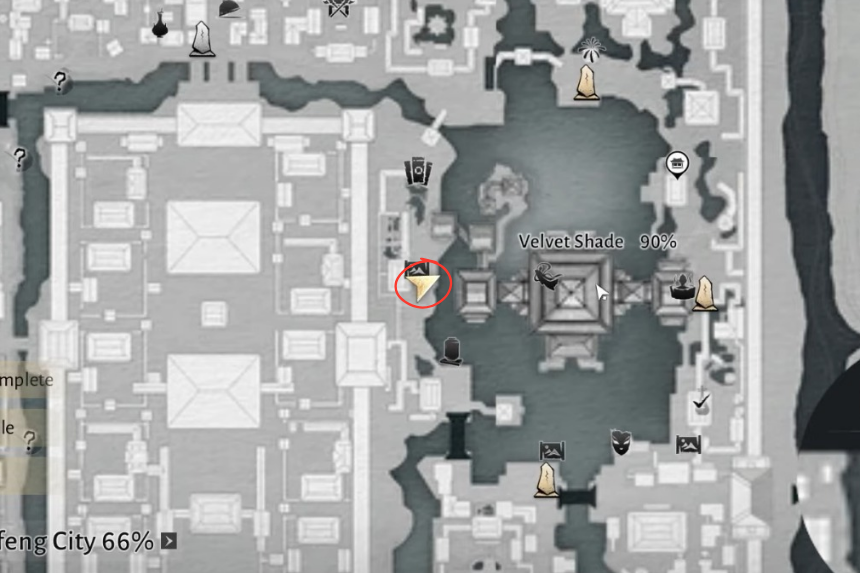
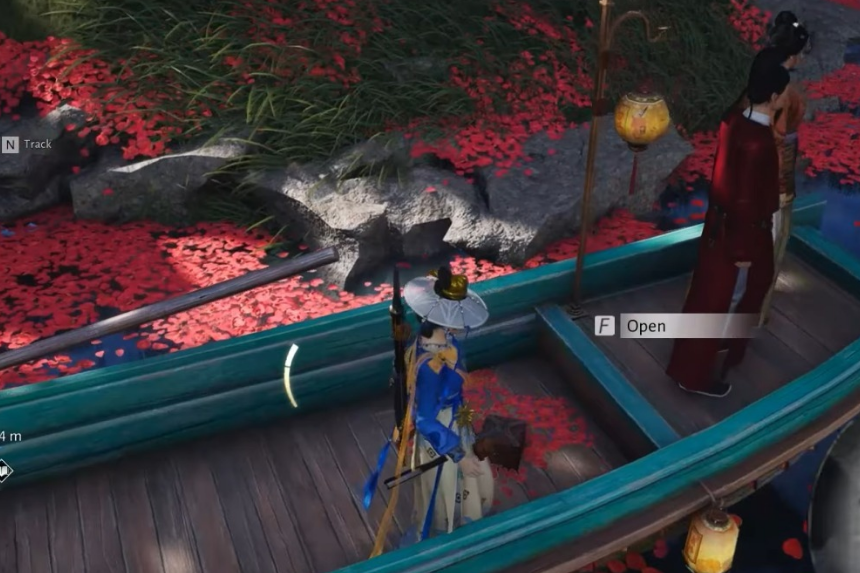
Getting the Peach Blossom Pendant is pretty straightforward. Start by going to the location shown on the map above and you’ll see a lake. There’s a boat with two lovers onboard and you’ll find them conversing. Going onboard and simply listening to their conversation will grant you the Peach Blossom Pendant.
Furnace Area
Here’s how you can get all the Antiques in Furnace Area:
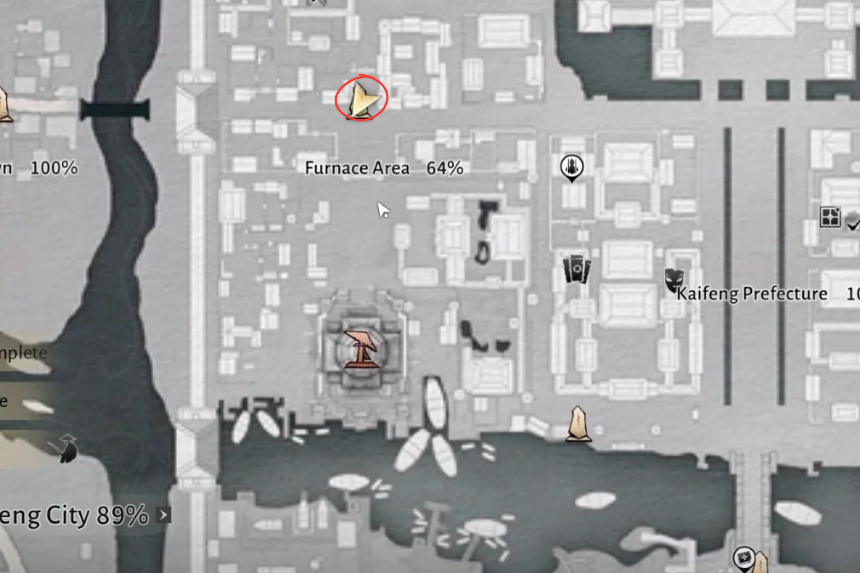
Golden Toad Bow
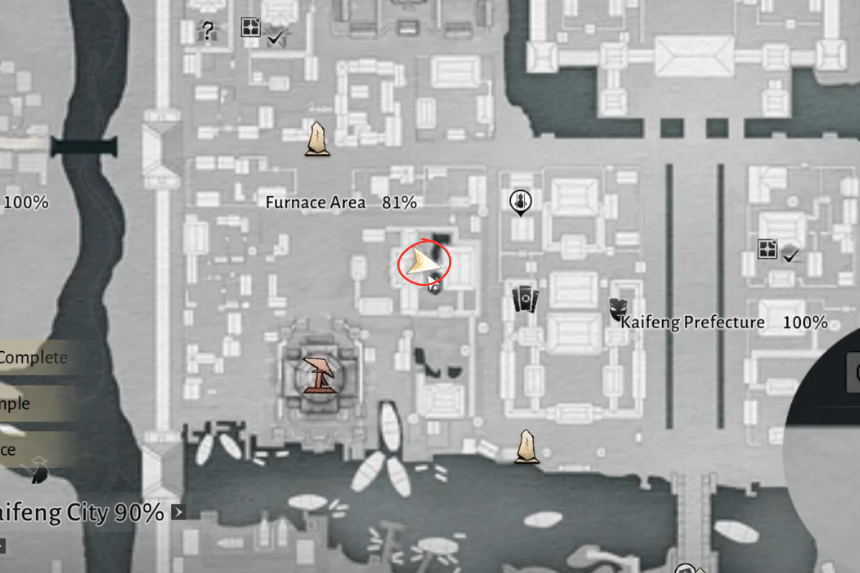

To get this antique, go to the location shown in the map above and head downstairs until you reach an area with a sort of elevator that takes you down further.

From there, keep to your right and you’ll reach a room filled with gold. The exact location of the room is shown in the map above. Here, you’ll find a chest towards the back containing the Golden Toad Bow antique.
Golden Toad Ring
To get your hands on this antique, you will have to finish the Furnace of Righteousness campaign quest first. On successful completion of the quest, you’ll get the Golden Toad Ring antique.