
Mask Shards are one of the most important upgrades in Hollow Knight: Silksong. Each time you collect four shards, you’ll gain one extra mask of health, making it much easier to survive tough fights and dangerous areas. There are 20 Mask Shards in total scattered across Pharloom hidden in secret locations, sold by NPCs, or earned as quest rewards. This guide will show you exactly where to find all of them.
All 20 Mask Shards in Hollow Knight: Silksong
Mask Shards are important upgrades in Silksong since collecting four of them gives you an extra mask of health. There are 20 Mask Shards you can collect in Silksong. You’ll find them tucked away in hidden spots, sold by NPCs, or given as rewards for finishing certain quests. Every four shards add up to one extra mask of health, so if you grab them all, you’ll end up with a total of 10 health masks.
NOTE: You can click on the images to enlarge
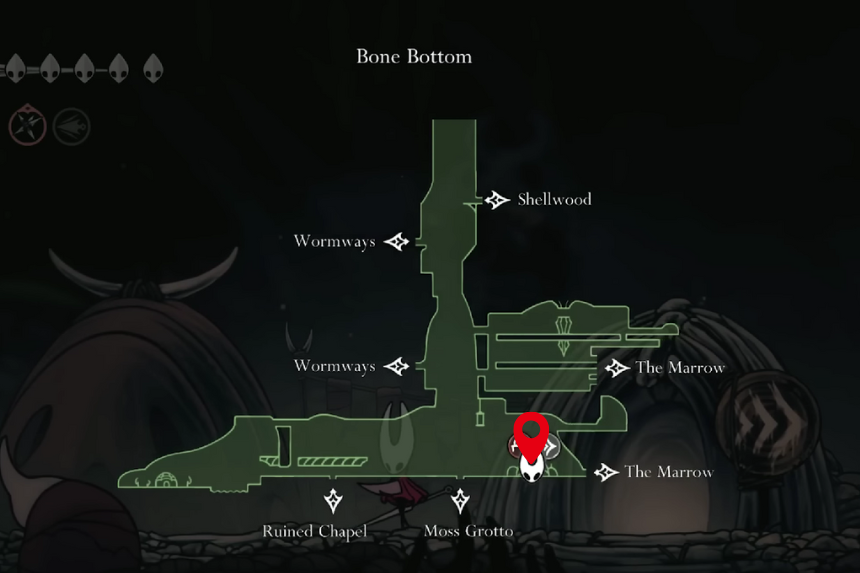
Mask Shard 1 – Bone Bottom
Talk to Pebb in Bone Bottom and buy this Mask Shard for 300 Rosaries. It’s a steep price early in the game, so farm Rosaries first if you’re short.
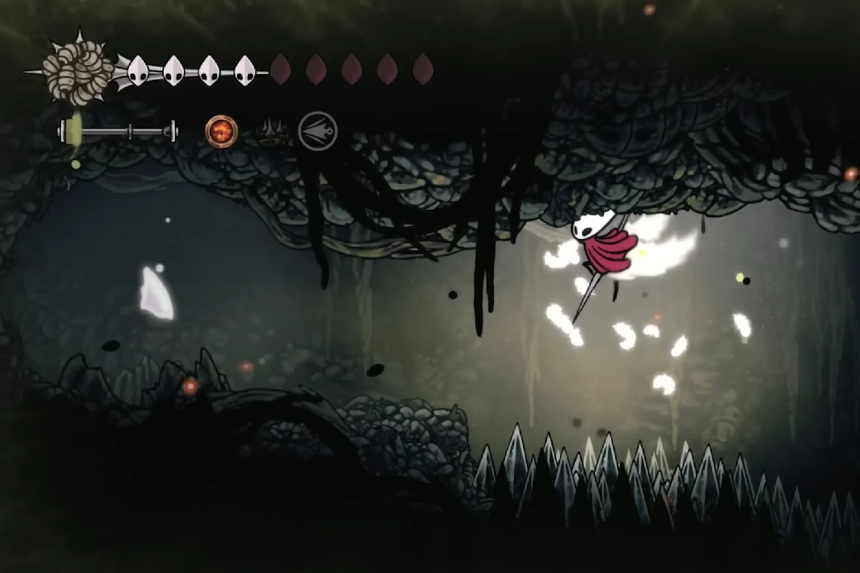
Mask Shard 2 – Far Fields (Near the Seamstress)
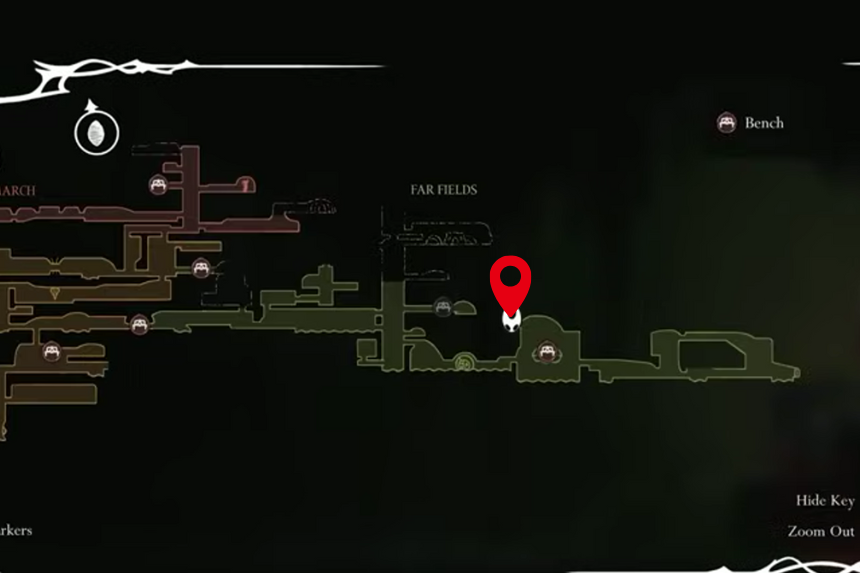
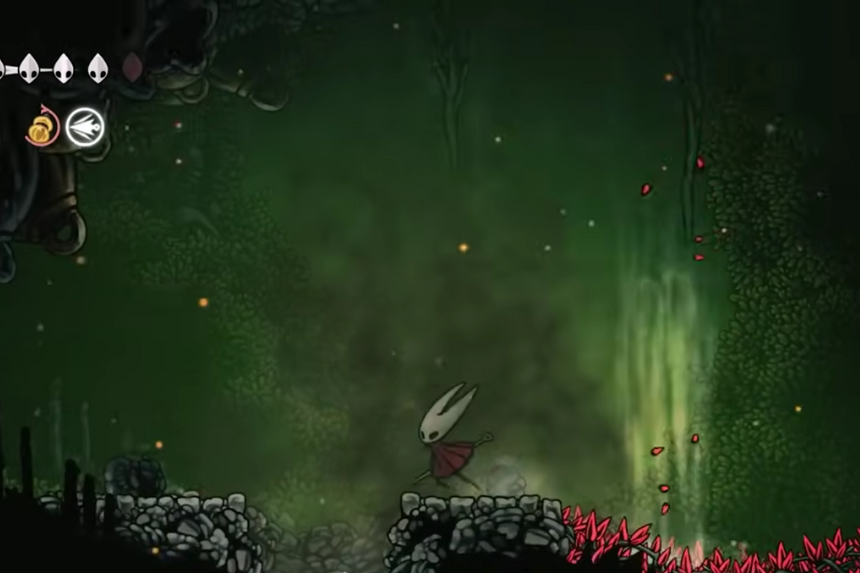
Ride the wind currents to the right of the Seamstress. Hit the explosive rocks to clear the way and use the air streams to avoid thorns. At the top, make the final explosive rock drop down and blow open a crevice. The shard is waiting inside.
Mask Shard 3 – Far Fields (Grappling Hook Required)
Head southeast of the Seamstress into the giant skull. Inside, finish the combat challenge over lava. Then ride the wind current up to grab the shard on the right.
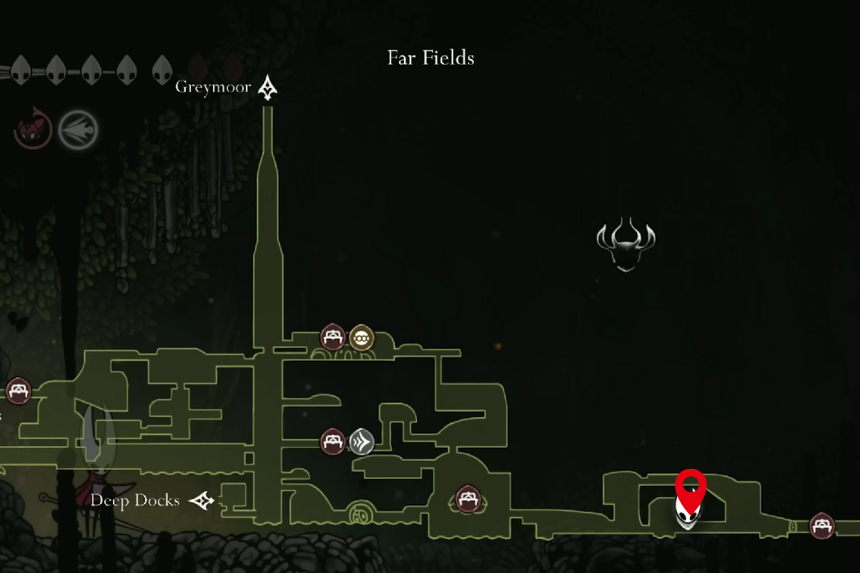
Mask Shard 4 – Far Fields (Act 3 Only)
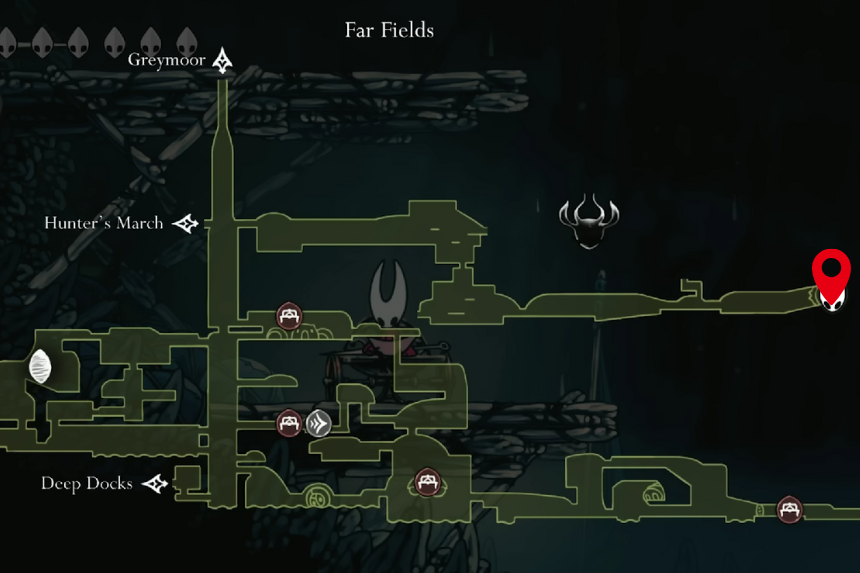
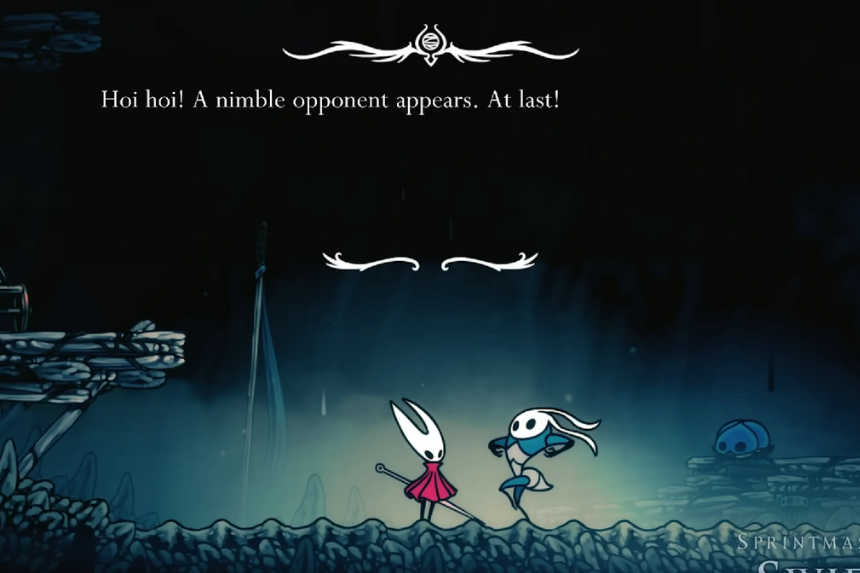
In Act 3, find Sprintmaster Swift at the far east of the map. Accept the Fastest in Pharloom quest and win all three races against Swift. You’ll be rewarded with a shard automatically.
Mask Shard 5 – Wormways
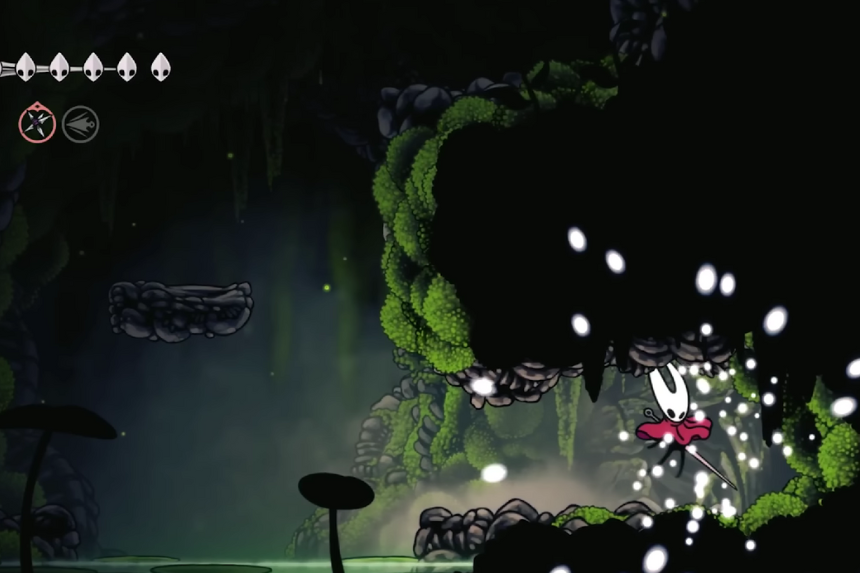
Just below the shortcut that uses a Simple Key, you’ll find this shard. You also need the Dash ability. Drop into the water below, strike the wall on the right, and you’ll reveal a hidden room with the shard.
Mask Shard 6 – Shellwood
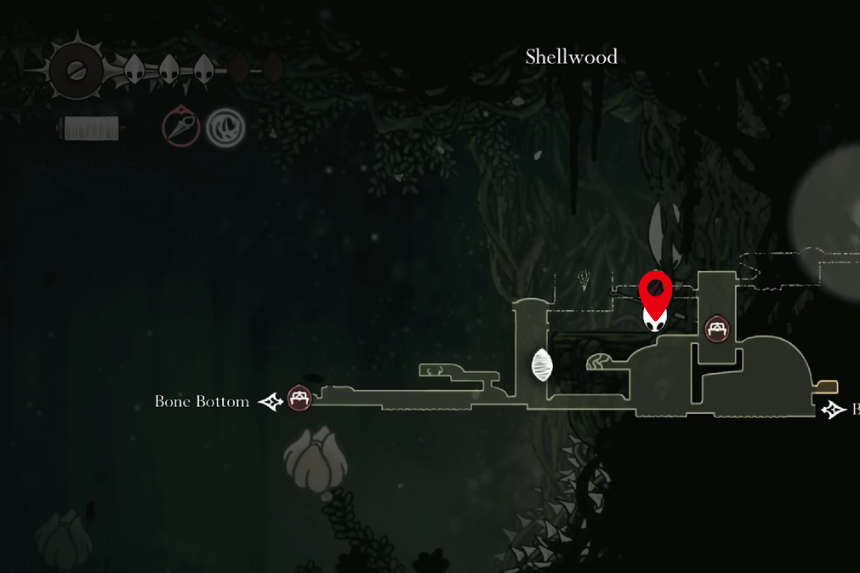
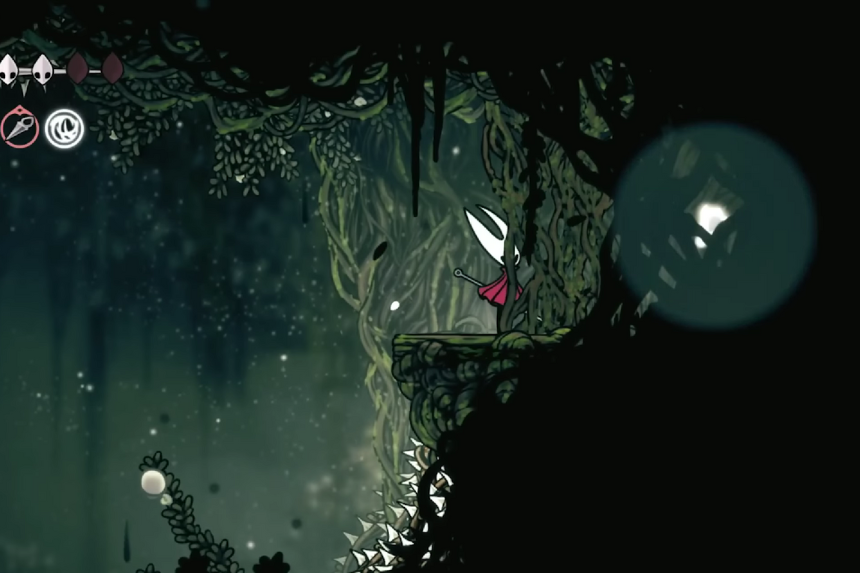
Go west of the Bellway, just above where the Lost Flea is. Bounce across the vines and smash the wall on the right. Cross the spike pit, cut down the vines, and collect your shard.
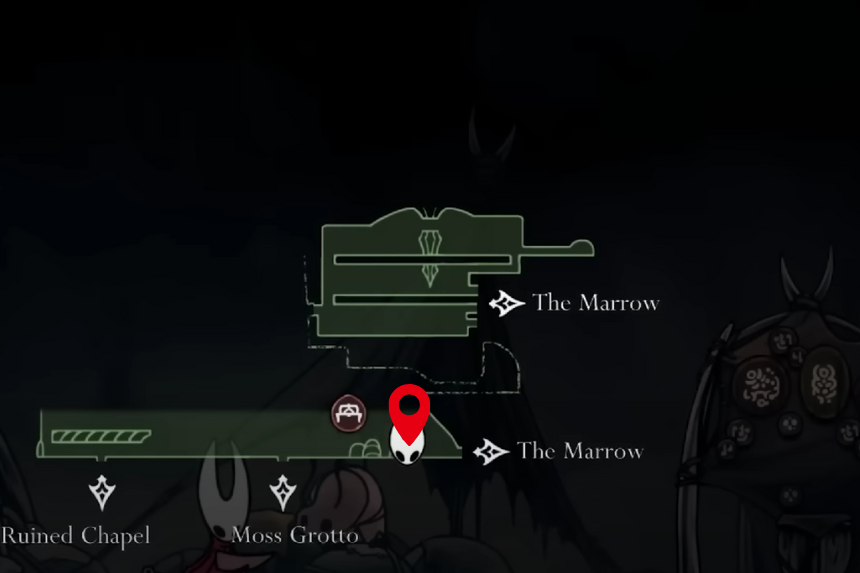
Mask Shard 7 – Deep Docks
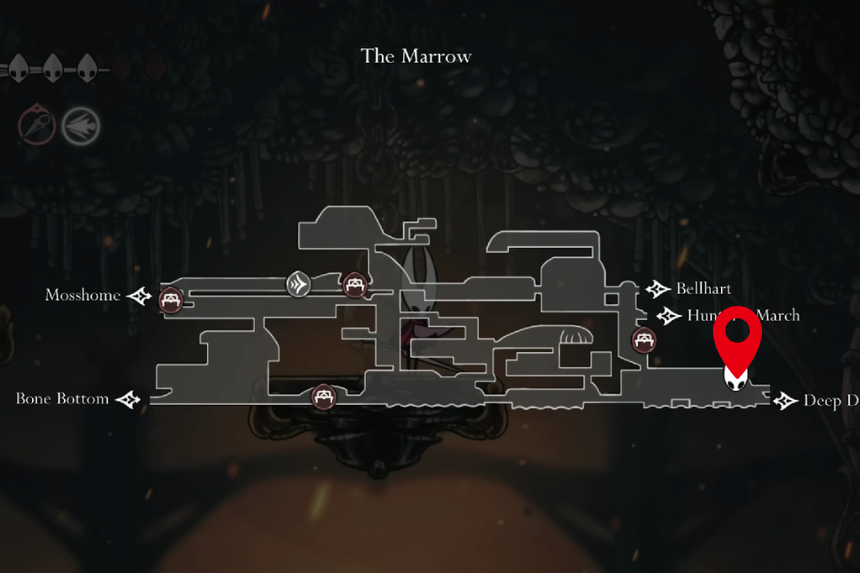
This one needs both Drifter’s Cloak and Wall Jump. From the bench in the Marrow, climb up and make your way past lava, enemies, and metal platforms until you reach the shard. Don’t forget to hit the lever on the right to unlock a shortcut.
Mask Shard 8 – Bellhart (Savage Beastfly Quest)
Accept the Savage Beastfly quest from the wishwell in Bellhart. Defeat the beast in Hunter’s March, bring back the Horn Fragment, and you’ll automatically get the shard.
Mask Shard 9 – Bellhart (Hidden Hunters Quest, Act 3)

Take the Hidden Hunters quest from Bellhart’s wishwell in Act 3. Hunt down Gurr the Outcast in Far Fields, then collect the Grass Doll from the left side of his room. Return it to the wishwell to get the shard.
Mask Shard 10 – Bellhart (Dark Hearts Quest, Act 3)
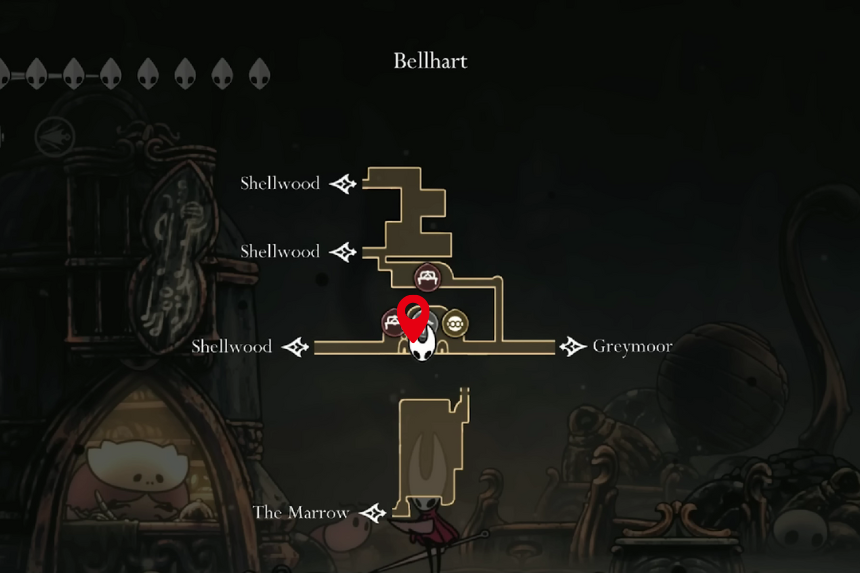

Also Act 3 only. Accept the Dark Hearts quest at the Bellhart wishwell. Destroy all Void Masses in Pharloom, then turn in the quest to receive the shard.
Mask Shard 11 – Blasted Steps
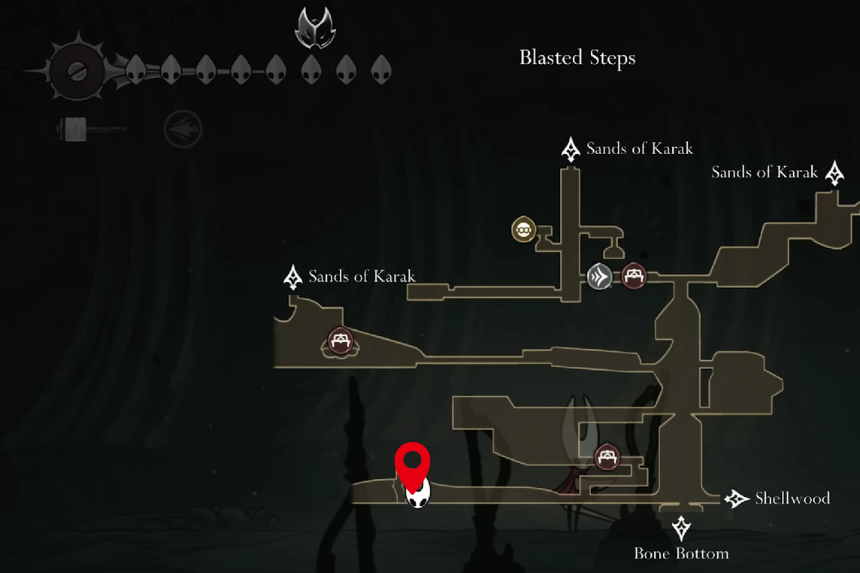
You’ll need Double Jump and Grappling Hook. Head to the southwest corner of the area, find the metal structure marked by three vertical lines. Use the hook to skip the platforms, then work your way past spikes, enemies, and falling rocks until you reach the shard at the top-left.
Mask Shard 12 – The Slab
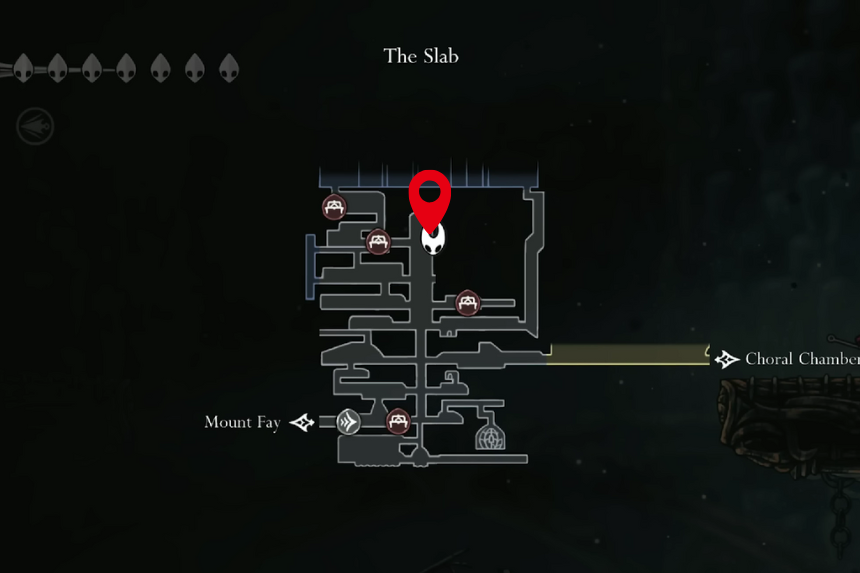
This shard requires the Apostate Key. From the Broodmother boss room, head right and unlock the central door. Use the spinning traps like trampolines to bounce your way up. Wall jump and pogo carefully until you reach the shard on the opposite ledge.
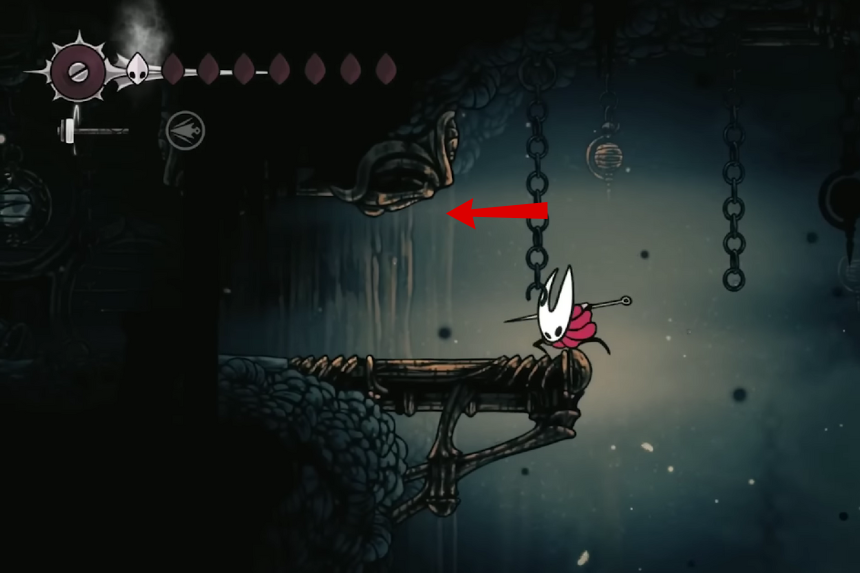
Mask Shard 13 – Weavenest Atla
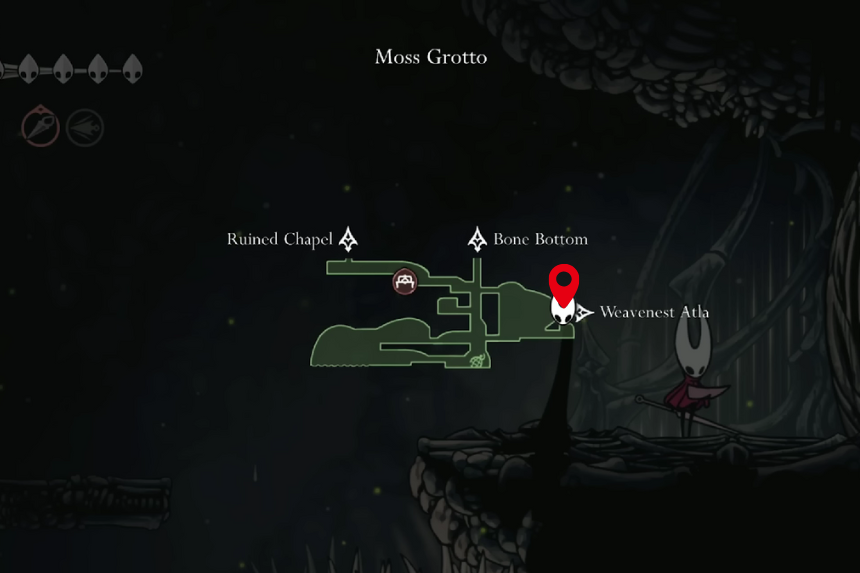
First, defeat the Widow to get the Needolin, which lets you access this area. Use the teleporter to reach the lower level, then climb and pogo across spikes and lava until you reach a high ledge. From there, jump and pogo up to the shard.
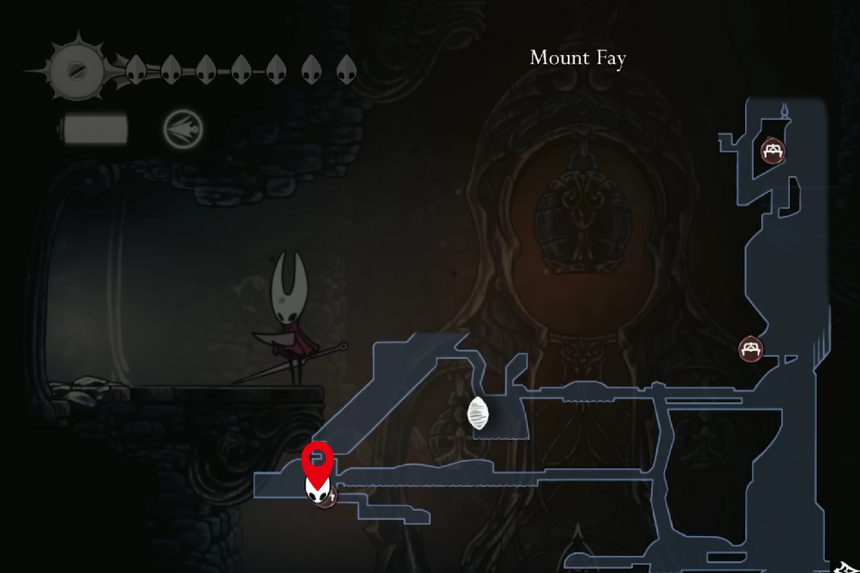
Mask Shard 14 – Mount Fay (Tower Base)
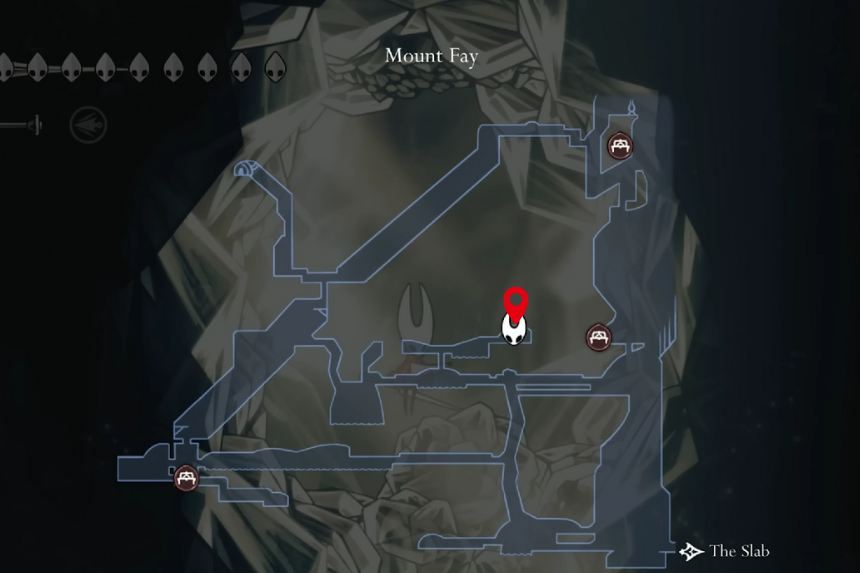
Head to the bottom-right of the area map. From the bench, go left until you see the base of a ruined tower. Use Double Jump and Wall Jump to climb into the hollow structure above, where the shard is waiting.
Mask Shard 15 – Mount Fay (Ice Cavern)
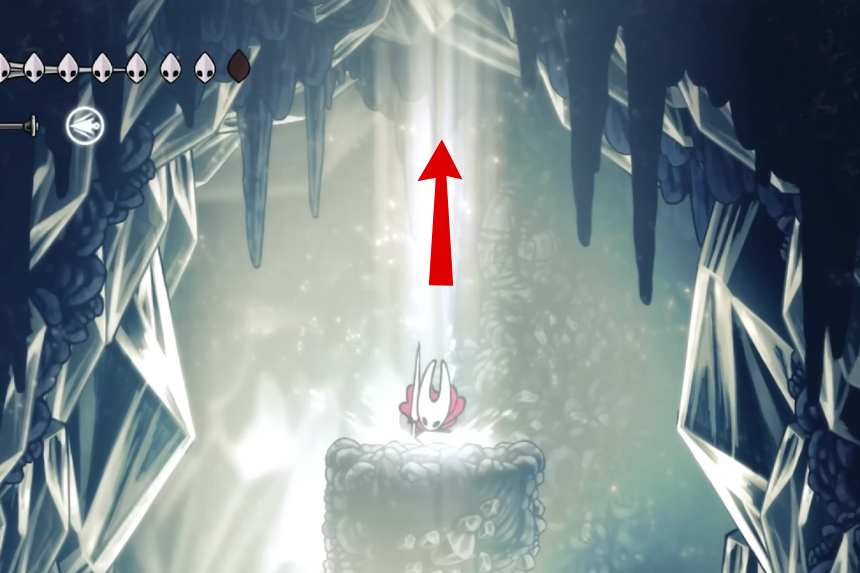
This one’s in the middle of the map, southeast of the Flea. Stand on the ice platform, smash the wall above with the Grappling Hook, and climb through the hidden tunnel. You’ll need to chain together grapples, wall jumps, double jumps, and glides to reach the top. Break the rock cocoon at the end to claim the shard.
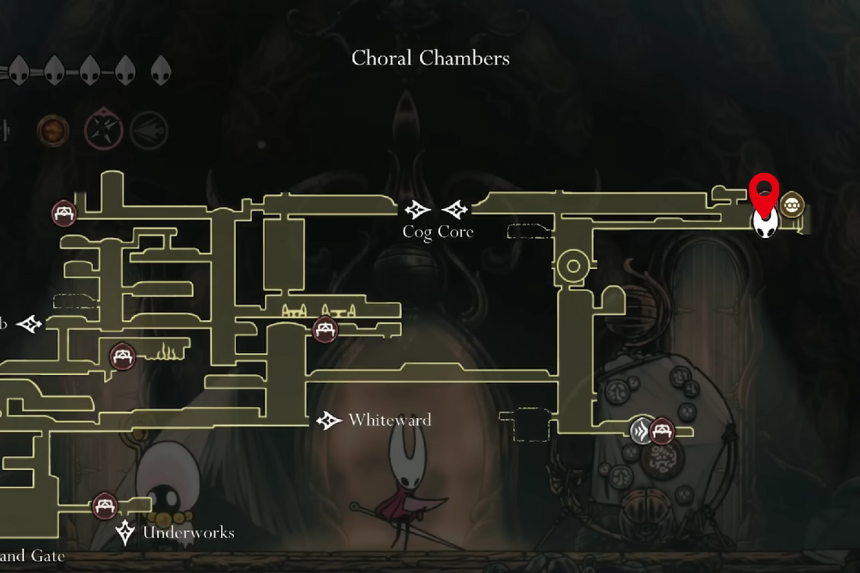
Mask Shard 16 – Choral Chambers
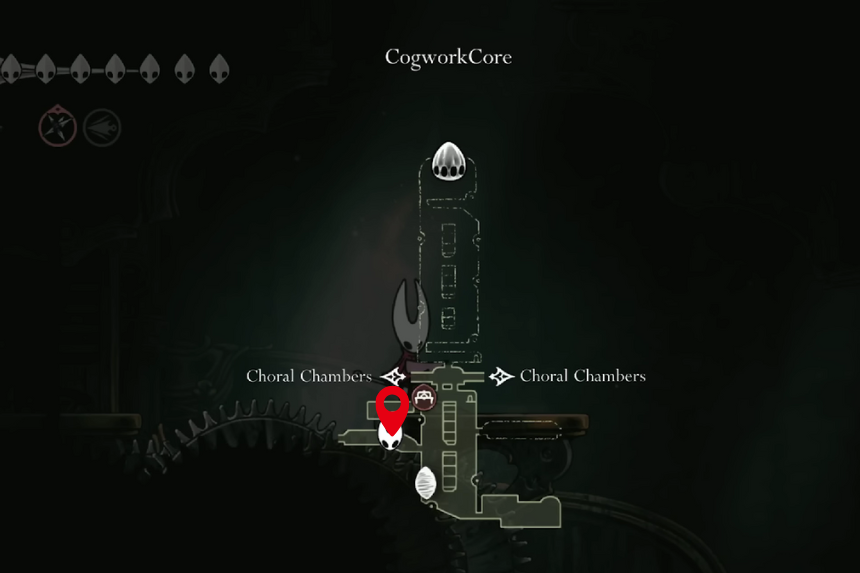
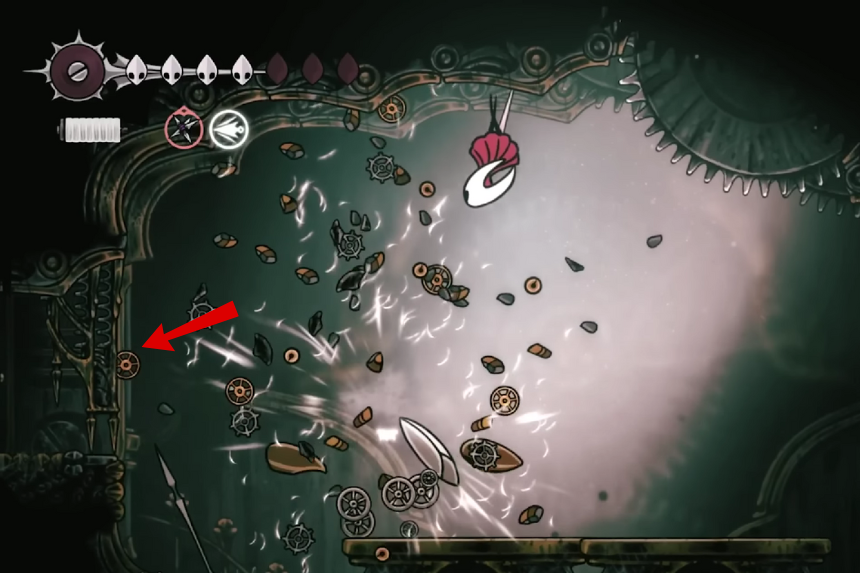
After beating the Cogwork Dancers, drop down and glide left to a hidden room. Clear the enemies, hit the lever, and wall climb up to a secret path that leads straight to the shard.
Mask Shard 17 – Songclave
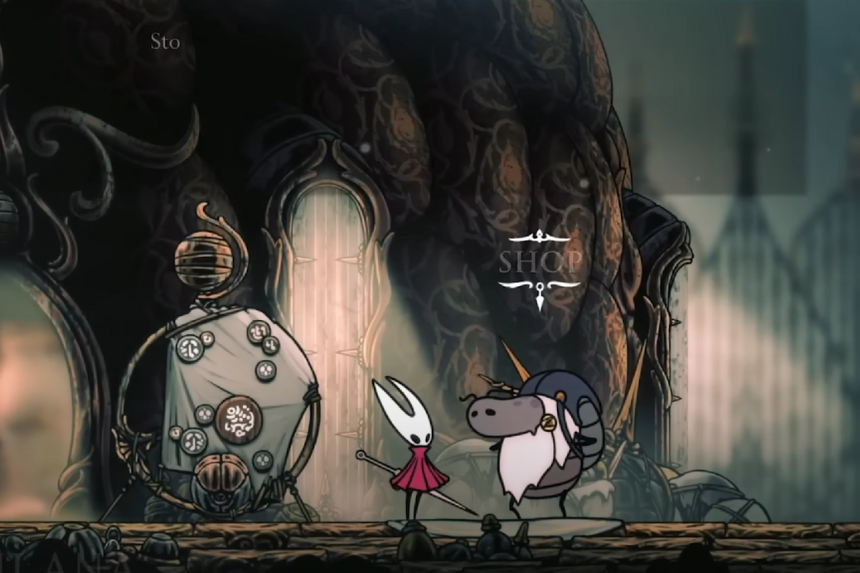
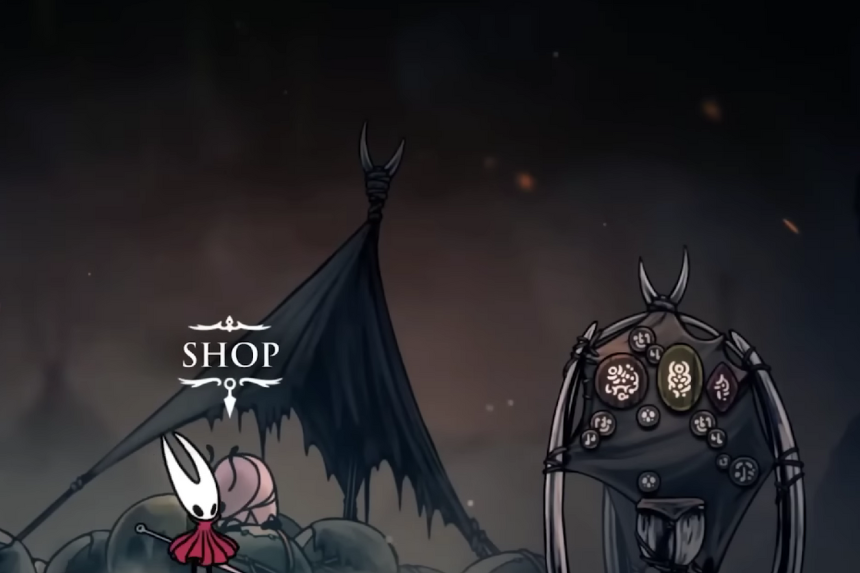
Speak to Jubilana in Songclave and purchase the shard for 750 Rosaries.
Mask Shard 18 – Whispering Vaults
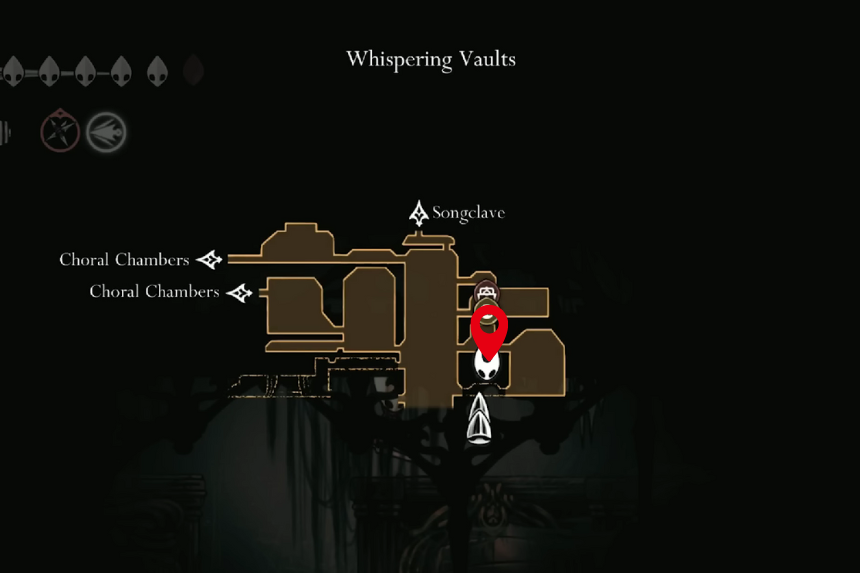
Go to the room just below the bench at the top of the area map. Stand between the tattered drapes and use the Grappling Hook to reach the upper ledge. Break the container to get the shard.
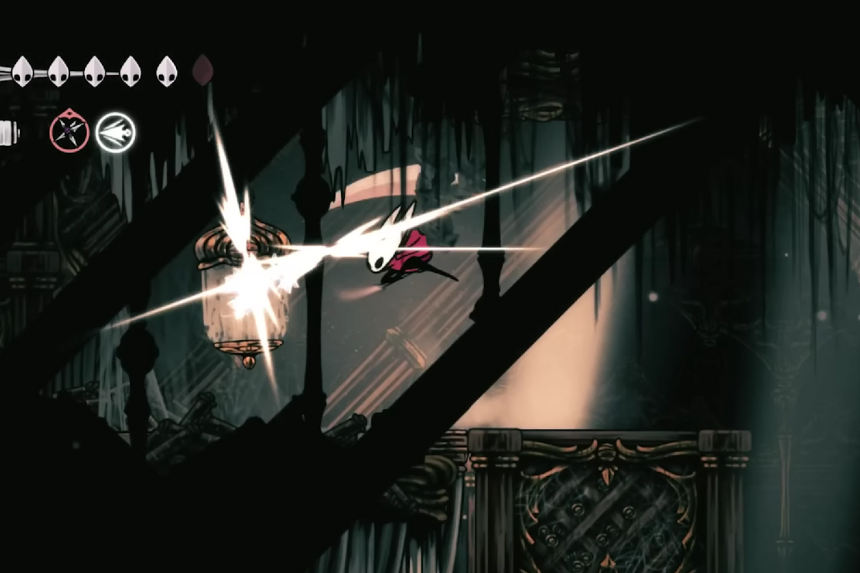
Mask Shard 19 – Bilewater
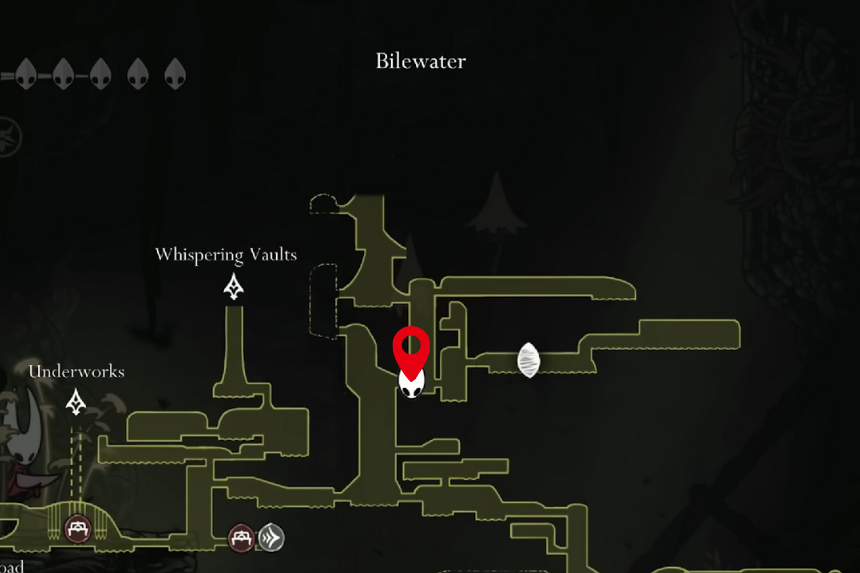
From the center of the Bilewater map, head midway up the main shaft, then go right. Instead of heading to the bench, cross the spikes and climb the wooden structures. Use wall climbs and grapples to reach the shard at the very top-right.
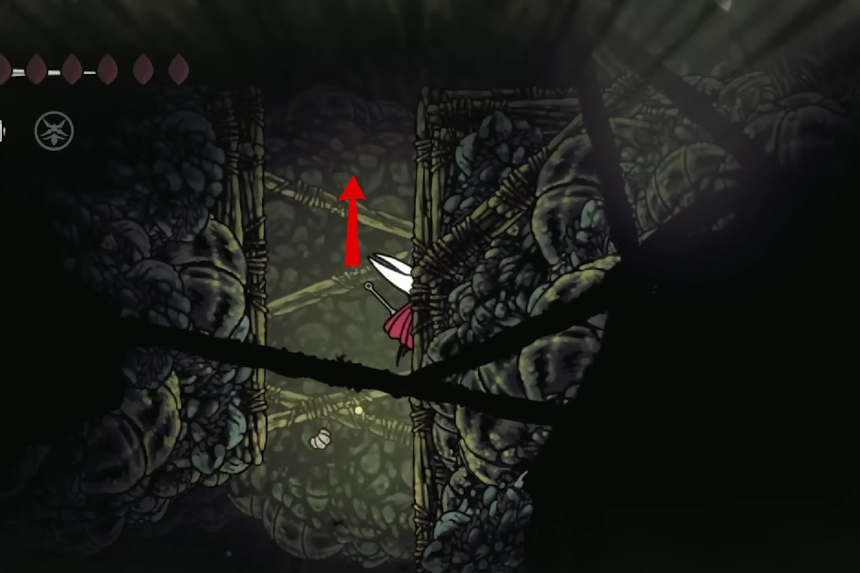
Mask Shard 20 – Wisp Thicket
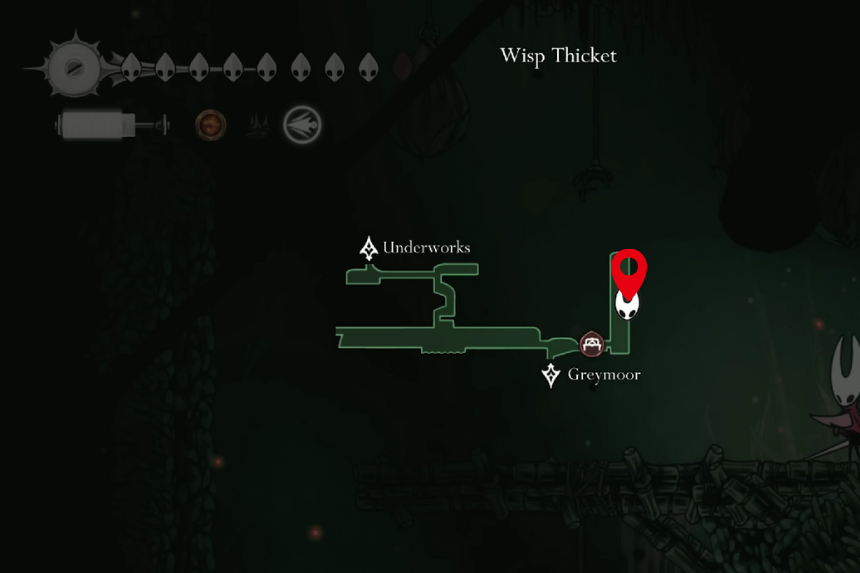
From the bench in this biome, head up and right until you reach the poison pool. Use double jump, wall climb, and grappling hook to carefully cross the spikes and reach the shard above.