
In Dying Light: The Beast, treasure maps are scattered all over the world, each one leading you to hidden stashes packed with loot, blueprints, or powerful weapons. Some are easy to find, while others take a bit more effort and puzzle-solving. This guide covers all treasure map locations we’ve found so far and explains step by step how to solve each one, so you can get every reward without missing a thing.
All Treasure Map Locations and Solutions
Dying Light: The Beast has a bunch of treasure maps hidden across the world, each leading you to some really nice loot. Some of them are easy to get, while others can be a bit tricky if you don’t know where to look. To make things easier, we’ve put together a list of all the treasure maps we’ve found so far and how to solve them.
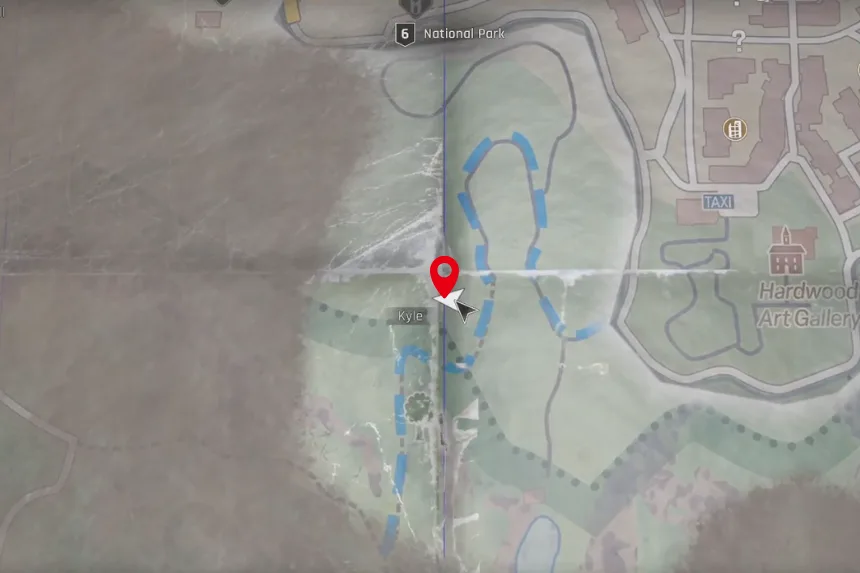
NOTE: You can click on the images to enlarge
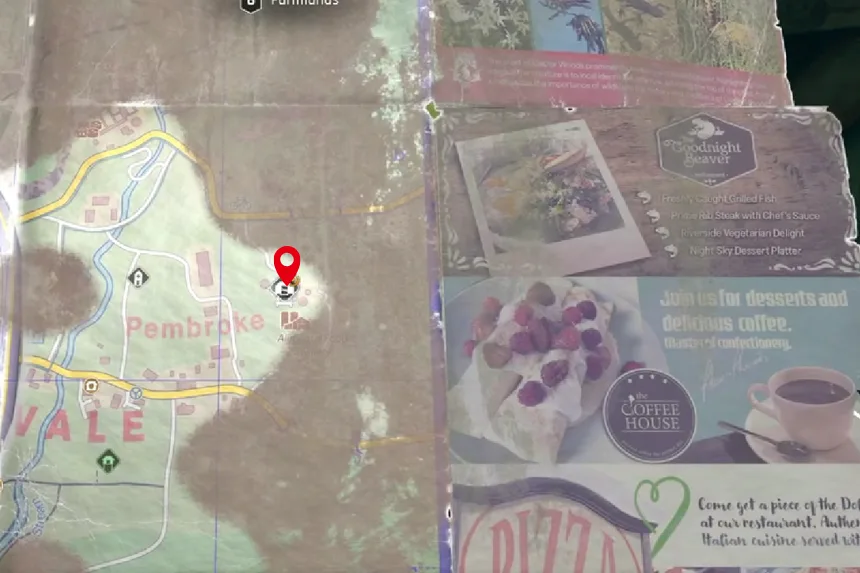
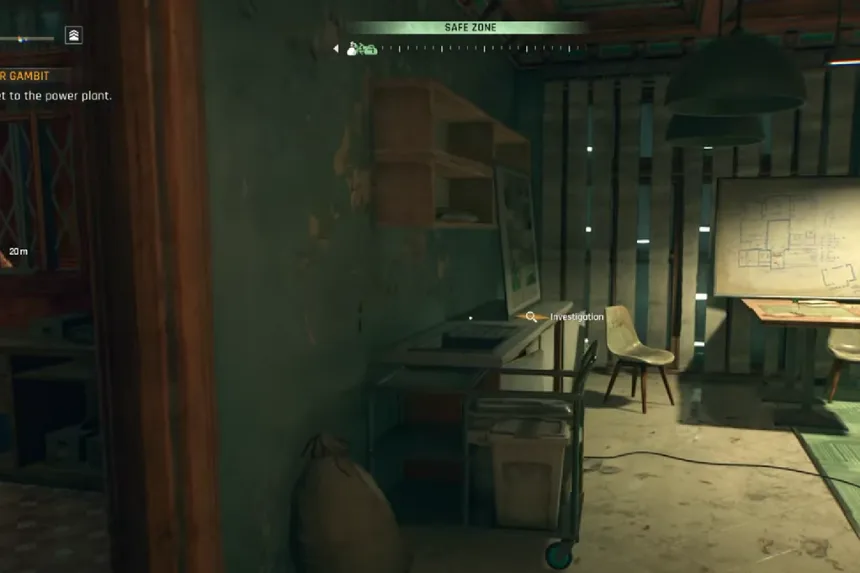
Treasure Map A1
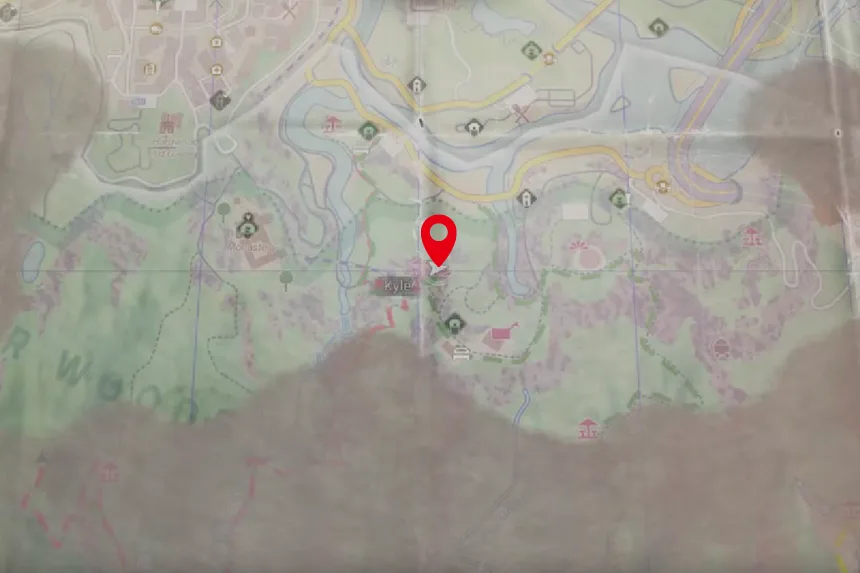
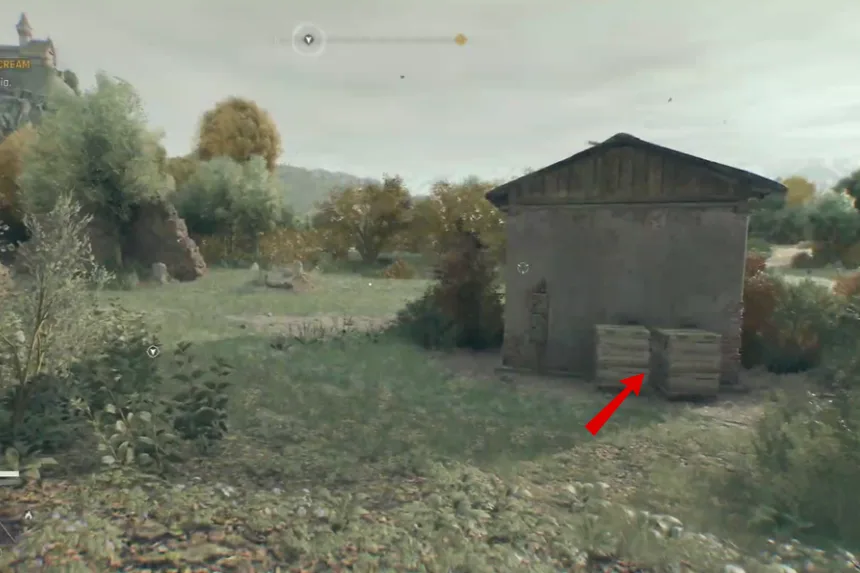
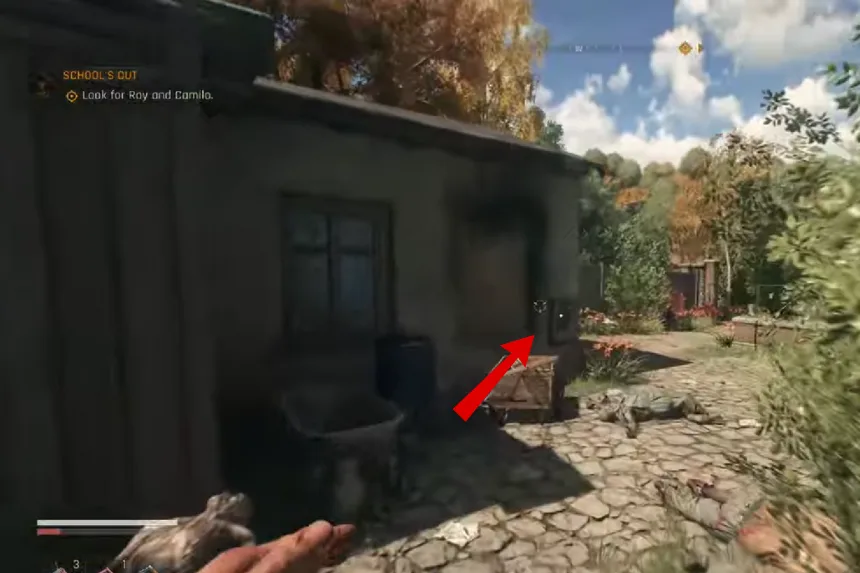
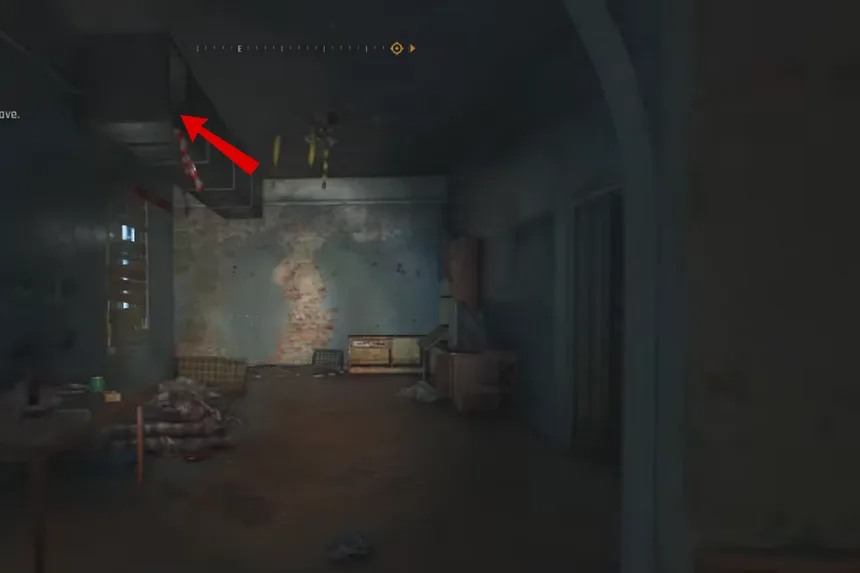
This one is found close to the start of the game. To get the map, start at the monastery in the west. From there, head down to a little park bench, and you’ll see the treasure map lying on the ground. Grab it, and now go for the treasure itself.
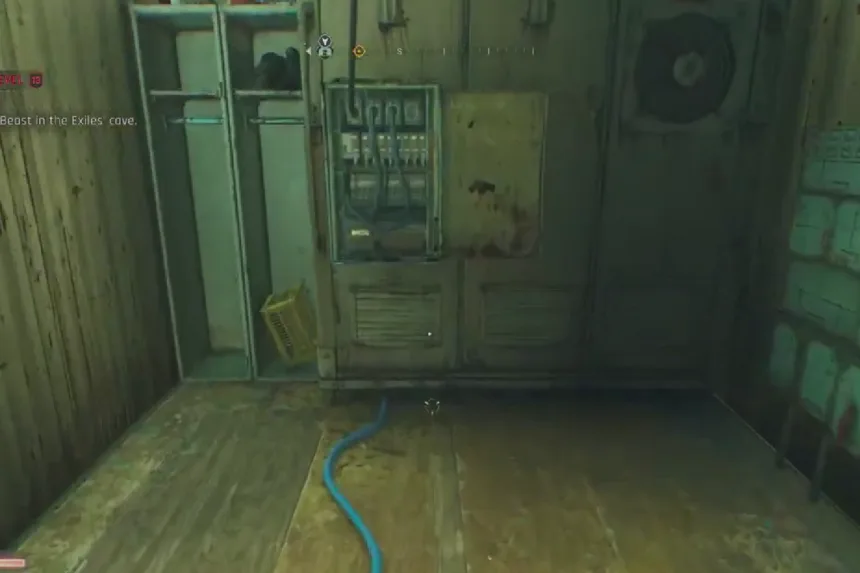
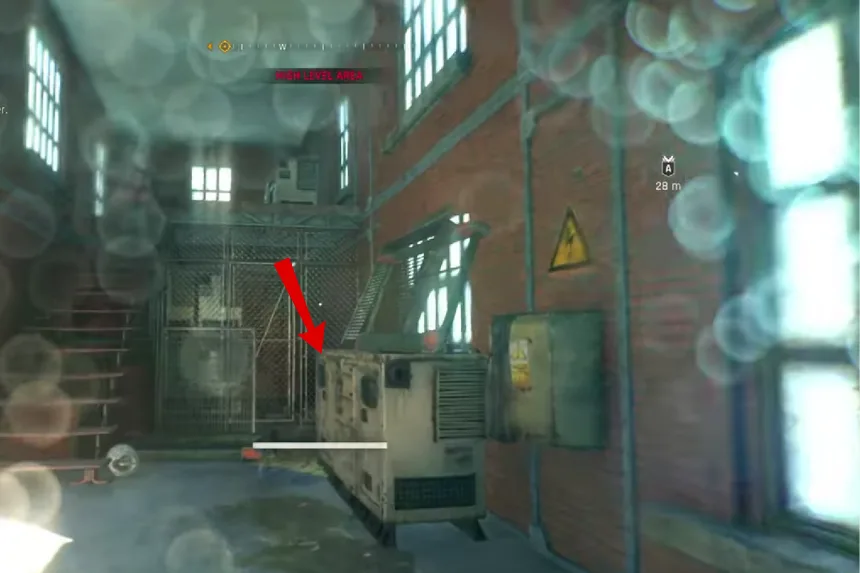
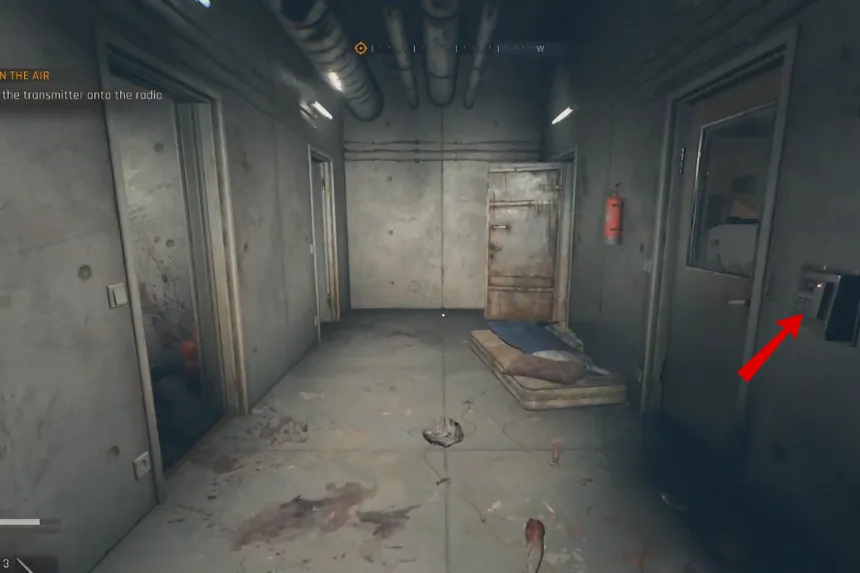
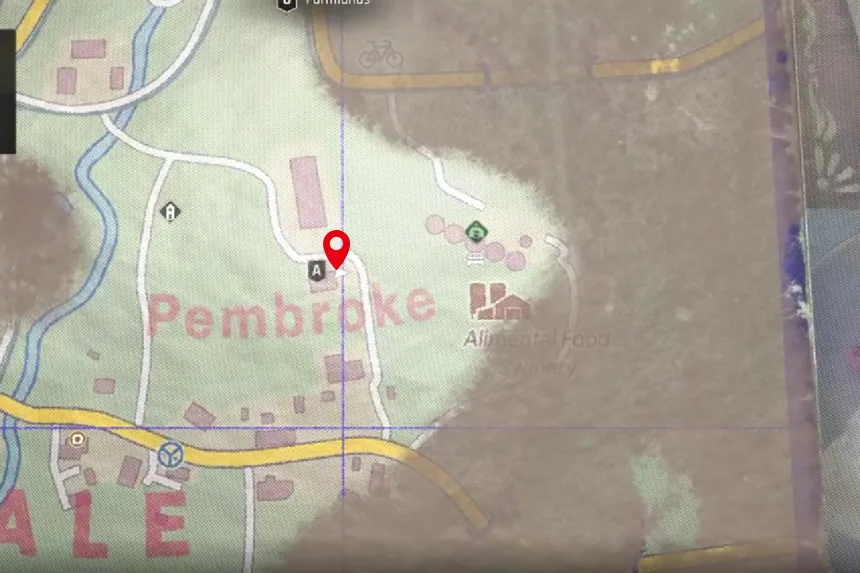
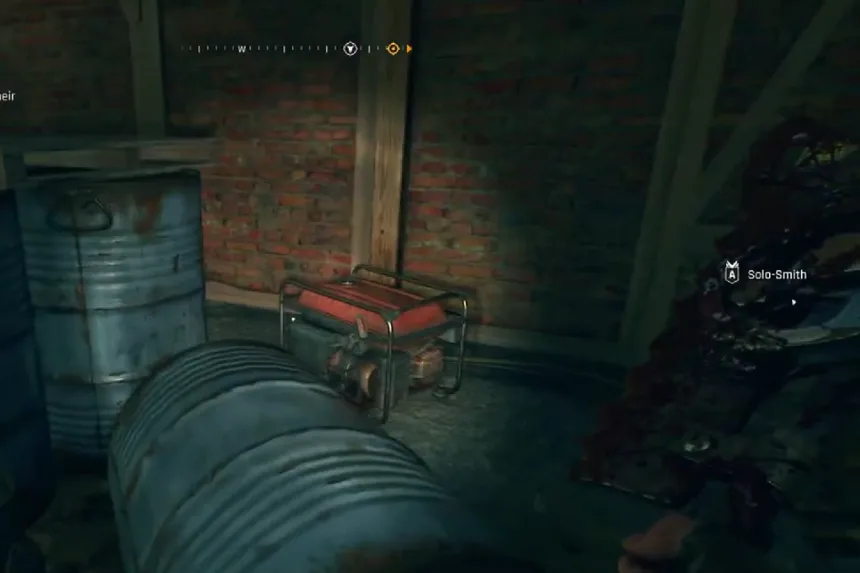
The treasure is just a short distance southeast from where you picked up the map. You’ll come across a house with a large lodge next to it. Jump up onto a container outside, open the hatch, and head inside.
- First, turn on the generator inside.
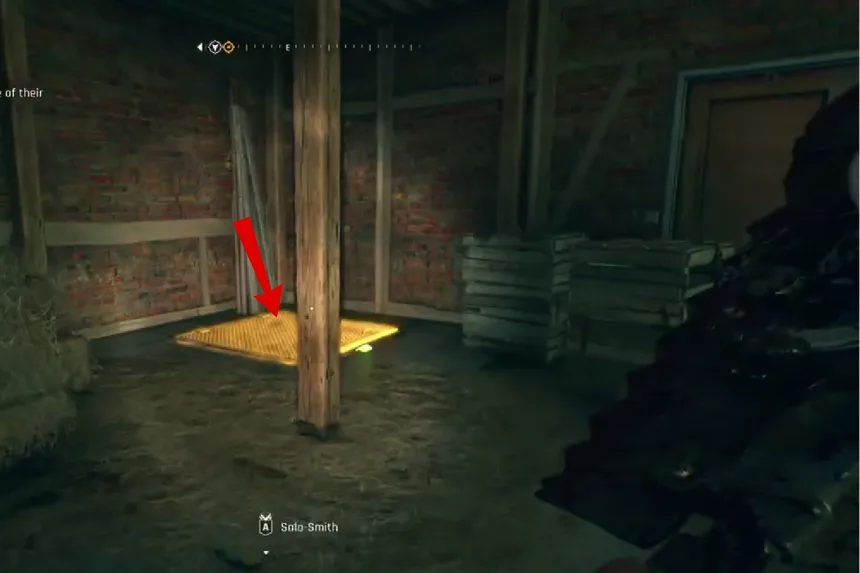
- That will power up a nearby wire box.
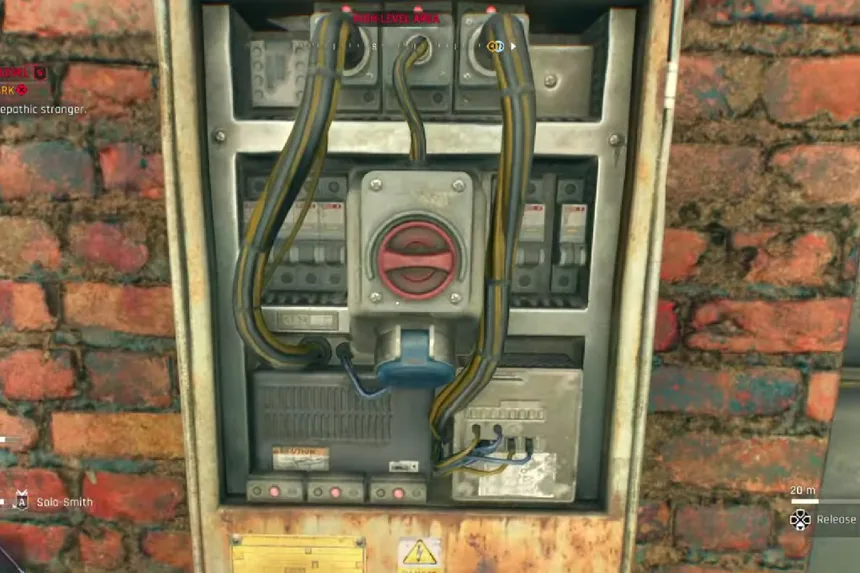
- Grab the wire from that box and carry it over to the other box across the way. You’ll see the wire following behind you while you move.
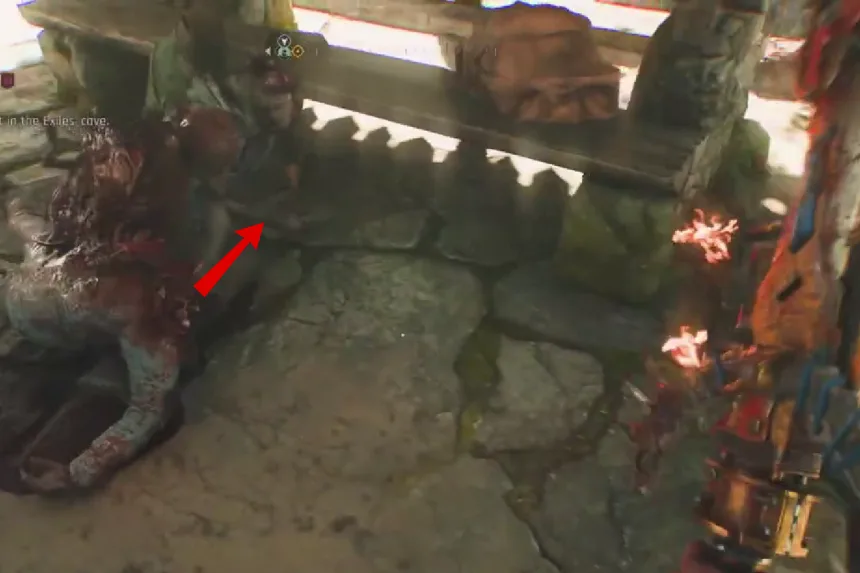
- Connect it to the second box, and the door will unlock automatically.

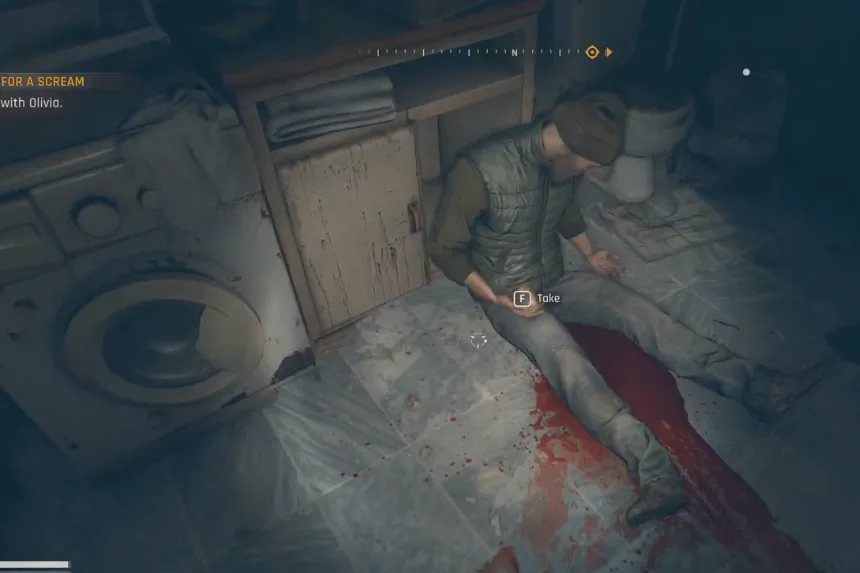
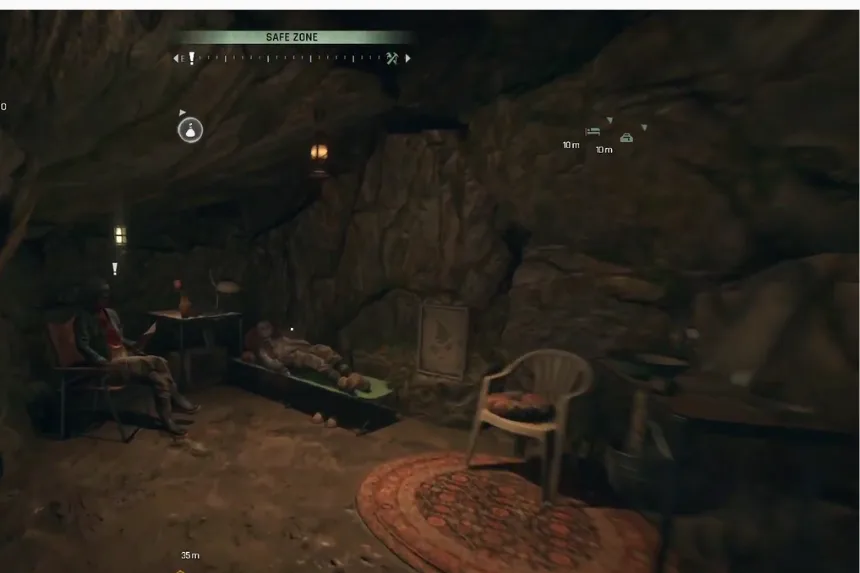
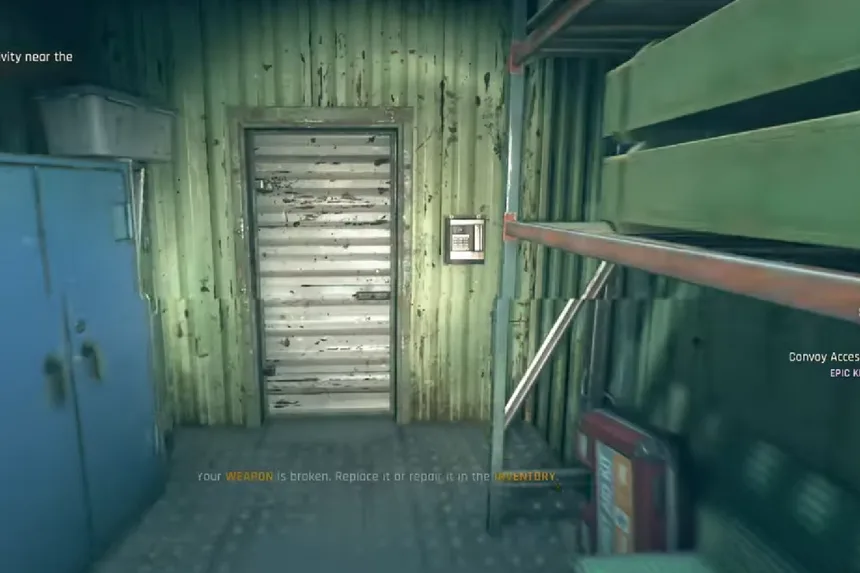
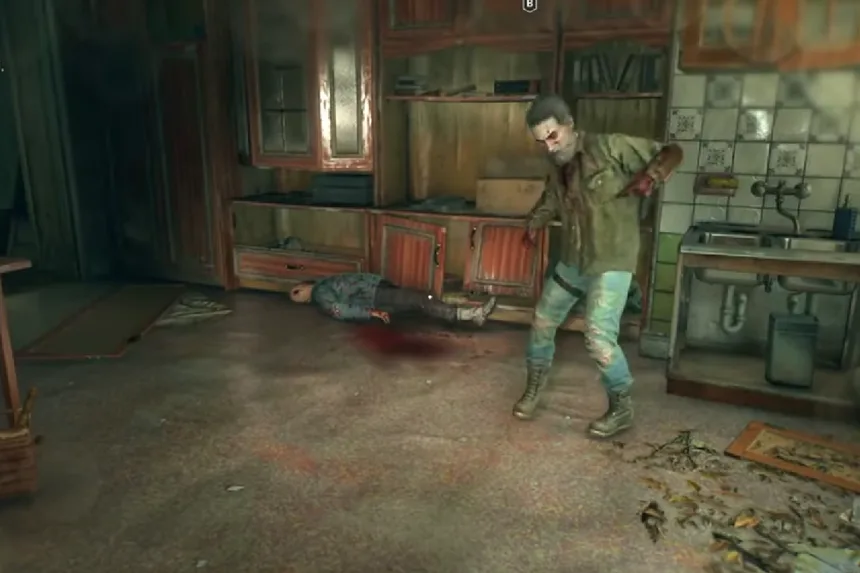
Be careful though once the door opens, you’ll run into a bunch of zombies inside. Take them out and then loot everything in the room to claim the treasure. The game doesn’t actually mark these treasure maps as “complete” when you finish them, so don’t expect them to disappear from your inventory.
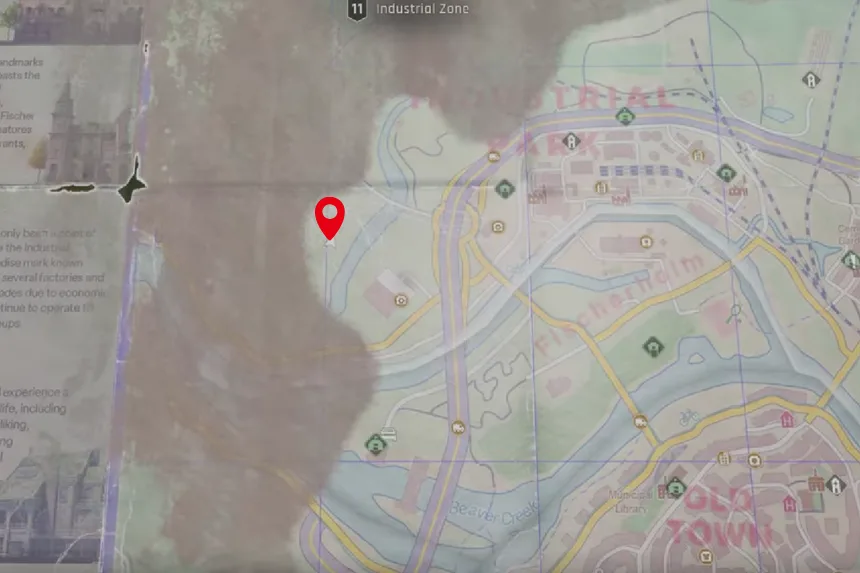
Treasure Map A2
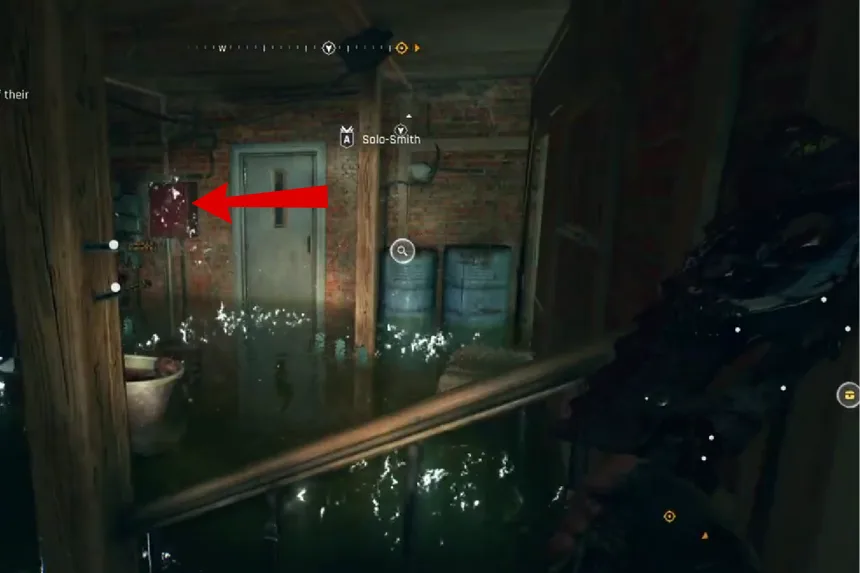
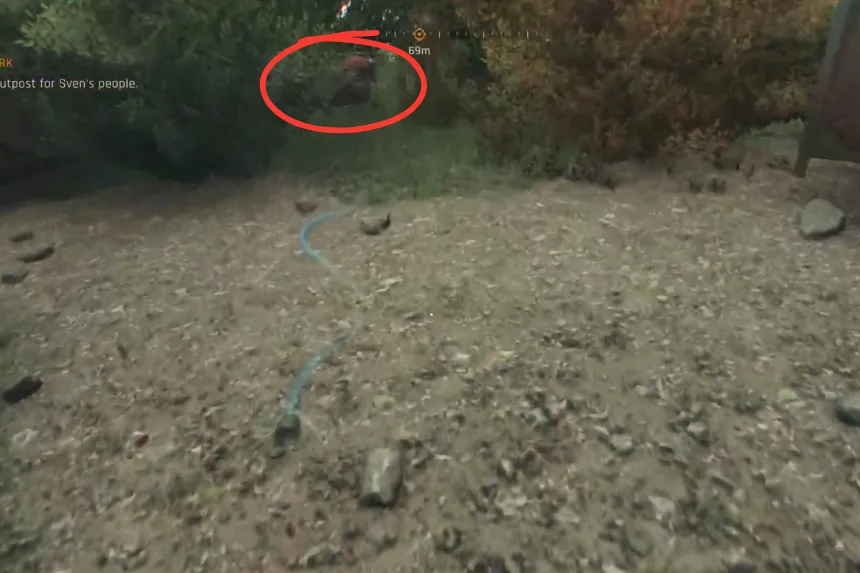
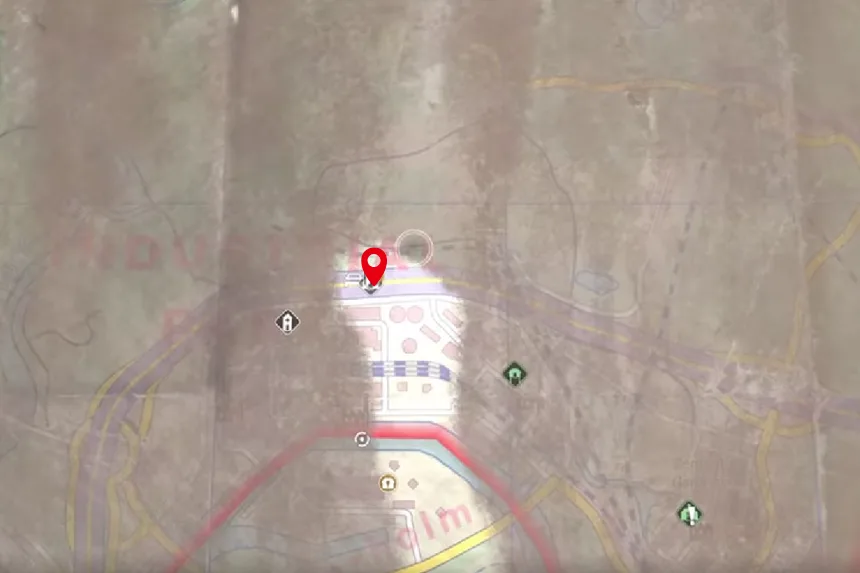
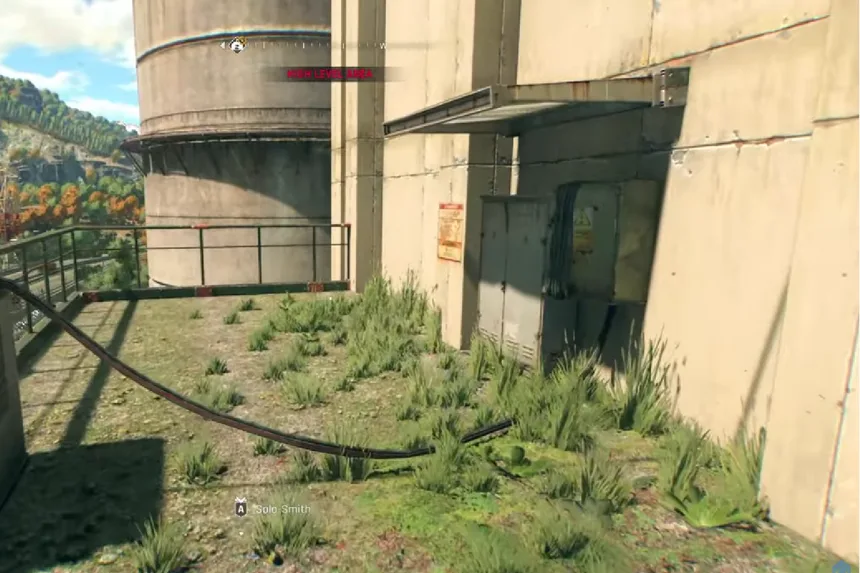
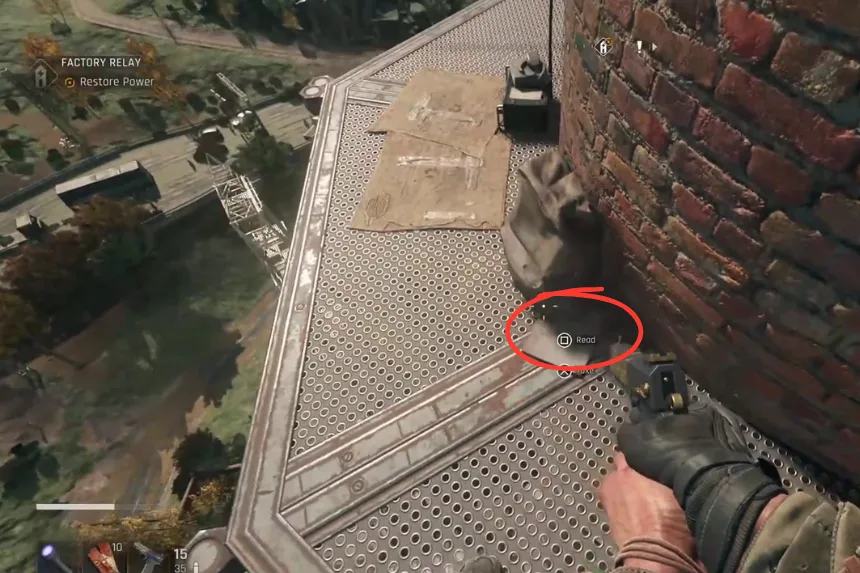
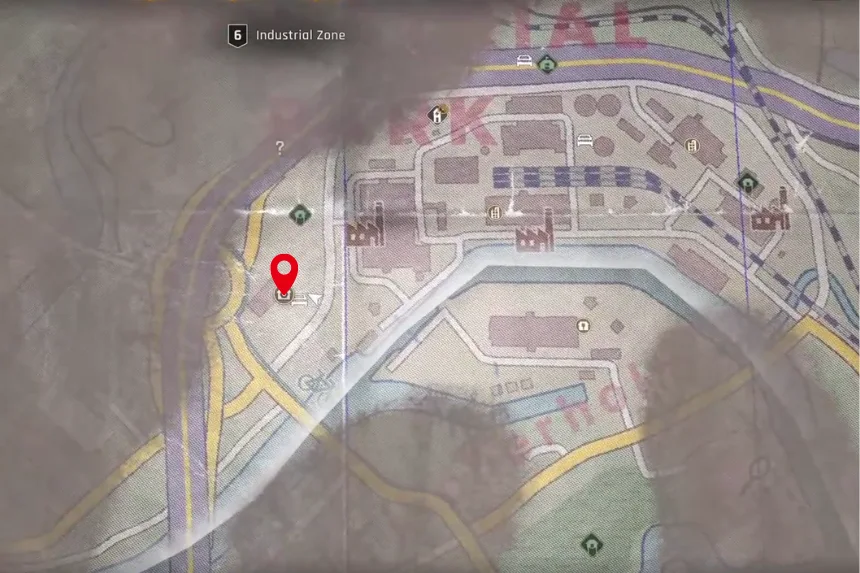
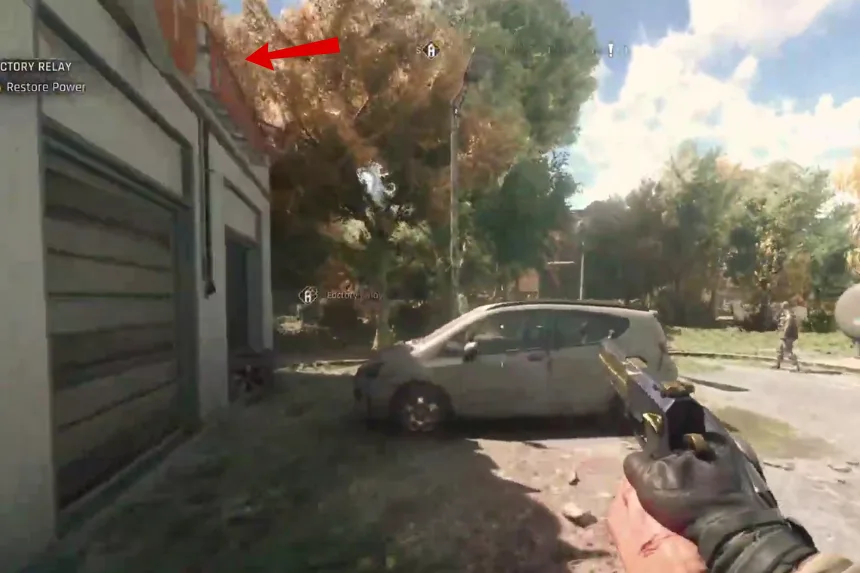
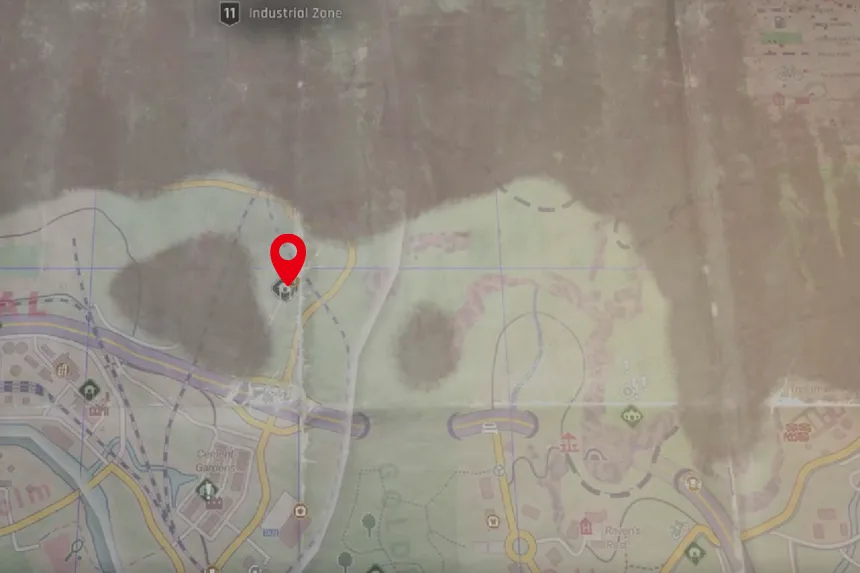
This one’s a bit tricky, since it takes you all the way up to the Chimney Towers in the Industrial Zone. First, climb to the top of one of the towers you’ll find the treasure map near the binoculars up there. Once you’ve got the map, you’ll want to head toward the big gated-off area near the tower marked “Smith” on the map.
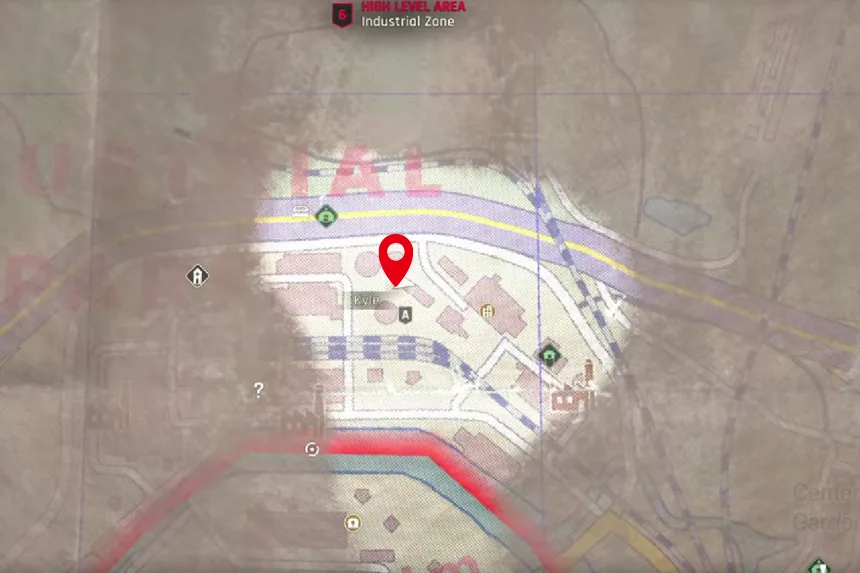
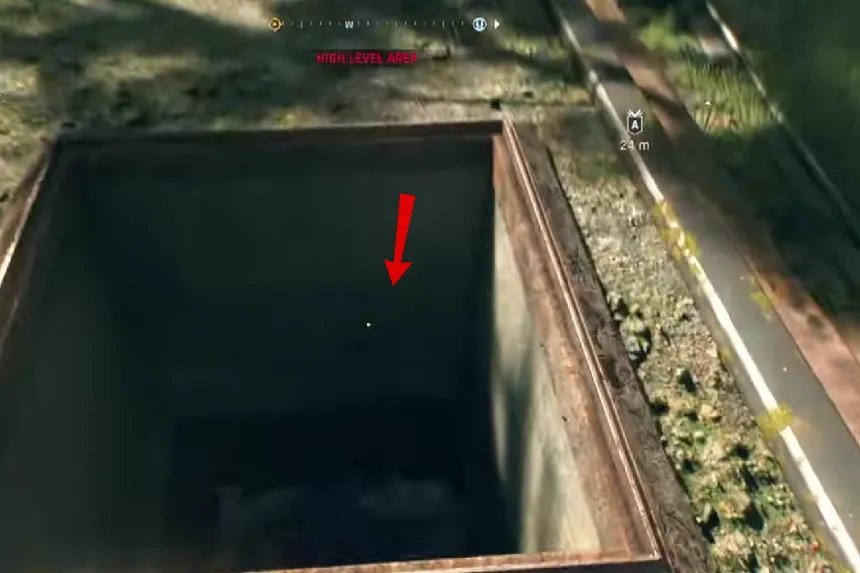
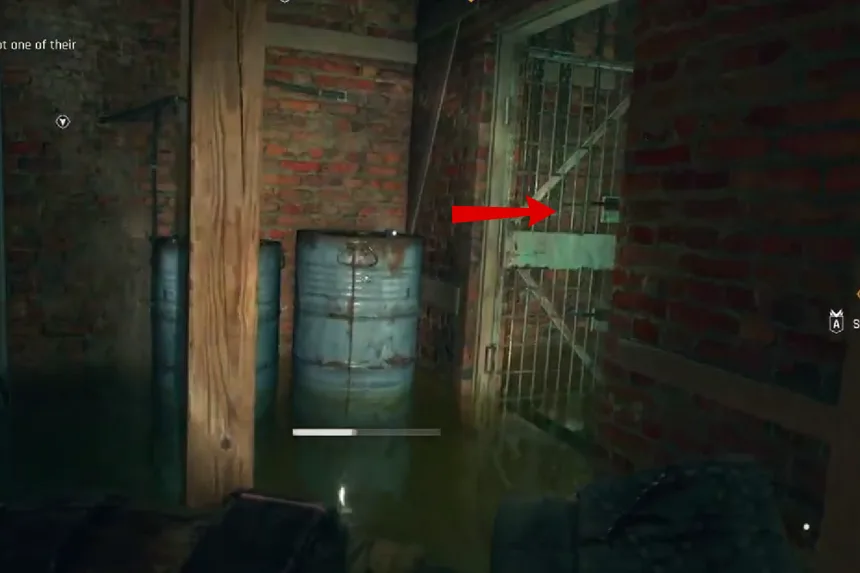
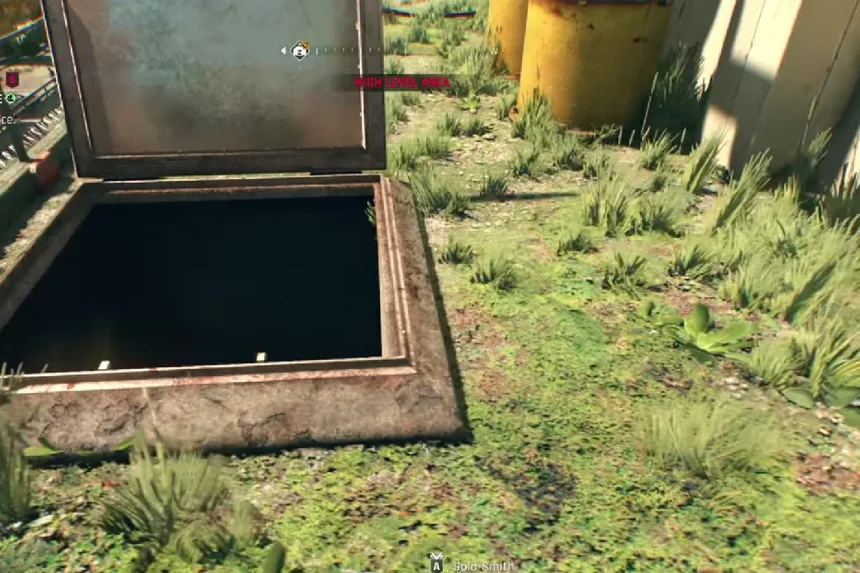
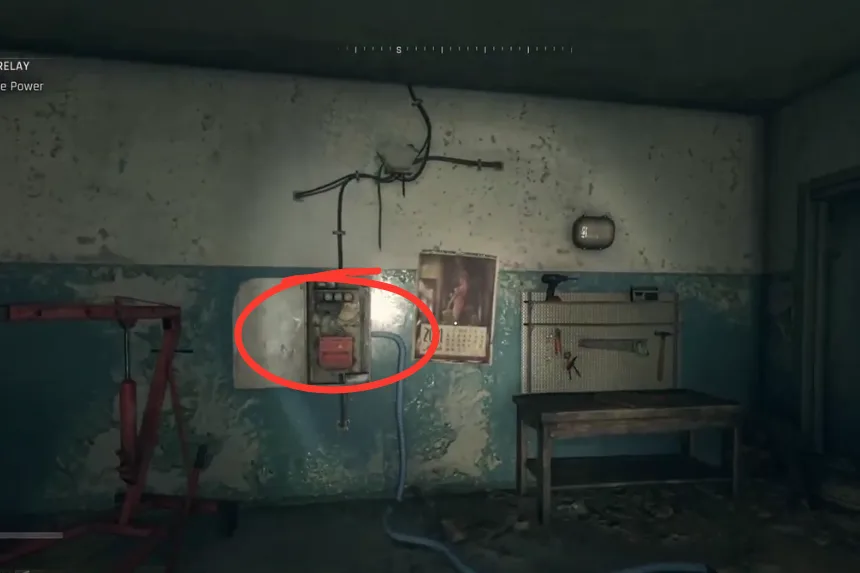
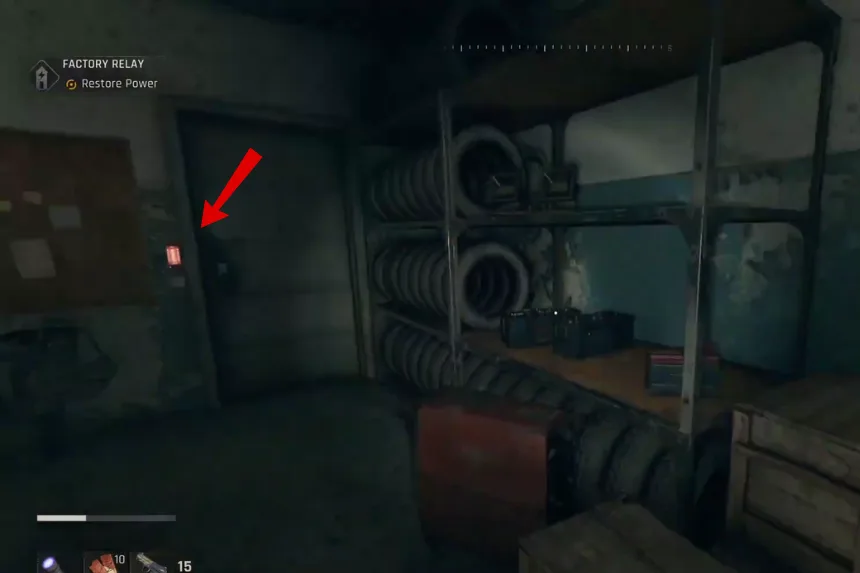
Inside that fenced area, you’ll see a hole leading down into water. Dive in and swim through. You’ve got plenty of oxygen, so don’t worry. Make your way through the passage until you reach a room with a generator. Clear out the zombies, then turn on the generator and grab the power cable.
Now you’ve got to swim while carrying the cable. Follow the path carefully:
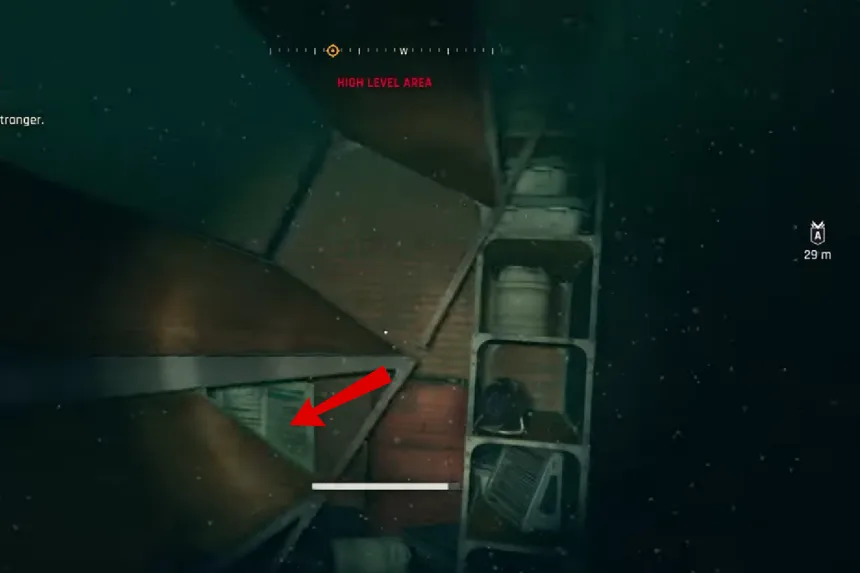
- Look for a tipped-over section and go through the doorway.
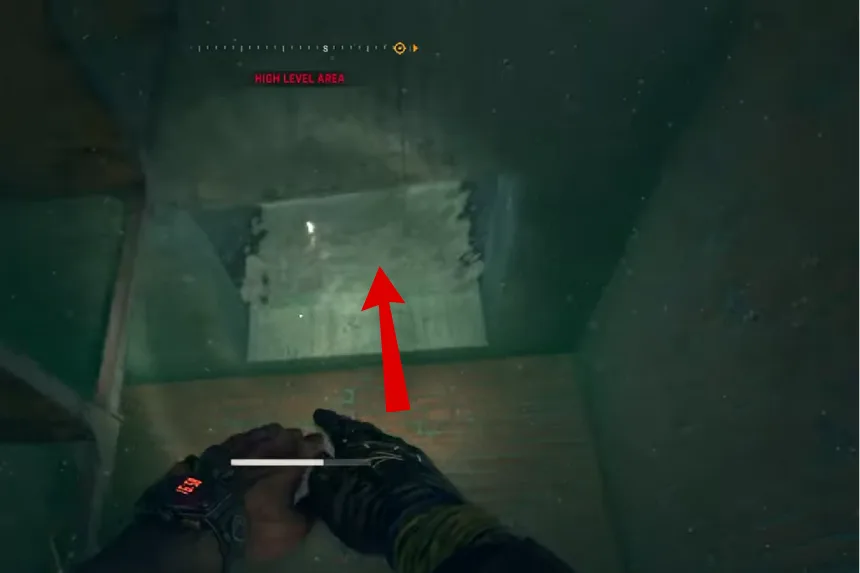
- Keep swimming forward until you reach a spot where you can climb up.
- Jump up and over the fence into the gated area.
Once you’re out of the water, plug the cable into the socket near Smith’s location. That will power up and unlock the office/industrial section. Inside, you’ll need to fight through more zombies, including a tougher one so be ready. After clearing them out, lockpick the door to the treasure stash. Your reward here isn’t just random loot you’ll find Rogue Pants, a piece of gear that boosts stealth.
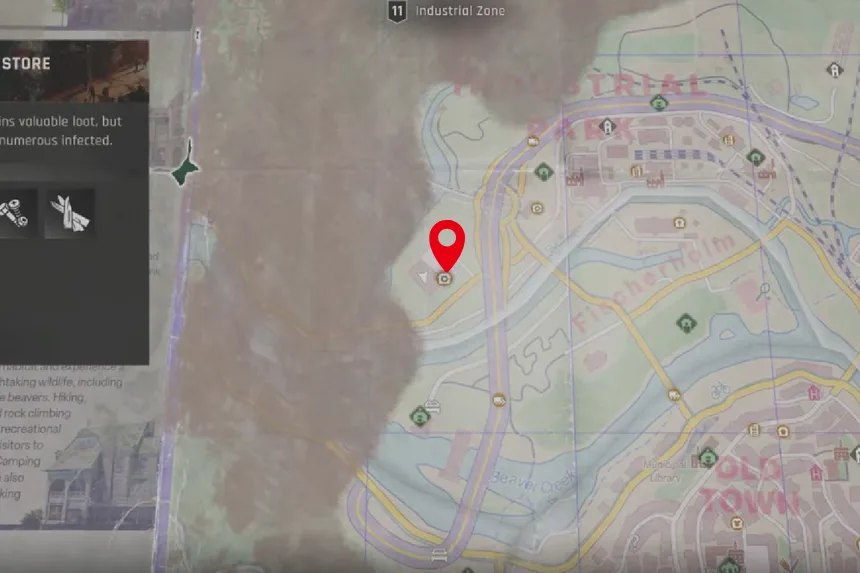
Treasure Map A3
For this one, you’ll normally need the grapple hook to reach the spot, but you don’t actually need it to grab the treasure itself. You’ll need to head to the farmer’s tower in the farm area.
You’ll need the grapple hook to climb all the way to the top of the tower. On the map, it looks southeast, but depending on your compass it might show as northwest just keep in mind you’re aiming for the tall tower in the farm zone.
Here’s what to do once you’re there:
- Climb into the building and break the vent to get inside.
- Open the door and grab the power cable.
- Run the cable over and plug it into the socket at the hatch this powers it up.
- Open the hatch, grab the power cable again, and then carry it down through another vent.
- Plug it into the next socket to fully power up the area.
It can be bugged out and you need to reload it. If that happens, just restart and try again. Once the power’s flowing, you’ll be able to open all the locked doors and loot everything inside. The big reward here is in the cupboard you’ll find a legendary assault rifle.
Treasure Map A4
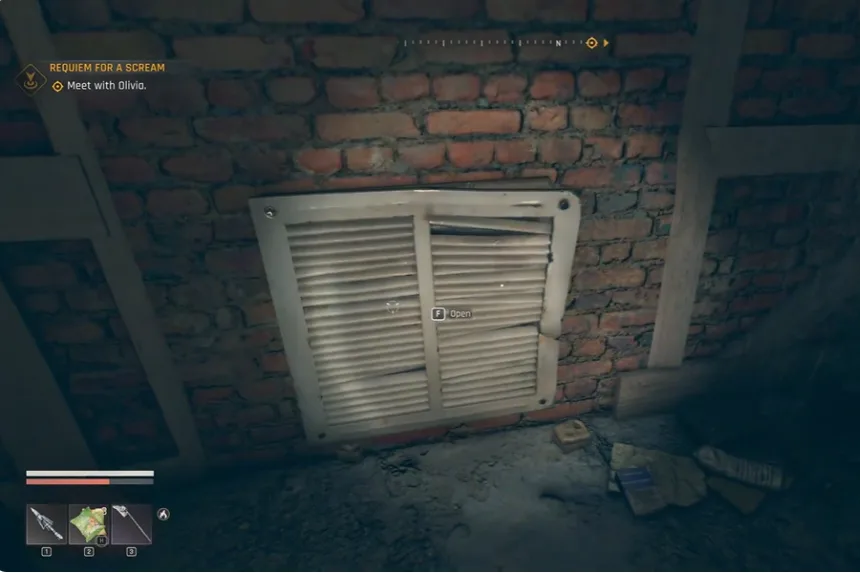
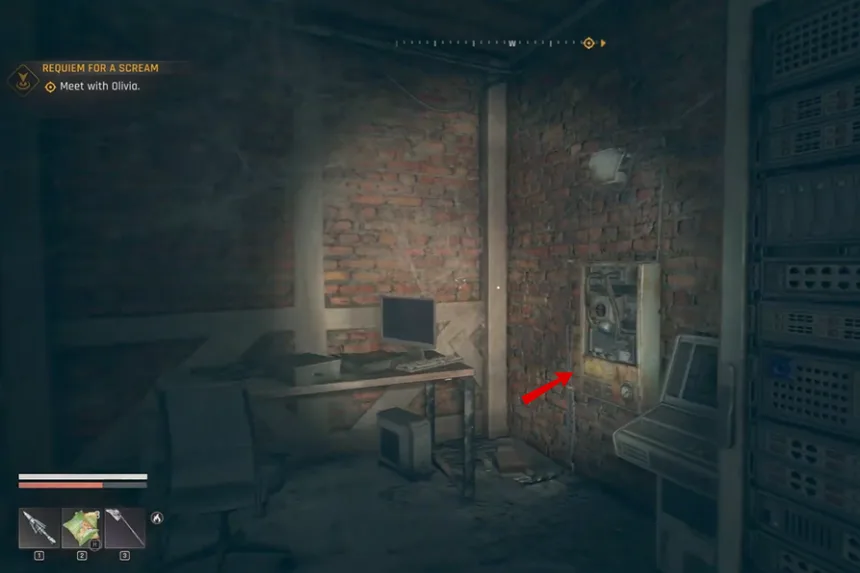
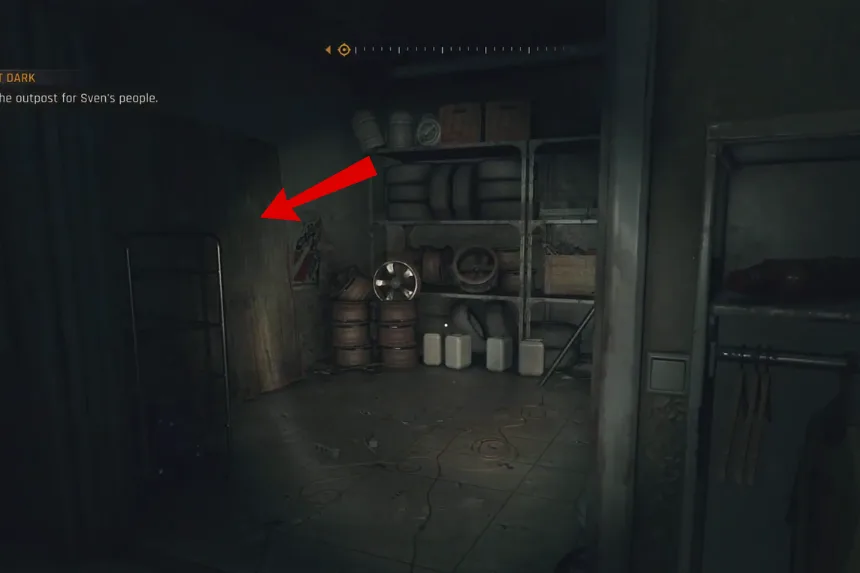
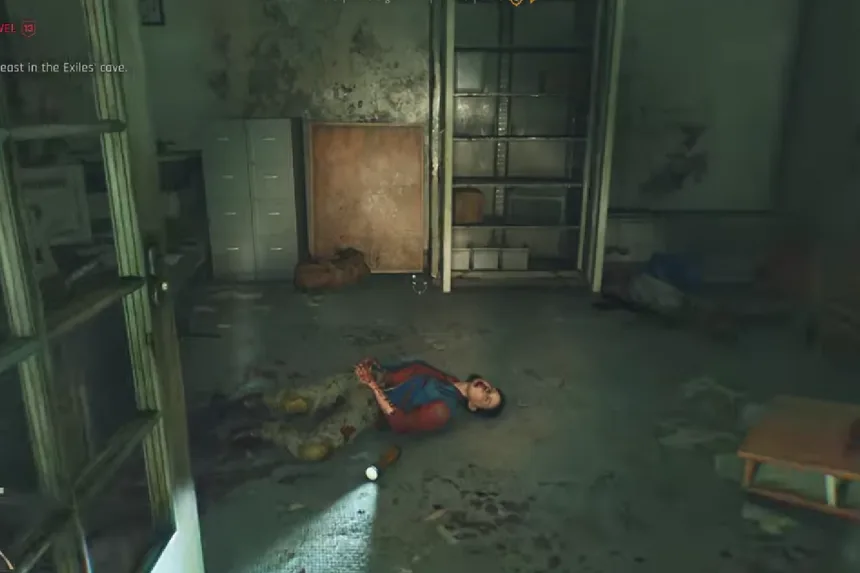
Go to the location marked on the map. You will find a ventilation shaft; break open the ventilation shaft door to enter the underground bunker. Inside, you will find a locked door; pick the lock to open it. Inside you will find the power station. Switch it on to get power in the bunker.

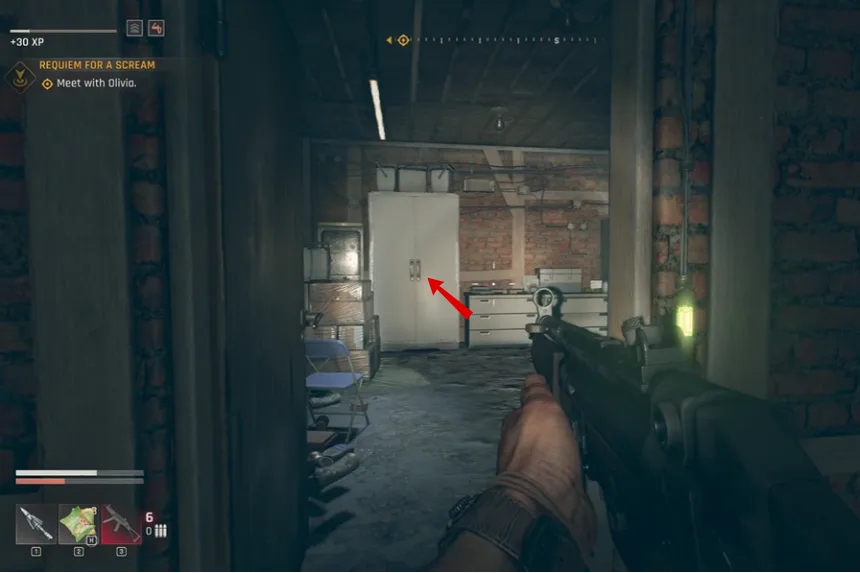
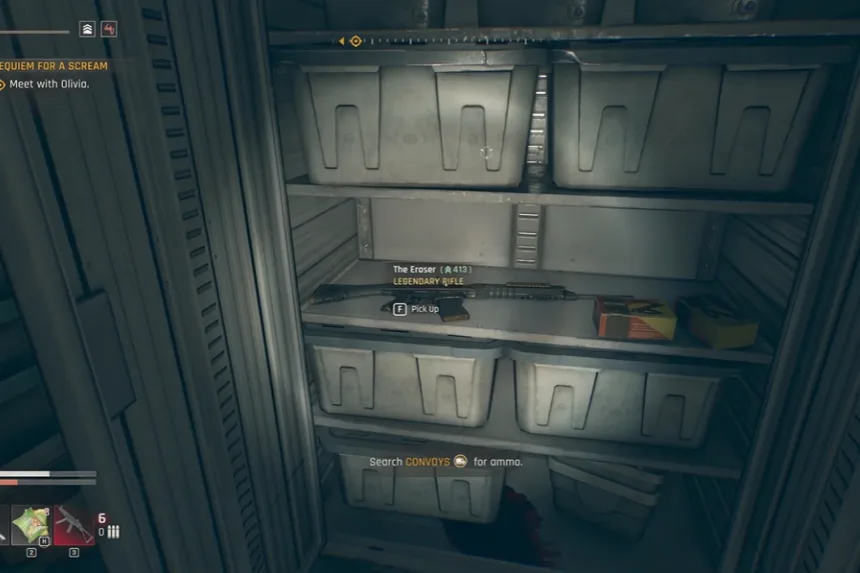
After switching it on, climb through the ventilation shaft to get inside to the next room. Inside the room, you will find a dead body. Search for it to get the room pass key. Now move back to the main area through the same ventilation shaft from where you came. In the middle locked room, you will find the A4 treasure by unlocking it with the room access key.
Treasure Map B1

Head to a barn on the eastern edge of The Vale. Once you’re inside, read the note and grab the map that’s posted there.
From your last spot, head a little northeast until you come across a few houses and a yard with undead. Make your way to the back near the field, where you’ll spot a grate. Open it to grab the cable, then take it back to the yard and connect it to the fuse box. Doing this will unlock the door, and as a reward, you’ll get The Statement, a legendary shotgun.
Treasure Map B2

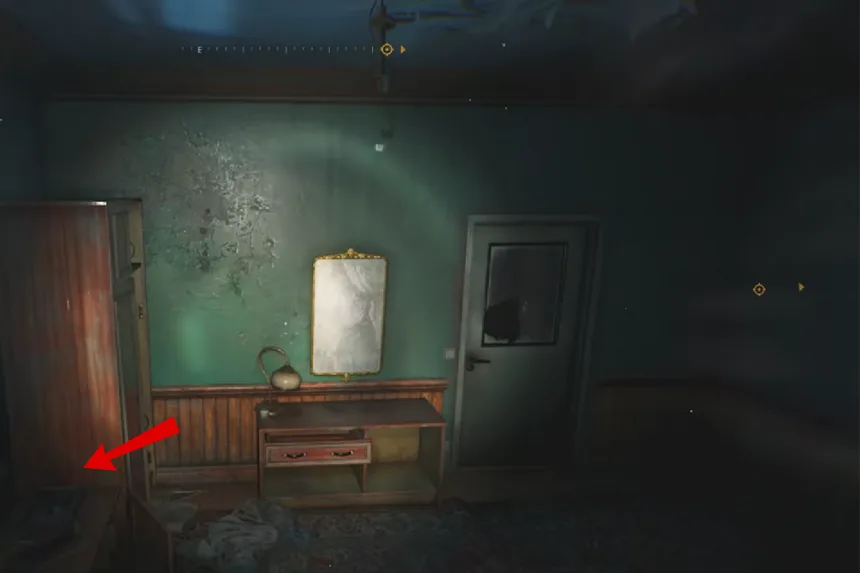
Go to the location marked on the map above, and you will find a house. Use the pick to unlock the door and enter the house. In the study room, you will find the Treasure map.
To get inside the bunker, search the dead body in the house, you will find the fuse to power up the bunker. Inside the Abandoned Rocker House, you’ll find a safe. The code is 2-2-19, which is actually the date of the Bloody Rabbits concert. Open it up to claim the Sunray Legendary Revolver along with some revolver ammo.
Treasure Map B3
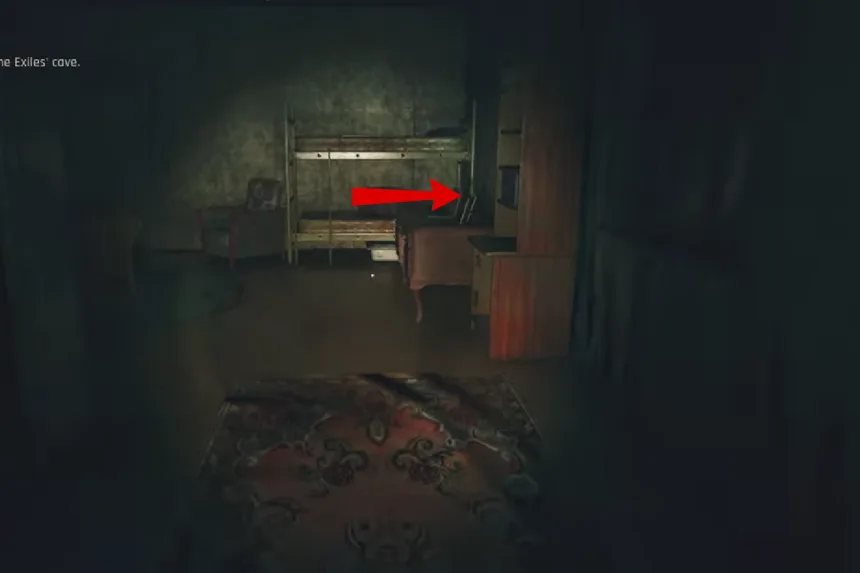
To get the Treasure Map B3, you need to do the “Last Wish” side quest. To start the quest, go to the location marked on the map above and talk to Amenda. Follow the quest marker and retrieve the Iris music box. Use the Iris journal to open the safe (20-7-6) and get the Treasure map. The location of the Treasure map and the treasure is at the same place.
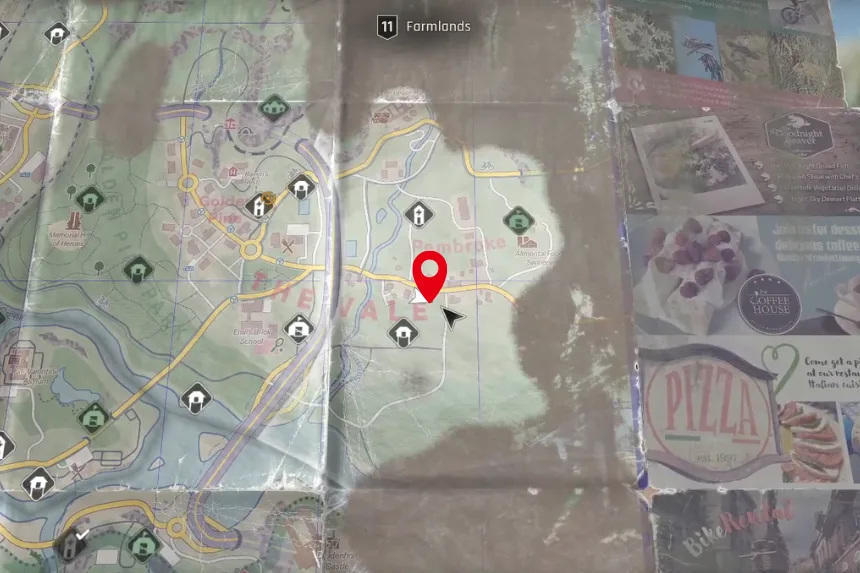
To get the Treasure, go to the Farmland region. Go to the back side of the garage, climb through the back door, and enter it. At a corner, you will find the treasure safe. The safe code is 11-17-8.
Treasure Map B4
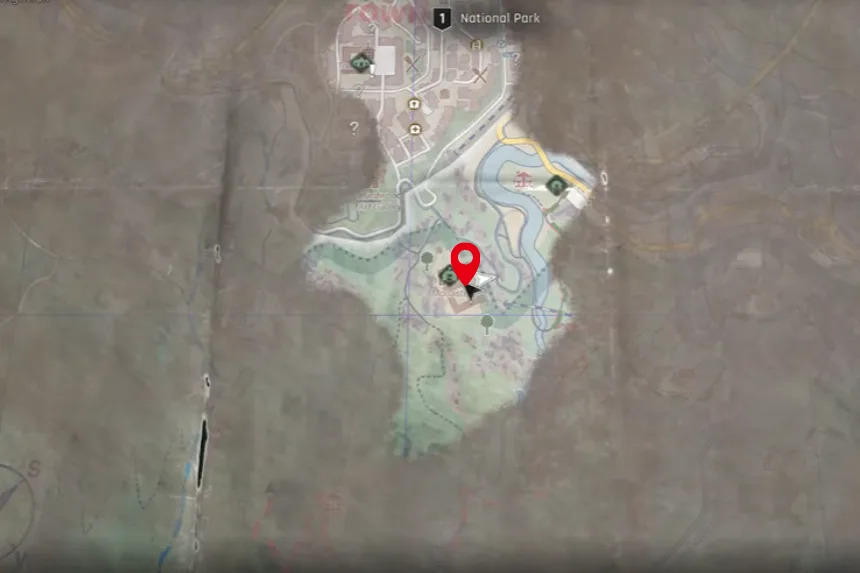
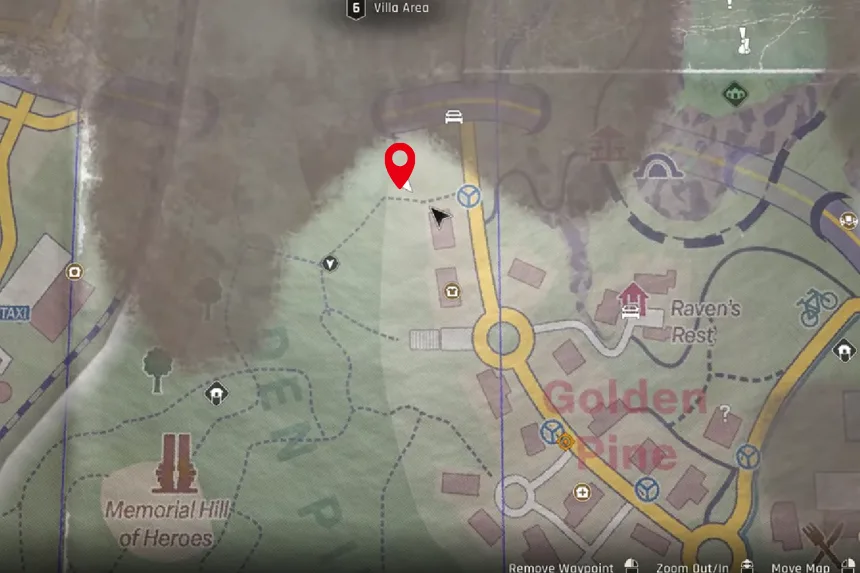
You’ll actually unlock this Safe Zone right at the very beginning of the game. To find it, head over to the west edge of the hill near the Monastery. There’s a broken bridge there with a few rusted train cars on it, but be careful, the place is full of zombies.
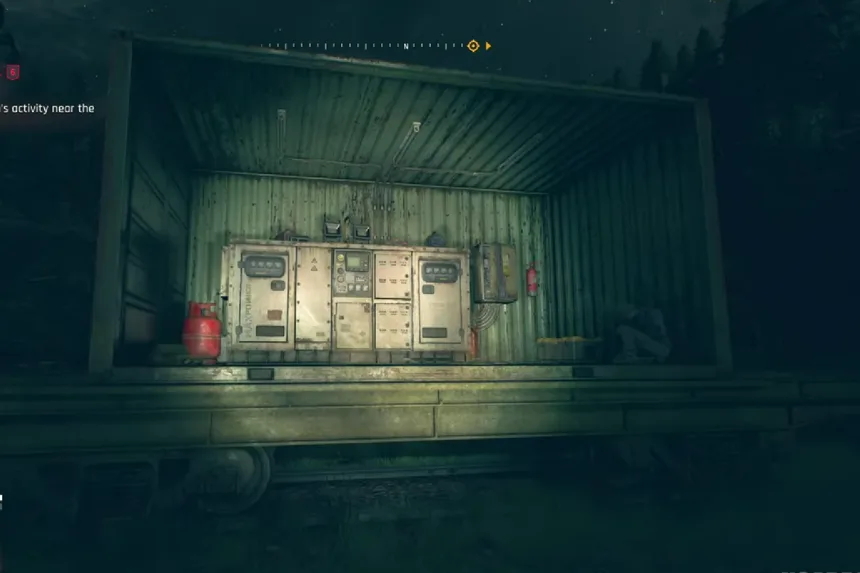
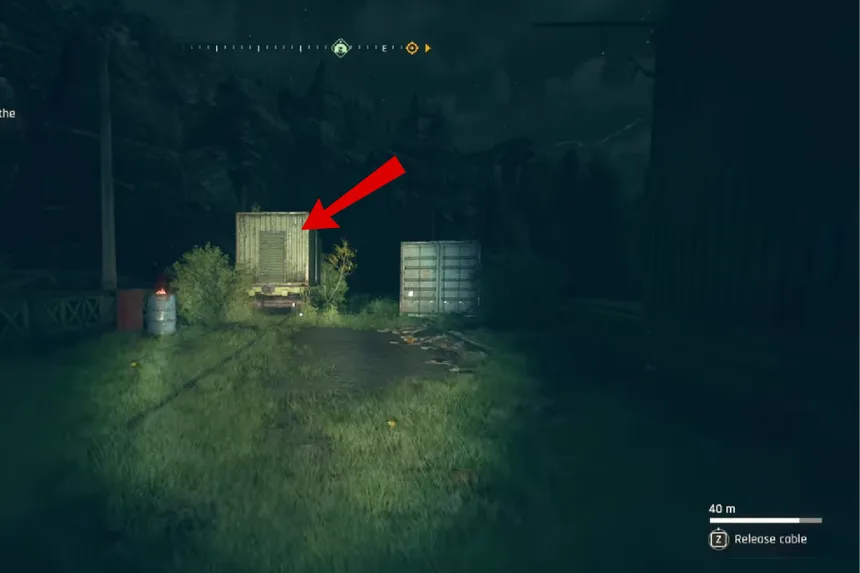
Once you’re on the bridge, look for an open train car on the far west side. Inside, you’ll see a green button. Hit it to fire up the generator, then grab the power cable lying nearby. You’ll need to drag this cable all the way to the opposite end of the bridge, where a locked bunker car is waiting. Pick the lock to get inside, then plug the cable into the power point.
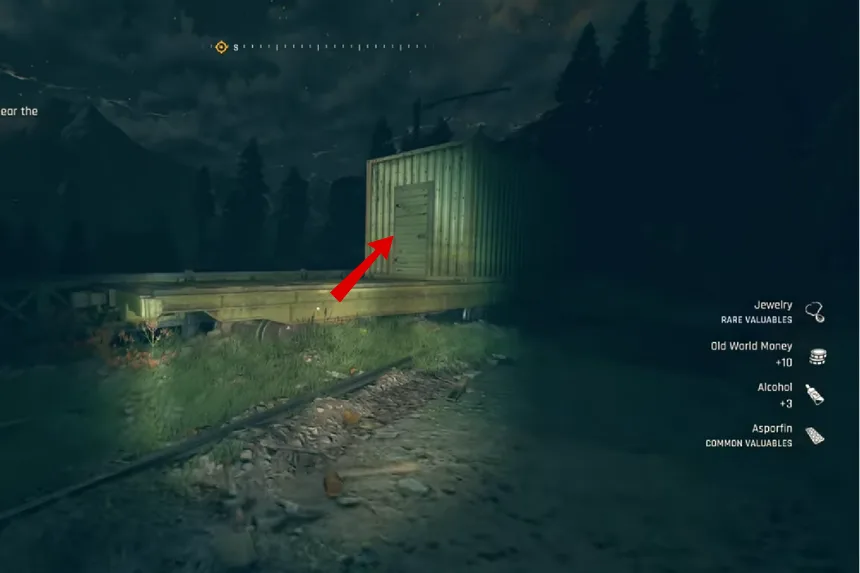
That’ll get the Safe Zone powered up, but if you’re after the real prize The Elite you’ll need a keycard. To get one, clear out the zombies dressed in military gear around the containers nearby. One of them will drop the card. With it, return to the bunker car and swipe it on the reader. Inside, you’ll find The Elite on a shelf to your right, along with some extra pistol ammo.
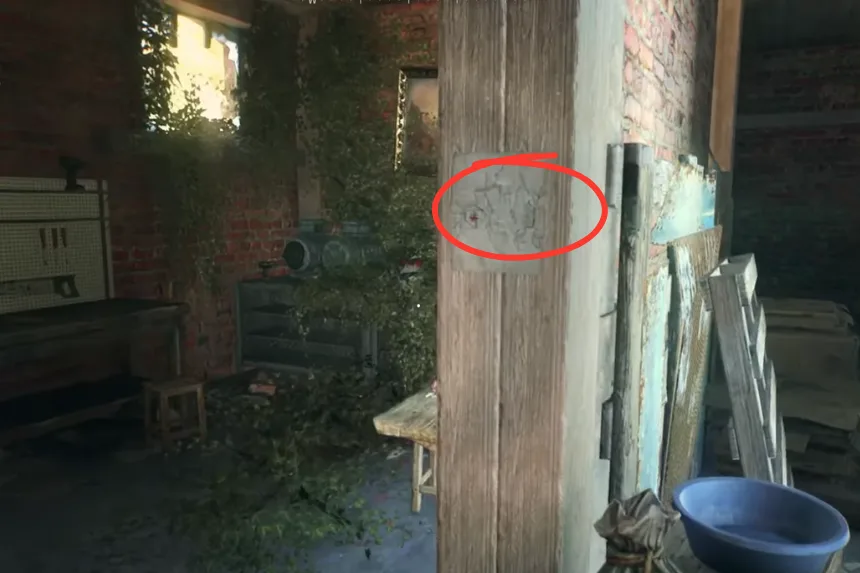
Treasure Map C1
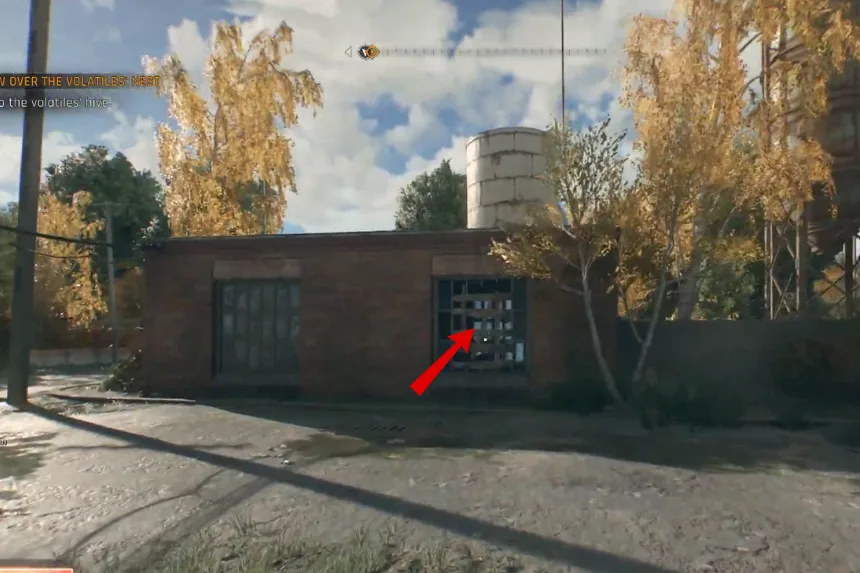
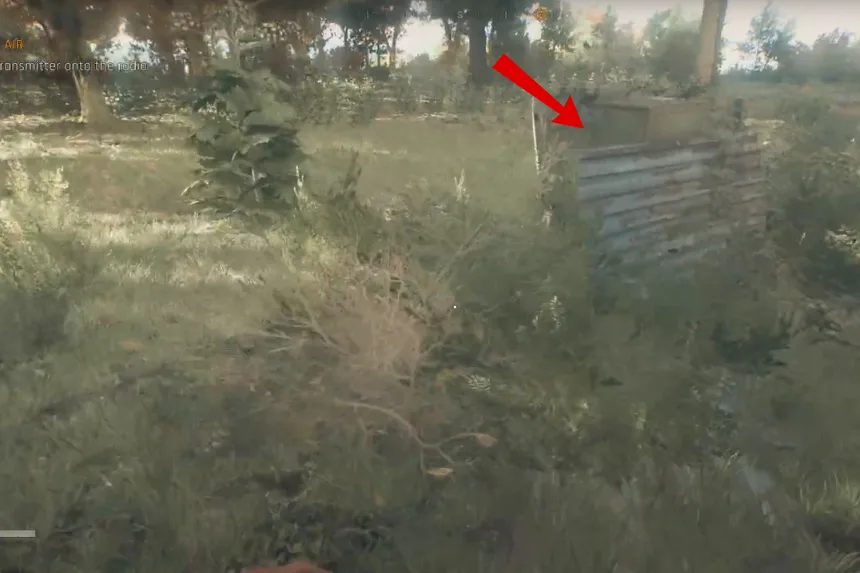
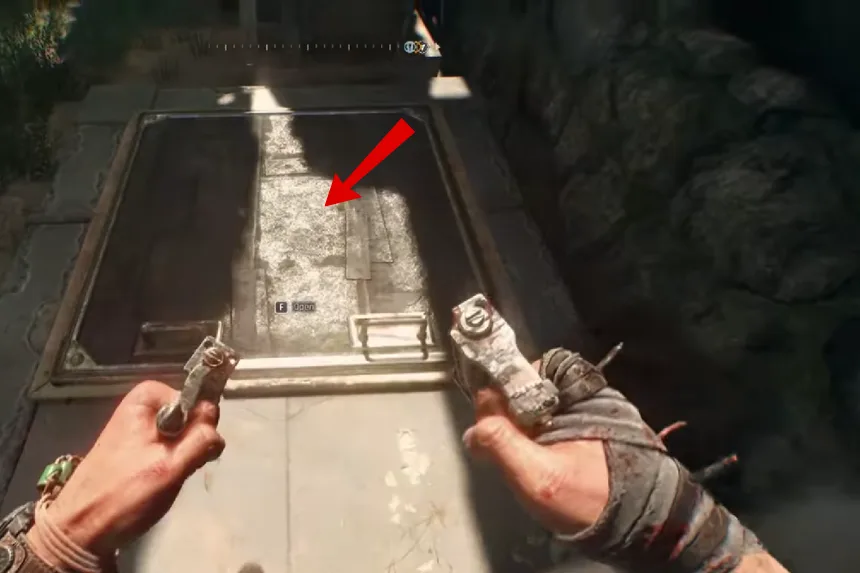
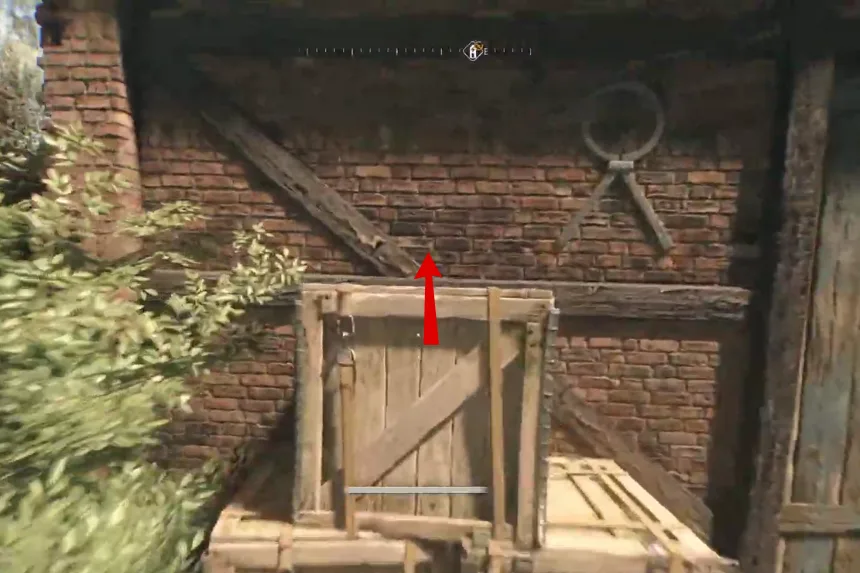
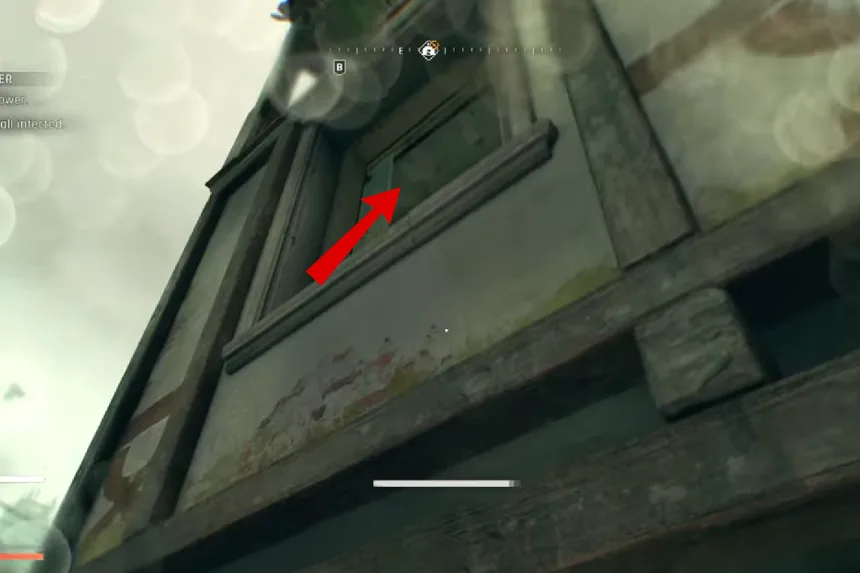
Go to the Recreational Area marked on the map above. You will find a red broken building, as in the above image. Use your hammer to break open the wooden planks blocking your way. Inside, you will find the Treasure map.

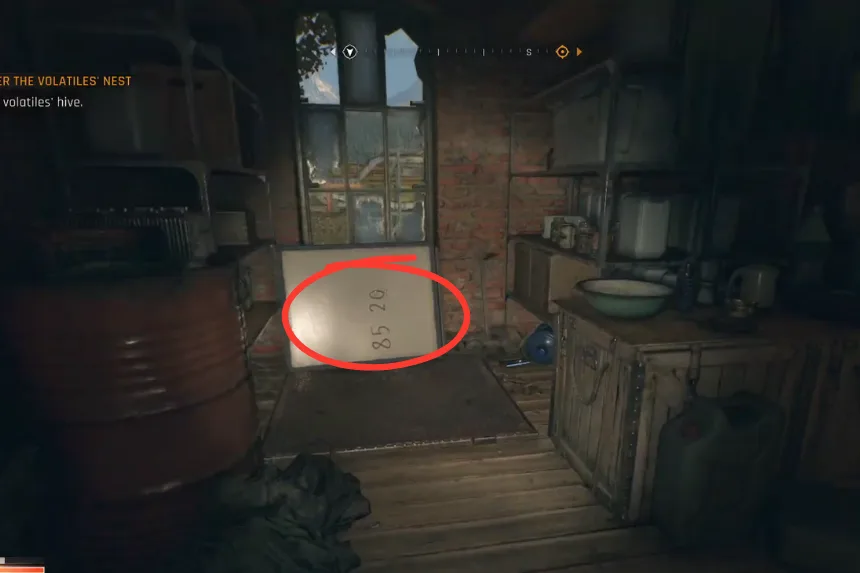
In the Recreational Area marked on the map above. Climb the big red building in front of you to the top floor through the window, by breaking it. Inside the room use your UV light to see the code of the safe in the room. The code of the safe is 85-20-48. Open it to get your treasure.
Treasure Map C2
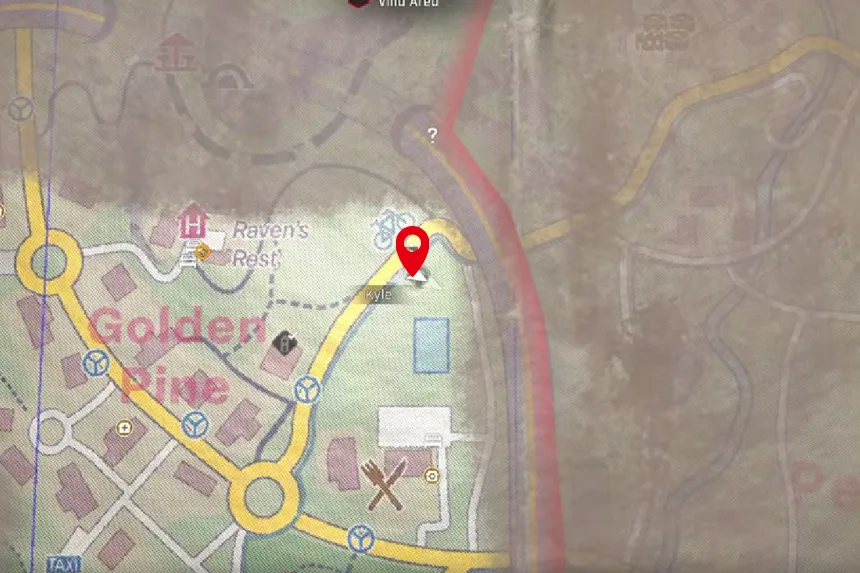
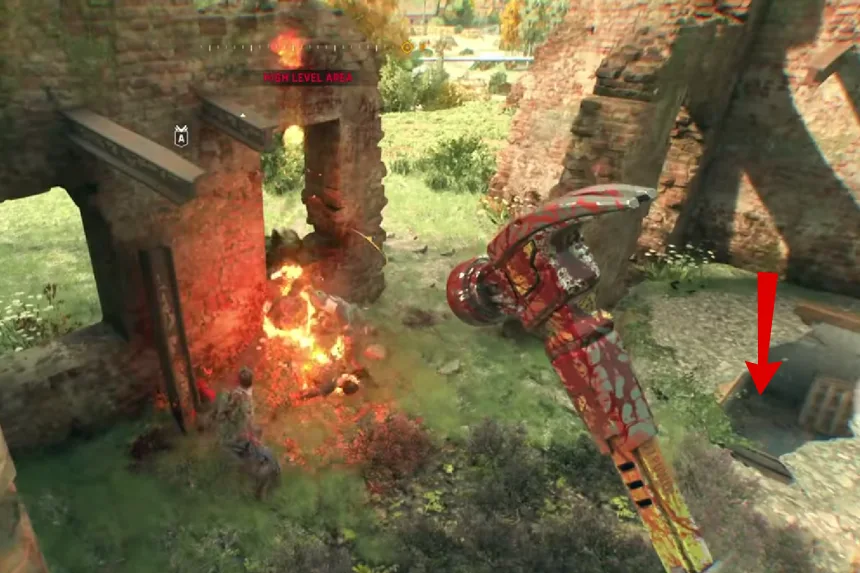
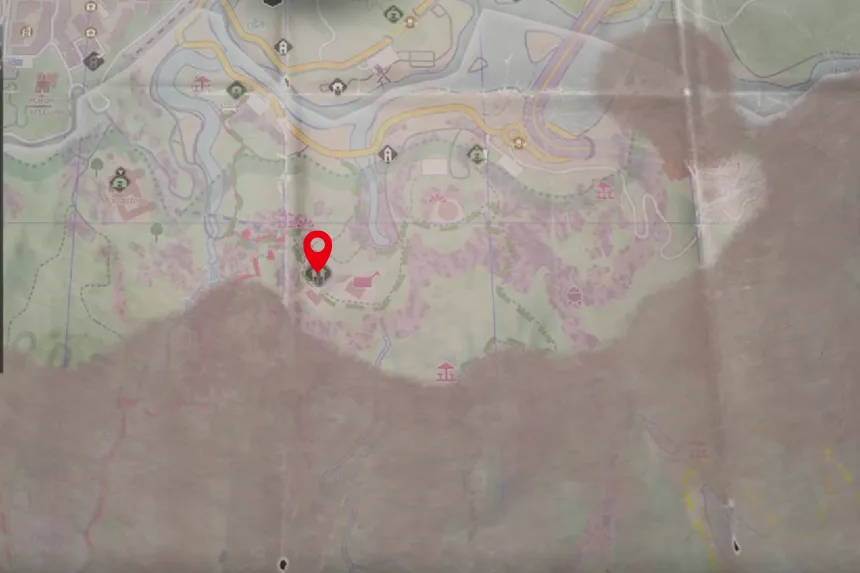
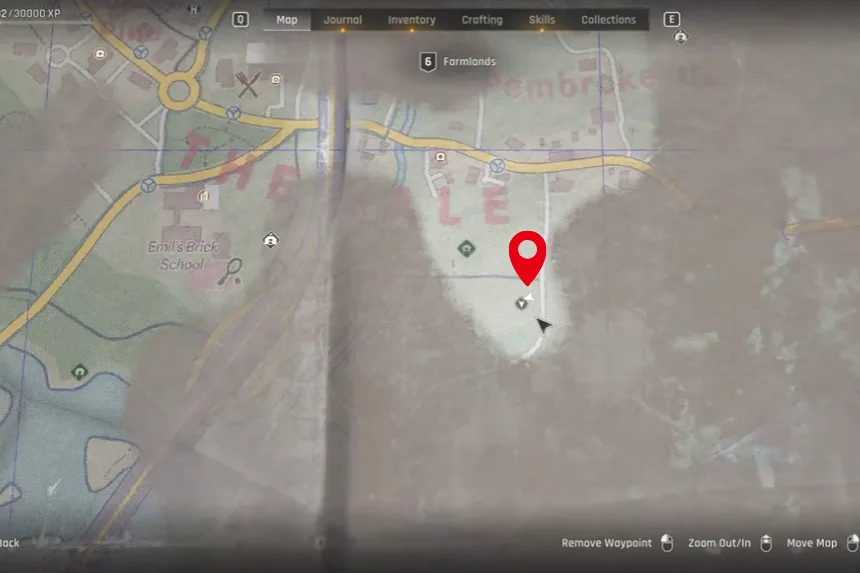
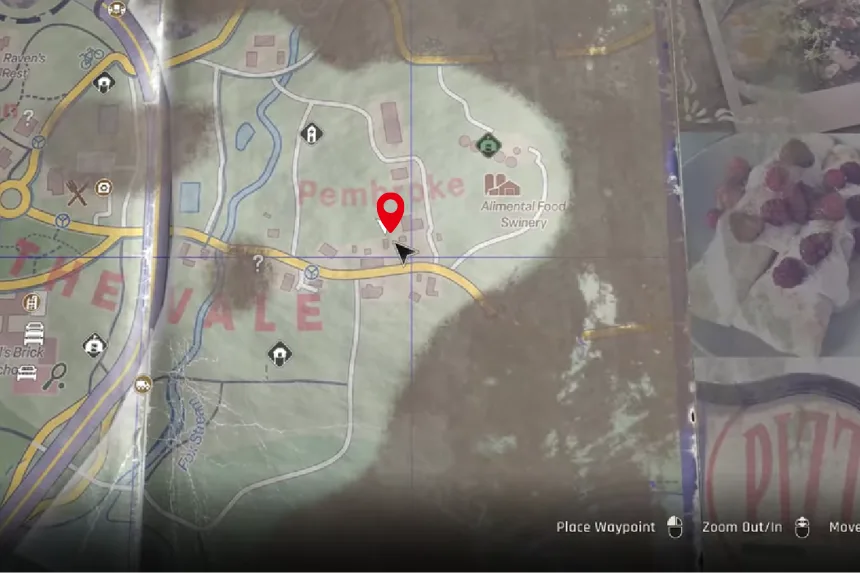
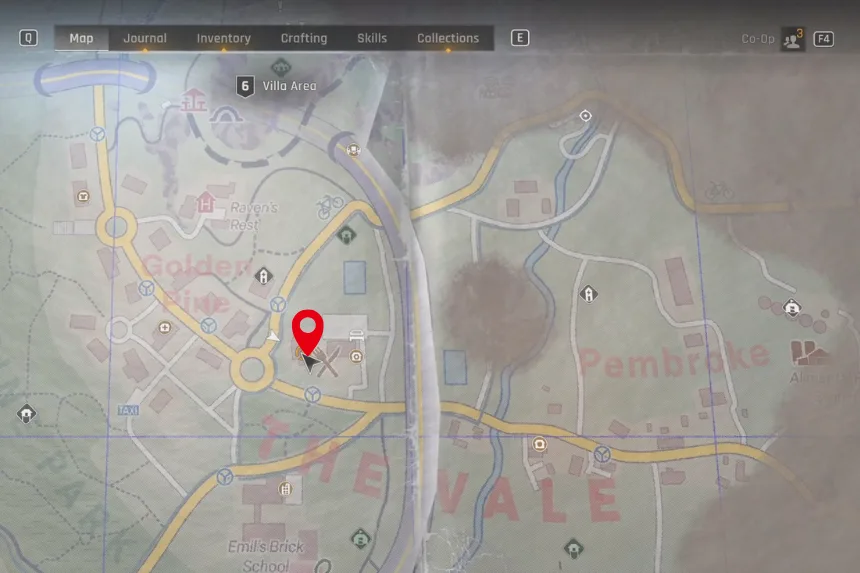
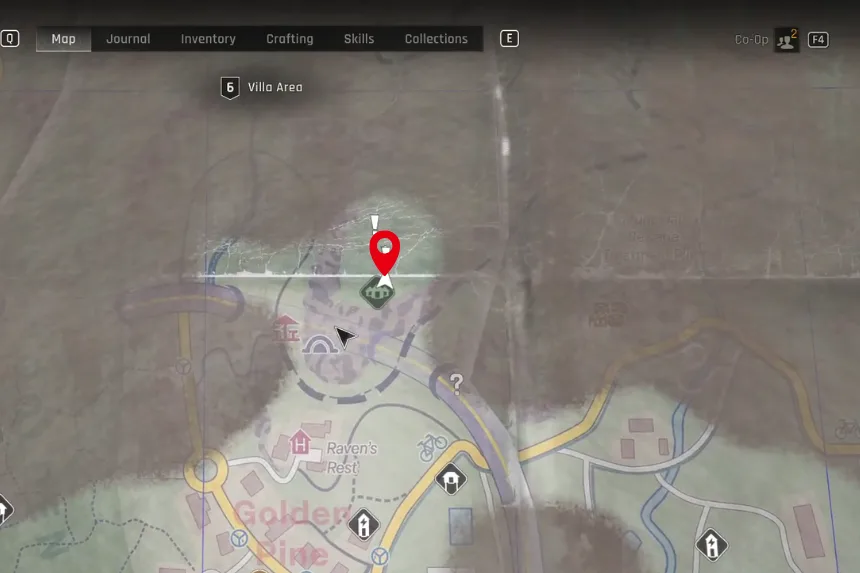
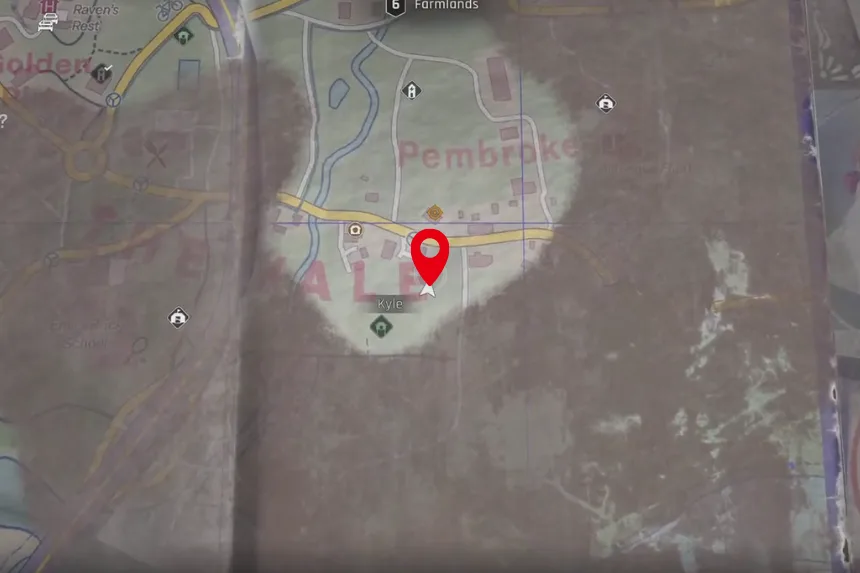
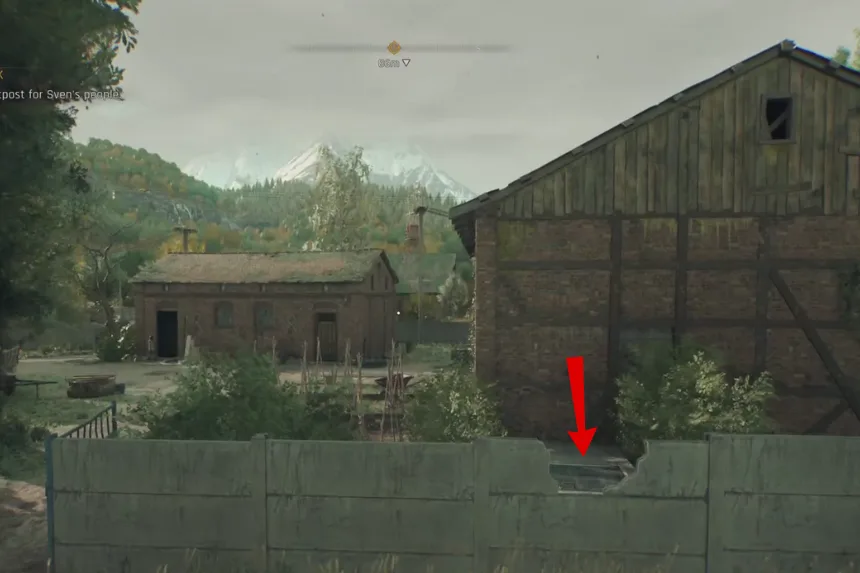
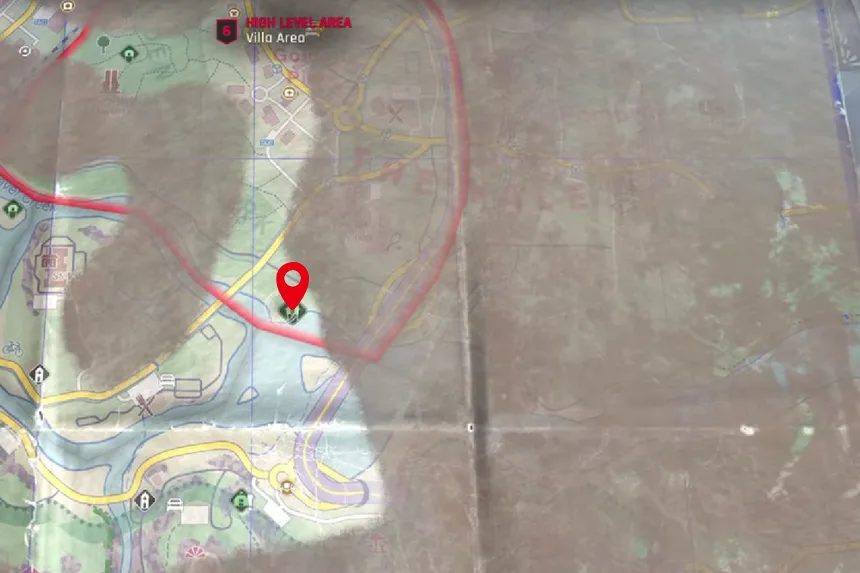
You’ll start in the villa area at the highway tower. Climb to the very top and you’ll find the treasure map sitting on a ledge. From there, make your way into the farmlands. Cross the river and head toward the ruins you’ll know you’re in the right spot when you see the broken structures scattered around.
Clear out the zombies in the area first, then drop down into the hole below. Be careful here there are mines on the ground. You can blow them up safely by tossing items at them, or just sprint through. Either way, expect more zombies to show up. Once you’ve dealt with the mines, wrap around the corner, crawl through the vent, and you’ll come to the stash. Open it up, and grab your loot.
Treasure Map C3
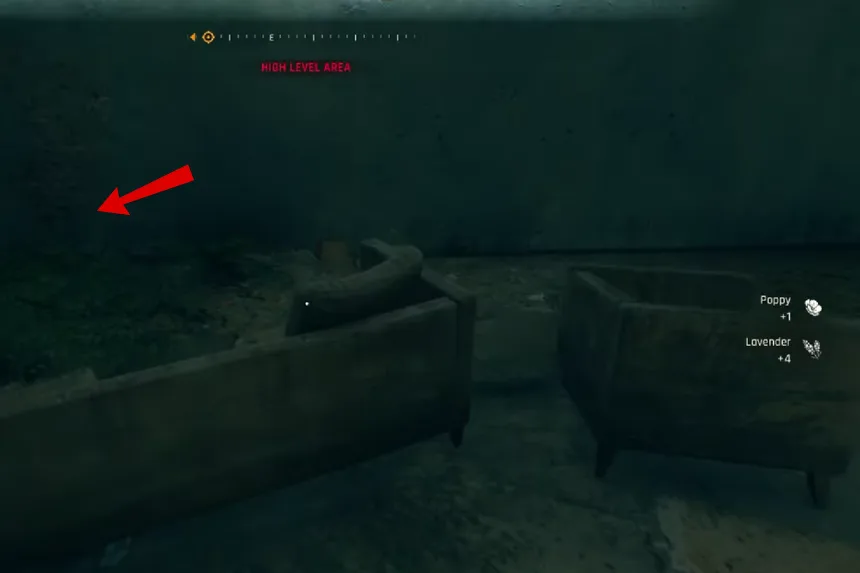
You don’t actually need the map itself to finish this section, but if you do want it, you’ll find it in the farm area at the top of the silo safe spot. Just climb up, unlock it, and scan it. The silo tower is over there, and we’re starting from the barn here. Watch out, there’s a zombie inside.
To move forward, you’ll need to activate the power by turning on the generator. This powers up a nearby hatch that you can open. The catch is that down below, there’s water mixed with live wires, so stepping into it will shock you.
What you need to do is throw a knife at the red fuse box to cut the power. After hitting it, wait about 10 seconds for the sparks to burn out before going into the water. If you jump in too early, you’ll still take damage.
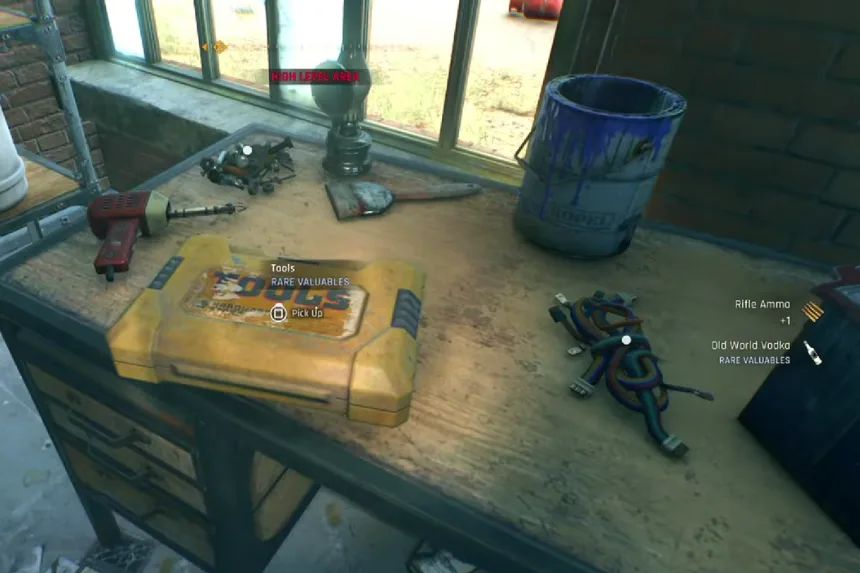
Once the water is safe, drop down, deal with the zombies that rush you, and then unlock the door inside. Grab the collectable note, and at the end, you’ll find your reward chest with some loot and even a blueprint.
Treasure Map C4
Go to the Farmlands region marked on the map above. You will find an underground bunker. To open it, follow the blue wire to a generator. Turn it on to open it. There will be a few zombies nearby; kill them before making your way.
Now move inside the bunker, and on the right side, you will find a wooden plank. Move it and you will find a ventilation shaft. Crawl through it to move to the next room. There will be a zombie inside. Kill it and loot the area to get your treasure.
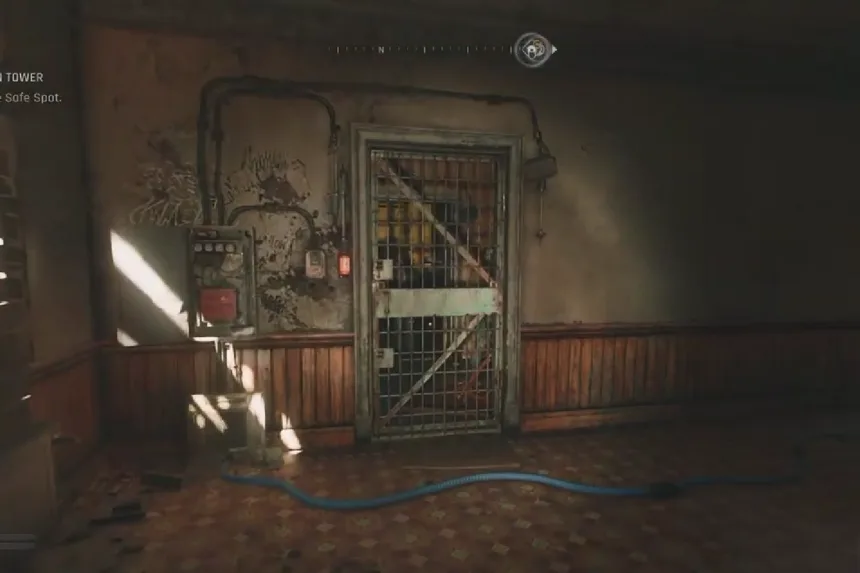
Treasure Map D1
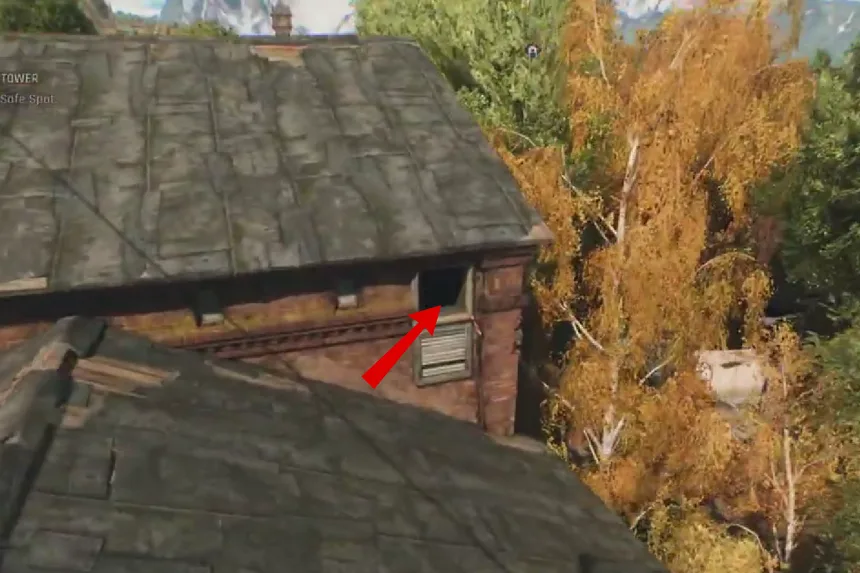
You’ll find this treasure map at the River Tower safe house. It’s the tower right by the river. Climb to the top, and you’ll pick up Treasure Map D1.
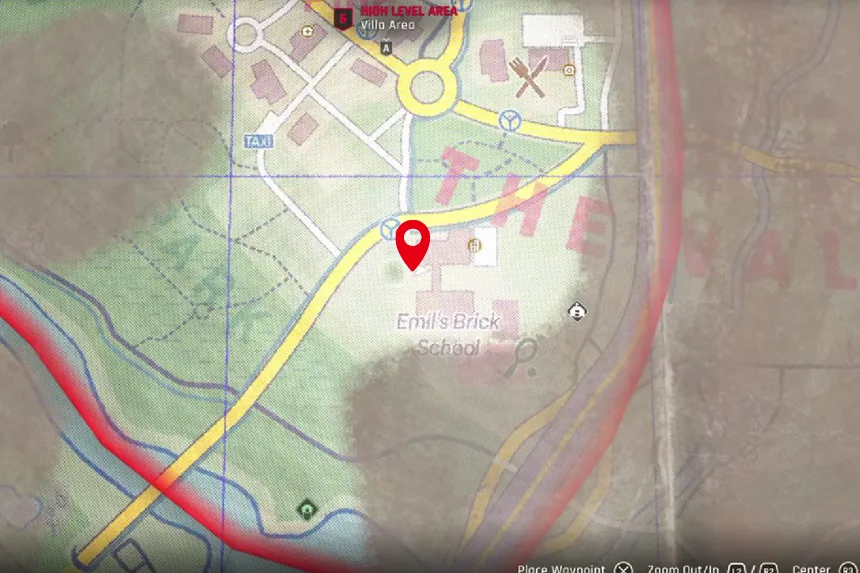
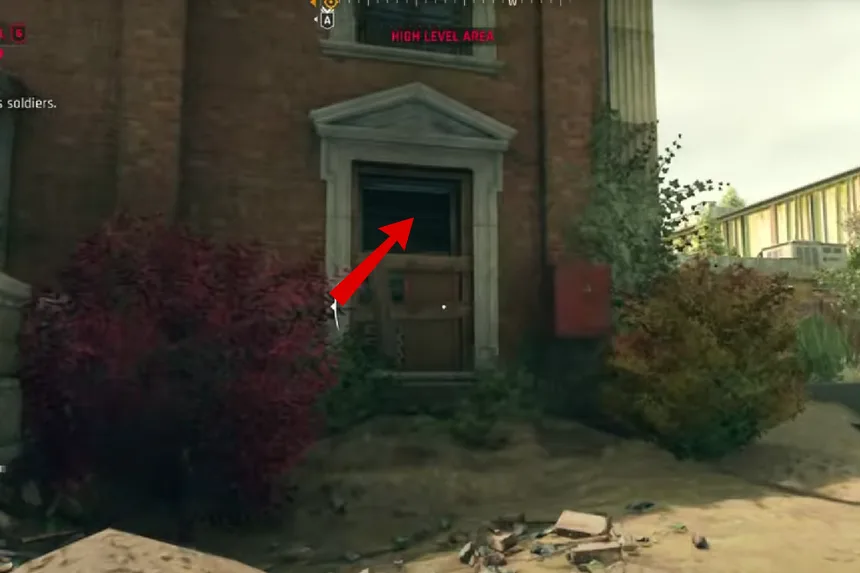
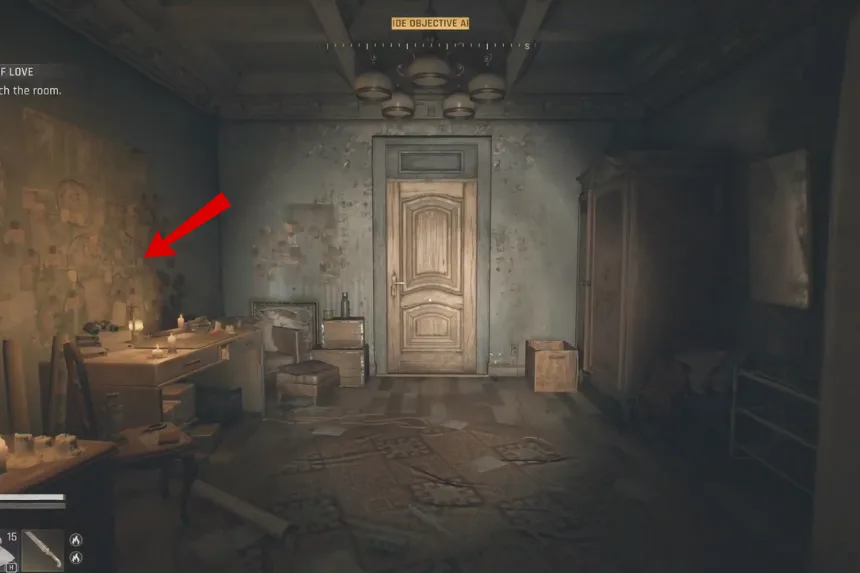
The treasure itself is located at Emil’s Brick School in the villa area. Head over there and circle around the school until you spot a gate with a single open window at the bottom. That’s your way inside.
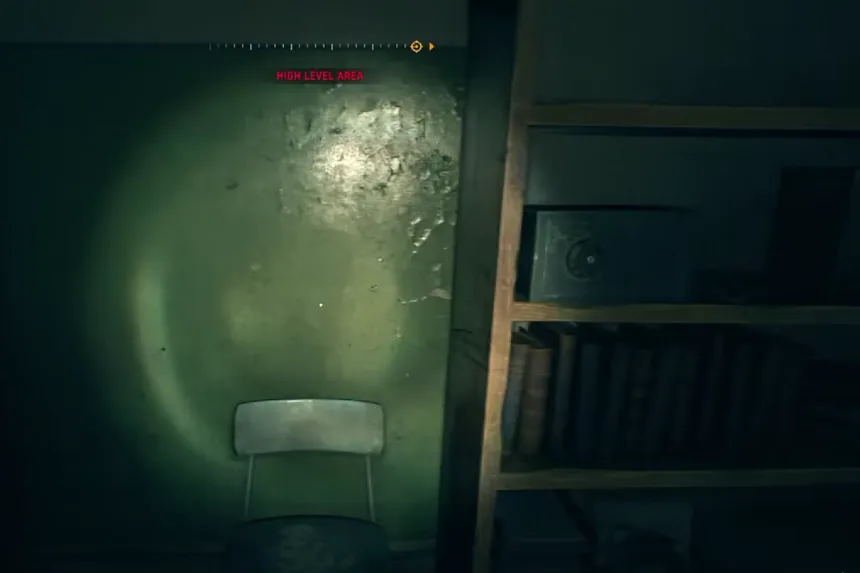
Once inside, push a little deeper until you reach the main entry hall. Take a left into the small reception area this is where you’ll find the safe. The lock code is hidden in binary on the map. When translated, it gives you: 54090
Open the safe and you’ll find the treasure inside. The school itself has more loot and a dark zone section if you want to keep exploring, but for the treasure map, this safe is your main prize.
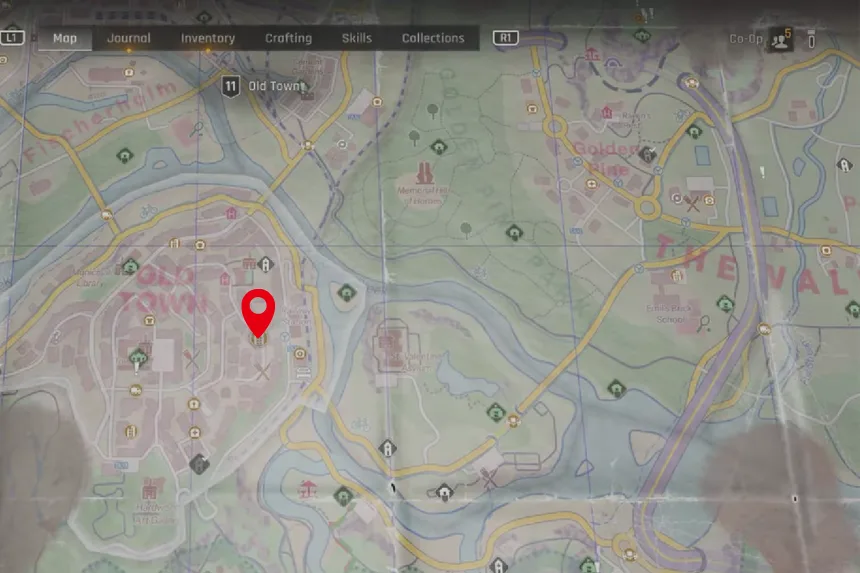
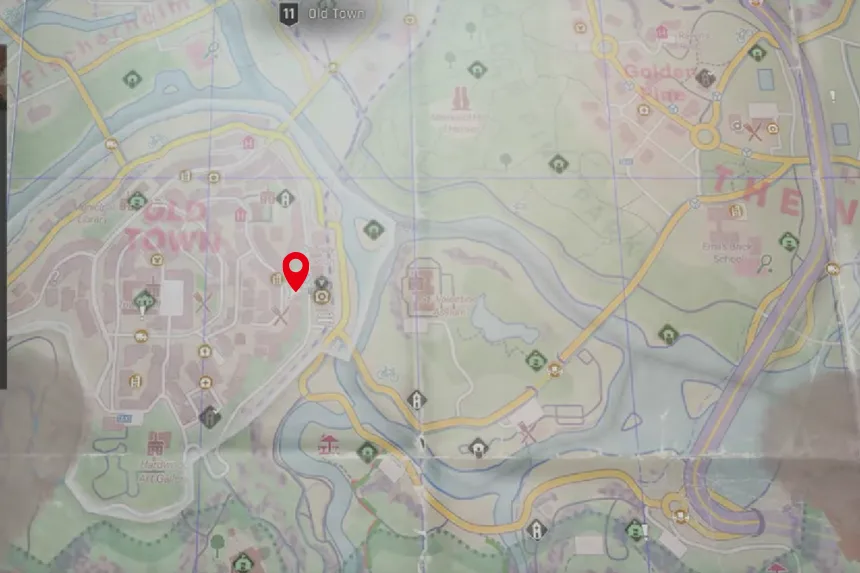
Treasure Map D2
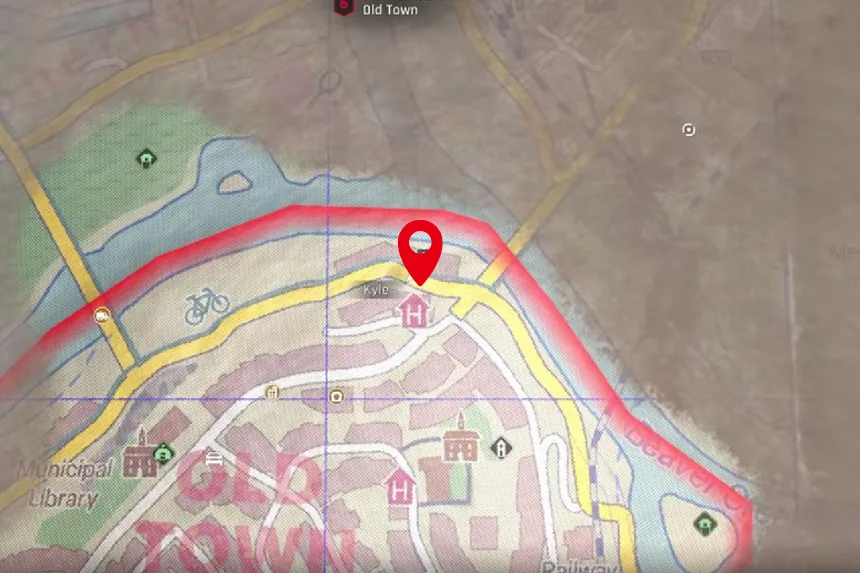
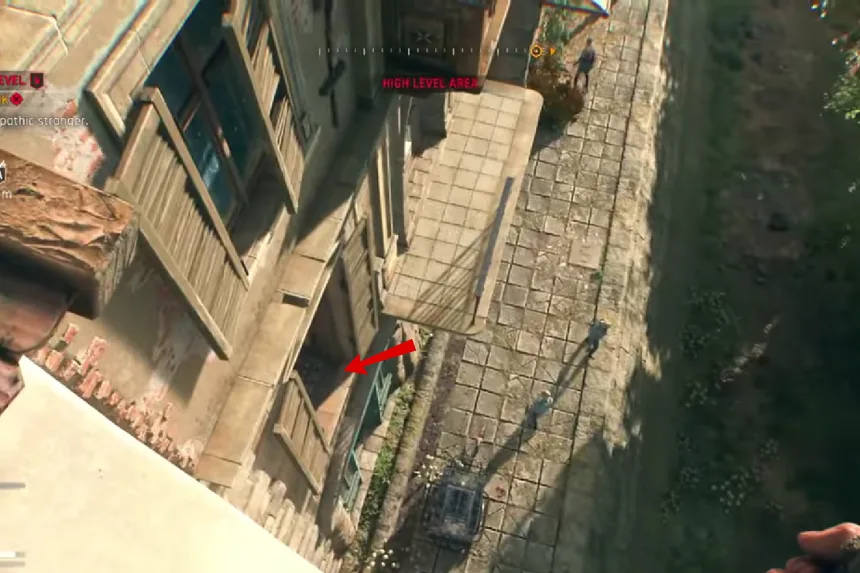
Head over to Oldtown, near a hotel building. What you’re looking for is a white building with a red shingled roof. From the rooftop, look down and you’ll notice an open window on the white building below (it’s tricky to spot, but it should be facing east). Jump through that window to get inside.
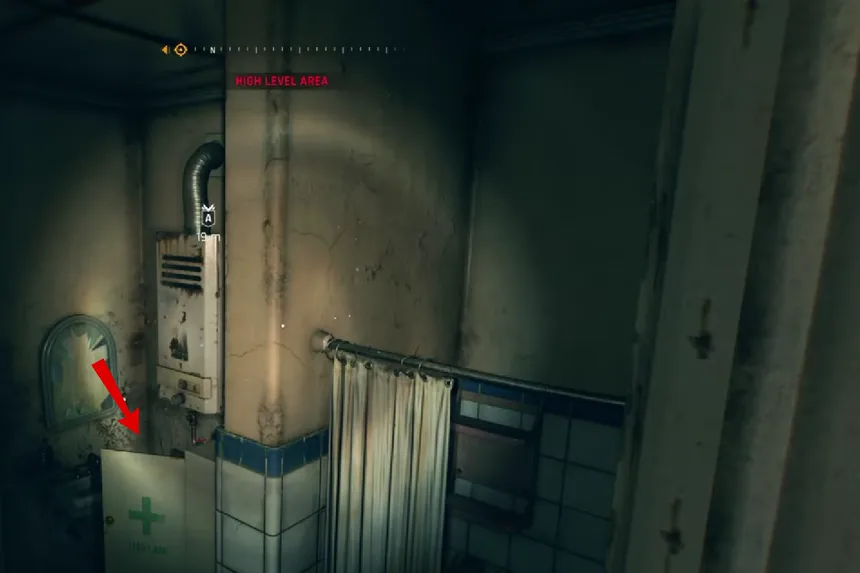
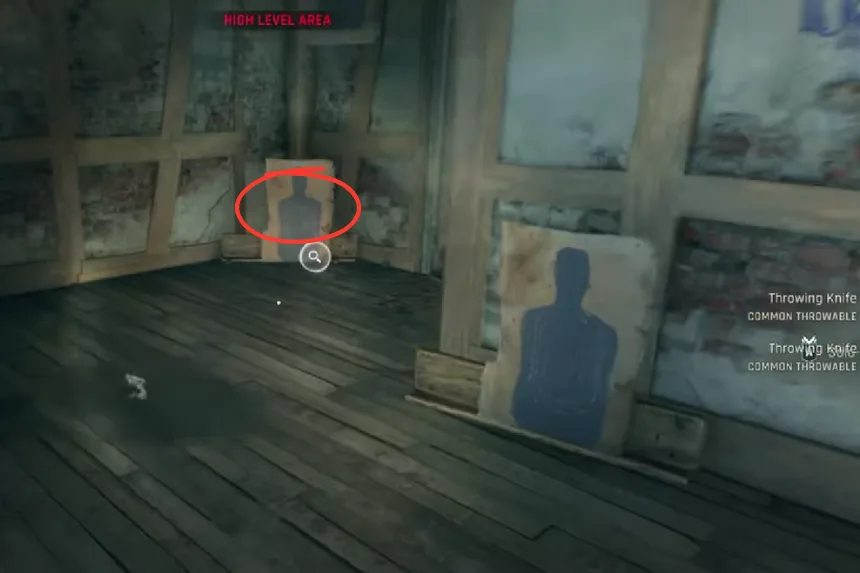
Once you’re in, ignore the regular loot for now and focus on climbing up, since the treasure is above. Eventually, you’ll reach a bathroom. Drop down inside, grab the bandage if you want, then climb up the pipe. At the top, you’ll find a small shooting range area with throwing knives. In the corner, behind one of the targets, there’s a key. This key unlocks the locked shelf in the room. Open it up, and that’s your treasure, mostly explosives and throwable weapons like explosive knives.
Treasure Map D3
You’ll need to head into the dark zone at Station Square Apartments. The place will be full of enemies, so be ready to fight or sneak through. Make your way all the way to the final loot room at the top. Inside, look around the tables you’ll spot the treasure map there.
Now for the treasure itself. Head just east of the hardware store. On a rooftop opposite it, you’ll see a spot that matches the picture from the map. Move the wooden board there and head inside.
Inside, you’ll find a safe, which holds the treasure. The clue for the code is “12:55,” which works like a clock. Enter the code as 12 – 25 – 55, and the safe will open.
Treasure Map D4
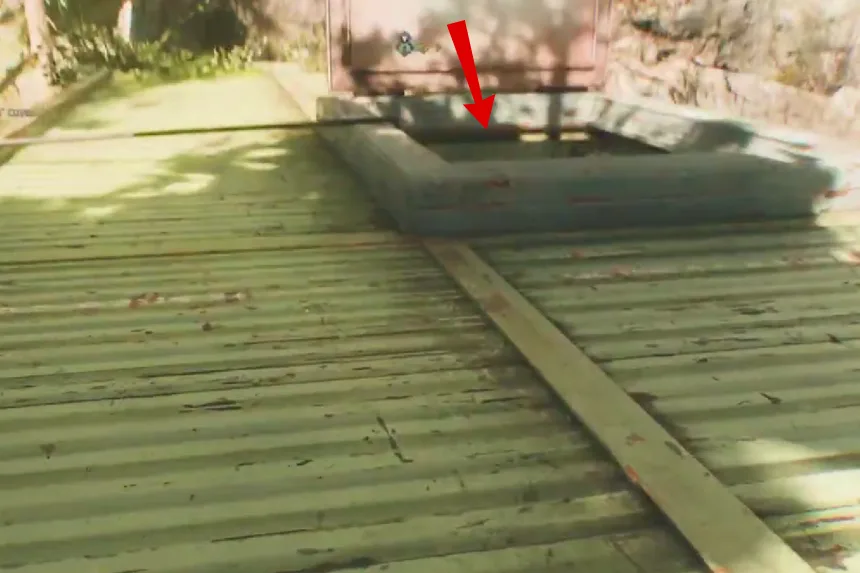
You’ll find this one at the bus station safe house. Once you’re there, step out of the bus and look east you’ll spot a big red building. That’s where you need to go, but the tricky part is getting to the top since most of it is covered in spikes.
From the bus station, climb up the nearby pipe. It can be a little frustrating you might slip a few times so it takes a couple of tries. Once you’re up, make your way across the ledges. You’ll want to climb carefully onto the safe spots rather than trying to grab the ropes, since they can’t actually be used here.
At the top, you’ll find a place to restore power. Make sure you have the treasure map quest active, then grab the cord and follow the marker to plug it in. Restoring the power here isn’t just for the bus station it also lets you open up one of the nearby grates.
Once the grate is open, head inside and make your way down. Your reward here is a blueprint called Blaze, which lets you add fire damage to your weapons. You’ll also pick up some extra loot along the way.
Treasure Map E1
You’ll need to head over to the northwest corner of the map, near the hardware store. Outside, you’ll see a vent on the wall climb in and head inside the building. Once you’re in, look under a table in the second section. There’s a locked door there, so pick it, and right next to a body on the floor you’ll find the treasure map. Now, you don’t need the map to grab the treasure, but it’s handy if you’re collecting them all since it helps you track which ones you’ve already done.

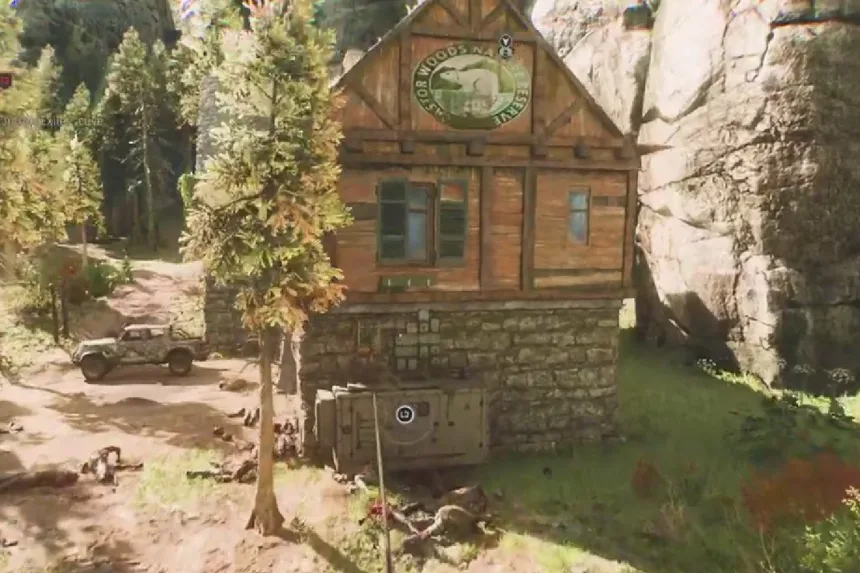
The treasure for this one is very close by. Just go a short distance northwest of the hardware store and you’ll come across a small cabin in the woods. Be careful there are a couple of human enemies here, and they’re armed with melee weapons. Take them out, then head inside the cabin. That’s where you’ll find the treasure.
Treasure Map E2
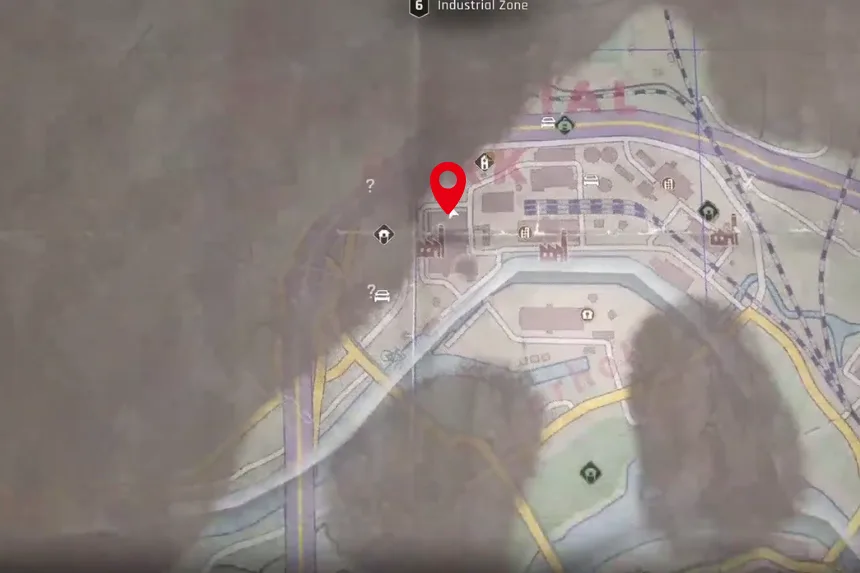
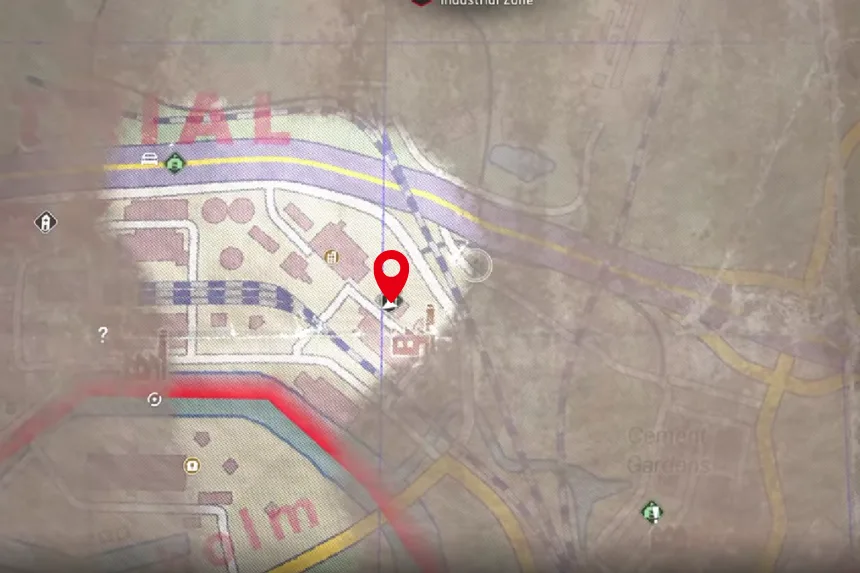
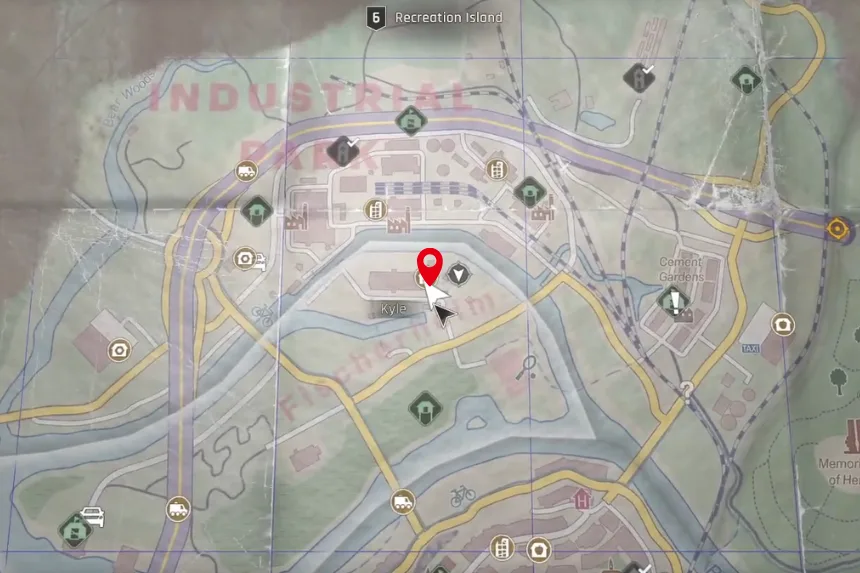
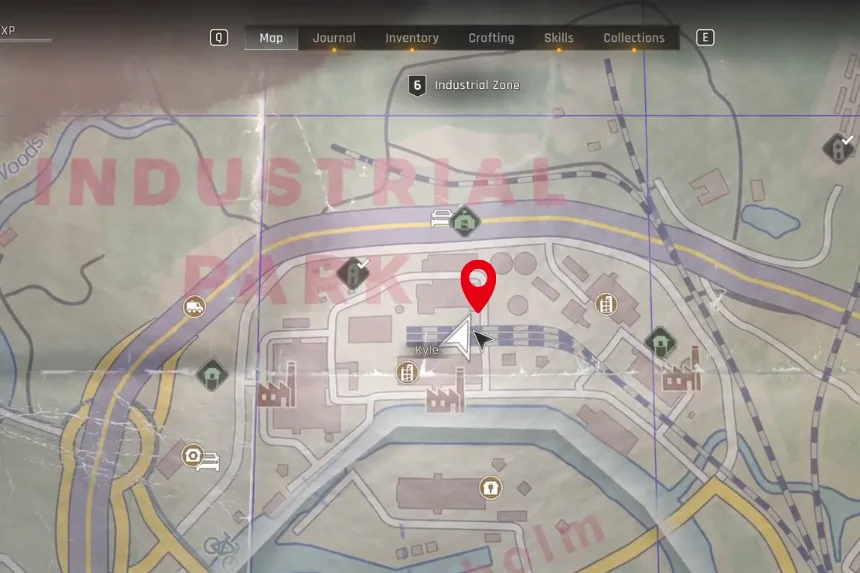
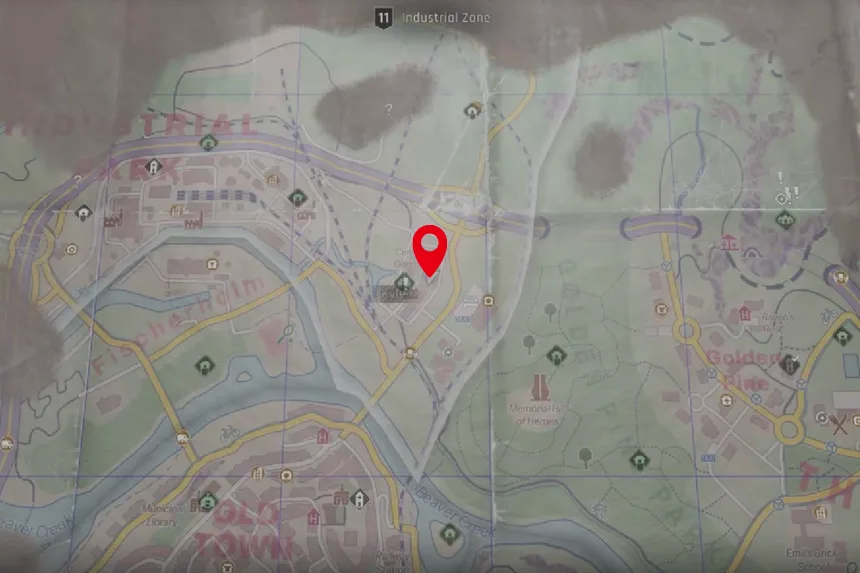
Go to the Industrial Zone area marked on the map above. On top of the chimney, you will find the Treasure Map E2.
Click on the images to enlarge
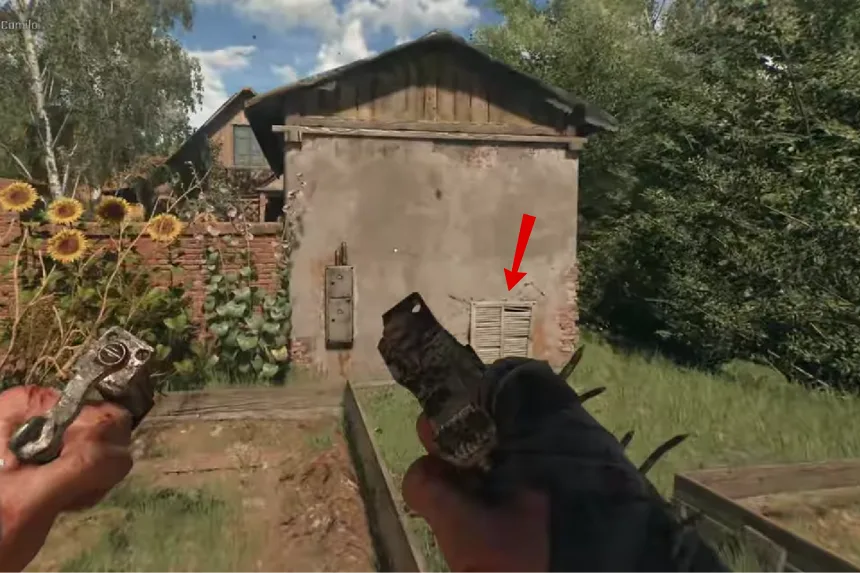
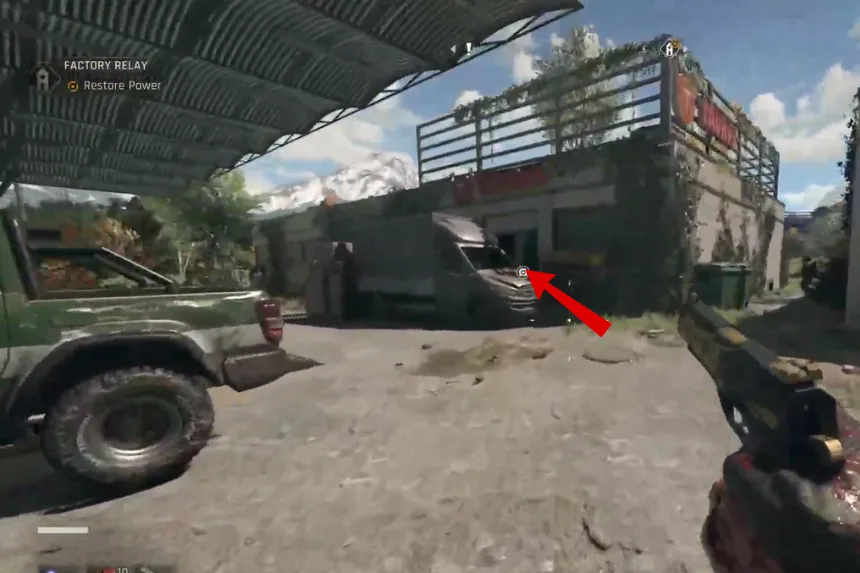
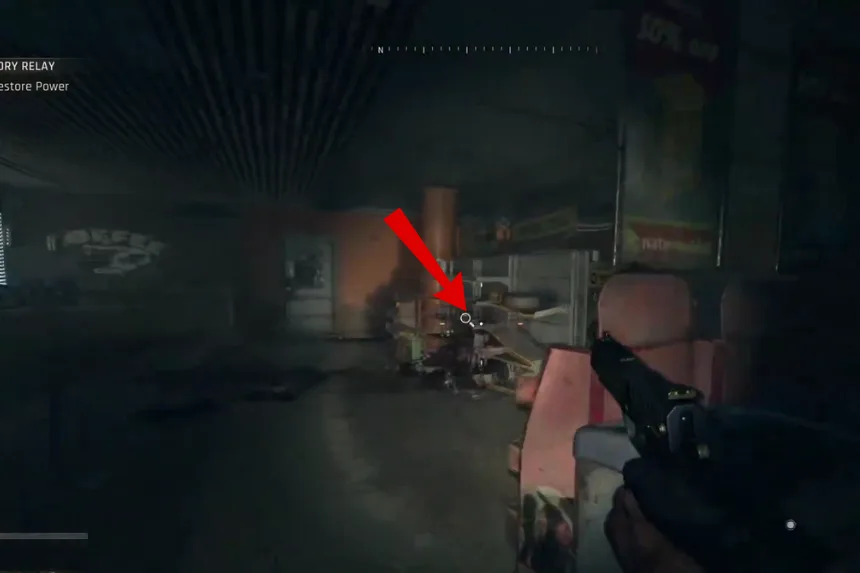
To find the treasure, go to the Tauras Gas Station. Crawl through the front door, and you will find the fuses on the shelf.
Now move outside and climb the roof of the garage, and drop down by going through the ceiling door. You need to change the fuse of the power supply to run it and turn on the garage door switch. This will open the door opposite you. But be careful, as there will be a zombie inside. Inside the room, you will find your treasure.
Treasure Map E3
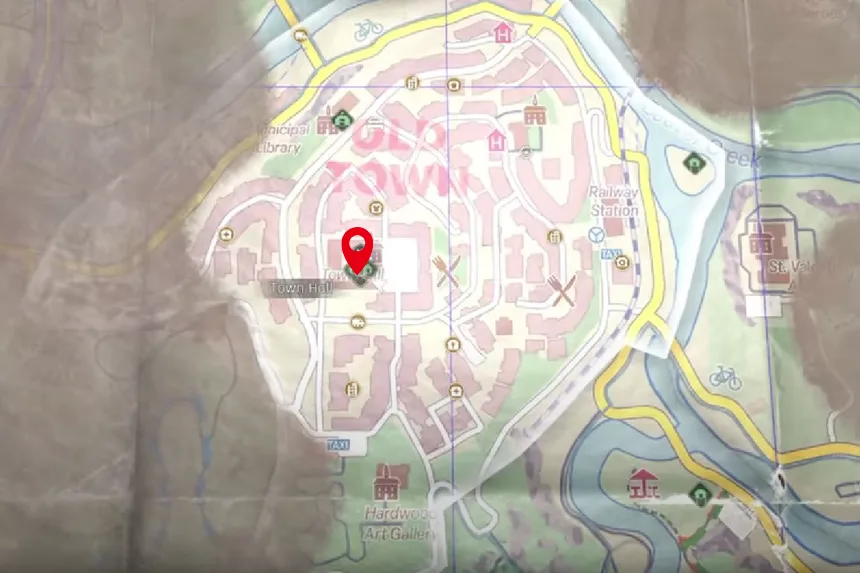
The map can be found inside the Town Hall either in the map room or pinned on the wall as a simple piece of paper. If you can’t spot it right away, just use your survivor sense scan and it should highlight.

Once you’ve got the map, the treasure itself is pretty close by. From the Town Hall, head toward the nearby restaurant area and the bell tower. There’s also a safe house right below, but to get in you’ll need a key, not a lockpick.
Here’s how to get it:
- Cross over to the abandoned apartment building nearby.
- Drop down, shimmy across, and climb through the window.
- Inside, you’ll find a corpse (watch out, a zombie might be there). Loot the body to grab the key.
With the key in hand, head back to the treasure location. Go inside the red house, move the cupboard out of the way, and open the locker. Inside, you’ll usually find valuables.
Treasure Map E4
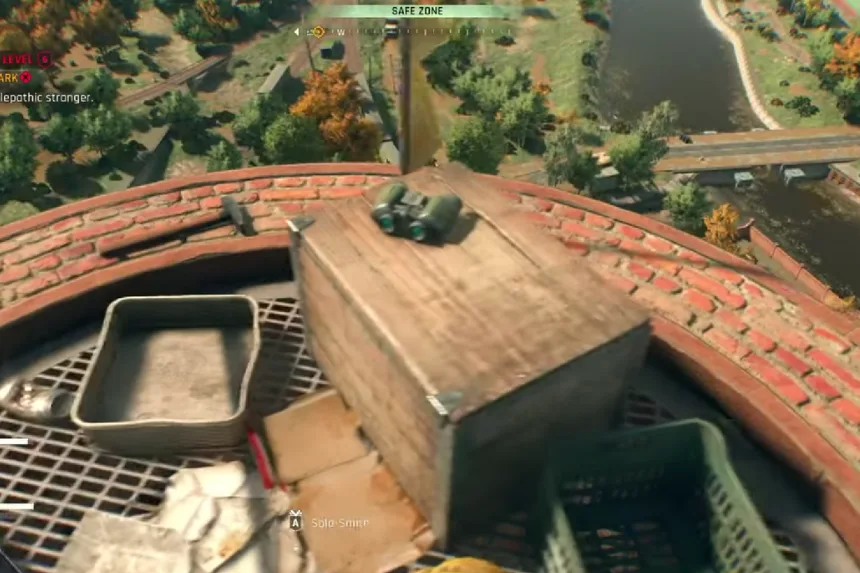
You’ll need to climb to the top of a tall tower. The easiest way to do this is with the grappling hook, which you unlock as a story reward after meeting the enclave of survivors. Once you’re able to climb the tower, you’ll find the treasure map at the top.
Now for the treasure itself. From that tower, head directly south to a small cement garden area. On one of the rooftops, you’ll notice it matches the picture from the map, especially with the little chimney stacks. Jump across, and look for a small window on the right it should already be open.
Go inside, but be careful there are zombies waiting for you. Head down to the lower levels (second from the bottom, since the very bottom is blocked). You’ll find a machine down there turn it off. After that, go back upstairs and repair the broken wire lying on the floor. Once that’s fixed, head back down and switch the machine on again. This restores power to the locked door upstairs. Open it, but be ready more zombies are inside. Clear them out and grab all the loot to finish up.