
There are 49 journals to find in Clair Obscur: Expedition 33, and if you’re aiming for the “Follow the Trail” achievement, you’ll need to collect every single one. It’s definitely not an easy task—some of these journals are really well hidden. So if you’re having trouble tracking them all down, this guide’s got you covered with the locations to help you out.
All Journals Locations
Expedition 81
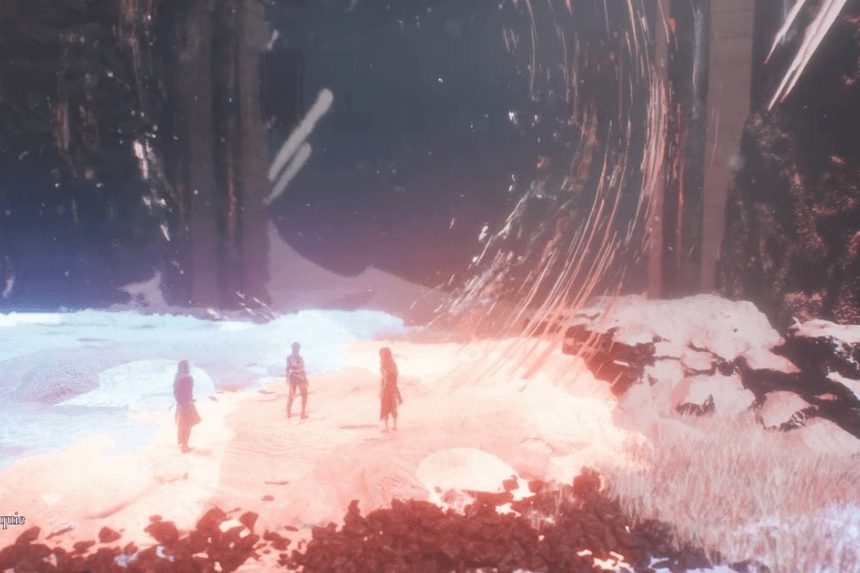
Spring Meadows
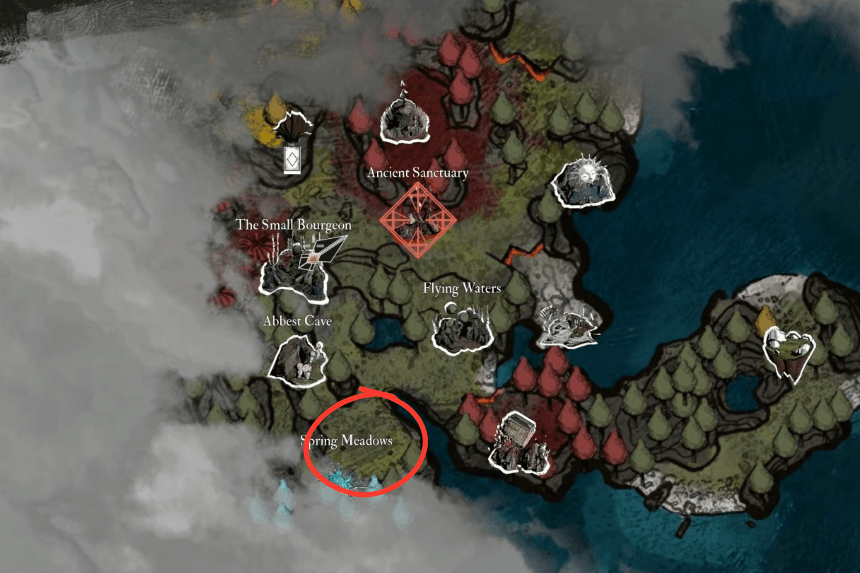
The first journal is obtained automatically as you advance through the main storyline.
Expedition 68
Flying Waters
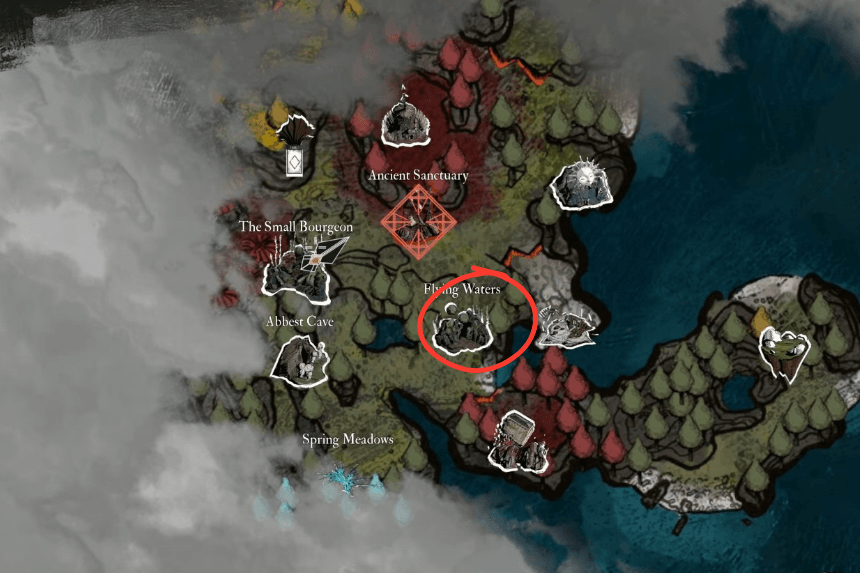
This journal is easy to find, as it’s located along the main path in Flying Waters that’s required to progress the story.
Expedition 53
The Small Bourgeon
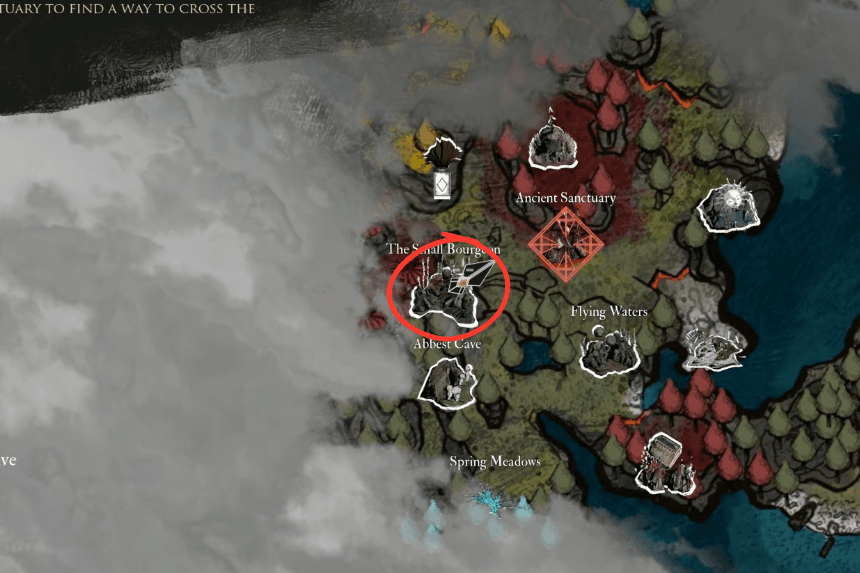
You can reach The Small Bourgeon from the World Map after leaving Flying Waters and before making your way to the Ancient Sanctuary. It’s located to the west—use the overworld compass to navigate.
Once inside, you’ll encounter a mini Bourgeon asking for Bourgeon Skin to help it grow. Follow the path behind it, and you’ll soon come across Journal 53.
Expedition 63
Ancient Sanctuary
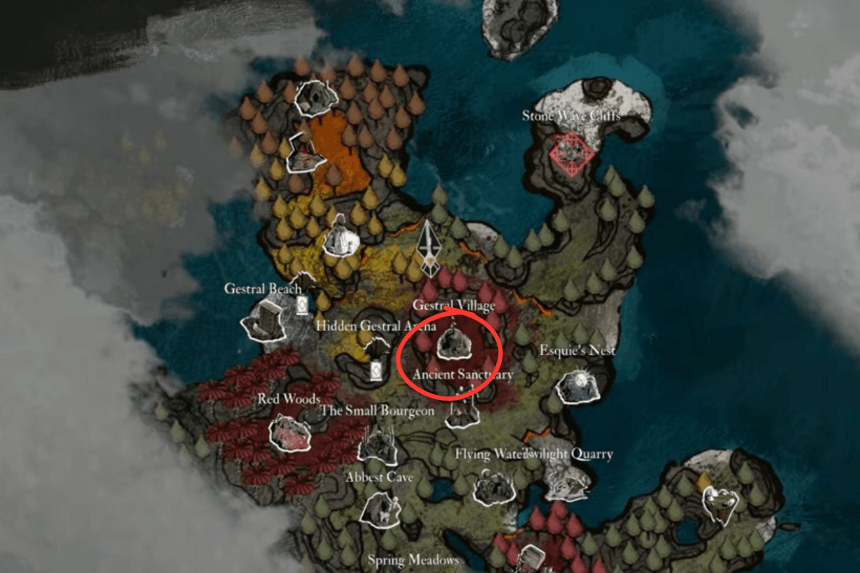
Starting from the Giant Bell Alley rest point in the Ancient Sanctuary, follow the path marked by blue lamps.
Once you reach the open field, choose the route that passes beneath the red trees. You’ll find the Expedition 53 Journal along that path.
Expedition 52
Gestral Village
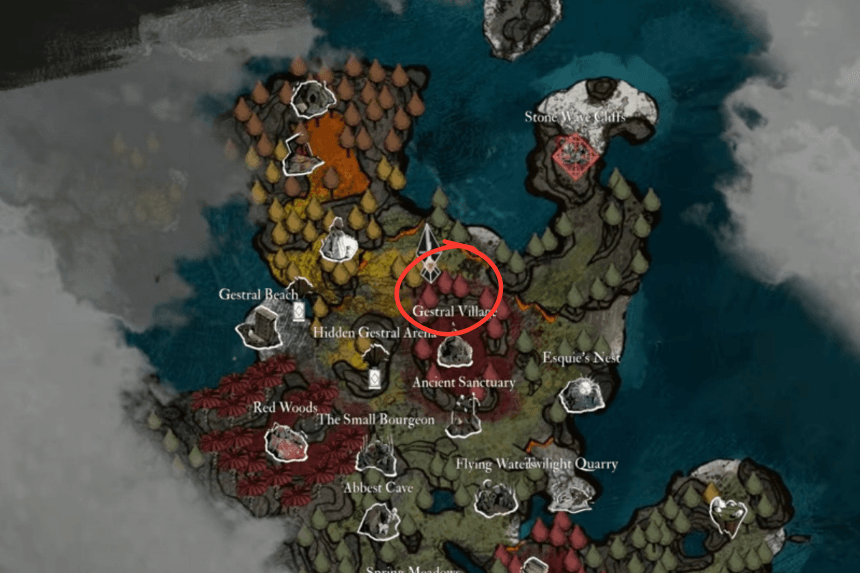
Head left from the Chief House until you come across what appears to be an infirmary with a large white Gestral lying down. On the right, you’ll see a cliff with an Arena sign.
Just to the left of that sign is an entrance—go in to discover the amusing Journal 52.
Expedition 66
Esquie’s Nest

Following the hilarious exchange between Esquie and François, the giant winged creature takes off but crashes into a pillar, causing it to collapse.
Luckily, the fallen pillar creates a new path you can access with your grappling hook. As you follow this route, you’ll come to a fork with one path heading north and the other to the right. Take the right path to find Journal 66.
Expedition 62
World Map

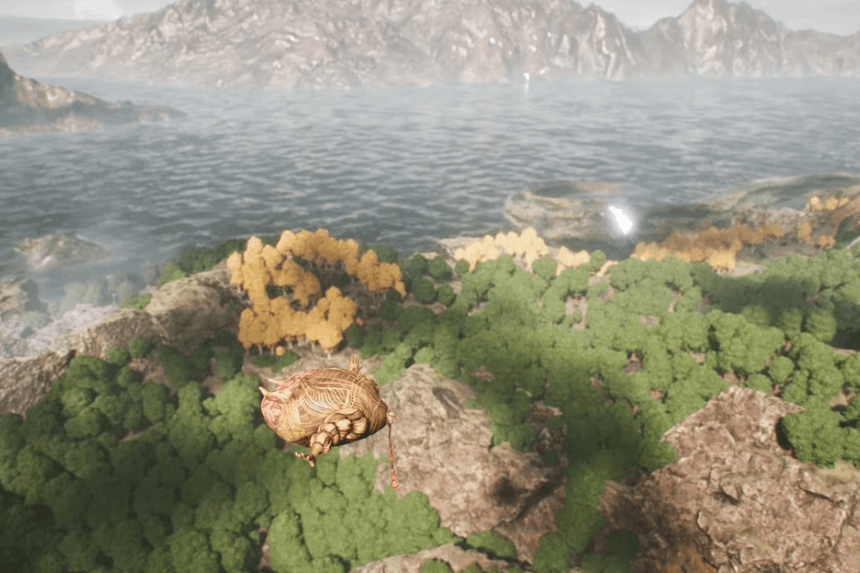
After rescuing Esquie, you’ll be able to ride him and break bluish rocks scattered across the overworld, unlocking new areas. Your main goal now is to reach the Stone Wave Cliffs.
However, before heading there, continue exploring west. You’ll come across more bluish rocks, and behind one of them lies the Expedition 62 Journal.
Expedition 38
Yellow Harvest

With Esquie, you can access Yellow Harvest in the overworld—an optional area. If it initially seems like there’s no clear path, look around for wall holders to climb. Eventually, you’ll arrive at an Expedition Flag called Harvester’s Hollow. Continue forward until you enter a wide open field.
Your target is on the right side of this field. Descend the rocky terrain and head straight, either battling or sneaking past the Nevron. Near it, you’ll spot a slope—climb up, remove the obstacle, and you’ll find Journal 38 at the top.
Expedition 44
Yellow Harvest

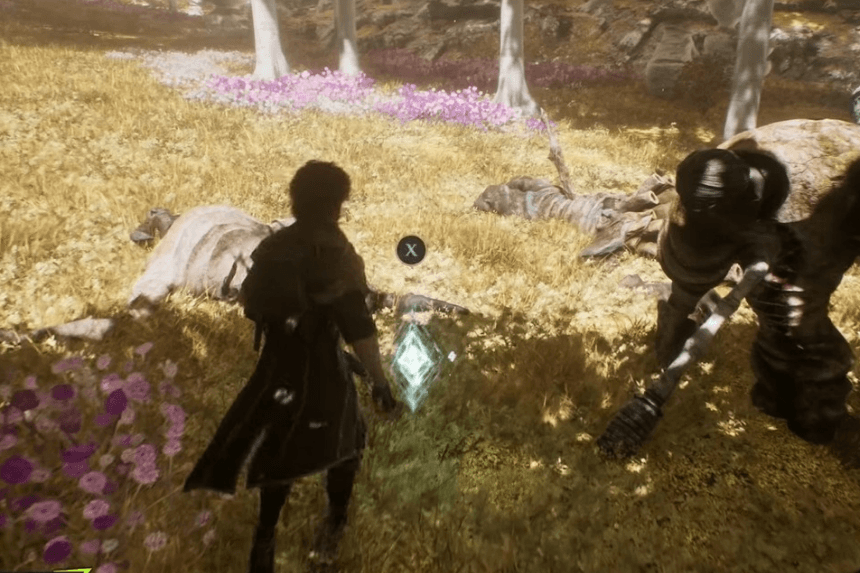
Follow the same path as you did for the previous Journal, but this time, skip the slope and continue straight ahead. Eventually, you’ll come across a blue lamp on the ground, with the Journal lying right next to it.
Expedition 59
Yellow Harvest
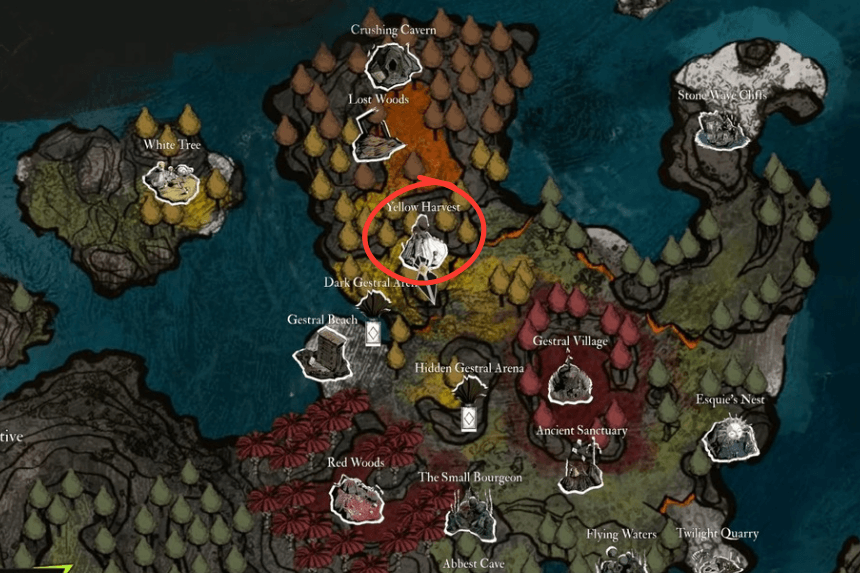
Continue exploring Yellow Harvest until you come to a grappling section. Climb your way up to reach the Yellow Spire Wrecks rest point.
From the flag, head left into an open area scattered with the remains of fallen expeditioners. There, you’ll find the Journal detailing the Nevron-eaters.
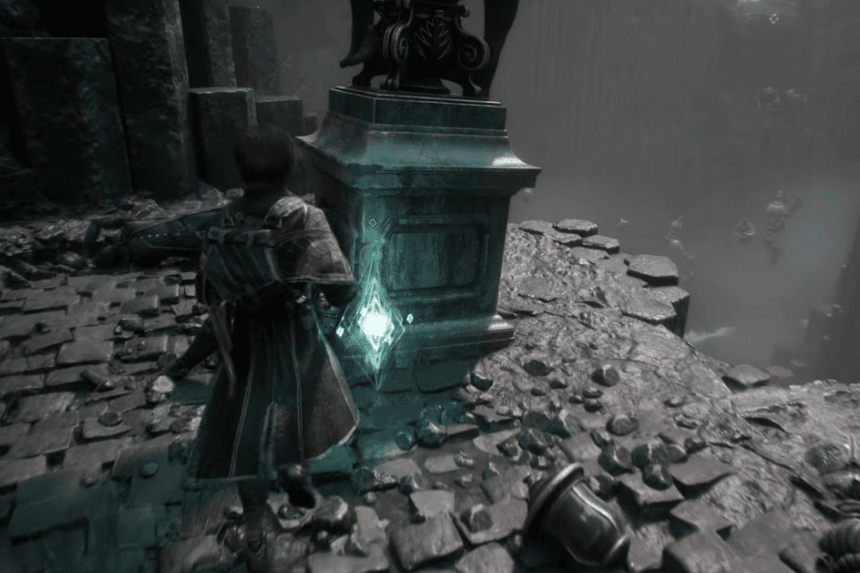
Expedition 78
Stone Wave Cliffs

From the Entrance rest point in Stone Wave Cliffs, follow the only available path straight ahead until you reach a tunnel, then a path branching off to the right. You may encounter a Nevron wielding a massive club nearby.
Take the right path and make a sharp 90° turn to spot an ethereal rope. Climb it to reach the next area, where the Journal awaits.
Expedition 56
Stone Wave Cliffs

While making your way through Stone Wave Cliffs, you’ll come across a grappling hook point. Use it to cross over into an area with paths branching left and right.
Both routes lead to the same destination, but if you take the left path, you’ll discover a Journal near a bridge.
Expedition 50
Stone Wave Cliffs

From the Paintress Shrine rest point in Stone Wave Cliffs, head downhill, pass the wrecked boat, and turn left at the intersection.
Shortly after, you’ll spot the Journal lying on the ground, ready to be picked up.
Expedition 64
World Map
Swim with Esquie to a small island located west of Esquie’s Nest. There, you’ll come across The Meadow, and a bit further ahead, you’ll find the Journal marked on the open world map.
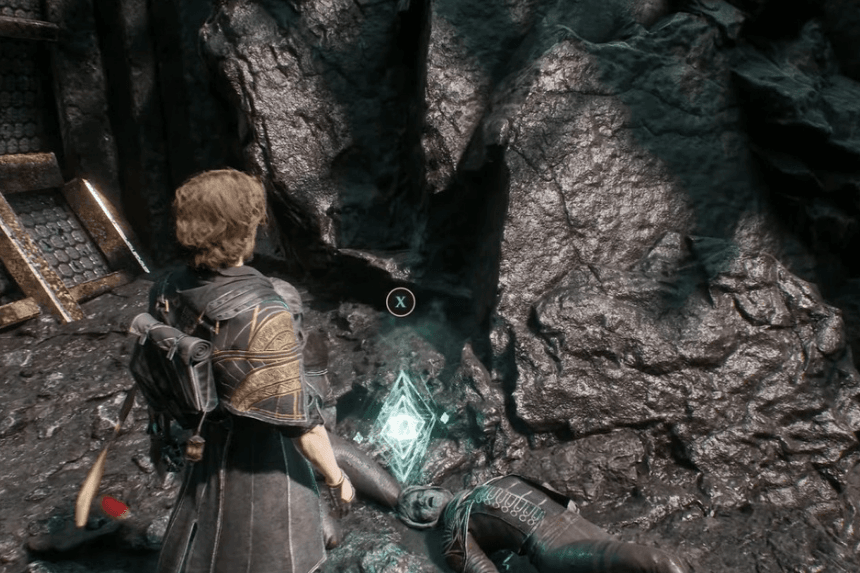
Expedition 54
Stone Wave Cliffs Cave
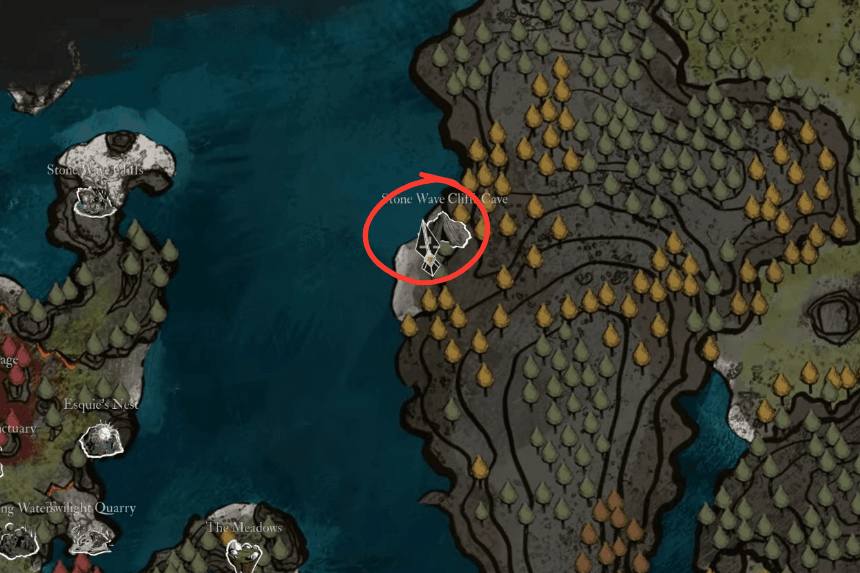
While riding Esquie, swim to a beach directly east of Stone Wave Cliffs to reach the Stone Wave Cliffs Cave. For reference, you’ll spot a Gestral merchant on the shore.
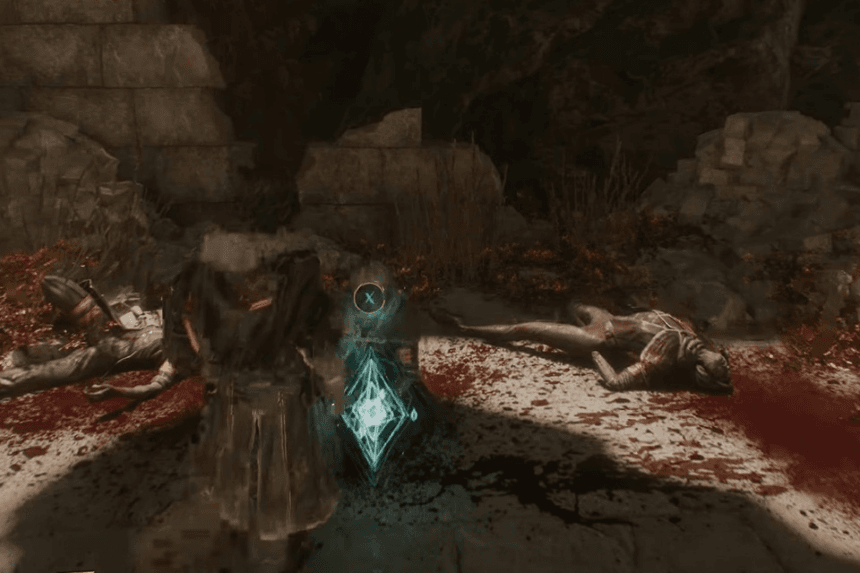
Progress through the dungeon as usual, and at the end, you’ll find a solitary Journal beside a fearsome Chromatic Nevron. To take it down, I recommend using Maelle’s skill to break its shields, then targeting the glowing crystal on its back until it shatters.
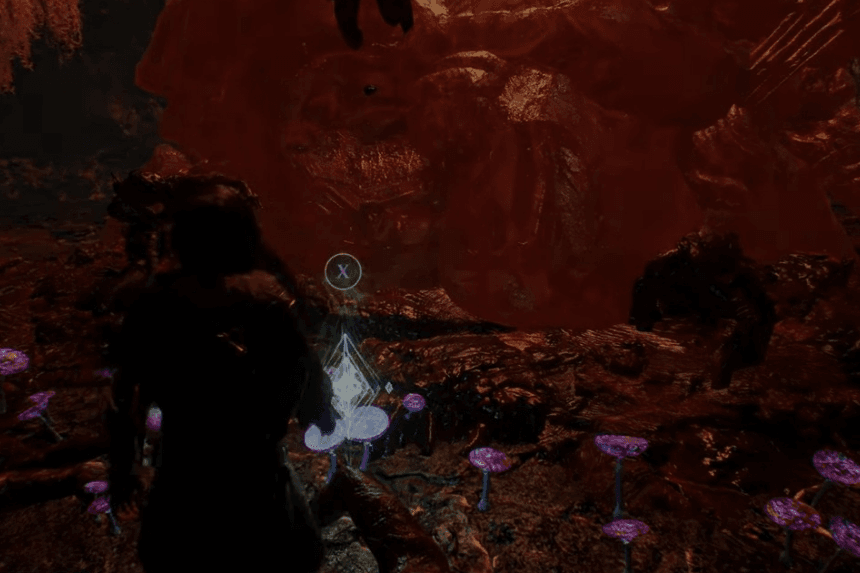
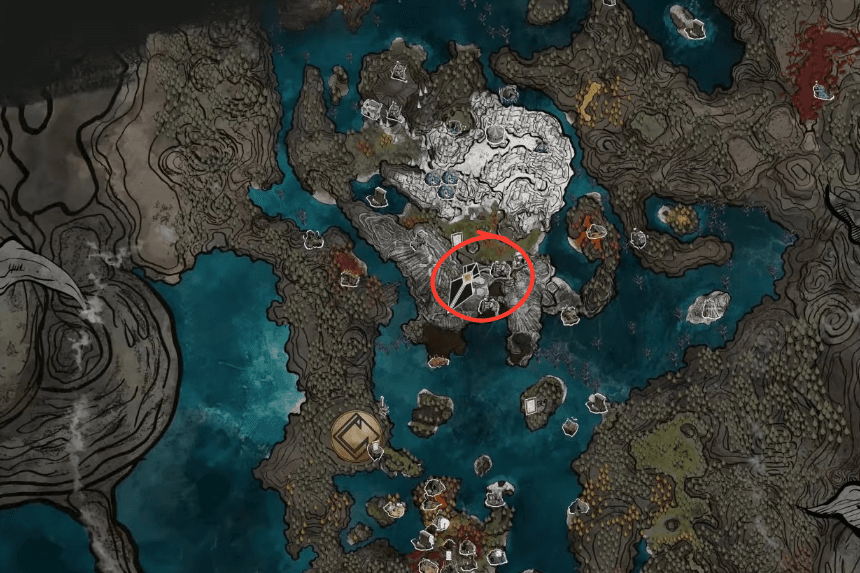
Expedition 45
Crushing Cavern
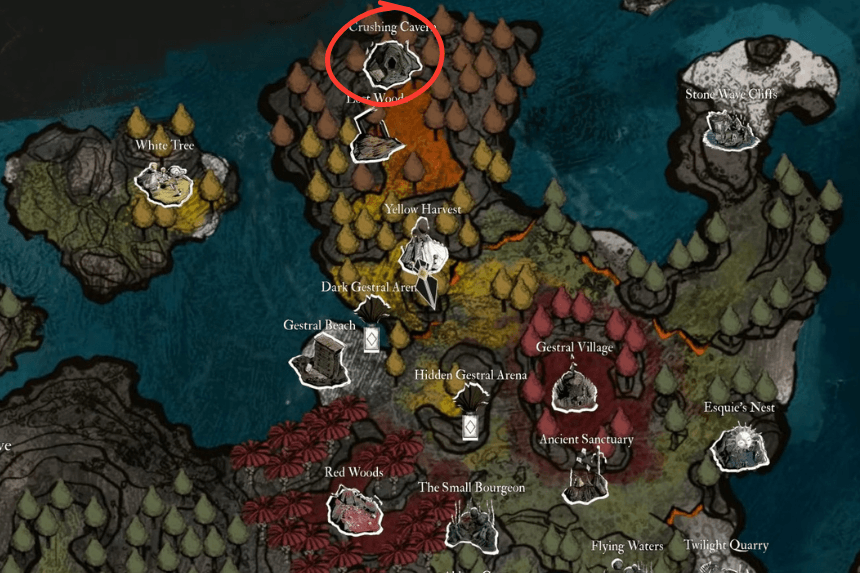
While swimming with Esquie, circle around the starting region to reach a shoreline on the northern side, where you can enter the Crushing Cavern dungeon.
The path forward is linear and leads you to a boss fight against the Sapling, which features a unique mechanic—walls that try to crush you. Your best strategy is to parry its attacks and trigger a Break to temporarily halt the walls for a turn. After defeating the boss, continue onward, climb the rope, and at the next intersection, take a left to find the Journal.
Expedition 36
White Tree

Once you unlock swimming with Esquie, you can access White Tree, located behind Gestral Beach in the starting region.
Inside, you’ll find both a Journal and a Record that plays part of the game’s soundtrack, ready for you to collect.
Expedition 41
Forgotten Battlefield

As you advance through the Forgotten Battlefield, you’ll eventually come across the eerie Fading Woman. Use the Battlefield rest point as a helpful landmark. Facing the woman, head to your right until you reach a fork in the path. Then, glance to your left—you’ll spot a journal resting on the ground.
Expedition 57
Forgotten Battlefield

From the previous journal, continue moving forward, passing by the Fading Woman. There’s only one path to follow, so keep going and you’ll eventually see a journal up ahead. It’s hard to miss—unless you’re playing with your eyes closed.
Expedition 48
Stone Quarry
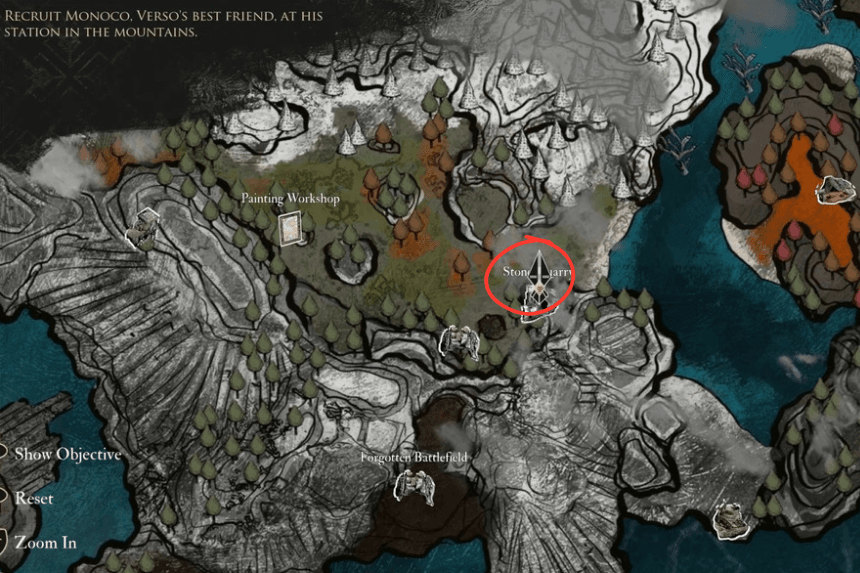
After exiting the Forgotten Battlefield and returning to the overworld, head east until you reach the entrance of the Stone Quarry. Simply proceed straight ahead to find Journal 48.
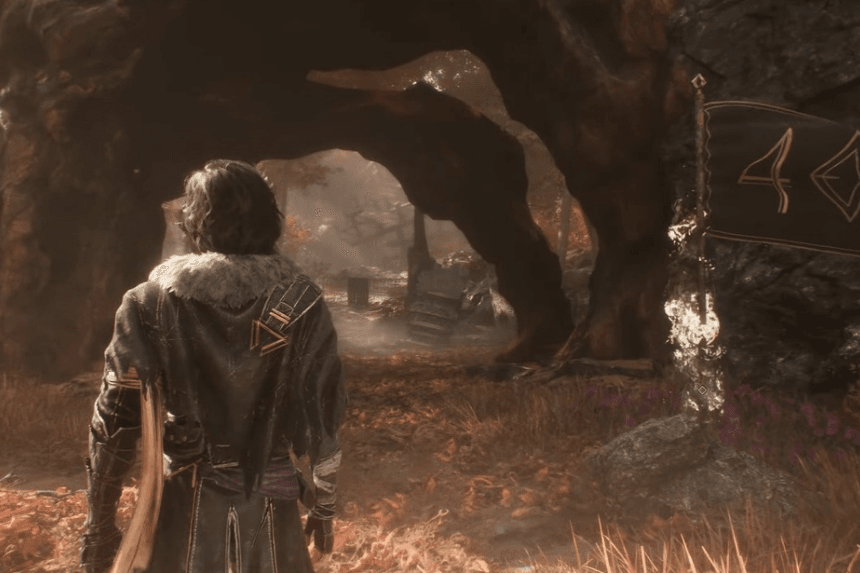
Expedition 65
Monoco’s Station

Once Monoco joins your party, some Grandis will return to Monoco’s Station, altering the layout of the area.
From the station flag, head straight until you reach a makeshift wooden bridge. The journal is located near the exit leading back to the overworld.
Expedition 47
World Map

After leaving Monoco’s Station, your next destination is Old Lumière. To reach it, you’ll need to travel through a new overworld region. Head all the way west in this area until you see a massive Nevron in the distance. Before you reach the Nevron, keep an eye out—you’ll come across a journal left behind by the Drunken Brigade along the path.
Fracture Survivor
Old Lumière

When you take control of Maelle and Verso in Old Lumière, continue forward until you encounter your first Nevron. From there, veer slightly to the right to spot a purple item on the ground.
Just past the item, you’ll find a hole. Drop down to discover a journal inside a locked, barred room. Hopefully, you picked up the Old Key during the Festival in the Prologue—it’s required to unlock the door and access the journal.
Renoir
Old Lumière → The Manor

After certain story events, you’ll find yourself alone with Maelle. Continue progressing until you reach the rest point located in front of a Manor in Old Lumière.
Near the flag, look for a broken wall. It leads to a door that takes you into the mysterious Manor—it’s a bit confusing, I know. Once inside, exit the first room, and you’ll find Renoir’s Journal resting on the headboard next to the bed.
Expedition 58
Old Lumière

This Journal will be discovered automatically as you progress through the main storyline.
Expedition 42
Old Lumière

After leaving Old Lumière, return to the area. The Manor will have disappeared, and two new paths will appear on its left side. Take the left path, descend the rope, and you’ll find Journal 42 directly ahead.
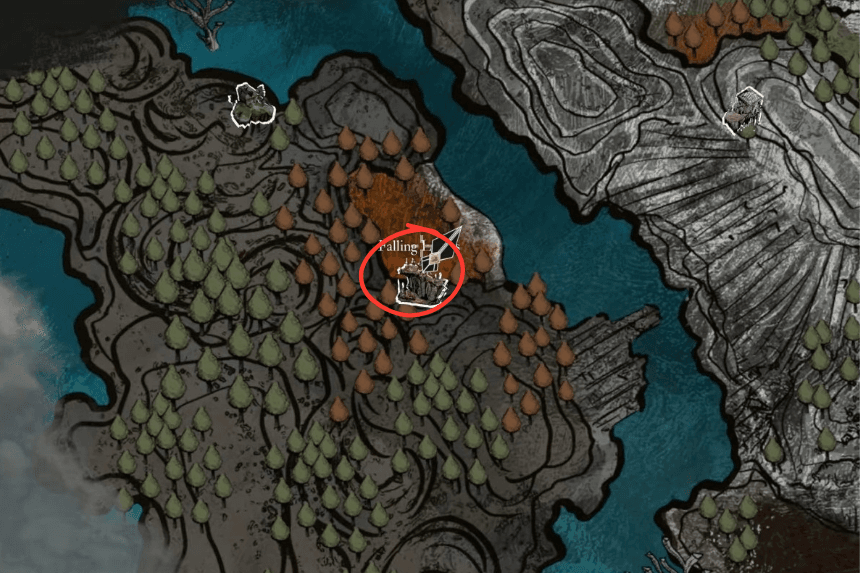
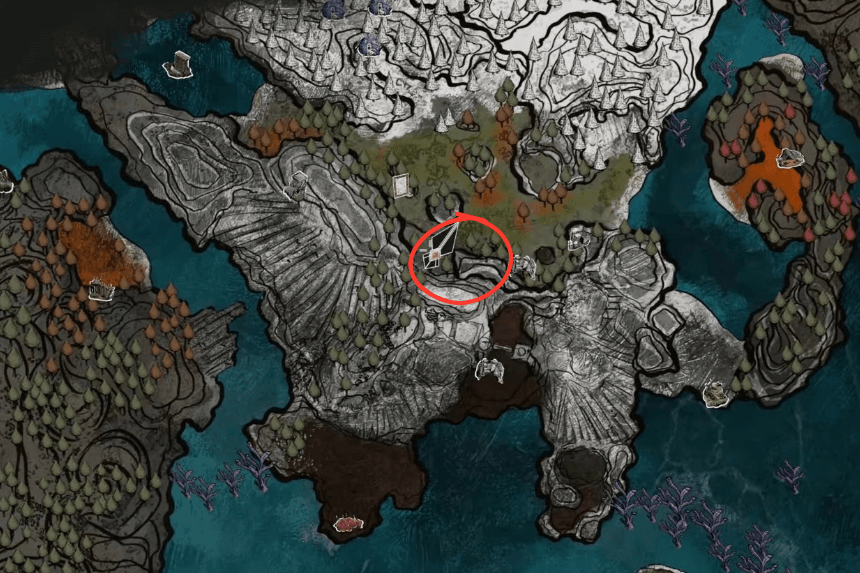
Expedition 35
Falling Leaves

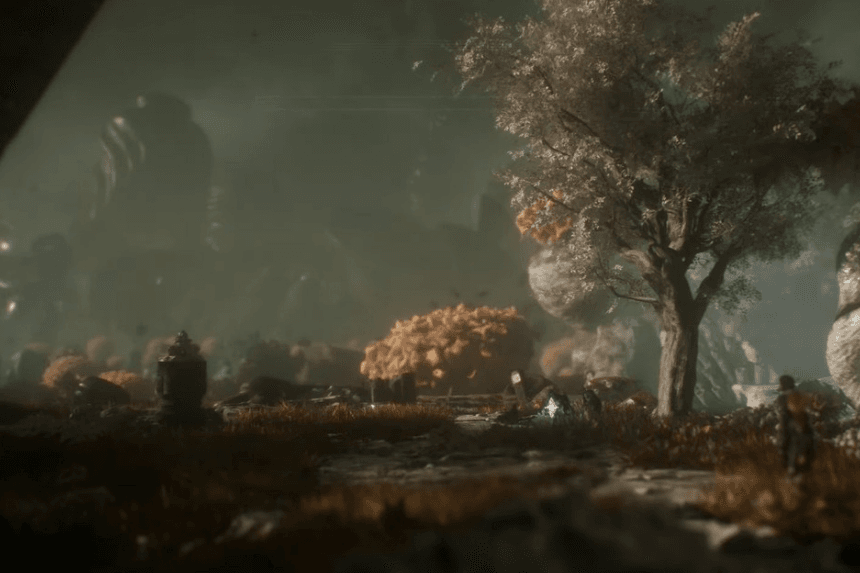
After finishing the events in Old Lumière, Esquie will gain a new skill that allows him to break coral in the sea. This ability unlocks access to Falling Leaves, located west of the Forgotten Battlefield.
Once in Falling Leaves, you’ll soon come across an Expedition Flag. Continue forward to reach a large area filled with giant Nevrons and a pillar. Head toward the pillar, and in the distance—near three unusual Nevrons—you’ll find Journal 35.
Expedition 49
Falling Leaves
In Falling Leaves, continue progressing through the area’s events to uncover this Journal. In the same location with the large Nevrons, you’ll encounter a faded boy standing near a gate. Speak with him, and he’ll ask you to find someone.
From there, head back to the Expedition Flag. While facing it, take the path to the right, descend two ropes, and follow the trail until you come across a creepy woman hanging from the ceiling.
Talk to her, then return to the boy. After speaking with him again, the gate behind him will open. Follow the only available path, and you’ll eventually come across Journal 49.
Expedition 43
World Map

Using Esquie, swim to the eastern edge of the landmass where Monoco’s Station is located. Circle around the mountains until you discover a secluded island nestled between them.
You’ll find a Chromatic Nevron on the island, but you can ignore it and head straight for the Journal. However, if you decide to engage it, a build focused on Free Aim shooting damage is recommended.
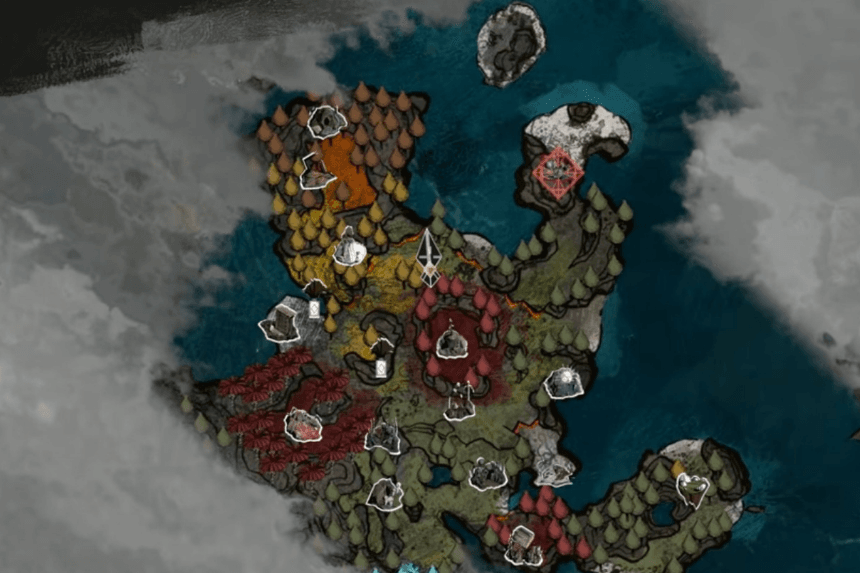
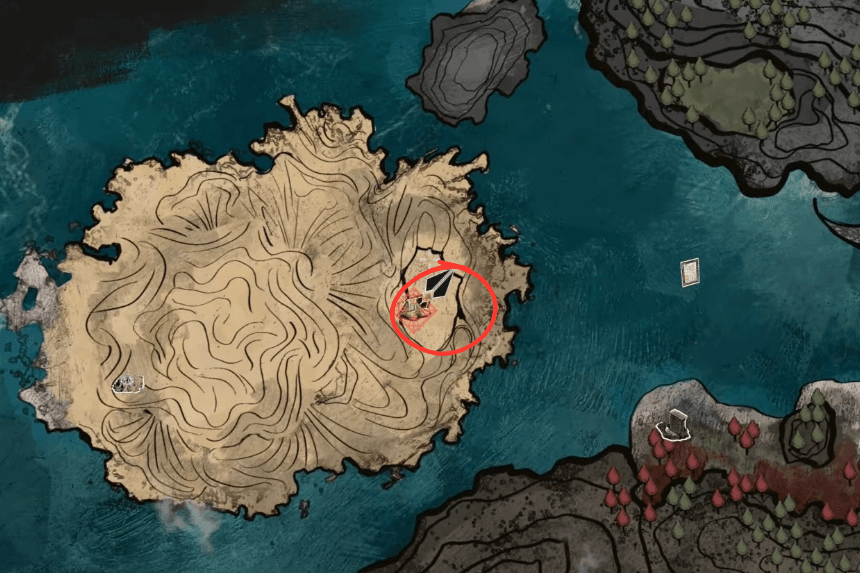
Expedition 40
World Map

At the northernmost point of the overworld stands the Monolith. Slightly southwest of it, you’ll find an island that holds another fallen expeditioner’s Journal.
Expedition 34
The Crows
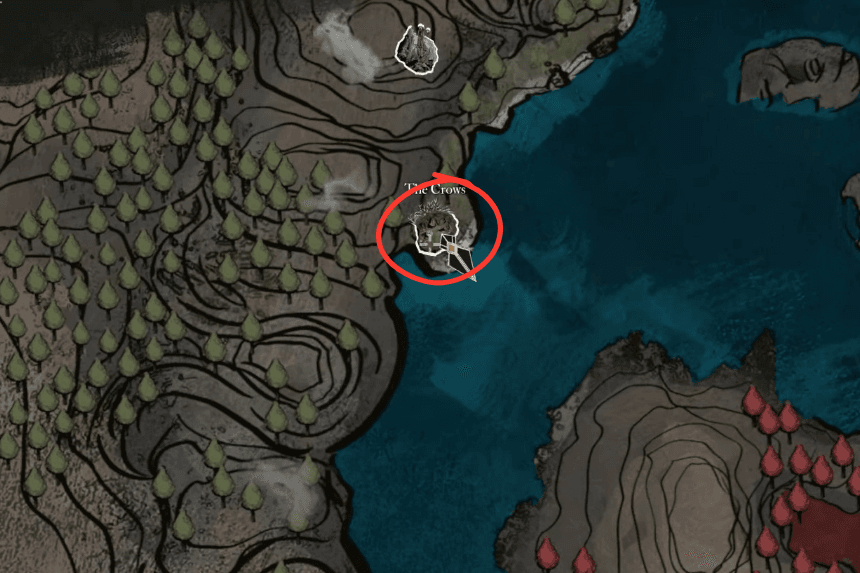
Directly west of the Visages—one of the locations required to confront an Axon—is an area known as The Crows. The game may warn you that it’s a dangerous zone, but you’re free to enter and pick up the Journal located just ahead next to the flag.
Expedition 69
Visage → Joy

After discovering the first Expedition Flag in Visage, you’ll have multiple paths to explore. Take the first path on the left to get swallowed by a face, which will transport you to a flower field.
Once you reach the Joy Vale flag, head left and continue a short distance to find a group of Nevrons—and Journal 69 waiting nearby among them.
Expedition 39
Visage → Sadness

From the entrance, take the path to the left of the Gestral Merchant to reach Sadness Vale. After reaching the flag, continue forward until you spot that unsettling face in the distance. Veer right and head up the ramp. Climb a few rocks, and there you’ll find the Expedition 39 Journal waiting for you.
Unknown
Visage → Anger→ Manor

For the final optional area in the Visages, head to the rightmost entrance from the first flag to reach Anger Vale. From the Anger flag rest point, go straight down to face the angry mask. Instead of continuing downward, look to your right to find an entrance with blue crystals on the ceiling.
Enter there, and to the right, you’ll find a door leading to the Manor. Enter the room, grab the Record, and open the second door. Inside the next room, you’ll discover a mysterious Journal written by an unknown author.
Expedition 55
Sirène

After reaching Sirène and riding the strange elevator, you’ll arrive at the first Expedition Flag, called Dancing Classes. Head straight ahead, climbing two sets of stairs, until you reach a hall filled with dancing Nevrons. On your right, you’ll spot the Journal among the dancers. There’s no need to engage the ballerinas unless you want to.
Expedition 67
Sirène

You’d have to be playing blindfolded to miss this Journal. Simply continue progressing through Sirène, defeat a cloth serpent, and take the elevator to a required area. The Journal will be near an Expedition Flag. If you’re truly playing blindfolded, the fast travel flag is called Dancing Arena.
Aline
Inside The Monolith → Manor

When you enter the dungeon Inside The Monolith, you’ll traverse several reimagined sections from previous dungeons.
Continue onward until you reach the Tainted Battlefield. Keep moving until you come across an area reminiscent of Gustave’s graveyard (cue the tears). From there, head left to discover a door leading to the Manor’s garden, where you’ll find Aline’s Journal.
Expedition 70
Inside the Monolith

As you continue through Inside The Monolith, you’ll board a train that takes you to Tainted Lumière. Proceed until you arrive at the flower plaza, marked by a beautiful yellow tree at its center.
From the entrance, take the path to the right of the tree. If you see a grappling point, you’re heading the right way. Use your grapple twice, defeat the Nevrons along the way, then turn the corner to locate Journal 70.
Expedition 46
Sirène’s Dress
To access this Journal, you’ll need to meet two requirements. First, spend time with Lune and raise her relationship level to at least 5.
Starting from Act III, speak to her at camp. She’ll open up about her parents’ Expedition story, triggering a quest to locate their Journal.
Your destination is Sirène’s Dress, located east of Sirène. This area features only one boss—the Chromatic Glissando—who shouldn’t pose much of a challenge at this stage. Defeat the boss, then head straight ahead to find the Expedition 46 Journal.
Verso
World Map

Using Esquie’s flight ability, you can land on a small patch of land just west of the Forgotten Battlefield.
You’ll encounter three Nevrons there, and at level 65, I personally struggled to defeat them—so I recommend holding off until you’re a bit stronger. Once you’ve taken them out, you’ll find Verso’s Journal near a few crates.
Julie
World Map
Just a few steps east from where you found the last Journal, you’ll come across another—this one written by Julie, serving as a poignant counterpart to Verso’s. Truly heartbreaking.
Unknown
The Reacher → Manor

If you fly with Esquie to the far northwest corner, you’ll discover The Reacher—a towering wooden structure that seems to stretch toward the sky.
It’s the backdrop for the side quest that advances Maelle’s relationship from level 5 to 6, so it’s best to trigger that quest before venturing inside.
As you make your way through The Reacher, you’ll eventually reach a rest point called Ladder Area. Cross the bridge straight ahead, then turn right to spot a Manor door below.
Head through the door to find another Unknown Journal—though Andy Serkis’ unmistakable voice leaves little doubt about the author.
Expedition 61
The Reacher
This one’s tough to miss since it’s right along your path to the top, but here’s how to find it. Once you reach the Foggy Area in The Reacher, just keep moving straight ahead.
You’ll enter a denser fog zone—take the path to the right, where you’ll encounter a Nevron holding a lamp. Take it down, continue forward, and you’ll come across a moving platform with the Journal right next to it.
Expedition 60
Lumière

When you return to Lumière for the final showdown, push forward through the city—soaking in the incredible soundtrack and intense battles—until you reach the Opera House. Alternatively, you can fast travel directly to its rest point.
Facing the Opera House, head to the right where you’ll find a broken bridge. Walk all the way to the edge to trigger an interaction, then have Esquie retrieve the Journal for you.
Expedition 51
Frozen Hearts
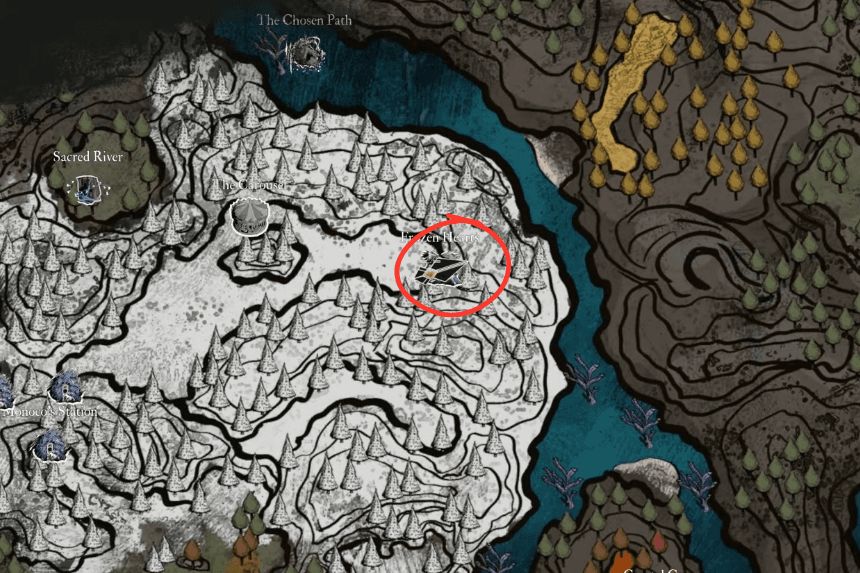
Frozen Hearts is accessible via the northeastern exit of Monoco’s Station, but it’s pretty challenging when it first becomes available. I held off and didn’t return until the post-game.
From the first Expedition Flag, climb up the tracks and head straight. Ignore the flaming dancer and veer slightly right as you continue forward.
After ascending a gentle slope, you’ll spot a blue item ahead. Look to your right to find the Journal tucked away in a corner.
Expedition 37
Gestral Beach
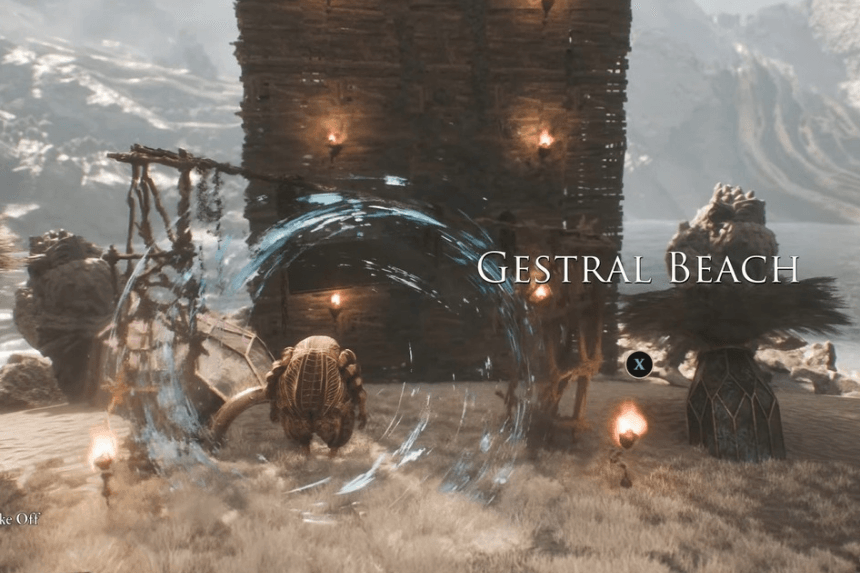
If you fly to the eastern edge of the world map, just northeast of the snowy region, you’ll come across Gestral Beach. Near the entrance—slightly off to the right—you’ll find this Journal, left behind by someone who abandoned their mission in favor of savoring life.
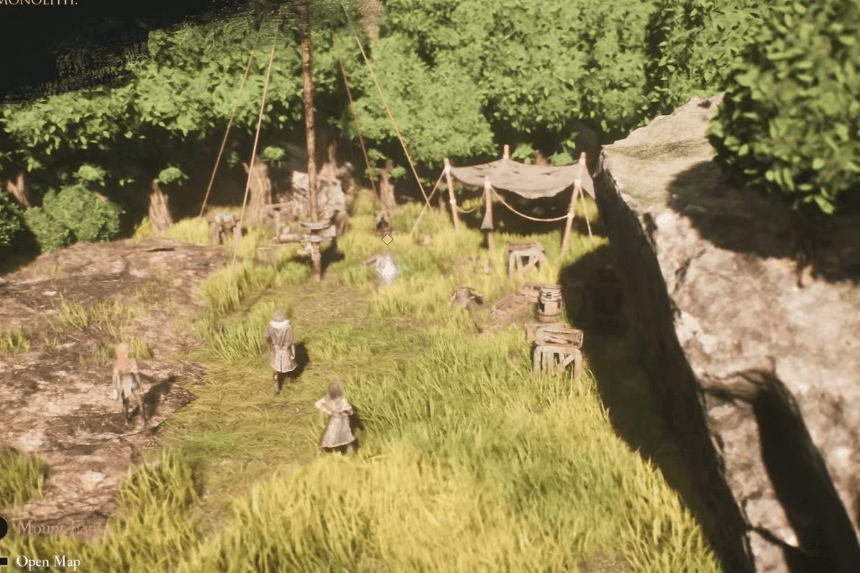
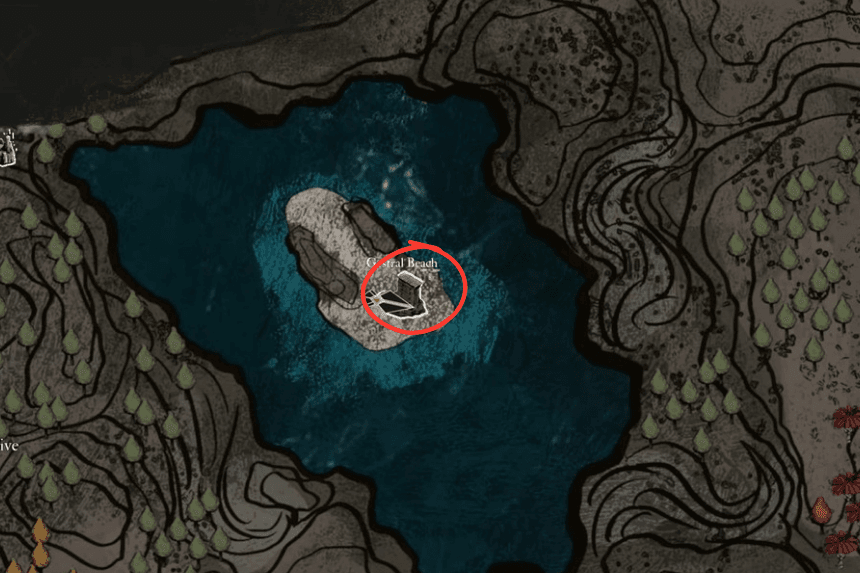
Expedition 84
The Fountain
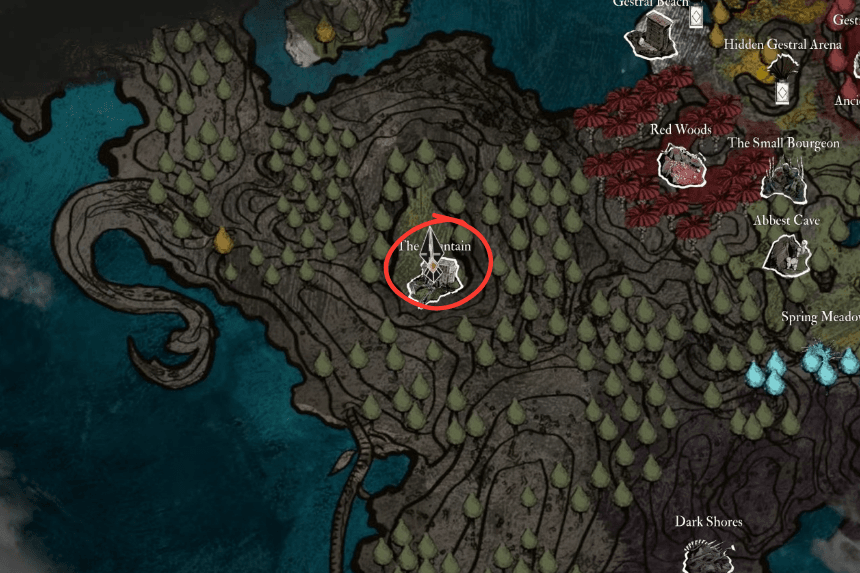
The Fountain is tucked away in the mountains west of the first region. It’s a small area, home to a quest-giving Nevron and this Journal.
From the flag, follow the only available path. Walk past the Nevron, and you’ll find a record of the first Expedition undertaken after the Paintress began her work.
Unknown
Manor
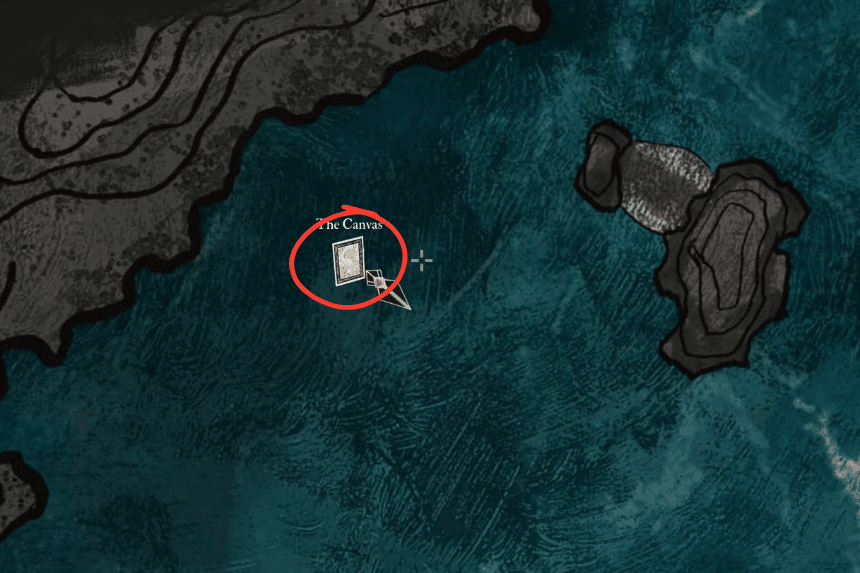
Finding this Journal involves two key steps. First, fly to The Canvas, located southwest of the Monolith. There’s only one thing to do here—interact with the Canvas and tear out the Dessendre family portrait.
With the portrait in hand, make your way to the Manor. The easiest route is through a door on the world map between the Forgotten Battlefield and Stone Wave Cliffs.
Once inside the Manor, head to the first room—the one with the Expedition Flag—and interact with the empty frame on the wall. Place the family portrait inside, and the door at the end of the hallway will unlock. Inside, you’ll find the Journal.
Simon
Renoir’s Drafts

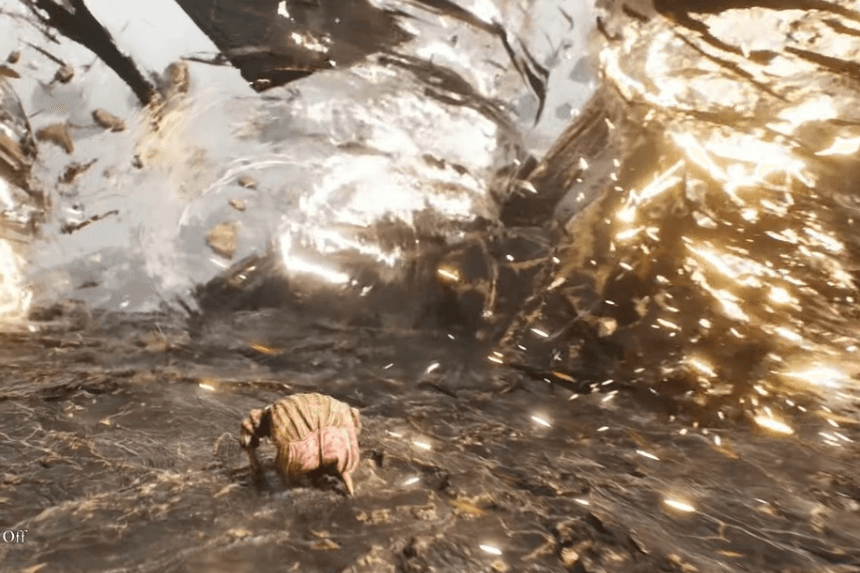
Get ready, because this Journal is guarded by Simon, the superboss of Clair Obscur. To begin, head to Renoir’s Drafts, located southeast of Visages. It’s only accessible in the post-game. Make your way through the dungeon as usual until you reach the Golden Tree Expedition Flag.
Nearby, you’ll find an entrance leading to the Abyss. Head straight and dive into the abyss to find another rest point, where a menacing figure sits next to a Journal.
That’s Simon. A word of warning—he packs a serious punch, has massive HP, and uses various gimmicks that will darken your path. But I believe in you! Go take him down! Once you defeat Simon and claim Verso’s strongest weapon, you’ll be able to grab Simon’s Journal, and the trophy/achievement will be yours.