
“Wisdom of the Ages” is a side quest in The Elder Scrolls 4: Oblivion Remastered where you’ll need to stick to the teachings of Julianos. Talk to Sir Henrick to kick things off, and he’ll point you toward Fort Bulwark, where you can snag the Shield of the Crusader, a super useful shield for the early game. Just be ready to tackle a bunch of puzzles to get your hands on it.
This Oblivion Remastered guide will walk you through everything you need to know, from starting the quest to solving all the tricky puzzles at Fort Bulwark and finally claiming the Shield of the Crusader.
Starting the Quest “Wisdom of Ages” (Finding Fort Bulwark)
To kick off “Wisdom of the Ages,” you’ll first need to complete the “Pilgrimage” and “Shrine of the Crusader” quests. Once those are done, you’ll move on to “Priory of the Nine.” Partway through that quest, after you defeat Sir Henrick, talk to him and he’ll reveal the location of the Shield of the Crusader — hidden away in Fort Bulwark. “Wisdom of the Ages” actually runs alongside “Priory of the Nine.”
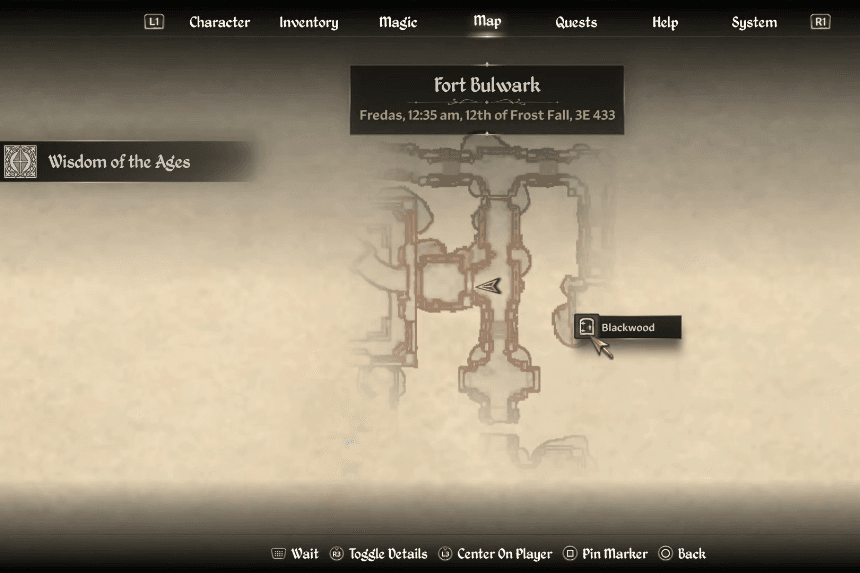
You’ll find Fort Bulwark down in the southeast corner of the map, near the Blackwood region. To make it easy, you can highlight “Wisdom of the Ages” in your Quests menu, and it’ll automatically mark Fort Bulwark for you — or just check the screenshot above if you prefer.
This quest is all about solving three puzzles inside Fort Bulwark. First, you’ll need to carefully step on the right tiles. Next, you’ll have to rotate some statues into the correct positions. Finally, you’ll tackle a panel-stepping puzzle that leads you to different chests with the items you need.
Solving the Puzzles and Completing the Quest
Below, we’ll guide you through all the puzzles in Fort Bulwark so you can finish Wisdom of the Ages.
Tile Order Puzzle (1)
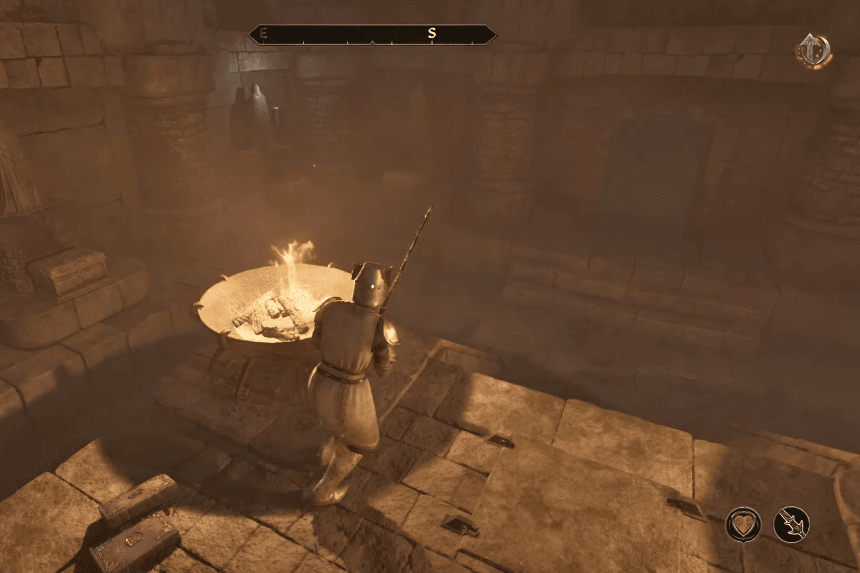
Once you’re in Fort Bulwark, head to the center where you’ll spot two huge flames. Along the way, you’ll face off against Conjurers, so stay on your toes, and watch out for arrow traps on the walls!
When you get to the room with the two flames, make your way across. You’ll enter a new area with two more Conjurers. After dealing with them, look for a handle at the back of the room to open a nearby gated door.
Go through the door, and you’ll find another handle. Use it to lower a drawbridge near the two giant flames. Head back to the room with the flames and cross the newly lowered bridge.
Now, you’ll face a puzzle with 12 tiles arranged in a 3×4 grid. You need to step on one tile per row in this order (as shown in the image above):
- Left (first row)
- Middle (second row)
- Right (third row)
- Left (fourth row)
This will open the door to the next area.
Statue Puzzle (2)
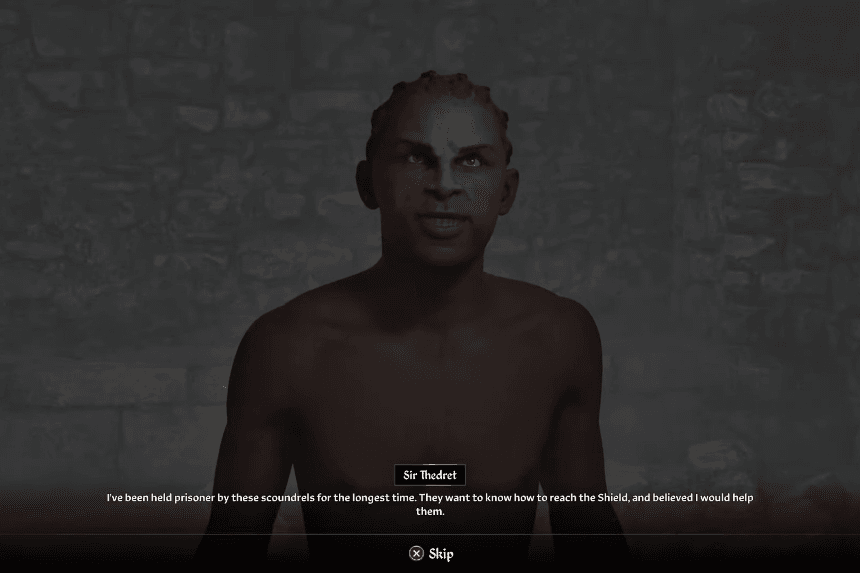
When you enter the next room, walk a little and you’ll hear someone talking from behind a locked cell. That’s Sir Therdret. There’s a handle beside his cell, use it to set him free.
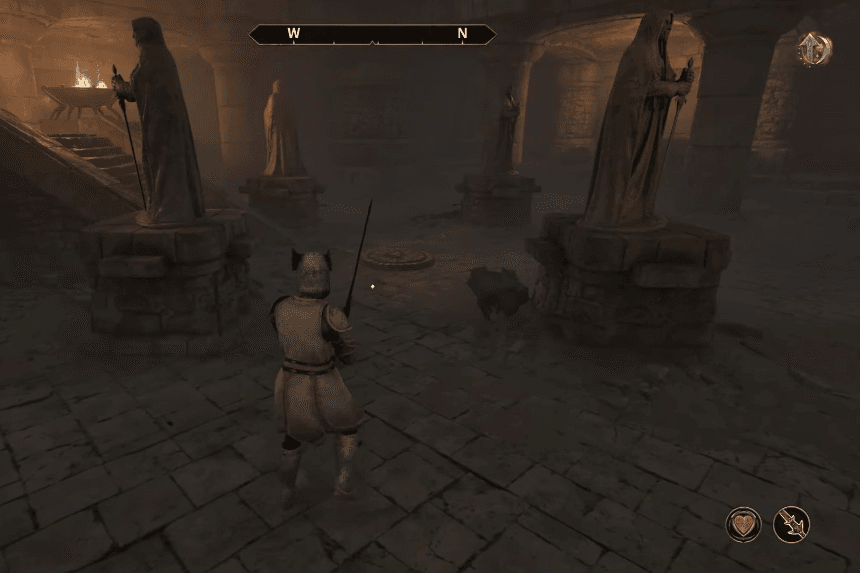
After you let him out, continue down the path in Fort Bulwark. It’s a pretty straightforward walk with some turns, so you shouldn’t get lost. Eventually, you’ll reach a room with four statues. Here’s the trick: turn each statue so it faces the center, looking at the icon in the middle.
There are two Conjurers in this room too, so take care of them before you move on. Once the statues are positioned right, the flames in the room will go out, and a door will open. This leads to the last part of Fort Bulwark.
Rodgar’s Chest Puzzle (3)
Good news: no enemies here! Bad news: there’s one last puzzle to solve.
In this room, you’ll find a panel and a gold chest in the center, surrounded by eight regular chests. Stepping on the panel lights up one of the chests and shows an item inside. The goal is to match the right item with the chest it lights up. Each time you place the correct item, the area shakes, and you’ll feel a vibration on your controller.
Here’s the correct order for the chests, starting from the left and moving clockwise, with your back to the golden chest:
1. Rodgar’s Stone
2. Rodgar’s Helm
3. Rodgar’s Goblet
4. Rodgar’s Sword
5. Rodgar’s Book
6. Rodgar’s Hammer
7. Rodgar’s Skull
8. Rodgar’s Gem
Once all the items are in place, the flames will go out, and the door to the Shield of the Crusader will open. You’ll also find some bonus loot, like Potions of Insight, Sorcery, and Restore Intelligence and Willpower scrolls.
When you grab the shield, the quest ends, and you’ll find two exits behind the altar — one leads back to the first zone, and the other takes you back to the entrance. Your “Priory of the Nine” quest will also be updated.
Note: If you choose not to free Sir Therdret, he’ll find his own way out. Either way, you’ll meet him later in Priory of the Nine. But, if you do free him, he’ll feel grateful and ask if he can become a knight.